Transcripts
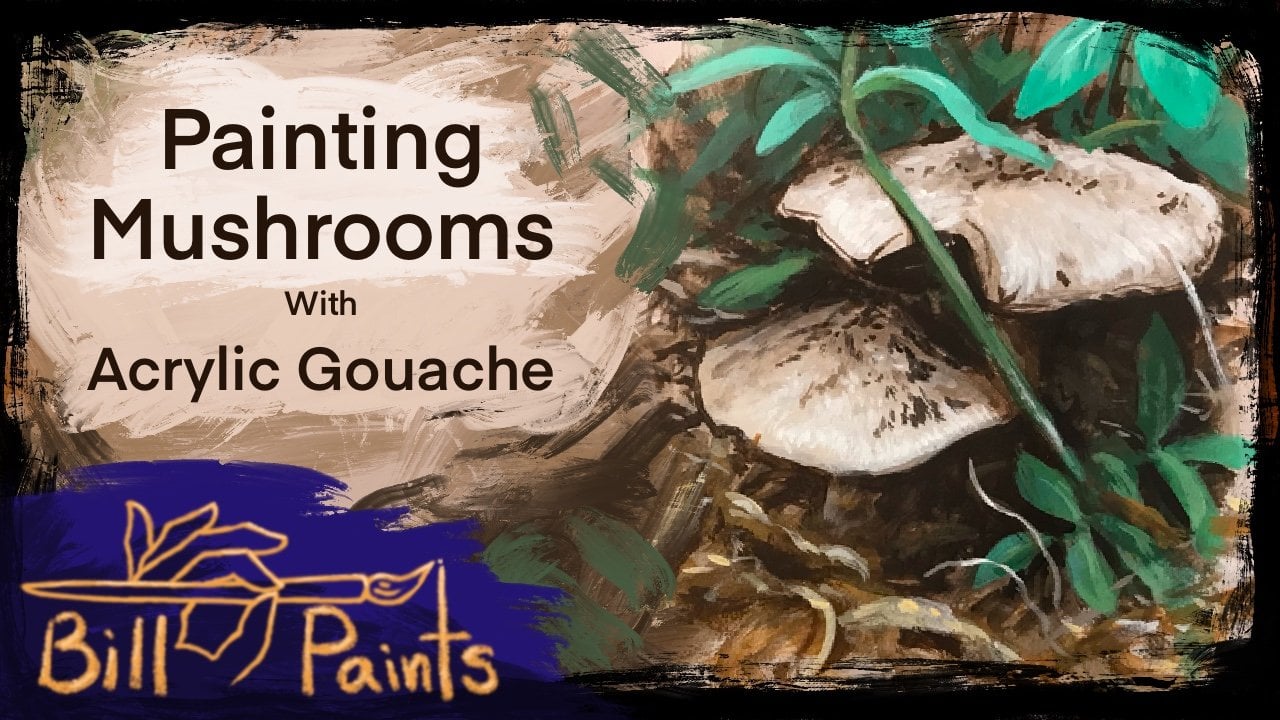
1. Limited Palette 1 - Introduction: Hi, I'm Bill Singleton, and today I'm going to talk about painting with a limited power. When I first started painting, I used to put out all my colors. You know, several reds, orange, yellow, basically the whole rainbow. And, uh, you know, I'd finish my painting and I end up throwing 80 to 90% of my pain away. And I realize over the years that you really don't need every single color on your palate unless you're painting a rainbow or something. For most things in the world, you can get by with a limited palate. And after looking at the works of Anders Zorn and one of my teachers can foster, I learned about the limited palate. And the cool thing about having a limited palate is that you can't make a bad color. Um, so in my limited palate, what I do is have black and white. Then I have three colors minimal. Sometimes I'll add to that. But those three colors are from the three basic prime colors, the prime colors or yellow, red and blue. Those are the colors at. You can't mix anything to get them there, there what? All the other colors are made of. So if you have one of each of those on your canvas on your palate and a black and white, you can paint just about any other color. And I'll go into that in some detail explains, or the basics. And when I say blue, red and yellow, it's not specifically those colors, but colors from those families. So I'll talk about the yellow family, which is like bright yellow and yellow Kerr and brownish yellow. The red family, which is, you know, bright red and cool reds, warm rids earth tones, Ciena's Brown's dark browns, Reds, browns and the blues, which I include green in there, too. All the different shades of blue light blue, dark blue, royal blue greens, four screen. So those are the three basic families, and I'll break that down and I'll explain a little bit of that. And then I go into some examples. So, uh, this is my just my sketchbook that I do out in my garden, and, uh, and here's I always use a limited palate, so I kind of go through the colors I've used for these paintings here, some of this, and then at the end we're gonna do a demo. And this is when I painted for this class. So it took, like, 45 minutes to paint. This is with wash. But this technique I'm showing you can be used with wash acrylic que seen oil paints pretty much anything, but, um, watercolor does not work with watercolor, but you can use any of those other paints, and the technique is basically the same. So all this was done with the limited palette. This is done with black and white and yellow Oakar, burnt sienna and green. So basically five paint colors for this, and I'll show you how to do it, painting with a limited palette. So let's get going.
2. Limited Palette 2 - Prime Colors: So this is what I mean by a limited palate. The ones I use, I always use. I'm gonna use eases samples. Just you can see the colors I always use a black and a white for my limited palate. And then I have one of each of the primary colors and one of the primary colors. The blue read in yellow. So blue, red and yellow are the primary colors. Why are they primary colors? Their primary? Because you can't mix any other color to get yellow, blue or red. They're the foundational colors. You can mix these colors to get every other color, but you can't mix any other color to get one of these colors. So this is our basic limited palette, this black and white and yellow, red and blue. But I don't want you to think in limited terms here. By blue, I mean the blue family and in my belief family. I also include greens there, very close to lose. So this is the blue family, and then I have a yellow family here. There's all these different shades of yellow, and then the red family. There's a lot of different shades of red did you go towards blue? You get more kind of purple e type breads here and then the browns, which are really red, red, modified colors. Um, fixing a more yellow you get? Yeah, Louis Browns, Uh, mixed red and yellow, and you're gonna get orange. Makes green and yellow. Get this lime green. So these are the color families. So we got the red color family here, the blue color family here in the yellow color family. Now, these don't have to be distinct. Uh, don't take all this literally. I mean this yellow may. This may include yellow and some of your paintings. Oh, are this purple? Maybe a red, depending on how you do it. The concept is you want one of these family members your palate? You wanna yellows? What's something from the yellow family? Something from the red family. Something from the blue family, plus black and white in every painting. And that's the limited palate. And with those three colors, you can pretty much get whatever you want. And the reason is since blue, yellow and red or foundational colors the only directions you can move, you can only move towards blue or towards yellow or towards red. You know, if you're moving from blue to yellow, you're moving that way. You're moving from yellow to red. You're moving like this. You're moving from red to blue, moving like this. So you're only the only way you can move with colors, is moved towards a red, move towards a yellow or moved towards the blue, and I mean moved towards the blue family member, a red family member or yellow family member. So let me show you some examples of how I do this.
3. Limited Palette 3 - Examples: All right, let me show you. This is, uh, well, make journal. I keep a backyard. So say this spread here. This is a limited palette. So course I've got my black and white here, and then I have a red. In this case, it's a very brown, red, like, probably burn number, but still in the red family and for the yellows. I think in this one it's a pretty much a bright yellow yellow light. And for the blue in these green emerald green. So this, this entire painting everything you see here it was painted with these every once in a while, I me come in with at a six color something depending up. But I think at least the spread here. It was all done with these black and white brown, which is my red, yellow and green, which is my blue family. So once again, one of the one of the three families the blue green family, the yellow family, the red brown family. So you keep this entire spread with just those those three colors and black and wife. So it's pope Another one here. So there's this one. So this one black and white green, and it looks like rid. Yep. And in this case, they used a warm and cool red. So use two beds here once again. Just five colors. Pretty much. Didn't really use a Yeah, I think I did use a yellow in here for the very throat here. So there might have been that one. Possibly this one. So once again, get your three prime colors here. Like I said, every once in a while, I used a six color, sometimes the seventh even. So that's for this one for this one Here. No red. Let's see. It looks like that was probably a warm reality. This and that. I think that's it. You can look at the 22 related on this one and see the exact colors I used, Remember? Exactly. But something like that. Okay, here's bird's nest, baby birds. So black and white for these graze. Here, It looks like a little bit of red for the throats and some Yeah, no, I think probably yellow Oakar. Yeah, I think that's that looks right for this. So, basically to here in the yellow Taylor, that, uh, red brown family, except sometimes these browns air towards yellow, they said. This isn't a hard and fast rules, just kind of a concept to keep you centred and to keep things simple. So for this one, of course, it's green in it on. This one has yellow. It's got that no red in here it off. So for this one, I see. So for this one looks like Yeah, Loker can see that in there. The green, which is modified by the yellow car and quiet, probably. And then this. Brown's in here background and the dark of rounds are makes it a little bit of black. So these colors here for this. So once again, where there are color families here, there's our red just brown yellow on our blue families. Livery families is bright green. So with these three colors, black and white do the whole painting. And if you have, like I said before what you're always moving from, one of these families were moving towards red towards yellow or towards blue green. And keep that in mind. You can only move in those three directions, but with that and modified by black and white, you can get in amazing range of colors so for this one. Looks like had used to reds in this because there's a warm red here and I think a cooler, cooler red. Maybe that one. Yep. So these colors here. So in this case, we have to from the red family, actually three in Cleveland Brown seven green and yellow. So that's our limited palate. Six colors. So for this one, obviously white in black green looks like this yellow and brown. And here but green and brown all through here. It's a little bit of red, one red right around this throat area here and then, uh, white and yellow car. Although for this bright yellow I might have used one of these colors here. So this one here is a really kind of limited palate. I don't think doesn't know yellow in there. That might be so. There's a little yellow car like right in here. No red read, read. But there's this rid, which I'm calling a red, which is very warm brown, no green. So this painting here was probably done with just four colors. I believe saying with this just black and white, the red, brown and yellow. And for this, even though It's kind of imperceptible to be, I hear are these highlights I believe I used a touch of blue and just very tiny amount of this blue mixed with white are these highlights. And then what happens is even though you can't see the blue, it makes this push pull so that this this looks like it's catching the light from the sky. And then So it's a little cooler, and it pulls it forward from this. Back. Here is a warm brown from this color, and so that pulls it back. So once again, you can use these to your effect, for the contrast pretty much see is used here. Once again, this is mostly black and white and brown a lot of brown in here and yellow car. So you call Mr Red Brown family and, of course, black and white. And then it's like, Yeah, I think that was a little bit of this color in here. Probably This is a looker. Why and then I use just a little bit of grain around here. And that was green mixed with this okra color for this one. Pretty much the same colors. Yep, these three colors in black and white. Let's see, This one has got a lot going on, so may have a little bit bigger range of colors. But the book of this painting is this reddish brown here they're working 90% of this spread . Here is those colors black and white and brown. And then there's a little bit of yellow in here, which you can see in here in here and just a touch agreeing to get some of these colors here. Not very much of this green at all. A little bit of red to get this pink in here. So red and white, I might have done a touch of blue in here, but I'm not sure this may just be black and white. So great. Basically here. Same with this one. So it's 90% of this is black and white brown and then yellow. Oakar this'll one. I think that's all I used. It's just $4 for this page. This has a little more red in it. So I might be used this. I think I did. Yeah. So this modified with this and black and white for in here, and then the rest is all just and then a little bit of this l a poker here in here, you'll see. And the rest of the pain is just these three. I don't watch any like this one is a little more colorful. A little more rainbow we saw may have more colors, but really the foundation of this of this painting here is this British brown, modified with black nest, all the shadow areas. A lot of these branches and stems and stuff with this color here. And what makes this painting work is that this the red the brown here is a warm color. So that's all the shadows. It's that shadow area and then for the greens percent screening modified with some flight. And it's got a little bit of blue in this one that you can see. So it's picking up that skylight, and then this one has a little bit more yellows in it, too. Yeah, was. And since there is, all these leaves were changing color. There's a lot more color in this one, so I might be used a touch of orange in here, too. So once again, like these sort of rules, I'm telling you about having your three D colors, uh, can be modified at any time. If you're painting a rainbow, we're gonna need a lot more colors than if you're painting a scene like, uh like this. So you modify your palate accordingly. But the one thing you always do have on your palate is black and white and one of these three color families white, black, a red or brown, a blue or green. Yeah, that's pretty much almost ologists to see, not my studio window. Next, what colors in there? So this one is mostly see for the produce. It's this color, the bird, this 1,000,000 flycatchers, the color. It's so intense it's really hard. Thio Thio, Catch its I use the A really warm red, almost orange in here and then a cooler red in here and, of course, black and white to get your graze here and then green. I think there's probably little bit a yellow car in here, too, so we have our several members of the red family green and a yellow and then, of course, the black and white. All right, so that gives you a basic idea. I'm using this limited palate and how you can use it. The rule is you need at least one rib when blue or green, and one day hello, plus your black and white. That makes your limited capella. And with these you can create amazing, probably millions of colors, So let's move on to the next one.
4. Painting Demo - part 1: right, Let's get going. So I got my white, black yellow Oakar in Sienna. So I'm gonna paint the majority of this painting with just these colors here. Just sees four, and then I'm gonna come back in with some green later. I'm not even gonna put it out yet, but come into some green to do some the, uh, leaves on that. So let's get going. We'll start with the background. So do black and brown. So warming it up and right around this mushroom is pretty dark in here. This is all just leaf litter from my yard here. Season mushrooms are popping up through the letter. It's kind of cool the way they just push up through things. So I got one bigger one here and then a smaller one popping up back here. So the cool thing about washes you can dilute thes as much as you want. You can basically make it kind of like water color. Get these other way. So this is just random kind of leaves and stems and stuff for my chop and drop. This is in my garden, and I do dio shopping. Drop enough. If you're not familiar with that. It's where you when you do do your trimming things in the garden, you just let the stuff drop any stems or leaves that your cut not let him go. And they basically go into the soil and their food for the fund fungi. All right, I think that's about enough for this big brush here going to go down the size to this one. So this is a little bit. Find your brush, have a little more control. Not in big areas here, doing smaller little details. A little bit. Like I said, these they're just kind of random branches in here. All right, I think I want to get some of this mushroom cap laid in here before I lose the edge of it. So this is white. May just turn that down a little. Bits will to white. You see, I'm painting back over this edge where the black one in a little too far. So just getting the big general shape here, and then is the form goes away from the light. It gets a little warmer. So I added some of this brown in it. So basically, the concept is most of the time in nature you're gonna find when you're painting natural scenes like this. Is that the direct light or that ambient light is gonna be cool because it's reflecting the blue sky and your shadows will be warm. So my general rule is, um if you have warm shadows, you have cool highlights and vice versa. If you have cool shadows, then you have to have warm highlights. So it doesn't matter which way you do it, but that has to be consistent in order for this illusion to work. Because that's basically what we're creating just this illusion of, ah, nature here. Okay, I think that's pretty good for a rough in. And then this leather little in is right back here They came just a shade darker, since he's getting maybe a little more ambient light a little further back so you can get a little bit modeling. Here, get some of these lighter areas. The cool thing about Gua sh is that you can render really well with it, And that's why, um, art, especially artists that air doing nature and botanical artists landscape is do their sketches with wash on the scene a lot of times because it is so easy, Teoh to use to get really quick details of the natural world. So once again, as it gets into the shadow, I'm using more of this brown and here to create. Stay with that illusion that's a little too warm if it needs to be a little darker. Here we go, this one. You can just barely see the stem coming down. This indicate that, and then it's now that we get those established. Let's go back in here and put in some of these a little twigs and things so amusing. Yellow, ochre and white, basically probably a little bit of brown or whatever else is on my brush. That's a cool thing with this limited palate is you don't have to clean your brush off too often. The only time you saw me do it right now is when I was getting into the white because I wanted to be clean. But otherwise you can. Since all these colors harmonize with each other, you can leave the paint right on your brush when you're mixing a new color and because it's and say, harmonize together, it just the whole works, So everything we're doing here is with these four colors right now. And as you see when I'm using white cooling it down a little when I use these yellow, it's warming up. So there's gonna be some of that really warm areas, some cooler areas where the light's hitting and then looks like a used on my Sienna. Get a little more of that of the Sienna in this black makes him really good colors in here , these branches. So you see, I still have white on my paint so that really cool this warm down a little bit and we'll go back into some warmer Brown's in a second. But have this on my brush. So you set up, OK, now I'm gonna watch me brush up, okay? And it's going with some just sienna black. Quick. Get some pretty rich browns in here for this bank from See? See how that contrasts nicely with some of these other colors behind it. Like I said, these are all just twigs, and we are chop and drop twigs. It's maybe add a little bit of this yellow in it once while he's living a full intensity here. Just get that kind of push pull. So you see all these colors in here, all these different shades of what you'd call Gray, and that's where the really the magic happens. And as you noticed, all this harmonizes Well, why? Because we're just doing these four colors so you can't make a bad color. No matter what you mix, it'll harmonize. With this, you could mix a color that if you put it in the wrong place, it's bad. But you can't make a bad color Over here. All these colors on this palette will harmonize because it's a limited palette. So no matter what you mix these air all related to each other, each one of these four colors has something in here. And so they relate to each other and gives you a really rich, uh, harmonic. All right, I think that's about enough of that. I think I'm going to go down a size brush here. It's going to go to my number two and I've been stand up all this time. I think I'm gonna sit down now and a little detail, So I'm gonna go around this this edge here. So I'm planing pretty quickly here. I'm just trying to get a kind of ah, an impressionistic kind of sketchy nous. It's to capture the the basic quality of this painting. It's kind of impressionistic, capturing a little bit of Zen, kind of just sort of tune into what you're doing. Look at each color, each value, decide what you're doing and then mixes colors. And like I said, you can't make mix a bad color Here. You can put the wrong color in the wrong place, though, like, say something that's too cool or too warm to be where it's at. So now I'm just doing the edge of this little mushroom here. Think around this one a bit. She noticed I didn't start it with the background. Then I came into the, uh, the foreground. Wanna throw around that The main character here, which this is the main character, is the secondary character here. So I kind of go back and forth between the two. This setting in the main focal point. Okay, so once again, this is just black and brown sienna hair. So what are we doing? Our red family? What? This Brown. Actually, we're doing a lot of value because this is black. Back in here, but I don't want to be just straight black. If I did straight black, it would be too cool. And if you if you get a cool background with these cool highlights, it'll look muddy. And that's when the questions I get people like what paints do you use to get those effects ? It's like it's not really the paints. It's how you use them. It's where you're putting the color, and the main thing you have to remember is a warm, cool relationship. So in this case, we're keeping our background warm. And for that under shadowy light is, um, is this warm, ambient light back in here? And that's going to contrast with the the cool, ambient light hitting in a minute here. When we get this going all right, since I'm sitting down every once in a while, I'll sit up. I'll stand up Teoh, get a little bit of distance if you get too close to your where sometimes you can't see stuff, so it's good every once in a while. If you're if you have in your lab, it's good to set it down and step away for a second. If you have a if you have it set up on a tripod or something, then step away every so often. Just got to get a little bit of distance between yourself in the painting. Sometimes you'll see things that you couldn't see before. Close up. All right, so I think we're going to go back into this. So, as you see, I'm doing these shadows here now, on this and there they're warm shadows. Why? Because it's ambient color underneath. So the light on these is coming from the reflected lights coming from underneath, so it's a warm light. So as you see, when we do the light coming from above, it's gonna be a much cooler light here, so the shadows have this warm light to them. The cool thing about washes. If you say message, been edge here. You can just teas until you re activate that paint and then you can modify it as I go up the shadows here, just a little lighter. It's too late. I think those air to cool those shows, like a bit too cool to me. So it's warming up just a little bit, a little bit this brown and all right, that's working pretty good. His little flecks of stuffer top of the mushroom here, The color of this these little flecks here is a little different. Let's see if I can mix it from these two. So basically got the, uh, sienna hair and mix it with this Oakar kids a little intense. That's pretty good. So this is, um, even though these air warm colors, the yellow hooker and the Sienna are both warned. But when I'm adding the white to it cools it down quite a bit. Remember, when you add white, you're always cooling. And when I'm doing this painting any of these paintings, the main thing, I'm thinking of two things. Really. One is value, how light or dark each thing is, and the other thing is color temperature by color temperature. I'm talking about the relative warmness or coolness, and it's really relative to this scene, So it's all in this painting. This is our world that we're creating, And so the warmness or coolness is all relative to this. Someday in these little ones here they're a little cooler because the lights catching them and it's a cooler light. So did you see that's already starting to pop by pop. I mean, this mushroom is pulling forward against in the background is going back and the other trick to do and that is to have your edges crisp. So since this is our main actor right here, this is the focal point of the painting. This is our secondary actor. We want people's I to go here and you make you can control where people look in a painting by edges and contrast. So if you have really hard edges saying, like here, quite against black and you have contrasts people's eyes going to go here So already, as you look at this, this stuff out here is just sort of this amorphous kind of stuff. But right here, your eyes just gonna pull in directly into here so you can totally control where people are gonna look in the painting. So it's more of this in. And then let's modify that. It's put some. It's a little lighter here, some mixing more white in it. So right where it's catching the light, see those little things or curling up here a little bit light here, where the lights catching in a really will tell your eye that it's a, uh it's hitting right there. Mess with some of these little areas in here. It's looking pretty good. Let's do a little bit on this one back here now, so this has kind of the same stuff going on, but I'm not making it as intense. I'm I'm sort of greying it down just a little bit, because if I make it, the exact same value is this. These two are gonna fight each other and want them to sort of compliment each other. So your eyes gonna go here, and then it's gonna look here, and that's gonna kind of warned around and come back here. And the way you do that is by controlling the values so the values aren't quite a sharp here. This light against this dark isn't as contrast is this light against this start? Okay, let's do some with a little more white in him, and this is good wash than a musing on this painting here.
5. Painting Demo - part 2: Now let's go in. I've done these little flecks tan. Now let's go into this sort of shadow part of them just a little bit warmer and darker. So since it's warmer, matting the red and since darker matting black. So let's modify that right there, like and dip into this color I had here. And then I can start putting some diesel shadows. I think that's too warm. So I'm standing up to see the contrast. Sometimes you need to back away just a little bit. Okay, it's think it's a little too to warm. Maybe see, it's modify it with that. Okay, I think that's working. Alright, let's try it on some of these here. These old things have kind of shadows in them and sort of like tissue paper, almost just sort of on the surface. So once again, what creates this illusion is the warm, cool relationship. If I made these shadows to light, they won't work. It's gonna fight itself, and that's the main problem. I see with a lot of people's painting, especially beginners, that air trying to learn is there not getting they're not paying close enough attention to the warmness or coolness oven area came going to try some more gray here, see how that looks. So this is just more black and white doesn't have too much color in it. So we're gonna put some of these little shadows with this in it here. So these air cooler whites, basically it's how it's going to read, and we're not using a blue, and that's at least not so far. I don't think I'm going to in this one, but you can sort of get the same effect of blue if you use black and white sometimes gray, basically. And that's what Zorn did. If you've ever seen his paintings and resort on their amazing a lot of paints, paintings don't look blue, but it looks like there's blue in the painting. Why, because the gray. If there's a warm color next to the grey, then it pushes the gray because of something called simultaneous contrast. It pushes it towards the blue visually, even though there's no blue in it. So I'm just putting a little bit of this cool grey here in these shadows, this sort of shadow highlight kind areas and that maybe a little too cool. Let's see, do a little more and see how it looks. Yeah. These, I think, need to be warmed up just a tad. So by warming it up, what am I doing? A mixing some of the sienna in it. Sometimes when you add warmness or coolness, you can't even tell. Like I'm adding more, Um, this warm kind of reddish color to it, but it won't look red. It'll just look like a shadow on the white capture some these illustrations in here. So see these air warm shadows here. I think these air little to, um cool. So I'm gonna hit him with this A little bit warmer color here. Okay, That's starting to work. It's hit this one back here this second go. Probably a little darker and a little warmer. I don't think that's warm enough. So you can see. See, these blacks thes shadows that just put in there to cool. They don't look right. So what I'm doing mixing limited brown in him and modifying them. So that looks better a little bit warmer. Okay, It's starting to come together now, and since we're talking about harmony here, but some of the same colors I've been here starts at into that harmony. Okay, now I'm gonna wash my brush out, and I'm gonna hit some hard white highlights here. So in order to do that, you gotta wash out really good. And one thing Have you noticed when I put my paints out, I put him out as a line that is a blob. And the reason is, as you can see, as I've dipped into these areas here, it's sort of contaminated the white. So since it's a long line, I can find an area here that hasn't been touched hasn't been contaminated. Now I've got, like, pure white. So now that I have that, I can come in and where the the light is really hitting on hair can really catch those highlights there. And this will help give it that sort of three D appearance. I think I hit a little too hard here. So gonna dab it up with my finger. Here we go. So this white, even though it's pure, is I'm kind of stroking it in. It's picking up a little bit of those underlying colors, which is okay in this case because that kind of helps harmonize it together. I hit it too hard. I can always dab it with my finger and kind of sponge it up a little as you see him kind of catching these little highlight areas and then let's put a little bit back in here so this thing starts kind of coming out of the darkness. Okay, that's looking pretty good. And we had come in with some harder highlights. Just here and there, just right where the the light is catching it the most. That's working pretty good. Also, these little white flecks coming out into the black hair helps give it that contrast now, I think, Well, the good thing about wash thes painter dried, but I can reactivate him right there in the candle on the palate. So I'm gonna warm up a little bit of these shadows here warming up, but put a little bit of more white in him, too. Some warming them up and cooling them down at the same time. Okay, that's working pretty good. No, I could sort of lost the stem of this, but it's kind of shadows, so just let it stand the shadow. Just give it a little bit of ah, highlight down the middle here, and there's other things. He's sticking in front of it, all right? No, we can paint some of these other little stems in front here. Okay, that's working pretty good. I think I'm just gonna go in with some more blacks right around edge here to make this pop a little more Since this is our 1,000,000 character here. And keeping in mind what I was telling you about contrast some. It's black, but I'm warming the black up quite a bit with this Sienna. So basically my red here, so making a lot warmer so you can see already how that's really given it that push pull effect, that kind of three D effect that makes it pop forward. And I'm doing it just by warming up the background in this case. And as you do these pains, you'll see that you may put a background color in, and you think it's fine. It looks warm enough for dark enough or whatever, and then as you start putting other elements of the painting and you realize like up now that's too cool or it's too warm or it's too light or too dark, so you start making adjustments. It's easy to do, especially with wash quashes a really forgiving medium. All right, Just gonna do a few more, these little foreground things, and then we're going to go into some of these plants, that air right around here. Case and I'm gonna get my green out. I think the mushroom to pretty well done. I'll see once I put this green on, see how they look. So I'm just using this emerald green. I think they call it. This brush may not be small enough. Um, you know what? People have a smaller one here. Let's go with this one. This is the number one. So with their green here, See, that's way too intense. So we need toe warm that up. That's better. So where's this plant coming in? Coming in across here, coming out with these little leaves that are just right in front of the mushroom. That's cool. The mushroom just pops right up through everything through whatever plants, air, twigs or brush or anything else that's that's their just pop up. So first I'm just gonna kind of lay these in hair. It's cool. We have one go right in front of that other cat, that other, uh, mushroom cap here. So this, you see, is just green and yellow. Oakar. So that's are gonna be our base here, and then I'll modify this as we go. So this I'm just kind of putting to make sure where everything's going to go putting these leaves in. It's one skin. This is just green and yellow car here. There's some other little plants popping up in here, and now I'm gonna add a little bit of brown. So what's that going to do? So that's gonna warm it up. So now I can be some Brown's like they're just back in the background there. So by adding green brown to that green, I warmed it up. And now if I had it, it'll look like it's in the background here so that ports forward, this doesn't. So now I'm gonna kind of make a little shadow on some of these. See, This may be too dark that works. So I did a little bit of black to the same mixture here, so it's green with the yellow curto, warm it up a little bit, and then I put some brown in it, too. we could look like shadow and a little bit of black. Do these here from the mushroom. Okay, that's working pretty good. No, I'm gonna use spit a little bit more of this detail here. Now, I'm gonna put in the highlights of this plant so we'll go back to the yellow Oakar in the green said, Now I'm gonna add white. So whites doing two things, of course, it's gonna raise the value up. It's also going to cool it down and by cooling it down your eyes, going to read it as ambient light hitting here. Skylight. Basically. So this is the areas where the the light is catching these little leaflets. Now I think I go a shade lighter. Maybe just a touch warmer here, a little more green. Let's try a little more green in that. It's now we're getting a really cool green mixture here. So there we go. Now that looks like the light's hitting it. So we called it two ways. We called it with the white. And then the green is a cool color too. So by pulling more the the green in and less of the yellow that cool down the leaf quite a bit. So now these look like they're they're popping forward here where the light's hitting Nothing. I go one step lighter here, person. Just hard highlights. So this is where the light is. This really catching these little leafs? I think we're done. That seems you could just put a few little touches here and there. Sure, the lights coming down, then maybe a few little dark ones here with some brown and green. Just do brown and green together. Nothing else. Yeah, that works. These little flecks of green here. It's put some right up against here. Just for what? A contrast. So there's a dark green up against this, much more Mary here. All right, I think we got it. So that this entire thing with five colors, actually, most of it we did with just four colors black and white, yellow poker and the sienna. And then I only had a degree ing for this screen ary here. But once I did use the green, I harmonize it with these other colors. So once again, we is green, and then I mix some browns in it for this shadowy sides and some black in it for the basic stem itself. We use green and yellow Oakar and then for the highlight part of this stem used white in green, just those two colors alone. And that way you get all that contrast there. So I think we're about done here. Sees a couple of little touches in hair. I think that's it. Maybe just a few little highlights of white, and this is literally like the icing on the cake here. So just a few little dabs in here, then here. Yep, that really helps it to pop. This is pure white, so it's extra, extra cool. Maybe we can modify some of these little Brown's here. So brown and white. All right, that's it.
6. Recap: Okay. What did we learn today? I think we learned that you don't need every color of the rainbow on your palate to make a really good painting. So with just five colors here, I've mixed them to literally probably 100 different colors. Oh, if you look at each one in here, so and what else do we dio? Aside from the limited palate, we learned that using black with brown see, if I would have just used black in here, this would have been too cool this background, because black is a cool color. And I'm going to do another class just on color temperature coming up. So what to do with this black is I put some of that red in it, that sienna, and that warmed it up court of it. So the cool ambient light is hitting in here. So this on the mushroom here, it's much cooler colors. And this in the background is warm colors. Same with these leaves here. So the back of this leave right here is warmer. And then when the where the lights had to get on this edges is cool. The fact on that highlight there's if you remember, I just use green and white, and in the shadow is I think I used green a little bit of, ah, the Al Roker and a little bit of Thea Sienna toe. Warm it up. So just with those five colors you can create Ah, an entire atmosphere. So for a class project, I think it be great if just try it, try a limited palate. Go look at something. Pick a scene or a subject of still life or a landscape and look at the main dominant colors in it and try to limit what you put on your palate and see if you can capture what's there . And the great thing about doing a limited palate is the fact that all these colors harmonize. So you see both here and on the palette. There's a harmony of colors in there, and really, no matter how you mix it, it's not a bad color. It all works as long as you stick to the right value and the right color temperature, so any color works anywhere as long as it's the right value. Are the right color temperature like this Green in here works as a background color it fades in. Why? Because it's warm and the values very similar to the ones around it. So it fits back in there. This this highlight here it's a cool color. It makes this pop the values, the probably the highest on the whole painting. So that's where your eyes going to go. So we have this, um, depth, this distance of value, of of really light to dark. That's our value range. We have a range of of, ah, breast strokes from really hard edges in here to ones in here that I'll get kind of indistinguishable from each other. And we got a range of colors just from those three colors that we use, plus the black and white. So all together can do quite a bit with a limited palette, So go try it out.
 Bill Singleton, Illustration & Fine Art