Transcripts
1. Introduction: Hey there, I'm Melanie and I'm a professional artist and art teacher from Austria. And my pronouns are they them. After having lost my passion for art and creativity due to uninspiring art teachers in school, I finally found my way back into creating a few years ago. Now I'm an artist and teacher. I have a YouTube channel and I also work with awesome brands. But enough about me. Let's talk about you. You're here to learn something about wash in case you've never worked with wash. Before, I recommend checking out my other course, wash one-to-one, which is a very beginners friendly cores. Check out that 1 first. But if you're eager to create some cool pieces now then you're exactly right here. We are here to create, to stylize, squash landscape illustrations. But I hope you're not only here to learn how to recreate those two pieces, but also to get some inspiration for more of your upcoming and future projects. Now let's get started and have some fun with these two paintings.
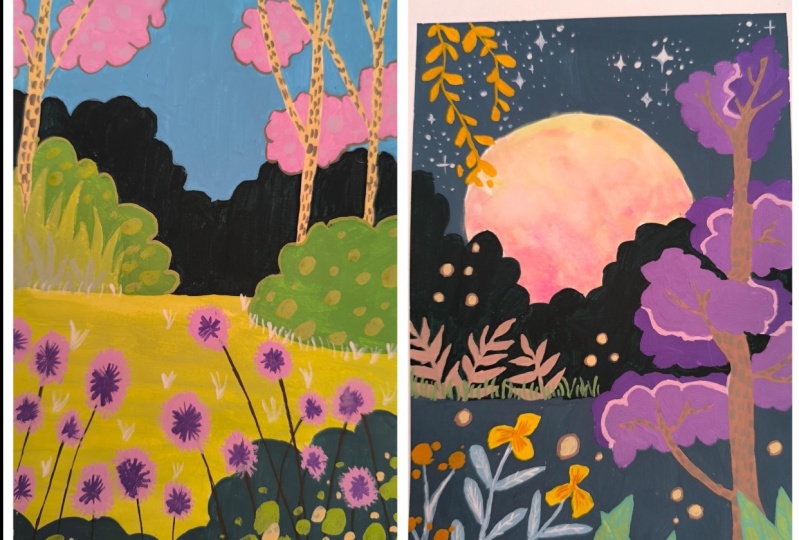
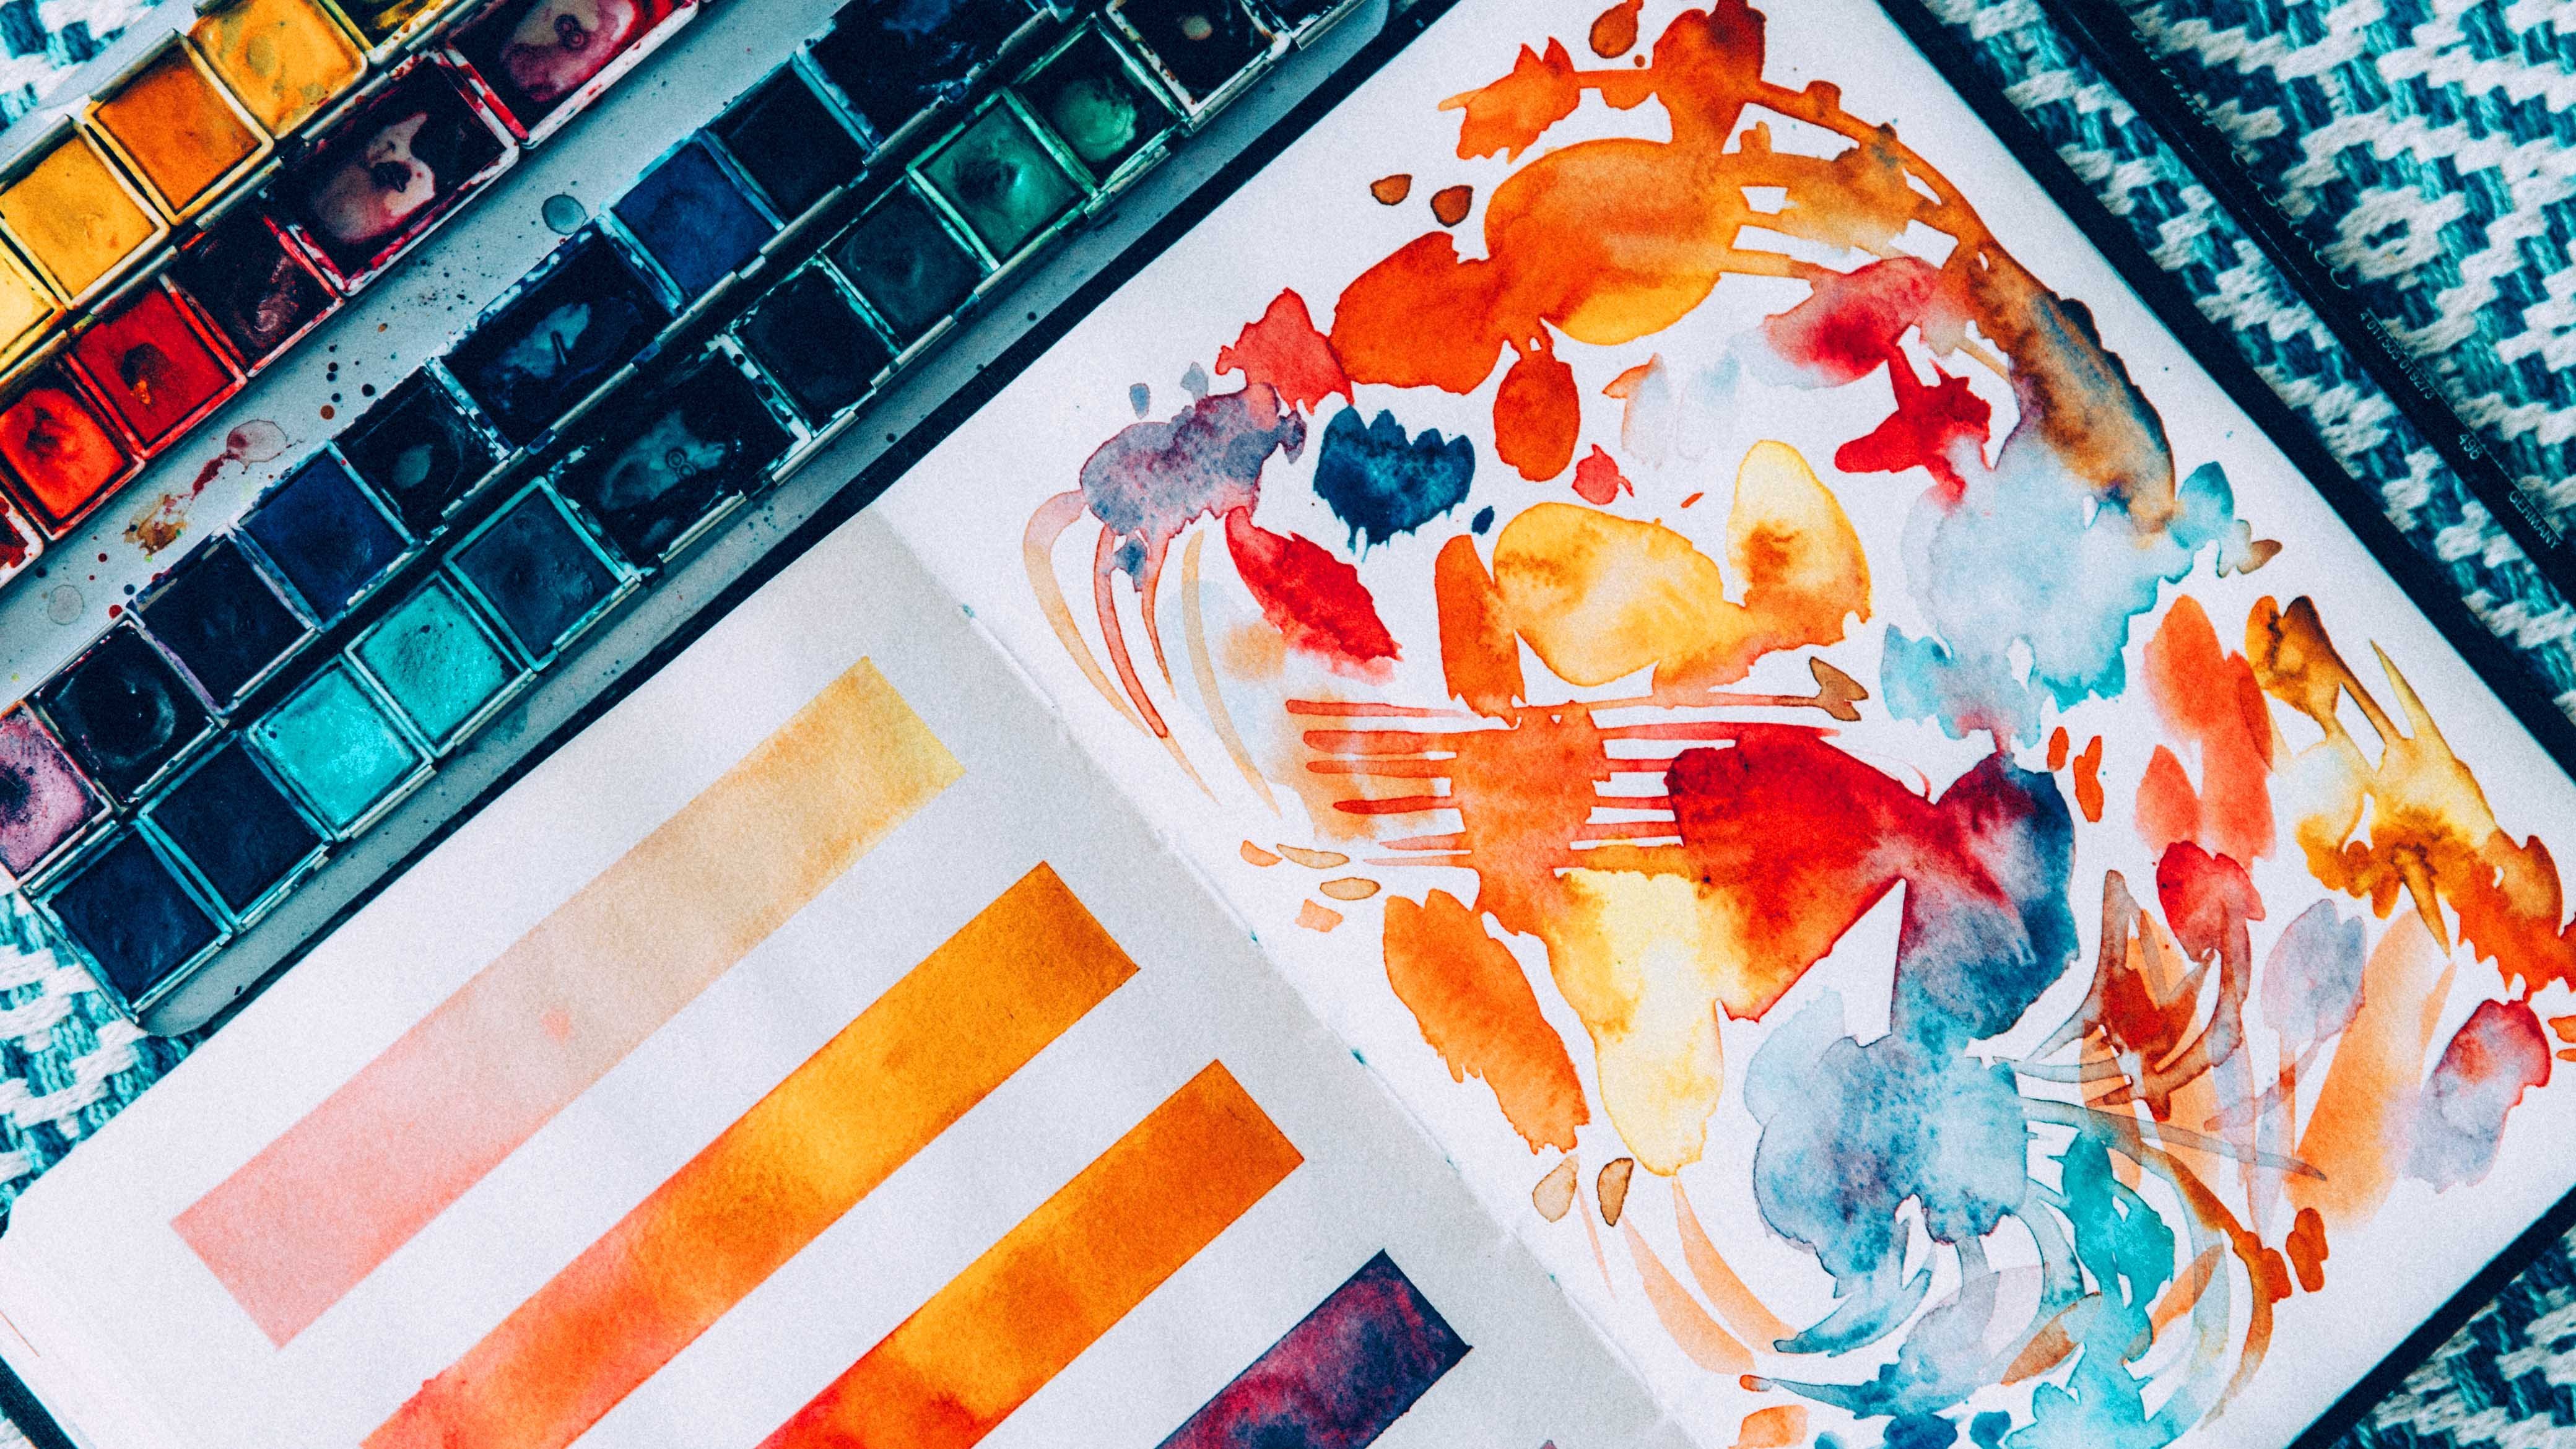
2. Outline and Products: So today we're going to paint these two pieces at first, we're going to paint this one and then this one. And I chose these two paintings because they have an illustrative style and that one is fun for beginners as well as a little bit more advanced artists. I edit quite a few details, as you can see here. And I left to create my own little magical worlds and I hope I can inspire you to do the same as for the products I'm using. Mole skin watercolor sketch book. I really recommend watercolor paper for wars because we're going to use quite a bit of water. And you could also do mixed media paper, but then you have to be a little bit more careful with the amount of water that you are going to use. So for the water, I have this container that I've had for ages and their recommends something like that with a lid. I love that you can put a brush on there like that. And I've never tried to drink this. So I really recommend investing in something like this. This was like $2 or something like that. As four brushes, I recommend to go with synthetic brushes because they don't hold that much water compared to natural fiber brushes. Also there began, which is amazing, and we don't want to have too much water for wash. I love these. There was a very cheap from a local store, but I also really love the step less synthetic brushes. And honestly just use brushes that you feel comfortable with and that aren't super cheap, but also they don't have to be extremely expensive. These come in a set like this and I think you're about $30.20 to $30, I believe. And for the Wash itself, I have this little palette that I got at a local store. It's like ceramic plate. This is a decorative dish. I wish I could give you a link for that because people seem to love that pellet. But unfortunately I can't, if you can find something like that, I really love working with this. And I have a lot of different brands on there. I have these Holbein water-soluble wash. And I also have Windsor and Newton designer squash. I also love to work with our teaser squash. And I also have these super cheap tempera colors. So honestly, whatever you have at home in terms of wash, It is awesome. I mostly recommend the Windsor and Newton guage, I'd say get a starter set of these and then you're really set to go in this class. I'm going to use water-soluble goulash, but just know that there's acrylic wash out there as well. And if you have a critic quash, it works really nicely with the type of illustration that we're doing today as well. Just remember, acrylic wash is waterproof, so once it is on your palate and it dries out, then it can't be reactivated with water. All of these colors that I have on my palette here can be reactivated with water because that is water-soluble wash. It works a little bit like watercolors were asked, the acrylic wash works a little bit more like acrylic paint. But as I said, you could use both for it, a kind of illustration that we're going to do today.
3. Picture 1 Sketch: So at first I'm using some tape just so I can get some very clean borders in my sketchbook. And that just makes things easier. But you can skip that part if you don't wanna do it, you can use any kind of tape or was she taped like I'm using here. It's just decorative tape with some patterns on it. Just makes sure that the tape isn't too sticky so it will rip your paper. So now I'm starting to do this sketch just to doing this half circle for a little moon. And then I am drawing this tree in the foreground. And I'm just making very, very simple shapes. And you can copy the exact shapes that I drew. You can go wild and experiment a little bit. You can do whatever you want here. Just have fun with this and don't pressure yourself too much into making and super masterpiece. This is a simpler illustration style and you can just mess around with it. And I kind of love that these leaf parts the look kinda like clouds. So I just did those super fluffy leaves. And now I'm adding in some branches here and just adding in more and more of the details for our little tree in the foreground. And it's a very, very simplified. We have a lot of these cloud shapes. So now that we're done with the tree, just making sure to map out bore the bushes in the background are going to be, and make sure that the moon is behind them. Obviously, a very, very big moon, but we just wanted to look very fantastical and magical. And now I'm doing more greenery here in the kind of mid section of the painting. And it just makes, it just adds a little bit of detail here. I'm just MEK being out where everything is going to go, just mapping out my composition. And I decided to do a little bit of greenery here on the top as well. And you don't have to make the perfect sketch doesn't have to look super sophisticated. We're gonna paint over it any ways. We're gonna lighten up the sketch so that it is a little bit brighter so that we can't see the lines through the wash later on. So no worries. I'm just making a very messy lines here. You don't really have to be super fixated on making them look perfect in any way. Doesn't have to be a super perfect circle. You don't have to add any details. Just don't pressure yourself too much. I feel like I'm going to say that a million times, but that's very important to have in the back of your mind. We're here to have fun. So now I'm using a kneaded eraser and I'm lightening up the sketch. I'm just rolling it over the sketch. If you don't have a need an array such as very carefully, use a regular eraser, makes sure that you can still see the sketch, but it is a little bit lighter so we can paint over it. And then we are ready to get into painting in the next step.
4. Picture 1 First Layer: Now I'm gonna get started with painting using the step size eight synthetic brush and started to mix this very dark blue tone. And I have a good mixture of water and paint on there. And I'm just painting the sky now. I just made sure that the paint is wet enough so I can easily control it because with quash, If you use not enough water, I find that it's harder to control it where it goes and it's a little bit refer to work with. So you kinda have to play around a little bit to find the right consistency for you. That's just something that you practice over time. And here I'm just filling the sky and leaving my sketch blank. It's from here on out is kind of like a coloring page and we're coloring a resection. So now I'm also painting this foreground area and leaving out the things that we have sketched prior. So I'm just making sure that those are still dare so I don't lose them. I just a painted over the little thing on the left though because I thought that it wasn't worth it to keep the sketch on there. Let's see if I remember to painted in again later on, probably now. And now I'm starting to paint the moon, and I'm just using different colors here. I'm using yellow, ish, tone and purple and this kind of tan color but with a lot of white added in so that we have a bright moon color. And I just mixed all of those colors on the shape itself. I was kinda going wild with the moon. And the moon is kind of in a different style compared to everything else. But I think that it looks fun and I was just experimenting a lot with the moon. And the moon is going to dry now and we're going to add more details to it later. Now, I'm painting in the trees and I used two different purple tones for the leaf parts. We have the leaves that are more in the foreground and then we have the ones that are a little bit more in the background. And the ones in the foreground are the ones that I'm doing currently with this purple tone and the ones that are slightly more towards the background, those are gonna be colored in slightly darker purple tone, just so we have a little bit of contrast here, little bit of difference in the colors. And I'm just filling in all of those shapes with this colored, just making sure that I have a smooth consistency of the guage. Sometimes you need to go over the layer again to achieve that. And then I added in a little bit of white to, I can mix it in so that I will have. More opaque and brighter orange tone for the greenery here at the top. You can always add in colors like a white tone. I use my palette where the paint has already dried and I just reactivate the paint with some water. But sometimes a need some paints straight out of the tube Most of the time that's white paint and I just add that in whenever I needed and I mix it in. So I've painted this orange section now and now I'm mixing a very bright blue tone again with the weight dead I added in. And the white just makes it a little bit more opaque and just a little bit more pastel kind of. And I love to do that because it freshen up the paint and I still can reactivate the colors that I already have on my palette. So now I'm coloring in yay remembered to color the heads as well. And now I'm using the darker peripheral, like Gary said earlier. And I left a little bit of white space in between the purple tones. You can do that or skip that. I think that I went over it with another color later on any ways. So you don't have to worry about making this perfect. I just wanted to make sure that I remember where exactly the line is because the colors, they were kind of similar even though they were a different tones. I just wanted to make sure that I have kind of a little bit of a border in-between those. And then I mixed my next color, very dark, ringtone and IE, colored in the leaves in the foreground and just went over where I had left them blank prior to that. And depending on whether you're going over the tone that you've already painted on there, you're going to need more paint or less pain and more water. It just depends. You can see here that you can kind of still see the borders where death happen, where are painted over it. But I honestly don't worry about that too much. And I just color that in. Like I said, it's like a coloring page. We're just filling everything out with different colors. Now that's everything for this section. We're going to move on to more details in the next section.
5. Picture 1 Second Layer: So now I'm mixing a very dark green tone for the bushes and the background. And we're going to fill all of the whitespace, says that we have left. And we're going to start with the wishes and the background and this very dark green tone. And I'm just filling everything here. And you can see that I'm leaving all of the little greenery that we have in the foreground here as well. And again, you don't have to be super careful about that because we're going to paint over it any ways. And I just wanted to leave it there so I know where my sketch was because if I was to paint over it, then I would lose that and not know anymore where I wanted to put all of the greenery. But if you feel comfortable just making it up as you go, you can paint over it or not even do a sketch and just make the greenery and then after the, the background. So here I'm painting and the flowers and the pedals for the flowers. And I did this light orange tone and the darker orange, Joan, and with the darker orange tone, I just did these circles. I think that those look really cute. And now I'm mixing a color for our tree. I mix my orange tone with a little bit of black and green and white so that I would get this beige brown tone. I think that it fits the scenery very well. And yeah, I'm now filling in, coloring it in. And you can use any kind of brown tone or even a black tone if you want to do that. And you can mix up the colors as you want or you can try to remake the exact same color that I mixed because that's a very good practice as well. So I'm just going over all of the white spaces like we're always doing. And just it is a little bit thicker than the original white space. That doesn't matter because it is an opaque medium and we can do this. And now I'm doing these greenery is these branches and make sure that the green is already dry. You can see here that mine wasn't completely dry, so this was a little bit risky. Much less risky if you just wait for it to dry or user heady heating tool or air dryer to diet. And now we have no whitespaces left anymore. Looks almost finished now, but we're going to add in a little bit of detail and make it a little bit more intricate. And here you can see I did some grass because I wanted to separate the grass in the foreground from the pushes in a background was a very similar tone. And now I used white wash. I think that that's straight out of the tube whitewash. And so it's very opaque. And I did some details for the moon. I wanted the Moon to be a little bit lighter. And so I painted over all of this beige color and just not all of it. I left some of it because I wanted to have a little bit detail, but I did this. I used a very dry brush with a lot of pain and just went over it and kind of messily spread it so you can see it here, how it turned out. And then I used light purple tone and I made the outlines for our little trees. And because I kept a little bit of space between these two purple tones, I could still tell where the lines were supposed to go. This helped me a lot and I just wanted to do an outline for the entire leaf area of the tree. And now I'm doing the same thing with the darker purple tone and outlining everything here as well. I believe I used slightly darker outline compared to the light purple outline. So it is lighter than the dark purple but it is darker than the other outlines. I hope you know what I mean. And now I mix darker brown tune and I'm adding some lines to the tree and just make it look a little bit more detailed. And I think that that adds a lot. It looks kinda cute and you don't have to make super straight lines. You can see that I didn't do that. I just muscly spread them over the tree and just painted one line after another until I had filled everything. And then I used light orange tone to make a little bit of a shadow for our flowers. And I did some details on the leaves here as well. I used lighter green tone here, and I did some outlines and edit in the veins. So now we can't even see the spaces anymore where the green tones overlap. So this removes our little problem that we had earlier, but it just makes everything look a little bit cleaner and just more interesting because we have more detail in there and love to do little things like that because it just makes the piece look a little bit more sophisticated. And it looks like you've put much more thought into it and it's just very easy extra step that you can take. I also added in some stars to the sky. I always think that that makes it look much more magical and just much more fantastical. And now I use an even darker orange tone to add even more shadows. Today's This just makes it look so much more three-dimensional. And now that we're almost done with the painting, I removed the tape later on. I decided to add a little detail and at that as well. But now this is so satisfying. Removing the tape and if you use tape, it just gives you just a super clean border which are really love, especially if you are a beginner, it helps you and gives you a starting point. And now I use this dark yellow tone to make some circles here. I wanted to add these little fireflies and just make it pop even more and make it look even more fantastical. And I did the yellow first, then I let it dry and then I added in a white in the middle of the yellow. And that's it. That's the last finishing detail that we have here. And now we have a finished piece and we're done with the first piece. I really hope that you enjoyed the first section. Now we're gonna paint the one on the left.
6. Picture 2 Sketch: So now with the next piece, I again started off using some tape and taped the borders to get this cleaner. Look again. And I just used this. I tried to use only one kinda tape, but I also try to use up my tapes. So I used two different kinds of tape. I hope you don't mind. And now I'm doing this sketch and I just used pencil again. And very simple Ali fight my landscape and a the bushes in the foreground, then a little horizontal line, and then some more bushes in the background, and then also a little bit of grass and some trees in the background. And again, you can create any kind of landscape that you want in this style. Just very much simplify everything that you see in your reference picture. And the fun thing about that is that you can use almost any kind of reference picture as long as you don't copy it too much because if you simplify it so much, you kind of can't tell anymore what's the reference picture because you've changed it up a lot or you can just make up the landscape in your head. You don't even have to look reference. So here I am painting, drawing another tree. And yeah, just doing those fluffy leaves again. And I'm just making up my composition at the moment. And again, I'm being kinda messy with this. Doesn't have to look. Super lines don't have to be super straight or anything because we are going to paint over it anyways. So here you can see the kind of sketch that I'm coming up with. I wanted the trees and the kind of forests to be in the background. I wanted everything to go together with the piece that we did on the right. So we have the bushes in the background again. And then I did these flowers in the foreground. And I believe I even painted over the sketch later on and then edit the flowers in later again. So really you don't have to focus on the sketch so much. It's just about the composition so you know where everything's going to go. And this is the little sketch that we have for this piece. Again, I used a kneaded eraser to lighten up the sketch so we get, can be ready for painting and paint over it in the next section.
7. Picture 2 First Layer: So now we're starting to paint this piece. And I used this light green tone and I added a lot of water because I didn't want my sketch to completely disappear and I shouldn't have lighted it up as much as I did. But oh, well, what can I do know? It really doesn't matter in the end because I'm just going to paint the flowers over it anyways. And the sketch was really simple to begin with. So now I'm mixing a very, very light blue tone with a lot of white. And I'm painting the sky This time we have a daylight scenario. On the right piece. We have kind of the same forest at night. And here we have the same forest at Day. And I'm coloring in the sky now it first, and I think that and that already kinda sets the scene so we know what kind of mood we're going for here. Now that we are done with the sky, I'm mixing again and mixing careen till n1. And now I'm coloring the bushes in the foreground with this color. And this is a little bit messy, but it really doesn't matter. And if you find that your painting as a little bit streaky, then you might just have to add another layer once it's dry, it's not a big deal. It happens a lot with squash. And it really depends on how much water you're adding. And I'd rather add more water and do a second layer than have a super thick consistency that's harder to work with. But you kinda have to choose which of these you want to do. And really depending on the Wash, it's more or less opaque. But I'm just assuming that you don't have the most professional wash either. So I think it's great to see that my paintings don't turn out perfect with the first layer. Often, I often have to go over it again. I don't use quashed. It's terrible, so I have to go over three times, but sometimes you just need a second layer and it's not a big deal. People make it out to be such a big deal, but it really isn't. And now I'm coloring in the trees with this light pink tone. And I think this looks so cute. I really loved those color and especially since the trees on the other piece are purple, I was just thinking what would they look like and daylight. And since they were purple in the dark piece, I thought they would be pink because why not? I didn't want to use green because I already have so much green in the P's are just one of them to pop. Anc wanted this little bit of magic and that thing, adding the magic is much harder on a daylight piece compared to the nighttime peas. Because with the nighttime piece, with the fireflies and to stars and the moon. And what are we going to do with the daylight piece? So I really went all in and made it look magical with the pink trees. And here you can see I'm mixing again green tone nowhere and with the green doing the bushes because we need some green in there. See, I'm coloring them in now. Just coloring page essentially at this point. And I'm also leaving out the parts that are supposed to be the Grosse here. That's just a little detail that I added. And now I'm using dark tone. It's black mixed with some other colors. Just make sure that it is dark tone. And I'm making these aligns wherein the flowers are going to be, those are the stems off the flowers. And just adding those curved lines here, some of them are a little bit longer and some of them are a little bit shorter. So we have this variation here that makes it look much more organic. And also we want to spread out her flowers a little bit. We're going to add the flowers and more details in the next section.
8. Picture 2 Second Layer: So now I'm mixing the color for the trunk of the trees. And we used this brown tone in the first piece. And I thought that I would do a lighter version of that. So I use a lot of yellow, a little bit of orange, and edit in a little bit of black to saturate that color. And now we have this kind of color that you can see here. And I colored in all of the trunks and the branches with this color. And I was trying to be super careful because when you have a lighter color, you're gonna wanna use a little bit more paint and that's a little bit harder to control. So you have to be a little bit careful when you're doing that. It's all a matter of practice and getting things thinner lines can be kinda hard, but you can do it, I believe in you. And now that we're done with this, mixing a lighter green tone, I use a lot of yellow for this, a little bit of green, a little bit of white. And you can also mix in a little bit of brown to make the green look even warmer. And now with the color, I'm painting the Grosse here. Again, I'm being super careful here as well so that my lines look the way that I want them to take your time with that one. So the really looks the way you intended. And now I'm painting the flowers and I'm pretty sure I use the same pink tone as a used for the trees. And just giving every little stem a little flour and Just this kind of movement that you can see here. So that I have this kind of circle, but it's frayed. I don't know how to describe it, but you can see here how I did it. Now I'm using the green tone that we used earlier for the grass and adding in more dimension to our little bushes with the flowers. And I just did these big dots. I did bigger and smaller ones and spread them out and just a lot of these dots. And yeah, I think that that added a law made it much more interesting. Now we're mixing and purple too, and this one is supposed to be a little bit darker than our pink tone. And now I'm using this color as an outline for our trees. You can see that on the right piece we used a lighter outline, and this time I'm using a darker one in the daylight piece. And now I'm using the same color to add more details to our flowers. And I just did the same motion that I did before. It just smaller and in the middle of our circle. And that just makes the flowers look much more three-dimensional. And now, using the Green, even lighter green tone, I added in much more white to this. And then I added in even more grass because I thought that it's still needed something. Now like we did. And the other piece, I used darker brown tone to add in some lines to the trunks of our trees just to make it look a little bit more detailed as well. And again, I'm being super messy with this, doesn't have to be perfect, just has to look like you had fun. And now I am using the lighter green tone to make a little bit of an outline for our bushes as well. And I also used a slightly lighter pink tone to add his kind of circles to the trees. I thought that it's still needed a little bit of detail, but those are barely visible. I don't know if I liked them or not. If they do add to the piece or not, but they're not as visible. So are also added in a with a little bit lighter green tone. That was the lightest one that we've mixed some more circles in the foreground. And I used the other green tone, the mid green tone to add in some circles here as well. I think that, that made it look much more detailed. And I also added in some little grass here. I think that that's almost white. It's a very, very bright green tone with a lot of white mixed in. And I added in a little bit of grass in the entire green space just to give it a little bit of dementia. And now I'm removing the washy tape and we are revealing our final piece now. Now this is our finished piece. Really hope that you liked this section and that you could replicate this easily.
9. Thank you for watching!: You've if mated, congratulations. We've painted to awesome illustrator for landscapes today. If you can take anything away from this class, it is not to pressure yourself into creating the perfect peace. Just explore the medium, just have fun with it and join a process Palais around. If it doesn't work out, it's okay, we're here to learn something. Now. Don't forget to upload your project to the project's gallery so I can see it gives you a little bit of feedback so we can all see it. I'm sure you've created something awesome and I'm sure you've learned something here. If you liked this class, please don't forget to give a positive review. And I hope I can see you in my next class. Goodbye.
 Visual Mind, Artist