Transcripts
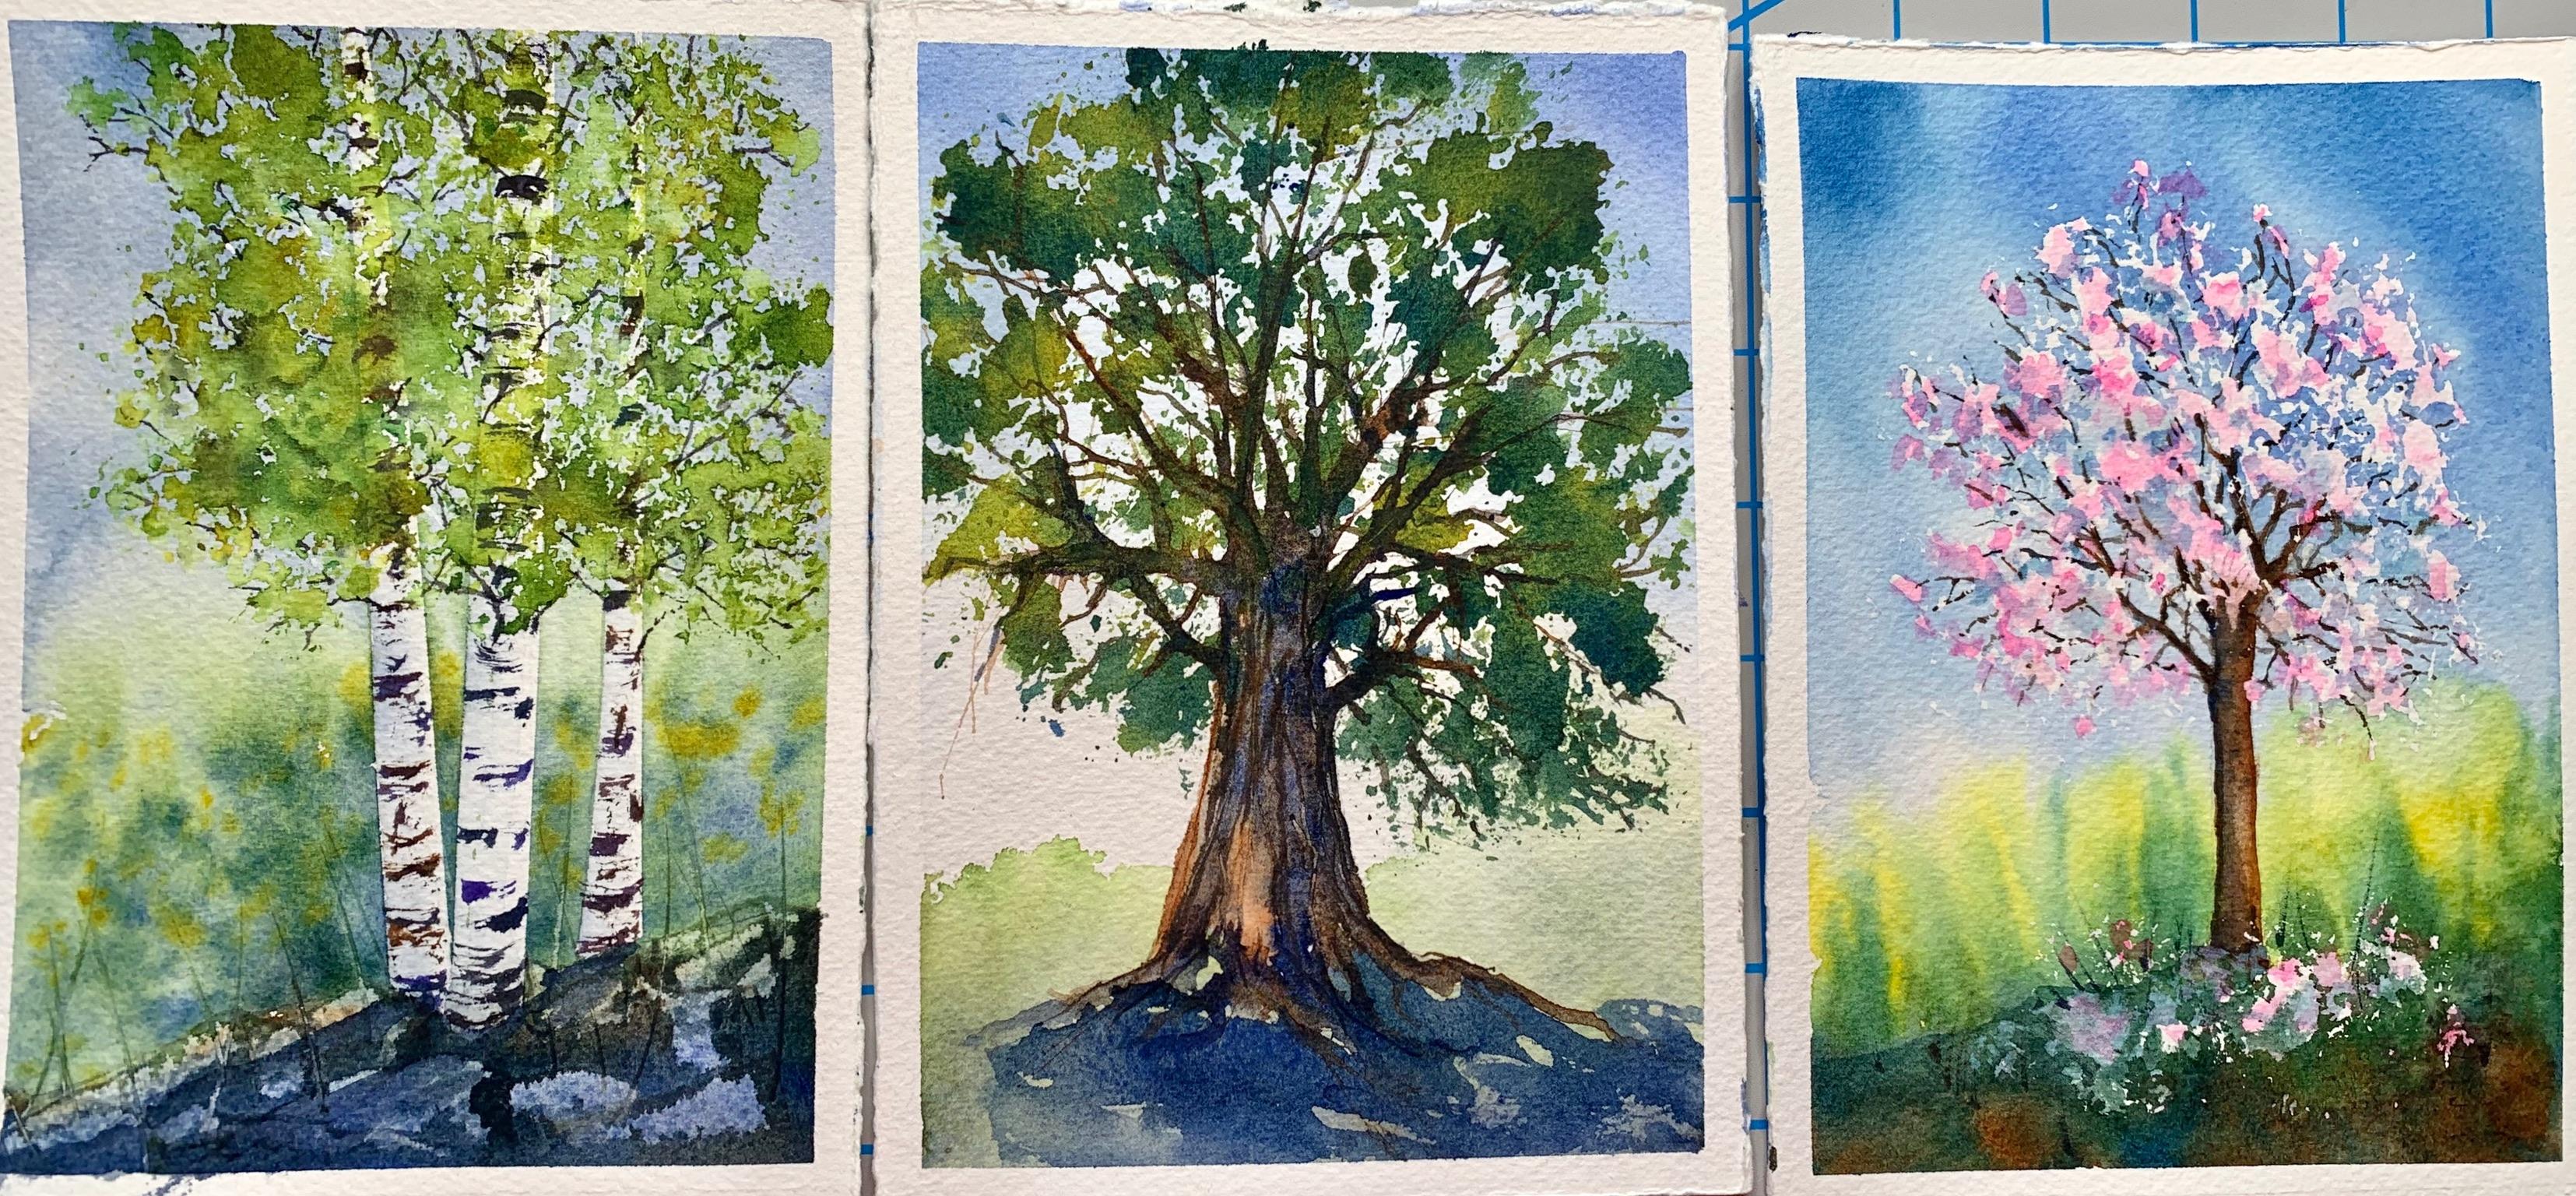
1. Introduction To Deciduous Trees: hi either here. So today we're going to paint. Some citius trees were going to try and pace s entries a flowering fruit tree and then an oak tree on that will give you some good tools for future landscape paintings. So let's get started, and we're gonna go over the supplies and the materials you need, and then we'll get painting. So grab your stuff and come along.
2. Materials: So let me go over the supplies were going to be using. We're gonna be using some watercolor paper. I am going to show you three different trees a flowering fruit tree, aspen trees and an old oak tree. And so I have to three pieces off £300 arches called price watercolor paper here, but you can use £140. I would suggest cold pressed or even alter your rough if you have that. And then I just put a little bit of masking tape on the corners. Just toe. Have a nice white edge when we're done. A pencil needed a radio star. Robinson mend eraser because we're also going to use some amass compute. You can either use the home made one speech so that I learned from Melinda Wild. Or you can use the PP or whatever mask include you have that doesn't really matter. My true M spray bottles. I have a Mr and a dot bottle and then all brushes. I have my dad brush number 12 number eight, number six, number four, and then number six rigger brush. Whatever brushes you have you like to use, that's totally fine. And of course, we need our palette with all colors. And I am going to use French, our marine blue, cobalt blue and blue transparent yellow bird Shana and probably opera Rose. I think that's gonna be it. And then an Exacto knife would be good. If you have that and a piece off masking take, I'm gonna use this one here. This time it's like it's kind of like an Exacto knife. But it's, you know, Blade and you concoct like that. And I think you use it for so winning stuff. I don't know. I can't remember. I have it for something. And now I just had lying there with all that would be good to cut that instead of digging through to find my Exacto knife. So when he was that and then a couple of pieces off crumbled up plastic wrap or cling wrap ants, maybe a strong and straw. Or you can also use this. I'm going to show you how to use this. This is one of those, you know, canned air, and you use it to clean up your keyboards and stuff like that other Tektronix. But I'm going to show you how you can use it. We do any fun way of using it. And I think, of course, you know that I have my water control station that's a paper towel and terrycloth and two containers of clean water, and I think we'll set.
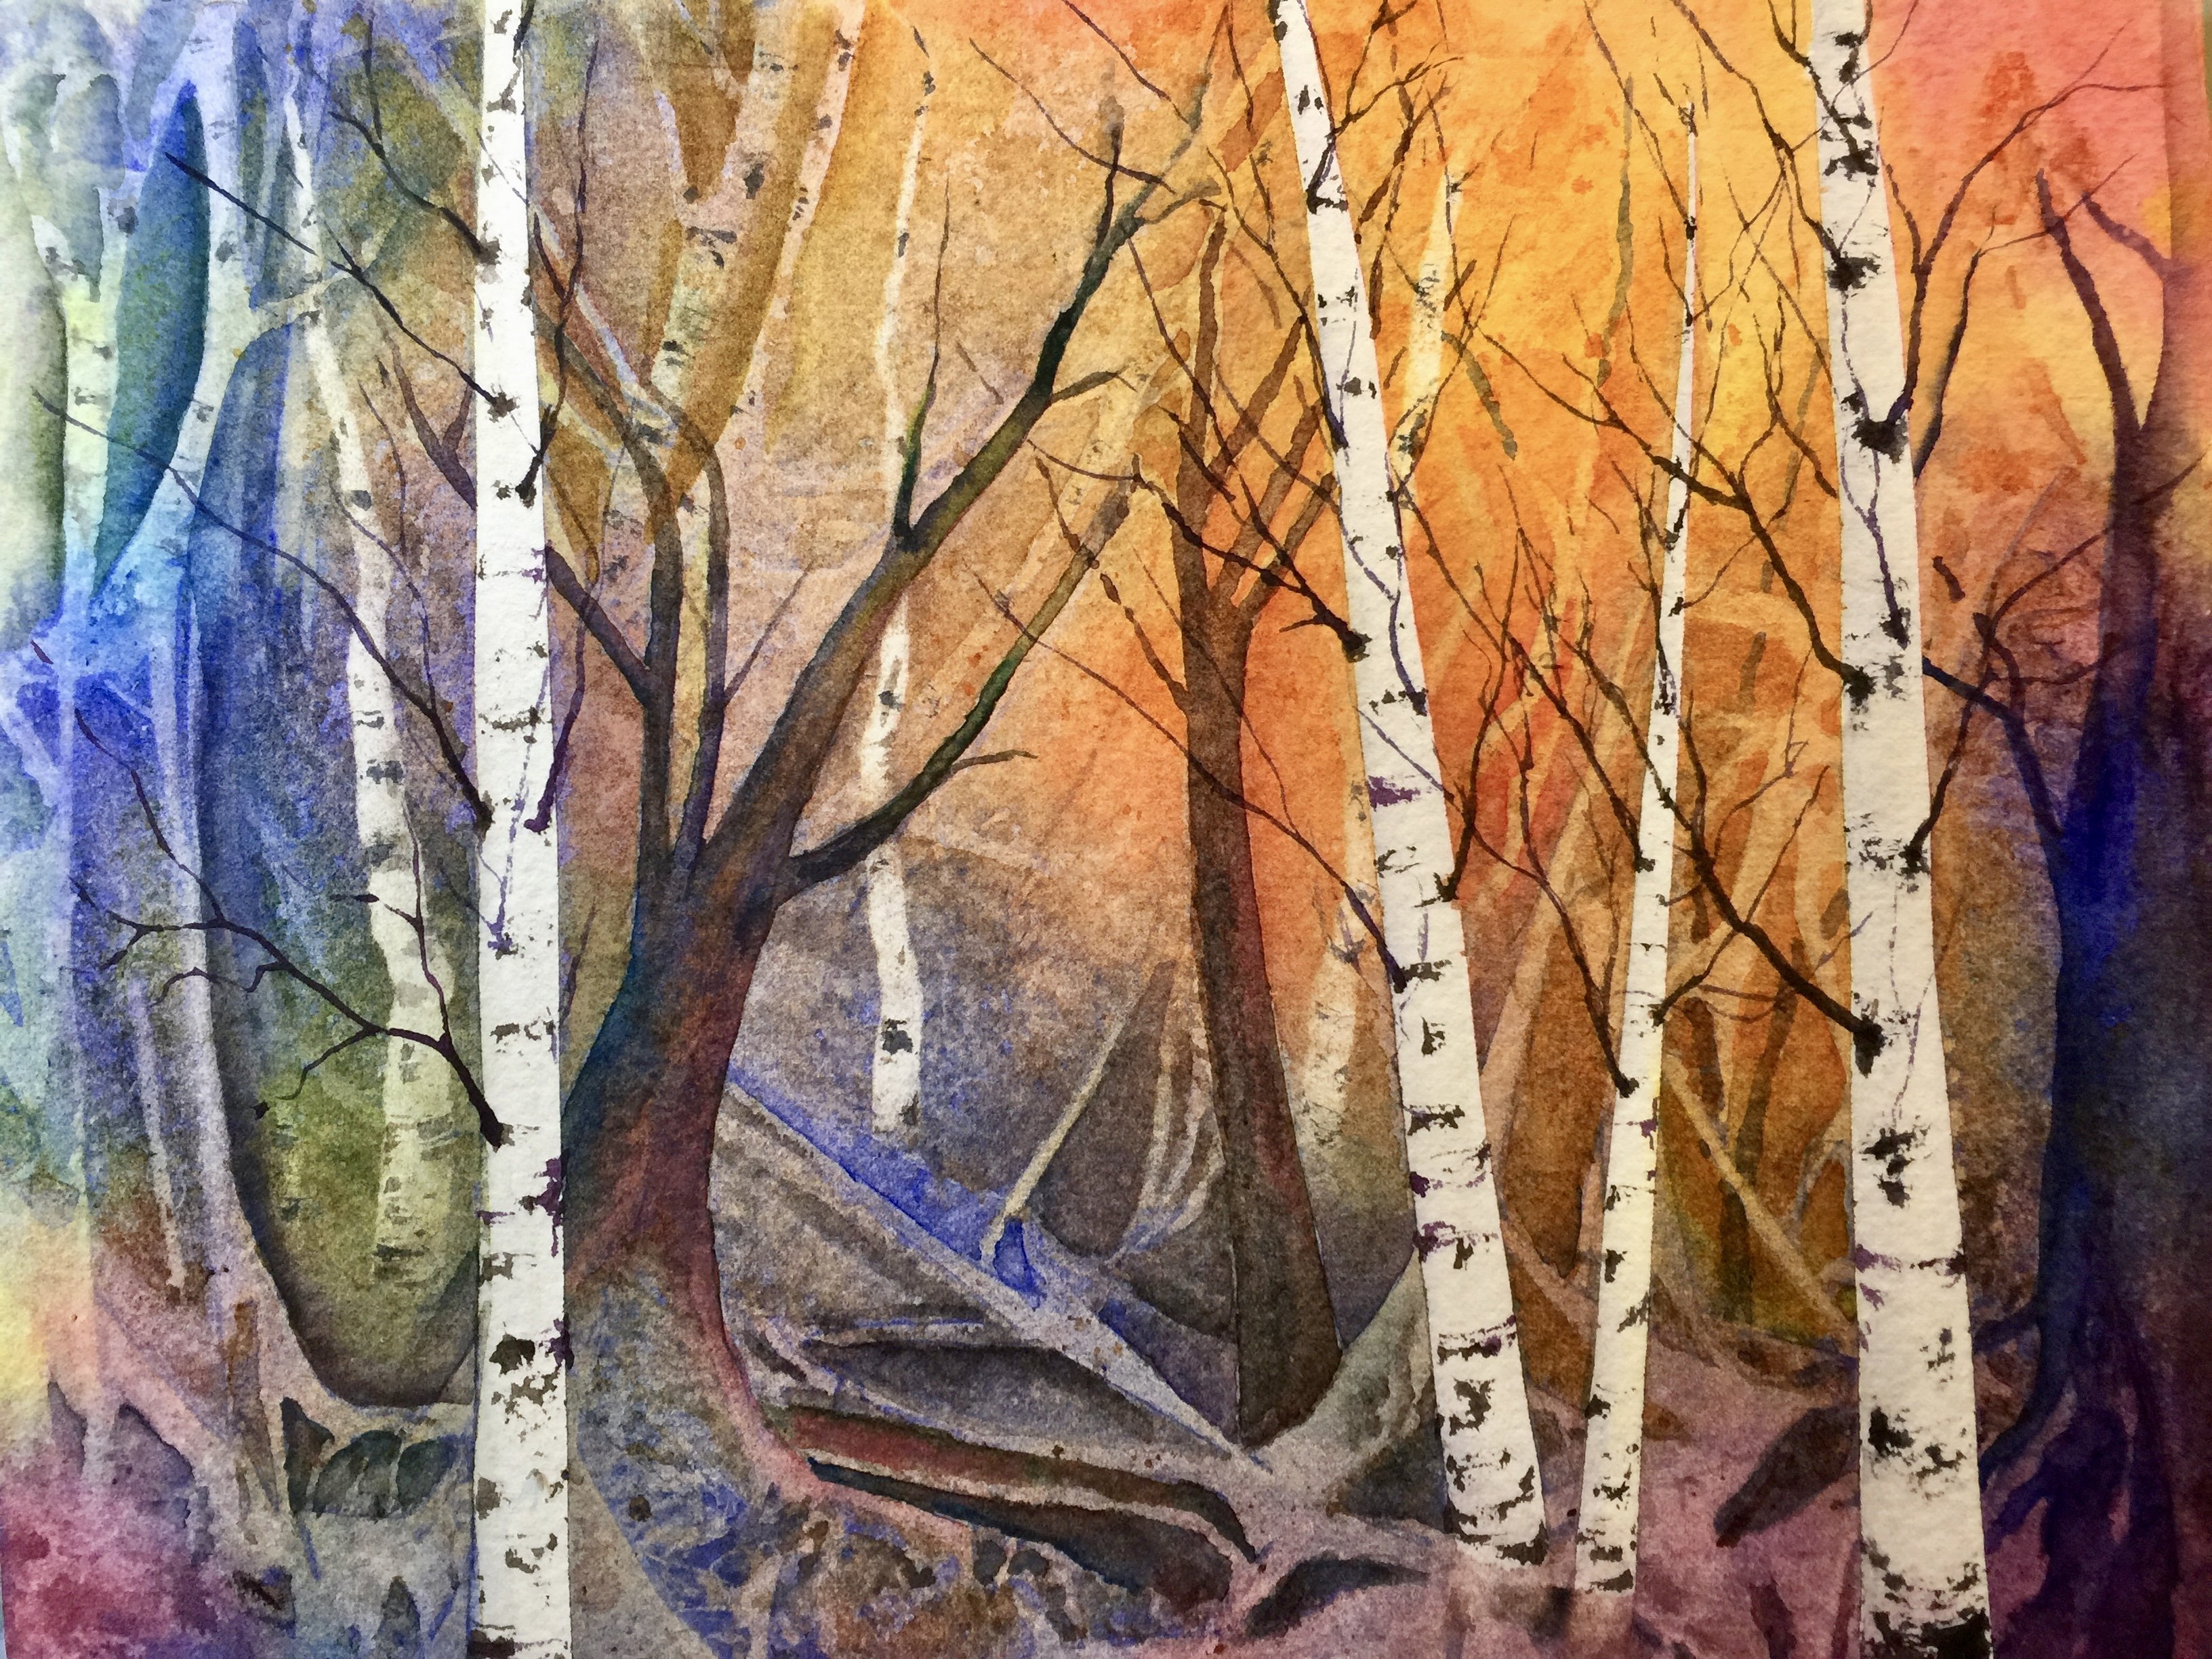
3. Birch Trees Step 1: so that start out with our aspen trees because we're gonna mask those out. And you can do it with masking tape. Or you can do it with masking through it. That's up to you, whatever you want to do. And I just had my masking tape cut with that roller thing I showed you, and I'm so I'm just gonna mask out just one tree and let's see what else I got here. You could be another tree and don't have them go, like in the exact same direction. Just one. And I have one more. Be a little bit more like this. Yeah, And I think that's gonna be good. Just like that. Just to show you I think this one here I'm not show happy with how that truck yes, there so might use this one to just I want to make it just a little bit bigger, actually. So there, none of them are exactly the same size. They have a slightly different tilt. And that's all good for composition and design. Um, so yeah, we'll just do it like that. And then the first thing we're going to do iss painting the backgrounds and we'll get started on that right away. And I'm actually just gonna missed. Then I'm going to Just used to call us. I have here in my palette. I have a great down blue to believe it. More cobalt blue. So great down a cobalt blue or French art Marine blue. It works really well, if you put some good, she and I'm gonna give it a little bit more water. And I think it would be nice to have it just a little mutes and he's gonna run that in assuming a little bit so you could see what I'm doing there so you can see That's kind of great down. And I'm gonna put a there. Yeah, I'm just gonna get it. Just kind of, you know, nothing. And I have a little bit of a slope off the land here. We can see. So I'm just gonna one some water up into their and, uh, let's see what we can do here is my French Ultra Marine Blue. Put that out here. No, I think and I'm gonna take and a little bit Oh, the transparent yellow Lovely were there, and I'm just gonna run it up like that. You know, it's not about the background here. I wanted to show you how to paint trees. So I'm not gonna go crazy with doing all sorts of fancy. Dancy. Yeah. Background. So not just trying some of that French, ultimately blue and, um more there at the great down Cobalt blue. And then I'm gonna grab a tissue. And before things dry on me, I'm going to try and lift out a little bit. It's too dry. Of course I didn't read it as much as I know you do what? I can still get a little bit, um, off a lift. I wanted it to look like, you know, it's not definitely not like and clear blue. This guy's a moody sky. And now I'm taking my back on and I'm just, uh, spraying in a little bit in that green color I have there because I want to win, get some. Hopefully some little run backs there. That would be nice. It's not that often we want that. But this time I do want that just so that they can be a little bit going on in this. Yeah, so more. There's that hands I'm not going it too much time has I'm gonna take some of my cocina and I'm gonna take more off my French after Marine Blue, All right? And then I'm going to go in and get some of that French ultra Marine blue down here in the bottom, a little bit of clean in here and there. And then I'm gonna put some off that, but Shanna over and I'm just gonna go in good a little bit more. That one, Sheena that and I think I want to try and see if I can get a little bit more texture into here. We can. We'll see. And now I'm going to grab one of my credit cards, and I need to just let this dry a little bit more, because when you see how what it iss super wet. So we just need to give it a name chance to just kind of singing into the paper, keeping an eye on it. One of doing waiting for that. I'm feeling frisky, and I'm taking my little number four brush and I put some transparent yellow pretty thick like that on it, and I think it be really fun if I could just dab in a few little dots here and there. You know, maybe this is, you know, spring flowers on these bushes. It could very well be you go. You know, No, I can see it's still quite well in this corner, but it's beginning. Has kind of lost it chyna with their So let's see what we can get away with. I take my credit card, get that out of the way, Hold up here. And I'm with the side of my card. I'm going to scrape some rock shapes in like that. That's pretty good. And then I'm gonna use the pointy pot off my credit card, and I'm gonna hang on here, and then I'm just gonna go in and just scraped up some little grasses and weeds and whatnot . Don't over do it just a little bit. Goes a long way. Yeah, and, uh, I mean, this is just for fun. I could go in and do some more little yellow dots around those, and now I'm gonna leave it alone. It's not even about that
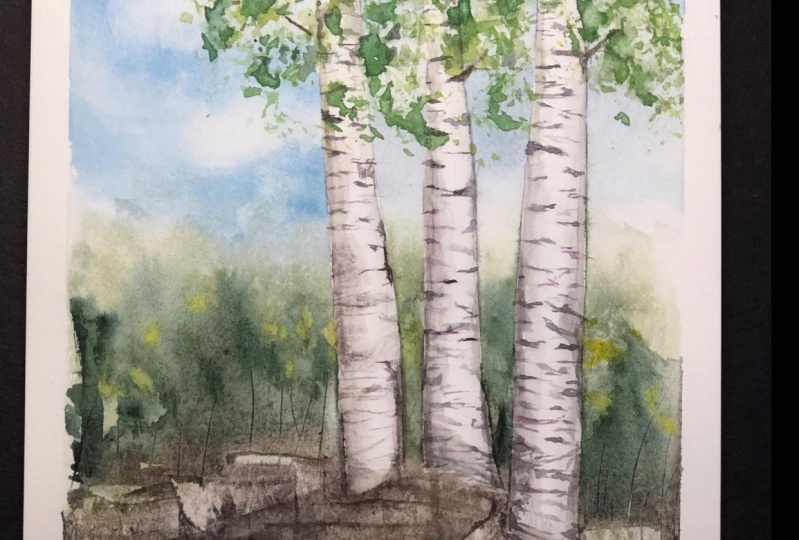
4. Birch Trees Step 2: okay, back from his drive, and now it's timeto peel off carefully. Uh oh. Are masking tape so we can reveal the aspirin for butch trucks, Whatever you want him to be. Those two trees, they're fairly similar. And there we have them, like trunks and off course down here. We're gonna fix that. It's never could You never want to have hard edges at the bottom off. Hardly ever wanna have hard edges at the bottom off trees and stuff like that. But we'll be fine. And now I have some tense realized reports I didn't totally didn't follow. When I have sketched in, Turner's gonna take those off my waist, and then the first thing we're going to do is we are going to We are going put a little shadow on are three trucks. So we're gonna create a shadow color. And that could be cobalt blue. I have here there, my little straight bottle, a little bit more watering, of course. You know, I wanted very light, and then we're gonna take a little bit of this birch and I happened to have their and great down this blue maybe way that and we want lots of water because we don't want it to be there. And let's start with the one in the middle. That's the biggest of the trees. And I'm just gonna take and put water down the middle. Watertown Mabel, that's judged to make the paint run. Let's say that we have our light coming from this side. So that means we're gonna put the shadow on the opposite side. Sure. Jews putting a shirt collar on here down there and we haven't And then make sure things are bleeding out nicely. A little bit more shared. What bottom and what I'm added. I kind of blew through the paint. Develop it. Can you see how that it's always better doesn't stick up quite a spat. And not to worry, because, you know you're gonna put these start markings on our birch trees. So we're gonna do the exact same thing to this one here, so again, going to put a little bit off skinny water in the middle, not all the way out to this edges. Gonna put a little bit off that shadow column just on the tip of my brush and now going to apply it to the shadow side of the tree. We from the light up here just a little bit and again, we can dab a little bit more few places just to give it a little bit of variation. That's always nice. Same here. We don't want too much that shot, which we can help it. And so here's that. Just a little bit. Can you see how those two a tree say, Look, they look better. Not sure Flat, is there? Yes, this one that's still just clean white. So it is. Just give that once. Um, um, she also. Then we start out with a little bit of water there, and then all shadow color just on the tip of the brush. Adage here. And if you're gonna go that no up here, Good. Dom's best I can there and a little bit couple places extra just because I like the variety . And now, before things drive, you're gonna go in the damp brush and just make sure that we don't have any hard edges and gonna mix it out, dab it, and then I'm just gonna go in here. Yeah, that's okay. Go. So that's step one. That's very easy.
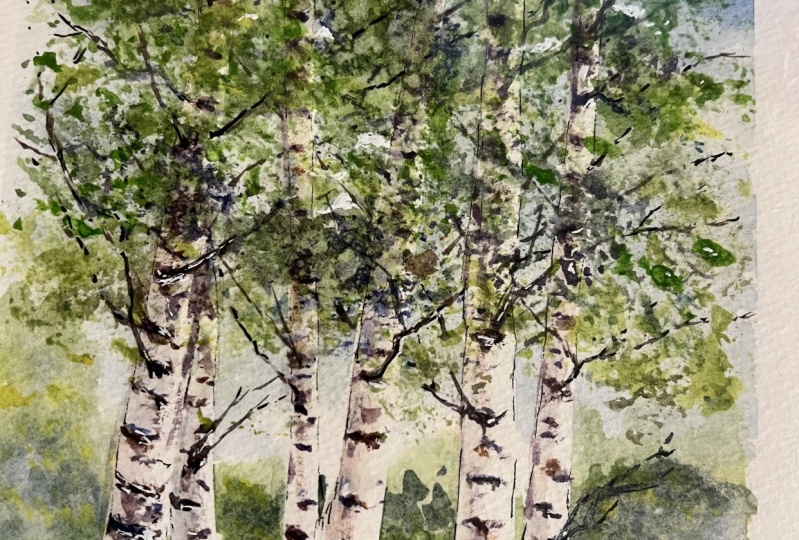
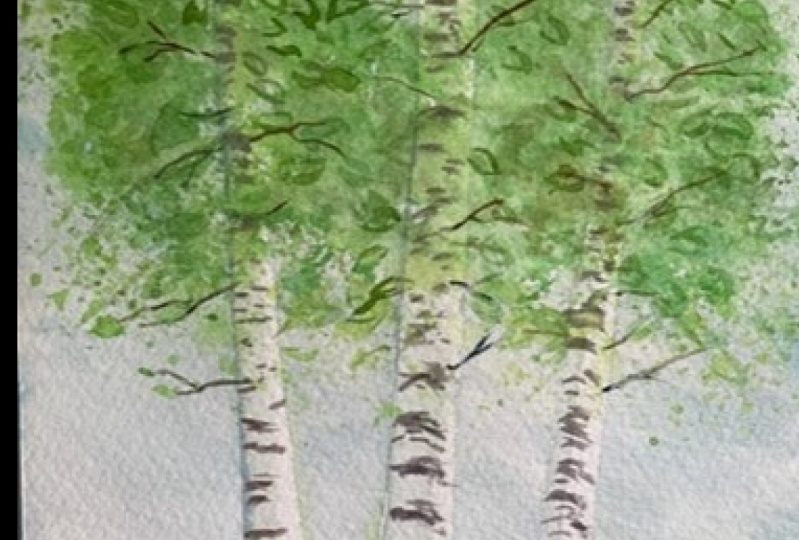
5. Birch Trees Step 3: Hey, so my trunks have dried. And so the next thing we're going to do is we're gonna put dosa. Typical, Butch, the markings on show I'm gonna have pretty dry paint. So let's see if we can dry up this What I have here off French Ultra Marine blue, you go. And then I'm gonna put some of it into here. My Jenna, And that's gonna create almost a black. So that's good. And then, um, going to take some or burn Shana, put it out here. Promise one, and then what I'm going to do is livening this up a little bit more, George. Morning, blue. Sicker. I'm gonna put some of the the promotion. What? More than that. Yeah, I want to get, like, a doctor. Certainly. Car. Just for fun. This is absolutely voluntary. If that's not your cup of tea, don't do it. I'm gonna do it. And then let's see what have you have that very, very dark. And then I can, So I am using my dagger brush, and it has to be a very dry paint because I'm gonna do dry brushing across here, So I'm gonna start down here, and I could put a little bit of that crippling. You know, you have to remember these are my trees. So they, you know, I get to decide how they look. I'm gonna put a little bit of the brown in, so just making these markings, and at the bottom, I'm making them curve up a little bit, because that way, it says will be more, gives more roundness. And as we move up the trunk, they become more straight and I level. And then, um, as we go up further, they start proving down a little bit. It's your very light touch and space amount Nice. Me so that they're not, like, true, symmetrical. And this home surprisingly hard to do and give them a little bit in the middle. So skipping like this. So I just go in and miss it up. There was one. And then let's do the other smaller one here. So will be the same coming up down here. And as we grow up, they become more straight. And sometimes I go over just good. If I, you know, feeling I need to repeat of color, go due to end and make sure your process Nice and just not very much more on. It's all stick pigment. That's what you need, they pigment. You're going to mess it up a little bit in there. It's good enough. Yes, that one here. And then it's that one in front. She will have very dark markings. What? We see it a little bit better than six. Saw the two others just because a little bit behind this one here, she makes you get nice and dark description of that purple. And then the other Carlos gesture. Mix it up straight. It would get here. Yeah, a couple of these little things here in front. Sometimes they're like little when they have the dark markings is actually either some deer . The animal had been nibbling on it or, you know, scratching honored stuff like that and that creates the Scots in the bark and also where they kind of lose, said Tiny. I don't have very sturdy branches, so they fall off as the trees growing. And, um, that will also create the scotch. And so they will be sometimes, like some little Scott's. Where and then, you know, it's so know where that branch waas Julia. So we can put some of those. That's right. So there we have. And then the next thing we're going to do is we're going to create a green. So I'm going to wipe out this center, and I am going to put in some off my transparent yellow I have And who pulled up franchise Marine there. So the other color I want to get in there is and whip and go and get myself Nice puddle out here. The yellow more yellow here. No, you know, and I'm gonna get some of the end. Put that over here, and they can see you know when you can see that. So very bright green. So I do want some of that bright green, but what I want to say this is springtime. Um What? I'm gonna have a little bit off the banquet there, too. Just with. And then I'm taking crumpled up plastic wrap, and I'm going to take my dot bomb and make sure it gives some nice dots. Yeah, there we are. And I'm gonna docked. And if you don't have a dark bottle, I would suggest you load up the brush and then, you know, Sprinkle with that that work also. But you can see these. I don't know if you can see, I'm gonna flip it back and forth so hopefully light will pick up so that you can see some of those. It's nice if the pigment will hit some dry and some wet spots. And I'm gonna dab in in these puddles and I'm gonna go across here and create this very light fall. It's that piece birch trees or aspen trees, Whatever. Whatever you want to be painting off that type of tree, Can you see how nice and light I can get it with lots of air holds for the birds to fly through. Also going to get do it just playing yellow. This works beautifully also, if you're painting trees in the fall. But now we're going into spring. I feel more like feeding spring foolish. And now I'm gonna go in and being a little bit in the purple just to give it some docks, A few places, especially down here. Yo, go there. I think that's about good, and you can go in and give it another little just. And there's a couple of the stock here. I don't really like them that much, so I'm gonna dab it up. I didn't like that. Yeah, this is more I have to remember. I tell myself that this is more so now we're just gonna let that dry. But look how lovely that loss I find that looks very, very natural. A bit more spring here. It's gonna let that dry, and then we're gonna go in and put a little bit of those branches in. In those places where we can we have, we can see through the folded shen, we'll see some of the no pieces of the branches.
6. Birch Trees Step 4: So here you can see the folded chest, right? And I'm quite quite happy with it. The only area that maybe got a lift solid is right over here. And, um, what I could do is I could take a little bit, make myself a little bit of a dark green with a little bit of French, all to marine blue in, make it a little bit more of a shadowy green. And I could go in and just break it up a little bit, a couple of places, put a little bit like that in pick an edge and then kind of do a little bit of a scalloped shape when Shaq your little brush, lose the edge on the underside there and that kind of breaks it up a little bit. But that is really being Nick picking. And there's no need for that. I just wanted to show you that that is a possibility, Chief, you got some solid shapes. But now I'm I'm going to declare this good enough, and then the last thing I want to do on this is and might use my white gel pin. That's the uni ball signal. A white Joe pin, and, um, I'm going to use my rigger brush, and I'm gonna assume out a little bit to sort up, end up painting outside off the camera so you can't see get my rigger brush, and then I have my dot puddles here. Hopefully, I didn't get them down too much here, So that's kind of a blackish color. And I'm just gonna pick up from some of those dark spots and put in a little bit of line work here and there. In the sky bowls, two women indicate some branches on. And when you look at a birch trees or aspen trees for that matter thes little twiggy type branches, they most of the time looked dark. When you look at the trees, so it's only the little bit thicker oneness that will have the light coloring. But all those Twiki, once they're dark. So I'm just gonna do a few more here, and then I'm gonna hold it up so you can see and, uh, here again, you could do as much or as little as you'd like. But can you see how this is beginning to look a lot more finished than over here, where I don't have any. So I'm just gonna do that and off Climate shuba boring for you to see me. You feel around with that? So I'm just gonna get that done off camera and gonna show you the finishing touches and how I would use my white job him if I find it necessary. Okay. I think I've gotten all the line worked on that is necessary. So let's just zoom in a little bit so you can see like that. That's plenty off detail for this painting. And if you wanted to have a couple off highlights, a few places you were can just put in some little connecting adapts with the white gel pen . But in this particular painting, I really don't find that it's necessary just doing it to show you that that's what you could do that you know, you'll see more the white if he was much more like close up kind of and painting. But here it's not really necessary. So there you have it. Let's try and take them asking. Take off here and evaluate this little painting off Aspen tweeze. And I hope you can you find this technique with creating the fold. It's useful, so you can use it both, um, negatively and positively. In a sense, you can use it to apply mask, include if you need to save the lights or you can use the plastic rep scrambled up like this, um, to apply pinks to create the actual college. So there you have it. I think that's a cute little painting. The only thing we might want to do just to finish it off is a grab one of this Lisa Doc ways that I created earlier. And let's just throw a little bit of shadow here, just a little bit this way there. Ground him a little bit more. That's all we need, I hope. Youll try this out, and I hope you find this helpful for future paintings.
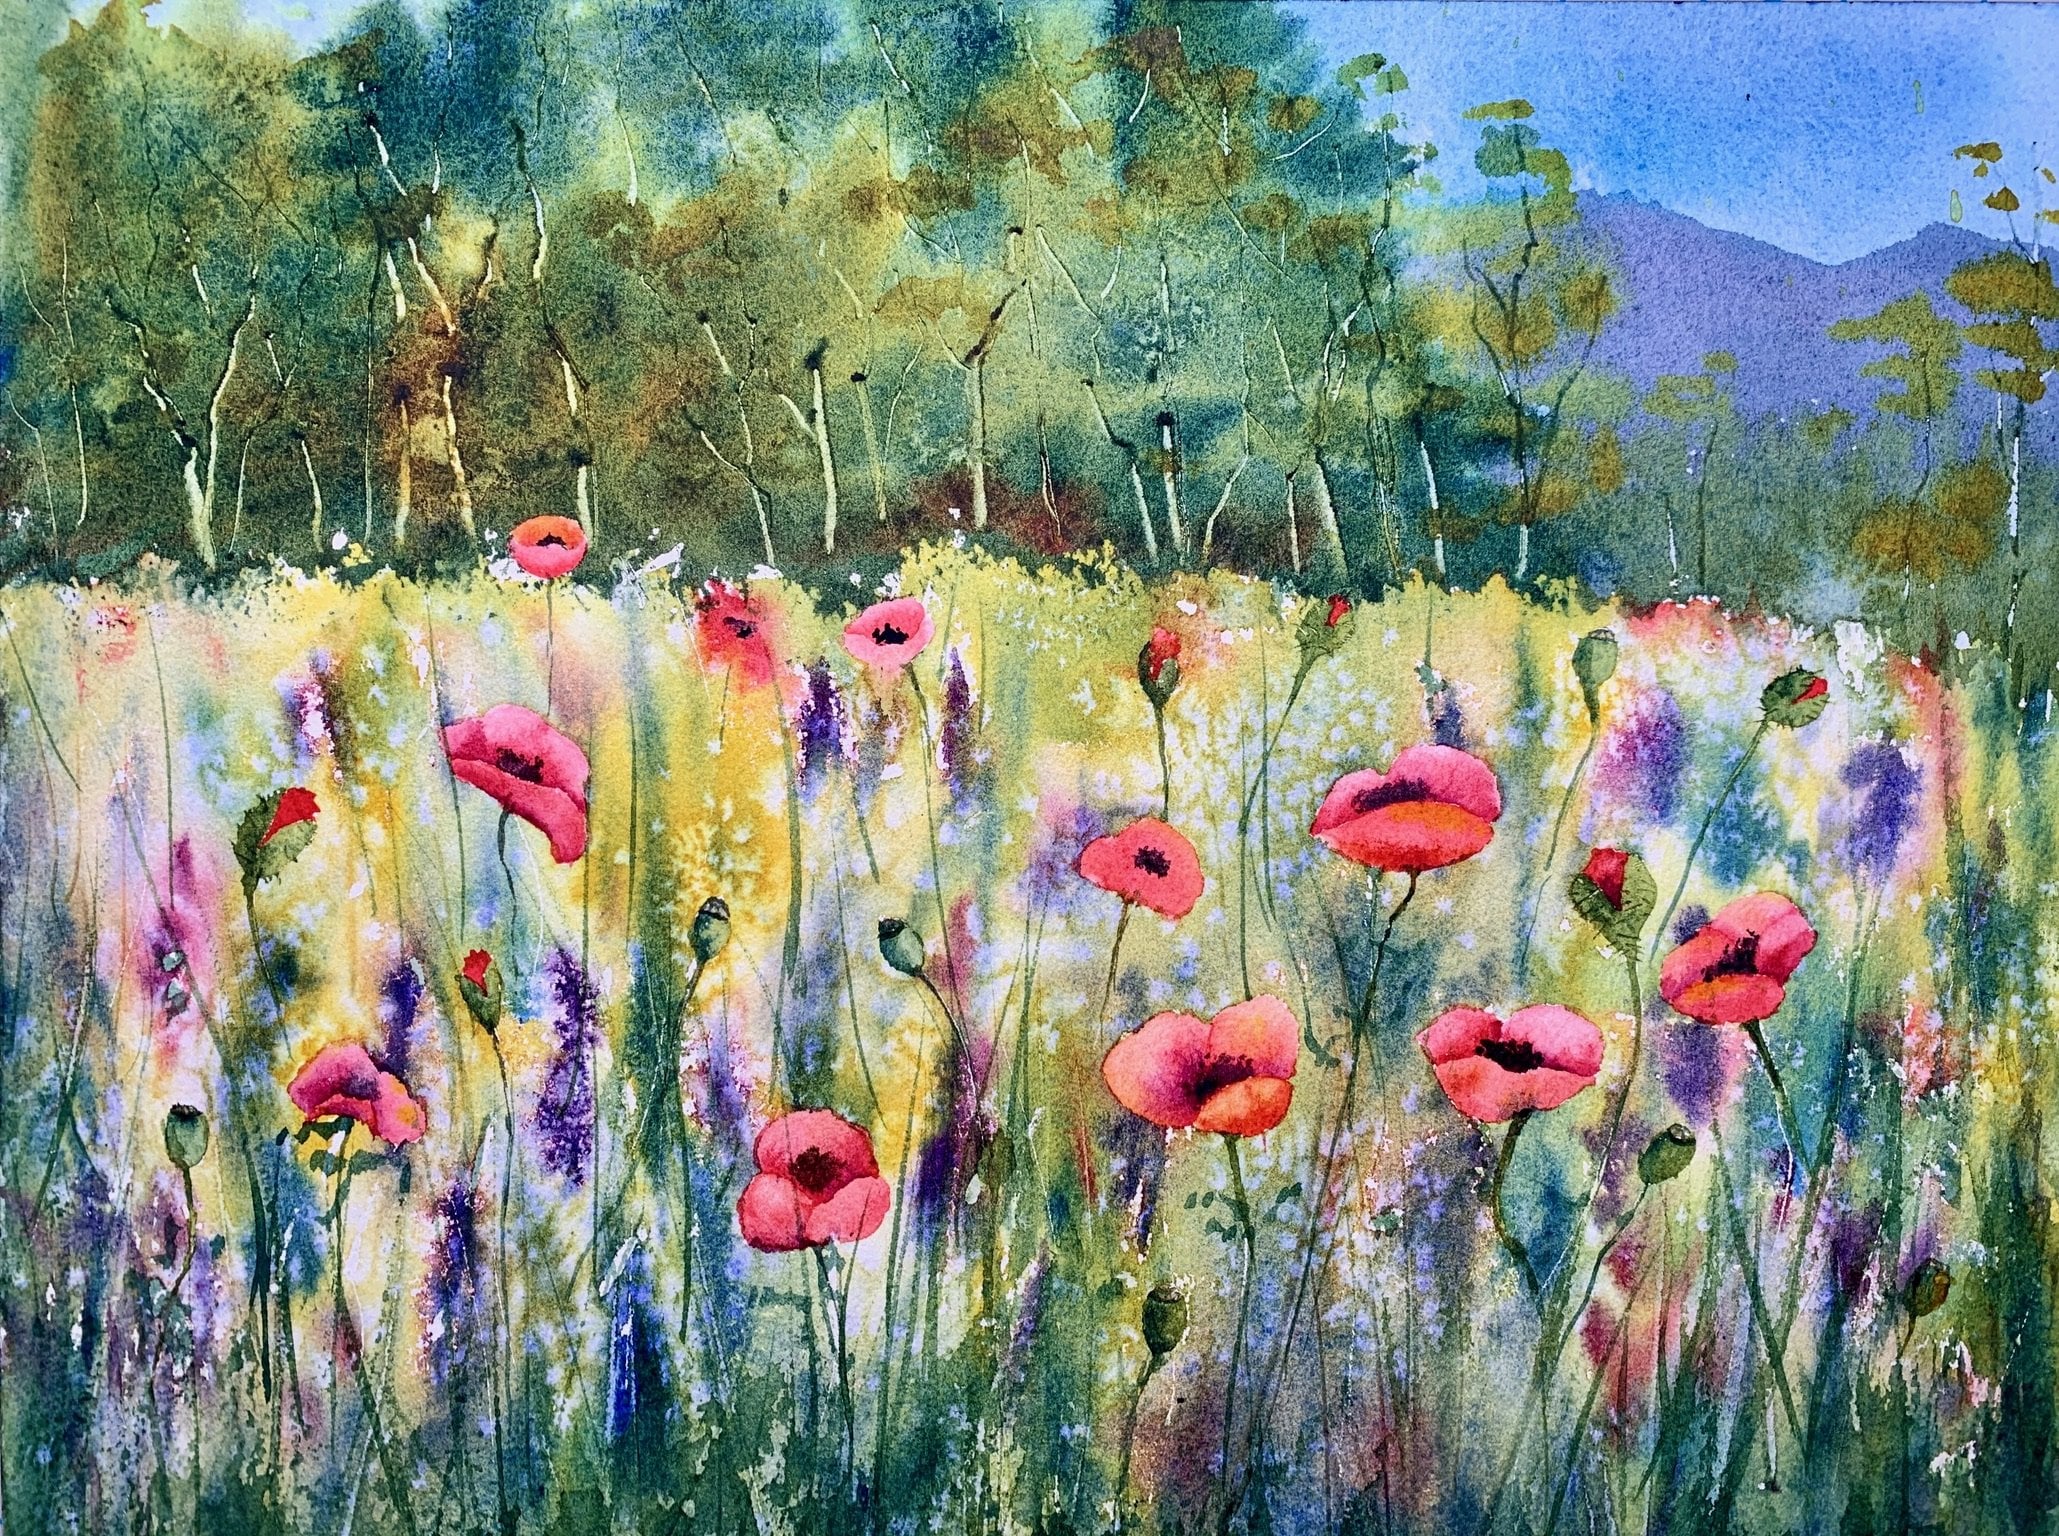
7. Flowering Fruit Tree Step 1: So the next three I'm going to show you is a flowering fruit tree. So I just sketched it in really lightly on my paper here, just a trunk and then a beginning off the branches there. And this is where we're going to use our plastic wrap. That's all kind of squished, squished up, and I'm going to use so my masking fluid. So I'm going to take a little cup like this, and I'm gonna pour a little bit just like that off the mask. If you it in, get that drop off, screw there, chop on again, and then I'm going to wear just dip my plastic crap in there, And then I'm just gonna get some of that masking fluid, um, on the paper, just with dabbing motions like this. And it's the way you would think the foliage would be on a fruit tree and she'll make sure you don't get like, you know, hopefully I don't get too big off some plops, Um, and you'll be able to see it a little bit better. And I'm gonna put a little bit underneath here because, you know, it's gonna lose all all the little pedals and so be nice if I have a little bit off life down here underneath the tree on the ground, okay? And throw that out, and then we're just gonna have to wait for it to drive before we can do the background. All right. In my masking fluid is dried. And I took my little rob cement eraser, and I just messed up a couple. I had a couple of areas, but I thought it was too solid, so I tried to make some holes in it. Let's see how that works out. Maybe you could see how once I take it off if there was a good idea or a bad idea. Anyway, the first thing we're going to do now is we are going to get our sky painted. So let me just get by. How goes out? So I'm gonna good my COBOL new and this guy I want to make it a nice blue sky and I'm gonna get a little bit. I think off, maybe some and quit over here dark blue and just more like a little to Accorsi. And I want to make sure that my sky get some nice volume. So it's doctor at the bottom, and then it gets night. I just goes down and it's gonna with the whole thing drops of water on. You know, I'm going to go down to this line here and I'm not gonna worry about the tree. Just gonna paint over it, make sure you have plenty of water, so everything will flow nicely. And then I think it's good, nice and whips. And then I'm going to start him my brush loaded here with that corporal when I'm gonna go in and get some of that and put one and then I'm going to put my sky color in just like that when it dr here. And then I'm gonna go in and get some more cobalt and I'm gonna put some water on my brush . Is we go down? Yeah. I mean, shot my brush and I'm just gonna let it float down like that. I think I want to just take a limpet more off the end here with a cobalt, it's on my brush could take a little bit of my transparent yellow footed over here, and then I'm gonna go from that line there and here I am gonna go around the tree trunk. Just gonna put a little bit of yellow in like that. You can see him doing my strokes up like that, then lifting. So want to get a nice soft edge there, topless in his blue? Gonna bring shot my brush again. That yellows creeping into my tree truck Lift it out with a dry tissue was not the end of the world. Get a little bit of color in there, and then I'm going to take my number four crush. And I'm just gonna go in and get that loaded up with some of the blue I have on and I'm gonna do the same thing is gonna do a little bit like that. I might just with a damp brush. Just get the tip in here and just soften this edge a little bit. So what about the bullets there? So I think this is good. And while I'm added, I think I can get some off that and group in, still have a little bit of the co box, and then you're going to get a bit off my front. Sheena here. Yeah, I'm gonna get so this is on dry gonna get a lived in that world. Shana here, just like that. And again, I'm just doing those strokes so that they solid at the bottom. And then you could see it, get some broken lines there, and then go in and get some of that blue one bit of the yellow so that it turns green. No. Then let's do something. Strokes like this. This is just getting fall down. You want a local A couple places and I'm gonna take my dot bottle. One of my doctors I have always had a bunch of nose. Yeah, I was gonna adopt a little bit of water And you don't have a doctor. You can do with just a tapping or using a truth brush and spray on, but just make sure that you get it up in the sky. That's why I like to use the doctor because I can control it a little bit better
8. Flowering fruit Tree Step 2: alrighty. Everything has dried and I like my loose sky A background. We gotta decide where our life is coming from. So I'm saying my lights coming from the right hand side here. Now we can paint in the truck so we only have a little bit of a moonshiner. They're gonna get ourselves some more. Shannon, just put some out here. No. And it consumes pretty thick. Of course. Now we're going for dark. So if we want docks, we gotta go with thick paints and brings that out. And the next one we're going to get is our French Ultra Marine blue. This is kind of like my stand stand by mixture for tree Trump's French Altimari. You are ultra marine blue and cocina together. They really make a nice neutral go in here. Make a real dark With that little I had left, You can see this one's more bluish gray. Of course, I had more blue in there once. A little bit more crown with more for Children. Yeah, is that I am going to put a little bit of water in my tree trunk, put it in the middle, leave a little bit of space out for the size. And if you take a small brush for getting a little bit of water into some of the branches, the bigger branches, the smaller ones will paint later. Just a little bit. Go and I'm gonna go up. So, my friend Shana and I'm gonna put it over on this side here. It's a night apart off the truck and now going all the way out to the edge. Yeah, I'm gonna go up a little bit on these ranches What I can and, you know, some of them are going to be covered up by our masking fluid and we can go in and do some of the smaller ones later. Just like to get some I showed up a little bit more, you know, just going in and putting some in where I think they should be. No. And then we'll do more later just to put beginning and before everything dries on us. Let's to step this loaded brush into our French ultra Marine blue when I'm gonna put that on the shadow side and you'll see how that then runs in and mingles hopefully with our burn chyna. And if it doesn't we can always help it along a little bit. And then I want to go in and dark in some of these areas, you know, there's gonna be shadow falling over some of these, um, a little branches said are peek a booing out here through all those flowers, blooms, and it'll be the foliage. Maybe on this flowering fruit tree Just going into a few more line works while I have a nice point on this brush on when he makes it out, dammit. And just how about mix and mingle a little bit more and I might pick up a few little highlights. Yeah, but overall, I'm pretty good with this. Taking the dark? Yeah, just making a few more your marks. And already I think I have a pretty good turn it around. So gonna go in and put a few more off these little no side branches and Twix in the full. It's here what I can and why The trunk is trying much. Well, so that done. We need you out here. Should have some forge parts here and step back and look what I got. And then a few more. Did you make sure I have nice and skinny little lines. I don't want anything too thick because you said no Twix and we don't want have been to sick. That's not gonna look natural. Has a ton of these little side branches. So this is kind of fun. I think it's kind of fun anyway. And if you need to use a little, like a brush or Lina brush, go ahead. Do that. Whatever works for you. Need a good tip on your brush for this stuff. And, uh, when I load up my pressures, I mean, make sure can share rolled it like this, making closer stricken CCF. Roll it like this. Drag it up. So I have a nice point. And I'm just carrying on here more. These little twigs. Be a little sticker in here. No. Sure. Through the truck. Find true. This one here. Just starting a little bit underneath. Here. Go. I think this is pretty good. See if I need something that might need a few more, right. Here you go. We think this just fine. And now we have to try a little bit and then we conduct the masking food off and then it's we're gonna put in the flowers and a little bit of a shadow. So on then I think we have a beautiful little spring painting.
9. Flowering Fruit Tree Step 3: Everything has dried now. And, um, I can take off the mask and food with my shrub instrument. DeRay since code, you can actually also use, um, a mask and take your pick up lit and you could see and we're just going in one direction. So I don't see me here by accident. That dirty masters. Now, you know, I painted over it, so there might be some pink on. Yeah, I'm asking to it that could smear, make a mess. One election. There we have it. So, just feeling she then if I hold them asking, threw it out and you know, you never You should never put masking through it on If you have damp paper, have to be completely dry and you never want to rub it off before everything is completely dry. Just remember that. Okay? Dokey. So now we are just going to get some of our opera rose. I think that would be great color. And I don't want it very dark. Quite wanted down. So I might even go over here and do super light. So it's just breaking the white, and I'm just gonna go in and dabble some of that pink on here, and I might take my little dark bottle and put some beautiful water on, too. So things steel, light and right and spread a little bit. And some places, he just for us out in other places, they still have hard edges. So just hit those white areas one ahead, a little bit dark over here. So I'm not going with a little bit of a doctor and kind of hitting some of the bottom parts of some of these here. Let's get a little bit there. Just protection that one off and there will be a little bit back down here away from the light in here. So it's good to marry the color a little bit brighter than I wanted. You just stepped off and then we also want to go and do a little bit down here. Some pedals have fallen down. Here is what I'm thinking, and that's probably the area leased. Happy with right now. Stand there. So I'm just going in and just with that damn brush, just kind of smarting it around a little bit. And this trouble your case, you still have some white showing, but see how that's coming to life when you do it like that and put a little bit more in here, and then I'm gonna reach out my brush and I'm going through, get a little bit more off the green in here, too. Just so it's not sure Hash this no more the pink. And then the last thing I want to do down there is I want to cast a little get off a shadow . Maybe I should let Dr First I probably shouldn't drivers. In the meantime, I can go in with a little bit of blue on my rush and dab effused places just to make everything a little bit softer and a little bit more indication off maybe a little bit of shadow. So it's just a very quick, you know, don't think about this too much. Just dab it in a little bit, just to especially some of those places where maybe you got it a little solid, just going with a little bit of that from the skies that's here set cobalt blue with maybe a little bit off the just at that in here, they're they're here. Extra plate things it can you see. All right, you do the same down here, so it's not so right. And then let's take a little bit of that blue here and it's great down and I want to just pick up and cast a little bit of a shadow here and just stab So there's a little bit there was showing, but they're not sure right there. I think this is good and one other thing we can do. IHS we can take our rigger brush and I just wrote it in some of this dark pigment that was the French ultra Marine blue. When you're Bert Tiana China, here's to burn Shana with some French ultra Marine blue in its stock and make sure I have a nice tip, and then I can go in and at a few more, um, off these branches. If I think I need it, just look at your painting and see what you think. You have some places where it looks like something is just being held up by nothing, and it's a good idea to go in and just put in a few of these more. These here again. I don't need to over do it okay and can do a few little Since we have it on rush, we can do a few little kind of grassy type things here. What I think leave it and called it a day. It's one other. No place here. Pink. Yeah. Another little ranch here. Yeah. Okay. We're gonna call this good. Let's peel off. I'm asking carefully and see how it looks. I always wanted you really careful. When you peel off the masking, peel it away from the paper like this. Don't rip it this way because you can with the pay for sometimes it has happened to me. All right. I like it. There is a flowering fruit tree.
10. Oak Tree Step 1: So here's the oak tree, and I'm going to win. Put a sketch in the in the notes for the project so that you can trace it if you don't want to paint or draw your own. And the first thing we're going to do is we're just going to give it a very, very he'll backgrounds. And so I'm gonna use my couple. That's my standard. And I don't mind wipe out the worst of the green here. Yeah, it's good. And let's get some cobalt blue. And I haven't been that pink over here. Maybe that'll be nice. And then he was gonna grab a big brush and, uh, get the background. We're just gonna do a very, very, very light background to stop with. And don't worry about painting over the branches here. It's gonna be just fine. I don't want to paint into a truck, but I'm gonna paint down a little bit here, you hear? Can you see many? Okay, dokey and then it's just put a little bit of that call or blue with tiny bit off a promotion here, and we can put it opened up. This Tina one in there, you know, what is what they want to call it. They dry quite a bit lighter. Then what? It looks right when you put it on. So here we are. And I am going to just grab my Mr It's great and just give it a little way like that just to make it flow a little bit more. And she here so much I'm just gonna hold it back and forth and let the colors mix and mingle a bit. I don't want any hard edges in here, so I'm just gonna go at my interest. You go hold it this way and we're just gonna get that dry. I'm gonna hang onto it for just a little bit if you just put it down and walk away from it When it's this what strange stuff happens sometimes. So I'm gonna take my tissue here and just very carefully. Wipe down itches here just so I don't have at puddle. That then creeps back in and creates a bloom on the edge of second easily hat happened. And then I'm gonna hold it like that on a little bit of an ankle and just let that extra pigment run back down here and then I can pick it up with the corner off my tissue. So not tapping in. I'm just holding the pigment of the tissue right to that corner where the pigment is running. I think it's not good. Now, is there something right on that itch? Go. I'm not gonna worry about bottom right now. Could you see I have a very light wash, and then we can paint the truck and the branches, and I have a new method. I'm gonna show you for those branches that I'm very excited about showing you. So here we have our sketch of the oak tree and our sky drives very lights. And I think I probably would like to put in just a very light a neutral color here for around the oak tree at the bar Just so I have a little bit about him. Of course, we have some routes that we're also going to a paint here. Sort of be nice if we have, like, the background off the foreground, so to speak. And so I just put a little bit of water on. I hope you can see that. And I'm gonna go with a very neutral color. So I have kind of like this grayish color over here that's from left over from my fragile marine blue and a little bit of the burnt Sienna in it. And let's put a little bit of green. And just like that, right up here. Yeah. And it's gonna have fairly soft edges. Sure. Just putting open water. Appear I'm truly fine if I get some blooms and stuff. So, actually, what it probably will do is I just use my dot bottle and give myself something regular ages like that. Very wet. Gonna take some of that water off with a little tissue. So we don't have to wait all day for these to dry in here a little bit. Just like the chops. Yeah, and much will clean this out. Yeah, I was gonna dab in some little things that could maybe be some for which later? A bit of a hill. There again. Just a few dots. You go. This is all just prep so that we can get hopefully a nice little painting out of this and not mess around with it anymore. Let that dry and one that dries. It's, um, mix all colors. So now I think I want a clean this area. I'm gonna use green again, But not maybe exactly this kind of green. I think I'm gonna go with a little bit more muted green for an oak tree. I feel they have a little bit more formal, muted tone. So I'm gonna get myself to house off the French Ultra Marine blue. It's gonna use these here areas that I have used in the past. So it's not like 115 but that's too fine, because we use it again in combination with the China. And no, Mr Get all this nice treatment out of here. And, you know, we have to remember that you want really pushed the French, especially French, off marine blue around a lot, because it has a tendency to have these little picnic equipment parable step I don't want to solve. So, um, they don't get that dissolved in a little puddles, and then we need to get a whole bunch off. Oh, but Sheena here and oftentimes what? Some here. Nature. More water in there. Okay, so now what we're gonna do is we're going to grab our painting and get the colors on the truck. And as soon as our back on has dried a little bit more
11. Oak Tree Step 2: right background has drive to a nice kind of muted neutral car. I'm good with that. And so now what I'm going to do is I'm going to put water inside my old tree and up the branches, said I kind of sketched out and not gonna worry about any of the details. Just right now, we're just getting the main shapes off this oak tree and actually the way I'm painting this is also the way I would be painting like an old chestnut tree painted some old chestnut trees. I mean, years ago. And, uh, same method that I'm using here would be very suitable for that. Any kind of an old knowledge tree, Um, some other trees that come to mind that, you know, I haven't actually painted yet, but I will. One of these days are the bristle cones. You know, that's the world's oldest tree, and we have a beautiful grow off those in like the Houston share in California. I went up there a couple of years ago when I was doing a road trip and I took a Sicilian pictures. I just haven't painted from them yet. It's coming one of these days I'll get it done. All right. So I think I want my light from this side this time so I could cast a shadow that way. And, um And then you start with some off my bird. Sheena, have some of that in here and there, There, here, like that down there a little bit. And then I'm not even gonna reach out my brush. Just gonna dip it into that French ultra Marine blue and get some of that on on some of the branches here. And I'm just laying in the color right now and leaving them kind of mix and mingle on their own. Won't call a variation in there, and it's very, very wet. And it needs to be very wet for the next step that we want to do good here. And then I'm gonna drip in some water into these colors, and then I can either take my straw and I want to blow in a direction so I can create some random branches. So I'm gonna get my strong behind and into a quick, strong blow. You see that? And you need to get behind and wherever you know, they kind of have a tendency to run out into these still blobs at the end. I don't really want that. So there was a dab up right away and let's see. Can we get a little bit more here? Yeah. Yep. And again, I'm just gonna dap up. There's some random shapes I don't like and let's see here. See, that's not wet enough. So that means we have to win, put in a little bit more water before anything drives. So you know, lots of water right now. We can always start me. I'm just going for the shapes. I'm interested in shapes, and you can always give them a little direction by just dragging out a little bit of water if you have a specific direction where you want things to go, like for instance, here I wanted something to go that way, kind of having some more here and maybe here again. Lots and lots of water. Let's get some going in some different directions here. We just got to give them some water so that they can move. That's very important. And now on this second go around, I'm going to show you something you might be challenged with blowing. And you can use this this duster, which is the Kandir and just want to get behind where you wanted to go. It is potentially a little bit harder to where see the direction but the texutil practice. And, you know, I would suggest you do some of this on a scrap piece of paper, so you kind of get the fuel ford. And it's good if you can fold your paper so that, you know, gravity helps you get the direction you want on some of your the branches and twigs. Okay. You know, you can go in right now. I'm probably gonna go in with my rigger brush, and I'm gonna go in and before things dry on me too much, I'm going to, um, get some of these inches the way I want them. And afterwards, we can go in and do some fine tuning. But this is like the basic thing Sodas and weaken Doc in some areas. And it's great if you can get it done. You know, four things dry on your too much, and see you could go in and then, you know, continue. Some of these um branches said you blew makes them a little thicker. Very the cholera, a little bit and, uh, just kind of go with what the blowing technique gave you. You know, it's good to wear. Go in and put some of these branches on a little bit thicker, so overlapping. And if you have some of them that are a little too straight to solid colored or, you know, just look at your tree, this is one of those Look at what you have and go from there. There's no right or wrong here, and we're going to cover some of these branches off up, of course, with the bullets that we're gonna put on. But this is also a wonderful, wonderful way to do in trees and winter. We can really see all those beautiful branches and call on here and there and again, I'm just using the French, ultra Marine blue and the birds China. Of course, you could also use other colors, and you could make it really, really colorful if you like. I've done some trees like that, and that turns out like really, really fun. Um, so it all depends on what you want. So here I think that one up a little bit. And I think I want to go in and maybe see if I can blow a couple more here where feel I needed. Now you control to go in and add on. It's not like you have to get the whole thing done in one go. You can add on built the tree, depending on how goes for you and, uh, get some of these not I don't want everything to straight. Let's see if we could do one more. I got my little lower year here. Yeah, like that. Okay, so now I'm gonna evaluate my tree shape, and I have one area here that I don't like. Think that's, you know, that's just not looking very oak tree like, So I want to go in and just kind of we'll set up a bit more. And here you get a couple shapes like that and here, and I think that's pretty good. This one, Salt Colonel Corrupt. Do you see, when I put it on with my my rigger brush, I do tend to like to wear wiggle them a little bit so that they are not quite sure. ST. And just fixing some shapes here. Here. That's pretty good, because, you know, the rest will well, there cover up with some foliage. Yeah, and then before drives completely. I also want to use my credit card because that's gonna be awesome to get some off those ridges in on the tree. Oak trees tend tohave, um, some ridges and texture in there. Black. Go in, put a little bit of darkness in places. Chubu going up here. So this one and after me before trash on me completely. I see you want to go down here and get some of these routes blown into so that they kind of mimic a little bit of shape you have in the crown of the tree. So let's see. Yeah, and then he's here, Doctor here in the corners. Yeah. And you know, we can fine tune here a little bit when no cast the shadows and stuff and go in the little bit more of a credit card, scrape out some of the texture. And now I'm using the round it so side it's around the corner so I could get some of the highlights over here on that side here and then I do some of the final ones. It does point you want to create some of those final lines here and which very wet it's gonna be dark patterns and where it's beginning to try, gets some of those highlights squeaked up, so its own about the variety. And I will also ask Wait a little bit here on some of the branches to scrape out some highlights where some branches are crossing over other branches. Yeah, and then here I think this wench go shoots way, and then the other one is behind it. Kind of take that established. But see how that's already really working Well, for old oak tree. And I'm just gonna dab up here so I get a little bit off softness. So some of these routes, they just kind of disappear, and we could make We're gonna, you know, make a little bit more off for want when we have when we have this established
12. Oak Tree Step 3: so I got my puddles ready for the college. I have switched it over like this. So you can see I have a couple of my friends charge Marine, I have some transparent yellow out here, and I have some more watery trying to deal up here. And I actually have a little bit of my birth, Shana. And here and here, if I decide, I need to do you some of that. And here is my crumbled up plastic wrap, and I'm gonna put a few splatters on. And I think that was maybe too much water. So I'm just gonna go in and just stop some of it off. So it's still happen. Moisture in certain spots. But it's not like dripping wet because, you know, otherwise I'm afraid it's gonna get to, um, to light. And then I dipped into the yellow and then back into the French ultra Marine blue, and I'm just dabbing on the foliage and now the foolish on his oak trees, they are gone. It that's gonna appear more solid. Then, for instance, on our birch and aspen trees, there's gonna be a little bit more clumps I liked up there. So put some yellow, more yellow where you know you want it to be lighter. And then some off the French ultra Marine blue under these in kind of in the middle Here, up here, the night here for side and move it, doctor on Denise. And just like on the previous trees we did, we can come in and support all the storage with a few more branches as needed. That's pretty good. There's a nice old oak tree. I like it. And then again, we could do that before things dry. We don't have to wait for it to dry, so I'm just going in with a pretty sick, dark, dark brown color. So with a dark brown color with the French ultra Marine, blue and general actually used on the other branches, and we can just go in and create a few more off these, um, branches in those sky holds that we have here. So that's, you know, fairly simple. And just like we did in the others there, I think that's pretty good again. You know, I don't have to overdo it just enough so that it feels like it supports the foolish we have there and the last thing we're going to do is we're just going to pick up a shadow color. We're gonna use the same call her scheme. So I'm just gonna take some more off the French ultra Marine blue equate down here with the birch, and I have over here. And then, um, I'm just going to pick up and cast that shadow here just like that. That could be some little light, because, you know, that light is coming through that foliage there. And then we have an old oak tree. Local leaders with light kind of, you know, filter down and catching a little bit off the truck. So I hope you'll give this a go. Oops, I'm seeing one thing that bothers me. It's kind of like I needed a little bit more foolish little bit up here going off there. That's better. Yeah, I like that girl. And it could go down here a little bit more shorts. Not sure. Symmetrical. Yeah, that's need picking, but that's what I do, right? And then it's got a couple more branches down here like here, you know, in there, I think it's a good composition and better, better better. Okay? It's not good to nit picky, Eva. So now that it's dry, I'm quite happy with the result. And I don't think I want to do any more to it. And I just wanted to show you here, get the masking tape. Oh, and see how we like it. And then, um, I hope that you will try out these different methods of creating texture and, um, and old itch and fun trucks for the sidious trees. I just showed, you know, three varieties, and of course there's tons off other types of trees. But I feel that these three trees I show to the birch the fruit tree, and then this oak tree gives you a good variety off. Three trucks and foliage toe. Create other types of trees that fall under one of those types of trump's and foliage and pattern on the branches.
13. Wrap Up Deciduous Trees: so that concludes my lesson. Arm painting to sidious trees. We learned the aspirins or birch trees, flowering fruit trees and then finally here an oak tree. And there's lots of other types of trees that fall in under one of these categories here, and you can mix and match, and that is a good tool for you to have when you want to paint landscapes. Thank you for painting along with me in this class where we learn to paint the city's trees . I hope youll picked some trees for me and share them with the rest of us on the project Gallery page. Human skull Shia and I look forward to seeing you in another class. Soon I will get cranking on filming some more landscape elements for you, so happy painting and see you soon.
 Eva Nichols, Watercolor Artist