Transcripts
1. Introduction: Hi. My name is Irina Traskas. I'm an artist and illustrator. Also, I teach classes
online and offline. In today's class, I want to
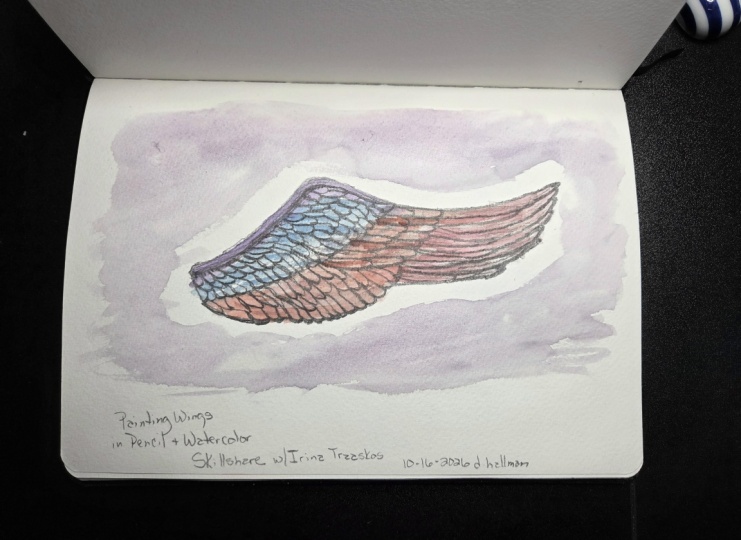
show you how to draw and paint wings in graphite
and watercolor. I hope you like
these techniques. If you're new on this channel, thank you and welcome. Press a follow button, and let's get started.
2. Supplies: So in today's class, we will
be using following supplies. I'll be using cotton, hot press, watercolor paper,
Saunders Waterford. So, um, you can use
any watercolor paper, but I suggest a smoother one
without too much texture. So that's why I'm
using hot press. Then we'll be using pencils, and I have a variety
of pencils here. I have HB, just like a medium, a harness, two H, which is very fine lines, and three B, which I'll be using for most for
the main drawings. As for the pencils, we'll need sharpener or if you are sharpening your
pencils with a knife, just use a knife, whichever
you're comfortable with. And we'll need a little piece of casing paper one you
don't care too much about it just to protect our drawing
while we're drawing on it. And next we'll need
at the last stage, we'll need watercolors,
A watercolors you have. I'll be using number four
round brush, watercolor brush. Misses Princeton. And I'll using paint pallet a little bit, mostly from there, water
and a paper towel. And that's it.
Let's get started.
3. Drawing the Wing Outlines: So for the first step of drawing our wing in pencil
and watercolor, we'll have to draw with very fine lines outline
of the wing itself, and some guiding lines. And because I'll be doing it on the main paper in
a very fine lines, I wanted to show you in a separate paper what
it's going to look like, just in case you can't see very well in fine lines,
how it looks like. So it will look pretty much like the shape of
the wing like this. And here we'll have some guiding lines,
something like this. On the bottom, I
don't go like this. And for long feathers,
something like this. And then I'll separate the different parts
of the feathers, so some guiding glans
which are going to be in very fine lines
on our final piece. So this is the paper I'm
just showing you in general, very quick how we'll be
working on a main artwork. And then we'll have here. So we have this part, which
is a kind of bending. This part of favors will
be fewer layers of favors, these favors, this ones, and very long ones here. So let's do the same thing, but a little kale and on
the main cutting paper. So this is two H, a pencil which makes very faint lines unless
you press on it hard. So we have a stop of a wing. Then I have the bottom. And here you can decide on
proportions of the wing. You can make it
narrower or wider. If it's the first time
you're drawing a wing, I'll just follow step by
step of what I'm doing. And when here, now we do very fine pencil
lines for guiding us how to draw feathers
in the next step. So this is a bending
part of the wing. Not all the wings have that. So the very fine ized because
we'll be drawing over it. Then these fevers go like this, and this one's just like this. So this is step one of
drawing our wing and pencil.
4. Drawing the Wing: So now we have our
outline to guide us. We can take a softer
pencil. This is HB. So the softer the pencil, the darker the
lines we can create and the smoother
moves on the paper. So first, what we'll do, let's add some shapes on the bottom of each
section of feathers. So like this just
scalloped feathers. And the next section will draw feathers in this direction. This bending part
will go in here. Here, once again, we'll have
feathers going this way. So you see why
those lines had to be very fine because we are overlapping them with
our final final lines. And these are long feathers so just draw them like these. And maybe one more here. Okay, so now you can see the main shape of the
sections of the feathers, and the next step will switch to softer pencils and I'll start
working section by section.
5. Drawing the First Feathers: So for the next part, we'll need this piece of
dressing paper, and we'll be placing it
where we're not drawing. So we don't smudge
any pencil with our hand because we'll be
working with pencils three B, which are pretty soft
and very easy to smudge. So we'll start working
section by section and, here, you can go as
detailed as you want. And it's very important to make sure your pencil
is very sharp. You can have your
pencil sharpener or a knife next to you
to keep sharpening them or you can have prepared some pencils ready to go if you don't want
to interrupt the flow. So for this bending part, we'll just make
some pencil strokes here and just add a little bit of texture
just in smooth lines. Just a little bit here. And maybe we'll add
a little bit of thickness a little fber here. Like this. Next, we can switch
on the lower part, and here we'll
have a few layers. So we'll start drawing
shapes of the feathers. Some are smaller and
some are bigger. So this is our first
section of the feathers. And let's switch the pencils
and add a little bit of shade right here under
this painting part. Just tiny tiny pencil lines. Just like this. Now, let's do the same thing with
the next section.
6. Drawing More Feathers: Alright, so I just sharpened
my pencils again and we can get into the next
section of these feathers. So once we get from the beginning of the
feather to the end, the feathers are getting
longer and longer. So here we'll have
just a couple layers, couple rows of the feathers. Like this. And in this section, we'll have also a
little longer feathers. So feel free to
rotate your paper. I'm trying to keep it straight, because the way I set
up my video station, but if you're comfortable
more comfortable turning it, if I wasn't filming, I would
be turning my paper a lot. A so make yourself as comfortable as you
can with drawing stuff. It will come out better. So you see we had those
sections drawn in lines. But once you start filling
them with feathers, they kind of blend in, but it's still, easier
to draw if you have some guidelines lines
guidelines lines. All right. And these are already long feathers which we already
drew a while ago. So every wing will come
out unique because I'm trying not to use the eraser. I don't know if I like that.
So these are our feathers. I think I want to
add one more here. And next step, what
we have to do is to add some shading on the feathers before we start adding a
little bit of color.
7. Adding details: So the card is very important. You to be very sharp because you need very tiny tiny
lines of shaded fears
8. Adding Color: So this is our last
step of creating our win in pencil
and watercolor. And mainly I'll be working
with number four brush, my favorite size brush. And for the colors, you can get really creative and just use your
favorite colors. And that's what I'm going to do. So just add some water. I'm still keeping with
tras and paper just in case to protect
the pencil lines. And then let's add just a
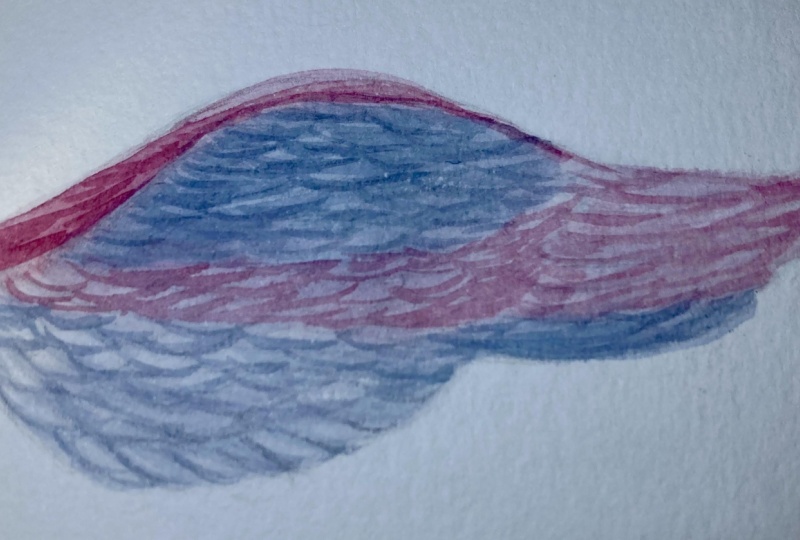
little bit of magenta, maybe. So this is the unique quality of watercolor is
its transparency. And that's why we can so nicely combine watercolor with pencil because all that work
we did on pencil lines, it will show through a
thin layer of watercolor. And some sections, I think
I'll leave just white. And some will be just
with pink and orange. And could be like
a flamingo colors. But really, I advise you
to use any color you love. Could be blue or purple. Mm. All right. And dry
your brush and moving. All the lines a little bit. So this is pretty much all I wanted to show you
today in this class, and I hope you'll find
this class so helpful and will use these techniques
I explained in many, many of your winged project, especially in holiday
season or really any time. Thank you so much for
painting with me, and this is our wing. Wow.
9. Project: For a project or a class, paint your own wings
in graphite and to watercolor and
upload the project to a project section of a class. I can't see what you create.
10. Thank you!: Thank you so much for
joining me in this class. I hope you had a
chance to paint me. If you are sharing your
project on Instagram, please tell me so I can
see beautiful artwork, and I'll see you in
next class. Bye.
 Irina Trzaskos, Watercolor Artist & Illustrator