Transcripts
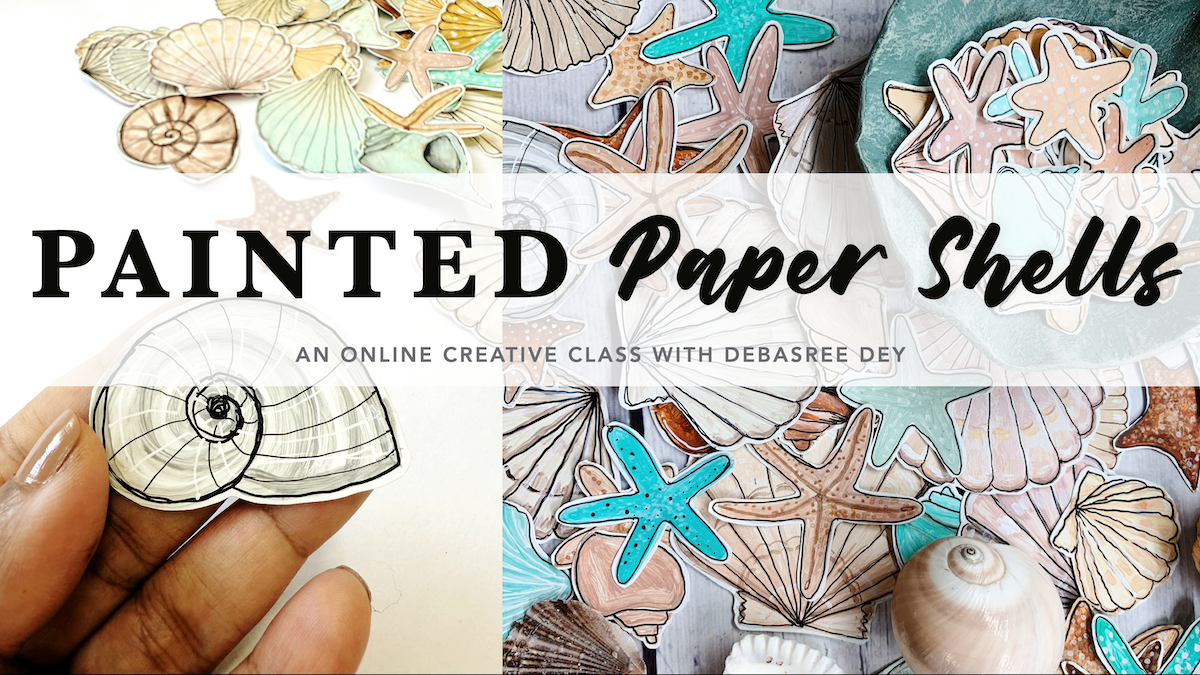
1. Intro & Supply: Welcome to painted paper shells. Hi. My name is Deboi and I am an artist
based out in India, I'm so excited to have you join me on this
creative journey. In this class, we
are diving into the simple joy of making
beautiful paper shells. We will be drawing, coloring, and decorating unique types
of shells and turning them into lovely art pieces that you can use
again and again. Imagine this as a
grown up beach day. Only instead of collecting
shells on the shore, we are creating our own
collection of paper treasures. These handmade shells are not only fun and easy to create, but they are also
a wonderful way to add personal touches
to your art journal, mixed media projects, or even
your seascape paintings. The best part it's
pure playtime. There is no pressure here, just like when we were kids on the beach gathering
shells with Wonder. Let's bring that same sense of curiosity and creativity
to our art tables. Create this project,
all you need is a skatebook page or any paper, watercolor paper
or acrylic paper, some acrylic colors, or you
can even use watercolor. I am going to use acrylic color for this project, some brushes, pencils, and paints and a cisar to cut your paper
shells. That's all. By the end of this class, you will have your very own
set of paper shells to add a unique and coastal
charm to any art project. So grab your supplies, and let's start collecting some beautiful seaside
treasures together.
2. Inspiration: Here I have a bore sketchbook on which I am going to draw them and here are my collection of shells that I have
got from Amazon. Honestly, I have not
really collected them, but there is this branch one. This is the one that I picked
up from a beach in Oman, which was a coal beach
and which was amazing, completely white beach full of these coal shells
which I picked up. But we're not going
to paint this today because it's
not very common. So I'm picking up only the
common ones and that are easy to paint so that you
don't have to worry to create something
very complicated. These are the ones
that I'm taking out. Gather your shells if you already have some
or you can look up online for some inspiration
or you can even look down. And on the page and you
can get some inspiration, I will share some of the
inspiration images. Okay?
3. Shell 1: This is the first one, which
is the most easy one I feel. So this is the one that I'm
going to start with, okay? So, look at the image or if
you have a shee like this, hold it up close and
have a look at it. You can see that it's
such an easy one. We're going to do it
by just sketching out a V shape and then adding
little wavy lines on the top, and then connecting all
the lines to the bottom. Now there is no point of doing the quincil lines much now because we're going to
color it up completely, and then we are going
to mark it on top. So just doing the
outline is fine, but this is just for
your practice sake. If you want to learn
how to do this, you can just do a little
bit more sketching to make your hand do the
lines a little more. Because the more you practice, better your hands become. And now I'm just
doing a few more, and you can do this to learn the shape that
you've learned first. So don't just do it once. Do it multiple times. I'm doing it just
four times as much it feels the preth
of my four paper. But if you want, you
can do two lines, three lines as much you want to do whenever
you feel like. If you're doing it for
the first time, it might feel a little uneasy. But whenever you do it
like four or five times, you will understand
how easy it is.
4. Shell 2: Next, I'm going to
draw this shee, which is pretty
much like the first one except that
there is a small, kind of a pin kind of thing popping out from the
bottom two sides. And this is also very easy
exactly like the first one. And you add the lines from
the top to the bottom one, and I'm just going
to outline it with my black pen so that
you can see it better. Now, like I said, you don't have to do the middle lines now, but this is just for
the practice sake because when we color it, these lines are going to get hidden and we will
have to do it again. Now I'm just repeating the second 1 second
shape multiple times. Again, just for practice because the more you do
better you become. So keep doing practicing it
as many times as you need. If you're doing it for
the very first time, you might need to do it a
few times to get it right. I have done this many times. In the past, I have created lots of shells like
this in the past, so it's it has become very
easy for me to do now.
5. Shell 3: Okay, next we are looking at this beautiful shell and it looks so complicated
looking at the shape. But you see how easy it is
when you do it on paper. Just make a spiral, which is very small
in the center. And then when you go
out, just spread it out a little bit and then
just join the end. See we're not looking at
doing a perfect shell here. I'm just showing you
the very easy way of creating the shells, and then you can do
it in your own way doesn't have to be exactly
like how you see the shell as, but close resemblance is fine. Whole point of doing this
exercise is, you know, playing like a kid on the
beach, picking up shells. So while you're
painting these shells, think of the first
beach that you ever visited in your
childhood, the very first one. I remember the one
that I visited. I was probably four or
5-years-old to a beach called Puri in Orisa and I still remember I spent so many hours on the beach collecting shells. So that emotion, I
want you to, you know, feel that emotion and take it out on this
page while you're sketching without the pressure of creating perfect shells, but just playing with it. And that's why I'm showing
you such easy ways of doing it so that you don't
have to feel any pressure. You can see how easy they are. They all look so good. The way you do it, it doesn't
have to be like mine. I yours is becoming a little
different, that's okay. As long as you follow
the basic outline shape, it's going to be totally fine. I like this shape doing a lot. So I'm just doing a few
more of them because I just feel it's so fun to
do the spirals and connecting the line at the end. And that creates such
gorgeous paper shells. So do as many you need to do. Don't think that you
have to do the number of shells that I am doing, do it as much. You want to do.
6. Shell 4: N. It's time for the fourth one. Look at these two ones. They look so complicated. I still remember when
I first saw them, I was like, How am
I going I do it. But look at the
steps of sketching. It's so easy. So first, I'm going to start by creating this pyramid
shape on the top. You see, it's just a small line after line, and on the bottom, you are going to create
that shape and, you know, in kind of like a fashion
and just join it. Do you see how easy it is? Just a small pyramid on the top, two, three layers is fine. You can do four or
five if you want to. And then just make a slanted line in the
bottom and just join them. You can make them
whatever shape you want. Don't have to make it
perfect like what I have, because if you look
at the shells, they all have different shapes, all different weird lines. There is no perfect
line in nature, right? So just do whatever line is
coming up in the bottom. It can be a little twisted towards the right,
towards the left, maybe towards the
center, O line is a little more inside
than the other. So however you want to do, whatever you do
is going to good. So don't think that if
it is not exactly like the shell or not exactly
like the way I am doing, it's not good, okay? So the most important thing that I want you to understand
is that having that playful nature while
you're doing it rather than having pressure is what is going to create beautiful
shells for you. So embrace that childhood
spirit while you are doing this process of
sketching and coloring. I mean, coloring is
going to be so much more fun than sketching in a while we are going
to get to that. And if you feel you
cannot do it with pen, you can do it with pencil first. And if you need to
erase to get some of the line the way you
want, you can do that. A. That's why doing it
with pencil is better. And see, I am doing it with pen so that you
can see it better. The video comes better. But when you're
doing it at home, you don't have to
do it with a pen. You can just do it with a pencil and so that you can erase
it whenever you need to. I hope you got the
fourth shape fine because it looks
very complicated, but it is not as you can see.
7. Starfishes: The next one that I am
going to do is a starfish, which I don't have on my table, but starfish is so easy to do. It's just tentacles popping
out in five direction, and you are just going to make small lines and connect it. Can you see how easy that is? Now if you are not able
to do perfect five lines, just make straight
lines like the one that I'm doing now and then
join it from the side. That is an easier way
of doing starfish. So I love doing
starfish so much. So I'm going to do
quite a few of them. You can do as many, you
need to do it as you want to do and have fun
while sketching out.
8. Coloring the shells: Okay, now it's
time for coloring. So take out four of your
favorite colors, four colors. Okay? So I'm taking out. So these are some of the
pastel colors that I have. So I'm taking out pastel color means just a lighter
version of the colors. So I'm taking out
a pink, a blue. This is a little orange
shade and then one yellow. So if you don't have
the pastel colors, you can take out just
the original colors, the saturated colors. I like these muted
colors quite a lot. That's why I'm using them.
And some white. That's it. Now here is a small round brush that I'm going to
use the size that will be perfect to go inside these shapes and fill
them up with colors. So take out whatever small
brush that you have. And now we will just filling up the entire shape
with one color inch. So for the first one, and what I like doing is, you know, with whatever
color I'm using, I like adding little touch
of white to all of them, just to create a
sense of light and shadow in each of the shapes rather than doing
one solid color. But one solid color is
also going to be fine. But you can try out both and see which one you like
because I feel this is a bit of personal preference.
See which one you like. I have tried doing
a one solid color and I don't really like it much. It's not bad. It's just
my personal choice. I like adding a little bit of white along with the
colors wherever it doesn't matter if there is no
light source coming from right or left
wherever you want to. I just like adding
a little bit of white while I'm filling up
the colors in some places. If you're using a
very saturated color, then of course, I
think adding white will mute the color
a little bit. It will make it a little
bit more pistil color. Mine is already light and
I'm making it even lighter. It's totally your
choice of color, however you want
to peel it. Right? So for each of the shape, I have done at least four
colors, four shapes, right? So I'm going to fill
them each of them with four different colors
that I have taken out. The process is pretty
straightforward. So I'm not going to be
speaking anymore through it. It's just about filling up
with color with some white. So enjoy this process
of filling up, take your time, put
on some good music, and add all the colors, fill up all the ones, with
your colors, your choice. So colors whatever
you have taken out. To Do Do Do do do Now, since I had more space left in my paper at the bottom, I decided to do some more of the start fishes and fill
them up with colors. This is like an
intuitive decision that I take depending on my mood, if I want to do some more, but you don't have to do
this if you don't want to, I just wanted to create
some more star features. That's why I'm
doing this process.
9. Pen outlining: All right, so all
the coloring is done and now it's time to go
with a black gel pen. Whatever black gelpen you have, it's fine or a black ball pen is also good doesn't
make a difference much. Now we're going to outline all the lines that we
created in the first step. So this is the time that you can so if you have practiced
before with pencil, this time you can do it way easier because your hand
strained to create these lines. And I'm trying to make the
lines a little bit more wavy, little wavy, not a lot. But if you do kind
of straight line, that's also totally fine. But, take your time and do
these lines slowly because these lines are what is going to define
the shells for you. Again, I'm going to speed up the process and you
can see all of it at once and then you
don't have to watch it. You can just do it
along with me and just look up at the screen whenever you need for reference. Is just the same thing I'm going to do over and over again. Okay, now I'm adding some extra
touches with a white pen, and I'm adding
some small dots in the starfishes just for
some extra dimensions. This is optional. You don't have to do it if
you don't want to, but I just feel like adding these small dots creates
really nice starfishes. Once the dots in the
star fishes are done, I'm just going to
add some extra lines in between all the
other shells also. Not a very prominent
one, as you can see, it's simple white lines. And these shells have these
white dots in between, if you can see in the real one. And so I'm just adding a few
of those small lines here.
10. Cutting the shells: Now that all the mark making, coloring, sketching,
everything is done, I'm going to tear out the
page from my sketchbook, and we are going
to fuzzy cut it. Now, fuzzy cutting is a
process that I enjoy a lot, which is basically you cut
out the shape of the shells, and I like to keep a little bit of white space on the side
while I am cutting it. The page looks so gorgeous
to me already right now, and now we are going to cut. Now, this is a
very long process. I must tell you, and cutting all of these shapes
takes quite some time. So I don't know about you. But for me, even though
it is a Lindy process, I absolutely enjoy this process. So I really don't mind doing it. I just put on a good
podcast or play some music, and I really enjoy this process. And if you have never done it, so this is something
that I did as a child, also, you know, cutting shapes
out from my drawing book. This is a process that
I always enjoyed doing. So if you've not done it before, try it out and see how you feel because if you don't do it, you will not even know
if you like it or not. I really want you
to give it a try. I fast forwarded the
video over here. This is not how fast I cut it. I cut it pretty slow. So take your time, take
as much time you need, and just cut it out on the side. It doesn't have to be perfect. Let me tell that
again and again. It doesn't have to be perfect. My lines are not perfect if
you look at them closely. I'm just kind of roughly
cutting the shape out. So again, I'm going to speed up the process and
enjoy watching this. But I must tell you that doing this is way better
than watching. So happy fussy cutting.
11. Gathering in a bowl & Final words: Okay, so here are all
the star fishes cut out, my finger is a little jam from
cutting the entire sheet. If yours is to just do a little exercise of the fingers to kind of
stretchen them out and, you know, feel a bit relaxed. Um, but yeah, you
can always take a break and then you can cut, you don't have to do the
whole thing at once. But yeah, it was I think
a process I enjoy a lot, so I don't mind doing
it um at the stage, and, you know, the final
outcome is also so beautiful. I hope you um, got to play a lot
in today's exercise and you played with your brush, pencil, scissors, and came
up with some pretty cutouts. I absolutely enjoy this process, and the whole point of doing this exercise was
for you to loosen up and have fun and play in the process of creating
these beautiful shells. I hope you have a lot
of shells on your table right now of different
colors of your choice and, uh Hope you had fun. Gather all your paper shells
and put them somewhere nice. I am going to go and search for a cute
bowl if I can find. I found this one. This is a clay bowl
that I sculpted, um, with my own hands and
colored it so I love it a lot. I think this is a perfect size for keeping on my paper shells. I'm going to put all
of them in here. We are going to
use the shells in the upcoming days in
some of our artworks, but even if I don't, I think just by
looking at itself, it's so good to just have
it in a bowl like this. And, you know, just
look at this beauty. Just admire the beauty
that you created, which is so easy to create. I hope you understand by
now it's so easy to do it. And, um just put no
pressure on yourself. Don't try to make it
perfect and just do it, you know, like a baby, like a child playing on
the shore on the beach, collecting shells, um and, you know, the way you do it as a kid, do it, just like that. And you would also come up with a small bowl full of
paper shells like me. So thank you so much
for joining me here. I hope you had fun
into this session, and I look forward to
seeing what you created.
 Debasree Dey, Acrylic Artist & Educator