Transcripts
1. Introduction: Hey, there. Welcome
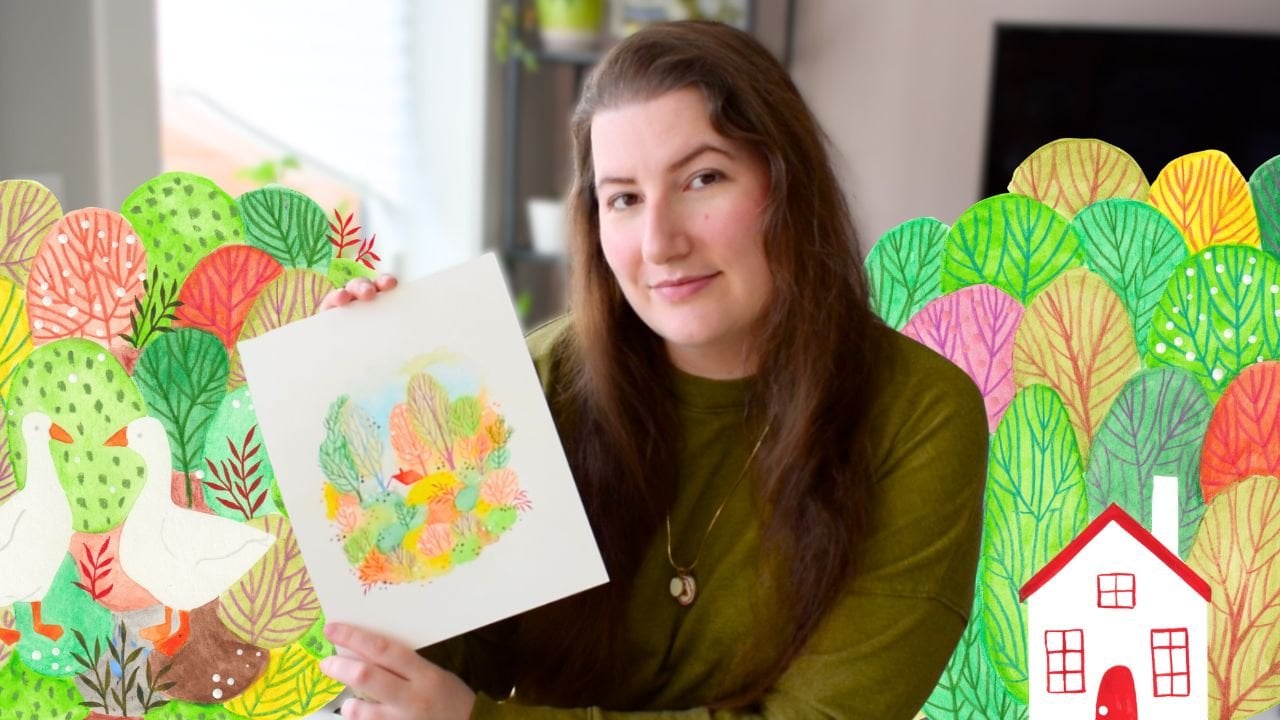
to my art studio. My name is Rebecca Wilson, and I'm here to teach you
how to paint rabbits. Rabbits are sort
of a signature in my art practice. I
paint a lot of them. I have a little
rabbit in my studio. So today, I'm going to show you not just
how I paint rabbits, but also how I do an
underpainting technique that lets me avoid having to
do a pencil sketch on the watercolor paper. But still gives me the
flexibility to figure out the pose before I commit
to the darker colors. This is the little rabbit
we're going to create today, just a little guy,
but he's very cute. I also have a bunch
of other examples of other rabbits I've painted
that we're going to go over. We're going to talk
about a lot of things like the materials
that we'll use. I'll show you what I'm using,
but I'll also give you some alternatives in
case you don't have the same stuff as me,
which is totally fair. We're also going to do
a couple sketches just on extra paper to talk
about the shape of rabbits, their anatomy, sort
of how they sit, just to give us a loose idea. Then we're going to do the
underpainting technique. I'll show you how that works.
We'll have a look at it, play around with it,
do our sample bunny, and then we'll go in
with the detail on top. I think this technique with the underpainting is really great. It lets you build a little bit of confidence before
you commit to a bigger range of
colors in a piece, but you can also use it for
other little furry critters. I've done squirrels and mice and bears and just anything
else with fur, basically. And in that same sort of
natural color palette. So there's a lot
you can do with it. I think it's really fun. I think you probably like
bunnies, too, if you're here. So if you are ready, let's head into the
class and get started.
2. Painting Materials: Let's first go over the
materials that we're going to use today to make our
little bunny paintings. So in terms of paper,
I'm going to be using this fabriano paper. It is cold press, which means that it has a
bit of texture on it, and it's just a eight
by ten inch paper. I like this particular kind that fabriano makes because
it is 25% cotton. My favorite paper to paint on is 100% cotton watercolor paper, but it's very
expensive, so I don't want to use it for every
single painting I do. Comparatively, it is expensive. This is 140 pounds or 300
GSM watercolor paper, but pretty much any
kind will work, especially as we're
just figuring out the shapes and things
of little bunnies. I've got some paper towels
over here to blot on, and I've got my water
for our watercolor. In terms of brushes,
I have a couple here. These are my most
frequently used brushes. We probably won't need
the big one today, but you are welcome to use a bigger size brush if you wish. You just may want to
increase the size of the piece of art you're doing to accommodate because bunnies have lots of
little tiny details. So probably not going to
use this one too much, but I just have it on
deck just in case. These are my two
favorite brushes. So this one is a zero,
and this one is a one. These are not very
expensive brushes. I got these at the
art supply store. They're probably
like $5 or under. They're just very
tiny, as you can see, and these are my two
favorite ways to paint. So mostly, we're going
to be using this brush, the one size brush, but I like using a
very tiny brush like this zero to do things like eyes and noses
on little rabbits. So if you have a small brush, I would say that's probably the easiest way to get
the details in. I think there's also
merit to starting with a bigger brush and
just going for the shapes and running
with the details after. So up to you, but
these are what I'll be using for the class.
I've also got a pencil. You're welcome to do
a sketching phase. We're going to be
painting right onto the paper without a sketch, and I'll show you the method
that we use for that. But I'm first going to show you sort of the shapes
we're going for. I'm going to do
them in pencil just so we can understand the shapes. And finally, for paint,
this is my paint palette. I have made it
myself, so these are all custom colors
that I like to use. But the main colors
that we need for this particular project are
going to be this one here, which is titanium buff, and I got this tube
of it to show you. Titanium buff is basically
just an off white or a beige, so you don't have to
buy this exact paint. I would say you can
mix it by getting a white paint and mixing it with a very
tiny bit of brown. We're basically just looking
for something that is just slightly off white so
you can see it on the page, but not so dark that it becomes a distinguishing
feature of the painting. Now, I realize that
a white watercolor, I have a white one
right there is not necessarily in
everyone's tool kit, so you may just want to
go in with, like, a very, very watered down brown to do the steps that we
use the titanium buff for. But if you are really
into watercolor, I highly recommend looking
for a color like this. I think it's really useful because obviously we're
painting on white paper, doing anything
that's sort of a tan or a light brown or
a parchment color. Since we can't really
paint just with white, I like to use this, and
I find it very pretty. The other color that
we're gonna be using is just a shade of
brown that you prefer. I'm going to be using
the burnt umber color, which is my very used
little chunk right there. Burnt umber is sort of like
a warm light brown color. But you can paint your bunny
whatever color you want to. Ultimately, bunnies are in lots of shades, but
typically, they're like, you know, white, to beige, to brown to black
in that family. Now, sometimes with my bunnies, I do like to do a tiny
little dot of, like, a red on the nose because they
do have little pink noses. This is carmine down here, which is the one I typically use just because I
have it on hand. I do find it difficult to find reds that I like in watercolor. So, I think that's
completely optional, but that is maybe
something we'll try, depending on how the
bunny turns out. So with all of these
supplies prepared, I'm going to hop
into the next lesson where I will break down
the shapes of a bunny so we can kind of
have a little bit of geometry in our head, geometry? Is that the right
word? I guess so. I'm an artist, not
a math person, but we'll do that before we move into
the actual painting.
3. Basic Bunny Anatomy: Before we get into
actually painting, I just want to discuss what
rabbits kind of look like. Now, obviously, you probably have an idea
what a rabbit looks like, and maybe you have a reference
picture you want to use. I have a little bunny rabbit named Blueberry
in my art studio. She is the best. So I spend a lot of time
looking and thinking about rabbits and their
adorable little shapes. So first of all, I
just want to talk about how some of
their poses look. There's a lot of different
ways you can pose rabbits. Most frequently, I
think they're sitting. So rabbits, to have sort
of a large round rear end because they have a lot of very interesting skeletal shapes that they kind of curl up. But then when they're
running, they get very long. So I usually start
with the round end, and then we are looking
for some little legs here. This is just a very rudimentary
sketch, by the way. We have a big foot that comes out because they have
these powerful hind legs, and the little
tail is down here. Their little head is
sitting right on top, so it's pretty much they
don't have a lot of, like, long neck unless they're sort of straining
to see something. So they sort of sit on
line with the back, and they have a sort of round head with a
bit of a point where their little face sticks out
because they actually do have a skull that is
shaped a bit like this. With this being the front,
where their teeth are, so we are looking at that
from a different angle. I like to do that kind of
shape, play around with this. They don't have big front paws, but they do have little ones. And rabbits actually
don't have any toe beans. If you've ever seen
a rabbit foot, they just have fur and skin, so this is why they don't like
to walk on hard surfaces. My rabbit prefers the
comfort of carpet. And depending on the breed, they will have
different sort of ruffs and how fluffy they are. My rabbit is very fluffy,
but not the fluffiest. She's only half lop. So
you can sort of give, like, a bit of a rough
around the front here. And then in terms of ears, there's a lot of
diversity in rabbit ears. You can have a lop with
the ears going down. My rabbit is half lop, so she has one down and one up. And most rabbits have two up, but they can be big or small. So there's really unless you're going for a very
specific rabbit, I would say just follow your
little bunny heart here. The ear shape is
sort of comes out, does like a soft point, and then out again to, like, a most triangle shape, but a very rounded triangle, and then back to the
base of the skull. And often when rabbit ears are facing different directions, you have, like, one
straight line like this, and then they come back around. So in this particular position, we wouldn't see the inside of this ear, but we would of this. I like to, like,
a little V shape because they do have
a lot of fur and fluff right at the
base of the ear, and it kind of opens up, like, um, I don't know. What's the right Like a cannoli. Almost like a cannoli shape. Anyway, so that's the basics. It sort of looks like
the Pokemon EV, as well. It's kind of a very
rabbit based Pokemon. In terms of the face,
it's pretty simple. They have obviously two eyes, but often you can't
see both eyes when you are doing art of them because
their eye would be like, right there, and the other
one would be behind because they have eyes on separate sides of their head because they are prey animals. However, sometimes that
can look a little weird. So sometimes I'll even add in a very small shadow of, like, the other eye peeking around just for the sake of,
like, visual harmony. Because sometimes it
just doesn't look right when I sketch it out, and you can only see one eye. And then for the nose, it's
sort of just a Y shape, and then it goes down
in a little line. At this point, there's sort
of let me do it bigger. So this is like the nose. They actually do look
genuinely like this. There's actually a little
curve right there, and the little triangle
in the middle is pink. And the way they actually look is that the mouth
comes right here, and then they have their
little bottom jaw. So that's, like,
more technically what their rabbit
mouth looks like. But when you're
doing your painting, you may want to go a bit
more stylized and just do the Y because it can be a
little bit more demure, or you can just add a
little mouth like that. In terms of the
actual rabbit eye, they are sort of a
really beautiful shape. There's, like, a curve and
then another curve underneath. So sort of like an almond shape. You can put a little gland
in the corner if you want. Rabbits actually
have a third eyelid that tucks in right around here. My rabbit's an older bunny, so hers actually is
visible sometimes, but I don't typically
paint it because it's a little creepy
looking, honestly. Not her fault, it's
just her body. Rabbits don't have a
white of the eye visible. If you see a rabbit with
the white of the eye, it's probably just their
third eyelid sticking out. So there isn't a white to add here unless you are doing
a more stylized effect, more cartoony, which
is totally okay. But they do just sort of
have big, dark, glassy eyes. Some rabbits, too,
have blue eyes. In which case, you would want to use different color. But
they do have a pupil. It's very large, and then the
outside is usually brown. So unless you're doing like, a very, very close up painting, you're generally not going to be doing any sort of color
distinguishing in the eye. But you can do a light spot. So if you wanted
to do like that, it does make them
look more alive. I've just got my Nable eraser here so you can
go in and sort of just erase a little a
little light spot there. Rabbits also have very
big, beautiful eyelashes, but it is a little
difficult to paint them unless you're doing
something very realistic, which is not particularly the aim of this painting course. So just so you know,
they do big eyelashes. They also have
whiskers, which are, like, a big array all around. I will usually save the whiskers for the very end even when the painting is dry because they are so gossam or
thin and they are, like, white or clear, typically. So painting them right on
can look a little bit bushy. So in some cases, I will
just do the ones that stick off the face to imply
that there's more there, and I'll do them in, like,
a very, very light color. Or you can go in with, like, a pen or a colored pencil or something in white and
add them in afterwards. So it's up to you how you
want to do the whiskers, but I don't usually worry
about them too much. At a distance, you
don't often see the rabbit whiskers unless the lighting is behind
them or something, because, like I said,
they are very, very fine. So I don't actually think it's a necessity to include them
in a watercolor sketch. So this is, like, a
basic sitting pose. You can also find them standing. And I would just
recommend finding photo references if you wanted
a very particular pose. But it's okay. I usually
start with the head. And then their big silly ears, and then it kind of comes out in the back and they have a straight back when
they're standing. They have their two
little arms down. And then there'll be sort of a more abbreviated
version of that hip, not as full circle as
when they're sitting. And they don't have a
big butt or anything. So then you do that, and
then we add a little belly. You can show the other
foot sticking out. You can put a little
bit of tail there. Often, the rabbit
tail is very tucked. So the references, like, even in this one, the tail will probably be more like
right under there. But I find adding the tail adds more visual
harmony to the piece, and also it is in the anatomy, so it just makes
it more visible. And I don't know.
It's cute, too. So, again, you just would
do the little face there. So that's another
pose that is very common when bunnies
are looking around. And then we can do more
of a sitting up pose. This is more of a sitting like an eating
pose, I would say. I see Blueberry do this
when she's eating. But if we're going
to do the front legs like this, more of an upward, and we could do a bit
of a chest rough, add in the shoulder, and then the hind leg back here. The foot doesn't
really stick out, so it's just a little bit of an indentation to show
the back foot is there. And a little smaller
on this side. And up. And then we'd
have the bunny head, which, again, you
can kind of shape to whatever angle you
want it to be at. Little eye, secondary eye. Oh, this one's a bit of
a scary looking bunny. But let's say this one's a lop, so we'd have his big ears down. And we wouldn't see the
tail in this kind of pose. In this sort of painting
pose or rabbit pose. Sorry, it's a little bit rough. We would have this area here. It would be a darker color, a little bit darker
back here and here, little dark under the
chin and under the ears, and a lot of the rest would be a very light color.
That's usually the case. Between the legs, under the armpit and sort of at
the bottom of the tail. Under the neck and under
the chin are sort of the darker areas a little
bit in the ear. You could also do the tips
of the ear dark if you want to be more like a
coloration of the rabbit. But yeah, Okay, that's probably enough rabbit sketching for you. Let's flip this over,
and we'll start doing a little bit of base painting
with the titanium buff, and I'll show you how
I like to approach it.
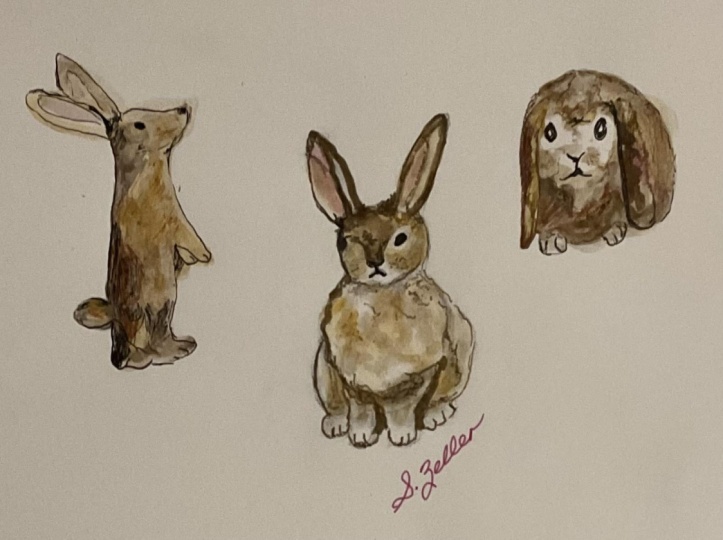
4. Watercolour Underpainting: I went to grab a couple pages of bunny paintings
I've done before. These are just more like
sketch ones that I did. There's also a couple
other critters on there. Just to give you
some examples of the poses that you can do and
also different approaches. As you can see,
some of these are more successful than others. But there's a lot of variety
in terms of rabbits. So even if you're making one, you're thinking it
kind of looks lumpy or the pose is weird,
just, you know, continue with it because I find that sometimes it is until you finish and add the
darker details that the rabbit
really comes through, and they're often very cute, even if they're a
little unusual. Like, this one right here, I
think I made a bit too long, but I think it
ended up being more stylized than incorrect look. This one was a really
light wash rabbit, so it has just like
little tiny details that I think are very charming
added with that teeny, tiny brush after it dried. And in these rabbits here, I did add a little extra color. There's a little bit of,
like, a gray tone and some yellow in just to
add different dimensions. So if you like painting
rabbits as much as I do, obviously, there's a lot of
ways you can go about it. The first color
we're going to work with is the titanium buff, which I have right
here in my palette, so I'm just going
to activate it with some water while I chat to you. So the reason that I
like the titanium buff is because it looks different than the color of the
paper, obviously. It actually dries
slightly darker than the color that you paint looks when you're
painting with it. But I like to use it to make as an alternative to
sketching with pencil on the paper because it has enough pigment and color
that you can see it. But you can also paint
over it with watercolor, and it doesn't really
cause too many problems. So, for example,
here I will just do a little bit, a
little blob there. So you can see it does show up. It's sort of like
a Biji tan color. So I like to do this
for almost like an underpainting when I'm
doing rabbits because I want to make sure I
get their proportions right before I get in
with the darker colors. So let's start with a
little rabbit here. I'm going to do,
like, a sitting pose. So we're going to start
with doing a head shape, which is sort of an
oblong circle of sorts. And you can fill it
in if you want to. You don't have to
leave it white or you can sort of playing with it. Next, I'm going to
add some ears in. So let's just do a big ear. Again, not worrying
about filling it in 100% because I like the tonality that leaving a little bit of white
leaves on the page. And we'll add our matching ear. Again, these are sort of like those Cooli shapes where it's smaller at the bottom
than in the middle point, and the top does come to a point, but sort
of a rounded one. So there's our little
basic bunny head. Next, I'll sort of add
the front chest area. Somebodies are quite
overweight in this area. It's called the Dow lap,
if you didn't know, which is the big sort of roll
of fat under their chins, which is very cute but can be problematic
if it gets too big. I can impede their
ability to eat and such. So then I add some little feet. And at this stage, the feet are just sort of like
little round pegs. I'm not adding too much detail. I like to do little toe lines
after the painting's dry, so we'll get to that eventually. We're just sort of adding there and then rounding out the
shoulder a little bit. The reason that this stage
is so nice is because, like, you can see,
I kind of made the legs two different sizes. So I'm just going to gently work the paint out to make
them a bit more similar, but it doesn't really matter because it's only
when I start to add the darker tones that it will be more visible
in the final piece. So now we have
sort of the front. I'm going to add a little
bit of the rabbit butt right here and a little
foot on the side. So that's just sort
of a round blob at the bottom and a little bit
of an angled shape there. On the other side, we'll have
a little bit more visible. So I'm starting just up by
the top of the shoulder, rounding it down, filling
it in a little bit, then we'll put another
little foot right there. This is a big butt rabbit. So now I can see
that the back end sort of looks disproportionate. So I'm going to just make
this shoulder and the neck rough a little bigger and even
the head a little bigger. Just to balance out
the proportions. I think this approach
works pretty well for doing just about any animal,
especially fluffy ones, because you can really play with their pose before committing to the colors that make them
really pop off the page. So there we go. I would say this is our underpainting
for the bunny. And next we can move on to adding some different
tones with the brown.
5. Adding Colour and Details: Now we're ready to start adding some brown tones into this piece to make the bunny come alive. So I'm going to be
using my burnt sienna. Which is this brown
color right over here, it's just burnt sienna, a
very common brown color. And again, you can use
whatever brown tone suits you if you have a
different one you prefer. So I'm just going
to activate that. Now, there's two
things you kind of have to consider when
you're painting a bunny, and one is the shadows on it, but also the fur patterns. And we're generally working with both of them
at the same time. So I prefer not to stick with a very specific
look if I have to. Sometimes if I'm painting someone's specific
rabbit for, like, a commission, I will have to do, very particular color patterns. But generally, you can
just play around with it and sort of see where the
lights and darks end up. As a rule, I generally leave the mouth area pretty light just because it lets you have more definition there. Obviously, if you're painting
like a black rabbit, that would be different. But I will do, like an under the chin for contrast something around the feet and to contrast the legs and,
of course, the ears. So let's start up with
the ears because they're a little bit flexible. So with this burnt sienna color, we're just going to
start by outlining the edge of the ear part closer to the middle of the head and get a little extra water just to sort of blur that out. And I'm going to bring it to
the other edge of the ear. I'm trying to avoid the
middle because it is lighter. They have very thin skin there. So generally light
does come through. You can always add a little touch of pink there if you want. My rabbit is also very
fluffy around here, so I do like to kind of go outside the borders
and add some fluff. I'm going to go to the other ear and do basically the same thing. Start with the inside edge closest to the
middle of the head, push that brown up and then take it around
the outside edge, leaving the middle
sort of blank. Now, there is the titanium
buff color in there. Now, if the ear was facing away, so it was like an angle you
couldn't see the inside, you'd want to do the whole
thing in the solid color because the backs of the
ears are typically darker. So now we have our
ears sort of started. I'm going to move
down to the nose. So most rabbits, well,
that's not fair. A lot of rabbits have
sort of a darker spot or darker area
above the nose. So I'm just marking in where the top of
the nose would be, but this isn't going to be
the final lines that I use. I'm going to push up from here. Adding a little bit of
water if necessary, just to make the face
start to come alive. Gonna add a little bit more
paint there to darken it up. As you also work over
the titanium buff, it does start to mute
the brown a little bit because it's already
paint on the paper. So it's sort of
mixing on the page. Again, if you're using
any sort of beige color, it's just going to lighten
up the overall piece, so you can work it a
little bit longer. I also like to do these tiny little strokes
because, of course, rabbits are fluffy, so I do find that it adds a
little bit of a fluffy look. Now, I don't want to
get too far down here, so I'm just going to add a
little bit of water and rub out that edge so
it's not too severe. A little bit more
paint on my brush. No, I'm just adding, like, the
tiniest amount every time. I'm going to start doing just a little bit of an
outline for the cheeks, so we can kind of see where the little bunny's cheeks are. And then we have a nice
round shoulder here, so I'm going to pull
the color down. In this, you can do a
little bit of, you know, small strokes to kind of
again, imply the fluff. You can add a little more here, and you see that I have a lot more paint on
my brush with this one than in other strokes because it's a little
less water on there. So you can start
to add very hair whisper thin hairs
along the edge. To add in the fluff. But
if you want it to look a little bit more smooth,
just add a little water. Smooth it back out. I like to have a little bit of
a combination of both. So we'll sort of go back and forth to move the water layers around the
different parts of this rabbit as it dries and
as it develops a little more. So, we're just going
to keep going down, and we'll start with
the little front paws. Now, I'm going to
do a fluffy bunny. So there is sort of
a little bit of fur hanging down over
the front legs. So I'm just going to stroke some little brush
strokes in there, and then pull it down
a little further, and this is just a little bit of shading on the legs, too. So you can sort of start to mark out where the
legs actually are. Like I said, bunnies don't have really huge feet on the front. They're a little bit more demure when they're
sitting like this. So you can just make them a little bit rounded
at the bottom. And if I'm going to do a little bit of
shading in between, I'll just get a little
bit more pigment on the brush and go in
the middle there. And then I'll do a little bit of the same darkness on the side, and then over the top
of the little foot. I don't want to make
the back feet too dark. Same thing here. We can go
over the top of the back foot. And bring it up to show where the front of the
body meets the back. Now, I've just got a little
bit more pigment on my brush. I'm just going to
round and outline the little back paws just so they have a
little bit of definition. It's all very light
and very malleable. So if you feel like
you went too dark, you can just add a little bit of water and just smooth it out. So for instance, we can smooth
out this spot right here by the bottom of the chest
just so it isn't too harsh. Alright, so it's starting
to look a little bit like a bunny. We're
getting somewhere. Now is a point if you
wanted to add other colors, like other shades of
brown or maybe something a little bit more
with a reddish hue, you can definitely start
to incorporate that, but we're gonna just
stick with our one color and just start going back
into areas that maybe have dried a little bit with just some really fine strokes just to add a little
bit more definition. H, like I said, this pose is not one
that really shows the tail, so I'm
not showing a tail. If you really wanted
to force one in there, you could do a little
bit right here, but I think that would
just be a little too awkward for this anatomy. But you might have done a
slightly different pose. So if you did, then please feel free to add a little
cottonbll tail. Rabbit tails, if
you didn't know, are actually quite
long, but they're very curled up
under their bodies. So it's not very nice to the rabbit to demand to see their full length tail. So, I guess, just go for with that knowledge and just know that rabbitails
are kind of long. Alright, so we've
got a good amount of detail on there now. So we're going to go in
with even thinner brush. You can still use
the same brush. I just find I'm a sucker
for a tiny brush, so we're going to use this one, which is the zero brush. And we're going to try
and do some details now. Now, this is sort
of a place where I find the rabbit gets, you know, this is
the make or break moment for how cute it is. So that's why I sort of save
it for a little bit after. I think the safest place is always to start
with the nose and the mouth because it sort of defines the
symmetry of the face, and you wouldn't want
it to be a little off because of the eyes. So we sort of created a guide
for ourselves here with this brown patch because the nose is going to start
right at the bottom of it. And like I showed
in this sketch, it's just sort of a Y shape, and we'll see if we feel
like adding a little extra. And it's always better
to go in a little bit light and have to
darken it afterwards. So there's the little y. And because I'm feeling risky, I'm gonna try adding a
little bit of a mouth. Now, rabbits don't really
have, like, a smile. They sort of just have a little grouchy face when
you had the mouth. So it is sort of like
an upside down why, just a tiny bit, a little
bit shorter than the nose. There you go. A perfectly
grouchy rabbit mouth. Next, we can try doing the eyes. So when I do an eye,
it's always that sort of shape with the two gentle
curves like I showed you. I do try and leave a
space for the highlight, but sometimes it's watercolor and the highlight gets lost. So you can always
add it in later with a white colored pencil or
a gel pen or something, or even use a clean brush with just water on it
to try and remove a little colour once
the whole thing is dry. So we're going to always try
and add the white highlight, but we'll just see what the watercolor tells
us to do today. So the first little curve, and then the one underneath, Add a little space for
the highlight and then fill it in. Not bad. Not bad. Alright. And
because, like I said, if this was a real rabbit, you really wouldn't be
able to see the other eye, but it does look weird
as a piece of art. I find without the other eye. So I'm just gonna do
it, right on the edge, like, a very small
hint of a second eye. That's basically a straight line with a little curve
on the other side, and just fill it in because
it's just a sliver of eye. So here we go. Now he's
got a little face. I find that my rabbit often
looks a little judgy. So sometimes you can get
that expression properly. Just go to add a little bit darker right on the
tip of the nose, and then you know, you can play around
with the eye shape. Add a little little
bit of lashes. Here. Alright, I'm going to stop touching the face now
cause I think it's fine. Next, I'm going to add some
little tiny paw details. So right here, you can just
paint in some little paws. I do like to outline the
toebas a little bit. Now rabbits do have long nails, of course, but they
don't usually show up. They're pretty, retracted
when they're sitting. Unless they've overgrown,
which happens. Blueberry hates
having her nails cut, so sometimes she fights me and she has a long
one if we miss it. But we always get
there in the end. Then we'll do the back
paws, same thing. Rabbits actually only have
four nails on the back feet, and they have five on the front. But the extra one is up, like a dewclaw
almost on the front. So you can't really
see it very easily. So there we go.
So at this point, we have a little bunny. I
think this is very cute. And you can keep going in and working it as much as you like. But obviously, there is
a point with watercolor. You do want to sort of
call it. So for me, I'm going to add in
some more fur details. I think that's kind
of what I want to add for this little guy. Just going in with
the tiny brush and just doing some little
details on the rough, where I think it would be the fluffiest part of the bunny. And I'm using the
lightest hand possible. This is typically
how I do all my art, so I do have a little bit of experience doing very
light brush work. So it might take a
little bit of practice if this is not the
technique you normally do. I do a little bit on the side. I'm going to touch up the
little mouth a little bit. So if you wanted to do whiskers, like we did Talk about whiskers, they do come from
sort of this area, like a little circle of whiskers right on each
side of the mouth. So you can go in and do, like, some very fine lines. But as you can see, this definitely is a different
kind of look, right? It's more I hate to
put a gender on it, because obviously
this is an animal. But as soon as you add
whiskers to an animal, sometimes it does look a
little bit more masculine. I think just because we are trained to think of
more human terms. So, you know, that
is silly, obviously, but I'm just letting you know that if you feel like
it doesn't look right, it may be because
you feel like you suddenly put gender on a rabbit, which they don't
look any diferent. In fact, it's very hard often to tell rabbit genders apart. So, I'm just going to show you what I could do with a little tiny bit of the carmine. This is, like, just
the tiniest bit. And they do have a little
bit of red right here. So, like, that's
literally all I would do. It's just the tiniest touch
right on the top of the nose, right at the bottom of the V, because that is where they
are actually pink in reality. Now, if you were doing
more of a cartoon style, I also sometimes do do like a little round red cheek,
which I think is very cute. You could add like, I've got a tiny bit of
carmine on my brush, a tiny bit with some water
into the inner ear section just because these areas
are thinner skin and light does travel through
them. So there you go. So that's the basics
of our little bunny, and I will just say, like, they always come
out differently. As you can see, I'll
pull my examples back. Like, there are so
many different kinds and variations of rabbit that I feel like you need to
paint a ton of them and just then decide which
are the best looking ones, because they always do come
out a little bit different. Like, this one is so funny
with his little claspy hands. And this guy his head
is definitely too big for his body. But
they're just very charming. So even our little
bunny we made today, I think is very cute
in his own way. I think the part that I'm
not happy with is the eyes, but, I mean, I think the pose is really adorable, and I
think the ears are cute. So, there you go. We can always be a
little critical, but I think it's
important to also recognize when things are
just cute, and it's fine. So that's it for our
actual painting lesson. In the last lesson
for this class, I will just give
you a couple other quick tips and then
we'll wrap up.
6. Class Project & Tips: I hope you're happy with the little bunny
that you created. As our class project, I would love to see the
work that you did. So, of course,
please take a photo of your bunny and upload it. I would love to see
what you came up with. Every rabbit is beautiful, no matter what their
particular shape is. So just a couple of
other little tips, in general, for painting bunnies or other
woodland critters. I would say reference photos are super helpful because
I do find that rabbits have very
particular sitting poses that change based on
how fluffy they are, and that will sort of
be the breed of rabbit. They're also very different
body wise than hairs. This rabbit here is a bit
more like a hair shape where they're sort of a
lot leaner and rangier. In general, I would say it is safest to start
working light to dark, which is pretty much a rule
in watercolor anyways, but just in terms
of these rabbits, I like doing the
titanium buff layer. As you can see, I did that for
all of the creatures here, so they do all have that
sort of undertone of beige. But I would say, if you want to try a
different direction, you could do a different
color as your base, maybe a really, really
light gray if you're doing a black rabbit or something
with black and white. I have definitely
tried that before. My rabbit is white
with gray spots, so I've painted her many times with sort of a gray wash
rather than a titanium. And as you can see, I did try a couple other critters
with this same technique, which turned out pretty good. I mean, this mouse
is a little too fat, and this squirrel is a little
too fat, as well, actually. But I think they're
really cute. I really love fat animals,
so that's great. Think the technique,
the base of it, which is sketching in the light shade of watercolor paint, rather than doing a pencil, is going to help
with the organic look of the piece overall, which I do think
elevates it a little bit away from looking more
like a cartoon sketch. It's more natural looking. So if you have any
questions about this technique or this project or anything we
covered in the class, please do let me know, and
I will answer them for you. I hope you had fun. I obviously
love painting bunnies. It's one of my signature
subjects in my art. And I really hope you
enjoy painting them, too. This is actually my very first
painting tutorial class. I normally do more
graphic design classes. So if you enjoyed this, I would really appreciate if you left me a review, let
me know what you think. If there's anything I
could do differently, or if you have any requests, please just let me know.
I'm really happy to chat. And I hope we can create many rabbits together in the future. Also, if you want to
see more of my art, you can find me on Instagram
at luckyspro dot studio. I'll put it on the screen
there so you can see. I also have a YouTube channel
where I show more of my, like, artistic process and
pieces I'm working on. Alright, thanks for
being here. Bye.
 Rebecca Wilson, Artist