Transcripts
1. Introduction: Hi, I'm Jeanne. Listen and welcome to my studio again. In this course, I'm going to show you how to paint a dramatic stormy sky. We're going to have a lot of fun. This is a wedding weight process where paints flowing around the paper and you have to try and keep control of it. And you can just let yourself go and have a lot of fun. Don't worry. If it doesn't work the first time, get out another piece of paper and try it again. But what I would suggest that you watch the first and second lessons first. See how I do it. Maybe watch them more than once before you start. And the other thing that I would suggest that you use a piece of watercolor paper at least 11 by 14 which is what this is. You don't want to do this sky painting on a smaller piece of paper because you really in order to get a dramatic sky like this, you have to have a big sky and you have to have a use at least 3/4 off the paper which will go over in the in the first lesson and what I've done is I'm eliminated unnecessary detail because the subject matter here is the sky, and that's what has to be the focus of this painting. And so we've done very little in the landscape so that the I concentrates on the subject off the sky. So if you have your materials, let's start painting and have some fun and I'll show you how to paint a dramatic stormy sky .
2. Materials: Let's quickly go over the materials that were going to use for this painting off a dramatic , stormy sky. So with regards to brushes, you can use whatever brush you want. Just make sure that for the sky you use the largest brush possible, because that's the only way you're going to keep your painting loose. This is a number 30 DaVinci brush, which I believe is a mixture off synthetic and riel hair. I used a 1.5 inch wash brush. It's a synthetic wash brush, because I work on hot pressed paper and I just find that the synthetic brush works better on hard pressed paper. But you can use a hark, a brush or any Ah, really hairbrush as a wash brush, especially if you're working on culprits paper. This is a sauce tin Kalinsky brush, and I use that in the foreground a little bit, and the other two brushes that I use this brush and this brush I use an awful lot in my watercolors. This is a synthetic hard West taught cheap hardware store brush, but it gives really nice textures, and this is a hugs hairbrush, which gives very nice grass textures, which I use a lot and you'll see how we use that later. You need a palette for your pains and the pains that we're going to use our just four colors they are. These are all Windsor and Newton, but you can use any brand that you want. This is yellow polka raw sienna because of the two yellows at riel years, indigo, blue and burnt sienna. And as I said, you can use any brands that you have. But the most important thing is that I always emphasize you want to use artist quality watercolors. Otherwise, you're not going to get the results that you want and you want to use good quality watercolor paper. This is our cious hot pressed paper, which I'm going to use, but you can also use cult. This will work on cold press paper. This is a February honor, and, um, I use when I use cold press paper. I use a lot of Saunders Waterford because it's a lovely paper. You can use our shires. There's a lot of fairly good quality watercolor papers out there, but don't use the cheap papers because you're not going to get the kind of result you want . You can tape down your paper two aboard, but make sure when you do that it's, ah that that the board is not much larger than the paper you're going to use, because we're going to be maneuvering the the paper back and forth to make the make the paint flow. So that's important Hours actually. Always clip my paper down to the board to a board with clamps, which it makes it easier for me because I like to just take the clamps, often pick the paper up itself and maneuver that because sometimes you want to bend the paper rather than and if you've got it on a board, you can't bend it to maneuver the paint back and forth. So there's basically all the materials were going to use, and now we're going to get down to painting
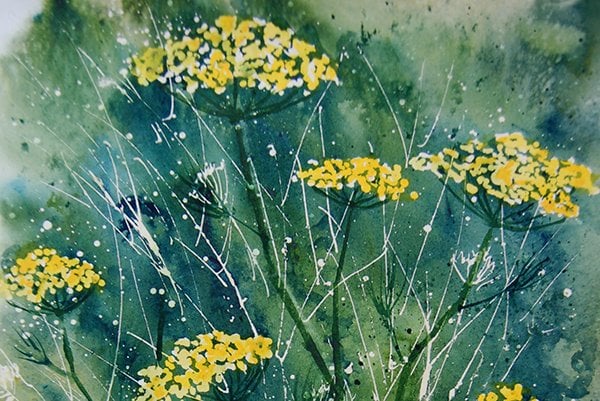
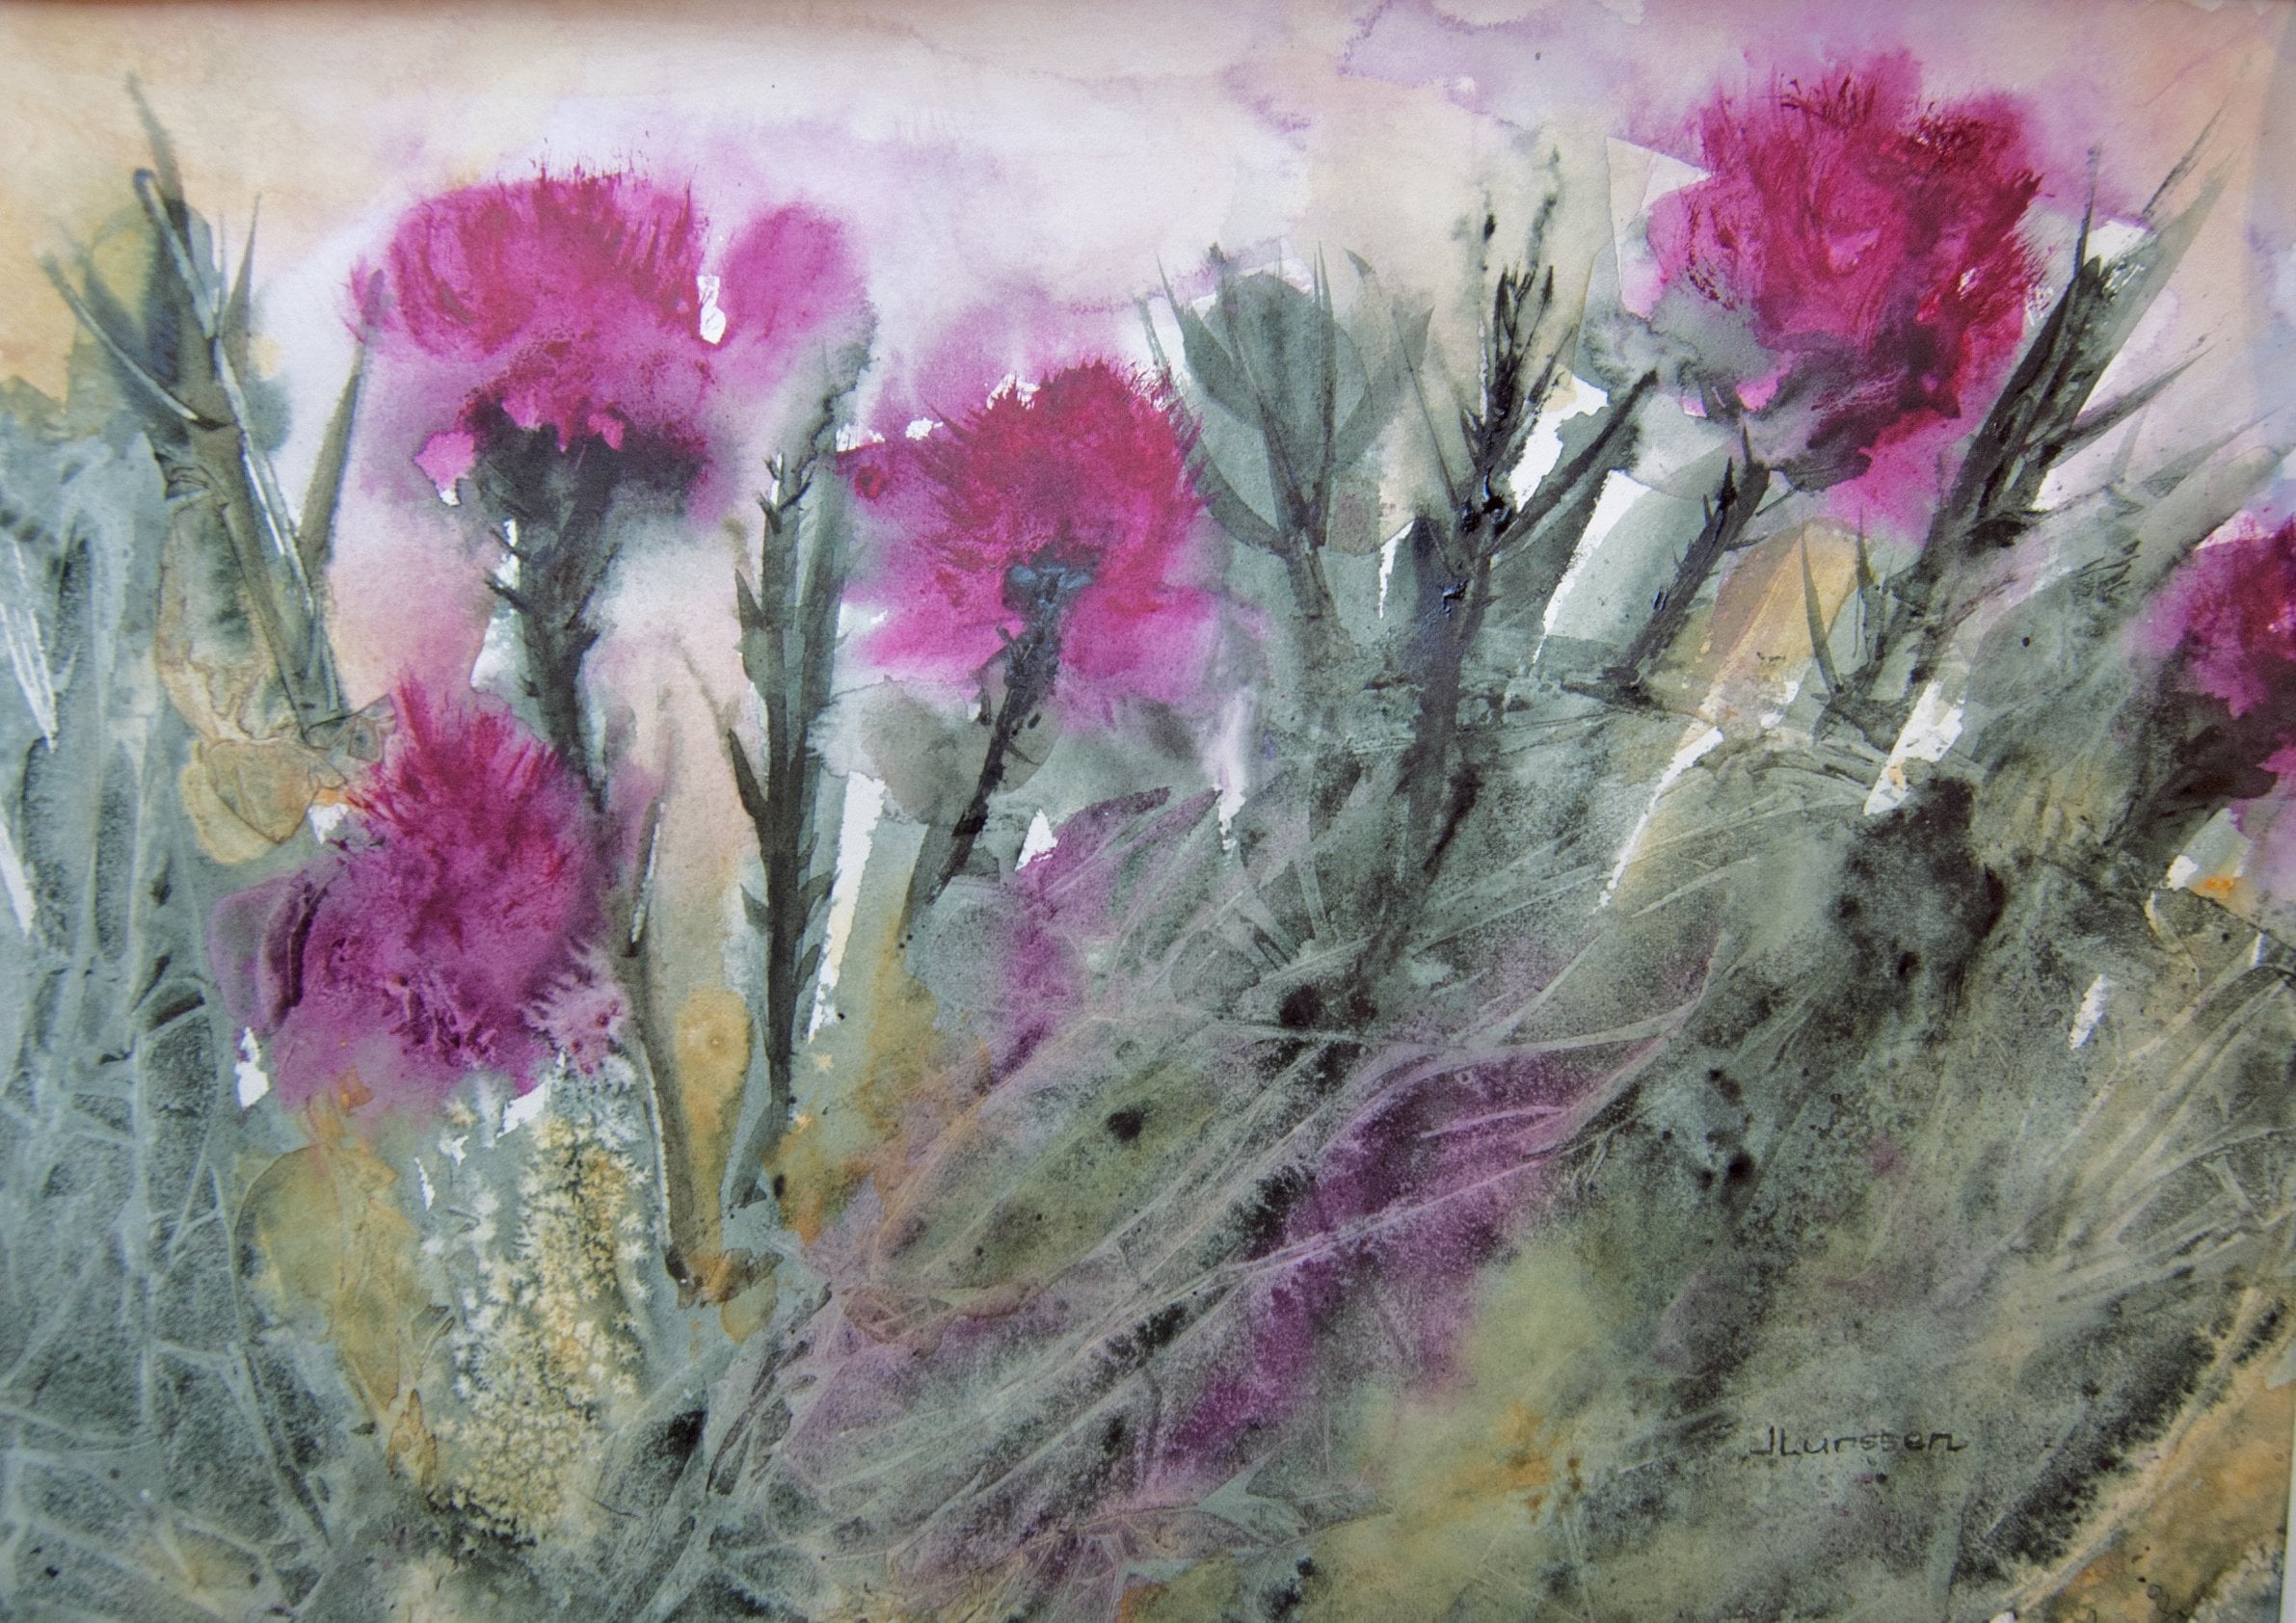
3. The rule of thirds and the first wash: because they just want to talk a little bit about the rule of thirds, which are using all my paintings and we're going to be using in this painting. And I thought it would be something interesting if you weren't aware of it. The rule of thirds is a powerful technique for creating good compositions that will make your paintings much more interesting. It's amazing how it works, and it works well. When applied to paintings and photography, it helps create a sense of balance to your work. The basic principles behind the rule of thirds is to break up your paper or your image if you're taking a photographed or if you're going about to do a painting, um, on your watercolor paper or canvas your you visually break up your surface into three equal parts, both horizontally and vertically. If you place your points of interest in the intersections along these lines, they're here and here you will have a far more balanced painting or a photograph. Studies have shown that when viewing an image, the viewers I usually goes to these points of interest rather than to the center of the pain of a painting or a photograph. And for that reason you'll find that most good photographers and, um, good painters. You'll never see the subject in middle of the painting, or if if they're taking a picture of a person or painting a picture of a person, you see them here or here. Or if you're doing a landscape, you'll see the horizon here or here. And it just makes for a far more interesting painting or photograph. I will just share your to a prince of two paintings that I did. I always use the principle of the rule of thirds in my paintings and in this one where I have the tree in this 1st 3rd off the painting here. And if you draw a line here, the horizon with an end of the top of the mountain is is about just under 1/3. They it's it's not, ah, hard and fast rule that you have to actually measure. Exactly. I usually just eyeball it. And here when I did a painting off the four leaves, you'll see that I didn't paint the trunks of the trees in the center of the painting. This one is in this third of the painting and these two are in the 1st 3rd of the painting . So we're going to use this rule in this painting. And I thought it would be of interest to you if you weren't aware of it. And you could just keep it in mind when you do future paintings because that's what's going to make your painting or interesting Kabul, it's, ERM just uhm I'm going to make a very, very light pencil mark where we're going to do the land area. And because this this is a dramatic sky and the subject is the sky. We want 2/3 of the paper to be sky obviously and just 1/3 to be land. In fact, I even want to make it a little less than a food just for some drama because you were not going to do a lot of detail in the land. So I'm just going to get rid of that pencil mark by using this kneaded eraser, which doesn't damage the paper. So the first thing you want to do is we're going to paint waiting wit, so we totally want to wit the paper. But you wonder not a sheen on the paper and And I'm going to start off for the first section during a very light mixture because we want to mix a very, very pale grey I'm using in Digger and Burnt Sienna and you want to. It's it's probably about 50 50 but you see, I wanted to be very, very pale, so I'm just adding a lot. Even that is, is not apparel enough? I want we want to do in an initial very pale grey coat. I think I'm gonna even add a little bit more blue here. Get just makes it very well. Knots of order. We're gonna try it on my little always have my little test pieces of paper. See, that's a little too blue. Now I want to add some more burnt Sienna together. More gray color. Let's try another piece of paper. Yeah, it still it still needs more water. I really, really want to make this a very pale undercoat. Just gonna add quite a bit of water to that. Mix it up. No, I'm going to take my says 30 round brush and we've got this weight paper going to get a bunch of paint soaking up and I want to leave some white areas here that just just random random white areas don't do round circle squares or what? Whatever move your paper around because that's going to be were the light shines through the clouds when we do, when this is drawn and we do a slightly darker color. So I really want two. And if you and if you find you cut covered up the paper too much, just add some water while Issa still wit and clear out some some white area. You can have it in more than one Fleiss or just one place. No, it's this needs to dry. Let this dry and real continue in the next section.
4. Creating the storm clouds: now that the papers dry and make sure it's totally dry before you. Um, before we go in with the second layer and again you want to with the paper. Look, I don't want to do it too much, but I do want some the clouds to flow. Now I'm going to take my number 30 brush again and go into the burnt sienna with mixed with indigo and try to get I think if you do about 50 50 you get a really dark gray on. This is a little too green to be priddle it more blue in there. Okay, Gonna do really dark this time with lots of paint on my brush And I'm going to go around this white area that I did on. Basically, I want you just have some dramatic clouds. Just add some blue in there. Just You just wanted to look good and look. And you wanted to look like a dramatic sky. So I don't like that hard edge this and we take my little spray bottle and just spread it so that it moves and I can tip it down a little bit. Take these things off so I can just do the paper so I can take the paper and let it run a little. But you don't want to run too much unless you deliberately one wanted to go in one direction. And I think maybe at the bottom here do wanted to run down a little towards the land area. And there's another hard edge, the anyway. There's a hard edge. Just get rid of it with your spray bottle. So you've got this nice white area where the, um, sun shining through and always want to take a very pale, even paler than that. Actually, um, I feel like the direction that that goes by talking it like that. So just keep tilting test, you know, experiment. And you may have to do it more than once to get it the way you want it. And you do want to take a drive brush if there's a lot of paint that's collected on on any of the edges of your paper because it will run back and course blooms as it starts to dry. So you don't want that to happen, sir, I actually want to take this hard edge away there and make that tilt down like that. Take it to shoot. And I want this to come too much into the land area, so I'm just keeping that fairly clean. Now again, we have to have patience and let this dry. Make sure if there's any wet area behind your paper that you dry it off because that will also possibly created bloom in your paper. So getting some interesting results now with this dramatic sky, and I added this little bit of gray here and then it was too much. So I watered it down a little bit. And when we finished, this is a little hard area, but it's too late to fix that. So I'm gonna wait until it's dry, and then we'll, um, fix it. Fix it then. So again, more patients. If you're using clamps, re clamp you painting and wait for this to dry. It does take a few hours. Do not use a hair dryer. I find I have tried using hair drives. When I'm doing this waiting wit, I never get the same results. So how much? Rather leave it the way it is now There is ah um, an instant gratification that you want to see the end product. But if if you have patience, you're going to get a much better painting. So in the next section, we I may have to add some or to the sky before we do the land area. But we'll see how this how like this drives because, remember, watercolors do dry about 20% lighter, and we may need to add some more into the mix.
5. Evaluating the sky and adding the first wash to the land area: Now that the sky is dry, I want to take a look at it to see if it needed anything further. And actually, I'm quite happy with this. I don't want to. I don't like to work into the sky too much. And I think that this time I was lucky that I did the second coat dark enough that I don't need to add anything more to this. Now I love the gray, stormy look of the sky. So we're going to finish off by filling in this land area. I'm going to I'm using, um, yellow Oka, raw sienna, burnt sienna and maybe some quinacrine burned orange. I just put that out in case I want to add that to the mix. I don't want it put too much in the landscape because, as I said, the sky is really what the subject is about. So it's good right up to the line we made. And unlike with water, it doesn't have to be dead straight. Got a bit of yellow polka here, and I'm going to add a little bit of raw sienna, which in the in the closer area, which just gives it there's a hair in there, but I'm gonna leave that they enter. Let's drive. It's easy to take it out then, So the closer you are, the slightly darker the um, landscape is that I think I'm going to add a little bit of just a little bit of burnt Sienna to the foreground for some some interest. We don't want to do too much. And when this is dry, I want to put a bit more raw. Sienna. They when it's dry, totally dry. What I want to do is put a little bit of shadow in from the's, the stormy scar. We need a little bit of shadow in this area, but let's wait until this is completely dry before we do that. And I just want to get rid of that pencil mark for leave a little bit of light shining here . So, um, again, let's let it dry, and then we'll finish off with a very distant mountain in the back and some shadow here, and that may be enough. If it's not weaken, see what needs to be added then
6. Adding shadow and distant mountain: So now that the paintings dry and weaken, take a look at it and see what still needs to be added in this area. To make this painting more interesting. Obviously we don't. I don't want to touch the sky at all except to add over here a very small, distant mountain, and you would mix a very, very pale grey off the same sky. Colors off. We mix the same sky colors to keep it to keep the painting harmonious and putting a very small, distant mountain there. And I'm going to make some indigo with some burnt sienna and really, really water it back a lot. And we can always It's better to do it lighter. He just turned this around. It's better to do it lighter to start off with, because this indigo sustaining color and you're not going to be able to really remove it. So let's try this light light, light colored. I tried out on a piece of paper first to see. Yeah, I think it may be a little too like, but I'm going to use it in that, um, consistency For now. You can always go darker, but you can't go lighter so gonna hold my brush on its side to get an uneven hm shape for the mountain. I just really wanted to go to the and I can already see that it's two lights. I'm going to add a little bit more blue and a little bit more burnt Sienna to get the gray , and and it's okay if this is actually a little more blue because, um, distant mountains do appear to be blue in the distance, sir, it's to see amount. Add a bit of water to that. That might be too dark now, so black that No, I'm not gonna do any more than that. Actually, I'm going to leave that I'm not getting too. Make it larger because you have to remember that the water color does Dr. R. 20% lighter. So when that's dry, it's probably gonna be okay Now, the more tricky part is that we have to air shadow here. I'm going to use the same color that we just mixed for the mountain, and basically I'm going to scrape it sideways or again also because your shadow is not going to be a definite shape. It's take just sort of throwing cost shadows on the land, maybe a little bit more watery and diffused. Actually, yes, I'm going to spray this with my spray bottle because I think we wanted a little bit more diffused, like the clouds are. It may end up having to be a little darker than that. Whoops. You went a little bit, too, too much there, just dipping my brush in some more shadow color. Andi, I think that's that's nice. We've left a little like pet share from the reflection in the lighter part of the sky and really that dry and see if it's dark enough. We need a lot of patients here. I like the way it looks, but and I still haven't decided whether to add some trees here. So or maybe just another mountain, a mountain. I'm thinking about that. This is where you really want to be careful and think about what you want to add. Because we've come this far. The painting looks great, and you have no idea how many paintings I've ruined by making a quick decision. So it's better to let it dry. Stand back, look at it. Let's decide. We're gonna put a mountain here. We're gonna put some trees that some distant trees. So let's decide that once this is dry
7. Re-evaluating and adding the finishing touches: Okay. Now, having thought about this for some time, I think what I'm gonna do is put some more mountain in here and maybe carry it all the way across. And then I'm gonna put some texture in here. And you see, the clouds are are the direction of the clouds are this way. So the texture that I put in, I'm going to use the same direction and not for too much in because again, as I said, the subject is the sky. So let me put in. I have to turn the sideways for the camera. Sorry about that. Um, because the cameras in my way and I'm going to just, um it's, um, mountain on this side, which I guess I'm gonna have to dark and again. And yeah, I think now that I see it, I'm going to carry it all the way through. And you don't want a straight line for your mountain. Yes, that looks better. I'm always very cautious towards the end of a painting because that's when you can ruin it . And you Really I don't want to do that, sir. I think I'm going to We want to sort of get thistle the same tone or values the one on the left Here, join it up with that. And I wanted to look like it's in the distance, so I'm making it very small. Get rid of that. Okay, now I can straighten this up again, and I think that's for the mountain area. That's perfect and fine. Wanted very pale. And, um, maybe comes up a little more here. Andi, I'm not going to do any more than that. So I'm not totally happy with the shadow yet. And I'm going Teoh out a little more blue Should just went down the area that I want in shadow. And at some, it's a more blue that the shadow was too light and and two broken up. So no, um, I think what I want to do is put a few grasses in the front here just to create a little bit more interest in the foreground. So I'm going to this my hogs hairbrush, which is, um, a very coarse brush makes nice grasses and in dipping it in neat raw sienna just the tips and dab it on my town and it's see, I think I'll start here just creating a few grasses to create some interest in the foreground and you don't want to do too much. And I just want to follow the flow off this painting, the sky coming down that way, this shadow coming that way, and I need to make us a little darker. This is kind of tricky to do, so I have to go slowly and you can use. You can use any brush if you don't have a heart is a brush. You know, just, um, did a very dry brush technique. Don't take my thin a hog's hair brush. I think I'll have are better results with that almost dry paint. And another thing you can do. I do too much. I think I'm going to sort of let it go there. But another thing you can do is take something sharp. You can take a tip of a knife I've gotta secure here, scratched through the the wet paint and get a sort of three dimensional look to your grasses. Just do a little bit more here. She's like that. Do a little bit here. So what? This this light area almost looks like a pathway coming through the between the shadowed area and this foreground area, which I kind of like It was unintentional. But this often happens when you when you're doing a painting, something crops up. That that looks good and you just leave it. You have these happy accidents so adjusting. I'm fiddling too much now. Actually, I'm done. Really? It that dry? We just put a match around that so you can see how it just finishes off. The painting makes quite a difference, doesn't it? There anything we need to do now? A sign it. I'll sign my name here, and we have a dramatic sky painting. So I hope you enjoyed this course as I love doing dramatic skies and pretty pleased with this one. So I hope you was came out all right. And if you'd like to email it to me, please email at Jean at Jean Louis and dot com. If you would like some comment and I look forward to seeing what you've done
 Jean Lurssen, Jean Lurssen Watercolors