Transcripts
1. Introduction: Creativity has its ups and downs and it's ebbs and flows. It's hard when you're in an ebb state, when you're feeling blocked, when you're feeling uninspired, and it's difficult to get out of that. Hi, I'm [inaudible] Tara, I'm the artists behind the website and blog, my giant strawberry. In this class, I'll share some techniques for helping you to get out of the slump. I'll share five easy, fun, no pressure exercises with many variations that will help get you creating again. I'll talk about some of the reasons behind creative blocks and how knowing what they are helps move past them. I'll also share some simple suggestions to get your creativity flowing again. I hope you're excited to get creating with me and ready to get out of your slump.
2. Understanding Slumps: The reasons behind creative blocks are varied and many. It sometimes helps to know what's holding you back in order to move past that. Sometimes it's a lack of ideas that's keeping you from creating. But I'm sure you're not really without ideas. If you spent some time without giving yourself any pressure, writing up ideas, lists of different motifs you'd like to, [inaudible] paint or draw different projects. You'd like to try different media you might want to experiment with. When you are feeling blocked, you can come back to that list and you won't have to think about it. You can just start creating. Sometimes creative slumps come from feelings of inadequacy and fear. If you're spending a lot of time on social media and looking at all the beautiful things other people create, It can be very daunting to start creating on your own. Giving yourself some time away from social media, some time away from the computer, getting outside, looking at the beauty that surrounds you, that can all help you to begin creating again. If you're feeling like your skills aren't really up to your high expectations. Choosing things that are simple to work on will help you feel successful. Then once you're feeling successful, you can move on from there and try things that will challenge yourself a little bit. When you're feeling slumped, when you're feeling blocked, when you're in [inaudible] of creativity, trying things that are just a little bit beyond your skills can be really frustrating and it can keep you in that blocked state. Building up your confidence, doing easy fun things will help you to move beyond that. I know that for me, my watercolors are very detailed and it takes a really long time to create a painting. Sometimes it'll take many days for me to finish something and the idea of starting a new project can just make me very tired. It's great to have some quick, easy projects that I can work on when I need something that's not going to take a lot of time. Finally, I just want to say that good self-care practices can really help with your creativity. Take care of yourself. Make sure that you're getting enough rest, that you're drinking enough water, that you're getting enough exercise, doing yoga, meditating, writing in your journal. All of those things can contribute to your overall health and well-being and that affects creativity. I hope you're ready to start doing some art with me and I'll see you in the next lesson.
3. Materials: Before we get started, I just want to talk a little bit about the materials. The materials that you use in this class are really not important. I don't want you to stress over having the right paper or the white right paint or any of that. That being said, sometimes when you're in a creative slump, it is energizing and fun to go shopping for supplies, if you have an art supply store nearby, or if you like shopping online, go right ahead and get yourself some new supplies. The black paper that I use in this class is this Strathmore Artagain, black drawing paper and it's got a nice smooth texture, that's what I use. The pen that I used, it's the metallic marker, case made I think is the brand. I've never even heard of this, just some random pen that I happened to have. Use what you have on hand or splurge if you find something really cool at the art supply store. I'm a watercolor painter, and so I love my watercolors. I was using mostly leftover paint from other projects for this. I use pan watercolor paints and I'll give you the brands in the handout. It really doesn't matter. It's whatever your preference. My palate is just this plastic palette that I stole from my husband, and I don't know what brand it is, but you can find similar ones online and in art and craft stores. Watercolor paper, I love experimenting with different kinds. These are fun paper blocks, I prefer blocks because the paint and water won't make the paper buckle because it's glued on all four sides. But the shape is fun. The color play exercise that we do is a similar shape to this, but I think I was just using some scraps of paper, it wasn't necessarily this. Look for either hot or cold pressed, and usually the 140 pound, that's nice, heavy paper. There are lots of great brands. This Canson paper I've really been enjoying. The hot pressed is not, here's a recent painting. It's not as smooth as smother hot pressed, and it's fun to work with. Then Arches is always great this is the cold pressed. Either one works, whatever your preference is. I really like this sketch book. If you'd prefer to do your exercises in a sketch book. This one, it has a soft cover, it's easy to open and it lies flat. Although sometimes I use clothes pins to hold it open. It's Strathmore a 500 series mixed media paper. It works well. It's not as great as watercolor for watercolors, but I think it'll do well for what we're doing here. This Mix Media XL Canson sketchbook. This brand is my favorite sketchbook right now. I haven't started this one. I have a larger one that I usually use, but it's really inexpensive. Lots of pages in there. It's also perforated and easy to tear out if you really hate something and need to get rid of it. Paintbrushes, buy the best that you can afford, I always say, but don't fret if you don't have really great brushes and I found these Princeton Velvetouch brushes, the long round pointed brushes. They work really nicely and they're not that expensive. The other brand I often work with is this Blick Master synthetic. My favorite drawing pens are Microns, and I use just some cheap mechanical pencils. But again, it really doesn't matter what supplies you use. Use what you have. Splurge if you feel the desire to. The important thing is the process. The important thing is to have fun and just don't sweat it.
4. Collage Quilt Blocks: We're going to start out by doing a collage in this sketch book. I don't really like this sketch book for drawing, but it works great for collage. Now I've already cut some pieces of paper to use. I have a bit of a color palette here. Blues and browns and corals and red. I think they'll work well together. I always like to start out by lining up my bits of paper before I glue them down just to see how things will look together. You can definitely start by gluing if that's your preference. There's really no right or wrong way to do this and you can't mess up. That's one of the great things about this project. You can't mess up. It's really fun. You get to play with colors, patterns, textures. You don't need a lot of supplies, just a collection of papers that you can find anywhere in magazines, catalogs, old maps, paint swatches. You can use old paintings that you've cut up. There's lots of options and it's fun. There's no pressure. These collages that I like to create are inspired by modern quilts. By improv quilts. The shapes don't have to be perfect. They don't have to be perfect rectangles and squares. I'm going to glue the pieces down with this Elmers School Glue, glue stick. Just really cheap and easy to find. I'm just going to start on one edge and work my way to the other. Work my way across the page trimming as necessary, moving things around a bit as I feel the need to. If you're looking for inspiration, you can look at websites or books about modern quilting. The modern quilting guild has lots of examples that you can look at. The quilt of GIZ band I love their real organic qualities. I don't want to overthink this. It's a really quick thing to do. Of course, you can spend more time on it if you'd like to, but it's meant to be quick and easy and fun. You'll work with color, with shape, with texture. These pages can inspire other ways of creating other pages, paintings, drawings, maybe even your own quilt, and you end up with a pretty results. There are lots of different directions. You can take these pages. Here's another one I did.
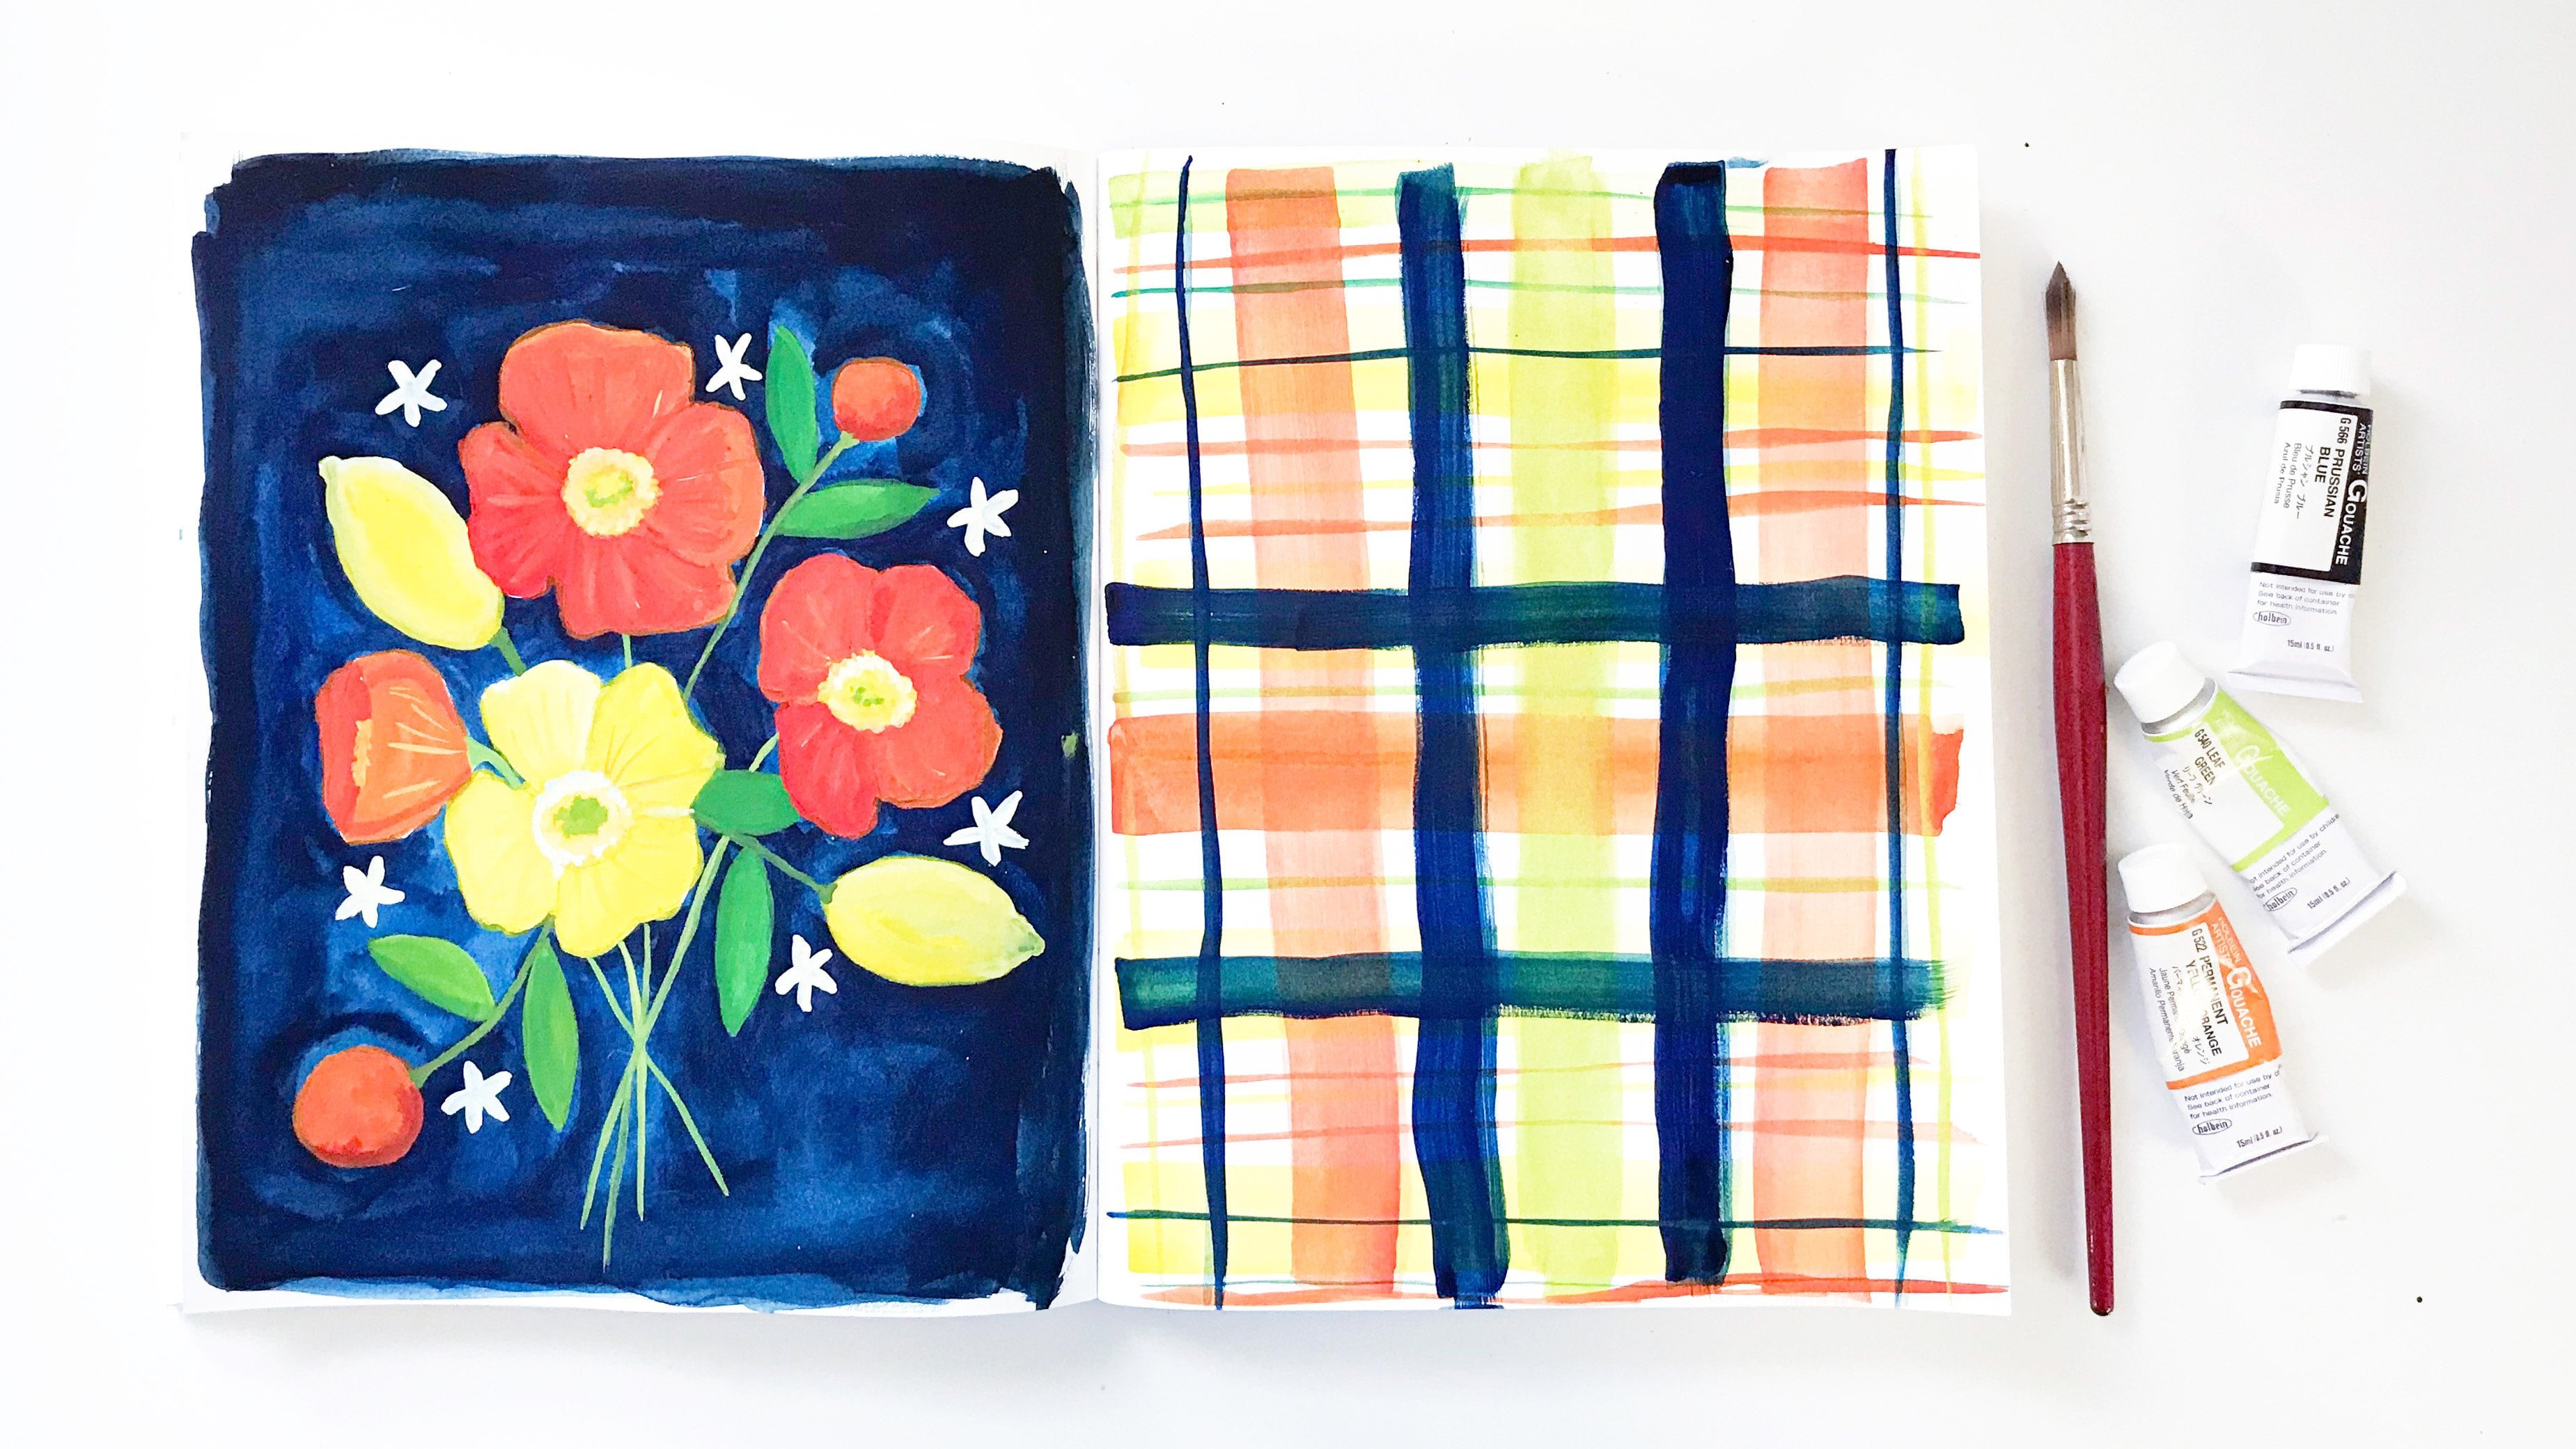
5. Watercolor Quilt Blocks: This next exercise is another quilt inspired page this time with watercolor. Taking a square piece of paper, I'm going to mark the center. I'm having a nine by nine inch square. You can use a different size. I'm going to draw a line just down the middle. Just a light pencil mark, I'm going to do another line from corner to corner. You will also do the other center line and the other corners, you can do it in any order that you want. Here's our other corner line, and here's our other center line. Next, we're going to draw a line from the center line to the other center line on the edges, cutting off a triangle on each corner. You're going to end up with a square in the center of your page. You're also going end up with four X's. Now line up the centers of the top two X's and draw lines from the center outward, and also from the center to the top of the page. You'll do that with all four of the X's going from the center of the x to the edge, the top edge and bottom edge and the side edge. Next line up your ruler parallel to the diagonal center line, creating a V to create the points of our stars. This lines up where the lines run off the page and opposite quadrants. You'll draw these lines from the center to the edges and each of the four quadrants, you will erase the extra lines. Another option for these lines is going straight across the whole page, drawing the line from one edge point to the other and erasing later or not, the choice is up to you. Whatever is easier for you to do. Next will be drawing lines to divide the arrow shapes we've just created into equal parts. I'm measuring half the distance between the edge point and the center of the page. This measurement is also one eighth of the whole page. We'll be drawing eight lines, one from each V-shape edge to the center diagonal lines. These lines create will look like two stacked arrows pointing from each corner to the center of the page. You know this might seem confusing, but once you start drawing, you'll see how it comes together. I'll also give you written instructions in the handout. Now we're ready to paint, we're going to paint this in two colors. I have two different blues on my palette. You can use whatever colors you like, you can use whatever brush you're most comfortable with. The nice thing about this exercise is that it's very meditative. You're just coloring in these different shapes on the page, and you're going to alternate the colors. I'm just trying and go carefully along the edges, if your edges aren't perfect, if your points aren't perfect, that's okay. The point of this is not perfection. It's nice to let go of control and let the pattern dictate your painting. I like my different colored bits to have some variation in them. I'm going to move the paint around to create light and dark on the page, different textures. This is not quick to paint. I've speed up the video, otherwise it would take a while for you to watch. Just work slowly across the page, creating this beautiful star shape. Choose colors that you really love. This blue, the dark blue is indigo. These dark blue shapes are going to meet at the corners, those tiny little points. I'm not worrying too much about them touching one another while they're still wet. I'm not worrying too much about a wet place running into another wet place here because the points are so small. One thing you do have to be careful of is not setting your hand down on the wet paint. Continue to move your paper so that you're always painting in the most comfortable position. Choosing a size of paper that fits nicely on your painting space and is easy to rotate around will make this even easier. Now you do want to wait until all of the first color is dry before you start on the second color. Now I'm using a cobalt turquoise light, which is really beautiful color. One of the things I like about it is that it granulate as it drives, which means the little bits of pigment fall out of suspension and give a nice texture. We also like using this color and mixtures because this turquoise will unmix and create interesting effects with your mixed colors. But we're just filling in all of the empty shapes with the second color. In the same manner that we did the first ones. This time, the shapes are bordered on the edges with the other color again making sure that it's dry. Continue painting in all of the other shapes with the second color until you're finished and you end up with a beautiful star that will look something like this. You can choose any colors that you would like, and you can even paint a smaller star if you want a quicker project or try choosing a different quilt block and paint that.
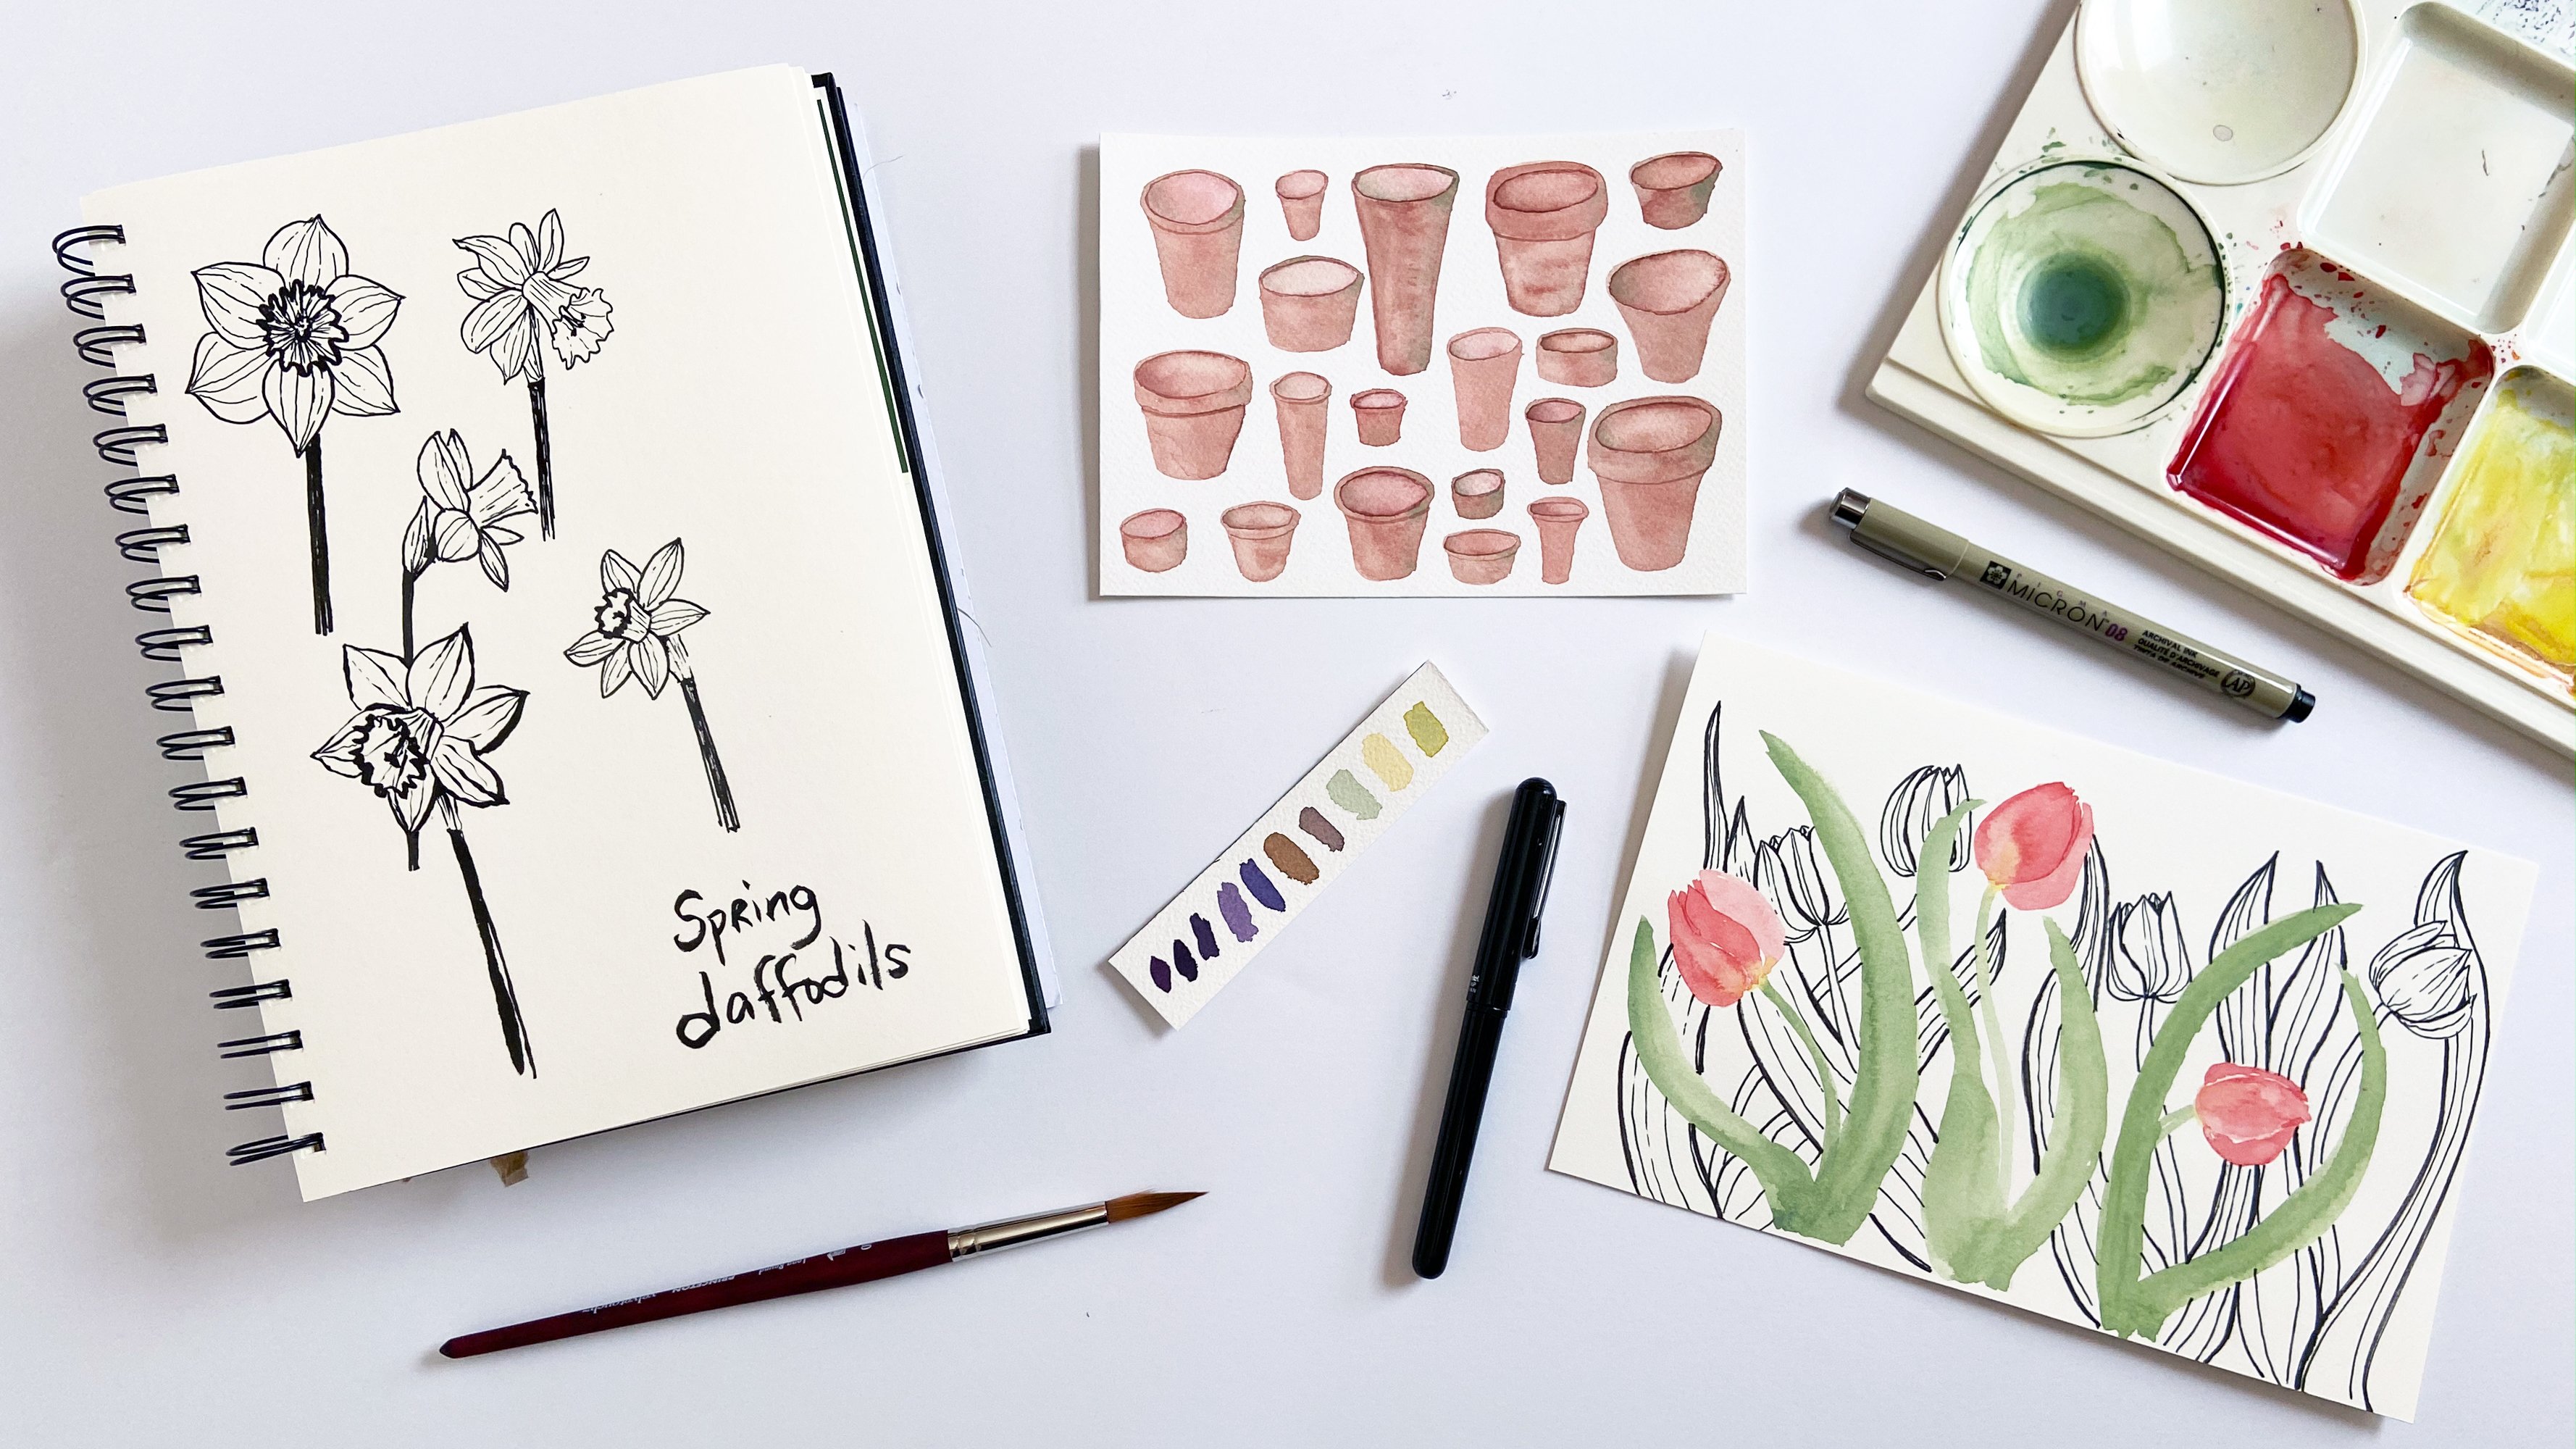
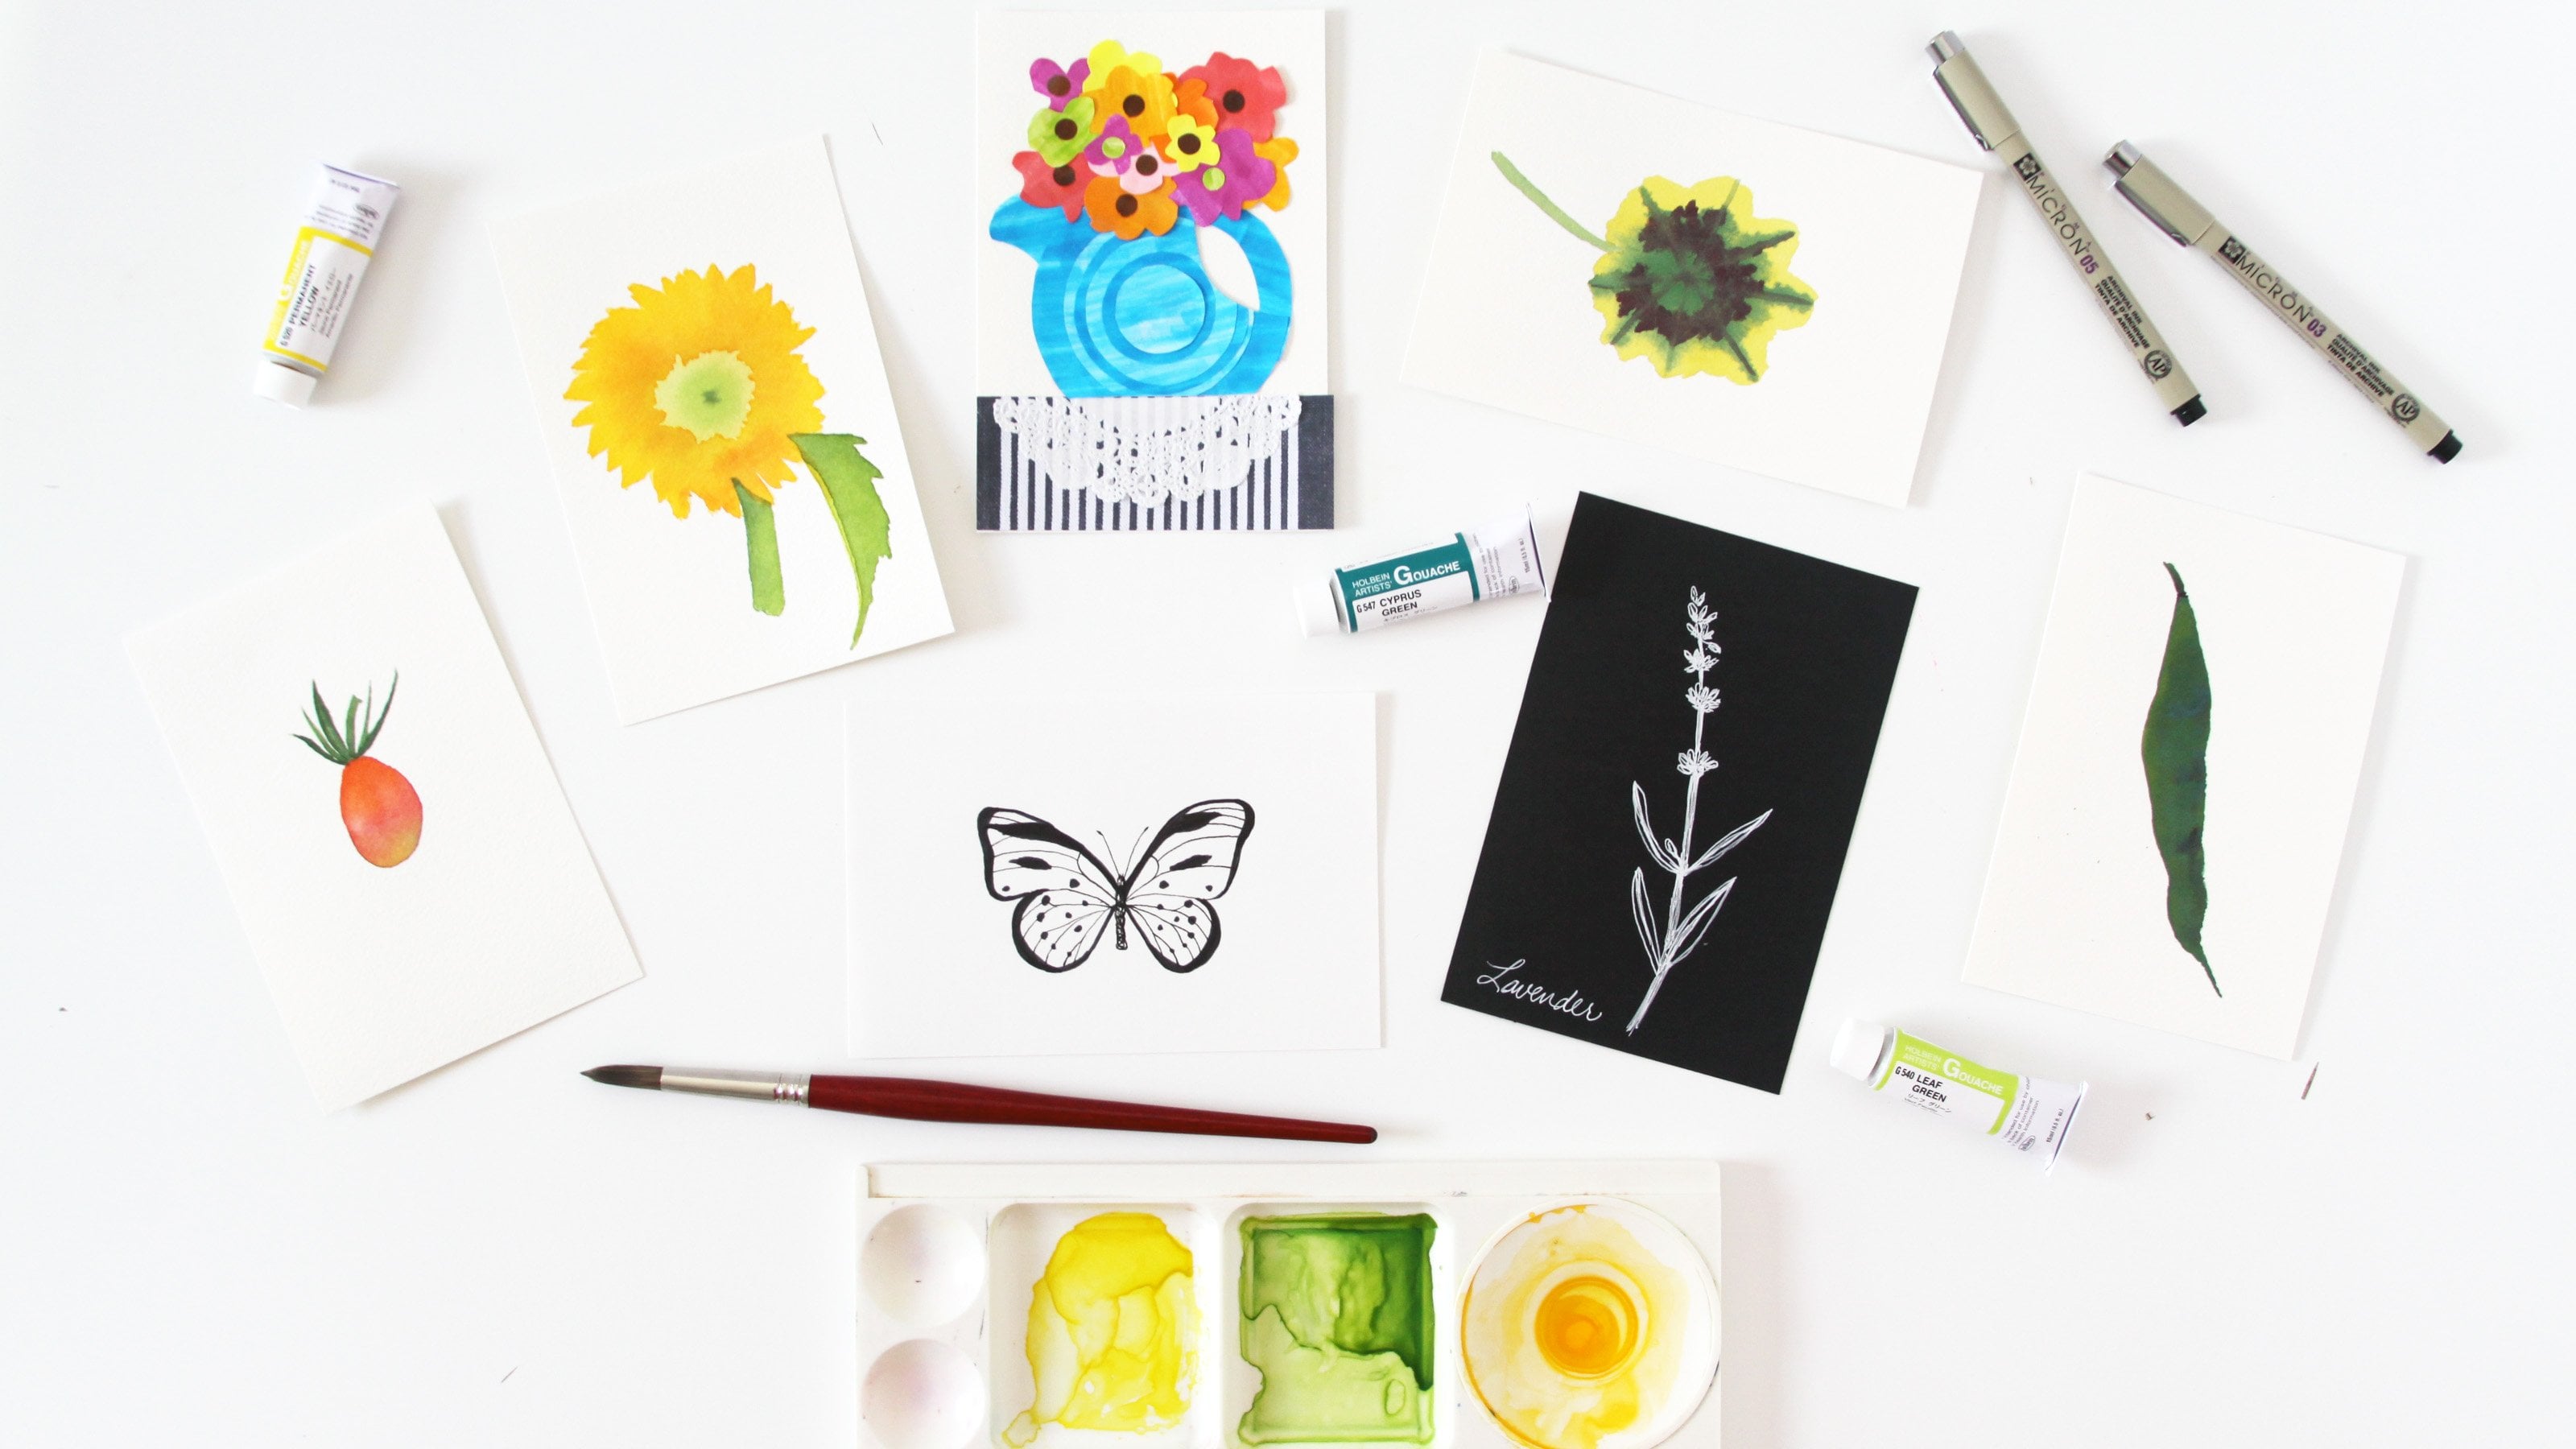
6. Fill a Page: One really freeing way to create, is to draw the same thing on a page over and over again. It can be doodles or more intricate drawings. Here I'm going to doodle a stylized leaf and stem shape using a silver paint marker on black paper. It's fun to use a metallic marker on black paper because it's really dramatic. I'm just going to fill the page with stem after stem of these leaves, in different directions, going all around the page. It's not something that you have to think a lot about. It's not something that takes a lot of drawing skill. You can use any shapes that you'd like. I love doing botanical, so this simple leaf and stem appeals to me for that reason. You could do flowers. You could do feathers. You could even do circles. I'm varying the directions of these stems. Which way they turn, which way is on top. The shape is inspired roughly by a whale plant that I have growing. My house plants during the winter are a great source of inspiration. I often get into a bit of a creative slump in the winter time, because I cant get outside into my garden. So having plants around me all the time helps keep some inspiration. So do things like that for yourself that help give you things to look at and be inspired by. These shapes and the way they fill the page, would be a beautiful embroidery too. I'm not much of an embroider, but I do appreciate it, and this would be lovely. You could use a different metallic paint marker, a gold would be pretty, or if you have a colored metallic marker, or if you don't want to go with metallic, white is always a nice dramatic contrast with black paper. Another option would be to create your own paper by painting a page in whatever color most appeals to you, and using either a pen, or a marker of whatever color you'd like on top of that painted page once it's entirely dry. Like the quilt blocks that we painted in the other lesson, this is a really meditative exercise. The same sort of motif created over and over. That didn't quite fit, but that's okay. Again with all of these exercises, it's not about perfection. It's just about creating. It's about doing something that isn't going to make you hem and haw and take a lot of decision-making, or be very stressful. When you're in a creative slump, it's good to do things that are easy and fast. They don't really like to say mindless, because I don't think this is mindless, but something that isn't going to take a lot of concentration and yet at the same time it allows you to zone out a little bit while you're creating. Just focusing on the shapes. Focusing on drawing them. Filling your page the best that you can. This is something that I return to again and again in my sketchbooks, not necessarily with this shape, but with all sorts of different shapes, and sometimes in multiple colors, sometimes in watercolor, and here's the finished page. I wanted to just show you how the metallic paint marker looks shiny, really fun. There are lots of options with the black paper and paint markers. Here are some feathers, but don't feel limited to using those colors. You can use a white paper sketchbook with micron pens, draw vegetables, flowers, leaves, mushrooms. Your work can be detailed, or it can be stylized like these plants. Could be a pencil, pen. Another motif that I like to draw is fish. You might want to create a list. Here are some watercolor pots I painted, so using your favorite media is another option, or try something different and challenge yourself. Markers are a fun challenge for me. Feathers, hearts, birds, whatever brings you joy. If you create a list of motifs, you'll never be without ideas. Breaking out of your usual motifs is really fun like with these cars. I hope you're inspired to get started on your own.
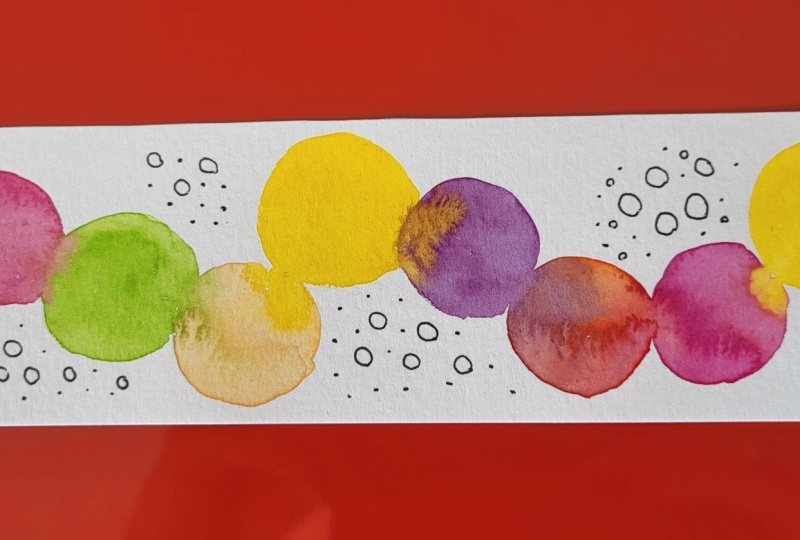
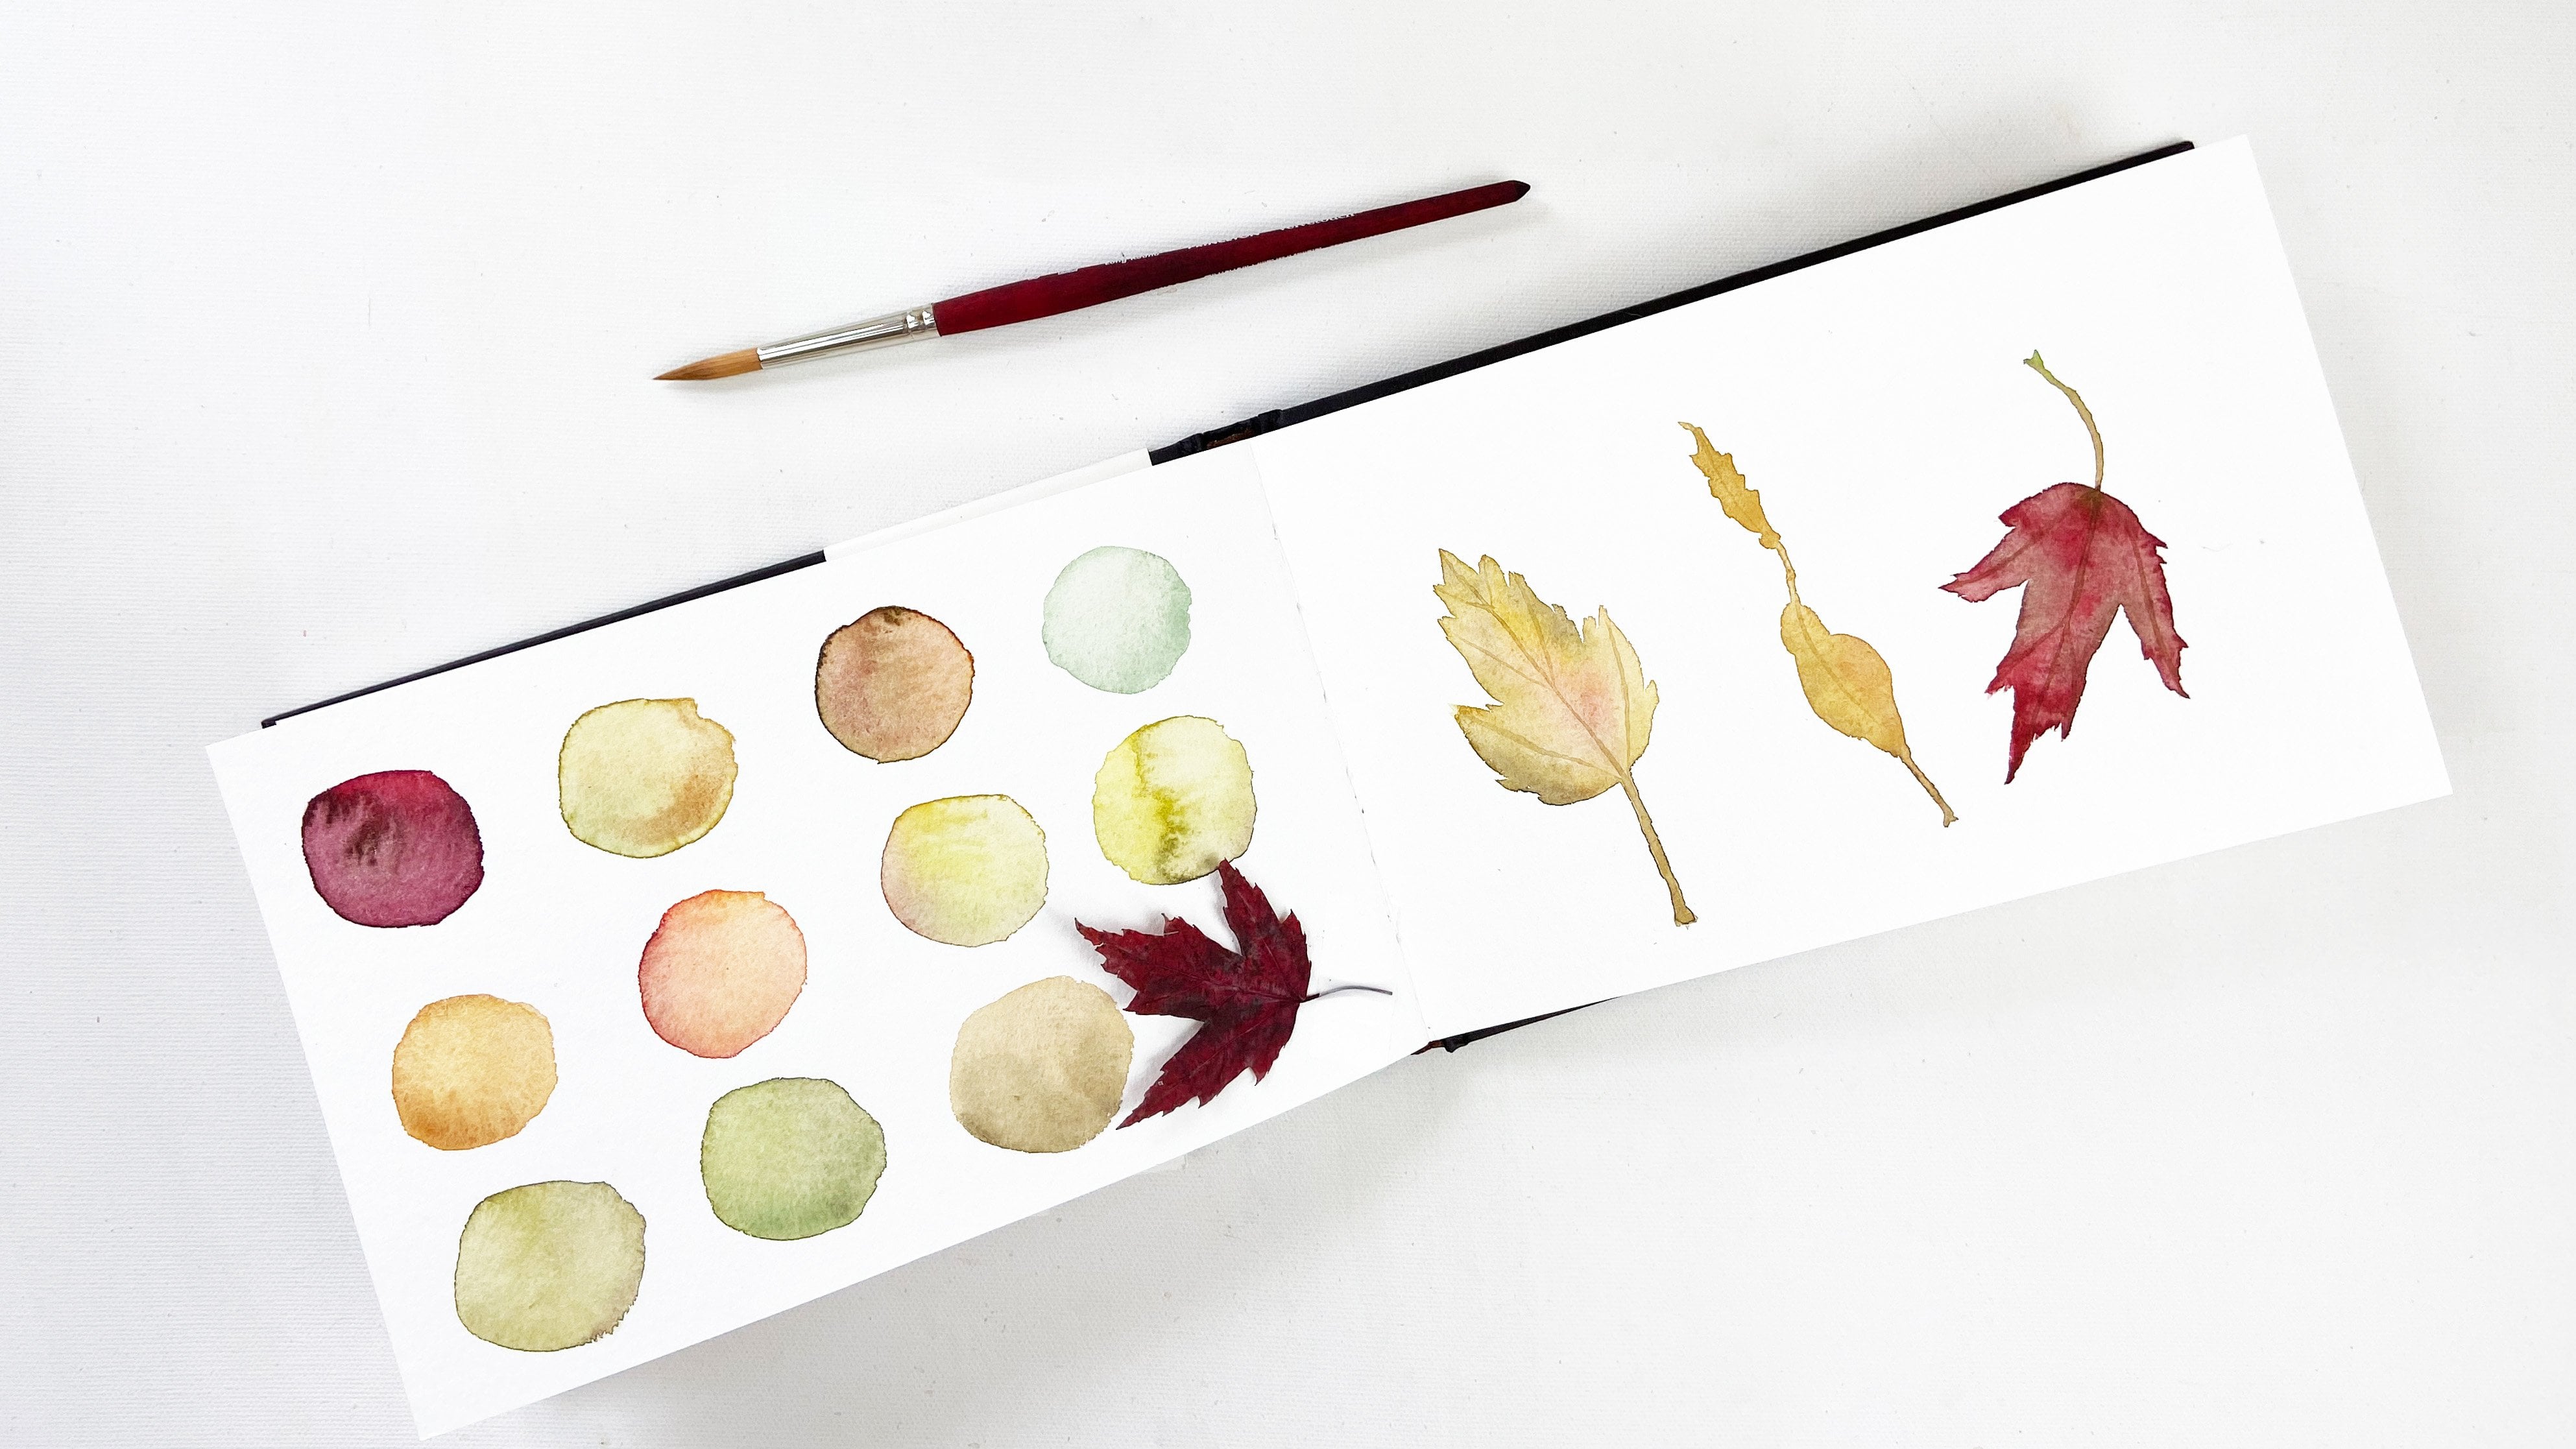
7. Color Play: One thing that I love doing when I don't have any idea what to paint is just to play with color. Here I'm using watercolor that is left over on my palette from some other paintings, and I'm using a scrap of watercolor paper. This scrap measures three and a half by nine inches, and I'm just going to paint some circles and I'll let the circles touch one another, and it's fun to watch the colors move and bleed and combine on the paper. For this exercise, there's no right or wrong way. You can use any kind of colors you want. Try choosing something like three or four or five colors, or maybe different tones of the same color, and see what happens. I'm not even sure what type of watercolor paper this is. It's a scrap, and I'm not really liking the way my paint is working on the paper, but that doesn't really matter, and it should give you confidence to use whatever materials you have on hand. Not to worry too much about the outcome or about doing something correctly. Those sorts of worries are really stifling to your creativity and so hopefully this exercise will help get you past those stumbling blocks. One color is leading into another, and I love the way it looks when it's wet like this, and the color is still moving. Make sure you have plenty of water. It's interesting to see what different amounts of water and how dry the page has gotten affects what happens with the paint. Try to vary your sizes of circle, and as you can see, it doesn't matter if they're perfect circles or not. Use different brushes so that your paint doesn't get too muddy by mixing on the brush. It's fun to paint some really small ones as well as some larger ones. Then it's interesting to see how it dries. The color is much less bright and there's interesting effects. So next time you feel stumped, just take some leftover paint, your sketchbook, or some scraps of paper and paint circles or squares. Have them touch, have them barely touch, have them not touch at all and try different shapes and arrangements. Lots of circles, less circles, try some stripes, make it monotone. There are so many options and it's just playful and fun, and easy and quick and it'll get you paining again.
8. Little Landscapes: When you're painting a landscape, it helps to have some example photos to work from. Keep your camera handy when you're traveling and you're out and about and you can snap some photos and use them later for your paintings. I'm not a landscape painter, but I'm not going to let that stop me from painting some landscapes. Starting with some sky I'm using a gray. I'm going to avoid the cloud areas. I'm just painting late strokes, sweeping them across the page. Here I'm adding some blue. Not using too many colors in this painting. I'm not going to get very detailed. If I leave some areas blink and then come back later and add some water, that will ensure that they are less saturated with color. I can also use the brush to pick up color. Here's a little bit of a rusty orange to give a hint of a sunset. That's some yellow. These colors are going to dry very light. They're going to fade into the other colors. Just keep adding some more water. A little bit more dark gray to give some distinctions to the clouds, make it a little moody. The foreground is just going to be a field. I'm painting it in brown because this is a dusk scene. You're not going to have a very detailed view of what this field looks like. It's careful not to paint the brown right up to the sky and so that meant the color didn't bleed, but I added that water to blend it a bit. Play around with how you add color and how you add water, and what's wet and what's dry and you'll see how the paint behaves. I'm going to dab out a little bit of the color for some clouds in the sky using a paper towel. I could leave it like that, but I'm going to add a bit more color. I want everything to really blend. Play around with the effect that you can get by dabbing up with a paper towel, just stroking across page to blend things. Most of it is pretty wet already. It's fun to watch how the colors move. A little bit more of this orange just to hint. Make things look coal and wind tree. Adding an a bit more blue the colors get less distinct as they blend and merge on the page. It's nice to add a little bit more for darkening and adds more to the foreground as well. There are like the effects that the wet and dry paint and the different saturation of the paper will give you. Again play around and see it can work in unexpected ways. Now let's paint another one. I'm going to start in the middle of the painting here and these are going to be trees. Wintry tree trees that are a bit indistinct. Again, these landscapes that I paint are not detailed at all. I'm leaving some space blink. I'm not really trying to paint tree shapes, I'm just adding in color and some texture add some blue for the sky and it's a grayish blue. I think I still had some brown in my brush, but that's okay. We'll darker blue and I'm leaving space for clouds. I'm not touching too much the places that we've already painted for the trees. Adding a very washed out gray to those blink cloud spaces. If you're careful about where you put the brush and the water, you can keep the lightness and not have the blue blend into everything. If it does, that's okay too. This is not supposed to be perfect at all, it's not supposed to be exact. The foreground is a cold wintry field covered with melting snow, with ice. Everything is blending here. This is another late in the day scene. Heading more to the trees I just wanted them darker and tell me where the paper filled in, not as much white. Again, you don't have to worry about the details. Just letting the paint add texture and color. Careful how you add it so it doesn't blend into everything. Adding more and more paint, darkening it and it is blending, but I like how the edges feather. They sort of feather into the lighter spots, creating a beautiful effect. Just dabbing a little more of the brown in here. I love the way it blends. Still little bit more and I think that's good. These were just two quick paintings. They dried much lighter than they looked when they were wet. I've painted lots of little landscapes like this. They're quick and fun. I don't put any pressure on myself and when you paint yours, I hope you don't put any pressure on yourself either. If they don't look good move on. These are all little scraps of watercolor paper. It doesn't matter what kind you use, if it's hot press, cold press. Just play around, enjoy yourself and paint some landscapes.
9. Your Project: Thanks so much for taking this class. I hope that now you're feeling inspired and energized, and ready to go on creating on your own. Creativity and creative slumps are such a personal thing. I'm not going to ask you to share your experience in the class project unless you want to, but please, feel free to share one of the things you create in this class, in the class project. Share a picture of what you create and a few words about what it meant to you to create it. If you're inspired to try something different or to try something new, or to go off in a different direction, I'd love to hear about that too. Please, be sure to leave a review and follow me to stay up-to-date on all of my new classes. I'll see you next time.
 Anne Butera, Artist. Instigating creativity and joy.