Transcripts
1. 1. Introduction: Hey, there, if we
haven't met yet, I'm Joseph Mavericks and an online content creator who
spent the last three years building my business
from scratch by writing over 300
articles online, publishing YouTube
videos, and making online courses like the one
you're watching right now. I also still have a nine
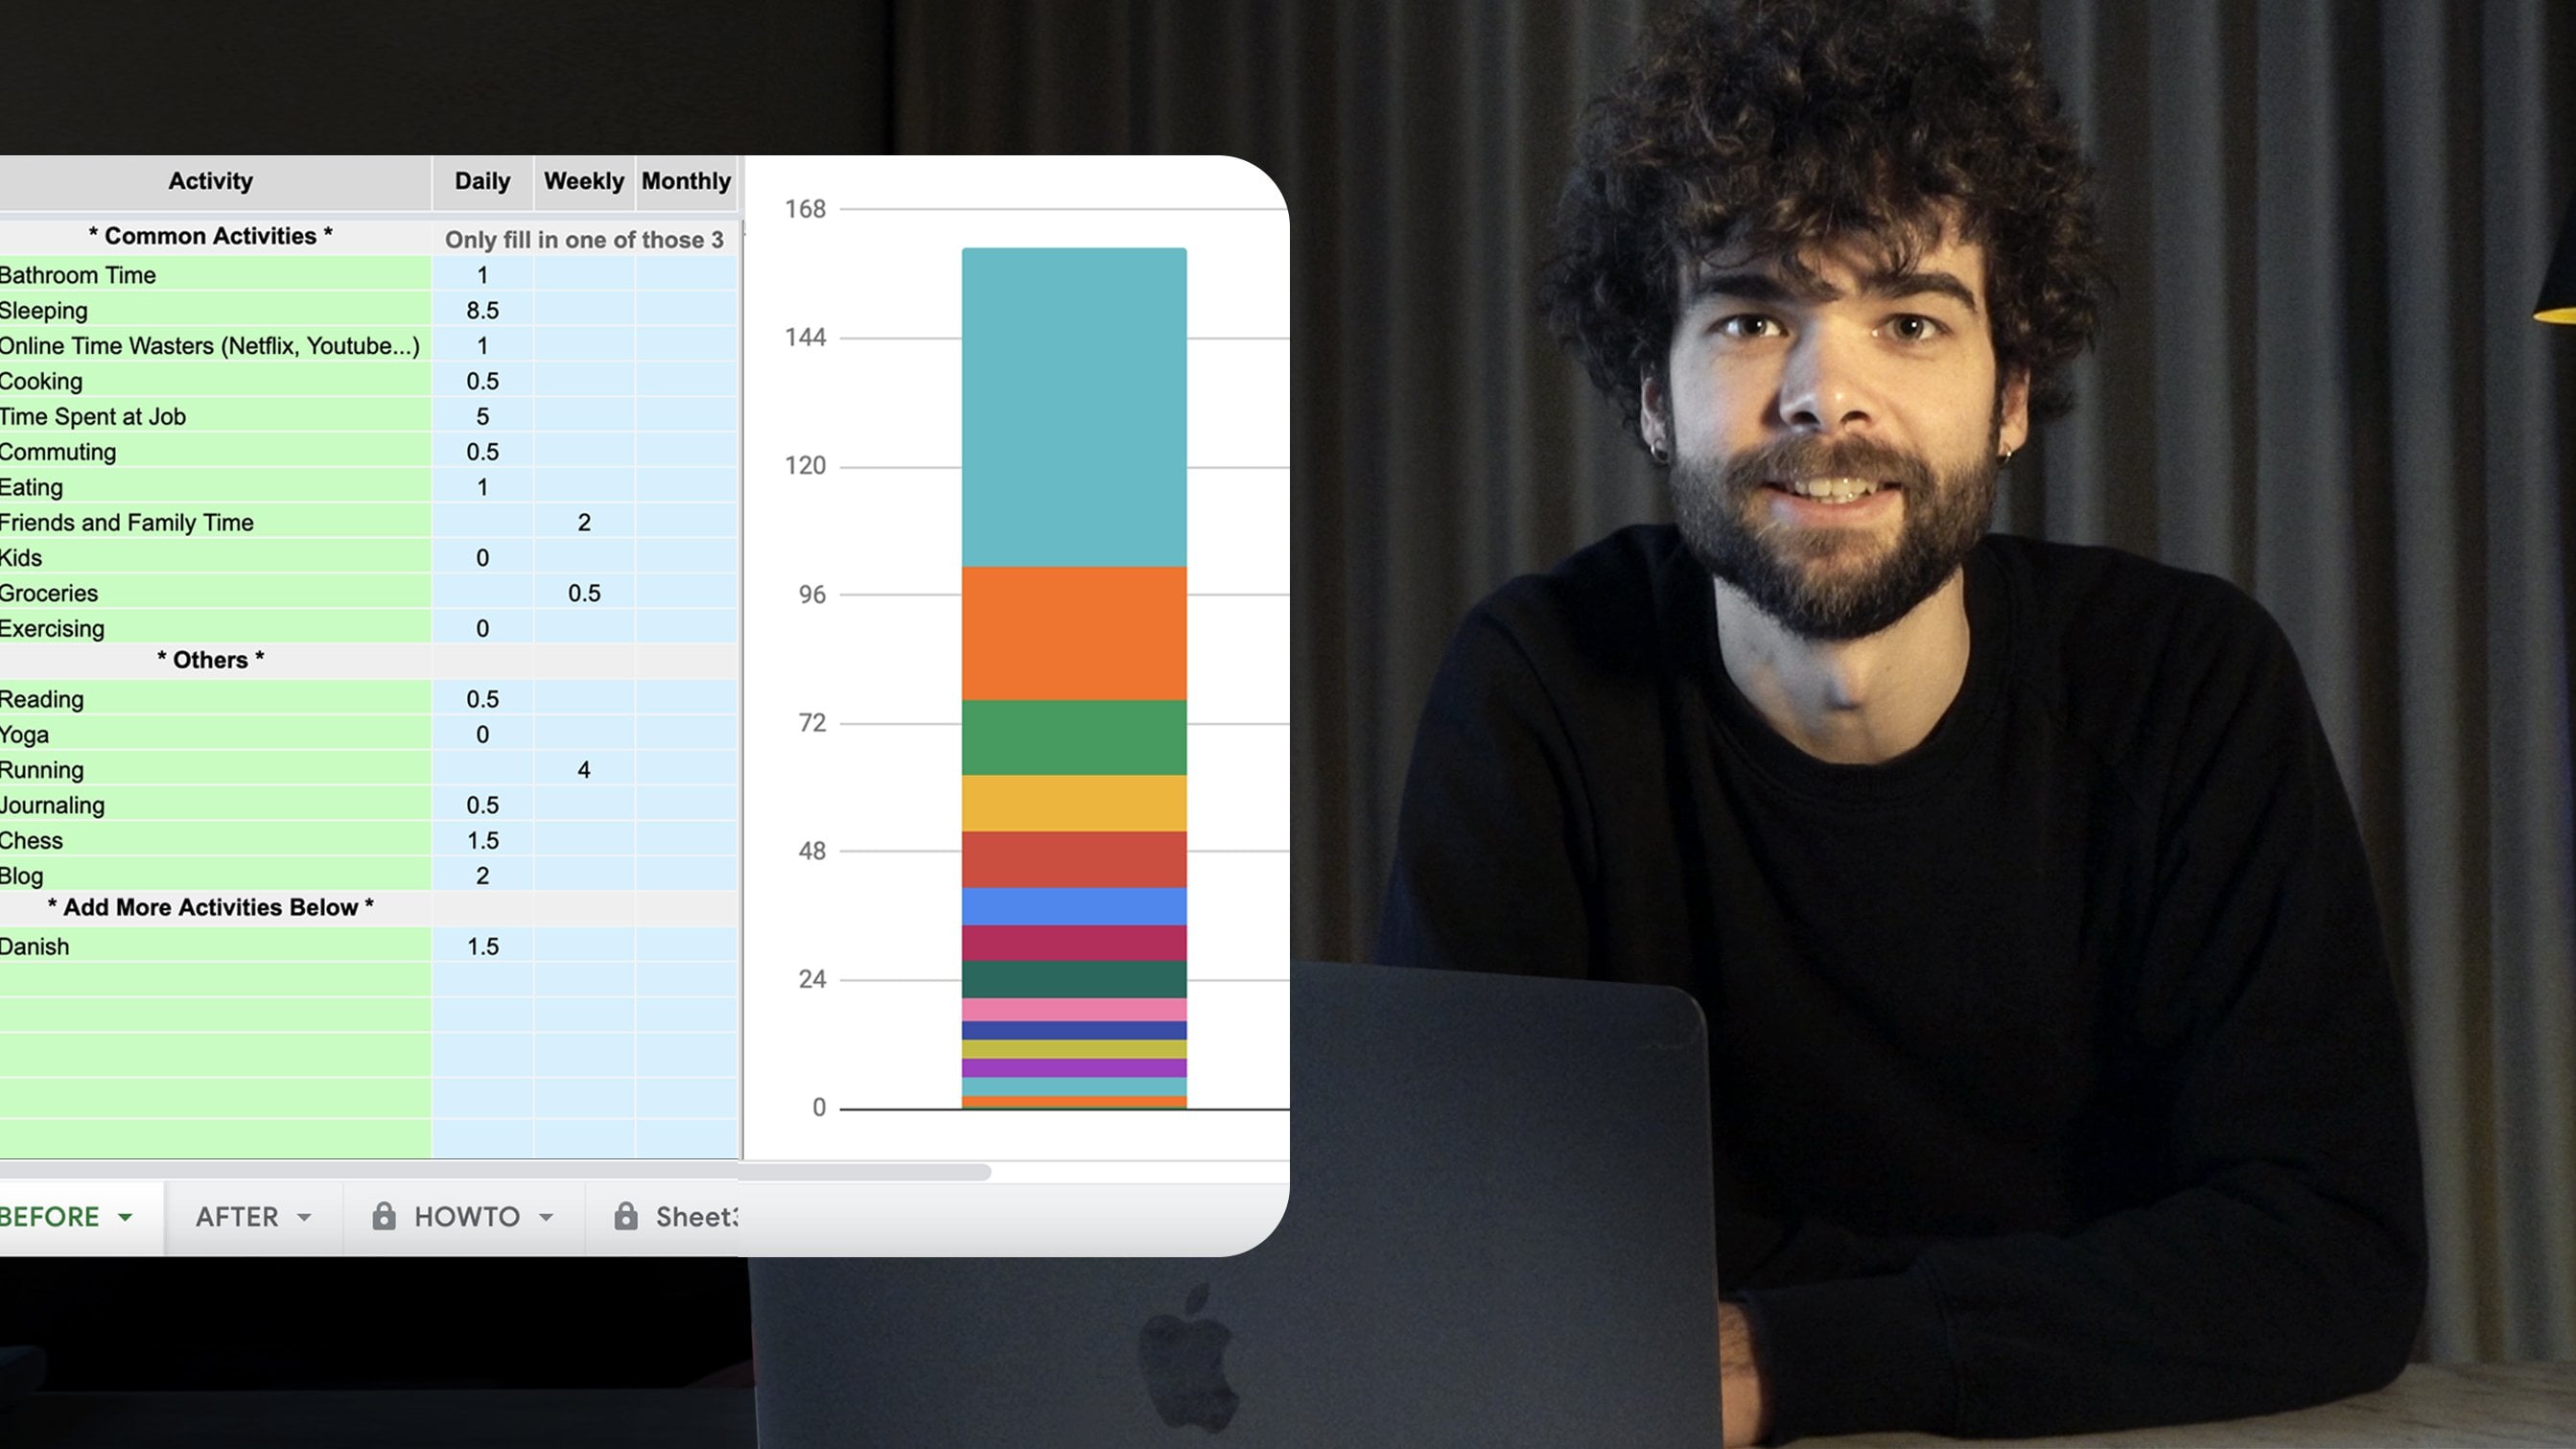
to five job on this side. And so, as you may guess, managing this kind of life requires a lot of organization, productivity, and clarity
over plants in general. One of the systems
I used to stay on top of my schedule and
the things I have to do is called the GTD method is short for getting
things done. It is a method developed by David Allen over 20
years ago in 2001. It is a time management and
organization process based on the simple concept of getting things out of your
mind and onto paper. And once it's there,
you don't have to worry about remembering
things anymore, only about structuring them. And this not only brings more
clarity to your workflow, it also helps you release a
lot of stress because you feel less like you're always
forgetting to do the things. As we will see, this system is based on first writing things down and then sorting
them back 20 years ago. This was probably a little
annoying to do because you will have to write and erase
things to sort everything. And so you would have
to always switch between pen, paper and eraser. But nowadays
technology is here to help a laptop or a
phone with an app. And a little bit of
organizational skills are all you need. And in this course, we're going to be talking
about how to implement the GTD method in my favorite
productivity app, TikTok. In the first part of the course, we will familiarize
ourselves with the app and the GTD framework. And the best way to do that
is to start practicing. So we will start listing
our tasks done in TikTok and go over the different
settings we have there. We will also learn to
create projects and contexts based on
the GTD framework. And we will see how
this translates in silent tick tick interface. In the second part, we
will learn to dissociate tasks for projects and to
organize them by context. This is where you will
see the most the power of using a digital tool rather than paper with this approach. In the third part, we will bundle them all together
and start getting things done by scheduling and putting our tasks
in the calendar. It will be the opportunity
to learn about the amazing arrange tasks
functionality in tick, tick, which I haven't
seen done anywhere else. In the fourth part, we will
go over features that are not 100% necessary to use
the GTD framework. But that can come in
really handy if you want to get the most out of the
tool and of the approach, things like filters,
groups, parent tags. Finally, in the
fifth and last part, we go one less time over the most important
learnings from the course. And I leave you with my best insights from using
this framework myself, and how to approach
productivity techniques and advice in general. And by the way, this isn't
just a theoretical class. All along the class, you will learn how to create your own GTD matrix,
as I like to call it, which is basically
a dashboard and TikTok where you can see
all your short-term, mid-term, and long-term goals in your everyday life as well
as in your life in general. And there's more on this in the next short course section. So you can learn to build that. Or you can also just
watch along and taking the theory with
the practice, you decide. And if this sounds
interesting to you, I will see you in the
next class section. See you there.
2. 2. Class Project: Hello again and welcome to
the first short video of the course where I'm
going to tell you a bit more about the
class project. So throughout this course, you will learn to create
your own GTD matrix, which is, as I
said in the intro, a dashboard in TikTok where he can see all your short-term, mid-term and long-term goals in your everyday life as well
as in your life in general. Now, because the TikTok
interface looks the same for everyone and it's not highly
customizable, which is fine. Your dashboard will look
like everyone else is, at least structure wise and you will always find the same
components in that way. But in the Going Further
section of this course, we will learn how to create elements that are
more customizable, such as smart lists, folders, and parent tags. And that's where
you can really make your TTD matrix your own. But the nice thing about doing a project while following
a class is that you can see what people are doing in the projects and resources
section of the course. And also, you get to actually
build something while you learn and get a cool
finished project in the end. So with that in mind, I
would love for you to share a screenshot of your
TikTok GTD matrix when you're done with
this class project in the projects and
resources section of the course down below, it doesn't have to
be complex or fancy, just something to inspire
us all in a way and to, and to learn from
each other really. So, thanks for watching
this first short video, and I'll see you in the next one where we really go in and get started with using TikTok and the GTD approach. See you there.
3. 3. Creating Projects & Contexts: Hello, Welcome back. In this part of the course, we're going to
learn how to create projects and contexts
around tasks. And in order to do that, it's important to
first understand the core of the GTD approach. This illustration here
is taken from the book, Getting Things Done
by David Allen. We can see at the very top, we start with just
putting things in. And in this course
we're focusing on the actionable part
of those items. We're not going to be
talking about things that can be done in less than 2 min. Because although it's a
very interesting part, this course is about
long-term planning and learning to consistently
organize your life. It's not about a two-minute
quick fix for a task. So once we've identified
actionable items, we're going to sort
them into projects. And inside those projects, we're going to add contexts, which is going to
help theme our task tackling process
further down the line. So that's a very basic
overview, right? If we now look at how that
translates inside of TikTok, this is what it looks like. The app is divided
in three main parts. The first left side column is where you will
find your lists, which will be your projects. You can also find your tags, which will be your contexts
more on this soon. And finally, you can find filters which we
will use as well. The middle column is your inbox, and this is where you
will find the tasks inside each one
of your projects. And finally, the right side
column is where you will see your task details
in this course, we're also going to be
using the calendar view, which you can find in the
small far-left column. And we won't be using, but I encourage you to check out this feature is
if you're interested, the focus mode, the habit
mode, and the search mode. So that's for the
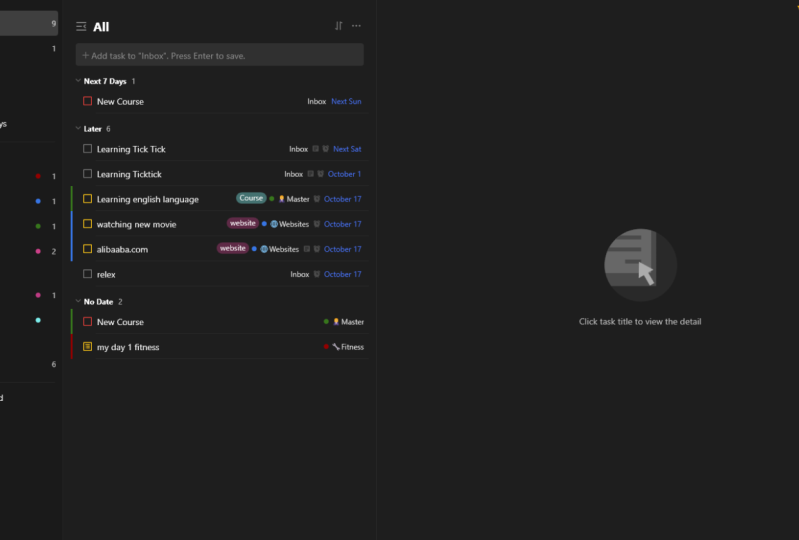
overview of the tool. Now, let's start using it. Opened up a list
in your TikTok app and create a new
list called master. In there, write down
everything you have to do, everything you can think of. It's very easy. All you have to do is read your test name, press Enter, and keep going. And you may wonder why not use the default inbox
function of TikTok, which is exactly
for that purpose, just distinct things down. Well, it's just a
simple mental trick. Not a lot of people
associate an inbox with. I have a good overview of what
I have to do with my time. A master lists cells better
and it's more reassuring. Think of everything
and anything. The simplest task to the most daunting one and put everything in there,
one after the other. Don't worry about
forgetting items. You can always finish
this tutorial and add items later once you
get the hang of it. So here is the list
I end up with e.g. it will take a while to actually think of everything
and write it down. So make sure you don't
rush through that step. Now that we've done this, we're going to create
our first project. And the goal is to move
as many of those tasks as possible into their
respective projects. Think of projects as a series of tasks that add
up to an outcome. The more specific the task, the better this means you
may have to split some of your items that you listed in your master list
into smaller tasks. E.g. say you want to try a new cake recipe with
your kids next weekend, you may have written
in your master list, try this new cake
for kids on Sunday, but do you have the ingredients? Are you planning on
buying them if you don't, Is this a new recipe? Did you check you have
all the necessary tools? Say you are planning on
doing this with Michael, but is even a hormone that day. Have you checked that? And
depending on your answers, you will realize that this
seemingly simple item is actually a small
project on its own. With that in mind,
let's create a project called Try new cake on Sunday. Create a new list outside of your master and advocate
tests to that one. Do this for all
your tasks that are big enough to become an
Eagle projects on their own. You will most likely add it off tasks overall when
you start thinking in projects because
you will have to split up everything
in smaller tasks, but do remember, the more
specific, the better. And there's also two
things you should keep in mind to make your life
easier with this. Number one, project names and tasks should start with a verb, because thing to be actionable, new cake Sunday could
be a project name, but it doesn't call for action. Try new cake, Sunday
is much better. It starts with a verb. And number two, you
can set priorities for tasks which will be helpful to make progress
further down the line. To set a priority for a task, use three exclamation marks. A drop-down menu will appear
where you can choose high, medium, or low priority
creating contexts. Here's a definition
of a context, according to the
Collins Dictionary, the context of an
idea or event is the general situation
that relates to it and which helps
it to be understood. And that is exactly what
we're looking for here. Ideally, you need one
contexts per task. In the official
getting things done guidelines from David Allen, assigning context is a whole. It's all big step on its own, but thanks to technology, it's actually easier to do it. Let's assign contexts for trying new cake
suddenly project tasks. So to do so, edit the task name and add
a hashtag at the end, followed by your contexts
name and tick, tick, those are called tags and in GTD and they're
getting things done, they approach again, those
are called contexts. So we are re-purposing
tags here, and that's all there
is to contexts really, the goal is now to do
this for all your tasks. So you go in each one of your projects or you
lists in TikTok, one by one, you add
context to your tasks. If you prefer to
see all your tests together rather than having to switch from project to project. Then here's a
little tip for you. Go to the filter section in the left side
column of TikTok and create a new filter that
will include all your lists, all your tags, all the dates, and all the priorities. This custom list
will show audio test together regardless of
where they actually belong. Once you're done assigning
contexts to all your tasks, you ready for the next
part of the course, where we're going
to be dissociating those tasks based
on their context. Sounds exciting, right? See you in the next part.
4. 4. Dissociating: Hey, welcome to dissociating an exciting chapter
in this course. This is the part
where you get to experience the full power of the GTD methods combined with the efficiency
of technology, which makes the whole
thing a lot easier. But it's still the part that usually confuses
people the most. So bear with me here. In this part. We're not actually
inputting anything into TikTok or we're not creating
any new tests, projects, lists will literally using
a one-click function to do something that would take
us hours and a lot of shuffling around and with
just a paper and a pencil. But it's important to understand the ins and outs of the system. So we just spent a lot of times splitting and sorting
tasks into projects. And we're now going to separate these tasks from
their parent project. We're going to sort
tasks by context, which will enable us to batch the tasks that have
the same context together while still making progress on multiple
projects at the same time. And a big warning here, this is not multitasking. You're still doing
one thing at a time, but you're moving forward with different projects as you
complete those tasks. I highly recommend against multitasking in
general with anything. Again, the purpose of sorting by context instead of projects, to be able to batch things. And here's how it works. So you have to go to the grocery store three times a week, one type for normal
groceries and other time for a quick lunch break because you don't
have time to cook. And a third time because
you forgot about that cake we mentioned
earlier on Sunday, and you have to get
the ingredients. Your context here is
clearly running errands. And I think we can
all agree it would be much easier to
buy everything in one trip rather than going back and forth
over the week, right? Well, with the help
of technology, you're able to see all your scheduled Aaron's in one place. So you don't forget about
the cake on Sunday. You can anticipate you will
need lunch on Tuesday, and you can also get all the necessary groceries
for the week. Here's how it works. When
you go to the text menu, you will see all your contexts. Click on one to see
all the tasks it contains regardless
of the project. And it's really as
simple as that. And that's where
technology really helps. Because imagine to
mess this would be with different note
pads, sticky notes, and having to move things around and erasing
and writing again, here are two screenshots to clarify the different
sections inside the app. Here's your projects with its tasks and
associated contexts. So you have your projects
in the left side column, a project you displaying
in the middle. And under that, you have
the tasks that belong only to that project along
with their contexts. But the key is that the
contexts may be connected to tasks that have nothing
to do with this project. And again, that's the
very important part here. Here is the same
tick tick window, but now showing your contexts in the left side column
instead of your projects. And in the middle, you're displaying one
specific contexts. Inside of there, tick, tick is showing you all
the tasks in that context, along with a little
reminder of what the parent project
of each test is. And so in the second case, you can see all your
errands in one place. As you can see, we haven't actually inputted
anything in this chapter. We've just looked at a new
way of sorting your tasks. In the next part of this course, we're going to borrow it
altogether and we're going to learn to schedule those
tasks in the calendar. See you there when you're ready.
5. 5. Scheduling & Getting Things Done: Hey again. So at this stage, you have your task split in projects and you're able
to tackle those tasks by context and to batch them as opposed to going back and
forth between contexts. But how do you actually
plan when to do what? Well, you put things
in the calendar. And in tick, tick, we do this text to my
favorite feature of all time. This is one of the most powerful options
available and tick, tick, I haven't seen it
done anywhere else, and I have talked about it many, many times in my contents. The arrange tasks
option, access it, open up the TikTok
calendar by clicking on the second icon from the top
of the far left menu bar, and click on the second icon from the top in the
far right sidebar, it will say arrange tasks when you hover over
it with your mouse. So this tool is extremely
powerful. Here. Not only can you see your tasks sorted by project or list, context or tag, or priority? You're also able
to drag and drop those tasks straight
into the calendar. And in our case, the
goal is to bundle tasks with the same
contexts together. So we go to the Text tab. This way, you can spend
one evening doing email, one afternoon running errands, one morning on meal prep. And of course, you may have
a bunch of email tasks, e.g. that are named the same way but belonging to
different projects. For instance, well,
in that case, you can either name
your tasks more specifically or you
can be reminded of their parent projects
by simply clicking on them and you'll get all
the info you need there. If you are already using another calendar
service like Google, and you don't want to
fully get rid of it, you can import it into
the TikTok calendar to you will then see what space you have left for what tasks. I believe there's also
an option to sync your TikTok calendar with your Google Calendar
and vice versa. But I don't really recommend
it because in my experience, at least it's laggy and it
doesn't update instantly, so it just creates more room for confusion and sing issues. So I would only import my Google Calendar
to have it as a, as a background so to speak, not to actually edit
things in there. Something else that helps me for even more clarity is to
color code my tags so that you get a great visual
overview of how you split your time to
color-code your tags. You simply need to go back to the list view events you are taxed menu and to edit any
tag you have in there, you can then choose
a color for it. Once you've color-coded
audio tags, you can go back in
the calendar view, then go to View Options. And there you need to select
tag in the color section. And that's it. Now your calendar will call your tasks based on their tag. You can also choose to color-code
policed upper priority, which can also be useful.
6. 6. Going Further: We're nearing the
end of the course now and before leaving you with the most important earnings and the closing chapter
of this course, I wanted to cover a few
extra features of the tool. Tiktok is a very powerful
tool with a ton of options, and I don't use
anywhere near all of them because I like to
keep things simple. I believe that one of
the great troubles with technology these days is that it lets you improve so
many aspects of your life. It's easy to get lost in all the options and to think
you're making progress. Well really you're just
playing around with the tool and you're
tweaking things and features that don't
actually have an impact on your progress is this weird feeling of feeling productive because you're
using your productivity tool. But forgetting that at
the end of the day, you still have to
put in the work. You don't have to
just use the tool. So I usually keep my digital
tools to the bare minimum. But that being said, in the case of the
GTD framework, there definitely
are some extra tips that can help you
for more efficiency. That's what I wanted to cover in this quick part of the course. So let's get started. So we talked about
coloring tasks in the scheduling and getting things done part of the course. In the GTD framework, we use the coloring
option to color per tag and not two per project. And just to give you an idea, here's a calendar showing
tasks colored per tag. And here's the
exact same calendar showing tests
colored per project. You can see that in general, coloring based on
tags is clearer. Of course, in the framework
of this course is because we're batching
tasks per contexts. If you decided to batch
your tasks per project, then it would make more
sense to color your tasks per project and it would
look clear visually. But then you're not in
the GTD framework if you're following me smartly, so allow you to filter
your tasks based on criteria that is not
available by default. In TikTok. For instance,
you could ask tick, tick to create a list that only contains high priority tasks due this week and next week
and that are part of the organized vacation
list or projects. You can also create a smart list with tasks that don't
have a due date. This happens to me a lot
because if I'm just jotting down tasks into my inbox
or in any other lists. They don't come with a
due date by default. And so those are easy
to lose sight off because they don't they
won't show in the calendar. That's why I always have my list called all which is set to show all my tests that don't have a due date in all
lists and all tags. So in all projects
and in all contexts. And by the way, it's smart
lists are a great tool to use for your GTD matrix, the project of this course, because they can help you get a better overview
of your short-term, mid-term, and long-term goals. All you have to do is create a smart list for each timeline. I personally like to
define short-term as tasks that are
due this month or the next midterm
tasks are due within half a year and long-term
tasks or anything after that, basically, this becomes really powerful once you start using tick tick to track your
personal life goals and big projects as well, which I highly
encourage you to do. If you pair that with a
power of arranging tasks in the calendar and getting a long-term horizon
over your projects. This can be really
helpful as well. So that's where the
tool gets really complex and I tend to stay
away from those features. But just for the
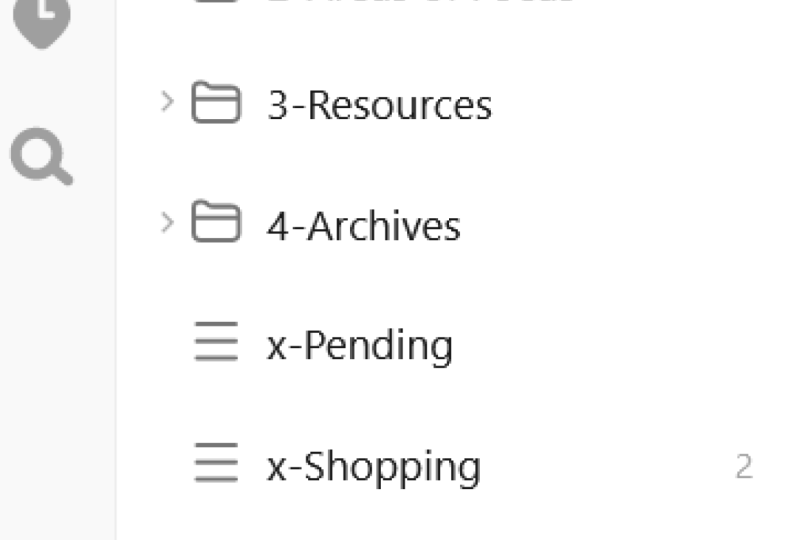
sake of sharing, know that you can create folders
for lists, aka projects. And this can be
useful if you have projects that somewhat
belong together. When you click on
the parent folder, all the tasks inside
this folder show in the main window
regardless of the list. And the same folder
structure principle can be applied for tags. For each tag you have the
option to define a parent tag. You can't have parents
inside if parents, so complexity is limited, but still it can
get pretty tricky. Plus To be honest, I could see a use to
bundle projects together, but I'm not sure about creating parent folders for contexts. Maybe my life is just
not complex enough. Yet. I do use subtasks because sometimes it's easier
than going back into tags and creating new separate
tasks, as we talked about. It all depends how specific
you were in the first place. To make it clearer, you can have your projects
structured like this, but also like this. And if you're not going with
a more structured option, then the subtasks
feature can help. It's also convenient
that when you've checked off all the tasks
inside a parent task, the parent task automatically
gets checked off. So that's nice. That's it for the quick extra
features I went to cover. And I will now see you in the
next section of the course. The last one. See you
there when you're ready.
7. 7. Recap & Outro: Hey, that's it. You made it. This is the last section
of the course and it's really just going to
be a very quick recap, nothing too long because there's something specific you
want to get back to. I would advise you to go back to the specific section of the
course and watch it again. Really, the very simple recap
I want to leave you with is this projects
are made of tasks, and that's the same both in the GTD approach and
in tick, tick, tick, tick lists are used
for projects and tags are used for what's called contexts in the GTD approach. And that's the most
important thing here is to remember to not get tangled up between
different terms. Project names should
ideally start with a verb because they
should call for action. And finally, custom
filters are really useful to create
custom views or to get an overview of
specific tasks and projects based on
complex criteria. Overall, I always recommend
to keep the usage of tools that can be very complex
to very simple standard. If you don't need subtasks,
folders, parent tags, and smart lists, then by
all means, don't use them. The simpler your
productivity framework, the more efficient you will be. It's much better to
use only one tool in a very simple way to
actually get things done, then to feel productive
using five different tools. But at the end of the day you're not getting anything done, you just playing around with those tools and the
different features. So keep it simple, stay consistent and efficient. And also remember that it's
completely normal if you don't nail down your
productivity framework after watching this course, it always takes a
bit of time to find your marks and build something you're comfortable with using. And once you've done that, don't forget to share
your GTD matrix in the projects and resources
section down below. And yeah, that's
about it really. Thank you very much for
watching this course. I hope you found it useful. If you did, please remember
to leave a little review, give me some feedback to
let me know how it can improve and if you want more
content from me and yeah, thanks again, Have a great
day and as I always say, enjoy the journey you're on.
 Joseph Mavericks, Blogposts + Videos