Transcripts
1. Introduction: Hello creative souls. I'm mani and I'm absolutely
thrilled to have you here for this inspiring journey of self discovery and creativity. In this class, nurturing
your creative practice, we're going to embark
on a quest to unearth your creative identity and unleash your artistic potential. In this class, I'll
show you my main secret of how I keep a consistent
sketchbook practice. This class is for beginners, but other levels
can benefit too. I understand that
sometimes life can be a whirlwind and it's easy to lose touch with
our creative selves. But I want you to know that you're not alone
in this journey. We're here together
as a community of creative explorers
to encourage and support one another.
So are you ready?
2. Class Project : I'm so excited you
decided to take the class for this
class project. You'll be making your
own book of references. I have multiple reference books like this and it's
been the biggest help. Whenever I get stuck, you can apply the
techniques, tips, and strategies you
learn in this class for your project and use this opportunity to experiment
and expand your skills. We'll be making a book similar
to this one right here, but please feel free
to get anything that you'd like to use as
your reference book. You can put anything that
you want in your book, take photos, document
techniques that you learned. Any subjects that
you like drawing. Basically, this
is a notebook for you, complete your project, and make any
necessary refinements based on what you learned
during your creative process. After you're done, create
a skillshare project in the class project gallery. Include images or
descriptions to showcase your project and the creative journey
you've undertaken. Engage with fellow students
by exploring their projects, leaving constructive feedback, and offering support
and encouragement. Share your thoughts
and insights in the class discussion
section as well. What did you learn
from this project? What challenges did you face and how did
you overcome them? Please feel free
to ask questions or seek advice from
your classmates. Next, we'll move on
to the materials.
3. Materials: There are a few materials
you'll need for this class, but please feel free to
use whatever you have. The most important thing
is having some good paper. Since we're building
a dictionary of sort, you would want to choose a paper that's
heavier in quality. I prefer watercolor paper mainly because I use
a lot of watercolor. But please feel free
to use what you have. You'll also need a ruler. You'll also need some thread. I'm going to be using
embroidery thread. Any strong thread would work. You'll also need a
needle, scissors. Alternatively, if you don't
want to sew your own book, you could also use
a hole puncher. So you'll need a whole
punch, some ring binders. The next items are your
personal preference of materials you use. I use mainly
watercolor ink wash, so I'm going to
use a paint brush, a micron pen, but any
waterproof ink pen works. I'll also be using a pencil. Like I mentioned, this is based on your personal preference. If you use acrylic or watercolor pencils
or any other medium, just substitute what you need. Additional items would be Al and a template ruler,
but they're not needed. Another optional
item is a candle. I find that lighting
this at the beginning of my practice helps set the mood. You could also incorporate
other activities, such as taking a walk or
turning on some music. Or even starting a meditative
practice only 10 minutes, 15 minutes right
before you start. Let's move on to
making up the book.
4. Making the Book: In this lesson, I'm
going to show you two ways you can
make your own book. For the first book,
we're going to sew it, plan out how many pages
you want your book to be. You also want to decide on
the size you want it to be. I use mine everywhere. I tend to make mines
a little bit smaller, so it'll be more portable. After you decide on
the page numbers, you can start folding them. What I typically do is
fold the paper in half, score it down the middle, and
then cut it in half again. Once I have a few of
them stacked together, I move on to the next step. You'll need your ruler for this. What you want to do is grab the first page and open it up. Lay it down flat.
Take your ruler and line it up in the middle. You want to pick two spots
where you could put a mark at. You could pick an inch away from the top and an inch
away from the bottom. What's important is you keep it consistent and continue to make the same marks on
the rest of the pages. Now that you have
your pages marked up, grab your needle and punch a hole through the mark
that you just made. Once you're done
with that, start laying the pages on
top of each other. The next thing you want to
do is thread your needle with the embroidery or whatever thread that
you have picked. I like embroidery thread because it requires less
stitches for me to do. I usually measure out four or five times
the size of the book, but this also depends on
how thick your thread is. If you're picking a thinner
thread, you might need more. Once you thread your needle, you might want to decide how aesthetic you want
your book to look. What I mean by that is, did you want the ends of the thread showing once
you tie off the knot? Or do you want to hide
it inside the book? If you want to hide
it inside the book, begin with putting your needle through the hole from
the middle of the book. This way when you tie it off, the knot is going to
be inside the book. Once you pull the
thread through, leave a little bit of a tail. And then put your needle
through the next hole. And repeat that one more time. Once you pull the needle
through the second hole, you want to tie a knot. I usually tie two or 3 knots
just to make it more secure. If you're tying your thread and it's going to
be on the outside, you can make it look
more aesthetic by leaving a tail and maybe
making it a tassel later on and you're
done. Pretty easy, huh? Now, if you don't want to sew, the second option
is also simple. You begin the same way as
we did with option one, but instead you cut it
again in two halves. Once you stack your pages, punch a hole in the same side in all the pages that
you just cut out. Now, stack them back together
and grab your binder clip, put them through the hole,
and then you're done. If you want more stability, you could add another
bind to clip. Now that we've
created our books, let's move on to the next
lesson and put it all together.
5. Putting It Together : So let's put it all together. Have you had these moments where there's inspiration
all around you? You look around,
there's so many colors and things you want to draw. You want to come back
to your sketch book and you want to start
scribbling away. But then when you get there nothing or have there been times where you
don't know what to draw, that's when the reference
book comes into play. I usually start my reference
book with the vision board. You start, take some time to reflect on your short
term and long term goals. What do you want to achieve in various aspects of your
journal or sketch book? Look through magazines, books, or online sources to find images and words that resonate
with your goals. Cut out anything that inspire you or represent
what you want. Start arranging the images
and visuals on your board. Be creative with the
placement and design. There's no right or wrong
way to organize it. The goal is to create a board
that resonates with you. Take special note of the colors and subjects you
gravitate towards. Next we'll talk about
composition and layout. Many of us struggle
with composition. When we first start off, I found it really
helpful to have a guide with me when I'm working
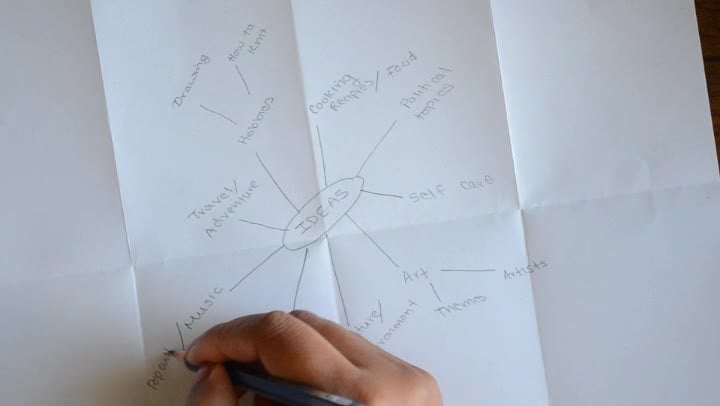
on my sketchbook. I make it a point to note
down which compositions that I like and practice
it in my sketchbook. Techniques are fundamental to the mastery of any
creative practice. In this section, I note down any painting drawing and
sketching techniques, this might be personalized towards whatever
you're working on. Please check out my
other classes for a more in depth look
at these techniques. One of my favorite
sections is colors. Colors play a significant role in various creative fields, from the visual arts to design, to fashion and marketing. Understanding color theory and its applications can greatly
enhance your creative work. I try to note down any
color palette that I like and keep a record of all
my favorite color swatches. Writing down the subjects
that you're interested in is a great way to
avoid creative block. This way you'll always
have a list to draw from. Another way I use
this handy tool is to make some layouts. This is great for color swatches and thumbnail drawings, 0 if you wont. Once you're
done with your book, decorate the front cover. I hope you can see the value of having something like
this in your tool kit.
6. Conclusion: Congratulations you guys. You've reached the end of our creative journey
together in this class. I hope you're as excited
and inspired as I am about the progress you've made and the creative possibilities
that lie ahead. I want to express my
heartfelt gratitude for joining me on
this adventure. Remember, your creative
practice is a lifelong journey, and every step you
take brings you closer to realizing your
creative potential. As you move forward, I invite you to reflect
on what you've learned and how you can apply it to your
creative endeavors. And please don't forget to share your classroom project
with me and the class. Once again, thank you for being a part of this
creative journey. I can't wait to the incredible
work you'll create, the ideas you'll bring to life, and the impact you'll make
through your journey. See you in the next class.
 Imani S., Artist & Designer, Life Draft Ink