Transcripts
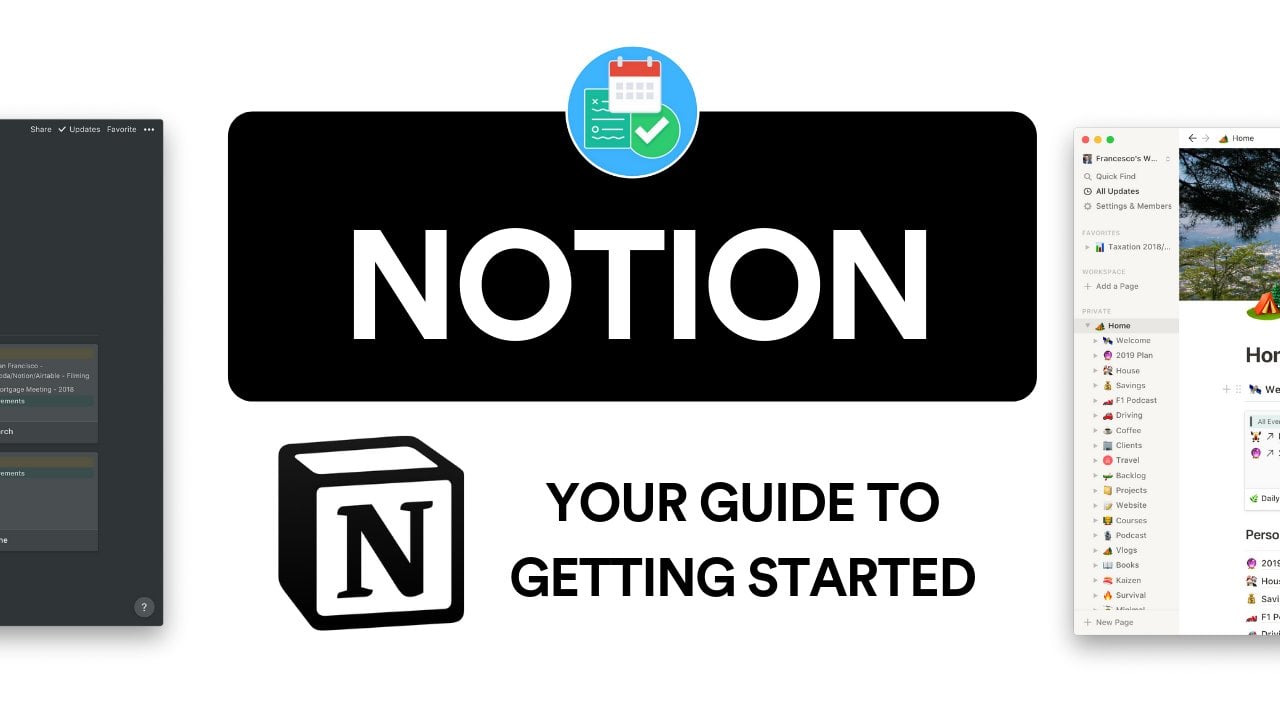
1. Introduction: In this Skillshare class, I'm going to show
you how you can get started with using Notion. Notion is a fantastic free
piece of software that lets you deep dive into time
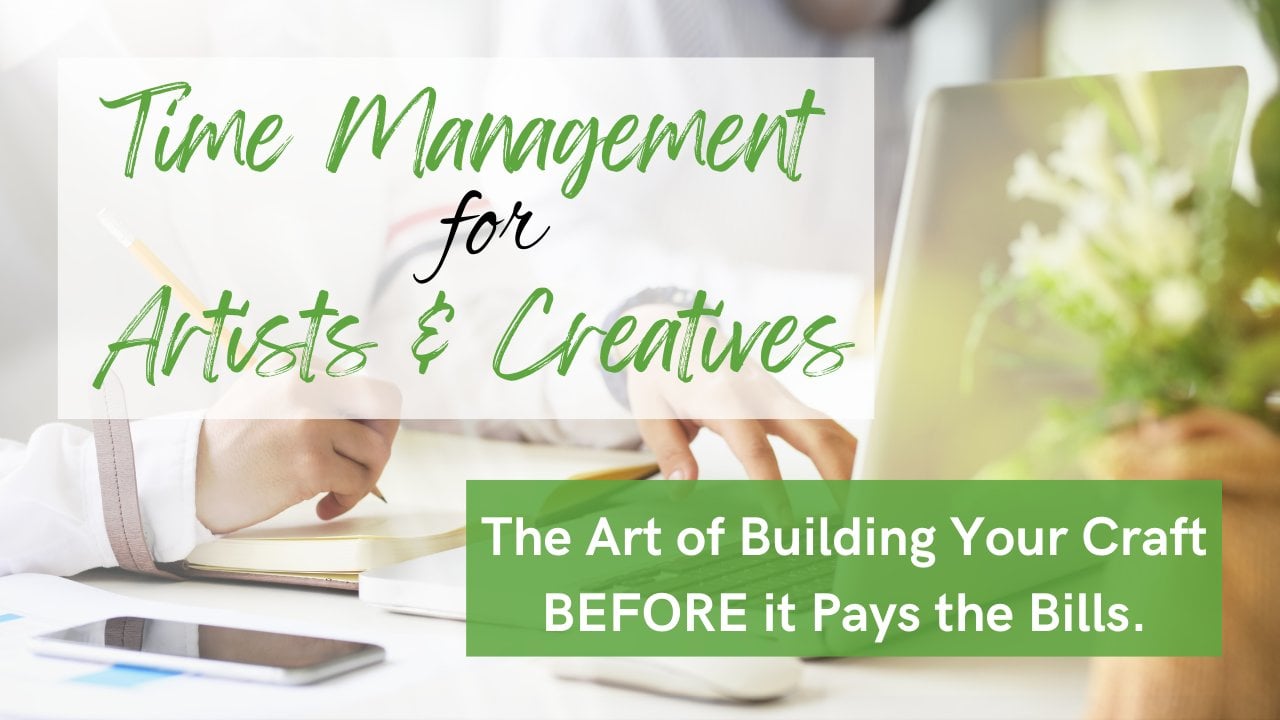
management and productivity. I want to specifically focus on a business application of this program using
examples that will be very applicable
for creatives and freelancers because I am a full-time content
creator and YouTuber, I do create a lot of
different videos. Inertia works
perfectly for tracking the video production process and showing that
projects are delivered on time and do not become delay. And throughout this course,
I will take you through the exact step-by-step
process I have taken to build out my
exact notion, workflow. If you want to become
more productive and organized within ether, your personal life or business. Joining me here for
this Skillshare class.
2. Basic Overview: First, let's begin
with a basic overview of notion exploring some of the different panels and
features that are present to help you understand how you could potentially use this, I went ahead and created a
brand new notion accounts. So we have the exact same setup. And throughout this course
I will take you through the process of how
I'm going to build out my Notion account for video production and content creation at
this current time, there are four
different account types that you can sign up for. And within this class
I'm going to be using the free personal plan. This can do pretty much
everything you need as an individual content
creator and you can also share it with up to five
guests if you have people collaborating with you
in particular videos, Let's go ahead and begin with a basic overview and
understand how Notion works with the default template for everyone with a
brand new account, you will have the
following pages. As we explore each
individual page, it showcases the variety of different blocks that you
can create to help speed up your productivity
and make you more efficient when it comes
to organizing things. So for example, with
the quick note page, this will be very familiar to anyone that's used Apple notes. And you can go ahead and create different text blocks
and sections along with to-do lists
that you can then take off once you
have completed. For the more in this
demonstration is the ability to embed links. And this can be
especially useful for researching and
planning a project. For example, if you are a YouTuber and you're
writing a script, you could embed links
for reference points for certain resources that
you're using from blogs. And you're maybe referencing
certain specifications and bank benchmarks. This is a nice way to organize that for quick and easy access. The next tab within
this template is called personal home, which is more oriented around your personal goals
within your life. Inside of here, there
is an overview of maybe some of your yearly
goals as well as some of your day to day
to-do list things that you want to achieve
within this particular week. Now if we use the
drop-down menu in the top-left corner over here, this will expand to
various sub pages. And then within each
of these subpages, these correspond to the actions within the list that
are located over here. So if we go into the movie list, you will see we have a
more detailed overview of the ones that we
want to actually watch. And in this particular
view we have two different columns want
to watch and watched. And this is a really cool
feature on notion that enabled you to just drag and drop
things between different lists. So you've gone ahead and
completed this movie. You can then put it
into your watch list, then go ahead and add
further movies that you may want to consume in this
movie watching example, you could even go ahead
and create a third column. So we'll duplicate
the Watched column and then we'll
drag it over here. We could call this watch again. The cause may be in this
particular example, you loved watching the
movie so much that you would go ahead and do it again. Continuing on with some of the other personal list
found within this template, you have a Recipes column for
trying out healthy eating. And inside of here you can
add names and also links to particular posts where you
found the recipes online. And in addition, this
particular template showcases some of the
tagging features. So here we have a
recipe and it's being tagged as a dinner recipe. But you could go ahead and do some predetermined tags here, and you could change it
out through a desert, a dinner or a nice, easy quick meal like
this, for example, it could be one of those quick and easy
meals that you can make within ten or 15 minutes. Furthermore, you can go
ahead and add your own tags. But interestingly, you can
also filter various tags which would enable you to specifically look at
your dinner recipes, your easy recipes,
or your desserts. This is a very useful
feature for when your lips become quite
expensive in the future. And you've got a lot
of different columns happening with a lot of different information progressing
onto the yearly goals. This is just a
nice simple bullet point list that you can use as nice trackers and
constantly keep them updated so you can track your
progress across the year. If you're a YouTuber,
for example, how many videos you've uploaded, how many subscribers
you've gained. So he could go, I want to get
a 10 thousand subscribers. And then throughout the year, you go ahead and update it so you can maybe go right
right now we've got 2500 out of 10 thousand
and then you can go back and just keep updating
it and go right now we've got 6 thousand and so on. Finally, the travel plans is kind of similar
to the yearly goals, but it's more in a spreadsheet
format and this sort of showcase more of the time management features
within Notion. So you have your
name of the trip. This could, for
example, be the name of your project like video, then you have your
status of whether it's booked or whether it's
an idea or in planning. And then you have the date of when you're going to be
flying and returning. And then the places
you're going to visit. This would be very similar. If you were a video
created here, you would have the
name of the project. So video one, the
status of whether it's being filmed, edited, etc. The start and end
date of the project, the places it's being
filmed at IIE in your home studio or outside
in his particular city. And then the people
involved with that, if you need some
videographers or editors to help you
with that, obviously, as previously mentioned,
we will create our own more
applicable versions of these examples later
on in the course. The next page I'd like to explore with you
is the task list. This is very similar to the travel plans that we
just briefly took a look at, but in a much more
simpler format. In this example, it's
taking a dog for a walk, but we could go ahead
and add our own. We'll add New and we'll say
YouTube video for Thursday. Then with this we can drag it between the different columns. Right now it's in doing, but it might be on
our to-do list. We haven't even sort of
comprehensive beginning it yet. And then it might be in the
doing process of the element. And then you might go ahead
and add an extra column here. So we'll click the plus button and we'll call this editing. And we'll just drag this over to this position and then this
video might be filmed. So you're going ahead and
now you're editing it. And then finally it's finished and ready to add and stay night. It's ready for
Thursday, it's done. And it is uploaded and ready to be published
if scheduled it. So that's a nice way
of tracking things. It's very useful
if you have a lot of projects on the
go at the same time, I personally run in multiple different
YouTube channels and make it lots of different
online courses. So this allows me to
track things along the way in quite a
visual easy way. Next up we have a journal. I personally don't use
this and I will not be really demonstrating this
later on in the course. But if you'd like to
track what you've done in a day within a
couple of paragraphs. I know some people really enjoy the process of finding quite useful for self-development
and also looking back on, see where they came
from in years to come. This is a nice, fresh
modern way of doing that. I know some people
personally that are much, much older than me that do believe in this generally method and obviously back
in the day they didn't have notion to do it. So they have multiple
books usually like offer that 2025
years in business where they've documented
every single day in a couple of paragraphs and
summarize what has happened. Whereas this is
obviously a much more practical way for the new, modern sort of paperless generation to just
document it all down without needing
Thirty-five books for their entire career. Obviously, using
Notion for all of your daily journaling
is going to be much easier in the long
run compared to that more traditional
method with pen and paper. Because if you need to go
back and reference something, you can use all the filtering
filters and search for things and it's much faster if you need to reference
something in particular compared
to going through five different books across five years on the
topic of books. Finally, in this
example, we have got a reading list which is sort of an adaptation of the movie list that
we explored earlier. And there's just some simple textbooks
that are explaining how we can get the most out
of this page in particular. But the way this content is organized is very interesting. So down in the media category, you can see we have this
drop-down menu and this lets us choose what type of reading
list we need to consume. So we have our articles. So reading news articles from your Apple News
or wherever it may be, then you have your podcast list. Inside of this media format, there'd be all of the
podcasts you like to listen to on Spotify or, or wherever you consume those. In addition, you then
have your essay resources if you're maybe a student. So inside of here you
would have all of the different books and webpages you've read
for your dissertation. And then furthermore, you
have your film plus TV. So again, any movies or movie reviews that you've saved that you want
to go and read. And whether it's worth
watching something on there. And then finally skipping over some of these other
ones we have all which will just
enable you to view all of them in more of
a spreadsheet format. And inside of this
view in particular, you can see all of your
categories and types, the name of the book
or the article, or whatever the
piece of content is, and then also its state
is for you personally, whether you've read it,
you've started reading it, or you are ready to start. And then finally you can
go ahead and score it. This could be particularly useful for the academic and SA, resource point of
view for a student, you could write how
good that resource was for your essay and whether
it's worth adding or not. So this wasn't too great. You maybe wouldn't put this in your essay because you
want to get a good mark, whereas these other
ones have been rated as great, solid sources. And then finally as well, another one that's
very useful for students would be
referencing your authors, the publishers forming you have to do that
page at the end of your essay that
references all of your sources and where
you got them from. So that was a basic
overview of some of the features that you can
find inside of Notion. We're now going to progress ahead and create
our own templates.
3. Customising Templates: Next we are going to
begin customizing and creating our
own notion profile. Something useful to be aware of, to try out a few different
formats for what you like with the
notion He's exploring the templates gallery
inside of here you can find a huge range of templates
covering different categories. So for students and marketing, inside of the marketing side, you've got obviously
media list, content, calendar, mood boards for
creating content plan ideas. And then there's more
business-oriented a presets as well such as product management and you're releasing a product, your research development,
and also sales, if that's your particular
area of expertise. Exploring these can be
quite a useful way to see how different niches and
businesses are utilizing notion. And you can maybe
format a bit of a hybrid workflow
between all of those. So for example, if we preview
the marketing media list, you will see how a
marketing workflow might occur with how you would track the progression of a project with the
name of the project, who's involved with it,
whether it's released, etc. If we then compare a very similar workflow but to something like
product development, like a roadmap for example, you can see a very
similar type of workflow with a totally
different approach. Both of the workflows I just showed you are tracking
the progress of a product being
created IAEA piece of marketing content or an actual physical product in this particular example
with this roadmap. But you can see the totally different approach to tracking the steps involved in releasing
that piece of content. And depending on how you
prefer to digest information, your preferences may differ to how I will go ahead
and set this up. Now, I'm not going to use any of these templates
because that will be sort of cheating for the
whole purpose of this course. Instead, we're going to
use the default template that everyone will have
access to straight away. The first page I
want to focus on in customize is the task list. So I'm gonna go ahead and
duplicate this page by using the shortcut command D or by using the three
dotted line over here, you can just go ahead and choose Duplicate within
the drop-down menu. Now if duplicate this page, I'm now going to
rename it by using the shortcut Command Shift R, which will then open up
this dialog box and we will call this content schedule. We can then also go ahead
and customize this emoji, which is this little
tick icon here, to something that may be
a bit more appropriate. And for me that
there'll be maybe a camera for this particular
page while we set it up, actually want to go ahead
and customize the view of the content within
this database. And we'll do this by
going to add a view. Right now it's set to table. I'm gonna go ahead and
change this to list. And I'll click Create. And then now from the drop-down menu, we can choose
between board view. We can also choose
between lists, list view. Now that we're
inside of list view, we can click into each
individual project and we have a nice overview of
what that entails, which is particularly
useful for when you want a deep dive into
a project that you're about to start and
you want an overview of all of the things
that you need to make. So let's go ahead
and change his dog walking example to something
a bit more useful. At this current time, I run two different YouTube
channels, Ben Roland's, which is more oriented
around tech reviews, and then also Ben
Rollins music which is oriented around music pedal
products and reviews. So I'm going to create a task oriented around
that music channel, which is a line six, paychecks stamp XL,
getting started. So this is just gonna be a video that's going to take
someone through the Getting Started settings of this
guitar pedal so they can understand how to set it up
and customize their settings. I will then go ahead and
change the emoji from a dog to be something a bit more
relevant like a guitar. Then I know it is music oriented the contents from this point I can now add some texts
that's relevant, a bit of a description of what I need to do now
you could just go ahead and write in your film a YouTube video or
something like that, and then go ahead and do a quick bullet point list or
whatever in a manual way. But there's a much
quicker way to do this, which is by doing
a slash command. So we're going to click this
button here on my keyboard, which is a forward slash. And this will let us open
up the Command Panel where we can then choose the type
of blocks we want to add, which is going to speed
things up considerably quicker than if we were
to write it out manually, like we were just about to hear, I want to add it to do list. This is the quickest way
for me to organize this. So this might be
film introduction. Then I'll just click the Enter
to add another to-do list. This might be performance video. We might need to do
performance section so enough some of
the guitar tones. And next we might have
something like update firmware. Make sure we've got
the newest version of the software that we're
about to teach people that's on this petal and then
whatever else and you're editing and uploading, etc. That's just a basic
to-do list that might entail what I need to do for
this Getting Started gut, it can now go ahead and
just close this out. And it will be here now
within my own list. And I want to go ahead
and add a different view. This will be a basic tableView. So now we have a completely
different overview of how the state
is being laid out. We can see we've got this
YouTube video to create. We then have the date created when we created this
actual command. You could go ahead and
delete this column because it may not be relevant. It just adds a bit
of clutter there. And what I like about this
view in particular is how easy it is to change the status
of a particular project. You just click into here and you can choose from a variety of different tags to define the progress that's being made in the progress
of doing it. We're now going ahead and we'll edit it because we may
be finished filming. Then finally, you can
just go ahead and click Done once it's uploaded. So actually let me
go ahead and show you how you can
customize some of these status options
to be a bit more relevant to your
particular video workflow. So to go ahead and
create your own filters, you just need to click into
one of the status boxes. And then you just type in
what you want to call it. So we might say color grading. This might be an extra step you take within your
video production. And then if you go ahead
and just click Enter, it will be added to
your current status. So now we have a more
tags we can choose from. So we have to-do doing, Done editing and
also color grading. So once you've
finished the editing, you could then go
ahead and go right when our color grading this. And then finally it's
done and uploaded. It depends how many
steps that are in your professional
workflow and how complex the content
is you're making.
4. Building Out a Page: So let's go ahead and continue
building out this page. I'm going to switch back to my list view and I'm
going to add a new task. Let's say this is a
Skillshare class. I need to make this
Skillshare classes how to start a YouTube channel. Then I could go
ahead and add my, my tasks and my to-do list
within this option here. But for now we'll just exit
this out to speed things up now and I'll go ahead and
switch back to my TableView. And inside of the table view, I want to show you
how you can add extra columns to build
out a more comprehensive, more descriptive workflow
of tracking a project. So we're going to click
the plus icon here and then you can change
the property types. So by default, it will
add a text column. But if you go down to
the property type, there's a range of
different presets are types of columns
that can be added. So a few that are
an example here are checkboxes for ticking off
the status of a project. There's an e-mail
addresses if you need to add a particular reference email inside of their
phone numbers as well for contacting
people involved. And then furthermore, there are dates like a start
and end date for the project and
the people within your team that are
actually involved in this. If you've maybe got one of
those more complex plans and you're sharing it
with other people. This is a great way to track people that are part
of that project. Now the one I want to add in
particular is a checkbox. I want to go back and
also add a text one. Then I'm going to
add a third column, which will be another
status column. We'll find this one over
here inside of the select. And then we can reorganize these by just clicking
and dragging. We'll put this one
right at the end and then we'll have our
text bond over here. We can then rename these columns by clicking into
them and then just typing what it is that this is going to be called
the done column. This will be platform. Then this will just
be a description. Then now we can go
ahead and we have a few different ways to expand upon the
information that's needed. Now this is where it's
gonna get interesting. We now have our platform. So if a piece of content
is made for Instagram, skillshare, YouTube,
Facebook, whatever it is, you can then organize these
into various filters so you know where the piece of content is going once it is completed. For example, this
Getting Started guide is going on YouTube, so we can add that
as a category. Now we can go one step further and change the
color of this tag. Obviously, YouTube is heavily
associated with being red and blue is a little bit
confusing at a quick glance. So if you just click into here
and click the three icons, we can then go ahead and change
the color of our filter. And we'll go ahead
and click red links better with the actual platform. And then down here with this, how to start a YouTube channel. This was obviously going
to be a Skillshare class, so we'll add
Skillshare onto here. And luckily, it's already
been added as blue, and that's the color
of Skillshare. So that's a nice, easy
way to organize things. And now finally, once everything is finished
with the project, we have our final
column which is done, which just lets you
quickly a glance, see what is finished
and what isn't. I know we have our status
bar for this as well, but this is just a
nice way that's a bit cleaner right at the end of all of the columns
to just quickly scroll down the different rows, especially when you
have a lot going on. One of my favorite things
about Notion is how it links to various database and
spreadsheets together. And when you change your views, it will seamlessly transition all of that information
simultaneously. For example, taking
one final look at our content schedule. If we go back and now change our view to our original
view that we began with, which was the board view. You can see now how all of our information is displayed in a completely
different format, but it's still related translates back to what
we had set in all of these previous views here you
can see all of the statuses remain the same regardless of which view we
are currently in. Here you can see how these different categories
we have created, have all combined together to
create a content schedule. We've got a tech YouTube video that I need to
create the January, then we have a YouTube video that I need to
create for Thursday, but that's in the
doing category, and we can drag this over
to the editing category. Likewise, we have our how to start a YouTube channel already
in the editing process. Now that might be color grading. And then finally we
have our dunk category when things are
finally published. And then we can click into these and we could take these off because there have
been completed and it will instantly update. You can see in the
top-right corner there how it's instantly updating without any delay in that video is
completely finished.
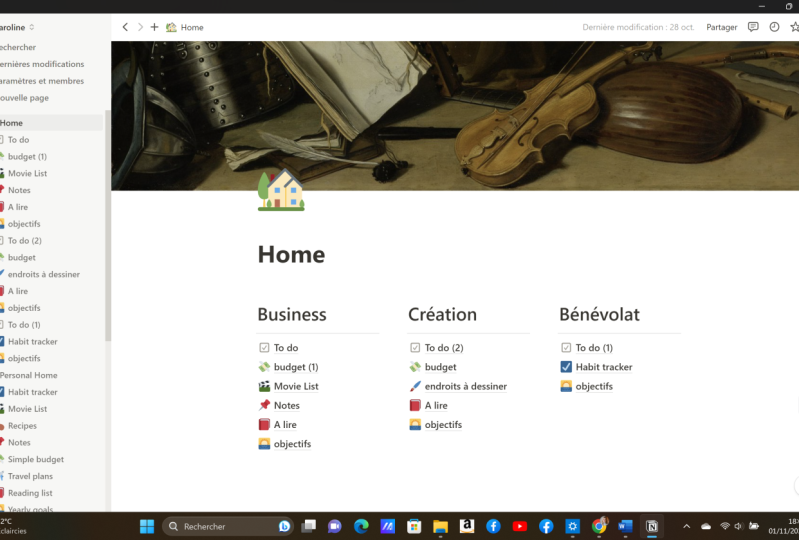
5. Creating a Home Dashboard: Now let's switch our focus to
creating a home dashboard. This is a place where
you can instantly write down your ideas, access bullet point lists, and also track various
elements of your business. So for this, we are
going to duplicate the personal home dashboard, which was from the template. And we're going to take this one and completely customize it. As you can see, I've already
went ahead and rename these two categories just
by clicking into them, calling one side creative
and the other side business, you could go ahead and add
more categories if you have various elements of
your video productions that you want to sort of track, but this is going to be nice and simple The me to
provide a few examples. First, let's go ahead and
clean up this home dashboard. We don't need this
explanation of what the home dashboard is.
We already know that. And I'm gonna go
ahead and customize this cover image is by
clicking Change cover. Then inside of here you
can upload one user and Unsplash image
that's sort of like database of images online. There's some stuff
from nasa here, but we'll just keep it
simple with a red gradients. Now the first page
I want to customize with you is the
goals and targets. Let's click into this. Now I've gone ahead and
rename this from what was previously
called yearly goals. And we're going to elaborate
upon this and create various sections for the goals that may exist within your life. Now we can go ahead and
customize this image over here. I'm gonna change it to
a soccer ball because it gets like goals,
goals type thing. Not really relevant, but you can go ahead
and change that. You can also change the
cover color image as well. But more importantly,
we can focus on customizing the text blocks
within this section. So I've renamed this to
be goals and targets. But for me personally, I have multiple different
YouTube channels and elements within my business
that I'm constantly tracking. So I can't just make one
definitive list for goals and targets because it would just get a little bit
of a complicated. What we need to do is create different subcategories
of goals and targets. I'm going to do this by adding a text block here, so
we'll click slash. And then inside of here
we can choose through a variety of different blocks,
different heading sizes. I'm going to choose a
small section heading, and I'll call this tech channel. So this might be some
targets for my tech channel, like 100,800 thousand
subscribers, a million views per month. And then we might have
the upload video, upload a 156 videos, which would be three
a week and so on. Anything else you
may want to set inside of here if
financial goals, etc. But we'll just
keep it simple and plain like that right now. Next we're gonna go
ahead and create another section just by clicking the Enter key and then forward slash will add another
small heading. And this time we'll call
this music channel. Then we'll click
Enter forward slash, and we will add a
bullet point list. Now we can add some goals and targets for this element
of your business. So whatever this may be for you. So for my music YouTube channel, we might go right it to 25 thousand subscribers because it's a slightly small
audience than Tech. And I want to maybe get it up to 250 thousand
views a month from a 100 thousand views per
month that it's currently at. For reference, tech is already at 500 thousand views a month, so that 1 million views
per month increase is hopefully achievable. That's a quick introduction
into how you can customize and start creating
quite expensive pages. Now going to move on and
create something even cooler. If you head back to
your home dashboard. This time we're going to create a brand new page called ideas. And the way you add
a page it just by clicking this plus arrow here. It will then add a page below. And you want to click Page. Then inside of here you can go ahead and name what your
page is going to be. But I've already went and done that with this ideas tab here, I've named the title and
I've added a cover image. We're now going to
create three columns below these by just
doing forward slash. And then I'm going to
choose medium heading. Now we're going to draw
some influence from the movie list that we
previously customized. At the beginning of this course, we added this watch again section where we're going
to break our content down, our ideas down
into bucket lists. For me, bucket list within
my video production would be tech and music and then
also cause creation. So inside of here
we're going to create a content bucket for tech. Now we'll go ahead and add another content bucket with
a medium-sized heading, and we'll call this one music. Then we'll call the
final one Skillshare. Because these, where
am I write some ideas down for particular Skillshare courses that I'm
going to create. Next, we're going to grab
this little drag icon here and we'll reorganize them so the next to one another. Then below this we're going
to click this Add arrow, and we're gonna scroll down
and add a toggle list. And we'll duplicate
this three times. And then we'll click and
drag it into position. Then now each category or content bucket has
its own toggle list. And then inside of
this toggle list, you can expand upon your ideas. So the idea of a tech
might be an iPhone review. Then I can click Enter
to add another toggle. And this might be
an iPad review, not the most creative
ideas I've ever had, but this is just for
example purposes. And then we can
click this little drop-down arrow
and it will enable us to add further things
within our comment list. So if we click forward slash, we could add some bullet points. And then within these
bullet points it might be unboxing video, a battery test. And then we could come up with
the different elements of this idea that we have
camera test, etc. So all the different
elements then you could expand upon this with paragraphs of how
elaborate your ID and a b. And then for the music it
might be performance video. And then same for Skillshare. I could go ahead and
create Notion course. Then inside of the
drop-down menu for this, we could go ahead and
maybe add a to-do list. So this might be filming
the introduction and then main pot
examples and outro. This would just give me maybe
a rough core structure for this particular Skillshare
course that I could then go and build out in
a particular page. Having an ideas page like this
split into content buckets really simplifies
that first step of coming up with a great idea. You can just dive
straight in to that page at quick blocks over that be bullet point lists to-do list. And so much more and really
expand and elaborate upon that initial idea of when that creativity really hits you. And I guess that's probably
the most important part when it comes to
creative tasks is reducing the amount
of friction it takes to conceptualize them
and make them happen.
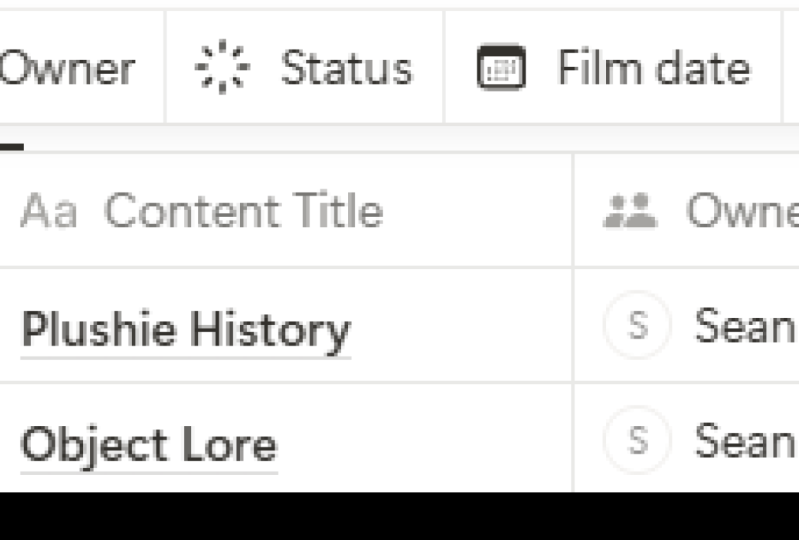
6. My Template for YouTube Videos: Next I'm going to
show you how you can create a video project database, which is basically an
overview of all of the content that you are
creating for different clients. For this particular example, we are going to take what was
previously the recipes tag and on our duplicate a page, we are going to rename this to be hugely videos in my example. But you could go ahead and
create client Videos page as sponsorships page or
which ever clients you have if you have certain clients that
you've worked with, unlike retainer on it
on a repeat basis, you would have individual
pages for each of those clients so you could
track their own databases. For this particular example, we're gonna dive into
the YouTube videos page. And I've gone ahead and began customizing what was
previously the Recipes page. We've got our new banner, we've renamed it and also
changed the icon. Here. We're going to add a
few different categories. We've renamed this
to be video title. We've still going to
have the same tags, but we're obviously
going to change them from dinner and dessert. So to do that, we'll
go ahead and click in and just delete them all. Or alternatively, you
could just click in, click on the icon
here and rename it. So some of these tags
are gonna be uploaded. Will put something like
edited inside of here, and we'll just call this status. In addition, we'll go
ahead and duplicate this. We'll rename this
to be category, or you could call it
something like niche than inside of here we will
go ahead and rename these to be music and tech. Which of the two
different categories of my YouTube channels, I now want to add a
few other columns. Won't being a published date. We'll call this published date. Next might be sponsor. Then finally, video number. Then we'll just drag these
over to the various position. So we're going to drag
our sponsorship 12 here, and then we've got
our published date. Then from this point
we haven't overview of tracking our publishing
of YouTube videos. So here we would have
our video number. This might follow a particular
structure like video 12022 or whatever the year is that you're creating it for. And then this will
be video to 2022. So you'd have a
particular structure to be able to track how
many videos you had. Hundreds and hundreds of videos. By the end of it, you might have particular video sponsor that
might work with this class. So let's say this video is
sponsored by Skillshare. You would add that
sponsorship there. In addition, you could also
use this as the categories, columns like this
if you wanted to, if you worked with
similar sponsorships on a regular basis, we then got the status here, which is whether it's
uploaded, edited, etc. So we could go right,
this is edited. That's our status. Then you got your categories, and then finally folder link. Once the video is published, this is where you would
go ahead and add that just for reference purposes
in case in the past, you need to go back and
check on something. You can just add the link in here once you
uploaded the video, and then it will take
you straight through to that landing page of that
video on your YouTube channel. It's just a nice
organization thinking too, just to check when
things are done, then you would go ahead and add your published date for
this particular video. Let's say we uploaded it
on the 15th of December. You would add that there. So again, you know that it went out on a particular
date and you could filter it in the past if you need to reference
it for whatever reason.
7. Video Project Data Base for Freelance Work: If we now create a more
relevant example for anyone that may be a
freelance video producer. I've just duplicated
the exact same tab as our YouTube video that I just took you through
the design process of. But this time inside
of the freelance tab, a more useful column
may be payment. For example, instead of
having a video sponsor, which is more of a
YouTube related thing, you could have a completely
different property type, which might be number. And then you would
rename this to be price. This might be how
much you charge someone for a particular video. And then inside of
the categories, you would change these out to
be something more relevant, which might be client one, client to whatever
they may be cold, like local estate agents,
small business, etc. You may still
include the link if you've uploaded it to
Vimeo or things like that. And then the published
date, you would obviously rename this to be completed by it might be the completed date
or completion date. You may also want to add an
additional status category, which might be used for showcasing whether
it's being paid, so paid or whatever else you have agreed like monthly
payment, installments, etc. Then in the price
category you can go, you could say how much you
charge for this video. You may be charged for
thousand dollars for this wedding video or whenever
it was that you created. And then it's inside
of the setup. Now you may have so
in that example that the price column did not
register the dollar sign. And that's because
you have to go ahead and change the formatting. So if we go to the
price category here, just click into it and scroll
down to this option here, you can change the
format numbers. For this example,
we're going to go ahead and choose US dollars. So now everything inside
of this category will have the according dollar
sign accounted for it. So this next project
might have been $8,756. We click Done, it'll go
ahead and automatically add the currency that's
being assigned to that. So hopefully that was a pretty
simple example to show how versatile it is creating
these different pages for both your freelance videos or your YouTube videos
and how you can add the different
categories that are appropriate to the things
that you need to track.
8. Bookings and Calendar: Next I want to show
you how we can customize this travel
plan page to help you organize your schedule for traveling between
different shoot locations. First, let's go ahead and clean up some of our
dashboard so we'll get rid of some of the excess pages that we no longer require, such as the movie list and
things of that nature. And we'll go ahead
and clean up some of these default pages now that we're beginning to
create some of our own. And the way you just do that is obviously by heading over, clicking the little icon, the three dotted line, and you can just
simply click Delete. Now inside of the travel
plans page, inside of here, you have a pretty
default layout that will be relevant straightaway, we can go ahead and
change the color, cover image, you
something on Unsplash. We'll go ahead and
choose a plane. The travel plans page
could be particularly useful if you are a
freelance videographer and you go between log
different shoot locations and you need to organize that so you don't show up late and miss particular bookings. For this example, I'm going
to be a wedding photographer. So we're going to our category here and we're
going to be filming a wedding video for
Mr. and Mrs. Smith. First thing we want
to do is we're going to allocate the date for this particular wedding
right now it's set to 2018. So instead of scrolling through
month-by-month like this, we'll just type in March 21st, 2022 as the start date. And then obviously
the end date would be midnight on that same day. So we might just put 2020, March 22nd because
obviously it might be a full day that we are working out and
then for the end date, we're not going to set one here, so we'll just uncheck
this, the RIA. Something pretty cool you can also do is set up reminders. So you might get reminded 48 hours before
or a week before, whenever you need, you can set all of these
different things up, which is pretty useful. You can then also go ahead and allocate a particular time. So they included time you may
be coming at, I don't know, something like 930 AM to get set up in your film
some of the morning stuff. You can add that in. Then we can exit out. Next, you would go ahead
and choose your places. So inside of here, this is
just a simple text document. And you could just type in
wedding venue in the lake. It might be the Lake District
or something in the UK. So in the legs and you
would maybe add a link here for the hotel or
wherever it is at. Next, you can go ahead
and allocate the people. It's false. So in this example,
it's Sasha and Bill Smith or whoever it may be. You can obviously
change this to who ever the persons are
that have booked you. Next, you might go ahead
and add an extra column here depending on what
types of jobs you do. And this might be a
checkbox type of column, and this might be
something like overnight. A few maybe traveled to do
the wedding videography. It might be an overnight shoot. So here you can go ahead and check this off and
then, you know, obviously you're
going to be traveling an excessive amount of time
and stopping in a hotel, then this would
obviously translate to statuses like this. Whether you need
to book a hotel, whether it's included
with the agreed price, whether they've
paid their deposit, you could obviously
change here and put something like deposit instead. So if someone's
added the deposit, a range of different things. This is how you could
leverage the travel plan page to keep yourself organized. In addition, this could also be used for a business
professional. He needs to track their
various meetings and get reminders and know where
and when they're going. This is a much nicer layout, I think then often
using a calendar on the topic of
using the calendar, you can go ahead and
change the view within this particular page to
something like Calendar, and then you could see exactly
where your bookings are. So if we fast-forward
it through to match, you could see we have a
wedding book at 930 AM. This is a nice way
where it just linked straight up to a
calendar as well. But you get the added
advantages of having the database spreadsheet type
view and many other ways. I've taken a look at
the same information.
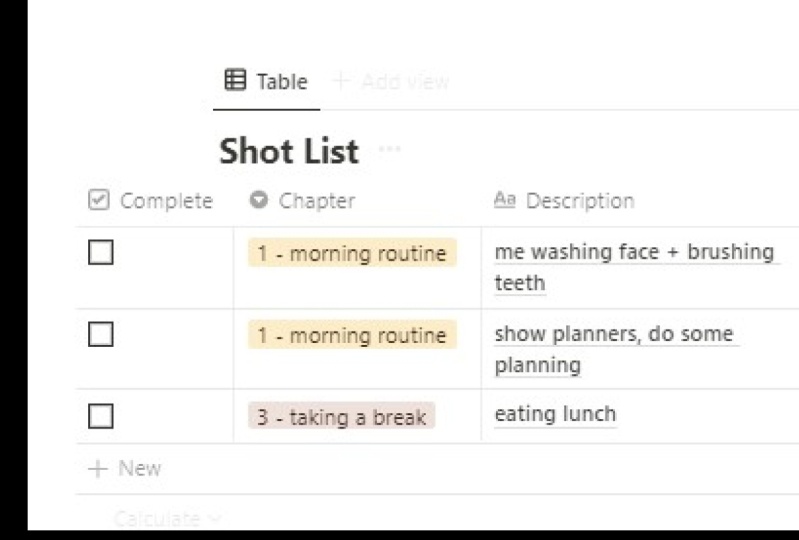
9. How to Create a Shot List: Next I want to show
you how you can create a shortlist database. This is a great way to organize the types of shots that
you need to capture when you arrive on location
to actually film the videos. So to do this, we're
going to create a brand new blank page and
we'll call this shortlist, and then we'll click
forward slash. And instead of using
a basic block, we'll scroll down
right to the bottom. And we will go ahead and choose one of these
database blocks. These are basically
presets of all of the databases that we've
explored throughout this class. And the one I want to in
particular is a table database. And it will boot up something
like this and we'll call this video Example one. Then inside of this
database you can go ahead and customize
the various columns. Now I've gone ahead
and create an example of how this would look
when it is completed. In the left-hand corner,
you have your chapters, which is the various
parts of the video. And for this, I've used a
YouTube video that I recently created and I've used the
chapters from that video, which is basically the various
parts, the introduction, the unboxing, the main review, gameplay, the outro, etc. It's the various
elements of the video broken down into
their very sections. So I've gone ahead
and added some of these into the
shortlist to show you how you would create chapters for the property
type for this column, it is just your
basic select one. And we've gone ahead and
added different tax. You've got introduction Xbox unboxing the controller review. Xbox Game Pass. Is it worth it? Gag, Xbox Game play, a bit of gameplay of the
console and then an outro. The next column onto
this is the description, a description of what is this particular shot going to entail when you are
capturing this, when you imagine
it in your head, how is that finished
thing going to look like? This is great for
the creative process because it means you can think beforehand how the
final video is going to look with all of
its B-roll and everything, and you can get that down in
this description section. Then when you do finally
arrive on shoot, you've kind of got
a solid idea of how the shot is going
to look when you actually get the camera out. For example, for the introduction
of the hugely video, we're going to kick it off
with a B-roll sequence, the Xbox unboxing and setup. This will be a
talking head section, just talking directly to the
camera in combination move maybe an overhead shot of me taking the product
out of the box. Then for the Xbox
controller review, we maybe have some
fun B-roll of me having a good time
using the controller, having a bit of fun, because
that's what's associated with playing games and you use
the controller to do that. Then finally here we have Xbox Game Pass
Review and whether that subscription
service is worth it. So these be Romain tail
browsing the library, browsing the store,
showing what's available for your money,
what you're buying. Then finally, to
close out the video, we've got some gameplay
from the console along with a new feature that lets you switch between
games quite quick. So for this gameplay segment, we may use halo and
Forza because they are two games that are exclusive
to the Xbox platform. So they're the gameplay clips
that we may as well show. Then finally for the outro, we might just finish the video off with some talking heads. So we've now taken
the time to create a shortlist and conceptualized
the entire video from the beginning
to the end with a description of what those shots will look like instead of just
sort of thinking, Yeah, I'm gonna go
review an Xbox, but not having any idea
of an outline of that. Having this outline, regardless of what video producer you are, whether it be professional
videos, freelance videos, YouTube videos,
social media content. This allows you to create your videos and final product
much faster if you've taken time to actually
plan and you're filming with intention
rather than just winging it. Furthermore, you can then
go ahead and even register what frame rate you're going to film these
particular shop tin. So for the B-roll sequence
will film this in slow motion. So 100 FPS, because I'm here in the UK,
we use PAL format. If your us, it would be 120 FPS. Then for the unboxing section, this will be filmed in
25 frames per second because I'll just
be talking to the camera like I am right now, just regularly talking to
the camera with overhead. So I just want that natural
motion blur of 25 FPS. And then again for the
controller section, we might cover combination of 25 FPS and also
slow motion here, depending on what we end
up finding works well, so we'll have a combo
category of those two SPSS. Then finally, for
the gameplay section and the browsing of the store, we will capture this at 60 FPS because we want to have the smoothest
gameplay possible. So we're capture that at the highest frame
rate that I would capture devices can do
for on-screen recording. This then takes us
over to the shot type. Now you can see here the
shots that are captured in a PS, our screen captures. So we're going to be capturing the HDMI out of these Xbox consoles
with a screen capture. So again, I know when I
rack up to film this video, I need to set up my
screen captured within the studio so I can
capture these images. Furthermore, we then
have B-roll shots. So all of these shots filmed in 100 FPS B-roll shots along
with this chapter two. And then furthermore, the
sections where we're filming, talking to the camera
with talking head, that is my a roll. So where you see my actual
face looking at the camera, a couple of extra blocks
that you may wish to add is a checklist so you can actually mark off a shot when it's done, you can just click complete
and then you know that it is completely registered and off the to-do list and
you can move on. Then you would fill them all
out once the shoot is done. And then finally,
you may wish to add a location depending on
what type of videographer, video producer you are, you may need to add a
location in case you film in various places. So for example, you may film a particular short outside of film outside with a drone in a field or on the
top of the mountain. But for me, I feel my
everything inside of my studio. So I don't use this
column because it would just look like
this every time it would just say Studio, Studio, studio and every
single shot over than the odd occasion where I do actually get some
sunlight and go outdoors. That is another
example of how you can leverage databases
within notion, but this time
creating a shot list.
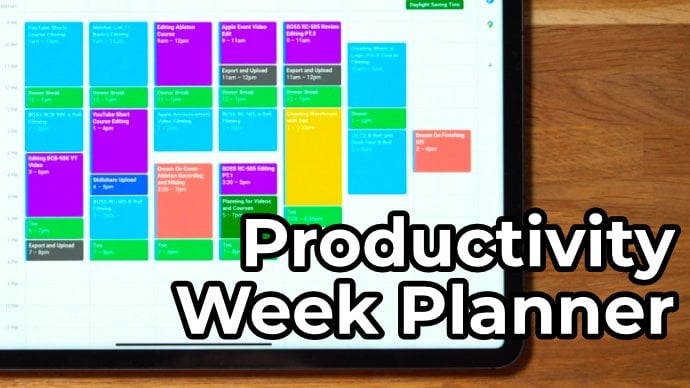
10. Thanks for Watching!: I do hope that this Skillshare
class has served as a good introduction into using Notion within your
day-to-day workflow. If you're interested
in learning more about productivity and time
management techniques that you could also
combine with Notion, I highly recommend checking out this Skillshare class next, where I showed you various
techniques to help you plan the perfect week to get
the most out of your time. But as always, I've
been been rolling. Thank you so much for watching and I will see you
in the next one.
 Ben Rowlands, Content Creator with 800,000 Followers