Transcripts
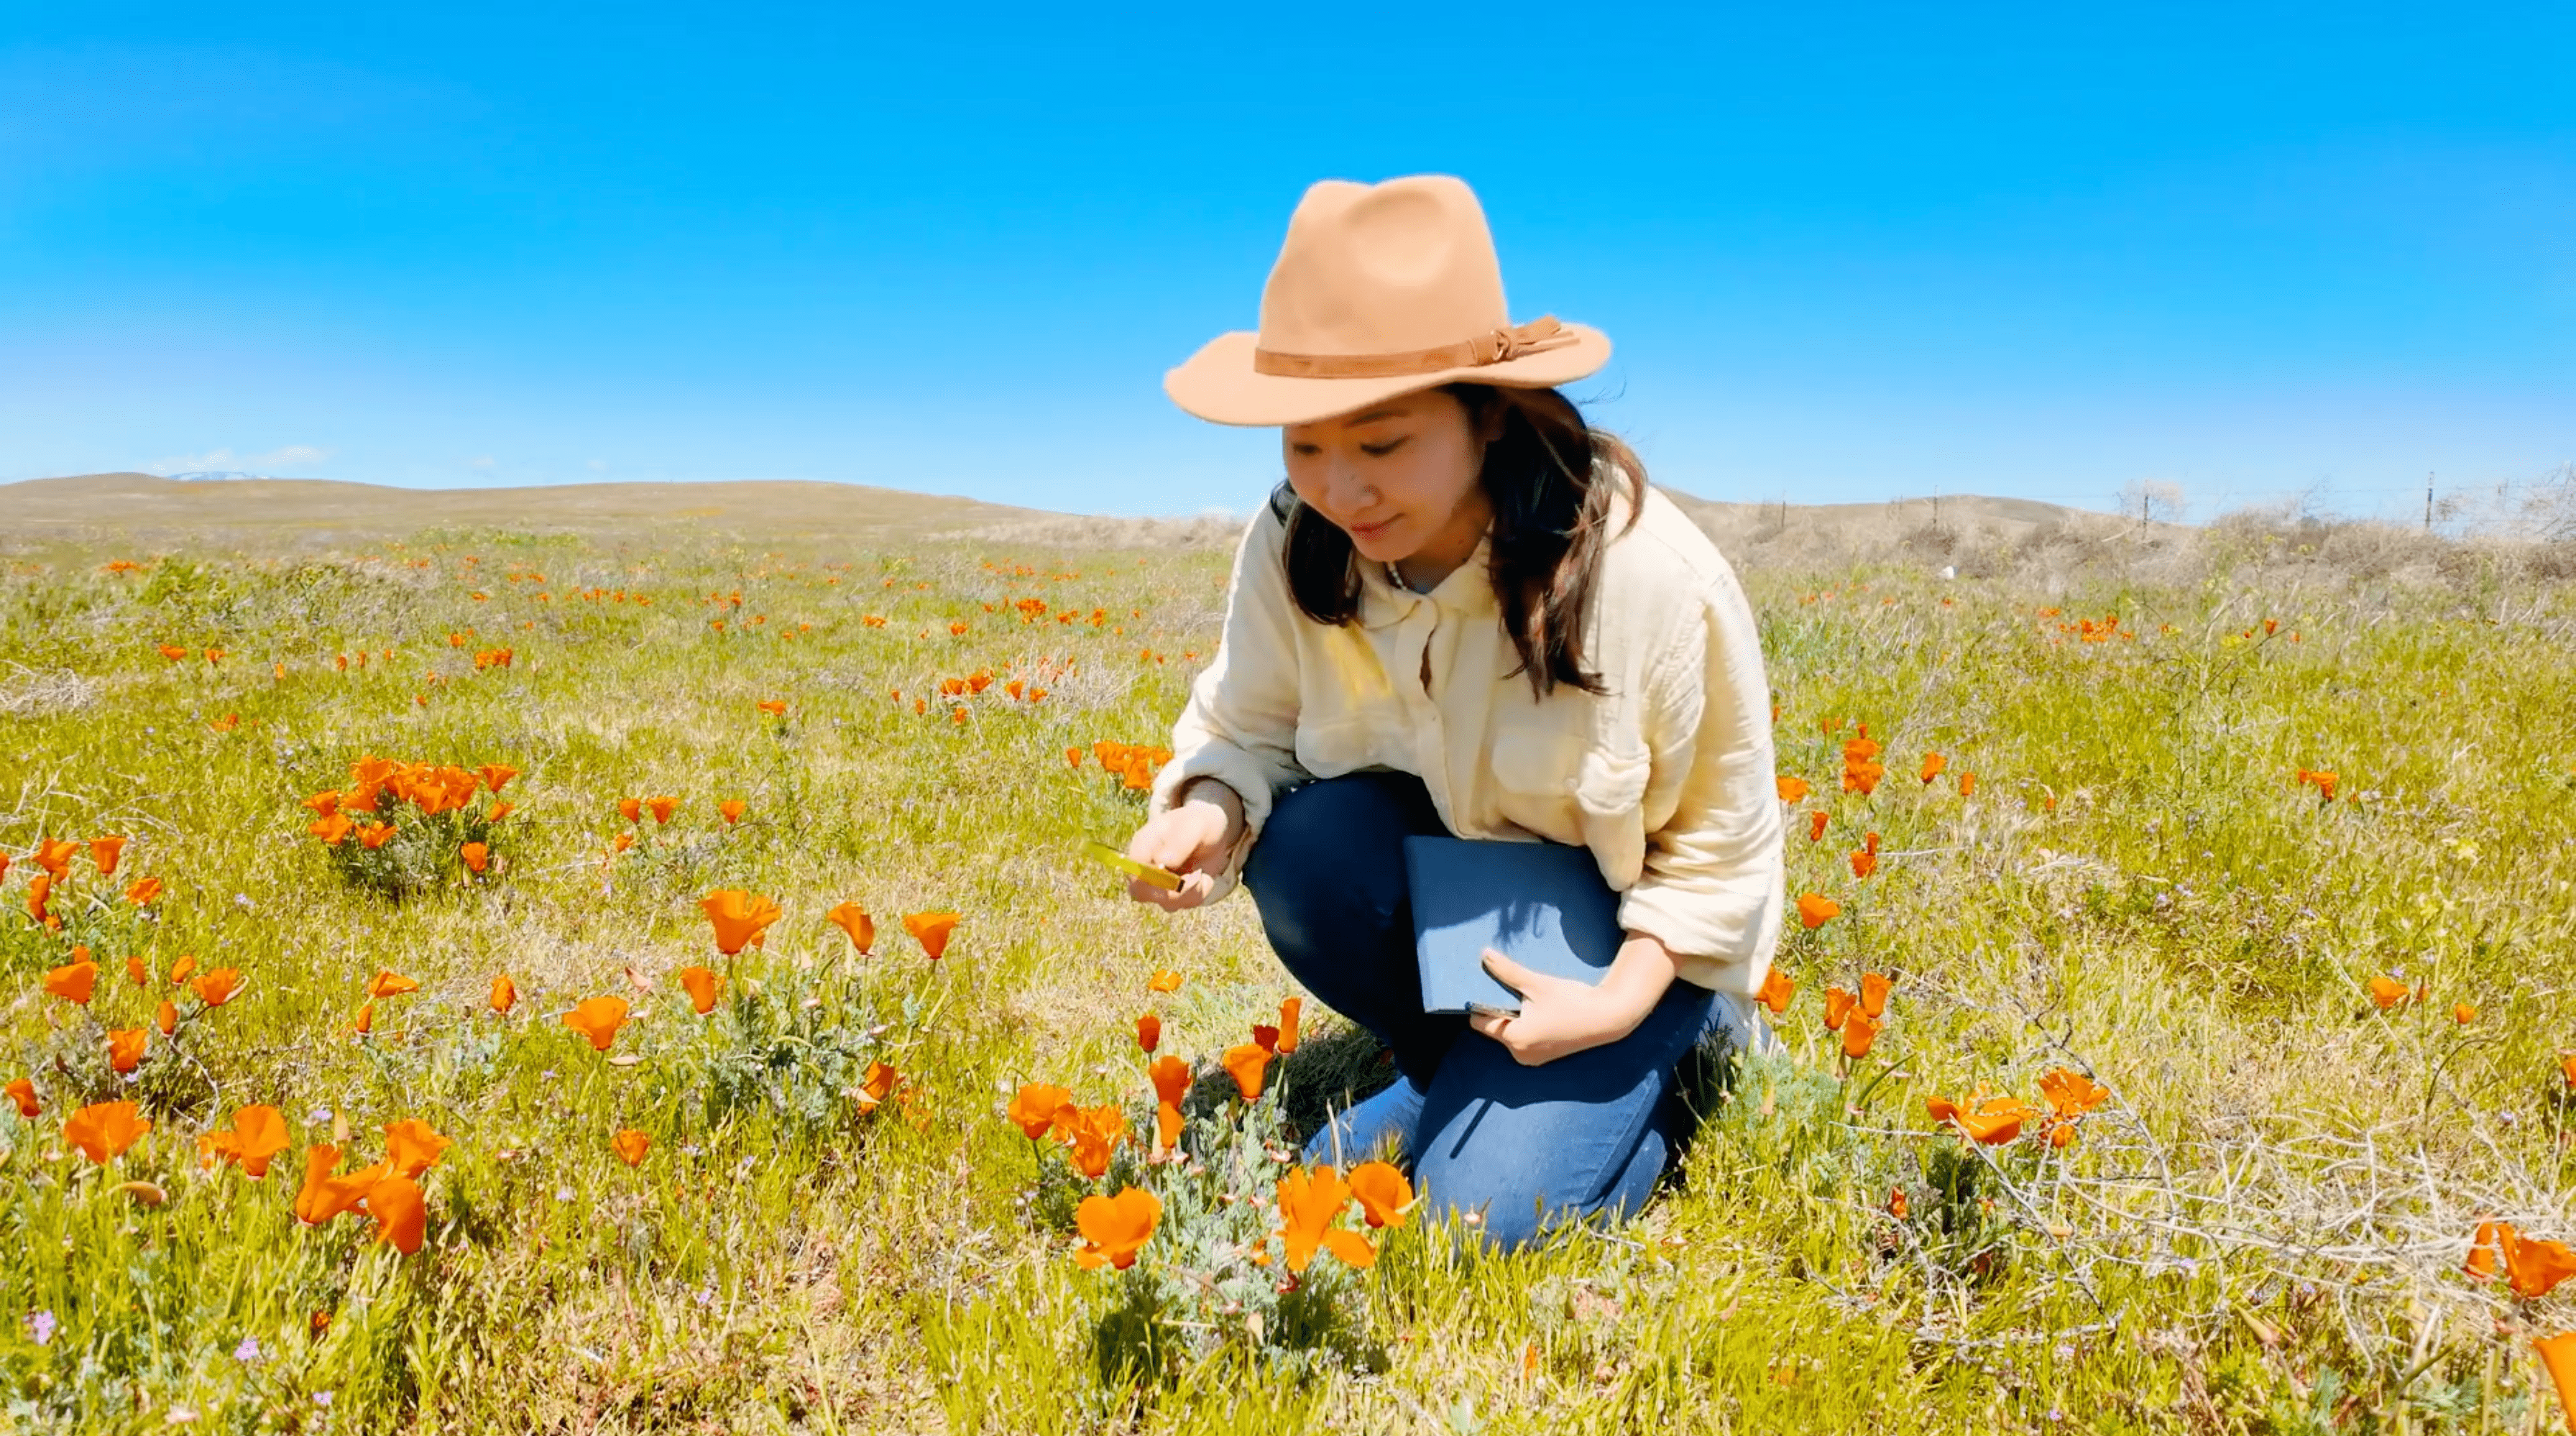
1. Introduction: Hi, nature lover. You
made it just in time. I'm documenting this
beautiful wild flowers in my nature journal.
Come with me. Let's learn about nature through art and
nature journaling. By documenting in
nature journal, we can learn how we can protect nature through
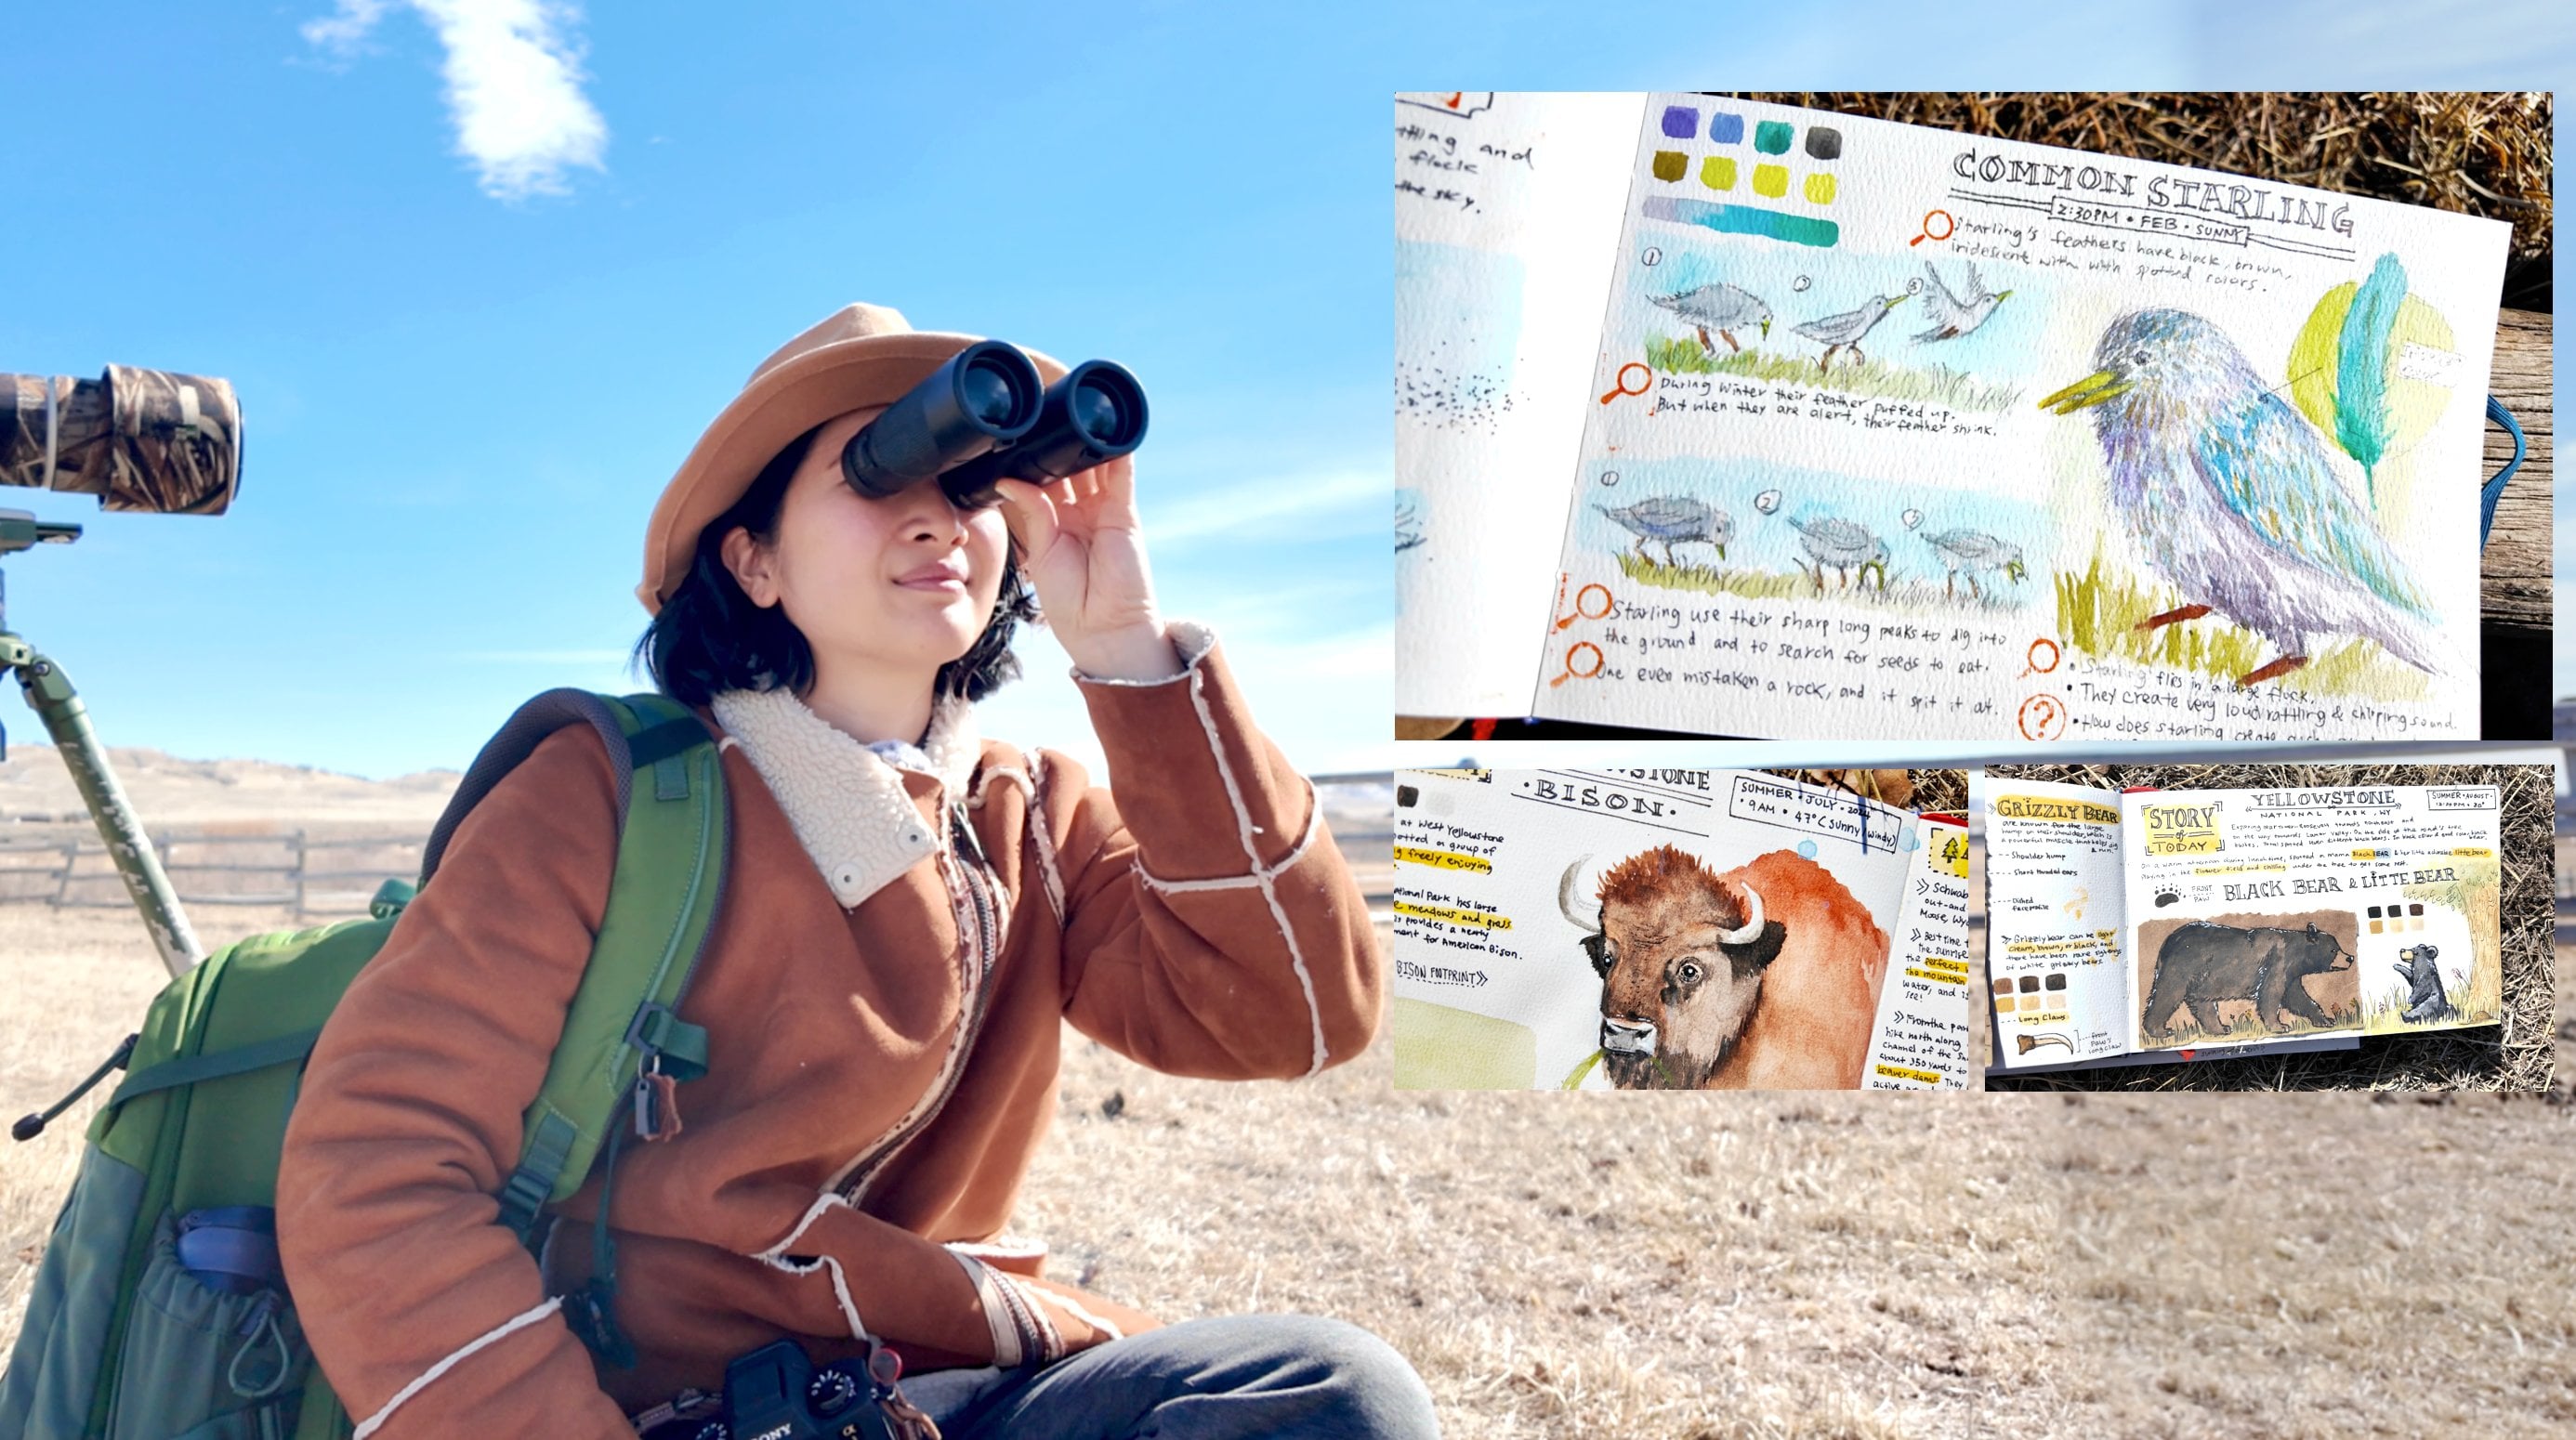
climate change. Hi, I'm Amy. I'm a designer and a
wildlife film director. I'm passionate about story
telling, art, and nature. Nature has always inspired
me throughout my project. In this course, I
will share with you all the process
of nature journaling. You will learn the skills of
observation in the outdoors, note taking and research and sketching your subject
and creating a diagram, and drawing your
subject in a sequence, adding colors and
creating a color pallet. In this course project, you're going to pick a subject you all love to
learn more about. It could be a flower
for your backyard, a rock you found when
you went on a hike or a butterfly or even a bird. You're going to create
a nature journal page and sketch out your subject, and you're going to write a
story from your observation. I hope this class
inspires you to find greater connections to
the environment around you. I'm excited to get
started, see you there.
2. Class Project & Material: Hi, welcome to
Nature Journaling. In this course project, you're going to pick a subject you'd love to learn more about. It could be a flower
from your backyard, a rock you found when you went
on a hike or a butterfly, or even a bird. You're going to create
a nature journal page based on your subject. You're going to write
down all the notes and observations and research
in your nature journal, and sketch out your subject
in a diagram in a sequence. You're going to add colors and create a color pallet
based on your subject. You're going to write a
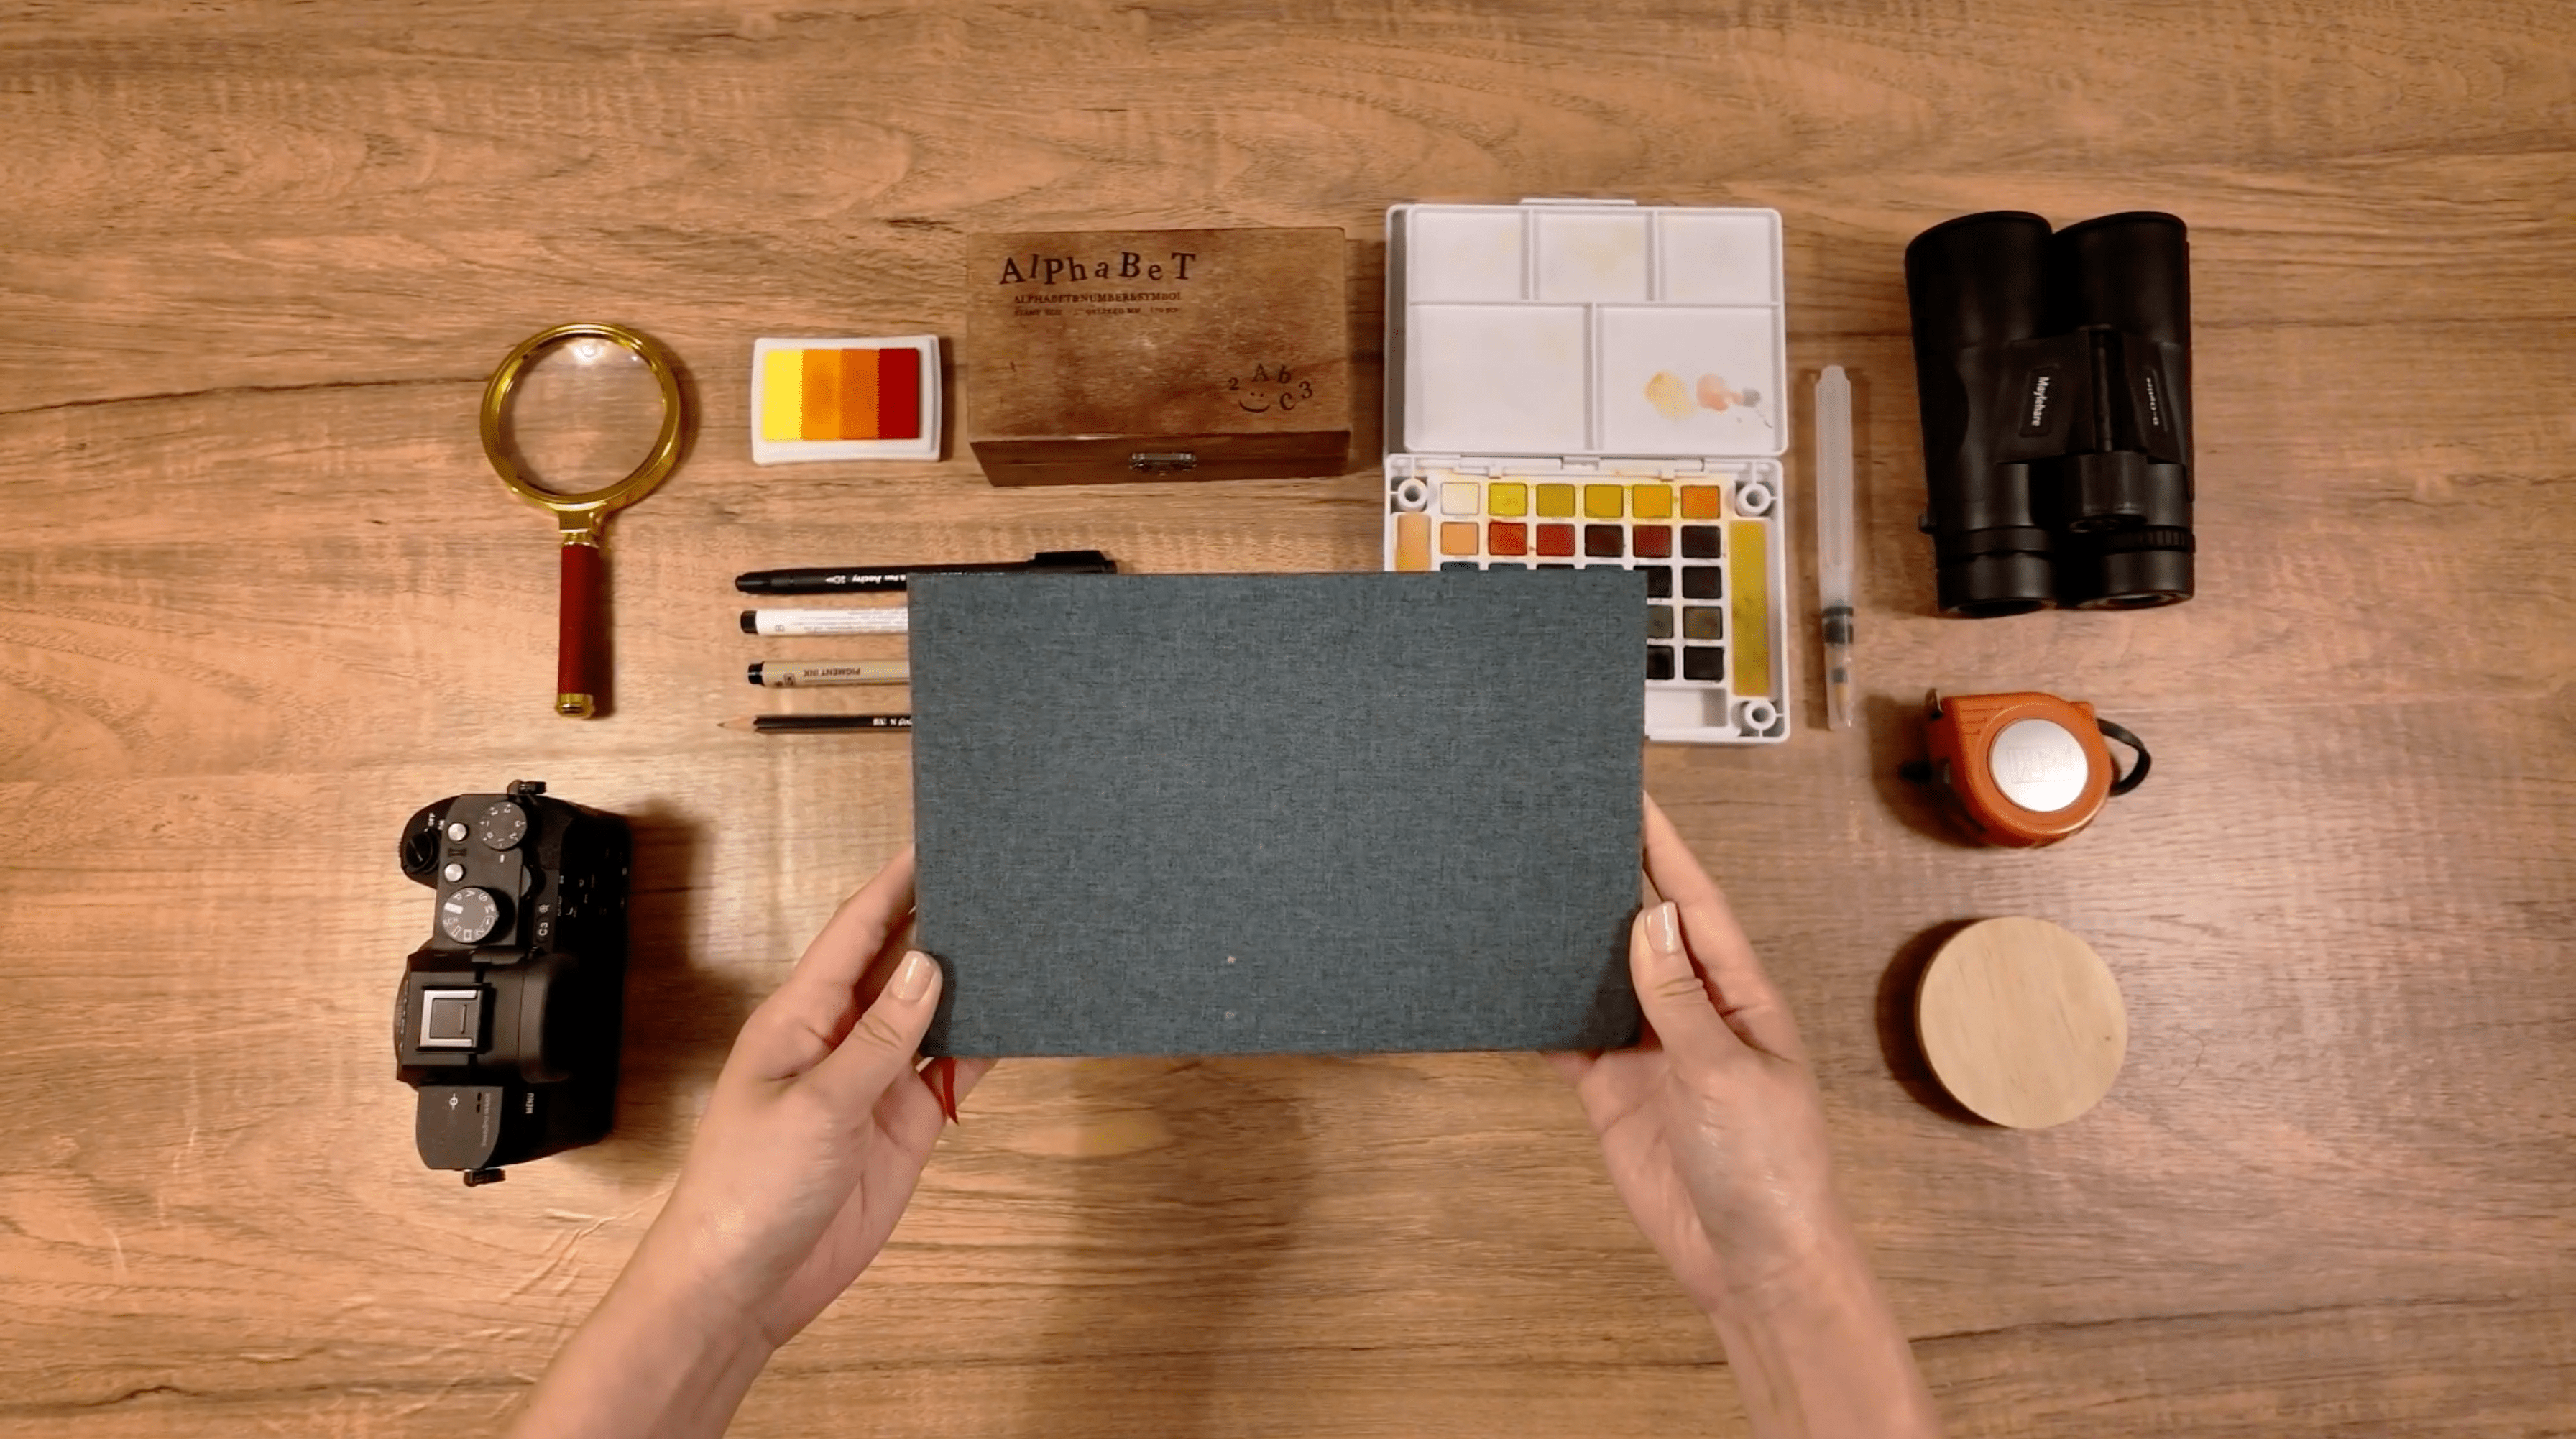
story from your observation. I'm going to share
with you every material you need on
nature journaling. I usually use a
watercolor sketchbook. You can use any sketchbook
that's available to you. I have an eraser when I
do my pencil sketches, and a pencil sharpener, a number B pencil. A waterproof pigment pen. It helps me not smear my
notes in my sketchbook. I also have a magnifying glass, which is a great tool
to use when observing. I also have a camera with me. You can use your
cell phone camera or any camera that's
available to you. I also have a binocular, which is an important tool in my back to observe
from a safe distance. I also have a small ruler, which helps me to
measure my subject. A circular item that I can
trace to create a diagram. I have a watercolor kit and
a small watercolor brush. You can use color
pencils for coloring as well for creating
titles and type. I use this letter stamp, which is a fun way to add
style into my nature journal. I also have some colorful
gradient stamps for me to use. I also have a white pen to
add highlight into my sketch. When nature generally outdoors, it's always best to
bring items that you can easily reach and easily use. So you can capture your subject
in a quick and easy way.
3. Observation Story: In this lesson, I'm going to share with you everything about observing in the outdoors and creating a story
from your observation. In this demonstration, I'm going to observe the
California poppy. Come with me. Let's go observe some beautiful
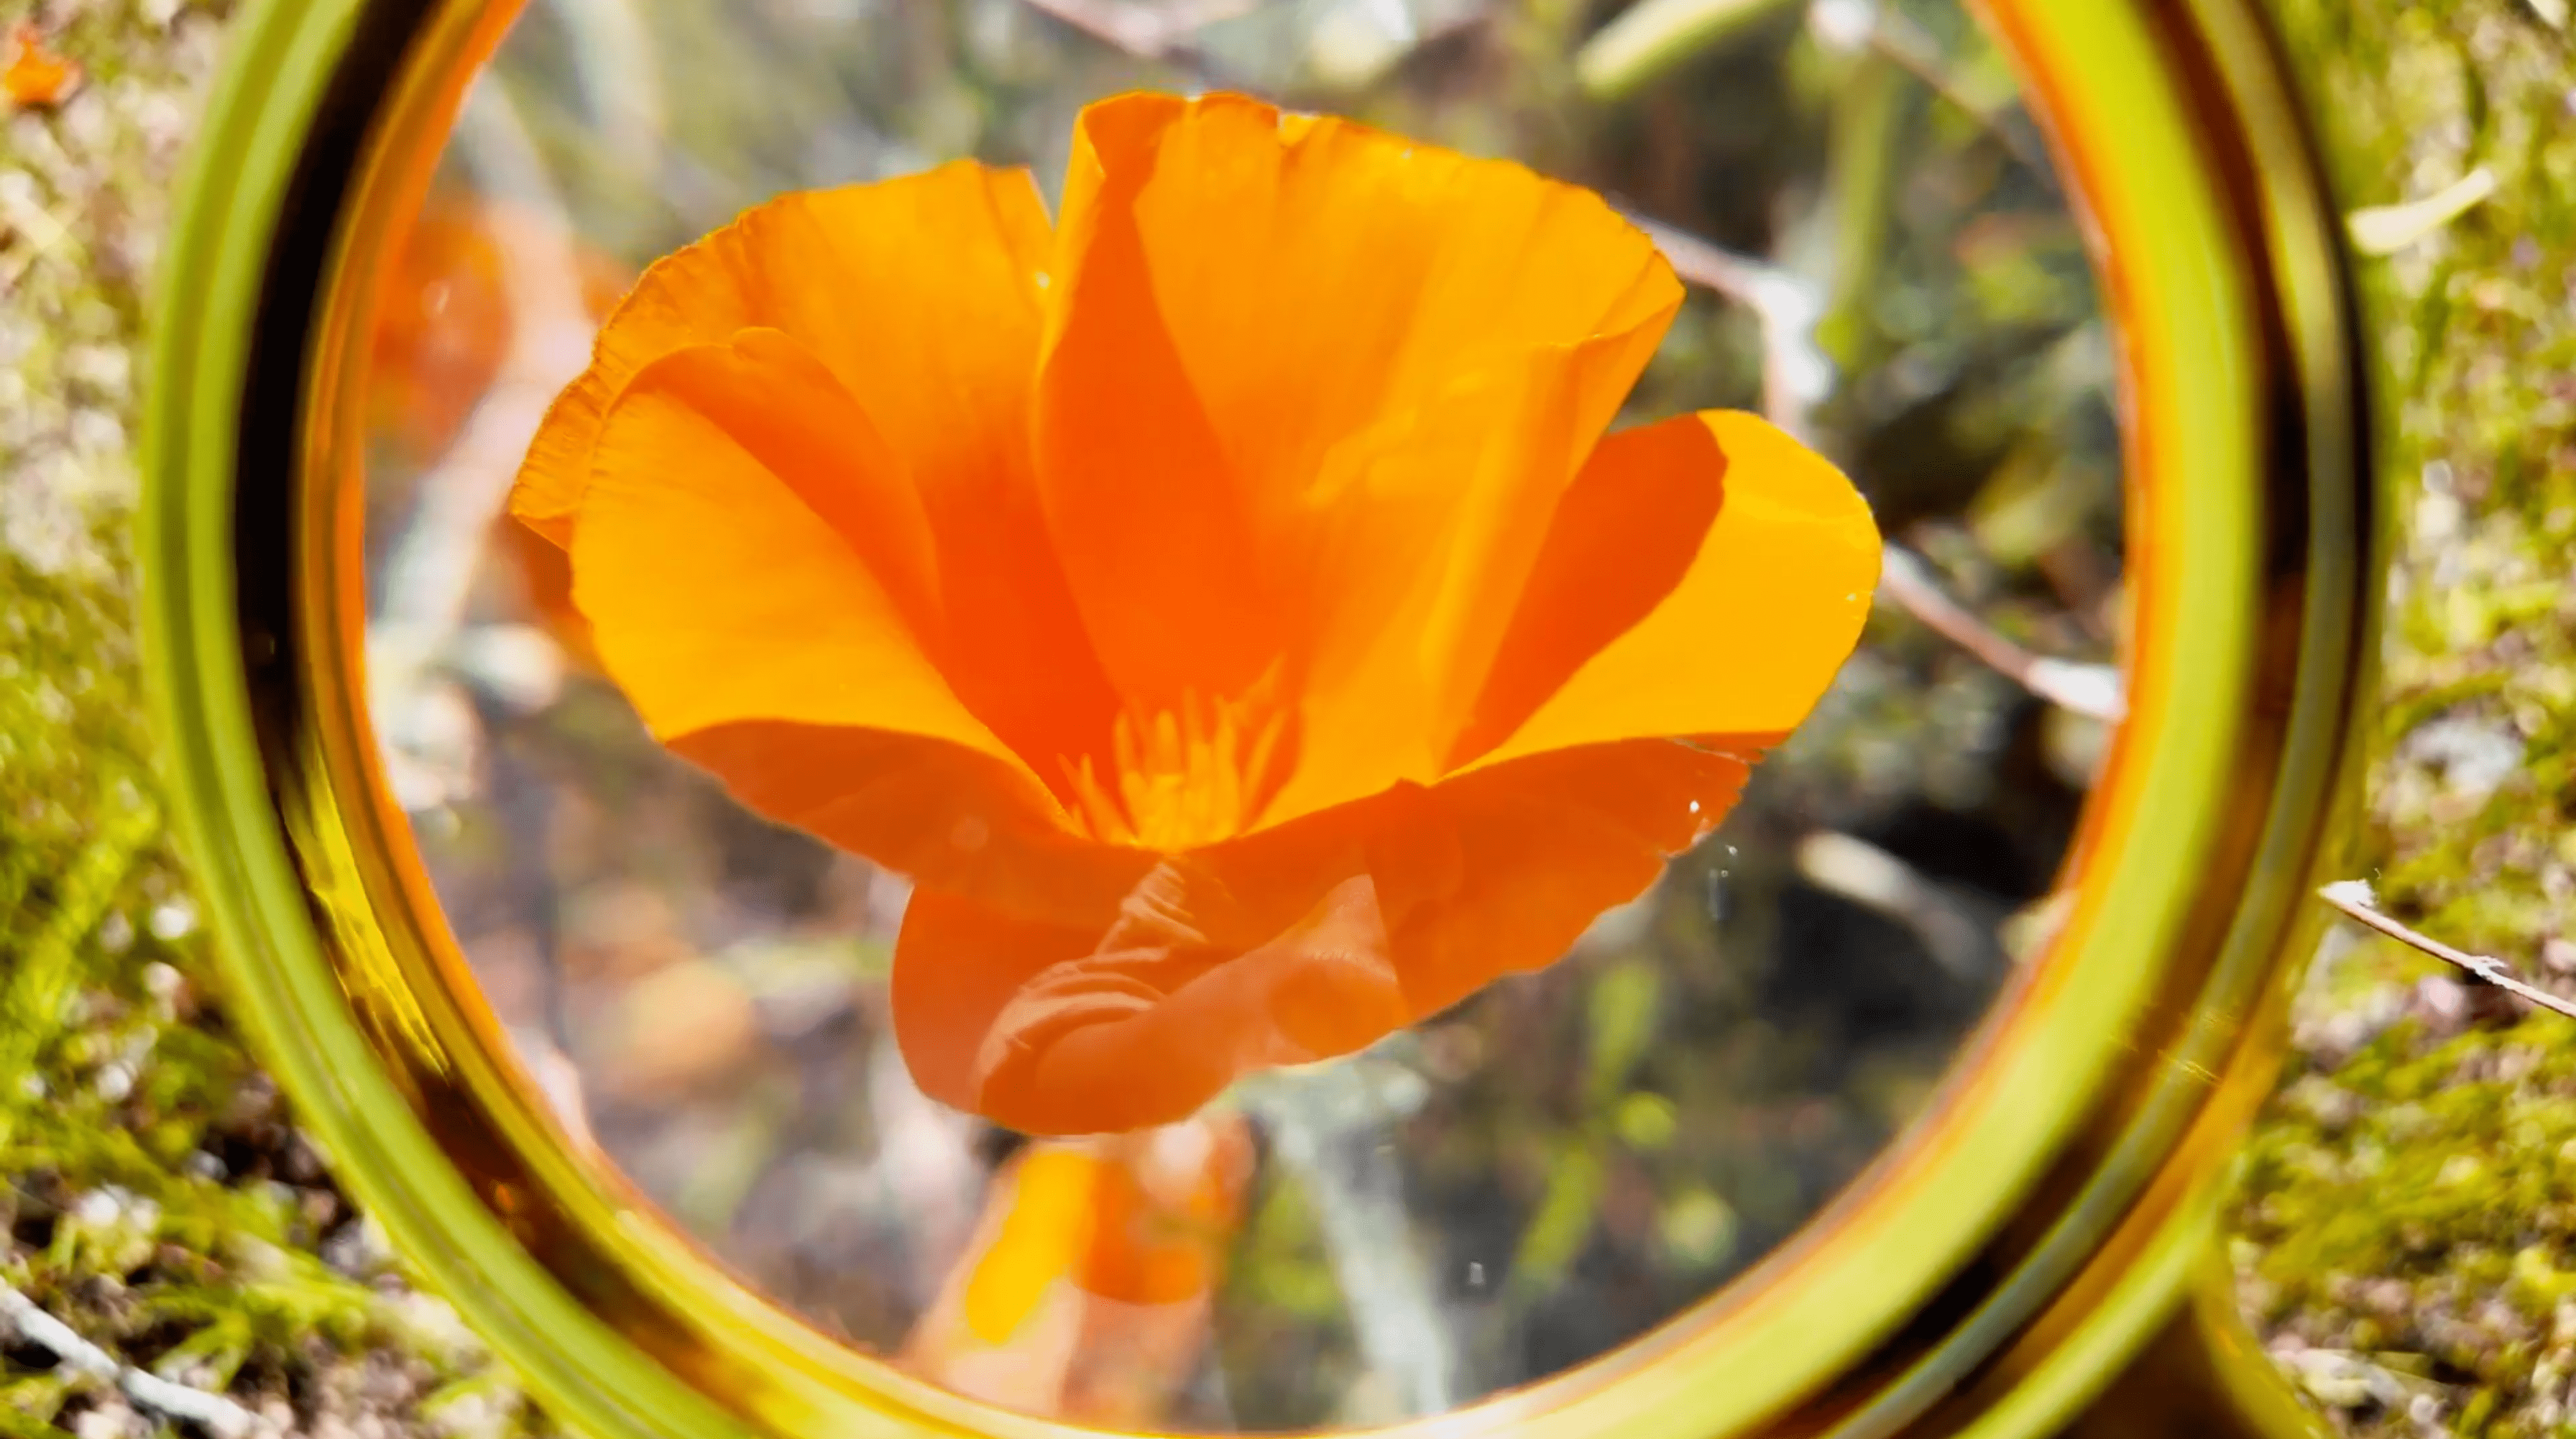
puppies in the field. When observing in the field, it's always useful
to have a camera or bernocular or magnifying glass to take a closer look
at all its details. But most importantly,
when observing a subject, it's important to bring your
curiosity and have fun. When observing your subject, it's always good to notice what kind of environment
your subject lives in. It could be the sound, the weather, the color,
or even the scent. You can write them down
all in your notes. Here is an observing
different seasons guide. These are general
suggestions of what happens to animals and
plants during each season. You can download this file
from the resource document. You can add your own information
depending on where you live and what you like to observe based on your
local animals and plants. During the autumn,
the weather is cool. I usually like to observe the weather change record
animals activities of their migration, and what trees changes colors
during the autumn season? During winter, as
temperature drops, many animals hibernate
during winter month. I'd like to observe what
animals stay through winter and notice
any winter flower and record the weather changes. In spring, I like to
observe the birds returning from their migration and the hibernating
animals awakening. And you can record the
first flowers bloom and signs of warm and
cold weather changes. During summer, I like to observe local animals
and plants activities. Plant a garden and
document its growth and record the weather changes
as the temperature rises. When observing my subject, I also like to use
a magnifying glass to take a closer look
at all its details. When observing, I like
to use the prompts. I wonder, it looks like I spot. This helps me to organize
my observations. I wonder you can write down all your curious questions
about your subject. It looks like you can write
down what it reminds you of. It could be from the
scent or the texture of the subject that reminded you of something you
have seen before. Spot. You can write down every tiny detail you have noticed when observing
your subject. And what is it that you have discovered that you
haven't seen before? When I'm doing nature journaling and observing the alfa poppy, I love to write down a story of the most memorable moment when I'm observing the alfa poppy. Like today. I love seeing them in their
full bloom and their vibrant, bright yellow colors are all
showing in their petals. And it reminds me of
the golden field. The thing that sparked
my curiosity is, I notice there wasn't any butterflies around
the California poppy. Then that lets me write
down my questions I have. Wonder why there
are no butterflies. Then I notice the
alfora poppy doesn't have any nectar and
only provides pollen. It really attracts
all the pollinators such as honeybee and
the arctic bumblebee. Welcome back. Now, we have finished
observing our subject. We can now take our notes and questions and start
doing our research.
4. Note Taking, Questions, & Research: Oh. In this lesson, I'm going to share with
you how I fill out my notes and the questions
I had from my observations. And I can start researching
the California poppy. For this demonstration,
I'm going to use the Nature Journal
guide that you can download in the
resource document. I'd like to first fill
out the subject name, the date, the time,
and the weather. I'm going to start filling
out my observation notes. Starting with the three prompts, I wonder it looks like I spot. When I was observing
the Calfora poppy, I spout that inside
the Calfora poppy, there are no nectars. Instead, there's only pollens. In the question section, I can start filling out all my curious questions
about the Calfora poppy. I like to pick three of my questions that I would like to focus
on in my research. The three questions
I'd like to focus on are what does the
California puppy attract? And how does the California
Puppy self seeding? And what are the different
stages when it self seed? When researching, here are a few ways to learn from
different resources. It's always good to write down where your resources
are coming from. So you can always refer back. I naturalists and Wikipedia are a great way to research online articles and
publish studies. You can always consult
with a scientist or expert who can identify your subject and all your curious questions. Books and your local
publications can also be a helpful resource to learn about your current nature news that's happening around you. I naturalist is a
wonderful resource where it can help you
identify the plants and animals around you while generating data for
science and conservation. For this demonstration,
I would like to focus on my research on the
California puppies fruit, and how does it self seed? And I'll go into more
articles to read more about different
stages of self seeding. Now I can fill in
my research section on the bottom of the
Nature Journal guide. Now, I have finished filling
out my research section. I also like to highlight
the part that I like to emphasize in my
nature journal sketch. When a California puppy matures, it splits open and
release abundant seeds. Also, California Poppy attract pollinators like honeybees
and arctic bumblebees. On the side, I also like to do a quick sketch of what I like to showcase in
my nature journal. Now, we have
completed filling out our notes, questions,
and research. In the next lesson, I'm going
to share with you how to draw the California
poppy with basic shapes. Oh.
5. Draw With Basic Shapes: In this lesson, I'm
going to share with you how to draw
the Calfnia poppy, first, using basic shapes. When I'm sketching my
subject in the outdoors. It is always useful to break down my subject
into basic shapes. This helps me to quickly
sketch out my subject, especially if the subject moves. These basic shapes are used
as a guide for my sketch, and later we can erase when
we add in the details. Here are a few basic shapes
using geometric shapes, such as cube, triangle,
circle, and cylinder. You can use any other
geometric shapes that's based on your subject. When sketching a subject, we need to think in
three dimensional form. When you view your subject from a different angle,
the shapes changes. When a circle is
observed at an angle, it appears as an ellipse. When checking your perspective, you can find the vanishing
point and the horizon line, and you can start drawing your line to create
a perspective guide. This allows you to check your perspective
on your drawing. For this demonstration, I'm going to use this photo I took earlier as a reference for me to draw basic
shape as a guide. The California puppy
has four petals. Starting from the
petal closest to me, I can break it down
to half cylinder. The next petal is slightly narrower due
to its perspective, so I can use a triangular shape. For the third petal, I can use a triangular
shape as well. As for the fourth petal, I can also draw a
triangular shape. On the bottom of
the Calforna poppy, I can draw an oval shape. In the center of the
California poppy, where the pollens are, I can also draw a
small oval shape. For this stem, I can draw two
straight lines as a guide. Now, we can start drawing
in our nature journal. Starting from the bottom
of the california poppy, I can draw the half cylinder
for the first petal. The second pedal, I can
draw a triangular shape. The same for the third
pedal, a triangular shape. And the fourth pedal
also a triangular shape. Remember, don't focus on
making your shapes perfect. These basic shapes are a
guide for your perspective, and we can later when we
sketch out our details. On the bottom of the
California poppy, I'll draw an oval shape. For the center of the
California poppy, I can also draw an oval shape. In my photo, I can see the California Poppy's petals has these wrinkling
textures on the edge. And in my nature journal sketch, I can add in all these
details in my drawing. Now, I have finished
drawing the basic shapes. I can start erasing my basic shape guides and start drawing all the details
of my California poppy. In the next lesson, I'm going
to share with you how to lay out my page and
to draw a diagram.
6. Laying Out Page & Draw Diagram: In this lesson, I'm going to
share with you how I lay out my page in my nature journal
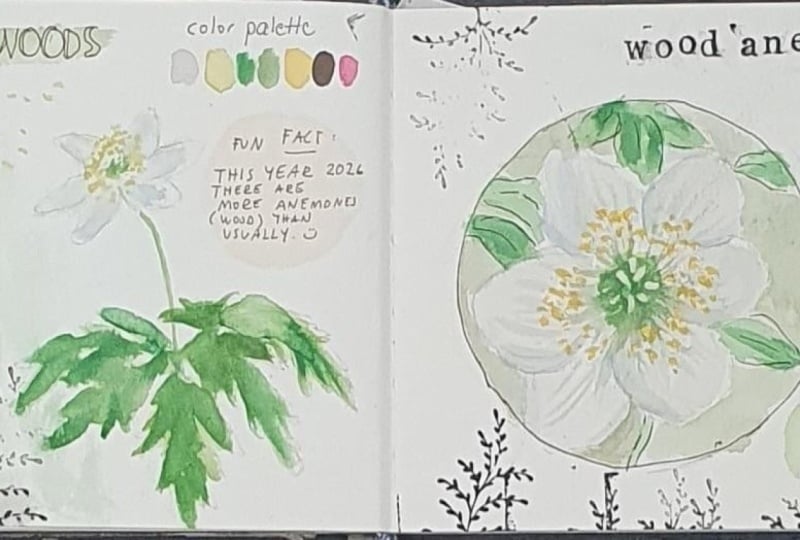
and to draw a diagram. When I'm laying out
my nature journal, I like my layout
to have a focus on a subject and to make my layout that's visually
legible to read. This is the part where you
can be creative and have fun. Remember, you can create your own style for
your nature journal. In my nature journal, I also like to use different
types of paper to draw on, like this recycle paper. This makes the
page more dynamic. It's always good to also draw
your subjects footprints, this lexrin you can also
measure its actual sizes. And it's always fun to also
incorporate the stamps from the location you visited like this Channel
Island National Park. You can also create a side view diagram like
this volcano landscape. It lets me showcase underground information
of the volcano. Here are different
ways to lay out your nature journal
page diagram. You can create a drawing
that showcase your data through a graphic form
Map and landscape. You can create a map that
lets you learn about the geography of the
location and its landscape. Cross section diagram. You can create a
site view diagram that lets you showcase
information that's in the interior
of the subject or landscape. Play with scale. You can draw a zoom in and zoom out version
of your subject. You can use different types of fonts to display
your information. For this demonstration, I'm
going to start laying out my page in my nature journal
and creating a diagram. When laying out my page, I usually like to start adding my headline on the
top of the page. So when I come back
to my nature journal, I can easily see the title
on the top of the page. Now, I can start laying out
my information from my notes, the time, the date, and the weather that I
recorded earlier in my notes. Here, I'd like to
emphasize on the year that the California puppy was selected as the
California State flower, and I can play with the
scale of the type and make the year a lot bigger to make
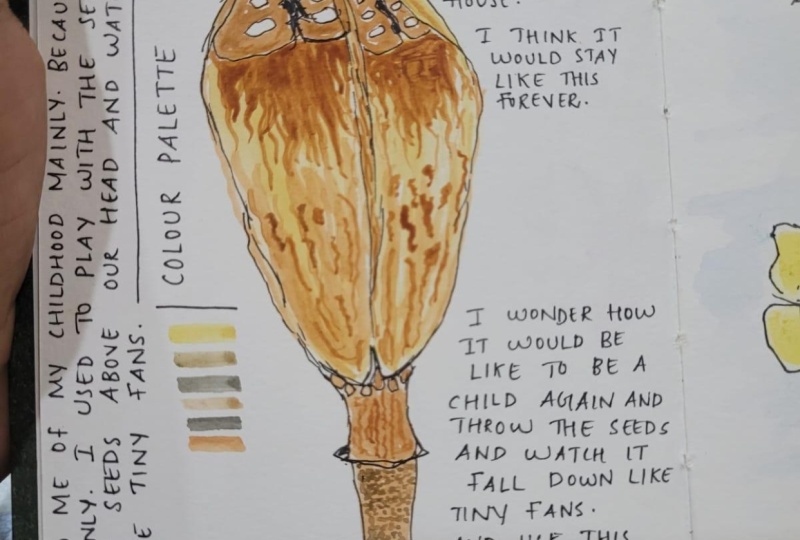
the layout more dynamic. In the bottom of the section, I can start creating my diagram to emphasize on how
the fruit opens up. I can start sketching
out the fruit. In my diagram, I also like
to showcase some movement to my sketch by showing the seeds
flying out of the fruit. Here, we can draw a big seed to show the details of what
the sea looks like. Now I can use my pen to
add in the information about the fruit opening up
and release abundant seeds. I'm going to draw a in version
of the pedal side view. You can use any
circular item that you can trace to create a
circle for your diagram. I have created my
circle for my diagram. I can now start drawing the
side view of the pedal. In my diagram, I
can also write in all the name of each part
of the California poppy. Now, we have finished creating our diagram and laying out
our nature journal page. In the next esson, I'm
going to share with you how to draw your
subject in a sequence.
7. Draw Subject In Sequence: In this lesson, I'm
going to share with you how I draw my subject
in a sequence. When I'm doing
nature journaling, I usually observe my
subject over time. But for this demonstration, I have taken photos of the California puppy's
progression from its part to bloom to self seeing as a
reference for my sketch. It's important to keep
track of your subject and observe it over a period of time during
its progression. This allows you to take notes of all its changes from color
changes, growth, and blooming. You can also document
its growth by measure how much it has
grown over a period of time. It's great to focus on
specific stages of change. To observe what
is the purpose of this change and what
has caused this change. When observing a
subject over time, it is always useful to
record its progression, so you can always look
back at all its details. Here's a time lapse of the California
puppy's progression from seed to pod to bloom. And the flower starts to fade and the petal
started to fall off. With the center
fruit still intact, the fruit starts to dry, and the seeds will start
to fall out of the fruit. Drawing your subject in a sequence is a great way to
learn about its behaviors. You'll be amazed at how
much it has changed. For this demonstration,
I'm going to start drawing my sequence of
the California poppy. For the first sequence, I'll draw the part first
using simple shapes, and I'll add in all the details. For the second one,
the pedal starts blooming and the starts
to slip off on the top. For the third one,
the sepal has fell off and we see the
petal starts blooming. For the fourth one, the
alfonapp is in its full bloom, and all the petals are
opened up and we can see the pollen in the
center of the Calfnapopy. In this stage, the fnapaps
petals starts falling off. I like to draw this movement
of the petals falling off. In the last sequence, the fruit starts to opening up and the seeds starts
flying out of the fruit. And I also like to
add this movement in my sketch of the seeds
flying out of the fruit. I also like to add a
headline underneath my sketch and create its own section in
my nature journal. Now, we have completed sketching out our
subject in a sequence. In the next lesson, I'm going to share with
you everything about adding colors and creating a color palette based
on your subject.
8. Adding Color: In this lesson, I'm
going to share with you everything about adding colors and creating
a color palette based on your subject. Here's a photo I took of the
California poppy earlier. Before I add colors
to my nature journal, I always like to create
a color palette based on the colors that I had observed on the
California poppy. This helps me to narrow down all the colors that I
can add into my sketch. For this demonstration,
I'm using my watercolor kit that I
usually bring outdoors with me. It is small and compact
with variety of shades of colors and a sponge to dry
off my watercolor brush. This is a brush
where you squeeze the tube and the
water comes out. The California puppy
is mainly yellow to orange to red
gradients on the petals. I'm going to create
a color palette and the yellow to red gradient. We can always start with
the lightest color. In this demonstration, I'll use the yellow as the lightest
color to start with. We're going to move on to a lighter orange color
for our color palette. O And the third color, we can add a bit more red into the orange to make it
a darker orange color. For the fourth color, I'm going to add more
reddish orange. For the next color,
I'm going to add a magenta color for the bottom
of the california poppy. I can add this olive light color and also a darker olive
color for the color palette. The next color can add
a bit more tone green. I'm going to create
a brownish color for when the fruit dries off Oh. I'm going to create
a dark brown for the shadows and for the seed. I'm going to create a yellow
to red gradient here. I'm going to add more red. When you add more water, you can see the water start
bleeding into the color, and you'll see the
water start picking up the paint across the gradient. I'm going to start adding the gradient color into the
California Poppies petals. Starting from the
lightest yellow first, then moving to a more
darker orange color throughout all my
California poppies petals. I'm going to start painting in the Calvina puppies yellow
to orange gradient color, and starting from the
lightest color using the yellow and moving on to the more darker
orange color scheme. The California puppies,
petals also have textures. I can also use the water to create the wrinkling
textures on the petals. Now, I can also start adding colors on my diagram on
the pedal side view. I also like to use the brush strokes to create
textures on the pedals. I'm going to start adding the magenta colors on the
bottom of the California poppy. I'm also going to add magena
color on the tip of the spo. For my diagram, I also like
to paint different colors for the background to make it
stand out and dynamic. Oh. I'm going to start adding in the colors
on the sequence sketch. Also using the yellow to red gradient colors
on the petals. Now I have added all the
colors in my nature journal. In the next lesson, I'm
going to share with you how to add light and shadow.
9. Adding Light & Shadow: In this lesson, I'm
going to share with you everything about adding
light and shadow. When I'm drawing
in the outdoors, it is always useful to record what time when
I went observing. This will help me determine where the light source is from. By understanding how
natural light works, I can help you
draw your shadows. During different times of
day, the shadow changes. In the afternoon, the
sun moves higher and the shadow becomes shorter
and during sunsets, the shadow becomes longer. For this demonstration,
here's a photo I took of the California poppy
in the late afternoon. The sun is casting on top
of the California poppy. Since the sun will be higher, the shadow will be towards the bottom of the
California poppy. In my nature journal, I can start adding the shadow by using the dark brown
color in my color pallet. In the section where the California poppies
are folded in. We can see there's a dark
shadow underneath the petals. Second star drawing the
shadows under each petals. Also on the top where the
sepals are slipping off, I can also add a
dark line of shadow underneath the sepal to make
my sketch more dynamic. When adding a shadow, you can always draw your
darkest colors first. Then start blending in
to the lightest colors. This makes your
sketch more or three dimensional and let you able to see where the light
sources are coming from. Now we have finished adding in our light and shadow
in our nature journal. In the next lesson, I'm going to finalize my nature
journal story.
10. Finalize Your Story: In this lesson, I'm going to
share with you everything about finalizing your
story in a nature journal. In this section, I can
write in my story of the most memorable moment when I was observing the
California poppy. I'd like to first
c a headline for my story using a micro
line pen on the top. In my story, I love to showcase an arctic
bumblebee that I saw, I'm going to draw
an cta bumblebee on this recycled paper to make it more dynamic
throughout my layout. After I finished
drawing the wings, I can now add two
dots for the eyes. Oh. After sketching
the Octa Bumblebee, underneath, I can start
writing in my story. For my story, I love
to emphasize on how the golden feel of the
alfa Poppy looks like. I'm going to paint a golden feel of Calfna poppy in this section. The Calfna poppy has
a lot of long stems, and by painting in different
shades of stems color, dark green, light green, it can create more
dimensions in my sketch. I'm going to start
adding in a headline of spring super bloom
underneath my painting. I'll also use a brush pen to create calligraphy
for my headline, give it a more different
types of fonts. Now, I have finished adding in the spring Super bloom headline. I'm going to use these letter stems to add some
headlines on the top. I'm going to add golden
field type here. I'm going to use this yellow to red gradient stemp which matches the California
poppies color palette. For final touches,
I also like to add the shimmering metallic
watercolor in my nature journal. This makes the
drawing more dynamic. And when you turn the
page under the light, you're able to see this reflective shimmer
in your sketch. Now, we have finished
creating our nature journal.
11. Conclusion: Congratulations. You have now completed your first
nature journal. We have started from
observing your subject, learning from your research, and lay out your notes and questions into a
diagram and a sequence, and writing a story from
your observation and adding colors and creating a pallet based on your subject. This is only the beginning
of nature journaling. I hope you stay curious about nature and bring nature journal
to all your adventures. Remember, when you're finished
with your nature journal, cheer it in our project
assignment section, and now get comments
and feedback. Nature journaling is always
best in a community. You never know who's going
to learn from your subject. Go outdoors and stay curious. Oh.
 Amy Wang, Creative/Wildlife Film Director