Transcripts
1. Introduction: Do you love the colors
and beauty of nature? Have you ever looked at
a gorgeous flower and wished you could bottle
it up to keep it forever? In this class, I will show
you how to do just that, Extract and preserve
colors from flowers, and then use that
pigment to create your very own handmade
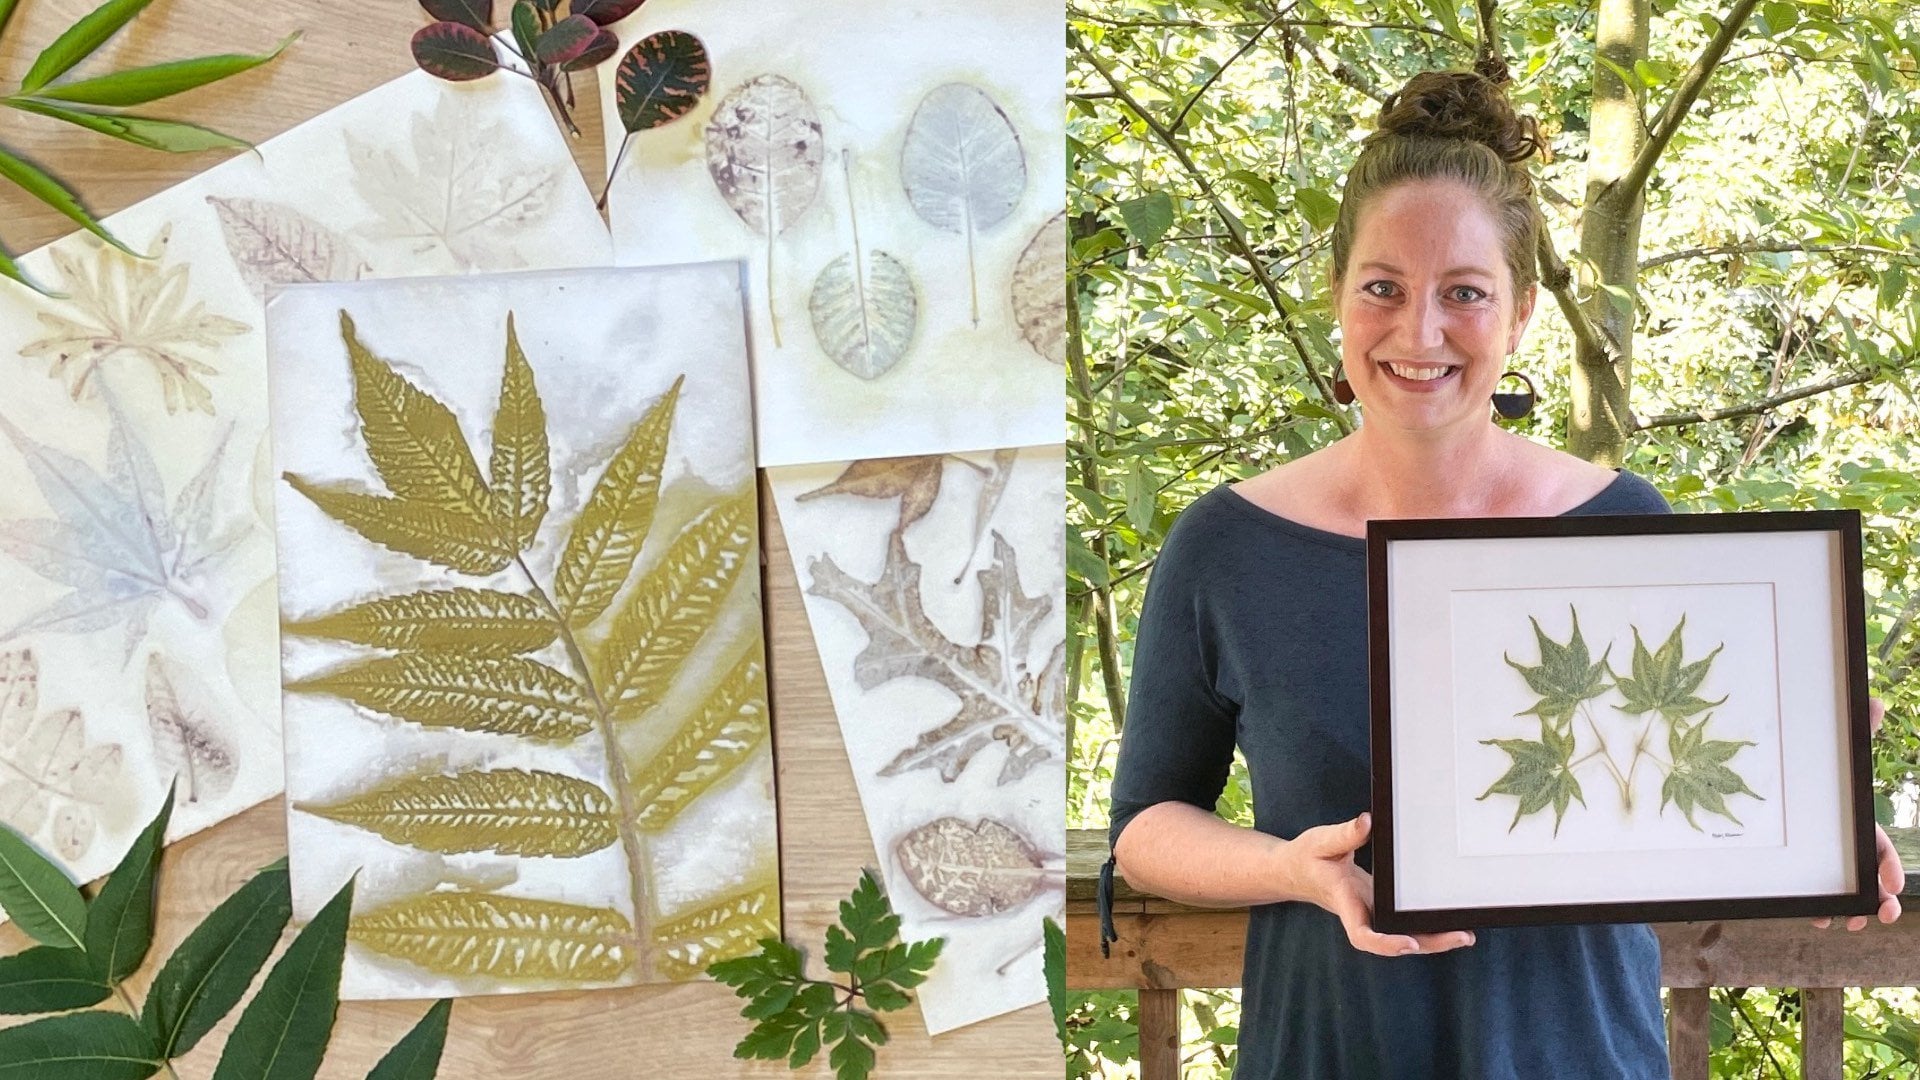
watercolor paint. My name is Casey, and I am a naturalist as well as
a natural dye artist. My deep love of nature influences everything about
the creative work that I do. I use all natural dyes in my studio to create
wearable items, home goods, and even jewelry. I also love using items
from nature to make my own art mediums like botanical ink and of
course, watercolor paint. My studio is on our farm just outside
of Portland, Oregon. We call it Cedar
Del Forest Farm. Here I have space to grow and
gather a lot of my own de, materials, including
the flowers that I'm going to be using
in this class today. I teach classes to kids
and adults in person. And I am thrilled to be a top teacher here
on skill share, where I offer a variety of
nature inspired classes. In this class, I will walk you through the
process of extracting pigment from flowers and using it to create your
own watercolor paint. I will be demonstrating this process using
marigolds because they are a very common flower that you may already
be familiar with. But I will use my decade of experience growing and
using natural dyes to share suggestions of
other easy to find flowers that you can also
use to make watercolors. At the class, you will have your own natural
watercolor to paint with. And the ability to apply this process to a
variety of flowers in your area to create a seasonal palette that's
completely unique to you. Whether you are an accomplished watercolor artist or someone who like me just likes to play with putting
color on paper, than this class is for you. Watercolor paint is so
playful and fun to use. Making your own is a rewarding
process that will deepen your appreciation and connection to all the gifts that
nature has to offer us. I can't wait for you to
join me in class and get started making your own
botanical watercolor paint.
2. Class Project: The project for this class is to make your own
watercolor paint, using the beautiful
pigments found in flowers. I walk you through all
steps of this process, beginning with
selecting flowers that create beautiful
and lasting color. To gathering the
necessary supplies, many of which you probably
already have at home. Extracting pigment from flowers
takes just a few steps. The hardest part is patiently
waiting for the pigment to settle to the bottom of the container so that
you can collect it. I'll share my tips for drying your pigment and at that point, you can store it for a
rainy day or follow along. Will they teach you to use your beautiful natural pigment to create watercolor paint? You can use your handmade
natural paint on its own or in combination with other handmade or commercial
watercolors. Join me in the next
lesson where I outline the supplies that you
will need for this project.
3. Supplies: In this lesson, I will share
the supplies that you need to make beautiful watercolor
paint from flowers. And I'll also share some
alternatives in case you don't have the exact
items that I'm showing. The most important supply, of course, is flowers. I'm going to be using these
beautiful sunshiny marigolds. And you are welcome to follow along and use these
flowers as well. But there are others
that will make some beautiful lasting
watercolor pigments. And I have a bonus lesson
at the end of this course, where I share some other
recommendations with you. You will need a pot large
enough to hold your flowers, plus a couple inches
of water above them. You will need a
strainer to separate your cooked flowers
from your E liquid. If you don't have a
strainer like this, you can use some cheese cloth or even a thin piece of
fabric like a tea towel. Once you strain the flowers
from your die liquid, you will want some
clear containers to put that liquid into. The pigment is going to settle to the bottom of the liquid and you need a clear container so that you can see
that happening. You can use a jar or
clear glass bases or even plastic containers that you maybe can rescue from
your recycling bin. To extract the pigment
from the die liquid, you will need a
couple chemicals. The first is alum, and you can find this in the spice ale and
many grocery stores. It's often used in pickling, but it is more cost
effective to purchase it from retailers that sell
natural de, supplies. You can get it in a
lot larger quantities. I have several recommended
sites listed in the file, in the resources tab. You also will need
soda ash, and again, you can find this from
Natural E retailers, though it's also
used in tie dying. So sometimes you can find it at your local arts
and crafts store. The most accurate way to measure these chemicals is by
weighing them on a scale. I highly recommend using
one if you have it at home. But I do include
some conversions in the Resources tab
so that you can measure using teaspoons as well. After these chemicals are added, the pigment will settle to the bottom of your jar
and to filter it out, you will need some
coffee filters and a jar or container
that they fit onto. Finally, to turn your
pigment into paint, you will need a
mortar and pestle, and this will be used to grind your pigment into a fine powder. To turn that powder
into watercolor paint, you will need to mix it
with a watercolor binder. I'm using the Schmincke
brand binder, but you can also find recipes on the Internet
to make your own. And I give some
information about that and a file in the Resources tab to mix your pigment and
the watercolor binder into a creamy watercolor
paint, you will need a molar. I highly recommend
purchasing one of these, and I share some of my
favorites in the Resources tab. But the important features of a molar are that they
have a little bit of weight to them and the
bottom is perfectly flat. If you have a drinking glass or other small container at
home with a flat bottom, then you are welcome to use that molding surface is
a heavy flat surface. Ideally, it has a little bit of texture to it, like
frosted glass. I picked up this granite
cutting board at a discount home goods store for less than $10 and it
works just great for me. You could also use a smooth ceramic tile as
your molling surface. Usually you can find these for just a couple dollar at a
home improvement store. Palette knives are a
really useful tool to have when you are molling
your watercolor paint. This flat side makes it work really well for
scooping up your paint, keeping it in the center
of your molling surface. You will, of course,
need to test out your watercolor
paint to make sure it's fully mixed and
looking beautiful. So have some
watercolor paper and paint brushes handy
during this process. Once your paint is made, you will need some small
containers to store it in. You can get ready
made watercolor pans which are specifically
made for this purpose. And they're nice because
they can be added to a watercolor palette that
you may already have. There are a lot of
creative dishes that you can use to
store your paint. I love these little
ceramic bowls. They're actually
doll house bowls. And I share a link to these
in the resources tab. Sea shells make cute containers
for watercolor paint. Plastic or metal bottle caps are another creative option that you may already have at home. One nice thing about
this project is that you don't have to complete
all the steps in one go. In fact, there are
several places in this process where
you will have to wait a day or two before
moving on to the next step. So if you don't have
all the supplies you need for each step of
making watercolor paint, you can still get
started today by heating your flowers
and starting to extract that color while you
gather the rest of your supplies and
the next lesson, we'll get started with
heating the flowers and starting to extract that
beautiful botanical color.
4. Heating Your Flowers: In this lesson, I will teach
you the very first step, which is extracting
the beautiful color from your flowers. To do this, you will of course, need your chosen flowers, a pot to hold them
in, and some water. I'm using marigolds, which
have a very strong odor, so I'm going to heat them
on a camp stove outside, place your flowers in the pot, and cover them with
several inches of water. How much of each you need
is not an exact amount, but to give you an idea
of what I'm using, I've weighed out
about 4 ounces or 115 grams of marigold flowers, and I'm adding approximately
ten cups of water. The flowers do float, so it can be hard to see exactly how much water you have unless you push
them down a little, turn your heat on, and leave
your dog to supervise. No, just kidding. They are
not responsible enough. This is boiling harder
than is desirable. You don't want all
of your water to evaporate away
with a heavy boil. It just needs a low simmer
to extract the color. This is looking a lot better and it's only
been a few minutes. And you can see that this
beautiful yellow color is already coming
out of the flowers. Simmer your flowers for approximately 30 minutes
and then turn the heat off and leave it to cool so you can strain the flowers
from the de, liquid. I usually just wait until
I can handle the pot, but it's okay to let your flowers sit
overnight and the water, sometimes that can even
lead to deeper colors. To strain the liquid, you will need something
to strain it into. I'm using this measuring cup because I do need to
measure the liquid. But this also has a
nice wide opening that I can easily fit
the strainer into. Remember, if you don't
have a strainer, you can use a piece
of cheesecloth or even a tea towel or other
piece of thin fabric. Pour your liquid through the strainer and then
into another container. This is four cups, which is just shy of one liter. I still have some
liquid left in my pot, so I'll set this up again. Any little bits of flowers
or dirt that gets through your strainer will also get
into your watercolor paint. You want to avoid that
as much as possible. I want to get every last bit
of dye from the flowers, but don't want to accidentally squish any pieces
through the strainer. I'm going to use
this small towel and still over the strainer, I'm just going to squeeze. I get all the last bit of that good colorful liquid and I got about a
two cup out of it. So I feel like that
was worth doing. If your jar of flour dye looks
a little brown or murky, not quite a bright,
beautiful color that you were hoping
for, don't worry. And the next lesson
we're going to add alum and soda ash to this, which not only extract
the pigment from here, but it also tends to brighten
up the colors and bring out some more of those beautiful golden yellows from
the marigolds.
5. Extracting Pigment: In this lesson, I will teach
you how to take this jar of flour dye that you have made and extract
the color from it. For this, you will need
your alum and soda ash, A scale to weigh it out on, or a teaspoon to measure it. You also will need something
to stir your liquid with. There's not an exact recipe
for the step in the process. And to understand why that is, I will share with
you what the alum and soda in the liquid. Now that you've
heated the flowers, molecules from them are floating around in
your container. Alum is the first
ingredient added because it will attach to
those molecules. Alum is slightly acidic, so when it is added, it lowers the ph. In this slightly acidic state, the alum dissolves easily. The liquid in your jar
will look much the same before and
after you add alum, because you can't
see the alum doing that work of binding
to the dimolecules. The second ingredient
added is soda ash. Soda ash is slightly basic
and you may recall from past chemistry lessons that acids and bases can
cancel each other out. The soda ash is used to bring your liquid back
to a neutral ph. This will also make the alum
turn back into a solid, meaning it clumps up
into larger particles. Eventually, those particles
sink to the bottom of your container and they bring the flour die along with it. Because the alum and die
are bonded together, this solid is called
a lake pigment. It cannot be used to
dye fabric anymore, because the dye is all
wrapped up in the alum. But this is perfect for
making watercolor paint. Back to why there
is no recipe for exactly how much alum
and soda ash to use. We can measure how much liquid we have from the flower dye, and this is 1.5 liters. But that doesn't tell us exactly how much
pigment is in here. And the amount of alum
that you use will depend on how many die
molecules are in your jar. That's impossible
to measure exactly. We're going to have to
make our best guess. If you look up lake
pigments online or in natural E books that
you may have at home, you will see the guide line of adding 10 grams of alum and 5 grams of soda ash for every one liter of die
liquid that you have. That's a great starting point, but many of those guides are
using this process to save the last bit of E
that is left in a pot that's already been used
to dye fabric or yarn. That means that some
of the pigment has already been removed
from the de, liquid. This is a fresh off the stow, fully concentrated
jar of flour de. There's a lot of
pigment in here, so I'm going to start
by adding 20 grams of alum and 10 grams of soda ash for every liter
that I've measured out. If you're not sure
how much alum and soda ash to add to your de, liquid, always start
with small amounts. You can always add more. And I will show you that
process in this lesson. But adding too much
alum can cause crystals to form
in your pigment, and that can make it difficult, or even impossible, to turn
it into usable water color. Alum is always added first so that it can bind to
the die molecules. I have 1.5 liters of die liquid. If I multiply that by 20
grams of alum per liter, I need 30 grams of
alum for my jar. You can add it all in one go and then stir it so that
the alum dissolves. I recommend letting this
sit for 30 minutes, up to a couple of hours, to give the alum p***ty
of time to bond with the die molecules before
adding the soda ash. Soda ash is always used at
half the amount of alum. If I have 1.5 liters of liquid, multiply that by 10 grams
of soda ash per liter, which tells me I need
15 grams of soda ash. Be sure there is some room in your container
because this is an acid base reaction and can
sometimes bubble up a bit, especially if your
dye is still warm. Yours might not bubble as much
as mine, and that's okay. It doesn't always create this much foam when the alum and soda ash are
both mixed into your de, liquid, it's just
a waiting game. It takes at least a few hours
for the pigments to turn into a solid and settle to
the bottom of your container. Usually, at this point, I leave mine to sit overnight
and then check it. The next day I'll show you some examples of what it looks like when the
pigment settles. This jar of pigment has been sitting for just about 12 hours. You can see the lake pigment
settled at the bottom and the liquid on top has
very little color remaining. This is about as
perfect as it gets, but it doesn't always
look like this, especially if it's your first
time doing this process. Let me show you some
other examples. This jar looks like
it has a good amount of alum and soda ash
that's been added to it because the liquid
here is pretty clear and a lot of pigment
has settled to the bottom. But there's also
this floating layer still stuck at the top. I don't know why this happens, sometimes it just does. Sometimes the solution is to be patient and let this
sit even longer. If you look closely, you can see that there
is pigment still floating down from the top and coming through
this middle layer. If your pigment does
this in the jar, you could let this sit
another several hours and see how it's doing. I often get a little impatient with this step and
like to help it along. I find that if I gently
stir the top layer, being careful to not
agitate the whole jar, I think this helps
encourage it to settle to the bottom
a little quicker. This is what your
pigment might look like. If not enough alum or
soda ash are added. You can see a line down here showing where the
pigment has settled. However, this top liquid still
has a lot of color in it. Now there is pigment that
has settled to the bottom, so you could collect this
and discard the top layer. But there's a lot of dye that would be wasted if I did that. And I prefer to extract as much pigment as
possible from my dye. If your container
looks like this and you want to extract
more pigment from it, add additional
alum and soda ash. Just as you did the first time, but in smaller amounts. Remember, you can always
keep adding more, but too much can
harm your pigment. With this jar, I chose to add an additional 5 grams of alum, 2.5 grams of soda ash, just like the first time. Add the alum and let it sit
for at least a half an hour. Then add the soda ash and wait. You should see more pigment
settle to the bottom, and the top layer will
have less color in it after letting it
sit for half a day. You can see that the top
layer is much lighter than before adding the
additional alum and soda ash. But there is still
more color in here than that perfect example
I showed you earlier. If your container looks
like this and you want to extract more pigment from
this liquid at the top, you could again add a
little bit more alum and soda ash and then wait for
it to settle even more. Another option to get
more color out of this top layer is to
carefully pour off this liquid into
another container and then add some more
alum and soda ash to here. And wait for the pigment to settle to the bottom while you move on to the next step with this pigment that
has already settled, whether your jar
has a clear layer on top or a little bit
of color still in here. If you are happy with it, then let's move on
to the next step, where I share with
you how to wash this pigment to make it
as pure as possible.
6. Washing Your Pigment: Now that you have a
beautiful layer of botanical pigment settled
to the bottom of your jar, I will share with you how
to rinse this pigment so that any extra dye or
alum is removed from it, making your watercolor
paint as pure as possible. The first step is
going to be pouring off this top liquid
very carefully, trying to not disturb this pigment at the bottom
as much as possible. If your liquid on the top still has a fair amount of color in it and you would like to keep that
and add more alum and soda ash to get the
last bit of color from it. Be sure that you
pour it into a jar or container so that
you can collect it. I'm pretty happy with the
amount of pigment that has come out of the liquid and
has settled on the bottom. So I'm just going to
pour this top layer off into my sink. The trick to pouring
off just the water at the top is to tilt your
container as little as possible. You can see I tip it just enough that the water
starts to come out. And then I hold it at that angle until the water
slows to a trickle, then tilt the container just
a little bit more and again, hold it still this way the
pigment at the bottom stays in the jar and you can
pour off most of the water before the pigment
gets close to the edge. You won't be able to pour off 100% of the liquid
and that's okay. You can maybe see
that there's still a little bit of this
liquid still at the top. Some people use a syringe or a turkey baster to carefully
suction off that last bit, but it's also okay to
leave it at this point. There may be some excess
alum or extra pigment that isn't bonded to any alum and that needs
to be rinsed off. The way I do this is to fill the container back
up with water, stir it around a bit, and then let it settle
back to the bottom. This doesn't usually
take as long as when you first added the
alum and soda ash. The chemical reactions
have already happened. Your lake pigment
is already formed. It just takes a little time for that pigment to float
back to the bottom. Repeat this washing process
two or three times. If your water had a lot of color still floating around in
it when you poured it off. You should see that each
time you wash your pigment, that top layer of
water gets lighter and lighter as the loose
dye is rinsed away. Here's an example of pigment that has been washed
several times. When your pigment has been
rinsed a couple times and is nicely settled into
the bottom of the container, Pour off the top
liquid one final time. Now that your pigment has
been washed and you are left with this nice layer of thick botanical
pigment in your jar, let's go to the next lesson, where I share with
you how to dry it.
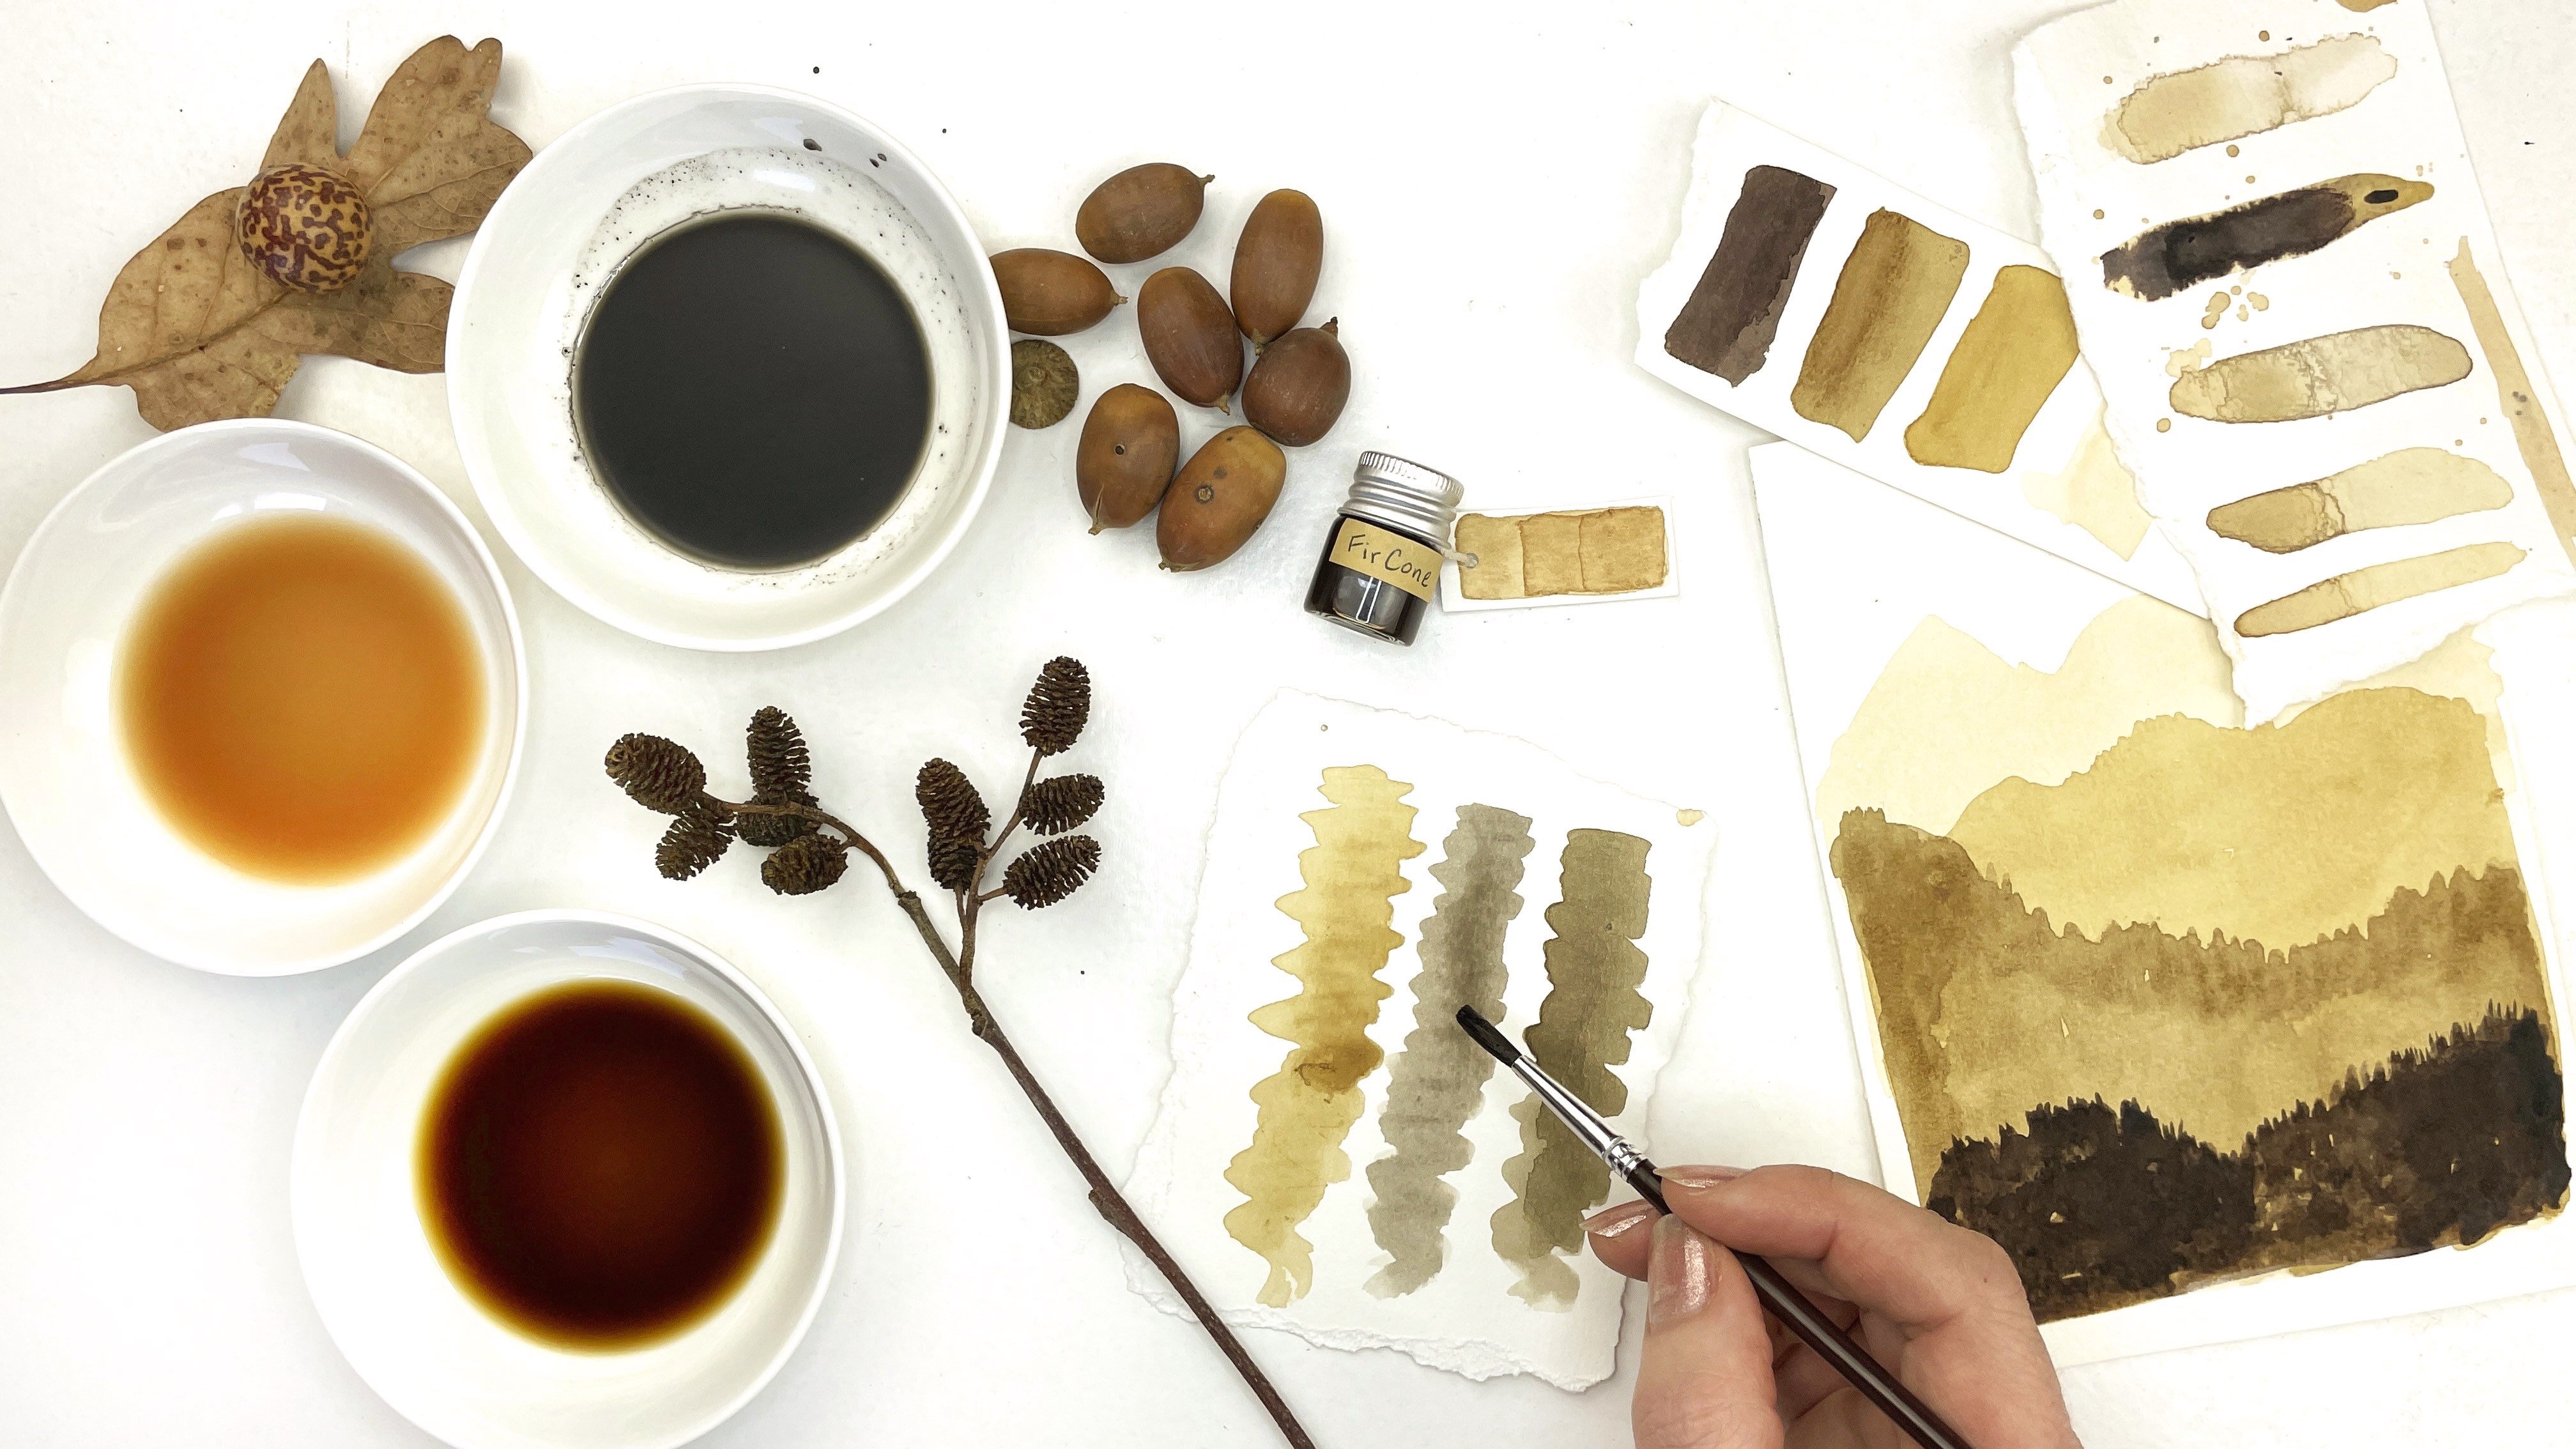
7. Drying Your Pigment: In this lesson, I will show you how to separate the
last bit of water from the pigment that you
have in your jar and how to dry it so that you can turn
it into water color paint. Place a coffee filter
over a clean jar or other container and secure
it with a rubber band. Then pour your pigment into it. Being careful to not
overflow the filter, it probably will not all fit. Sometimes a bit of pigment can pass through the
filter at first, but as it starts to fill up the little holes in
the coffee filter, your pigment will stay put and just the water
will pass through. The water will start to drip
through much more slowly. As the pigment collected in the filter gets
thicker and thicker, add a little bit
more pigment bit by bit as the water
is filtered through. This is where a second
container may come in handy. When I have a lot of
pigment to filter, I like to split it into two coffee filters to make this process go a
little quicker. It can take quite
a while for all of this water to drip through
the coffee filter. Now, it's a great time to
take your dog for a walk, or watch your favorite
Netflix show, or even just leave this to
sit and filter overnight. As the water filters through, you will see the pigment
and the coffee filter get thicker until you can safely remove it
without its spilling. Carefully remove the
rubber band and lift the filter with your pigment off of the jar and
lay it out to dry. I like to place it on a
couple layers of towel. You could also use a
clean piece of cardboard. Having something absorbent
underneath it will help pull some of that remaining
moisture out from the bottom, and your pigment
will dry faster. You can test it out on some
paper to see the color. And this is looking
so beautiful. You could paint
with it like this, but it's not water color. It won't behave exactly
like paint and will sit on top of the paper and could
flake off when it dries. You want your goopy
pigment to dry completely. Exactly how long that takes
depends on your climate and how thick your layer of pigment is on the
coffee filters. But expect it to
take several days. You may be tempted to put it outside in a sunny
place to dry quickly, but I recommend
keeping it indoors. Bright sunlight can
bleach your pigment the same way that clothes can fade if left in
the sun too long. Also, the outside
has dirt and dust, and insects which aren't bad. But anything that finds its way into this wet pigment
can stick in it. And then that will also be
in your watercolor paint. Even indoors can have
some chal***ges. Like my cat, who loves to get in the middle of
all of my projects, I'll show you what to expect
during the drying process. This is what my
pigment looks like after drying for about 12 hours. The towels are damp all the way through these folded layers, so I'm going to
switch them out for a dry towel to continue soaking
up some of the moisture. You can see that the pigment is starting to clump
up a little bit, and when I spread it
with the palette knife, the pigment can hold its shape. Now here's that little
swatch I painted earlier. And you can see that
these thick edges can be scraped right
off the paper. It's really worth going
through this drying process, so you can mix your pigment with watercolor binder and
turn it into true paint. After 24 hours, it's
starting to dry into smaller pieces that you
can see here in the center, and some of the bits on the edges are looking
completely dry. At this point, I take the
towels out because there's not enough moisture left
for them to help anymore. I can feel that the
pigment is a lot stiffer and it's not very
easy to spread anymore. This is after 36
hours of drying, so about a day and a half. And you can see that it's really shrinking into smaller pieces. You don't need much pigment
to make watercolor paint, so don't worry that your
big pile of pigment is turning into what seems
like a pretty small amount. I think that lake pigments look really interesting
as they dry. I would love for you to
snap a picture of yours and share it in the project
section for others to see. It's also nice for
you to be able to compare what your drying
pigment looks like with the color paint
that you will make with it After two days of drying, some pieces of my pigment do look like they're
completely dry. These larger pieces still
have some moisture in them. It definitely needs
more drying time. After 3.5 days, my pigment
is completely dry. Yours should look something
like this. When it's done. When I move it around, you can hear that it sounds
really dry and crispy. There's not a hint of
moisture left in it, and it looks perfect. Now that this botanical lake
pigment is completely dry, let's go to the next
lesson where I show you how to turn this into
watercolor paint.
8. Turning Pigment into Paint: In this lesson, you will turn your dry pigment into beautiful,
creamy watercolor paint. To do that, you
will need to first grind it using a
mortar and pestle. This makes a very fine powder, and it's not good to
breathe in powders, even if it's made from
non toxic flowers. So I did not show this
in the supply lesson, but I do recommend wearing
a mask during this step. Once your pigment is ground up, you will also need the
watercolor binder, molar, and a molling surface. Some palette knives,
paint brushes and paper to test
your paint out with. And then lastly, a little dish of your choosing
to store your paint in. To begin, pour your
pigment into the mortar, I like to fold coffee
filters in half and gently rub it together to get all the little bits of
dry pigment off of it. It can be hard to
grind the pigment evenly if the mortar
is very full. So you may want to
do this in batches. I start by pressing down on the large pieces and then
grind it in a circular motion. You will want to do this
until your pigment is a very fine powder and there are no large chunks of
pigment remaining. If you don't want to
make watercolor paint out of all of your dry
pigment right away, lake pigments can be stored
in this state indefinitely. I like to use these small glass bottles and
they even come with cute labels and these little funnels so it's easy to
get the pigment into them. I have a link to
these and some of my other favorite
containers in the file, under the Resources tab. I'm going to grind up the pigment on the
second coffee filter, and then let's make
some watercolor paint. Pour some of your pigment out
onto your molding surface, and then add an equal amount
of watercolor binder. I eyeball this, but you can measure each one
out if you'd like. One teaspoon of pigment would get one teaspoon
of binder added. Don't use all your pigment at first because you may need to add a little more later if the ratio needs to be adjusted. I did not add enough
watercolor binders. I will add a little
bit more now. Use a palette knife
to mix the binder and the pigment together so that you can check
the consistency. You want it to look like this, like a thick syrup, but not too runny. You will notice that even though the pigment was ground up
as finely as possible, this is quite gritty and this is why the paint
needs to be mold. Remember that the lake
pigment is not water soluble. This dry powder is not dissolving in the
water color binder. Rather, molding breaks
it apart into teeny, teeny tiny pieces and helps spread it evenly
throughout the binder. To make smooth watercolor paint, people have different
styles of ling. Some like to move it in a
figure eight pattern while I find it more comfortable to
mole in a circular motion. Changing directions
every so often, you don't need to exert
a lot of pressure. The weight of the molar
will do the job of pressing down on the
pigments and breaking it up. It can take up to
an hour of molling to create a really
smooth watercolor paint. The exact time will depend on the pigment
that you're using. Since each one is a
little different, it is very helpful to test
your water color periodically throughout this
process so that you can see how the
paint is developing. This is after just a
few minutes of molling. You can see that the
paint is very gritty. The wet paint can create a
suction between the molar and the surface to lift the molar off without risking
splattering your paint. Gently tip it to the side, you'll see that
suction release and then you can safely
lift off the molar. As the paint spreads out
on your molling surface. Use a palette knife every so often to scrape it all
back to the center. The paint out on
the edges is not getting mold as much
as that in the center. So scraping it all
back ensures that your watercolor paint
will be evenly mold. The second Swatch
here shows the paint. After about 15
minutes of molding, you can see that
there's still a lot of grittiness to it though it's much less than
at the beginning. I'll make another swatch
with a little less water on my brush to see
what it looks like with a more saturated pigment. The color is looking beautiful, but it still needs more molding. You may find that as
you mole your paint, it starts to get a
little thicker and doesn't spread as easily as
it did in the beginning. This is because it's such
a thin layer that it can dry out a little as you mole just through evaporation. Add some more water as needed to maintain a smooth consistency. You can use a spray
bottle or dropper, but I like to just use a paint brush since I
always have one handy. And I use that to
flick some water onto my molding surface and then
use the molar to mix it in. Continue mulling and
testing your paint. This is after approximately
40 minutes of ling and the paint looks
really smooth and creamy. When I spread it with
my palette knife, I've made a few swatches
as I've been mulling. And it's time to make another because I think
this may be done. This looks beautiful. It behaves just
like water color. It spreads easily on the paper, and the color looks very even. Be sure to look at your sample swatches
after the paint dries, because sometimes they need
a little troubleshooting. This swatch shows what
the paint may look like. If not enough watercolor binder
is added to the pigment, the color looks okay. But when I feel it
with my finger, the texture is almost
like sandpaper. If your paint looks and feels
like this, when it's dry, add a little more
watercolor binder and mix it in thoroughly. This example has the
opposite problem. It's fairly light
colored because it has too much binder and
not enough pigment. Another sign that is hard
to capture on camera, that when I hold it at an
angle under the light, some places look shiny, almost like it's still wet. And that's because of
the excess binder. If your paint looks like this, add some more pigment
and moll it again. When your watercolor paint looks and behaves in
a way that you like, scoop it up with a
palette knife and put it into a container
of your choice. You can paint with
it right away. You can also let it
dry out completely and rewet it whenever
you want to watercolor. Congratulations on making some beautiful botanical
watercolor paint. I hope you love
the color that you made and I would love
to see a picture of it. Please snap a photo and share it in the project
section so that myself and others can see the beautiful colors that
you got from nature. You can join me in the
next and final lesson for some final thoughts
about botanical watercolor, as well as some ideas
and inspiration for you to continue your nature
inspired creative journey.
9. Final Thoughts: I'm so glad that
you joined me in this class to discover
the beauty of colors that nature has to offer
and the satisfaction of making your own
handmade watercolor paint. You have learned how to heat flowers to extract
their beautiful color. How to add alum and soda ash to create
a lake pigment that will settle to the bottom of your container and how
to collect and dry it. Lastly, you've learned how to combine your dry pigment with watercolor binder to make a smooth and creamy
watercolor paint. You can use your handmade
botanical water color on its own to create beautiful,
monochromatic paintings. There is a lot you can
do with just one color. Of course, water color b***ds beautifully
with other colors. You can use your
botanical watercolor with any commercial
water colors, or with other handmade
paint from other flowers, just like any other water color. It's also fun to use your handmade paint and
mixed media pieces. I may be biased with
my love of nature, but I think it's so fun
to use paint made from flowers with ink that's also
made with natural items. And you can find
my class to make botanical ink also
here on skill share. Flowers are not the
only natural materials that you can use to make paint. In my natural dye class, I introduce you to many natural items that dye
fabric a variety of colors. Any natural dye that I cover in that class can also be used in the same way to make a lake pigment and
then watercolor paint. The possibilities
are nearly endless. I would love to see
your watercolor paint and any art that
you make with it, Even if it's a big, beautiful rectangle on a piece of paper. You can share a photo
here on Skillshare in the Project section or share on Instagram
and tag me in it. My username is Cedar
Dell Forest Farm. If you enjoyed this class, I would love for you
to leave a review so that others can know
what you thought about it. And I appreciate your
feedback as well. And lastly, before you go, follow me here on
Skillshare so that you will be notified when
I publish a new class. Thank you for joining
me and Happy painting.
10. Bonus Lesson: Choosing Other Flowers: As a natural de, artist, my interest is a natural
pigments that make beautiful colors and that
are very color fast. Meaning their colors will
last through time and use and they will not fade
or change considerably. These are some of
my recommendations. Fire weed is a common
roadside plant that you can use to make paint. Fire weed is just about
done blooming in my area. These are fairly small examples, but they grow these tall spikes of purple flowers
When made into paint, they make this beautiful
greenish gold color. Cosmos are one of my favorite flowers
to grow in my garden. Bees love them and they
are prolific bloomers. They are always just covered
in these gorgeous flowers. The paint color
they create is very similar to the color
of their own petals, which is not always the
case with flowers like you saw with the
fire weed cosmos, make this gorgeous orange. This is golden rod, which is one of my very
favorite plants to use for dye. It's extremely color fast and it makes a
beautiful yellow color. It can have a little
hint of green to it when some of the leaves are
used in, with the dye bath. And if only the
flowers are used, then it's a little more
of a bright yellow. You can also create a beautiful olive green
color with golden rod. This is done by adding
a little bit of iron to the dye water and I cover that technique in my
botanical ink class. This plant is Reopsis, which is also commonly
called tick seed. I grow this here in my yard. It's another prolific bloomer, but you can also find it growing
naturally in many areas. They come in a few
different color variations. They make a gorgeous
warm brown paint. I have a few flowers
to show you that I do not have watercolor
samples to go along with, but one is Queen Anne's lace. These dainty little
flowers commonly grow along roadsides and fields. When they dry, they form these cute little shapes
that look like bird nests. There are some look
alike flowers. But you can identify
Queen Anne's lace by this tiny dark colored flower that's usually right
in the center. Queen Anne's lace flowers
make yellow paint. Dahlias are some of my
very favorite flowers, and they come in a
whole range of colors and a variety of shapes
and sizes as well. Regardless of the color
of the dahlia flower, they all make a
beautiful yellow paint. You may have noticed
that there are a lot of flowers here that make
yellow and orange dyes. Even flowers that maybe aren't themselves yellow or
orange. Why is this? Flowers often
contain a variety of compounds in them that
make different colorings. A common category of flower pigments is
called flavonoids. Flavonoids are responsible for yellow coloring and they are generally a very
stable compound. The yellow pigments produced by flavonoids hold up
to time and use. These are what are used for natural dyes and
paint that will last. Anthocyanins are the chemicals responsible for red
blues and purples. They are gorgeous colors, but not very stable. These pigments fade over time, often to dull gray colors. Does this mean you
should not use them? The colors made from anthocyanins are really
interesting and pretty, and I think they're
fun to play with, even if I know they
won't stick around. If you have red roses or purple flowers and you
don't mind impermanence, go ahead and make
paint from them. Just know that they will change
significantly over time. So please don't sell works made with them to
unassuming customers. Now go choose some
beautiful flowers in your area and make
some watercolor paint.
 Casey Gallagher Newman, Natural Dye and Textile Artist