Transcripts
1. Introduction: Hi guys. This is just for fun. Are you looking for an activity in which you can use both part of the brain? You're right side corrective. Did your left side logical? You want to stimulate your creativity or are defeating the breast morning for some reason, Going through a rough time. Live feeling stressed out Thies is Ryan class for you. They class to teach you how to build up this beautiful Monday with vibrant colors inspired by while flower. So don't wait up. This class is divided in three classes, the whole class to finish the homeland because I'll explain to you step by step detail by detail Tonight we'll tell you all my secrets and guess what You're gonna be increasing observation skills. You're gonna be using your hands so you're gonna be coordinating your body much better, and you're gonna have fun and create a beautiful piece of art. What? We're waiting for you in this glasses for you. You don't need previous experience with yard with art. This is multilevel class to have fun in to see life from a different perspective. Don't wait up just wrong
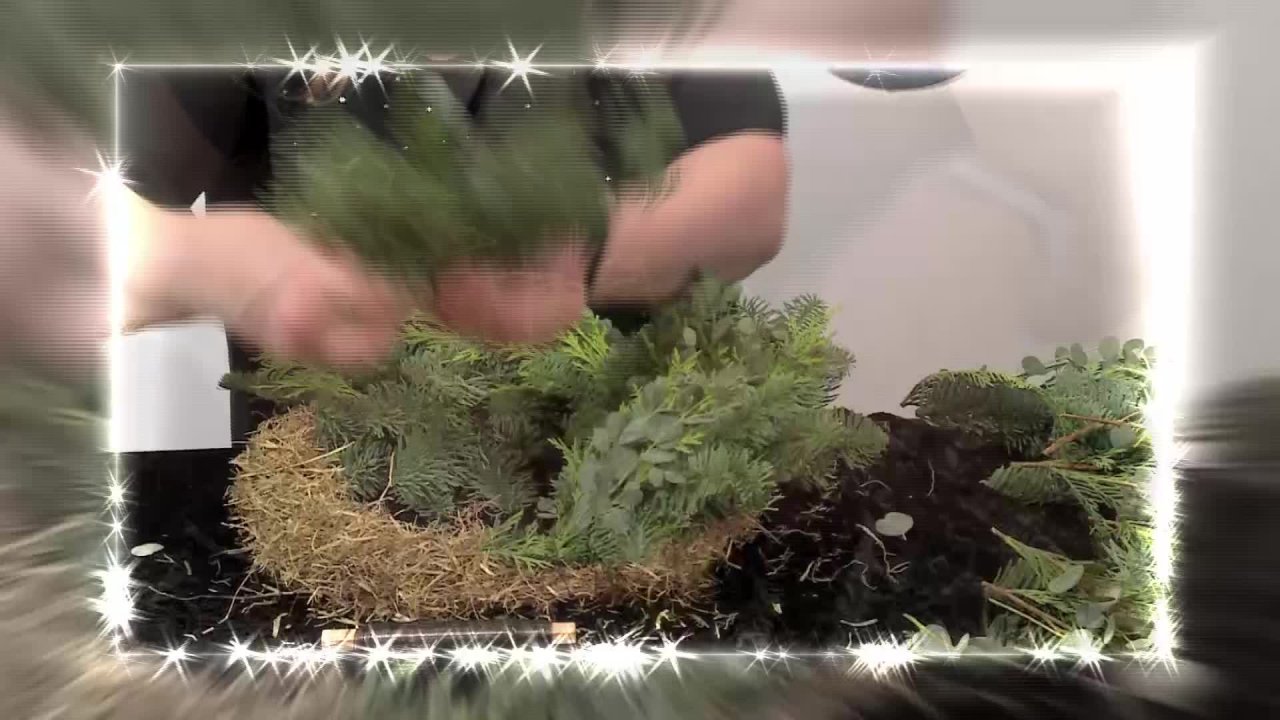
2. Video No.1 Materials and Tools: The mandala itself is composed off six. And here, talking about the sticks. I have two options. First of all, you can think about working with bamboo sticks. You can find in any art supply store or stores that sells supplies. To do some cotton candy, you have to make sure they have 30 centimeters off length. Yes, I am going to show you now. See, I'm putting together this edge along with zero 70 meters and it gives 30 meters and make sure they are really wide enough, like more than 0.5 centimeters off with. Why is that? Because then it the stick is gonna be stronger. And you're gonna have ah, much more durable product. The other option we have is this metal stick you confined at the harder store. You will never find them like thes. They're actually sold like a huge bar metal bar like these it has. Can you if you can see here proper leads, it has several little Rochon owes. Also, you can asking the harder store that they have 30 centimeters length or you can cut them with any car team, too. 30 centimeter, Some off length in the preferable with would be 0.5 centimeters to show you this, these air actually 0.40 point four. Uh, what is the difference off working with bamboo and working with metal sticks? Bamboos lighter is easier, I would say toe hold in the hand, but it's It's also breakable. While the metal stick is stronger and tow, avoid it getting rusty. It's a matter of just putting on the edge some nail polish and let it dry. Another good thing about working with mental is that this little channels will help make sure the yarn camo dates in the channels. So, to be very honest with you, I do prefer working with metal sticks, but feel free to shoes. These three materials are regular Germans Allah Cottam, young mandala in acrylic yarn, mandala be friends are in terms off pricing German allies cheaper. The cotton yarn is not that cheap. Maybe it can cost twice or three times with great energy and Mandela would cost and a Cree leaky similar to the coast of the courtroom in terms self texture. You can see uh, here that the regular Rundle eyes thicker and it's like Harry, the bottom vandalized is very smooth. It's not Harry at all, and it's not asked. Think as the regular Aaron Mandala, uh, end acrylic one is very things. So in terms of texture to savory honest, I prefer to work with cotton. But it's a matter off how much you would like to invest in your artwork. If you're starting to work, maybe it's good to start with regular yearn mandala. And then, as you get better at constructing the urine Mandela than you can invest a little bit more. A Cree League. The this advantage of working with acrylic is that you need much more loops to cover the stick than when you work with either coding or which regular yard. So these are the three types and go toe that today art supply store. Feel the material and choose one. Pick one with the with the color palette of your preference. OK, I am going to be using some cotton yarn here, nine different colors. But in the next videos, I will explain to you how I shows those colors how I organized quarters. These are some extra tools you will need to construct him and that are building up. You need a paper that is easy to fold our card work. You need a pencil. You need an acrylic pen. Posca, preferably of syrah 0.7 millimeters black color. You need a NATO. A big needle that would its hold will allow the yard to go through the whole. You need Ceasar so you can use regular Caesar's. You need a ruler at least of 30 centimeters off length, and you need four small spoons, pieces of sponge.
3. Video No.2 Color Palette: Okay, Now we're talking about inspiration to build up a color palette. So check out these Burda Barna dies Flower. I am outdoors here, so I am full inspired by the colors. Bolder colors that combined here. So, uh, making up honest, we have several green Kohler's we see like a dark pink color. Here we see a degradation off courters here from like vanilla, too. Um, toe orange. And then we have, like, a purple, blue or blue purple that I'm not sure, but we have to check out these these colors and combined that for Armando. Let's have a look again on this one. See, So you make a list of the colors you see in whatever inspires inspires, do you and then week over. That's into a color palette, as I will show you soon after the field trip in which we analyzed all the colors of the bird of paradise Flower or Avital. But I use a flower. I knew I noted, I didn't notes, and I I took a picture and I went to their supply store in. I understood that I needed some green that I needed some violent Kohler's maybe sahn some total's off my Janta in sometimes off orange and and yet and I got these two sets off your in this are Colton yearned. He's a regular yard. I didn't go for their credit because it waas too thin. As I explained, I mention it because I really wanted to to show to you these other that this material exists. And then what is? What are the difference? The tones off greens were different. Um, then I found that I needed so magenta. I found these magenta colors in cotton that I didn't find in regular John. But I did find, just just for the sake of perspective, this violet color similar. Okay, And then I found semen or corner seen yellows, and I worked thes us a corner degradation. You can see a reorganized the yarns, let's say, from dark to light, dark to light, dark to light. This will give me a better perspective about how to organize the color, something in there. But then I love these coolers. But then I started to think like why, if I did this just for the sake of getting more vibrant quarters, I mean, I love thes. I could work among dollar with these corners, but I don't know I loved, including this strong pink or magenta color into the yarn. Mandel. So I think in the end, it's some murder off taking the flower or whatever to get the inspiration from selecting which colors are going at work. This Monday has nine corners, different colors, but you can make it 12. You can make it five, as you like. In this case, it's it's a personal choice, but in this case, inside, I'm going to show you how to build this up. I'm going to choose working with Cotton Mandel I'm going for, and I'm going to be using $3.3 different greens from darker to like to lighter. I'm going toe work here from orange to a lighter. Uh, yeah, so and then I have in the middle these colors that I find there are really making a big contrast. The most important thing when to send recorders air gonna work with is making sure they made you vibrate insects when the ring bells that's to write pallets to use. And always if you're stuck at which colors I need to do to use which Carter saved your ass secure. Go to nature. As I showed you organize your corners like this and big the ones too late. See, for example, Iwas in doubt about using these. And I think you're beautiful. But I think with this corners I have much more vibrations, so let's get started.
4. Video No.3 Geometry Guidelines: let's create a guidance that will ensure them and Alice aligned according to geometric principles. Let's put the paper, hurry centrally. Then let's fold right in the middle, making sure the corners our together. And let's defy the paper into equal pieces. Put some pressure with the ruler of your like, then open and place the paper vertically. Repeat the same procedure but vertically put some pressure. Create the middle line, invisible middle line, tick the corners and open. We have Deb. We have found the center of the piece that's fold from top to bottom. And let's take this corner to the center line just like this. Put some pressure with the ruler and let's repeat the procedure with the neck with the other corner, as if you were doing worry. Got me. Now you open the paper, and we have divided the paper in eight equal pieces. This is the center, and we have eight extremes, like the Mandela we're going to build. If you like, you can mark with a pencil, just making sure these vertical line crosses the center off the paper, and then the horizontal line does the same just to reinforce the line and also there they ever known mines have to cross the center. These guidelines is going to help us. Make sure the distance between the eight extremes off the mandala are 12345678 piece. We need to mark do sticks first of full check the box. Skupin is working properly. Check it up a little just like this. And then big one off the sticks. Put it along with the ruler. Just like this one off. They just has to be a centimeter. Syria, the other one on centimetre 30 half off it. It's gonna be 15. Send Dementors, make a mark on the half and then keep marking centimeter by centimeter toward the rights and to the left. Then pick up the other sticks. Make sure they're aligned in one off the news. There might be differences on the Baldridge because of the cutting as you're gonna see and rip it. The marks. And don't forget toe remark strongly this intimate er 15th because it's the middle. And that's important for the ID of God. Construction
5. Video No.4 First Eye of God: to build the Eid off God, we have to choose a color of yard. I'm going to take the lighter, uh, yellow color to do that. Then, um, we have to make sure because they're so white. Mark Here. 2123456789 10 11 12 13 14 15. This is the middle of the stick. So we're going to do our knots. It seems it's it would be important to leave some some, um, yarn off. Okay. And then we're going to go to nuts. One important to keep them marks and inference just like this one. And to very stroke. And then with the fell, we secure this extreme like this, and then we don't one. Well, look, toe the This is the center okay with the one look toe the rights and one look to the left. And once we're done with that, we opened the sticks just like this'll Make sure, uh, make sure the marks you're going to see the marks. OK, this is important. And then this is the extreme of the of the threat. You you have to press it like this with some consider you. Although your fingers will be needles. OK, so what we're going to do is in this direction, OK? With one Loop three Looks like this plan to in three. And it doesn't matter very much if if the threats are located, more right or left Took aides just to start. Um, making this cross still Okay. And then sit still. Can more security like this and into the one two in three. Okay. And now this still can move. But it's OK, but you keep in mind that where this is the stick. Okay, this is the stick where we start. So this is also the stick where will will ends the I have got what we do next. We're gonna start with these. We put the thread on top very strong. Stretch it up very much. Then we go to the next one and we can spin. Then we go to the next stick with we spin. And this is where we started. What? This is where we're going to end. This is where we're gonna and spinning. We're gonna repeat this movement until we reach this. These marks OK, these black marks. So I'm going to do one more see you spin. Stretch the threat a lot as much as possible. And if you're using these, um, material made sure the threat is located in every one of the channels off You are. If you're using, would stick. It s a matter. Okay. We have completed two rounds. Every time we do this, movements in the four sticks, it's You can go see there. That us a whole round. Let's do one more. And then I'm gonna speed up the camera a little more magic. Remember to stretch very well the camera. So let's make an observation in here. We have rich to mark in here. We haven't see in here. We haven't either in here we haven't done. What are we going to? Because the idea is that it is It looks like a perfect square. So? So we're gonna start the next round, but we're going to speak. Spin it twice, one to a spins. Then way, Move to the next tick with the same one. Do spins. Next stick to speak sick and then we have reached are Mark. See? It looks like now it looks like a perfect square. So whether we do with the scissors. We cut the thread big. Okay, we put it backwards upside down, just like this. And then we do two knots. Very strong nuts. Important detail. This has to look up us a perfect square. You can even measure it just to make sure. From the center. It's once and Demeter, it's once and Demeter, one centimeter in one centimeter. This has a little bit more, but it's okay. It's
6. Video No.5 Second Eye of God: and to take another. See, it's darker, you know? Then same procedure. I'm gonna put the sticks like this. 15 is here. I live a considerable, uh, amount of your in here. So right in the middle. Not Jeez, magic. - So now we have Do I so good? We put one about the other, and it doesn't matter now. Which one goes pumped up and we make sure they are right in the middle that the edges year in here. So they're both writing that we're going check our guy in here, that test and, um, decided it's perfect if you need to make some adjustments. That's right. The moment because this director is not 100% uh, 100 percents steel makes see for so we have built top already.
7. Video No. 6 Assembly - Part A: I put together, uh, assembly this twice. Eyes have got. So I'm gonna take my eye off guard. That is gonna be at the bottom. I put it backward and on a stick different from the one I finished the eye of gorge. I'm going to make another nuts. Cheese. Very strong. Leave some thread like this and just make sure that the get me help myself. Make sure the threat he's continuing it gives their snow gap between the eye off God and, uh, these okay, um, and secure these very well. Make it really, really hard. Then we're gonna have this thread not to get confused there. We're gonna have these threats. And this is how the threat that we're going to use to put into structures together then work on that for the the others, director, and to help give violence. E said below this director, these four see this four sport is just to help to allow me somehow. So this is where the readies okay. And then I'm going to from here below. She's I'm going to secure with the right finger the second, these finger from the left hand, or if you're left handed the other way around. Uh, you stretch, They're not has to be. We have to make sure they're not notice in in the back part of them on that, OK, that we have the stretch. Very well. Like these. Okay, keep the structure secured. Here, import the finger like this. Would some pressure on this part of this structure and make sure these hard that does threads from the from the ending off the ID of God, I tried to put them on top Little. So you end up raising them. We gave threat before we We make it here so much, just men's. We have to make sure these threats are kept below. But these the the threats from when the finishing off the these I got are below. Okay, not here in front. And they're pressed by these new threat we're using to us saying, Don't worry. The structure moves a little because it's It's I told you, this is a the most difficult part of the mandala. If you get it right sometimes. Don't worry if you have 2 to 3 times okay? Now and what I did, I keep pressing. He took, gave these guys get misplays. Okay. What? I did these. The threat comes from here to here. Uh oh. Always in front with food. We take the bread here below, and once it is there, you make separation. I think if this happens, for example, in here that threat is composed off several tiny thread so you can put them together, suss us. I just Okay, now we're going to these guys. First. It's You place the threat on the right place you're giving, allowing continue. It'd to a t i O God. And then you make the pressure even in 2 to 3 feet. Do that. For example. In here, I have to loosen it a little. Place it and then stretch. No, Uh, I see this structure. It's a little bit misplays. Then I can again make some adjustments. For example, I can food here, here, so we're gonna move through these. So first we're gonna go with this that read what it has to be and then make pressure First . These, uh, first, his location of the thread, then pressure. Okay. Uh, then I'm going to these guy going to I'm going to put some first a threat. What? It has to be. I even can put some pressure. But after after? Right after the threat is you said the right place. Okay, now time to go. Did this stick below again? Let's play this threat at the right place. If you have to move to separate that the little from the full order from the table, Don't worry. And don't worry for its not a lying. It's the first round we're doing. So it's OK and then we push make their adjustments. Unit. Let's take this Director Buck. And then we're going to to these stick, excited to stick. We place the threat and then we do pressure. And now this is where we started, right? So let's do the same procedure but remember their suffering here. So we have to make sure we britisher it with the thread were using to suit him on that. So make some adjustments. Let's check. Okay, I really would like this. This part is the one that is more uncomfortable than it's so much fun to to them, and you will see. So we need a second ground to get it right. Maybe adjustments make sure, do I off goods are right in the meadow. Bring simply lose that thread like these. Just put some pressure. Give Bush in the red, for example. In here, you little bit lose then then straight stretching here. But then these one is gonna be lose. So stretched the next one onto you gets to the end of the round. So I think you can put it up now. Just like this. After one full round. And this is where the fun starts. Okay? It's still loosen its OK. Still lose. But we're gonna fix that. Let's do another round. But it's gonna be different. Put it up and then just spin. When you spend, make sure it has continued Teoh. Then we go to next week. Okay, remember this house threat, so keep it backward in speed.
8. Video No. 7 Assembly - Part B: once we've managed to take out Destructor out of the table Now we have to. It can be a bit confusing. You pass on the you learn like this just bean. Then you go to the next. Remember that? That are If that is left over you have to do this like this from the eye of court Young from Day of God took over with you You're in. It can be confusing because there that there will be left over yarn from the first and the second I have got in yearn from these caller this dark yellow toe assembly. So be careful. Stretch Very well. Very strongly separate older yarns. And make sure when you move from one stick to the other like this You speen And you're stretching very well the young and I'm just in case off gaps Mikel So sure. Um keep up Justin geometry Say I'm sure you're right now against the guidelines. See, the structure is not still yet. It will be very soon. It takes several rounds. Toby finished? No, I'm going to cut some left over from one of the eyes of God. And keep in mind that this red he's from the beginning Off the assembly. This is the reference. So I'm gonna keep spinning past the yearn and then being one stick above one below, and, um, the young from the starting point is bugging me. So I do this. I used this finger. I put the threat from my work to be low, and I push it so it gets a dashed meaning because we need toe reach the third listen. Immature mark. Remember, uh, this is the toughest part off creating them on the left, and this is the most important one. It is critical that your structure east's to you. You need to be checking permanently adjusting a get against the guidance. See, um, we're gonna get here. This is the third marks, and Demeter begin, uh, this structure is not steal yet. It's not super strong and steal did her some You can see some sticks Duds in which we're closer to the third mark. If some others we have reached already day second, intimate remark and his mother's. We haven't normally this sticks that are part of the eye of God that is in the background. Take more Aspin's. If you need to adjust with now, as I am showing now, because the more rounds we do, the more steel that destructor will be. So take that time to adjust to make sure that there are no gaps between the threats that the district continuity in the yarn. Durst. No past spaces where you can see the Mato keeps being see, I am showing not even it's important to a place properly, each threat off urine and you keep stretching. Okay, one above, one below. Remember to speak twice when needed. The idea this that this distinction between, uh, yarns between this sticks. Keep checking George geometry. And don't worry if you have to assembly Morden once. If it is not good enough, now it's time to start from scratch is Don't go, Auntie. This this part is critical for the success before well built mind that let's keep spinning . Until this directories strong enough, we're about to reached end when we reached end, and we're just going to do strong notes and go to a big swing. It enjoy also that we are doing a corner degradation in this center. They have got that is in front piece Haas light yellow yarn and We're same thing with that . Darker. You know, you do a fine geometry, take adjustments and check the tension of the yard.
9. Conclusion Lesson 1 out of 3: wait, Have fun! Part of the momentum of this first last. As you can see, the videos are step by step with lots of detail. You maybe the points of struggle are the assembly returns More Chinese. What? I encourage you and I urge you to keep trying to keep checking Giorgio my tree to check keeping. I've seen this structure and goes to the second class for the rial. Finally start. Uh so I hope you have enjoyed the first part of the whole class. Please don't leave us feedbacks. Police Teoh, send messages. Let me know if you have a show. I love your teacher. I want to create this beautiful. I'm going to be boasting your part. Work in all my social media. Count on me. I'm here for you. Let's go to the next class
 Yosymar Vasquez, DotMandalasforfun