Transcripts
1. INTRODUCTION: One, if you want to master Nano Brenna pro without
wasting your time, this class is for you. I'll walk you through
everything from simple proms to insane
cinematic output. So if you want to level
up your AI content game, then jump in and start today.
2. How to FREE Access | Nano Banana Pro: Welcome, everyone. So we got the new model for Nano Banana, and we have now Nano Banana Pro. The previous model was not accurate if you want
to generate text to images or if you
want to generate text or if you want to
generate consistency, there wasn't any accuracy
in those images. Now let me show you
how we can access to Nano Banana Pro in different platform
for completely free. By the official,
you have to go to geminigogle.com and you
get to this website. Have to click here onto tools, and you can select
Create images, or you can select
Create image from here. You have to click
onto this plus sign and you can add your
images or image. You can manipulate that
image by typing your prompt. Or you can just type any prompt and you can
generate your image. Second method, go
to hello dot video. You have to go to agent. And as you can see,
we have banana, too. This is Nano Banana. And now you can upload
your image from or you can type any prom and you can generate your image
for completely free. Now, third way, go to mna.ai. You have to click here and you
have to go to direct chat. You also have to select
generate images. And now, as you can see, we have semini three Pro image preview. Now if you click here, we have this dropdown menu where we
have all other tools as well. You can access to this
tool for completely free.
3. Customize Aspect Ratio | Nano Banana Pro: Welcome back, everyone. So now I'm going to
show you how we can change the Aspect Ratio
in Nano Banana four. Well, it's very easy. While in the previous model, you can't really change your
Aspect Ratio accurately, but now with the pro model, we can easily change
the Aspect Ratio. So first of all, go
to geminigogle.com, click onto this Create Image, or you can go to tools
and select Create Images. You have to upload
your file as well. So I'm going to select my file. I'm going to use this file. As you can see, the Aspect
Ratio is in vertical, so we are going to change the
aspect ratio to horizontal. So we have to type
this simple prom. Change the Aspect
Ratio 60 by nine. Now you can press
Inter or you can click onto this submit
button and as you can see, the gemini is now changing
the Aspect Ratio. So before we look
at the final result of the new Aspect Ratio, we have a new model
which is Demini three, and we have a new
feature called thinking. If you click here, as you
can see, guys, the first, the Nano Banana examine
the composition element, then he is expanding
the horizon. After that, at the end, he is elevating the integration, and at the end, we
got our final image. If you want to
download your image, you can simply click here
onto this download button, or you can simply click here. We have the second example
which is this image. And instead of typing the whole prompt from
start to finish, you can just convey your message what you are trying to
do with this image. So as you can see, I
type the short prom. Now, change the
ratio of this image. So Nano Banana
understand my task and expand the aspect ratio
of this image as well. Now for the third image, I also make my prompt
shorter than before. So I type now change
for this image. So Nano Banana understand that I am still trying to
change the Aspect Ratio. So we got this
result from if you are trying to do the same
thing to all the other images, you don't have to type your
prom from start to finish. You can make your
prom shorter just to convey your message
to Nano Banana. Now we have this example. And I type now change
for this image, and I got this result. By the way, if you are not
satisfied with your result, you can simply click
onto this redo button and it will redo your
Aspect Ratio or your task, what you ask to do. Now as you can see, we
have the improved image. Now you can go back to your previous version
of the image as well. If you want to, you can go to the next
version if you want. And download this image as well. Now, for example, if you go to the previous version and you upload a new image and you try to make some
changes to the new image, then you will lost all the other images expect
the image that you open. So make sure you have
selected the right version, and then you go to
your next task. Once you upload your new image, you don't have to right
click and copy this. You can simply hover your
mouse to the prompt. You can click here
to copy your prompt, or you can edit your
prompt as well. So now I'm going to paste this prompt and let's
expand this image as well. Now, if you are getting
this kind of desert, let me show you what I mean. So if you look at the original image in
the vertical image, we have this whole view. If you look at the
horizontal image, it crops some of the
view from the image. Let me show you how you can fix. You don't have to upload this image again and
type your prompt. You can simply click
here, edit your prompt. Now you can type
the simple prompt. Now change for this
image, or you can type, change the expectation
to 60 by nine and keep the original
view of entire image. When you update this, it will automatically
generate your image. While the AI is
generating your image, let me show you some
other examples as well. Now we got this image, and this is the
new Aspect Ratio. Now we got this image. We have this beautiful
view in vertical, and I typed the same problem
now chain for this image, keep the original view
of the entire image. And as you can see, guys,
the Nano Banana try to keep the view in one
single horizontal image. Then we got this image, and this is the
horizontal result. We have this image
with the Aspect Ratio, 60 by nine, this is a new
result. I mean, checkout. Isn't this beautiful? You can expand any
scene that you want. We have another example and we have this example. I
mean, check this out. If your image is
still not fixed, then you can redo your
generation as well. Now, if you redo
your generation, then you will get different
Aspect Ratio result. So let me show you.
So as you can see, this is the first version. In the second version,
we have a little bit tweaking onto this section. And next, we have these changes. And finally, we got these tend. So you can select your version. What version you like the most? You can select that version. You can download that
version as well. Now I try four redo, and as you can see, guys, I did not get this part from my image in the
horizontal image. So let me try this last time. Expand image 60 by nine, keep original vertical image. Don't crop any area. Now this is the updated result, and still it crop this part of the
building from my image. Now, if you simply type
expand image 60 by nine, will lose a lot of
area from your image. But if you want to keep the original image
as much as you can, then you have to type
some additional words like keep original image. Don't crop any area,
or you can type, keep the original view
of the entire image. This way, you will lose a little bit area
from your image, but not the whole area. So as you can see, guys, in this example, it crop this part from my image, and this is the horizontal image that we got from
Nano Banana Pro.
4. Best Text Accuracy | Nano Banana Pro: Welcome back, everyone. So let me show you the text
accuracy of Nano Banana Pro. I'm using the whisk and whisk
is using image and four, and I typed this prom Window 98 screenshot with Microsoft
Excel open and Photoshop open. And as you can see, guys, I don't know if you
look at the title, and I don't know what
are they saying, but this is not the
English language, and the text is not accurate. We also have the
second variation, and we have the same problem
that we faced before. Now with the exact same
pro the Nano Banana Pro, I mean check out
the text accuracy. We have the correct
name of this folder. We have my computer recycle
being Internet Explorer. We have the tiny text
correct by Nano Banana Pro. Now, it also named the
Photoshop version at that time. So maybe this version was used
at the time of Window 98. Now I use Nano Banana
one and I say change this to window 2000
like this prompt, and this is the result
of that prompt. I mean, check out the result. This is not accurate. I don't know what type of
files are open right here. But if we look at the result of Nano Banana Pro,
check out the result. It turns the 98 Window
to 2000 Window. I say now change these
two Windows seven, also change apps
according to the window. Let me show you first the
Nano Banana result of one. And as you can see, guys, we got Windows seven right here. It got the title correct, but as you can see, guys, all the other folders are in Gibberish or some
alien language. I don't know what
are these titles, but if we look at the
result of Nano Banana Pro, I mean, check out the accuracy. We can redo and we
can fix this error. But other than this, we have the perfect example. I mean, it also nail this bar, it blurred the background
behind this bar. And it also changed
the icon as well. The photo version
changed as well. Then I say now change
this to Window ten and check out the
Window ten result. And this is the time when I
was generating this image. All the other time
are not corrected, but this is the time where I was generating the image because
I am using Window ten. So maybe it got my
timing from my window. So now on you can accurately generate text
in your image as well.
5. High-Quality Remasters: Welcome back. Now
I'm going to show you how we can
remastered all games. If you use Nano Banana one
and you type remastered this, you will get some awful result, like I just made the explosion
or the gun flash bigger, and it did not change
anything at all. In this example,
it just polished something and it did not
change anything at all. Again, we have the same mistake where it just make
the element of explosion flashes a little bigger but not polish
the whole thing. Now let me show you the
Nano Banana Pro version. If we look at this image, this is the original
image of the game, and I just simply tie make this remastered and check out the polished version
of this game. Isn't this look amazing? Then I have this example and
like the Nano Banana one, it makes a mistake. I just make some
additional element and it just makes
some element bigger. And it just polish the
game a little bit, not remastered like in
this example we did. I use this image, and I say, now make this modern three DMs. Before I show you the final
result of Nano BranaP, take a look at the
detail of this model. And if we look at
the three D version, take a look. Isn't this crazy? They all look like in
the original game, but in three D. I mean, even it matches the lighting of the surrounding area as well. And it made it this three
D live bar as well. I use the DT three and I say, now remastered this
and have a look. Isn't this beautiful? This looks like the modern
PS five or console game. Then I use the Pepsi
Man and I say, now remastered this and
check out this result. Isn't this crazy? Then I use tac and
three and I say, now master this and have a look. Then I use the Call of
Duty one and I say, now you mastered this,
check out the result. So I don't think you have
to use the Photoshop again. You can truly use Nano Banana
Pro for all your workflow.
6. How to Change Camera Angle : If you are trying to get different camera angles
after typing a prompt, but you are getting
the same image, then try this hack. Instead of typing, give just type make and then the
camera angle that you want. So I type make closeup
of this image, and as you can see, we have
the closeup of this image. Then I type make lower angle, and as you can see, we have
the perfect lower angle. And I have to say
that Nano Banana Pro is accurately generating
the angles of this scene. For top angle, you can type
this prom, make top angle. We have the top angle I mean, check out the details
in this image. Then I type make
left side angle, we have the left side angle, then a type make
right side angle, and we have the
right side angle. Now, I want you to look closely. If you look at the result, we have the top angle view
and after I type make side angle is
manipulating this image, not the original image
where we have started. So this is my original image. And if we look at the
left side angle view, as you can see, guys,
the Nano Banana Pro is maniplating this image. So if you want to manipulate
your original image, then try to copy and
paste your image. Let me show you how you
can copy and paste. Right click onto your image, copy, click here and paste. Image. So why this is important? Because if you look closely, I say make left side angle,
we have left side angle. After the left side angle, I type make right side angle, but I did not get the result. So that is why I copy
and paste my image, which is this one, and I say make right side angle
and check this out. Then I use my same image. Again, I say, now make
behind camera angle, and we have the behind
camera angle view. So this is how you
can accurately generate different camera
angles using Nano Banana Pro.
7. Multi-Reference: Nano Banana Pro,
you can now input 14 images and you can manipulate them into
one single image. So let me show you
how we can do that. So I have myself
this helmet guy. I have bunch of suit, and I type this prompt. Man in glasses is a silman and all these suit are displayed in his luxury element
person is customer. As you can see, guys,
I did not define any lighting or anything else. This is a basic prompt. That is why we got
this crappy result. So what I did after I used these two person and I typed two person standing in
a empticity at night. So as you can see, I typed
this keyword at night, so I have to adjust the lighting because these two
shots are in daylight. So this is the reason why
we got this perfect result. I have to say Nano
I wasn't able to correctly manipulate two
person into one single image. I mean, if you
look at the light, the light is directly casting
onto this person head. We also have another
bad example where I am sitting and I type all of these standing on
moon, white shot. Earth can be seen
in the background. The problem is not bad, but my input reference is bad because if you
look at the result, I am not standing, I'm
running in this image. I'm sitting in this image. That is why it generated
this type of bad result. Other than that, these
two cartoon character and this creator is perfectly
placed onto the moon, and the Earth can be
seen in the background. Then what I did, I used
these reference images, and again, I use
the night keyword. So I type all of them are standing in a A street at night. And this is the
result that we got, I mean, check out the result. I tried best to merge
these people together, even though all of them are
from different backgrounds. Have anime guy, cartoon guy, we have some other guy as well, and even in this creature. All of them are from
different backgrounds. So this is the toughest example. That is why we are getting
this kind of crappy result. So after that, I use myself
and the creature again, an Atta person in park,
petting creature. Check out the detail. Then I use myself and this
cyberpunk bike, Atta person on a cyberpunk bike. So I type on a cyberpunk
bike, not driving bike. So this time, I use different bike and type person riding cyberpunk
bike and checkout. It merges the person onto this bike perfectly because
if you look at the lighting, the lighting is matching correctly according
to the background. I use the cyberpunk car. By the way, if you want to
generate these type of images, you can use Wisk to generate
these type of images. Then I use cyberpunk
card and I say person driving cyberpunk
car, have a look. Then I say person flying jet, this is the result that we got. Then what I did, I combined these element. We have cyberpunk
car, cyberpunk bike, cyberpunk, dog, cat, beer. We have cyberpunkity. So I t merge them in one image, person in cyber punkity, dog, car, beer, car, and
bike and have a look. Isn't this crazy? Have another example
of multi element. So I use Nano Banana Pro to
generate all these images. I have this simple prom
agin robot in a city. And as you can
see, guys, we have this beautiful realistic robot. If you are not getting
realistic result, then try to type photo
realistic keyword in your prom. This way, you will get
photo realistic result. Then I generate this moster
by typing this prompt, Agiint robot in a city. Then I use these two images. I basically copy and
paste these two images, and I type both
fighting in a city. And as you can see, guys, we have this beautiful result. They both are fighting I say make top camera
angle and have a look. Isn't this crazy? Then atta make
lower camera angle, and we have this
lower camera angle. And just like that, I have
made it this whole sequence. I have this close up shot. Then I type monster ribbed
and throw his hand away, Thenata monster destroy robot. Then at final, I have this white shot of a
monster one step on top of. So I meant to type robot, but I mistakenly type monster, but the Nano Banana
understand it anyway. And we have this
final crazy shot. And at the end of type of fighter five bullets on monster, then I say, make it wide angle. So as you can see, we can make a whole sequence, starting by one single image. And finally, by
using Google ids, I animate these images. So as you can see, this
is our first image. This is a very crazy shot. Then we have the robot
walking in a city. Then they both start fighting. Now we have a different
camera angle from top view. We have lower camera
angle, close up shot. Now, as you can see, guys, we have the flaws in the video. So my highly recommendation
is don't use the whole video, this eight second video. Just use that part which
make your video look better. So as you can see, we can use a few seconds of this video. So we can use 2
seconds of this video. Then we can crop this part from the video because this part
is not looking realistic. And from here, we can
continue our video. Also, try to tweak your words here and there to
make your video look better. And I may have a look. We made this whole sequence starting from one single image.
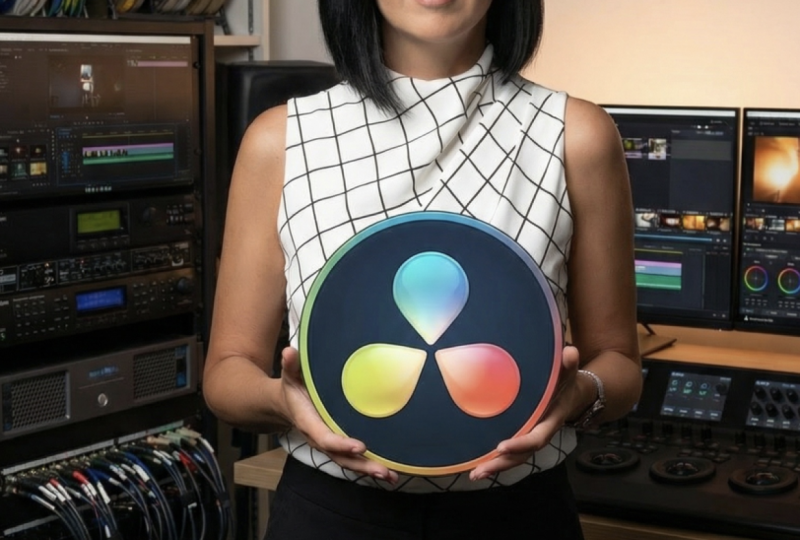
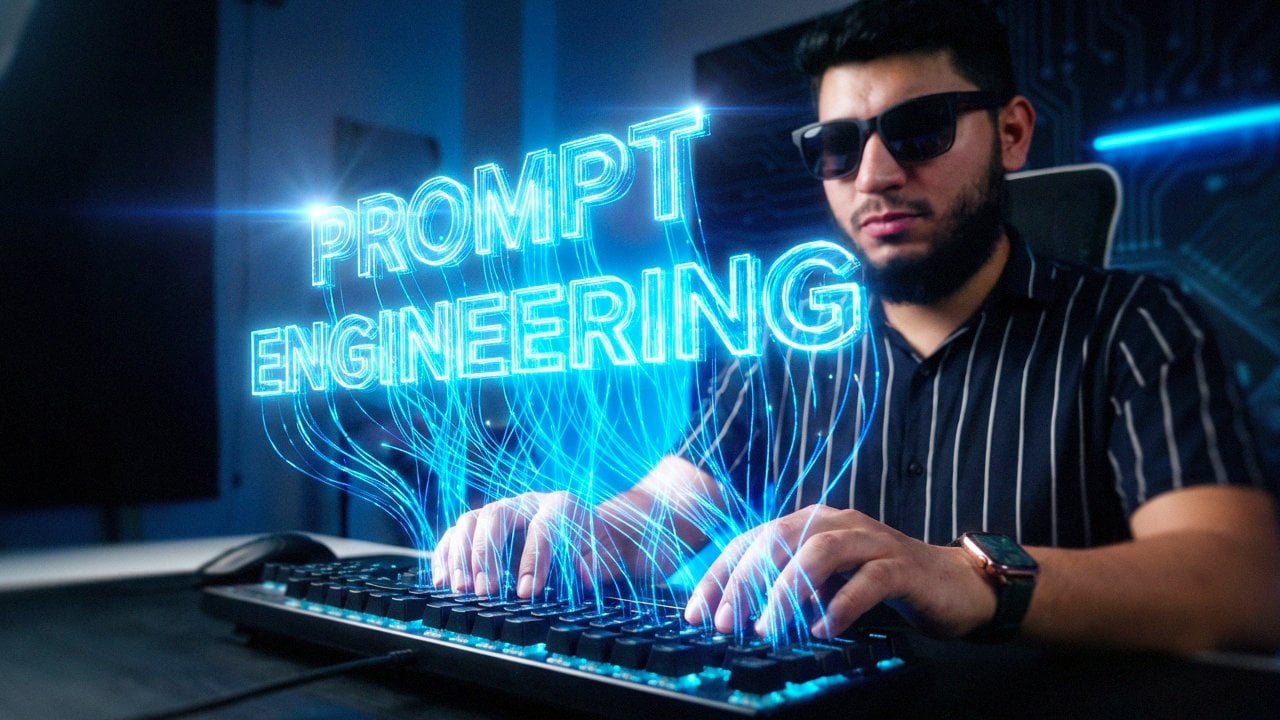
8. Professional Thumbnail Design: Welcome back, everyone. Now I'm going to show
you how we can generate awesome thumbnails by
using Nano Banana Pro. So we got this image and
I type person wearing black sunglasses and standing
in a video editing studio. Now, by using this image, you can manipulate
this image and you can create a
perfect thumbnail. So I use Gemini logo, and I type now person holding this logo with both hand
check out the detail. I type adds cinematic studio
lighting to the scene. We have this studio lighting. Then I type change the
aspect ratio to 60 by nine, and this is our final thumbnail. Well, this is the one thumbnail, let me show you
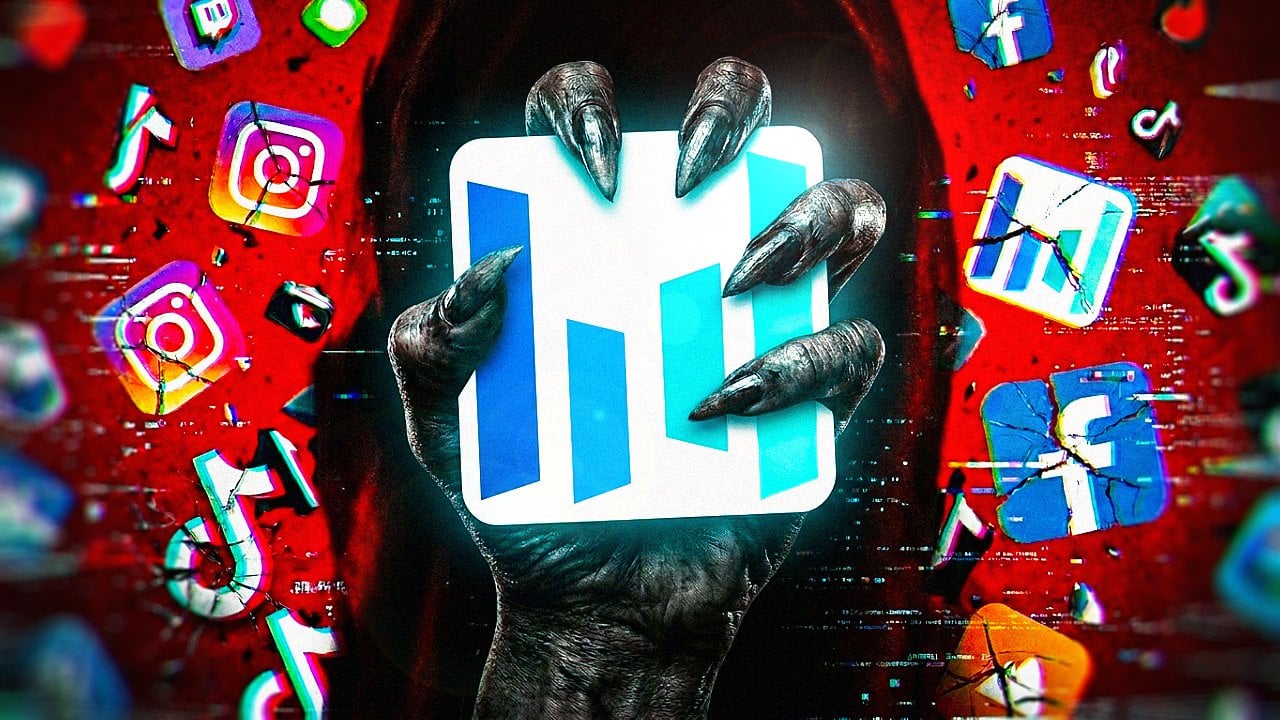
some other example. I use the Dawntisolve logo and atta person holding logo in
his both hand check out. Then I use myself an Atta
person wearing sunglasses with white frame doing professional photo
shoot in studio. Have a look. So then
I use the same image. An Atta person wearing sunglasses with
white frame standing in professional video editing
studio. Check this out. Then we have this
image nata person wear black sunglasses with
white frame, have a look. Then I change my Aspect
Ratio to 60 by nine. Now, these are some basic
examples let me show you how you can copy any
thumbnail from the YouTube. So I use Mr. Beast thumbnail as a reference, and I use this image. So I type create a
thumbnail like Mr. Beast, and I mean
check out the result. So I did not like the text, so I typed remove
all text from image, and we have the final result. Isn't this crazy? If you have to make this
exact image in Photoshop, it will to you hours to
create this type of result. And after that much time, maybe you are not able to
match this kind of result. Then I use the same
image and a type, create a Mr. B's
thumbnail style, make it look like I am testing the winter dissolve
video editing software and I mean, have a look. Then I say remove all
the text and make it Aspect 16 by nine, have a look. Then I use this image and a type make person sit on
a cube like reference, just make it different
than the reference. So it is return me
the same image. Then I use the reference
image and myself and I type now make person
sit on a cube like reference, just make it different than way, you can create your thumbnail without spending
any time at all.
9. Draw on Image : In Nano Banana Pro,
you can even draw on your image to manipulate your
image. Let me show you how. Simply right click onto your image and go to
edit with photos. Once you got here, you
have to go to markup. Then you can use one
of these three tool. I'm going to select this one. You can draw anything that
you want in your image. I'm going to draw
these to monitor. You can then arrow
them down or upward, and then you can
draw their name. Like I'm drawing
monitor like this. We can even draw it here. After that, you
can click here and you can save this as a copy. I'm not going to do
that because I have already make some
changes to my image. This is my image. This is awful place to
place your monitor. We have the awful
glasses as well. So I use this image, and I make change according
to the instruction. So these are my instruction, and as you can see, we have the glasses and we
have the bonior. And the Nano Banana place the monitor where
I ask it to place. Then I draw this awful UFO. I draw this dust, and I arrow them up
and I draw dust, and I draw right here space. So I type the same prong, make change according
to the instruction. And as you can see,
Nano Banana generate this master even with the
awful drawing I mean, how can you get this kind of result from this awful drawing? Then I use mymte I
draw this keyboard. I draw this mouse. I draw this haze, and with the same prompt, I got this result. So I did not like the result. I want my keyboard and
mouse to float in the air. So what I did, I
make some changes. I draw the keyboard, the mouse, we have the haze andati
mouse floating in air, keyboard floating in here. And check this. Keyboard, mouse floating, we have this haze. What I did, I draw
these fake tears and I make change according to the instruction
and check this out. It makes me cry, and I mean check out the detail. Now, after this, I
draw this awful car, which is the big
one, arrow this up, draw a car, draw the
smoke, arrow this up, and I draw smoke, and I only got the smoke. So this time, what I did, I draw my car in between
these two person. I draw the smoke or dust and
I arrow this up type dust, arrow this down, and I draw car. And this is what we go. The reason why we are getting
this kind of result is because there is no place to place the card in this image. Now in this example, I draw these random
lines, arrow this up, and I type arts, and it just place myself in between
these two people. So what I did, I
upload the image. Again, I type make changes to this image according
to the instruction. So it just added these hands and place
myself in the park. So what I did I say covered the scene with ants
s around the person, his halfway can be seen
and check this out. Isn't this beautiful. Then I tie filled ends in the background and on
the table as well, and I mean check this out. So this way, you can easily
draw onto your image, and you can manipulate
your image very easily using Nano Banana Pro.
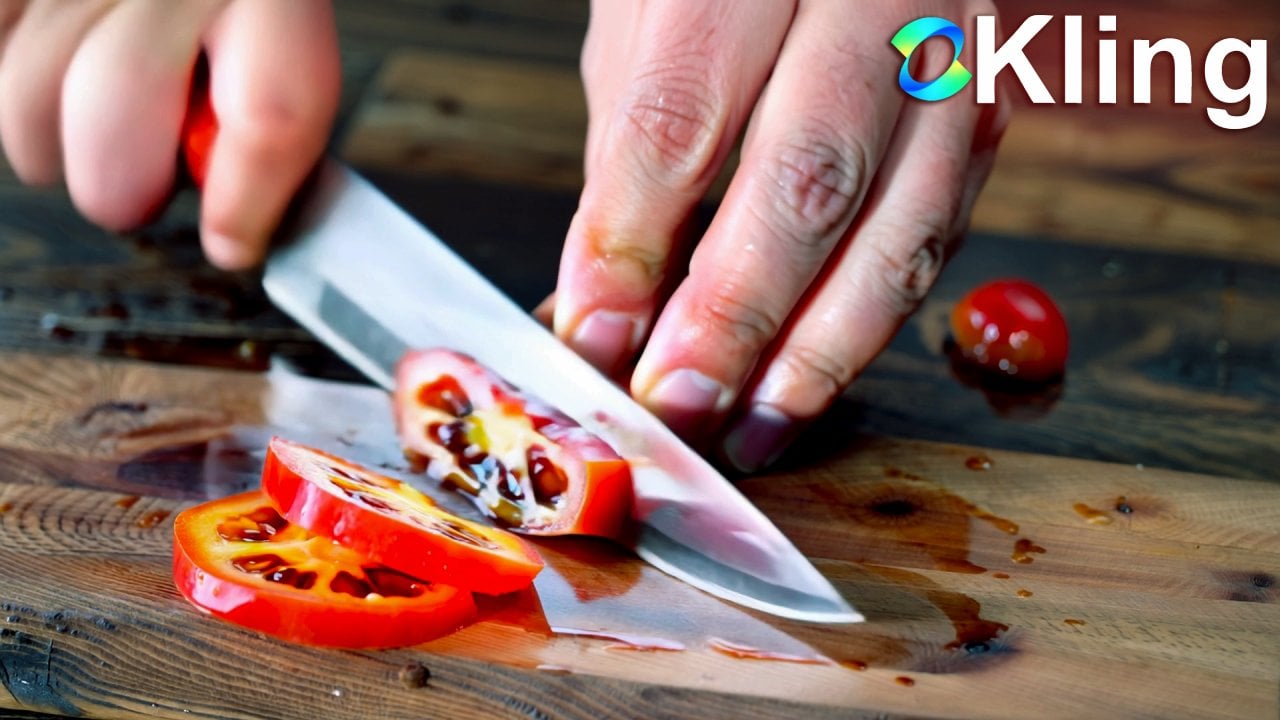
10. How to Add VFX: With Nano Banana Pro, you
can even generate V effects. So I use this image and I type person holding
a machine gun and firing at robot arming behind him and check
out the detail. The person is
shooting the robot, and the robot even
in the background, have the shadow depth of it. Then I type now person firing like icon at the
sky, check this out. Then I use the person
and type person running from the flood, and I mean check
out the flood and the person is running
onto this water, and we have the splash as well. Then a type person running from big explosion in the background. The Nano Banana use this image and apply
changes to this image. So make sure if you
want to apply changes to your original
image, you can copy, and you can paste your
image right here, and then you can make changes
to your original image, not your latest image. Now, even with the
flood and explosion, check out the detail I
use my original image, and I type person running away from Army of robot, have a look. Then I use the same image
and I type person running from big explosion in the
background and have a look. Even the explosion fire is casting light at the
edges of the person. So you can easily generate
VFX using Nano Banana Pro
11. Practical Use Cases: There are a lot of ways
to use Nano Banana, but I'm going to show you
some practical use cases to use Nano Banana Pro. You can use your drawing and you can colorize
your drawing accurately. You can merge multiple logos and you can create a brand
new logo from scratch. I use Gemini logo, and I use banana and
Google logo, and I say, create a new logo
with combination of Google Gemini plus
Nano Banana logo, and here we have the result. Can generate a sprite sheet
of your pixel character. You can merge fictional
character into one image. So in this example, I have
typed Pikachu, courage dog, Shawn Sheep taking
selfie and it accurately make these characters which are from different background. The Shawn Sheep is
from stop motion. The court is a cartoon, and ikat is from anime. So these are three different
style merge into one image. So I want to make them driving, so I say they are now driving. I mean, check out the result. You can create your graph, I type population of world
graph 2000-2025 visualization. And this is the
graph that we got. And I say change graph
style to three D modern, and I mean, have a look. Isn't this beautiful? You can use Nano Banana for
motion graphics as well. You are a website designer, you can use Nano
Banana Pro for that. I say UI design for
motion graphics site. This is the site that we got. I say, now, make this for
Window because this is, as you can see, is
for Apple or Mac. So it turned this into Window. Then I say polish and redesign this website
and have a look. Isn't this beautiful? You can take a screenshot of your crappy website and you can type polish and
redesign this website, and it will redesign
your website. Now if you go and check out the original Nano
Banana Pro guide, we have these some
additional use cases. We have this image as an input. If you want to
generate infographic, you can use this simple prong. Create an infographic
about this plant, focusing on interesting
information. You can even generate any infographic for anything
like we have this achy chi, how to make the Lachy chi. We have the information graphic or infographic of the Lachy. If you look at the text, all the text is typed
correctly by Nano Banana Pro. Now, if we are talking
about the text, I mean check out
the Berlin text. Isn't this crazy? This is a prompt used
to generate this image. You can also make text effect very easily with
Nano Banana Pro. You can create your
mockup as well. You can generate
typography and you can generate accurately
text on your image. If you want to accurately turn any night scene into
day or day into night, you can use this prompt turn
this scene into nighttime, and I mean have a look. Isn't this accurate? You can also play around
with the lighting, generate any effect on your. Can even play around
with the depth of field. As you can see, in the scene, the camera is focusing
onto this person. Everything that is in
the foreground is blur. So I just type now, focus on flower, and I'm
in checkout as adult. Everything is in blur
except the flower. This is the previous version and this is my second version. So these are some
practical example of how we can use nanobranap
 Faizan Amjed, Video Editor,Filmmaker & Youtuber