Transcripts
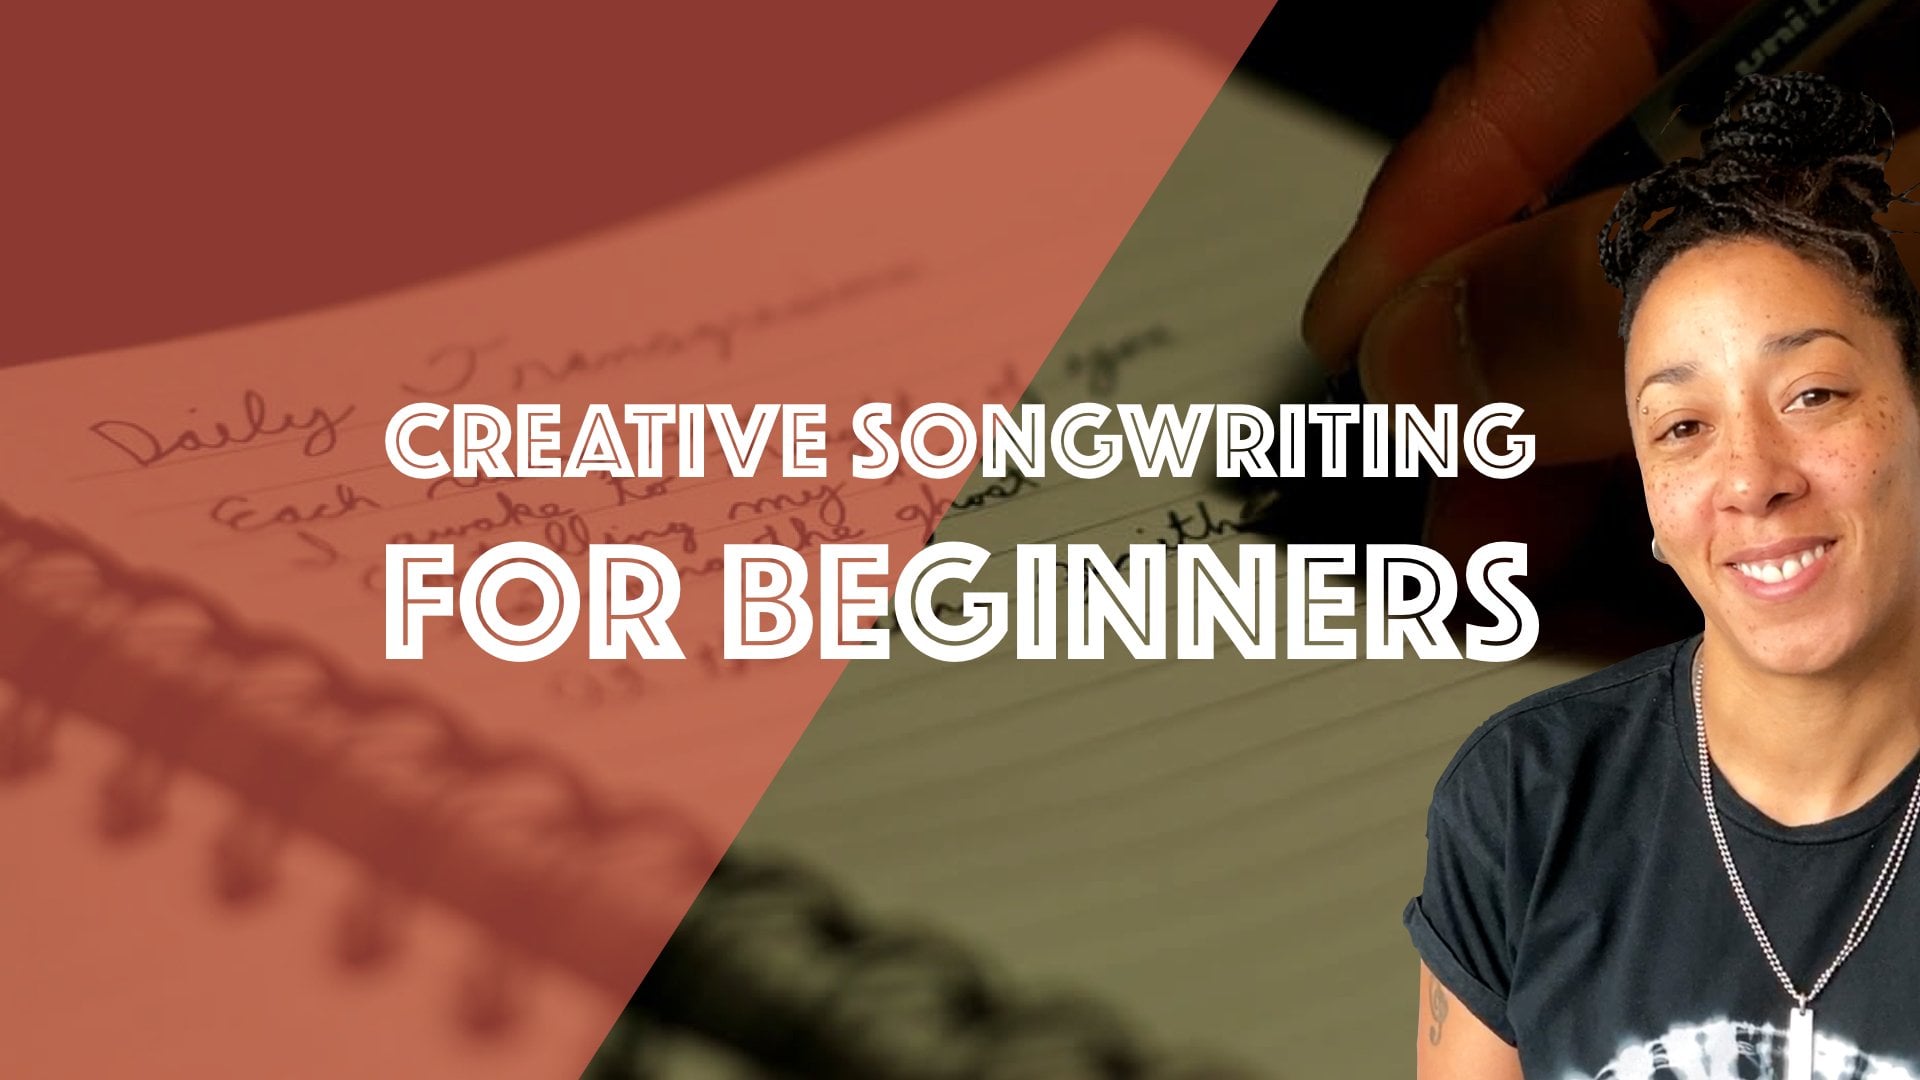
1. Introduction: It doesn't matter if you're
a singer songwriter, producer, podcast
producer, editor. If you've just started at the beginning of
your music journey, this class is the perfect
class and get you started. Whatever direction
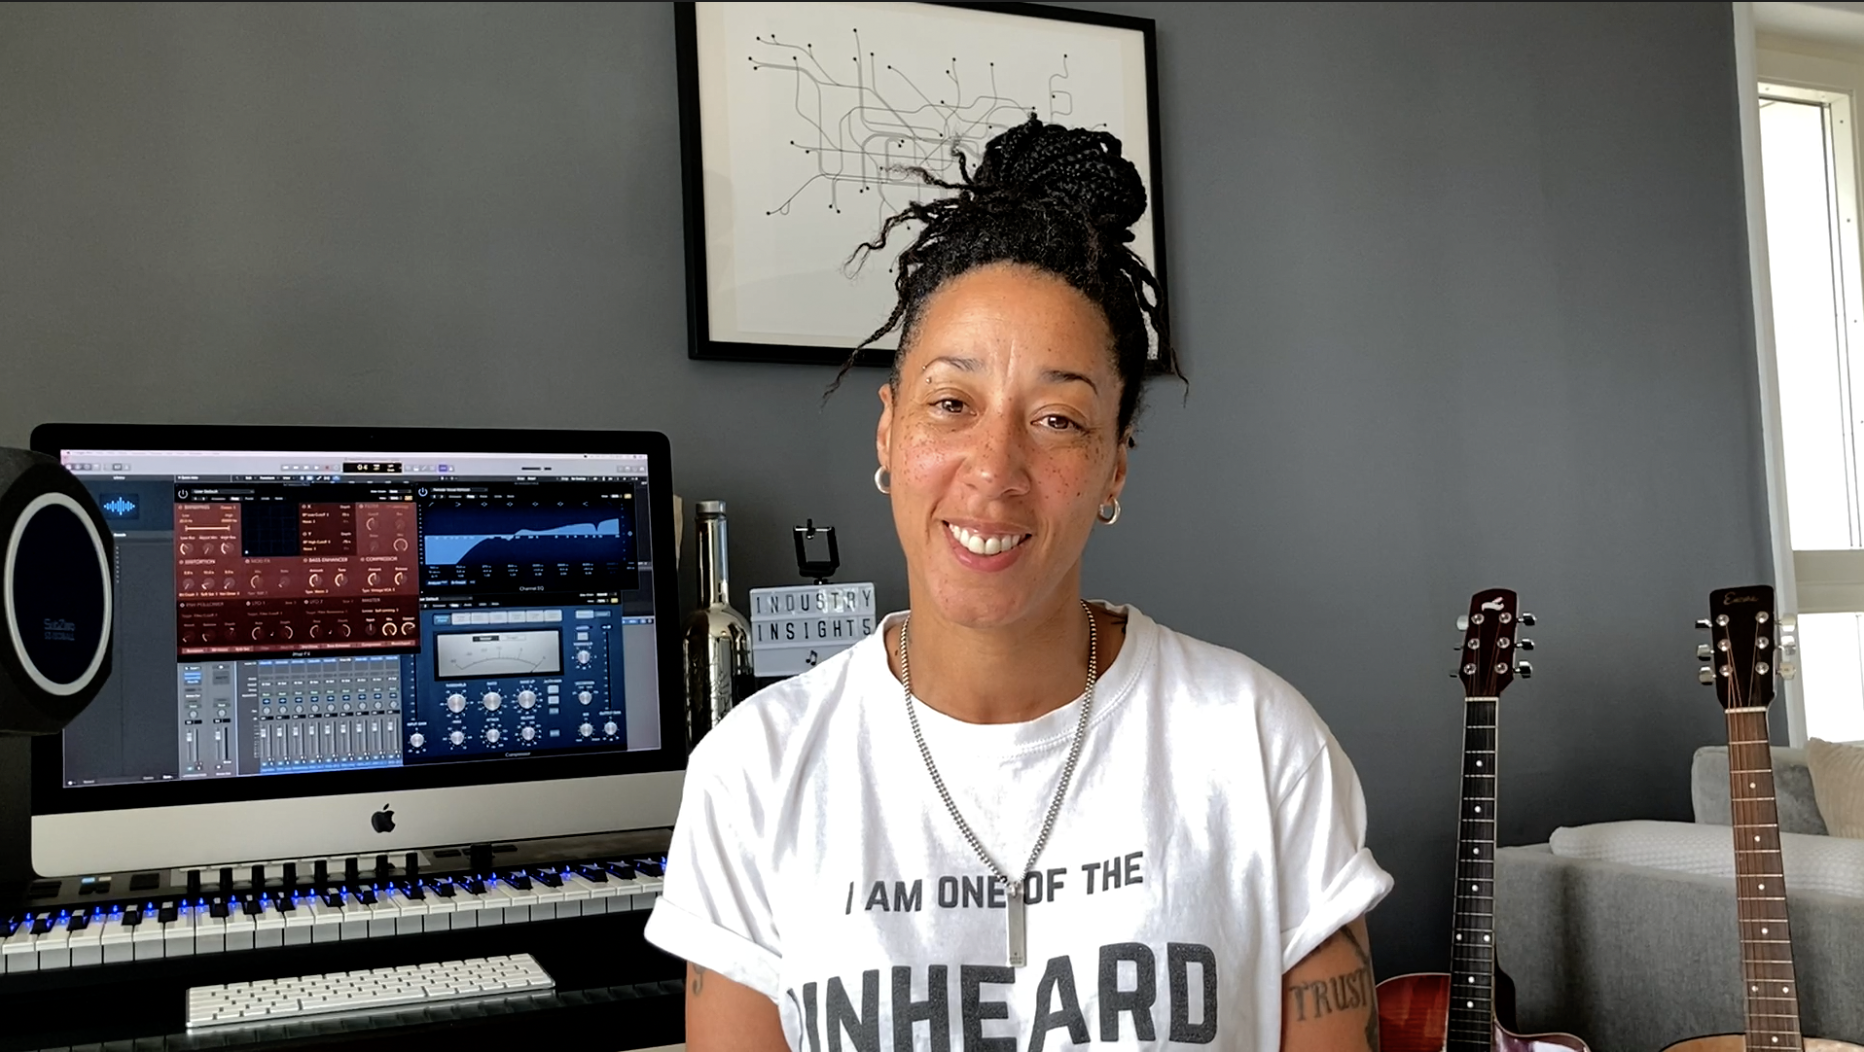
you are going. Hello my beautiful creatives. My name is Eve Horne. I am a singer,
songwriter and producer. I'm also found that a peak music UK and we are the
unheard campaign. I've been in this
industry now for over 20 years and
I've collaborated with some huge artists,
producers, songwriters. Since I launched my campaign, I've raised and loads
of awareness for the equality of women
in the music industry. I've been able to
teach production and songwriting to women
and gender minorities. I was also nominated
for a music week, women in musical ward. I also produce all the
music for this car. This class is aimed
at beginners, so you don't need any prior knowledge of software or hardware
to take this class. I'm gonna guide you through everything to get you started. And even if you're
not a beginner and you're just new to logic, feel free to take
this class as well. This class is my third
class on Skillshare. You might remember
my first-class, creative Songwriting
for beginners and my second class production
for songwriters using able to live
11 for beginners. In this class, I'll be
giving you everything you need to get started with
Logic Pro ten or Pro X, so that you can start making your own traps if you want to start using it as a producer and getting some
loops in recording your vocals and getting ideas, your songwriting, if you want
to use it as a songwriter, by the end of this class, you will have a clear
understanding of the functions of Logic Pro ten. You'll be able to
start your own tracks, recording your own audio, edit them, arrange
them, and export them. You'll be able to
understand plugins, input levels, again,
midi automation. So there is nothing stopping you from creating your own tracks. I look forward to seeing you
in the class orientation, where I'll be
giving you some key concepts and the tools that you need for your future in
production, songwriting, or ever.
2. Class Orientation: Hello and welcome to
your class orientation. Here, I'll be breaking down exactly what I want from
you for your class project. I would like you to
complete a 2.5 minutes song using a minimum of
the following things. Drums, bass, synth, vocals, piano, strings, or guitar. I chose this project because
I feel it's so important for creatives to be able to
learn and feel confident. We're broadening their tuple and expanding their knowledge as we go on this journey together, I will be guiding you through
every step of the process. I'll be providing
bite-size lessons to make it easy for you to understand so that you can create each musical
element, practice them, and then upload them to the class community to
take part in this lesson, you will need a computer
Logic Pro X or ten, a midi keyboard,
headphones or speakers, or your computer keyboard. In order to make this
class work for you, please make sure you read
the class description, take your time and focus on one piece of
information at a time. Complete the tasks I give
you throughout the lessons. Be too hard on yourself
and make sure you contact me if you have
any questions at all. Remember, no question
is a stupid question. I can't wait for
you all to dive in. Make sure you download the resources that I've
provided for you along the way. And I will see you
in lesson one.
3. Creating A Project: Hello and welcome to Lesson
one, choosing a project. In this lesson, I'll be
showing you how to download Logic Pro X or Logic Pro ten from the App Store
or the Apple website. How to open an empty project? How to open a live loop project, different style to grid
templates to get you started in Live Loops available tutorials which are highly recommend. You check out in your own time. Project templates, which are
great to get you started, whether it's a commercial truck, TV, film, orchestral, singer, songwriter, they're really
good to help you get going. And lastly, I'll be showing
you how to save the template. So in order to start
using Logic Pro, we need to go to the app store and download
it onto our computer. So I'm going to click on
the App Store app type in Logic Pro X or Logic Pro ten. And there you go.
You can see it says open because I already
have it on my computer. But if you don't, it will
say get or purchase or buy. You click the button and it will download onto your computer. And then you just simply follow the instructions and install it. Once you've installed
it, you can go to your application folder. And there you will
see Logic Pro. And from the applications folder you can drag it down into your doc so you have easy
access to it at all times. Once you've done that, literally click on the icon
and open Logic Pro. If you haven't got Logic Pro and you can't afford
it right now, you can go and get a 90 day free trial directly
from Apple's website. So you literally go
to Apple's website. Here you can see the page where Logic Pro is beautifully
set of all its colors. And right here is where you will download your free trial. Before that though, I'm just
going to scroll through and so you can see the
other features in logic and feel free to read all of these at your
own leisure may be good introduction
to see how powerful logic is as a digital
audio workspace. So obviously as
your more advanced, It's good to know that
logic can go into Dolby. Here. You've got new sound packs. So definitely go
into that because they're always creating
new sandbox for you. Here we've got Logic Remote, the Live loops and
stuff, all good. I'm gonna be going into
that later on in the class, but checkout all the
other stuff as well. I don't want to go
into too much that it does because it
would overwhelm you. Here it's showing you live
loops and the step sequencer remixes a great
stock plug-in that allows you to add all
sorts of effects to your track and almost like
give it a DJ style effect, flextime pitch, smart
tempo and stuff. They're all quite advanced
features of logic, which I'll probably
cover in another lesson. So we go up to where
it says free trial. Click on that. And then you have the Download button that will ask you if you want to download allow downloads from Apple.com, you will click Allow. And then up here you'll see that once you've
clicked Allow, your download will start. Once I started,
you simply follow the instructions and open
Logic Pro for the first time. I'm going to cancel because
I already have logic, so it's pointless me adding another to something gig to my, my already diminishing
hard-drive space. So as soon as you open logic, you will have this
window here or this box, and it will give you a
list of different options. So at the top here we have
New Project and we've got the option of an empty project
or live loops under that, we have our recent projects. So this will show you any recent projects you've
been working on. Then we have started grids. This gives you a whole
different range of sound packs. Here we have tutorials, so I would definitely recommend going into these at
some point and going through all of the tutorials just to make sure that
you are completely familiar with the different
options within Logic Pro. Here we've got a demo
project and they've been kind enough to give us a
Billie Eilish demo project. So definitely go and
have a look at that. Here we've got
project templates, which is really good because
it allows you to open an existing template so you don't have to
do the hard work. Everything is already
set up for you. And under here we
have my template. So this will be
the templates that you create and save yourself. Here we've got all
the details about whatever project you have
highlighted at the time. So it'll give you the
Tempo Information, key signature, time
signature, and so on. So I'm gonna go to New Project and click on empty
project and press choose. Now you can see that it has
bought this drop-down menu, and this gives us a variety
of things to choose from. Automatically, it
will highlight audio. So you have the option between
a software instrument, an audio track, drama, guitar, or bass,
or external Midea. And you can see that the details of each of those projects
options changes slightly. So I'm going to click
on software instrument and just under here
where it says instrument is set to default patch
here you can actually choose what you want
to open as default. So say for instance, I wanted to open to software
instrument tracks. I could essentially have piano open on them every single time I open a
software instrument, I like to use empty channel strips or just
default, which is nothing. Or actually it's a
piano because I like to choose what I want on the
tracks when open them, here is your audio output, so that will stay as 12. Here is the number of
checks you want to create. It will default to one. I generally do for just for standard. I don't
actually know why. Then we press Create. And as you can see, we now have four instrument tracks in logic. Okay, so I'm gonna
close that and go back to the project section. And this time I am going to
open a live link project. As you can see, it
looks kind of similar, but this time we have
these square boxes. And that is because each box is where you
would add a loop. Here you can see there's
two different tracks. One has got a blue wave form and the other one's
got a green note. The blue waveform
represent audio loops, and the green musical note
represents midi loops, okay, as you can see here. So I'm just going
to randomly drag some things in on each
track and then press play. So effectively you
can add as many loops as you want and they'll play
simultaneously together. Here you can choose the
amount of bars that it plays, four, and it will loop
that amount of bars. Okay, so now we're going to come out and we're gonna go to start to grids. So I'm just going to download this boom bap Masha
vision inverse, stomach that as well. Okay, so now it's loading
and this is our session. This is a live loop session, so it's lovely and colorful. As you can see, I can play
any of the loops that I want is a great way
to really disliked. Create tracks, create sounds. It's really a good way to
explore your musical ideas. You can trigger them
at different points, manipulate them in real time. I'm basically just create any type of
arrangement you want. So it's really, really good to start exploring different
ways of arranging songs. So definitely have a play with those because
it's so much fun. Okay, here are the tutorial. So again, definitely make
sure you go over them. I'm just going to open
the Live Loops tutorial and just quickly take
you through that. The great thing
about live loops as well as you can just create like completely
different arrangements from things you've
pre-recorded as well. You can drag anything in. It just gives so much fluidity to the arrangement of
your stuff is great. Okay, so here's a tutorial
and you literally come over here to this column
on the right-hand side, you can see that
it will take you through how to use Live loops, how to add content to the grids, how to play cells and scenes, and then how to edit
those cells as well. Also, it shows you how to
record into live loop. So if you want to play
your own stuffing or record some guitar
Ian or whatever. So, yeah, have a lot of
fun playing with that. Okay. Demo projects. I'm not
gonna go into this because it's going to take
ages to open and stuff. And I just think for
the purpose of time, Let's move on, but definitely go and check that
demo product out. Okay, So here are our
project templates. I'm going to quickly open
some of them so you can just get an idea of what
they might look like. Not everyone who buys logic
is gonna be a producer. You've got songwriters in here. You have composers,
you have people who want to specifically
write for TV and film. Okay, so the first
template we're gonna go into is songwriter. And as you can see, it's already got a piece of
audio in the truck. It's already set at eight bars. We've got our smart controls up and the audio already has effects on it
and stuff like that. It's got the drum kit loaded, so you're ready to pretty
much stop playing instantly. Okay, This one is
music for picture, for anyone who is interested in sync in sound to film or TV. So already you can see
how different it looks from the template that
we just had open. This one has this
little box up here, which is for the movie or
the visual, the picture. And it will be set
in frames rather than beats and
bars, so to speak. And you can see all of
the instrument tracks are set for sound that
would be used in films. So sound design, sound
effects, that type of stuff. And again, over
here on the side, you have the effects already set up and they're already
going to Abbas as well. And you can see here all of those buses will be going
to an auxiliary channel. And they also have
effects already set up. It's just literally ready
to go. It's plug-and-play. Okay, So now we're gonna go into our hip hop template here you can see similar to
the songwriter one. We have the drama set up here, but our instrument
is a trap drum. Okay, so before we
had a live drum kit, this has got an electric drum
kit and it's a trap kit. And straight away you can hear
like how easy it is to get ideas directly
from this one loop that's been put in there
for you to start with. So exciting. And the fingers as well, they've already set out all
the other tracks for you is all using
the same stuff. So everything will be
based around the track. Track. It's hard to say trap truck. And again, each track
that's laid out, you've got your truck base, your agile synth base, your voice box, simply, each of these tracks all have the effects laid out
ready for you to go. So in order to
save our template, we're going to go
up here to File, and then down to
save as template. Here we're going to name
our saved template. I'm just going to
name it Eve trap. And that will save in the
project templates folder. And then we press Save. You can see it's
named it up here. So now if I go to File
New from template, it's going to open up our box, go down to my templates. And now we can see we have IV trap and then
we press Choose. And there you go. It opens our template. Okay, So now I've shown
you all of those. I'm just going to
open a standard for track software instrument
project so we can get started. Try to focus only on
what I've shown you in the lesson so that you
don't get too overwhelmed. I would like you to practice
opening different projects. Spend some time playing
with the starter grid templates to help you get
familiar with the door. Take time to check out
all of the tutorials. Familiar with the
project templates, create a new project and
save it as a template. When you're done practicing, take a screen grab
of your project in the template section and upload it to the
class community. I look forward to seeing
you in lesson two, where I'll be helping you
to understand preferences.
4. Preferences: Hello and welcome to
lesson two, preferences. In this lesson, I'll be showing you general project handling, how to correctly set
your inputs and outputs, how to set up your
required file type connecting midi devices, where to set up your project for a score or movie
automation preferences and storing your
information in your tracks. To get to preferences,
we're going to go up to where it says Logic Pro. Then the drop-down menu comes down and we can see
preferences here. So when you hover
over Preferences, you've got another
drop-down menu, which we'll go into in a sec. It just gives you the overview
of what you can see in preferences underneath
that control surfaces, which I would recommend to just leave as is, you
got key commands. If you want to set up
your own key commands, you can do so your
sound library. So anything to do with
downloading your sounds, you can find here and also
any other things when it comes to services or
providing feedback to logic. And also where you can
quit Logic Pro or hide it. And the key commands
are there as well. Okay, so let's go back up to Preferences and I'm
just going to click on General that will open
the Preferences tab. So you can see along here, you have everything that is in the drop-down menu will be along the top here,
so it correlates. So general audio recording,
midi display score. So it's the same thing
across both sections. So first of all, the first
tab here is general, and this is going
to basically cover everything general to logic. So your overall preferences
of Logic Pro ten. So here the Tablet selected
here is project handling. And this is everything to do
with the project that you open and how you
want that project to open your startup action. Do you want it to open with
the most recent project, which I would recommend. A lot of this is
done by default. You'll see a lot of
things already ticked. So logic, we'll just default
at the most standard thing. So a lot of this stuff
doesn't actually need to be touched unless once you get
more familiar with Logic, you want to go back in and
start changing things, but as of now, we don't need to
change anything. Okay, so the next type
of cross is editing, and this is the tab that is responsible for anything to do with your editing preferences. So number of Undo steps, the way your mouse
works or your trackpad, the piano roll you can
see down the bottom Double-clicking a midi
region opens what? You can set all of
that when it comes to the editing section
of your project. Next we have cycle that's off. Just leave that
catch is when you want your playhead to pick up. So I would leave that as
it is for the moment, notifications leave that here
you've got accessibility. And underneath that it
says plug-in windows. So you have the
choice to opening controls view by default or not. So basically all that means is that when you
select this option, your plugin will pop
up in the window every time without you having to
click on it to open it. Okay, let's go
across now to audio. This has everything to do
with our audio preferences. So recording anything in
getting sound into the project, audio will always be enabled and should always be enabled. And first of all, here we
have our output device. So that is basically
how we are going to hear any sound
coming out of logic. So if you have speakers, if you have an audio
interface connected, if you want it to come
out of the main computer, if you have headphones, this is where you would set your output and the
same as the input. If you have things to get the
sound coming in to logic, you'd have to set your input
to the correct settings. You have your buffer size here, which I would always
leave it default to start with recording
delay as well. Leave all of that until you are much more familiar with logic. Similarly with processing
threads and buffer range, basically what this does is if you have a lot
going on in logic and your playback is you're getting some latency because your
processes are going insane. You can change
certain things within preferences to improve
your playback, okay, you would leave
summing here at 64 bit. That's what logic
uses at the moment. And then rewire
behavior, keep us off. So anytime you want to change
anything in preferences, you will always have to click
the Apply button down here. Okay, so the next tab
along in audio is general. Again, this is all stuff that
happens behind the scenes. So changing the amount of bus assignments is not something you need
to worry about now. So down here we have
plug-in latency. I would keep that as all. And here you can see
low-latency mode. So basically, if you
are running Logic Pro off a laptop that
doesn't have a lot of CPU and stuff like that, you can go into something
called low-latency mode, which basically frees
up some CPU usage so that the interface can
run smoother on playback. And there's a great shortcut
way of being able to access without having to
always go into preferences. So if you come up
here to your control bar and press
customized control bar. You can see it brings
this nice drop-down menu. And here we have
low-latency mode. When I click that, you can see a new button appears
on the control bar. And if I turn that on, you can see now that
the low-latency mode within Preferences
has been ticked for, turn it off, it goes away again. Okay, so sampler is all about the amount of
samples coming into logic, not something we need
to worry about editing. We don't have to
worry about for now your input and
output assignments. I would also leave, this is basically showing that your output is
going to stereo. Output 12. Literally leave
that as is if you're working on a film or a score that needed to be set
to surround sound, you can set that up here. So you're in, our assignments
would be set up in here. You can see left and right
centers and stuff like that. Next Cross we've
got File Editor. Don't worry about that. And then your MP3
preferences within audio. So this is basically
how your mp3s are going to export
when you bounce out. Okay, so generally
leave that as is. Okay, next, we're gonna come to recording and underneath
we have audio. So this is our file type and Logic Pro ten uses AIFF files. I would leave that
as is you have the option of WAV
files are wipes. I would leave it as AIFF again, leave everything here
as is next week, come across to the MiniTab, and this is our
midi preferences. So if you need to
connect a milli driver, you would put it here all your recent messages and
sinks and inputs. I wouldn't worry about this. This is all about midi
timecode and things like that. You don't need to worry
about that your inputs. This is if you have
a midi keyboard or I've got my machine
is set up here. So all that does
is makes sure that any midi input coming into logic proton is
connected correctly. You will display this is
what it says on the tin. So this is how your
windows will be displayed. So if you've got dual screens
and things like that, you can set all that up here. It should set up automatically. You can also set additional
displays up in here. Along here your
score preferences. And they will relate to if you are writing a
score within Logic. So unless you're doing that, you don't need to worry
about this section at all. If you are doing
that, you can click on score project settings. And that will open
up a whole host of sub categories for you to
start editing your settings, for your score, pretty colors. Now we have the movie tab here. And this is if you are
doing any sound to picture the adjustments that you can make, and
so on and so forth. Again, if you're not
doing anything like that, Do not worry about that. Majority of people using
logic will only need to worry about the audio and
midi sections of preferences. Okay, so here we
are, automation. And this basically
is quite important, especially once you start
getting used to automation. If you have loads of tracks of audio and then you
start automating them, what will happen is
you might automate a piece of audio and
then say for instance, you started the
truck five bars in. And then you need to
pick the whole track up and move it back to one. What's going to happen is
that audio is going to move, but the automation
doesn't unless you have it ticked for
always move or ask. Very important if you're
doing podcasts editing. So down here as well, you've got just the pencil tool when
it comes to automation, how you want that to act, and just some other things that you don't
need to worry about. Control surface preferences. Again, not something you
need to worry about as such, unless you are connecting midi controllers and
assigning them to things. So I wouldn't worry
about that right now. But if you do want to start connecting things
and then assigning, you can click set up and
it will bring you to this section here and help
you set up your device. Here we have my info. So this section is
literally about the artist. So if you're making
tracks or whatever, it's a good idea to get
your information in. Because what happens is
when you balance out that track and then say you
want to play it in iTunes, it will bring all of that information that's sitting
in the track into iTunes. So the minute you
press Play and iTunes, it will pop up with your
artist named composer, named the album name, and everything like that. So it's a really good thing to start getting into
that practice. Here's the Advanced tab and you can see everything
here is ticked. So advanced tools, I
like them to be shown. You can take that off, but as you start
getting used to logic, it will be good
to just have them ticked so that you can
understand them all. Before moving on to
the next lesson and practice using the shortcut to access the control bar and
add and remove icons from it. Also filling your artist
details under the info tab, I look forward to seeing
you in lesson three, control bar part one, where I'll be helping
you to understand the control bar
and its functions.
5. Control Bar Part 1: Hello and welcome
to lesson three, control bar part one. In this lesson, I'll be helping you to navigate your way through the main part of the interface so you can get started
straight away. I will be showing
you how to browse your library for sounds
and select them, understanding the inspector
window, your toolbar, Smart Controls, accessing your mixer and
accessing your editors. So let's get started. So let's start with this
little section here. And first of all, we're
going to start with this tray looking icon. This is your library. And you can see as I
click on an off it, the sound library
appears and disappears. This is where you're going
to search for all of your instruments that
come with logic. So I haven't downloaded most of my sons because I have so many. But here you can see I
have downloaded base, so I'm going to
just click on that. And then we have
another drop-down menu within base that gives us all of the different styles and types of base available to us. And you can see up here that
the icon changes as we go. So if I just load one of these, so I'm just going to load
a finger style base. You can see it automatically names the track that we
have loaded it onto, that will load onto
the highlighted track. Okay, so let's go and
choose another sound. So I'm gonna go to Oregon. Again. We have the
drop-down menu showing us the different styles and variations of organs that
are available to us. Any way you see
the little arrow, you have another drop-down menu. So I'm going to click
on here experimental. And this is gonna
give us a list of experimental types of organ. So let's check out
this reggae organ. And again, you can see that it's loaded to the track that
I have highlighted. Okay, Nice. So a quick way to go back to
the main menu is to click down here where you can see the latest instruments selected. And if you click on that, that'll take you back to the main menu of the sounds that you
originally started with. If you go and legacy,
this brings you to all of the jam packs that
come with logic. They provide you
different types of jam packs for
different instruments. So you've got remixed tools, rhythm section,
Symphony, Orchestra, and within those you
have more drop-down menus of the different
instruments within that. So mallets, horns and you can see there's a ray of
different instruments. So strings, it has loads of
different types of strings, obviously because
there are lots of variations of a
string in the world. So make sure you have
a play with those. Okay, So next
across here we have the Inspector tab button
wherever you want to call it. So what that does is brings
up this window here, and this is the information
for the selected track. You can see when I change
the track that I select, the information within the
inspector window will change. Okay. So what that's doing is pretty much giving us a quick look into what's going on
within the track selected. So it's going to show
us any plugins we have on it and allow us to change the different parameters of that track at a glance. Let's just drag this up here. You can see up here in the midi region section where
it says Mu is grayed out. And that is because we don't
have a midi region yet. So let me quickly
record something in. So now we can see that the
Mu has become available. Okay, so you can see now, once I tick that box, I can mute it. If I loop, it loops for
as long as I want it to. Here we have quantized, so that allows us to quantize
to a specific amount. Then we have transpose here. This allows you to
transpose up or down a certain
amount of semitones. So if I just transpose
up 12 semitones, you can hear the
difference there. Bring that back. So here we have delay, dynamics, gate clip, lymph, all this other stuff that
you can play with. And again, all of these
things will become available once the region
has what it needs. In their next under here we have the track information so we can rename our track from here. If I just add a one there, you can see it's
renamed my track. We can change our icon as well. So if you have multiple organs or you have a specific
way, you like things. A lot of the time, we like to have our own colors and stuff and be able to customize the door so that we're
comfortable with it. So this is a great
way to do that. Here. It has channel
instrument one. So this tells us what
channel we're coming into, the instrument that we are on. The midi information here that will generally
be set to all. So all of this
information is generally what's going on in the track. You've got the key,
the velocity limit, because middy it
goes from 0 to 127, or in this case 12127 delay
if you want to transpose it, and so on and so forth. All of this will change
depending on if you add or change something
within that track or on the media information. So down here, this
little section here is the channel
strip setting, basically anything
that you want to effect within that channel
strip you can do here. So if you want to remove
all of the sends on it, if you want to remove all of
the plug-ins that are on it, you can literally go
there and do it one time instead of having to go in manually and change things. You can also save the presets
on that channel strip so you can copy and duplicate it to another channel
strip as well. Okay, Just under here there's this little thin
line and what that is as a gain reduction meter, and it will essentially
have a compressor on it. So if I click here, you
can see that that is monitoring the gain reduction
on that channel strip. Just under that, we
have the channel EQ. It's logics built in EQ, and you can just double-click on it and it will bring
that straight up. It's a great way to put
an EQ directly onto the channel without having to go and search for specific one. So under here, we
have midi effects. And what that does, it brings us a list of any effects that we would like to apply it to the existing midi we
have just played in. Then underneath that is the actual instrument
that we have. So it brings up a
little moving part, so to speak, or
something that you can physically go in and edit. You can change the parameters
of the instrument. As you can see here. You can have a good mess about with it and really go in and manipulate the sound that you've created to make it your own. Okay, I can be here all
day playing with this. I love these things. And you can also go in and
edit it from this window here. Then if you want to change
the organ that you're using, you can use these arrow buttons. And that will change the type of organ that you have selected. And again, once
you've done that, you can click and edit it
to your heart's content. Okay, So next down on
our channel strip, we have some plugins that
come with the instrument. So when you select
an instrument, a lot of the time on a preset, they will come
with some plugins. And you can see here, when I click on either of them, it's the same compressor and
EQ that we selected earlier. Down here, we have our buses now a bus routes the audio that's
coming into our channels. So imagine our audio is going
in a specific direction. So it's coming down
the channel strip is going through the
compressor, through the EQ. And then down here, what we can do if the
bus is we can send that audio signal
to somewhere else. I like the analogy
of a physical boss. So you're putting it on
a physical bus and that bus is going from one
station to another one. I remember when I was
learning sound engineering at uni that I had to do visual things like that just
to get my head around it. Obviously, we learned on
the actual mixing desk. So it was very hard for me
to understand signal flow. So I used to create pictures in my mind of physical things
helped me understand it. So I literally think of a
boss that people get on, in this case signals. And we can give that boss destination and change the destination
as we please. And then that bus
off it goes with the signal on it to
that destination. Don't judge. Okay. Underneath that we
have our stereo out, and that is basically routing the signal to a stereo
output, literally. So speaker's set of headphones and you can choose
where you want that to go. Underneath that we have groups. So that allows us to be able to group our information
on that channel. So that basically comes later
on down the line and we will group things for the
sake of mixing our tracks. Underneath that we have
where it says read. So that is automation, which we will come
back to later date. And here we have our pan pot. So this is where we would pan
out signal left or right. And this again comes when you're mixing your
track where you've got multiple channels of
information and you would like to pan them in
different directions. So if I have, for instance, multiple vocals recorded on
different channel strips, I can then stop panning
them slightly in different directions
so they're not all coming out down the middle. And we start to get some nice
spatial awareness, I guess, in the mix for the instruments, the midi and audio that
we're using in our tracks. So here is our level
meter and this is just where we monitor
our level coming in. It is very important to make
sure that you do not peak. It doesn't go into the red. A good rule of thumb
is to always have it at minus three db or minus six, whatever you want,
and make sure that your fader here is always at 0. It's just a good bit
of housekeeping to always keep your fader at 0. The more tracks you add, the more information that's
coming into the tracks. Don't forget, all of those
audio signals are going to go out to your master,
which is going to be. Literally overloaded. So it's very important to make sure that we
don't go above 0 and make sure that we have a good balance of
instruments coming out. Okay, down the bottom
here we've got a mute and solo buttons. You can see when I press mute, mute the track that I'm on, again with the Solo button. You can see that when
I press it here, it's solos, my track. And the great thing as well is the Solo button at
the very top appears. It's like a master Solo button. So if for instance I have multiple tracks and I've got 20 something tracks and
I've got multiple things. So load, it's a very quick way to just un-solo everything. Okay. I'll just show you
here. There you go. Okay. Next across we have
our Quick Help button. This is absolutely
vital and I would recommend every single
one of you go through the door with the Quick
Help button on and just get familiar with every
single aspect of this door. So basically wherever
I hover my mouse, it's gonna give me
the information as to what that is in
the door. Okay. And it's a really good
way for if you're in a studio environment and
you start hearing people talk about certain
things within the door. A great way for you to learn and understand about what is what. So yeah, definitely
take your time and go over stuff and
write some things down. The key things that
you're going to need so you can get used to it. Okay, Next across we
have our control bar. So this gives us a shortcut
to any tools that we want. And the great thing about
this is you can customize it. So if I right-click up here, you can see this drop-down
menu of anything that you want to put up
on your control bar. So it's a really great way to get all your
shortcuts once you start getting used to
the door and getting really familiar with the tools
that you're going to use, you can literally choose exactly what you want to add on
your control bar here. So you can see if
I press bounce, it's going to add
that icon, shuffle. Icon comes on. So have
a play with that. And as you go along, you start figuring out the
more things you are going to get used to and the
things that you're going to want on your control bar. Next across we have
Smart Controls. Now, earlier when I was
showing you that organ, it brought up the whole
instrument and showed that we could play with
so many different things. So again, that can be
really overwhelming if you are not used to using the
door or the instruments. So what Smart Controls
does is it gives you a really quick snapshot of the main controls
of that instrument. So rather than you
going in and be like, Oh, don't know what
any of this is. It's just going to give
you the main things that you're going
to need to use, which is just so
much more easy to understand when you're
new to the door. Understanding the
instruments and even what a midi instrument is, okay, here you can play
around with some reverb. Here you can see a
conflict between the EQ and the controls. Okay. Do you
remember when I said earlier with our
inspector button, the inspector is
a very quick view of the track that we're on. So now when we're on the mixer, you can see my
highlighted track, reggae over n1 is also
highlighted on our mixer, but we can also see all
of the other tracks. As I click on each one, you'll see that
it will correlate to what is happening
in the mixer. And sometimes people find
this confusing because it's horizontal and its vertical and it takes a while to
get your head round. But you can see the names at the bottom here
correlates the names. Our tracks. Again, it's like a mirror. And so if I move
something on the mixer, you'll see it move as well on the channel that's
selected, okay, and if I pan anything
on here or if I do any adjustments
on this track, it will do exactly the
same in this window here, okay, So this button
here is Editors. This is for the edit window. So generally you
would be using it. Most people call
it the piano roll because what happens is when
you play in some middy, you can double-click the
area or you would click the editor button and it brings up this piano
roll sections. So that allows you to edit the middy that you
have just played in. You can change the velocity. So if I highlight this and
move the velocity down to one, you can see the
color and the line changing within that
one midi part, okay? And this allows you to
individually go into each midi part and
change and adapt. It is really good to make sure not everything is the same
velocity like you would on a, say, a kick drum. Whereas if you're
doing something like hi-hats at sixteenths or 32s, you would want some feeling
or movement in that. So you'd need to be
changing the velocity or playing it in differently, so the velocity isn't the same. You can also
quantize your notes. So if I select these here, if I come up and click this q, those midi notes snap, then to the nearest. So then they snap. And that means that all of
our Medina will be on time. So if we want to play
something over that, we can without the metronome on because we have snapped
everything to the grid, making it in time. And that is a definite rule, I would say to anyone if you're playing something in
for the first time, you need to make sure is on
time and snap to the grid. Otherwise, your whole song
is going to be out of time. Before moving onto
the next lesson, practice selecting instruments
from your library, Change parameters
and add effects in the inspector window
and then compare the differences in those
changes depending on whether it's an audio
track or a midi track, practice accessing your
toolbar and customizing it. And lastly, practice
familiarizing yourself with the
mixer and the editor. Once again, please try to only focus on what I'm
teaching you in this lesson so you don't get too overwhelmed and frustrated
when you're done practicing. Let's take a screen grab of your customized toolbar and upload it to the
class community. I look forward to seeing
you in lesson four, control bar part two, where I'll be
continuing to help you understand the control
bar and its functions. See you there.
6. Control Bar Part 2: Hello and welcome
to lesson four, control bar part two. In this lesson,
we'll be continuing our journey of control
bar discovery. I will be showing you play
and record functions, loop functions and its features, the time position display, the media and loop buttons
and all the other functions. Okay, So this is part
two of the control bar. We're gonna be going over
this middle section here. So these two buttons here
are quite self-explanatory. They are the rewind
and forward buttons. So when you press them, they will shuffle the cursor backwards and forwards
throughout your project, this button here stops and jumps back to the beginning
of the whole session. If you're say at the end and
you want to start again, you can press that
button or press the Enter button on
your computer keyboard. Also, if you right-click
on that button, it brings you this
drop-down menu so you can actually adapt what you
want that button to do. I just leave it as
the default settings. Next across is our play button. So we obviously use this
when we want to play back any audio or
midi in our session. And again, if you click on the little arrow
down or right-click, you can actually adjust the
place settings from there as well and save any defaults
or customize it as you wish. Next up is our record
button that allows us to record any audio
in or any midi. So first of all, we
need to make sure our track record ready
or record enabled, which is the little r on the specific track that allows an input to come into
that track or channel. And then we press the record
button when we're ready to actually record a piece
of media or audio. This button here is our
loop or cycle button. So whatever particular piece of audio or midi
we want to play, we can change the loop length so that it will repeat
over and over again. And it will keep looping that
section of muddy or audio. That's great if
you're working on a particular idea and
you need to hear, I know, so you've laid
the drums and you need to start working
on a melody piece. It's great to start
hearing the drums. You get the feel of
what's already put down. So you would loop
that section to play over and over
again and to stop it, you just press the stop button. You can also change
the location of the loop by putting
your cursor above it. And you can see that the
arrow then changes to a hand. Once that happens, you
just press and hold and then you can
drag left or right. So it allows you to move
the loop from bar to bar. You can also change the
length of the loop. So if you put the cursor
at the very end and you see it changes
to this icon here. You can then press and hold that and drag it left or right. And that will change how
long your loop length is. At the moment we have
it set to two bars. So if I want to make
it four-bar loop, you'll see now that the
cursor plays for four bars, but we only hear the midi
coming through between 12 bars. So what I can then do is
loop the midi region. Okay, So there are two
different types of loop here. You've got the loop
that allows you to Loop audio and midi. So that's your loop
function, I would call it. And then you can
loop pieces of middy itself so you can look
at actual midi region. Okay, and again, you
would put your cursor into the top right-hand corner
of that piece of muddy. And your cursor will
change to this icon here. And once it does
that, you press and hold and you can drag out. And if you have gone too far and you want to shorten
the midi region, then you would drag
it back to the left. So this section here is your
play head position display, and that indicates the play
head position based on bars, beats, divisions, and ticks. So you can actually drag it vertically to
change the amount. Or you can double-click and
write in the information. You can see my cursor changes from an arrow and that allows you to drag up or down
to change the amount. So for instance, at the
moment it's set to bar one, beat one, because that's where the cursor is going to start
playing our track from. So if I then move my piece
of middy to bar three, you can see now it has
changed to the number three, so it's bar three, beat one. So it starting from bar
three and on the first beat. So now if I move my piece
of middy to beat three, you'll see now where
I put my cursor. It starts bar A3, B3 because we've
started a bar free, and then there are four
beats in-between each bar, okay, this next section
here is your tempo display. So this gives you the
tempo of the whole truck. It always defaults to 120. Again, you can change
that by dragging up or down or typing it in here where it says keep at the moment that is selected. So what that means
is we're going to keep the project tempo. It does give you the option
to adapt the project tempo. So for instance, if
you drag in a piece of audio that you've done
in another project, and it is different from
the default tempo in logic, it will ask you, do you want
to adapt to this tempo? And you can click yes or no. So here's your time
signature display, and it gives me the option
to change my time signature. So when you click on that, you'll get this box pop
up and ask you if you are sure that you want to change the time signature of
the whole project, and then you can say yes or no. And the good thing about this
is you can actually change the time signature just at a specific point
within your project. And then just under that we have our key signature display, which tells you the
key that you're in at the moment is on C
major, which is default. So if you want to
change the key, you would click on it and
it will bring up a list of different keys and you can change to the specific key one. So at the moment, we can see the bars and beats, the tempo and time
signature and key. But if we wanted to change what we're seeing
on our display, we can go to this little section here where this down arrow. And when I click on that, it gives me this drop-down menu. So at the moment we're looking
at beats and projects, but we can make that
bigger so that we have a bigger display and
it goes more in depth. So you've got bars, beats, the divisions and the ticks. You can go to beats and
time and what that does then it will give you
the beats and bars, but then the time
in terms of hours, minutes and seconds, you can
go to beats and time large. So that basically
does the same thing, but breaks it down into
even smaller increments. You can go to just beats, which will give you the beat
bar divisions and ticks. You can go to just time, which is great for if
you're editing a podcast, which I do quite a lot. So time is what I would
generally use and then you can customize it and that basically brings up
everything that you need. So also you can
have it separate, so you can have it
floating and have a giant display if
you need to as well. This section here is really
good because you can also adapt it and customize it. So if I right-click here, it will bring back
this drop-down menu. And you can see, I can tick all of
these boxes here. So low-latency mode,
pre-fader metering, auto input monitoring,
software monitoring. And it just keeps adding
as many buttons as I want. So again, when you're
going through this, double-check what they
are, have a look at them, have a play and then
customize it to the way you want when you start
getting used to the door. This button here is
the replace button. And this allows you to replace an existing
piece of audio that you've recorded with a new piece or just a specific part of it. This next button here is
your tuner button that so basically if you
have any instruments connected to your system, you can use this button to tune them and make sure that in key, if this button is grayed out, it's because there's no
recording taking place. This next button here is
your solo button and you can keep that or get rid
of it because you also have another solo
button over there. And again, that
allows you to solo selected regions
during playback. This button here is
you're counting buttons. So basically when
you press record, you get a counting and
it will just say 1234. And then cool process
will start happening. Now again, you can change the length of the count
in that you want. Or if you even want accounting, all you can make it start directly as soon as
you start recording, or you can have it counting
for longer than a bar, one bar, two bars,
free bars, four bars. And here is your
metronome, the beautiful, lovely metronome that is the most important part of the door because
this is exactly what is going to keep you in
time and it works with your time signature
and your tempo. So if you speed your tempo up, your metronome will go faster. If you slow your tempo down, the metronome will go slower. Again. If you right-click here, you can adjust it and customize it exactly how you
would like to. This here is your
master volume slider. I would suggest leaving
it exactly as it is. Okay, the last
section over here, we have these four boxes. The first one here is
our list editor button. This allows you to view
and edit midi events. You can view and edit markers, tempo changes, and all the
signature events as well. So if we go down here to event, you can see it's got all of the information of
that midi region. So you can see it's got the
position of the playhead, the note the channel that
is on the velocity status of each of the nodes and the lymph Next
across is markers. So this is if you want to
add markers to your session, which we're going
to cover later on. And adding markers
is a really good way to start getting
your arrangement in. Okay, let me just name it here. We double-click on there. I'm going to rename that
now one and then done. And then I can say
at marker one, I want this to happen, okay? And again here, this just
gives you the information of the tempo of the track
and your time signature. Okay, So the next section
across is literally a notepad. So again, anything that you want to write
about your session, anything you want to
write about your project, the specific instruments
you're using, what you want to happen
at a specific time. Any effects that you put on at a particular time in the track, if they're automated, what you want to happen to
them at that time. So again, great way to just have some housekeeping
and your project. This button here is
our loop section. So when you purchase logic, you will also get a load of audio and midi
loops that come with it. And it is a great way
if you're brand new to logic to start learning
how to build a track. Another thing is if
you're a songwriter or you can just drag some
of these loops in and it gives you instant inspiration to start getting some melodies
and lyrics on top as well. So here you can see I'm going to drag in a midi loop again, it's named that track for me
tostring acoustic guitar. And you can see again, the middy loops are green
and the audio or blue. So if I drag a blue loop onto a midi track is going
to come up with this. Notice it's going to let me know that this isn't
an audio track. So you won't be able
to drag audio onto it. Drag green Apple loops
here, which is great, and drag blue ones
onto an audio track. So we don't have any audio
tracks at the moment. So what I can do is just drag it down into this
empty region here, and it will create an
audio track for me. Again, it's named it instantly 12 to eight acoustic
strum a one. So if you want to make
the tracks bigger, we can put our cursor
here and you can see it changes to this little line
with two arrows on it. Hold Alt and drag downwards. And you can see here that definite difference
between the two. So the green one
has midi notes in, and the blue one is
a stereo audio file. This last button here, this is our browser button. So this allows us to access audio and other
media files that are on our computer or elsewhere that we might have bought
onto peter and then we can actually go and put
them into the project. So if I click up
here to audio file, you can see it says
Add audio file. Once I click on that, it's going to bring up
a box that allows me to search my computer for
the specific file. So you would just literally
go to where you've saved it, click on it and then it will
add it into that box below. And then you will click Add, and it will show up down
here in this section. So for instance, if
I just go to one of the tracks I've done before
and I just get a bounce. I can add that file. Once I've done
that, I press Done. And as we can see, that's now in our audio
pool as we call it. And then we can just drag
that into our session. Excellent. Remember if you don't want to see any of these boxes, just click on it again for a little tip to double-check
if you're like, Oh, how do I get
rid of this box? Look at the top and if you
see anything is dark gray, that means that it's selected
and it is therefore open. Click on it and it
will go to light gray, which means it is not
selected and closed. Before moving on to
the next lesson, make sure you practice changing the time
position, display, accessing the media
and loop browsers, right to markers
and naming them and practice changing
tempo G takeaway. Remember that the tempo is the speed at which will
track will play back. So if you want a fast track, the BPM beats per minute
needs to be higher. And if you want to slow track, BPM needs to be lower. When you're done practicing, take a screen grab of
your named markers and upload them to
the class community. I look forward to
seeing you in lesson five, musical typing keyboard, where I'll be showing
you how to use your computer keyboard
to make music. So if you don't have
a midi keyboard yet, can't afford one wherever. You are still good to go.
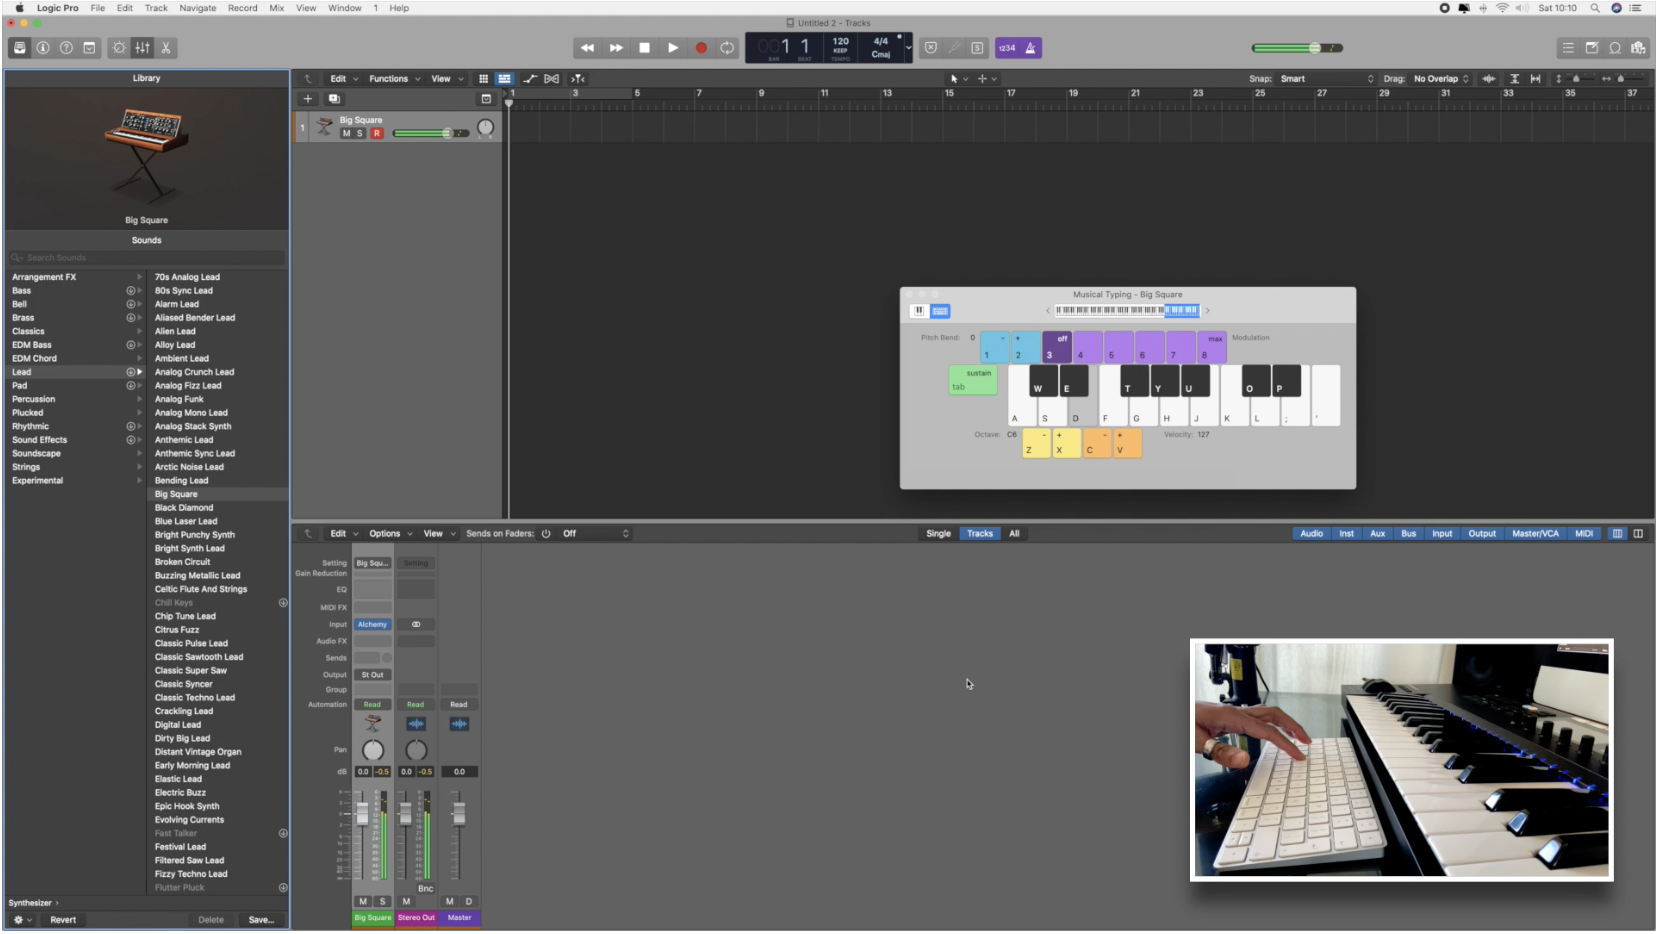
7. Musical Typing Keyboard: Hello and welcome to lesson five, musical typing keyboard. So in order to get up our
musical typing keyboard, we come up here to Window, and then we go down to
Show Musical Typing. And now we can start actually
using this to make music. So you can see if I press on these letters on my keyboard, is actually
generating the sound. Now the great thing
of this is by using different keys on the
computer keyboard, we can actually alter
the sand as well. So if you press
the Tab key here, it allows us to
sustain the note. I can also change the
octave of the keys as well by using my mouse
up the top here, sliding left or right. Or you can see those
little gray arrows either into the
keyboard at the top, you can tap on them and it
will go up and down an octave. Alternatively, you can
use the Z and X buttons, which will zed is to
take it down an octave. And x is to bring
it up an octave. Cmv, all to increase or
decrease the velocity. So if you want to make a note sound more aggressive
when you hit it, then you would
increase the velocity pressing the B button. And if you wanted
to make it sound a little timid or more quiet, you would press the C key. Up here. Numbers 12 allow
you to add pitch bend. So if you press and hold
number one, it pitches down. So it bends down.
And if you press and hold number two, it goes up. And then numbers three to
eight, or for modulation. So you can actually
add modulation to the note as well.
This is what I mean. Like you can do all of this on your actual computer keyboards. So there is absolutely no excuse for you not to start
getting some music made. Remember, your musical
typing keyboard will only work if you have a midi track
created in your project. When you're done practicing, it takes a little video
of yourself using your musical typing keyboard and upload it to the
class community. I look forward to seeing
you in lesson six, interface overview part one, where we will be delving deep into the main part of logic. See you there.
8. Interface Overview Pt 1: Hello and welcome to lesson six, interface overview Part one, I will be showing you
how to reverse audio, how to access media effects, how to create groups, the edit functions
and view buttons. How to access your
automation controls, your flex time tools, and you'll catch button. Okay, so let's just recap. Remember, we have our
library button here. This right here is
our inspector window, and this gives us a snapshot of the track that
we have selected. This bit here is
our midi regions. Then this bit here is our
track information, okay, if I click on the midi
track here and press loop, it will loot the midi track
infinitely and we can change that so it's
a quick way to loop. And depending on whether or not it's a midi or audio track, the information in that
section will be different. Here we have our
quantize and transpose, so you can change
the values of that. And if we click
on this more tab, I can change all of the
information down there as well, but I tend to just
leave it as is. So here on the track, information is showing that we've got instrument
number two up. And right here we can change the icon that we
use in remember, so if I just click on this, you can actually
change the different images to whatever you want. This is the channel information middy will always be set to all freeze mode
defaults to pre-fader. And this is all the other
information like your key, your velocity, if you
want to add delay, transpose it, and
so on and so forth. And you can see when I
click on the audio track, the information in the
tract section changes. So it's important
to remember if you are going to access
that section, make sure you're on
the correct track and you have the correct
track selected. Again, if I press mute loop, I can increase the gain
and decrease again, you can see the waveform
changing as I do that. Here, I can reverse the
audio to solo that. Again, this is a great
tool that instantly can change any piece of audio
that you're working on. It's great to do vocals and
just mess around with stuff. Also, if you're doing builds and stuff and
you've got a crash, it's very easy to reverse it
and add it to a building. Your track here is where
your compression will be, so that would be your
noise reduction. This is where your EQ go, right here. Midi effects. So we're going to just add
some effects to this mini. So let's add an arpeggiator
here straight away, the effect on that,
then we can just literally start playing
around with it. Here we can change the rate
of the arpeggiator as well. So we change it to
triplets, apes, halftime, dotted quarter notes. Okay. If you don't want
to plug-in anymore, you just got there to know
plugin cola modifier. And if you want to listen to the media or audio signal
without the plug-in, you can turn it on or off
here that selects it, the middle section and the
bit at the end allows you to remove the plugin
from the audio path. So again, this is
where the instrument sits down here we
have our plugins, so compression cores and EQ. So this is what will come
with the instruments. When you load an instrument, it will come with its presets. Again here, this is where
we have our bus member. What I was saying before is
where it will get sent to another destination where you
can add more effects to it. So you'd turn the bus
on and then increase the amount that is getting
sent to the auxiliary channel. So again, we spoke
about groups before. So when you're mixing and you start adding more
and more tracks, you can actually start to
group tracks together. You will select the
tracks that you want to group and you put them in the same group by clicking here and say pressing group one. And now you can see
when I moved to faders, they will move together. So everything that
is within group one, I can actually adjust
the levels on their own. So if I get rid of the group, you can see now I can move the
faders individually again. So now I'm putting this in
group one and you can see now that is going to move
with the one next to it. So whatever you
put in group one, if you want to move the
faders and adjust the volume, you can do so together. Very good when you have loads of vocals and you want to
change the volume slightly, you can actually change
the volume individually, then put them all in a group. Then if you need
those vocals to be louder as a whole in your mix, or lower as a whole in your mix. That's when the groups come in. And then also you can send
that group to a bus and an auxiliary channel and you can actually affect the whole group. This section is for automation, which we will cover later on. This is where we
pan left or right, and this here is our fader. And remember we want
to keep it at 0, okay? And this is our level meter down here is where you can
press record at the moment, it's not going to record because there's no source selected, because we are on
an audio channel, but we haven't got
anything coming in. We haven't selected an
input to record with. Remember, we need to make
sure I track is record ready before we press
the record button. And we need to make sure we have input monitoring selected so that we can hear
the input coming into that track or channel. Down here again, we have
our mute and solo buttons. Okay, This area here is where you will be laying
down all of your tracks. And this section
here allows you to edit what is happening
inside this area. So any tracks that you have, these buttons here will
correlate exactly to what is happening
within your session. So the main tools that you're gonna be using
when you're making your tracks or the Cut Copy
Paste selections up here. So make sure you get
familiar with the shortcuts. So Command X, Command C, command V, these are
going to be used a lot. You want to split any audio or midi you can come here to do so. If you want to trim
or time stretch, you would also use
the Edit function here and here you
can see the time stretching algorithm
gives you the option of universal complex
or percussive. But that's, I wouldn't worry
about any of that right now. So here you can also
delete media events and separate midi events
and cut an insert time. So yeah, basically all
of your edit functions within this window you
can access from here. But I would recommend trying to get used
to the shortcuts. Again, we just went to
insert in time or silence. You can also access
that from the toolbar here where you can
insert silence as well. Next section across functions. Again, this is all
based on what is going to be happening
within your actual parts. So you can see most of these
functions are grayed out. If I just click here
on the midi track, we can see now a loaded
them come back because we're looking at the
actual regions and cells, so we're naming the actual
part, everything inside it. Now let's click on the
piece of audio and you can see the other options have
also become available. So for instance, normalizing and removing silence and stuff. So all of this is
based on audio and the other stuff is
based on middy. So again, I would recommend in your own time just going through these logic is non-destructive. So just create something for the sake of having some midi or audio in the session and just
see what each of them do. Okay, so up here
we've got create midi region and create
midi patterns so we can click on there to
create it all become right-click in the space and create the midi
region from there. Then we can drag it out, and that creates a space. We double-click on that, that opens up our
piano roll editor. And then we can start
drawing in our midi notes. Okay, lovely. And you can see here now
our region has midi in it. This section here is everything to do with how we
view the session, so it allows us to
zoom in or zoom out. Again, I would recommend
getting used to the shortcuts and also if we want to view or on
view certain things. So here we've got
a secondary ruler. I wouldn't worry too
much about that. This section is literally what we're seeing at the moment. We have the track area highlighted because
that's what we're in. If I press this one, this one brings up
the Live Loops grid. This is quite new
to Logic Pro ten, and it gives us a different
way to create a track. This section here
is for automation. So this allows you
to add automation to each track separately and
different types of automation. So at the moment it
defaults to volume. But if I click here and go down, I can actually go into different parameters
of automation. So if I want to
say, for instance, automate the panning and make
it go from left to right. But without me having
to manually do it, I can then automate it to do so, I can draw that information in. You can also do the
same with effects. So any effects that you
have on that track, you can actually automate them. And we will be covering that as well later on in this class. This section here is flex mode, so it's all about
flextime and flex pitch. And this allows you
to actually stretch and manipulate the audio
within your session. Allows you, if you go into flex pitch, you can
actually change the, the pitching of vocals
or instruments. And you can change the gain. There is load you can
do in this section, but we're not gonna go
into that now because it's too advanced for beginners, and I don't want
to overwhelm you. And lastly, this button
here is your catch button, and that basically keeps your playhead visible as
your track is playing. So at the moment, we can just see one
piece of the screen. And when your track goes
outside of that screen, the playhead will disappear. By having that button on. It allows the playhead to follow the project
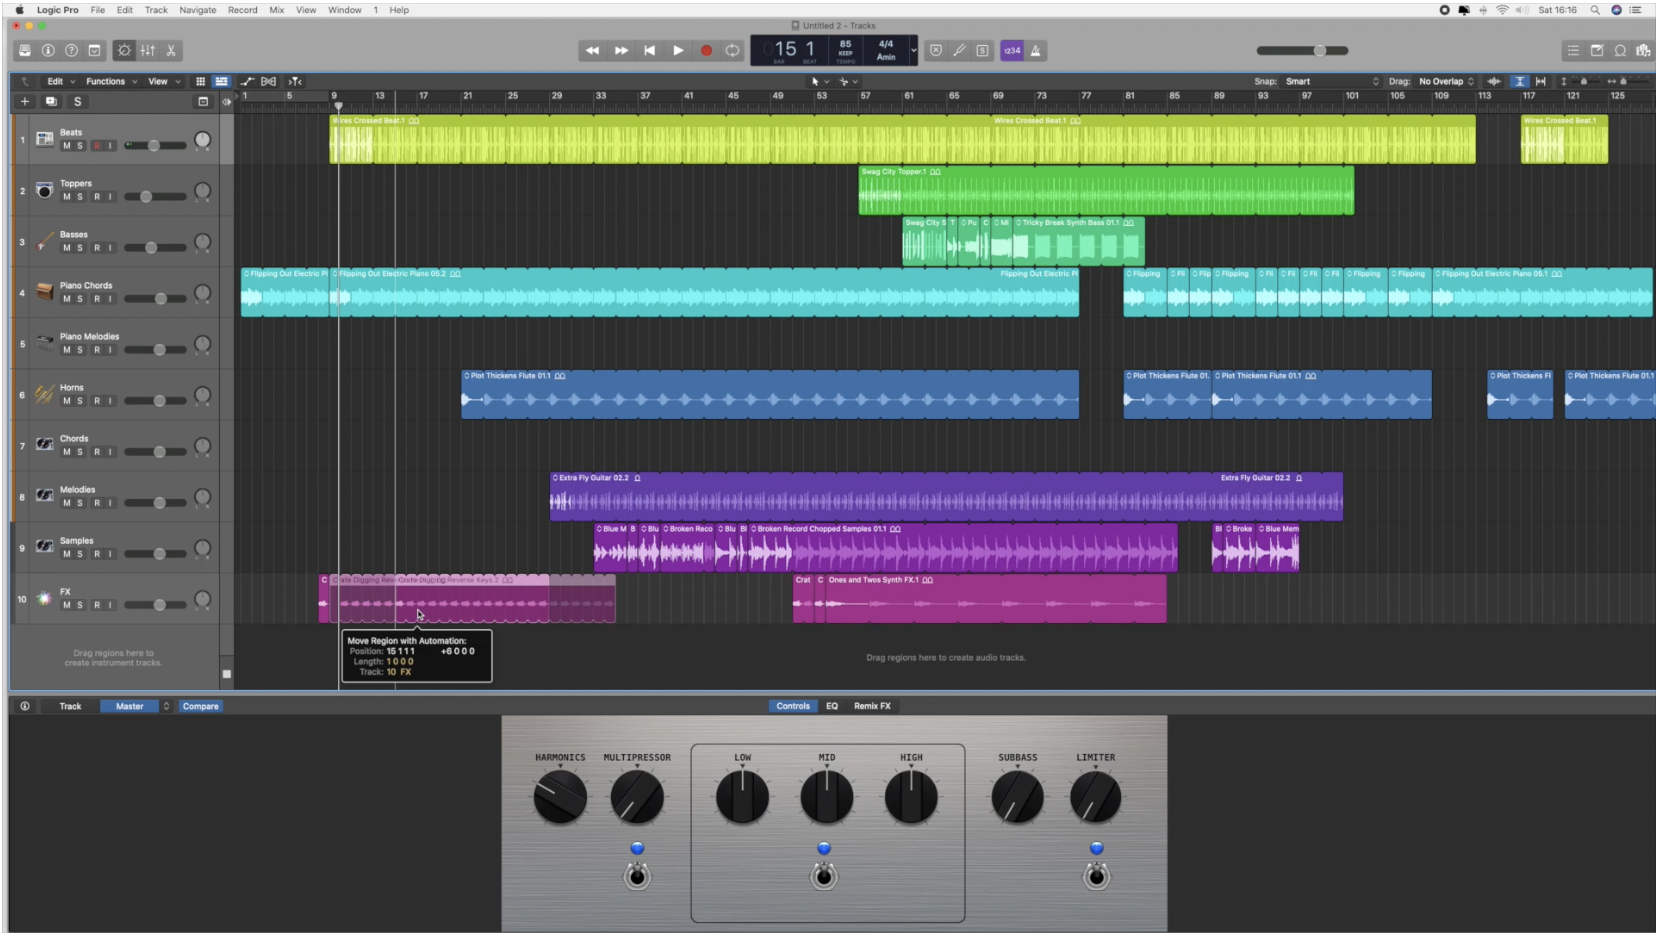
as it continues. Practice dragging
in some audio loops from the loop pool
and reversing them. Familiarizing yourself with
the automation controls and creating a group. Before moving on to
the next lesson, please make sure you take a screen grab of
your reversed audio and your automation and upload it to the class
community automation. I look forward to seeing
you in lesson seven, interface overview part two, where we look forward to seeing you in less than seven
interface of view part two, where we will be digging deeper into the main part of logic.
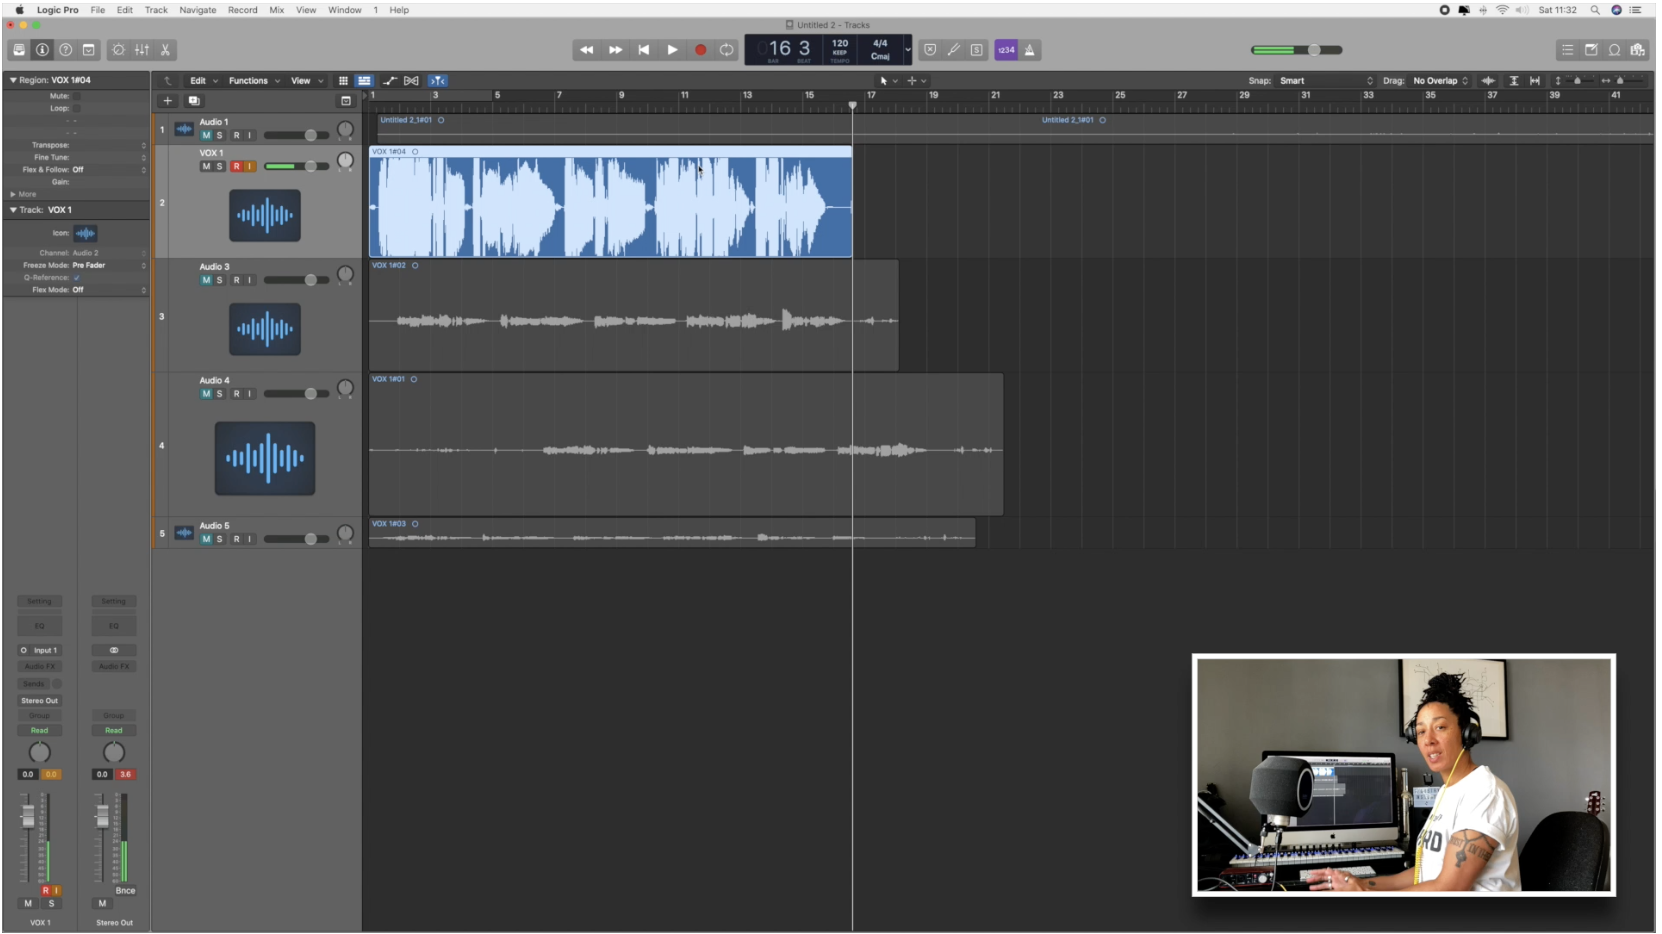
9. Interface Overview Pt 2: Hello and welcome
back to lesson seven, interface overview part two. In this lesson, I
will be showing you your primary and
secondary tool menus, the smart and drag pop-up menus, the different Zoom buttons, your file drop-down menu, and all of the other functions that you need to be familiar with to make sure you can start getting
creative straight away. Okay, so now we're
going to come to this section here in the middle, and this is where our toolset. So if you click on
this first box here you can see we've got the
pointer tool selected, which is our cursor. We have our pencil tool. So this we use to
draw him things like automation and
Midea eraser tool, which erases any midi or
automation that we don't want. Down here we have the Text tool. So if I click on that, we
can see that I can come over here to this piece of midi and click on the top here, and then I can rename it. So this is a scissors tool
and this allows you to cut pieces of media or audios. So if you just place the scissors tool where you
would like to make the cut, then click it will make a cut in your audio
or midi region. If you find that you've made too many cuts or you've done cuts where you
don't want them. You can simply press
Command Z, which is undo, or you can go to File undo, or you can come and
get the gluteal. And then you would select the whole piece of
media or audio and then click on any part of that and it will glue
everything back together. Okay, underneath that
we have our solo tool. I'll mute tool and
I'll zoom tool. So if you click and
drag on the piece of midi or audio that
you've selected, you can zoom right
into that region. Alternatively, you can use
these buttons over here. Okay, so next we
have the fade tool. So this works only
on audio tracks. As you can see when I tried
to put it on a midi track, is just bringing the
loop function up. Whereas when I moved
to an audio track, the cursor changes to
the fade tool cursor, okay, so I put it at the
end and drag inwards, and that allows me to put a
fade at the end of each cut. So for instance, I want to
fade out a bit of vocal. I've done a cart and
I want to make sure there's not a clip
in the audio because sometimes you might
have not cut it directly in a space where
there's a bit of silence. Sometimes you might
get a little clip. So great housekeeping,
whenever you do cut is just a little fade
at the end of the car, you can also do a cross-fade. So a crossfade would be
when you take two pieces of audio and that have been cut and you bought
them up together. So say for instance,
you've got a sentence and there's a word in the
middle that you don't want, but you want the bit at the beginning and
the bit at the end. You can cut the middle
of it out and then, but the other two up, but then you can cross-fade them so that they
flow seamlessly. And the same with the
beginning of a piece of audio. You can also fade it in, and then you can choose how
you want that faded in. So you can have a tiny bit just so that it makes
sure it doesn't clip. You can make it fade in a slower rate and
a longer route as well depending on how far
you drag that fade in. So just by dragging
the cursor down or up, we'll change the curve
of the fade as well. So if you right-click on
the cross-fade or the fade, you can actually remove all of the fades
that you've put in. If you are finding
that not working, you can just remove
them all at once. And then you can go and get the gluteal and glue
it all back together. Next, we've got our
automation tool, automation curve tool, marquee
tool, and our flex tool. The main tools you're
going to be using are going to be
the pointer tool, pencil tool, scissors, glue, maybe zoom and fade or eraser. So this second box here is
literally our secondary tool. So it's the command function. Basically what that means is you can use it as a shortcut. So the first box will be your main cursor that you
can use at all times. The second box is a shortcut. So when you press command, it brings up whatever secondary
tool you have selected. So having my scissors
as my command tool, it makes it so much easier. So I will literally press Command and be able to go
cut, cut, cut, cut, cut. And you can see all
the tools are the same as the main toolbox. So this bit here
is our snap tool. So basically when
you do a cut and you drag a piece of audio or midi, this is how it's
going to snap back. So you can either
make it snap by bar. You can see here when I move it, it's only snapping to the bar. If I change that to beat, you'll see now it's going in much smaller increments
and snapping to the beat, I go to smart, which is what I generally always have it on. Basically, you can move it in really tiny increments
and it will always almost magnetically connect
to the last piece of audio that's been
cut that you want to, but it up to the drag
function here means that when you cut a piece of audio or midi and you want
to drag it again, and like I just
said, but it up to the bit before it or after it, you can choose how you
want that to happen. So if you choose cross-fade, what it's gonna do is it's
going to allow you to. Automatic cross fading. So if I dropped my bit of
audio on top of the last part, it will create an automatic
crossfade for me. If I click shuffle right, what that's gonna do is
it's going to shuffle that piece of audio to the beginning of the
whole audio clip. And it's the same as if
I press shuffled left, if I keep it on no overlap. What it does is it does that magic magnetic thing where it just makes it stick to
the last piece of audio. This button here is to zoom in or out to the
actual waveform. So when you're editing and
you want to make a cut, you might want the
waveform to be bigger so you can see exactly
where you're cutting. This one here allows
you to zoom in horizontally as do
these two here. So this allows you to zoom in vertically for the
whole of the tracks. And the same for
this button here, which allows you to zoom into all of the tracks horizontally. So also, if you want
a shortcut to this, I use the shortcut, which is Command and the
two little boxy things. I have to put the image up because I don't
know what they're called. But yeah, you can set
your own shortcuts as well to help
with your workflow. So if we go to file up here, this list will give
you everything that you need to save your
project or export it. So everything to
do with managing your project or saving it, you'll go up to File. You can create a new
project, save it, Save as you can save a template. So when you click Save As is going to bring up
this box and then you can name your
session and save that. You can also revert to
any last saved sessions, which is really
important sometimes if logic accidentally crashes, which happens to the best of us, you can also revert to
the last saved project. But what I would highly, highly recommend is
that you make command S your best friend and constantly use it like I have
command S on tap, every single move I
make, I come on this. So I'm constantly
saving just in case. Okay, so down here we have
input if you want to import any external projects
into logic or any files. Here we have export. Again, you can export your
project or selected tracks as audio files or midi
files or a whole project. So you have an air foil which can be read by other
doors as well. Bounce is where you would
bounce your tracks. So once you've
finished your track and you're happy with
it and you've had a mix or you want
to bounce it out just to listen to it
and reference it. You would come down
here and press bounce, and you would bounce it as
a project or a selection. So if you just
want to bounce one track within your project, you would make sure that that
one track is soloed, okay, make sure that the
loop function is from the start to the end of
that one selected pieces. So load and then you would press bounce project
or selection, and you would name it
and make sure that you save it in the
correct destination. Also, if you want to
share your projects, you can do so here. So you can share it directly
to Apple Music SoundCloud. You can AirDrop it
to your phone or bring it to GarageBand or
email it across to someone. Okay, so the next tab
along is your edit tab. And here is where you
are going to pretty much do all of your undoing,
copying, and pasting. So these are very
common commands, so I would definitely
recommend getting used to the shortcuts are down the
side on the right here. So here you can
select any tracks. You can choose which ones
to select all unused. Don't really touch any of
this stuff to be honest, show flex pitch time, you can get that up in the other window to
this just gives you multiple ways of doing the similar things in
the other windows. Next along, we've got track tab, and this is where you
would do anything to do with any tracks
within your projects. So if you want to
create a new track, a new audio track, a new software instrument track. Also, remember when we open up our project
for the first time, it gives us the option to choose audio tracks or software
instrument tracks. So this is another
way that you can add more or create a new one. You can also rename
your track here and delete any unused tracks
that you don't want. Another feature in this section
is coloring your tracks. You can assign a track color and attract icon as
well, pretty colors. So you can see here is brought up this little color chart. And if I select the tracks
and click on a color, it will change the
tracks to that color. But then if I want to
change a specific piece of audio or midi so the region, I can click on
that part and then press the same color
to match the track. It's a great way to be able to distinguish between
the sections. So if I color all of
my vocals in orange, and I do my drums in blue. And all of my stringed
instruments I want to do in purple is a really good way of visually being able to
manage your project, as well as going up to the
track icon at the top, you can actually add a new
track in this section here. So if I click on this cross, it will bring down the drop-down box that we saw when we first
opened our project. If I want to recreate a
track that's already there, say for instance,
I've created a track. I really liked the sound
of it as a vocal on it. And I really like the effects and plug-ins
that I've put on that vocal. And I want to add all of
those effects and plug-ins to another instrument or
another piece of vocal, I can duplicate that track. So you select the
track you want to duplicate and then you
press this button here. As you can see, it's completely copied the
exact track down. And then you can actually record your piece
into that track with the same effects or plugins or settings
that you have. Again, this bit
here is your solo, but on social universal
Solo button to say this little tab here
just brings down other information
in your project, such as your arrangement, your marker signature
tempo, things like that. So here you can change the tempo within the track manually, which is a great feature. So the next along
we have navigate. I don't really use any of this. This is basically where you can create your markers
and stuff like that. There are shortcuts
for those as well. Next across we've got
our record section. So anything under
here is to do with the record function within
Logic Pro turn or Logic Pro X. And this is where you can
customize your counting like we spoke about earlier and sort out your
metronomes settings. If you don't like
the sound of it, you can change the sound of your metronome setting as well and all of your record
button options and settings. Next across we have
our mixed tab. So this is pretty
much to do with automation groups
and assignments. So when you're mixing stuff, this is what you would do
to start putting things in groups and assigning things to different tracks Across. We've got our View tab. So this just allows us to view different windows
within the door. So you can show and
hide different parts of the door depending on
what your preferences are. Next to cross, we have windows. So again, this opens different windows that you
might want to see earlier. We spoke about the
transport section being able to open as a
separate window and float. So let me just do that. There we go. So you can have that floating
on your screen if you want, and open the piano roll
as a separate screen. And this is good obviously
if you have two monitors, so at the moment
I'm using an iMac, but sometimes it's great to
use two separate monitors, which is what I used to use
and I love because you can have your Arrange window on one page and your
mixer and the other. And it just makes the
workflow so much nicer. It's an X across. We've got this number two. So this is, as you can see, I've got screen set to enabled, so that's showing me the
tracks and the piano roll. So basically, it's the
way that your screen is split top and bottom and you can change that or you can
just leave it as it is. And lastly, we have
the Help button, which would obviously
use if you need help with logic in terms
of tutorials, any help with instruments affects what you do
is you can click on any of these and it
will take you straight to the Logic Pro user guide. And there you will
be either just read everything and
anything that you need. You've got PDFs for the user guide,
instruments and effects. So if you want go and
download them as well, and you can just get them on your phone and
read up as you go. Before moving onto
your next lesson, I would like you to practice assigning your secondary tools, changing your
metronomes settings in the record tab at the top and changing the colors of your tracks in the
tracks tab at the top. It doesn't matter if you haven't gotten any
instruments on them. Just create a little tracks and practice changing the color. Remember, you can always use your musical typing
keyboard if you don't have a midi keyboard
yet to start practicing everything I
have taught you so far. Also remember that Apple
loops are a great way to get inspiration for your some ideas for moving onto the next lesson. Please make sure you
do a screen grab of your beautiful rainbow
colored tracks and upload them to
the class community. I look forward to seeing
you in lesson eight, interface overview Part three, where I will be digging
deeper into the interface and giving you tips on how to
improve your workflow.
10. Interface Overview Pt 3: Hello and welcome
to lesson eight, interface overview part three. In this lesson, I'll be
showing you how to navigate the editor or the Piano
Roll as we like to call it. I'll also be showing you
how to edit your midi, change the velocity
of your midi notes, and all importantly,
quantizing it. It's so important
that we quantize our midi notes before we
create any more sections. Okay, so now we're going
to look at the piano roll. As you can see, you can drag
it up and down like this. So once your cursor turns
the little double arrows, you can drag it up
or drag it down. So all of these little
functions here are pretty much the same as what
you get in the other window, except a few of the
functions will change depending on the middy
that is selected. So even though some of the
functions are similar, when you go into editing
your video or your audio, the functions and the
view buttons will have different things
within the drop-down menu. This section that's
highlighted right now is our piano roll. And you can identify
that because it has the piano
down the side here. And this allows us to identify the midi notes and what
sounds were playing. So if, for instance we
had a drum kit in here, we'd be able to identify where the kick is
on our keyboard. When you press a key on
your actual midi keyboard, it will highlight the note
on the piano roll as well. Another thing you can do
here, as you can see, if I just select all
of my midi here, the moment we're on S3. So I can drag that down to C2. And now I've got a bigger court. So I have my original
chord playing on S3, and I've dragged it
down onto C2 as well. And then if I don't like
that, I'd simply delete it. If you're not used
to playing in Midea, this is a fantastic way to
start arranging your song. So if I duplicate the
midi region up here, now, I've basically got
doubled the length, so it was, okay, so what I can do is click in this first bit of memory
here and then delete the second chord that I just
dragged down the octave. So we have the first part of this midi region
playing the one chord. And then when it goes
into the second part, both cords come in. Okay? This is a really
simple and easy way to start arranging your song. If you don't play, just remember, you
can get your loop, add loads of stuff
into it, duplicate it, and then start taking
away from the beginning. That is, you have the feeling
of the song building. And the great thing about
Midea is if you put something in and you don't
like it or it's the wrong key, you can just delete it again. But also, you can see that the midi ports on the
loop that we dragged in, don't forget, we
drag this in from the loop section in logic. So this was a midi loop, and so it purposely
didn't start on the one. But say for instance, I
wanted to drag it to the one. I can select all my midi
part, drag that on, and then we're just
gonna do the same for the next section. That will completely change
the feel of the guitar. Now we dragged it. So it starts on the one. I personally don't
like it myself, so I'm going to put it back. Okay, so next tab or button
along is the score button. So this is for people
that know exactly what they're doing
and they know how to write and read scores. And what it does is it
scores your Midea for you. So people that can read music and are good with music theory, this is great for them because they can go in and edit it. They can change the
way they're seeing it. Okay, So the next
section here is a step sequencer
which is grayed out. And you'll see if I click on this audio, those
options change. So now we have track, file and smart tempo because it's going to
give us the track, the actual file of that audio, and then the smart tempo
that we can add to audio, which isn't available for Midea because middy does
not contain tempo. Okay, so if I go back to the audio and I tap
on Smart Tempo, you will see
automatically we can start adapting that
piece of audio because we can manipulate
it and stretch it or squeeze it and change the
tempo of that piece of audio. Whereas you can't manipulate
midi in the same way. Okay, so remember earlier
I explained that some of the functions
in this section, when it comes to the edit
functions and view tabs are slightly different from the
ones in the Tracks area. So if I click on this,
you've got undo, delete, redo, move events. So again, because we're gonna be moving individual
events of middy, you can click inside this box and then use
one of these shortcuts. When you start using shortcuts, you have to click inside
this box to make sure that those shortcuts work on that piece of
media information. If you're not
clicked in the box, they're gonna do it in the
track section of logic. So again, we've got
the copy and paste and delete options and the
options to repeat, select, split, join
the notes as well. So the functions tab
here allows you to quantize your notes
within this window. You can mute your notes
within here as well. And that's basically just
giving you midi information. That the view button here is also basically
just giving you the information of
what you want to view within that window and
how you want to view it. So here you can see that
you can set the note color and stuff like that just as you could in the Tracks window. This next section
here allows you to zoom right into your midi notes. Here, again is your
automation so you can actually automate your middy at the moment it's set
to note velocity. So remember what we said before. It goes from 0 to one to seven. If I click here, you can see there's a big
list of different things that I can actually
change and automate. And if you click on here,
you can actually flick between volume and velocity, two very different things. So again, up here, you have the tools
that you can use to edit your midi information. So at the moment
I've got my pencil, which is set as my command tool, so that's my secondary tool. So I'll have to press
the Command button on my keyboard to
activate that tool. And that's going to allow me
to draw in my automation. We, there we go. And you can see the fader
sliding up and down following that automation because
we've set the volume, so the volume on the fader is gonna go up and down if
I want to set it to pan. So it's going to
pan left or right. I can do it manually. So you can see on my
track channel there, my pan pot is going
left to right. I can also manually do it by clicking on it and it
creates this little dot. And then I can drag up and down. So what I'm doing now is panning hard left
and hard right. So you can see my
pan pot and the slider here going
from left to right. Now if I want to draw it in, again using my secondary tool, I will press Command
and the pencil comes up and I can
do exactly the same, but what that does,
it just allows you to be a little more specific
with where you might want it. Instead of going very
hard left or hard right, it just allows a little
bit more freedom when you can draw it in. This next button here is
your midi out button. So this allows you to play midi events when
they're clicked, selected, or added
using a midi editor. Next along is the same button as we have in the track area. And that is the
catch button that basically just allows you to follow the playhead as it goes through your project
with the link button, you can click that
to link the display to the selected region in
the window with focus, again, we've already
covered these. This is where your
tools are and these are gonna be used within
this specific window. So this section
here, it shows you the key that your
midi notes are on. So if I hover my mouse
over each midi part, you'll see that that information
is changing depending on where my cursor
is and on what note. This section here is
where you would snap your mini two and these
sections over here, or where you would zoom in and out vertically and horizontally. You can also use this
little bit at the bottom to navigate your way
across your project. So this section here, we have our Quantize section at the moment is
set to 16th notes. So if I set it to two, what that means, it's
going to quantize. I snapped to the grid
in shorter increments. So rather than it's
snapping to a bar or a beat is going to snap
at the increments in-between those that
gets smaller and smaller, which makes it
much more precise. And you would press
this Q button here to make sure that you
quantize those notes. So if you have
played something in and it's just slightly offbeat,
but you want it bang on. Then you would command a, select all of your midi ports, and you would press the Q button and that
will snap it to the grid. Down here is just strength. I always leave a 100 and swing. So if you're doing a track
and depending on the genre, you would like to add a
bit of swing into it, which means it's just sits either side of the actual grid. I say in inverted commas. So it can swing behind the
beat or in front of the beat. That basically gives it
a little bit more of a human feel and
makes it less rigid. So down here, this is our scale, and you can quantize
your midi information depending on what scale
choice you choose. This is really good for people. Again, like myself, who don't really know how to play music. So for instance, if I
wanted to set it to a C, I could set the scale here
and then create a chord and then quantize it
and it will snap to that scale, which is amazing. And down here we have
our velocity again. So I'll just zoom
in here and you can see the little line in my midi notes at the
moment it's set to A25. I click on this 5780,
so on and so forth. So if I select this and
move my slider up and down, you see it goes up to one to
seven and the color changes. Again. Remember to wait till
the cursor changes. Then you can drag this
down to the bottom and start playing
with some midi notes. Getting there, just play
with staff, have a listen, change your instrument
while you're in there, start quantizing, messing about with the
change of velocity. Have a play with your
automation as well. And yeah, Just have fun with it. Before we move on
to the next lesson, I would like you to
practice recording and join in midi notes
in the piano roll, quantizing your midi notes, changing the velocity
of each note. And finally,
familiarize yourself with the automation function. Please make sure you
take a screen grab of your Quantize notes and the velocity changes and upload them to the
class community. I look forward to seeing
you in lesson nine, Live loops where I'll be
showing you how to create and arrange your
music in real time.
11. Live Loops: Hello and welcome to Lesson
nine that live loops. In this lesson, I
will be showing you how to open a
live loop session. How loops are
arranged in the grid of functions that you can
access for each cell. How to play yourselves
in a scene, and how to record your loop
session into an arrangement. So this is live loops. First of all, in order to
open a live loop session, you would come up here to
File and down to New from template or Command N. So I'll keep this open till I've
still got the one behind. And here you see
the star to grids. So you can choose some pre-selected grids that have all the sounds
filled in for you. I've already got the
boom bap Masha one open. If you want to start
a brand new project, you'd click on New Project
and then select Live loops. So I'm gonna choose that
and it comes up with this option of
closing the project. So if you do just press yes, and here is what it looks like. So this gives you a
nice empty session and you can start adding
all of your sounds, your loops, premade
loops wherever you want, and stop playing about with
them, creating tracks. You can see down here it says Drag apple loops here to
create instrument tracks. So just like in
the other session, like a normal logic session, you would drag your loops
wherever they're midi or audio into the blank
space to create a track. And you can see at
the top it's got a midi and an audio
track already for you. Okay, so we're gonna go back to the original one
that I had open. Okay, So in this session, again, you can see that all of the
instruments are preloaded. So you've got beats, toppers, bases, piano chords, piano melodies, horns, chords, melodies, samples and affects. The pattern will probably
be the same in everything. So the beats will
always be at the top, affects always at the bottom. And so now what we're
looking at here is on the beats track,
we've got multiple. It can trigger to
play simultaneously. You can do that on
every single track. And again, you've
got pretty colors. Okay, so I'm just
going to play some of these here for
you for a minute. You can hear how great they
already sound together. So if you right-click on a cell, you can see the
information here we have record into cell Dequeue. So Edit, select
Transpose playback, record, bounce and join
export, name and color. So here you can
see I can dequeue the cell and then q
in playback again. So what that will do is
it will make it stop. And then when I'm ready
to queue it back in, it will count in for me to bring it back into the track in time. Here you've got select. This drop-down menu allows
you to select all cells again using the command a
function all following cell. So what that means is
all the cells that are following after that cell, all following cells
of the same track, pretty self-explanatory
and so on and so forth. Here you've got the playback, so the drop-down for
the playback, again, you've got mute it loop, it reverses the speed
of the playback, making sure it's
quantized at the start. This is obviously really
good if you're playing in your own sound into a loop, make sure it's quantized
and stuff like that. Everything plays in time. Again here play from, so this allows you to choose where you want the cell
positioned to play from. So from the play head position, from the start or
the stop position, definitely recommend
opening this up and having a plot of
all of this stuff just to get your head around it. These two little arrows up
in the top left corner, these show you the different
versions of that sample. So you can see here that we
have version five selected. If you want to change that out, you can just choose a different
version than it would replace what's already
playing in that cell. This section here is where we enable performance recording. So this is where we
would record our cells that were playing simultaneously into an actual arrangement. So let's do that now. So you come up
here and you would press record and that goes red. And then once we've press the record button in
the live loop page, we then have to press the
master record button. Okay, We can see here that
we have an arrangement. So I'm going to
press Stop up here, but you can see it's
all grayed out. So in order for that
to become live, we have to take that off record and we come to track view. And now you can see
on the tracks as these little sections just to
the end of each track here, like two little arrows, these enable each
track to be edited, okay, and you can
see at the bottom there's Stop button as well. So we're going to
click on each of these or you can click on
the top one to do them all. And now we can start
editing our arrangement. First of all, I'm going to
select everything and drag it to the beginning because I didn't start
paying straightaway. So that's quite
cool as an intro. Then here we can save the
crate dig in reverse. K is like, I didn't want it
that many times that quickly. So what I can do now
is get my scissors, cut it or I can drag it in because it's a loop and
place it where I want. So I get my scissors using
my secondary tool commands. Don't forget press
and hold Command. Move that out of the
way. Okay, now I can place this one piece where I
was hearing it in my head. Okay. So then now I can copy
it out and that's in place. I can select them, duplicate them, then do exactly the same to
select all of them. This section here, I would like to come
in a little earlier, so that needs to come in. So that's on the one down a little bit
panicked slightly. That's great because
this is where you can really start arranging them and you can really start
sculpting your arrangement. Again, the good thing is
if you don't like it, you can go back to it in order to save your
arrangement or you'd go up here to File Save As brings
up that box again, you'd make sure you're
in the right folder. And then you would name
of session, live lops. All I've loops, and then
create a new folder. So I always copy and then paste
that into the new folder. So it's got the same name, create new folder in the logic
folder. And there you go. We have our live loop session. And again here you want to
start tailoring your outro. And if you don't like the outro, if you don't like
any part of it, you can actually go in and
change what's in the cell. You can see here I use multiple different samples here because none of them
are quite light. So different ones because I knew once it was recorded to
the arrangement section, I can choose which one. It's the same. As
you can see again, just to make sure you press these two arrows
here at the top, it actually mutes everything in that session or
enables it again. And you can see if I
open the Live grids, the ocean or the colors
correlate to what is in the track area
or the arrangement. This base didn't like it, so I can delete it from the
track area and then store it where I want the base to come
in and go to my live cells. Make sure I've got
the record button on. Different selling where
I want that to be. Saved. Section here is recording. So it's showing me
that something is actually now if I
stop recording that, there you go, enable that. So it's available
in our track area and there's our two new different basis from
different cells. It's just so simple and
easy to chop and change and make different
variations of a track. And of course you can add all
your effects to it as well. So I can add a little
bit delayed to that. And these again, these
are the Smart Controls. Don't forget what this
is doing is giving you the main controls from the
plugin to make things easier. So it's not too overwhelming
and confusing for you. If you hover over
and right-click, you can actually
open the plug-in itself in the windows of pop-up and change the parameters
within the plugin if you want. This section here
is re-mix effects. So this is an actual
plug-in in itself. But obviously again, because
it's the smart controls, the skin, you'd just be
overviewed the main functions. And this is really good. You can have so much fun. It allows you to apply DJ
like affects your truck. So you can start it, you can add records. Stops are so much fun. We can reverse it. This bit here. This just brings on the
drop-down at the top. Switch between
pheophytin, classic fill modes or your wasn't time. Endless fun. And then when you're ready to
export your track, you would just do
so as you would any other truck and got
to file and bounce. I would like you to
practice playing with different cells,
triggering scenes. Try importing your own
audio into the cells, create an arrangement and then edited key takeaway
for this lesson, live loops is a great
way to get ideas down or to remix
and existing track. Before moving on to
the next lesson, please make sure you
create an arrangement that using live loads and applies
it to the class community. I look forward to seeing you in less than ten recording
and editing audio.
12. Recording & Editing Audio : Hello and welcome to lesson ten, recording and editing audio. In this lesson, I
will be showing you the audio interface
might collection differences between a condenser and dynamic Mike's input levels. How to record into
Logic Pro Tem, putting your audio
and adding effects. So here we have a focus, right, scarlet 212, great audio
interface for the price. And it's all you need. So you'd have your two inputs with their adjustable inputs. Here. You've got your line
and Mike in switches here. Here you have your
48 volt button, which is also called
phantom power. And you will need
your phantom power when you're using
a condenser mic, which we will get
back to in a while. Down here you've got
your direct monitor. This is your main
monitor knob here. And then just under here
we have a headphone in, and our headphone
monitor on the back here we've got our USB power, so that goes straight
into your computer. And here we have our line outs, which are left and
right speakers. So we have inputs on the front and our
headphone monitoring. And then on the back we have the power source and our
left and right speakers. So when you have a microphone, you have a lead which
is called an XLR cable, and they have male and
female connections. You also have pulled
two inch jack, so we have a microphone. You can either connect
via your XLR cable or you might have an
XLR to Jack input, in which case the
jack will go in this centerpiece here as well. So if you have an XLR jack than the jack can go in
there, XLR to XLR. Then you just simply put your XLR in and
turn up your input, and then you would monitor your input when you start recording. Here we can see my microphone, and this is something
called an ISO ball. And inside this we have
our microphone, okay? And also you can
see here, this is, it's like a pop shield
that comes with it. Now, this is a condenser mic. And earlier, if you
remember me saying about the 48 V button on
our audio interface, you will need that
button turned on when you're using
a condenser mic. And the reason for this is because condenser Mike's
contain a diaphragm, which is a thin piece
of metal and that lies behind another bit of
metal called back plate. Phantom power needs
to be applied to these pieces of metal that
create a static charge. And then when a sound wave
or someone's things into it, or noise is picked up
from the microphone that makes the diaphragm
moves back and forward. And that generates a voltage that then can be read
as an audio signal. So basically what phantom power
does is it sends a direct current down the microphone to activate the
electronic circuitry. That's like it in a nutshell. So when we're recording a vocal, we have to make sure that
our input level is correct. And the reason being
is if it's too high, then your vocal
is going to clip. And once the recording
is clipped or distorted, that recording can't be used because it will have
digital clipping in it. You can't get rid of that. So it's very, very
important when you're recording to remember that the human voice or an instrument isn't exactly the
same all the time. So we have to constantly
adjust the input level. Or you can get a general input level
that is good overall. And you might just
need to adjust it slightly throughout the session. So as we touched on earlier, dynamic mics are the mikes
that don't need phantom power. And the most famous
dynamic markets, you can get a Shure,
SM58 and SM57. They are both
directional mics and they have a cardioid
pick up pattern. And what that means is that the pickup pattern
picks up the sound directly in front of it and reduces or minimizes
any background noise. So when it comes to
condenser microphones, this is literally down to taste. It depends on the sound of it, the warmth, the pickup
pattern, everything. So that's the difference
between the microphones. You have a condenser
and you have a dynamic. A dynamic mike does not
need phantom power. They're rugged, they're strong, whereas a condenser mike
does need phantom power. It's got much more fragile bits inside, but they're beautiful. Mike's as well for picking up vocal recordings in the studio. Okay, so now I am
going to show you how to record audio
into Logic Pro ten. So in order to record audio in, obviously we need to mix it up. And you can recall vocals, you can record an instrument. You can recall pots and pans, Chris, packets,
whatever you want. As long as you have, you
might set up and you'd have your audio input ready to go. So in order for me to record
phone calls into logic, I need to create a vocal track. So in order to do that, we come up here to the plus button that
brings a drop-down menu. We choose Audio. And I always default to four. So I'm going to choose four in the box at the bottom
here and press Create. That's gonna give me
four audio tracks. Now, first thing we want to
do is click off anywhere in an empty space so that
it selects all of them. And then click to the
one you want to use. You can right-click
and rename it. I'm just going to
call this Vox one. Press enter. So we have now named our track. You can see here that there's
two inputs coming in. And that is because
this bottom one here is record readied. Alright, so I've taken that off. So now we have the input
only come in on the track. We want to record on a
principle called ready, make sure that my
inputs coming in. And then the other thing
that we need to do in logic is press the input
monitor button, and that means that
I can hear my voice, my headphones when I'm singing. Now for seniors out there, it's really important because we need to hear
what we're saying. And I always keep one
headphone off as well. Some people don't like that, they have both of them on. But I liked here my actual voice and what's
in the headphones as well. Once that's set up, we need
to make sure our input is a decent level and then
we're ready to record. You can see as I'm talking, the inputs quite high, let me just turn that
down a little bit. And role of family, you want to stay at
least a fifth limb away from the microphone. So normally in a
recording situation when you're recording vocals,
you'd be standing up. You would be in a studio environment or even if you're
in your front room, you'd have your this would
be kind of like up up there. But for the purposes of this, I'm gonna be sitting down
showing you, alright, so I'm going to press Record and just start
recording a bit vocally. Old-school RMB. One, I think, yeah, I love cocoa, so I'll
just do want to tell it. Okay, So we're gonna go
back to the beginning. I'm going to meet
whatever was on there before and
I'm going to press Record and you'll see it
starting to record now. Okay. So I'm just going to
start seeing something. You can see how it gets
recorded from ten miles away. Project light for
you and me to see leaves on a tree clearly so we can
breathe. We breathe. Okay, let's leave it there. And let's encourage. You can see, let me just make this a bit bigger input,
so it's quite small. Okay? That's not bad because with women input
that is quite low. We can always add into it after you can
increase the gain. So it's always better to
have an input that is low than an input that is
too high because once you are distorting and you're committing too harsh or too hot, you can't do
anything about that. So low input, it's always
better than a high input. Okay? So what you
ideally want is for this to be in
the middle here. So there's room Eva side, decent amount of
room either side. So let's go again. I'm going to just drag
this one down to here. And I'm going to meet that.
We're going to record again, but this time I'm
going to increase the input a little bit. Alright. Now, we will press descends and Miriam miles away, Project Green Light
for you and me to see. Leaves on a tree. Clearly. We can bring the BRI, but I sometimes feel that way. Okay, less and there again. And it's clear input. So we can see between the two. The second one is a lot bigger, so we've increased
the input volume. Alright, so you've
got a better income. Income. We got a vector input. Now I'm going to
turn it really high. Alright, this is
what we've done. Say feedback already. Okay, so let me write that down. We're going to go really
high and the sun's a million miles away project
for you and me to see. And leaves on a tree. Clearly so we can breathe. We breathe. Let's look at our input. Alright, so now we can see we have three
different types of input. Yeah, amazing. So we have a really quiet one, codon Midwestern, and
then a bigger one. So we don't really
want to go any higher than that because
that means we're going to end up
really distorting and in a place that we
can't come back from. So I would say between
these two inputs, there actually is a good place
to be and write them off. Okay, now I've gone really high, just turned my speakers of k. This is what we don't want. The sun's light for me to say and leaves on a tree clearly so
we can bring Bree. But I sometimes feel that we are going to say that I was hearing at the stoma and it
was really painful. No good. Not good at all. It was actually nice because I didn't need the one underneath and it sounded like
little delay on it. But wow, this is definitely
what we do not want. You see it's completely flat at the top,
flat at the bottom, there is no room and distorting badly and you
can't come back from that. Never, ever want to have
your input that high. Alright, so let's
turn that back. And you want to have
it like halfway or maybe three-quarters
of the way. Nasa decent input. It's now showing you how to
record into Logic Pro Tem, how to make sure you
have the correct input. I can now show you how to cut it up and start adding effects. Okay, So first of all, what
I'm gonna do is I'm going to listen for a little
bit of phone calls and then I'm going to
spend a bit that I like and then I'm going to chop away project light for you, lied for you
clearly, yeah. Yeah. So first of all, I'm going to increase the gain that I can see where I'm cutting it and
also I can hear it better. Then I'm going to zoom in, get my secondary tool. Again, hold command
and use my scissors to cut exactly where I would
like my sample to be. Descends. And then I'm going to drag
that onto a new track. Meet that descends and I'm just going to fade the ends out so that there's not
a clip at the end of it. The sons, and remember
what I said in one of the earlier lessons that we need to make sure that we put fades on our cuts and codes, put the metronome
on for the timing. The sensor. Now, don't forget at the moment, I'm not doing this in
relation to anything. I'm just getting it
in time for myself. The sun. The sun. Okay, and here, obviously, you can just play
around with the vocal, see where you'd like it to sit and as you start
moving it around, something will
form in your head. If you don't have one
already that is descends and the sons in this case, I'm going to copy that vocal, this enzyme, this enzyme. Dozens and dozens and dozens
and dozens and dozens. And right now I am going
to have a listen to the rest of the vocal
that I did before and see what else we
can take to add to it. And you can see it's easy for
me to just pick up and move the loop bar by placing
my cursor over it. And then the cursor
turns into a hand to C, to C, to C. So I'm going to just grab
this bit here to see. Mute that descend,
descend to see, drag that in to organs and to see descendant,
descendant to see. Not really working here k. So now I'm going to select
all and duplicate that. So I can either
press Command D or a press and hold O and
pick it up and move it and then let it go before
I let go of the old but very important to see dozens and dozens and dozens and dozens and
dozens and dozens of times can get rid of that. Dozens and dozens and
dozens and dozens. And this is the beauty of it. You can just play
about with things. It's all non-destructive. You can undo anything. If you delete something, you end up wanting to
keep and just have a play the sons and to see the sons and the
sons and the sunlight, that's going to
have to do for now. Now I'm going to add
some effects to it. I'm going to go over here to the drop-down menu where it says Audio Effects and you've got step effects
and fat effects. I'm just going to choose step
affects, select that mono. And here we have it. Now we can start with people. I love the XY control on this. Great thing is you can
assign what you want, the X, Y control as well. So at the moment it's
assigned to the filter. I'm just going to add
the fat effects as well. And then I can turn
the stuff off. So it's only the
fact the census. How many more times
can I say this? Again? This has got loads
and loads of presets. You can see here
we've got rhythmic, so I can choose any of those
sustain the drop-down. And again, depending on
where I move it in the x, y controls, depends on
how the sound effects it. So here you've got down to that is going
to have the filter affected to save loads of
different presets here, since you have loads more plug-ins as
well as if we go down here to modulation, see, I'm just gonna go to chorus mono so we
can add course. What that does is
it basically adds a nice smoothing effect over the vocal and it's really good
flux background vocals. It gives the illusion
that there's multiple voices
happening at once, hence the name course. The sons and the sons. And here I've got
FAB, feel, timeless. Three, these are
really good plugins. Plugins are beautiful to see. The sun isn't descends and obviously I'm not going to teach you how to use all of the plug-ins because one, you probably don't have them. And two, it's more
important that you start getting
used to logic and understanding how to use it daily before you even
start going into plug-ins. But this is just kind of like an overview so you
can understand what happens after or how you can enhance vocals and
add to your creation. You can see here there are
so many different types of plugins is live and all of
these are stock plug-ins. Grab an Auto Filter and again, go to the little drop-down here. And there are so many
presets that you can just quickly choose from and
then adjust as you wish. So here I'm just going to
show you the different types. Normal district. Let's have a look at some delay. Again, this is a really good
stock plugin from logic. Loads of presets. Again, the sun, the sun. The sun is the sun allows you to tap the
tempo of the delay yourself and listen,
listen, listen, listen. And there you've got
your wet and dry mix. Here you got like
pitch shifted reverbs. These are really great as
well for adding effect. There's so many I
would recommend going in and really having
a playful this stuff. Just have some fun with
it. Don't forget as well. You can automate these
plug-ins as well. If you want to add even
more effect to your vocal, you can actually
cut it up yourself. If you want to create a starter, you can literally duplicate
the same bit of audio. There you go. I mean,
there's so much you can do. I am hopefully giving you all of the tools that you need to understand how
to do these things. And I think it's important
now that you really just get used to these tools and
get used to doing them well. So they'd become second nature. Don't forget you got your
little reverse button up here so you tick that you can
reverse the piece of audio. If you don't like it,
you can untick it. This lovely. I would like you to
practice creating an audio track in
Logic Pro X or ten. Record some audio. That audio using the scissors as a secondary tool
and add an effect. Key takeaway for this lesson is to remember it's important to adjust your input gain to
avoid distortion or clipping. A great tip is to stand a fist limb away
from the microphone. Before moving onto
the next lesson, please make sure you take a cheeky little video and upload it to the
class community. I look forward to seeing
you in lesson 11, recording and editing midi.
13. Recording & Editing MIDI: Hello and welcome to Lesson 11, that recording and editing midi. In this lesson, I'll be showing
you the different ways of adding or recording
midi into your project. How to change the
length of the notes, changing the velocity
I'm quantizing. Okay, so to start our project, we're going to have
to go up here to software instrument and create a software instrument track. And don't forget here
where it says instrument. We can choose an empty
channel strip or choose from any of the instruments
in the drop-down menu. Then we go to the number of
tracks we want to create. Again, I choose four as
default and we press Create. This will give us four
software instrument tracks. And remember to
click anywhere in an empty space to
deselect them all. And then you want
to select the one that you want to
start creating them. Remember, over
here on your left, this is where you're
going to start selecting the instruments you want to
start creating your track. So if I just go to keyboard here and this isn't
a faded keys. And again, remember
if you click on it, it names a track for you. Okay, let's listen to
this one, plastic keys. Okay, So I'm just gonna go to some orchestral
stuff and strings. I'm going to load pop strings. See what that sounds like. Nice. Okay, let's record something in. Remember, we come up here
to set our loop length. So I'm just going to
create eight bars there. And then we want
to make sure I'm metronomes onto a
complaint time. So it's a good idea to start practicing with the
metronome on just so you can get an idea for your timing before you
actually press record. And then we press record and
start recording our median. Okay. Let's get that in. Oh, I totally mess up the start again. Okay. Try and do it properly. Lovely. Okay, So again, if we
click on the region, it will bring up our piano roll. Care played some
DAD notes there, and now I can get rid
of those dotted notes. And this is where again, we would start
editing our middle. Okay, So I like that. I'm going to quantize that. And then I can duplicate
it by selecting the region and holding Alt and then dropping
it into place. Okay, So I feel like
these notes, but the end, they're a bit long and I
want to just alter it. So what I'm gonna do, shooting that here
and then repeat that code right there again. That does, it just gives
us a little bit of a variation between
the two as well. Again, I do everything by ear so I don't really
know what goes where. So just start placing things. First of all, I'm
going to save this. So again, we go to
File down to Save As. And then we will
need to name it. Make sure it's saved
in the correct folder. Create a new folder. So I copy the title, create new folder and name the folder the
same as the title. And then make sure that we're in the logic folder as well. And then press Save. Okay, there we go,
our new session. All right, so now I want
to add a new instruments. So I click on the next
track down instrument to, and I'll go find an issue and our animated swells. Just have a listen to that. Very nice. Indeed. Like that. Right, let's get
that in. Again up here. Press Record, it'll
give me a count and do select all quantize. Again, command a Cuba and make those notes little shortlist, they're
not overlapping. Just going to duplicate that. Again, select the region, press and hold Alt, place. Okay, now we're gonna go
down to instrument free. Choose another sound. Rhythmic. Metallic fireflies
sublicense that. Neurons firing. Crunchy synth patterns. Crunchy. Else. Say what? Short swells sim sounds like. Cool. Quite like that. Right?
Let's recall that in. Again, select all
press Q to quantize. Sometimes the sound
of Simpson stuff just doesn't fit right
so you can move it a little bit left or
right of the bar. Duplicate that. And down to instrument for over
to look at this, get another since k, Let's look at synth leads IC
simply gritty cost of squib, how shimmering base store. That's quite nice, actually. So very area. Love it. Okay. Let's get that in case select all quantize. Shortly snapped in time. Much change these around. Bring that down, put
that one up there. Another truck come up here, right-click, Create
new instrument track. I'm going to add some drums. So go over here to
drum kit, juicer kits. So-called this one. Permanent come down here and choose and Native Instruments plug-in battery,
just get that up. K, this is battery. Now I've got another
massive list of kits in here
and it's come up. Percussionists just go for a standard care members
killed assistance that Duchy kick coalesce record that in NYSE, Show us or ends on four bars. Duplicate that. Okay, now because I
liked that drum kit, I'm going to do is
duplicate that tracks. So I press hold the truck, drag it down, and then
delete the region on it. But it means I can
still use that. Hugging. Kelly's getting nice. Again, select all Q. Again, this is an easy
way to start a trap. Okay, so you can see here
within battery you've got all of these effects as
well so I can filter it. I can turn the compression
on some saturation. Following Sunday. I just got to make sure
I'm on the right track. Assessing. Make sure you have the
correct plug-in open. So what you could
effectively do, which I've just done, is affect the wrong track. So make sure that you
have the correct plug-in, open the trunk,
just duplicate it. Go turn that foot one
compressor saturation. Right now we can. Why isn't it working easy done? Always the mute button. Let's add some effects. The Shakers. Okay, you could do
anything, do what you want. Okay, so let's try this. I'm going to drag this
in and duplicate that. And then this section, I'm going to highlight
every other one. Move it up to this track
here to change it up a bit. As multiple ways
you can do that. You can choose
different instruments. I move it up to a
different instrument. You can change the velocity, which will add dynamics to
your shakers or hi-hats. What that does, it just gives it a little bit depth and it
makes it feel like it's moving a little bit more
rather than being really lacZ. It'd be much, wow, I've just turned into a shaker. Let's try up here. This is again, a
really good way. You can just select all
and just move it around. Sometimes the best
things come out of like happy accidents. Yeah, that's my tip to you guys. Create happy accident. So let's solo that. Now we can mess about with
the actual sound of it. Case. You can see that the actual instrument comes
from the alchemy plugin. And I can actually change
the sound of it by changing some parameters
within the plug-in itself. So let's hear what
that sounds like in with the other instruments. Nice. Solo. Change the waveform because he's gone
between oscillate at 12. Cool. So there you go. There's the perfect way to
start a track using midi. And you would put an eight bar loop on,
start building it. And then when you
start arranging it, just keep duplicating and then subtracting for versus controls. The light. Lovely. I would like you to practice creating for
software instrument tracks. Set your tempo, use for
different software instruments. Play and draw in
your midi notes. So you can have a play them
by using a midi keyboard or your musical typing keyboard and draw them in using
your pencil tool. Lastly, I would like you
to create some hi-hats and change the velocity
to create dynamics. Key takeaway for this lesson is for more dynamics
in your percussion, you can change the velocity
of each of the midi notes. Before moving on to
the next lesson, I would love if you could
please take a video of what you've created and upload
it to the class community. I look forward to seeing you in Lesson 12, plugins
and automation.
14. Plug ins & Automation: Hello and welcome to Lesson
12, plugins and automation. In this lesson, I'll be
giving you an overview of remix effects that
affects logic stock, EQ, logic stock compressor, and the different ways
of using automation. For this lesson, I'm
just going to use the live loop session we
did in a previous lesson, purely because it already
has lots of plug-ins on it. So as you can see, Every single track comes
with its own plug-ins. So again, in order to
get to that plug-in, you would need to
come down here, click on this section here, and it will bring this
drop-down menu up. As you can see at the top
here it says fat effects. So that's the effect
that we've actually got open at the moment. Underneath that it's
got no plug-in. So if you get a plugin and
you don't want it anymore, you can get this drop-down menu and go to no plugin
to get rid of it. And then just under that,
you have the recent list. So this allows you
to access any of the plug-ins that you've
recently accessed. So you haven't got go
looking for them again, which comes in really
handy for your workflow. So underneath that is a list
of your stock plug-ins. You have amps and
pedals and moving that, you have other drop-down menus. Here you've got delay
and the different types of delay, distortion dynamics. Within Dynamics, you'll have
multiple different things. We have EQs, filters,
metering, modulation. This is different types of plug-ins that affect modulation. Pitch reverb specialized. So this is where you'd
find your excite as your re-mix effects and then
utility and multi effects. So the multifactor
is where you will find your fat and step effects. And then under that
you've got audio units. So this is for any
external plugins, the top of the list
and the drop-down menu is all of the Apple stuff, that's all your stock stuff. Again, each of those will have its own
drop-down underneath that are the rest of my
third-party plug-ins. So there might be some you're
familiar with Fab food or isotopes and toys,
things like that. Let's go back up to
our fat effects. If you want to turn
it off from here, you would press
this button here, which correlates on
the plug-in itself. This section in the middle
opens or closes it. And the little bit on the right is what brings up the
list to replace it. Okay, So as we
went over earlier, this section here
is our x y control. You've got your presets, which you can access here
where it says use the default. Make sure that's on loop. So you can hear the difference
as I'm moving this, how the filter is
affecting the sound. And you can see we have the low filter cutoff and the high field cut
off on your x and y. So depending on where I move, it will depend on
whether you get the high fever cough or
the loaf filled cough. And to change that, you would come to
this section here. Okay, So if you come over here, you can actually
change what the X, Y control is affecting. Case if I change the
filter to residents. You can see over here.
So let's turn that on. The resonance part. Wherever
you want to call it, you can see it moving as I move this around
the x, y fill. Now you can actually
hear it affecting it. You can add any of
these sections and control it with the
XY control here. So if I put basin
and turn that up, you can now see the blue line. The dark shows you how
much you have to make sure that section is turned on and then the
amount to sign up. You can see down the bottom
here the ones that are on the ones that are lit up. So if I turn it off,
it goes grayed out. So it's just another
way for you to see what's getting affected. And this section
here is your master. The LFOs here are
connected to the filter, so you've got your filter cutoff under there, under the LFO. So you can assign an LFO and then where that target
is going within the LFO. So drive to filter
cutoff resonance. And depending on
what you set it as you see on the plug-in itself, the blue line will just
dark around so you can actually see what's
getting affected unchanged, the amount you could literally
be on here for hours. Okay, so you can choose the
waveform of the LFO as well. Okay, let's turn on LFO two. And now you can
see we've got one effecting the residents and the other one's affecting the drive. And we can do the same
with the Fill coffee. So we can assign that to
something completely different. Okay, so here again is
the drop-down menu. And we can see there are so many different types of presets that you can add to it. So depending on what the
instrument is that you've had, you have to plug it on. You can actually find a
preset that is already been created for that
specific instrument or sound. So that's the great thing, though already
would have gone in and figured out the types of presets and settings that would work with
that type of sound. And then you can just
adjust them to your liking. These buttons here allow you to flick between the presets. This Compare button
allows you to compare it to the last
setting you had here. You've got your copy and paste. So for instance, if I go and get another version of fat effects, but I can actually copy my settings from one
plug-in to another. So if I go back
to the other one, press coffee on this. Now you see the paste
buttons come up. Then I can paste it in this and you'll see all my
settings change too much that one can go back to the other
one that I was in here, some really good feature, okay, and here we have undo and redo, which is always very good. Here is your side chain section. So you can actually side chain your plugins to anything that
is on a different track. And this is your view section. So it shows you how you're
viewing your plug-in. And then a section is your
link is take that off. Okay, let's go down and
get our stuff effects. Again, exactly the
same principle, but with a step sequencer. And again at the
bottom you can see which bits are active
and which bits aren't. Delay on. Turn that up. Okay, so
if you go down here, you can see I can turn on
the panning and the gate. And again, we can change exactly what's here by clicking on
this little drop-down menu. And now you can see that
it's added delay to the mix. So the delay Mix button
is getting affected. Then we can choose the amount of feedback and delay go into that. So we can put the
modulation effects on. And again, you can say it's gone straight to
the right depth. It will flip to that feedback. Then you can move your X, Y control and really, really mess with
the sound is great. And if you don't want it,
you just turn it off again. Here's your reverb. Again. You can choose from
the different types of reverb that are affecting it. And likewise, you can come up here to the drop-down
menu and you have another massive choice of presets that are
already in good. Let's go to this
negative comb space. Okay? Yeah, and again, using
the X bar control can completely change
what you're hearing, how you're hearing
it, and don't forget, all of this can be
automated as well. Playful glitch, what says, Wow, you can don't
forget change. The amount is
getting modulated by using the step
modulator down here, I say step sequencers, same shape, overdrive
and beat maker. Interesting, Okay, you can see how much of that field is going, is using, it's going
insane and the modulation. Okay, Let's just quickly go to war to show you
something from here. Excellent. Okay. So yeah, you can see they're
pretty much the same. The great thing of logic is most of the plug-ins
have the same setup. So once you open it, you know exactly where
your drop-down menu is, where your undo is,
your Compare button. They're always in
the same place. And you can see here, if
we just open this EQ, again, you turn it
off from there. You've got your
drop-down menu for your presets and then all your
other bits here and there. With the queue, you have here, your volume on the side
too, or your gain. And it goes from 0, which is where this line is. And then you got plus or minus five plus or minus
ten plus or minus 20. And you can see
this little slider. So once you set
your EQ settings, you can actually
increase or decrease them as a whole using
this slider here. Okay, so these along here, this is the frequency spectrum. So it starts at the bottom, which is where your bases are, and it's 20 hertz, and it goes all the way up to 20 thousand hertz is
20 hertz to 20 kilohertz. And then a long hair or your different functions
that are going to affect different sections
of that frequency, if that makes sense. But the bottom and the top, you have your high-pass
and low-pass. So you can click on
them to effect the top of the frequency range or
the bottom frequency range. So you can see if
I click on that, it enables that section of the frequency and the same file click on this one at the bottom, the High Pass, it will
enable that section of the frequency spectrum to come on so we can start
actually affecting it. So for instance, if I
drag this bit here, what it's doing is getting rid of anything that is in
the low frequencies, so it's wiping out. So all that you're going
to hear is anything from 800 hertz to 20 K. And
if I do the top here, that basically means I'm
doing a low-pass filter. So what I'm doing is
I'm getting rid of all of the high frequencies and I'm allowing all of the low
frequencies to be heard k. So the same applies
for the next ones in. So you'll see they look
like a tuning fork. And what they'll do is
they'll start affecting the next section of the
frequency spectrum. So the bottom one will affect the low frequencies and then you start going into the low mids. So as I pull this up and down, you see that the numbers correlate to the color
that I'm moving, the color that I'm moving. You can see as I'm dragging
it up and down the spectrum, the top numbers are
moving and that is because I'm dragging it
through the frequencies. The next one underneath
is the amount of decibels I am affecting. So you can put your cursor
on that drag up and down. And you can do exactly
the same with underneath. So the bit underneath
is the amount of frequency spectrum
you are affecting. What you can do is
you can sweep through the frequency
spectrum by dragging the dark or putting your
mouth on the number. So that will go left to right. The one in the middle
goes up and down. So your effectiveness decibels. Then the one at the bottom, once you've got the frequency
that you want to effect, it will bend that frequency
or make it narrow or wide depending on how much of that frequency
you want to effect. So the easy way to show is this one which is
kinda like a bell. Okay? So you can increase the gain on
it and then sweep it up and down your
frequency spectrum to see what part you
would like to effect. Once you have that, you can also do the
same from here. So you can increase
the gain or decrease. And then the bottom one
is how much of that? So you widen it or narrow it, and then you can sweep
that up and down as well. So say for instance, you have some essays that
you want to get rid of. You can make it really,
really high like this. You can sweep it up and
down the spectrum until you find the noise or the thing that you
want to get rid of. And then you can drag
it all the way down. And then effectively you're almost depressing
something because you're taking out that
specific frequency, okay? That the same hair.
Now, this works with those four controls in
the middle of your EQ. Once again, they're
pretty colors. So this is where you
would get rid of the essays up here
again, like I just said, you would come up here, sweep it, bringing it as high as you want and
then drop it out. It's a really easy way to
start cleaning up, I guess. Again, up here you've
got brilliant presets. Most of the presets really good. You just might need to
adjust them here or there depending on what your
preferences are down here, you've got your analysis. This will analyze
it pre or post EQ. So you can see once
I turn this on, we have our waveform. So we can actually
see if I bring up, the waveform goes up. Then if I bring it down, the waveform in, that
frequency starts to dip. So you can actually
start seeing what you're affecting
within that waveform. You can see where it
might need increasing or decreasing and presets here so you can actually
see the difference. And then like I said,
you can just go in and adjust them as you wish. And if you don't want that
frequency to be affected, you can just turn it off or turn the whole plugin off
from there as well. You can see here
it's grayed out. Once it's turned off. Here again, we've got
our stock compressor. This gives you different skins. So what this is doing is emulating actual
outboard equipment. So it's emulating the hardware. So you've got a
studio, DSA, studio. Here is your input gain. This is your auto gain. You've got your side chain
and your output here. You've got filters, so you can listen on
or off frequency. I personally don't touch
any of these here. You've got your makeup
gain them ratio for now, I would think your best
bet is to stick with the presets because a big
mistake that people use, and I've done it myself, is using compressors for
gain and not realizing that compressors actually
reduce the volume, they minimize headroom. So I would really
recommend trying to take some time to understand compresses before
messing about with it. Because if you start overdoing
it with compressors, then you can start
getting into a lot of trouble later on
down in the mix. So here again, you've
got your output. So generally this needs
to stay where it is on 0. You've got a limiter here, so you can always add the limiter within a
plug-in as well or reduce the input gain is always better to reduce the
input gain at the start, I would recommend
leaving your output gain as is your makeup gain. This is showing you how much gain reduction you're getting for your compressor. Let's put that my
cocaine back to 0. Okay, drop-down menu. This is great as well because
you can see they've done presets for specific
instruments. So for instance, if you have got a keyboard
and you want to just add a compressor so that
the precise there for you, you can see here
it's like peaking. So what we're doing is we
would take the input gain down and the makeup
gain a little bit, and you can change
the threshold. So how much of the signal is getting compressed at some
limit around that as well. Because you don't want to
make sure that your output is staying around
minus three dB. Again, you've got
the presets here for voice and different types of
tools for different things. So if you want to
fatten something, if you want it to
be more pumping, if you want it to be like have an orchestral feel,
a type compressor. It's just putting these presets
and a different kind of pool is so to speak,
rather than instruments. And then down here you
have Compressor by type. So again, breaking them down into the types of
outboard compressors. So the affects your classic
VCA and stuff like that. So if you know that
you've, for instance, you like a fat on it, then you'd go straight to that, put the preset from there, instead of going to the specific instrument,
preset, voice. Brilliant. They've got some really good
presets I'd recommend, as I've said in all
of the lessons, to take some time to go
through these presets. Just play something, a vocal
or some drums or whatever, and then listen to the presets. Really listened to how
each preset effects it and make some
adjustments because this is how you're going to
start understanding your plugins and really getting
the sounds that you like. And then you can save those presets as well
and name them your own. So you can have your own bank of presets for all of your plugins. Okay, so now I'm going
to quickly show you how to automate your plugin. So you need to come up here
to the Automation button, and that allows automation to be shown on all of the
tracks in your session. You can see here that the tracks have now
got lines through them that are all grayed out and underneath where
it says track, it says volume,
and here is where you start adding
your automation. So straight away you can
see it's got fat effects. And now I can choose from that plug-in what effect
within that plugin, I want to automate. So let's choose
your low cut off. You can see now that that's
changed from volume, I click on the track and
now we've enabled it. And to start adding
the automation, I click on it and then
these little dots appear. And you can see now
as I'm moving it, the dot on the x-y control
is moving with it. I just love automation to
that all the way down. That way instead. Now you can
see where I've drawn it in. I've just drawn a
straight line going down. And you can see my
little dot on my x, y control within my
plug-in is moving with it. So let's undo that. So now I'm going to show you how to do it this way as well. So let's go to volume. And this section
where it says read, this is how you would add
automation by recording it in. So you'd come to here
and click touch. You can see now
that goes orange. Then we want to put
the cursor where we need it and we're
going to press Play. And now I'm going to move my
control within the plugin. And you can see on
the track that is actually changing my automation. So that's how you would draw it in by using read and touch. Once you've done that, make sure that you
go back to read because it will keep
recording over itself. So you have to make
sure you put it back to read some radius. I'm going to read the automation that you've just written in. By doing it this way, it just gives you a little
bit more freedom in the automation rather than
it being a straight line. You can actually manipulate
way you want it to go. Okay, let's do that again. And the great thing
about this is once you've recorded in
the automation, you can still edit
it after and it will still read that automation. Okay, and if you want to
turn the automation off, you would literally
come up there. It was still automate,
but you're just not seeing it in the
session anymore. So you're not effectively turn it off, you're just closing it. So if you want to
actually use one of the buttons are knobs
who do exactly the same. You would enable
it, press touch, and then go to
whatever Navi would like to affect and move that. Make sure you put
it back to read. And you can see here
we've got field cut off, this ones in pink. Lovely. Now you can see we've got three different sets of
automation happening. You can just stack this
as much as you want. And this is really good once you're starting to get a
track down and then you really start playing with
the dynamics of it in so many different ways and
layering it and are endless, I want to make sure that it stops just before
this bit comes in. So you can see, if
I go back here, I can now move these to make sure that they
all connect to the correct place and
see if something is assigned and what you
can actually go in and edit it and change it. There you go, see, perfect. And that's exactly what
I wanted it to do. Lovely. So that's how you
automate your plugins. I would like you
to practice adding two or more effects to an audio or software
instrument track. Change the parameters of
those effects so that you can actually hear the effect
changing the sound. So within each plugin, change a separate parameter and listen to how it's
affecting the sound. Lastly, I want you
to record or drawing some automation key
takeaway for this lesson is remember if you like
a specific setting on a plugin that you
can actually save it before moving on
to the next lesson, please make sure you film. You're working automation in your project and upload it
to the class community. I look forward to seeing you in the bonus lesson. See you there.
15. Creating A Track in 5 Mins BONUS : Welcome back to
this bonus lesson, where I'll be creating a track in five minutes
using Apple loops. Okay, So first of all, we're going to start with
five minutes on the clock. Go. Okay, So coming to loops. Okay, What we've got
here but percussion go. No, no, no, no. Okay. Alright, strike that in. Okay, next. Drag that in Hamlet. You just imagine it like
going from there to there, like having a bit of a bill. Let's go and look
for same tempo. So we want this to stick
with a similar tempo. So it was like 96 or seven days. Okay. Scroll down. Scroll down. Okay. 1990. Let's see what we got. We got No, no, no. This is more stressful
than it seems. Okay. Float pad. Wow. He's jumped out and
say that sounds like a little strings. It's got some strings in. Okay, tempo, tempo, tempo. Between, between these two. Let's just drop that in. Okay, they won't
drag it back in. Time for this. Okay. There you go. Okay. What else? All right. Let's just
get some phone calls. Sophie. Trekking in. There we go. Wow. Know what time it is. Stop. Drag. There we go. Time's up. No, man. All right. Let me just
quickly move this. Wow, that was
actually so much fun. I definitely would recommend
that it's super fun. All right, let me
just drag this out. Just so regressed. Tell you what though,
this would be really good if you
could practice this like five
minutes every day, you definitely get
good at listening to stuff them quickly,
making quick decisions. So much fun. Brilliant. Then what you can do with all
of this is just from there. Select it all, drag it all out, loop it, and start arranging it. So select all again. We know what that is by now. So let me just drag
that out there. Just make this intro
a little bit longer. Okay, So then we can say
it starts with the drums, a little bit of vocal comes in. Then with this, we can make
it even longer than that, so that we have eight bars. So then we've got like four
bars of the Ghost Kit intro. We've got the little vocal
leading our same for one bar. She could be a chorus. Okay, Let's bring that in a bit earlier, see if that works. You guys get the idea. It is so much fun and I
would highly recommend them. Practice time and yourself, creating your charts using Apple Loops and make sure
that you have fun with it. Don't take it too seriously. It's not a serious thing. You can, you can see
what I've just created. The thing is if we put too much emphasis on things
happening to be good, we end up ruining the process and we put way
too much stress on it. Like half the stuff I've
done in these lessons is like a fraction of nowhere near what I know
that I'm capable of, but none of that matters. None of that matters
because my role here is to teach
you how to use it, not to produce tracks. That will be a whole
different lessons. So have fun with it. Try not to be. So far. I want to see you laughing like when you're
pulling stuff in and going over time and then doing it again and
stuff like that. It's just, it's just a laugh. But what that does is it's going to
subconsciously make you get so much better in terms of
timing and being able to identify what goes where in a track and
your subconscious, you're going to get
better at that. So it is going to
be doing something, but just don't stress out key
takeaway for this lesson. So remember to make
it easier for you, you can actually choose loops at the same tempo and length before moving
onto the next lesson, I would love you to
film what your trap. You can even go one further, film yourself doing it. And it's stressing out in the
moment so that I can have a laugh as well
and make sure you upload it to the
class community. I look forward to seeing you in the conclusion where I'll be recapping everything
that you have learned in this class.
I'll see you there.
16. Conclusion: Congratulations you.
So one of them. Well done. Honestly, you've done
it well done for taking the first steps in
your production journey. Whether you're a singer,
songwriter, producer, editor, it doesn't matter
it you've done it, you've taken the first step
in your production journey. So give yourself a
massive pat on the back. Well done, Let's cover all the
things that you've learned in this class in less than
one, creating a project, we looked at how to download
Logic Pro X or Logic Pro ten from the App Store
or the Apple website. How to open an empty project? How to open a lively project, different style to grid
templates to get you started in Live Loops available tutorials which are highly recommend. You check out in your own
time project templates which are great to
get you started, whether it's a commercial
track, TV, film, or Castrol, singer songwriter, and how to save the template. In lesson two, we
looked at preferences. I showed you general
project handling, how to correctly set
your inputs and outputs, how to set up your
required file type connecting midi devices, where to set up your project for a score or movie
automation preferences and storing your
information in your trap. In lesson three,
control bar part one, I showed you how to
browse your library for sounds and select them
in the inspector window, your toolbar, Smart Controls, accessing your
mixer and accessing your editors in less than
four control bar part two, we looked at the play
and record functions, loop functions and its features, the time position display, the media, and loop buttons. The other functions
less than five. I showed you how to use your musical typing
keyboard in less than six, interface overview part one, you learn how to reverse audio app to access
media effects, how to create groups, the edit functions
and view buttons. How to access your
automation controls. You'll flex time
tools and you'll catch button in less than seven, interface overview Part two, we delve deeper into your primary and
secondary tool menus, the smart and drag pop-up menus, different Zoom buttons,
your file drop-down menu, and all the other functions
that you need to be familiar with to make sure you can start
getting creative. Straightaway, lesson eight, interface overview part three, I showed you the editor or the Piano Roll how
to edit your midi, change the velocity
of your midi notes. I'm quantizing it in less
than nine Live loops. We looked at how to open
a live loop session. How loops are arranged in a grid of functions that you can
access for each cell. How to play yourselves
in a scene, and how to record your loop session into an
arrangement in less than ten, recording and
editing your audio, you learn the audio interface might collection differences between the condenser and
dynamic Mike's input levels. How to record into
Logic Pro Tem, cutting your audio and
adding effects in less than a recording and
editing your midi. We looked at the
different ways of adding or recording midi
into your project. How to change the length of the notes, changing
the velocity. I'm quantizing in less than
12 plugins and automation, I showed you an overview of remixing effects that
affects logic stock, EQ, logic stock compressor, and the different ways
of using automation. Lastly, in lesson 13,
the bonus lesson, I showed you how
to create a track in five-minutes
using Apple Loops. My last words to you or that I hope that you continue
practicing the steps I've given you in this class
is so important to continue practicing those steps until
it becomes second nature. It's so easy to
get caught up with new things and new
shiny bits and pretty. And before you know it, you're gonna get lost again. And you're really
going to make it hard for yourself by sticking
to what I've taught you. Make sure you keep
practicing it. It becomes second nature. And that way later
on down the line is really going to help
you with your workflow. When you've done that, you're used to and
it's second nature, then you can start playing
with your plugins. Then you can start customizing your doors so that you like it. You can start saving your settings and really
amping up your production. Remember as well, to upload your finished projects to the cars communities so
I can give you feedback. I absolutely can't wait
to hear what you produce. I have faith in each and
every single one of you. It's been absolutely brilliant guiding you through
this process and I really hope that you do continue on your
production journey. Remember, this is
just the beginning. Please try not to be too
hard on yourself and also try to have fun
and not focus on that. Number one, cheesy. But true. Please please also
contact me if you need any help or
support and make sure that you follow me on socials so that you can become part of my world and I can
continue to support you. I just would like to
take this opportunity to thank you again so much
for taking this class. And I will see you in
a class very soon.
 Eve Horne, Singer | Songwriter | Producer