Transcripts
1. Intro: If you thought the creative
process of producing a song ends after every
track has been recorded, you'd be completely wrong. Mixing is one of the most fun, creative, and vital processes
a producer can learn. It's all about carving
out and molding a track to shape it into
your signature sound. With a few simple effects, I can take a recording
from sounding weak, dough, and messy
to sounding clean, full, and professional. In this class, you're going
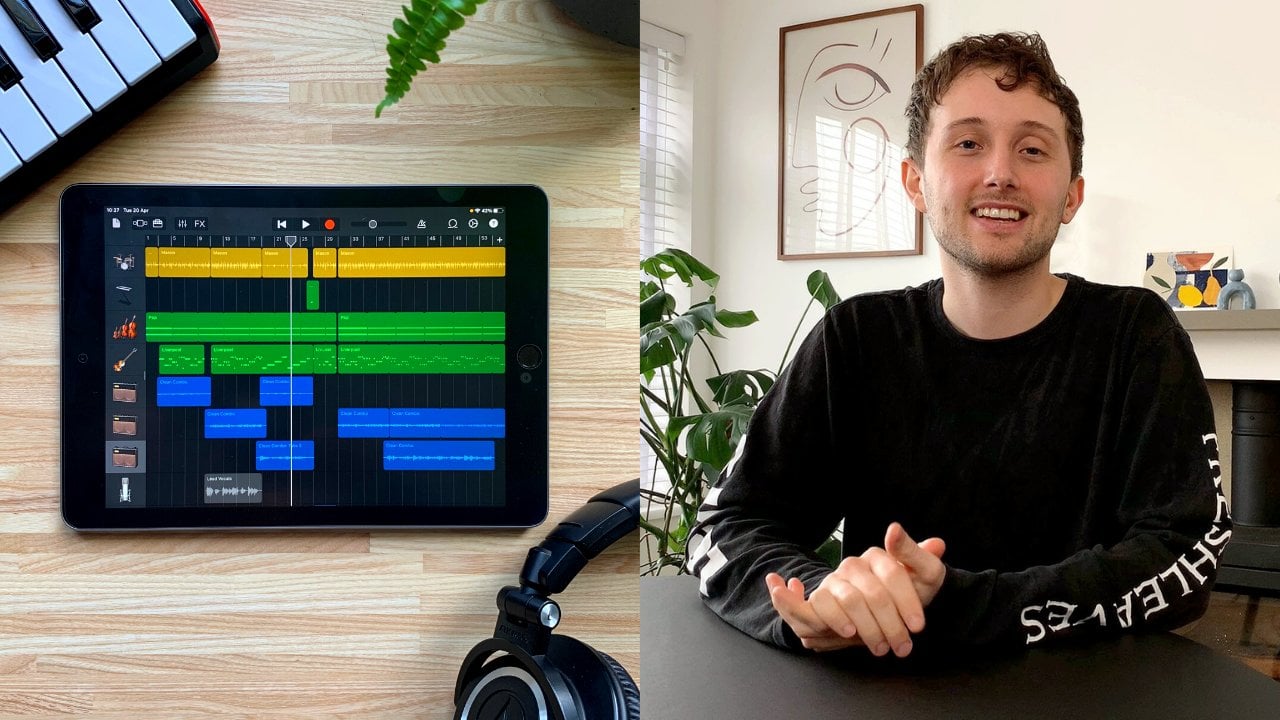
to learn to do exactly that. Hey friends, How's it going? I hope you have a great day. Welcome to my beginner's
guide to mixing music. My name is Mike. I am a full-time musician and a
music instructor from the UK. I've been playing, writing, and producing music
for the last 13 years, and I also co-run a multi-award-winning
music charity called TIME. We run music sessions
and workshops for people of all ages,
abilities, and backgrounds. I'm also a top teacher
here on Skillshare, and I've had an absolute blast making classes here the
last couple of years. In this class, I'm
going to teach you everything you need to know about mixing music to craft
incredible-sounding tracks. This class is going to
be beginner friendly, so even if you're
totally new to mixing, you better follow along and
get around out of this. We'll start with some
simple preparation to get things cleaned up and
easy to work with. We'll then learn about
gain staging and volume balancing to ensure
everything is sounding clear and balanced. I'll teach you about
using compression to make every track sound
punchy and confident. We'll then move on to
learning about EQ to curve, shape, and clean
up our recordings. We'll break down
panning, reverb, and delay to create a 3D space
for our song to exist in. I'll also teach you how to
manage these effects with automation and buses to give a true professional
quality to the mix. And lastly, we'll dip
our toe into the world of creative effects
like distortion, exciters, and chorus to add flare and interest
to our track. Throughout the class,
I'm going to be mixing a song myself so you can see exactly how we implement each
of these topics into a mix. The only thing you'll
need for this class is a basic understanding of
an audio workstation. I'm going to be
using logic today, but I've made sure this
class is appropriate, no matter what DAW you're using. Mixing can feel like a very daunting and confusing subject, so my aim for this
class is to really break down each
subject into small, bite-sized chunks, and
make it the simplest possible for anyone to pick up and learn the fundamentals. I'm really excited to
make some music media, I hope to see you in class.
2. Class Project: Hey friends, how's it going? Thank you so much for joining
me here on my mixing class. I really hope it's useful for
you and you come away with a load of really
good information about mixing your own music. Before we jump into the mixing, I very quickly want to talk
about our class project. By the end of this class,
you're going to learn a ton of cool stuff
about mixing, which you can apply in your
own songs and recordings, and I would love to hear
what you come up with. Anything that you implement from this class into your own work, please feel free to send
that into our class project. It's going to be a safe
learning space where we can all post our songs
or little ideas, and this could be anything from a fully produced mixed
song with like 100 tracks, right up to just like a really nice reverb sound
that you've made for a guitar. Anything in that stratosphere, feel free to post it in that
class project, and yet, which have a cool songwriter and producer can chat about it. I'll respond to every
single project send in, so if there's anything
you ever need help with too or want to advice on, please feel free to let me know. All you have to do is
upload your sound or your track to a site like
YouTube or SoundCloud. You can create a private
link if you'd like to as well in case you don't
want anyone else to hear it, and then just post that link
into the class project, tell me a little bit
about that your song or what you'd like to feedback on, and I'll get back to
you as soon as I can. Please don't feel scared
about posting in there. It's such an
important thing to do as a musician or an artist to get feedback and talk
to other artists and producers about the
stuff you're making. It means you progress much quicker and learn a
lot of cool things. Please feel free
to post in there, and I'm really excited to
hear what you come up with.
3. Important Mix Lessons: Before we dive into
the real nitty-gritty of mixing and stuff, I need to just run
through a couple, really important lessons
that are going to be vital to really understanding and getting the most
out of this class. First lesson is,
record it right. We can do a ton of
cool stuff in mixing to improve the sound and
the quality of a recording. But there is no getting
away from the fact that recording a sound right in the first place is going to be vital to really getting the
best out of that sound. Let's say while you're recording you are listening to
some things back, and the room sounds a
bit weird or there's a weird buzzing sound, or maybe you just didn't get
the take you were after. Honestly, spend as
much time as you can in that recording phase, getting the best recording
you possibly can. Second lesson, listen to this
class wearing a decent pair of headphones or some
semi-decent speakers if you can. A lot of the
examples I gave with E queuing on compression
are going to be so hard to hear from a phone speaker or
an iPad speaker. To get the most out of it, I highly recommend
wearing some headphones. Lesson Number 3, 1% at a time. A lot of the examples that we're going to go through won't necessarily sound
groundbreaking when we start to tweak with them. But my mindset behind mixing is we're just making a
1% difference at a time. If we spend long
enough on a track, we make a little 1% here, a little 1% there. Over the course of
a couple of hours, we do enough of
those little tweaks, those little one percents, and it will amount to
a massive difference. Next lesson, if you can, follow along with me is
going to be much easier than just watching this class
and then trying to remember and replicate
some things later. If you can take a
track or a recording, and while I'm talking about
E queuing or something, if you can be mucking around
with it at the same time, you'll absorb all of this way, way quicker than if you were
just watching the videos. If it is a song your
precious about, save a copy to just totally muck around with and just get
really experimental with, and then you can
always just go back to your default one if
you get a bit lost. The next lesson is going to be, have intention behind
everything you do. What we're going to do in
this class is really learn about what each mixing
technique does. What I really want
you to do is ask yourself when you're
about to go into a mix, what do I want to
change out of this? For example, if you're
mixing a guitar, rather than just
slapping a lot of effects on it just because
you think you should, listen to it really
carefully and think, how can I make
this sound better? What tools do I have at my disposal to affect it
in the way I want it? Mixing is all about listening
to a piece of music, identifying what needs to
change to get a better result, and then using the appropriate
tools to change them. To contradict myself there, the next lesson is, there is no real
right way to mix. It's very much a
creative process, just like writing a song is. I remember when I
first learned to mix, I would get really frustrated at teachers because I
just wanted to know what compressor
settings do I put on my drums or what reverb
do I put on my guitar, but that is just not
the way things work. I say it's like an artistic, creative process in itself. How a compressor works on one drum kit will be completely different
to another one, and it's very much depending on what kind of song
you're going for as well we know if you're doing a
vocal and guitar track, the way you compress, and EQ, and mix that track
is going to be wildly different to
a 10-piece band. It's again about really knowing what all
of these tools do. Like we said earlier,
analyzing what needs to change and changing it. But I know that can feel a little bit scary to think, oh, I have no boundaries or
things to really hold onto. But I think this is
where you can just get really weird and
experimental with it. Like I said, there's
no right way to mix. Often, the coolest
tracks come from those that really do push boundaries and don't play
by the rules and stuff. For example, one of
my favorite albums of all time For Emma, Forever Ago by Bon Iver was
recorded in a wooden shack. No sound installation,
no proper studio, one pretty cheap mic, and a very, very basic door. The album is full of weird
buzzing, and creaking, and room noise, and it would totally go against a very professional way
of recording a track. But I absolutely love it, and it's all that weirdness
that adds character to it. Once you know how
to use the tools, use them in whatever way
you think sounds best. I'm going to give you some very basic parameters to go by. But as I say, get
experimental with it. You really want to find
out what producer, and which mix engineer
you are personally, just like what kind of
songwriter you are personally. Everyone is going to
have a different taste in music and songwriting, just like everyone's
going to have a different taste in mixing. To follow on from that,
I know it sounds cliche, but practice really
does make perfect. Is quite tricky trying to
explain sounds with words. Sometimes there just is no way of really explaining something verbally without you really going in and trying these
things for yourself. Just like anything else,
the more you do it, the quicker you're
going to be able to recognize what frequencies don't quite fit right or what compressor settings you
like best on vocals. The only way you figure
that out is by practicing. My biggest piece of
advice to top this lesson off is make this whole
process just super fun. Don't take it too seriously, have fun with the process of just mucking
around with things. Don't put pressure on
yourself to try and mix like the top
engineer straight away. Just take however long you need to really work out
each of these tools, what they do, what
sounds they create. Make it fun, do it regularly, and you'll be an
absolute pro in no time. Enough, the yap run-on, let's actually dive
into the mix now. I'll see you in the next lesson.
4. The Song We'll be Mixing: To demonstrate all of the mixing stuff we're going
to be talking about today. I'm going to be mixing a section of a song that I've been working
on with some friends, so to give you a good idea on the track we're going
to be mixing today. I'm just going to
play it through. We're only going to be
mixing the middle section. Just so it's not
so overwhelming. Just so you're aware of the song we're
going to be mixing. I'm going to play
it for you now. Then it starts to go into a slightly different
section there. But it's that first bit, money, that middle bit that we're
going to be focusing on today. Now, it's worth saying
that is not mixed at all. If you could tell the volumes
are all over the place, a lot of instruments
can even be heard. Actually what achieve
play that too, because it's just
a bit of a mess. But hopefully that gives
you a rough outline and the genre of the song
and where we go in. Let's dive in and start to
sort some of this mess out. Sherry, I'll see you
in the next lesson.
5. Mix Preparation: Hey friends, welcome back. In this next lesson,
we're going to be talking about mixed preparation, which might sound lame. But trust me, it makes the whole process much
less overwhelming, and just in general
makes it way faster and easier to mix and bounce
around through the track. I always like breaking
stuff down into steps to make it as
easy as possible. Number 1, this might
sound obvious, but pick your best takes. I've already done most of that because it takes a little while. You just want to go through and pick all your best performances. There may be like a verse where the first vocal section you
liked more than the second. Or you might want to cut up like each vocal line if
you want to get really and great with it. Then the second step
sounds obvious, but just delete anything
you don't need. Any bad takes maybe
some ideas that you are experimenting with that just
didn't quite work out with, just go ahead and delete them. Next, we're going to
properly label each track. It's really easy to
fall into the trap of guitar 1 or instrument 1 or audio input 5 or
whatever you know. It means you have
to constantly be remembering what track is what. Just spend a bit
of time just going through and just giving
everything its proper name. Quite like factor,
that's fine and Lead, guitar, harmony, and
so on like that. Just so everything is
really clear and I like to change the icon as well. Just so again, just
a nice place to be, a nice, easy way to
look through the track. On logic, you can right-click and select your
icons from there. I'm just going to spend
a minute doing that. We've got a much clearer idea there on what each track is. I guess a little bit more like [inaudible] down here with
all these different vocals. But what we're going
to do later is like stack these
up into a folder. I don't feel like I need
to label them too much. But again things
like the guitars, the main vocals, and all those sort have been
nicely labeled now. Next, just organize the tracks into an order
that works well with you. This is different for everyone. Some people like the
vocals sitting at the top, other people like the
drum sitting at the top, and then the bass and the guitar and they're
going like that. Just group them together in
any way that makes sense. I've just really
just thrown all of the main instruments
up towards the top. Then I've got all the vocals
more towards the bottom. But to move these, you can
just select the ones you want and then drag
them up and down. That'd be pretty similar
on any Doyle you're using. Next is color-coding.
As you can see here, most of the tracks are
blue, which is fine. But what we can do just
to make things a bit easy for us is
color-code them all. This is going to be a little bit different on every Doyle. You might need to
do a little bit of Googling on your own if
you want to do this. On logic, we go onto Logic Pro, settings and go to display. Then we go to Tracks. Then we can auto assign a 24 color or a 96 color
depending on what you want. And is here we can dive into some other settings
so we can treat each different track
as a different color. If you see there,
we've selected it. Then each one is going to
assign a different color. Now if we want to
say like group all these up in a really easy way, we can just select them all, right-click and then go
to a soundtrack color. We can just change
them all by groups. All of these weird
vocal sessions we just know are all
grouped together. We can just go through the track and color however we like. Next we're going to
group instruments together and create
track stacks. This is really useful
if you've got like a ton of vocal stacks you're working with like this track. Or often if you've got like a drum kit recording
where you've used like 10 different mics, what you can do is group all these together and
treat them as like one specific file and
hide them away so that you're not constantly scrolling through like
tons and tons of tracks. When it comes to just working on the drums and the vocals, you just dive into that folder and it all opens up for you. In this example, I'm going to
use this weird vocal stack. It is going to be a little
bit different on every Doyle, but you should be able to stack folders no matter what
Doyle you're using. On Logic, we just want to
select all of the tracks. We want groups together. Right-click. Then we want to
go to Create Track Stack. It's going to give us
two different settings. The folder stack is going
to be just literally just grouping them all together so we can bring out the folder
and shrink it again, which is fine for organizing. But a summing stack
essentially allows us to like create effects or adjust the
volume on the whole stack. This is really useful on like drums if you want to turn
the whole drum kit down, rather than turning each
individual like mike down, we can do it all at once. If you're using logic, I'll recommend going
for Summing Stack, if you're going to be
adjusting anything. We can see here, it's tidied all of those vocals up into this
one track that we can open and work on
or we can close, and then we've got a slightly
neater look in timeline. We can name this stack as well, so like weird vocal stacks. Then yeah, we can
adjust the volume to this or the gain or wherever it is and
it's much easier. We could do the same
for all of these. I know these are all going to be just the verse harmonies. I can create a track stack
verse vocal harmonys. That's just shrunk down the sheer amount of things
we've had to scroll through. It just makes things more simple and this makes more
sense to me now. Next, we're going to
delete empty sound. In lots of recordings
like this one, for example it's
acoustic guitar. There's no sound actually
until over here. Again, just to make it really clear where each instrument
is coming in and out, I like to delete all
the empty sound, not doing anything
for the track. If you like a little low-end
rumble or something weird, obviously feel free
to leave that in. But I liked yeah, delete as much empty
sound as I can. This could be as simple as
just like trimming down, attract and just
finding where it stops. There's often an easier
way around this. If we select the track, we want the noise
taken away from. Then on logic, we go to functions and remove
silence from audio region. Again, there's going
to be a little bit different on every Doyle but it should be something similar. Then we just want to adjust the threshold so that we're
removing the silence. Now, you can obviously get really like
specifically with this. However, I would recommend just being as loose as you can, so you're not cutting out
any of the nice resonance. About there is fine it just roughly cutting out the silence. We're going to hit
Okay and you can see there that it's just cut out with that silence
[NOISE] for us. I'm just going to go
through and do the same for every instrument that has that silence in it or
we can use the shortcut, the arrow and x, two easy bring this up and
just really quickly go through and get that sorted. I would recommend
doing it one at a time just so you can make
sure you're not cutting out anything on wanted and everything is
just really accurate. Again, that's looking
much clearer to me now. Now on top of this, we can create crossfades
and just in general, fade things in and out. For example some things might come in a little suddenly,
like this guitar, like this lead guitar for example obviously cuts out there so rather than just
ending suddenly on logic, we can hit Shift
Control and then draw a line and it's going
to create a fade out. For that one for example
needs or even fade out a bit earlier so ends there. We can just cut that
back and then hit Shift and Control and draw a line and that's
going to fade it out. You see that that line
is going to take it down and it's just going to fade out more naturally than just
suddenly endings. We can go through and do that
to each one if you want to. Don't feel like you need to
have every single track, but just any have a
bit of clipping or just make a sudden like
pop when you bring it in. That's scratchy
guitar, for example, we could just do a little bit of just makes it a bit nicer. But what we can also
do is crossfade. If you've ever got
two takes and you're trying to put them
together and there's a weird bit of crossover
over there's like a pop or it just doesn't fade from one type to the
other very naturally, we can create a crossfade with
the exact same technique, so control shift and we could just put a little crossfade in that and it's going to take one and put down while
the other ones coming up. They're going to
meet really nicely. Just give like a
very natural sound. To make things even easier
for ourselves you can often just apply a
default cross-fade. If you go to the track, you want to insert your
cross fades on go to functions and then apply
default crossfade. That'll apply all cross
fades where they're needed. Next, we can create some
sections the top of our track, so we can really easily, know here the verse and the
chorus and the bridges are. Is very optional one, but again, helps you just bounce around
and speeds things up. On logic, we wanted to
show the global tracks here and then you can see
this arrangement marker so we can hit plus and you can say it adds a market for
an intro for us so we know the intro
ends about there. We can just stretch it out and then hit Plus again and it's going to
default to a verse. We can just keep going like
that and we can rename them just to fit whatever suits. It's like a verse
section to hear for me. We just keep going like
that and it just makes it really easy to bounce
around the track. If you want to you can also
get rid of these as well so we can right-click and
take away the tempo, the signature marker
would get rid of that too so we can just have the sum sections
up at the top there. Now, taking a look at
this track as it is, this to me is much clearer than where we
were at the beginning. It's just going to
be way more like fun and accessible
to go in now and tweak things rather
than just battling between really confusing track
names and stuff like that. That's all looking really good but there's one
more step I like to take when preparing for a mix and that's importing
a reference track. A reference track is
going to be super helpful as we go out
the mixing process. It's very easy when you listen
to attract over and over again to get used to
the sound you've made. Unless we're really
comparing back-and-forth to a song that's an
industry standard, It's quite hard to stay on track and stay aware of
what you're aiming for. Have a think of what genre or style you're trying
to replicate or work towards and it's often helpful to grab a couple of
tracks like two or three but for today I'm
just going to grab one. I'm going for a Bon Iver, Phoebe bridges style
with this track, and one of the songs
that really inspired me while writing this song was
blood bank by Bon Iver. I've downloaded that reference
track and I'm just going to drag it in to
the bottom here. Obviously move it away from
track so it's not crashing, but just so that you can nip over and have listened
go back to yours. But do keep in mind
your reference track is often going to be mastered to the highest
volume it can go so just always be balanced
and the volume of the reference track in line with the track that
you're working on. Don't worry too much
about getting up to the same volume right away. That's what more
mastering is about but a reference track is going to be super important down the line. Let's clean up their track of yours and once you're ready, let's dive into the next
lesson. I'll see you there.
6. Gain Staging: Hey everyone, welcome back. In this next lesson,
we're going to talk about gain staging. But before we dive into that, what even is gain? You see gains, the
process of getting absolutely jacked like
me. No, I'm just joking. Gain, is essentially the level of the
input of the sound. Now, it's very often
confused with volume, which is the output
of the sound. Now, they may seem very similar, but volume and gain, are actually two
different things. I like to think of
it like a guitar. If you plug a guitar
into the amp, you have a gain dial, and if you turn that
gain all the way up, you'll get a distorted
sounding guitar. You're adjusting
the input level so that it's over driven. But you can control how loud that guitar is still
with a volume dial. You can create a distorted sounding
guitar at a low volume. Although not many rocky distorted guitar players
seem to do that, but that's how I
like to think of it. Volume controls the loudness, whereas gain controls the tone and the input of the channel. In goes gain, out goes volume, if
that makes sense. With that in mind,
what's gain staging? Gain staging is
correctly setting the balance of gain for each of the
instruments in our track. That's either adjusting
the gain up or down., so it hits a certain sweet spot, which minimizes noise
and distortion. But it also ensures that
you're getting the best possible sound out
of that recording. It's also really nice
because if we gain stage all of our tracks
that same sweet spot, it means all of our instruments are sitting at the same level, so it's much nicer and faster when it comes to mixing
and adjusting volumes. It's really important to do
this step before we do any mixing like any compression
or EQ or anything like that, get the gain staging done first, and we've got a really good
foundation to work from. Before we start adjusting
the gain of each track, we want to make sure that all of the volumes are set to zero dB. As you can see here, we just want to make
sure that number is at zero or if we're
working from up here, we want to make sure they're
all neutral on zero dB. We also want to make sure that none of the instruments are pan, so this dial here that
we use for the panning, we're going to come
to that later. But yeah, we're just going
to make sure everything's central and everything's
at the same level. On logic to adjust the
gain of any track, we want to just
click on the track, we want to adjust the gain on, hit this little i button, and here you'll see there's
an option to adjust the gain. Or if you want to, you can
head into the mixing section, and we can add a gain unit here, if we want to use it
in a plugin form. But I quite like using
it on this trip, so that's what I'm going
to be doing today. To gain stage, we need
to adjust the gain so that the audio is hitting a
certain audio sweet spot. Now we can find that sweet
spot in two different ways. The best way is to use
what's called a dBVU meter. I'll leave a free download link to that in the description. Or you can use your DAW's
volume fader to get an idea on where that volume is sitting and do it
that way instead. Hi, I'm editing. I'm just going to pop
in here and there to add a bit more context
to what I'm saying. Just to expand a bit on decibels and dBFS and
that kind of stuff. dBFS and dBVU are just different ways
of measuring volume. DBFS is the digital
modern version. DBVU is more of the old school like analog way of
measuring volume. Because they're based
on different systems, they work a little
bit differently. But all you really
need to know is it's just a way of
measuring a volume, and the old-school analog way, dBVU, tends to be more the gold standard to aim for when doing things
like gain staging. But when working with
modern DAWs we'll almost exclusively be working
in decibels or dBFS. It's also worth noting that
if we go above zero decibel, we'll be peaking the signal, and that often makes distortion and just some nasty sounds. We almost never want to be
going above zero decibel. If I play this guitar e.g. you can see the
volume meter there. This is reading in
decibels or dBFS. Little bit technical, but
essentially we're looking at the numbers and the readings
on the level meter here. The most accurate way of getting to this
audio sweet spot, like I said, is
using a dBVU meter. We can download this
for free online. At least they're
free at the minute. They look a little
bit like this. What we're trying to aim
for is to get the audio sitting at zero dBVU. Again, if I play this guitar, we can see is actually
pretty close. But if we want to adjust this, we can just click on the guitar and head over to the gain. We want to just up
a little bit so that it's hitting that zero. On a bit more. Obviously, any instrument is going to
go up and down in volume. That's just the nature
of any instrument. What we're really aiming for
here is to get it as close as we can to that zero dBVU. If it's going over a
tiny bit, that's okay. I tend to like to keep
it below zero if I can. But that's pretty close to me. I've only had to do
a minor adjustment there at 1.6 decibels. That's all we're doing,
is we're going through each track and
adjusting the gain so it's sittings close as
possible to that zero dBVU. Now, if you really can't
get your hands on this, or you're just in a pinch, a lot of people also say
to aim for minus 18 dBFS, which we can see
our volume meter. I find that most of the
time we're trying to find the balance that's sitting
at around minus 18, and it's our peaking
at minus ten. That tends to be a similar
range to that zero dBVU. If we take a look here, we take a look at our volume
meter instead this time. We can see that we're
seeing around 18, a little bit more muscle
peaking up around 10, which is about here. That is a pretty good level
to me. Keep that in mind. We're going for about zero dBVU, or peaking at minus 10 dBFS. I'm going to select all of
our tracks here and I'm going to bring up the dBVU
meter on all of them. Just like that. I'm
just going to go through one-by-one and adjust that game so it's hitting
around zero dBVU. While we're doing this,
we want to be looping the loudest part of
the track to focus on. You can see here with the bass, we're going way over. We want to take this game down. Now, obviously, every instrument is going to be a
little bit different. Now with instruments
with lots of dynamics, particular drums where
there's sudden punchy sounds, we need to gain stage in
a slightly different way. For example, this right isn't quite hitting
that zero dBVU. We'd think about taking it up, but if we look at
our level meter, we're picking the signal, which is going to mean
we're going to get distortion and it's just not
going to sound very good. It's going to sound
very unbalanced with everything else as well. We can't have it peaking, which means we need to bring
it down and that's fine. Not every instrument is
going to be able to hit that digital sweet
spot on this VU meter. In a case like this, I will again look
at the level meter and I'll try and get it
sitting around minus 18, peaking at 10 instead. But again, if we can get
it as close as we can to zero dBVU, that's also great. [NOISE] That's good, it's
sitting around 18 there and they're peaking
up at around minus 10. I'm cool. Unfortunately can't get acquaintance
that sweet spot, but that's absolutely fine. Kicks it in pretty good there. Organ sitting around
there too, which is good. For each different instrument, like this guitar is
just a little bit tricky to nail down
exactly where it is. I'm just constantly
looking between my level meter and
my dBVU meter, I'm trying to just dial
it in as close as I can. But a lot of this is quite
like a soft science. It doesn't have to be exact. We're just looking for
a good ballpark level. So most of the tracks have
been gained stage there. Now, we've just got to do these vocal harmonies,
but what we can do, is something quite
cool to save a bit of time for instruments that aren't too in your face things like background
sounds or harmonies, especially ones like
these that are just like one or two lines gain staging
those isn't quite as vital. What we can do is something
called audio normalization. That's essentially going
to adjust the gain to each region so that it's hitting
a certain peaking point. If we select everything
we want to adjust, then go to functions and apply normalize
region gain here. Then we can choose
if we want it to be individual tracks or
individual regions, we're going to go for regions
because we've selected love regions and then like
we were saying earlier, we're aiming for around
minus 10 peakage, [LAUGHTER] if that's a word. So we can type in
here minus 10 and hit Apply and then all of these little regions
are going to be brought up to about minus 10. You see, they've
all been brought up to a pretty good level there. Now what we can do
is go back in with a metering and just
see how that's doing. So we can say that
that's way too loud. So we can just do that
exact process again, but bring it down a little bit. Maybe we'll go to minus, say like minus 16 instead. Let's try minus 13 instead. That's hitting a
bear balance there. So we can play around with that normalized gain feature
on more like background, the instruments, or like a big drumming kit with a
ton of different sounds. Sounds a little bit of time. Again, it's fine for getting our audio into that sweet spot. Now the question that
often gets asked is, do all instruments need
to be gain staged? Well, not really, but it's worth considering. What I mean by that is you definitely want to
gain stage tracks out front and very present
like guitars, vocals, bases, but instruments
like a little shaker or a tambourine or some background ambient
noise, stuff like that. Don't worry too much about, but getting up to about
the right level is just going to mean
you're going to be hard to mix nice and easily. As long as you're in the right
ballpark is totally fine. Should you gain stage midi? In a way, yes. Like for example we have
the strings the amidi. Now because amidi is just like audio information
isn't like a recording, it doesn't exactly
have like gain, but we can often do is go into
the plug-ins like we have here and they'll often be like a volume dial or some way
of adjusting the output. We can get that into the sweet spot just so
it's sitting nicely with the other instruments
or failing that if you're plugging doesn't
have a volume slider, you can add a gain plug-in a little
bit that we saw earlier, so just adding utility gain, adding that onto the effects and you can adjust
the gain from there. Now you might be able to
hear things are sitting at a slightly nicer balance now, just by adjusting those gains, everything's just sitting at a nice level and you
can hear most things. By creating this
foundation for ourselves, it's so easy to just make small little tweaks and
balance in the mix you want. It just creates a perfect
foundation to work from and means we're getting
the most out of all of our recordings and all
of our instruments. Next, we're going
to be working on the balance and the volumes. As well, I'll see you
in the next lesson.
7. Volume Balancing : Next we're going to work
on volume balancing. That's exactly what
it sounds like. We're just going to be playing around with the volumes and making sure that everything is sitting a really nice level. We can hear everything
clearly and we're happy with the
balance of the track. This is where our
reference track is going to come in
really handy too, as we can just compare
the volumes and where everything sitting
with a reference. Let's again break
this down into steps, so it's really easy
to understand. The first step is going to be to loop the loudest
part of the track. Then we're going to select
every one of our instruments. All of these, and
we're going to turn all of the volume sliders
right down to zero, so you should be able
to hear anything. Now we're going to pick our
most important instrument. This is usually the vocals, but obviously depending
on what style you're working in, it
might be different. You may be working in lo-fi, which has no vocals, in which case you might have
a really strong melody. We going to pick out the
main sound in our song, which is going to be
vocals for this track. We're going to bring
it so it's sitting at about minus -5 db. See the loudest
past climates was -6 or -5 roundabouts,
there's fine. Then we're going to pick for second most important instrument and bring it so
that it's sitting nicely with those vocals. I think for me, it's
probably the lead guitar. There's going to come in second most important. That's here. Then we're going to just
carry on in that fashion, choosing the next most
important instrument and the next most important
instrument and just mixing that in to the instruments
that are already present. After that lead guitar
for me probably comes the rhythm guitar. Next is the base. We're just going through
each of those tracks and just mixing
them in one by one. It goes without
saying that you can obviously come back
to each instrument. You'll be tweaking this for
the whole track, I'm sure. But we want to just get
it as close as we can, suspend like a really
good amount of time here. Just keep listening
to that same section and getting those volumes
close as you can. It's worth saying that if you play the song from
beginning to end, there's some parts
in the beginning or the ending that might
not quite sound right, but we're going to fix
that a little bit later. But for now, we just want to get the loudest part of
the song sounding good and balanced
and we'll come to the rest of the summer
a little bit later. Make sure you have
a break as well. Give you a raise and rest. Go on have a cup of tea or just go do something else
and then come back to it like half an
hour later with some slightly fresher is. Also keep bouncing back between your reference
track as well like. I can solve here that
I think I need a little bit more of
the main guitar. A bit more kick as well. I think I'm quite happy
with the balance there. It's a little bit
intimidating trying to film while doing this, but I think that sounds okay. I'm happy with that for
now. I'll probably think differently [LAUGHTER]
about half an hour's time but that's cool for now. If we play this song
from start to finish, you'll probably think that
things sound a little bit unbalanced in certain sections. That's totally fine. That's normal. We're
going to fix that with something called automation
a little bit later. Some people may like
to do a light bit of automation at this stage,
which is totally cool. But for me, I'm going to do it a little bit
later just because I know through EQing and compressing things can sound
a little bit different. But next, we're going
to talk about buses. I will tell you more about that in the next
lesson. Thanks, guys.
8. Busses: Hi guys, welcome back. In this next lesson, we're going to
talk about busses. I was confused by busses
for the longest time, but it's actually
super straightforward. The old saying goes a
little bit like this. Imagine you want to get a
group of children to school. The easiest way to
get all these kids to the same place is
to send them on a bus to the place and that's exactly what
bussing in audio is like. Say we've got like
a drum kit with loads of different
mics and drums, and we all want to
get reverb on them, we want to send
them to a reverb. Rather than sending
each one individually, we can send them all at the
same time. Why do we do that? First of all, it
saves a ton of time. Rather than applying reverb
onto every single track, we can just create a reverb
we like and then send a ton of different instruments
to that same reverb. It makes things so
much quicker and easier in like every
single way and it also greatly reduces the amount of power your computer needs
to make it all work. Also because we can
use this to apply like this same effect on a
group of instruments, it helps to glue it together, like reverb for example. Rather than every reverb
being a little bit different, if we can send a lot
of our tracks to the same reverb bus it will sound like they're
being played in the same space and it
nicely glues them together. Also, if you want to adjust the reverb
later down the line, again, rather than
having to go into each individual track
and adjusting it, we can just adjust
the reverb bus we've set out for ourselves
and we can do this with any effects we want, like reverb, delay,
compression, EQ. Sometimes it's nice
to EQ whole drum kit together rather
than individually. Again, helps to
glue it together. We don't necessarily need to set up all of our busses now, but just as we go into the
section where we talk about things like effects and
compression reverb, keep in mind you can
slot these effects onto a bus to make life a
bit easier for yourself. For now, let's just
learn how we can set up a bus ourselves. Let's take this lead
vocal for example. Let's say we want
to send this to a reverb bus rather than
putting a reverb on this track. We can come to this little
section here and we can select what bus we
want to send it to. All these are just going to
be vacant, empty channels. We can go to Bus 5 and you
can see over here on Aux 4, this has created
a new bus for us, so this is Bus 5 here. We can rename this
at the bottom, reverb and that is
our reverb bus now. On the reverb bus I'm going
to put in a reverb plug-in. At this point we can set up
the reverb however we like. We're going to get into
this a bit more later, but we can dial in how much of this effect we want
added onto our track. With the lead vocal in mind, we can use this
dial to change how much of the signal is
being sent to that bus, which means we can
still like dial in how much reverb or how much effect we want on
each different channel. We've got this reverb
going through Bus 5, and I can turn this bus way
up if you want lots of reverb and turn it down and we're getting a nice
level of reverb sound there. Now, let's say we wanted to add vocal harmonies
to that same reverb. We just need to select
that track and again, bus it out to Bus 5 reverb, and we can play these
together and we can do the exact same so we can just adjust how much reverb
we want on the backend. They're both going
to the same reverb, we don't have to set
out that reverb channel twice and muck around
with all the settings, we can just get a
reverb sound we like, and then adjust how much of the signal goes
into that effect. We can also adjust the intensity of the bus using
the slider as well. That's all bussing is, it's just sending different
instruments through one effect makes
things much easier for ourselves and creates a nice
cohesion between tracks and have a play around
with this and I will see you in the next
lesson. Thanks guys.
9. Compression: Hey friends. Welcome back.
In this next lesson, we're going to talk
about compression. Compression is one of the most
key components of mixing, so it's really important
to understand and learn. But before we start
talking about compression, we need to understand something
called dynamic range. What is dynamic range? Essentially, it's just the
difference between the loudest and the quietest
part of a recording, so let's use the example
of recording a vocalist. Now, naturally, when you're recording something like vocals, they're going to be parts
that are louder than others. The performer might move
closer to the microphone, they might just
shout align [NOISE], or whisper align [NOISE], and that's going to
create certain loud parts and certain quiet parts
in the recording, which is great for performance, it gives it life and
makes it feel human. But this causes a bit of
an issue within mixing, because if we try and balance the volume
to the louder parts, the quieter parts are
going to sing quite weak and a bit too
distant, but equally, if we have volume balanced
the quieter parts, the loud parts are going
to be far too loud. This is where
compression comes in. What compression
does is essentially squeezes down the louder
parts of a recording, so the whole recording
is more consistent. We can control how
this compressor works, so we can essentially control the dynamic range
of a recording, and that creates a more
consistent volume level, and a lot of people say it adds presence and punch to a track. But we have to be
careful as if we compress a signal too much, it can often just dead in a performance and make
it sound quite flat, inorganic and quite processed. That's what compression does, is just making a more
consistent volume level for any recording. Have a listen to these vocals before and after
they're compressed, and notice how the
non-compressed vocals sound unsure of themselves
and quite under confident. Hopefully, you can hear that the compressed vocal
sound much more confident and consistent
and stronger overall. But how do we use compression? Every compressor is made up of several different
elements of dials. The first is the threshold. We set the threshold
where we want the compression to
start taking place. If we use this as an example, here we have our
audio signal and we want to compress the
loudest parts of this, so you want to just focus on
this loudest bit of audio. We set the threshold where we want that compression
to start taking place, so if we set the threshold here, everything above it, all of this is going
to be what's affected. The lower we set that threshold, the more of the signal it's
going to be compressed. We could set the
threshold down here, but that would make a
very intense compression, so we want to get
it at a level that sounds nice and organic, ideally, unless
you want to go for crazy compressed
drums or something. Next we have the ratio. The ratio determines
how much compression takes place above the threshold. If we compressed everything
above that threshold, it sounds a bit flat
and an organic, so we adjust the
ratio to determine how much compression is taking place above that threshold. I think of it a little bit like a filter sitting on
top of the threshold, and we can either
open that filter up and let a bit of
that signal through, it sounds a bit more natural
and organic that way, or we can really close
that filter down, turn that ratio right up to make a much more intense
style of compression. The higher the ratio, the more compression, the lower the ratio, the less compression. Here are some really
simple ratio milestones to give you a clearer idea. Next we have attack. Attack is the amount of time it takes for the compressor
to start working. A faster attack time gives
a thick and tight sound, whereas a slower attack sound sounds more like
punchy and organic. Usually, slower attack times
are more pleasing to hear. As you can see
from this display, with a fast attack time, as soon as that signal
goes over the threshold, the compressor is
coming right in, is digging the compressor in
the signal straight away. Whereas with a slow attack time, as soon as that signal
hits the threshold, the compressor starts to work, but it's a much slower decline, as you can see here, and with a slower attack time, it means some of
that initial signal is going to just punch
out that bit more, so certain lines are going to
have a good bit of impact, hence making them a bit
more punchy because they only just catching the
beginning of the compression. On the other end of
this is the release. If the attack engages
the compressor, the release releases
the compressor, so it's the amount of
time the compressor takes to let go of the compression. Fast release times tend
to sound more natural and people tend to
lean a little bit more towards that
fast release times, so you can see here that once that signal comes back
under the threshold, that's the compressor
sign to stop working. The reliefs determines
how quickly the compressor goes from
working to not working. You can see here
with a slow-release, that compressor slowly
comes back out, but with a fast release, as soon as that signal
comes under the threshold, the audio goes straight back
up to its regular level. Next we have the knee. The knee is the transition
between the compressors full reduction to no
reduction of the signal, but in Layman's terms, I think of it essentially as just how aggressive the
compressor's working. A higher knee will result in
a more subtle compression, whereas a lower knee will be slightly more in your
face and aggressive. But it is quite subtle, so don't worry about
this one too much. But again, just to
give you a rough idea, you can see a soft knee here, just like Ben's the compression and makes it just more
subtle and softer, whereas a hard knee is
just going to be much more direct and sharp. Lastly, we have makeup gain. When we're using compression, we're making the signal quieter because we're bringing
down those louder parts. We use the makeup gain to just re-adjust for the signal loss, so we're just bringing it back up to a level
we're happy with. Also, in most compressors, you will have a mixed style, and this essentially is just
the difference between like the dried non-compressed signal and the wet compressed signal. You can just dial
it in if you want to take the edge off
of a compressor, also is worth mentioning
about gain reduction. Compression is measured in gain reduction because it's squishing down that signal
and making it quieter, reducing the gain, and if you ever look
at a compressor, you will see a dial or a graph, and that is what
that's reading is how much gain reduction
is taking place. We get a really clear idea from these readings how much the
signal is being compressed. That's quite a lot of
stake on, isn't it? Feel free to bounce back through this lesson as many
times as you need, but next we're going to get
into how we actually use compression in the audio itself. I'll see you
in the next lesson.
10. Using Compression: Hey guys, welcome back.
In this next lesson, we're going to take
what we learned in the last lesson about compression and apply it to the recordings
we've got in our song. In this example, I'm
going to be using vocals. Now, if we listened
to this vocal track, you'll see that there
are certain words in certain parts that feel a little bit weak and under confident. That's not the fault of
Harriet, the singer at all. She's an amazing singer, and it's totally natural that
any singer is going to sing certain words louder,
certain bits quieter. That's what we want. We want
a genuine vocal performance. But we just want to be able to control that dynamic
range so that it's not sounding too quiet or under confident.
If we have a listen. Hopefully, you can hear there, the beginning of that,
is quite strong. But then these later parts here, that missing the feeling, sounds quite under confident. Now, if we were to solo
that it would sound fine. But when we've got so many other instruments
and other sounds, it can easily just bury
those louder parts, which is exactly why
we use compression. I'm going to head
over to the vocal, and I'm going to put
a compressor on it. Here you can see all the dials that we were talking
about in the last lesson. Now we haven't
adjusted this at all. This is just the factory
default setting. But you can see that
the line there. It's digging into the signal and just pushing down
those louder parts, that line that's being drawn is just digging
into the signal. Now, even if you know
what all these dials do, it can feel really overwhelming to look at this compressor
and know what you're doing. Again, I just like to
break it down into several steps to
follow every time, and it always seems to
work really well for me. First, we want to just ensure
that we're not soloed. We're trying to mix the compressions so that
it works with the track, not that it works on its own. Ideally, we want to be mixing
with the track playing, but we can bounce back between the soloed just so we can
hear exactly what's going on. Also, it makes it easier
for me to explain. To start, I like to set the threshold at
about three to one, so we know that
there's a good amount of compression taking place. Next, I'm going to
adjust the threshold until I notice some
compression taking place. I'm going to bring the
threshold right down to zero. I'm going to put it
over to the meter, and I'm going to
bring that threshold down until it starts
compressing the signal. A more smooth and subtle
compression normally sits between two and four
decibels of reduction, whereas more heavy
compression sits more towards minus six and minus 10. But I wouldn't worry
about that too much. Every instrument
is so different, and I just like to
adjust the threshold until I see some
compression taking place, and it sounds right to me. You can see that we're
sort of floating around minus five, which I think it
sounds quite nice. It doesn't sound too aggressive, it just sounds nice and subtle. You may not notice like a
massive difference there. But if you listen
really carefully, you can just feel that everything's a little
bit more leveled out, rather than that dynamic range making certain bits quieter. We can make this really
aggressive if you want to. If I turn the ratio right up, bring the threshold
down a little. That's with heavy compression, and you can hopefully here
there it kind of sounds processed and a bit flat
and kind of boring. We want to be adjusting
to avoid that. But some genres like heavy
metal or compressing drums, sometimes people really like
a harshly compressed signal. But with this vocal,
I want to keep that natural element to it, so I'm going to
bring it back down. Step three would be to bring that makeup gain back up to the level we
had it beforehand. We just want to be
adjusting that makeup gain, turn the compressor on and off, and bringing it back up to the level that we
had it at before. To make this even easier, we can just look
at the amount of gain reduction that is
taking place on our graph, and we can adjust the makeup
gain depending on that. If the meter is reading
minus five gain reduction, we can bring the makeup
gain to plus five gain, so that we're bringing it back up to the level it
was at previously. Next, we can set the ratio so that things are sounding
nice and consistent. If there's lots
of dynamic range, you might want to go a bit
higher with the ratio. If certain lines are
really popping out at you, that's a sign that you need
to up that ratio a bit, so you can bring it down. But I quite like to just
close my eyes and just turn this dial up and down until I hit a sweet spot with it. Just for now, I'm going to
take away those harmonies. Okay, so I'm quite happy
with that ratio there. I've just dialed
it down a little bit to make it a little
bit more subtle. That's sounding
pretty good to me. Next, we're going
to set the attack. This is another one where I just like to close my eyes
and feel this out. Again, like I said last lesson, the attack is how quickly the compressor is
going to snap in. The slower we set this, the more that initial signal
is going to come through. Yeah, slower attack times
tend to be more pleasing. We're just going
to see how slow it can go without it
sounding too weird. Hopefully, you can hear that the faster attack time kind
of sounds more snappy. The slower. I want it, everything you had now. See how the slower one just feels like a bit more natural. Again, it's really subtle. You have to really
listen out for it. I want it, everything you had now I'm bored and I'm
missing the feeling. Harriet didn't really have
any big standout lines where she suddenly shouted. We don't have to set the
attack speed too quick. If you're seeing a
suddenly shouted a word, and if that attack
turns too slow it won't be added to
compress it properly but because Harriet vocals
were quite smooth here we can set it quite slow and it's not causing
too much of an issue. Saying the attack time too
fast can very often suck the life out of a
performance or it can make an instrument feel
like it's further away, but with a slower attack time it's just going to be
a bit more punchy, natural, and organic. But slow attack times
aren't the best for really controlling very
dynamic instruments like a drum kit or a really loud shouting
vocalists that suddenly shouts out of nowhere. I want it, everything you
had now I'm bored and I'm missing the feeling.
[inaudible]. Next we're going to
adjust the release. We learned this is at the
letting go of the compressor. If the release is too fast, it's going to sound a bit choppy like it's going up
and down really quickly, but if it's too
slow it will just sound a bit too
quiet and dull and I start to close my eyes
and fill this out and you'll hear where things start
to get a little bit weird. This is a very
slow release time. I want it, everything you had now I'm bored and I'm
missing the feeling. You can see from the graph
there that is really slowly letting go of the compressor but if we make that
release time much faster. I want it, everything you had now I'm bored and I'm
missing the feeling. You can see how it sounds
more choppy, doesn't it? We can just set this in a
place that feels natural. I want it everything that you had now I'm bored and I'm missing the feeling. Shining green Forester Park Beetle from August to September. It's feeling right
at about 30 to me. Now, I forgot to say that
when adjusting the release, we are essentially looking
for the compressor to let go between words or sounds. In this case the vocals, if you hit Harriet singing. I want it in everything
in that little gap, we ideally want the
compressor to stop working and start activating
again when she starts singing them
again. If you listen. I want it, everything you had. Hopefully you can see there, just about as soon
as she stop singing, the compression let's
go and the graph is reduced back to zero dB and that creates a
nice natural sounds, the compression that is almost like breathing with the music. We want to be adjusting the release so that
it's letting go of that compressor between
lines or sounds, but at the end of the day, do whatever sounds right. It doesn't matter who cares. Lastly, the name. Now again, this is going
to be very subtle. All we really need to know
is that the lower this is, the more aggressive the
compression is and vice versa. The higher the less aggressive. Again, let's just fill
this out with our ears. I want it, everything you had now I'm
bored and I'm missing. Let's again, do a
before and afterwards so fast. Low knee. I want it, everything you had. I preferred a higher knee there. I want it, everything you had. Bring it back in with
the rest of the track. I want it, everything
you had now I'm bored and I'm
missing the feeling. That is our vocals compressed. I'm going to do a couple
of before and afterwards now and hopefully you
better hear the difference. I want it, everything you had
now I'm bored and I'm missing the feeling. It's just making
those vocals more present and stand
out that bit more. Some of those quieter lines
that felt like they faded away and now much more present and you can hear
them much more clearly. I know that's a lot
to take on and so I really recommend
just heading in yourself now and just really
playing with all these dials and just listening out and feeling out what each one does. Now you don't need
to add compression to every instrument. Again ask yourself, what needs
to change about a sound? Have a listen to a guitar
or a drum kit and think, are there notes that are
fading away a little bit or they're certain bits that
are standing out too much. If you want to control
that dynamic range, that's when you
use a compressor, but it's very often the
case that instruments like guitars, bass, vocals, drums are
all very dynamic, so being able to control those front facing instruments is often a very powerful
good thing to do. Next up, we're
going to talk about EQ. I'll see you in
the next lesson.
11. EQ: Next we're going
to talk about EQ. EQ stands for equalizer, and is essentially a way of adjusting the frequencies
of any sound. If you've ever used
a basic mixer or a guitar before you
may have seen bass, middle, and treble before. We can use these dials to adjust the frequencies
of a sound. Can bring up the high-end
with the treble or bring down the base with the base
and shape or sound. All an equalizer is, is essentially a far
more accurate way of using those three dials. We can use loads of
different tools to better shape the frequency
that a sound is making. It can be used to enhance
certain frequencies. Say if you want a bit more
top-end sparkly sounds, we can up the top end equally if there's like a weird
room noise or resonance, don't like, you can cut
that out using EQ as well. We can also use this to make
room for other instruments. Let's say like rhythm guitar has a bit too much bass in it, we can duck out some of the bass and make room for the kick and the bass guitar and shape out our instruments
like that so they can be heard a bit clearer. They're not like fighting in the same frequency
band as each other. I think of it like
sculpting out a sound. Leonardo Da Vinci shaping
out the statue of David. But in this scenario, it's a crappy snare sound
instead of a piece of herp. There's several
different frequency ranges that often
talked about in EQ. We have the bass, the low mids, high
mids, and treble. Each instrument in
a mix is going to have its own frequency range. The better we can
understand these, the better we can make
informed decisions about what to do with an EQ. A really common technique
in a busy mix is to focus the EQ around the instruments
natural EQ pattern. That way those other
frequencies aren't interfering with other
instruments in the mix. For today's example,
I'm going to be using an EQ on our rhythm guitar. This is what most EQ plugins will look like as
we play on track. You see where the
frequencies are forming. We've got a lot in the
low mid area there. Now you can obviously use any EQ plugin that
comes with your door. But if you're a beginner and you're trying to sort
of work out what each frequency band sounds like and get a really clear idea
on what we're doing here. I do really recommend getting something a
little bit like this, which is the neuron
for equalizer, just pay a little
bit of money for it. But essentially what
it allows you to do is what lots of
different things. But I think the most
handy thing is that it can show you a soloed
frequency band. If we hit solo, you can
see all of this white area here is the area that is soloed. You can really clearly hear what each frequency sounds like. You can hear once we
get past that 60 hertz, 60 down there, it can only
have very low rumble. We know that there's not much information back
there that we really need. The more basic frequencies, I mean here that the main
body is still sitting between 3,000 and 1,500. We picked out really where
that sound is saying. Because some nice little
overtone, the things here. But a lot of this is
very just scratchy and we probably don't need
much past this top end here. But essentially, that's what each frequency is sounding like. Whenever I'm making,
are really just like to jump into this
and just really fill out an instrument and how is that each frequency
coming through. There's several different
ways of like molding and shaping an EQ and we do that with several
different filters. The first is a high-pass filter. A high-pass filter
will look like this. High-pass is going to do
exactly what it says. It's going to let all
the higher frequencies through and it's going to
cut away the lower ones. As you can see here, all
these lower frequencies and it's going to
be cutting away. This is really good
for taking away unwanted room noise or Bulinus and we can
also adjust the slope. That's like how dramatic
the falloff is to the past, so it can make it really
dramatic there and cause everything past 299 hertz. If we get quite
dramatic with it, or we can level the slope down a little bit and make it
sound a bit more natural. Again, we can solo it to really hear what area
we're affecting. On the opposite end of
the spectrum, literally, we have a low-pass filter, and this is going to be just at the high pass but in reverse. We can shelf off alone without the high
harsh silly noises. We can always create a quite low-fi effects with these two. This is really good
for just taking away really weird high-pitched noise
or symbol bleed and room. Next we have bells. These look like this. They used to boost or reduce
a very specific area. If we want to just really target down one
frequency specifically, we can use a bell for that. What we can also do
is adjust a queue. And that makes the node wider or narrower depending
on how much of the frequency we want to effect. If we can narrow it down, if we just want to
get a weird bass or just a really
annoying frequency from the room or something, we can really finely
targeted with a high Q. Or we can make it much wider. We want to just add a bit
more top end to this guitar. We can make quite a
wide Q and we could bring up this nice
frequency on the guitar. Say I quite like that scratchy been guitar and wants and more
than that in that. We can use a bell to focus
around that frequency range. Lastly, we can use a shelf. A shelf is going to
target a wider area than the bellies and it's going to flat-line a certain
frequency range. It's easier to show you
with the thing itself. If we go for a
high or low shelf, just like the high and low pass filters and when we
bring a shelf down, you can see it carves out
a line of frequencies. Let's say we wanted to just take the base end of this down, but we don't want
to get rid of it completely with a high-pass. We can use a shelf to
just time that low end. The minute that there's
corn on low-end, there has is it that intense. But we can just really time it by bringing that shelf down. Again, we can adjust
the queue and change the shape and how it's
affecting their frequency. So that's a brief
introduction into EQ. In the next lesson, we're
going to learn how we can use EQ to better shape our instruments and go through the process of what we should do when trying to EQ an instrument or a sound. I'll see you there.
12. Using EQ: Hey, guys, welcome back.
In this next lesson, we're going to learn
about how we can utilize what we've
learned about EQ into our track and learn really what we should be doing and what we should
be looking for, and when the EQ instrument. Yet to some more steps on how
to make things sound good. Like we said earlier, all we're really
doing with the EQ is boosting the
frequencies we do like, cutting the ones
that we don't like, and making room for other
instruments in the mix. Before we actually start
making moves with EQ, again, I will need to have a listen to the sound and think
about what needs changing and start to make some mental notes about what
you want to do to change it. If we're working on this guitar, let's just have a listen to
it and work out what it is we want to change before
we change anything. Just for context for
working with this guitar, so a couple of things are
jumping out to me there. The first, is that there's quite a lot bassy
frequencies in that guitar, and the bass is doing a lot of the work in
that very low-end area, so I can only tell that we don't really need a lot
of that low end, and we can actually make
the guitar stand out a bit more by cutting
some of that away. I can also hear a tiny bit
of hiss in the top end. None of that matters too much because you can barely
really hear it, but it might just help
to obtain that and take away some of
the tiny little bit. It's almost like
an electric noise, but it's so subtle. Also, I want to keep
some of that low-end in, but it doesn't need to
be nearly that loud. We can just time that
low-end and bring it down. Also, there's a
certain frequency, like a mid, higher. I want to get that ringing frequencies
boosted a little bit because I think it
sounds quite nice. That frequency. First, I'm going to use a high-pass filter
just to get rid of a lot of those unneeded
super low bassy noise. Again, we can hear there's
quite a lot going on here. I don't want to cut
that away too much. I'm going to maybe just
move into this zone, slip it down a little bit more. All that really bassy stuff
has been filled by the bass. We want to make a bit
more room for the bass, so cutting that
away makes sense. Unlike everything else,
it's really important to always be turning an
effect on and off, soloing it and unsoloing
it so you're saying exactly what effect it's having within the
context of a song. Essentially, you don't
really want to be making moves if they're not
making any difference, so you always want to be really aware of what you're doing, and you want to really touch EQ as little as you can really. Next, I want to just take
down that low end a bit. I'm going to use a shelf to just reduce all of that low end. Also, what's good about this EQ here is the
fact that you can just turn it on and off to easily hear
what you're doing. Now again, if I was mixing
this guitar on its own, a lot of those frequencies
sound quite nice. We maybe wouldn't want
to cut them all away. But because I know I've got
a bass there and I've got several other instruments
filling this low-end, I'm comfortable with
taking that away. Next we said about removing
that super high-end. Some of that just unneeded frequency doesn't really add
anything to it, so we can use another pass, low pass and just slope
that super high-end out. Now what a lot of people
like to do in EQ is removing any unwanted buzzes or
just nasty frequencies. A lot of people go by this rule of making
a really narrow Q and going through a sound until you hear a
nasty frequency. Then once you've found
that nasty frequency, bring that now right down and cut out that
nasty frequency. Now, that works fine if there's
a certain noise you can hear that you want to get rid of when listening
to it just plainly. But the problem with this
is if you go through and listen out for a
frequency you don't like, when you're boosting the
frequencies that much, every frequencies
can sound nasty. Then if you cut that away, you're doing more damage in the process rather than actually
making any improvements. You really want to be listening
and figuring out what you want to change before you
start moving these Q's around. But let's say we had
some weird crackle or something like that. We can use this to pin down where that
weird sound may be, and then we can pin that down and remove that
frequency from the sound. But it's worth saying
if you are going to be using this cutting technique, it's always wise to use quite a narrow Q because
we don't want to be cutting away too many of the nice frequencies
that make up this sound, so we really want to
be just narrowing down the exact frequency we
want with a very narrow Q. However, on the
flip side of this, if we want to give any areas a boost, say, for example, I wanted to try down that
nice frequency in the guitar, that almost clunky,
scratchy sound. But when using this, we want
to make the Q quiet low. We don't want it to be too radical because it will
sound a bit unnatural, so you want the Q
to be quiet wide. The old saying is cut
narrow and boost wide. That's exactly what
we're going to do here. It' s just making that rapidly scratching
stand out a bit more. A lot of people like
to go by the rule to cut over boosting
whenever you can, which I do agree
with to a degree. I think you want to be mainly focusing
around cutting away nasty frequencies and shaping the sound to work with
the other instruments. However, if you want to
add a bit of top end or you want to just emphasize
a certain frequency, rather than having to record a guitar again and
adjust the AMP, just making those
little differences to the EQ can just boost
it up in a nice place. Listening to the
reference track. It's actually a bit more
present in the mid than mine. Again, let's go back and maybe
adjust that a little bit. This is the thing, it's fine to experiment and adjust as you go. You can adjust these things
as much as you want. Listen to it now, maybe I want a bit
more frequency there. It's also worth saying that
people don't tend to go too crazy with boosts as well. Once we get up to plus 10
gain and up to that level, things are going to
start sound a bit weird. Often people like to boost quite conservatively and just make small adjustments to the sound. So to give you a
before and after. Now, I know that
might seem subtle, especially when we listened
to everything else. But like I was saying earlier, is all about one
percent at a time. Once we adjust everything else, there'll be a much more
noticeable difference. Again, it's like carving
away at the song, and the more instruments we can carve away with a bit of EQ, the clearer each
one will become. For example, we want to
make a bit of room for this guitar because it's
quite hard to hear, so we can cut some
frequencies away from that organ sound
and the bass sound. Then suddenly this
guitar is going to be a good bit clearer. Continue to make small
little adjustments in the EQ to every instrument. You might have to come back to certain instruments
off to the EQ to some others as the frequencies are always changing
as you're EQing. I will see you in the next
lesson. Thanks, guys.
13. Panning: Hey guys, welcome back. In this next lesson, we're
going to talk about panning. Panning is super
straightforward. All it is, is moving our
instruments either left or right to create a wider
sound stage for our mix. If you go and see
a band play live, the members of the
band will be spread out across the stage
left to right. They wouldn't all be
standing in front of each other because that'd be
really weird, wouldn't it? It also would sound quite
weird, wouldn't it? All those sounds just
coming at you from one narrow direction, it doesn't sound nice. It's like trying to listen
to a mix through a tube. What we can do with panning is scatter our instruments
all around the audio field to create a much more like spread out and balanced sound to our mix and gives a lot of depth and 3D effect to our mix. It also makes things easier
to hear because rather than things are overlapping
in the same space, we can move some bits over here, some bits over there, and place each instrument around the listener rather
than all in the front. Now we can use panning
however we like. It can be quite a creative
process going through and finding what space works
nicely with each instrument. But there's a couple of sensible
ground rules to follow. The first is to keep any real core instruments or heavy bass instruments
in the middle. Like drums and bass, if they're off to one side, because they're such
a dominant sound, it can feel like you're
lopsided in some ways. This goes the same for vocals as well at the lead vocal line. You don't really want it
panned off to the left. You want that to be
out front and center. Those are the
instruments you want to really keep in the middle. But a lot of the
others we can really play with the panning of them. Another good rule of
thumb is to always keep this balance in mind when
it comes to panning. If you imagine like a scale, we don't want to overweight
one side because again, it's going to sound a
little bit lopsided, so just try and make
sure that there's an even balance of instruments on either
the left or the right. On Logic, it's really
easy to find the panning, it's just this dial
here so we can go to the right or the
left and as you see, we've got 64 different
places we can take it. A ton of space to work with. For this lead guitar, I'm going to take that
off to the right. Already you can hear that
a good bit clearer now, it was struggling
in the mix before, but it's a lot clearer. I'm with these vocal stacks. I'm just going to get
really experimental and pan them like all
over the place. It's going to sound like this
cool quiet surrounding us. I just panned most
of the instruments in this section all
around the place. I think that sounds
pretty good as it is. Sounding cool. Now,
some of you may have noticed that down here, I have three lead vocals. That sounds a little bit weird, doesn't it? Why
have I done them? Something else we can do with
panning that's really cool, is called double tracking. This is essentially the
act of recording two of the same recordings and panning one hard left
and one hard right. This is often done
with acoustic guitar, rhythm guitar as well. It gives it a much wider
sound stage and it really fills the stereo field rather than just one track coming
at you in the center. By having two things
coming through, each speaker just
sounds huge and wide. Now that's great with
guitar and to be honest, any instrument you want
to really widen up, works great with as well. Now with vocals, it's a more
common technique to pan one hard left and one hard right and keep
one centered as well. Essentially three
tracks all have been recorded
slightly differently. Ideally, the strongest
one wants to be in the center and then we're going to pan them
over to left and right. You can go crazy
with this as well. Lots of people like Billie
Eilish layer up tons and tons of different double tracks and pan them all over the place, and it makes this
huge fat vocal sound. For me, I'm going to
keep one vocal centered, one hard left and
one hard right. Now it sounds like this. Compared to this. Now if we listen to that in
the context of a mix. Now let's hear it without
the double-tracked. You see how it sounds much
more lonely with just the one. Now, again, you very much
use this as you want. In the first verse, I wanted it to sound
a bit more lonely, so I just had the one vocal for that section low. But then within the
double-tracked version, with all the instruments, just made the vocal stand out and give them
a bit more confidence, so that is panning. Just the way of like shifting
run those instruments in different spaces
in our headphones or our speakers and making
a nice wide sound stage. Thanks guys. I'll see
you in the next lesson.
14. Reverb: Hey guys, welcome back.
So in this next lesson, we're going to be
talking about reverb. So if you've been a musician
for any length of time, you probably know exactly
what reverb is already, is one of the most
used effects ever. But if you don't
know what reverb is, it is essentially like
the sound of a room. For example, if you play
in a big Cathedral, the sound of your voice, your guitar will echo and
bounce around the room in a very different
way as to if you were playing your
guitar in a small room. So what we do is use digital
reverb effect to try and recreate that feeling of an instrument being in a room
and it gives a performance, a ton of life, and makes it feel like real and it's being played
in a natural space. But it can also create
the illusion that the instrument is further
away from the listener. So this means we can
actually push things back in the mix by using reverb rather
than adjusting the volume. It makes more of an
atmospheric impact. So if you remember
from our past lesson, rather than putting a reverb
on every single track, I'm going to create a new bus. I'm going to make it
our lead reverb tone. Why do I call it lead reverb? So like I was saying
a second ago, we can either use reverb to add character or to push
instruments back in the mix. So what I like to do
personally is create one bus for like a lead reverb. So we're going to pull up our lead instruments
through that nice reverb. But then any ones that
we want to use for like ambient effects and
push back in the mix. I'm actually going to
make a slightly different reverb for that one. I'm going to create a new
bus for that to go on. So every reverb plugin is going to look a
little bit different. I'm just using the stock
reverb plugin from Logic. It looks a bit scary with
all these different dials, but it's actually much more straightforward
than how it seems. But let's go through each
of these dials so we know exactly what
we're working with. So first of all, we can often
change the room sounds. Like I was saying
about a minute ago, we can choose from any of these different spaces
to create a cool sound. So let's have a
little play around. I call out the sound of
this chamber reverb. I'm going to stick
with that for now. Now, if we come down here, you'll see that there's
a dry and wet slider. So all this is, is it lets
you adjust the amount of dry and wet signal that is
coming out of this reverb. The dry is just the recording
without any effects on it, and wet is the effected signal. So the one we've reverb on it. You see as we take the way up, it just becomes more effected. We can balance in how much of the reverb is affecting
the signal with this. Now because we're using
this as my lead vocal. I want to have a lot of
dry signal going in, and I wanted to have reverb. But again, I don't
want to be too wet because that's going to push
it too far back in the mix. But in my ambient reverb, I'm going to make this
a much wetter channel. Next is the decay time. So this is essentially
just how long the reverb lasts for and
it's measured in seconds. So it's really easy
to understand. If we turn the decay up. You see how long that reverb trail is. Whereas with we tighten that down it fades out way quicker. So again, for a lead instrument, I'd have this shorter, and for the more ambiance
that I fired up a good bit, and aside from that, it's
really just a taste thing. Again always be soloing and telling these things on and off seeing what difference
you making. That's sounding pretty good. We can also click on this
button and we can add how many bars we want
the vocal to last for. So we can get a bit more mathematical with
it if we want to. I think the next most important
thing is the pre-delay. So the pre-delay is
essentially how long it takes for the
reverb to kick in. In this example, when
Harriet starts singing, the reverb doesn't
kick in straight away as a couple of milliseconds
before the reverb starts, and that's where
the pre-delay is. So the more we up this the longer
the pre-delay is, it's really going to exaggerate the reverb and make
it more noticeable. Again, we can up it for
the more ambient reverb, but if you want to keep it a bit more like tighter to
the regular vocal, I'd recommend going
under 15 milliseconds. Most reverbs will also
come with EQ parameter. This thing here, and this
essentially just allows you to shape the EQ of the reverb. We can do this for both
the ingoing signal and the outgoing signal. On main, we adjust the
EQ signal coming in. On details, we adjust the
EQ signal coming out. Don't worry about this too
much if you're a beginner. All it allows us to do is take what we learned
about the EQ stuff in our last lesson and apply it to the reverb and how the
reverb is working. We can use a high-pass filter to reduce any of
those muddy sounds or we can use a low-pass
filter and make them more dark reverb or we can do both and get a really concentrated
mid-sounding reverb. Then we can also go
into the details and do the same thing with the
reverb that's coming out. But I'm not going
to muck around with that too much today. I feel like this is so much
to take on board as it is. So we're just going to focus on these dials for the
rest of the lesson. These are the dials
you see here and here. Your reverb may not have these, but in case they do, I'll go
through them very quickly. The first is the attack. Now the faster the attack is, the quicker the reverb reflections
are going to build up. But if we have it slower, they're going to fade
more in overtime. So pretty subtle there. It's going to be
more apparent on the ambient solo reverbs. The size is pretty
self-explanatory, just really affecting
how big the room sounds. It's pretty subtle,
particularly in this chamber one because it's quite a
small room we're replicating. The density controls the amount of reflections, this
bouncing around. So if you imagine
a sound being made and it bouncing around the
walls is essentially like, how many times it's reflecting. Again, all these things are very subtle and the distance is the perceived distance between you and the instrument
that's being played. So again, for that ambient one, if you want to push
something back in the mix, we can make that
distance further away, but with a lead
instrument like this, we want to echo a bit closer. As always begin to
listen to this alongside the regular track and mix
it in to which sounds best. Cool. What's great? If I want to adjust how intense that reverb
is in the vocals, I can just use this
little bus style here. What if I want to make it more? Now what I can do is use
all of that knowledge to create another reverb bus, which I can make
the ambient reverb. I can create a channel
where the reverbs really exaggerated and it's going to push things back
in the mix slightly. But it's still going to add
a lot of character to them. Which sounds really nice with backing vocals or any
ambient-style instruments. Now because I've got
them on my buses, I can just go through each of these instruments and choose
which bus to send them to. So like for example
let's go for this kick. Let's add the bus and we
want to make this more of a lead reverb tone because
it's going to be very present. I just adjust the style. So that is our lesson on reverb. I'll see you in the next lesson.
15. Delay: Hey friends, welcome back. In this next lesson, we're going to talk about delay. Delay often gets
confused with reverb and it's for good reason because they're
both quite similar, but they're actually
a bit different. Reverb emulates sound
waves reflecting off of services to create a
three-dimensional space, whereas delay creates a copy of the sound as being
made and plays it back, but at certain intervals
to create an echo effect, like you're speaking down
a big cave or something, and then you're getting those reflections
come back at you. That's what delay does. I think of it just like an
extension to reverb really, we're just adding more space
and dimension to a sound. What's really nice about delay is it's really
straightforward. Again, to make this really
easy for ourselves, I'm going to bust a delay out. Yeah, just lives
much easier for me. There's delay. Now on logic, there's a couple of
different delays. Now, I'm not going to go
too in depth with delay. I'm only going to be using
a bit of it on this track. There's this basic echo plugin, which is super easy to use, but still gives us a good bit of control over the kind of
delay that's going on. I'm going to put
this on the vocals and I'm going to turn the reverb on the vocals off so
you can just really you can really clearly hear
what the delays doing here. As you can hear, it's
just like bouncing those sound waves back at us
in academic fishing fashion. With these dials, we can
just control how that works. The dry and the wet mix, as we've already explained, is just the effected levels. The note dial here
is just determining the amount of repeats that are echoing and on what intervals
they are happening at. We can get quite like
crazy with this. We can make the echoes
triplets or dotted. Just having a one-fourth
timing there, or we can go right the other end and go
like one-sixteenth. It's a much more rapid. Or we can go for like a triplet. We're just choosing what
sounds interesting really. It's quite nice too often line up with the timing of your song. You don't really know
much about rhythms to know how this works,
just turn your match on. That one eighth is in
time with our song there, but if we changed
it to a triplet, you'll see that it's because we're not writing in
triplets is a bit more out of line with it. That's in time, but it's creating a different
kind of effect there. It's much more
exaggerated like that. I quite liked the sound
of the one eighth. Sounded pretty good to me. I'm just going to turn the
wet signal down a little bit. This is just the
length of the delay. There's loads and loads and loads of echoes
coming back to us there. But if we turn this right
down, it's much shorter. We're just controlling the
amount of delay, and lastly, the color is going
to affect like what frequency range the
delays are taking up. Usually with delays, you'll get a high and low cut to determine where those
delays are sitting, but this color dial just
makes it even easier for us. We can just choose what area on the frequency spectrum
we want to focus. Lower or higher. Let's exaggerate it and
go for the top end first. Those delays are happening
more in the top end, but equally, if we
can bring that down. Those delays are now sitting out in a more lower frequency. Again, let's just
play a song and balance this in until
it sounds good. Adding just a
subtle delay there, I don't want it to
be too apparent, it just fills a nice
bit of space between the lines and just adds that room effects that we're
creating with the reverb. It's as simple as that,
and that's pretty much it. We can work this on
any instrument that we just want a bit of
extra life out of, have an experiment and see
what you like the sound of, and I'll see you in
the next lesson.
16. Automation: Next, we're going to
talk about automation. Automation in music is
the process of altering certain effects or volumes
at certain times in a track. What do I mean by that? Let's say that you
volume-balanced your track and everything sounding nice
and balanced in the chorus, but you guys play the verse and suddenly that guitar
is way too loud. What we do is
automate the volume, so it's a little bit quieter in the verse and then
picks back up towards the chorus so we can much better balance the volumes
over the entire track, but we can use automation
for any effects. Let's say that in the
bridge we want to just drench the
vocals in reverb. We can automate it so
the reverb comes way up and give us a ton of
nice reverb in a bridge, or let's say you want
to really pick up the distortion in a guitar solo. Again, we can just automate the distortion to pick
up during that section. Now, it's worth saying
that this part of the mix is very crucial. You'll want to spend a
lot of time automating the volumes so everything's
really nicely balanced. It's worth saying before
you go into automation, really spend a lot of time on the volume balancing
and make sure that you're really happy with it
because it's much easier to change the volumes
and bits now. Give yourself a
break for 24 hour, come back with fresh ears, have another volume balance, give yourself another break, and then come back and start to automate those volumes in,
but don't worry too much. We can always adjust the
volume after an automation, it just becomes a little
bit more finicky. It's access automation on logic, we can just select the
track that we want to add automation to and hit A. Now we can zoom in
and you might see this faint gray line there. That is our automation line. Now, if we look back
towards the track, we'll see that the
different bars appeared. This is an automation parameter. We can click on it and change what effect is being
used on the automation. We can adjust the
compression or the EQ, but we're going to stick
with volume for the minute. If I play the track
from the first section, the bit that we haven't been
mixing the song to so far, those vocals are just a little
bit loud with that guitar. I also want to make the
whole section a bit quieter before all of the
instruments come in because if we have
a volume boost, when all those stuff comes in, it's going to create a
good bit of excitement. I want the first verse section
to be a good bit quieter. All I have to do is
click on the bar, click again and it's going
to create this node. We can move this
node up and down. That's what's going
to change the volume. I've just taken it down
by minus 2.5 dB in the verse and then I'm
just going to click another node and
another one here, and I'm just going to bring
it back up to where it was at plus 1.7. We can go over to this dial and bring up and down front
to get really accurate. Bring it back up to 1.7 and it's quite visually clear there. We're just bringing it
down for this section and then the volume is
just creeping up there. When the vocal is
coming back for that chorusy section,
they have been boosted. I'm also going to do this with
the Manne guitar as well. I want it to be brought down and then I want to slowly
pan it up into the chorus. Now, it's worth saying
for something like this, where there's a constant sound, we haven't got a break where the volume swell is going
to be very noticeable, we want to make the curve
quite subtle because you don't want to suddenly
shoot up because it's going to sound a
bit weird like that. If I find where the
chorus comes in, so that's where we want
our next node to be. We want it to reach that volume
as we go into the chorus. I want to make a
really gentle slope there and I'm going to just
bring this guitar down a bit. You can see it's
just really nicely gently risen up there
and it's almost create a little bit of bars as well you can just about notice that the volume
is increasing and something's about to happen. Like I said, it's
really vital that if you're mixing an entire song, go through and automate
as much as you can and make it sound balanced
over every single section. Spend a ton of time here and get really particular with how those volumes
are all balanced, but what we can also
do is get a bit more creative with
automation as well. For example, this
scratchy guitar I've got in here sounds fine, but I think it'd
be really cool if that sound is being panned
around as it's played. I think it just adds that 3D space and I think
I just sound cool. If we go to volume, we can select panning instead. Let's just go absolute. Then I'm going to start it
all the way left and I'm going to automate it
round to the right. Just like before, we're
going to choose a node. I'm going to pan it this way, and then by the end, I want it to end up
on the other side. It's actually
starting on the right and go into the left side. More starts over here, so I'm just going to
bring it around a bit. Hopefully, you'll hear
there that guitar has been moved around our head. What does that sound
like altogether now? Really cool. Spend
a lot of time here, get creative with it, and see what cool effects
you can make with this and your mix will
be absolutely ace. I guarantee it. Our mix
is very nearly there. We're going to talk
about some cool effects in the next lesson, so
I'll see you there.
17. Distortion, Exciter and Chorus: Hey, friends. Welcome
back. In this next lesson, we're going to talk about some really cool effects that we can add to our track to
just add a bit of interest. It's worth saying that you can stop here if you'd like to, we've gone through
the bulk of the mix. But, there's just three effects
in particular that adds a real nice bit of life to our mix and they're
super easy to use, so I'm just going to go
through them quickly now. The first is distortion. A super popular effect, you've probably heard
about it already. It adds character, warmth and grit to a track. It's used a lot in
guitars, spaces, drum kits, ads, a bit more aggression and a
bit more punch to a track. But distortion can muddy up a mix if we use it excessively, so we need to be careful with the amount of distortion
we put on something. For me, I want to add a bit of distortion to this lead guitar. I've added a distortion plugin, really simple to use, we're just adjusting
the pre-game, the drive and a tone. There is no right or
wrong way to use this, just play around
with these dials until you get a tone you like. Again, we want to
be like soloing it, turning on and off, listen to with the
track and without. Every social is going to
be a little bit different, but it adds a bit
of that grit to it. This is before and after. I drive it a little bit more. I turn the volume down a bit, so very subtle there, but just added a
bit of interest. Next is an exciter. An exciter is
essentially going to add some more harmonic
sounds to attract. It will make things
sound brighter, and more lively and sparkly. It's essentially boosting a
lot of the high frequencies, it can add a lot of
clarity to attract. To save something that's
being buried in the mix, adding an exciter can make
it stand out a bit more. It's very often used
on things like vocals, that can also add a lot of
energy to drums as well, particularly with the
symbols and stuff like that. That's exactly what
I'm going to do. I'm going to add an
exciter on to our rise. Again, this is another
one that's really simple. With this, we're just adjusting what frequency range we want
the exciter to work within, and we're adjusting
this harmonics so you'll hear how that sounds. The harmonics is the
intensity of the exciter, and this slider here is going to allow us to focus on what frequency we
want to exaggerate. Before, after, that's a heavy exciter, I'm going to play with
the track and mix it in. It's making that ride sparkle and it helps it stand
out in the mix, and adds a lovely bit of top end to the general
sound of the mix. An exciter can add a bit of harshness and too much
brightness to mix. Again, just keep that in mind, you don't want to overuse it, you want to balance it in
so it's sounding nice. We don't use it on too
many things because then there'll be loads of
harshness to the mix. Last is chorus. Again, you may have heard of chorus, it's essentially a
cool audio effect that adds a good bit of thickness
and depth to a sound, but it is very characteristic and it's going to add a very different dynamic
to an instrument, and it sounds a little
bit like this. Before, very famous effect used on a lot of Nevada tracks
if you noticed. Again, there's not really any
right or wrong with this. We can just adjust
these three daus until it sounds about right. The right is going to be how quickly those frequencies
without wobbling. The intensity, self-explanatory, and the mix also
self-explanatory. Using the chorus, we're widening the stereo image
so that guitar is taking up a bit more
room in the mix. It's also adding
a spiral effects, which is making cool, interesting layer to the sound. It's very often used
with vocals as well as a good bit of thickness
and can enhance vocals. But for today, I'm just going to leave it on that elite guitar, I think that sounds cool. But again, it's important
not to overdo it as too much chorus on
too many things can create a lot
of mud in the mix. This is your chance
to really have a lot of the fun of these effects
onto different instruments, and seeing what creative
sounds you can come up with. We are so nearly finished now. There's a couple of
things I want to go through in our final checks listen to make sure that this mix can be as
good as it can be, so I'll see you in
the next lesson.
18. Final Checks: Our mix should be
sounding pretty good now. We spent a long time going
through and adjusting all those different elements to make everything sound
as good as it can be, and we've put our
own artistic flare onto the mix as well. Now is the time to
really narrow down. If there's anything
we're not happy with or anything
we want changed, now's the time we can go
back in and just make those little tweaks to
really polish it off. When I'm at this stage, I give myself at least
12 hours, if not 24, to just have a break, let your ears just readjust to the normal world rather
than just hearing the same song over
and over again. When you come back to the
mix a day or two later, you'll just pick out things that maybe don't
quite sit right or maybe you didn't notice before when you come back
to mixing the track. I would listen to the
song from start to finish and make notes on
everything that comes up. Rather than trying to
adjust it as you hear it, just make lots of notes, and then after you've listened
to the song once or twice, that's the time to go back in and work through that
list you've made. Don't forget your
reference track, always be comparing it to those couple of reference
tracks you've laid out. They're really going to be your North star because they've been mixed and engineered by most likely very
professional people. So always bouncing
back and forth between that reference
track and your own is going to make
it much clearer, maybe what needs to
change or where you want each instrument or
sound to be sitting. You'll also want to keep in
mind that if you've been tweaking an exciter or some distortion or
any other effects, that very well might change how you EQ a
certain instrument. For example, if
you've added a bit of distortion to something, and now it maybe sounds
a little bit too harsh, you can just go straight
back into that EQ and maybe take a bit
of that top end out. Or if you've added
compression to something, that might make it
sound a bit quieter. So you might need to go
back and tweak the volume. It's also really
important to listen to your mix in as many different
environments as you can through different
speakers in different rooms,
different headphones. Listen to the mix in your car, find the cheapest, worst
speaker you can find. As you may be mixing
really well to your specific
headphones or speakers, but you have to
keep in mind that everyone's sound system
is going to be different. So you really want to be making a mix that works best over lots of different rooms and
speakers and stuff like that. It's very often the case
that mix engineers will have a crappy speaker
on their desk, which they'll run the
track through and they'll make mix decisions on this really bad speaker because that's often what
people listen to music through. It's also a great idea to
ask other people's opinion. If you've got any friends or family that know a
bit about music, see what they think about it, what sticks out to them as maybe not quite sounding right. Someone else aside from
you that is going to have a completely fresh ear
to a track is going to hear things really clearly. If you don't have
any musical friends that can give you that
critical analysis, please feel free to send it
into that class project. Like I said earlier,
I listen and respond to every single one. If you want any help or advice or you just want me to go check out your band or whatever, please feel free to post
it in that description, I genuinely love hearing
what people come up with. If you've got your mix sounding really good and you're
really happy with it, the next point on from
here is often mastering. Mastering is the art of
mixing the track as a whole. Rather than volume balancing each individual
instruments or adding compression to each
individual instrument, mastering is affecting
the track as a whole. We often export the mix as is, and then bring it into
a separate project so we're not tinkering
with any of the levels. Now, I think mastering really
deserves its own class. So we're not going to be
talking about it today, but if you're at
a stage where you want to get that music released, you can download
programs like Ozone 9. This is a program I
use all the time and essentially uses AI
to mask your track. It's super easy. Alternatively, you can
send your track out to highly professional
companies like LANDR, and they will master
your track with some of the best engineers and
the best equipment in the world often for
a quite low price. That will really add the
cherry on top to your song, sounding complete and
ready for streaming. We're pretty much done. I'm going to say a
final couple of words in the next lesson, so
I'll see you there.
19. Final Lesson : Hey friends, welcome
back so you made it. You're here at the
end of the class and thank you so much
for sticking with me throughout this
whole entire course and I really hope that it was useful for you and you took a lot of good information
away from this. Hopefully you feel a
bit more confident now about going into a mix and essentially shaping
the song, how you like it. Now it goes without that saying, but there is so much more
to learn about mixing. It's a little bit
like a dark art. There are so many
different techniques, ways of doing things, different plugins and effects to muck around with
and play with. It's one of those
subjects that you'll just forever be learning about and everyone does things
so differently as well but it's basically
impossible to really get into that realm without first really
knowing the basics prophylactically and down
like your knowledge about EQ and compression
and all the things we've talked about
in this class. I really hope this
class has lays a really strong
foundation for you. But it's worth saying
the topics we've covered in this class alone are enough to get truly professional
sounds out of a mix. There's just so many
different things to learn and know about mixing. If you implement
anything you've learned in this class into
your own tracks, please consider sending it
into that class project. I would honestly love to
hear what you get up to. Honestly, one of
my favorite things about making classes is the interaction with people
sending in their staff legitimately always makes my
day when I see one pop up. If you want to share what you're working on or you want a bit of feedback and critique
about a project, please feel free to send
it in stack class project I will generally love to
hear what you've been up to. Also if you've got
any questions, please feel free to reach out. I respond to every
single question sent in as best as I can. You can either send them into
the discussions as part of the course page or
feel free to email me or send me a DM on Instagram. I know they can feel like a
bit of a disconnect with like online teachers and
courses and things like that but genuinely, I'm here checking my discussions and my emails like
every single day. Please feel free to get in touch and reach out if you'd like to. I'd just love to help if I can. Lastly, if you
enjoyed this class at all or you got some
good information out of it a positive review is honestly so massively
appreciated. They have such a massive impact for people like me
making these classes. It really helps out
more than you know. If you get the time, I would honestly appreciate it so much. I know you're really busy, got lots to do but if
you get two minutes to just take a positive
box and just say, thanks Mike, You have no
idea how much that helps me out and thank you in advance if you get the
chance to do that. That about wraps things up. Thank you so much
for sticking around. If you want to keep in touch, feel free to add me on
Instagram or you can check out my YouTube channel if you'd like and I'll catch
you really soon. Thanks again. Have
a great day. Bye.
 Mike Barnes, Music Instructor