Transcripts
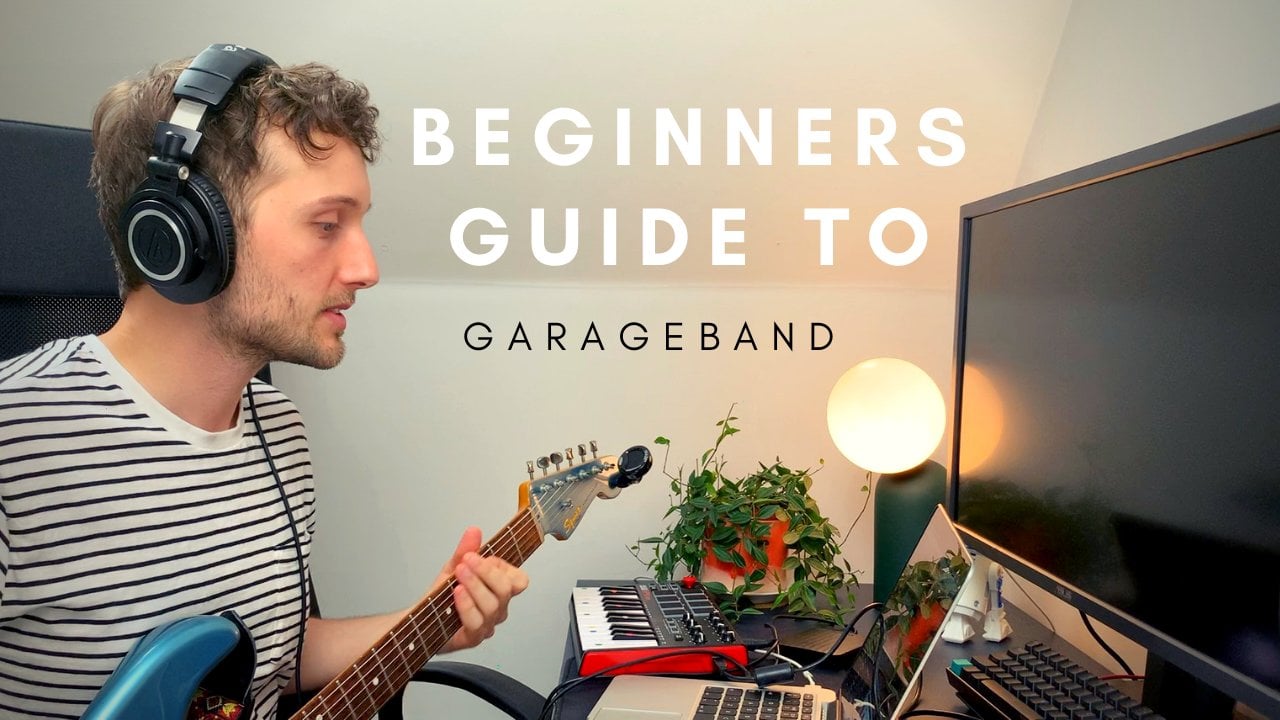
1. Intro: Lo-Fi has established
itself as one of this generation's most
popular genres of music. With YouTube streams and Spotify playlist hitting billions
in views and streams, it's fair to say that
Lo-Fi is here to stay, and for good reason, beautiful chords,
relaxing beats, smooth melodies, and awesome samples
are hard not to love. Let's learn how we can
make some Lo-Fi ourselves. [MUSIC] Hey friends.
How's it going? I hope you're
having a great day. Thank you so much for
joining me here for my Lo-Fi music production class. My name is Mike, I'm full-time musician and music
instructor from the UK. I've been playing, producing, and writing music for
the last 12 years. I also co-run a multi
award-winning music charity called Time Together
In Musical Expression. We run music classes and
workshops for people of all ages, abilities,
and backgrounds. In this class I'm going to
teach you how to write and produce your own amazing
sounding Lo-Fi tracks. We'll start by learning about the best instruments, plugins, and effects to work
into your track to create the
perfect Lo-Fi sound. We'll talk about using
texture and soundscapes to create an atmosphere and a space for our
song to exist in. We'll then explore
how we can create beautiful sounding
chord progressions using both instruments
and samples. I'll teach you how I build
Lo-Fi drum kits and then utilize them to create
awesome sounding beats. I'll walk through
how to layer and develop a Lo-Fi track
to its completion. Lastly, I'll show
you how I mix and master our track to
ensure it sounds full, professional, and
ready for streaming. Throughout the
class, I'm going to be producing a Lo-Fi track myself so you can see exactly how we build
one from scratch. This class is going
to be suitable for beginner and intermediate
level producers and I'm going to be splitting certain
classes down into easy, medium, and hard levels. No matter where you are
in your musical journey, you better get
something out of this. I recommend going
into this class with a very basic understanding of a recording program just
so you can practice and implement some of the things we've talked about in class. I'm going to be
using logic today, but I've made sure this class is appropriate no matter
what door you're using. I absolutely love Lo-Fi music. It's always playing
in the house, and it's one of my favorite
genres of music to produce. I'm really excited to be
making some with you today. Let's go write some
Lo-Fi. [MUSIC]
2. Class Project: [MUSIC] Hey friends.
How's it again? Thank you so much for
joining me here for my Lofi music production class. It's great to have you here. I really hope that this
class is useful for you, and take a load to get
information away from this. Just before we get
started with the class, I very quickly wanted to talk
about our class project, so by the end of this course, you're going to be
able to produce Lofi music to a
really good standard. I would absolutely love to
hear what you come up with, so any songs or demos,
or final mixes, please feel free to send
them into the class project, and if you'd like
any feedback or critique or any
help with anything, I would absolutely
love to help you out. I think it would be
a really great space to share what we've
learned in the class, what music we're writing, and what things we're into. Maybe you found a cool
drum sound do you want to share or a cool chord progression that you
just really like, anything like that post it
in stack class project. To do this, you've just got to upload your track or your demo to any site that allows
you to grab a link from, so like YouTube or SoundCloud
or anything similar, and then post that link
into the class project, and then me and
any other students in the class can listen to that track and give any
feedback or any comments on it, and have a little
songwriting chat. Please don't be shy
about posting in there. It's really not a space
where something has to be polished and finished
and professional, please use that space, is a place to learn from
and get feedback from. I just think it'd be a cool community somewhere
out in space. On the subject of
sending stuff in. If you have any questions
about anything in this class or anything
music-related, please feel free to
send in to discussions. I'm always checking
on Skillshare and I'll quickly respond to
any questions you have. There is no such thing
as a silly question. Literally, ask anything that you're confused
about. Thanks, guys. I really look forward to
hearing what you come up with. Let's crack on with the class. I'll see you in the
next lesson [MUSIC].
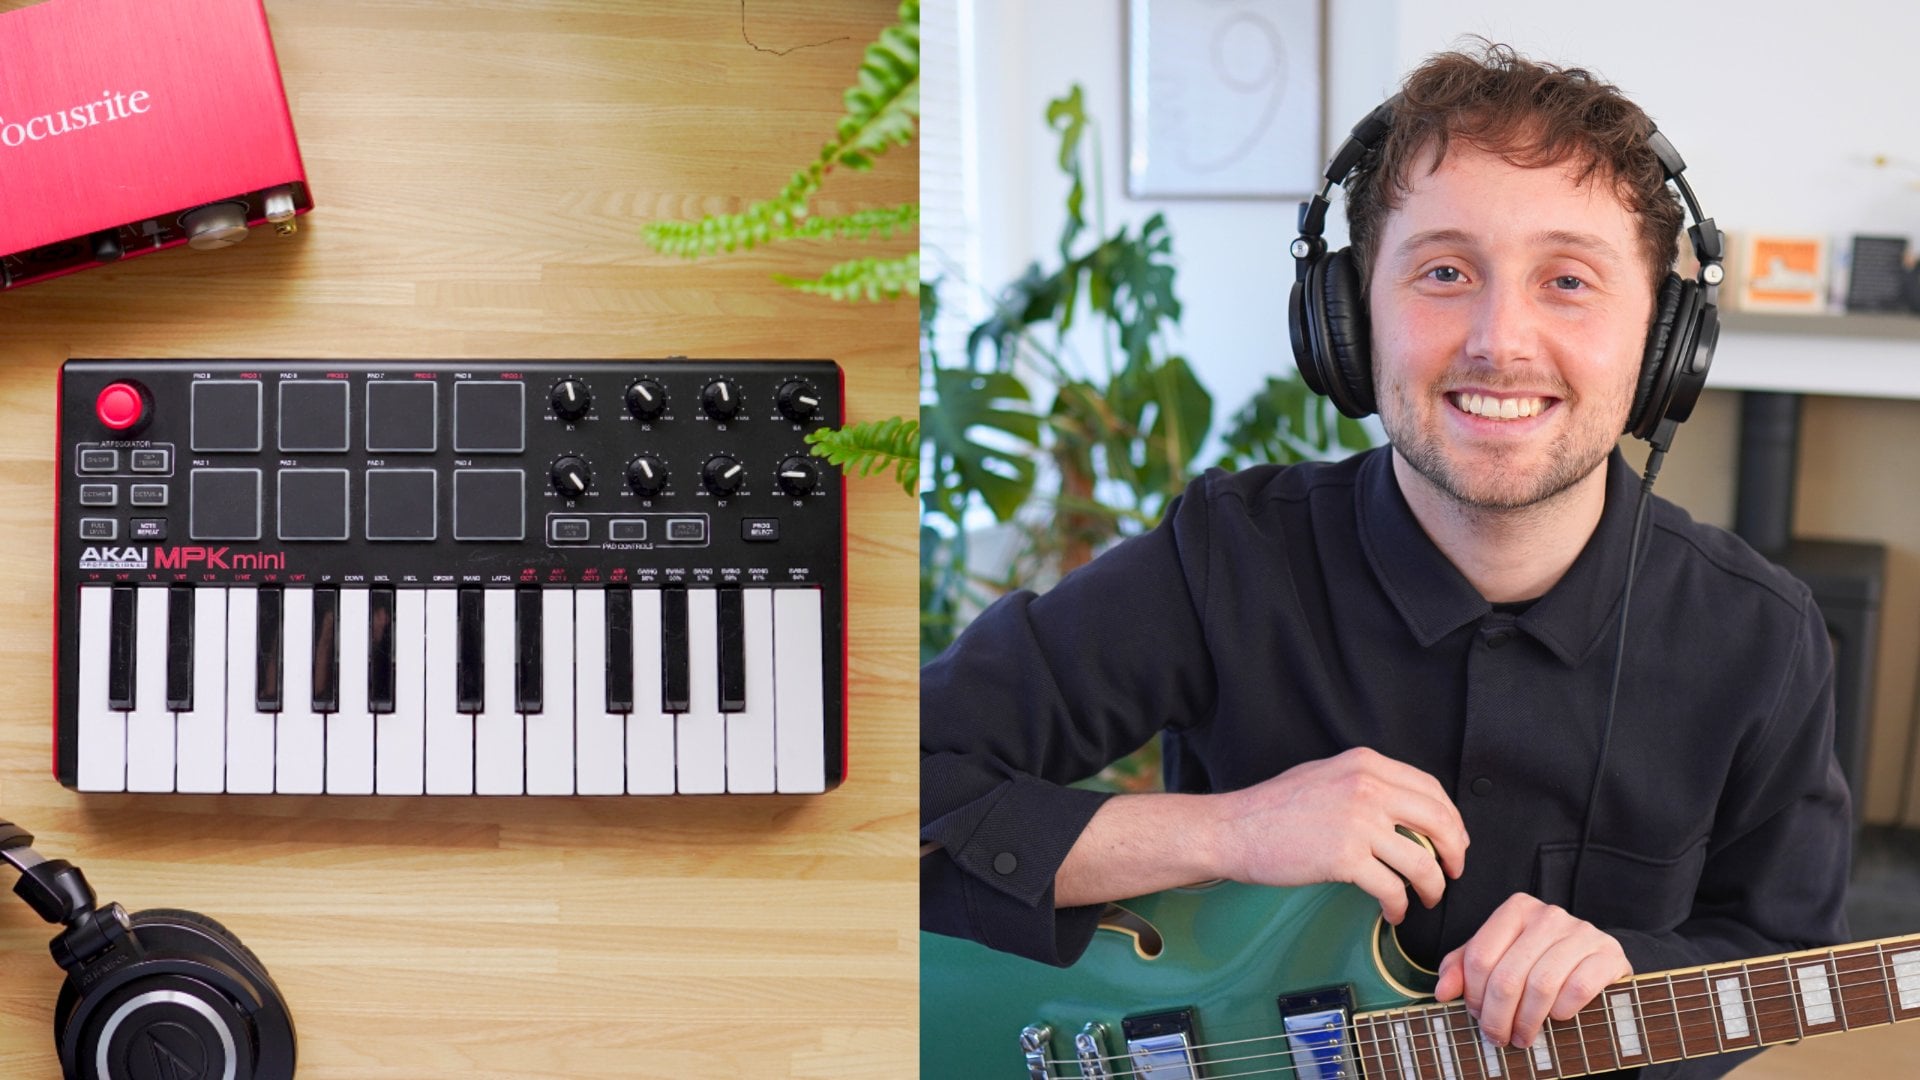
3. Plugins & Sounds: [MUSIC] First I'm going
to go through some of my favorite sounds that I use
to make Lo-fi all the time. A lot of these are
going to be free plugins so that you can download on any
door that you run. But obviously, any
of these downloads are totally optional. They're just some suggestions to create really cool Lo-fi vibe, and it's worth saying
that there'll be a ton of different virtual instruments
in your existing door. These are just
some options here. If you maybe haven't got them or you want something
slightly different. These are just some
of the instruments and plugins that I recommend, but it goes without saying, use whatever you like. Lo-fi is such like a loose genre and it welcomes all weird
instruments and sounds, so get creative with it. It's worth saying
all these plugins are going to be linked down in the resources so you can just go straight and just
downloads any of them. Let's dive straight in
with my first plug-in, which is possibly my favorite, and one of the most important
and is iZotopes vinyl. This is a free plugin
and essentially it emulates a vinyl
kind of sound. You can put this on anything
like a piano or a drum kit, even the master of your track, throw this on board and it just creates this wicked
sound. Let me show you. Up here we have a grand
piano, matched with a pad. [MUSIC] Now I can put Lo-fi
vinyl here, as you can see, it brings up this
cool vinyl [MUSIC]. That's just the default
setting and you can hear that it is mudding up, making it a bit dusty
and a bit warped. We can change a load
of these settings. I'm not going to go too deep into the settings of each one, but we can change the year
and this is just going to give you a
massive cut EQ wise. We can go a bit more
mid and go to 60s, which is going to
be a bit lighter. Right to 2,000, which is going to be a bit fat on wider and modern sounding. Obviously you can play
with all these buttons. We can spin it down. This little Lo-fi buttons, cool. We can add the wear on the
vinyl and we can adjust all these different
dials to just make a really cool Lo-fi sound, no matter what instrument
we've put this on. I'm going to put this
onto our master track, I think a little bit later. We also just get some of
that nice vinyl crackle and these mechanical
sounds which give it all such a cool Lo-fi vibe. Totally for free,
super easy to install. This is the one I recommend
more than any others. Next is some piano plugins. Any instrument can go and Lo-fi. But it seems that piano is
a real staple of the genre. Nowadays most doors will have a really nice little piano
sound in them already. Like this one, this grand piano, the pad is really nice, but by far my most
favorite piano sounds are made by Spitfire, Labs. Labs are a collection of a ton of different
instruments that are all free and all designed by this amazing company
called Spitfire. I'm going to be
talking about a lot of their plugins and it's
great because they're all tied into one singular plugin and you select your
instrument from there. The whole UI is super easy to use, and I'll
find it for you now. Their soft piano is
super famous for a good reason it's
just really lovely. [MUSIC] My favorite
piano sound, and again, through this easy to
use self interface, we can add some reverb on here, and so about the dynamics
with these sliders too. Amazing. Then this paired with the Aztec vinyl just makes
the perfect Lo-fi vibe. But also, but they have a couple of different
panels on here. If you want something
slightly different. My other favorites is this
straight up electric piano DI, just got a really
classic electric piano, soft sounding thing. [MUSIC] Super nice. Amazingly, as I was planning
this class out as Spitfire released a ton
of new tape piano sounds, which are spot on for Lo-fi and I absolutely
loved these again, all free, so you really need
to go and download them. They just sound perfect
for Lo-fi stuff. Basses. Either a virtual bass or bass in real life is going to be good. I don't
know why I did that. I'm going to use a regular bass today, that's my preference. But in case you don't
play bass yourself, and most stores should
have a really nice, clean basic sound, electric bass or some logic has
really nice clean, simple sound and electric bass. But if your door doesn't have
quite what you're after, there's something called
the ample p-base, which is a free download, which is really nice, emulates
precision-based sound. Free, really nice,
clean sounding. A lot of people talk
about the ample p-base. If not, there's this
awesome free plugin called the 'kee bass by Martinic, I think is how you say it. [MUSIC] Like a cool electric
piano sound in bass, and you can obviously play
around with all these dials. That sounds cool. Also people like to use some basses a lot, and you can just about always find these
inside your door. It will be something
like deep sub-bass. This little creates
that low-end rumble without too much of a
signature bass sound. You can use that if you like. Guitars. I'm going to play
my own guitar in this track. If you play guitar too, there's a ton of good softwares you can
use to plug into like an interface or a microphone
and emulate a cab sound. I'm going to use logics, inbuilt and build it today. But in case your door doesn't
have that you can download something called guitar rig
6 from Native Instruments. I believe it's a
little bit basic, but it still has lots
of nice clean stuff. Some reverbs and some pedals and the perfect stuff for
nice, clean, Lo-fi. But in case you don't
play guitar yourself. My favorite guitar sound in
plugin is the moon guitar. Again, by labs. [MUSIC] Really nice sounding,
soft alternative guitar. No virtual instrument quite gets to the sound of an
organic guitar. But what I quite like about
this one is it sounds a little bit like it's not
trying to be a guitar, it sounds somewhere
halfway between. But if you are trying to emulate a real sounding guitar
Ample Sound again, have a really nice guitar
empty layer, all for free. Raise really nice acoustic
sound. Go check out. Another important thing in Lo-fi seems to be atmosphere
and texture. We're going to talk about
this in more detail later. But these are essentially
nature sounds or drones that fill out and create a space for us on, to exist in. They're used all the time
in Lo-fi you'll often hear vinyl crackle or the sound of rain or the sound of a city. There's lots of ways of using this texture and atmosphere. The first is you
can use a plugin. Again, Labs has got a wicked
set called London Atmos. They work super well
and they're like Lo-fi vibe and there's loads of different
styles to choose from, and then we'll take it from
my somewhat local town, London. Points for that. We can also just take
samples of the Internet, like rain or thunder
or a cityscape. I'll leave a link in
the resources that have a ton of copyright-free, and downloads that
you can take for your nature sounds
and things like that. Or if you want to,
you can record your own samples, I don't know. You can go out into town
or go for a walk and take a little mic with
you or just your phone and record some
things that you like. Drums and beats. There's really no right or
wrong with drums in Lo-fi. There's acoustic kits
used, electric kits used. I'm going to get
into how we can make any kits and a little bit
Lo-fi in later lessons. You can also just download a drumbeat and drag
that into your project. We'll get into that later too. The obvious abruption is to
just use a kit in your door. There is quite a cool one on logic called
just the Lo-fi kit. Sounds super Lo-fi, and it's just built
straight into logic. My favorite way of putting
in drums and bass is to download some samples
of drums that you like, which we're going
to talk about in a minute and then load them into a drum machine
or drum kit designer. Now, I'm going to
be using the one that's already in logic, which is just the
drum kit designer. Lots of other tools
have a really similar thing where you just drag the sample you like
into a drum designer. But if your door
doesn't have that, there's a really good free
plug-in called decomposer, and that is exactly
what logic does. You could just drag
the school sounds in, play them on a midi
keyboard or type them in with your laptop
and it works great. Samples. I'm really into giving you a free option
for everything that I can. I know the last thing you want
to do is spend any money. However, for
samples, I struggled to recommend anything that's not a splice or a
paid subscription. [NOISE] Now, look, I know, but just hear me
out for one second. Hi friends editing mic here.
I know I just said that. But while editing, I found really good piece of
software that provides free, royalty-free samples
called band lab sounds. Works just like Splice, but totally for free and
not quite the amount of stuff the splice has still
really recommend splice. But if you want a free option, I have found one is really good. Go check it out. Where should you get your sample
shown in that case? I personally use a
subscription called Splice. Splice has a ton of different sounds on it and
they're updated all the time. There's always new
stuff coming in is great for drum
sounds, soundscapes, a chord progressions just about anything and not just
within Lo-fi even, literally all genres, it's so amazing for gathering
samples and get inspired. The great thing about Splice is after you pay for a
monthly subscription, you get a ton of credits to buy a ton of sounds that you like. Once you've bought
those sounds with your credits, they're
yours forever. My advice to you is head on
to Splice, pay for a month, and then just
download as much as you can get a ton
of free drum kits, a ton of free samples
and chord progressions, and a ton of stuff you like, and then cancel it afterwards
and you've got a ton of cool stuff for essentially the
price of a cup of coffees. On the nose samples. Let's talk about sampler. Most doors will again have some splicing sampler within it. I'm going to use logics today. But if your door
doesn't have one, there's a really good
free one called momentum, and that's made by Big Fish. Audio. Really cool
works just like logics. There's a lot of
people read about this one go and get it if you're interested in sampling [MUSIC]. For a bit of an all-rounder
is called love fi-lite. Love fi-lite just has a ton of really nice
Lo-fi song sounds. Again, all for free. You can muck around
with a load of different dials and change
the instrument you're using. It has loads of cool pads, keyboards [MUSIC], and since, and has some drums
on here as well. Super nice. [MUSIC] Those are some of my favorite plug-ins for creating Lo-fi music. Download as many as you'd like. I think my first top tip for the class is going
to be to load up a ton of your favorite sounds
before you start writing. I really like to do is just load up my favorite drum sounds, my guitar, and some keys
and some pads that I like, so that when I get into my creative flow and
I start writing, I don't have to worry about finding a kick
that sounds right, or trying to get a good
pad sound because all of that takes so much
time and can just really interfere with the flow. Thanks so much, guys. Let's
crack on with the next class about atmosphere and texture.
I'll see you there. [MUSIC]
4. Atmosphere and Texture: [MUSIC] To start off track,
we're going to lay down some atmosphere and
texture sounds to start. It gives us some of the
feeling that it's like inner space and it's used
all the time in Lo-Fi. If you've ever
listened to Lo-Fi, you know that there's
vinyl crackle or nature sounds or sea sounds, or rain sounds, just creates
this really nice vibes. Let's start there, shall
we? The easiest way you can do this is just by typing into Google
royalty-free vinyl sound. Any one that comes up
should be absolutely fine. I know I spoke earlier
about samples being a little bit dodgy
to get for free, but with nature sounds and stuff is not quite
on the same level as a singer performing or a
guitar player performing. We can download an
MP3 from there. But because I've got a
subscription to Splice, I'm going to use a
sound from there. But like cosec about earlier, you could use like London Atmos by
Spitfire, sounds great. Or if you want to
get really into it, you can go out and
record your own sample. We can go into here and
just put in nature sounds, or let's try field recordings. [NOISE] Just some of really nice sounds there. But again, this is a thing
we have something like Splice as you can so quickly and easily find a ton of
different sounds rather than heading through
weird websites. [NOISE] I found this nice rain
sample that I like. I'm just going to drag
that strain to our door, it should be the same
just about every door. Then we have some
nice rain sound. A really popular one to use is obviously like the
vinyl crackle. I'm going to put
that in a little bit later with our isotope vinyl. But that's like a super popular
classic Lo-Fi atmosphere. You can add in. What we can
also do to create a bit of atmosphere is use
what we call a drone. A drone is just one sound that holds throughout an
entire song or entire section, is usually just have one note. I often like to use
pads and we can just hold down a note
[NOISE] and I'm just going to create a
droney constant sound which just gives a bit
of fullness to a song, and again, gives it a bit of light of the world to exist in. A drone might sound a bit
weird just on its own. [NOISE] But equally, sometimes a little bit of lead can also sound a bit
weird on its own. [MUSIC] But if you put them
both together, hold the drone [MUSIC] suddenly it makes a really simple couple
of notes sound way more atmospheric
and interesting. Alternatively, we
could play a chord. I'll just hold that down
to use as a drone as well. What I like to do is play the note or the chord that relates to the key of our song, we're going to be
writing in C Major today because that's
the really easy one, so we can just hold
down a C. Now, there's a bit of an
atmosphere to work around, let's start playing some music. Shall we? I'll see
in the next lesson.
5. Chords intro: [MUSIC] Let's talk about
Lo-Fi chord progressions. This is a tricky
one to talk about because I think a lot of you are going to be
at different stages of your musical journey. To make it as easy as possible
for everyone watching, I'm going to split this down
into three different levels. I'm going to go easy,
medium, and hard. The easy level is going
to be about sampling. It's ideal for people that average one and easy
chord progression or those of you who
have no idea about music theory or know how
to play an instrument, that's perfect for you. Level medium is going to
be for those who know a little bit about
instruments and theory. Ideally for those people that have come off my
music theory class. Level hard is going to be for those really confident
on an instrument, really know their way
around scales and chords. We're going to go a
little bit more into changing keys and doing
some fun stuff with that. But just before you
jump into those, let's go for a couple of basics. A chord progression
is going to give the song a motional
movement and it's vibe. Lots of Lo-Fi uses like three or four chords repeated and they just repeat
throughout the whole song. It keeps it really nice
and easy that way. That's what we're going
to be working on today. Don't feel like you
need to have loads of different chord
progressions in there. It's also quite important
to talk about key. Now, if you don't know
about music theory, key is essentially just a group of notes and chords that
sound really good together. In each key, there will be seven chords and seven notes
that work really well. If you want to keep things
easy for yourself we can just stick working within one key. This also translates to samples. Lots of samples will
have a key next to them. It'll be like in, F. You know that if you're
writing the key of F, that sample work great. Things like Splice make it
really easy because you can search for samples that
are just in a given key, so it makes that putting this stuff together
so much easier. I'm also going to
be leaving a bit of a cheat sheet down
in the resources. That's going to show you
how to play the chords on the keyboard and some scales and some cool stuff like that. I can't put everything in
there because it would be just super long and
that's not all that music theory classes is for. But make sure you check that out if any of this is confusing. Before we jump into
chord progressions, I need to talk about tempo. Now in Lo-Fi we tend
to use slower tempos because the kind of music is quite chilled out
and quite relaxing. So the average BPM of
most Lo-Fi songs sits between 70 and 100
beats per minute. But again, you do
whatever you like, you don't have to sit
within that range. I'm actually going
to make this song slower than that today. I'm going to go for more
towards like a 60 beats per minute because I want it to be really low and chilled out, and 60 beats a minute
is actually around the resting heart rate of
a very chilled out human. I feel like to make it
as relaxing as possible, trying to hit that
60 BPM super slow, super chilled out is going
to work really nicely. We can bring our track right
down to 60 beats a minute. [MUSIC] I think I want to
ever so slightly quicker, so I'm just going to
bring up to a 62. [MUSIC] That was sounding good. However, what I'm going to do is I'm going to
double the tempo, because I like couple
more clicks on my track. It just helps me keep in time. I'm going to push it up to 126. [MUSIC] Just helps me
play a little bit better. Let's hop into our easy chord
progressions lesson next. [MUSIC]
6. Chords/Sampling - Easy: [MUSIC] The easiest way to get a clear progression
going within your song without knowing any
music theory or no instrument is
by using samples. Again, I'm going to be using
splice for my samples. We can just put in
that low five chords and we can have a search
around from there. [MUSIC] I really liked the
sound of that one. I can just buy on
here for one one, which is like nothing. Now all we need to do is drag and drop it
into our projects. But before we do that,
we just want to check the key and the tempo of our sample because that's going to line up to how
we set up our project. We can say here is some C
major and 130 beats a minute. I'm just going to
go into logic and make sure we're in C major. We're going to take our
tempo up to 130 beats. Perfect. Once we've done that, I'm just going to drag
this straight in. Line it up. [MUSIC]
There you go. [LAUGHTER] Lo-Fi easy. Then we can just loop that
for as long as we want it. If we add like one or two
more samples in a drumbeat. We've literally
got Lo-Fi song is super easy to make your samples. But if we want to go more
in depth for these samples. We can sample the sample using the plugin I
spoke about earlier. For me it's just going to
be logics, simple sampler. If you forgot, the free one is called Momentum by
Big Fish Audio. I'm going to load up logics quick sampler by just going into the instrument tab and
finding empty quick sampler. Then I'm going to drag our
sample into here and then hit optimized and Here
is our sampler. Now, I'm not going to go into too much detail with this
because as you can see, there's a ton of different
dials and options here. Again, if you're using
a different door, I don't need to be
even more confused. But the main things that
I'm going to focus on are these three tabs up here. They just change how
the sample is going to work classic one
shot and slice. Again, this should be similar on wherever door you're working on. Classic is just going to
play as I press down. [MUSIC] As long as I hold down, is going to play
through that sample. [MUSIC] But if I hit
a key higher up, it's going to change the
pitch of that sample, [MUSIC] which is cool. We can move these arrows depending on
how long we want the sample. But this is all just repeated so we can keep
it back where it was. We can also change
it to one shot, [MUSIC] which they're going to play it from
beginning to end. Or we can go to slice and what this is going
to do is it's going to detect where each node or each chord or a
sound has started. We call that a transient
so when a noise is made. Logic does a pretty good job at recognizing
where those start. But as you can see here, it's got lots of nodes and we don't want all
of those nodes. We're just going to turn down the sensitivity here
with this slider. It's going to land on
where we want them and we can just hit on here and hit delete
slides if you want to. We can make new ones
like this as well. I just want to line
that up so that there's a line starting on each one. Then there's one were rogue one there and then we
can use our keys [MUSIC] to trigger
each different sound. [MUSIC] We can play about manipulating those codes in a different way. We can adjust the pitch. [MUSIC] Again, whatever
sampling you're using, you can just have a play
around with these dials and make something
that sounds cool. This system also works
great with drums and so feel free to drag some
drum samples in there too. Let's go back to classic. [MUSIC] Just using
that one chord. [MUSIC] But front
around on the keyboard. I'm just going to ask a
couple nodes, down one node, C. [MUSIC] We're trying cool chord progression
like that and totally changing up the
sample is being used. One more original,
one more personal. Let's try using a
different sample. [MUSIC] I like this piano one. I'm going to drag
that onto a sampler. [MUSIC] For this one, we want to turn up
the sensitivity to just track down all
those transients. That's perfect. [MUSIC] Each of these different lines is going to represent a
node on the keyboard. As you can see, here
we go, I C2,C-sharp. That's just going to relate to the MIDI keyboard
that I have here. [MUSIC] There we go. A really easy way to create some chord progressions
with samples. Just mark around with the
samples you can download. Further means that sampler, if you'd like to mark
around with them. Thanks guys. Let's crack on
with the next class. [MUSIC]
7. Chords - Medium: [MUSIC] Let's talk
a bit more about some Lofi chord progressions. This medium lesson is ideal for people that know a little
bit of music theory. Ideally those
people who may have just come off my
music theory course, we're going to keep
things really nice and straightforward
and we're going to work around just like
a couple of guidelines. The first is we're going to
write within the same key. As you may already know, in each key there are seven chords that are
going to work really well and we're
going to just stick within those seven calls
that are in the key. It keeps it really
nice and easy. If you're not sure what
chords are in each key, you can either Google it. If we're working in C major, you can just Google what
chords are in C major or what I like to do is take a look
at the circle of fifths. When looking at that circle
of fifths I want you to circle what key
you're working in, and then that and the five
chords surrounding it including the one
you've circled are going to be all the notes
that work in that given key. There's also a circle of fifths where an inner circle displays a diminished chord of the key as well if you want
to throw some of those diminished chords in. Diminished chords do work really nicely in Lofi particularly
as passing chords, so I highly recommend you try throwing them in
if you're feeling brave. We have the codes that
work well in our key. Now, we can play these chords in any order we like and they're going to
sound really great. Today I'm going to be
working in the key of C major because that's
a really nice easy key, it uses all the white notes. I'm just going to [MUSIC]
have a little play around, and see what
progression I can find. Now, if we're just
playing regular triads that's going to sound okay, but it's not going
to sound very Lofi. What makes a chord
sound more Lofi and jazzy is using extensions on
top of our existing triads, so the easiest way of
extending our chords and making them a bit bigger
is by using sevenths. [MUSIC] It sounds a little bit more jazzy and a bit more Lofi, but if you don't know
what a seventh chord is again I'm going to leave it on the cheat
sheet how you can play every single seventh chord, but basically what we're doing is picking what code
we want to make. Let's say we want to
go for D [MUSIC]. We're going to build out
our major scale from C, so whole, whole, half, whole, whole, whole, half, and then we're going
to play the 1, 3, and 5 to create a major chord, and we're going to
add on the seven on top to create a C major 7. Now, if we're working
in the key of C, we can use this
exact same shape. Essentially, playing a
note, skipping a note, playing a note, and so on. We can move this shape
[MUSIC] around the keyboard, and we can find every
single seventh chord that works in the
key of C major. Now, if you're not too sure how to work out seventh chords, I would really recommend
staying within the key C just to make it
really easy for yourself. Again, I'll go into more detail about listening my
music theory class. I don't want to bulk
this class down too much with a ton of theory, but essentially all we're doing is adding an extra note onto our basic chords to make
them sound a bit more professional and a bit
thicker and fuller. [MUSIC] Now, let's take
this a step further. I love using ninths, elevenths, and thirteenths as
well within my chords. Again, if you've
watched the music theory course you
know about them, but if we can turn them into our chord progressions
too [MUSIC] it just makes them sound a bit bigger
and a bit fuller, and you mostly here these
big beautiful chords in the Lofi you're listening to. Again, I'm going to break
down how we come at a chord progression standard
a bit better in just a sec. [MUSIC] I'm just
going to change up this keyboard sound
to my labs one. I really like the sound
of the tape piano, so I'm going to go
for that today. Again, to keep it
really simple I'm just going to work in the key C, and I like this little
progression between C, D, F. Back to D,
and then C again. For now I'm just
playing in the seventh chords and I'm going to extend them and invert them just a bit later because I'm not actually really good at piano, so I'm going to hit "Record" [MUSIC]. That's our chord
progression done. That chord progression
sounded great, but there's a couple of
different things we can do to make it sound even better. The first thing I'm
going to do is add some ninth nodes on top of this course to make
them sound a bit bigger. That's C7 [MUSIC] and it's actually going
to sound really nice with that nine on top. It says D note there, and I can just add
that on up here. I think that D sounds okay. It's just a seven, but I'd
like to add a nine on to the F which is just there on the G. Let's see
what that sounds like now. It sounds all right, but again we can do a couple of different things that
made that sound better. The next thing I'm going
to do is I'm going to invert those chords. All that means is
essentially changing where the notes and
the cord are sitting. If I move some of
those notes down, it's going to make this chord
sound darker and brighter. Equally, if I move
some of those notes up the chord is going to sound
brighter and higher pitch, and I can also just
drag those notes apart to make the
chord sound wider. With inversions,
we can also move the nodes of each
chord in a progression closer together so that the chord progression sounds
smoother and more organic. Let's try and move
these nodes around to make them sound a
little bit better. I'm [MUSIC] actually
just going to move these realms they're flowing. To be honest, I'm just going to experiment with moving
some of these notes around a bit and see where they may be fit in a
little bit nicer. I'm going to try and
take the ninth note, this D down to D2 instead.
See how that sounds. It sounds pretty nice. That's sounding good. It just sounds a bit
more interesting. Let's try moving
maybe this G up. That doesn't quite work.
What about this A? Move the A up? You see that sounds lovely, very like Studio Ghibli. Super nice. You can say how
that second chord sounds a little bit basic now, so let's see what we
can do about that. We've got a D minor chord there, so we can try and move the F hop to make it sound a bit
brighter and a bit wider. That sounds okay. What I might do for this one is add in another node that is already
existing in the chord. We've got a D, and if I add in another D well, that's going to do is just make the chord sound a bit thicker. I'm just going to
say how that sounds. Super nice. Adding in an extra note just thickens up that
code a little bit and I'm using the D note
there because it's a D chord, so adding an extra D just
nicely thickens it up. To me that nine just sounds
a little bit to ringy, so I'm going to bring that G down and I'm just going to move these
around a little bit more. Very nice. What if we try
to move in a note down? What if we move this A? I think that's going
to be pretty basic, and it's quit sound right. We try moving this C down, and that would technically
make it as C over F. That sounds cool. [MUSIC] Very nice, cool. You can just hear that last
chord there just sounds boring compared to
these inverted ones, so we're just going to
add another D on here and just make those
notes flow better again. [MUSIC] Super nice. I guess so just to recap because quite a lot
happened there. We built a chord
progression from the chords in the
key that we chose. We chose C major, and we chose four
chords that we liked. We then added some extensions on top to make them
sound a little bit more professional and I stuck
with sevenths and ninths. Then we inverted the notes in the chord to make them
sound a bit bigger, flow a bit better, and just experiment
with the code really and try moving around those notes a bit to see what worked best with
the progression. Again, I've really done
nothing fancy there. I've just played the chord
out as simply as I could, but it still sounds really nice with those stuck notes on top. That is another
way we can create cool sounding chord
progressions. Now, if you're feeling
brave and you can hit over to the hard section of
chord progressions, it's not necessarily
going to be crazy hard. It's just a next step up. I think a lot of you
better take it on especially if you know
a bit of music theory, so hopefully I'll see
you there. [MUSIC]
8. Chords - Hard(ish): [MUSIC] Hey everyone,
welcome back. Next we're going to
talk a little bit more about code progressions and how we can make them even jazzier
and more lo-fi sounding. I should say I've got
my guitar for this because I'm not very
good on keyboard, a little bit more
comfortable on guitar , hence the guitar. We learned in our last lesson, we can take a look at
our circle of fifths, or just the codes in our key and any of those codes are
going to work really great. Let's go for C
minor. [MUSIC] That sounds okay but
like we've learned, if we make those seventh
codes instead or nines, it sounds much more like Jazzier and much
more interesting. [MUSIC] We already
know how to do that. How do we take this
a step further? Lo-fi has a lot of
influences in jazz. We needs to talk a little
bit about jazz harmony to understand how to write
good lo-fi code progressions. Now, obviously, jazz harmony is a huge subject and it's a very complicated
environment as well. It's one of the
most complex forms of music you can learn. But we're just going
to dip our toes in today so we can just make our code progression
sound a bit more mature and a bit
more jazzy sounding. A really common way of making our code progressions sound a bit more lo-fi and a bit more jazzy is to use code progressions that
move outside of one key. Now what I really like to
do and to keep it simple, is again, take a look at
the circle of fifths. We essentially use
this to understand how our codes and our notes
are related to each other. I think the codes and
the notes that are closest to our key are the ones we are
most friendly with. The further away we move
from our key center, the more that code
progression is going to sound a bit more
interesting, let's say. This becomes really clear
if we actually take a look at the code that's
furthest away from our key. Let's say we're in the key of C, the furthest code
away from that is G flat which as you can hear
their sounds simple way. It doesn't sound nearly as naturalist C to an
F, for example. [MUSIC] What we
can do is just use this knowledge to have
a play around with how far we can move
outside of our key or the kind of codes
we could maybe go to. For example, if
we go from C to D to E, that sounds all right. [MUSIC] See, we're moving
outside of the key there, but it still sounds all right. We're not moving
too far away and we're stepping a little
bit further away from the key with
the D and then going over to E which is
a bit further away. [MUSIC] We can bring it back to a C to
[inaudible] back home. I often find sometimes just
moving one step outside of our key can be enough to add a bit of interests without
sounding too clashy. Let's try that now. Just going one step outside of our key, and let's try in C minor. [MUSIC] We've moved
outside of the key of C minor with that E minor. Then we bring it back rounds
the key nearly C minor with the F minor [MUSIC] and we
resolve on the C minor. [MUSIC] That sounds
alright, but again, it doesn't sound super
jazzy, super lo-fi. Let's try turning those
codes into sevenths instead. [MUSIC] That's something
way more jazzy, way more lo-fi now. We've only just used one
code outside of the key. We've just pushed it past and then brought it back
with the F minor, and then resolved it
back on to the C minor. Four codes, super easy, but just jazzy enough to
feel a bit more mature. Again, have a play with this. See how far outside of that circle you can
shift your codes. Again, using the seventh
or any extensions, just make it sound
much more jazzy. But if you want to take
this a step further, what we can do is use
ii-V progressions. II-V progressions are
a fantastic way of moving between keys
really seamlessly. They're the bread and
butter of jazz music. For this example, I'm going
to start in the key of D minor and I'm going to
modulate to B-flat. Now, I know B-flat is
in the key of D minor, but the key of B minor still holds slightly different
codes and notes. Sometimes, again, just
going that one step away is more than
enough to make it sound a bit more
interesting without going too extreme
or too complicated. A ii-V progression is
just playing the ii and the V from the key
we want to move into. If we start on D minor and we want to move
into the key of B-flat, if we play the ii and the
V leading into B-flat, is just going to sound
really nice and organic. Again, I'm going to be
playing seventh codes just so it sounds a bit
more jazzy and lo-fi. [MUSIC] See that. We're going from D minor, ii, V, B. It just sounds really
natural and organic and we can make that B a bit
more interesting, [MUSIC] a bit more
jazzy sounding. In the key D, [MUSIC] want to go to B.
Let's do ii-V, B. Then what we can do to get
back to D minor is play the ii and the V from
the key of D minor, which is an E minor, and an A. [MUSIC] Back to D
minor. [MUSIC] Back to the key of D minor there. Not the best guitar
playing there, but it just gives
you an idea on using those ii-V to move
into different keys. Just worked super well. Experiment with
this, moving into different keys with
this ii-V progression. Again, use this circle
of fifths to see how closely-related each key and each code is related
to each other. If you want to move
another step up from this, try experimenting with flat and sharp fives
on some codes, try using diminished and augmented codes as
passing codes and try bouncing around between
major and minor code. Again, with all of these codes, we can experiment
with inverting them, restructuring them a little bit, and putting some different
notes in the bass. But this idea of
moving outside of key is super common in
lo-fi and jazz. I thought it'd be a good
time to talk about it. Now, a big point about working outside of key is obviously, once we've moved
outside of a key, the notes that we can play as a lead or a melody
will change slightly. Just keep in mind
when you're moving to a different key that
you might have to play at a different scale
over the top of it. For example, if we start
off in the key of D minor, we could use the D
minor pentatonic scale. Then when we modulate
into the key of B-flat, just modulate that
pentatonic scale into B-flat major instead. Again, it gets a little
bit complicated, hence why this is
at the hard level. But if you know your stuff, you absolutely know this
jazzy and lo-fi sound. There are some more
ways of making cool lo-fi code progressions. You can now call yourself
a jazz musician. Congratulations. I'll see you
on the next lesson. [MUSIC]
9. Beats: [MUSIC] We've got our
chord progression. Next, let's move on
to some drum beats. I really don't want to
make this complicated and I don't want to get
into the science and the technical aspects of beats and timings and
the rest of that. That's a whole class in itself. But the thing is, and I
say this as a drummer, I really don't think you need
to know the science behind beats and drums to make
a good-sounding beat. We're going to keep
things super easy today, but we're still going to get something that's
going to sound great. Now, the easiest way of creating a beat is again by
using sampling. We can go into Splice and we can find a cool drumbeat you like. [MUSIC] Again, we can just search for Lo-Fi drumbeats or just any beats and then just drag them into our project
and there we have, done. [LAUGHTER] But this
will be much of a class if I just
told you to do that. Let's talk about how we can build our own beats organically. You can either use a drum kit in your door or what I personally
like to do is again, go through something
like Splice and find singular drum
sounds that I like, and I've got some
picked out here. [NOISE] We've got a
rim shot, a clap, another hi-hat, another kick, a snare, and a shaker. The main things you want
to be looking for is yeah, like a hi-hat sound, a kick sound, a snare or a clap, and maybe some percussion to
add in a bit of variation. You can also use a
ride if you'd like to. Like I said earlier, acoustic kits and electric
kits will both sound fine. I really like using things like Splice because the
drum sounds have already been mixed
and they sound really nice in Lo-Fi themselves. It's just a much quicker
and more intuitive way of picking out this sounds. Now what we can
do is either drag in each sound at a time. We've got a shaker, a kick, and a clap. We can then go into our
project and line these up [MUSIC] and move them around like that. However, what I personally
like to do is use a drum kit designer
and then play in those drum beats
myself on my keys. To do that, you
can either open up the decomposer app I
told you about earlier. I'm going to be using
Logics' Drum Designer. I'm going to open up any
drum kit and then I can click on this button
and it's going to bring up this drum designer pad. Then what I can do is take the kick through each
rows and just drag it in and then we've got a Lo-Fi
kick in the drum designer. I'm going to bring this
rim shot into here, I'm going to bring
this hi-hat here. [MUSIC] Then we have
a cool setup already. Now I'm just going
to add the claps. In fact there I'm going
to have the snare there actually, the clap here. [MUSIC] Now that we
have a drum kit design, we can start writing
in some beats. Now again, because I don't
want to get too much into the science of rhythms
and beats and stuff, my advice to you
is to really just that emulate the thing you'd hear on your
favorite Lo-Fi tracks. I feel like you can take inspiration from a track
without directly copying it. Even just changing up the sound of the drums and adding in a slightly different variations on beats and stuff
is totally fine. It's sort of what I'm going to do today, and to be honest, a lot of Lo-Fi drums
are very simple anyway, it's very much like
[MUSIC] very chill. Again, if you want to get fancy and add some little
hi-hat frozen, or some little fills and
stuff, do go for that. Just experiment, have a play. Use inspiration from the tracks
that you've listened to, and start to record
something in. What I also like to do is,
this may sound really silly, but I guess a top tip
is while you're going about your day, try beatboxing. [LAUGHTER] The old boots and cats thing is so appropriate
for Lo-Fi because again, it uses the kick, snare, and hi-hats all the time. Use the [NOISE] boots
and the cats as the base and the snare and then the [NOISE] as the hi-hat. Just when you're going about
your day like [NOISE]. Germane. Sort of like
start beat boxing out. [LAUGHTER] A little
idea maybe record on your phone and then just play that idea of rhythm in
when you come to your door. Let's play our track and just see the kind of
thing we come up with. [MUSIC] If you want
to, what you can do is just recording one part a time. I can just record the hi-hat in first and then add the kicks
and the snares afterwards. But for today I'm
going to play in all three at once if I can. Then I might have some claps and some percussion afterwards. [MUSIC] That was pretty at a time. But that's okay because what we can do is use a quantizer. Now, this is going to be a little bit different depending on what door you're using. In logic, we need to
select the track we want quantized and come up
to this info button, hit ''Quantize'', and we can select how we
want it quantized. If you're new to this
experiment with 1/8, 1/16, or 1/32. The same with the triplets. I've written in triplets, so
I'm going to select that. But you can also select swing. Swing is really useful
because it's going to add a bit of looseness
to our plane, which is used quite a
lot in Lo-Fi and Jazz. Experiment with some
swing quantization and maybe not getting those
notes perfectly in time. Sound nice and human
and nice and loose. I've quantized it
into 1/8 triplet, that seems to have hit
it into time for me. [MUSIC] What's great about the drum designer is I can
open it up like this and see all of the different drum
tracks that have been used. That hi-hat is a
little bit loud for me [MUSIC] so I can just turn it
down a little bit [MUSIC]. Nice and then I'm
going to add in some claps and some
percussion too. I'm going to add this
shaker over here. I'm going to add them in on top. [MUSIC] Nice. What we could also do is get open up our quick
sampler and then drag in a drumbeat
sample [MUSIC]. Drag that into here. A little bit like our lesson
on easy chord progressions, we can chop up this drum sample using the slice feature
in our quick sampler, just like we did with the codes, but [MUSIC] this
time it's for drums. [MUSIC] That's what we're doing there really is
just picking out a cool, steady beat and that's maybe inspired by the things
that you've heard in other tracks or
it's maybe some of the samples that
you've listened to. Maybe you like the sample,
but you want to change up yourself, play in a simple beat, then add some other beats
on top if you want to like percussion or collapse or some fills or some open hi-hats. I'm going to keep
it simple today, but lots of Lo-Fi keeps
the beat very simple, almost like a drum
machines sound. If you want to add a bit
more of a human element, we can use the swing or a humanized feature
inside of our door, but I'm just going to keep
you straight quantized. I want it to sound like
a drum machine today. That's pretty much
it. Thanks, guys. Hopefully, you've made
some cool beats there. I'll catch you in the
next lesson. [MUSIC]
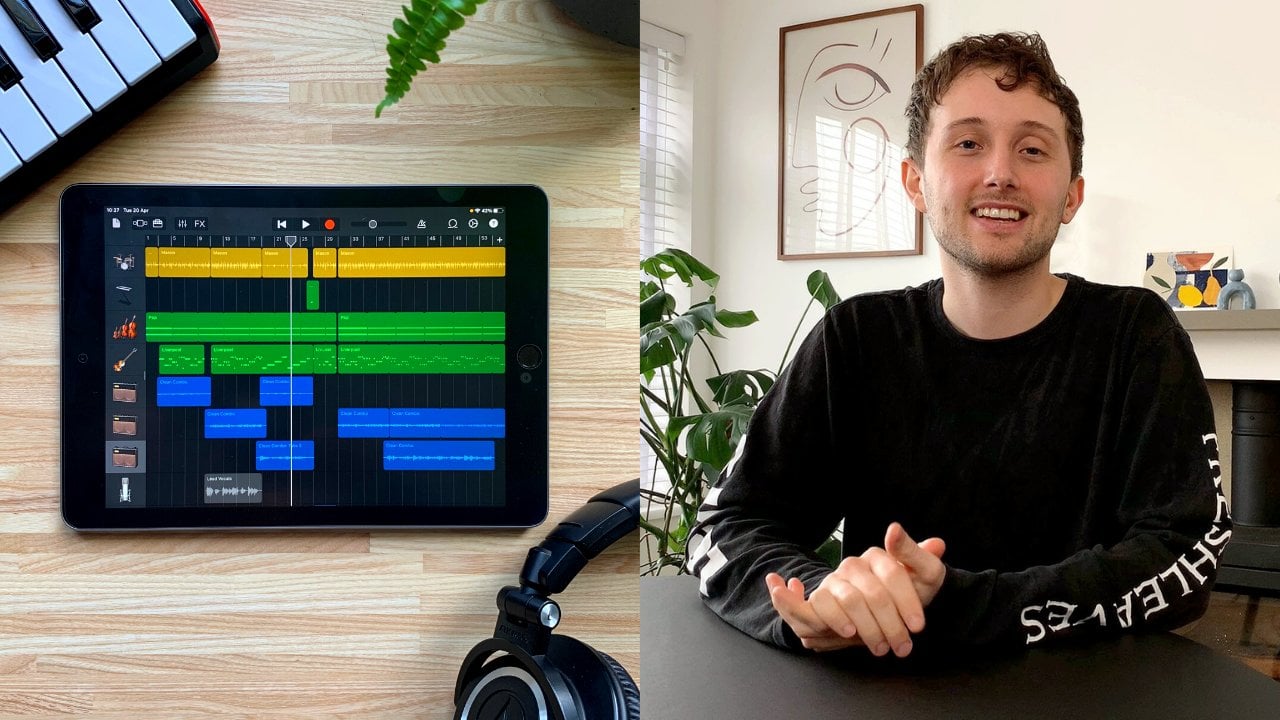
10. Song Development : [MUSIC] Next we're going
to develop our song a little bit more by adding
on some more instruments and creating a bit of a song structure and getting our track a
bit more fleshed out. To keep things really simple, you can just stick with like four chord progression and use that the whole
way through a track. Lofi is very repetitive, and when something
is quite repetitive, it can be quite relaxing. Obviously, if you
want to add loads of different sections in, and change up the
chord progression, you totally go for that. But to keep it simple today, I'm going to have one
continuous chord progression. What I'm going to
do is play with some instruments
coming in and out to make it feel like it's developing custom
instruments away, print it back in, and it's
going to be nice and easy, breezy, and it's going to
create a nice relaxing vibe. But before that, I'm going to start layering up
some more instruments to thicken out the loop
we've got going on here. First, I'm going
to put in a bit of bass. [NOISE] Oh, Jesus. What I'm going to do is
just follow the chords with a bass note to add
a little bit of low end. Now you can keep this
really simple and just play the root notes of the chords. If you want to add
a little bit extra, you can add the fifth
of the root notes, [MUSIC] so on bass, it's two frets up
and one string down, [MUSIC] or you can use any notes that will work well in the key. I'm going to throw
one or two little five notes in there
just to add a bit of interest and maybe add some little slides
in there as well. Again, to add a bit of interest. [MUSIC] That sounded good to me. Next, I'm going to record in
a bit of acoustic guitar. Essentially, all I'm
going to do is play the same codes that are
played on the piano, on the guitar, and just
layer up some more sounds. [MUSIC] [NOISE] That will do. [MUSIC] Oh God. This
is sounding great. I'm going to put more
electric guitar on there. [MUSIC] All I'm doing there is playing the C pentatonic scale, [MUSIC] because we're
in the key of C major. I know the C pentatonic scale is going to work really well. If you're not sure what
the C pentatonic scale is, it is essentially the
major scale that the four and the seventh of the
scale have been taken away. If you're not sure what that is, you can Google C pentatonic scale or wherever
key you are in, and it'll show you
what the keys on the keyboard or what frets and the guitar I
should be playing, and you want to make things
have been more bluesy, you can use the blue scale. That works great too for lofi, so I am going to loop these
and play for a little bit. [MUSIC] I quite like that
little piece there. I'm going to cut that, like that for a sec. But what will often happen in lofi is other like a guitar or some keys will continually
do ever changing lead part, and I'll just move
throughout the song doing wherever sounds pretty. But if you want to make
something more catchy, you can pick out three
or four notes from that pentatonic scale and play
them in a repetitive way. [MUSIC] You can make like a catchy lick,
[MUSIC] like that. What things I'm going
to do is just add on a last little layer, this nice worldly pad from, again from Spitfire LABS. I'm just going to play the
notes that are in the chords, but I'm going to play them
a little bit like this. [MUSIC] A little bit like that. Just really subtle, in
the background there. It gives you a little
bit more top end and a bit of something
pretty sounding. [MUSIC] We're thinking now I try out with some
more instruments there. Now let's start to develop this into a bit more
of a song structure. Developing our song
is going to be very personal to the thing you want to make and what you're
feeling like that day. A very common thing
to do in lofi, and what I'm going
to do today is, slowly introduce one or
two instruments at a time. We're going to start with
just the piano on its own. I'm going to slowly introduce
more and more bits, so as to feels
like it's growing. I often like to guide
the listener through the same experience that we
went through to write it. If you write your chords first, I think there's
something nice about the listener hearing
them first and then maybe loop the baseline
next to introduce that next. I'm going to start
off track with just the rain and the piano. [MUSIC] Then I'm
going to introduce the bass and the drums the
same time [MUSIC] I think I'm going to have
a guitar come in. Then we'll go for the keys. We see with a guitar
and the keys are like together [MUSIC] Sounds okay. We can do some stuff
in the mixed layer to maybe separate them
a little bit more. But I think for now
that's sounding cool. I think we'll have that
repeat once more round. [MUSIC] There, I think it's a
good time to start taking some instruments away. I'm going to loop all
these back to here, and I'm going to have the
piano playing on his own. [MUSIC] Maybe actually, I'll add the acoustic
guitar in there as well. [MUSIC] Again, in lofi,
it's just make it about those chill vibe and the way of the
instruments just gets it, nice and calm again [MUSIC] Then we can add all
their insurance back in here, 1, 2, 3, 4. Let's just copy and paste
these as well as these. That sounds really
really good to me. But what I'm going
to do now, I'll add a bit more interest. I'm going to drag
some samples in here. Again, these were all
found from Splice. I just went into browse. I went for spoken word. It's going to come up
with a load of sort of- Spirit. That was scary. [FOREIGN]. Why are they scary? [LAUGHTER] I thought
it'd be cool to have some vocal samples in there so on Splice, I just found this. You know what? I
liked that idea. They're from the same pack. I'm going far away from here, and I'm going to
write a book about you. I'm going to call it. They all sound pretty similar. Again, all I'm going to
do is just drag these in, and I'm going to move them into a place that I feel like works. [MUSIC] You can possibly be
jealous of that man upstairs. I think I'm going to
make that just kick in right before the drums and
the bass kick. [MUSIC] You can't possibly be jealous
of that man upstairs, but he is utterly
harmless. [MUSIC] That works quite nicely there. Then I think I'm going
to put these other two in the gap where the
instrument's cutaway. [MUSIC] I'm going far,
far away from you, and I'm going to write
a book about you. I'm going to call it the
Heel and his Victim. That's a very horrible title. It'll do. You know what, I like
that idea. [MUSIC] I'm going to move
that a little bit closer just so it,
once it finishes. You know what, I like that idea. What I'm also going to do is put one more sampling in there, and we're going to use A riser. A riser, if you search in
somewhere like Splice, it's going to be like a
cinematics swelling sound. If you don't have Splice or you don't want
to use samples, you can reverse a cymbal sound and this creates the
same sort of effect, but essentially sound
like [NOISE] that. [LAUGHTER] I found [MUSIC] this one from earlier
which I really like. I'm going to drag that in, and it's going to
rise up to bring us back in after
our break. [MUSIC] You know what, I like
that idea. [MUSIC] I'm just going to move that
guitar and keep it around. You know what, I like
that idea. [MUSIC]. Then I'm going to keep it really simple and just repeat some of these a couple of times around, and that's going to
see our song out. [MUSIC] But obviously,
you can go to town here and add more
chord progressions, and new sections in. This song is coming out to
about three minutes and again, I want to keep it really
nice and chill today. That's about right for me. I actually don't want
to over-complicate it, so I think that's really nice. We've got a really
nice foundation there. But there are several
things we can do to make this sound much better. We're going to mix it to a point where sounding
more professional, and there's a better
balance there. Let's crack on with
actually, shall we? [MUSIC]
11. Mixing: [MUSIC] Next, we're going
to mix our song to make it sound much more polished
and professional. The good thing about
mixing lo-fi if you're a beginner is that it's
a very forgiving genre. The whole lo-fi vibe is that
it's a little bit broken, and a little bit sketchy
sounding sometimes, so you really don't need
to be a mixing pro. However, just knowing
a couple of bits and pieces can really
make your mix sound a lot nicer and a lot thicker and fuller and
much more professional. But that being said, mixing is tricky to talk about
sometimes because how you mix a song is so
dependent on so many factors, what instruments
you've got in there, your personal preference,
and your own opinions. I'm not going to go
too much in-depth with exactly what each of these
mixing things means, I'm going to make a mixing and mastering class really soon, which is going to go into
loads of detail about this. I'm just going to give you an overview on how
I'm going to mix this track and talk you through what I'm
doing as I'm doing it. The first thing I've done
on here is just to make sure all the levels
are nice and balanced, I can hear everything clearly and everything just sounds nice. Everything sounds pretty
good to me at the moment. [MUSIC] After that, what I'm first going to do, start to pan some
of the instruments. On logic, we use these dials
to pan our instruments. All panning really
means is either sending our instruments
to the left or the right and that is
just going to give each instrument its
own space in the mix. Let's say, for example, this piano and this guitar
are clashing a little bit. If I pan the piano
off to the left a good amount and I pan the
guitar off to the right, [MUSIC] suddenly sounds
much more balanced. Before, they were fighting
in the same middle space. I can actually balance
the volumes much better now that they're
panned because I can hear them so much clearer. We can do this for
each instrument. Now, I'd recommend
keeping your drums, bass, and possibly your
codes reasonably centered. But the rest of your instruments
try experimenting with how you pan them and create some nice
space for your song. I'm going to pan the codes
MS right slightly off. The drums and the bass are going to remain central and
I'm just going to pan the acoustic guitar a little bit to the
left. [MUSIC] Now I'm going to pan
these samples too. [MUSIC] I'm going to
keep that riser central. [MUSIC] That's sounding good. Next, I'm just going to add some reverb to separate
the different instruments. You can keep this
really straightforward and just say head into my drums and just click on "Reverb" and turn up like that
to keep it really simple. [MUSIC] You can add some
delay in there too. Also, add some
reverb to our base. [MUSIC] Just wanting to play about with some of
these dials [MUSIC]. Add something to this guitar
too sounding very dry at the minute [MUSIC]. I like a lot of reverb
if you can tell. [LAUGHTER] [MUSIC] Already, just adding that panning
and a bit of reverb has really brought this
track to life, I think. Then next, I'm going
to do a bit of EQing and I'll show you
what I mean by EQing. On logic will go to our
mixing tab and then up here is the EQ setting
inside of logic. Using this, we can
just manipulate the frequencies of the sound. These are going to be our meds, are highs and lows and
we can just EQ it, however, we see fit. There's really no
right or wrong it's totally just
personal preference. We're going to start
with our keys. Whilst doing lo-fi,
but also any mix is if there's like predominant
bass and drums, I try and EQ the super low-end out of all the
other instruments. Just said the low end of the piano chords aren't fighting with the
bass and the kick. Like with this piano, although that it
doesn't read that there's any low
frequencies there. I'm just going to take
it out anyway because there will be stuff
happening here. This is the zone I really want
for the bass and the kick. This is what we call a high
pass filter because it's letting all the highs in and it's just cutting
off all the lows. Now what we can do
to any instrument to make it sound a
bit more lo-fi is get really aggressive with a
high and low pass filter. I'll show you what I mean. If I just get really
aggressive with this, take a load to that low-end off [MUSIC] and say add a
high one as well [MUSIC]. Just sounds extra lo-fi, although it's already
been mixed to sound, lo-fi anyway but essentially what we're doing with that EQ is emulatings of old-school stereos that had really bad
bass and highs. But we're going to
make a little bit more of a modern sounding one today. I'm just going to cut
off some of the highs. Then I think [MUSIC] I just want a bit
more around here. I just add a little bit
more high-end in and I've just cut off the
lows to the piano and I'm just going to do the same
with each instrument just so EQing as I like it. With this kick, I just
want to bend more low-end [MUSIC] and just a bit more high-end with
those hi-hats [MUSIC]. Again, if I do that
low-pass filter, you can say it
sounds super lo-fi, but you can just control
how much you want. Sounds a lot lo-fi, that sounds [MUSIC]
that there's cool. Again, this is all just
totally personal preference. Just keep turning your EQ and the other
effects on and off, see what difference
they're making [MUSIC]. This is the end of
our base [MUSIC]. So essentially all we're doing is exaggerating the
frequencies we want, and taking down the
frequencies we don't want. [MUSIC] So I want a
bit more of that zone around like 150 hertz on the
bass, I've just upped that. The same with the guitar. Again, I'm going
to cut out a lot of these low frequencies. They're not interfering
with the bass. It says most things just getting a little tweak
in the EQ and then next, I might add a bit
of compression. So what compression
essentially does, is reduces the dynamic
range in our recordings. Let's say for the
guitar recording, we're going to have sometimes
where the guitar's a bit louder and then other
times it's a bit quieter. What a compressor does is just makes the sound overall
more consistent. Again, it's all just
personal preference. If you don't think it
needs compressing, you don't need to use it. I'm going to use a bit on
the bass because I was just a little bit inconsistent
with my playing, and so I'm going to open
up this compressor, head over to the graph, and essentially it looks
really complicated, but you only really need
to adjust the threshold, the ratio, and the attack. If you want to keep
things simple, you can just tweak
these three dials until it sounds good to you. But essentially the threshold is determining where the
compressor starts working. If it's at 20 dB, that's where the compressor is
going to start working. The ratio is how
much compression takes place beneath
that threshold, and the attack is how quickly
the compressor works. So the lower the threshold, the more intense the
compression is going to be. [MUSIC] You can see
for that graph, the compressor is
really cutting into it, but we don't want
to squish it out like that so I'm just
going to lighten up a bit. Then the ratio is how much
compression is taking place, so the higher the style, the more intense
it's going to be. [MUSIC] I'm just going to turn
the attack down so it's nice and quick to engage. But yeah, essentially
I'm just tweaking these dials until it
sounds about right to me. Then because we're compressing, the signal is going
to get quieter. We can adjust the gain
to just bring that level back up so it's as loud
as we need it to be. In fact we can do this with
the makeup gain here [MUSIC] We've just add a bit of
compression to each instrument. I'm just going to add
a little bit onto my acoustic guitar, I think. [MUSIC] In actual fact, I don't like it with a compressor on so I'm
just going to leave it. Okay, so that sounded
really really nice to me. Then the last thing
we're going to do, and possibly one of the
most important things is what's called
side-chain compression. So using this is really
prominent in Lofi music. So essentially what
side chain compression does is it activates a compressor on an instrument when another one is playing. I know that sounds a bit weird. I'm going to give you an example with the bass and the kick. So what we're going
to try and do is have that kick really stand out, and at the minute the
bass and the kick frequencies are in
the same space. By adding side chain
compression to the bass, every time the kick hits, the bass is going to duck
out of the way of the kick, which is going to make
the kick hit extra hard. But we're still going to
have that bass coming straight back up after the kick. So we're still going to have
that nice sound of the bass. For Lofi, I always put side-chain compression
on the bass to let the kick through. I know a lot of
people like to add the same side chain
compression to any instruments that are going to interfere with that kick. It depends how intense
you want that kick to be. Again, all comes down
to personal preference. For today I think I'm just
going to put it on the bass, but let's see how things sound. So on logic, we're
going to select our bass and we're going
to come to the mixer. We're going to select
a compressor here. Then up from the top you can see there's a
side chain button. We're going to side
chain this to our kick. So let's try and find
that in instruments. BBL kick, this is it. If I go into graph now
and I play the track. It already has put a bit of
compression on there for me, as you might better here [MUSIC] you can see that the signals ducking but only when the kick is hitting. Just like with our
regular compression, we can play with the threshold, ratio, and attack to
get the sound we want. I often say the attack down. [MUSIC] Essentially the
lower we make the threshold, the more intense that
compression is going to be, so let's lower the threshold [MUSIC] and add a rollout
pumping effect to the bass. I can make the compression really intense and then solo it so you can
really hear it. [MUSIC] See how much it ducks
when the kick comes in, but we're not going to
make it too intense. Again, if I add the ratio, it's going to get a
bit more intense. If I reduce the threshold, that's also going to
get more intense. You can just adjust
these three dials to your liking and that
should give your kick a load of extra oomph. Okay, so I'm pretty happy
with that there I think. I might tweak it ever
so slightly later, but just so you can hear. [MUSIC] That's what the bass is sounding like on its own now. So it's nicely ducking out
of the way of the kick. [MUSIC] That's what sounded
really good to me now. Any instrument that
we want to add a little bit of extra
Lofi in this too, again, we can just use
the isotope vinyl. So I can to my
guitar if I'd like. [inaudible] guitar. [MUSIC] Could add a
bit of warp to it. Turn down the dust maybe. A bit of mechanical
noise and maybe nicely. Just essentially just
play around with these dials and create
a lofi sounding guitar. You know what, I actually
quite like that. So I'm going to leave that on. Our song is more or
less there now guys. It sounded really really good. I'm just going to do a tiny
bit of light mastering, which I'm going to
show you through. But we're more or less there. Thanks again, guys. I'll
catch you in the next lesson.
12. Mastering: Hey, welcome back. So in this next lesson, we're going to talk a
little bit about mastering. Mastering is a huge topic
and it's one that's hard to get everything into in
a short 10 minute video. But essentially, what mastering is mixing our song as a whole, rather than mixing little bits here and there individually. So for example, rather than
like EQinq our guitar, mastering would be EQing
the track as a whole. essentially, mastering prepares
our tracks so that it's ready for like streaming,
it's loud enough. We may be compressing
it a little bit. We mucking around with
the EQ to maybe just accentuate some
frequencies we do like, damping those we don't. So essentially, just
mixing it as a whole. just another disclaimer, mastering is a very
personal thing. Everyone has slightly
different methods and ways of working. Again, a lot of it comes
down to personal preference. We're going to keep things
nice and simple today though. I'm not going to go into
any like crazy plug-ins. I'm just going to
do a little bit of light Mastering
just to make sure it's loud enough if
you want to upload it to any streaming platforms, and yet make sure that
it's sounding good. Now there's a couple of
little things we can do, that work particularly
with a lot of Lo-fi. So let's have a
look at that now. So to find your master
track on logic, you will come to your
mixer and it will be under this stereo out. Any effects we've put on here are going to affect
the track as a whole. Just for the sake
of transparency, I personally use
a program called Ozone 9 to do a lot
of my mastering. If you're really into
music production and mixing and
mastering and stuff, I really recommend you
look into this plugin because it makes
mastering so easy. A lot of it's done at
one-click and then you just make fine adjustments
after that. But I use that for a
lot of my mastering, but today I'm going to show
you how to do it a bit more manually because I know
that's a paid program. So the first thing I like
to do is just a bit of EQ. So similar to our mixing lesson, we can just EQ however we like. We're just increasing the
frequencies we want more of and decreasing the ones
we maybe don't like as much. So forget about tracker play. [BACKGROUND] [MUSIC] I felt
like just a bit more of this top end would be nice just to crispy
up a little bit. Just move our EQ curves around
the track to see the kind of frequencies we want to be
accentuating or decreasing. [MUSIC] What we can also do on the
master EQ to give it a real Lo-fi vibe is again use
high and low pass filters. Low-pass filters
use all the time in Lo-fi mastering and they
create a really Lo-fi vibes. [BACKGROUND] So it can be
quite aggressive with this. [MUSIC] We can just EQ all of that high-end out. Again, we're emulating an old vinyl or some kind
of school sound system. Almost makes a warm, cozy vibe, I think. [MUSIC] This is,
again, can emulate a more old-school style of Lo-fi but I've noticed a lot of modern Lo-fi tracks actually
don't do this too much, they have a much wider
frequency range to yeah, just feel a bit more
modern, a bit more crispy. [MUSIC] What I think
I'm going to do is just EQ off that
ultra high-end. I'm just going to try and say how much of
the low end I can take off too [MUSIC]. [BACKGROUND] Again, we can take a load at our if you want to really old school sound. I'm just adding in a high-pass
filter there just to like shave off those
ultra-low rumbly sounds. Yeah, I've just picked up the top end just a
little bit [MUSIC]. Again, I can turn this
on and off to see the difference I'm making
is only super subtle, but often think one
percent difference at a time makes a big change, so [inaudible] [MUSIC]
[BACKGROUND] Turn it back on. That's really pretty good to me. So next, I'm going
to add a compressor. This works just like we spoke
about in the mixing class, is just going to reduce the
dynamic range of our track, is going to make it
punch a little bit more. But I'm only going to do a
light bit of compression because I don't want it to be too in your face
and too intense. I want it to be quiet and
chilled out kind of track. [MUSIC] So again,
[BACKGROUND] if you want to keep things easy, we can just use threshold
ratio and attack. I'll take the attack
down a little bit low. I like it looser on the
master to loosen up a bit. Then essentially,
we're just going to play the threshold
and the ratio. [MUSIC] I'm literally just fiddling around with
these three dials just until it sounds good to me. I think I've got
a nice mix there. So this is before [MUSIC] [BACKGROUND]
and this is afterwards. So only really very
subtle change there, just tweaking it
ever so slightly to just dial in what kind
of sound we want. Another thing I often like
to do is use an exciter. An exciter is essentially
just going to add on some harmonic, high-end. Really simple. We're just
going to look at the exciter. We can pick what frequency range we want it to
start working at. Again, it works more
towards the top end. Then we can dial in how much of the exciter
we want it to work. [MUSIC]. Exciter at zero. You see it just really beefs up the top end and gives
it some sparkle. [MUSIC]. It really makes that
range shine through. Again, I'll turn off.
I'll turn it back on. It just really brings out the sparkle in that
range in that top end. [MUSIC] This is much more of
a step if you want a modern sounding Lofi track, but if you want the more
typical low-fidelity clunky sound, it's probably best
to leave this out. I'm going to leave it on for now because I'm actually
going to put on an iZotope vinyl just
to see how that sounds. Again, this is going to just
replicate a vinyl sound. It's going to give us
some nice vinyl crackle and also selecting from these years is essentially
going to cut the high-end out. But there's something about it I find that just glues
everything together. Again, I'll give
you some examples. [MUSIC] It's just the ton
of that high-end out, but again, we can control how much by effectively
changing the year. The older the track here, the more low fidelity
it's going to be. If I go around at 1930
because there's no low-end, no high-end, it's
just all in this mid. If you want to go really
in depth with this, you can actually trigger this
too with the automation. If you want all of the
tracks to suddenly come into this ultra low fidelity
and then pump back out, you can automate it, but I'm not going
to do that today. Even just switching there
between the 2000 and off, you can hear that there is more definition when
the vinyl is off. [MUSIC] Turn it off. Again, we get more of
that sparkly top end. But I quite like it on. Something about it I
just find helps glue it together [MUSIC] and I like
this on the 2000s as well. The others may be a little bit too cutting in for the song. Now, that crackling
is this Dust. I like it, but I just want to
turn it down a little bit. I'm going to reduce the gain. [MUSIC] Again, we can just
play around with these dials and get
the vibe that we like. That's just going to be
like the wear and grit. I like it about 14, that's cool. That Lofi button is a
bit too much for me. [LAUGHTER] We can also add
in some mechanical sound. [MUSIC] Again, it gives
a bit of atmosphere. Electrical sound too, which I like, sounds good. We can dial this warp
in a little bit. Again, just dialing
in the thing we like. I like it with or without. I think for today
I'm going to leave it on and you might want to head back into your
EQ or your exciter afterwards as well
because this is going to obviously change the EQ pattern. Maybe I should
explain this first. But again, just have a play around and see what
things you like. The last thing we're going
to do is use a limiter. A limiter is essentially
just going to ensure that our track
is loud enough. It's super, super easy to use. What a limiter is
going to do is, it's going to ensure
that our track is loud enough but that
it's not peaking. It's going to act
a little bit like a compressor and just make sure our song is loud enough and everything over that is
going to be squished down. We're also going to
pull up a level meter so we can see how
loud it's getting. We want to change it to peak an RMS and we want to
ensure that the RMS, that's the average volume, is hitting around 10 RMS. Head over to our
limiter. [MUSIC] I'm just going to turn out
the gain a little bit. Head back to our limiter. Turn it up a little more.
Just hang around 10 there. The limiter, we're just
adjusting the gain and we're making sure that the RMS
level is hitting minus 10. [MUSIC] Once we have the
limiter to that minus 10 dB, we're all good. We're done. That's our
track, written, produced, mixed, and mastered and it's
still sounding really good. But it's going to Spotify
or YouTube or SoundCloud. Massive congratulations to get into this point in the class. I really hope that
it's been useful. Let's wrap up the
last few other things in the last class.
I'll see you there.
13. Finished Track: When you passively meet, Batman appeared
utterly harmless. I go in here and I'm
going to write it, but I'm going to call it
a very horrible time. I like that idea.
14. Final Thoughts: Hey, massive congratulations
for finishing the class. Well done. I really
hope you enjoyed it and you took a load of good
information away from this. I really hope it set you off in your lo-fi songwriting journey or it's leveled up your
existing lo-fi music. Again, I just want to stress if there's anything that you make after watching this class
that you'd like to share, please, please feel free to send it into that class project. I listen and respond to
every single one sent in. I absolutely love hearing
what you guys get up to. Or even if you do want
me to go and check out your Band page or
your SoundCloud, please feel free just to
link anything like that in. It's been an absolute pleasure putting this class together. I really love lo-fi music. I listen to it all the time when I'm working or
just chilling out. It's been really fun for
me to dive into this and teach you about how to
make lo-fi music yourself. If you'd like to,
you can follow me on Skillshare and you'll
get notified every time I make a new class or if I post any discussions
or giveaways. Just before I go, if you enjoyed this class or it was
helpful for you at all, I would really,
really appreciate if you consider leaving a review. Those reviews honestly are an absolute game changer for people like me making
online courses. If you get just a minute or
two to leave a quick review, I would appreciate it so much, and thank you in advance if
you get time to do that. Thanks again, guys, really
appreciate you being here. I hope you have a great
rest of your day and I'll catch you very
soon. Thank you.
 Mike Barnes, Music Instructor