Transcripts
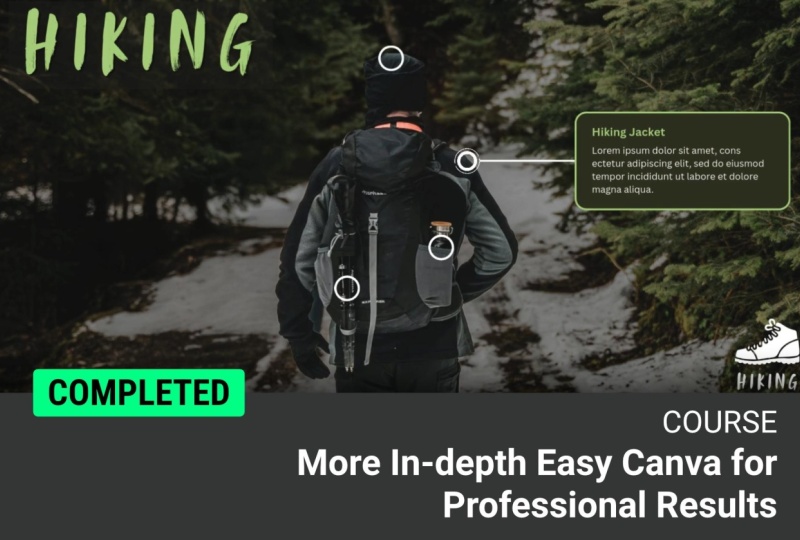
1. Welcome to this In-depth Canva for Professional Results Course!: Hi. My name is Tim Wilson. I'm a senior trainer
at Red Rocket Studio, and I would love to
help you to create beautiful and professional
looking work in Canva. Not only have I
trained for some of the world's leading
companies like Adobe, Disney, Times, Nissen. I've also worked
for many years as a lecturer at a university
teaching graphic design. I'll be showing you some
pro tips and tricks, as well as design principles to help you create
amazing looking artwork. These are some of the
real world examples we'll be working through
during this course. Social media documents. Fliers. Documents for screen documents
for professional printing, animated page documents, Animated posts,
multimedia projects. Infographics. As well as we'll create a
website and so much more. Start right now. I can't wait
to help you to loan Canva.
2. Create a Marketing PowerPoint Presentation - Intro: In this section,
we're going to create a PowerPoint presentation. So we'll make the whole
presentation in Canva. And we'll also be
using some branding, and I'll show you how to use the colors that you've
got in your branding to change the colors
throughout the whole of that document.
Let's get going.
3. Use a PPT Template & Adjust Clothing Colors: I'm going to go up to
the presentation button. Click on that, and
that will create me a presentation the right
size for PowerPoint. Now, I want to use
a particular style. So I'm going to go to
marketing presentations because the presentation we're creating is all about marketing. And down here, there's a lot of different marketing style
presentations that we can use. And I found a really
nice one called Marketing Plan over there,
which I'm going to click on. Now, that shows me all
these 12 pages in here, and I don't want all of them.
I just want some of them. I could just apply
all 12 pages and get a 12 page presentation
very quickly. But I'm going to
start with this one over here and just
build it as I go along. So I click on that,
and that puts in my first page down here. Now, firstly, I don't want
to be called marketing plan. I want to be called marketing
growth because this is a seminar about
marketing growth. So And because I've done that, obviously, I need
to move the picture over a little bit to there. And I'm going to go to this background weird
picture, I think. It's a hand on a skateboard. I don't know where that comes from. Let's get rid of that. No. And then I want to put in my main speaker
in here for this. I'm going to go along to the uploads and I'm going to
upload the file that I want. Now, I've included this image for you so that you can
try out the same thing. Obviously, this could be
somebody a stock picture or a photograph that
you've got from somewhere. So I'm going to go and bring her in and she comes in over there, and then all I have
to do is to click on her to get her to go
into our presentation, click on there and there she is. But I want her in there
instead of that picture. I'm going to drag her and
just drop her right in there, double click on
her, and move her across in that
little area there. Now, this is all looking okay at the moment,
except the color. She's wearing this
really purple top, and it really doesn't go with the rest of the style
of our presentation. So I'm going to change it. Obviously, you might
want to talk to the person first
before you go changing the color of their
clothes because they might not like that, but I'm going to change that. So I'm going to go up to Edit. And in Edit, we've got things
like the magic studio. We've got filters that
we've looked at so far, effects that we've done in the duo tones and some
apps down the bottom. But there's another area
here called adjust. And I'm going to click
on the adjust arrow. And this allows me to do
a number of adjustments. So for example, I've
got the white balance. I can make the image warmer. You can see how it's getting
more orange or cooler, it's going to get more blue. I do want to be a
little bit warmer, so I'm going to
warm that up a bit. You've got another tint over here and you can use
this if the image looks particularly purple or green to help you get
rid of that color. Over here, we've
got the lightness, so I can brighten it
up, darken it down. We've got the contrast. Sometimes reducing the contrasts particularly with portraits, makes them look a
little bit more pleasing if the
lights too harsh. Moving all the way down
here to our vibrant, vibrance and saturation,
these are all about making your colors really
go quite harsh. So you can see that
it's already bright. The skin tones are bright, the
purple of a top is bright, likewise, I can reduce that until I get to almost
a black and white. Saturation is the same thing, but it's a bit more extreme
the way that it works. Now this is the area that I
actually want to deal with. This allows me to change individual colors on
the image itself. I want to change the purple, so I'm going to click
on purple in there. It opens up hue saturation
and brightness. Now, hue is the color
on the color spectrum. Saturation is how saturated
or bright that color is. I showed you
saturation earlier and bright is about how light
or dark the color is. Because I've clicked on purples, it selected the purples and it allows me to just
change the purples. Look at that how I can
change the color of her clothes. In there. So I'm going to
go with something maybe a little bit more orange. But I might be thinking,
you know what? It's not bright enough,
so I could increase the saturation or decrease
the saturation in there. I'm looking to get
something which will work quite well with
this gold color. And then I could
lighten it up or darken it down depending
on what I wanted. Now I'm going to
lighten it up just a little bit and maybe change that color until I get
what I want with those. Now, let's say, for example, we've got the trees in
the background there. I don't like them. They're a bit
distracting, so I can click on the greens
for the trees, and exactly the same, I can go and either
adjust their colors, which I really don't want to do, or I can reduce
their saturation, maybe darken them down
a little bit, as well. If you make a total
mess in here, just click on reset adjustments. Otherwise, I'm done, and you can see the original over here compared to that one, you'd never know that her clothes weren't actually
that bright purple. Lastly, with this one, I don't like the
background, actually, so I'm going to click
on the Biji background remover over there, and that will just remove
the background for me. Sometimes it takes
a moment to do it. There we go, and we've got a really clear
background. In there. Have a little bit
of a go with that, bring in use some
sort of template, find one with
people in possibly, and then have a bit of a go, maybe use this image that I've
got, changing the colors, or if you want to bring on
anything else, once again, try changing the colors
so you can adjust individual colors
within the image. You just do that by going
to the picture, edit, and don't forget it's
in adjustments over there rather than in this
area down here. Try it out.
4. Set Up Your Branding: Now that I've finished
with my image, I'm going to go and get
some logos in here. I've gotten rid
of the little one that they had at the bottom, and I'm going to go over to brand over here and click
the little brand button. Now, this allows me to then load up my company brands,
colors, fonts. There's so many
things that you've got in here that
you can add to it. I'm going to start off
with a little logo, so I'm going to click
on add to brand, and I've got my own logo here, but you can find your
own logo if you've got one or just use any image
that you like for now. I'll open that up,
and it uploads it, and I've now got
my logo in there. I'm going to go back over there, save the changes and
go to my brand colors. I'm going to add my
brand colors in there. I'm going to click
on the little plus, and if I know the hex colors, I can type that in there
or I can actually choose the colors from this
little area over here. Now, for speed, I'm
just going to use this little area here rather
than having to type them in. I'll just add another
one in there as well. So this one is going to be
more of that. Goldish color. And once again, and
add in another one. I'm going to have
a gray in there. I'll click on save, and now I've got my brand
colors ready in there as well. Let's just go back again. Fonts, I can add my
brand font in there, and we've got all
sorts of things. Titles, subtitles, headings to the body,
to quotes, captions. All you have to
do is to click on the little Edit button there. Go in and find the
font that you want, so you can either choose it for there or you can
just type it in. So I use Helvetica new
usually or Helvetica. Let's go with Helvetica now. And I think for the title, I want that to be bold. So I'll click Okay.
And then I might do just a heading
over here as well. So once again, I'm going
to go and choose the font. Helvetica. This one is going to be smaller
to Rod than 32. I'm going to go to 28, and it's not going to be bold in there. And finally, I will
do my body text, click over there into body, choose the font, and
that'll be 12 points. Click on Save and back
again, and you're done. Have a go with that, bring in some branded items or
items for your branding.
5. Add Branding & Copy Formatting: I want to add in my logo, so I'm just going to
click on it to bring it in and move it into
the right position. I'll scale that down
because it's going to be quite smalleish over there. Do watch out with these pages that you
don't have anything that you don't want to appear
on your final presentation. I've just noticed
this is August 2040. I don't want the date in there, so I'm going to remove
that completely. And then if I want some
more text in here, what I can do is I can
go along to my fonts, and I can say I want a title. So I'll click on Title, and this is going to be
um never a dull moment. And I'm going to move that into the right position over there. Now, this bit of text, I'm going to select it and have a look at
what the typeface is, which is public sands. I'm going to go and change
that now to Helvetica as well. So it all fits in quite well. I do need to move this
over a little bit, and I'm using the keyboard. Arrows on the
keyboard to move it. Make sure it's selected and
then just move it along. You'll find that if you just use the right arrow or the left
arrow for that matter, it moves in small increments. If you hold down shift, it will do it in larger
increments for you as well. I'll just get that into the right position
and once again, that's going to go just
underneath it over there. Now, I'm happy with that. I want to add another page. I go back to design up here. And it shows me
my recently used. I click on recently used. All my pages are there.
I'm going to go down. I'm going to add in
the budget in there. We just drag that in. Now, if I drag it in here, it'll replace that one. If I drag it onto the plus, it makes a new page
and adds that in. I'm not going to fill in all
the details at the moment, but I will get rid of their branding over there
and bring in my own. Once again, back to brand and
I will just find my logo. Click on that. And
bring that in. You'll find that some things
are very editable, as well. This is a row chart.
I'm going to go down I really like
doughnut chart, so I'm going to choose
doughnut chart, and it will just
change it in there. Let's have numbers
instead of percentages. I can resize it. Like so. So feel free to reuse any of
the items that they've done, and you can edit
everything and watch for things which don't make sense. Now, let's go and add in one more page back
to design over here and I'm going to go and find another page up
there, the branding. Now, I've clicked on
that and what it's done is just replace
my last page. So do be careful. I will just use
Command Z to undo it. Take this and drop it onto my plus to add my new
page in that way. I don't really like
the salt and pepper, so I'm going to get rid of
that. I don't want this. I don't want the line in there, and I don't want
their website either, as well as their brands.
I can remove that. So as you can see,
I'm just getting rid of the things
that I don't need, but I do want my own
branding in there, so I'm going to click on
that to bring that in. I'm going to go to the
corner and just edit it down so I only get the
little icon over there. We'll just place
that in the corner. No way, have a bit of a go, add in a few more pages and
just play with those pages. Don't forget when you've
got your text in there, check because this one here, I've done this bit of text here. I've used Helvetica. I changed it from the
default to Helvetica. If I write click, I
can copy that style, and then I can go into these
pages here and I can just paste that style onto
the next bit of text. So where has it gone?
Well, it is there still. If I select it like so, you can see it's just
brought in the style, and that style also included the fact that it
was black and quite large. So I can then just go and
get more colors as well. I think I will just find another quick color over
there, pull that out. That radius too big. We just scale it
down a little bit.
6. Brand Colors: Now I want to bring
in a photo in here and I'm going to
go to the elements, and I want to bring in a photo. I'm going to go down to
the photos over here. Let's just say see all and I'm looking for something
which will describe branding. Now, I could try
searching the photos and seeing what branding brings up. Click on that, go to BG remover and you can get rid
of your background really, really fast,
especially on things like this where you've got interesting backgrounds
to work with. I just want to go back to the branding now and have
a look at something else. But to do that, I'm actually
going to close this down. I'm just going to do a new I don't want to
ruin my last one. I want to go to a new
presentation in there, and I'll just pick a totally different presentation
from here. So I'm just looking
for something with some interesting colors
in them over there. So I'm going to bring
that one in like so. So if I go to my branding, how do these color
palettes work? Because if you hover over
them, it just says shuffle. Well, what you do
with a color palette is if you click on
the color palette, it will replace the colors in your presentation with
your brand colors. Then you can go, Well, I
don't really like that. You just click shuffle
until shuffle those colors around and give you
a variation on them. You can just keep shuffling until you get the look that
you're actually after. Now, it helps when
you have more colors. I've only got three
colors in there, so nothing's really
going to be white, but you can see then
how that works.
7. Presentation mode & PowerPoint File: Let's add in another page. Once again, I'm going
to go to Design, and I'm going to use the marketing team page and
just click to add it in. It says, Do you want to add
the template as a new page? Yep, I want to add that page in. But look what's happened
because I was on this one here, which added the new
one between those two. So we can just take a
page and drag it over the other one if you need
to reorder your pages. Now, of course, I'm going to do the same thing that I did
before, but very quickly, I'm going to right click
on that, copy the style, go to marketing team, and paste the style on there. Get rid of the logos
that they've put in, bring in my own branding. Oh, but on the large side, let's just make that
a whole lot smaller. And all I'm after here is the little icon on
the left hand side. So white on white doesn't
really matter for that. And then, of course, I'd replace these pictures with
pictures from my team. I'm not going to do that. I'm just going to go to
them individually and use the background remover to get rid of the
backgrounds from them. So hopefully they should
look a bit better. This last one, I think we'll get rid of the
background over there, so she's just cut
out up the top. Now that you've got
your presentation done, we want to save it
because we want to Karen working with
it in PowerPoint. But you don't have to use PowerPoint if
you don't want to. You can present
directly from Canva. So if you do, you can
actually go along. I'll just start with
marketing growth. Click the little present
button at the top, and I'm going to be
presenting full screen, and I'm just going
to click on present, and that'll take over my screen here and I can then just
click through the slides. One to time, backwards
and forwards, like that. Press Escape to get out of it. If you want to take
it to PowerPoint, click the Share button, go to download, and
one of the options in here is a PPTX
PowerPoint presentation. A I've got to do
is click on that, download that to
where I wanted to go. I'm just going to save this now. So I'll put onto my desktop. Click on Save, replace the
one that I had there before. And now I can go
along to my desktop, and we'll double click on that and open it up in PowerPoint. So if I can find which
one it was, There it is. Let's double click that. It's
opening in PowerPoint now. Let's get rid of some of
these little buttons. And you can see in PowerPoint,
there's on my pages. Each one I can click
on and adjust as well. Have a go with that.
8. Cool Reveal Animation - Intro: This is such a cool effect, and once you've seen it, you'll start to see it
all over the place, and it's reasonably
easy to do, as well. I hope you'll enjoy
this reveal animation.
9. Set up Images & Graphic Shapes: Let's start this animation. Now, the one I'm going to
show you is so popular. You'll see it all over the show. But you don't really notice it until you've
actually made it yourself. And then you go, Oh,
yes, seen that before. But it is so cool. I'm going to go to
social media again, and I'm going to go
across to YouTube. And what I want is
a YouTube video. So we'll just take this
1920 by 1080 in there. Now, I don't want any
of these presets. I want to go to the elements, and I'm going to set my background picture
to start off with. So I'm going to
search the images, so I'm just going to go
down and find photos. And I'm going to
search for beaches. What I'm looking for is
an image from the top. This thing is
absolutely perfect. I'm going to pull that out. If, by the way, you want
to use a video instead, if you've got a movable one like that, that's absolutely fine. Just go along to your videos and search for a video from the top. It's absolutely fine.
Either one will do. I'm going to bring
in my aeroplane. I'm going to go and
find an aeroplane, and I'm going to search not
in the photos, actually, because I have
searched the photos, and I couldn't find
a good one in there, but I'm going to be
searching in the graphics. If I go to graphics over there and I'll put in
airplane or plane, we've got all of these sort of very cartoon airplanes in here. I want something more realistic. So let's have realistic plane. And that's the sort of
thing that I'm after, something along that line there. I'm just going to pop that in, and I want the
plane to go across from left through
to right to reveal. So I'm going to pull that
around to 90 degrees. You can see it says I'm
exactly on 90 degrees there, and I'm going to make
the plane a bit bigger. And I want those wings
to touch the edge of the of the top and the bottom. So what'll happen, excuse me, is the plane will fly across revealing the beach scene
and some text underneath. Now, I'm going to
hide everything else, so there's not
actually going to be anything over here before
the plane comes in. I'm going to do that with
some basic simple shape. Now, you can do this
any color you like. I'm going to go and
find my shapes, and I'm going to start off with a rectangle in here and I'm going to make
it actually quite big. You can see I've gone
right the way off the edge over there, and especially off
the front, like that. I'm going to pull this over
to the plane like that. Now, I can't quite get
these little bits in there, so I'll just take
another shape in there, rotate that around, put that over the wing to cover
up that little section. You don't have to be
perfectly accurate about this because it's actually
going to go under the plane. I'm going to hold down the
alt or the option key. Let's try that
again, select this, hold down the t to
the option key, make a copy of that,
and rotate that one around to hide the
sittle section in there. And these bits here, I then can change the color to whatever I want
my initial color to be. Now I want something summary. I'm going to select
all three of them. So I've selected one, hold down the Shift key and select
the three of them, click up here and find a
nice sort of summer color. I kind of quite like that sand color that
we've got there. So I'm going to
group them together, and you can see with
all three selected, I can click on group like that. And I want to get my
plane above that, so I'm going to go
over to the top, click position layers, and drag my plane above that layer there. Have a go, get to this stage, and then I'll show you
where we can go from there.
10. Create the Animation: I also want to group this
background with the plane. I'm going to select
them both and then once again choose
group over there. When I move one, the other will move
at the same time. The plane is actually
going to come through. We're going to have
some text here. The planes going to
whiz through like that, revealing the background
with the text. I'm going to move my
plane all the way over out to there so
it's hidden out the way. Now, we'll come in and we'll put some text
in a little while. But for the moment,
I'm going to take this page here and I'm going to click on those three
little dots and I'm just going to say
duplicate the page. I've now got two of those pages. On this second page, I'm going to move
the airplane to the other side right
out. To there. So we've got one on that
page, that on that side. Here's the magic
bit. You go between the two of them between
those two pages. You click on the add transition, and the transition
that we want is this one called match and
move. I'll click on that. I'm going to take the duration right up to 2.5
seconds in there, and let's just play that
over there, so we have that. Then the plane reveals
the background. And we'll have some
more text in there. Do try that out.
Remember, you start off with just this
one over here. The plane must cover
the background. You make a duplicate
of that page, but then move the plane right over to the
right hand side, and then you click between the
two of them over there and you choose match and move and take your
duration right way down. Otherwise, it's
going to be really, really fast, the plane. I'm going for 2.5
seconds in there. Then test it out and make
sure that it works fine. O.
11. Add Text & Download: I want to add some text in here. I'm going to go to
my text options. I'm going to add a text box, and I'm going to put in my
text in there, bare feet. And we'll make
that a bit bigger. All right, so I'll move
it over into the middle. Now, I don't like this typeface, so I'm going to go up to the top and I want some sort
of handwritten font. So I've just gone over to
these little ones in here. You can see we've got
some different styles, and I'm going to go to
the handwritten style and find something which
looks interesting. Over there. That's okay, but I want something
a little bit more wild like that
apricots in there. That is perfect. We're going to change the color of the text, and although we've
got this color from the document, if I
choose that color, you'll never see it, but I
still want to use that color, so I can actually click
again and then say, Well, let's make that just a little
bit lighter like that. So it almost looks
like it's in the sand. I'm going to just
move that right into the middle over there. Once I've got that there,
I want this to animate in. And I'm going to right
click on the Barefeet text, and I'm going to show my timing. So over here, I can
see the timing. I don't want to start
right at the beginning. I want to sort of a blank bit first and then the
bare feet to come in. So I can then go in
here up to animate, make sure I've just
selected that again. I'll get there. Apologies. I've just clicked
on the wrong thing. Right, let me make sure that
I've clicked on bare feet. I'm going to go to
animate and over here, I can choose which
bits to animate. So am I getting it to rise
in or is it going to be panning in from the
left, right, up or down? I kind of quite like
the blur where it just blurs in from the sand, almost like an old footprint. And we can then obviously choose different speeds
on that as well. I'd like it to be
quite slow like that. So let's play this now
from the beginning. So that doesn't come in. Then the bare feet comes in, and then we go
across into there. Now, you can see my bare
feet are too far over, so I'm going to
just take it back. So as the plane goes, it's vanishing in there. And then over here on this page, I want to have the
text over the top. So same again, click on the box. I'm going to have
summer in there, select it, make it a bit bigger. And once again, choose a typeface that will work
and looks very summer like. Once again, I could use one
of these handwritten ones, but I think it might be better if I just got something more normal or even maybe
more heavy duty like that. Over there. It's a bit on large side, so we will just take
that down a bit like so. That's very, very heavy. So I'm going to change
the color to white, I think, so we get something
like that in there. Right. I'm happy with
that. Let's try this out. Probably still needs a
little bit of tweaking, but you'll see as it goes. So we have the bare
feet coming in. And then summer
happens, and summer happens right on
top of everything. We want summer to be
underneath the plane. We also want summer to not happen until
we're on this page here. So I'm going to drag it over. Like that. So it's
going to start there. But you can see, it's still above the plane, if
I move that over. So what we have to do
is go to position, drag Summer
underneath the plane, and this will all
work perfectly now. Let's go back to the beginning. Barefeet comes in, play goes across revealing
Summer in there. You could go to Summer
and you could then put in some animations on that
where it's panning in, fading in, wiping whatever
the case might be. I'll just use a little
blur on that one, too. If you'd like, on the beginning, put in some other graphics. So if, for example, I went to elements in here, I could try something
like footprints. No, I'm in the wrong one. Let's make sure that I'm looking for footprints within graphics. So in graphics here, footprints. And there's quite a few of them. I want something which
is barefoot like that. So I'll just click
on there, maybe move it to the side. In there. Remember with these graphics, you can change the color
so I can go in there and use a different color for
my footprints, as well. Once again, animate them
in, animate them out, and just make sure that your
timing works so they don't appear on top of the
plane like mine did they. All you have to do
is to go back again, click on that and just check that everything is
stopping where it should. I'm going to stop
mine over there. Once you've done
that, go to Share. We're going to download
this as an MP four file. I've got two pages in there. I'm going to click Download
and wait while it downloads. All I need to do
is to save that, and let's have a
little look at that. So here it is. Double
click and play. Looks really good.
And you'll see this effect used
all over the show.
12. Add AI Music and Sound Effect: So what is this missing? Well, probably a bit of sound. Let's go in and I'm going
to go over to my elements, and I can go and
find some music. I've just typed in
happy music over there, and let's see what we get. Now, there's all sorts
of other options that we can choose from in here. I'm going to go with car music. Maybe car music might
be interesting. And I'm going to go
to the audio over here and get some calming music. Now, you can just spend ages looking for
interesting music in there. Or you could actually try, instead of doing this, having
a go with the AI music. If you click on AI Music, you can go and design
your own music in here. So I'm going to try
happy and epic. I want to use those two
styles and moods in there. Once again, this is
very hit and miss, and you can try all sorts
of options in here. I want to be reasonably fast. Um, Bright, stable, buried. I'll put that in the middle. And then down here, you put in the
length of your clip. Now, my clip is
actually together. It's actually 7.4
seconds over there. So I'm going to just
click on Compose. And just sit and wait and
it will do it for you. That's still doing
it. There we go. Let's have a listen to that. As simple as that, and you can just experiment with
different bits of music. But you could also decide
on some sound effect. So if I went to
elements over here, let me go back to
my audio in there, and I'm going to
search for waves. Sea waves. I've got
gentle waves crashing. I'm going to try that
one. So I've clicked it. I'm putting that in over here, and once again, we'll play it. Now, those waves
are probably going to be too loud, but
we'll find out. Oh, that is loud. It sounds like toilet
flushing, not waves. So what I'm going to do is I'm going to right
click on the waves, and I'm going to go
up to the volume and just reduce the volume
of that a little bit. And also, while I'm there, Oops. Sorry, wrong one. If I right click, I've
got another one in here, which is to fade. Click on fade and I can
then fade things in. I'm going to just fade
it in over maybe 1 second and fade it out
over half a second. You see, we can go to adjust
and beat sync in there, too. We'll leave it like that. Let's try this out. You can keep going with this. I'm going to go back
to my fade and fade it in a little bit more. And I think I'll change
the volume again, as well. So over to volume. Take that right down so you can barely hear it in the
background. One last time. A very subtle wave
in the background. Good to share and
download it once again. Try it out. But
13. Advanced Animation - Intro: Now we get to the more
advanced animation. And in this particular project, we're going to have products which are going to come down, and they're going to make a noise when they
hit the ground. And then we'll get
some text coming in. And well, as you can see from the side, it
looks really cool. You don't have to use hats. You can use anything
you want, but enjoy it.
14. Make a Groovy Background: For this more
advanced animation, we're going to once again go to social media and we're
going to be using Tik Tok. I'm going to go to TikTok video. Of course, if you want
to do the same thing for Instagram or for YouTube, the process is the same. I'm going to first of all, find a background image I want
something interesting. I'm going to go to
my elements in here and I have found this
little graphic over here, which really looked quite wild. To find these, just search
for different things in here. For example, I would
search for gradients, if I go along to graphics, you'll see we've got all kinds of weird and wonderful graphics. There. And just find what
it is that you want. Some of them are
movable as well. So, for example, if I
take this one over here, this is a still image, whereas this one down here, has got some animation
built into it. Anyway, find a few items for your background.
I'm using this one. I'm also going to go with
a more simple gradient, and I just want something
in the blues range, so I'm going to drag
that one in as well. This one is going to
be my background, which I'm going to
place up there, and then I want the other
one in front of this. Now I'm going to click position, go to layers and just
move that above it, and that's going to
go in the corner. Maybe even larger still. Let's make it a bit bigger. We want this to be
kind of groovy, so that's probably a
little bit too big. You can use your Zoom
here to zoom in and out to get to the bits. Right, I'm going to go
with something like that. Anyway, get yourself an
interesting background going on. As I said, I just
searched for gradients, and I went to graphics and found all of these ingradients.
15. Add the Hats: I'm going to bring in the hats that I want to use in here. So once again, I'm
just going to type in hat and see what I can get. Now, there's tons and
tons of different hats. I went for a cap in the end because there are a few
variations on the colors, but you can use whatever
you want in here. If you can't see
them in graphics, try the photos as well. If we go to photos,
you'll see we've got a whole bunch of
different photos. This is the one
that I want to use, so I'm going to click on
that to bring it across. And you'll see here, we've
got some recommendations. If I click C A, it shows me
variations on that color. And that's because
they've been created in that particular color. Now, what I want to do is I want to have three
of these hats. They're going to come
down one at a time. And the hats so that they
look like they're actually in the right position will have
a shadow underneath them. But let me get my
hats first of all. So I'm going to go with red. I think we'll have an orange in there and a yellow
one at the top. You could use any
colors you like. So very subtle differences in the colors there,
to be honest. And I'm just going
to move them over so they're all lined up. Select them all and move
them across with my arrows. Get some hats going on or objects, anything
you like in there.
16. Add Shadows & Text: I like to put some shadows
underneath my caps. So what I'm going
to do is I'm going to search for shadows. And you can say
I've done it before because it's in the recent
so I'll click on Shadows, and I'm going to
go to the graphics rather than the photos. Now, in the graphics, let's see all of these. We can have a look
and we can find an interesting shadow
that might work. I'm looking for this type
of shadow over here. I'm going to try this one. Click on there.
I'm going to move that down and see
if that will work. I think that will be okay. But of course, it's above
the hat at the moment. So I'm going to go
to position and just move it below
the hat over there. We just get a subtle
shadow underneath the hat. Let me make a copy of that. Now I want to select it and every time I try and select it, I just end up selecting the hat. So I go to position again, and I can then select it there. Hold down the Alt or the option key and drag a
copy of that up like so. Now, this one should
be above the red one, but underneath the orange one. Once again, I'll do that. This time, I'll use
a different method. I'll click on that
little duplicate button, and that duplicates it, and I'll just move that one
up a little bit to there. And maybe move it
down under the hat. Don't forget, you can always
go along to these shadows. Let's just get to those shadows again, click on a picture, go to position, choose it, and we can actually just
scale them around if we need. I think that one
might have to go up, be scaled in a little bit like that. Same
with this one here. Maybe it should be
scaled in a fraction. If you make a mess like
I've done on that one, you can see I've pulled
it in on the sides there, so it doesn't really look like a shadow at the moment
because it's cut off. Can you see those
little cut off points there? Doesn't matter. Just once again go
to your position, delete it, and you can make a copy again from
one of the existing ones. Let's just move
that one up over to there and underneath the hat. We're also going to
put some text on here. So I'm going to go
to my text tool, and I want the word yellow, orange and red to be written
on the front of the hats. So I could either use my added text box
and find the font, or I can go and find
something in here which looks like it
might work quite well. And I quite like
this text over here. So I'm going to click on that you can see
it's brought it in. This particular text has
got a shadow on it already, which is really cool because
that's kind of what I want. So let me select the text. I'll get rid of the word
shadow, go to the word soft, and I'll change
that to, um, yell. Yellow. I'm going to make
it a little bit bigger, and I think something like that, maybe it'll have to be
rotated a little bit as well. I can then move
that onto the hat. I suppose it really should
be yellow, shouldn't it? Let's go over there and pick a nice bright yellow for that. Now, that one's absolutely fine, but I then want an orange one. I'll do exactly what we
did with the shadows. Hold down the alter the option key or click on the
duplicate button, and I'm going to move
that one down this will be orange Aura. This one's not quite
in the right position because it should be underneath
the cap of the other one, so we go to position, you know, the skull with these and just drag it down
underneath that one, and we'll move that around. It's the right position as well. If you have problems moving
things, use your Zoom tool. Zoom right in. It's a lot easier to do when
you're at this stage. And the last one's going
to be the red one, so I'm just going to hold down
the alter the option key, make a copy of that,
change that to red. Make it red. You'll notice I forgot to make the
orange one orange. And let's go to this
one over here, orange. Oops. And we'll make
that one orange. It's really nice bright
orange for that. Red is above it, so
I'll go to my position and move red underneath
the red cap. Now, lastly, with these hats, I want to move them
around and animate them, so I need to make
sure that the shadow, the hat, and the text are
all grouped together. And to do that, I'm going to, of course, go into my position, go to my layers, and
I'm going to select the cap over there, it's shadow. Let's just put the red
text just above it. So it's shadow, the
cap, and the red. I'm holding down the Shift
key on the keyboard. I'll just say group and it
groups it together in one. Let's do this one shadow cap, and orange and group
that together, make sure you got the
right ones, shadow, cap, and yell and group that
one together as well. We've got those in
nice little groups now so I can click
on one of them, move it around, the shadow moves and the cap moves all
at the same time. Have a bit of a
go whether you've used caps or something else, put a bit of text on, maybe
put a shadow underneath it, make some copies of
those, and just group them together so you can move them all around
at the same time. Don't group all three of them. We want to animate
them separately.
17. Animate the Hats: I'm going to just hide this area here by
clicking on the little X. And what I want to do is
I now want to animate. So I need a little
timeline in here. At the moment, that's just
show me a single page. I know there's movement
on the orange thing, but that's not the
animation that we're after. So we're going to
click on duration. Now, we're going to make
a copy of this page, and I'm just going
to right click and say duplicate page. So
we've got two of them. And I want to show
you something before we actually get started
with the animation. You see, if you take
these first page objects, and I'm going to
move this object up and I'm going to move it. So it's almost touching. Let's do that there, so we'll get that just
at the top there. That object still
exists in this page. Let me do it again. Let me do it again with the orange one. If the orange one,
if I move that, but I moved it further
up and let go, it doesn't exist in
this page anymore. The red one, once again, if I move that and I keep
just a little bit of that in there so you
can barely see it, it exists in this page. What happens is when we go over here and
add the transition, and I'll just use
match move over there, you can see one of
them just vanishes. It just disappears, where
two of them animate up. So if you make sure
that your objects are still slightly
touching the page, they will animate into the page. This can be a little bit annoying when you're
trying to get them right to the very
very edge in there, and once again, this tricks
around that as well. But for the moment,
let's just put them just on the edge
of the page in there. I'm going to go back again. So I'm going to just delete this page and go
back to this one, and I'm going to
duplicate the page again. So we'll duplicate the page. I'm going to start
on my first page, and I'm going to move these up. So I want them all
to kind of come in a little bit over here. So starting with this one,
I'm going to move that up. Once again, I'm just
keeping it inside there. Same with this one inside there, and with that one, just
inside there as well. And you then right click
between the two of them. Sorry, you click
between the turf them, you don't right, click
between the two of them. Click on the transitions,
use match and move, and you'll find now
that when you play it, they will just animate
down into position. You can go back there
and you can change how long you want
that animation to be. So 1 second, so I can get them to come
in slowly like that. But the thing is, I want them
to come in one at a time. So I don't want to do
all of them in there. I just want to have
one coming down. So on my second page, let's just duplicate
the page again. I'm going to say on
my second page here, I actually want to have the yellow still at the top there. Make sure it's just up there and the orange still at the top. When we play this now, it'll only be the red
one that comes down. But then on the third page here, I'm just going to
duplicate the page again, on the third page,
we're going to have the yellow one being
just outside there. So what we'll get from
the beginning is red one, orange one, yellow one
coming in one at a time. And then I'm going to
duplicate this again. And this one here,
I'm going to move those hats down so they're
kind of in more of a pile. Give myself room for
some text to come in. Let's check that last bit out. They come in and they
just move over like that. I want this move to
be a lot slower, so I'm going to slow
that down like so. Let's look at this from the
beginning. Play the button. First hat, second
hat, third hat, and they all settle down onto
each other in try that out. Takes a bit of getting used to which ones you need
to have where. And if you need to rewatch this, by all means, do so. But the first page,
let's try that again. The first page, all
the hats at the top, second the second page, the red one is there, the
other two at the top. The third page, those two are there and
that's at the top. The fourth page, they all here, and the fifth page, they're going to settle onto each other. And you can do them as close together as far
apart as you like. Assume the hats, if
there are anything else, find another way to move them. And then make sure that
between all of these pages, you have a transision
If you've done one, like I did, it just keeps that transition going
all the way through. And it's a match and move, and you can make them as
fast or as slow as you want. So this time, I'll have a
fast transition for the first one, like so.
18. Add a Graphic Explosion: I want to have a little
cartoon explosion as each hat hits the ground. So what I'm going to do is I'm going to go
to my elements, and I'm going to go along and
find and I'm going to just type in Bang in there. I'm going to go to the graphics, so I'm going to go and find a little explosion which
looks like that. That looks perfect for me. I'll click on that
and bring it in. So this one here, and I'm just going to Make
it a little bit bigger. That one is going to be
my, my first hat in there. Now, I need to get
a position and I need to move it
underneath my red hat, so it's going to come in there. I now want to go in here. Let's just get rid
of those bits. I want to go into my timeline. I'm going to zoom
into my timeline. I'm going to click on that
little Zoom button there. Expand my timeline, and I'm seeing that little shape
there in the timeline. Now, if you can't see it, make sure that you go
in here and you say, show timing, and that'll
show the timing. So when my hat hits the ground, so it comes in like that, hits the ground, and that's
when I want to bring in that little explosion. Let me show my timing again. It says hi timing, show timing, and I'll just click on
the little explosion. I want to appear then, so I'm going to move it
along just a little bit, it starts just at
that point there. And you'll see that
it actually comes in and there's my
explosion there. It's not going to be for long, so I'm going to go to the end. I'm just going to pull that
back a little bit, like so. Let's have a look at
the timing of this. So if I go back
here and play it, so you can see just a little explosion pops in over there. Now, I'm going to copy that and go over here and paste
it in for the next hat. Now, I used Command C
because I'm on a Mc, but you can use
Control C on a PC, move to where you
want and copy it. Move to where you want to
go and then command V to paste or Control V on
PC to paste it in. The same over here, I'm
going to get it to start over there and end over there. But I want that to
actually be up here. I want to be underneath
the orange hat. So I'm going to have to
get my position and move that under the orange
hat over there. Let's do the same
thing over here. So we copy that, move the playback head to where
we want it to be paste, and that's going to start
over there, I think. This one's going to come
in, so I'm going to shorten the end so it's
not there all the time. Once again, move it to
the right position. And move it underneath
my yellow hat. Let's take the timeline
down a little bit. Go back to the beginning
and try it out. So hat comes in, explosion. Next hat with an explosion, third hat with an explosion. I think what I'd like to do with those hats is actually have the explosion
starting slightly later. So I'll just move them along
a little bit over there, that one along, and
this one along. You can move things
along or you can start or you can move the
start or the end as well. Once again, I'm going
to try that out. Perfect. And then it just
lands where I want it to end. Have a bit of a go with that and bring in some explosions, and then we'll bring some
sound into this, as well.
19. Find a Bang: I want to add a sound. Now, as each hat comes down, I want to put a thud
or an explosive sound, so I'm going to go to elements. I'm going to do audio, and I'm going to look
for an explosion. So let's try boom over here. Hm. Can't really see
anything in the boom area. Let's try bomb explosion. And
I'm gonna listen to that. I have unplugged my microphone
so you're hearing me through my machine so
you can hear the sound. Hmm. There's all sorts of different
explosions in there. I'm gonna try bang.
Dirt explosion. That I like. So what I'm going to do is to just double
click on dirt explosion, and it brings it
straight in over there, and we'll move these around to get the explosion
working properly. Find yourself a bang.
20. Work With the Sounds: Let's move our sound around. Now, your sound comes in
wherever your playback head was, and because my playback
head was right over here, that's where
the sound came in. But I'm going to move it about
because I wanted to come in when this first
hat hits the ground, so it hits the
ground over there. And that's when I want
my sound to start. So I'm going to
just move the sound in right up to that area, and I'm going to zoom in on
my timeline so I can work a little bit cleaner
and easier in here. Let's move that right
the way over to there, I'm just going to try it
out and see what happens. Ah, that's perfect. Now, let's come down. I'm going to shorten
it so it kind of stops when the
next one comes in. I'm going to copy that, so control or command C to copy it. Move over here to the next one. Control or command
V to paste it in. Let's shorten that one
and one more over here, put the playback head where
I want it to come in. And paste that in
again over there. Now, I'm going to just check the timing on these because I'm
going to go in here, make sure they're
all on half seconds because I wanted to
come in really quickly. Let's play this
from the beginning. Play In fact, I'm going to because the sound
disappears very quickly. I'm going to go
along to the sound, click on the three little dots, and just fade that out. So I'm going to just
fade it out over there. So let's see how that
sounds for that first one. There we go. That's better.
It doesn't cut off then. And once again, this
one, I'm going to fade. And the last one
I'm going to fade. Click the three dots. It's
fade and fade that out. Right. I think that's
going to work. Let's test that again. Perfect. Have a bit of a go.
21. Add Text & Hide Hats: Bring in the text. I've
gone to the beginning, and at the beginning, I'm going to I'm going
to say hat sale. And at the end, I want to say come in and
see our new range. So very beginning,
go over to text. I'm actually going to use
this soft shadow text that I used on the hat for the same text to keep
the style going. And I'm going to
select that text, and this will be sale. And of course, I want
that to be in white. You can have any color
you like. Once again, that can be white, as well. And we want that to
be a lot bigger. Over here. It's got
hat sail in there. And you can see, because
we've got that transition, the hat sail just fades
out slowly in there. But if you wanted to
disappear very quickly, you could pull that in so
you can get your hats to just there it is,
and there it goes. I'm going to pull it
across so it does actually just fade out into
my moving hat. And then I'm going to copy that. So command C to copy, control set to copy,
go to the end. Pasted in over there, and at the very end over here, I want this to just appear. We're going to pull
this out so we've got some more time there,
pull this one out. And I'm going to just
change that text to say, see our new range. We don't want the
word sail in there, so let's get rid of that. And I'll just move that into
the right position as well. So, this one will just once
the hats have settled, that'll just pop straight in. I'm gonna move it
down, so it's right in the middle over there.
Let's try this out. You won't hear my sound because I'm plugged into the
other microphone, but I can at least
see what's going on. And then the last bit of
text pops in over there. Now, I've tested mine out, and I've realized
that we've still got these little hats at
the top over here. What can we do about those? Well, what I'm going
to do is I'm going to change the transparency of them. So on this first page here, I'm going to go to my position, and I'm going to select
the hats and adjust the transparency down
to zero for all three of Then I'm going to go to
the second page over here, but not do the red one, but I'm going to adjust the transparency
on the other two, which are still at the top. Like so. Then onto my third
page over here, once again, this one is just the yellow one, and I'll change the
transparency of that. So now we won't see any of those hats, and we
can just play that. They come in, and they're actually coming
from 0% opacity in. Once again, I will go in and just download this so we can have a look
at the final result. I'll just move that into the
middle and we'll play it. That's it. It's all done.
Have fun with that. Try it with different
subjects, as well. You don't have to have
hats, do whatever you want, but check out those timelines.
22. Create an Infographic - Intro: I love infographics, and this one is one
of my favorite ones. We're going to get
the infographic bars to come through the trees, so we'll have the trees
as different objects. We're going to animate
the background, so you'll see as you go from the trees into the next slide, for one for better
word, the background will slightly animate as well. We're going to have
the charts coming in, different types of charts, and we're going to have text coming in at the end, as well. And we're going to get the
AI to write the text for us. And this is going to make a really cool infographic video.
23. Add in the Assets: For this project, I've already started because you know how to do what I'm
about to show you. So what I've done, and I'm
going to go to my layers here is I've set up
various items in here. So I've got a background, and it's just this
background over here. It's a gradient, and it's
going from green into yellow. There we are. You can
see it over there. So we'll just put a bit
more yellow in there. I've got this shape here, which is that one. Once again, it just came from the shapes. Then
I've got some trees. I found some trees, some
different trees in here. You can see there's
one there, one there. There's a whole bunch of
them over here as well. You've got these different
trees to go in at the same time that also
came from the graphics. Now, I'm doing this
on a video size. So this is 1920 by 1080. So when you go and
do a new document, just choose YouTube video
and it'll be the right size. And set yourself up with
something like this. A few items like trees, a bit of a background
over there, and the hills as well. They don't have to look
exactly like mine. And once you've done that, come back for the next
video and we'll then start building the little bars that we go into here
and animate in.
24. Add the Gradients: I'm going to go to my shapes over here and I'm
going to find a shape. I'm just using this
rounded rectangle. Doesn't matter about the
color at the moment. I'm going to change
the corner roundness, so it's a little bit
rounder and pull it into a sort of lozenge. I'm going to pronounce that
a lozenge type of shape. And that's the one that's
going to be coming out with our details on it. Now, I need to get
some color on this. I'm going to click on
the color and over here, you can see it's showing
some colors from the photo. Now, I could go along
to those colors and just pick colors
directly from there, or I can go along and
I can create my own. Maybe I'll go down over here to the gradients and choose a
color from the gradients. Now, having picked that color, I'm not really sure the blue
goes with the rest of it. I'm just going to go
back in there again. Now you can see that once I've chosen the color and
clicked off of it, it appears in here in
the document colors. I can then click on that
color and then edit it. At the moment, it's going
from blue to yellow. I'm going to click
on the blue and maybe pick more
of a green color. I'm going for this
really vivid lime green over there going into it's a slightly
brighter yellow like that. It's up to you what
colors you want to use. If you find that's
a bit too bright, just go down and take the
color down a little bit. That actually looks
quite pleasant. So I'm happy with that. I'm going to make
two more copies. So I'm going to hold down
the alter the option key, drag another copy
of that one out, and maybe this one I'll change the color a little bit as well. So going up to the
document colors in here, if I click on this, let's try that again and
change the color. We'll go from a yellow to maybe something
slightly more red. You can see it's not
changing the existing one. It's just changing
this one here. And I'll go to the
greens and maybe adjust the green a
little. Like that. Let's do one last one over here, so I'm going to
hold down the alter the option key drag a copy, and you can see as
I'm dragging it down, when it's the same
distance as the last one, it just shows me those
270 fives in there. And of course, the same with this one, I'm going
to click on it. I'm going to go along
to the color in there, click it and then adjust
the colors on that. I think I might change that
to be a little bit more of a slightly different green, maybe a little bit
darker and then change the orange to something. Once again, maybe a
little bit more red. I've almost got
this yellow orange, dark orange or red
going down that way. But you can do any
colors that you like. Then I'm going to
leave it like that. Have a bit of a go
with that and get your three shapes up there
with a gradient on them.
25. Add the Type: Now let's get these exactly
where we want them. I'm going to select
all three of them, so I'm just holding
down the Shift key. I'm going to move them down so they're kind of in
the middle of the page. Once again, you can see those
little smart guides pop up to show me that I'm right in the middle of the
page over there, and I'm going to move
them across a little bit. Now, individually, I want to put these where I
want them to end up. So this one here at the bottom,
I'm going to move across. Now, as I'm moving
it up and down, it kind of jumps around. Once again, I'm
just watching that 75 or you can just hold
down the Shift key. It's much faster to do it that way. I'm going to
pull that one in. So I'm going to go to the
top one and adjust that one to where I want it
to end up like that. Now that I've got this,
we're going to go and have a look at making
a second page, but I'm actually missing something else and I want
to do that before we go onto our second
page that's put some text over here
to say forest. I'm going to go to my text tool. I'm going to add a
text box, forest. I'm going to make that
quite, quite bold. So I'm going to go
up to my typefaces and find some sort of
bold text like that. I think that's pretty much it. I'm going to rotate it
now around 90 degrees. So you can see when
I get to 90 degrees, the little degree appears
next to my cursor, and I'm going to move that into the right position. Now,
it's not quite right. As you can see, it's a little
bit on the large side. But I'm going to select
it because I want to move those characters
closer together. So going to the top here,
I'll go to spacing, and I'll just use
the letter spacing to pull those in a
little bit like that. I'm kind of after this
almost logoi type of look where the characters are all touching each
other like that. I think that works quite well. I might even make it just a
little bit bigger and move it into the right position over
there and change the color. So I'm going for the sort of yellows and oranges in there. I want to make sure that
it doesn't get lost at the top or the bottom, or you can go for
a color that is completely opposite to that. So if I went for a
purple, it would look really totally,
totally different. I'm going to go and keep with the oranges and
yellows in there. Anyway, have a bit of a go. Get these into the
right position, get your text in there. I still don't like the color
that I've chosen in there. I always default to white. If in doubt, I go
with the white or the black text. Have
a go with that.
26. Animate Bars In: Now let's change the
order of these items. So I'm just going to
click on one of them. And I want to go along
and find my position. Now, animate is there,
but no position. If you click on the
three little dots, you'll see any missing
items are over there. If this whole text
thing wasn't there, they'll all appear at the top. So I'll click on position, and what I want to do is to adjust these around
a little bit. So if I move that back there, that doesn't really work. Let's move that above it, and I'm going to move the
trees to the very bottom. So I've got the group of trees, which is going to
be at the bottom. And then let's try
this one over here. If it moves behind
one of those trees. Let's try it again. Okay,
so it's behind that tree there and this one here
or that one there, let's put behind
a different tree. As you can see, they don't
really work like that because the trees are
going to be covering this bit over here. So I might have to rejig
these around a little bit. And I'm going to go to this tree and just
move that tree over, so it's going to be
sitting over there. I'm going to adjust the size or the length of my little bar here because I want
them to pop up. In there. Now, these two here, I could change them around
as well if I wanted to, so I could go to that one there. I could move that one
behind that tree, and I can move that one above that tree depending
on what I want to. I kind of quite like them to be coming out under
all those trees. That looks rather good there, where they just pop up, and you can then just adjust your trees until
they work for you. In fact, this tree, I'm going to move out a little bit that way. And we'll move
this one. In here. It just gives a little
bit of depth like that. Now, once you've got that, we're going to go and
make a copy of that page. So get this right first because you're going
to be copying this, so make sure that everything is there as you want it to be. And once you're happy with this, we're going to go
along and copy it. So I'm going to go down to the bottom to my thumbnail view. And we're going to add a new
page, a copy of that one, so I'm going to
right click and just say duplicate page in there. This on my second page is
how I want it to end up. I'm going to go to my first page now and I'm going to move
these items all the way out. Remember from the
previous videos that you can't move them totally out because they just
disappear completely. So we're going to
move them right the way to the edge over there, and I'm going to move
them with my arrows. A little bit, so it's just
on the very edge in there. You might be able to get
yours closer than that. Let's move this one over here, closer as well, and
that one closer to. Now, doing it this
way means that when I use my match and
move transition, what will happen is it
will play and they will just come out all
at the same time. Like that. And maybe that's what you want for them all to
appear at the same time, but it could be that you
want one to come up, then the next, and
then the next. Now, if you want to do that way, let's just go back
in here again. I'm going to just
undo all these bits. Over there, I'm using my command and Z or Control and Z
to go all the way back, we go to this little
page over here. So we need some more
copies of this. So I'm going to duplicate
this, duplicate the page. And if I'm happy with that
one, let's try it again. Duplicate page, duplicate page. You never have too many of these duplicates, to be honest. You can always delete
them later on. It just helps with
what we're doing. So if we go back to this
first page, over here. Once again, I can
say, let's move all of these back again, get them as close as
I can to the edge. Let's move that one
all the way back. I'm just holding down the
arrow keys on my keyboard. And this last one, I'm
going to actually do it manually because otherwise
it just takes too long, but then use the arrow keys
to just do the final bit. I'll go to my position to
make sure they are all still there and I
haven't moved them off the page completely. That one there's
still showing up. I could probably move it
a little bit further in. Now, going along to
the second page, what I'd want is to have
the first one in position. These ones here, I
would move back again. Same again, let's move
that all the way back, make sure it hasn't disappeared,
and let's move that one. All the way back into there. So that's how they're going to the second one's
going to look. Let's go along to the third one. So the third one is going to
have this one, but not that. So we'll move this one
all way back in so. And then the last one
will look like that. So we've got this page here, then that page, then that
page, then that page. And if we've got these little transitions
match and move between them, I'm going to slow them
down a little bit, so it's a little bit better. Let's play it and
see what happens. So at the moment, our
timing's totally wrong, that one pops up, then that
one and then this one. Have a bit of a go with that. You'll need, about
four of these, but I'm going to do a fifth one as well because
obviously we're going to be adding some text to them. Have a bit of a go with
that, get to this stage, either animate them all at once or individually,
which looks better. Don't forget you want to use
a transition between them, which is going to be match
and move and you can change the length of that
transition in there. Once you've done that, go along to these pages because we
want to speed them up. Just click on duration
for a moment over here and I'll just zoom that in a little bit
like that. There we go. It's a bit easier
to see over there. We can then go along to these and we can shorten them as well. So let's say 1 second on there. Let's go to the next one, and I can shorten them from
one side or the other, as you know, 1 second
on that and 1 second. On there. Play around with your timing and see
what works best for you because even 1 second is a long time when
you're watching something come up like that. Have a go.
27. Add More Text & Icons: I'm on this first page here, and I'm just going to
go to my forest text, and I want to animate it in. So I'm going to
click on Animate, and then you can choose from whatever animation
you want in here. I'm going to go very simple
just to blur it in slowly. Now, I want to move
over over here. We've got those three
coming in there. And then when I
get to this stage, I want to bring in some little
logos and also some text. So the text on here is
going to say things like, it's all about the forest, and density and ecosystems. So I'm going to start to
bring in my text now, so I'll just add a
textbook in there. Let's put in ecosystem. In here, obviously, I need to find a typeface that
will work with that. So I'm going to select it and
go and choose the typeface. I'm going to go with this very heavy duty
typeface in here, but feel free to choose
anything you like. In fact, let's go
with something else. Now, I've got that
typeface in there. I'm just going to
click off of it, move it into the right position over here and change the color. I have this typeface absolutely correct
before I start to copy. I'm going to select
it, go along, choose the color that I
want to use for that. You could use some color that you've got
in there already. I'm going to go
with white on that. And I think that's
pretty much okay. Once I've done that,
I can then hold down the alter the option key
and just copy it again. You'll notice I'm
kind of leaving a gap at the end put
in a little logo. Change that to this is
going to be density. I'm going to do it all in caps. Over there, that'll
go in there and the last one is going
to be land over here. If you wish you could
put it under your tree, but it's not really
readable that way. Let's do this all
in caps as well. Now, we need some little
icons to go in here. I'm going to go along
to my elements, and I'm going to go
and find leaves. So Let's look and see if
we can see any leaves. I'm going to go with
graphics in here. I'm just looking for
something really simple, like little black and
white leaf to work on. I think if I just do leaf This is the sort of
simplicity that I'm after. I'll just click on that
and we'll take that down, make it a bit smaller so
that could be in the land, maybe, change the color, and once again, I'll
make that white. And I'll go and find
some other ones in there something to
do with density or forest density and a little
bug for the ecosystem. Anyway, you can do whatever
you want with those, but they're just going
on this last page here. Once you've done them
and you put them in, we want to have a look at the timing over here
because at the moment, if we play this and
we'll just move the playback head back
a little bit like that, they will just slowly fade in. But I want them to
fade in one at a time, so people will read
them as they go. I'm going to right click
on there and I'm going to go up too. Let's
try that again. I'm going to go to my shape. I'm going to right click and I'm going to
say show timing. I can actually see when
the land is coming in and maybe I want that to come in a
little bit further on. Don't forget, click this
little button here and you can zoom your timeline a
little bit in like that. So with the playback head, that comes in and then let's get this one
to come in over there. I'm going to click on density, and that's going to come
in just after that. And ecosystem and ecosystem
will come in over there. So we'll have this
sort of effect of one, two, three, coming in like that. You can do them in any order
you like. It doesn't matter. Then I can do exactly the same
with these little shapes. Once I brought them in, I could get them to
come in either at the same time or they can
pop in individually as well. So I'm actually going
to take that to the same height as land. So that will come in at the
same time or offset it. It's entirely up to you. I'll go and find some more
little icons to go in mine, but have a bit of
a go with that and don't forget you click
on one of those shapes, right click and then say show timing to get to this
timing area in here. Once you've done
that, if you wish, you can then go along to the items themselves,
for example, and, I can go to the
effects and sorry, to animate, and then I can go and put in some
animation in here as well. So if I do want
to get it to fade in or pan in or
anything like that, might look quite nice
when it pops in. We can also go to the effects, and I'm going to put in a little bit of a
shadow underneath that. I'm going to blur
my shadow slightly. But there, you can
play with this and get it exactly as you want to look. Let's just play that last little bit once again over here. So that'll come in,
and those will pop in. So I think I need
to make that shadow a little bit harsher to separate it from the
background. Try it out.
28. Create a Donut Chart: Now, I've got so many things over here up at the same time. So I'm going to right click and I'm going to
say hide timing, so we just get a slightly
better and cleaner page. I want to make another copy
of this whole page here, so I'm going to right click
it. Duplicate the page. And I'm going to go to
my duplicate over here. Now, this one here, make sure that you're
not on that one. You should be on page
probably page six over there. And I'm going to remove
most of these items. So those that can
go, that can go, that can go, the trees
can go, that, that, that. All I want to do is to
have this bit of land, the forest, and the
background in here. And then I'm going to move
this bit of land around. So I'm going to just
pull mine around. Mine's slightly
bigger than the page. You can see, I'll pull it
around and move it down. You can do anything
you like with yours. So what's going to happen
now, and by the way, because we've made
another one we've already got in position I
move and match, I'm going to take the
duration to 2.5 seconds. It'll be a nice slow
animation between them. Let's move our playback
head back to here. So what'll happen is
once they've come in, those bits have all popped in, and then everything
will fade out, and the ground will move into the right
position over there. So those those come up, they fade, ground moves like so. And then on this page over here, this is where I'm
actually going to get to my technical details
for the forest. So using a chart for that. And I really like
the doughnut charts. So I'm going to use
one of those. You can do whatever chart you want. Now, to put in my chart, we're going to go to
our elements again. Over here, let's
just hide those, scroll up a bit to the charts, see all, and choose the sort
of chart that you like. As it, I particularly
like these ones, so I'm going to go to one
of these for this page. Now, the colors are
just totally wrong for what I want to show because this is all about
forest, not about water. So I can go to my
colors up here and I can change the
colors on my chart. You'll see we've got the blues there getting darker and darker. Now, although I've
gone up to here, you actually change
the colors in the top. Let's go to this one
would choose a yellow, and I'm just going to
go through my colors, pick some different colors
being careful that I don't choose the same
colors as the background. Let's go with a darker green. I'm going to have to make
up some colors over here, so I click on that and choose
a totally different color. Let's have some brown for
that one and the last one. Once again, I'll go with a
darker brown over there. We can then go to the data, and this is where we can
start to put in our data. Now, we're going to use labels, and then over here,
we've got series. I'm going to put in
the figures in here. But have a bit of a go. Get this animation
running across by using the transition and
removing all those bits, and then bring in your chart, change the colors on your chart, and we'll put the data
in in the next video.
29. Add the Data: As you can see, I've changed
a few of my bits of data. I've got land density
and ecosystems, and I've put in some
numbers in there. Item four and five,
I don't want, so I can actually
just go in there and delete them out completely. Let's get rid of that
ten in there as well. Now, if you've got
a very large chart, you can actually click
on Expand Table and that'll take you
into another screen. It's a lot easier to
work in the screen here, so I'm going to get rid of that one and get rid of the ten. As well. And you can see
it just updates on here. The labels over there, we can choose labels
or we can choose the values to have
in there instead. I'm going to keep mine
set on the labels. Oops, wrong one there. In there. Once again, we will just close that
down. It fades out. But the chart is
there automatically. So I'm going to right click
on it, show the timing. I'm going to move my
chart so it comes in after everything
has faded out. So that'll fade out, and then my chart will just animate in. Let's have a little
look at this. If I play that, those bits fade out and my
chart animates in. Have a little bit of
a go with getting your chart details right. You can use any sort of data
that you like in there. And if you want to, once you've done
that, right click. Duplicate the page again, go into your next page, get rid of this chart or change it to a different chart in here. At the moment I've
just clicked on it, you go to edit in there, and I could change it to say, for example, a bar chart. Same information, but
I'm going to change the color of those bars
to something else. Let's go with much
brighter yellow in there? Have a bit of a
go, try those out.
30. Magic Write Ai: I want to do one
more page over here, so I'm going to go along to
this last page in there, right click it and
duplicate the page again, but I don't want the chart on that last page, so I'm
going to get rid of that. What I want on this
last page is some text. So I'm going to go
along to my text tool. But I want to write
something in here. I want about 60 words
on the importance of land density and
ecosystems in the forest. So I'm going to click
on Magic Right, and I'll describe
exactly what I want. So 60 words on the importance of land density and ecosystems. In the forest. Apologies that my typing is a little bit on
the slowed side, and I'll click on Generate
and I've mistyped forest, but it still understands that. I can just click on Insert
and it'll pop it straight in. Now I'm going to just make it a little bit smaller in there. If you grab a corner, you
can get it to move around. I'm going to take this text
and over here go up to my text color because I want that text to be white on
that white background. Let's make it a
little bit larger. I think otherwise it will
be very difficult to read. I think that'll just about work. And let's go to the effects
and bring it in effect sorry, let's go to the animate and bring it in with an animation. I'm going to choose typewriter because it doesn't
seem too over the top. We can change the speed
on that over here. I'm going to leave it
right in the middle. And then with my
timing down here, let's have a look at the timing. So I'm going to go back
to my timeline and scale this in a little bit
so I can see what I'm doing. This needs to be
quite a few seconds. So if I want that to be
say 10 seconds long, giving people
enough time to kind of read through
that very quickly. You can make yours
longer if you wished, and we'll just start that. So it comes in about there. Let's have a look at the
timing and see how that works. So that one comes in, that fades out, and my
text starts to come in. Like that. Once I've got my text in
and I'm happy with that, I'm just going to
have a last page saying thank you or
with my logo on it. So easy still,
duplicate the page, get rid of the text,
and bring in my logo, which should be in my brand kit. So I'm going to drag that in, place that in the
middle, like so. So once you're happy with that, I would suggest going
back to the beginning and running it again and making sure that everything
works for you, that the timings all work,
and you're happy with it. We can then go up to share. I'm going to go
down to Download, and you've guessed it MP
four and download that. So let's watch the whole thing. 10 seconds seems like a long
time to have on one screen, but it gives people
time to read it. And in fact, that wasn't even long enough for them to read it. Have fun with that. If you
need to make any changes, go back and do some
changes to it.
31. Motion Graphics - Intro: Not many people realize
that you can do some very professional looking
motion graphics in Canva. And you can see from this
one where we've got the text going around the shoe to
show the different details. Now, this is obviously just one example of what you can do, but once you understand
the process, you can then apply
that to all sorts of different types of motion
graphic situations. But let's have a bit of a go. It's not as hard as it seems.
32. Get the Assets Together: I've set up a few
things on my document, and I'm just going
to go through them, and then you can set
up yours as well. So first of all,
I've just changed the background color to a dark color so that I can see
the things I'm putting in. It honestly doesn't matter
what color you use in there as long as you can see the
bits that you're creating. I've also then
found a photograph. Now, I've found a
photograph of some shoes. If you want to do
another subject, that's absolutely fine. But find something
where you can put some text partially behind it so it looks
really, really cool. As you've seen in
the intro video, the way the text goes behind the shoes, that's
what we're after. Then I found a few other
bits and pieces as well. I found, well, some shapes. I've got a little
shape over there, and I've got another
shape exactly the same, but it's just the white
stroke and no fill. Now the reason I've
done that is because I want this one to be semi transparent and I
want that one to be solid, the outline. You'll
see how that works. I've made a little
line over there. The line, if you go to your elements is not
the recently used, it's down here in the shapes. I've got some text. This
cathedral is just text, but this could be a
logo from a client. And I've got another
bit of text over there, and I found a little picture, once again, a little
graphic of a shoe, and I've made all these
things, by the way, white. This is just a little
circular shape from there, and I went up here
and I chose none, no color for the fill, and I went to the stroke, and I chose white
for the stroke. You know, you can pick any
color you like for that. And then this one over here, I searched for an
animated circle. So I found those in the
graphics in the end. So I'm just looking for
an animated circle, something that will
show up the areas that I want to draw attention
to on the shoes. Lastly, you can't see it, but I've got some text in here. Now, to create the text, I'll just do a new page, what I did was I went
to the text tool and I went to Magic write seems
to be covered up by this, but that's as to be fine. I said, 20 words
on shoe leather. Clicked on Generate,
and then I clicked on Insert and that gave me
some text over there. You can do whatever you
want with that with a text. If you've got text elsewhere that you want to
copy and paste in, that's absolutely fine as well. But that was how I did my text. Where is my text? Well, once I put it
in onto one page, I didn't want a
second page in there. I'll just delete that page. I actually went up to this
little comment section, clicked on the comment section, I just pasted it
into the comments. So when I need this, I
can go back and just copy it from the comments
window in there. This is just all the
pieces that I'll be using. I will be deleting
this once we've done with those shapes, and we've used them
in our document. So set those up, get a picture, get the two shapes over here, one solid and just
a stroke, a line. You may want a little logo. You want some text
that you can use, a little circle,
an animated shape. And lastly, you want to have the comment text that we're
going to be using as well. 20 words is probably
plenty in there. Get on with that and
then we'll make a start.
33. Put Text Behind Shoes: Let's do our first page. I'm going to go over here, click on the Plus to
make my first page, and it doesn't matter what
the background color is. If you want to change it, that's okay because we can
have a photo over it. I'll go to my first page, copy the picture,
so I'm just using Command C or Control
C to copy it. Go to that page, paste it in, and I'm going to size this up to the size that I want
for this project. So I'm looking at something
about that size there. Now, I'm going to just zoom
out a little bit so I can see my whole screen in there. I'm happy with that.
Now I want to go and make a copy of this and then delete
some of it, as well. But just before I do that,
I'll go and get my text. Once again, I'm going to
copy that, go over to here, paste the text in and make
the text a little bit larger. So it will go in the
background there, and it's going to
go behind my shoes. Now, as you can see,
we can't really see it against the shirt, but
don't worry about that. So let me go back
to my shoes now. So I'm going to go to position so that you can see what
I've got in my layers. Here's my shoes. Here is
my text. I'm on the shoes. I'm going to copy the shoes. So I've now got two
versions of the shoe. The top version, I'm
going to say BG remover, and it's going to it looks a
bit strange at the moment, but it's going to
cut out the shoes. You can see how it's
cut them out there. I'll just place them back
on top of the original. Now, it's also pushed my text behind the shirt.
I don't want that. So what we need to do
now is to click on Edit, go over to BG remover, where we can get
into the settings and I can use the brush size. I'm going to make
the brush a lot bigger and just
paint out the shirt. So I don't want that. Let's
just paint it out. In here. You don't have to be
too perfectly accurate, but a little bit of accuracy
might sort of help, especially where
there's an overlap. Right, so I'm done with that. Close this down, and now you can see that
the text is in front, but behind the shoes. If I were to move the shoes, it's only those shoes that are sitting in front of the others. Oh, seem to give
them platform shoes. Let's just drop that
back again like that. The other thing that
we want to do is we want to just put
a little bit of a shape behind that text so
we can actually read it. And I haven't made one
already the right size, but I can just choose
one of these, copy that. Go back to this page, paste it in and
resize it in there. I didn't specifically
make this for this, but I can use it quite happily. I'm going to once again
go back to position. Move that behind
those two layers, and I will pull this down
a little bit over there. I'm going to change the
opacity of this so it's sort of semi transparent and we can see the text rather nicely. Now, the other thing
that you could do is you could go to your text. Now, I'm having trouble selecting my text because
every time I click, it selects the cutout shoes. So just go to position all the time, click on it in there, and then I'm going to go to the effects and I'm
going to use well, you can use anything
you like in here with a shadow or a lift or anything. I'm just using a slight shadow. I know it's not
much of a shadow, but just something like that. I'll take the transparency
down just to give that almost lifted
effect in there. You can blow that
if you want to. I'm going to keep
mine sharp in there. And then color wise, we can pick any color for that shadow. I'm going to go
with black on mine. Let's see how it looks
with the transparency, just enough to pull the text above the
surface of those objects. I'm going to stop over there, so you can get to this point here, so make a new page,
put in your picture, bring in the text, make
a copy of the picture, and put it above the text, and then cut out the
top copy of the shoes. If you're not sure
of any of this, just watch the video again. Have a go get to that stage.
34. Add Page & Animate Text: I forgot my logo. So I'm going to go back,
select the logo. Now, there's two
parts to this logo, so I'm going to group them
together because there's the little icon and the name.
I've grouped them together. I'm going to copy them
both, go back in here, paste them in, and pop them in the position
that I want them to go. Now, this is all
absolutely fine. The next I want to do
is to copy this page. So I'm going to say duplicate
page, duplicate page. And this one here, I'm going to make the
text a lot smaller. So over to position layers, I'm going to select both
the shape and the texts. I'm holding down the Shift
key to select both of them, and I'm going to scale
them down quite a lot, and they're going to sit right
in the corner over there. So I can see them, okay. Now, this will be the first
thing that's going to happen. So when we play this,
obviously, it's over here. It's going to go,
and that's going to go to that section or
that part of the page. But of course, I want to have an animation
between those two, so I'm going to my transition. I'm going to say match and move. Now when we play this, you'll see that it will
just animate across. Now, this is quite long, so I'm going to actually change the length of these
as we go along. But for now, let's just
click the play button, it's a long old intro and
that moves across to there. If you click on that,
don't forget you can go in and you can
adjust the duration. I'll just make it
almost a second. Now that I've got that
animation going on there, I'm going to make
some more copies of this layer because this is not layer of this page, because this is the one that
I'm actually interested in, and this is where we're
going to bring in all the details about the shoes. So right click, and I'm going to say
duplicate page again. I'm going to bring in
little circles that I want for the areas that I want
to highlight on the shoe. So going back to my
first page over here, I'm going to use this
standard circle, not the animated
one at the moment. I'm going to copy that,
and I'm going to go across to the page here. I'm going to paste
it in over there, and we're going to have
something about the laces. I'm going to make
a copy of that. We're going to have
something about the comfort of the shoe, another copy, something
about the sole. And one last one
about the toe caps. Oh, I think I'm
missing one there. I might have moved
the wrong one. Let's pop that one up
over there. There it is. I moved it by mistake. So those are my four areas that we're
going to be looking at. Let's go back and find in
our position the layers. Here are our layers. Over here or our little
circles over there. So if you'd like to
get to that stage, we've got this
page number three, what's actually the third
page, page number four, but it's the third page because
this one we're going to delete once we've
used everything. Get your three pages in there, get your animation going from the first page into the
second page like that. Then bring in this
page over here with the little dots in there, and then we'll
take it from there.
35. Add the Text Box & Lines: Let's make another
copy of this page. So we duplicate the page again. This is page five, although technically it's only
our fourth page. And I'm going to be bringing
in these little shapes. So I want this shape
here and that shape. Now, this shape, if I
just move it over there, I'm going to change the opacity. You can do it later on your
picture if you prefer, but I'm just going to adjust
the opacity so that I can sort of see through
it a little bit. I'm going to put that
one on top of it. So let's just move that one, if I can get hold of
it across onto there, select both of those, and I'm going to group
them together, like so, so they're
grouped and I can move them around
and scale them. Click the little
View Comments icon and find the text that I want. I'm going to copy
the text over there. And let's just go
back into here. I'll go to text and add a textbox and paste my
text into that text box. Now, I'm going to
move that over. You can see there's
quite a lot of text compared to my text box
size that I've got here. So I'm going to make it
a little bit bigger, and that text is
going to go in there. I also want a bit of a heading. So where it says,
our best leather, I'm going to actually copy
that our best leather. Let's zoom in a
bit so we can see what we're doing. Wrong one. Zoom in a bit with this and move up a little bit
here and I'm going to do a return and put in our
best leather in there. Now, all of this text really should be aligned
to the left hand side. But I'll take that bit
of text there and maybe go with some sort
of bold on that. I think I can move
that in there now, Let's have a look and see
if it'll fit just about. We might need to once
again change the sizes of things and make this
a little bit larger. So select the text, you can see it's 19 points. I'm going to go with 18 points over there and the heading. I'm going to do
that as 20 points. That looks a whole lot better. Now, let me select both of
those at the same time, copy them, and I'm going
to paste them in to there. You can see it, it does
show up quite nicely now. We'll just zoom out
a bit so you can see the whole thing
and it is readable. So this is the
best shoe leather, so we're talking about, I think it's about the
soles of the shoes or maybe it's this one up here. I can't remember anymore. Anyway, I'm going to
try and select those. You see, as I clicked
to try and select them, I just select to the top ones. Always go back to your position. I go to my text
and this one here. I'm going to move this to
where it will be readable, I think just over there for that bit of that little
circle in there. Lastly, I'm going to bring in
one of these little lines. I'll click on this little
line here, copy that, go back into here
again and paste the line in try that again, copy this one, go back here, paste the line in over there. And you can see the line's got
these sort of big circles, and as you move over
them, it becomes across. I'm going to move over to there and it snaps it
onto that little shape. And if I do this one here, it'll snap it into the middle of that object
onto the side of that object. So it means that now if I
move this object around, the line will follow suit
as well. It's really cool. By the way, I copied
this by mistake, so I'm going to just
remove that page. So we'll just delete
that page in there. Anyway, if you'd like
to get to that point where you've got some text
in there in a little box, use the line, and of course, try out that feature
where you can get it to go to the shape itself. Lastly, once you've done all of that and got
to this stage here, we're going to go to this shape. And we're going to change
the opacity on that shape. So I'll go up to
the transparency, make it invisible, and
then we're going to go and we're going to bring in
this flashing one over here. So I'll copy that
back into here, paste that in and put that
where the other shape is. Have a bit of a
go with that, try that out and get to this stage, and then we're going
to do the same with these other
ones in a moment.
36. Animate More Text: Let's make a copy of this. I'm going to right click
duplicate the page, go to this next page, and this is where we're
going to start to move some things around. So I'm going to start with
this shape over here, not so much the text,
but the shape itself. I'll just move that text
out the way for now. I'm going to move the shape, and I'm going to place
it I think over here. And then I'm going to
go along to this line, click on the line
and move that part across and move this bit
over to that little section. Now, what about this one here? Well, this little chap, we're going to actually
move across to there, but I don't want
to animate across. So I'm actually going to
delete it over there. This one that we took the
transparency down on. We're going to increase
the transparency of that. We're going to go
to this one here, and we are going to reduce the transparency of that there. So we're going from that
one to that one in there. Now, my text, let's go to
the position over here. My text, I'm going to
select all the text and then bring in my next bit
of text from here as well. This is about the laces, so I'm going to copy that, go back into here again, paste the text into there and change the
heading to laces. And we'll move that
I can get to it. Let's make sure that we on
position, click on that. I'll move that across to there. So what's going to happen now? Well, let's put a transition
between those two, which is match and move. And you'll see that
when we play this from one to the next, let's
get it back to there. The text disappears, but
this actually moves. Let's do that again. It's
very fast. I'll slow it down. So we play that again. That moves and the text there fades out and this
fades in over here. Now, we want to
actually get once again this little
chap and bring it in. I'm going to go across,
we copy them first. We'll copy that back into here and I'm going to
paste them in Over there. So what'll happen with
the animation now? Well, if we go back
again to here. There we go. Let's go
and do that again. And now we've got this little section which is highlighting. Have a bit of a go with that, and don't forget to go
through between all of these and just put
in the match and move. I'll do the same over here. Add transision match and move, and go back from the
beginning again. Once again, we need to change
our timing a little bit. That one, that one in
there. Try it out.
37. Add 2 More Pages: For the next two, it's
exactly the same process. I will just make a new
duplicate page over there. I'm not going to get you to
sit and watch the whole thing because it's exactly
the same process of moving things around and getting your
next lot of text in. Have a bit of a go
with two more of these and get the other
ones done as well.
38. Timing: I hope you've got all those in. Now, for the final page, what we're going to
do is we're going to do the hero shot of the shoe. So I'm going to
duplicate the page, go to the last page. We don't want any of
these bits over here. So I'm just removing them. That can go, that can go, this, that I think that's everything. And in fact, we don't actually want the shoe overlap
picture either. And we want to keep
the cathedral. But what I like to
do is I like to zoom in on the shoe shoes. So I'm going to just zoom out. Oh, that's not the right one. We'll click on the
Zoom thumbnail. I'm going to zoom out a bit, and I'm going to click
and drag out here to make the shoes bigger and this is going to be our
hero shot of the shoes. And once again, we might even go in over here and make
the text bigger, if we wish, I'll zoom in a
bit over there, go into that. Shift select the object
behind it, that one, and that one, and I'm
going to zoom them up a little bit as well. I could do something
along that line. Honestly, I think that's
hiding most of the shoe, so I will just take it down
a little bit like that. Let's pop it over there. Right. And of course, we want a transition
between those two, which is match and
move, this would be a slightly longer one in there. Let's see what that
does. So we play that, and that moves up like so. So what's happening over here? I don't know whether
you noticed, but as I did that, there's sort of a
double shoe over there. That's because this one over here has got the cutout
of the shoe and the shoe, as it animates, you're
seeing both the cutout and the main shoe as one disappears. So what I could do is
I could go back to this page because we don't need the cutout
because remember, we've got the
cathedral up there. There's no reason to have it, and I'll just delete
it from there. And let's try that
last bit again. So as this plays, that just animates into
the right position. Let's make sure all the rest
of our animation works. Timing is a little bit out, but we'll fix that. Right. So this
page here, Whoops. This page here, we're
done with that. We don't need it anymore, so we can just right click
and say delete page. So we start off over
here with the shoe, the hero shot of the shoe. This one here is quite long. We don't need that
to be quite so long, so I'm going to take it in
a bit maybe half a second. The next one, this one also can be quite short because it's just showing the little
dots on the shoe. And then after that, we go
in to the to the first one. This needs to be a bit longer so people can
actually read that. And I'm going to pull this
out, so I'm going to make it 2.5 seconds in there. Probably not really
enough time to read maybe 3 seconds there. Then onto the next
one, that would also need to be about 3 seconds. This one here, 3 seconds and the last one over
there, 3 seconds. And then this one, we're
going to extend out quite a lot because that's
where it's going to finish on. So I'll do 7 seconds on there. Let's have a look right
from the beginning. So, click on I think the Zoom effect that I've got here needs to be a
lot longer at the end there. Let's try that and
see how that works. Right. So I'm going to
go up to share now. I'm going to go to
download MP four. This is going to be HD quality. If you want to go higher,
you could actually take it up to four K. I'm going to click on Download and then
sit and wait while it downloads. Let's have a look. And on to the hero shot. Fantastic. Have fun with that. Maybe try it with some
other subjects, as well. It's a really lovely,
lovely effect.
39. Animated Book - Intro: We're going to put
together a book, so we're going to have a really nice looking
digital book. I'll show you how
to do the layouts, we'll do copies of the outs. But at the end, we're
going to take it, and we're going to
put it into an app, which will give it
that animation, as you can see on the side here, where the pages just flip
from one to the other. There's even sound effects
with that, if you want them.
40. Get Assets & Add a External Font: For this project, we're going to prepare
everything first. It'll make your life
so much easier. So we're going to
have a document. It's going to be A four, but it's going to be
A four in landscape. So what I did was, I've gone in mine and I've
prepared mine already, and I'm just going up to
the crater design up there, and down on the left hand side, I'm going to say custom size. Instead of pixels, I've gone for millimeters and I've just typed in my millimeters
four a four, which is, it's
actually over here. You can see it. It's 210 by 297, so the height is 210, the width is 297 in there. Once you've got that, you'll then have your page.
I'll just show you mine. So let me go back over here to go and open up my my project. There. So here is my page. And what I've done is I've
gone and found some pictures. Now, before you start looking
for all sorts of pictures, decide on your subject. My subject here is I've decided to do barley.
I love travel. I've never been to Indonesia, so I don't know
what baleys like, but I've looked at
the pictures and they look absolutely gorgeous. So I'm doing bay, but you can do barley. You can do cats, dogs, cakes, mountain climbing,
whatever you want. The subject is not
the important thing. It's how it looks. So I've gone here and I've found eight pictures
to do with barley. This one, over here, this is going to be
my cover picture, and that's going to be
my back page picture, and then these ones here
will go inside the document. Now, what I've done is
when I found a picture, I just brought it in and
just resized it down. So it's all sitting
on this page here. So it did came in at a
good quality over there, and I just scaled it down. So I can then go and
take pictures from here into my document as I need them. The other thing that
I did while I was here was I found a
little embellishment. Here's this little
embellishment over here. I just went into my
graphics and typed in embellishment and
found something that look interesting
on some of the pages, and I'm going to
change the color. I've also found two
different font types that I want to be using in here. This is for my paragraph text. If I just select, you'll see, I've chosen roboto. It doesn't look
terribly Balinese, but it's easy to read
and it's very simple. And then for my big titles, I've actually got
this typeface here. Now, this one is not
actually in Canva. I went to find it. I want
to show you now how you can actually bring your own
typefaces or fonts in. So what I did was I
went to a website, there's one called
Defont dafont.com. I'm not particularly
recommending them. If there's other
websites that you use to get your fonts, that's
absolutely fine. This is just one that
has free fonts on it. And I went looking for a font that I liked, and I
liked the look of this. I thought it sort of had that Balinese Hindu style
that I was looking for. And then I downloaded it. Now, once you've downloaded it, what happens is it gives
it to you as a zip file. Over there, let me
pull this zip file out so you can have
a look at that. And I opened the zip file, and that gave me
this font file here. No, that's the hardest part because all you've got to do in Canva is when you go
to your text and say, for example, I'll
go to my text here. And I'm in my text, let's click on that again. You just say Upload a font, and you just choose the font that you want.
I can pick on that. I've done it already,
so I won't click open. You just click Open, and it says, you have
permission to use this? Well, it's a free
one, so, yes, you do. And it comes in. And in here, you'll see that it's actually in my uploaded fonts down there. So if you do want to find
an interesting font, have a go with that. Lastly, I wanted some
text about Bali. Now, I know nothing about Bali. So one way I could have done
it was I could have gone to Wikipedia and had
a look on there. But the other way
that you can do it is you can use Magic write. And this is what I did.
So I went to Magic write. It says, What do you want? So I want to have 50 words on the magic of a Bley holiday. And I'll just generate
that and there we have 50 words on the
magic of Bali Holiday. Now, what I've done
is I've copied those you can just
add them straight in, but I've actually copied
them into Word documents. I've got a Word document
over here with those in. I pasted them in
there. So I did one on my first page on
the magic of it. I've done on the people, I've
done on the local religion, and something about
the landscape as well. So just different
paragraphs in there. And it's up to you. You
can do whatever you want. If you want to copy text
from somewhere else, you've got another bit
of text somewhere. You can use that. That's no
problem. I've got my text. I've got my pictures. I've
got my embellishment, and I've got my typeface
all ready to go, and we can now start to build. So if you'd like to set that up, get everything ready
to go, your text, the whole lot, and then come
back for the next video, and we'll start to
put it all together.
41. Add Cover & Pg1 & Some Design Principles: Let's do our cover page. I'm going to add a page. And then what I can do is I can just go to this first page here. I'm not going to
copy that picture. I'm actually going to cut it. So I'm going to use Control
X or Command X to cut it. Go to my first page and
paste it in over there. Now, I'm using cut rather
than copy because that way, at least I know which ones I've used and which
ones I hadn't. Obviously, I can remember for a document that's as
small as this one, but for larger documents, you might just want to cut them. I've got my picture in the
background over there. And once I've got in
the right position, I'm going to click
the little lock, so I'll lock the position of that picture so I can't
move it by mistake. Let me go back and get my text. And this I'll be using
a number of times, so I will actually copy
that bit of text there. Go back to that
page, paste that in. I'm going to put it down
here in this darker area, and I'm going to enlarge it
a little bit over there. You can change it to
anything you want. Mine's already says
Barley, which is fine. I'm going to go
to my text color, and I'm going to choose white, so it's very visible
on that background. Now, I'm going to be using
this embellishment, but very, very subtly throughout the whole document
to just add that feel that I think I think I
don't know. I think Bali has. So I'm going to once
again copy that and just go back into
here and paste it in. And I'm going to put
it over the whole of that document just
slightly inside. Edge over there, and I'm going to change the color of this, so I'll just change it. And I'm going to use a
color from the photo. So I'm looking at sort something
along that line there. Now, it still looks a
little bit too much. So I'm going to go
to my transparency and reduce the transparency. So we just get this
subtle effect of that. And the great thing
about that is you can build up a number of different embellishments
because just use different
transparencies on them, so you can have one page about ten different
embellishments if you wish. I'm just
going to use the one. While I'm here, though,
if you're going to be printing this document out
or sending it for printing, don't forget that
anything that you put onto the page needs to
be bigger than the page, so you've got a three
millimeter bleed. I'm not doing this for printing, so I'm not going
to do the bleed, but if you do want to print it, make sure that that
photo has got plenty of space on the
backboard around it. Right, that was really easy. Let's do another page over here, so I'm going to go
to this page here. And now on this page, I want to have an embellishment
and I want to have a picture across the
middle as a panoramic. So let me go and
find the picture that I want. That's
the one there. I will cut that go to this page, paste it in, and I'm going
to pop it over there. I'm putting it right in
the middle for the moment, but you'll see I'm
going to be moving it. Now you can see, as
I pull that out, it sort of makes the
picture panoramic. It doesn't nastily scale it. I'll pull that out
a little bit that way and a little bit that
way because I think, which is the bit
that I want, that's the bit that I want in there. And at the moment, if I do that, it's situated right in
the middle of my page. Now, from a design perspective, having something in the
middle is really nice because you get that
mirrored effect of things. But it's also not quite
well, how do we put it? It doesn't work from a visual
point of view sometimes. You see, there's two
things when it comes to the center of the page
that one has in design. One is the true center, and I've got this in the
true center of the page. But the other one is something
called the optical center, and this is the center where your eye rests
because your eye, when you look at a page
doesn't rest in the middle, it rests slightly
above the middle. If I move this up a little
bit like that, not too much, just a little bit this is
now in the optical center. In fact, if this wasn't
four page like that, we'd also go slightly
to the right because the optical center is slightly above the middle and
slightly over to the right, very, very small amount, though. But it just means it's
more pleasing to the eye. So if you can have
a look now at this, you'll see that there's
less room up there, more room at the bottom, but it still looks like
it's in the center. It looks more pleasing than
when it was in the middle. I feel that anyway. I'm also going to
go and I'm going to get from here this
little embellishment. So I'm going to copy
that, go back into there, paste in my embellishment
over there. It's above the picture,
which is absolutely fine. I'm going to bring in some text. So this time, I'm
going to go over to the word barley in there. Copy that go into you. Once you've done this
template pages if you like, things speed up so much more. Paste that in, and
we'll just make that about that size there and I can change
that to whatever I want. I'm going to have
a look at my text in a moment and
then change that. Excuse me, accordingly. Let me go and get my text now, so I'm going to go back
to my word document. I'm going to select this
bit of text, copy that. Go back in there again, go to add a text box and
paste it into my text box. And if I pull from the edge, you can see how the text
kind of comes down like so. Deselect that and
reselect it again. I can move that into
the right position. I'm putting this on
the left hand side, and I'm going to balance it with some other text
at the top there. Remember. The other thing about design is it's all
about balance. If you do something on one side, make sure something
else is going to balance it elsewhere. Now, my text is centra aligned. I'm going to change this to
being left aligned like that. You'll find you've got
other alignments in there. You've got all lines aligned, which from a distance looks
great, but it's really. Well, it's quite difficult to read when there's these
big gaps between. It's tiring. So just be
aware of using that. This right aligned,
and I'm going to go with left aligned in there. I'm going to change
the text color as well to something maybe, which is on my page
similar to this. I'll use that
little color there, which is the document
color too light to read, so I'll click on the color
in the middle. Over there. And I'm going to use that color, but I'm going to darken it
down quite a lot like that. So I'll get this
very dark brown. Now, I need to use
a word from here. So this says barley chant. So I'm going to use
the word enchant. And we'll just pop this
to the size that I want. I'm going to move it in
there. This is too heavy. Although you've got
the text in there, this in black looks too heavy, so let's change
the color of that, and Well, that's too light now. I'm just going to maybe
darken it down a little bit. Something like that.
I'm still using the similar colors to my
cover picture in there. And the main colors
that I want to use for this document are going to be
sort of oranges and blues. Those are two colors
which are opposite each other on the
color spectrum. So they balance each
other out really nicely. You'll hear me from now on, use the word balance
quite a lot when it comes to design.
I'll stop there. So if you'd like to design your first page
over there, very, very simple picture,
embellishment, some text, move the text
around place where you want, put the embellishment
where you want. I'm going to come back and move that baley up a little bit, I think, in a moment, and
then do your first page. And don't forget if you're
putting in this pan, put it just slightly
above the center to get that really good optical center and then try
balancing your text, maybe a bit on one side,
bit on the other like that. Have a go with that,
and then we'll do some more pages. But
42. Add 2 more Pages: Let's do another page. So
I'm going to add a page. But if I click the
ad page button, I've then got to go
and do the same thing and copy all these bits across. What be a lot easier for me to do is to actually just
go to page three, right click it,
duplicate the page, and then go in and remove the
things that I don't want. I don't want that picture over there. I'll
get rid of that. The text I'm going to select, I'm going to replace
with my new bit of text. I'm going to go along and choose this little
bit of text here. Copy that, go back into Canva, and delete that and replace
it with that one there. So we've got the same font, we've got the same
color on that as well. Might need to be moved
around a little bit. This one is traditional, so I'm going to change
enchant to tradition. I'm going to bring
in some pictures. So we've got this one here. I'll cut that picture, go back in there
and paste it in. And we're going to take
that up to the side. I'm going to take this
to the halfway mark. You can see as I'm moving it, I got the halfway mark
right over there. That smart guy just pops up. And I'm going to do
another one now, which is going to
be this one here. Cut that back into
here again and paste that in and do the
same thing over there. Just pull this out
to the very edge. Try that out, get that
second page going on. If you want to then
start to change up the color a little bit,
by all means, do so. You know, you can
pick another color for the text over here, and I can go for something else, which is maybe maybe
something a little bit bluer. If I can find
something appropriate, similar to that first page
that I had or the second page, shall I say, that
I had in there. So you can kind of
keep it fresh by just getting the viewer to
sort of see different colors, but still within the same
color palette of the document, or I could pick greens or
reds from here as well. Once you've done
that page there, you want to do two more pages, and one of them is the next one after that's going
to look like that, and one after that's
going to look like that. I will do mine now, and you'll see at the
beginning of the next video, I'll have those
pages done if you're not sure what to do
with the next two. I
43. Make a Flipbook: Now, I've created
some more pages. If you've created more pages, I hope you did it this way because you'll have saved
yourself some time. You just took one of the pages, right, clicked,
duplicated that page, and then replaced the picture
and the text in there, exactly the same. I
did that one as well. My last I've just noticed that these two pictures over here have got a little bit
of a gap between them, so I'm just going
to select that one and move it over
just a fraction. There. There we go. That
looks a little bit better. Then I did my final page, and on the text
on my final page, I'm going to click on the text. Now, I can't select
the text over there, so I'm going to go to position, click on the text to select it, and I'm going to use effects. And I'm going to use a lift. This just brings it up from the background
just a little bit. You can see where we've
got the M over there. Without this on, well, it sort of fades
into the background. So a tiny bit of that lift
in there. Not too much. Otherwise, it looks really well, a bit tacky, to be honest. Now that we've got
to this stage here, what we're going to do is
we're going to go in and use something to make
this into a flip book. Now, you would
think that it would actually be in the
apps, but it isn't. We're going to go along to share and we can download that obviously
as a PDF if we wanted to. But, in fact, I'm
going to look for some more share options in here. And to do that, I'm
going to say see all. And then you've got loads of
different ways that you can see that you can
share these things. And I'm going to go down.
You can see over here, we've got some saving options in there to OneDrive, PowerPoint. I'm going to go down
here to design, and I'm going to choose
Hazen flipbooks. There's another one called a
simple simple booklet flip. I'm getting tongue
tied. Hazen flip Books. Click on that and then
we just say Save. I've got seven pages.
I've made a mistake. I've just realized, I've still got this page in here.
I don't want that. Let me get rid of this.
That was my mistake. I should have told you earlier. I'll click on that
first page and we'll right click and just delete it or you can press
Delete on your keyboard. I'm glad I saw that in time. Let's click on Share, S A, go down to hazing and we're going to save
all those pages. Then it just takes a
moment in here and it will take you to
the Hazing web site. If you say view in hazing flipbook it just
processes your book. There we go. Now,
you can register. Otherwise, your books will
be deleted after a week. I'm just going to
close that down because I'm not
registered with them. And you can check it
out by clicking on that little button there
and see how you flip books. Is working. Looks beautiful, doesn't it? Really works well. Like that. But what about
what other people will see? Because you don't want them
to see all this stuff here? Well, what you do is in hazing, you click on Share up the
top left hand corner, and once again, it just
warns you about this. And this is the link
that you send to people. So if I just copy that link over there, we'll
close that down. I'm going to go into
a browser over here, paste it into the browser. Bless return, and this is what
I'll be sending to people. So once again, they
can just click. In fact, you don't have to click that little button there. You can just click on the page, and it will do it as well. Even with a little bit of
a sound effect in there, there's an option here
where you can turn it off because it can be a little bit annoying with a lot of pages. Anyway, do try that out. It's lovely that
hazing flipbooks and so very simple to use.
44. Apps - Intro: Canva has got so many apps. And between you and me, most of them are awful, but some of them are
really, very, very good. And I want to show you
some of the better ones. We're gonna be using things
like reflect and skew. And well, I'm not going to spoil it for you by
showing you all of them, but we're going to
create three different little mini projects
in this section, and we're going to use lots
of really cool apps for that.
45. Dreamlab App: Now let's look at one
of Canvas new features, and that's this
dream lab down here. Dream lab is an AI way
of creating images, all you've got to do
is to describe it. I'll do you one. Now, some
of them are very good, some of them not so good, but you have to look carefully. I'm going to do dog
walker in a crowd. Try spinning that correctly. And I'm going to
click on Create. And then you just wait for it, and it will generate four variations on whatever
you've typed in there. The more specific you can be, the more accurate an image, obviously you're going to get. But we're just
going for a sort of a general dog walker
in the crowd. Now, these all look
not too bad at all. I'm going to click on this
one to have a closer look. So what I like to
do is to just check that things are where
they should be. So the walker is
walking away from us. Dog that dog there is sort
of walking away from us. This one, well, it looks like its head is
in the wrong position. It's almost facing us, even though they're
walking that way. So not so great in there. Let's try different one,
this one over here. And once again,
check things very carefully because it's
easy to miss something. Um, now, this one looks
pretty reasonable. I'm looking at the shadows here. They seem to be okay. Most of the dogs seem
to have four legs. Sometimes you'll find that the dogs only have three or two. The human looks okay. I'd look very, very carefully just to make
sure that there was nothing amiss in there
before I used it. Then I can either use
it in design or I can download the
picture from there. But do try it out. Have some fun with it.
Obviously, you know, serious subjects like
that are one thing. But, you know, if you want to do an octopus and a top hat, swing from a trapeze, it'll create it for you. Have fun with it.
46. Typecraft: I've gone to Instagram Real
and I've got my page up. What I'm going to do now is to use an app to put some
text into a shape. Now, I need to get
the shape first. So over in my elements, I'm going to search
for roller skate, and I'm looking
for a very simple in the graphics roller
skate type of shape, something like that, so
not too many details. And I'm just going to make it a little bit larger over there. Now, we're going to put our
text into these shapes. But in order to do that, I'm going to reduce the transparency so we can
see the picture there, but I can see the
text on top of it. And I'm going to lock that down so I can't move it by mistake. Have a go, get to that point, do a simple shape and
reduce the transparency.
47. How to Adjust Text in Typecraft : To do the type, we're going
to go down to our apps. I'll click on the apps
button down there, and we're going to
search for type craft. So I'm going to be putting
in the word type first, and you can see we've got a
few types that have come up. If you're looking
and you type in the whole word type craft,
it has to be one word. I won't find it for two. So just typing the first few
letters will bring it up. And here is type craft. I'm going to click on that and then what it allows me
to do is first of all, find a font over here and a style and put
in the text that I want. I'm going to start
with a bit of text, which is going to
say roller skate and I'm putting it all in caps. Now, I need to go to my font and find an appropriate font, and I'm going to suggest using something fairly
bold and heavy duty. That one looks quite
good in there. Otherwise, something along
this line over there. Once you got the font in
there, just click back on the little back button there. This then allows us
to manipulate this. Now, if I click on add
element to design, it will just add the word
roller skate straight in there and I'm going to just
be moving this around. I can rotate it
around on here and I'm going to pull it so I
might make it a bit bigger. Now I can start to
manipulate this. So the R on roller skate, I want to grab that
corner and just move it out maybe like that, like so. Once again, if I
click Update element, it will do it on there. And you can see how I can
actually just pull this around in different ways. I'm going to go to
this middle here, pull out that roller skate bit, and we've got some
handles in here as well. Once again, if I
say update element, it will update it on there. So I will keep going with this. I'm going to move
this up a little bit. Sometimes it takes a moment to get hold of those
little things, and I'm going to pull
this one up over here, let's pull that bit up as well. Let's click Update element, and you can see how it
keeps on updating it. The E is too far over, so I will go back to this E, pull that in a little
bit like that. That needs to come up a bit. That goes up a little bit there. Maybe do something like that and pull this little
handle across a bit. You can just spend ages
doing these sort of things. As you pull these handles out, by the way, you'll get
more of a curve in there. They're known as Bezier curves. And I can pull them
the other way as well, so I can pull this one in to get more of a shape like that. Once again, just
update that element. You can see we're getting
close with our shape in there. This bit down here with the
T and E is not quite right, so I'll pull that
handle in a little bit. Like that, maybe move this
across a bit as well. It just takes a bit of
well, I'd say a bit, quite a lot of actually
fiddling until you can get it as you want it to go. I'll move that in a bit more, update the element in there. Now, this doesn't
have to be perfect. We're just looking for a
rough roller skate shape. So if you find that
you think, actually, I can read it a little
bit better like that, we can move that up a
little bit over there, this one up a bit into there. And lastly, this one over there. If that works a
little bit better, we design, that's
absolutely fine. That's actually working
really well now. I'll just go to this last one, pull that in a little bit, like so, and update the element. So now that I've
got this one piece, which is going to be over there, I'm going to do another word
for this section over here. But before I go any further, I like to have a bit
of a play with this. It's a really lovely way
of just pushing text around into the shape that
you wanted to go into.
48. Add a Second Word: I think I'm done with
that over there. So I will just close
this type craft down. And you can see I can
always click on there, and we've got an edit
button at the top. I can click on Edit and go
back into that at any time. So when you want to
change the color, you can just click on them,
go to colors up here, and you can choose a different
color for your text, and down the bottom,
update the element. In there. Now, I do
want to do another one. So I'm going to close
this down for them. And we're going to have
another one which is going to go in this sort of
area over here. We're not going to do
all these details. If you want to on yours,
that's absolutely fine. But I'm not going to
I'm just going to do sort of one area over there, and then we'll do the
wheels separately. So back to my type craft
because I'm on apps over there, and I've got this
little bit of text, and I'm going to say days. So let make sure I put
in the right place. S. Right. So I've got term the
word days in there. Once again, go in,
pick your typeface. It doesn't have to be the same as the previous one if you don't want to mix and match
different typefaces, gives you really, really
wild results. I'll do that. I'll choose something
completely different in there. Let's just go back
again over here and I'm going to add the element to the design so I can
see what I'm doing. Move that across, and
this one's going to be a lot simpler because
I'm just going to go up and down there, so I'm going to grab the edge
of the D and pull that up. Get that one there. Pull
that right up to there. Might do something similar with the A and just twist that down. These are actually going to
be closer together, I think. Let's update the
element and see how that's working. It's not bad. If this was slightly bigger, you can see how it's
starting to fit in there. I will go a little
bit bigger on there, get my D roughly in
the right position. Now all this has got
to be squished in. So I'm going to select
these points here, move them across a
little bit and then grab those and pull them down. Sometimes, it just
takes a little bit of fiddling to get
hold of those. Right, I think. Let's try
that one a Update element. Okay, we just need to move
the wine, the airs in. If you get bored of
watching me do this, just skip on to the next
video or try it yourself. Over here. I'll just update
the element in there. Right, that's almost it. I'll stop the video here. I'm going to fix this. I won't get you to
watch me do it, but it's exactly
the same process. Have a bit of a second bit
of text in over there.
49. Add Wheel Type on Circle: So the last little
bit is really simple. It's just the text
for the wheels. So we're going to do
that using normal text. I'm going to go in over to the left hand side
and find my text. There it is there. And I'm
going to add a text box. I'm going to put in wheels. It's a bit on the small side. Let's make it a
little bit larger and I need to move it up here so I can
see what I'm doing. I'm going to zoom in a bit using the Zoom button there and
just scroll up to that. That'll be a lot easier. Let's pull in that bit over
there and make them larger. Now, actually, I want
to do this all in caps. And, of course, make
it a little bit heavier from the
typeface side of things, so we get more of the
wheel coming through. So I'm just going
to go and find a once again, large typeface. That one works
perfectly in there. Now, I need to then go in and change this so it'll
go around the wheels. So I'm going to go
along to effects. I'm going to scroll right the
way to the bottom to curve, and this is where
I can then curve them scroll down a bit more, and you can see how we can
pull that around like so. Now, looking at that, I could go in and change
my if I can find it my spacing over there and adjust my letter spacing so
I can get those to go all the way
around the outside. Or I can just go and put
some more text in there. So I'm going to say wheels. With this really,
really long word now, and I think that
will just about do. We'll make it a
little bit larger. And we've got a bit
of a gap over here. So this time, I will
select the text, go into my spacing, and just move it
along like that. You can see if you use
a more chunky text, it'll look a bit better. And unfortunately, I did
all that one in lower case, so I'm going to have
to just go back over there and retype it. Well, there's my text. Now, of course, it's
overlapping again, so we will just
go back to letter spacing and pull in there. I think that looks okay. I can just scale that down now and make two copies of that. So to scale this down, if I just click on it like that, I can't get to the little scaling options
around the outside. But if I select the text and then choose my font
size over here, I can scale down both the text and the little
shape that it's in. Et's have one there.
Hold down the alter the option key and drag that to make another
copy. Like so. Go to your position and
select your original design. Now, it's locked, so you
might have to unlock it. Select your delete, and that leaves you with your
roller skate design.
50. Add Some Animation: As you can see, I've changed
my background color. I just clicked on the background and then picked a new color. I put a little word
cafe in there. I've gone to this, I've put in some more text
saying wild ride. That is this particular script that I've used, by the way, I've also went in over here to the spacing and I changed
the space between the lines. To get them to get really close. I changed the letter
spacing as well so that the individual characters looked like they were all joined up. Then lastly, on the text, I went to the effects and I used that neon effect in
there you can choose how much you want to
affect your text. Okay. Let's animate these. I'm going to select
those items over there. In fact, I'm going to
do them one at a time. Let's start with days. I'm going to go along
to the animate. And then I'm just
going to choose some of these effects in here. So I think I'll get
days to come in from the left. Roller skate. I'm going to get that
to pan in as well, but I wanted to come in
maybe a different speed. Let's try different speeds here. Yeah, so that comes
in after that one. We'll go to these ones, and you can choose
whatever you like. Let's pop that one in and
we'll pop that in as well. So when we play this now, the different items come in at different speeds and timings. But you can play with that.
You've done enough of these animations to
know how it all works.
51. Direct to Instagram: Let's create a
copy of this page. I'm going to duplicate the page. On the second page, I'm
going to select my skate. I'm going to scale
it down over there, and I'm going to
bring in some text. I'm going to go to
add a text box. I've written some text
which I've copied, so I'm going to paste
that straight in. Now, this text is
very, very far apart. The characters are far apart, so I'm going to go
up to my letter spacing and just space
it out a little bit better and we'll make that
a little bit larger so this can be seen on a
social media, reel. Let's pop that in over there. Now, I've also gone in here and I've added
a match and move. So when we play this now,
we'll have that coming in, and then we need to shorten
that a bit actually, and then it just scroll
zooms down to that. I'm going to just pull this
in a little bit like so, and once again,
let's try it out. I've lost my the other two. But you get the idea with that. Let's just undo that
again. From the beginning. That appears. And that scrolls down zooms
down to the bottom. So let's go and share
this. I'm going to click on the Share button. And instead of actually
going and downloading it, we can go directly
across to Instagram. Click the Instagram button. And then it says, do you want to
immediately post it or you can actually
schedule a post as well. If you click on Immediately
Post it and click Continue, it'll give you a QR code
and you can then download the Canva mobile app and
post directly to Instagram. If you want to try that out, have a bit of a go with that. Otherwise, if you want to just
download it, do the usual, click the Download
button and make sure it's an MP four video in there.
52. Gradients & Waves: Now that we've done
the basics of this, let's go and add some sort of background to make it a
little bit more interesting. And we're going to do that
using different apps. So I'm going to
start off by putting an interesting gradient on there because there are some
gradients that we have, but there's actually
a really nice gradient app that
we can use as well. So let me go back to the
beginning over here, and I'm going to go
down to my apps, and the gradient that the
app that I'm going to look at is called the
gradient generator. If I type in gradient in there, we get a mesh gradient
gradients and gradient generator. That's
the one that I'm after. Here it is over here
and this allows me to generate gradients based on
a number of colors in here. I'm going to just pick
some colors in there, which are similar to the
colors that I've got, but maybe a bit darker. Maybe some darkish
purple over there. Then this one here, I'm
going to go with orange. I've got some orange there. We'll go with a
darkish, darker orange. Let's have a bit of
some blue over there, a bit of red and
another bit of red. Well, let's make that a different
color. Maybe some blue. Now, if I'm happy with that, all I have to do is then go down here and
add to the design. Now you'll notice
over here we've got a noise level and you
can get some noise if you wanted to have grain on it and make it look
a bit more interesting. There it is really simple. All I'll need to
do is to pull that out into my background. I might even round
off the cornice to make it look a
little bit more interesting and then go to my position and move it
behind everything else. Then we've got a quick
interesting wild ride gradient. That's one type of
gradient that we can do. There is another
form of gradient and that is where we can put
a gradient onto text. I'm just going to go
over to add a new page. I'll do this on a blank page, this one is obviously it's a text gradient and it's
called type gradient. Same again, find your apps. I'm going to do type gradient. I can't see type gradient there. Now, sometimes you need to do a one word, sometimes as two. Type there it is. Oops, I missed it. Type gradient over there. With this one, once you've
kind of clicked Okay on it, you then generate
your type in here. I'm going to use the W from
wild, the R from Ride. I'll have W and R in there. I'm going to change
the font as well. If I go down to the font here, let's change that
to something else, something a little
bit more wild. Over here, bad typeface. Looks really interesting. Let's see how that looks. Yeah, there we go.
It almost looks like a sort of a bit
of graffiti on there. I really like that. Now
I can then go down to the colors here and I can change the colors. So I'm going
to click on there. I'm going to go with a pink.
And I think on this side, I like the purple
that I've got there, but I'm gonna make it a
little bit more wild. And this one over here, well, what should we do
with that middle one? We'll make it more of
a teal type of color. And then I just add that to
the design as simple as that. And there we have
it. Let's change the size on that a little bit. Two types of gradients, one for putting on to text, one as a background in there. Those are really
nice apps as well. Some of the apps can
be a little bit tacky, but those ones are
really useful. Let's do one more
interesting background. I'm going to go along to this middle one over
here, the middle page. What I'd like to do is
to go and do a new app. This app is called Can wave. It's all one word, and it's all about creating
graphical waves which can look really cool. So here it is over there. I'm just going to click on it, and you can see it's
started off with this simple little wave in here. Now, you can have them
curved or more pointy. I'm going to go with curved. You can have a different
number of layers of those little bits in there. I think three is quite
nice to start off with. And you can either have
solid or gradients or lines. I'm going to go
with a gradient and I'm using purple in here, I might make a more of a bright purple over there and a bit of a
pink in there too. Then all I do is add that
to the design and it will generate that and make an interesting wave for
me. Here's my wave. I'm going to rotate it
round the other way, like so and I'm going to
make it a lot bigger. But there, it's increased the size maybe GS little
smaller than that, but something along that line. And I'm going to the position
and I'm going to move it underneath everything
else like that. Now, I want to animate this, so I wanted to actually
move across the screen. And I'm going to split
this page into two. So if I right click it,
I can say split page, and that now becomes two pages. So if I go to this page, then what I can do is I can take this shape and move it to the other side
so it goes purple. Now, because I've
just moved it from one to the other from
one place to the other, we should automatically
get an animation in there if we've got that
animation transition on. Let's have a little
bit of a look at that. Look at that how it just move from one color
to the other. Of course, I'm going to
click on the transition and make it a lot slower. Now when we play this a lovely slow move from
one to the other. This wasn't very slow, was it? I might have to try that again. Anyway, I will stop over there. So do you have a bit of a
go with those apps there. Remember, we've got
the gradient app. We've got the waves
or can waves, called as in Canva waves. And then there's this one here, which is your type
or gradient in type. And they're called
the type gradient, the gradient
generator, and C wave. They're already
called. Have a go.
53. R10 Easy Reflections: I'm going to go along to
Instagram and do a square. And this time, I'm going to
use some elements in here. Now, I'm looking for
a perfume bottle, and the one that I
want is a photo, and I'm looking for
something with a number of bottles like this one here. I'll just bring that in there. Remember this is
the pro version. If you don't have that, you can find plenty of perfume
bottles in the free one. But at the moment,
this looks like it's floating in this white space. So I'm going to go once
again back to my elements, and I want to get rid
of the perfume bottles, go down to shapes, and I just want to bring in a rectangle. Over here, I'm going to put it from one side
through to the other. Instead of it being gray, I'm going to have a gradient, so I'm going to go down to
the bottom to the gradient and that puts on this rather nice ittle gradient
that I've got there. I'll use the rotate option to
rotate it round 90 degrees. I've got the dark
area at the top, the light area at the bottom. I'm happy with the
way that looks, but it's, of course,
above the bottle, and you know how this works, position, layers,
drag it underneath. And that looks more like
it's actually on one of those photographic infinity
curve backgrounds. So that's coming
in rather nicely. Now, that's all very well, but if this was on
a shiny surface, it would need a
reflection underneath it. And this is where the apps
come in because there is an app that does well, shiny surfaces, it
does reflections, and I've already used it, so mine should be
down here somewhere. But there and there it is, it's called Easy reflection. Otherwise, you can just
type in easy reflection to find it. And it's so simple. All you do is you make
sure that the object you want to select is well, object that you want to
reflect is selected. Click on create the
reflection. There it is. You can go top,
bottom left or right. And I'm just going to
say add to design. Now it's a little bit
on the small side, so I'm going to scale it
up so it kind of looks like it should be there. Get the same size
as the other one. I think that's almost there. There we go. And I will
go to the opacity or transparency and reduce
the transparency because I find their reflections
are a bit too harsh. We just want something
really subtle like that. And then I'm going to bring
in a bit of text on the top, but you don't have
to watch me do that because you know
how to do that already. Try that out. Have
a bit of a go with that easy reflection,
and it's an app.
54. Skew App: I popped in my text, and I'm going to
make another page. I want to use the
same background, so the easiest thing for me to do is to just
duplicate that page, go to my second page and delete the things that I don't
want those two there, and I'm going to leave
the label the logo, sorry, up the top. Now I'm going to find
a different bottle. So back to my elements again, and I'll go once again
back to perfume bottles. And I'm looking for a bottle
which stands on its own. So something with well, that looks similar to the
ones I've had there already. You can find anything you like, but we are going to cut it out, so try not to have
too busy a background just make life
difficult for yourself. I'm going to try
this one over here. And what I want to
do is to cut it out, so I'll click on BG remover. It's left the flowers in there. I really don't want
those flowers. So remember, we can always go along when we're
cutting things out, and I'm just going to go over here to the the iron weight. I'm going to go to edit
to the BG remover, and I'm going to use the arrays to erase out those bits
that I don't want. Let me make a brush a
lot bigger over here. O it's very easy to by mistake, just leave tiny things in there, so be careful when
you are doing this. I think that's probably
just about it. Right. I'll close that down. Let's have a look.
Yep, that's it. Brilliant. I'm going to
make it a little bit larger because I want it big in here. Now, what I'm thinking is that, first of all, I will need
a reflection from this, and secondly, I
will need a shadow, as well, just to sort of
place it on the surface. So let me do the shadow first. I know it seems to be
the wrong way around. What I'm going to do
is I'm going to make a copy of this bottle. And to do that, I will go to position layers so that you
can see the layer there. I'm going to copy it by clicking
on the duplicate button. I've got two of them almost
on top of each other. Now let's go to this top one. Click Edit, and I want
to make it just black. I know it seems a bit
strange at the moment, but I'm going to do that
by going to Duotone. Custom and the highlights and the shadows are both
going to be black on there. That just makes that shape
absolutely black like that. I can just move it over
there and you can see it. The next thing, though, is
this is going to be a shadow, so I want to make it softer. So out of dua tone, I'm going to go to
blur down the bottom. And we're going to
blur that, so I will use rather than these brush
size and intensities, I'll use the whole
image over here. I'm just going to go to
the whole image and blur the whole image, like so. Let's go back again
over to here. Now, this is my shadow, so it actually needs to
go underneath that shape, and it will shortly. But I want to make it look
like it's on the ground, so I want to skew it, and this is where
the app comes in. Because if you go
along to your apps, once again, I've
used this already, so it's in my set
of tools down here, there is a skew app. And if I can find
it, there we go. It's called a skew image. So just search for
the word skew. And this will then
allow me to skew it, and you can see I
can skew things around in here to any
angle that I want. I'm kind of looking for
an angle like that. You can then rotate into whatever sort of plane
you want it to be in. I think I'm going to go
with something like that. Over there. I'll add
it to the design. Now you can see that we've also got this one. This
is what it used. But of course, if I
go to my position, it's there, still,
there's the new one. I could just delete that one. So let's right click over here and choose a delete from there. Now I'm going to scale this
up to a sensible size, rotate it into the
right position. I'm kind of thinking
that that will go somewhere like that. Maybe along a little
bit over there. I'm going to take that
underneath the other one. It looks like it's floating, so let's place it over there, and then change the opacity on this so we just get this
very subtle shadow, just like so in the background. Whenever you're doing
shadows and reflections, you shouldn't do them to
the point where people go, Wow, what an amazing
looking shadow. They just shouldn't see them. They should just say,
Oh, it actually really looks like the image
was in that position. You can always go
back to this and adjust it if you want
to change the size, rotate it around,
change the opacity. Lastly over here,
let's go and get this, and we're going to use
the same one that we did before, which
is the reflect. I just need to find
my reflection in here's when you get more
and more of these apps, it's difficult to find the
one that you're looking for. There are only a handful of apps which are really very good. I think I've shown you a
lot of them at the moment. But if you find some
really interesting ones, just use them, put
them in the side. Easy reflect.
That's what I want. Great reflection,
add to designs. It's exactly the same
as we did before. We'll make it a bit bigger over there and
reduce the opacity on that. As well. That gives
us reflection and it also gives us the
shape at the back. If you thought that that shadow over there was a
little bit too dark or gray, what you could do
is you could change the color of it to match
some of the colors in the bottle so it looks almost like the light is coming
through the bottle. Now, we can't do a pure one
in there at the moment. But what I could do
is I can go along to the edit and go down to Duaton and this is where I
can give it a bit of color, so I could just say
color it up like that. Maybe I use the
orange one in there. You can use your own
colors over there and a little bit less
intensity on that. So it's not so gray. It's
got more of that pinky, orangy hue to it. Try that out, have a bit
of a go with a shadow.
55. Font Frame: The last of these apps
we're going to do is to put in a picture
inside the text. So what I want to do is
exactly as I did before, right click on the last one. I'm going to duplicate the page, go to the last page, and I don't want a
lot of these items. So I certainly don't
want that shadow. I don't want the reflection for now, and I don't want the text. All I want to do is
to keep this up here. And what we're going to do
is we're going to go and find an app called font frame. Now, you might
find it down here. I can see it over
there, or obviously if you haven't opened it
before, you go to your apps, and in Discover, you go down and you'll find it somewhere in here or better still just
type it straight in. But once you've used an app, you can click on your apps, and these are all the apps
that I've used before. Now, if you don't want one
of these apps in here, you can just go along to them and click on the
three little dots. And then you can go
down and you can choose remove from your apps in there. That'll just get
rid of it. The one I'm after is actually this
one called Font frame. So let's go and put in the
word that we want in here. I'm going to put in Zola. In fact, I'm going
to do it all in caps, like the other one was. Then I need to go
and find a typeface, which is similar to the
one that I had before. I'm going to try this IBM one. No, that's a little
bit too square. I want something a little
bit softer in here. Now, as always, I
can spend hours in here just looking
at the various fonts. So I'm going to be fairly quick. And that looks reasonably close. I'm going to go to
the frame border, and I'm going to choose white, and I'm then going to
change the border weight down to something quite
delicate and thin. Says choose a file
to include in that. I don't have a file,
but I've got this one. If I click on that, I can
then say use selected Image. When I click on it, what happens is it
places it in there. Now I can click and move that around wherever I want it to go. But I'm actually going to
zoom in on that image. Let's zoom in a bit.
Now, where's it going? It seems to have
disappeared. I think it's looking at this
transparent area here. I I just click and
drag, there it is. I want it to be a bit larger, so I'm going to keep
going with my zooming in and let's move all right. Almost bigger still. That looks really good. I'm just going to add
it to the design. Then of course, I don't
need this one anymore. I can get rid of it, click on that and scale
the whole thing up. Let's do the other side as well, make it a reasonable size. Then because this is an image, I can actually
reflect it as well, so I can go to Easy reflect and I'm going to
create a reflection, add the design, and
let's just scale it up. I think that's about right. Maybe it's a little
bit too large. And then, of course,
I'm going to take the transparency and
reduce that down like so. That's it. We've got
three different pages with our product. And we've used lots
of apps for that. So all you have to
do is go to share, download it, or upload
directly to Instagram. Have fun with some
of those apps. Remember, there's some
really awful ones, but there's some very
useful ones, too.
56. Magic Media: Let's go and have a
look at something else. It's not quite an app, but I'm going to
keep going down. We've got something
called Magic Media, similar to the dream lab. And in here, I can put in
and create whatever I want. I'm going to have
another page in here, but I'm going to create the
perfume bottle from words. I'm choosing photo in
here in the styles, and I'm also going to make
sure it's in a square. So I've copied this. I'm going to paste it straight in so you
don't have to see me watch typing all of that out. It says a perfume bottle with crystal clear glass and a
pale orange liquid inside. That's what I've typed in.
I click on Generate Image, and then you just sit and
wait while it does it. Those are not bad at all. It's quite an interesting one. If I click on there, that
looks fairly realistic. And I suppose I could then use the background remover to
get rid of the background. Or I can actually carry on
and try and do it again. That's done quite a nice job. Let me get rid of
that over here. So I could actually go
and change this and say liquid inside on a
white background. I'm going to change
the orange to blue. Once again, we generate
again and see what we get. Once again, not
bad going at all. This one's rather nice.
It actually looks very, very good in there. But do check it out just in case things don't make
sense in the picture. I have had some strange
ones happening, but these all look pretty
good. Now, that's in images. There's also graphics in here, and once again, I'll
just use the same thing. And we could say, Well,
let's make that as a doodle and generate
the graphic from that. Oh, some of them are quite cool. Really interesting. It's little sort of
logos on the side. And then over to videos as well. And once again, I'm going to just paste
the same thing in. Click on Generate Video
and see what happens. Well, that took about 2 minutes. Obviously, I've cut this down so you didn't have to
watch the whole thing. But let's see what it does. Maybe I'll just drag that
into here and play it. It's quite cool really with the little light coming
on in the middle. Look at that. Let's
just play it again. That's lovely. So this time, it's worked really well, as I said, not always, but experiment with that and
see what you can create.
57. Data Upload Card - Intro: Sometimes you might want
to speed up your workflow. For example, you
might have to do badges for an event
or business cards, something where you
have the same file which is repeated with
different data on it. And Canva gives you
this great way of bringing in data from a
spreadsheet or you can type it straight in and making different variations on a card or a theme from that
data with photos.
58. Create Business Card & Add Headings to Columns: I'm going to create a design, and I'm going to use a
business card up here. And for this business card, I'm going to just
choose a template. I've got all sorts of
templates in here. I'm going to just pick
this one up here. And what I'd like to do
is apply both pages so I get both of them page one
and page two in here. So one side and the other
side of the business card. I'm going to change the text
on here to my business. I'll call this
boss Construction. We just pull that out a
little bit over there, and I'm gonna make it a bit
smaller, as well, I think. You can just do
whatever you want with these the look of it. Then I'm going to go
to the second page. So what we're going to be
doing here is we're going to be taking these bits of information and applying
our own information to it so we can do multiple
cards very quickly. So especially if
you've got to do 200 employee business
cards for 200 employees, or maybe it's something like
name tags for an event, and you've got to do all
sorts of different ones. So what I'm about to do is I'm going to go along
to the apps down here and I'm going to scroll down until I get
to more from Canva. In MeF Canva, there'll
be a bulk Create. I'll click on Bulk Create, and this will open up another
little window in a moment. And then I can enter data
manually or I can upload data. We're going to enter
the data manually. I'm going to click on
that and this opens up a table, spreadsheet. I'm just going to
clear the table because we don't
want that one there. This is where we create the
fields that we want to use. So the first one over here is going to be
the person's name, and then I'm going to
add another field. So I'm going to say add text, and this is going to be their
position in the company. I'm going to add another one over here for their
phone number, another one for the email. And one last one, which is
going to be an image so we can change the image
in there as well. If you'd like to get that far, then we can start to populate
this with information.
59. Add the Images: As you can see, I've
gone and filled out some of these little cells, and I've just put in
made up some names, some positions, phone
numbers, and emails. I haven't done anything with
the image at the moment. Because when it comes to
putting in the image, you have to click on the little plus and then choose your image. Now, I don't have the images
that I want to use in here, so where do I find them? Well, what I'm going to do is, and I won't lose
this information is I'm just going to
click on Done over here. I'm going to go to my uploads, and this is where
those images are. So what I need to
do is to just go and upload some images. I'm going to say upload files, and I've got some images
over here, portraits. These are the ones
that I want to upload. So I'm just going
to click Upload. I'll upload them into here
and then I can go back again when I'm ready to
go and choose the images. I've got my images here. I'm going to go to once
again, Bulk Create. You can see it appears
down here now. Then I want to get back into it. So how do I do that? Well, if I just go from
bulk create just back again and then say
enter data manually, it'll take me into where I was. When I go to my images now, I can then just choose
from those new images. She's going to go in
there. Let's see. That's another she so
she'll go in there. We'll have him in there. Um, that one there. And I think I've made a bit
of a mistake with these, but I will sort them out. Um, I think I've got two in the right place. She's in the wrong place there. So let me just go and
change her to him. And that one. Anyway, you get the general
idea of how this is working. It would help if you actually named your pictures properly. I've just used ones
from a picture library, and I will sort
them in a moment. I think I've got two of him. So finally, I think
that's right. Anyway, once you've uploaded
your pictures, come in, put the pictures in, get your information in
there, click on Done. Then what we're going to
do is with this open, we're going to then link
this information to those, but get that far and then
we'll fix this together.
60. Connect Data: Let's link these to those. I'm going to start with
the name first of all, so I'm going to right click on the name and I'm going
to say connect data. Then here it says, Which
data do you want to connect? Well, I want to
connect the name. You can see it's
picked up over there. I'm going to do the
same with position so the marketing manager, connect data and that's
going to be position. This one here is
the phone number, connect data, phone number, and lastly, the email. Over here and let's connect
the data to that the email. Then over here, we've
got the website. Those are not going to be
connected because they'll be the same for
all of the staff. But I'm going to
go to the picture. Once again, right
click on the picture, connect data and connect
that to the image field. Now that I've done that, I'm
going to click Continue. And over here, it shows me all the fields that are going to be using
with the names, sorry, all the names that
are going to be used. And I'm going to
generate five designs. Click on Generate,
and it's done. So here's our first
one over there. Second one there, third one, fourth one, and fifth one. Now, they're not quite
in the right position on these pictures because I
didn't crop them down first. I just used whatever
picture I had. So I'm going to double
click on the picture and then just move it
down over there. Let me move to this one here. Double click on the picture and move that to
the right position, or I can scale it up because she looks a bit small in there, so let's just scale it
up and get that right. This is a lot faster than
doing them individually. Double click on him. And
we will pop them in there. I think we've got just
a few more to do. Then finally onto this one here, he does need to be
scaled up quite a lot. That's it. They're all done
and ready for printing.
61. Use Chat GPT to Populate Fields: I'm going to do an
Instagram post, so I'm going to click the
Instagram post button. I'm going to use a template. Now, I quite like this
template over here. If I click on that, there's
nothing much to it. There's a bit of text in here, another bit of text
at the top and a little video
over here as well. I want to update this live in the moment over a
number of different posts. So we'll keep the
same or everything else the same except for
this live in the moment. Now, live in the moment is actually grouped with
the name above it. I'm going to ungroup those two, and I'm just going to
move this up a bit, give myself some more
space over here, maybe pull this out a little
bit like that. Over there. So we've got more space
for the quotes to come in. Now that I've got
that, I'm actually going to go to Chat GPT. And in Chat GPT, I've got the setup
because otherwise, it takes me ages to type things. And I've put in create a table one column
wide with ten rows. Each cell will have
an inspirational quote not more than
ten words in length. So when I click the G button, hat GBT hopefully will create
me a single row column. There we go. Okay, so ten rows, that's not really
ten rows in there. There we are. There's the
rest of them coming in. So what I'm going to do
is I'm going to take these ones here and I'm
going to copy them. So let's just copy that. I'm using Command C on the Mac or Control C on
the PC to copy that. Let's go back to Canva. And in Canva, I'm going
to go over here to the left hand side to my
apps as we did before. I'm going to go down here. I'm going to say bulk Create, and I'm going to upload, sorry, I'm going to
enter the data manually. Now, we don't want
what they give you, so I'm going to clear the table, click on that first
cell and paste. By the way, when
you click in these, make sure you click
right into them. It's very just click on one,
it doesn't actually go in. I'm just going to
paste, so that's Command V or Control
V to paste in. Each one of those
has been pasted into a separate cell. Let's say done. Now, I'm going to choose live in the moment, right click it, go and connect the data, and it's going to
be that empty one because I didn't
have a title to it. That's fine. Let's
click Continue, and those are the ones
that we're going to be using we'll
generate ten designs from that there we
have our ten designs. I'll just zoom out a little
bit so you can see them all, each with a different
quote over there. So that's ten days worth of posting done in
just a few seconds. Of course, you can go
to each one of them if you don't like it.
Move things around. I'm just going to
move the text down a little bit on that
one. This one down. Maybe I put that box too high, but it's easy enough to just
fix those very, very fast. Then, of course, you can
then share up the top I could download those or we can use any of the other
options in here, and don't forget this
the CAL option in here allowing you to share
other ways at the same time. Have a go with it. I'll
save you so much time.
62. Create a Website - Intro: This is the last section
and the last project, and we're going to
make a website. Now, this website is going to be one of the long
scrollable websites, but it's going to comprise
of multiple pages. Now, I'm going to use a template to start off
with and then adjust it. You could make yours from
scratch if you wished. And I'm going to
do certain things in the things that we've done already as well
as a few new features. But what I'm going to suggest
is that you could use this to try out all
the different things that you've created
already in Canva to just refresh yourself on them and put them all
into the website. You might not want to use this website commercially
if you've put in every single effect
that you've got in there, but it's a great way to just refresh yourself on all of
the items that you've done. Of course, if you
want to make it for yourself and you do want to make it with
a really cool style, that's absolutely fine as well. But anyway, let's get on
with this final project.
63. Use a Web Template: To create a website,
I'm going to go to the website button over here, and what it does is it
gives me a web page size. And then in my templates, I'm going to find a template that would be appropriate
for the type of website. So the website that
I want to do is for a business which
creates infographics. So I just went in. I've
had a look before. I showed you this, so
I knew which one to go for rather than
you just watching me look through tons of them. I did a search for illustration. I found some interesting
illustration looking websites. But for yours, you can
create whatever you want. If you want to do a portfolio for images or art or
anything like that, type in the word portfolio. If it's a collection of
something, once again, just type in the
appropriate word up the top there to search. I really like this
one over here, so I'm going to click on it, and that then shows me 17 pages that I can
use for the website. Now to use these pages, you can either just
click on them, add them straight in
like that and go, that's my first page there, and I can then add
a second page, go back to the design and click in my second
page in there, or you can just say, apply all 17 pages and you'll see it then adds in all the pages from
that website there. If you don't like any of them, you can just go along
and on the side, there's a little
delete page button. You can just delete the
pages that you really don't want in there. That's
what I'm going to do. I'm going to delete
some of these pages. Over here, so we
don't want that one. Now, I'd like to see more of this site. I'm just
going to do that. This is a scrollable site, so people will
scroll up and down, and we'll have some
buttons so they can jump two different pages in
this scrolled area. We're also going
to change some of the pictures and the
information that's in here. So if you'd like to get yourself an interesting
web page up there, don't put in too many pages. You'll be here forever
and working on it. So, for example, this page here, I'm just going to
delete that one. And yeah, we don't want all
of these ones in there. I think that page, I'll get
rid of that one as well. So maybe just eight
or ten pages, it's entirely up to you. Have a go with that
and then we'll start to adjust the text
and the pictures.
64. Make It Yours: I'm going to go and change some of these graphics in here. They're rather nice, but
they're not quite what I want. I also want to change
the data on there. I don't want the
data to be in there, and I want to get rid
of the little logo at the top because that's not the name of the studio
that I'm working on here. So I'm going to start off by removing that picture,
and then I'll go along. You've done this so
many times before. I'm going to go to my elements, and I'm going to search
for graphic designer, I'm looking really at
these graphics over here and finding something
interesting that might work. This looks like quite
a nice image and it works with the
colors as well. It's got vectors in there. That seems like something
I might want to use or you can choose from any of these
little ones in there. There's another interesting one. Over there, I'm going to
try this one, I think. Once again, it's all about
vector shapes in there. You can do whatever
you want, really. If you want to change the
background color, don't forget. Click on the background,
and you can choose any color that you
like for that. Now that does look a little bit dull with just being white. It's a bit too clinical,
so I'm going to undo that. Going down to my
second page over here, I've got a report from the CEO. Now, I really don't
want this text in here, so I'm going to delete it, and I'm going to go down. I have got some text into
a Word document over here, and maybe this is written by somebody else in the company, maybe it is written by the CEO, or in my case, I got
chat GBT to write it. But I'm going to just
select this bit of text, copy it and paste it
straight in over there. Moving on, once again, we get to this area here. By the way, I've still
got these studio Agatha. I'm going to change
them shortly as well. But I'll then go on to this
one here, do some changes. I won't get you to
watch the whole thing onto this one once again. I've got some text for that, so I'll delete the
text that's in here and just add in the bits of
text very quickly from here. There's my bit of text. Copy
that, paste it straight in. And I'll update
this one as well. Work your way through
all of these pages just updating the text,
updating the pictures. If you have a map like this, they are almost always editable and you can go in and change anything in the map. Exactly the same with any graph. So when you come across
a graph like that, you can go into the
graph, double click it. I'll take you into the chart
area, charter or graph. If you want to change
from one type of graph to a different
type of graph, do that. Then you can also
go to the data, click on the Data button and update all the
information in there. Once again, I will be doing that on mine whilst
you're not watching. We have got these
white backgrounds. I'm going to get rid of the
white background and see if it works better on there. Anyway, if you'd like
to update your website, find some different
pictures to go in there, make it yours, and then we will have a look at these buttons and how
they work as well.
65. Add Links: I've updated all my pages. Now I've got different
pictures on there. I've changed the text, updated everything that
I can think of in here. But the one thing
are the buttons. So this discover more
button over here. When they click on it, I
would like it to just jump to this little page over here so they see right from
the beginning, A, we need to scroll. And this little
button over here, I'm just going to put right up very close to Annual Report. In there, this is kind of
a call to action button. So to get this to actually work, all I've got to do is
to right, click it, go to Link, and then in here, I can choose which page
I want to link to. So I'm going to link to that second page in and
I'll just click Done. Buttons are really
that easy to do. So if I want to go down here, I've got some more
buttons in here. You can make your own
buttons, by the way. You can just take a little shape or a graphic or
anything like that. Right click it and
choose Link in there. So I've got a few more in here. I'm going to go to
this one over here, so I'm going to
right click that. I'm going to ungroup it to start off with so I can actually just go to
the button itself. Right click that one, link it, and that's being linked
to I think it was this page over here. Same
again with this one. I'm going to ungroup that
button, right click Link. That gets linked to the
Team, which is down here. And last one over here, we will just unlink that.
Sorry, ungroup that. Right click Link, and that
one gets linked to the map. I believe that one there. Now, as I said, you can do
anything that you like. Over here, we could actually
go into this percentage, right click on that and link
that to something else. I'll link that once again
to another area here about finance. Over there. Or we can go to a
picture over there, click on the picture,
click it, shall I say. Now, why won't allow me to link? Well, I need to make
sure I ungroup it first. Click on the picture,
right, click, Link that, and that's going to be
linked because she's the CEO to the CEO at the top.
66. Publish Your Website Live: Now that we've done that, let's see what the website looks like. I'm going to go up to preview, click on preview, and we
can then scroll down. You'll see the little
animations happening as well as I'm moving down, all the headings move in there. These ones here, they don't seem to do
anything at the moment. Sometimes when you
go too slowly, you miss the
animation over there. Let's just go up a little bit here. So I'm happy with that. But what will look
like on a phone? Well, if we go over here, we can see that on a mobile. And once again, I can
just scroll up and down to see how it's
going to look on a phone. Let's close that one down.
So do have a look at that. Use the preview button, check it out, see how it looks. Then we can go and publish it. So once you feel happy with it, you click the publish
website button next to that over here. Over there, it says,
Resize on a mobile, and we could also include a navigation menu if
we wanted to, as well. Now we need to give
this a URL link, and it's going to be my dot
canva dot sit over there. You can use a custom
domain and you can buy the domain
within Canva itself. I'm going to choose a URL
for this and I'm going to say my studio Vector. Over there and publish settings, if I click on that, I can just do a little bit of
description on the website. Put in the main keywords
that I want for that. I won't bore you
without at the moment, but I could do
that very quickly. Let's go back again and I'll say publish website in there, and then we just
have to sit and wait while it updates and publishes, the website is now live. Let me copy the URL in there. I'm going to go to
browser Press return, and there it is
looking pretty good. As I move over discover more, you'll see that
the little finger comes up so I can click. It takes me down
to this page here. I can move down to
any of these buttons. Click on the button to
jump to a specific page, click on a picture
to jump to a page, but it's all one
below the other. And when you go through these, you'll find that the first time the little animation appears when you go from one
page to the next. There you have it a really
quick and easy website done in Canva. And as I said, if you want to get your own custom
domain, you can do that. It's some wins of
20 to $30 a year, I believe, for that. And then it won't even say
Canva on the URL link. Have fun with that, create something wild and
wonderful for yourself.
67. Well Done & Thank You: Congratulations on getting
to the end of the course. I'm sure you're
creating awesome work, and I hope you enjoyed
doing the course as much as I enjoyed
creating it for you. Don't forget to
show your projects, and also please leave a review. It really helps us
out. And lastly, look out for the
other courses that we do in graphics,
stills and video.
 Tim Wilson, Adobe Certified Instructor and Expert