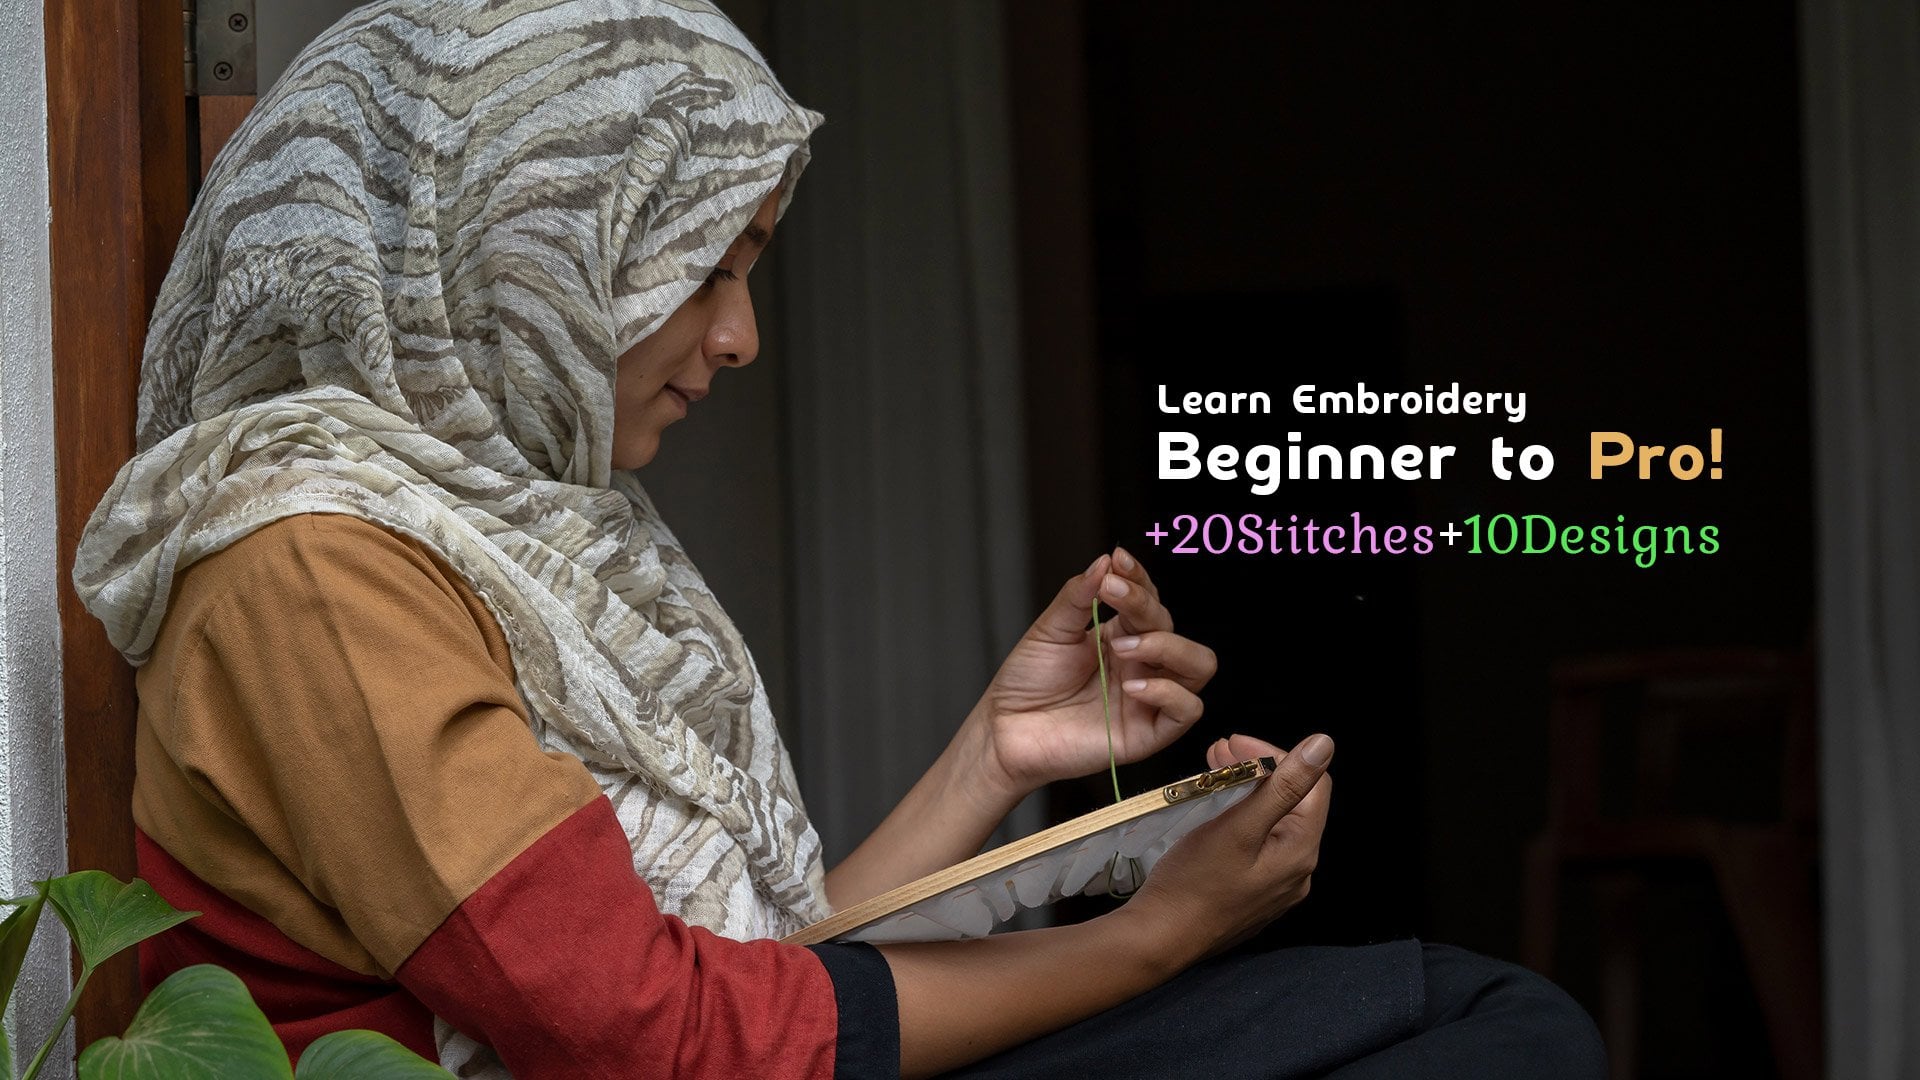
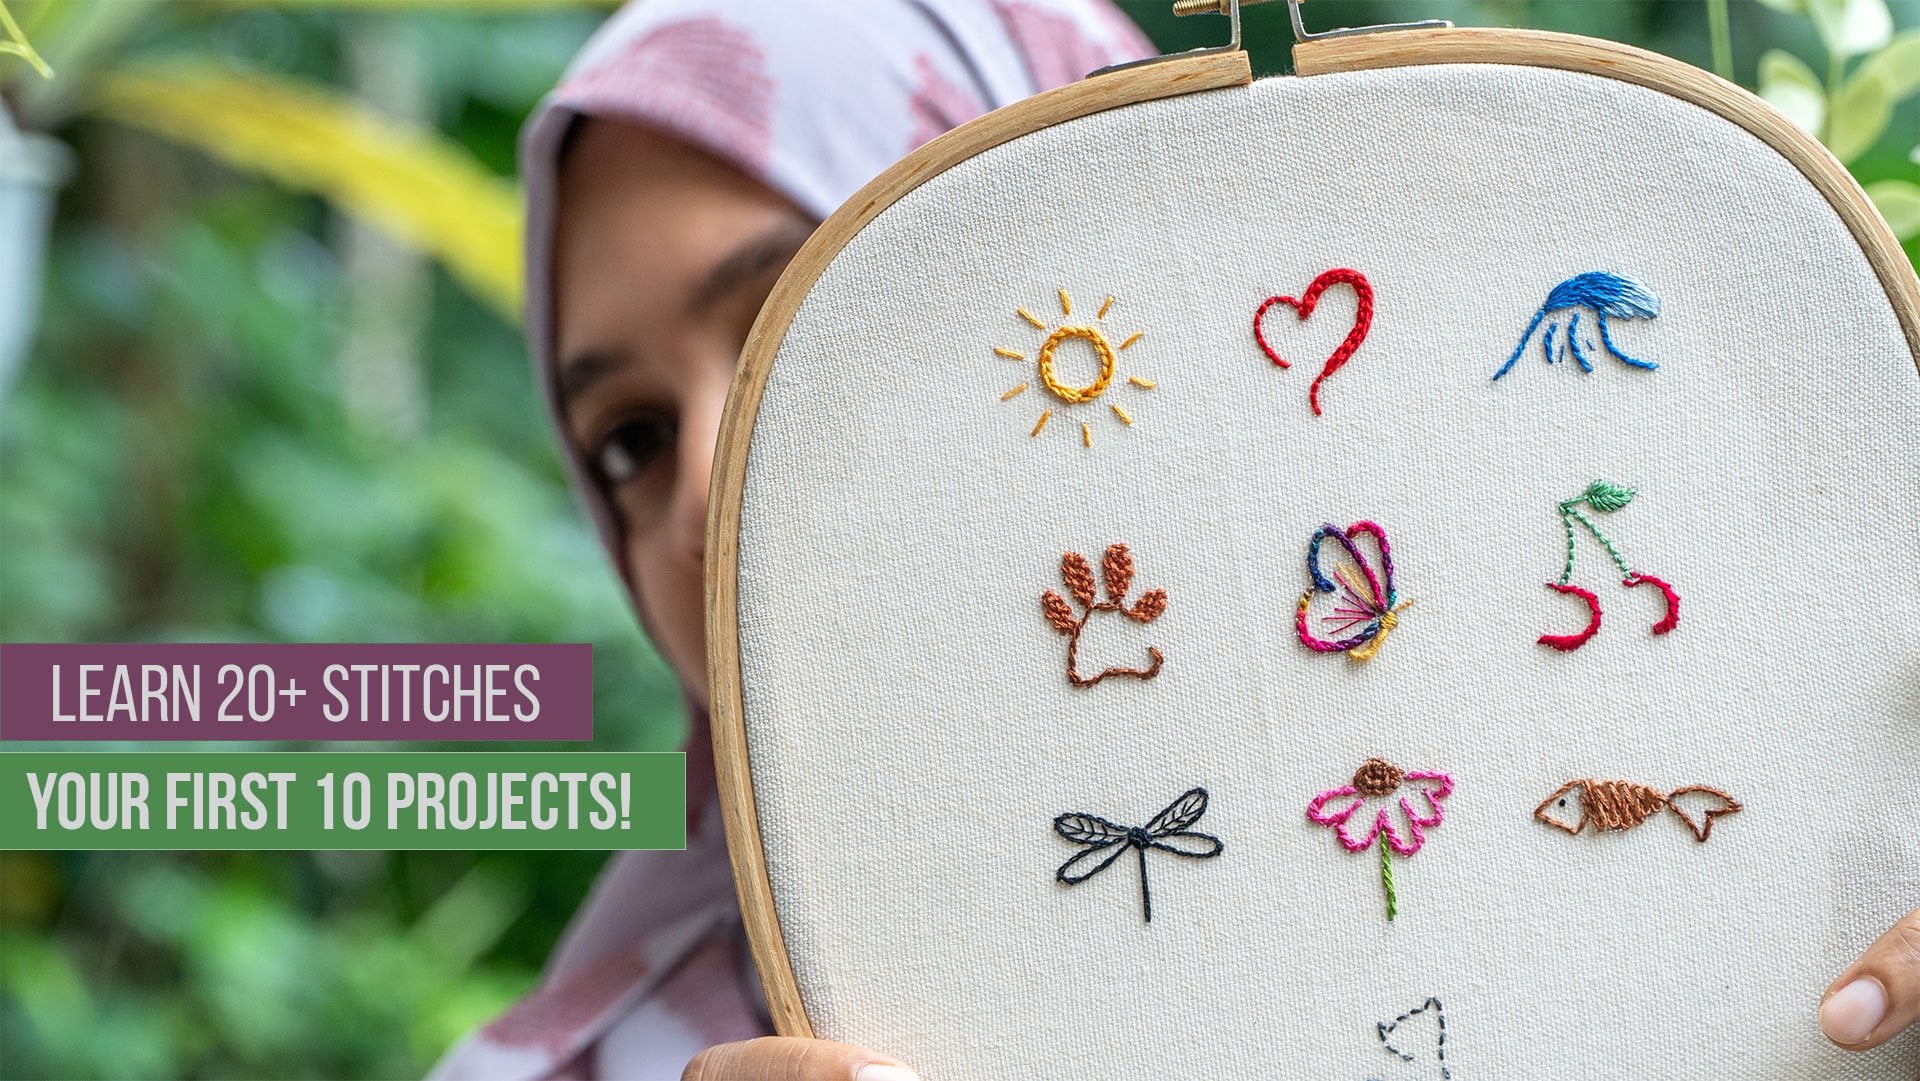
Transcripts
1. Introduction to Dress Embellishment: Have you ever wondered
how to transform a simple garment into a
one of a kind masterpiece? Or maybe you're
looking to become a textile artist yourself, designing your own
fashionable clothes. If so, then this is
the course for you. Hi, I'm Shane, and I'm a
passionate embroiderer, a teacher, and a
content creator. I'm so glad you're here to join me on this
creative journey. In this course, I'll be your guide to the art
of dress embellishment. We'll explore a variety of beautiful hand
stitching techniques that will allow you
to create stunning, personalized designs
on any garment. We'll start with the
fundamentals and then build our way up to
more intricate patterns. We'll begin with the most
important foundation, learning how to draw perfect
grids on your fabric, the secret to neat
and elegant patterns. You'll master a simple but beautiful running stitch
and weaving technique to create an amazing
textured border. We'll apply our skills
to a ready made blouse, creating a lovely
embroidered neckline that will make any
dress special. We'll tackle a more advanced
geometrical pattern, turning a simple top
into a work of art. And for our final project, you'll have the chance
to apply everything you've learned to a
detailed butterfly design. This is your chance to
show off your new skills, and I can't wait to
see what you create. So get comfortable, get your
needles and threads ready, and let's start creating. I'll see you in
our first lesson.
2. Foundation First: Drawing Grids on Fabric: Hello, everyone, and welcome to my special new course on dress embellishment
techniques by hand. In this lesson,
we're starting with a fundamental yet incredibly
important lesson, how to draw grids
on your fabric. I'm going to show you three
fantastic methods for drawing grids that you can use for
all our upcoming projects. Our first method is simple
and straightforward. You'll need a ruler and
a heat erasable pen. First, take your ruler and
place it on your fabric. I'm going to start by marking dots along the
edge of my fabric, using half centimeter gaps
to create a nice even grid. Once I have my dots marked along all four sides
of my square shape, I'll use my ruler to
connect them drawing straight lines from top to
bottom and from side to side. Don't worry if you don't
have a heat erasable pen. You can also use a water
soluble pen or pencil, which will wash away
easily when you're done. Another simple and
effective method is to use a Taylor's
chalk pencil, which brushes right off the fabric when you're
finished stitching. As you can see, this creates a perfectly uniform
grid of squares. This is your foundation
for building beautiful geometrical
patterns with your stitches. You might be wondering,
why do I need a grid? Well, using a grid is the
secret to creating precise, neat and elegant patterns, especially for geometrical
and textural designs. It ensures your
stitches are even and your final design is perfectly
balanced and professional. For our next method, let's say you want
to stitch a grid inside a specific
shape like a circle. This is where a simple piece of graph paper can be
your best friend. I've already drawn a circle on my graph paper and cut
it out into a square. Graph paper is great because the squares are already
perfectly aligned for you. I'll now pin my square of
graph paper onto my fabric, securing it so it doesn't move. Using my heat erasable pen, I'll mark dots on
my fabric through the corners of the squares
on the graph paper. This pen is truly a
Stitch's secret weapon. It allows you to erase any unwanted marks simply by applying a little
heat from an iron. So don't worry about
making a mistake. After I've marked all my
dots along the four sides, I'll remove the graph paper. Now using my ruler and pen, I'll connect these dots to draw a perfect grid inside
my drawn circle. You can see how easy
and precise that is. Hi. See how easily those marks disappear
with just a little heat. It's amazing. For
our final method and honestly the easiest one, we're going to use a
cross stitch canvas or a plastic mesh. Just place the mesh
directly on your fabric, making sure it's straight. Now simply start marking
dots onto your fabric, using the holes in the
mesh as your guide. This is a fast and
foolproof way to get a perfectly spaced
grid in no time. Why these grids are
a game changer. It allows you to add
unique textures, create bespoke clothes,
enhance any garment. Now that we have our grids, you might be asking,
what's next? Let me show you. Here I've printed and cut a leaf
shape out of paper. You can see how I'm able
to place this shape onto my grid and then
draw the outline, giving me a perfect
foundation for my stitches. Using these grids,
you can create unique and elegant patterns
with your needle and thread. These aren't just
for small designs. You can use this method to add beautiful
textures to garments, creating stunning
geometrical patterns or even more complex
embroidery arts. You can print any
design you like and transfer it using
another method. Simply place your
printed pattern underneath the
fabric and trace it. For darker fabrics,
a light box or even a bright window works wonders to help you
see the lines clearly. Learning these hand stitching
methods is so important, especially in the world of
dressmaking and fashion. You can use these techniques
to embellish everything from a simple t shirt to an
elegant evening gown, making it truly special. In our next lesson,
we're going to take what we've learned here
and put it into practice. We'll be doing a very
simple running stitch with a weaved pattern
on a dark fabric. You'll see how I use these very grids to create a
beautiful and neat design. So get your materials ready, and let's get stitching.
3. The Elegant Running Stitch: Your First Pattern: In our last lesson, we mastered the art of drawing perfect
grids on our fabric. In this lesson,
we're going to put that skill to use and
create a beautiful, simple and elegant border pattern on this lovely
black cotton fabric. I've already secured
my fabric in an eight inch wooden
embroidery hoop to keep it nice and taut. For this project, you'll need your trusty white
heat erasable pen and your plastic mesh. I'm placing the plastic mesh on my fabric and starting
to mark my dots. This process is all
about consistency. The plastic mesh
makes it foolproof, so just relax and
take your time. This small effort now will
pay off with a stunning, symmetrical finished
pattern later on. I'll mark four parallel
lines of dots, keeping a consistent
four to five millimeter gap
between each line. As you can see on
this dark fabric, the white pen stands
out perfectly, making it so easy to
see what I'm doing. I'm going to my floss collection and choosing this
beautiful light page. On a dark fabric like black, using a light color creates a fantastic contrast that
really makes the pattern pop. Cut a longer thread
than you think you need enough to complete
your running stitches. If it's a bit too
short, no worries. You can always
secure the thread at the back of the fabric
and start with a new one. I'm now pulling out two
strands of floss one by one. I want to have a delicate look, so we'll be stitching with
a total of four strands. Next, I'll thread my needle and tie a secure double
knot at the end. Let's begin our
running stitches. I'm starting from
the first line on the left and stitching
all the way to the right. While we're using a dark
fabric and light thread today, you can also try this on a lighter fabric with dark
threads for a different look. It's especially beautiful on
delicate fabrics like silk. The key is to match your thread color to
the fabric if you want a subtle texture defect or choose a contrasting color
for a bold statement. Once I finish that line, I'll move to the second line and stitch in reverse
from right to left. I'll continue this process on all four of my dotted lines. This is a satisfying
and rhythmic process, and it's so helpful for stress relief and
mental well being. It's like a peaceful meditation
with a needle and thread. You'll see how quickly these simple stitches
build our foundation. Our foundation
stitches are done. I'll secure the thread at
the back of the fabric. But instead of cutting it, I'm going to grab a
different needle from my pin cushion, a
tapestry needle. I chose a tapestry
needle because its blunt rounded tip won't pierce the fabric or
my running stitches. This makes it perfect
for weaving without catching or damaging our
foundational threads. Using the same four
strands of thread, I'll come back to
the top left of our first running stitch line. Now, just relax and follow my
needle as we start weaving. We'll go over and under
each running stitch, creating a beautiful
interlaced pattern that adds a lovely
braided texture. S. As you weave, you'll see this simple
running stitch transform into a truly elegant
and unique border. This is a method
that's easy to learn, but makes any garment
look incredibly special. You can use this technique to
embellish a simple t shirt, add a unique border
to a sleeve cuff, or create an entire all over
pattern on a bag or skirt. It turns an ordinary
item into a work of art. This simple method
is the gateway to more complex geometric patterns and other unique
embroidery arts, giving you endless
creative possibilities. Once we've finished weaving, I'll secure the thread
on the back and then give the fabric a
quick press with an iron. Oh See how all those pen dots
vanish instantly, leaving a clean and
beautiful design. This pattern gives our fabric
a new life and a new look. For our next lesson,
we're going to learn another stunning pattern and apply it directly onto a dress. Get excited and I'll
see you there. Oh
4. Customizing Garments: A Weaved Neckline: In our previous lessons, we learned how to draw
perfect grids and practiced a beautiful running stitch with a weaved pattern
on a dark fabric. Now, we're going to apply this wonderful technique
to a ready made garment. I hope to stitch a simple
yet elegant pattern for the neckline of
this silk blouse. To begin, let's
select our colors. I have my floss collection here, and for this beige blouse, I've chosen these two flosses, a lovely yellow
and a rich brown. I think this combination
will give a beautiful, sophisticated look to the dress. Next, I'll draw two
parallel lines. Instead of a full grid, we only need two parallel lines to follow the V shape
of the neck line. You can also use your
ruler to mark dots with 1 centimeter gap and then connect them to create two
perfectly parallel lines. For curved neck lines, you can use a curved ruler
or even a simple object from your home like a plate or a bowl to help you draw
a perfect smooth line. It's all about finding what's easy and
works best for you. Now let's get our hoop ready. I'll use this oval
wooden hoop and carefully fix it to the neck
line area of the blouse. When you're stitching on a
ready made garment like this, it can be a bit challenging. A good tip is to choose
a hoop that fits the space and be mindful of how you're
holding the garment, so you have enough room for your needle to go
down and back up. Let's get our threads ready. As we did before, I've pulled two strands of floss from both the yellow and
the brown threads, preparing both at once. For colors, I've chosen
these two beautiful flosses, a bright yellow
and a rich brown. This combination will give a lovely sophisticated
look to the dress. Okay, now our threads
are ready to stitch. We'll start with
the yellow flows for our running stitches. As I begin to stitch
along the first line, I'm taking care to
keep my stitches even. To make your running stitches
neat and perfectly even, you can also mark half centimeter dots on your parallel lines before
you begin stitching. This will give you a clear
guide for each stitch, which is especially helpful when you're just starting out. For the second parallel line, I'm carefully positioning
my stitches so they fall in the blank spaces opposite
my first line of stitches, which creates a very
neat, staggered effect. Remember to relax and take rest while doing your
embroidery projects. While I'm using an
embroidery hoop stand to keep my hands free, and for a comfortable
stitching position for this video, this
isn't necessary. You only need the embroidery
hoop itself to start. The most important
thing is to be comfortable and to
give yourself breaks. Now that both lines of running
stitches are complete, we move on to the weaving part. I'm switching to my
tapestry needle, which is perfect for this, and I've threaded it with the four strands
of brown cloths. Starting from the bottom of the right side of the neckline, I'll begin weaving
through and under the yellow running stitches,
alternating my path. Now, just relax and follow my
needle as we start weaving. We'll go over and under
each running stitch, creating a beautiful
interlaced pattern that adds a lovely
brided texture. As you weave, you'll see this simple running
stitch transform into a truly elegant
and unique border. As you're weaving, you might find that your
thread gets short. Don't worry. That's
completely normal. Just take your needle to
the back of the fabric, snip your old thread, and start with a new one. You can secure the ends later after you've
finished the weaving. As you weave, you'll see how
the brown thread creates a beautiful braided pattern on top of the yellow
foundation stitches. This technique creates an elegant border
that's easy to learn, but makes any garment
look incredibly special. And You can apply it to a simple t shirt, a tote bag, or even use it to create a stunning
all over pattern. Whether you're on a
sofa or in the garden, find a rhythm that works
for you and don't hurry. This process is a wonderful
way to relax and distress. I highly recommend practicing on a scrap piece
of cotton fabric first to get a feel for the rhythm and to find the
perfect color combinations. Learning to embellish
garments with hand stitching is not only a
fantastic creative outlet, but also a valuable skill that can turn into a
home based business. I hope you enjoyed this lesson. In our next video, we'll learn another incredible
pattern. See you there.
5. Geometrical Wonders: Creating an Intricate Pattern: Hello, everyone, and welcome
to our fourth lesson. In our last lesson, you learned how to create a simple but elegant
pattern for a neckline, and today we're going to
build on those skills with a unique and beautiful
geometrical design. We're going to apply
this pattern to this lovely cotton long top
just below the neckline, giving the dress
a brand new look. First, let's fix our hoop. This time, I'm using my
eight inch oval hoop. Hoops come in many
shapes and sizes, round, oval or square, and they can
be made of plastic or wood. The best one to use
is simply the one that comfortably fits the
space you're working on. I'll carefully fix my hoop, making sure the fabric is pulled evenly and taut
with no wrinkles. Now for our grid, as we
learned in our first lesson, a perfect grid is the key
to a beautiful design. For this time, I'm using my
graph paper to draw our grid. I have cut a piece of six
millimeter graph paper to 12 squares by 24 squares. I'm pinning the graph paper in the right place on the dress, marking my dots on
all four sides. You can adjust the square
size to your preference, like four or 5 millimeters to make the pattern
bigger or smaller. Then I'll draw lines
vertically and horizontally to create
my perfect grid. Now for the pattern, this time, we're going to mark a
special design on our grid. We'll be stitching
two sets of patterns. Each set will be made
of four squares, and the second set will be placed directly
below the first one. I'm going to carefully mark
these patterns on my grid. You can use a different
colored pen to help you distinguish your pattern
from your grid lines. Okay, our pattern is marked
and ready to stitch. If you're having
trouble understanding the pattern, you
can download it. Please check the links
below to download it. Oh Now for our threads, I've pulled two strands
from my six strand floss, so we'll be stitching
with four strands total. As before, I've prepared my
needle to begin stitching. We're going to create our foundation stitches with
simple straight stitches. When you're working on a
ready made garment like this, it's all about finding a
rhythm and being patient. Take a longer thread so you
don't have to stop too often. But if it gets short,
just secure it at the back of the fabric
and start with a new one. We've now completed
our two sets of patterns with eight
individual boxes filled with our foundation stitches.
Time for the weaving. I'm using the same thread, and as you know, I'm going to grab my tapestry needle again. Remember, it's blunt
tip allows us to weave without piercing the fabric
or our foundation stitches. Mm. Starting with my
needle on one side, I'm going to weave under the foundation
stitches we just made, alternating left and right. H This is where the magic happens. You'll see this beautiful geometrical pattern
start to appear. Okay. Weaving should be a
relaxing process. Find your rhythm just like we talked about before,
and don't rush. This is a meditative and
calming part of the project. See how this simple
weaving gives this dress a new
and unique look. Okay. Okay. Okay. To help you get the hang of it, pay close attention to the
way I'm moving my needle. I'll start with the top square, then move to the right,
then the bottom, and finally the left. Just follow the movement of my needle and you'll
easily get the rhythm. You'll see this beautiful geometrical pattern
start to appear. You can apply this exact pattern to other items like tote bags, tenem jackets, or
cushion covers. Try this on a dark fabric with a light colored floss or vice versa to create
a striking contrast. Use this technique to
create a wide border or to cover an entire section of fabric with a beautiful
all over pattern. This kind of hand stitching
adds a unique texture and a personalized touch that you
can't get from a machine. It's an art form that can be both a fulfilling
hobby and a business. I hope you enjoyed this lesson. In our next lesson, we'll learn another
incredible pattern. I'll see you there.
6. Your Final Touch: The Advanced Butterfly Project: You've already learned how to stitch a simple border pattern, a beautiful neck line pattern, and also a simple diamond
pattern on a long top. With these skills, you can now easily embellish any dress. This lesson is our
final challenge where we'll tackle a more advanced
embroidery pattern. Think of it as your final
assignment for the course. I can't wait to see
your finished designs, so please submit a picture of your work at the
end of this course. For this final project, we're going to stitch this
beautiful butterfly pattern. For light colored fabrics like this white cotton
fabric I'm showing you, the pattern is easily visible
right through the material. All you have to do
is place the pattern underneath and mark the
dots and grid lines. You can download and print
it on A four size paper. I've already included a six millimeter
grid on the pattern, which makes it incredibly easy to transfer
onto your fabric. If you're working
on a dark fabric, a light box is your best
friend for tracing. You decide which method works best for you
and your fabric. For my project, I'm choosing a rich dark maroon
hanloom fabric and I'll be using my ten inch
wooden hoop to get started. I'll carefully fix my fabric, making sure it's taut and that the hoop is
tightly screwed. We don't need graph
paper for this one. I've already done
that part for you. I've already cut my
square grid pattern from the downloadable file. I'll place the grid
on my fabric and use my white heat erasable pen to
mark the dots for my grid. I'll mark all four
sides of my square and then cut out the butterfly
shape to use as a template. I'm using my small
embroidery scissors to carefully cut it out. Now, I'll place the
butterfly template inside the square on my fabric, and then I'll draw
the butterfly shape first, and then the grids. I'm starting by drawing my vertical lines
from the middle. These lines are your guides, your roadmap for
the entire design. After drawing the
vertical lines, I'll draw the horizontal ones. This completes our grid, creating perfect six by
six millimeter boxes that will serve as our guide
for the entire pattern. Remember to take your
time with this part. Keep calm. And if you're
using a heat erasable pen, you can even draw the full grid first and then place the
butterfly pattern on top. Our grid is ready, and we're ready to stitch. For my threads, I've chosen a bright gold and a soft beige. I'll be using the beige floss for our foundational
running stitches. I've pulled two strands
from my six strand floss, and I'll use a thin
small needle to begin. I'm going to start by stitching
the horizontal lines of running stitches from the top of the butterfly's left wing
going from top to bottom. Remember, our stitches will be placed on the plus
signs of our grid. I'll continue completing
each line one by one. Make sure your
stitches are even. You can also mark
half centimeter dots on your parallel lines
before you begin stitching. You might find that
your thread gets short. Don't worry. That's
completely normal. Just take your needle to
the back of the fabric, snip your old thread and
start with a new one. You can secure the ends later after you've
finished the stitching. When you're stitching near
the edges of the pattern, you might have to
make half stitches. Fill those edges with small stitches to get a
clean, finished look. Remember, this is our
foundation, so take your time. If you feel tired, take a break and have
a cup of coffee. I have now completed all my horizontal lines
of running stitches, and I'm moving on to
the vertical lines, starting from left to right. Don't rush these projects. Take your time and
rest if you get tired. These kinds of projects can
take a few days to finish, and that's perfectly normal. He Remember to secure your threads. Once you finish your
running stitches, remember to secure the thread at the back of the fabric
with a small meat knot. Our base stitches
are now complete. Let's do the weaving. I'm threading my
tapestry needle with the beautiful gold floss
using three strands. I'll begin weaving through the vertical stitches
horizontally from left to right. This part is incredibly
easy and relaxing. Just follow the
rhythm and you'll see a beautiful pattern
start to appear. This is a more
intricate pattern, so I highly recommend
you first practice this weaving technique on
a simple square shape. Once you get the hang of it, you can then confidently
apply it to the butterfly. Say these hexagon shapes, you'll have to wait a little longer to see the final texture, but the result is amazing. A You can easily get the hang of it just by carefully following
the movement of my needle and you'll understand how to
weave this pattern. Take your time to become an expert before you
tackle the main project. Earning to embellish
garments with hand stitching is not only a
fantastic creative outlet, but also a valuable skill that can turn into a
profitable business. Now that our horizontal
weaving is done, let's do the vertical weaving. I'll rotate my hoop 90 degrees. Using the same gold floss, I'll now go under the
horizontal stitches in a zig zag motion going
from top to bottom. Just like before this
is all about rhythm. This technique, often
called a lattice or woven filling can be
applied to any other shape, a fish, a turtle, a leaf, or any of
your own designs. Be creative and try mixing
different colors and fabrics. Now that you've mastered this woven technique
for the wings, feel free to get creative and further decorate
your butterfly. For your final assignment, I want you to complete
this butterfly project. Upload your picture in
the project gallery. I would absolutely love
to see your designs. You could use different
embroidery stitches like satin stitch or seed stitch to fill in the butterfly's abdomen,
head, and antennae. Try experimenting
with different colors and stitches to truly
make it your own. Thank you so much for
staying with me throughout this course and completing
this final project. You can transform
ordinary garments into bespoke one of a kind pieces
that you can sell or gift. It's done. This amazing pattern gives our butterfly
a new unique look. I'll now iron it to remove all the pen marks and reveal
the clean finished design. We have now completed
this course. I hope you've learned these
unique embroidery methods to enhance your
garments and dresses. I can't wait to see
what you create. Happy stitching.
7. Bonus Lesson: Modern Geometric Flower Design: Welcome everyone to our
final and bonus lesson of the dress
embellishment course. This half circle design
is so versatile. Imagine it on the back
of a denim jacket, the bodice of a blouse, or even a decorative pillowcase. To get those flowers
perfectly symmetrical, we need a precise grid. I'm using a rectangle of graph
paper with six MM squares. I'll pin it right onto my fabric which is
already snug in the hole. I'm pinning the rectangle of paper directly onto the fabric, which is already
tied in my hoop. Make sure the paper
is flat and smooth. By pinning it first, we ensure that the paper won't move
while we're marking, so our 6 millimeters grid stays perfectly aligned
across the whole surface. Using a white heat-erasable pen, I'm marking dots
at every corner. Once the paper is removed, I'll connect those dots to
create a grid 25 squares wide. To get that perfect
half circle shape, I'm using a simple
ring as a guide. Once the shape is drawn, I just iron away the grid
lines outside the circle. It's like magic, a
perfectly clean workspace. I'm marking dots
on the first row, then X marks on the third, then dots again on the fifth. This creates the map
for our flowers. Now, let's prepare our thread. I'm separating a single strand from my black embroidery floss. We want to keep these foundation stitches very thin and subtle. By using just one strand for
our double cross stitches, we create a strong anchor for our flowers without adding too much bulk under the petals. The needle is threaded and my knot is secure,
so let's dive in. We're starting with our
black foundation stitches. I'll bring my needle
up from the back at the corner of the
first grid square. Remember, we are aiming
for a clean X and then A plus on top for each
of these marked spots. Since black on black can
be a bit tricky to see. Keep an eye on the diagram
I'm showing right now. Those red marks represent every double cross
stitch we're making. If the grid gets
a bit confusing, just download the pattern from the link in my description. It's a perfect reference to keep next to you
while you stitch. We are working in a
half circle today, but you can use this grid
for any shape you like. Don't ignore those small partial squares
along the border. It might be a little tight, but make sure to fit your double cross stitches
into those edge pieces. Even if only a tiny corner of the square is
inside your line, you must carefully stitch your cross stitches on
those partial grids, too. This ensures that the
final shape looks like a perfect smooth curve rather than a jagged edge once
we finish our weaving. On the X marks, we'll use a single
strand of white. This foundation is the
skeleton of our design. Now for the fun part, weaving, switch to a tapestry needle here because it has a blunt tip. I will glide under
the stitches without piercing the fabric or
splitting your threads. A quick note. My footage for the very first petal
was corrupted, so we're jumping in
at the second petal. Don't worry. The steps
are exactly the same. I am using two strands
of off white floss, starting from the white center, weave under the
black cross stitches to create four petals. To make them look full and lush, I'm wrapping each petal twice. Embroidery is more
than just a craft. It's a form of therapy. You want a different vibe, try bold neon colors on dark fabric or soft
pastels on white linen. Next, I'm switching to four
strands of beige floss. We're going to weave
another four petals right between the white ones. See how the flower blooms. Just repeat this
for every set of crosses until the half
circle is filled. Don't feel limited
by the half circle. You can use this technique
to fill a full circle, a square, or even follow
the neckline of dress. Taking the time to count
your stitches and watch a pattern emerge is incredibly relaxing and great for
your mental well being. So take a deep breath, be patient with yourself, and enjoy the process. We start with a foundation
of double cross stitches. It looks like a simple grid now, but watch what happens
when we start weaving. You'll notice I've switched to a tapestry needle for
the weaving part. This is so important because
it has a blunt rounded tip, it will glide right
under your base stitches without snagging the fabric or splitting the black thread. I am adding some delicate
straight stitches using a single strand
of off white floss. While I love the
high contrast look of off white and beige
on black cotton, don't be afraid to experiment. This pattern looks incredible
on dark denim jackets using bright neons or on heavy white
linen with soft pastels. It's all about finding the combination that
fits your style. Remember, embroidery is more
than just decorating fabric. It is embroidery therapy. The rhythm of the weaving
and the focus required for the geometry is a wonderful way to slow down and
practice mindfulness. It's healthy for the mind and
beautiful for the wardrobe. Use a single large half
circle at the neckline of a plain dress to act
as a built in necklace. Mirror the design
on both cuffs of a charm sleeve to add weight
and luxury to the drape. Don't be afraid to be creative. Fill a whole circle or even a square and experiment with colors that speak to you. Thank you for stitching with
me throughout this course. I can't wait to see how
you use this pattern to transform your own
clothes. Right.
 Shanas, Embroidery for Everyone