Transcripts
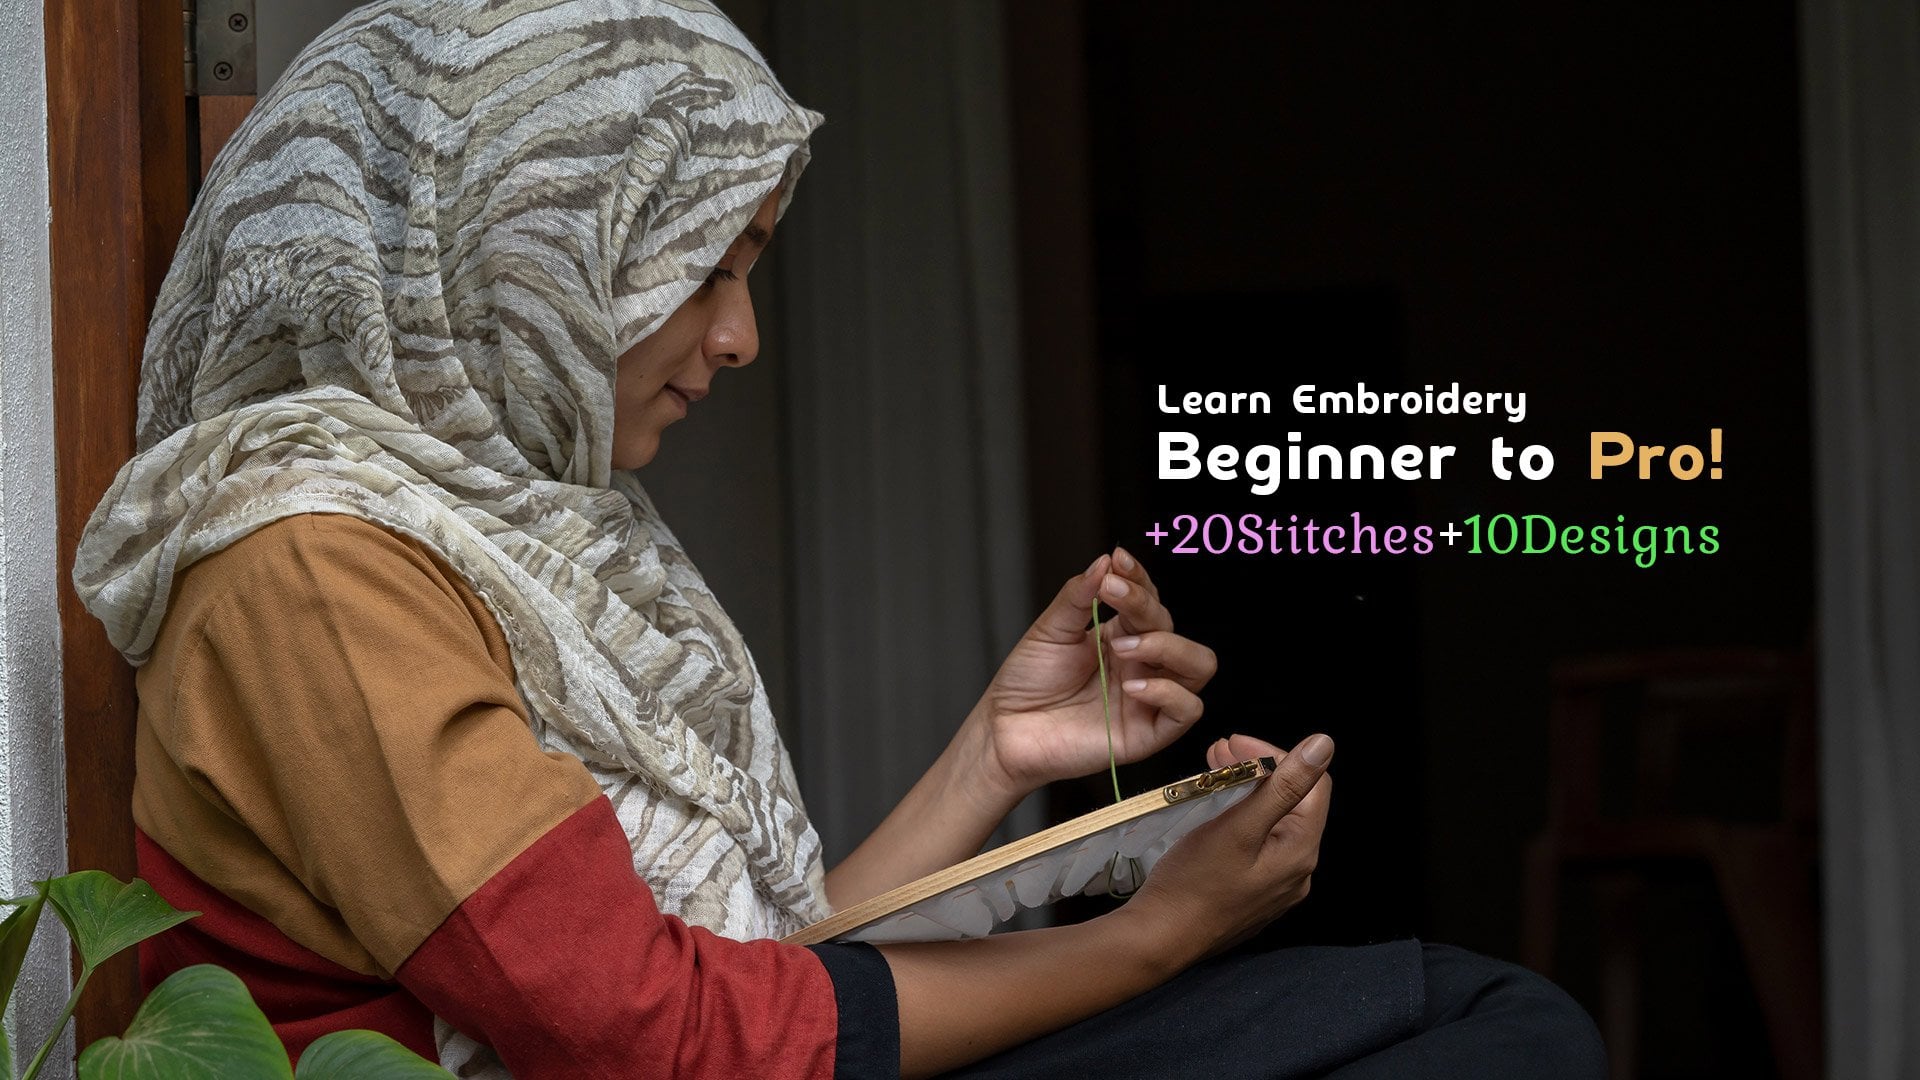
1. Presentation: Have you ever looked
at a beautifully embroidered piece and thought, I wish I could do that. Or maybe you're already
a stitcher looking for fresh inspiration.
Hey, everyone. I'm Shan and I'm just
so excited you're here. As an embroidery
artist and teacher, I absolutely live
for the magic you can create with just
a needle and thread. Well, you're in
the perfect place. I'm absolutely thrilled to introduce you to my
new online course. Easy embroidery for ten
designs to get you started. Beyond my embroidery
and teaching, I absolutely love
traveling and finding joy in stitching with
nature as my inspiration. In this course, we're
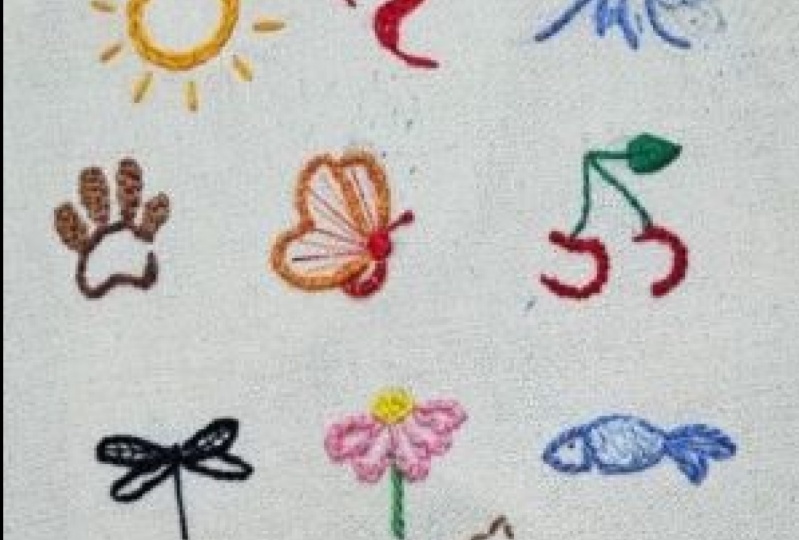
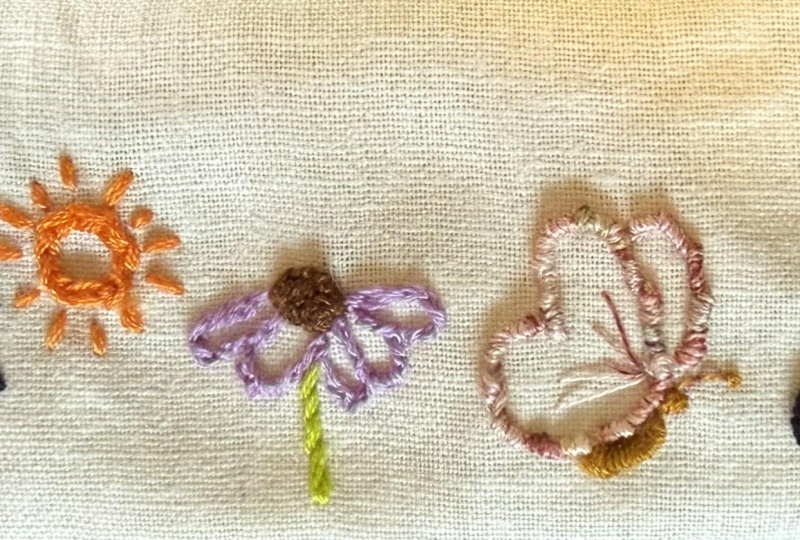
going to create ten stunning and super fun hand embroidery
designs together. Whether you're picking
up a needle for the very first time or you're an experienced stitcher
who just wants to relax and enjoy
some new motifs, this course is designed
for absolutely everyone. It's not just about the designs. Through these
projects, you'll learn more than 20 different
embroidery stitches from fundamental basics to more decorative and
textured stitches. I'll also be sharing all my best tips and tricks
I've gathered over the years, helping you achieve neat, beautiful results every time. The best part, this course is
incredibly easy to follow. I'll be guiding you step by step through every
single process. You'll be amazed at what
you can create with just a needle and
some colorful thread. So are you ready to embark on this beautiful
stitching journey with me? I'm so excited to share
my passion with you and help you discover the
joy of hand embroidery.
2. Gathering Your Tools: Hello, wonderful stitches, and welcome to our very first
lesson of easy embroidery. Ten Designs to get you started. Before we begin stitching
our beautiful designs, let's look at the
essential tools you'll need for this course. You can see I have a piece
of cotton fabric here. For hand embroidery, a medium weight cotton
fabric is ideal as it's sturdy enough to hold
your stitches but not so thick that it's
difficult to needle through. An embroidery hoop
has two parts, an inner ring and an
outer ring with a screw. First, loosen the screw on the outer ring and
separate the two parts. Now take the outer
ring and gently push it down over the
fabric and the inner ring. You might need to apply
a bit of pressure. Once both rings are together with the fabric
sandwiched in between, gently pull the edges of your fabric outwards
from all sides, pull gently working
your way around the hoop until the fabric
feels as tight as a drum. You want it to be firm
with no sags or wrinkles. Once your fabric
is perfectly taut, tighten the screw on
the outer ring firmly. This locks your fabric
securely in place. Starting from one point, begin making simple
running stitches all the way around the outer
edge of the excess fabric, about half an inch or
an inch from the hoop. Just a simple in and out stitch gathering the
fabric as you go. See, now our fabric
is perfectly tension, secure and ready
for the next step. Our next step is just as exciting transferring our
pattern onto the fabric. We'll learn some easy and
effective methods for that in our next lesson until then
get your hoops ready.
3. Transfer Patterns: We got our fabric perfectly prepped and tensioned
in the hoop. First things first, make
sure you've already downloaded and printed
your ten designs onto a four sized paper. Having them handy means we
can jump right into tracing. I'm going to take my
printed design and pin it securely to the back
of our prepared hoop. Now, if you hold your hoop
up to a light source, you'll start to see the design faintly through the fabric. This is the magic of using light colored medium
weight fabric. If you're finding
it a little hard to see your pattern,
don't worry. This is where a light source behind your hoop comes in handy. You can use anything from a
bright window during the day, a tablet screen, or even a specialized light
box if you have one. I'm going to start
with our sun design, tracing all its beautiful
rays and the center. If you don't have
an erasible pen, a fine tipped pencil
can also work, but be very light
with your hands so the lines are easy to
cover with your stitches. Then I'll move on to the heart, making sure to capture
all its curves. Take your time.
There's no rush here. Trace slowly and deliberately
focusing on accuracy. The clearer your
traced lines are, the easier it will
be to stitch later. Take a moment to admire your work. You now have a perfectly transferred pattern
ready for stitching. And that's it for
transferring patterns. Our fabric is prepared
and our design is traced. We're officially ready to start stitching in
our next lesson. So get excited because
next time we'll pick up our needles and make our first
stitches. See you there.
4. The Beaming Little Sun: In this lesson, we're
going to stitch our very first design
a cheerful sun. Let's start by
picking our colors. I've got my handy plastic
floss organizer box here. It's a great way to keep all your beautiful
threads neat and tidy. For our sun, I'm going with this lovely pastel orange floss. It has such a warm and inviting feel perfect for a sunny day. I'm choosing a thin
embroidery needle. The size of your needle often depends on the number of
floss strands you're using. Now let's get our
needle threaded. I'm going to take a
comfortable length of this pastel orange floss. Usually about an arm's length
is good to prevent tangles. I'm threading all six strands of my pastel orange floss through
the eye of my thin needle. This course, especially
as beginners, we'll simply tie a small knot
at the end of our thread. Now, for the main
circular part of our sun, we're going to use
a wonderful stitch called the chain stitch. Bring your needle up from
the back of your fabric to the front right on the
line of your drawn circle. Pull your thread all the way through until the knot
at the back stops it. Now insert your needle back into the exact same spot
where you just came up. Don't pull the thread all the way through to the back yet. Instead, keep a little loop of thread on the surface
of your fabric. Move your needle forward a short distance along
your circle line. Bring your needle
up from the back, making sure it comes up inside
the loop you just created. Gently pull your thread
all the way through. As you pull, you'll
see that first beautiful chain link
form on your fabric. Repeat to make the next chain. Continue making
these chain stitches all the way around the
circle of your son. Take your time, try to
keep your stitch lengths consistent and enjoy watching
that lovely chain form. Don't pull your
thread too tightly, or your chain links
will look pinched. Keep them nicely rounded. Most embroidery
flows like this one, comes in a bundle of
six individual strands. You can choose to use all
six strands together, or you can separate
them to create different thicknesses and
textures in your embroidery. Strong. Strong. Strong. Strong. Once you've completed
your chain stitch circle, it's time to secure your
thread at the back. Make a small loop
with your thread, pass your needle
through the loop, and pull gently
to create a knot. Do this twice for
extra security. Slide your needle underneath a few existing
stitches on the back. Now that we have
our central sun, let's add some radiant rays using the super simple
straight stitch. Take your needle, thread it with the same pastel
orange floss, all six strands, and
tie a knot at the end. Make as many straight
stitches as you like, radiating outwards
from your chain stitch circle to create
all the sun's rays. Varying the length of
your straight stitches slightly can add a
nice dynamic look. You did it. And just like that, our first design,
the sun is complete. How amazing is that? You've just learned two
fundamental embroidery stitches, the chain stitch and
the straight stitch. Imagine this cheerful sun stitched onto your
favorite T shirt, a summer dress, or
even a tote bag. The possibilities
are truly endless. K practicing, have fun
with your stitching, and I can't wait to
see what you create. I'll see you in the
next lesson where we'll explore our next
exciting design. Oh
5. The Sweet Stitched Heart: If you enjoyed stitching
our cheerful sun, you're going to absolutely love creating this
beautiful heart. What's a heart without
a little red, right? Now, remember how
embroidery floss typically comes
with six strands. To separate strands neatly, pull out one strand from the main bunch
slowly and gently. Don't pull too hard or
you might create tangles. Once you have your five
strands separated, thread them through your needle, remember to tie a knot at the end of your
thread to secure it. Okay, back to our heart. For the right hand curved
outline of our heart, we're going to learn the
stunning braided chain stitch. Bring your needle
up from the back of your fabric onto
your drawn line. Make a small loop
with your thread, then go back down into the same spot you
just came up from. Bring your needle
up a short distance away along your line, making sure the thread loop
is caught under your needle. Pull gently to form a
small single chain stitch. This gives us a nice, secure starting
point for our braid. Now, bring your needle up
from the back of the fabric. Pass your needle underneath
that initial straight stitch. But this time, pull gently only halfway so that you leave a loop open on your
fabric surface. Now, take your needle
back down into the exact same hole where
you just came up from. You'll leave this small
chain stitch open like that so you can easily
access its inside. Now pick up the inside stitch of that open chain loop by sliding your
needle underneath it. Then pass your needle over the loop of the
working thread that's coming from your needle and pull gently to tighten
up the thread. You'll see your first
braid link form. Pass your needle underneath
the most recent braid link. Go down into the exact
same hole where you just came up from leaving
that chain stitch open. Pick up the inside stitch
of that open chain loop. Pass your needle
over the loop of the working thread and pull gently to tighten
up the thread. Continue this sequence following
the curve of your heart. This stitch creates a
raised textured line that looks like a
beautiful braid, perfect for adding a rich
dimension to your curves. Continue this sequence following
the curve of your heart. You'll see a beautiful raised
braided texture forming. It takes a little practice
to get the tension right, but it's so rewarding. Don't pull too tightly, or you'll lose the lovely
raised texture of the braid. Keep your tension
consistent and gentle. This stitch can be a bit slow, but the result is
truly worth it. As you continue your
embroidery journey, feel free to experiment with
different types of cotton, like calico or quilting
cotton or even linen. The key is to choose a fabric that is not too stretchy and has a weave that allows
your needle to pass through easily
without fraying too much. For now, our trusty
cotton is perfect. Now, as we reach the bottom
pointy part of our heart, where the curve becomes sharper, the braided chain
stitch can be a little tricky to
manage very tightly. This is where combining
stitches comes in handy. We're going to seamlessly transition to the back stitch to finish the bottom point and the entire left hand
side of our heart continue using the
backstitch to trace the bottom point and
then all the way up the left hand side of your heart's outline until
you meet your starting point. Once you've completed tracing the entire outline
of your heart, using this beautiful
combination of braided chain stitch
and backstitch, Go ahead and secure
your thread neatly at the back of your fabric with
a couple of small knots, just like we did with our son. You're not just
learning stitches, you're learning how to combine them to create unique effects. You're doing wonderfully picking up these new
stitches so quickly. Keep practicing, keep
enjoying the process, and I'll see you
in our next lesson for another exciting design.
6. The Serene Rolling Waves: So far, we've brought a sunny day and a
lovely heart to life, and now we're going to create some beautiful flowing waves. For our waves, it's only natural to pick some
beautiful blues. I've chosen two shades
of blue floss threads, a lovely light blue and a
slightly deeper medium blue. I'm going to separate
out three strands. Three strands are perfect
for a smooth fill that still has a nice presence
without being too bulky. Before we start stitching, you'll see I've
taken a moment to do a little prep work
on my wave design. I've marked three subtle lines across the inside of the wave, almost like faint guidelines. This isn't strictly necessary, but it's a fantastic tip, especially for beginners
when you're trying to achieve a smooth blend with
long and short stitch. I've already got my needle
threaded, ready to go. I'm going to start stitching along the top edge of our wave. It's called long
and short because, well, you alternate between
long and short stitches. This helps to avoid harsh lines and creates
that lovely blend. Okay. Okay. The next row of stitches will go into
the ends of the first row, overlapping them slightly to
create a smooth transition. These lines will help
us define sections for our different shades and
guide our stitch length. Secure your light blue thread
at the back of the fabric, just like we did with
our previous designs. Now take your medium blue floss, separate three strands
and thread your needle. Tie a knot at the end. Start bringing your
needle up within the light blue stitches
in that second section. Continue making long
and short stitches, blending the medium blue
into the light blue. The goal is to make it look like the colors flow seamlessly
into one another, not like two distinct
blocks of color. Using different shades of
the same color family is a wonderful way to add depth and dimension
to your embroidery, creating a subtle
gradient effect. Keep filling down to your third marked line
and then continue filling the final section of the weave down to the bottom
edge of the drawn shape. Now that the top of our wave has this lovely light to
dark blue gradient, let's give the bottom
outline a crisp finish. For this, we'll use
the outline stitch. Go ahead and secure your
thread neatly at the back of your fabric with a
couple of small knots, just like we did with our sun. So take same blue floss, count out four strands
and thread your needle. Tie a knot at the end. For a slightly
bolder outline that really stands out
against the filled area, I'm going to use four strands of my medium blue
floss this time. Before pulling the thread
all the way through, bring your needle
back up from the back exactly halfway between where you started and
where you went down. Make sure your working thread always stays to the same
side of your needle. This is what creates that consistent twisted
rope like effect. Continue this outline stitch all along the bottom
contour of your wave. You'll see how
beautifully it defines the shape and gives it
that polished edge. Once you've finished
outlining the bottom, go ahead and secure
your thread neatly at the back of your fabric with
a couple of small knots, just like we did with
our previous designs. And there you have it, our
beautiful waves flowing with a lovely light to dark blue blend and finished
with a crisp outline. Keep up the fantastic work. I'm so excited to
see your progress. I'll see you in our next
lesson for another fun design.
7. The Darling Dog Paw: Welcome back. I
hope you're feeling proud of your beautiful
sun, heart and waves. A lovely light brown and a slightly darker,
richer dark brown. These natural tones will give our paw a warm and earthy feel. For this, I'm using the
light brown thread. Go ahead and separate
four strands from your light brown skin
and thread your needle. We're going to start by filling the four smaller digital pads of those little
toe like sections. The Spanish knotted
feather stitch. This stitch is also sometimes called the twisted
zig zag chain stitch, and that name gives you a big hint about
what it looks like. Take your needle down a
little bit to the right and slightly down on the
outline of the pad. Before pulling your thread
all the way through, loop your thread
around the eye of your needle once
from left to right. Make sure your working thread is underneath your needle
as you pull it up. Pull your thread through gently. You'll see a small
twisted knot form. This is the first part
of our braided chain. Loop your thread
around the eye of your needle once from
right to left this time. You need to make sure
your needle actually catches and goes through the center of the
previous stitches loop. This is how we build that
continuous beautiful braid. Alternating the direction of your loops and the
side you bring your needle up from filling
the pad in a zig zag motion. It's a decorative stitch that
creates a wide, beautiful, braided like line, almost like a twisted chain that
zig zags as you work. It's fantastic for filling small organic shapes
like these pads. Each stitch will
create a beautiful, twisted chain like segment, building up that
lovely brided texture. This stitch requires a little
patience to get the rhythm, but it's incredibly rewarding. Aim for consistent
stitch lengths and try not to pull too tightly, or you'll lose that
beautiful braided dimension. You need to make sure
your needle actually catches and goes through the center of the
previous stitches loop. This is how we built that
continuous beautiful braid. Continue working this stitch, filling each of the four
digital pads one by one. Take your time, enjoy the process of creating
that unique texture, and secure your thread
at the back after each pad if you're
using shorter lens, or simply carry it to the
next pad if they are close. H The Spanish knotted
feather stitch can be a little tricky
for complete beginners. If you find it challenging, try practicing it a few times on a simple circle outside
your main design first. Patience is key. There's We're going to use a classic and elegant stitch, the stem stitch. It creates a smooth, rope like line that's perfect
for outlines and stems. Now bring your needle back up
from the back of the fabric about halfway between where you started and where you went down. Crucially, make sure
your working thread always stays to the same
side of your needle. This creates the characteristic
twisted rope effect. Continue working the stem
stitch all the way around the outline of the
metacarpal pad until it's beautifully defined. Once you've completed this part, go ahead and secure
your thread neatly at the back of your fabric with
a couple of small knots, just like we did with
our previous designs. You're doing an incredible job, and I'm so excited to see
your designs come to life. Keep up the fantastic stitching, and I'll see you in our next
lesson for our next design.
8. The Elegant Butterfly Bloom: We're halfway
through our course, and I'm so excited to share our fifth design with you
today, a stunning butterfly. For our butterfly, I've chosen two very special floss threads. One is a bright orange, and the other is a mesmerizing, shaded or variegated
color floss. I've already threaded my
needle, so let's jump in. Insert your needle back down a short distance forward
along your outline. Now, bring your needle back
up from the fabric closer to the beginning of that
first stem stitch you just made almost
in the middle of it, but closer to where
you first came up. Now with your needle through, you're going to pass
your needle underneath that stem stitch twice,
creating two wraps. These two wraps together form the distinctive knotted
part of our stitch. Now continue the motion
for a regular stem stitch. Go forward a stitch length along your outline and push your
needle down into the fabric. Coming out at the end of
your previous stem stitch, right where it
entered the fabric. Make sure your working thread is below the needle as
you pull it through. Pass underneath twice to create those two wraps
for the next knot. Pull gently to tighten. Always pass your
needle underneath your previous stem stitch
twice, creating two wraps. Take your time, focus on getting those two
wraps consistent and ensure your working
thread stays where it needs to be for that
clean, knotted look. Continue this
sequence all the way around the outlines
of both wings. You'll see those lovely knots
forming along the line as your variegated thread shows off its beautiful color changes. This lesson is packed with gorgeous textured stitches that will really bring our
butterfly to life. This variegated thread
has a repeating gradient flowing from a dark red all the way to an
almost black shade. It's going to create a truly
unique and dynamic effect on our butterfly's wings. The beauty of the
variegated floss will truly shine
with the stitch. I'm going to separate
a single strand from the same variegated
floss we just used. This thinner strand will
create a delicate line. Now stitch a few simple straight stitches
in the middle of the wings radiating outward slightly from the body,
almost like veins. This adds a lovely subtle
texture to the wings. With our wings
beautifully outlined, let's move on to the body or
abdomen of our butterfly. For this, we're using the wonderful Billion knot
and our bright orange floss. Bring your needle
up from the back of the fabric where you want
your Bullion knot to start. Insert your needle back down into the fabric a
short distance away, almost forming a
straight stitch, but don't pull it
all the way through. Now, without pulling
the needle all the way, wrap your working thread around the needle
multiple times. I'm wrapping it about 20 times. The number of wraps depends on the length and plumpness you want your
boolean knot to be. Once you have your wraps, hold them gently with
your non stitching hand. Now carefully pull
your needle and thread all the way
through those wraps. It might take a gentle pull and a wiggle Gently smooth the Billion knot
with your finger to shape it into that
nice plump abdomen. For the head, you can add a few small
neat satin stitches with your orange floss to
create a smooth, filled circle. And for the antenna, we'll use a long French knot. Wow, our butterfly
is now complete. Doesn't it look
incredibly elegant and vibrant with all
those different textures? We've now completed
five stunning designs, and you're learning so
many amazing stitches. Keep practicing and
enjoying the journey. I'll see you in our next lesson for another exciting design.
9. The Luscious Cherry Pair: Our juicy cherries, I've picked out two
lovely floss colors, a fresh light green for
our leaves and stems, and a rich red for the
cherries themselves. I'm using my light
green embroidery floss and I've separated it
into three strands. Go ahead and thread your needle and tie
a knot at the end. Bring your needle
up from the back of the fabric at the very
tip of your leaf design. Make a single short straight stitch down the center
line of your leaf. Now bring your needle up on one side of the leaf
outline, for example, the right and take
it down slightly across the central line on
the opposite side, the left. This creates your
first angled bone. For the next stitch, bring your needle up on the other side of
the leaf outline, the left and take it down slightly across the central
line on the first side, the right, just below where
your previous stitch ended. The key here is to keep
your stitches very close together where they
cross the central line, ensuring there are no gaps. Three strands are
perfect for getting good coverage while maintaining a delicate feel for our leaf. This is a fantastic filling
stitch that creates a beautiful textured and
slightly ribbed effect, much like the veins of a leaf or the bones of a fish,
hence the name. It's perfect for giving organic shapes a
realistic dimension. Now, let's move on to our two individual cherries using the beautiful red floss. For the outlines of
these round shapes, we're going to use
the rope stitch. Without taking your needle
down into the fabric, simply take your
needle and position it a short distance forward
on the drawn line. While your needle is positioned
there on the surface, take your working
thread and wrap it around the needle from
right to left once. Gently pull your needle all
the way through the wrap. As you pull, you'll see a little raised twisted segment form directly on the surface. Wrap the thread from right to left around it, pull through. Continue making
these rope stitches all around the outline
of your first cherry. You'll see a wonderful
textured rope like line forming
directly on the surface. This stitch creates a
wonderfully textured, slightly raised and continuous line that looks just
like a tiny rope. It's perfect for
adding definition. As I get to the bottom part
of this grape outline, I want to give it a slightly thicker, more pronounced look. Once you've completed the
outline for the first cherry, secure your red thread. Then repeat the exact same process for
your second cherry. Finally, let's add the stems to our cherries using our
light green floss. For these fine lines, the back stitch is
absolutely perfect. Once you've stitched both stems, secure your thread
neatly at the back of the fabric with a
couple of small knots, just like we always do. And just like that,
our sixth design, the lovely Cherries is complete. You've learned the versatile
fish bone stitch for filling and the beautifully textured rope stitch
for outlines. Plus revisited the
backstitch for fine details. Isn't it wonderful how combining these stitches creates such a realistic and attractive design? You're doing an amazing job building your embroidery skills. Keep up the fantastic work, and I'll see you
in our next lesson for another exciting design.
10. The Dainty Dragonfly Delight: Alright, my amazing
stitches. Welcome back. We're moving on to our
seventh design today, and it's a beautiful one,
a graceful dragonfly. By now, you've learned so many incredible
stitches and honestly, this one is going to
feel a bit easy for you. You're building up serious
embroidery expertise. We'll start with
the delicate wings. For these, I'm using a single
strand of black floss. I've already threaded my needle, so let's get stitching. Bring your needle up from
the back of the fabric at the top right point of where
you want your V to start. Take your needle down into the fabric at the
top left point, creating the top bar of your V. Make sure your
needle comes up over that loose V shape
you just created. Take your needle back
down into the fabric, just a tiny bit below where you came up for
the tacking stitch. This small stitch secures
the bottom of your V shape. For repeat this
process to create a series of small fly stitches
within the forewings, giving them that
beautiful airy texture. The fly stitch creates a beautiful Y or V shape and is wonderful for open fillings
or delicate textures. We'll be stitching this on
both sides of each fe wing. Okay. For a slightly
bolder outline than our single strand fill, I'm now using two
strands of black floss. Thread your needle
and not the end. Bring your needle
up from the back of the fabric onto your
drawn wing outline. Take your needle down
a short distance forward along your line. Now, bring your needle back up from the
back of the fabric exactly halfway between where you started and
where you went down. For the next stitch, take your needle down a
short distance forward, then bring your needle up again, splitting the thread
of that new stitch. But here's the key.
Bring your needle up directly through the middle of the thread of the
stitch you just made. You're literally splitting
the previous thread. The split stitch creates a strong continuous rope like line that's perfect
for defined edges. Continue working the split
stitch neatly around the entire outline of all four of your dragon fly's wings. You'll see how beautifully it defines them. Okay. I have decided to use a few simple French knots
with the same black floss. Remember, French knots create those lovely little raised dots that add wonderful texture. You can use two or three
strands for your French knots here depending on how large and prominent you
want the head to be. Okay. Simply bring
your needle up, wrap the thread around your
needle a couple of times, and then insert the needle back down very close to
where you came up, pulling gently to
form your knot. Make a few knots close together
to form the head shape. Oh Finally, for the long
slender body of our dragonfly, we'll use the straightforward
straight stitch. For the body, I'm going with all six strands of black floss to give it
a nice solid presence. And there it is. Our elegant
dragonfly is complete. Doesn't it look amazing? You've expertly applied
the fly stitch, refined your split stitch, and perfectly placed those
French and straight stitches. You truly are becoming
an embroidery expert.
11. The Blooming Garden Flower: I've chosen a lovely
palette of colors, a warm brown for the stamen, a beautiful pink for the petals, and a fresh green for the stem. For this, I'm using
my brown floss, and we're going to combine
two cool techniques, the backstitch for
the outline and a fun weaving method
to fill it in. Stitch half of the
bottom outline of the stamen shape
using the backstitch. This will act as our
foundation for the weaving. We're going to fill
the stamen using a technique based on the
detached buttonhole stitch, but we'll be weaving through our back stitches to
create a unique texture. This is important
for the weaving, we're going to switch
to a tapestry needle, also called a blunt
point needle. This needle has a large
eye but a blunt tip, which will help us
weave smoothly through the stitches without
piercing the fabric. Now carefully weave your needle
under the back stitches, going from right to left. Don't pull too tightly. You want to create a slightly
raised woven texture. For the next row, weave
back from left to right, again going through the
buttonhole stitches. Keep weaving back and forth right to left
and left to right. Until the entire stamen
shape is filled. You'll see a beautiful
woven texture emerge. With our stamen complete, it's time to stitch the petals. For this, we'll use the
lovely twisted chain stitch. Bring your needle up on
your drawn petal outline, take it down and then immediately bring it back up
a short distance forward. Before pulling the thread
all the way through, loop your working thread
around the needle. For the next link, simply go down into the end of your previous stitch
and repeat the process. Continue this
twister chain stitch all around the outline
of each petal. Trap your working
thread over the needle, making sure it forms a
loop before you pull. Sometimes, especially
when your fabric is taut in the hoop, it can be a little
tricky to push your needle up from the
back of the fabric. Don't hesitate to
use the thimble or even the fleshy
part of your thumb or finger on the back
of the fabric to gently push the needle tip
up until you can grab it. This gives you better control
and saves your fingers. This stitch creates a delicate, slightly raised and
twisted line that's perfect for outlining the
graceful curves of our petals. Finally, let's add the stem to our flower using
our green floss. For this long slender line, the stem stitch is perfect. It creates a smooth, rope like line that's
ideal for stems. Thread your needle
with your green flows. Let's use three or four strands
for a nice defined stem. Make a stitch forward, then bring your
needle up halfway between your starting
and ending points. Be sure to keep your working
thread to the same side of the needle to create that
characteristic rope like twist. Once you've completed all
the parts of your flower, remember to secure
your thread neatly at the back of the fabric with
a couple of small knots, just like we always do. And there you have it. Our beautiful
flower is complete. You've combined the back stitch, a unique weaving technique
with a tapestry needle, the delicate twisted
chain stitch, and the classic stem stitch. You're becoming a true
embroidery artist. Keep up the incredible work. I'm so excited to see
your next designs.
12. The Charming Little Fish: A lovely fish. By now, you've built up such
incredible skills, and this design will feel just right for your
growing expertise. I want you to
remove two strands, so we'll be stitching with
four strands of floss. For the fish's body, we're going to use a truly
decorative and textured stitch called the braid stitch. Bring your needle up from
the back of the fabric, right on the upper edge of
your fish's body outline. Now using your other hand, wrap the working thread around your needle
from right to left. Gently tighten the
wrap on your needle. Then take your needle down into the fabric through your
bottom stitch line and bring it back up from
the back of the fabric again coming out from
the top stitch line. Next, take your working thread and loop it under the
needle left to right. Now, pull your needle out
completely all the way through. What you should see forming on your fabric is a neat,
bean like shape. That's your first braid segment. For the next segment
of your braid, again, wrap the thread
around your needle. Pass your needle through the
bottom stitch line and come out again from the
top stitch line a short distance forward. Once more, loop the thread under the needle and then pull
the needle out completely. As its name suggests, it creates a gorgeous, raised and continuous braid
like line that's perfect for adding rich dimension to
shapes like our fish's body. Continue repeating steps for the entire body of your fish, building up that gorgeous,
continuous braided texture. Don't try to master
everything at once. If a stitch feels hard, practice just that stitch over and over on
your scrap fabric. Make rows of it, make circles, make zigzags, whatever helps you get the feel
for the movement. When you reach the end
of the fish's body, anchor the very last
stitch down by making a small neat stitch
right at the end, securing that final
braid segment. First for the fin, I'm switching to our
dark brown floors. We'll use the outline stitch, which you might remember as the stem stitch to
define its shape. Simply bring your needle up, go down a short distance
and come back up halfway, always keeping your working
thread on the same side. Stitch neatly around
the fins outline. Next, for the
outline of the head, I'm going back to our
light brown floss. Think about personalizing
your clothing like t shirts, jackets, or hats or add a handmade touch to your
home decor on tea towels, pillows, or even just
framed in their hoops. These designs are also perfect
for sprucing up tote bags, pouches, or making thoughtful
gifts for loved ones. Your creativity is
the only limit. Finally, let's give our
fish an eye for this we'll use a single French knot with a single strand of black floss. Using one strand will create a small neat dot that's
perfect for an eye. Our fish is swimming. You're just one design away from completing all ten
beginner designs. You are truly becoming an expert embroiderer keep
up the incredible work, and I'll see you in our final
lesson for our last design. Uh
13. The Sweet Napping Cat: Our tenth and final design is simply adorable, a sweet cat. I'll be using four
strands of floss, and for this
particular long tail, I'm also using my
long straw needle. A straw needle, sometimes called a millinsNle is wonderful for boolean knots because
its extra length helps you wrap many
times smoothly. We're going to start with the
cat's tail, and for this, we're bringing back
a stitch we've explored before the
boolean stitch. Now with your long straw needle, wrap your working thread around the needle more than 30 times. Yes, you heard that right. Over 30 wraps. The more wraps, the longer and plumper your
boolean knot will be. Gently hold those wraps with your non stitching hand and carefully pull your needle all
the way through the wraps. This might take a little
patience and a gentle wiggle. As you pull, guide the knot
with your finger to follow the curved shape of the cat's tail as you lay
it down on the fabric. You want it to follow
that graceful curve. Insert your needle
back down into the fabric right
where the tip of the tail should be securing your beautiful long
curved bullion knot. And there you have it a perfectly shaped
plump cat's tail. Next, let's outline the rest of our cat's body for
this we'll use a stitch you're now
an absolute expert at the running stitch. Simply stitch a series of small even running stitches all along the outline
of the cat's body. Remember, it's
that simple in and out stitch that
creates a dashed line. It's super easy and
you'll fly through it. My wonderful students,
you have officially completed all ten designs
in this amazing course. That is a huge accomplishment, and I am incredibly proud of
each and every one of you. Your embroidery skills
are now blooming. Learning embroidery isn't just about making pretty designs. It's a wonderful skill
that brings creativity, mindfulness, and a sense
of accomplishment. It's a relaxing hobby, a way to personalize your world and a fantastic
creative outlet. And. Remember, we used a heat erasable pen to
trace our patterns. Now it's time to make
those marks disappear. Gently iron your designs or use a hair dryer and watch those
lines magically vanish. Your beautiful embroidery
will truly shine without any tracing marks. Congratulations. You're an embroiderer. To complete this course, I'd love for you to submit at least five of your
completed designs. Please take clear pictures of your finished pieces and share them at the
end of this course. I can't wait to see
your incredible work. Remember, practice is
key to perfection. Don't hesitate to go back and
do one design many times to truly master a stitch and get that perfect neat finish
you're aiming for. Every stitch you make builds
your confidence in skill. Thank you so much for joining me on this amazing
stitching journey. Keep stitching, keep
creating and never stop exploring the wonderful world of embroidery, happy stitching.
 Shanas, Embroidery for Everyone