Transcripts
1. Introduction: Hello everyone. I welcome you all to my class. And this class, we will come to know the mere concept of Mandela and pointillism. Knowing that thought metadata, I repeat you, how good as duplicate, that goes with different designs and factors with the help of dots in the phone book, mini dot Mandela. All artists and non-artists are welcome to my class. Firstly, would it tell you the material required for this art bug? After that, I will demonstrate in Minotaur Mandela, and we'll try to make it easy through few tricks and tips in-between in a step-by-step manner. In the last, there will be a small project for you all to complete. So let us start.
2. Material Required: Material required for this many doors, Mandela, a blank sheet. Venison. It is a compass, is killed at Crayola colors. Professional doting tools. If you have a device to weaken US home mid voting booths, some water, and it closed. We will start our mini dot Mandela in the next video.
3. Making "The Grid": Don't Mandela being good, nearly symmetrical article I will start off with some basic markings. Will be held both pencil, scale and a compass. This will help us to make asymmetrical design. I took before being centimeter, 14 centimeter piece of black chart paper. I will first marked the midpoint on the sheet is simply plus sign in dissenter, marking seven centimeter points and simply joining them. Now making two diagonal lines, joining default coordinators of the sheet and passing through the center of the sheet in the form of a cross. I will make few sun because for my reference and to get estimate tick design, there is no fixed dimensions. You can always go ahead with your own ideas. But here I will be taking few dimensions. Taking my compass and Martin, zero-point if centimeter from the scale, please the compass on the centerpoint and gently rotate the sheet. The middle circle of any Dort Mandela is called the Core. Going ahead, marking 1.2 centimeter on the campus and making the second circle. Now we will just make a few more circles with larger dimensions. Retired central of 2.2 centimeters in radius. Ford, so girth of three. Finally, the last so both to compute upgrade. This is 6.2 centimeter radius. And this is how our grid looks like.
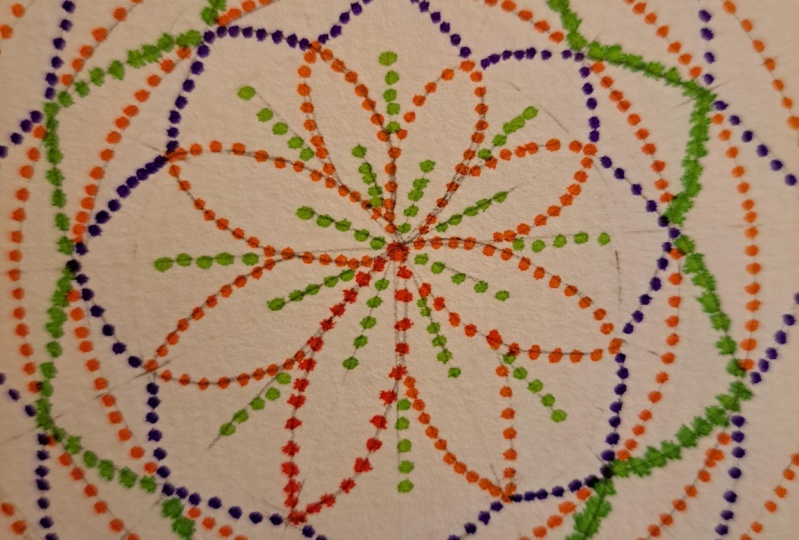
4. Making the Design (with Pencil): To make our dot Mandela in a easy way, I will make the design first with pencil so that the placement of doors become easy for me. As you can see, eats uncle is divided into eight parts. Vb will pay the second circle and marked the midpoint of those eight equally divided parts. Need to be very exact. We will work on approximations. All the work you do with pencil should be really light so that we don't face difficulty while it isn't it. Especially on a blank sheet where it leaves a whitish badge if you tried to erase hard. Now, I've had just joined deployment with slightly curved lines in the shape of bed dove. Oh, similarly, we will mark the midpoints on default circle of smiler pedals will act as the base of bigger ones. And we will just join the points alternatingly. And now finally, the last and the outermost layer of our designed, marking the point and joining alternatingly. This is how our design will look like. And here we are done with depends Silva.
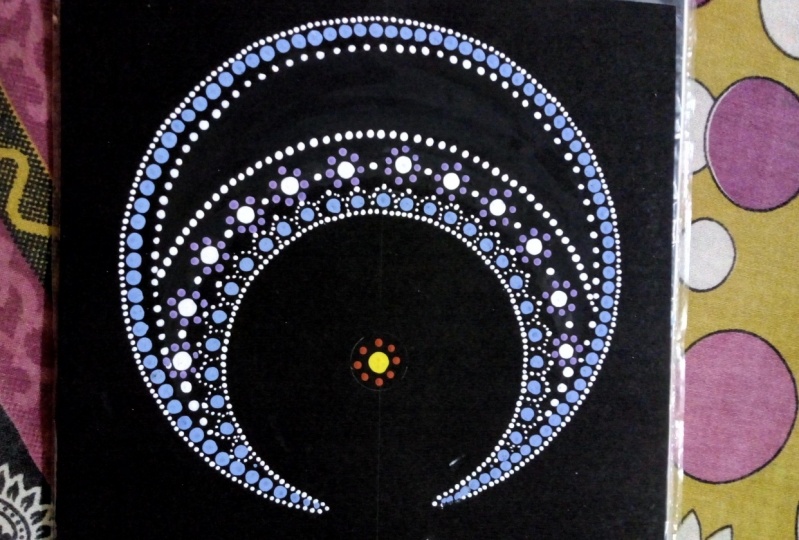
5. Starting our Dot Painting : I will start with the dot painting now, I'm using professional tools. These are ideally help to get the perfect circle shape. But it is never necessary to use these professional tools. You can even use homemade tools like an earbud pencil or a pen tip, matchstick, back of a pencil or a pen, paint brush to big Makeup Brush, et cetera. Now, I'm going to use four different shades of acrylic colors for the painting, right? Light green, yellow, and sap green. I will start with yellow color became the biggest tool for the center core. Dipping it in Gullah and blazing indoor Adelaide at the midpoint. Now I will take light green color and with the help of small tool, I will put a dot on the eight lines, just 0.11 to 0.2 centimeter away from the center door. To avoid mixing up of the colors. These doting tools don't have any defined size or number. It varies from company to company. So it absolutely depends upon the design you make and the size of a tool you need to make their design. Taking sap green color. I will start with the petals. I will put in Dort, added people's battle first, and then go down slowly along the curved lines that we drew earlier. And you must notice the size of dots alternatingly becomes small as I'm going down. This arts mean in Lord of patients. So make every door slowly. Always tried to use bright colors on black background. For that. The painting stand out well enough. Like in this one, I'm using prepaid colors and then moderate one, which is Sap green. This might not look good right now, but at the last, it will definitely stand out with other colors. And this is, I first clear. Now I will make this second beer inside differ. Bid tool and place a dork and just here and go down slowly along the curb lanes in the same way as before. You can even, you are beggars single layer. First, it might look a bit empty. Ob, really very careful while making the second layer as they are very closely placed. And there are high chances that we mix up two doors and might be difficult to corrected later. Moving ahead with the light green and the petals about that I am using is slightly bigger than the previous one. I am doing this in this same V would be a big dot on the pip of B Becker and mown down along the lanes globally. And the doors automatically becomes smaller and smaller as you read the base, making the first layer. Now the second layer below the first row. Okay.
6. Bigger Tools....Bigger Dots: The last clear of Pareto's with white acrylic color and a bigger size two. I am putting the big doors at the clip first. And continuing with this small tool for further completing the pedals. Oh, goes with the second Lear below deck. Now, I will make spokes, do anything before coordinates are perceived in the descending order. I mean, the bigger naught, two smaller ones, liberal light color. And this is our basic design. Looks like let it dry for five to ten minutes and even start with the dealings in ad next to ego.
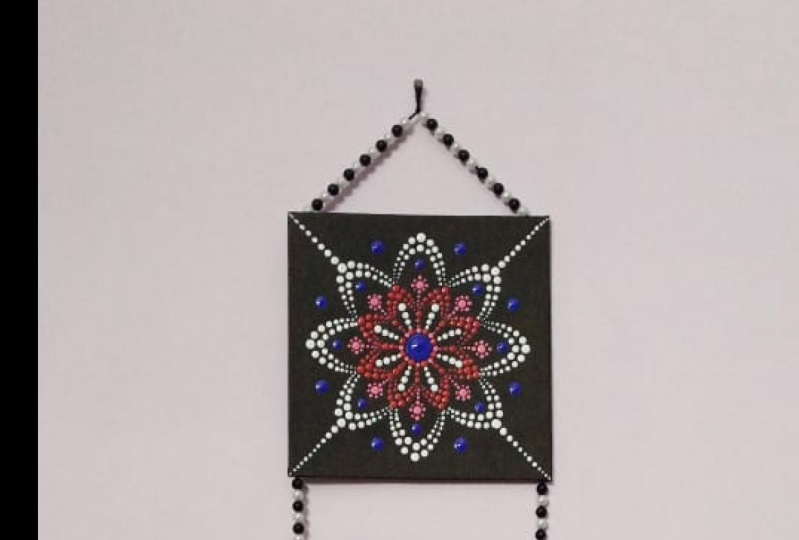
7. Detailing and Finishing: In this video, we will be dealing Park. I'm digging sap green color and slowly glazing dots between the light green dots around the yellow color. We can even use a toothpick for d small dots. Moving on to the next color, light green. I am making more doors in-between the empty space on the bed oath. Making released more dots at the base of the burritos. White-collar. Make sure you don't mix up colors. Again, taking white colour and making Dorothy in-between deeper dove. White color is like the life of North Mandela, which can make any color stand out on a dark background. And the best option for filling up the empty spaces. Now, the last color to add in Harbin being is yellow and making spots in between the last layer of petals in a descending order. These bidding phase dots, Meg, I'd been being looked more bold, a direct view and impressive to one side. And making dot Mandela with so much of patients give us internal piece and also add as a meditation penalty. And didn't last depth. I will put some yellow doors in between the outer layer of petals. I hope it looks beautiful to everyone after WWII. And our mini Dortmund Allah isn't adding now, began simply it is off the bends and marks, which are invisible ones did grace completely.
8. Project Work: Now here is the project work. Try leaking Metadata Mandela on the Autobahn. Quickly turns off your work and upload them in your project section. Keep printing, keep creating, thereby.
 MOHIT BHARDWAJ, Creative Explorer