Transcripts
1. Introduction: Today's class, we're
going to take doodling to the next level both in
meaning and in terms of creativity and in
terms of producing a really lovely finished
work of art as our project. Doodling is the
idea of mindfully creating all of different
objects on our page. It can be anything
from a scene to an animal to a person to
just abstract shapes. The important bit is
letting our mind wander. In this class, we're
going to allow our mind to wander around
different subjects from important hobbies to perhaps a lovely weekend
you've had recently. Taking those wanderings a
doodle storm if you like. We're going to refine a
couple of the doodles. We're going to use
ink and watercolors then to bring them to life. We'll talk about how we can turn those doodles into
beautiful micro paintings, things which could be a bookmark or even hung up on our wall. By the end of this class,
you'll have produced a really delightful,
lovely project. Or perhaps two or free because it's going
to be so much fun, so easy to do and so fulfilling when you
look at them at the end.
2. Supplies: So, what are we
using in this class? Well, just a couple of things. We're exploring ink and
watercolor doodle sketching, and we're going to
turn our doodles into something really lovely, sort of work of art by the end. So we need some kind of pen. I'll be using a fountain
pen with an extra fine nib, but equally, you could
use a fine liner. The key is both of these
have got permanent ink in, and that lets us use
watercolors on top. The ink that I'm using is
carbon ink by platinum. It's a waterproof ink that
goes nicely in fountain pens. Next, I'm using some color. I've got my messy
watercolor palette here with my messy
watercolor palette. I've got a couple
of small brushes. Now I'm using really small
brushes today because we're making micro
art really small. But you don't need to
necessarily use watercolors. You could even just
do this with ink. You do it with soluble ink. You could do it with
some colored pens or watercolor pens. There's lots of ways
that you could add color to your project without
needing to use watercolors. Next, the paper. I'm going to do a lot
of doodling in this. This is just a cheap own
brand sketching sketchbook. Inside. I've got pages and pages full of
doodles and sketches, and we're going to be
doing a doodle storm later today and working on our colors and our doodles in a
few pages of this. I could be any paper,
this could be copy paper. This could be office paper, and it's how we're going to warm up and prepare our ideas. For the final project, I'm going to use some
watercolor paper. It just helps the colors look more interesting. I'm
going to use this. This is a little block of paper. It's five by 25 centimeters,
nice, wide dimensions. I could also use
just an off cut. This is a little bit of paper. I've cut off one of
my other paintings. Or I could use a sketchbook and you can see the dimensions
are surprisingly similar. So I could still create very
much the same idea here. One thing you could
do. I'm not doing it. One thing you could do is
prep your piece of paper for your project with some
masking paper as well, and I'll show you
how to do that when we talk about
designing our artwork.
3. Your Project: So the project today is
to take some doodles. Use our doodling skills, build up a bit of confidence with two or three
objects which are important to you or places which are important to you
and turn them into art. And how are we going to do that? Well, for example, this, at what point does
this become art? We have here some
mushrooms, some coffee, and a paint brush and pen
three things which are important to me and by presenting
them in a certain way, and we'll talk about that. We have something which is, I think, worthy
to go on my wall. We could go more complicated but still keeping
the same idea here. We have three places we
were on our wedding day. We've got our closest
friends and family. We've got our home where
we finished the evening, and we've got our wedding venue. And again, simple
very doodly bits of art presented in a
certain way to create well, even something like
this, much simpler version is a fun scene, which becomes more than a simple doodle just
presented in a certain way. Here, one of my favorites, a cup of coffee. Again, that is now
a giant doodle, but it's still a doodle. It's still that mindfulness, creating a simple
shape on the page. By applying loose colors and
having a lot of fun with it, it becomes perhaps
something more, something we can be
proud of, something we can throw on the wall. When you mave your project, don't get to take a photo and upload it in the
project gallery. You can do that in a few seconds
or maybe a minute or so. And I'll come back
and leave a comment, give you some feedback
and some encouragement.
4. What IS Doodling?: Doodling is a really
wonderful form of art. If we learn to doodle and if we become confident
in our doodling, we can spend our
time, our free time. There's little moments in the day where we've
nothing better to do. Creating really fun art and just filling up pages and
pages of your sketchbook. There's nothing we
can't tackle with a simple bit of doodling. But the question I've
got for you today is when does doodling become art? When does doodling become something you're
proud to show off? And in this class, we're going to show how tiny little doodles can build up into something more very easily and with just a little
bit of confidence. The idea of doodling is also
something which is very mindful by focusing on our mind and what's
going on in our mind, allowing our mind to follow tangents and really
being in that moment, we are being mindful. Mindfulness is the idea of
focusing on your awareness, focusing on that present
moment and calmly acknowledging what
is going on whilst not judging those thoughts and not allowing those thoughts to impact on your emotions. It's an amazing
therapeutic technique. It's an amazing way
to relieve stress, and just allow yourself a little bit of extra
space in the day, and that's the other goal that I hope we can achieve
together in this class. So the starting point to our doodle journey today is
really what is doodling. Well, we've talked a
little bit about that. But let's dive in and actually
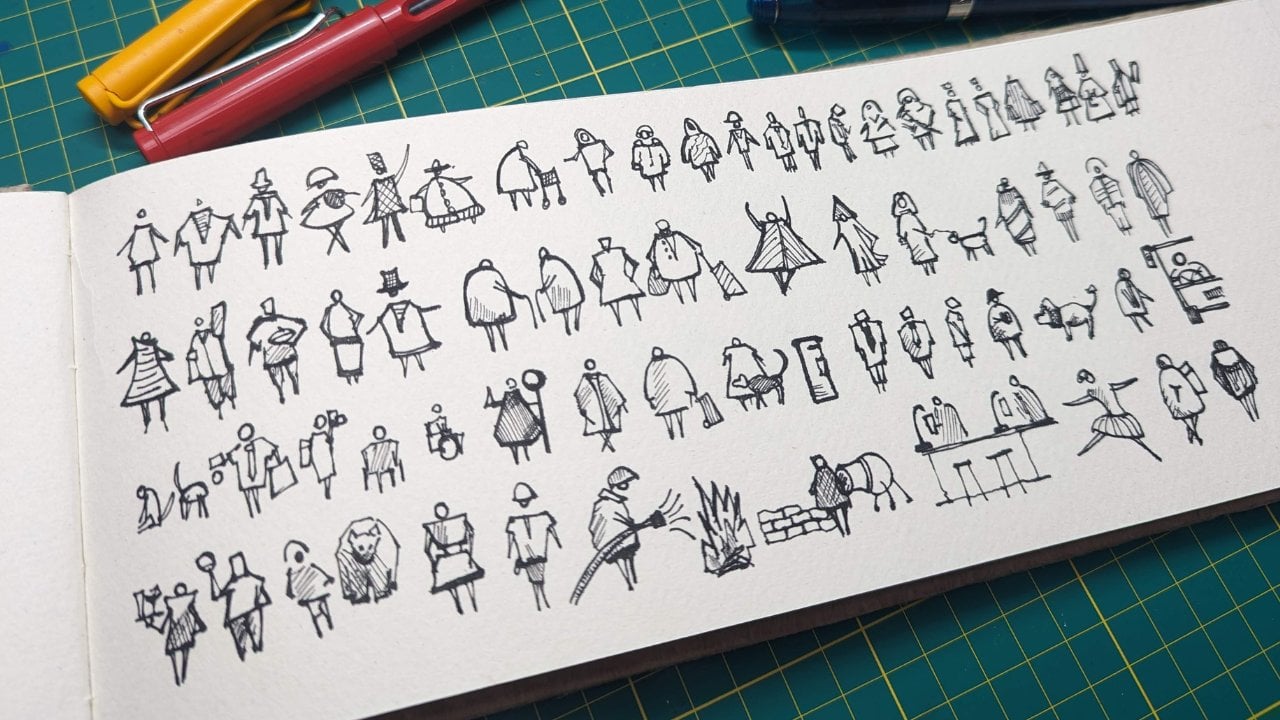
just do some doodling. People normally
think of doodling as probably drawing and you can
just be drawing anything. Perhaps you just making a series of little shapes
going along your page, and then something
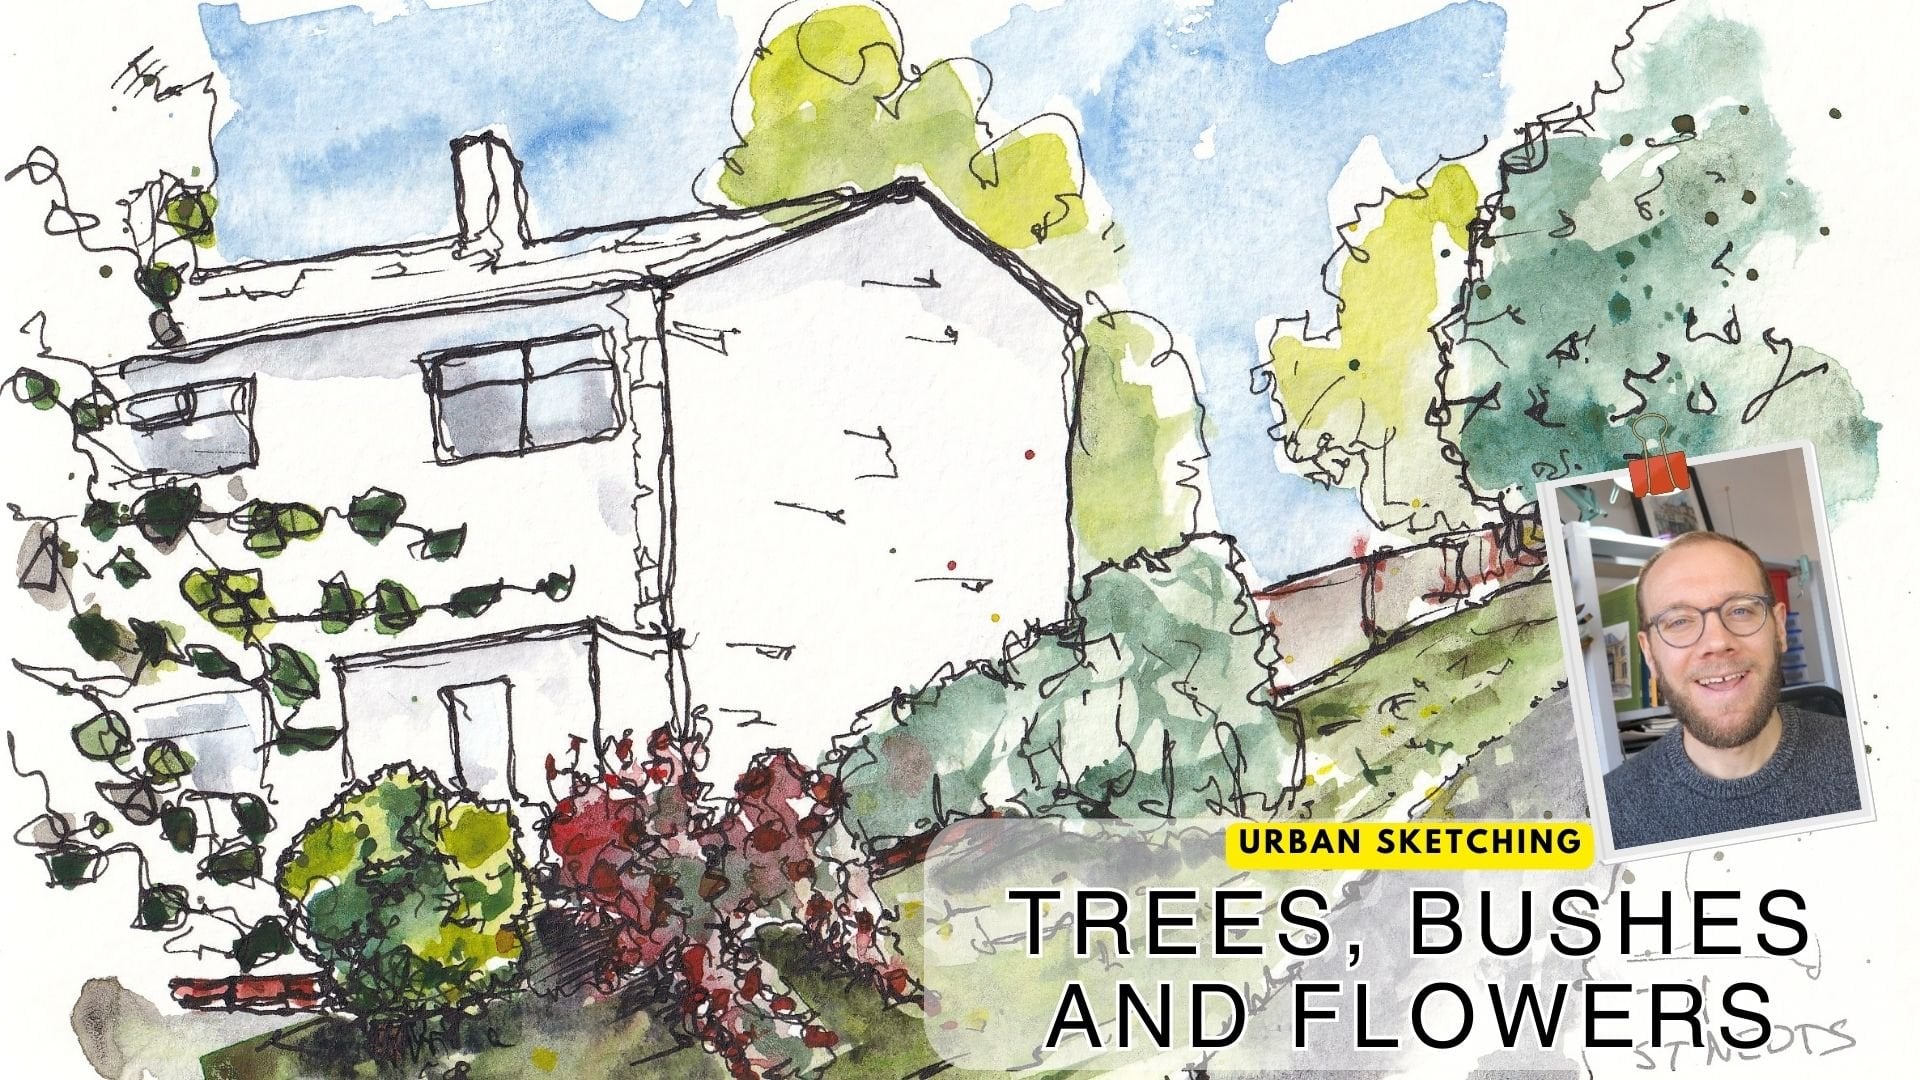
from that emerges. Here we've got perhaps
a series of trees along the horizon line
all from just the doodle. We can start to just
build on said doodle and said imagination by maybe popping a little house
in the foreground. Maybe some sheep in a
field in front of it. Suddenly, our little
break from reality has become a fun scene that's
emerged in our page. From these scenes, we're not just stretching our
creative muscles, we're also having a
bit of mindfulness. We are taking a
break from reality. We're also actually working on creating interesting
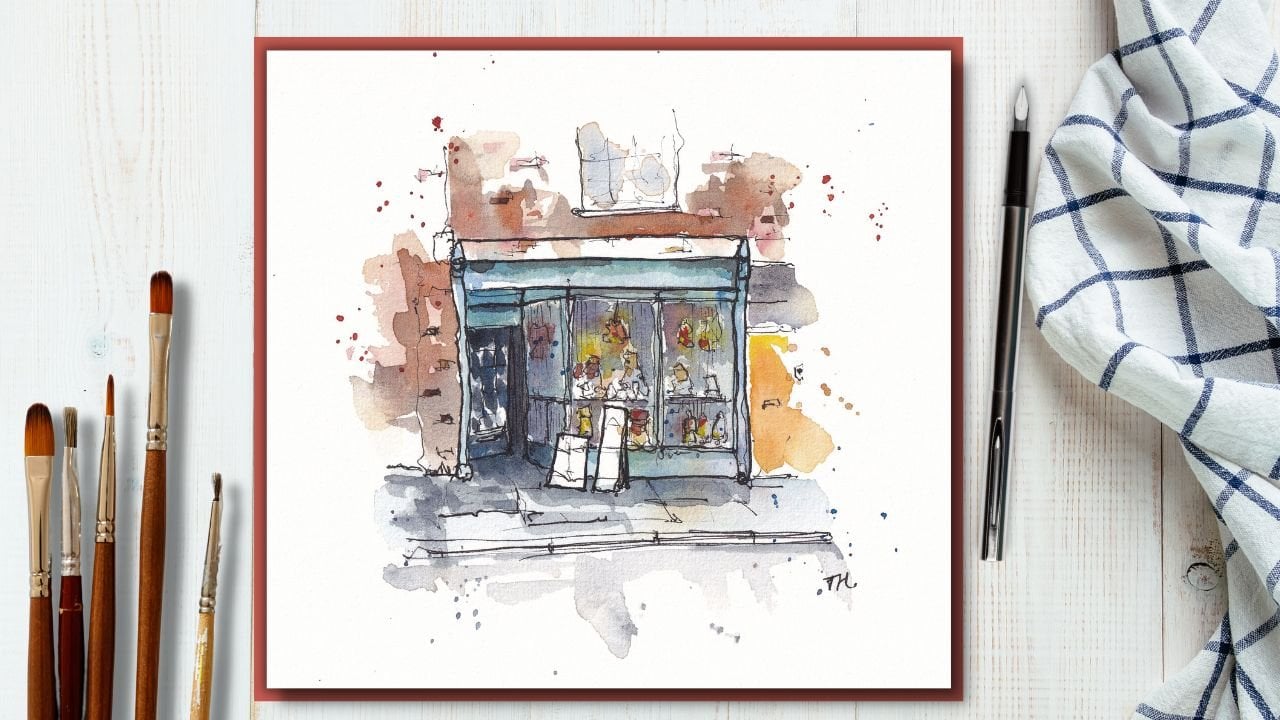
bits of art. The thing we often think about is that it has to be drawing, but that's not true either. You could easily bring
out some water colors. You could bring out some
pastors and you could just create some fun on the page. A few splashes here,
a few flashes there. And maybe something
else emerges. Something like he's a little
coffee mug sat on my desk, just created with a
little bit of fun, a little bit of splashing
and next door to it, maybe a little fruit or
something like that. This doodling doesn't
have to be just drawing. It can actually expand
far beyond that ind creating really
lovely works of art. Now today, we are going
to be focusing on these two media ink
and watercolors, using them together to create simple doodle sketches
of things important to us. And then creating some real
works of art out of that.
5. Turning Doodles into Art: Oh. So how do we turn
doodles into art? Well, there's one simple way. It's just presenting
them nicely. So a doodle is already
a piece of art. It just happens
often a doodle is on a sort of messy
piece of paper, filled with lows of
things which have worked, lows of things which
haven't worked, and lots of different ideas. And that just makes it
difficult to look at. Doesn't make it rubbish, makes it something which
doesn't work well on a wall. Now, ink and watercolors work amazingly on a wall if they're given a
little bit of space. So what we're going to do is present some connected doodles. And we're going to
present them with space. We'll have doodles. This is my idea,
having three doodles on the same piece of paper, all a few centimeters
from one another and with lots of space
around the outside. We'll talk about how we connect
them in meaning, color, and the character of the linework in the
next few lessons. If you want to do
something more complicated or a more full doodle sketch
as part of your scene, then something else you
could do is prepare and measure how you're going to lay them out to
create that space. For example, you could
measure as I'm doing here, and then pop out some masking
tape to give yourself three different windows upon which to apply your
lovely sketches. And then you could complete your lovely sketches,
remove the masking tape. Look, you get this amazing sense of space around each scene. And it's as simple as that. Your doodles are already art. There's nothing clever
happening today. I'm afraid your doodles
are already art, and it's just by
presenting them in a certain way and
connecting them together, which is another
of the keys that you'll create a work of
art from your doodles.
6. Connections in Line: I mentioned how we're going to make it
into a work of art. And now, I just want
to run you through some ideas of how we're going to make our simple doodles feel connected on our page. So I'm going to do a very, very simple project here. And I'm going to talk you through what I'm
doing as I do it. And I'll explain each bit of why I'm doing it and why
that connects these images. So the first thing
I want to do is connect my objects in meaning. So in the middle, I'm going to have an apple. I can do it with that
kind of Swirl line. To connect that in meaning, then why don't we make this
three doodles of fruit? Alongside here,
we'll have a banana. Again, I'm doing that
funny swirly line. Why am I doing that? Well,
look it connects them as well. So line quality, our line
character is connected. If I had, for example,
done my apple, as I've done here, But then done my banana as a blocky
geometric bowl shape. This is where we're losing
that connection with losing that neatness that comes from making things
feel more uniform. First, connecting them in the meaning and also in
the quality of line. Then we'll do something else
here, maybe some grapes. The other thing I'm
doing, if you notice, I'm connecting them
through a line here, they're all horizontally
connected and they're all about the same distance
from one another. That's the important things
to think about our linework. The other thing I'm going
to do is a little bit of attention to detail. I'm going to have a little
bit of hatching here to create some shadow. Then I'm going to have
that same light source coming onto my apple here, and the same light source coming onto the
banana over here. The underside and the left
hand side of all of the fruit. Is affected by the same shadow. Then once we're happy, we can reaffirm some of these lines to really get
these shapes working for us. In my big project, I'll show you some other ways of
connecting the line work in more literal sense
and how that can really work to elevate
the scene as well. But with that, connecting
them in meaning, connecting them in line. The next thing to do
is connect them in color and also talk about
how to apply the color. We'll do that in
the next lesson to keep these nice and
short and bright size.
7. Connections in Colour: So we're all connected,
our lines are done. Let's talk about
applying color to our doodles and
how we can do that in a connected way as well. Here's my lovely little doodles. There's a couple of things
to think about here. With color, you have both the color and also
the texture of the color. So what we want to do is ensure that these things are
staying the same in each. I'm going to encourage you
to use plenty of water. I'm going to first apply some water where
I want my color. By doing this, we're
going to end up having colors which feel connected
in how they've been applied. The other thing that we can do, we could connect them in color literally by making all
the colors accurate. We could connect
them in color by doing a different
primary color on each, which is what we'll end
up doing for my project. But I would also
suggest being brave and trying to connect them by all the colors being
a little bit abstract. Here, I could make this really simple version of
the project. A gray scale. What I'm doing is
I'm just popping a little bit of a graphite
gray pigment into my colors. Then I'm going to move
the water around, let that pool and move. Let it splurge out a little bit. You can see how the colors
are just painting themselves. Just because I applied that
little pool of water first. Then we can move the colors
around a little bit more. We can get that
feeling of the shadow, which we've already considered with the light coming
down across say. Now I'm going to just let these
dry see what's happening. Here we go. We've got our images connected
in multiple ways now. What I'd encourage
you to do is treat your watercolors to a
second little layer. This time we can
come back and be a little bit more specific
and controlled. Like so, we can just again, that attention to detail, that attention to
shadow the attention to layering up our
colors will connect these images and it will
turn our simple doodles into art into something a little bit more and a little bit
more exciting as well. Boldening up that shadow. Now my paints not a lot thicker, but what's happening is because
this is a second layer. Water colors add together. The first layer adds
to the second layer, and you end up with
a more impressive, more saturated, higher value color with
your second layer. There we go. There's always fun things you can do, splashes. Again, the idea of having these same texts linking
across the page is a really neat way to make your simple
project feel connected. The connected in color, connected in line,
connected in meaning. This is the idea. This is a really simple
version of the kind of thing that we're
going to produce today.
8. Doodle Storm Ideas: It's time now to
make a bit of a mess and do a bit of a doodle storm. We want to come up
with our ideas. This is where we're
going to do freely. Going to think of things
which are important to us or important to a subject
we'd love to paint about. Perhaps it's a book, a story. Perhaps it's a
holiday you went on. You can think about
important things relating to that subject and
then create a lot of varied and diverse
sketches around that idea. Now, the first thing
we're going to do is a doodles storm of ideas. Doodles storm, I'm going to
trademark that scene because I think it's a fantastic way
to describe a brainstorm. Normally, the brainstorm,
you might have a central idea here and out
with that come some cobwebs. But today we're not
writing, we are doodling. What we want to do
is find three, four, five things we feel
passionate about, which connect in some way. For example, I'm going to
start with a little doodle of me and I'm going
to be stood here. In the middle. Really simple. And then I can start
just thinking, what are things which I value, and we've already seen
a couple of them. So for example, I
could think of coffee. There's lots of things
I could do with coffee. I could have a cafetier. I could have a mocker pot I could have even just
some coffee beans. This is my doodle
storm number one, just drawing lots of
things really simply, even messily related to coffee. Here's a little jar of coffee. Then what else is
important to me? Well, I love going for walks. I love just getting outside. So even drawing maybe
a little parkland. He is a little fence, a tree. Here's a little Toby
going for a walk. What else connects to that? Well, I've got a
dog called Betty. He's a little bit mad and
certainly 4:00 P.M. Every day. It becomes very important
for me to go to walk, otherwise you won't
leave me alone. There's lots of
things we could do with this as well.
Simpler things. We could draw a pair
of Wellington boots, which are kind of rubber
boot very popular in the UK. Then we could draw
some walking boots. This time we got more
sort of obvious laces. We could have trainers. Even we could extend our
metaphor and we could have some sandwiches we've taken out on perhaps a longer
walk with us, or we could be out
there with an umbrella. Here we go lots of doodle ideas for my so far, two passions. Next, I like my food. I love cooking, actually. Cooking is probably the bit
I enjoy more than anything. I could move on my
ideas and I could draw a cast pot or a
little casserole pot. I could draw my oven. You know, this is what
doodling is all about. It's going well, an oven
is obviously a horrible, boring thing to draw, but what happens if I try it? Can it become interesting? And actually, I think this is quite quite a fun little shape that could go in a
scene, isn't it? So stretching our little
metaphor, stretching our idea. I love making bread as well, I must confess, I cheat a lot. I've got a breadmaker,
but nonetheless, I do love making bread or cheating with
the dough and then shaping the bread into
paguette perhaps. So it is a baguette. And although I tend towards this sort
vegan side of things, Tash does love her cheese. Sometimes I'm forced to help her finish off the
cheese because she's overbought and I even
more than being vegan, what's important to me
is not wasting food. Let's face it. Cheese is tasty, even if you are
trying not to eat it. There you go. Fill pay
page with a doodle storm. Hopefully you can understand
from this little narration that it's all about
just letting your mind wander doodling in the
true sense of the word, finding connections which you might not consciously
thinking about. Just having that mindful
attitude, finding random things, and connecting them
to the next thing and the next thing is a really
lovely way to expand some creative energy
whilst also creating some really lovely
art and getting these ideas with connections, which is really important
for our project today.
9. Doodle Storm 2 - Let your mind drift: A really important
part of doodling is to allow your brain
to wander around. In doodling, we're not trying to sketch something specific. At least not at the beginning. What we're trying to do is
just relax, enjoy ourselves, and get some byproduct fun and some byproducts of improving our art and developing our
sketching at the same time. But the primary goal is normally just to relax and
let our mind wonder. So another way of expanding
on some of the ideas is to just go tangentially
from one idea to the next. That's what we're going
to do in this video. I'm going to show you
how my brain works, very worrying state to be and
give you some ideas for how you can expand on one idea to create lots
and lots of ideas, which could be your
finished doodles that are going to be
coming up in a moment. Another option for a simple
doodle store might be. The idea of a holiday
you've been on or a place you've been recently. I went to a place called
Buxton Buxton has got this famous old baths in
this big square building. It's got some other really interesting
architecture as well. I could start by just
doodling in the building. Lots of people around there. There was a man who is
pushing a giant trolley, selling well, they're
selling all sorts of nicknackss a traveling
antiques salesman who was very
interesting actually. Then I also went to
this funny pet store. I again any excuse
to draw my dog, but I can draw that and I could draw the fun things
which were in the pet stoles. End up buying this kind
of UFO feeding bowl. I don't know. Does this
relate much to the place? No, it's a strong memory, but I can move on from there. I was there with a
couple of friends and we had some beers. What about drawing a nice
bottle of beer or two. I can imagine maybe
a bottle of wine, a bottle of beer, maybe
a point of beer as well. And we're there, we
had a lovely curry, that'd be an interesting thing
to try and draw as well. We got this kind of big
plate of food and rice. Whilst we're on food,
we had a big fry up sort of vegan fry up for
me and for everyone else, a nice less vegan fry up. So there's an egg, some
bacon, one another. Big plates lofty garden that we had which
had a little pond. Some little trees and
pushes all around it actually creating a nice
painting in this point. So I can remember it quite well. There was a lovely
walk we went on on a bk I could just get
the hell in and get an imagination of the path
and then here's us about to set off on our walk with
a rucksack in tow as well. Look by talking thinking through what happened
that weekend, I'm able to create a
page full of doodles, all connected in meaning. Collected in a different
way. These are no longer just things which I feel
are important to me. But equally, this
could turn into a really interesting
set of doodles. For example, this
set of doodles, which is all about a weekend
I had a few weeks ago, a venue, another venue, and the group of
people who were there.
10. Expanding and Elaborating: So you've created your little
Doodletorm or your giant Doodletorm full of
ideas and inspiration. Now, what we're
going to do is going to explore those ideas. I'll explore a couple of mine in the next couple of lessons
with you and you do as many as you want
until you feel super comfortable in going into the last lesson where
we're creating our art. And I actually really
liked the idea. Of going for a walk being an important unifying
part of my day. So we could start just by making the first sketch I did
a little bit bigger and seeing what happens,
what shapes emerge. I could try my trees in a
couple of different ways. At the moment, I'm doing
a continuous line. There's no reason that I have to be doing a continuous line. So perhaps I stop and I try
and let's expand on this. This is a bit of a doodle shape, isn't it in that it could
be a lot of things, but it isn't
necessarily anything. What it could be is a
fence, couldn't it? We could draw a much
nicer idea of a fence. Classic bit of something which emerges on a walk you
walk past lots of fences, normally in the UK, you can find lots
of lovely footpaths going free farmland and things. There's our fence and then what can we associate
with the fence? We get some little
grass at the bottom. For example, that's
something which associates part of our doodle. We can start to
imagine some sheep. And sheep, just really simple. They are a big cloud with
a little ball attached to the front and give them a
nose and a little twigs. There we go. That's
a doodle sheep. Move the sheep around in
another direction. There we go. Another one, give them
a little tail as well. What else could it have
been? It could be a bench? We could have had a
sort garden bench but a park bench in a part. So here's our bench. We can have the seat coming
off at an angle as well. Got their legs here, extending down on it, we, maybe there's a man.
As part of our doodles. It doesn't matter that we
didn't draw him first. We're just playing with ideas. So it's okay to doodle one
thing on top of another. Maybe the man a newspaper. That could be something else
that emerges in our scene. Often we get a bin or
something like that alongside. So here's a Bin a bit taller. But the bin almost
looks like a postbox. Maybe the postbox is something
which could feature in our walk and that's
a interesting thing. It's more interesting thing
for color and for shape. Again, we could have
a little person Here's me sending
off a painting, maybe. There we are. So from one idea, we've elaborated and elaborated. And now, maybe it's a good idea to start
refining an idea.
11. Refining and Testing: So now that I've
expanded on my idea, let my mind wander. What I'd like to do is
start considering how I can perhaps turn these
into some kind of art, and this is the point
at which we're going to just refine
things a little bit. And in the case of refining, all we're doing is basically
drawing it a couple of times and just feeling happier
with the shapes. For something like this, I'm actually already happy with it. Perhaps a post box is
something really good to include in my finished
piece of art. Here I could just practice
a couple more times. Just trying to go
what's the shapes here, we've got a rectangle. We've got a little
bit of a curve at the top and the bottom. Maybe adding some real contrast in here is something to do. And maybe adding a little bit of writing on there is
something as well. I could then just try
something different. So I could try really just being loose and
swirlly and scratchy in my lines and just seeing if I can
create the same idea, put in a more odd
or interesting way. This might not work. Let's find out if we just keep
going, will it work? You know what
actually? It's quite fun, isn't it? It's quite fun. Maybe from there, it
starts to add some grass. This is now like an overgrown
little area, isn't it? We perhaps this is
a nice little town. This is out in the
villages been a little bit neglected
and forgotten about. Couple of ideas emerging just from trying those same
things a few times. Up here, here's some things
which didn't work so well. Did the sheep are
less convincing. How can we get the
sheep into our scene? I like the idea of
having the sheep as part of a lunch time walk. Let's just try the map. Let's just try them
more carefully. Certainly, I like the idea
of having this cloud. That's the sheep's body, and then circle the head. Maybe adding in little horns will make it clearer
that that's what this is being a
little more careful with the legs and getting the
legs almost in perspective. Actually this sheet does
work better already. What if we just do
it really loose, we've got a circle and a circle, giving a little
tail, little horns. That's also actually
quite effective. Maybe the circle and the circle fits the
idea a bit better, but I to try it a few times
until I feel a bit confident, more comfortable that
it's going to work. Then I could try
this one as well. Let's try our circle on
the front of a cloud. Then we can get a few more little textures
in there as well. Give them the horns
and the legs. Then we can have a look and decide which ones work better. We've tried it in
different ways, and probably more reliable
is this one, isn't it? These ones still
didn't quite work. I really like the
front on swirly one, but these ones didn't
quite work and actually, These here work really
nicely with this post box. They're in a very similar style. Now I'm starting to be
able to elaborate on ideas and gain confidence.
The last one, I think. From this page, which would
be really interesting, fun to include and simple and confidence
boosting would be the trees. Now we know we want this
scratchy style for our doodles. I can jump straight
in going right. Will that work if I do
scratchy random lines. Can I make a tree
work like that? And that works, okay, but trees can be all
sorts of shapes. What if we make it a
bit more interesting, it's going to have a few
little different bunches of of leaves in different places and a few
more swirls and textures. That one works probably not
as convincing as this one, can try a couple more bunches of leaves and see if that helps.
I don't think it does. Here we go by doodling
going through ideas. We've got idea. 02 and three. I'm ready now to start thinking about my
finished bit of art. There is however one
more thing that we need to look at and we'll
do that in the next lesson. Oh.
12. Colour Trials: Oh. So to go with
our refined ideas, the ones we're feeling
comfortable in. What I'd like to do is add
a little bit of color. So on my paper, I'm going to just try
some very simple colors. These are going to inform
about whether these colors are going to work together and how
we're going to apply them. So let's jump back to our little doodle sheet
and see what happens. So I'm back on the same paper. I must stress this is
not watercolor paper. This is just a cheap
sketching path with just 100 grump per
square meter paper, but it's plenty good
enough to test things out. And here we got three
different objects, haven't we? There's a really obvious
idea we can try with the postbox in England,
the post boxes. Or in the UK, the
post boxes are red. So I could try a couple of reds. I've got a Mayan orange and sort of it's
called RhondGenuine. It's very similar to magenta. I can just apply these colors, and I know these will work. And then maybe something extra
in there, a bit of green. And how does that
all work together? Well, that's pretty safe choice, isn't it? We know
that's going to work. So maybe that's my
first color is done. My first color is done because I know these
all work together. But how am I going
to do the sheep? Do I want to unify my colors
or do I want to move away? Do I want to have all the
colors feeling very different? Let's try having
them all different. I think that would be
more fun. The sheep, perhaps, can be blue. Not blue everywhere, but blue to provide a bit
of a sense of shadow. Here's a bit of ultramarine blue and a little bit of lavender. The lavender I can and do around and a bit more
tamarin blue in here? A bit of a bolder
sheep, this one? Does that work? Don't know. Let's see what
happens as it dries. I think the effect is quite fun, that boldness, but it's
probably too deep blue blue. I'll remember that and
I'll drop it back. Maybe the way to unify things is apply the same green
underneath the sheep. That means that we can
also unify things up here. We can use yellow that way, we've got a primary
color in each sketch. Also we can have a little
bit of green again. We've got the same green
running through every scene. But a different primary color. There you go. A
really simple idea. The other thing we could have tried is being very
abstract with our colors, so we could do even
like a monotone. I take a different
blue this time. We can have a blue
postbox and we could have a light blue
touch to our sheep, and we could have a blue tree. Maybe that would
work together if we spent a bit of time just increasing the contrast and things like that,
that could also work. We could focus more
on shadows as well, so we could use something dark. In there. Remember, this is all about playing,
experimenting. This is not supposed to
be working necessarily. If everything here worked, you probably not experimented enough because you've not taken enough risks and
you've not found things which aren't safe, you've not found things
which don't work. Actually, I do think both of these options are
perfectly valid. I think trying
abstract monochrome, trying colors which are real, but linking them with one color. These are all great options. So like that, have a play
with your doodle sheet. Color things in in
different ways. Imagine how those colors
are going to work together. Don't need to be tied
down to anything. And the amazing
thing about the art we're going to create is
because it's doodles. It's simple doodles on a page. It's not going to take long.
So if it all goes wrong, you can just do it again.
13. Project Step One: It's time to create our
finished piece of art. Now, what I'm going to be
using is this sheet of paper. This is hot pressed
water color paper. Now, the advantage
of this is that it's something I can easily peel off as a sheet of
paper and frame, which is potentially what I want to do with
something that's designed to be meaningful and also fun and
just look great. But an equally valid option would be to use your sketchbook. You could open the
whole sketchbook out and use a double spread. You could use a bit
of masking tape to tape down segments
of your page. And from there, You could create a little framed
works of art as well. But today, I'm going to doing simple doodles on this paper. Like that, let's jump into it. We have to decide what's
going to be front and center and what's going
to be on either side. So I'm going to pop
the thing I feel most comfortable
doing in the middle. That is my postbox Remember, we're just going in nice and gently and just creating
those loose scratchy lines. Remember the shapes and the
feel that worked for you. You might find it helpful to
have your doodle storm in front of you at this stage so that you have a
little reference, not necessarily copy,
but to remember what worked and take a
bit of inspiration from. Notice how simple I'm keeping mine and how I'm keeping
it really small. One of the things we
want to do in framing this is have a nice bit of
space between each of them. And that is going
to be part of what makes it look
really fascinating. I'm going to move
straight on from this. This is taken no time at all because we've
practiced it so much. I'm going to jump on to the, the sheep which were more
scary and more difficult. Just remember the ideas and
remember we're going for this character of line as well because we want
these to be unified. By unifying them,
will make it feel connected and we'll make
it please connected, all this idea of my
favorite activity going for a walk by connecting
the objects, by connecting them
with character, by connecting them with color, the whole thing
becomes a work of art to do a couple of sheep. The first one went so well, I'm feeling so confident
going to do a couple of sheep. It's okay as well. I've just had an idea, and it's okay if you also have
an idea at this stage, and you want to
change things up. Because what I've
just realized is each of my things is
obviously outside. Each of my scenes can be linked by the same scratchy
little bits of grass. What might even be really fun. Is to link them like so. Now we've got a link that's going to run
through our whole scene, and it becomes more
obviously linked together. That means last but not least
we can move onto our tree. Our tree is going to be a little bit more complex
than the first one. I do but a little less complex and abstract than
the second one. We'll have lots of texture
insides and little swirls and sweeps and then we'll
have the same bit of grass. Why not have something
else in front as well. We'll have a little bush running in the
front of the scene. Then the same little bit
of grass coming along. And connecting. Now we've got our doodle scape moving along. That's stage one. Stage one
is setting out our scene. It's now time for stage two, and we're going to
reaffirm our scene. We're feeling good about it, and all I'm going to do
now is come back and add a bit more structure to the lines which have
worked really well. The bit of boldness here. And a bit perhaps of hatching. Again, this little attention to detail is what's going to turn this set of doodles into something which feels a bit more like purposeful art. By applying hatching, we're just applying a bit more texture a bit more shadow that just lifts the
scene a little bit more. Come along here. We can
just add a little bit of a dark touch here and a bit of extra contrast in
some of this grass. Then we get to our postbox
bit of boldness again. Again, a bit. Of hatching coming down
the side and suddenly, the postbox feels a little
more free D. I'm also going to make this sign in
the front bold and black. Just another way of adding
some contrasts to the scene. Before we move along and
add touches of dark grass. Let me get to our sheep and
repeat the same process. Be of extra boldness. Make sure the horns
are still there. Make sure these legs
are still there. Go extra boldness on this as
well, and then the hatching. Gentle, little hatching,
go to be really gentle for the hatching
not to overtake the scene. We can get this
little sense of grass poking along like that, we're ready to move
on to the next step.
14. Project Step Two: Line work is done, and this
is a really short lesson because it doesn't take
long to add our colors. Remember to keep in mind
your unifying idea. For me, it's going to be the green running through the scene, and then those bright
primary colors as the point of difference between each of my
little doodles. Now, even though these are
doodles, it's important. To remember, we're not
training. Over paint. We're not trying to paint everything and we don't want to necessarily
paint in the line. What I'm doing here
is just adding water and we'll find if we then just add a
little bit of pigment, remember our unifying color in this set is
going to be green. I can add that a
little bit of pigment to the water and the pigment
will basically paint itself. I'm going to do all
the greens first, so the green can come along
under our sheep as well. And then I'll come back in to my trees with those
bright yellows, which is going to be the
unique primary color to this side of the sketch. Then I add some water
to the postbox and I'll come in with my reds, which now can drip
and down and merge. I can tilt my page. And this doodle, become artistic without us
having to paint at all. The paints will
do their thing if you just add some water
and let them play. Into the sheet will add
a little touch of blue. Remembering what happened last time when I went overboard with the blue to just a tiny
touch tiny touch there, and then let things soften out. Normally, I talk about
painting in layers, and that's exactly what
we're going to do today. I'm adding a tiny bit
more pigment over here. Then I'm going to let
this dry and we'll come back and add the
finishing touches both with ink and
with watercolor. Oh.
15. Project Step Three: Now that things have tried, we can add a little bit of color, just a touch of a second layer to bring some highlights
onto the page, as well as perhaps
little ink touches to finalize our sketched
doodled art. So here we go. We've got our lovely piece of paper
with our lovely bits of art. And what I'm going to
do now is just add some highlights with some
slightly thicker paint. And these are going to be
perhaps more specific touches, finding these little
shapes in the in the paint and in
the ink from before. And just adding
perhaps a little show a little punch of
color here and there. This is lifting,
hopefully the artist, a little bit more
with a tiny bit more of that lovely contrast. For example, in this bush, an extra layer of that green and suddenly, we have a shadow. Just softening the edge with
a little bit of water will make it remain
feeling more real. Coming along
underneath, we could add little touches suggesting the grass and they could even continue in between our scenes, maybe I'll move
all the way along. Adding these little bits of crass till we get to the sheep. Then why not jump
to the sheet next. Touch of blue in here, a little bit more of that,
lovely ultramarine blue. We could even add a
shadowy color and bit of indigo in a couple of places to keep the
feel of the white fluffy, cloudy fur it's not fair, is it? Well. Whilst also, Just applying
a bit of fun to the scene. And last but not least
going to come into our postbox and brighten
up a couple of those reds. Again, maybe even just a little bit of shadow in a couple of places with the indigo
to lift it a tiny bit. Underneath, I noticed
there's an absence of green here so we can touch in some
of those lovely greens. Last thing we could do
with our watercolors, maybe some little splashes, little flicks of the
green going along. Then around each doodle section. We can do some yellow, blue, then over here,
a touch of red. Like that, I think the
water color is done. Now with the ink, I'm
actually happy with these. What you could do
little extra touches, bit of restructuring,
if you want, adding some more
textures and things. I'm not going to
do that because I think here I would
overwork things, but what it will do is apply a tiny signature to each of
my little doodle sketches. A.
16. Using Your Project: Now, when this guy is fully dry. What we'd be able to
do is take the paper off the board and cut
around the edges. When you've cut
around the edges, you could imagine framing it. You could imagine using
it as a bookmark. You could imagine just
leaning it against the wall perhaps on
your book shelf, and you'll have a
wonderful bit of art, which is just a doodle. But by thinking
about it a little bit more by warming into it, we've turned our
doodle skills into something really fun,
vibrant and connected. And there we are. There
is my finished project in a sort of mock up frame. In fact, I'll
probably use this one just length somewhere on
my bookshelf behind me, or maybe even as a bookmark
for my next good read. I'd love to see your
finished project. Do pop it up in
the class gallery. If you've enjoyed this class, ve a review, it means the world, and it really helps
spread the word. And if you'd like to follow your skill share,
that would also be amazing. I have loads of classes here. Loads of doodle classes, and you can also join me for
a one on one sketching class in the one on one sessions
free Skillshare as well.
 Toby Haseler, Urban Sketcher, Continuous Lines