Transcripts
1. Introduction: As the holiday
season approaches, we're often caught up in the bustle and business
of preparation. This course is an invitation
to slow down, unwind, and bring mindfulness into your creative space by designing some beautiful handcrafted
Christmas cards using paper as our
main material. Hi, Is, and you might know me more for my skill share
classes on branding, topography and color palettes. Yet I've always enjoyed the more hands on
side of creativity, and I find crafting and
painting very therapeutic. In this course, I will
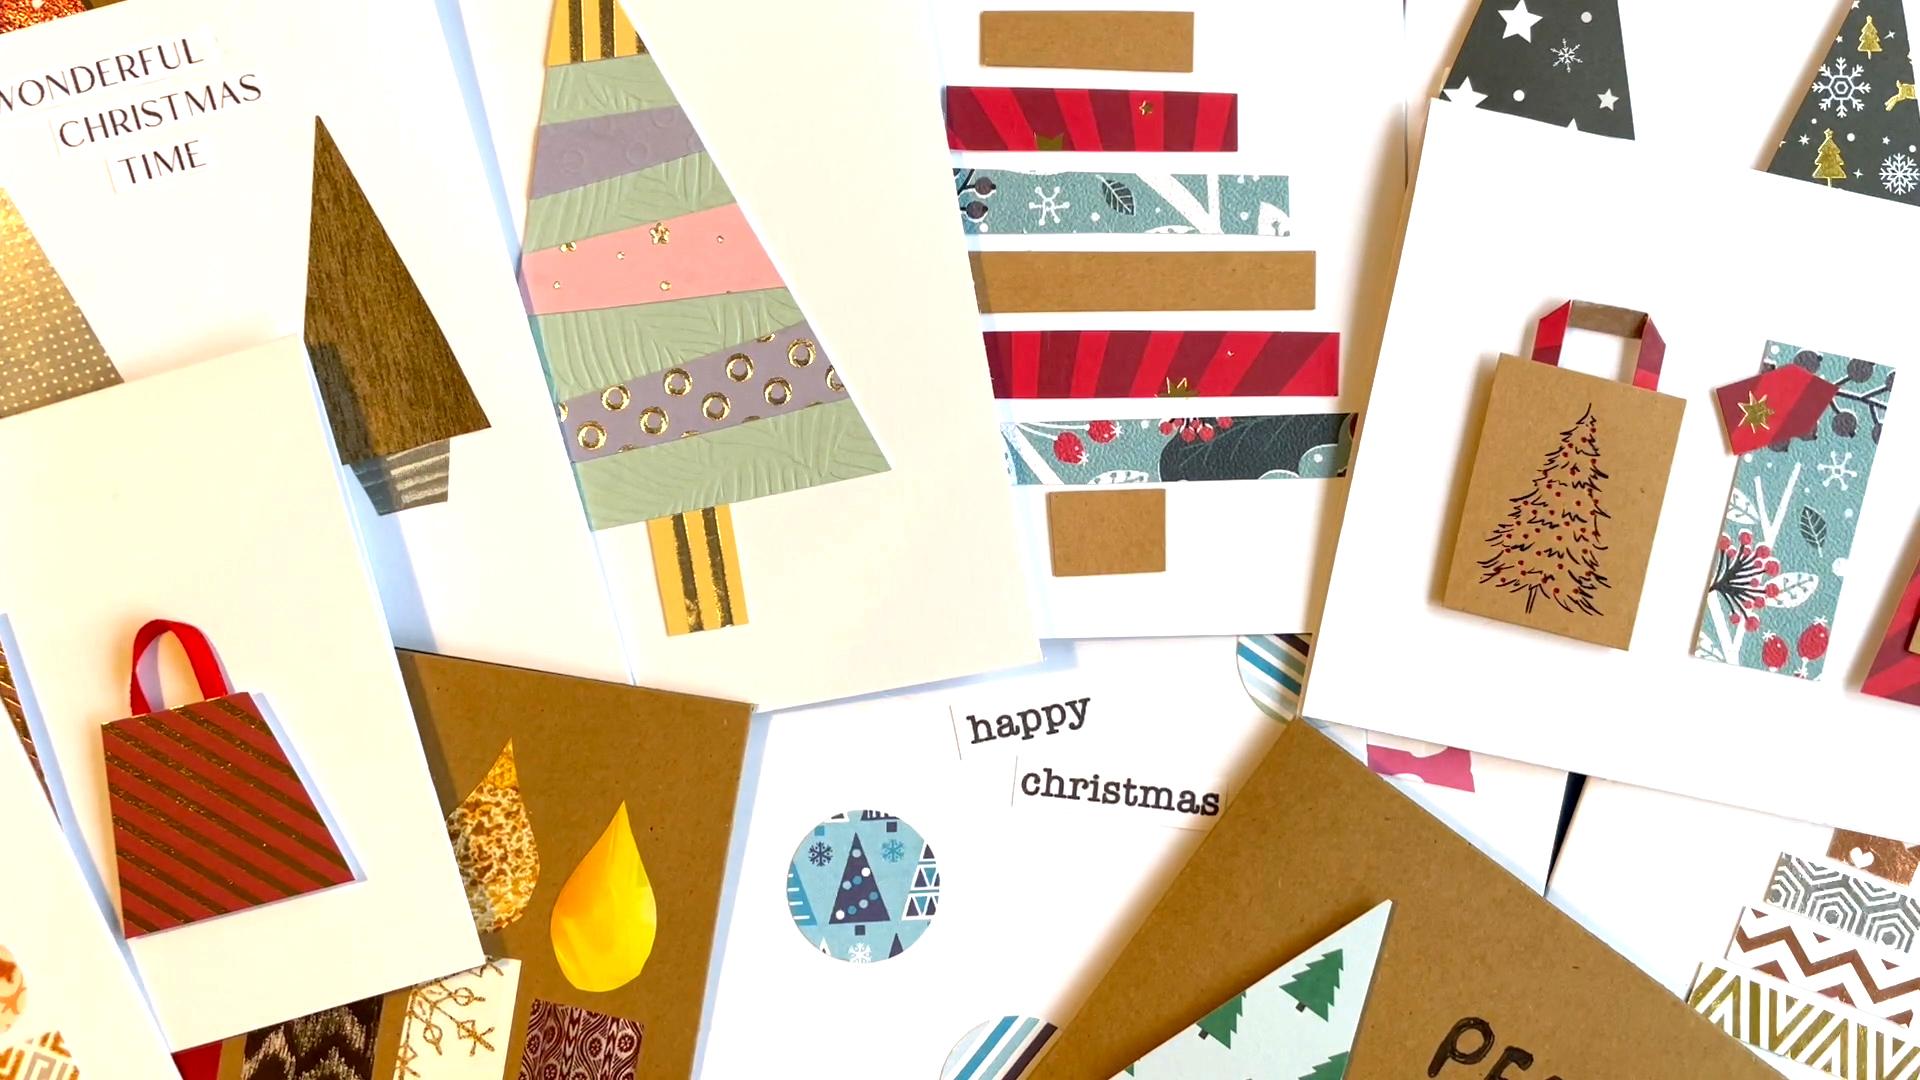
guide you through six different card
designs inspired by Christmas themes
like decorated trees, baubles, and gift bags, all made primarily from paper. With just a few tools
and an open mind, you can explore the calming
effects of hands on creating reconnecting with the joy of creating something
personal and meaningful. Each design is purposely
fairly simple. I really want you to
enjoy the process, possibly get together with a
group of friends or family, and spend some time
creating together. Whether you're an
experienced crafter or new to cardmaking, this course encourages
you to embrace the process rather than
focus on perfection. Each design will focus your
mind on the present moment, giving you a chance to relax, find peace, and add a personal touch to
your holiday greetings. Alongside the
festive card making, this course invites you to pause and reflect
through journaling. So whether you're
new to journaling or have kept a journal
for a few years, this practice is
designed to nurture your creative spirit and add a little more light to
your holiday season. Let's step into the art of mindful creating and make some
beautiful cards together. Christmas jumpers are required.
2. What you will need...: I'm so pleased you've
joined this course mindful making holiday cards to
inspire creativity and joy. I look forward to creating some crafting calm with you all. Over the next 25 minutes or so, you'll embark on a creative
journey designed to bring a little bit more peace and joy into your
holiday season. Together, we'll explore six unique handmade Christmas card designs that celebrate the magic of simple paper based crafting. With each design, I'll walk
you through a design process. I'll show you some
alternatives and encourage you to use
your own creativity. So just see me as your guide. If you get inspired to try
something different with the designs as we go
along, please, please do. I really would love to
see your own designs or twists on these ones. At the end of the
course, there is a short video with some
creative journaling prompts. And in the resources, you'll see a printable E book for
you to use if you wish. You don't need any prior
experience for this course. It's all about finding joy in making regardless
of skill level. So here is a basic list of supplies we'll be using
through the course. Paper, various colors,
weights, textures. This could be from
scrapbooking paper boooks, magazines, wrapping paper. I've also included some
printable patterns in the course resources that
you can download and print. Also included is a sheet with some typography options
that you can use, along with some templates
to use as guides. So these are good for
kind of figuring out the sizes that you might need
for some of the elements. Card stock for actually sticking everything
onto the cards. So I tend to use A six cards. But on some of the examples
I've used to square, I've also used a craft card, but you can go bigger
if you want to, and you can get these sort sets online and craft
shops quite easily. Scissors, definitely
need scissors for cutting out all your shapes, glue or double
sided sticky tape, and these are used to
assemble your creations. Some optional items might include decorative
items like stickers, ribbons or small embellishments
for some extra flair. Foam tape or stickers to add some depth into some of the
designs are quite useful. And for some of the designs, I use a shape punch. I use a star and a circle, and these are fairly affordable from Amazon or craft shops. Everything is designed
to be simple on purpose, so we can really
take time to enjoy the process without
getting frustrated. I can't wait to see
what you create, so please do share your projects
in the project gallery, any card designs
that you create, whether you go off
and do your own thing or you follow this as a
guide. I'd love to see it. So let's get started
with the first design.
3. Design 1 - Seasonal Stripes: We're going to start
with a super simple one. This is really effective
and get the kids involved, and this one is called
seasonal stripes. So we're going to start
with a plain white piece of a six card, and I've got these nice, small scrapbooking paper
books in teal and red. I'm going to use a
mixture of these two, but you could just go
ahead and use one book, try and make sure
that the papers are going to look good together. Now you want paper that is going to work as a small strip. So those snowflakes are probably a bit too
big for this design, whereas these stars
are quite perfect, and I'm just going to cut
out a simple strip here. And as you can see, it's not like, super straight. I've really kind of done
that quite roughly, and that's okay because this gives it a little
bit of personality. This isn't a perfect card. So go ahead and cut out
a few more strips and then kind of put them all together, see which
ones are going to work. I quite like this
one for the base. Just sit there on the
card and kind of get that size right as
your base layer. And then you can
measure the others against it and just take sort of like half a
centimeter off for each one to start getting
that tree shape in place. So go through all of them, keep cutting until you've got about eight or nine
sort of small stripes, and then we can start placing them on our card and
sticking them down. You probably don't want to do
what I do where I stick it over the actual card because if the Pritt stick
is a bit monkey, it can get onto
the other layers. So maybe just do that
on a clean board. Once that's in place, I want to get a little
bit of a trunk, so I'm gonna look through
these books again, and there's this really lovely stylized wood paper
in this book, so I'm going to use that for
my trunk on this design. Okay, now this tree looks like it's missing
something, right? I think it needs a
star at the top. So I've got this
really nice star stamp that I bought off Amazon
quite reasonably priced, but you could just
cut your own out, and I'm gonna stick that nice, sparkly star at the
top of our tree. And now we have a nice simple
card, really easy to make. You can get all ages to do this. So if you have got kids, then get them involved
in making this one. And then you've got all these extra
little off cuts of paper that you can make
another card with. So you might just have to
add an extra little bit here or there if they
aren't long enough. And also, don't worry about
wasting need bits of paper. So I'm just going to
cut these two bits, and I'm going to show you
how we can use them again in another card
in a later video. So here we go. To cards
for the price of one. You can have some real fun here with different paper types. Doesn't have to all
be Christmasy paper. You could use lots of
colorful paper on this one. And that is your
first card done.
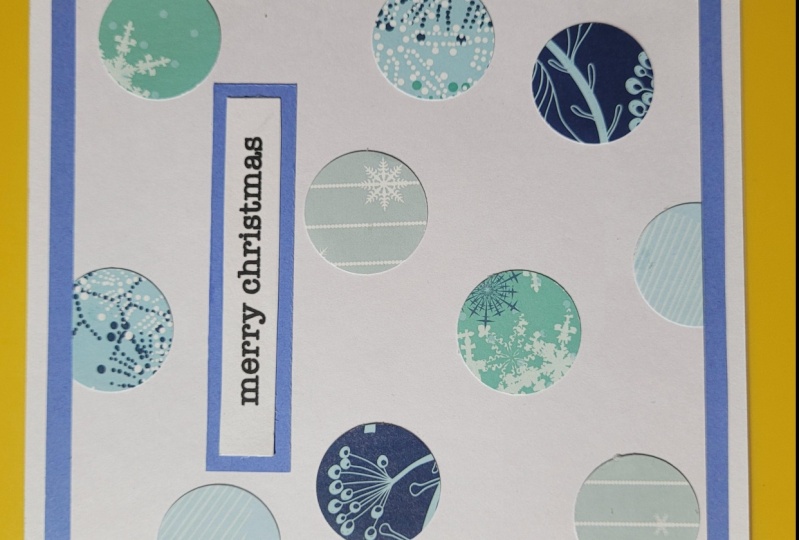
4. Design 2 - Bright and Baubly: Next up, we have a fun
design based on bore balls. I'm using some of
the paper designs in your resources for this one. So I place these on an A four
page and just cut them out as I don't need a full page for each for this particular card. I'm using a 2.5 centimeter circle cutter punch
that I bought on Amazon. This was about six pound
when I bought this, but it's super
useful for getting clean circles as they are
difficult to cut freehand. The really useful
thing is that you can also turn it around and see exactly what you're
punching out so I can center the
tree to this circle. Once I've got a
range of bore balls and some text cut out, I'll start laying
them out on the card. I try to make sure that the same pattern doesn't
sit next to each other, as this helps with a little
bit of balance in the design. You can also use the
cutter to punch out half a circle for any that might sit on
the edge of a card. This gives a nice,
clean, straight line. So I then tend to play around
with the layout quite a lot before finalizing and sticking the ball
balls in place. You could put a text
in a straight line, but I'm going to make
it a little bit of a jaunty angle for a bit more fun in this
particular design. And then I'll cut off any edges. You could really see on this green stripy ball ball
how cutting it isn't as clean as using the punch on this particular sort
of side of the card. And there we have another
card to the collection. Here's a few other designs
using other papers. On this black and gold one, I decided to add
little Buble ribbons to the top just with
a fine line pen. And if you don't
have a circle punch, you could try this design
with diamonds instead. Try to use the same
sort of idea of not putting the same
patterns next to each other.
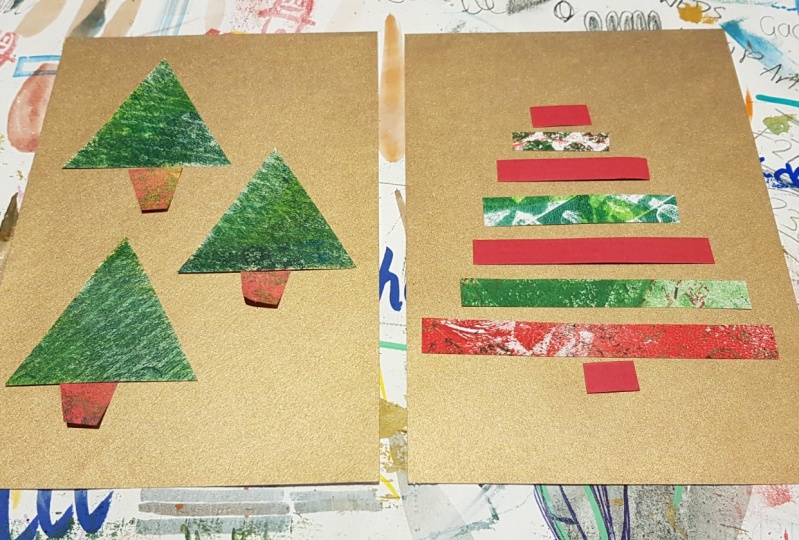
5. Design 3 - Trio of Trees: This design is called
Trio of trees, and I've decided to do this
example on craft paper. It's nice to mix it
up a little bit. So I found a lovely
scrapbook paper set, which I think will work
well on this color. So start with selecting
three of the patterns and cut out rectangles
roughly 3 centimeters by 4 centimeters. Think about the patterns
that you select, making sure that they
work quite well, on a small tree shape like this. And then I just cut
out a tree shape. But if you need a little help, just mark the middle point on the top of the bat and use that as a guide
with the bottom corners. Keep the off cuts, we're going to use these for
our tree pots or trunks, if you prefer that shape. And then go ahead and
cut out three pots. We now have three lovely trees, but I quite like to mix up the pots for a little
bit more interest. So figure out which ones
work well with each design. I'm not keen on the two
green ones being together, so I decided to cut off another red one from
the other off cut. Okay, and then we get to
the fun bit of trying to lay out our trees and making
them all look good together. Some of these cards are actually quite thick and they can pop up. So I've just used some
scissors to help weigh this down so my trees
don't fly everywhere. And I'm laying this
out, and I'm thinking the trees look a
little bit too big, so I'm just going to take a little bit of the edge of
some of these trees now. Once that's done, I'll just go back and lay them out again, and I will then start
sticking them down. So I'm going to use prick
stick to stick my hops down, and then I'm going
to use foam for the actual trees just to give
it a little bit of depth. So let's just take the
trees away and try and keep our pots in place
when we're sticking, so we kind of remember
the placement. If you do need a little
bit more of a guide here, just put a little bit of a pencil mark underneath where
the trees are going to go, just so you remember once
you've taken the trunk off if you want to make sure you get it
in the exact spot. So your fingers can get a
little bit sticky here. If you'd rather use
double sided sticky tape, you could do that instead
for these trunks, you don't have to
use brick stick. Basically, just use
what you've got, and, you know, it all
works, doesn't it? As you can see, I've
got a little bit of pitch stick stuck on
the top of this one, but I'll try and rub that off. Now, my fingers are sticky. Okay, so I'm going to use these little foam circles for
the backs of the trees now. And these will just give that
tree a nice bit of depth. And again, these little phone circles can
be quite fiddly, but there's foam tape
you could use as well. I'm going to use that
on another card. This one's really fiddly. But that's quite
good for the top of the tree because it's
quite a small area. And when you stick these down, just kind of do
it so it overlaps the pot quite a bit so you don't see sort
of a gap in between, and that kind of gives it
quite a nice effect where it kind of really looks
like a tree in its pot. So once they are all in place, you will have your card. And now there's kind of
going to be a few options as to whether you want to
just leave the card as it is, like, quite nice,
clean and simple, or whether you want to add
some other parts to it. So there's, you could
get some stickers, add some words, or
I've got these, like, silver stars I thought
I'm going to try and just see how they look in
a little bit of spaces. And it doesn't look
like it in this, but I try and keep
the metallics to the same color unless you're
purposely going for a mix. So that one on top
left is silver. I would use gold
stars, for example. And that looks quite nice. Another option. This is a different
design of trees, but you could add
some hand lettering and just sort of make
up some nice words. This kind of depends on
how confident you are with lettering if you feel like this is a route that you'd
like to go down. But it can be quite fun, and it also adds a really
nice personal touch. So I did this, and then I colored
in the letters. I just felt like it
looked a bit bolder, but you could leave it
as an outline, as well. Calligraphy might
look really nice on this sort of style
of card as well. So I really want to give
everybody lots of options here. Now, you don't need all these
sort of scrapbooking paper. If you don't have them to hand, another really good option is to use old magazines
and find some, like, really cool textures. These were all from, like,
an interior design magazine, so you can get some quite
nice patterns and colors, and then figure out which
ones will work well together. I quite like the
gray natural look, so I'm going to cut
out some trees and use that bark texture top
left for the pots. And then I'm just going
to see which ones sort of start working well, and we'll do a really nice
minimal very designery card using just magazine cutouts. So really nice and simple. Or you could use some of the free resources
with this class. There's some patterns
in the resource folder, and they would work well for this sort of card
design as well. So I've got these three pots, but I think they work really
well with the gray ones, but not so well with
that wooden one. So I'm going to
do a gray pot for that one just to kind
of mix it up a little bit and kind of give that
variety on that design. Because this is a
magazine paper, it's really thin, and
it's really fiddly. You can see it getting
all stuck to my hands. I'm not gonna use the foam
on the backs of these. I'm gonna use Pritt Stick and
keep this as a flat card. And then you might
decide to add some of the letters in the
resources, some other words. You could have a play around
and see what works here, or you could just leave
it minimal again. I've got a really annoying
little gray smudge in that top left bit
from some prick stick. So just be careful when using pick stick for things like
that because it's very easy to get a sticky
mark on your cards. Um not sure about using I'm not sure about this typeface with this particular design, so I'm going to use one of the other options a
little bit more stylish. And I will stick that on. Now, apart from the smudge on the left hand side, I
quite like this design. It's really nice and minimal, quite stylish, unfortunate
about that sticky bit.
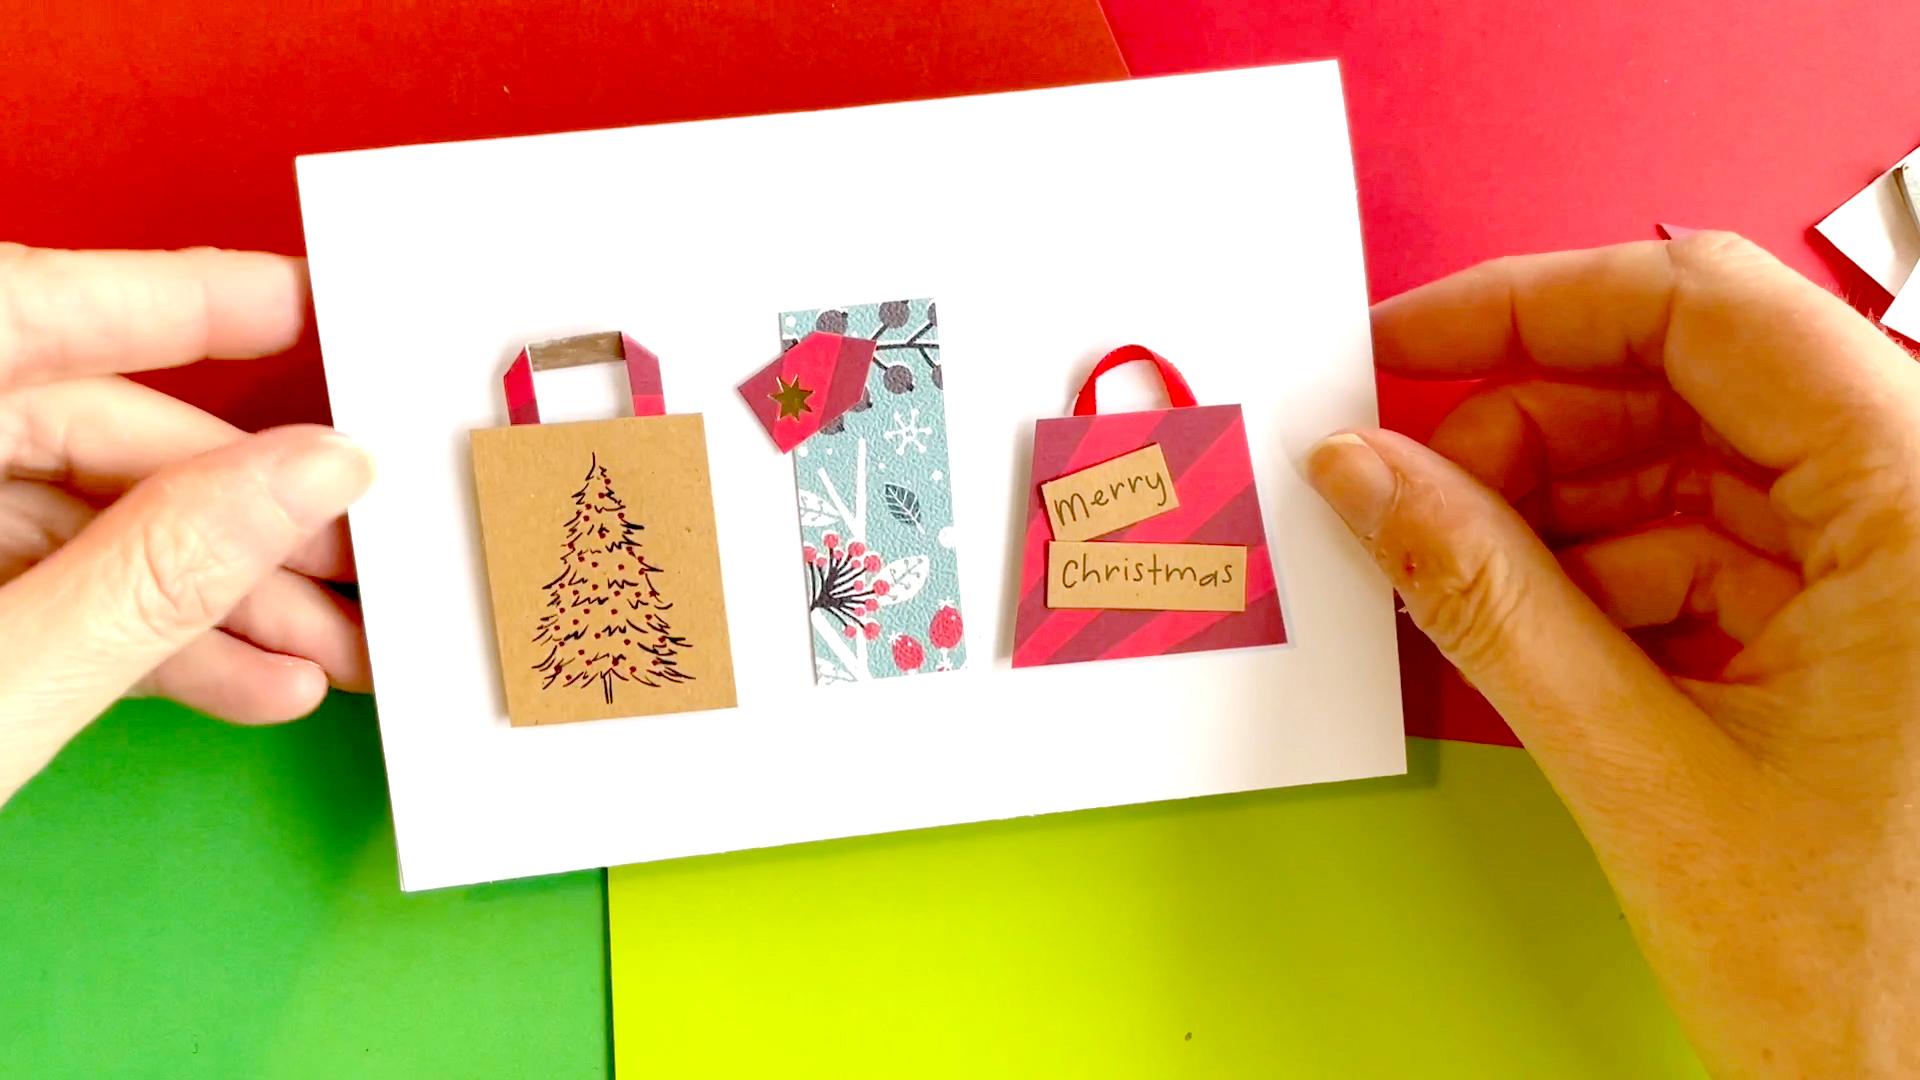
6. Design 4 - Gift Bags: This design is based on
shopping bags and gifts, and it's probably
my favorite one. I really like
making these cards. And we are going to use some old Christmas cards
for this particular one. So save your cards this year. It's a great way of reusing
them and just trying to go through those cards and figuring out which
ones might work, so like those trees will be
really good for presents. This one's got some really
lovely patterns on that we can reuse and make
it look like cards. So Robin's probably
a bit too big. Again, there's some nice
patterns going on here. Um this one Santa on his bike could make a
good one look like a bag. This one with the
Santa in the middle, the Santa is a bit too big. Might be to do something
with the type, and also these red
diagonals with the stars could make
a good box shape. And these are really
fun with the colors. Again, these snowmen,
you could cut out one of these snowmen and
make it look like a bag. So get some cards together
and then sort of place three next to each other and see which ones work like color wise. So I really like
these ones together. They kind of look like they're
a little bit of a set. So I'm just going to go ahead
and cut out some shapes. So I've got a bag shape, a kind of bottle bag
shape in the middle, and then a box, which could be a present,
or it could be another bag. So I'm going to try to
make this look like a bag, and I've just used
another bit of the red stripy one with the santa on to make
a little handle there, and I'm just folding
that over neatly. I'm going to see how that looks
with this Christmas tree. So that looks really cool. I'm not sure about the white on the handle it kind of gets
lost on the white card. So I'm just gonna grab
a gold sharpie pen, and I'm going to colour
that little section in, and hopefully that'll
look a little bit like it's matching
the bag as well. So let's see how that looks. Oh, yeah, that's gonna
work quite nicely. So I'll just get that in place, whilst I do some bits
on the other ones. I'm going to use some
ribbon for the red bag, make it look like a nice bag, and I might put a little tag on that bottle bag in the center. Also, on one of the
cards that I've used, there's some nice
type in the middle, so I'm just going to cut
out that Merry Christmas and see how that
looks on the bag. That's pretty cool. I've
also decided to use one of the star shapes on that red card for a little tag rather than one of the ones
with the type on. I think that looks nice,
and they all look like really like they're tied
together with the colors now, so it's like a nice
bit of balance. So then we can
start sticking on. I've stuck ribbon on
with ella tape there, and then I'm just
going to stick these on the foam tape to give
it a little bit of depth, which I think works
really well on this card. Just try and make sure that the bottle bag is in the center, and that helps kind
of balance the card. But I've still got quite a
lot of these cards left. Now, I could make more or I
could try a different design, and I just thought
I'd try this out on the Christmas tree stripy one, which is quite effective. Obviously, the trees
didn't work on that one, but the other bits
of patterns did. So I might keep these and make another one for the
shopping bag and just see how many
cards I can make out of those three cards. Here are some designs. There's that star
that we used earlier. I just remade that
into a bottle bag, and this one is used
in some patterns. This one's definitely
very Christmasy. And then the golden black one, I've used some ribbon to make that one
look like a present. So they have lots of
opportunities for some creativity for
those shopping bags, have some fun with it and enjoy.
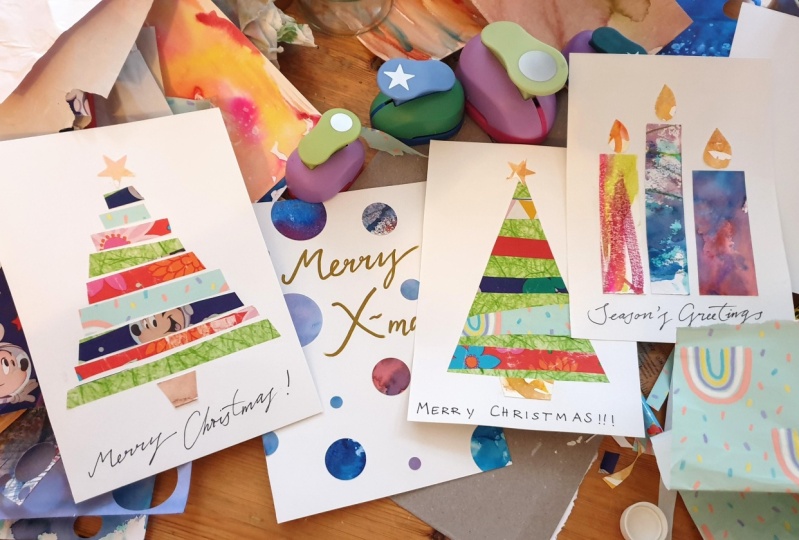
7. Design 5 - Flickers of Joy: For this card, we're going
to create four candles. As you can see from
these two examples, this card is pretty effective
just using nice patterns, so could also be used
for birthday cards. But for this example, I'm
going to use magazines again. So I'm going to look
through and see areas of textures that might work for the sort of main
stem of our candle. Possibly this tree texture. I really like these curtains and the pattern on them.
They could work well. This red part of the
rug could look good. And then let's not forget
our little flames. So in this magazine,
this page is perfect for some
warming flame colors. So go ahead and cut
out a few options just roughly to see what might
work well together. I really like this
snowflake pattern, but not sure it'll work
on a white background. So let's try it on
craft paper instead. Oh, yeah, that's quite nice. So I'll bring in
some of the other options to see how they work. This black and gold one was a picture from someone wearing a Christmas
outfit in a magazine, but that could look
really cool as a candle. And then I'll just place in some potential flames for each candle to see
how they might work. And then it's time to cut out. You can go free hand
here or you can follow the template as a
rough guide for shapes that will work well
on an a six card. I'm just gonna trim
the tops a little here just to get a bit more
of a variety in the heights. And then let's get sticking. I'll just use the
back of a magazine to help bonus five points if
you can name the actress. So now our candles are in place, it's time to do the flames. And for this, I'll draw a
little guide on the back. I'll then have a little
bit of a play around with which ones go well
with each pattern. This one needs a little trim as it's popping off
the top of the card. And there we go. Seeing
these side by side, I really do prefer the one on the right with the
Moroccan style pattern. But using magazines
can be fun and a really good way of
recycling, too. But
8. Design 6 - Trimming the Tree: For our final card, I've called this one
trimming the tree, we are going to
decorate the tree. I'm using some really
lovely carmin colors for this one that are not
specifically Christmasy paper, but there's a nice mix
of metallic elements, and I really like this
embossed leaf pattern, which might work well
for the main tree. So I'll go ahead and cut out a rough rectangle
from this one. Then I'm going to place this on the card to get a good size that will fit leaving space for the trunk or a
pot at the bottom. The next stage is to cut out some random strips that can have some jaunty angles
or they can be straight, whatever you prefer, and then start placing these
on the rectangle. Once they are stuck down, we will cut out the tree shape
so we get a really nice, sort of clean edge. I'm not keen on these two lilac colors being next to each other, so I'm just going to move
them a little bit about and make sure I'm happy with
it before I stick it down. Once they're in place,
turn over the card, and this is where we're going to draw a tree shape on the back. So just mark roughly
the middle at the top, and then you can use a ruler
or the edge of the book to draw out two straight
lines reaching the corners. Then we cut, and I like to see the reveal
when we turn it over. Yes, I love this little tree. Now, to place it on the card and make a
little trunk or a pot. We could think about adding some typographical elements to this or maybe a star at the top, like this one here. But I think I'm going to leave this one quite clean
without any extras. Don't forget to check
through your off cuts. There might be a few things you can use for one of
the other cards, like the seasonal stripes one. I also wanted to show you to keep your lookout
for any sort of paper. This is an envelope
that I got through the post from a magazine,
and as you can see, there's some really
nice areas on here that could be really
good for these cards. So I cut out loads of shapes
from just one envelope. I've got shopping bags up there. I've got the ball balls. I could probably get two cards out of those, possibly one, strips for the tree, and then another load of little Christmas trees I can make another
two cards out of. So I could probably make
another five or six cards out of just that one envelope. So keep an eye out for things that you might
get free to post, things that you could use and
recycle whenever you can. So now you have six Christmas card designs
to choose from. I would love to hear which
one is your favorite, and please do take
some photos and upload them into the
project gallery.
9. Seasonal Creativity Journalling: In this session, we're diving into the practice of journaling. So we're going to sort of have a quiet space where
we can reflect on the scenes of Christmas,
creativity, and connection. This journaling session is an opportunity to
create with words, exploring what
makes this time of year meaningful for each of us. Together, we'll
use the prompts to help spark some self reflection, express gratitude, and inspire a creative mindset that brings
calm to the holiday rush. Remember, there's no
right way to journal. This is your space
to explore, relax, and connect with the joy of the season in a way
that is unique to you. So grab your favorite pen, find a cozy spot, and let's start this reflective
journey together. I will read through
each of the prompts. You can use the
printable resource or write in your own journals,
whatever you prefer. And after I read the prompt, please pause the video and take as much time as you need
to journal about each one. You might find you
only want to do one or two of these
prompts each day, so feel free to come
back for the others. Journaling is a very
personal thing, so I don't expect you to share this in the
project gallery, but if you'd like to take
a bit of time to write how you found the prompts when
you upload your card designs, then I'd really love
to hear about that. So let's begin. If I could design a
Christmas card that represents my personality,
what would it look like? Imagine a card that
captures who you are and what you love
most about the season. What holiday colours, symbols or images
inspire me and why? Ride about the
visuals of Christmas that spark your creativity
and bring you joy. What am I grateful for
this Christmas season, and how might I capture
that in my design work? Take a moment to acknowledge what brings you
joy and gratitude and consider how these feelings could be expressed creatively. Describe a cozy, creative space I could create
for myself this season. Imagine the perfect
spot for crafting, writing or relaxing and consider how it
would make you feel. Write about a
recent small moment of joy that felt special. Whether it was quiet cup
of tea or seeing twinkly Christmas lights
capture the moment and think about how it
really made you feel. How does my environment
affect my creativity, and how could I make
it more inspiring? Notice what elements of your
space bring inspiration and calm and brainstorm
some small changes to make it even more inviting. Thinking ahead to the new year. What creative practices am I
keen to try or do more of? So think about all those
things that really give you the most joy or do you want to
try something new? Maybe set a little bit of a plan to try something
new each month. There's some extra
black pages in the printout for you to do
some free writing also. H
10. Thank you and Next Steps: Thank you all for
joining this course. I really hope you enjoyed it. And remember, it's about the
process, not perfection. This wasn't about creating the perfect professional
Christmas card. You could also do
some Christmas tags. I was going to show you here by just using some
of the designs, like the Christmas tree
or the shopping bag, that one looks quite cute. So there's other little kind of things you could do
with these designs. So I really hope you've
enjoyed this course. Please do post up your designs
in the project gallery. I really want to
see them and have a fabulous holiday
season, everybody.
 Faye Brown, Faye Brown Designs