Transcripts
1. Meet your controversial instructor: We all have that first
wow moment with AI, when your mind is just blown and we realize that there
are things possible now that just simply
weren't possible before my wow moment
came in late 2022. And playing around with an image generator
called Mid Journey. And it absolutely hit me, man, this thing can create images
that are so realistic, so quality, they're good enough
to pass off as real then. And there I knew it would revolutionize the creative
industries because essentially this thing can do my job pretty much
better than I can. It's something that
isn't bound by the things that traditional
photographers are bound by. The potential was huge, but no one was
really talking about these tools yet no
one knew about them. I did an experiment that would shock the creative industries into realizing that this was
a genuine turning point. Sitting at home, I generated
an two surfers at sunrise. Drone shot, beautiful
wave crashing, That was it, 2 minutes work, and I entered this image
into a photography contest. And guess what, this image, then the backlash
started rolling in wave of fury because for the
first time in history, an AI generated image had won a traditional
photography contest. Now, debate has been sparked
in the world of photography, after an artist entered
a photo competition with an image generated by
artificial intelligence. And it was a spark that
made the world start to take note about what these image tools can actually do. Of course, I returned the
cash prize and came clean. The experiment was more about making people realize
the potential of AI to create genuinely
exceptional imagery. You have access to
this technology too, it's just about learning
how to master it.
2. Mastering Midjourney: Settings: As a photographer, I've spent hours in the cold, in the dark, just waiting for the
sunlight to creep up over the horizon so I can take the perfect shot. It takes time. It takes plenty of effort, and sometimes it
doesn't always pan out. Now there is definitely beauty in that struggle to
get the perfect shot. However, you're always bound by certain things like
location, equipment, money, weather, all
sorts of things can get in the way of traditional
photography or filmmaking. What AI does is removes
those constraints. We're now able to generate exceptional imagery that can
be used to tell stories, promote products, or just
simply fun to look at. There really are no boundaries
creatively anymore. If you know how to effectively
use these AI tools, we're going to be
using Mid Journey, a popular AI image generator
to create our visuals. There are three main features that we're going to be using. Imagine, blend, and describe. We're going to be using
the imagined tool. First, the imagined
tool allows you to type in text and a corresponding
image will be created. This process can create
all kinds of imagery that range from the hyper
realistic to the abstract, and everything in between. There are literally
countless artistic styles. It can also be used
to mimic the style of the master painters like
Van Gogh or Salvador Dali, and be put to work on an
entirely new masterpiece. So let's have a look
at the different ways that we can create
visuals in mid journey. The way that you
access mid journey is through a platform
called Discord. You can use Discord on your phone or on your
computer as well. Now let me say something
straight away. Don't be scared or put
off from using Discord. In a few minutes, you'll
pick it right up. To set everything up, what you'll need to do
is to head over to Discord.com and
set up an account. Then head over to
Mid Journey.com and set up an account there too. It only takes a few minutes, and if you get stuck, I've included an
easy to understand guide and you can find that
in your resource list. Great. Now, once you're all set up, this is what you'll see. It's not exactly a
pretty platform, It's more a constant
feed of people putting in text prompts and
receiving their imagery. I personally like that Mid
journey operates this way. It's a great way to get inspiration to see what
other people are creating. And it can really jog your creativity in a few
different ways. Now if you scroll down, you'll see a text bar. Now this is how you actually communicate with mid journey. Think of it as the
place where you input your prompts or
change your settings, really just working
with the platform. But before we dive in and
start creating our imagery, we're going to first
have a quick run through the settings and what
each of them means. To access settings, we want to go down the bottom text bar and type in forward
settings and hit Enter. Then it will bring up all
these different settings. First up, we have Stylize. This is exactly what
it sounds like. It controls how strongly mid journeys default
ascetic is applied. Now you can dial
up the stylization and you'll start to
see more wild results. I personally keep it on medium, but once you get to
grips with mid journey, feel free to come back and tweak these settings
just how you like. Next we have the speed settings. With turbo fast or relaxed mode, I usually used fast mode, which means my images take about one to 1.5 minutes to complete, while relaxed mode
takes a bit longer, but it won't burn through your monthly batch of generations that you
have each month. While Turbo will go
through them a lot faster, you can always see how many
generations you have left each month by typing in forward slash information
and hitting Enter. Now back to our settings. The last and most important
one you'll note is which model of mid journey
you're actually using. By clicking here, you
can change the version. But as a rule of thumb, I usually keep it on the
latest version of mid journey, which means it will
change with any updates. And they do come out quite
frequently on mid journey, so this is usually the
best one to keep it on. The only time I really
change that is to switch to N IJ mode with a little
apple symbol right here. The NIJ model is great for cartoons and illustrations
and kind of anime images. The other one that I do like
to change to sometimes is the raw mode that allows for really realistic portraits,
really realistic faces. We'll play around with these a little bit later
on in the course, and we do also cover these in detail in your
resource lists. But for now, let's
keep it locked on to the latest version of mid
journey and start creating.
3. Image Generation: Generating an image always
starts the same way. Let's go down the bottom to the text bar and type in
forward slash imagine. This is where we can type in our text prompt and hit
Enter With your prompts, you can be as specific
or as vague as you like. You can simply type in house
and you'll get lots of different variations of
what mid journey thinks a house may look like in
lots of different styles. Or you can be a
bit more specific. Say something like,
Beautiful House next to a lake with a red door. And you'll get something
much more specific. It's really up to you. This also applies to different styles. You can include a specific
style or leave it blank. And mid journey will suggest a number of different
styles that you can use. For this one, I
want to demonstrate a few different popular
styles that will show some of these variations of imagery that you can create. Let's start with
a simple prompt. I'll go down to the text
bar and type in forward. Imagine a woman in a yellow
dress on a sunny day, realistic photography
style hitting enter. Now, once this bar goes yellow, it means that it's
been submitted and you'll just wait for
your imagery to generate. After waiting about
a minute or so. Here's our final output. Now you'll see that we have
four different images. Now let's go through what these different buttons
underneath mean. U stands for upscale. If you find an image
that you like, say this one in the
top left corner, you can click U one and it generates a higher resolution
image that you can save. That's the same for 23.4 which is the bottom right
hand corner option. And it's a similar
story for the V option. V stands for variation. You can hit V one if you think the image is close to
what you had in mind, but it's not quite right. Hitting the V button
below will create four slightly different options using that first
image as a reference. Here's those outputs. Now you can see that they are slightly different
while keeping to the same general aesthetic of the original
reference imagery. Well, let's say that
you didn't like any of these images and you just want to start
the process again. Well, the final option is this arrow circle
to the far right. This is a re roll button and
means that you want to start the whole process over again using that same
initial text prompt. If we hit that, we'll get a completely different set of images that we can
then choose from. There you go. That's
how you can use mid journey to create
really impressive imagery.
4. Styles and Artistic Techniques: You really do have
the master painters, photographers,
artists living within your phone or your computer. Let's take a look at how
we can tap into them. Using AI, I'm going to demonstrate different
popular styles, so you can see how these affect the final output of imagery that's created
in mid journey. To do that, we're going to use the same simple text prompt, but change the last couple of words that dictate the style. So unlike the first one, instead of a realistic style, let's type in forward. Imagine a woman in
a yellow dress on a sunny day oil painting style and see what that comes up with. A woman in a yellow dress on a sunny day Pixar studio style. And another, a woman
in a yellow dress on a sunny day surreal style. I'm going to create a movie still from a new Batman movie. Let's see how the visuals
change if we bring in different directors forward, shine a cinematic movie still from a new Batman movie
directed by Christopher Nolan. Not bad. It's very on brand
with his movies forward slash a cinematic
movie still from a new Batman movie
directed by Wes Anderson. Nice and colorful. And finally, a cinematic movie still from a new Batman movie directed
by Alfred Hitchcock. And we've got some
moody horror vibes. You can start to see how a simple tweak can affect
the entire output. This will also work for referencing different
painters or artists. A portrait of Batman
painted by Van Gogh, a portrait of Batman,
graffiti by banks. You can start to
see how differently these turn out. Now
it's your turn.
5. Adding Emotion For Powerful Imagery: Descriptive words and
emotive language are fantastic at getting the
most out of mid journey. Don't just explain what
you'd like to see, but include how you want the
audience to feel as well. For example, here's a
simple prompt that I used, a man sitting on a bench
photography style. Now let's see how it
changes when I add in some emotion and make
it more like a story. A devastated man sits
alone on a bench. The weight of the world
on his shoulders, leaving the audience feeling sympathetic and extreme
pity photography style. There we go. Now let's compare these
two different images. This is option one and
this is option two. They're both showing
the same thing but in vastly different ways. One is layered with emotion and that can be
the difference between creating an engaging image or one that people
forget pretty quickly. You don't need to
go overboard with wordy or overly lengthy prompts. The new updates are
making it more intuitive. So you don't necessarily
need to add in sentence upon sentence
to your prompts. But instead, let's make sure
you add descriptive words. Let me show you what I mean. Say you're a restaurant
owner and looking to create some images to
show off your menu, but you can't necessarily
afford a product photographer. This is a simple
prompt that will create an image of a hamburger. But let's take it up a notch and see what happens when
we simply add in the words delicious and
mouthwatering hamburger. We can see it's much
more appealing. This is particularly the
case if you don't really have a specific request in mind. The more vague but
emotive you are, you can get some really
fantastic results. If you aren't needing
a very specific image, try keeping your prompts short, but add plenty of feeling. Here's another example. Let's imagine where
the owners of a cafe and creating a
marketing campaign. We want the image to tempt people into coming in to
get their morning coffee. The image should tell a story
of warmth and welcoming. Let's do a short basic, prompt a coffee on
a bench in a cafe. Warm and welcoming, feeling,
product photography style. It's not bad, but let's add a few more emotive words and see how this changes
the final output. A delicious morning coffee in a homely cafe in the
soft morning light. Warm and welcoming feeling
product photography style. This one tells much more of a story and will resonate
more with the audience. A good prompt is
creative and detailed. Remember to use vivid language
and descriptive phrases to paint a clear picture and really ignite mid
journey's imagination. Think of it as something
that's complex and you can really work with it to
create something fantastic.
6. Mastering S.E.S Framework: Now you know how to
effectively describe a scene, why emotion is important, and also how to select a style. Let's bring them all together. We've created a powerful
framework called S, S, which stands for Situation,
Emotion, and Style. This framework is a game
changer when it comes to creating engaging AI
generated imagery. First, situation refers to the scene or context
you want to create. This sets the stage
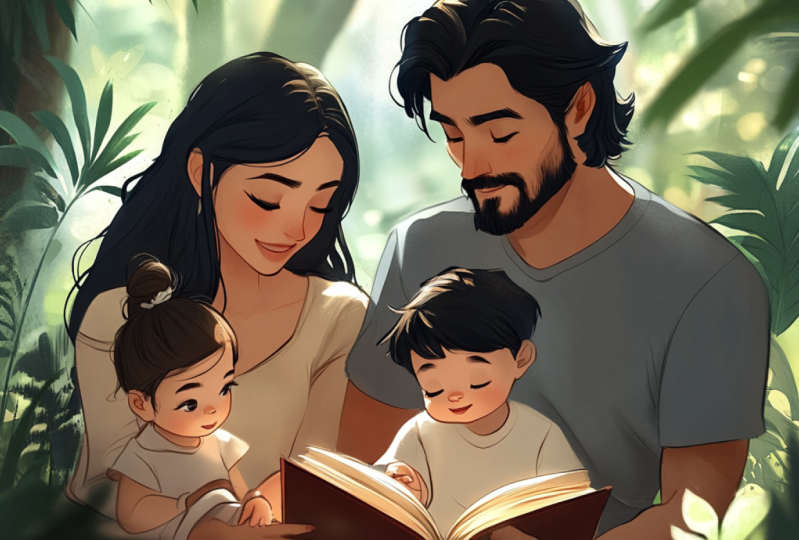
for the entire image. For example, a grandpa meeting his new daughter
for the first time. Next, emotion helps infuse your image with
feelings or atmosphere. This can drastically improve how relatable and engaging
your image is. Feelings of overwhelming
joy, pride, and warmth. Finally, style directs the
AI's artistic approach, allowing you to capture anything from a realistic portrayal to a more abstract or
illustrative image photography with a 35 millimeter ****. Why is the SES
framework so effective? It's because it gives a
clear direction to AI, helping it generate more
precise and engaging visuals. By defining the situation,
emotion, and style, you guide the AI
to create images that can truly resonate
with your audience.
7. Audience Essentials: Let's talk about
tailoring your visuals to different demographics
using the SES framework. Let's imagine that
we've been hired by a fitness brand to keep
people healthy and active. We're in charge of
a new initiative called Fit Revolution. All we want to do is
get people moving and to keep people
healthy and active. To join a class or to take
up running or meditation. Now we're targeting everyone
from kids to the elderly. Let's go through by different age examples and start to think about what different styles will resonate best with the
different age groups. For kids, the SES prompt
could be, illustrate a fun, energetic dance class
filled with kids conveying joy and enthusiasm in a
lively cartoonish style. This appeals to young,
energetic audiences who value fun and vibrancy and the
social aspect of exercise. Now let's target a slightly
older demographic. In teenagers to 20 somethings, we want to create
a more exciting, realistic image that highlights working hard and feeling good. In contrast for young families, a prompt might be depict a home scene where a busy
parent transitions from work to a quick yoga session focusing on feelings of balance and
calm in a realistic style. This resonates with
their need for balance and stress relief for older demographics
we might use show a tranquil garden scene with a mature person practicing chi. And feelings of serenity
and well being are shining through in a
warm realistic style. This aligns with
their preference for low impact exercise and a more peaceful
setting or scenario. By using the SES
framework effectively, you can tailor your
AI generated visuals to various demographics. And you're ensuring that
your images are engaging, memorable, and relevant
to your audience. Now it's your turn.
Imagine you're in charge of fit revolution and need to make an AI image that targets different
demographics.
8. NFL Case Study: When creating imagery,
your aim is always to make it as relevant as possible
to your target audience. Think about the age,
interests, the location, the demographic
you're looking to hit that will inform the look, style, and tone of
what you might create. We've been approached by big companies to create
imagery for their branding, websites or social media, and we use this
exact same process to create imagery for them. We were asked to create
an image series for the NFL Super Bowl this
year. So what do we do? Firstly, we asked them who they wanted to reach
with this imagery, What kind of NFL fans. They came back and they said, Philadelphia fans, fantastic. So we settled on a
specific concept and we went to work,
let's jump in. So we settled on highlighting
Eagles player Jordan Mila. He was the player we
really wanted to focus on. The idea we came
up with was as a marauder being dropped
into the Arizona desert. That's where the NFL Super Bowl was being played this year, and he's being dropped into
the desert on a mission. We wanted the overall feelings, vibes to be exciting, almost like a
predator type movie. We used quite a
detailed prompt for this one because we had quite
a specific image in mind. And you can find
that complete prompt in your resource list. These images were shared
by the NFL across their digital social channels and did really, really well. And you can make
images just like them because this was a
campaign for social media. We wanted to make
sure that the image itself was optimized for
the social media platforms. And what I mean by that is by making sure that
the aspect ratio, the actual size of the
image, is correct. Most people consume
social media content on their phones these days. And the best aspect ratio for viewing the average
post on an Instagram, on a Facebook is
usually four by five. With mid journey, you can change the aspect ratio by typing in R and then the image
size that you'd like. For this one, it's four by five. This is how images in those
dimensions will look. I won't dive too much
into the aspect ratios, but we have included some
examples in your resource list. You can also change the size of a generated image within mid journey using some
different functions. Say, I've created this
image of a close up face, but I'd like it to be zoomed out to reveal more of the scene. This zoom out button allows
you to do just that. This is great to show more of the location without
changing the image. It's simply extending
out the borders. You can zoom out times two. Zoom out by 1.5 or there's the custom
zoom option as well. If your initial image was
in horizontal orientation, say an aspect ratio
of 16 by nine, you can also hit this
button to make it square and more optimized
for social media. These final arrow buttons
are in a similar vein, and allow you to pan
in any direction that you want almost to
get a panoramic view.
9. Cameras, Lenses & Lighting: And if you're a photographer
or have experience filming, no knowledge is wasted. You can even use mid journey
to control the type of camera that's used for the shot or even the type of lighting. Let's jump in and have a look. Remember, you're not bound by the same limitations
anymore if you've always wanted to use a certain expensive camera
or **** to take an image. Well, now in a way you can, let's have some fun
and see how you can include the use of
different lenses, cameras or lighting
to affect the image. I'm going to start by
typing in forward slash. Imagine a portrait of a man photography using
a 70 millimeter ****. Okay, now let's try a portrait of a man
using a fish eye ****. This also applies for
macro photography, or black and white, right through to the selfie
style imagery. You can really do it all. You can really be as
specific and creative as you like with these
different combinations of cameras and lenses. And it's similar when
it comes to lighting. You can include silhouette, volumetric, back
lit, long exposure. Any of your favorite
photography styles can really shine through here. Let's look at another
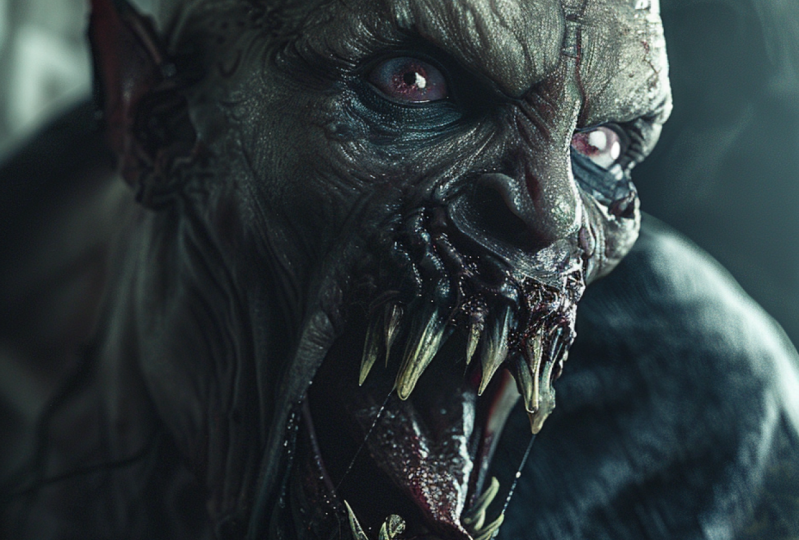
realistic example. And this was for a
client in Mexico. It was a news outlet. And they wanted to prepare
for the event that filmmaker and director
Guillermo Del Toro won and Oscar again, this was for social media. We included the aspect ratio, A R, four by five. Now you can see that this image is very dark and cinematic, which really fits what we
were wanting a vampire king. But what if we wanted
to create something realistic like an editorial
style photograph? Let's head back to
our settings and change to the raw mode. This mode is best if you want really realistic faces and portraits that displays
them warts and all. They look really clear,
really realistic. These raw images are
usually less glossy and without that cinematic treatment that mid journey is known for, Let's take a look
at a few examples, then create some new pictures. Now it's your turn to
create some images, and let's have some fun with it.
10. Transforming Your Own Photos: Yeah, Leonardo
Dicaprio is great, but what if I want to
create an image of myself or a family member
riding on a bicycle? Well, what you can do is
upload an image of yourself in mid journey and
have AI run its magic. Let's jump in and have a look
to add in your own picture. Make sure it's as
high quality as possible of the person that
you're wanting to highlight. Click Add to the bottom bar and drop in the image. Hit Enter. Once it's dropped in,
it may take a minute, but you'll be able to click
and hit Copy Media Link. The link you've just
copied will come up as a URL and that is now the
reference to that image. Alternatively, if you're
on a computer and can't see that Copy
Media Link button, you can instead click the image, then tap open in browser and copy this URL link at the top. This will work the same way. Now to add that
into your designs, type in forward
slash imagine and then paste that link
into your prompt. So it's the first thing
within the prompt. Then you can type out
the prompt as normal, and it will use that
image that you've provided as a reference
to build upon. Here's some examples forward. Paste this man as a
Pixar three D animation. Of course, you can build on
these as much as you like. Now, likeness can be a difficult thing to
get down sometimes. And we will be going
through an advanced face swapping technique later
on in the course just to get that accuracy of
your images as close as possible to the likeness of
yourself or real people. But for this next task, take a photo of yourself or use the stock image
of a person provided, and build on that image
using some simple props.
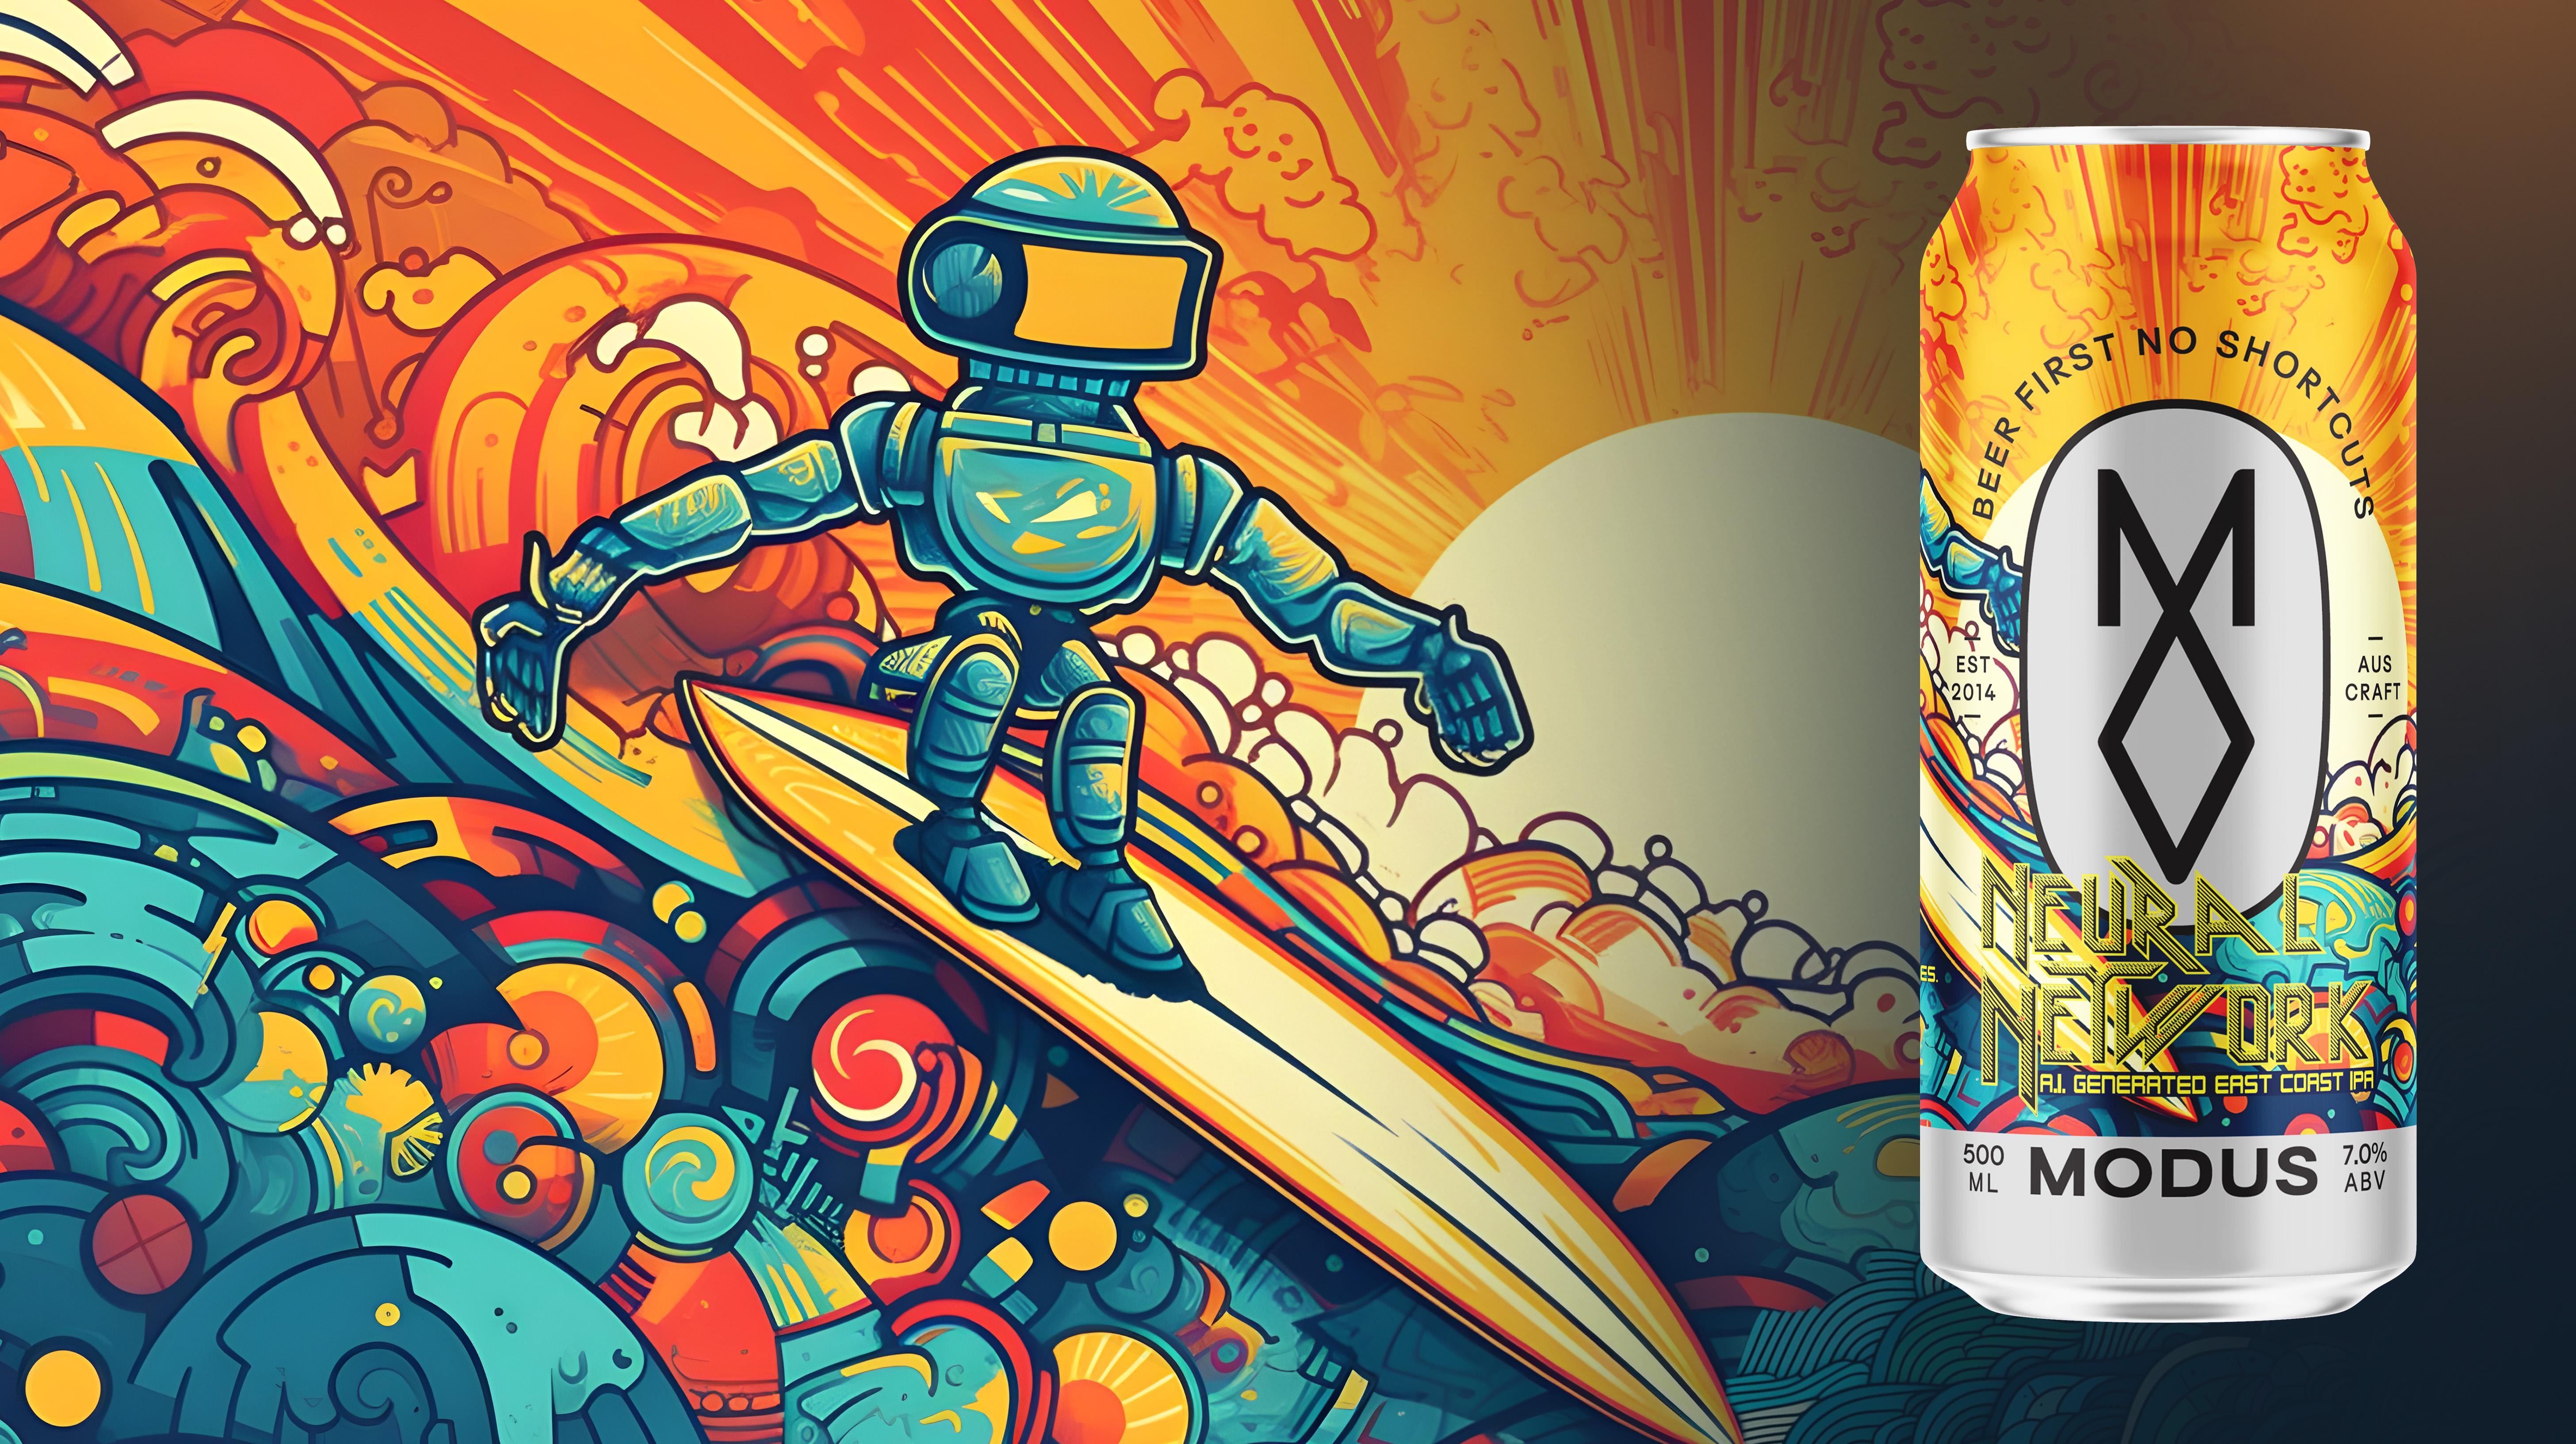
11. A.I. Beer Case Study: We had an idea to
combine a few passions, artificial
intelligence and beer. What's billed as the first AI generated beer in the world, has been created at
a Newcastle brewery. Neural network has all the
components of regular beer, except it's not made by humans. So we used AI tools like Chat GBT to create
the ingredients, list the brewing
process, the name, and we use Mid Journey to
create the can design. The only human element
is the brewers. For this concept,
we partnered with an Australian brewery
called Modus. Now Modus are famous for capturing themes of
sun and surfing, coastal, laid back kind
of vibes in their beers. We wanted the can design to reflect the themes that
modes are famous for, while also tying it into the AI vibes like
robots in the future. So we combine these in a
prompt that was fun, vibrant, and engaging and went down
a more illustrative route. We were really happy with
how it turned out the can design is actually
up for an award as well, for best beer can design. And it doesn't
hurt that the beer actually tastes
surprisingly great too. But while the creator might
be artificial the brew, it's the real deal to create
standout illustrations, cartoons or anime of images. The NIJ model in mid journey
is really effective. This provides a different style of imagery to the
default ascetic that mid journey usually applies
to change to the NIJ model, head back to your set forward settings and hit NI
JI with the apple symbol. Now let's create some
anime and cartoon imagery. Now it's your turn.
12. Vary-Region (In-painting): The next feature
we're going to look at is called Very Region, also known as in painting. Now before doing this, make sure remix mode is
enabled in your settings. Now this is a game changer when it comes to editing and tweaking your AI imagery
because it allows you to change specific
areas of an image. Let's pick an example using this image of Tom Cruise
on the red carpet. It's a nice picture, but there's a big old sun flare that
we'd like to remove. We can do that by
hitting very region. Now an editor window will
appear where you can choose to highlight the areas of the image that you'd
like to change. There's a box
selector on the left that will select a whole
chunk of the image, or a lasso tool on the
right that's for selecting those more complicated
areas like a person's hair. We want to remove this
big old sun flare from Tom Cruise's jacket. Selecting the lasso tool we drag and make sure it's
completely covered. Now the bottom text
bar is where we choose what we'd like to
replace into this area. If you just want to blend a smudge or a blemish
out of the image, leave the text box
blank and mid journey will smooth it out
of that region. Let's try again and replace
the jacket out entirely. We can do this by using the box select and
highlighting that region. Let's type in white tuxedo and you can start to see how
powerful this tool is. The opportunities are really endless and it does
a great job with making realistic changes that seamlessly fit into
the environment. Let's give Tom
Cruise blond hair, nice 1.1 step further to push
this tool to its limits. Let's fill out the rest of
the image with animals.
13. Advanced Tips: Creating A Server: I'm going to share
two advanced tips that are really helpful, particularly as you
get more confident and more comfortable with
using mid journey. The first is creating
your own server. Now the reason you do this is
because you get a bit sick of sharing the same channel
with all these random people. And you just like to create
your own organized channels. To do this, go to the
far left side bar and hit the plus symbol. Then add a server, create my
own for me and my friends. Then you can name it
anything you want. Great, is it this
is your new server. Now we want to
invite mid journey into that server so we can use
it just like we have been. You can do this by clicking
on your new server name, then selecting app directory. Next, search for mid journey in the search box and select
it from the list below. Click Add to Server. Now you can use this
channel just like you would clicking forward, Imagine. And using it like normal, you can set up
different channels for different styles of art. And the best bid is that
because it's a private server, that it's just yours. You don't have to scroll
endlessly to find your images. They're only going
to be your images.
14. Advanced Tips: Face-Swapping Technique: I love this next tip and it's the advanced face
swapping technique. Now this can really
help you to get an accurate likeness
of someone down. First you need to install a plug in called Insight Face Swap. You can do that by
following the link in your resource list at
the end of this module. We've dropped it in there.
Once you've installed it, you're good to go to
use this plug in. You first need to supply a
reference image of yourself, of your face, or the face that you'd like featured
in your images. To do that type forward, save ID in the discord chat
and then drop in your image. As an example, I'm going to
use an image of this man. After dropping in your image, you'll need to give your
character ID a name. This will be used to identify your character in future
commands for this guy. Let's call him Mike. Next, we want to swap Mike's face onto the face
of another character. This is done by typing
in forward swap ID. Then we type in
Mike because this is the character that
we want to reference. Then drop in the
image that we want to transform and hit Enter. Now you'll see that
Mike's face has been replaced onto the face
of a new character. Let's do another
one. Now. You can do this with all different
styles of characters, from the abstract to
the really realistic. This is an extremely powerful
tool and helps you to get the most out of the A I
images that you're creating. You can save many
different characters by using forward slash save ID and creating a reference
to James or Jessica. And then using insight, face swap to swap their
ness onto a new character.
15. Blend Tool: Then we've got the Blend tool. This tool combines two
or more images into one single image and can
be a whole lot of fun. This can be used by people
like artists to combine two works to create something
entirely new and different. The blend tool
allows you to take two or more images and create
something entirely new. Let's see how this one works. I'm going to type
in forward blend and choose two images
that are on my computer. One is of the Mona Lisa and
the other is of starry night. Hitting Enter, Let's
see what it creates. Bingo. You see we've got
four different options. This can be really
useful if you're an artist or a photographer
wanting to blend some of your own
images and everything that is created is based
off your own work. It's a really interesting
new way to use mid journey. Keep in mind that the more
images that you blend, the more wacky and weird the final output is
likely to become. This is because Mid Journey will combine different aspects from each image to create an
entirely new piece of art. Now let's see what happens
when we blend four images together and see how different
the final output is. Here are the four
images that I've chosen and I'm going to
blend these ones altogether. You also have the
option to choose the aspect ratio
and dimension size. So you can go for portrait
square, or landscape. I'm going to select
square for this example, but you could also change it. Now it's your turn to use
the blend function to combine a few images that we've provided in
the resource list.
16. Describe Tool: And finally, we have
the described tool. Now this is a really under
rated and useful tool because it allows
you to reference and build on an existing image. Say you like the look
of a photograph and you want to create something
in a similar style. Let's have a look
at how it works. Describe Tool is a really under utilized function within
mid journey and I'm going to explain why
it's really one of the most important and powerful functions
within the platform. Here's why. If you
ever see any kind of imagery on
Instagram, on line, anywhere really, and
want to mimic the style, you can do that by using
the describe function. For example, say I love this image of a tiny bird
sitting on someone's hand. And I want to know what prompt I could use to create
a similar image. To do that, you type in
forward slash describe, and then choose the
image that you'd like to reference and hit Enter. Then that image will be
offered up in a prompt. As always, there will be
four different options. Once you've selected one, you can choose to input that
again into mid journey. Now the best bit is instead of just accepting this option, I can actually add to the text prompt to
make it more specific, more to something
that I'd like to see. For example, I want there to be a winter snowy atmosphere
to this entire setting. Let's add a simple winter
wonderland location to the text prompt and see
how we go beautiful. Now you can have a try using the described tool using
the imagery provided.
17. Conclusion and Final Tips: Okay, that's a rat. Thank you for joining me on this journey. You now have all the tools you need to make an
impact using A I. And I can't wait to see
what you'll create. My final tips are stay curious, experiment, and play around with AI tools as much as possible. New tools will
continue to come out, but if you stay
interested in this space, you will get ahead and the most important
thing is have fun. I mean, these tools are just fantastic to
play around with, so keep it up and I really look forward to seeing what
you create with AI.
18. Bonus Content: Sky Documentary A.I. Investigated: Which brings us to this image. A beautiful sunrise
shot, but it's a fake. I was playing around with an A I image generator one day
called Mid Journey. I realized that the
quality of output you could get from those was as good as what I could
take with the camera. Early in 2023, AI presented photographer Jamie Van *** with a picture
perfect opportunity. And I thought, okay, people need to realize how powerful the potential
of this stuff is. What's the best way to do
that, to bring this to light? And I thought,
let's shock people. His A I creation was then entered into a
photography contest. This photo one. And it was the first
photo AI image to win a photography contest. And then the criticism, the backlash started
rolling in the hate. The hate because people were scared and
understandably, I mean, someone sitting at home miles away from a beach
can just put in, you know, beach shot
award winner in a minute, 2 minutes and create something that is as
good as a real image. It is scary to think about A, I created it by taking
an infinite number of pixels from an infinite number of photos that were
found on line. Jamie called the image the
most stolen photograph. This is actually a
dangerous point in society where we don't know what is real and what is fake. 100% I mean, I came
clean straight away. I gave the cash prize back. I said, look guys, this was an AI image
and I did it more. So The experiment
was more so to show people what we are
capable of now, so people can start to
wrestle with these big ideas. The huge ideas, you
know, of trust. Can we believe what
we're seeing people say, Am I afraid of AI? I say I'm not afraid of AI. I'm afraid of HS. And they said, you
know what's HS? Hs is human stupidity. It's the dumb things people
will do with powerful tools. We do need rules, We
do need regulations. We do need a framework around
these kind of technologies. Now is the time to be
doing that because I don't actually think we're
at a dangerous point yet. Thank you very much. These are uncertain times in
the world of AI. A technology that we've long taken for granted
is now evolving at breakneck speed and it's
only going to accelerate, Leaving most to agree, we must step carefully. It's all real. Thank you. Even technologists are saying you've got to have a
circuit breaker with automated decision
making if it's not working in the way
that it's supposed to, to be able to intervene in the software and stop
that and reset it. A kill switch. The need to
kill switch effectively. So yeah, that type of things
being being thought through. If all of this seems too much, perhaps the solution is simply
to turn the machines off. Often I get people asking me, oh, but it must
have an off switch. No, it doesn't. Okay. If you
know AI in itself is self. It's distributed everywhere, and our economies are
dependent on it already. The challenge that's
facing humanity in the age of the rise of artificial intelligence
is not the machines. The challenge that's
facing humanity is humans and how they are instructing AI to service
the age of humanity. Being the superior intelligence
of the planet is over, I believe that robots should have rights just like humans. With the new AI technology
and our skills already. What's going to
come? We don't know. I am not Morgan Freeman. People need to realize how
powerful the potential of this stuff is and what
you see is not real. Are you saying the
next interview there'll be a robot
sitting there. I have your daughter. You
better have all the cash. Both you and your
daughter are dead. Why make something human when you can make something
super human, are you capable of
causing people harm? It's all the real thing.
19. Bonus Content: GoggleBox Midjourney Experiment: Tuesday on the ABC, we watched a doco about
artificial intelligence, A I versus human, the
creativity experiment. Oh okay, this is going
to be interesting. Ai is everywhere, and it knows more than we
can possibly imagine. Ai is completely
revolutionizing the world. I love Google 'cause it finds my car if I get stuck
at a shopping center. But will it really be better
than us at everything? Yeah, yes, 100% N. Well, we've got robot vacuum
cleaners. Yeah, true. In fact, AI is evolving so
rapidly that it has been predicted to overtake
human intelligence in less than a decade. Arguably, it's already
there. That is so true. Well some people for sure. What about the art? Yeah. What about art? Nothing can beat the human hand. There's no feeling,
there's no love. It's a bit like having
sex with a condom. It's not quite the
same. Oh my God. I've set up a special exhibition to see if the public can spot the difference between images
created by AI and humans. We, Ai is doing the art. This is a cool concept,
you'd be good at this. I set up two competitions, one for photography
and one for painting. Behold Frida. What the hell is that? Frida is a painting system. Oh what? Oh my god. It's painting y brushstrokes. It outputs those brush
strokes using a robotic arm. Wow, this is very interesting. All that robot is
missing is a face. Have they got? Yes, no. How do they know what
they're going to pay? They've literally turned
art into an algorithm. Yeah, humans are gone. Say that at art school. It's then onto the photography challenge with Jamie and Doug, of course, his name Doug. Their task is to capture or create an extraordinary
image of a fruit bat. I can shoot 10,000 photos
for one that I like, Oh my god, 10,000 photos
on a fricking fruit bat. How exciting is your life? But if so much goes into
capturing the perfect moment, I wonder how Jamie thinks he can achieve that without
even leaving the car. This'll be interesting. Wait,
how does A I take photos? Did you make it on your phone? Yeah, that's awesome. He made it on his phone, but he drove to the
place of the batter. Holy ****, what a waste of time. It took me maybe 5 minutes for hits and with the other guy, he's got to take
50 million photos. That's not, that's cheating. Although I took a photo once and the photographer
made me look skinnier, can Frida's portrait and Jamie's AI generated photo
fool the public? Let's open the doors and
find out the big reveal. Let's go ring in the humans. Let's see if we can guess. First up, what have the public made of our paintings?
What's that? He's missing an
eye. The computer would never have missed an eye. Looks like a three
year old Dunn. So the one I bet it is the small colorful one that
is absolutely AI city. No, I'm saying black
and white ones. I, I don't know eyes. You gotta fix the
robot. If that's AI, only 43% of people correctly
identify AI artwork I, I, n does out of a gig,
all of a sudden, isn't he? Let's take a look
at those flying fox images now. Which
one do you think? Definitely. The one
on the right is I left is fake. Right?
His face really? I think the right
one's the real one. I reckon the water one's fake because the slashes
are just too perfect. 61% of people thought that the human artwork was
made by A I. Wow. Which is trumomment of
truth. Who did what come on? No way. I told you
bro, we're done. Us humans. How? Very interesting. What do you think about
all that super smart show. Holy ****, Yeah, technology. Right? So far behind you.
Still have a flip phone.
 Jamie Absolutely Ai, The secrets to creating professional A.I