Transcripts
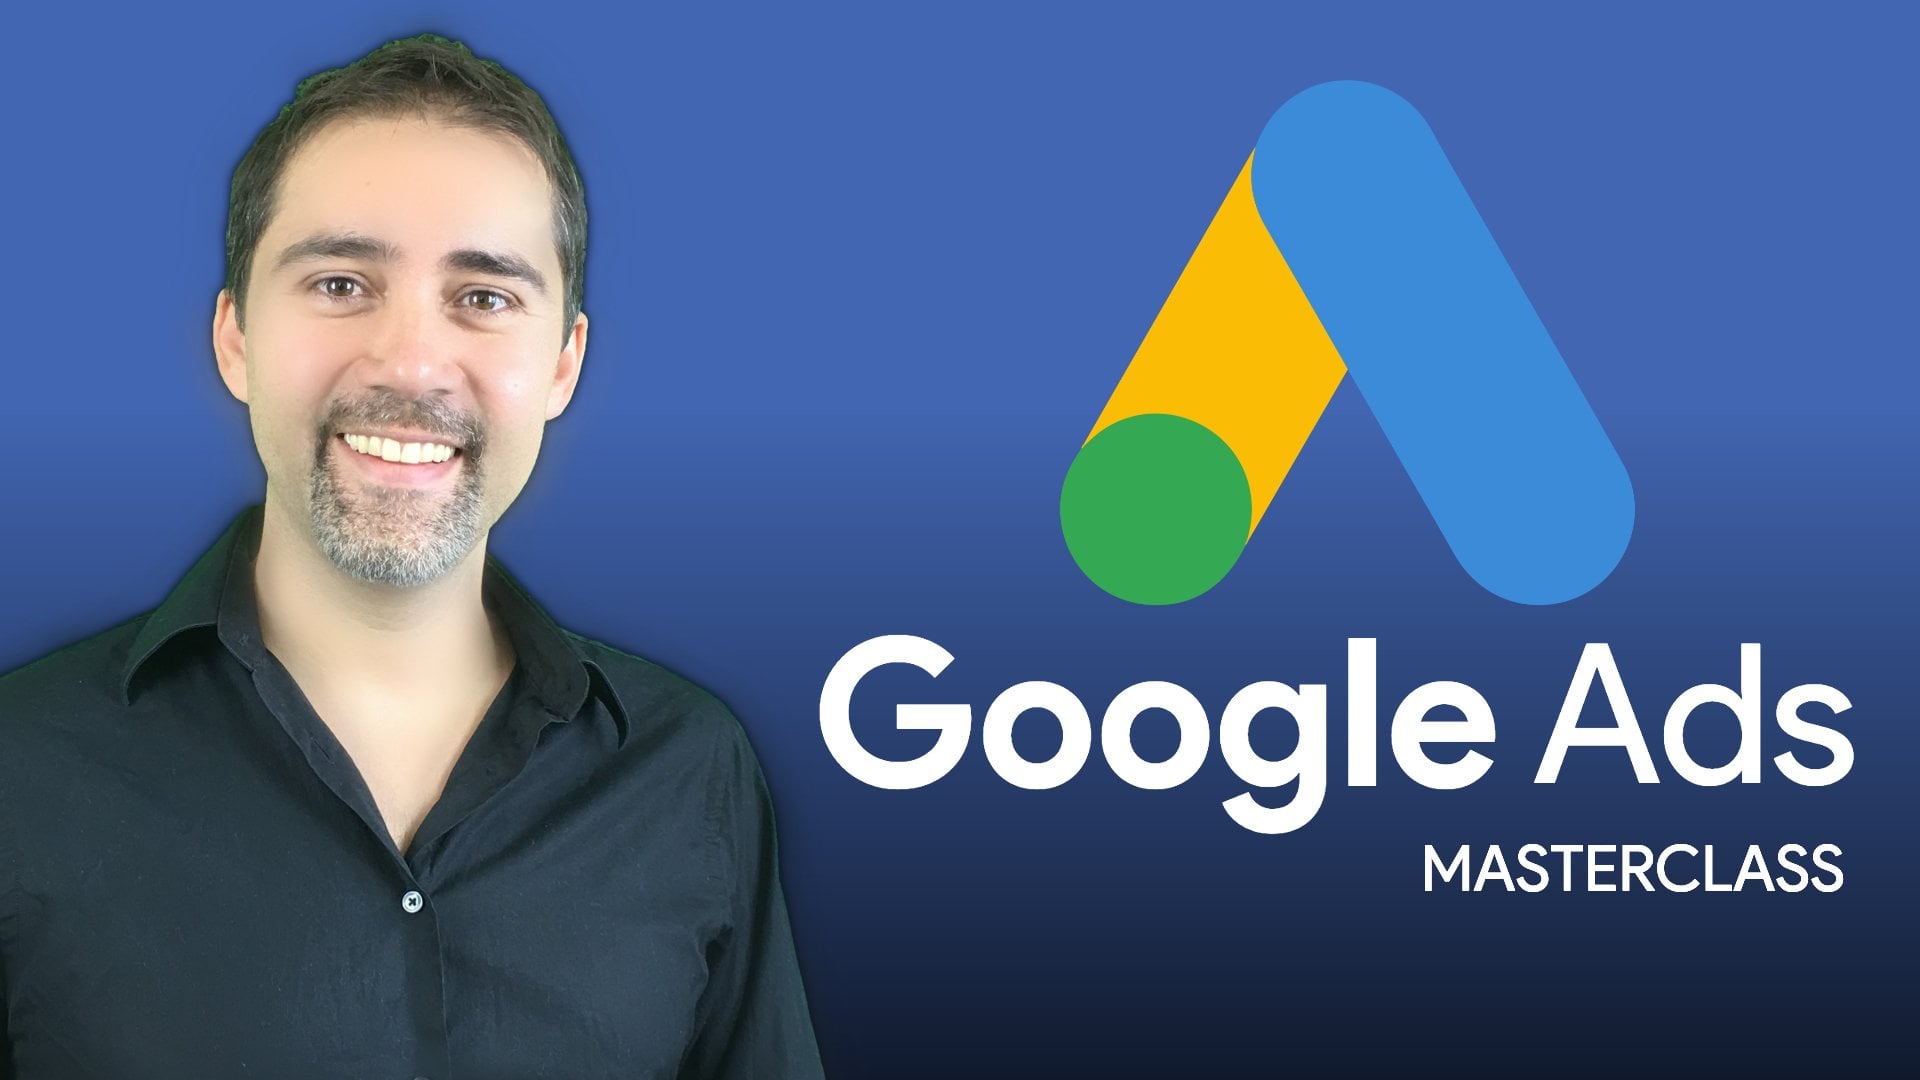
1. Welcome to the Class: Welcome to the Mid
Journey Marketing course. We are excited to see you here, because here you'll learn all
the best strategies to use Mid Journey to generate all the images you
need for marketing. So from now on,
instead of spending money and time dealing
with designers, you can go and create all your images for
Facebook, Instagram, for a newsletter,
for your website, for a product that you will create for any reason
that you want. You can create these images for free basically
with mid journey. So we are exploring all that. And the good thing
here is that we are not just teaching
you how to do that, we are also giving you, and you can download
that in the next lesson, an ebook with all the
Proms that we are using here in the course
to have the same results, all you have to do is just
copy and use the same prom on mid journey and you will be generating these
graphics in no time. Also the great thing here guys is that you will
also learn the system, the recipe that you can use from now on to
create these images. Not only for you and for your business, but
also for friends. If you have friends,
if you want to start a new career
as a freelancer, creating these images for
companies and clients, you can do that with what you will learn here
in the course. Okay, so with that being said, in the next, in the next lesson you will download this PDF. And after that we start with
the course. Let's call that.
2. Creating your Midjourney Free account : In this video, we'll talk
about mid journey and how you can use it
to create amazing, professional images
for your business, for personal use, or for
any goal that you have. This is the best AI
image and art generation we have today in the market. And I'll show you here in
this section and the next one also how we can use this to generate any image
that you want. I'll teach you step
by step how to do it, to sign to it journey. You can go right now to Mid Journey.com and this is the
page that we have right now. Of course, this page
changes frequently. So if you see
something different, just follow the steps here. Right now they are on beta, so you can click
here on the bottom, Join Beta, or if you
have an account already, you can just click on Sign In. On this case, I already
have an account, I'll just go sign
in. This is my user. You see I already
created 32 jobs, 32 images with this user. Also, we see here on the left, the left menu where
we have the home, explore the ranking,
and also you can subscribe if you
are not a subscriber. Clicking here, you
see the prices. Here are the plans that
they have right now. These plans change all the time. So it may be you have
different amounts, different values here when
you visit mid journey. But this is what I have
right now and right now in the $10 per month plan. And with this plan, I can create a hundreds and
hundreds of images. So you can choose any of these
plans because they just, I mean, they end the free trial. They had a free trial
before that is no longer available because it's so
on high demand right now that people all
over the world are overloading the mid
journey server. Many, many users. So they decide to end
the free plan and they are starting with the ten
bucks per month plan. You can start with
that if you want. So in order to start using this and you are
maybe asking, okay, de, why I like this, I
want to generate images right now,
How can I do that? You can come here to
your user at the bottom and you click on the
dots and go to Discord. Maybe if you don't
have this option here, you may have here on the center to access the Discord platform. Discord is a platform where mid journey is
running at the moment. This may change at any time. If this changes, we will update this
lesson in the course. So we click here on
go to this Court, and you'll see that this
program will open right now. And this Court is
not exclusively for mid journey. This Court, there are many gamers and websites and communities that
use this Court every day. For some reason, Mid Journey decided to start to
run their program, artificial intelligence
software that they have here within this court. So this is what this
course looks like. The first thing you see, how do we know that
we are mid journey? We see here mid journey. At the top, we see all
the lists that they have. And you can start right now, here on getting started. So if you want, you can
read this to have an idea. You don't need to
do this because I'll teach you here
how to use it. Okay, so now you have
access to mid journey. You have your free account. We have all the elements, all the tools we need to
start creating wonderful, amazing, outstanding images for your personal use or
for your business. And we will start doing
that in the next video.
3. Creating your own server on Discord: Welcome everybody to
our mid journey course. And now you should
be here instead of the mid journey
discourse server. But there's one problem with the server is that every
single prompt is public. Everybody can see all of your prompts and
they can just copy it. We need to make our
own private server to fix that, let's do it. To do that, you're going to go to the very left
of your screen, right over here to this plus
button says Add a server. You're going to click on Create, My Own, for me and my friends. Here's where you give
your server a name. We're going to name it Mid
Journey Server, click Create. There you go. We have
our own private server. It is only mean here it's ready to add the mid
journey into the server. Now we need the actual
mid journey bot. Where do we get that? Go back to the mid
journey server. Go to the very right of
your screen over here, where you can see
every single member on the server, but
you only need one. You go to the Mid
Journey bot section, click on this guy,
click Add App. Here you select the server that you want to add your bot to. We're going to click
Mid Journey Server, give them all the permissions, and click Authorize. I am human. As you can see over here, he's now in our server. If you want to type a prompt, you can do slash
imagine, and then type. You're prompt, as you can see, is really, really simple. I hope you understood everything And I'll see
you on the next video.
4. Generating images with Midjourney : Excellent. Let's have
a general overview on this court and how you can start using this software right now. By the end of this lesson
will create your first image. So stay here with me. Okay. So here we have
this court again. In the left, we
have the left menu. If you are a free user, you will see these groups
here on this case, we have the newcomers room. We have right now Newbies 50, new Bs, 20, Newbies 80. These names changes
all the time. I suggest you now, if you are following with me, to go here to one of
these specific channels. In these channels,
you can see everybody that is on the channel
is creating images. And we can see all the images people are creating
here right now. So let me go to the 20. So you see the images people are creating,
these great images. This one looks great. All these images are created by Artificial Intelligence
Bit Journey on this case. And you can see what the
community is creating. If you like one of
these, you can also create a version, a
variation for you. You can use this or add as
a favorite if you prefer, you can use that
on your marketing on your personal
life is up to you. So you see here that
Mid journey works very similar to Cha GPT as we are
starting here in the course. Basically, you need
to write a prom, you need to write a message, a command telling the
mid journey system what do you want
to create exactly. That's how it works.
Similar to Cha GPT, you will write down
all the details about the image you
want to generate. We will enter these
details here on this court and we can generate great
images by doing that. Let's do a test here. We come here to
the free channel. Let's go to Newbies
20 on this example. You can go again to any channels that are available at the
time when you connect. And the way to create these images is by
doing a forward slash. And you see that when I
do the forward slash, we have all these
commands that we can use. We will talk about the
commands in the next lesson. For now, I want to show
you how to generate the one that we are always
using in this course is image. You see here, forward slash
forward slash imagine I click on this and now
you see that we can add the prompt so it's ready to receive your
prompt right now. So here I can write
something like, okay, generate beautiful
landscape with volcano at the end and the
beach to the other side. So let's do that for a test. Here I'm entering the pro, this is the prom I created. This is a complex prompt and I'll show you how
you can do this too easily. You can just copy
and paste my formula here. But basically, if you are trying this with me while you
are watching the course, just enter forward, imagine
and enter the prom. Create something you can
describe with your words. Just hit Enter and you
will see the result. Okay, so in this case
we're doing this. Create a beautiful
landscape with a volcano on one side and
the beach on the other. And I am adding also
some description, some more details to my prompt. The more details we add, the best result we will have. Okay, it's like imagine you go to designer and
you say, okay, I want you to draw a frame, an art for me to put
it onto my house. And so what do you
want me to draw? I want you to draw
this with the details, with these colors,
with this style. So you think need to describe
all these as the same as you are talking to an artist that is
creating an art for you. So in this case, let's
take a quick look here. We're saying to create a landscape with a beach and a volcano standing
landscape features towering volcano on one side it speak shoulder with clouds. On the other side,
a pristine beach stretched out with crystal clear waters, blah, blah, blah. All this is ready to go. And at the end, as you can see, we have some parameters. And I'll show you, I'll teach you all the secrets
about parameters, so you can even
customize the size, the style, the version
of your images. Right now we are on
the nubs channels. You can see if I go
here and I hit Enter, we see that is thinking
about our job, as you see here, is
thinking about what we are generating and we need to wait. Usually takes up to 60 seconds,
sometimes even longer. And you see that
my prompt is here, is waiting for the
AI to generate this. And while we are waiting, you see other images from the community
being generated here. If this is too
confusing for you, stay with me because
I'll show you how to do all this in a private channel
if you have a pay account, which I think is a
great investment, okay. Okay. And the beach and the photos are ready.
Here is a description. We had the prompt and we click
on the image and you see that we have actually four versions of the
image that we requested. And why is on this
dimension what is not like landscape style is because we asked that on the parameter. So I'll give you the details
about that in a second here. Here we have the images. If I, this is version one, version one, version two, version three, and version four. My favorite, I mean, I like version two, I like version three and also version four.
They are all beautiful. If I go back here to the prom, you see that below the images, we have some buttons right
now that we can press. You see U1234 and V
one through four. What are these buttons here? The U is to upscale, Let's imagine that
I like version two. I love version two and this is good enough for me.
That's what I want. I just want to upscale this to have like a huge image with four resolution
that I can use to print out and put in a
Canva maybe on my house, or I can use on social media
any goals that you have. So I can just click on Two, so it will upscale the version, the image number two. And with that I can
download that image. I like version two and I want to create four new versions that
are similar to version two. I can go to the variation, I can create four
variations of version two. I click this V two, it will create four
variations of this. If I click on U two, it will upscale number two. I can download and that's it. Let's do for fun a variation
on the version two. I will click this okay
variation, version two. Now we need to wait for a few seconds to see
that happening for us. You see the prompt is here, is ready for us, is
thinking about it, is waiting to start now, I will wait to see the four new
variations of version two that we just
generated is ready. You see here we have four new
variations of version two. If I look closely to this, we have variations on
the clouds, on the sky. We have difference on
the coconut trees, on the palm trees
as you see here. And also on the water, right on the wave, the rocks here on the water. My favorite I think
the one that I want to upscale will be version
one on this image. Or let me check.
Yeah, version one. So now that I can create even more variations
of version one or do use this button here to create a complete new set of images based on the on
the original prompt. But I really like
version one on this one. So I will click on U one
to upscale version one. You see that it's
already creating the job right now.
This is wonderful. We just want to wait now for the AI to create
this new one. The high quality images is
ready really fast this time. So you see here, I
can just click on here and we have the
upscale version. Okay, I can add these two
favorites to my favorite. I can make variations if I want. If I click here on
Open in browser, you see that we have
a bigger version. I can even zoom this and you see all the details of
this beautiful image. This is actually
not a real beach, this is not a real place, It's just an AI generated. So that's mind blowing because looks so real and so beautiful. So now I just right click here. If I want to save the image, I can save the image.
And that's it. I have the image, the
high quality image here, ready to use, as you
see here on my screen.
5. What's new in Midjourney 6: Welcome everybody to our mid
journey marketing chorus. And today is a very
special video because not only is it the last
class of the year, it is also a brand new
mid journey update. Today I'm going to show you all the new things that we can do with mid journey 6.0 alpha. There are lots of
things to go over. So let's go to our discord and check out the mid journey
discourse server. Here it is, we are on the mid journey server and the first thing
you're going to see on the channels
is that there's a new channel called
V Six Showcase. And this is where
you can take a look at all the new images being generated with
the brand new model. One big thing about
this model is that it can generate
text a lot better. It's not 100% perfect, but it will get most
stuff right now. Because if you remember
in the previous version, it didn't really
work all that well. So let's see if we can
find out. Here we go. Here you have one example. As you can see, it's written, make love, not war perfectly. There's no grammar mistakes. It looks perfect. It could use a
little bit of work. Yes, but the spacing is off. But it did write the entire, the entire thing with no
grammar errors, errors at all. Right, here we
have a cat saying, I'm not going to say that, but you can indeed
read what it says. It even got the little sensors
really, really cool stuff. And in general, as
well as you can see, the realistic images are looking awesome as really nice stuff. But where do we get to
see the actual news? Whenever you want
to see news for any kind of model or just
my journey in general, the announcements channel
is where you want to go. Here we have the V
six announcement. If you scroll up a little bit, there are a couple things to
go over with the new model. First of all, it can take a longer prompt
that's pretty cool. Improve coherence
model knowledge, improve image prompting. But here is an important
thing over here, the text drawing ability. Whenever you want to write
some text in your image, make sure that you write
your text in quotations. That is how you can differ
from other keywords. You put the text
that you want to be text in between quotations. Another thing is a
man called Style Raw. What it means is that the
picture is going to be raw. It is not going to be
stylized in any way. It's not going to be cartoonish. It's not going to
be a digital art or a painting, basically. When you do this, you're just telling the program
that you want it to be realistic with
no stylizing whatsoever. It is really, really
important cool command that we can get a
lot of use out of here. It gives us an example, a prompt example of how to use the quotations to
write a certain word, and we are going
to use that later. I'm going to just
copy it right now. You don't need to copy
the V six command. I'm going to show you how
to get around that later. What else have we got
to have improved up scalers with both subtle and
creative Mota modes as well. I'm going to show you
this as well later. Here is a list of commands
that are currently working. Ar Chaos, Weird Tile, Stylized. Here are the ones who
are not supported yet. In the alpha version of 6.0 p, zoom very region, we
know some of these, just keep that in mind that some commands are
still not supported. Then the main thing
that we also want to go over is that peers you can see, it says that you
will need to re, learn how to prompt. One big thing about that, as you can see in
the very next line, is that it tells us to
avoid junk like award winning photorealistic K K. This is something that
people will normally type in their images to bring force DAI to generate very realistic images and to keep everything
photo realistic. But now then something
that J does for you very, it does it for you naturally. So you don't have to
just spam your prompt with keywords that are meant to basically tell the
same thing, right? So just try to avoid that. And that just makes
you prompt longer for not really any
good reason, right? So try to avoid that when you
do make your new prompts. So be explicit about
what you want. It may be less vibe, but if you are explicit, it's now much better at
understanding you. If you want something
more photographic, less opinionated, more literal, you should probably default
to using style rack. That's something that
I just told you about. But as you see, another
thing to keep in mind, then another option
to style row is to use lower values
of slash stylize. The default is 100, but if you do slash stylize 50, you are lowering down the style that your
image is going to have. So here you go, may have
better prompt understanding, While higher values up to 1,000 may have
better aesthetics. So blow ring and bring it up, you can change the
amount of style that you want in your image or you
can just use style rot. If you want something just
straight up realistic. No stylizing at all. Now we already got a basic understanding of the new things. How do we get to choose
V six for our AI? You're going to go to our server to change the AI version that
you were currently using. You're going to use
Settings, press Enter here. It already is selected for me because I already
did that before. But for you it might
be, for example, Journey V 5.2 Do you just want to click to drop down and click on model V six? And it is now changed and
ready to go very easy. So we are going to do the example prompt that we got before from the sticky note. The sticky note prompt
that he gave us. Oh, I guess he
didn't have to copy. Imagine what's going
to delete this. It is basically a
photo of the text, Hello World written with a
marker on a sticky note. We already have the
resolution over here as well. The aspect ratio. We don't need to do the six because we just changed
the model to V six, so there's no need
to specify that. Again one more time, right, So let's
just press Enter. An image is now being generated. Another thing that I
wanted to do is to compare an image
from version 5.2 to 6.0 I'm going to find a prompt that we can use from our
previous images, and I'm going to compare
it, the cake over here. Let's do the cake. I'm
going to copy this prompt. We are going to take it to version 6.0 and see
what the difference is. I'm going to do
slash imagine past the prompt and
everything looks good. Let's do the style wrong.
Let's also do that. I want it to be realistic. I'm going to do style
raw in terms of text. I don't want to add any text. I think I have another
prompt in mind to make our own custom text
later on. Let's do that. Press Enter Images
being generated. Also, as you can see, our
sticky note is ready. As you can see, it is
written perfectly. In every prompt, the grammar
is flawless. Hello World. Hello World. Hello world, And Hello World. Really cool. It is a huge step up
from the last version. As you can clearly see, I'm just going to do an upscale of one of
these so we can take a closer look here. We have really awesome stuff. As you can see, you also have
the new options over here, Upscale, subtle, and
upscale creative. What they do, very similar to very strong and very subtle, which is something that we have learned
how to use before. Very strong means
that it's going to make variations of your image. But the difference is
going to be very strong, very subtle variations of
your image. But very subtle. It will do basically the
same thing for upscaling, except it's an upscale, one of them is going
to be more creative, another one is going
to be more subtle. It won't be as many
changes to your image. Here we also have our cake, and it has been
completely generated, and these all look really good. The style rock clearly
worked, amazingly realistic. If someone show me
these pictures, I would not guess that these
were generated at all. You could not guess
unless someone genuinely told you, really cool. I like this one a lot. I like the sunlight hitting the cake from the back.
Really, really cool. I'm going to upscale
this one here, you have the full look,
really cool stuff. You can even see the
little bits of smoke over here coming up from
the hot chocolate, right? Really cool. Just
for a comparison. I'm going to go back
up really quick and we can see the difference. So this one obviously is also realistic because we did
specify that in the prompt. But I still do
think that there is something a little bit more realistic about
the other ones. I feel like maybe it might be more because of the
background, right? The background over here
is just dark, right? This one might look like the
back of a restaurant maybe, but the other ones
are just empty. Meanwhile on this one you can
see the whole restaurant. And it blurs the backroom
perfectly for you as well. So the focus is just on point. This form, for example, you
have the entire table laid out and you have chocolate
all over the table. You have a couple
of eggs over here. Really, really nicely done. For our last prompt,
I'm going to try using the text feature in quotations. As you remember, since it is
our last class of the year, I'm going to do a close up
picture of Santa Claus. He is holding up
a sign that says, let's sign in quotations. Happy New Year. Then I'm going to also put the style so we can see
what that will look like. I wanted to keep this realistic. Then let's do aspect
ratio, 16 by nine. I think we are ready to
go. Let's press Enter. Let's see how our sign
is going to look like. Remember to always do your text and quotations
if you don't do this, it just get lost in the prompt and you're going
to get something that looks very wrong compared
to what you really want. Let's see how our
prompt looks like. And once it is done, I can
come back and show it to you. Here we have it. Our images are done and they all
look very nice. This one, the sign didn't
quite make the picture. You can see that on
the bottom over here, hiding from the overall picture. But the sign is there, but for these other ones, it worked very nicely. Here you can see
Happy New New Year. We added an extra
new, like I said, it's not 100% perfect, but it does get
the overall idea. Here again, we got
happy New Year. And also Happy is missing one P, but this one grammar wise, it got everything perfect. But it did add an extra new. Again, you won't get 100% exactly what you
want all the time, but it is a lot better
if you want to do a comparison of text prompts from 5.2 against 6.0
in your own time, you'll see that the
difference is huge. And also the rest of the picture also
looks flawless, right? I mean, we did do style
raw, and all of these. Santa Claus looks
very, very realistic. It looks very nice. I can we
talk about the hands here? The hands are perfect, right? This is something that Journey
used to screw up a lot. We're hands and we had to vary the picture again and again and again until we got U
that he has that he wanted. But all of these look
lawless, very nice. I like the fourth one a lot. I like the whole sinus showing. I like the text being read. So I'm just going to
upscale this one. You have the full look
of our final. Nice. If you wanted to try again and see if you can
get the text right, you will do a very strong, very subtle, and see
what your results are. But I was going to end it here. I hope you guys enjoyed. I hope the lesson was easy
to follow and understand. I wish you guys
happy holidays and happy New Year and I'll
see you on the next one.
6. Image sizes and dimensions for Social Media: Welcome back everybody to our mid journey
marketing course. And today we will be talking about the sizes of your images, also known as the aspect ratio. You might or might not
know some of these, but just in case we're going to quickly run through all of them. So here I have the PDF with three examples from three
different social medias, and you can find this in a download section of the course. Here we have Instagram image
sizes, it's very basic. The profile size is 720
pixels by 720 pixels. Stories is 1080 by 1920. Vertical feed, 1080 by 13 50. The square feet is actually
the default for mid journey, so you don't even have to
type anything for this. It's 1080 by 1080 is
already the default. But you might ask, well, what is this four by five or 916 inside of
the actual boxes? Well, this is the actual value
that mid journey takes in. This is the actual aspect ratio, well this is just the
actual size in pixels. What you're going
to type for Journey is the aspect ratio,
four by 5916. It's very, very simple. Here. For Facebook, we
have the Facebook banner. The actual banner
side is a 51 by 315. But instead of typing
that, you're just going to type the actual aspect ratio, instead it's very simple. For Youtube, for example, you have this really big banner, 2560 by 14 40, but the actual aspect
ratio is 16 by nine. And then the actual visible area on the banner that
people will actually see on their screens
is 12, 35 by 338. But the actual aspect
ratio is different. It's not too hard of a concept. But now what do you type
on your prompt when you actually want to set a
specific aspect ratio? Well, the command is
this is AR aspect ratio. You type this followed by whatever aspect ratio that
you want for your image. For example, 11 is a
default for mid journey. Five by four is common. Frame and print ratio three by two common in print photography. Seven by four is close to HD TV screens and
smartphone screens. But what is the standard prompt that you want to use
most of the time? Well, that will
probably be 16 by nine. That is an example. Over here you can see
it is very close to the average TV screen that
you might see if you want. You can also switch
that out to 916, so that way you can get a
portrait image like this. It's just a flip version. It's really, really simple. You just type imagine and then your instructions,
whatever your prompt is, it goes over here and then
at the very end you do AR aspect ratio and you
type out your number. It's very easy if
you use this PDF. Every time that you
do your prompt, you will get it in no time. I hope you understood
all of this and I'll see you
on the next class.
7. Midjourney for Instagram Feed: Welcome back everybody to our mid journey
marketing course. And today we're
finally going to make our own images for
the first time here. Before we do that,
I just want to show you a couple of commands
that might be useful. The first one would be Info. What this does is just
show you information about your Journey account and the subscription type and
your user ID, everything. You might want to
take a look at this. And then the second
one would be settings. What this shows us is basically just the settings that our
bot has on our server. Just make sure that you're
using the latest model, in our case is 5.2
We're good to go. I'm going to show you
a prompt that I have over here that you can
change however you want. And here this is basically
just a detail image. And then prompt, you get to choose whatever it is over here. And then you choose what that
thing is doing during the. And then you pick
a time of the day. It could be daytime, sunset, and maybe nighttime. Then using a certain camera
with a certain camera lens. Now, if you don't know much
about cameras, that's fine. You don't specifically
have to use this, but it does make
your image better. It does help. Then
lastly, movie lighting. You get to choose what kind of lighting you want
in the picture. Then we choose our aspect ratio, just like we learned last time, and we're going to be using
a 60 in nine aspect ratio. Let's get this over
here. Let's copy this. Take it back to this court. Let's do it slash imagine, then paste this
inside of the prompt. Now let's see what
we want to do. I'm going to make an
image of a woman. Let's pick what she's doing. Let's say drinking coffee. Then let's pick a
time of the day, say during the sunset. Why? I'm going to use a
simple example of a camera, Sony camera seven over here. And then we're going
to pick a camera lens, I'm going to say camera lens
1.8 with movie lighting. And then our aspect
ratio command of exactly 16.9 We should be good. Let's press Enter and it should generate
our image over here. Once this is done, I'm going
to show you how it looks. Here they are,
Here's our images. They all look really nice. Once your prompt is done, you're going to see a bunch
of buttons below your image. What these do is basically
upscale and versions. The images are currently
numbered 123.4 for example, Let's say I really like the second image over here
and I want to make it bigger. You want to press
the upscale button, and what this does is just makes your image bigger,
upscales your image. And it does it very, very fast. See what does the V Bun do? The V Bun, it basically just makes more versions of
the image if you like. For example, you really
like the third image, but you want more variations
of it just to make sure. Well, you will pick V three over here and it will make you four
variations of that image. Very simple. Let's try this one more time
with a simpler prompt. Our second prompt
is a picture of a cake over a table
with a coffee cup. A blurred background
and soft lighting. We are not going to
use any cameras here. Let's copy this and go to Image. Image based are prompt
and I'm not going to use any aspect ratio commands
because I just want the default size that
mid journey gives us. I think we're all ready
and let's press Enter. Our image is now
being generated, and once this is done, I'm going to come back and
show you how it looks. Our image is done.
As you can see, we've got four
different variations. They all look
really, really nice. We have the blurred background,
just like we asked. Looks really, really nice. Let's say I'm looking
at the image one here and I really like it and I want to make an ad out of it. I want to make a
social media post. Maybe it's because I
have a coffee shop, or maybe it's because
I have a bakery and I just want to
make an advertisement. I really like the first image. First of all, let's just click one to upscale the first image. Let's press this over here, and it should do it very fast. There we go. All right, so our image is now
ready and upscaled, and all you need to
do to save it to your computer is right click
and click on Save Image. And I want to you do
that. Just choose where on the computer
you want to save it. And click Save. There you go. Your image is now ready to go. It is saved on your computer. Now, how do we write
some text on top of it without working
for it too much? Well, I have the
website for you. This website is called Canva. It is free to sign up and it's very simple,
very easy to use. Once you make your account, you want to go to the
top right over here where it says Create a Design. You could click this and then find the
Instagram post square. It's just the normal
default Instagram post. Here we have our work area. Here's where you want to drag the image that you
downloaded earlier. Let's drag this here.
And there we have it. Let's just stretch it so it
fits the size of the canvas. And then now we want to slap
some text on top of it. There are a lot of templates
over here on the left. As you can see, you can
just grab any of them. The ones with the crown
require a subscription. I'm going to choose this white Christmas one. I think
I like this one. Let's change the text.
Let's double click this and change the text to
something that we want. I think I'm going to
remove this then. Here, let's say, I'm
dreaming of coffee and cake. There you go. We change it. It's really that easy. Let's say it's too big, so okay, let's scale this down. Maybe put it on the top
right of the screen. Let's say you don't like
the color of the font. Okay, well, we can change this. Just select this and
click on Text Color. You can change it to, let's
say maybe red. There you go. Let's do the same for
this line over here, Red. There you go. You can now read it a lot
better against the background. It really is super simple. There are tons of
templates that you can use for absolute free. Very easy to make a
social media post. I hope this was easy
enough to understand. I hope you enjoyed and I'll
see you in the next class.
8. Midjourney for Instagram Carousel: All right, everybody,
welcome back to our Mid Journey
marketing course. And today I'm going
to teach you how to make an Instagram carousel post. We can indeed do this in a
mid journey and it is very easy to do in case you don't
know what that looks like. I have an example over
here that I can show you. All that is, is basically
just one big image is split into different
blocks or different posts. And then once you look at
that person's profile, you can see the entire thing and it looks really, really awesome. So how can we do
that for ourselves? Well, let's say that we
have a travel agency and we really want to make a social media post to
promote our agency. Well, I have a prompt
for us right over here. And it is a very short,
very simple prompt. It is a picture of
the Eiffel Tower, and then I want the sun in the background in
a panoramic image. If you don't know
what that means, it basically just means a shot that is done
from really far away, so you can see the
entire subject from a really far away distance. Then the aspect ratio
we want to use is 51. In my case, I want five posts. I want to split the image
into five different blocks. I'm going to use a five to
one aspect ratio if you want. For example, let's say
ten posts or three posts. You would do ten by
one, or three by one. It is very easy to change
depending on what you want. We're going to copy this prompt and go back Square
Discourse server. Now here we are. I'm going to type imagine
and pay Start Prompt. Now just make sure that you have everything
written correctly. Our aspect ratio is fine,
the prompt is fine. So we're going to press Enter. And now I'm going to wait until the image is generated
so I can show you how it looks. Here we are. Our images are now ready
and they look really nice. I really like all of these, but let's say for example, maybe you didn't like
any of your variations. Well, that's completely fine. Instead of typing the
entire propt again, just press this re little
button over here and it'll give you another
four variations. Okay, you don't have to type
the entire thing again. It's completely
fine. Here we are. I'm going to press three because I want to upscale
the third image. It does this very fast. There we go. It is now upscaled
to save to your computer. Again, you're going to write, click and click on Save Image, and then choose the folder you want to save it on, in my case. And we're just going
to do downloads now. All we need to do is
just add the text, we need to make this an
actual social media post. Where we go, we can
just go back to Canva, which we learned how to
use in the last class. So I'm going to go to that
real quick and I'll be right back. Here we are. Our post is going to
be a specific size, it's not going to be your
average Instagram post size. What you want to do is go
to the custom size button. What is going to be
our width in pixels? Well, we want five
blocks of posts. Right? Let's pull up
our calculator and all you need to do is just
to do five times 1080, because I I want five
different posts. I want five blocks
that equals to 5400. If you wanted ten posts, you would just do
ten times 1080. So it's very simple, so we're going to do
5400 and D width, and 1080 for D height. And we're going to click Create. Here we go. Our canvas
has been created. This is where you want to drag your image that you
just downloaded. Here's our tower now to scale this to the proper
size very easily. Just make sure that
you're holding the Alt button and then scale it. There you go. Now we want to split it into
five, but how do we do that? Well, what you can do
is just add guides. To add your guides, you're going to click
on File View Settings and add Guides. Now here there's some
pre made guides for you. There's 12 columns, six
columns, and three columns. But we don't want
this, we want five, we want a very specific
amount of columns. We're going to click on Custom. We're going to say, oh, I want five columns. Then the gap between
the columns, instead of 90 pixels we
want want zero pixels. That way it is seamless. Click on added guides, our post is now
perfectly split in five. Now what I'm going to
do is going to add some very simple text
over all of these blocks. And I'll get back to you
and show you how it looks. Here my editing is done. I didn't want to do anything too detail too crazy just
for the sake of the example. So now we have a different text around every single block. Now normally we think,
well, we're done, right? This is it. We can just cut
the blocks and we're done. Well, currently in my
version of canavaybe, when you're watching this,
you can actually do it. But right now we can't
cut these blocks. On my current version of Canava, we have to use an
outside website and another website so
we can actually cut it. How do we export this image
and save it in a computer? You can click on Share Download. Make sure that the size of the image is right,
5400 by 1080. In my case, we are good. And click download now. It is easy. You
can see your image is being downloaded
and once this is done, it'll be saved on your computer. It is now saved on my computer. I'm going to take to
this different website over here so you can
see what it looks like. Okay. So here we are
on the new website, and it's called Pine Tools. It is absolutely free and
it has a lot of really, really cool tools for us to use. But right now we're working
with images, right? We just want to do a
quick image editing. So we're going to go to the image section right over here. What you want to look
for is the split image. We want to split this
into different blocks. Just look for the
split image effect. So you will just want
to click on this, then choose your file. You're going to click on the
Choose Your File button. And then you're going
to go to wherever you saved the image and open this. Here we have our image. We want to split
this horizontally, one number of blocks
that we want. Well, in our case, we want five different blocks. I
think we're ready to go. If you want a specific
image output, a PNG or a J pack, you can click over here. I'm just going to do the same as the input. I think we're ready. We're going to click
on Split Image. Five pieces of images were generated. Now
it is ready to go. All we can do is
to download this. I'm going to download
the zip file. There you go. It's
been downloaded now. Let me go to my file so I
can show you how it looks. Okay, here it is. You
can see that we have split them into perfect blocks, 1,234.5 and they
all look very nice. Look very well done. Once we post them into our
social media page, we will be able to look at the whole thing and
look very nice. I hope this was easy
enough to follow. I hope you understood
everything. If you've enjoyed, make sure to keep going and I'll see
you in the next class.
9. Midjourney for Instagram Stories: Welcome back everybody to our Mid journey
marketing course. And today I'm going
to teach you how to make an Instagram stories image. It is basically just
a normal resolution except we are flipping it. We're making a vertical image that you can post on
Instagram stories. And I'm going to
keep the theme from last class in which we have a traveling agency and we just want to make a post on
our social media page. I'm going to go to our
prompter right here. So you can see, and
it's pretty simple, but I'm going to make a slight
change so that way you can see the different kinds of styles that Journey can handle. Today we're going to try a cartoonish style
for our picture. It will be a picture of
the Toronto CN Tower with the city in the background. I want to panoramic image just like we did in the
last class as well. I want it to be set
during the daytime. Now, what aspect ratio would we use for
instygram stories? That would be nine to 16. We're going to copy
this over here and we're going to take
it to our discord. Then like we learned, we're going to do slash
imagine Paste our prompt, and here just make sure
that everything looks okay, our resolution looks okay. I think we're ready to
go. So you press Enter. Our image is now
being generated. And while we wait for that, I'm also going to make
the same prompt again. But I'm going to set it in
the nighttime just to see. I want a different version. Maybe. Let's say the daytime
doesn't look as good, so we're going to ask for
a picture in the nighttime with the moon in the
background as well. Let's do that then. Once these two images are done, I'll get back to you so
we can see how it looks. Okay. And they are now done. And you can see they
look really nice. They look like straight
out of a cartoon. I really like the style
on all of these pictures. I think it looks really awesome. Then we also have the
nighttime over here. This one also looks really nice. I like how Ak see the reflection
on the water as well. I really like that idea to
show part of the water in it. It's really hard to decide. I think the holidays are
really, really good. I think I like the nighttime
a little bit more. I like the moon in
the background. I like the water
out of these four. I would say that I really
like the fourth one. I like how there's a little
bit of the water here. You can see the reflection. I like the moon. I like all
the lights in the city. Let's upscale this one. And like we learned,
these images are numbered 123.4 If I want the third image, I'm going to click
upscale Three. Once this is done, we can
save it on our computer. There we go. It is now upscaled. I'm going to write,
click this, click, Save Image, and then you just save your image
wherever you want. I'm going to choose
my downloads folder. Now we can go to editing the picture so we
can post it on social media. You probably already
know where we're going. We're going to Canva,
Give me a second. I'll be right back. All right, we are back here on Canva. All you need to do is just
click on Create a Design Here, you should see Instagram story. Just click on that. Then this is where you want to drag the image that we
downloaded earlier. I'm going to get my picture
that I just downloaded. Here it is. Remember
the little trick? So we can scale this
proportionally. You want to hold Alt and then scale the image to
the canvas size. Then now you just want to choose any text
template that you want. You can put it on top. For this example, I'm going
to use this globe template. I like this one. I think it fits the vibe of this picture. I'm going to change
it to, let's say, let's just write Toronto. Maybe increase it on
the side over here. There we go. Looks nice. Let's center this. There you go. I think that looks really good. I love the cartoon style that
we got this time around. It looks really nice. As you can see, it's
really, really simple. The more we do this,
the more you can see the format of how
to do these things. So I hope it was simple us to understand and I'll see
you in the next class.
10. Midjourney for Facebook Feed: Welcome everybody to our Mid
journey marketing course. And today I'm going to show you how to make some posts
for your Facebook page. Now if you remember
our little PDF, here are the aspect
ratios that we can use, and some of these are very
similar to the Instagram one. These stories, for
example, is the same, 916 and the square post
is also the same today. Instead of doing these, we're going to do the horizontal feed, which is also the
same between those. Now you might get a little
bit confused as to, okay, but why is there 191 by one and then 16
by nine in brackets? Well, that's just a simplified
version of the ratio. Basically, 16 by nine, you're going to lose
a little bit of height and width in pixels, but you can still work
with it perfectly fine. It's just a simplified
version of this one. So let's go to our prompt so we can see what
we're going to do today. So here's our prompt. And today we're also going
to use a different style for our images so that we can see all the different kinds
of things that we can make. On the first prompt,
we're going to do a painting of a dog
running in the park. And I wanted to be
in pop art in style. And you see how we can basically any R style
that you see on the Internet, you can pretty much
replicate it here. For this example,
we're going to be posting on our
social media page. Let's say we have maybe a dog training company
and we want to make a post in our Facebook or just make a banner or
anything like that. Let's copy our prompt and
go to our Discord server. Here we are. If you remember how to our prompts we want
to do slash magic. Let's base our prompt here. Let's just make sure
that we have everything. I think everything is fine,
aspect ratio looks good. Let's just press Enter. While we are waiting for this, we're going to use
our second prompt. Because we want to make
a variety of images. We want to have a lot
to pick from in case these four variations
here that we're making don't look as good as
we wanted to look. Let's go back here.
The second one is another different
type of painting style. I'm going to do an
oil painting of a happy woman hugging
a dog in the park. I want it to be set
during the daytime and we're going to use
the same aspect ratio, 16 by nine. Let's copy this. Go to Discord slash imagine, Paste our prompt
and press Enter. Our first image is already done. It looks really nice. We can do a variety of
our styles in this. They all look, I really
like the variety of colors. I like this one the most. I like the camera
angle with this one. I like the color
palette that it picked, I think is really, really cool. For now, it's probably
my number one contender. Let's just wait until
this one is done, and it should be done
in the second over here so we can take a
look. And here it is. As you can see, we did get the oil painting
style that we wanted. And it looks really nice. To be honest, I
don't think a single one of these look bad at all. You could use literally
any of these and it would look really nice
on your social media. But personally, let's say I think my favorite out of
these ones is the second one, Like we learned before
to upscale this, this is the second
image to upscale. The second image, you press two. These ones, well they pretty much in composition wise,
they look the same. I'll pick the first one. I'll like the first
one, so then we can upscale the first 11. Then how would we save
this for a computer? While we learned this
before, it's very simple. You want to click on
your image, right click, and then click Save Image, and then choose where
you want to save it. In a computer, I'm going
to use downloads folder. Same thing for this
one. Save image, and then pick your folder here. We're just going to take
a final look. Here it is. Here's our second image. Here's our first image. They all look really,
really awesome. Full of details, very creative
color palette over here. And as you can see, you can do pretty much any art
style that you think of. Feel free to get as creative
as you want with this. Now, this is the part where, let's say if you want
to put some texts on top of this or
any kind of editing, really, you would go
back to Canada and do what we did for the
past couple classes. Very simple, but if you don't, you can just go straight to
posting is really that fast. Is that simple to do? So I hope you understood everything. I hope this was clear enough. And I'll see you
on the next class.
11. Midjourney for Facebook Stories: Welcome back everybody to our mid journey
marketing course. And today will be a
very short video. We will be making a
Facebook stories image. If you remember
our aspect ratios, this happens to be
the exact same as the Instagram
stories Aspect ratio also happens to be the opposite
of the horizontal feed, which is the one we did
yesterday, 16 by nine. Today, we'll use
nine by 16 instead. We're going to keep the
theme from yesterday, our dog training agency. And let's take a
look at our prompt. Our prompts are getting
a little bit longer. You start to see that the more you describe the picture that you want, the better
it will look. We want a dog running
after a ball in the park. We want people in
the background. We want it to be set during the daytime, maybe
in the carnival. The style today
that we're going to use is go painting style. You'll see that this is
going to look really cool. Let's copy our prompt and
take it to our discord again. Imagine control V, make sure
that everything looks good, aspect ratio looks good. Press Enter, and then
once the prompt is done, I can get back to you and you'll see how awesome this
is going to look. Okay, and our images
are now done. As you can see, we
did get the style right in all of these pictures. Maybe not this one, it
didn't quite get it here. And that's okay. All of your images are going to
be exactly what you want. Every time as you
can see this one, we don't even have the ball. That's okay. That's actually
the perfect example to use the reload feature
over here in case you don't like any of
the variations here. I think it could be
better. We could you get some more
variations on these. So you just press
the reload button. And what this does is it gives you a brand new set of
images to pick from. So we're going to press this and see if we can get something
that looks a little bit, a little bit more like
what we asked for. So now we have a couple
more pictures here. I think the third one
looks pretty good. We got the R style correct. We have the ball, the
fourth one, it's okay. The third one, composition wise, is basically what we asked for, but it seems like you forgot
the R style a little bit. Again, we're not getting
the best results here. Let's say you're
running into a problem where you're not getting
what you really want. Well, sometimes you just
have to rewrite your prompt. Sometimes maybe
changing the order of things can help a lot.
So let's try to do that. Maybe let's do slash imagine, then I'm going to
paste the same prompt, but we're going to change
a couple of things. Instead of putting the
Vangal painting style last, I'm going to do this, I'm
going to delete this and I'm, I'm going to write
here, painting of a dog running after
ball in the park. In style, maybe we
remove the carnival. I think people in the
background might be enough. Maybe it's just getting
a little bit too much. Put painting first in the
image because it seems like it's missing the style
in a couple of pictures. Maybe if you put painting, it'll take that into
consideration a little bit more. Whenever you don't get things
exactly way, just reload. Change your prompt, try different things and
see how it goes. Let's see what we can make now and see instantly,
huge difference. You can see that here, it captures the R
style that we wanted a lot more than these ones. These ones look a lot more
like real life, you know, with a little bit, you know, of painting here and there. But this big, big
difference, right? You can clearly see every
single brush stroke, it looks really, really good. I really like the third one. I like how it's really bright. I like the fourth one a lot
too, is really stylized. I think the third one
is also really good. I like how it put
an actual person behind throwing the ball. Maybe I'll pick this one red dog training agency after all. So why not put the human in throwing the ball right again, the images are numbered 1234. I want to upscale the third one. Let's click Upscale Three, and this will be
done in a second. Sometimes it might take a little bit longer,
but that's fine. Here it is, upscaled. Let's save this image so we
can take an even closer look. Right click, save image, Put this in your folder, and here it is,
our full picture. And it looks really,
really good. And the exact R cell
that we wanted, you can see every
single brush roll really is just beautiful, right? Imagine how long this would take for you to actually
paint it by yourself. I mean, I know that
for me it would take me hours and hours
and hours, right? So like this, you can just
make it in a couple seconds, barely any work at all. Again, if you want to put some text already
editing in this image, you can take it to Canava. I've showed you how it works a couple of times.
It's very simple. Just pick any template that
you want, absolutely free. But if not, you would just go
on and put it in your page. It is really simple. I hope you enjoy today's class and I'll see you
on the next one.
12. Midjourney for Facebook Business Page Cover: Welcome everybody to our Mid
journey marketing course. And today we are going to
make your Facebook banner. If you still have our PDF over here that I'm
going to show you, we can see the aspect ratio that we're going
to use right here. One thing that I need to
explain before we start is that mid journey can't use
values like this. We can't put 2.7 by one. It only uses whole values
like three by one. For example, since we can't use exactly 2.7 what I'm
going to do instead, we're just going to use the
16 by nine value instead. Like I said in the
previous class, you're still going to
lose a little bit of pixels in height and width. As long as you
have that in mind, you can adjust your
image as well. For your banner, we can use the same
resolution right here, and it will work perfectly. Let me show you our
prompt for today so we can see what we'll be making. And we are going to go back to our theme of
the travel agency. Again, with most classes, I'm going to always
try to show you some different style that we
can explore in this prompt. Today I'm going to use
the watercolor painting. We want a plane
flying in the sky. I'm using a panoramic
view again, it always looks really nice
with these kinds of pictures. I want it to be set
during the sunset. I want sunset lighting. And I'm going to also tell the program that
I want vibrant colors. If you want any
specific color palette in your picture, like, oh, I want warm colors or cold
colors or neon colors, make sure to type that in. Again, the more description
that you give the program, the better your
output will look, the more it'll look
like what you want. I already copied this prompt. Let's go back to our discourse
server. Here we are. We're going to type
imagine Past Start prompt, make sure that
everything looks okay, Aspect ratio is okay.
So let's press Enter. Once this is done, we
can see how it looks. In case we don't like our looks, we can do the same thing
as we did in last class. Maybe change the proper round, maybe just ask for
more variations. We'll see we go. Our image is done and this
looks amazing, honestly, I love the watercolor
style that we chose. It really fit with the image. As you can see, you can see like every single little
brushstroke, it looks perfect. And like I said, I specified, I want vibrant colors in this. And clearly translated
in the picture, the colors really are vibrant. And you can see the sunset. It looks really, really nice. And you can see the
clouds, it looks awesome. But we always want as
much options as possible. And while looking
at this, I thought, well, maybe this
will also look good. Maybe in the nighttime, maybe we can, you know, write the same
prompt, but instead, I wanted to be sat
in the nighttime and I want the moon
in the background. You know, I feel like it could
also look really cool with the same kind of setup
that we have going on here. Let's try that. I'm going to do slash, imagine
again, Pasteur Prompt. And I just change a
couple of things, so I'm going to remove
the sunset lighting. And I'm going to say during the night with the moon in the background, in
the background. Let's see if we can
make that work. Let's see if it looks good. Once this is done, we
can compare the two of them and see if it
looks nice or not. Here we go, our images
are done again. Wow, these also
look really good. I don't think we got a single
bad prompt here image. They all look really cool. Man, it's hard to choose. I'm going to be honest, I'm going to choose one from
each because it's a little bit too hard to pick
only one out of all these. From the sunset on. I think I'm going to go
with the first picture. I like this one a lot. I like the really vibrant
sunset on this one. I'm going to go with this one
to upscale the first one, we're going to
click one for this, I think I'm going to go
with the fourth one. I like this one a lot. It seems like it's higher up in the sky because you can
see the clouds over here. Here, it looks like
you can see the sea. I want it to be
more up in the sky. I like that the moon is really, really huge on this one too. So we're going to upscale the fourth one as well over here. Our first upscaling
is done already. As you can see, you can take
a look at the fold thing. It looks really cool
to save the image, you're going to click this, press Save Image. There you go. Here with this picture as well. Right click Save Image, Choose your folder, click Save. Now I'm going to open these
in my folder so you can see how they look on a
full scale. Here it is. Here we have the first one, looks really, really cool. Let me zoom in a little bit. There you go, Looks awesome. Then the second one over
here, also really nice. Again, same thing is last class. If you want to put some
tanks on top of it, maybe put the name
of your company or your agency,
whatever that is. You want to go to
Canva, pick a template. You don't even have to
come up with anything, just pick a template, change it to wherever you
want it to be. That's the image is if you don't want to
put anything on top of it, then there you go. You just post it on from
media and it is ready to go. I hope you guys
enjoy this lesson and I'll see you
in the next one.
13. Midjourney for thumbnails of your Tiktok videos: All right everybody,
welcome back to our maj journey
marketing course. Today we are going to make
a picture for your Tiktok. Now we're going to make a
Tiktok thumbnail image. If you are familiar with Tiktok, you would know that it
uses the same aspect ratio as the Facebook
Instagram stories. That would be 916 or the
opposite of the horizontal feed, which is 16 by nine.
Pretty simple. Let me show you the problem
that we're going to use, and here we have it. My prompt will be a woman
dancing in a nightclub. I want people in the background. I want neon lights, and I want a very
energetic mood. And I want vibrant colors. And then again, the
aspect ratio that we're going to use
will be nine by 16. Now, since this is a
thumbnail for Tiktok, I want it to be a little
bit more realistic. I'm not going to use
any specific styles. I wanted to be more, more
closer to real life. We can match the
average. Take talk. I've already copied the prompt. Let's take this to Discord
our discourse server. Here we're going
to slash imagine, and then paste your
prompt with control V. Again, make sure
everything is okay, aspect ratio looks fine. Press Enter. Our image
is now being generated. Now once this is done, I'm going to show you how it looks. And I also have a couple more options that we're
going to explore today so that you can change
your picture afterwards. Let's see how that
works. Here we have it. Our images are done and
they look really cool. You can see all the neon
lines that you asked for and they all have
really vibrant colors. Just like we asked, you can see the crowd in the background. You can feel the energetic vibe that we asked for in our prompt. Cool. Now what we're
going to do is we're going to pick one of
these so I can show you a couple more features
that you can use. I will go for the first picture. I like this one. I
like the camera angle. We're going to press one
for the first picture, and our image will be upscaled. Here we go. Our image
is now upscale. Looks really, really cool. Now what I wanted to show
you is a couple of things. Number one, let's say
that you like this image, but you think the shot
is overall too close. Like it's just too close. You wish you could zoom out. Well, I have the button for you. Zoom out button right here. Now you have three options. You can zoom out two times 1.5 or you can make
your own custom zoom. For this example right here, let's say I wanted to zoom
out, but not too much, so I'm going to use 1.5 Let's
click the zoom 1.5 Zoom out 1.5 and let's see how this
looks. So here it is. Our image is done as you
can see. It is zoomed out. The shot was really close here. And now you got four more variations of
it being zoomed out. It's just so you can see that there are multiple options here. There are various
buttons and you're always welcome to explore
what they all do. For example, the very button, there's a very strong and a very subtle. What
does this mean? Well, if you click very strong, it will make very easy
to have this image. It will keep the image
very similar to this one. In the subtle will mean it's a little bit more
subtle variation. It won't be nothing too crazy, it will be very small. You have the custom
zoom as well. Another thing is let's
say you made one image. You made it on a
certain aspect ratio for your Techtc, just
like we talked about. But you really liked it and you want to use it
somewhere else. I want to make a post
out of this too, but it's on the wrong aspect
ratio. Well, what do I do? Like I said before, every single time you put in a prompt, you're going to get
something different so you can't replicate this. It's actually pretty simple. You can change the aspect ratio of this one image over here. All you have to do
is you're going to click on Custom Zoom. You're going to get
the prompt here again. You can just highlight the aspect ratio that
I've used before. Let's say I want it to be 16 by nine now because
I want to change it then instead of using zoom two, we're
going to use zoom one. That way we keep the image
just the way it is right here. And we're going to click
Submit Now It's going to give us the same exact image but in a different aspect ratio. Just like we asked
for these prompts, they do take a bit longer. The zoom out and the
change of aspect ratios, they take a little bit longer.
It's completely normal. If that happens to you, don't be worried it's completely normal. This one took me quite a
while to load. It's okay. Now, once this is done, we can can tell that the
aspect ratio is no different. So any image that you have, if you want to use it
somewhere else for a different aspect ratio and you don't want
to change it at all, you want to keep it the
same thing. No problem. We can do that as well. So just just make sure
that you click on custom zoom and change
your aspect ratio. Make sure that you
keep to Zo 11 if you want to keep the exact same
angle that we already have. Our image is already
almost done. And here it is. A completely
different aspect ratio. As you can see, it created the borders that we
didn't have before. And the image is now ready for let's say a Facebook
post or an in second post. Right? Really cool. As always, I'm going
to upscale one of these so we can
see the fold thing. I'm going to go, let's
go with the first one. I like the first one.
Let's press one, and it should be done very fast. Here we go. Our
image is upscaled. Now remember to save the image. Right click, Save. Image chose your
folder, and press Save. Now I'm going to open this really fast so you
can see how it looks. Here we go. We have our image over
here completely ready for our horizontal feed post. Or if you wanted to keep
the first version of it, you can use it as
a Tiktonktumbnail. I just wanted to show you that the program is really flexible
with what you can do. If you change your mind
halfway through and want to post it on a different
platform, that's cool. Or if you want to post it in multiple platforms
with different ratios, that's also cool. Just keep it up in mind, you explore every
single feature. I hope you guys enjoy this class and I'll see you
in the next one.
14. Midjourney for YouTube video thumbnails: Welcome back everybody to our mid journey
marketing course. And today we are going to be
doing some Youtube things. So if you remember
our PDF over here, the thumbnail is 12 80
pixels by 720 pixels. But like I said, all you have to worry about is
the Aspen ratio. What is it, 16 by nine? We've done this before, we
used this using before. It'll be easy the theme that
I'm going to use for today, since we're on Youtube, Let's say that maybe we have a Youtube channel to
talk about movies. We'd like to talk about
comic book movies, superhero stuff, or maybe
just comic books in general. To prompt, going to use will be comic book style drawing of Batman standing on
top of a building. I want it to be in the rain. I want a night time setting. I want the moon
in the background in an overall dramatic mood. Like I said, aspect
ratio that we'll be using will be 16 by nine. Very different our style here
that we're going forward. Let's see if we can get it done. Let's go to our
discourse server. We're going to type slash, imagine Paste the
prompt to control the, make sure that
everything looks okay. And press Enter
at the same time. I'm going to make
another prompt, but I'm going to ask for
a different style here. We're going to try digital
drawing, a Batman. You always want as
much variations on the art style as possible, so that way you can
just take a look at everything and see what
you like the most. Once you see we're done, I'm going to show it to you
and we can compare them and pick out which
one is our favorite. So our drawings are now done. This would be the digital
drawing that we asked for, and it does look like we
got what we wanted here. I really like the
composition of this shot. I think it's more
visible that he is indeed standing on top of a
building. So I like this one. I think we're going to go
with this one on this bench. But then on our book drawing, it doesn't really look
like a Como, right? This one maybe a
little bit more. It looks a little
bit more two D, but these ones, they look a
lot similar to these, right? They look a lot more digital. They don't have the
comic book kind of feel that we're going for. So Well then we can try again. That's completely
fine. What can we do? We can change the prompt
or we can just reload. Maybe it was just a small
problem that happened. So number one thing that
we're going to try is just reload in males doing that. Let's rewrite the prompt and see if we can get it to work. Pace your prompt again, let's enforce the fact
that we want it to look like a classic comic book. I'm going to say two D.
I want it to be two D, maybe. Let me think. Let's call it a vintage
comic book drawing, that way it doesn't look as
modern as what we got here. Maybe we can reinforce
that idea to Journey. Let's press Enter and
is now on the way. So this is our reload
that we ordered again. Now really looking like
the comic book, right? This one maybe looks more like a two D drawing that
we wanted to go for, but could be better. I think we're going to wait for the rendition that we
just type over here. Once we get this done,
I can show it to you. Okay, so there is a little
bit of an upgrade here. This one looks a lot more
drawn in the shadows. They look a lot more
like pencil like marker made shadows
than just digital. This one as well looks a
lot more like a drawing to me made by hand. So we did get a little
bit better here. Let's upscale this fourth one. I think this one has potential, so I'm going to
pick this one out, and then let's go back
to the digital drawing. These ones were always pretty
good since the beginning, so I'm going to also
like this fourth one. Let's upscale this one
as well. Here you go. Yeah, this one is
definitely a drawing. This one definitely feels a lot more like a drawing
than the other ones. If you go back here and try
to compare it 100% right? This one looks a lot more like a three D model
compared to this one. This one actually
looks a lot more like the drawing that we
wanted to go for, right? So really, really cool, Awesome. You can see the raindrops, you can even see the raindrops
falling on his cape. Isn't that just insane? Really cool. This one
as well, same thing. We can see all the rain
drops that he wanted, the moon in the background. You can really see that he is indeed staying on
top of a building. So really, really cool. I'm going to save
these images again. Right click, save image, save it on your folder. Same thing for this, easy save. And then I'm going to open
this up so you can see. So here's the first one, really cool, let me
zoom in for you. Perfect. Really awesome. And then the second one as well, I'm going to zoom in perfect. Man, I mean, can you imagine how long this would take for
you to actually draw? I'll tell you it will
take me hours and hours. Really cool. Again, this is a Youtube dominio
that we want, right? So we would normally maybe want some text on top of
this picture, right? Again, you would go to Canada, the website that we've used
previously, multiple times. It is completely free,
super easy to use. We would just pick any template
of text that you want, put it on top, and then just write the title of your video. I hope you enjoy this video. I hope it was easier to
understand, easier to follow. And I'll see you
on the next class.
15. Midjourney for the YouTube Channel banner: Hello everybody. Welcome back to our Mid Journey
marketing course. And today we're going to
make your Youtube banner. If you can take a look
at our resolution PDF, this is our banner. We can use the 16 by
nine aspect ratio, but today we're going to have to make something different
and I'll tell you why. As you can see right here, this is the visible
area on all devices, that means on your cell
phone or on your TV screen. This is the area that
every single person will be able to see on a computer. It will be somewhere
in the middle between the TV size and
the cell phone size, which is the smallest one. Each platform has their
own different size here, but this is visible to everyone. Obviously, this is going
to be where you want to put the most important
information of your banner. The text that you want to
put. It has to be here. If you want your, if you have a really special
important picture that you want to
put in your banner, you want it to be visible
on this part of the screen, so that way everybody
can take a look. So how can we do that? How can we make sure that our image is in the
middle of the banner? Well, we have actually
kind of done that before. And I'll show you over
here really fast. If you remember correctly, we have done the
zoom out technique on this picture over here. Now basically what we had to do is just generate
an image and then zoom out a couple of
times until the image is dead center on the picture. You'll see what
I'm talking about once we actually
get to doing it. What prompt are we
going to use today? Let me show you. Here it is. I have my full prompt here and I'm not going to use
any specific R styles. I want it to be more realistic. I want a closer picture
of a 30 year old man, and I wanted to be
in a fancy suit. I want his arms crossed. He's looking at the
camera with a smile, in a confident posture. In terms of lighting, I want just a smooth daytime
lighting, nothing too crazy. And I want a building in
the background, obviously, more of a business
Youtube channel. And then the aspect
ratio again, 16 by nine. We're just going
to use a couple of zoom outs and go from there. Let's copy the prompt and
take this to Discord. Here we are, You're
going to type slash, imagine Paste the prompt, make sure everything looks okay. And press Enter. Once this is done,
we can pick out the best version and
start our zooming out. And you'll see exactly
what I'm talking about. Here it is. Our image is
done and as you can see, it is exactly what we
asked for. Really cool. Now here, if you didn't exactly get what you
wanted out of your prompt, this is where you would maybe reload or maybe change the
prompt around a little bit. But since we got pretty much
what we asked for exactly, I'm going to keep
it this way now. First I'm going to
pick one of these. I think I'm going to
go with the second one and upscale this second one. That would mean you to, Let's upscale this
image really fast. Here it is. Now here's where we start the zooming out
process of things. I'm going to zoom out
the max value first. We're going to use
zoom out two times. Then like I said, the
zoom out sometimes might take a little bit longer
than your average prompt. Don't be worried, it's
completely normal. Once the zoom is done, I will get back to you and
we can see how it looks. Here is our first
zoom is now done, and as you can see, it
gives you four variations, but they all pretty
much look the same. It's just expanding the
environment around our subject. I think in this case,
it doesn't really matter what you upscale or not. This one, as you can see, has a little bit more reflections on the windows, but
that's pretty much it. I'm just going to upscale. The second one doesn't
really matter all that much. Here we go. Then we would
zoom out one more time. Then I would say that around
the second or third zoom, it should be enough to fit the area that
we want it to fit. But then it's obviously
just personal preference. If you want to zoom,
just keep it there. You can keep it there
after the third zoom. I'm going to zoom
out one or two more times just so you can see
that you can indeed do it. You can also see how it would look after a while you lose
the focus on your subject. So I don't recommend
doing it too much. But yeah, it's obviously
all comes down to personal preference and how
you prefer it to look like. Once this is done, we can zoom out one more time. Here it is. This is
our second zoom. Again, not much difference in the environment
around the subject. The buildings do become
a little bit different. I suppose you just pick
your favorite here. I'm going to go with
the fourth one. We can upscale this so we
can take a closer look. Here it is, our upscale image. And as you can see, it is a lot further than what
we started with. I'm going to do one
more final zoom if your picture already
looks good this way. If you think this is fine
for you, we would stop here. I think it looks normally good on the second and
third zoom anyway, so that will be completely fine. But I'm just going to do it a couple more times so that way you can see how it looks and that you can
really indeed do it. I'm going to do around
one or two more zoom out and I'm going to use the
1.5 instead. Let's do that. Here it is. I zoomed out a
total of two more times. This is our third zoom. This still looks pretty decent. I think it still
use this very well. Then here's our fourth
zoom over here. This is where you start losing
a little bit of focus on your subject and the edges of the picture
become a lot darker. This is around the
area where you probably need to
stop zooming out. I would definitely pick
the third or second zoom. I think those definitely
look the best to me. I'm going to save these
real quick just so we can get an even closer look again. You just want to right
click and press Save Image, and then choose where you want to save this
on your computer. Let me open this for
you really quick. Okay guys, so here I
have an example for you. I can show you how
it would actually look in your Youtube channel. I have this Photoshop
file that shows you the guidelines that I
showed you earlier on the PDF. So here we can actually
put this to use. This is going to be in the download section of the course. You can get your hands on this
and take a look yourself, but here are the guidelines
that we're talking about. This is the full size. Our picture is going to be this area will be in tablets and in this area will
be in mobiles and desktops. This area is named desktop, but it's actually,
this is the TV size. So we would only really see the full side if
you're on your TV, which is not as often as like people are on
their phones, right? So here I have our two pictures
that we got at the end. So this is the one that
we zoomed out the most, and as you can see, is actually
zoomed in pretty well. This is the area that
everybody will see no matter what we got our subject
on the very middle. So it looks very good. Just make sure that you
scale your images to the size of the canvavas here so you can have
the actual full size. So not bad, this is the most zoomed out
image that we had, and it's right in the middle. And then the other
picture that we got, it was like one zoom
before that, also. Pretty good. So we have
this and then we have this. You know, it's really
up to your own choice. We got both of them right in
the middle of the manner, so we did what we wanted to do. And now I'm just going to put some text on the
sides over here. So just so you can see what the final product might
look like for you. I'm not going to put
too much work into it just for the sake of
it being an example, but I'm just going
to slap some text here and I'll show
you when it is done. Here we go. This is a
very simple example, obviously, of how
it's going to look. You might want to change
the text color or the font, but I just did this
very quick to see. You see how we would normally
place your text here. You would put your channel
name videos every week. For example, as a phrase that you want to put
in your banner here, maybe you would put the name
of your social media so your followers can see where
else they can find you in. Very simple, you don't have
to think about it too much. This is just a fast example that I put up here for
you to take a look. Yeah, not too bad.
Very, very easy to do. I hope you guys
understood everything. I hope the lesson was
clear enough for you, and I'll see you
in the next class.
16. Midjourney Basic Commands: Welcome back everybody, into our mid journey
marketing course. And today will be a very simple, very laid back class where
I just get to explain to you a couple of
commands that maybe I glossed over or I
talked about it too fast. So that way you can
have a better idea of how mid journey
commands work. By commands, I mean
all these buttons that we get at the
end of our prompt, and I'll tell you
what all of them do, you're probably
pretty familiar with these buttons over here and I'm going to explain
them very quickly. It is basically upscaling
whatever image you pick over here will get upscaled
and you will get the full version
of that picture. The way they are numbered is 123.41 23.4 correspond
to these images. The V button also is numbered
in the same exact way, but what they do is they create variations of a certain image. Now let's say I really like
the second image over here, but I would like a couple of
variations of that picture. Well, I would click
on the V two button and then it will create
four more variations for me of that exact picture. And as you can see, it
is being done right now. As we speak, these buttons
are all very simple. Then this last one is
the reload button, which will just give
you a brand new set of four variations
of your prompt. So in case you don't like any
of the variations at all, you just click on this
button over here. Now once our variation is done, we can take a look at the rest of the buttons
below our picture. And there we go see we've got four variations
of that one picture. You can see the background looks about the same
in all of them. And the clothes that the
character is wearing is also very similar because
we just created a variation of one image. Now I'm just going to
upscale one of them so we can take a look at
the rest of the buttons. And here we have them. What
do all these buttons do? There is a very strong button, and what this does is very similar to this
button over here, where it will create a
variation of this image. But if you click on
the variation strong, it will make a very
strong variation. The picture will be very
different from this one. If you click subtle, it'll
be a subtle variation. It will change only a couple of things, very small things, and you won't see a
really big difference if you click the very region. This is actually a very
cool feature as well. I'm going to click this on for you so you can take a look. What this does is
that you can select a certain area of your
picture to be regenerated. You're going to click on
the Lasso tool over here. That way you can
see I'm going to outline the face of the
character just like so. Just make sure you're
holding your mouse button. Now, if I were to click Submit, the only area that will be regenerated again
would be his face. If I did it on his body, it will only be his
body if there's a certain aspect of the
image that you don't like. But everything else looks fine. You can use this
feature over here. Let's press Submit. Let's
see what my journey will do. What different face are we going to get
once that is done? And it should be pretty
fast because you only selected a small
area of the picture. I'm going to show
you what we got. There. You have it. It
generated four more images, but the only thing that
these images have that is different is the face and
the facial expression. Very useful tool to keep in mind of when
you're making your images. Now what do these
other buttons do? There's upscale two times, which I'm going to click on this so you can see what
that looks like. Up scales are normally,
they don't take too long. Let's see what we get here. As you can see, it's just
a bigger upscaled version of our image is the same
thing for upscale four times. I'm not going to click on this because this is where it starts taking a little bit long
for images to be generated. It's basically just
a bigger upscale the zoom out feature
we have used before. Basically what it does is it
will zoom out your picture. Let's say in our case over here, his head is a little bit too close to the edge of the image. If I were to click
Zoom out 1.5 times, it will zoom out the picture
a little bit for me and he will be a little bit more towards the
center of the image. Once this is done, you can see exactly what I'm talking
about. Here we go. As you can see, the images are zoomed out a little
bit more, right? His head is a little
bit more towards the center of the
image, right here. It was super close to
the edge of our picture. And it will give you,
as well as always, four variations where the
room looks different, right? So very simple, a two time zoom would be
basically just a bigger zoom. Now the third kind of zoom is the custom zoom,
where if you click this, you'll get access to your
prompt again and you can type in on the zoom two
instead of zoom two, you can type in whatever
number you would like. Another cool thing
about this area over here is that you get access
to your full prompt again. Which means that you can
change anything about this prompt if you
would like to. You could type something
brand new or you could delete something and put something else in its place. You basically just
get another shot of reconstructing your prompt and also obviously making
your custom zoom amount. What else do we have
after custom zoom? We have make square,
which is another image that I'm going to press
this over here so you can see what it does as you can see as our
image is already almost done. It basically just
makes the picture a simple square, right? If your current resolution, your current aspect ratio
is not a perfect square, as you can see, it is
not a perfect square. Once you press that button, it is now a perfect square. Again, that's that. We also have these
arrows over here. So let's test them out.
Let's see what they do. I'm going to press
the right button, the right arrow, and let's see what that
will do to our image. As you can see, as
it's being generated. You can already
see what that did. Well, it basically
pushes your subject, your main subject, towards wherever arrow that you clicked. If you click up, it will go up. If you click down, you go down right is right,
and left is left. If you want to change the
composition of your image, that is where you would go. The last couple of buttons over here is the
favorite button. Over here you can press
and then it will be saved as one of your favorites. You have Susully Job with
her eyes. Very cool. Then the last one is another
way of seeing your image, which is on the web,
is on your browser. Let's click this and see
where we go. Visit site. Here we are. We are now on
the Mid journey Website is basically just another
way of seeing your image. If you go to the main page, I mean you go on my images, this is where you see
every single image that you've ever generated in case this account over here is another Discord
account that I have where you can see I generated a lot of other things here too. This is where you would
see your entire gallery. If you want to go back
to an image that was done very long time ago, this is where you would go. This is also over
here is where you can see the kind of plans that you can have
for my journey as well. Everything that's plan based, if you want to pay
for my journey, this is where you want to go. Yeah, just a couple
of things that I wanted to let
you guys know of. I hope you understood
everything. I hope you found this lesson useful and I will see
you on the next class.
17. Transform any image into a Cartoon: Welcome back everybody to our mid journey
marketing course. And today I'm going to
teach you how to transform a real person into a
cartoon character. And you'll see that it's
actually not too hard. So first of all, you're
going to want to find a model for
the transformation. That could be a
picture of yourself, a picture of your friend,
a picture of religious. Anybody In our case,
I'm going to be, in my case, I'm
going to be using the picture of a famous actor. Just so we can get started. First, you need to upload that picture that you
have into discord. You need to send it on
this chat right here. There are a few
ways of doing that. After you have your image saved, you can press on the plus
button and click upload file. Or you can just double click the plus button and it'll
open up your files. Or you can actually
just go to your files and just simply drag
in your picture. I'm going to do that and drag it in over here
and press Enter. And there we go, we have our
picture of Ryan Reynolds. Now what you want to do is first of all make
sure that you were on the Discord application. You need to have
that downloaded. Because what we're going to
do is we're going to right click this and
click on Copy Link, which is a feature that is not available on the browser
version of Discord. If you right click it, you
will not see this option. You need to do this on
the Discord application. If we're going to
click copy, link, then to transform this
into something else, we are going to press Imagine, then you're going to paste the
link that you just copied. Then press Space. And then here is
where we're going to type what we want it to become. In our case, we want
to turn it into a cartoon style character. I'm going to put
Pixar style. Why not? Then we're going to, if you want a specific aspect
ratio like I do, I'm going to do AR 16 by nine. Otherwise you just
get the default size which is also fine. So once you have
everything typed out, just press Enter and then
our image will be generated. Once this is done,
we can take a look at how our cartoon character
is going to be like. Here it is. Our image
is now generated. And as you can
see, Ryan Reynolds has now been turned
into a cartoon. Now, for some reason,
we got a lot of background characters
in all of these, which is just something
that happens, sometimes it is
completely at random. But we did get the
result we wanted. Here, you can see it
does indeed resemble a Pixar cartoon character. But again, we are getting these background characters
here which we do not want. Let's try to change our prompt
and see if we can maybe specify that we just want only one character to
be displayed here. We're going to do slash,
Imagine again, paste our link. And maybe instead of just
typing cartoon Pixar style, maybe I'll type as a cartoon, let's say, a Pixar character. Now what I'm saying
is basically, I want this picture as
a cartoon character, and pretty much nothing else. I want this picture as
a cartoon character. And that is it. We're
going to do that. And then just put the aspect
ratio again, 16 by nine. Let's see if that
makes any difference. It might do, it,
might not do it. It's all about trial and error. Let's press Enter and see
how that will look like. Here we go, our
pictures are done. And again, we did resemble the pan cartoon style
that we wanted. It is Progress. Now two pictures don't have background
characters in them. This one still has this
little guy over here, and this one has a face
in the background. But we got two of them. Well, we don't already
counts as progress. Now, another thing that I've seen that happens quite
a lot of times actually, when you ask the program to
make a cartoon character, is that it will add
glasses to them for some reason we want
to remove that. That does happen a lot at
the time. How do we do that? So I've talked about
negative props before and I'll show you how we
can do that in mid journey. So let's just copy
this prop that we have over here, type slash. Imagine we're going
to press control V. Here we are basically
to add negative prompts. All you want to type is the same thing is the
aspect ratio slash. Then you're going to type no. Then whatever type after this
will be a negative prompt. Let's type glasses. We do not want glasses
in our character. Reynolds does not wear
glasses in our pictures, so we do not want
it in here as well. Let's press Enter and
try that as well, and see what we can get. So here we go. We now
got rid of the glasses. This one does not have
a background character. This one also does not. It
looks a little bit weird. This one has a giant
thing, maybe whale, in the background
also looks like he's riding some
sort of motorcycle. This one has a giant
face in the background. So it's just things
that will come up from time to time
and it's just random. Maybe the only thing you could do is specify the background. In this case, it seems
like we're getting a lot of characters
in the background. Maybe we can specify that
we want empty background. Let's try that. This
is how the process is. You're going to type
the same prompt, and you're going to keep
refining it and adding more things to it so
you get what you want. Let's copy this slash imagine past our prompt and then this is where we
make our changes. I'm also going to do,
so actually I was, what I was going to do is slash
no background characters, but instead I'm just
going to do this. I'm going to specify what the background is supposed to be. I'm going to say maybe
he is in an empty room. Maybe we can just do
empty background. That way we can just get
any sort of background. I don't want to restrict
ourselves just to a simple room. Let's let him figure out
what the background is, but we want it to be empty. Let's press Enter and see if we can get any major
differences here. And I'll show it to
you once it is done. Here we go. Problem
solved, right? A background is now empty. This one is just a
flat background. This one seems to be
an actual empty room, and we still preserve that cartoon style that
we want. Here we go. You just have to
keep testing and testing, changing your prompt, tweaking it a little bit
every here and there, and you eventually get
exactly what you want. You just need to be creative
about it and just be ready to keep trying again and
again. It looks very nice. I'm going to pick out
my favorites here, upscale them, and
download them so we can take a closer
look at all of them. For this one, I think
I'd like the third one. I think the background
is pretty simple. There's no one in
the background. We preserve the cartoon
style that we wanted. So I'm going to
upscale the third one. And then another one that I
think I liked was this one. The third one. This
one I quite like. Unfortunately, we do have the glasses that
we didn't ask for, but, you know, maybe he needs glasses for reading,
Who knows, right? I still really like the style. This picture, there seems to be someone in the
Mack around here, but it is Burdel as
much of a big deal. I really like the facial
expression as well. So we're going to also
upscale this then. Here it was our
first try where we got a ton of characters
in the background. So I'm not going to
pick out any ads here. We have them both
upscaled again, to save your pictures,
you just have to right click and
press Save Image. Now I'm going to
open them for you so we can take a closer look. So here we have our
picture with the glasses, and then here we
have our picture without the glasses and
no background characters. This was our final
picture. Very, very nice. One thing that stands out for me on this image right
here is the hair. I mean, look at this hair. It's absolutely flawless. You can see every
single string of hair. Same thing for the
beard. You can see all the little strings of hair in his beard looks
really, really nice. And there's also a mix
of realism, right, with the hair and the overall cartoon style that we went for. It looks really, really cool. This one as well
was a final one. We got wear the glasses were the background characters
very, very nice. You can see all the
folds in the clothes. Looks really, really cool. I hope you understood
everything. I can't wait for you to try
this out for yourself and turn your own image into
a cartoon character. I hope this was clear enough to understand and I'll see
you in the next class.
18. Change Faces using Insight Face Swap: Welcome back everybody to our mid journey
marketing course. And today I'm going to
show you how to face swap. To do that we're going to
need a brand new bot called the inside face swap bot to add them to your
discourse server. Is very similar to mid journey, in which are going to give them all the permissions
to join the server, choose the server and
then click Authorize. The link that you're
going to need to add this bot to your server
is this one over here. And I'm going to leave it in the download section of the course, so that way you can click it, give them all the permissions,
and then let them in. Once you are done with that, the next step is we're
going to need pictures. We're going to need
two faces so we can switch them around
and see what we get. But the thing about
this bot is that we cannot use the face
of celebrities. So if we were to use the
Ryan Reynolds picture from our cartoon character
class, it would not work. It will simply be the
text that is celebrity and it won't let you
do anything with it. So how can we fix that?
What's the other option? Well, obviously you
can use a picture of yourself or family, or we can use free stock photos that you can just use
anywhere you want. Now, where do we get those? Well, I'll show you just
a website for that. So here I am on
this website called Pexels and it is
absolutely free. And all these pictures that
show up here are free. You can just search
for anything over here and we'll give you tons
and tons of options. Just keep in mind
that the images that are sponsored are not free, but everything
else is fair game. So in my case, I search
for a man with a suit. And then, and then I think I'm
going to go with this one. And then the second picture I'm going to go with is this one. I already have these images
saved on my computer, but all you would do
is just press download and it will just get downloaded straight to your
downloads photo. Very simple. Now, once you download both
the images that you want, we're going to go back
to our Discord server and here we are. What
do we need to do? First of all is you want to show the inside face bot
what image you have. You're going to click on
the plus button over here. Click on Use Apps. The first thing
you want to do is click on the little
picture over here. And the first command
that we want to use is called save ID. What this means is that
you're going to, that person, that picture that you got, you're going to give it a name and you're going to
drag it over here. Let's first drag
our first picture and I'm going to name this
guy, his name is Nathan. Then you just press
Enter and DID is saved. Now it will associate
the name Nathan with that picture is now
ready to be used. Now the second thing
that you want to do is use the swap command so we
can actually do the swapping. We're going to go back
over here and swap ID. Now here we're going to
put nathan like we saved. What image do we want to use for Nathan while we're going
to use our second image? I'm going to drag my second
image in here. We have it. We're going to use, we want to use the Nathan
ID in this picture, which means we want Nathan's face to be on
this picture's face. Let's press Enter, and then our image should be generated. Right now you can get the mesh saying there are 17
commands in the queue. Please wait and not resubmit, which means that you have
to wait in the queue. Sometimes the que will be long, sometimes it'll be
short. It just depends. Once this is all done, I'm going to come back
to you and show you how our face swap
looks. Here we go. We now have our face swamp. Now it actually
looks pretty nice, it looks pretty genuine. Now I'm going to put the
two images that we used. I'm going to just upload
them to the chat so we can truly take a look and
compare them. Here we go. Here is the original, here's the face that we
put on top of that one. Then here is the result. Looks actually very good. Now, how would we
do the opposite? What if instead of putting this guy's face onto
this guy's face, what if we want to put this guy face onto this guy's face? It's very simple. You need to
save them as an ID, right? We already made Nathan
ID, which is this guy. We just need to do
an ID for this guy. We're going to do,
save ID again. And we're going to drag this
image over here of this guy. Well, I guess it doesn't work if you do it straight
from Discord. So I'm going to use
the actual file that I downloaded and here it is. We're going to give them a name. I'm going to give them
the name Tyler. Why not? Now command is saved and
now Tyler is now an ID. What we want to do is
go back to the swap ID. Then instead of
using Nathan here, I'm going to use the Tyler ID. Then for the picture, I want to put Tyler's
face upon Nathan's face. We're going to drag
Nathan over here. Now, here we go. I'm going to press Enter. Command is now sent. Once this is done,
you see that we're going to be doing
the exact opposite. This might look a
little bit complicated, but all it takes
is a couple tries and you'll understand
completely how it works. It's really not hard at all while this is
being processed. I'm going to show you another
quick commander here over here which is the list ID. This helps in case you
have a lot of ID saved. At the same time,
it'll just give you a list of every single
saved ID that you have. In my case, I have the
Nathan and I have Tyler. The current ID name is Tyler. Because of this command that
we just did, very simple. It even shows you a
subscription type as well. Which minus is the
free one? Here it is. Our image is done
and as you can see, it looks actually very good. We basically put
this guy's face, in this guy's face, it
actually looks very nice. You can see the hairline had a little bit of trouble here. It doesn't look too good, but overall face,
facial features wise, it looks very good. Now one thing that I want to say as well to keep in mind is if you grabbed a stock
image where the subject, he has glasses, then might
screw up the face swapping. Unless both pictures
have glasses, it might look a
little bit weird. The final result might
look a little bit weird. The program will look
at one person that has glasses and
the other doesn't. The face is going
to look very weird. If you have one person
with the glasses, make sure the second one
also has them so it doesn't look weird. Here you go. You can see looks very
nice, looks very simple. Another couple of commands that you might want
to take a look at in case you are max on IDs, you don't want to add more IDs, you wanted to just delete All this will delete every
single ID that you have. Or if you want to
delete a specific ID, you can de ID and that
will delete a single one. This is the list I
just showed you. This is how to save.
This is the set ID which basically sets a
specific ID to the default ID. Very, very simple. Another
thing that I think you can do is if you write click this
and then you click on apps, you can just do this face
swap from over here. So if you write click any image, click go on Apps, you can do the face swap
right from over here. So it will face
swap that picture with whatever image I have
as my default ID currently. It's also an easier option. In case you already
have an ID saved, just right click apps and
then click on Swapper Easy. If that's better for you, make sure that you do. Remember that. There you go. You can see it is the same
face Wap as before. But I just wanted to show
you another way of doing it, a faster way of doing it. So as you can see,
it's very easy. I hope you guys enjoy it. I hope the lesson
was clear enough. And I'll see you
on the next class.
19. The Describe command: Welcome back everybody to our mid journey
marketing course. And today I'm going
to explain to you a brand new command
that you can use when you don't have a way of describing what you
want to do very well. Let's say you have an idea, a certain concept in mind
of what you want to do, but you don't really know
how to put it in words. You don't know how to turn
it into keywords like these to describe
it to mid journey. Oh, that's completely fine. We have a way of figuring
out how to fix that problem. Now all you need is a
certain reference image, let's say, of what
you want to do, something similar to your idea. A picture of it that looks at least somewhat to
what you want to do. The command that we're
going to use to make that happen is called describe. What this does is that
you upload that image that I talked about
in mid journey. We'll analyze it and
describe it for you in these prompt like terms that we use in every single
one of our pictures. And it will give
you multiple ideas. It will add on new
concepts to that image. So it's really cool
to grab your images. You can use the
stock free websites that I talked about in
the previous class. Pexels is a very good
website for absolutely free. I already have my picture and
I'm just going to drag this in. Here it is. As you can see, it's
just a very simple image of a man walking down the
stairs looking at his phone. There's a little building
in the background, very simple, nothing too crazy. I'm just going to press Enter, and then let's see
what journey gives us. This is normally pretty
fast as you can see. He's already thinking,
there we go. It is ready instantly. We can see that we get
four prompts over here. Let's see what we got
a young businessman walking down the stairs holding a smartphone in the style
of gray and emerald. Hassle, bad photostic
or urban scenes. Second one is a man
walking some stairs. The cellphone in the style
of elegant clothing, light gray and
dark emerald here. Another one, the style of
social media portraiture, pixel perfect, walking
down the stairs, standing in front
of an art building. So as you can see, it keeps the vibe of the
original picture, but it adds on new things, so you can still make
something original out of it. So let's try these prompts. As you can see, you
don't even have to copy and paste
them into slash. Imagine there's these little
buttons over here where you can just make these prompts
come to life immediately. So let's try those. I'd like, number one, I'm going to click Submit. As you can see, after
you do click the button, you can still edit a couple of things if you want
to make some changes. And I'm also going to do number four in case you don't
like any of these ideas, there's the reload button. Just like in normal prompts, This is very similar to the usual prompts that
we make all the time. As you can see, our image
is already being processed, and once they're both
done, I can get back to you and we can see what we get. Okay, now both of
our images are done. So here's the first one. As you can see, it looks very cool. It changed the background
a little bit and made the overall color theme of
the picture gray and green, which it looks pretty cool. We still have the
original idea of the man walking down the
stairs holding his phone, but you get a little bit of differences between them
and it looks very cool. And this one is also
completely different. It completely different
in terms of composition. I would say we still do have a man
walking down the stairs, but this time is a different
kind of shot, right? Instead of being a
picture from up close, like these ones is from really far away and you have
this vibrant lining in the background that
kind of allows you to see his silhouette and it
kind of pops really nicely. We have a really
cool color scheme here of dark green
and gray as well, just like in the first picture. So as you can see, it gives you a different perspective on the image that you upload first. And it gives you a multitude of different ideas to try out. And it looks really cool. If you're ever feeling
like you don't really know how to put your thoughts as prompt
into the bar over here, just search for someample
on the Internet, something that looks at
least similar to what you want to do and upload it. It won't straight up copy it. As you can see, it
will clearly give you something
different and original out of something that
you have in mind. Cool feature, very easy to
use. I hope you guys enjoy it. I hope it was clear
to understand. And I'll see you
in the next class.
20. How to use the command Vary (Region): Welcome back everybody to our mid journey
marketing course. And today we're just going
to take a closer look at the very region
tool that you get once you generate an image
and upscale it, right? So I think I've briefly
touched this before, but today we're just
going to try it out on a couple of different images
and see what we can get. So this tool is normally for little things in your pictures that you
don't really like. And maybe you want them removed, or maybe you just
want them changed and regenerated in some
kind of different way. So let's say I have this image
over here of our burger, or Mcdonalds burger
that we've done before. But I don't like the soda cup. I just don't. Maybe I
don't want it to be there. Maybe I don't like how it looks. I don't like the shape. So
you click on Very Region. Once you're taken
into this editor, you can use the Rectangle tool to select things like this. Or you could also use
the lasso tool and just do it with your
mouse like this. To unselect, just
press control Z and it will undo your selection. I'm going to try to select
my soda cup over here. It's going to select a
little bit of the burger, but it should be
fine. And here we go. This means that this part
of the image right here will be regenerated completely.
Let's click Submit. Let's see what journey can
do without more information. So if you go down here, it's
already being regenerated. And since it's a smaller
part of the image, the time that it takes to be generated should be a lot less. As you can see, we
can already take a look at the preview of what
it's going to look like. As you can see, it looks like the cup has just gone
in a couple of images. In the top two, it looks like the cup is
just completely different. Let's see, here we go. As you can see now on
these two bottom images, this one it seems
like the cup is gone. I'm not, I'm not entirely sure. This one it seems
that the cup is just like a tiny little cup. This one seems like it's a glass cup with soda instead
of being a plastic cup. And this one looks like a cup with a fire
coming out of it. Or maybe it's a
candle. I don't know. As you can see, it's a lot easier to control
your images that way. Maybe you like what you got, but it's just a certain aspect that you don't like and
you don't want to make an entire different prompt
or you don't want to regenerate or maybe click
on the varying buttons. Just just one little thing. You want it to be
removed, right? So let's select another
prompt and see if we can use this tool again in some
sort of different way. So I'm going to scroll
up over here and find a certain prompt that
maybe we can make use of. Well, you know what, Maybe I'm just going to make an
entirely new prompt. Let's, I have a
good idea in mind. One thing that I seems to normally get
wrong is hands right. Sometimes the hands
will look weird. Maybe the wrong amount of fingers or the fingers just
look like they're broken. So let's try to make that happen and then
try to fix it. Why not? So let's go and slash
imagine and say, I want a 30 year old
man playing the guitar. Then I'm going to do
the AR 616 by nine. Let's just leave it at
that simple prompt. I don't want anything crazy. I don't want it
to take too long. Let's see what we get. And once this is done, I can
get back to you. Here we go. Here is our image. Now actually seems like the
hands are not too bad here. This one looks at,
the hands are good. This one looks at, the hands
are good. This one as well. Pretty good. But it seems like on this one we got a little
bit of a mistake. As you can see, it
seems like it has 123 and then one
finger in the back, so a total of four fingers. This one doesn't look too good. Look, there's something
wrong in there. This one actually
I just realized, this one also only
has four fingers. 1234. We got a little
bit of a mistake. We got a cool image. But there is something about
it that throws me off. I don't like it. First,
let's upscale this one. Then we're going to use the
tool that we just learned to maybe try and fix
that very region. It's going to take
me into the editor. And I'm going to
use the lasso tool because it allows me to be a little bit more specific
about what I want to select. And I'm going to go
around a hand like this, and there we go. Now only this area will be regenerated and I'm
going to press Submit. It is now being worked on. It will give you
another four variations where only that area is
being reworked entirely. Let's see if we can
fix the hand problem over here and make
it look normal. Here we have it. Our
prompt is now done. Now, some of these still
don't look too good. This one, it looks like
he has two fingers only. This one, it looks like
his fingers are just all broken apart and they're just
merging into each other. This one looks almost good. It's almost there also. It looks like the
fingers are just like melting into each other. So it goes to show that you're not going to get
it first time, right. We have this problem
before where sometimes we don't get exactly why
we wanted to go for it, but this is why the
redo feature is here. You can just click
it and it will try again and again and again
until we get what we want. Or maybe we can just
specify on the prompt, It's just a tool, just a way that you can
maybe try to fix things, but not everything
is going to work. Another thing to keep in mind is that you can use this for any, the varied tool can be used for anything not
just a subject to, maybe it's something in the
background or maybe it's just the background as a
whole or maybe the object. Right. If I didn't like the
guitar that he's holding, I would, I would go on
and select the guitar. You can use it pretty
much for anything and you can try it again and
again until you get it right. Here it is. We tried
to the second time. It's getting better slowly but still not quite
there, right? This one looks almost right, but then this part of the hand
looks a little bit weird. This one also looks
like it's missing just one finger from
just being good. It has all the fingers but
they're all in broken. This one as well. They
look all really weird. So maybe, you know what, Maybe the problem
is just that we're not selecting it, right. Maybe our selection went
too big or maybe it's too small and it's just not
quite working out for us. So let's try that again. And I'm not going
to stop until I get this picture right
because I want to show you the entire process. So maybe we're just not getting exactly the selection might.
So let's try this again. Let's keep the selection
a little bit tighter. I'm going to use the lasso, select this, try
to keep it tight. And there we go. I don't want to select too
much outside of the hand. Or maybe we could
do the whole arm. Maybe that's the case.
What you want to do? I'm going to try to just keep
it tight, keep it small. Press Submit, and let's
see what we get this time around. Here we have it. We have our regenerated
version of our hands. Now this, it looks almost there. The thumb, I think, looks
a little bit weird, but the rest of
the hand is fine. I think this one
might be passable. Maybe not as much. This one, not as much. This one, it looks a
little bit passable. The thumb isn't showing,
but I'm assuming it's because it's
behind the hand, behind the guitar
handle over here. This one also might be passable. And, you know, this type of experience just goes to
show that you're not going to get exactly
what you want first time around
and that's fine. Don't feel frustrated, that's
just part of the workflow. You know, you're
not going to get exactly what you want always. And sometimes you just have to regenerate it and
generate it again. And, you know, use the vary
tool, reselect it entirely. Change the prompt, It's
part of the workflow. You know, you can't always
get exactly what you want. And sometimes you
just have to keep building upon your image slowly. So I hope this was a good class. I hope you guys enjoyed
the lesson overall, I hope it was easy to follow. And I'll see you
in the next class.
21. Free image generation with BlueWillow: Welcome back everybody to our mid journey
marketing course. And today we are going to use another alternative
to mid journey, which is called the blue willow. This program is also
completely free. Um, so don't worry
about subscription. The suppression does
have its bonuses, but you can use it
for completely free. As you can see, it's
pretty simple to use. You just enter Prompt
and click Generate at a discourse server in case you want to
join that as well. But I'm just going
to use the website as it is easier for the video. Now, prompt wise, just
like the other videos, I'm going to use a prompt
that we have already seen in use by my journey so we can compare
the two images at the end. Let's go back to our
discord server so we can pick an image here. I'm going to go with
the airplane painting that we did before with
the watercolor style. So I'm just going to
copy this prompt. And I'm not going to include the aspect ratio because I just wanted to
be on the default. So I'm just going to copy this and take it to Blue Willow. So I'm just going to
paste my prompt with control V and click
on Generate Art Work. Now our image is now
being generated. Once you get in here, you will see that
you'll get a pop up telling you to sign
in to the website. Now, I'm already signed in, so it didn't give me anything. But you just see quick
pop up asking you to sign in through Google
or Discord or Facebook. Just make sure you do that correctly and you
should be here. And as you can see, the Promp
was done very, very fast. There are also a couple
of previous attempts that I have done
before over here. This one doesn't
look quite right. I don't think it doesn't
quite look like a plane. Maybe it's a plane from behind. I'm not sure what's
going on here. The second one over
here as well had a third wing that I
didn't really like, which is why I decided
to do it again. And then this one
was the first one. This one actually ended up looking pretty cool,
pretty decent. The plane looks very accurate, but overall, we got the sign that we wanted in
all three of them. On all three of them, we have the water color
effect that we wanted. We have the sunset as well. The vibrant colors
are all present. It's just a matter
of using a prompt a couple of times until you
get exactly what you want. As you can see, this
one doesn't really look like a plane and this
one has a third wing. It happens, we have
run into this before. You just have to change
the prompt or maybe do it again and eventually you
will get what you want. Now as for the settings
around the website over here, I'm going to explain
to you very quickly. On the right over here you
have the image dimensions, which is also known
as aspect ratios, but here they are
in pixels instead. Then here you have
quality details. You can say it's low,
medium, or high. Here the number of
images that you want to be generated at once. The maximum is four, just
like in mid journey. On the left, you have the model. I chose blue willow V four which is the latest
blue willow model. We have our prompt and
our negative prompts, which I have explained before. Basically what they mean
is just things that you don't want to be
in your picture. In my case, that is
night trees and dust. They basically will not be in my picture
at all in any way. Now that our images are done, I'm going to
download all of them so you can take a closer look. And in this case, to do that you want to
hover over the image. Click on the three dots
and press download. So I'm just going to
do that to all three. And once I'm done with that, I'm going to show
you how they look. Fully zoomed in here they are. All three of them right
next to each other. Like I said, some of these
don't look quite right. But we ended up reaching a good version of what
we wanted over here. Just to make a comparison, I'm going to select our
Journey Picture. Here it is. You can take a look at the difference
between both of them. The major difference is
obviously the aspect ratio. This one is 16 by nine. While these pictures
were generated with the default size in
mind, not too bad. I think it looks pretty good. One thing to keep in mind
about will as well is that they have a similarity with Leonardo where you
are using credits and you have a limit to the amount of images
that you generate. Very easy to use. I hope
you guys understood everything and I'll see
you in the next class.
22. Free image generation with Leonardo: So welcome back everybody to our mid journey
marketing course. And today we're actually not
going to use mid journey. Today I'm going to show
you an alternate AI that you can use for
image generation. In case you are feeling
a little bit curious, you want to try something new, look at what other
options you have. And what we're going to
use is called Leonardo Do. This is another free
website that you can sign up for absolute free. The only thing that you need to be aware of is that
you have credits and these will refresh after
a certain period of time. You only have a certain
amount of prompts that you can use at a time. You can't just generate things infinitely unless you want to
upgrade your subscription, in which case you would get more credits. First
things first. You can see there are lots of
things on our screen here. Lots of cool features in
Leonardo as you can see. For example, Live Canvas
which is still in beta, which is something
like where you draw. And then the AI turns it into something realistic.
Really cool. You have motion where you
can make videos coming soon. So really lots of
things to explore here. If you scroll down, you
can see all the kinds of images that people have
gotten out of Leonardo. As you can see, the
results are just as good, if not sometimes even
better than majority. So all these look
really, really great. If you want to see what prompt the person used to
get their image, you can just click
on it. There you go. You can see on Prot they
used really awesome, lots of things to explore. But if you're brand new
way you want to look at will be on your left of your screen you can
see fine tuned models. What each one of
these models mean is that basically there
are different styles. If you want something that
looks photo realistic, you're going to go for
the photo real model, something that
looks like an RPG. There's the RPG model, anime. You have an Anime model, Three D animation, you have
a three D animation model. You have vintage style
photography. You have pixel art. You have chest armor, you have isometric fantasy. So lots of things that you can make here, cute
animal characters. So basically anything
that you want you can make here
in multiple styles. So our front prompt, we want to make a comparison
to mid journey and see what mid journey does
with the prompt and what Leonardo does
for the same prompt. So let's grab a prompt
that we have used before. We're going to go to our
discourse server. Here we are. I'm going to use the
prompt that we used last class of the
photorealistic 30 year old man. Let's just grab this
and see what we can make with a different AI. And the same prompt over here, like I said, we're going for
a photo realistic image. We're picking the
photo real model. We're going to click on this
and click Generate with this model. Now here we are. There are lots of
things to explore here. Here I already
pasted the prompt. This is where you write down your prompt on the
top of your screen. Over here, the settings
that you want to mass with the most will be
on your left over here. First of all, we have
the number of images. This is basically the variations that we get from Journey. So do you want one picture? 234 up to eight? I'm going to keep it
at four just so we can have some similarity
with Journey. Then you have a couple of
buttons over here as well. So you have the photo O button, which you probably
know what that means, You want the picture
to be photo realistic. But as you can see, some of
these do take a subscription. You need a subscription
to use a couple of these. We have prompt
magic, for example, which what this basically
means is if you turn this on, you're giving the eye more
freedom to do what it wants. And it would ignore a
little bit of your prompt. So it is kind of up to, you know, if you turn this on, your variations are
going to be more, they're going to be a lot
different from each other. So I'm going to turn this
off for the public images. You have to keep this on because we do not have
the subscription. Here is also where you
control image dimensions, which is where the
aspect ratio comes in. You can choose a
certain aspect ratio, just like we do
in image journey, if you click on this
button over here, or you can choose the
amount of pixels, or you can even use this slider. If you want a specific
amount of pixels, you can just use the slider. We're going to keep
it one to one, which is the basic. Yeah, the more you explore these settings,
the better it is. I recommend you to use different
kinds of settings every time you put down a prompt so we can learn as
much as possible. Back over here we have the model that we want to
use. We already picked that. Let's just press to generate,
and as you can see, next to Generate is the amount of tokens that
we're going to use. We're using 12 with this current prompt out of
150, so we still have U. A lot more prompts to go. Let's click Generate.
And let's see what Leonardo makes with
the same prompt that we already gave to Journey. And then we can
compare both pictures. Here we go, our images done. This was actually a lot
faster than journey as well. As you can see, they
don't look half bad. They look pretty good. The eyes look a little bit
weird on this one now. The eyes look a lot
better, not too bad. Let's take a look at
this image right here. Let's compare it to the one
that we got in mid journey. This is the one that we ended
up with in mid journey. And this is the variations that we got as first as
well as you can see, not the biggest
difference at all. There's very little difference
in between these images. If you want to use Leonardo, you pretty much aren't
missing out on too much. It's definitely a tool to
take into consideration. Now let's take a look at the
other models that we can use so we can see what other kinds of
things that we can make. I'm going to go
with Dream Shaper, and as you can see it looks
very similar to digital art. Let's go with this and click
Generate with this model. Once again, we're going to
use a prompt that we use in mid journey so we can
compare both images. What prompt am I
going to choose? I'm going to go with the Batman prompt that we use
for our Youtube thumbnails. I'm going to copy
this over here. We don't have to copy the
AR command because we can already choose that in
the options to our left. So we're going to
just copy this. Paste it over here. Here we go. I want four variations
just like we just did. I don't want it to be photoreal. I don't. Too much realism. Let's start on prop magic
and see what we get. Let's turn this up
a little bit more. I'm going to turn
it up to about, let's say 0.55 hit save. I'm going to keep the
aspect ratio the same, Let's put the one to one, so I think we are ready to go. Let's generate our image. We are now using eight credits. So let's see what we can
get out of this one. Here we go. Our images are done, and as you can see, we got
exactly what we wanted. It looks a lot more
like a comic book. This model actually got to the comic book style
that we wanted, a lot faster than the journey. We had to change
the prompt around, if you remember to
get the comic book look that we wanted
to go for here. It got that straight away. There's a couple of the looks to be messed up a little bit, but overall it got the style that we wanted a
lot faster because we're using a dedicated model
for these kinds of images. So here's what we
got in mid journey, I mean, Leonhardo, sorry. And then here is what
we got in mid journey. So this took actually a while. We had to change the prompt
a little bit and reload and reload because it wasn't
quite getting what we wanted. It was looking a
little bit too photo realistic and we wanted
a little bit more two D, so we had to actually change
the prompt a little bit. Yeah, having models dedicated to these kinds of things
certainly does help a lot. There's lots and lots
of models that you can play around with,
lots of things to learn. And if you did enjoy
what you saw here, feel free to explore and
try out all the features. So yeah, I hope you
enjoy this class. I hope everything
was clear enough to understand and I'll see
you in the next class.
23. Free image generation with Stable Diffusion: And welcome back everybody to our mid journey
marketing course. And today we have
another example of another AI that you can
use to generate images. Today's example is
stable diffusion online. Now the website is just
called Tab Fusion on Web, so it's right over here. And to generate our images, you're going to collect on
a free image generator. And here it is. You don't have to
make an account, We can just use this for
free and type in our prompt. Now I also want to make a
comparison to mid journey. So we're going to
use a prompt we already used in mid journey. So let's go to our
discourse service so we can see what we want to use. So what I want to use
today is I'm going to use the burger image that we used
on a realistic image class. So I'm just going to copy
this prompt over here. We're going to take it to a
stable diffusion. Here it is. There's a couple of
advanced options here that you can take a look. I'm just going to paste
my prompt to here first. Then on Advanced Options, there's a couple of
things that we can do. There's negative prompts. Negative prompts mean it's basically things that you don't
want to be in your image. Let's say you are making a picture of a
person on the beach, but you don't want a
crowd in the background. You don't want anyone
else in the picture. Only the closer picture of the person that
you're going for. Then if you write it over here, it's basically what you don't
want to be in the image. So let's say you make
your first image and then something
you don't like, you can try it again and put a negative prompt of the thing you don't
want in the picture. It's a very cool feature. I believe Leonardo
also does have that. Yeah, very cool thing that you can play around
with if you want. But for this example, we're just going
to keep it simple. We also have the
styles over here. I'm using cinematic Default, but as you can see,
there's tons of things that you can go for. Some of these we already
have done as well. There's anime comic work, which is something that
we also tried before. Craft clay, digital art,
we've done that too. Fantasy art, isometric
line art, neon punk, tons and tons of things
for you to try out over here for our burger. However, I want to just
keep it realistic. So we're going to do it
on cinematic default, and once everything
looks okay to you, you're going to
clean and generate. And then our image is
going to start to process. And once this is done, we can take a look at
how it looks like. So here we go, our
image is now done. One thing to keep
note of is that this model is a little bit
slower than mid journey. And Leonardo, if your image starts taking really long,
don't worry about it. It's pretty normal
for this model, but as you can see, we've
got a pretty good image. It looks like the background is indeed a Mcdonald's
restaurant. We got our burger over here. Very, very nice. It
looks pretty real. Our realistic prompts
did indeed work. Maybe the logo here, because
it's a little bit of work. You can see that the
Mcdonald's logo confused, but overall looks pretty good. Just another model that I wanted to show you
that you can use for free in case you want to
try some other things out. As you can see, it looks
very good just to compare to what we got from a journey here. It is just minor
differences, right? The background is
definitely different. The table is not
made out of glass. Just a couple of
things, but that's just nothing too
crazy to worry about. Yeah, I hope you've
enjoyed this class. Feel free to play around with the prompt and stable diffusion and I'll see you
in the next class.
24. Free Images with Dall e 3: Welcome back everybody to our mid journey
marketing chorus. And today I'm going to show you another AI that you can
use to generate images. And today's AI is
called Dolly Three. It was made by open AI, the same people
that made chat GPT. So that's how you know this AI is going to be pretty good. If you want to take a look
at the research paper, you can click on this button
over here and you will get tons and tons of
information about the AI. You can see the kind of images that we can make here as well. These look incredible. Now I got a free way for
you to use Dolly three, and that is on a
different website. And this website is called
Bing.com slash Create. Here you can make images using the Dolly Three
model for free. But the first thing you're
going to have to do is sign in into your account. Or if you don't have
a Microsoft account, you have to make a
Microsoft account. And once that is done, you should be on the
same page here as I am. And if you scroll
down, you can see the kind of images
that are being made. Really, really cool stuff. Now, once you sign in, one thing that you
want to be aware of is these booster coins. These boosters
basically make it so your prompt gets
generated faster and you only have
a specific amount of boosters for a day. As you can see, I
have 15 boosters for today and these boots
get updated weekly. Keep in mind when you're
generating images, keep in mind how many
boosters you have. Otherwise, a couple of images could take from
hours to minutes. It is a very long range of time. How do we get our
images generated? Well, it was very
simple. We just want to type it on this bar over here. Let's say we want a picture
of a cute cat on a couch. Let's then you
would press Create. As you can see, our image
is now being created by AI. As this is being
created, you would get tips like this as well. Tip at media types
like watercolor. I'll try a cowboy riding a
horse in space, watercolor. But we already knew that one. But as you can see, our
images was now generated, made it looks awesome.
Looks really, really cute. We get four variations
of our picture, just like Journey
and a couple of other AIs that we
saw before as well. If you really like
one of these images, you can just click on them. You have the option
to share them, to save them, to download
them, customize them. Very cool. And as you can see, our image looks amazing. You can see all the details
in the fur of the cat. You can see the couch. You can see the room
in the background. Yeah, really, really cool. I'm going to download
this image over here so we can take
a closer look. And I'll open it for you. Here is our image
really, really nice. You can zoom in a
line here and you can see all of the details, all the little hairs on the cat. And it looks really,
really cool. Very simple. Very
short class today. I hope you guys
understood everything. I hope it was clear
enough for you. And I'll see you
on the next class.
25. MS Designer: Welcome back everybody to our mid journey marketing course. And here, this
video is basically going to be the second part to our Microsoft being
image generator that we used for dolly three. We wanted to use Do three and we use this website
to use it for free. This is basically
the second part. Once you have your image done, you should come up with
a screen like this. You should get all
the variations. You should click on whatever image you think looks the best. And this is what
you're going to get s, this is what it
should look like. Now obviously you already have the option to
download it, to save it, to share it, but I didn't
show you last time, is a customized button. Now if you click on this, you are basically going
to stumble upon a editor program kind of like Canva is very
similar to Canva. But obviously Canva came out a long time ago
compared to this. And I'm going to show you the
basics of how this works. And as you can see, you're
going to be taken to the editor over here
and on the right, it already gives me multiple ideas based on the
kind of picture that I have. So as you can see, there's a couple of templates over here. This one looks like it's
a photograph, right? This one looks like
it's a profile picture. This one also looks
like a photograph. This one also looks
like a photograph. So really cool because this image does look
like a picture, right? It looks like like the owner of the dog took the
picture in the park. So it kind of just
gives you ideas based on what you already
have as your picture. And then on the left, kind
of like Canada as well, You can see that we have
templates that we can also use and just change things around
if you want to really cool, you can really see the
similarities in here. If you want to drag
in your own media, you would go over here and use your own pictures that you
download it somewhere. We have visuals where
you can put in basically stickers or shapes
to your image. We have texts where
you can add a heading, and there's also just
templates for texts as well, so very, very similar. This isn't that
hard at all to use. You have color schemes
as well over here. Really cool stuff. Let's say I want to
go with the picture. I like this one over here. If you want to change the
placement of the picture, you can just drag it
around like this, but I'm just going
to keep it the same. If you want to undo an action
that you didn't mean to do, just press control Z, and then it should
undo your last action. I'm going to put in
some text, let's say. I'm going to pick a template
over here, what fits. I'm just going to
use this first one just to keep things
simple over here. I'm going to drag this
onto our picture. And as you can see, even DUI, it's really similar to what we've used previously
in the course. First of all, I'm going to
select the entire text, and I'm going to change the color because
I don't think it's really legible with this color. I'm going to make it white and I'm going to write
something new, let's say. What do we want to write
for our picture of a dog? Let's say we just want to
write a day in the park. Then as you can see, oops, was no longer fully in
the picture anymore. You can do is you can extend the tax box that way you
can make it fit perfectly. I'm going to center this
a little bit better. Here we go. We have our day in the park picture ready to go. Another couple of features
you have here is, for example, the
rewrite feature. You can select your text and
if you click on rewrite, it will generate a alternate
heading for you to use an alternate See strolling
around the green. You can keep going and
rewriting it and rewriting it, see wandering around the lawn. If you don't really
know what to write, you also can just generate
the writing for you. Cool. I'm going to keep
it a day in the park. In the park. I think day
in the park is cool. It's simple, as you
can see on the right, our templates, they adapt
as we change our post. As you keep adding things, it generates new ideas and new templates based
on what you wrote. This is really cool. Let's take a look
a couple of these. We have this one Y in the park. It instantly takes your text, changes the phone, it
changes the color, puts it in a different layout. We have this one as well. We have this one. It's cool. There is AI basically
everywhere. As you edit this, it
gives you more ideas. Really awesome. See day in the park.
Say you're done. I picked this idea over here. I really like it. So
what do I do next? To save this image, you
will press download. And then here you can obviously download, copy this image. Maybe you want to send
it to your phone. But another thing that's
really cool that you can try is use AI for
captions and hashtags. So let's say this is
a social media post for your agency,
your company, right? You want to post it on
Instagram or Facebook or Linked in. Let's strike that. Let's click on Try It, and then here we
have our selection. You can make it linked
in Instagram, Facebook. Let's see, I want to
make it Instagram. Then here you're going
to give it a goal. What is the main
goal of this post? What do you want to
do with this post? And there's a couple of options
you can raise awareness. I want to get more engagement. I want to increase
sales or bookings. I want to build my community. Let's say this seems like
a pretty chill image. I'm just going to say I
want to build my community. I don't want to get engagement, want to increase
sales, I just want to build a nice low community. So I'm going to select this. Then you want to just give it a quick description of what you, what you want the
post to be about. Right, our picture for example. We can go maybe with the example that we used very
early in the course, which was the dog
training agency. So maybe that's the case here. Let's just do, oops, I have my caps on dog training
agency, step like that. We are a dog training
agency and we want to build out our
community, right? So let's generate
a post description over here and let's
see what we can get. Here we go, We have the
captions over here. Make sure your pup is the best behaved dog.
Go on the block. Our experienced dog trainers
at agency are here to help or come join our
hashtag dog training family. At agency, we provide
super positive, it makes a little joke for you, experiences for you and
your four legged friend. Really cool and get
tons of ideas here. And you can even
generate more in case you're not happy
with any of them. Really cool, I'm going to pick, let's say this one,
I like the joke. And then you also have
hash tags as well. So if you want to add
hash tags to your post, they're also generated for you. So you can pick all of these. Let's say I want to pick,
maybe not too much. I want to pick about
half of these, You'll just highlight them. And as you can see, you have
a little template over here where it shows what your
post is going to look like. And you can scroll up and down in here to
see what it looks like. I mean, it's just awesome. It basically does every single piece of work
for you, right? So really cool. So now once you're done,
you click Review. Here is how it would look like if you want to
generate it again. You just click on this
button over here. It's really cool, you
can do it for Facebook. And a template will also change according to
Facebook or Linked in. Let's say you just want
it to be Instagram. You click connect
and account here, you have to log in into
your account and it would, you would post the
image from there. So really, really nice. It basically makes an entire
social media post for you. It generates everything based off just one little
idea that you had. So really, really cool. I
hope you guys enjoy it. I hope you find it useful. And I'll see you
on the next class.
26. G Prompter: Welcome back everybody to our mid journey
marketing course. And today I'm going to give you a look at another tool that you can use in case you don't really know how to describe your image. You have an idea in mind,
they have a concept in mind, but you don't really know
how to put it as keywords. You don't know how to
write your prompt, You don't really have any ideas. So the website that
you're going to use to fix that problem is
called Prompter. It is a free tool that
is super easy to use. And what it does is
that you basically give it the concept of an idea, super basic, keep it
as short as possible. And then it will develop that idea into something
else that will make it. I'll make a prompt for
you, a prompt that is completely ready to
be put in my journey. As you can see, we have a couple of styles
that we can go for. We can do photography, which is more photo realistic. We have artwork, we have vector. It's more design wise things. We are going to go
for photography, Let's keep it simple and go
for photography for now. Now here is where
the magic happens. Here's where you're
going to put your idea. Just keep it short, keep it simple, and it should be fine. Let's say I want to make
a picture of a cake. I have a bakery. I want to
make a picture of a cake. So let's do cake. And maybe hot chocolate or
coffee or whatever you want. Then here you're going to choose the R style that you want. As you can see, we have
a lot to choose from, but just to keep it simple, I'm going to choose
realistic and detailed. I'm going to press on this
and then click on the X. Then it should be
selected. There you go. I had one more
selected over here. As you can see,
whenever you click something, it gets highlighted. So that means you're selecting more than one style at a time. I'm going to keep
it just realistic and detailed for
now, press on the X. Then here you're
going to choose how long you want the prompt to be. I'm going to keep a medium'.
Going to keep it simple. Here's the mid journey ratio. I'm going to use 16 by nine, this is a ratio that we
used quite a lot before. Then here's the mid
journey version. Now for me right now 5.2
is the latest version. For you, it might
not be the case. Then you just click Submit and our prompt will be
generated at the bottom. And we have cake
and hot chocolate. And that got turned into
capture a photograph that showcases an exquisite cake and steaming hot chocolate
in meticulous detail, evoking a sense of tantalizing warmth and scrumpshios,
indulgence. As you can see, it gets
really, really cool. I know for sure I couldn't
have come up with that on my own,
really, really cool. And as you can see, there's also a next step here
called Spice It Up, which is where you can add a couple more styles
to your prompt. You can see there's a
galaxy, dark, dark warrior, three D, abstract psychedelic
pattern is vibrant. If you want to add more
things on top of that prompt, you click one of these
for a first prompt, I'm going to keep a sample
going to keep it short. Let's copy this. I'm not going to copy the
version command because we already set our bot 25.2 in the beginning
of the course. If we don't need this,
let's keep it like this. And click Copy. Now we're
going to take it to this court. Here we are. I'm going to press
slash imagine control, make sure everything looks
good. And press Enter. And while this is
being generated, let's go make a second
prompt where we get to use a little bit more of the
features of the website. Now let's come up with
maybe something different. Let's say I want to
have a picture of a bird in the sky and that's it. I don't really know what
the background looks like. I don't know the colors,
I don't know the style. Let's see what we can get. Let's add one more
style to this. I want it to be realistic, but also I want to make
it pop art influenced. I want it to be vibrant. I want to have contrast. That's that I'm going to keep
the prompt length medium. I'm going to keep the
same ratio, same version. Now I'm going to submit this. Our prompt has now been
generated and as you can see, we got capture a photograph of a majestic avian soaring
to the endless sky. Is intricate feathers
depicted with meticulous detail in the vibrant popular
style, relatively cool. Now let's straight this next
step, let's spice it up. What do we want to add to this? Let's do patterns
vibrant. Let's copy it. Let's see what we
get on this prompt. As you can see, our cake
prompt has already been made. It looks really, really cool. As you can see,
the image is very detailed because we
gave it lots of detail. We gave it a long description of what we wanted. Really cool. I really like this
fourth T over here. It looks really
fancy, really nice. I'm going to upscale
this already. Now we're going to paste
our second prompt. This one should be a
little bit more vibrant, should have a lot more contrast. Let's see what we get out
of this one. Here we go. Our image is done,
and as you can see, it looks really cool. We capture the pop art style
that we wanted to get. We got all the vibrant colors and patterns that we asked for. I really like the composition. I like the style of this. I like how the screen is, is filled with feathers. It looks really cool. I actually didn't expect
the images to look good. This is really
nice. Let's upscale the third one. I
like the third one. I think it is more visible, that is a bird, than
the other ones. Now, I'm going to upscale this. It looks awesome. I mean, wow, I couldn't come up
with that description. I mean, it's a really nice, really useful tool to
use in case you're just struggling to come
up with something. Or maybe you're not
even struggling, but you just want
something to be as detailed as possible. You just want the best possible
output of mid journey. Really cool. I hope you
guys enjoy this class. I hope the lesson
was easy to follow. And I'll see you
on the next one.
27. How to calculate Aspect Ratio: All right guys, welcome back to our mid journey
marketing course. So today was going to
be a very quick class. It's just a short little
tip that I want to give you of a website
that you can use for calculating aspect ratios in case you ever run into
something that you don't really understand
or a certain amount of pixels that you
don't know how to convert to the aspect ratio. I have the website just for you. I'm going to be putting
it on the screen for you. It is the aspect
ratio calculator and it is very easy to use. So as you can see,
recalculating what? Calculating the aspect ratio. You can calculate width
and height if you want, but we're using aspect
ratio and then here, there's a couple of ways
that you can use this. Maybe you just want to know the aspect ratio of
a sudden preset. If you want to know
what's the aspect ratio for let's say HDTV, 720, Boom. It gives you over here
aspect ratio 1.78 by one, or the simplified version
that we also use, 16 by nine, right? You're probably familiar with this 14k academy, 1.37 by one. Very easy to use. You can
just choose any preset if you want to make a certain
aspect ratio for one ads or let's say you have a
specific resolution with a weird amount of pixels
that isn't in any dis, Let's say you have 5,000 by 1,000 Aspect ratio is
calculated for year over year five to
one if you want to make a picture of a
certain size of pixels, but you don't know what the
aspect ratio of that will be. Well, here's your tool. Just type in the resolution in pixels and it'll
calculated for you straight away and give you the aspect ratio of your image. Again, you can just search for any preset or you can enter the specific amount
of pixels and get your results super easy
to use, super intuitive. Just a short little class
for you to keep in mind whenever you are in trouble
making your picture. So I hope you guys enjoyed and I'll see you on the next class.
28. Final Project: Hey guys, welcome to the last
lesson, hitting the course. Here we are ready to
do the last step. One of the most important, which is to create
your final project. The final project
is really good. And it is important
because the way for you to apply what you learn, hitting the course with us. And also to make sure you take action and you create the
results that you want. This is a really fun and
easy to do final project, so all you have to do is scroll
down here on Skill Share, and you will see the project
area here, my project. You can click and submit
project, and I'll do one. As an example, you
add a project title. This is example
project by instructor. Okay? You have a project
description, something like, this is an image I created
for Facebook for example. Here you can add an image. So I click image and select the image that
I want to upload. This is the image I created. It's uploading right now. As we are recording. Here we are. All
we have to do now. You can also add
tax if you want. You can make your
project private. Don't do that,
because we want to share the project with all
the community we have. You are sharing positive, you will receive positive
feedback from the community. When you are ready,
you click and publish. And that's all you have to do. Thank you so much, and I'll
see you in the next class.
 Diego Davila, Entrepreneur and Social Media Innovator