Transcripts
1. Introduction: Image creation using AI has opened up infinite
possibilities for aspiring artists and it's actually not that hard
to use Midjourney, the leading AI image generator. Hi, I'm Arnold and I've been in the creative world for
over a decade now. Midjourney has made it extremely accessible for anyone
to create artwork. In this class, we're going
to learn how to create your favorite art
styles using AI. More specifically,
I'll teach you how to write a better prompt and to dive into every
individual aspects of generating an image. We'll go through case
studies and dissect how certain keywords
affect a prompt. I'll also guide you through all the essentials
so you can have a step-by-step guide to
navigating the journey. In this class, we'll
discuss how to write prompts for better
Midjourney renders, finding inspiration
for your prompts in the community and how to navigate through the
Midjourney platform. This class is for all artists, whether you're just getting
started on Midjourney or you've already done
a few generations. For your final class
project we'll be creating your very own
AI generated image. If you're ready to begin,
let's get started.
2. Class Project: One of the best
ways to practice on Midjourney is actually
to do a project. For this class,
our project is to help you make a work of art. Now, most of the big struggles that come about when somebody is trying Midjourney
is that they're just creating a random image. Most people that go on
for the first time, just type in something and generate an image
out and it's like, that's cool and just give up. But the thing is, Midjourney
is so powerful because it is all based on your imagination and how
you guide the prompts. In the course, we're
going to learn exactly how to guide
your prompt and make it specific in a way that Midjourney understands
what you're trying to create. The principles you're
going to learn in this class along the way, is going to help you build the foundations on how
you're going to be able to create and mold a Midjourney
prompt so that it comes out exactly like a work of art that you
want it to come out. The keyword here is it's artwork purpose-built
with intention. This is how you really push
the platform to its limit. Now, make sure you post
your progress along the way and submit your final project
to the project gallery, because that way I can
give you feedback and help you write a
better prompt if you're lost or if you're
trying to figure out how to get this exact
thing to work out. Along the way as we go through the different
steps of the class, keep in mind how you're going to use certain techniques to craft your work of art into exactly where
you want it to be. The next lecture you're
going to learn about how to setup and get
started on Midjourney.
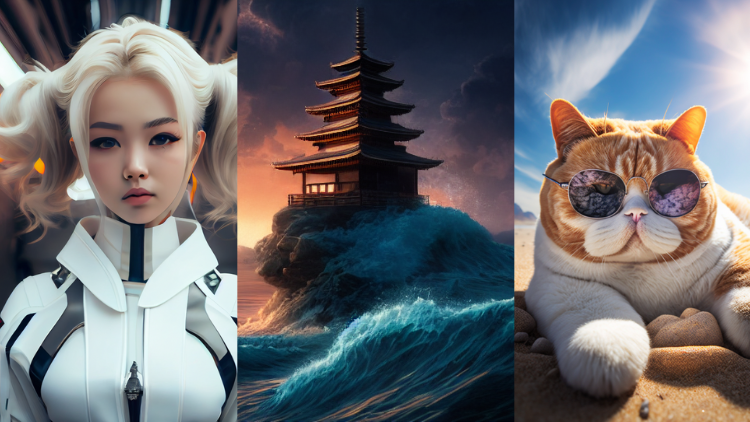
3. Introducing Midjourney Web User Interface: This is the web interface
of Mid journey, and I'm going to run you through the user interface so you can understand what is on here to get you
started in creating. First of all, we're on
the Explore section. This is where you
can find a lot of inspiration and what other
people are creating. Here you can go and actually, if you click on something, you can see the prompt
that they use, more information about it, and then you can
even potentially use these prompts as well
based on this here. You could, for example,
click on this and then it will go up in your
prompt box right. There's a lot of different
inspiration that you can look through and you can see what everybody's making. If you're running
out of creativity, you could come here and reference
what others are making. Next is the create section. This is where the magic happens. On the create section,
this is where you actually go and type in your prompt
and you make your settings, you fix your settings,
and then you go and do the other fixes and features once you finish
generating your image. For example, if I had
generated something here, then you have these
sections here. The next section is the
edit section where you could at an image from the Internet or you could
upload your own image. From here, you can edit
it in certain ways. This is how Adobe has
its generative fill. You can generate something
based on AI here and change it up based on
what Mid journey has. I personally prefer Mid journey, so this is very useful. Next, there's the
personalized section. This is where you
can personalize how your images come out. For example, there's
profiles for this one here is my profile for using a
certain version of Mid journey. So it looks at what I like. I get to choose
between these two. So if I keep choosing images, then it's going to understand
me better on what I prefer. Then next is the
organized section. This is where you can
have certain features to organize your images
and your renders. The next useful section is
actually the chat section. This is where the
community lies. You can go on the
Newbie section here and watch what people
are making can go on the daily theme and just
participate in what's going on with the daily
creations that everyone's doing. Now, what I really recommend
is the prop craft section. Some of these people here are magicians and they
are really good. If you have questions about
something that you're making and you can't seem to get it exactly what you want, you can bring your
question here, ask and see what people come up with as a possible solution. Then there's general
chaos. Just chaos. With that, you understand the different sections on
the online user interface. Now let's dive into actually creating something with
the online user interface.
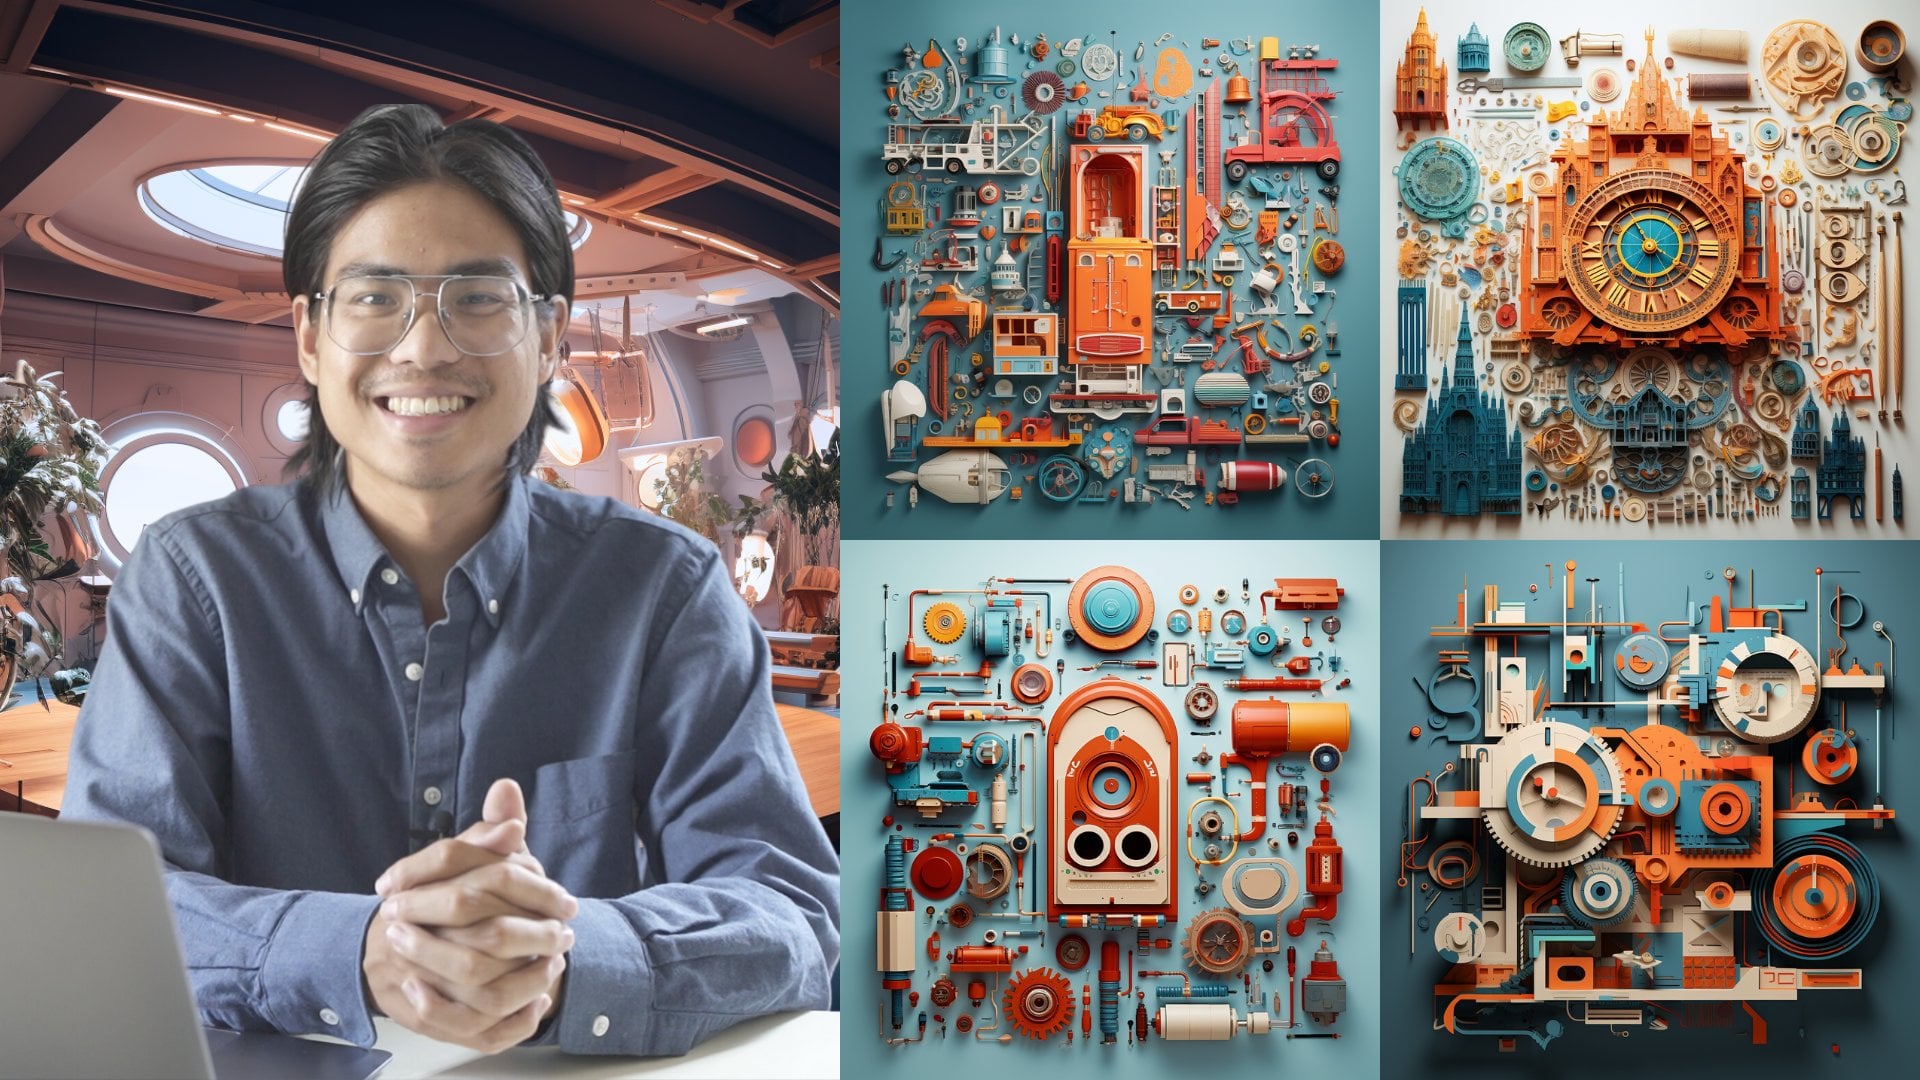
4. Midjourney Settings (Web UI): On the online interface, you have the explorer section
right here where you can explore the different
generations that other people have done, and if you want to gather the prompts on how
they made it themselves, you can click on the
image and this shows up. Of course, you could also
use this as your prompt. You can click this and it
will automatically go here. Then from there, you could
just send this, submit it, and then it will start
rendering this image prompt. It's not going to come
out exactly like this because this has its
own unique seed, but if you want something
very similar to it, you could use down here, you can see that
there's a section. You can click on Image, style, and prompts, Image, style. From there, it will
reference this image first and then it will also apply
the same style as this image. But we'll go into
this in a second. Let's first just start off with a clean slate,
delete all of this. This is where the magic happens. This is where everything begins. If you want to just
generate an image of a cap on a beach, this
is where you start. So you type that in
and you'll watch your generation come
out on the bottom here. Now, let's go and discuss
some of the settings. So of course, you're going to want to customize what
you're making, right? So when you go onto here, you can change the
settings on how your output comes out. So
let's go through this. These are the image sizes, so you can see that
there's landscape, there's square, and
there's portrait. Portrait has these different popular aspect ratios,
square or square. Landscape also has these other popular
aspect ratios as well. Movie format, for
example, 16 by nine, and then for social media, there's also nine by 16. Then moving down there's models, so you can either
have standard mode, which is essentially
using some of the pre settings based on the version that
Mid journey has. If you have it on raw, it will listen to you a bit more without having its
own creative liberties. Here you can also
change the version. So depending on what
versions you like, maybe you liked something in
Version five or Version six. Maybe they had just released
Version seven and some of your renders were not looking like how they used to
look in Version six, so you can go back to
Version six and choose that. Now Niji is also one
of their other models, which is mostly used
for anime style stuff. If you're doing anime, you
can use Niji six and moving on to the aesthetic side right here, there's
a stylization. Stylization is
essentially, how much creative liberty do you
want to give mid journey? Because as you're
creating images on AI, all of these
different platforms, these AI platforms
have their own styles. Either you let it be completely in control and
be extremely creative, you could have this at 1,000
or if you have it at zero, then it will be more
similar to what you have. For example, something general like this, cat on the beach. If you have more
stylization on it, it might come up with
something more creative than just this because the
prompt is pretty bland. But if you're trying to do
something more advanced, then it would be beneficial
to bring this down because you don't
want it to go too crazy on what you're doing. Now, weirdness also has
something similar like that where it might include things that you wouldn't
expect in there, so you could turn this all
the way up or all the way down or just have it
somewhere in between. The best way that I would
advise playing with this is to actually just play with
it and see how you like it. Personally, I generally
turn it down. Have it just very low that
way all my prompts are more exactly the way that I have it because I go very in
depth with my prompts. Then Variety is helpful in that when you
generate the images, sometimes the images
turn out very similar. For example, here, there's
a lot of variation. This is cool. But if you look
at some of these ones here, it looks very similar. If you turn on variation, then you return it
to a higher level, you might have more
variety in your images like this for you to further
build on your prompt. The final section is
the speed section. If you have the most
basic subscription plan, then you have fast. If you have the other
higher level plans, you could start using relax, which lets you generate images without taking up your minutes like the
credits that you have. But of course, it's going
to be slower and then if you want to generate
images really fast, there's
5. Midjourney Discord Interface: All right. Now I'm
going to introduce you to accessing Mid
journey on Discord. This is how people
used to do it. It's more advanced. It takes a lot more manual work, but if people are used
to doing it this way, I personally prefer
doing it on here because there's a lot more typing involved and the typing
gets me more on the flow. This is the Mid journey
Discord channel. On this channel, there will be similar things to the web UI, which is announcements up here, which is the info section. You don't really need to
look at this so much. There's also the support
section where you could go on here and
ask for questions and just familiar yourself
with the Mid journey platform. Scrolling down, you also have the chat sections just like on the web interface and
other things like feedback that you
can give originally, this is where the mid
journey community lied. It's because it all
started on discord and when they finally announced that it was going to
be on the web browser, that was a huge announcement. But the magic of this is that if you wanted
to create manually, which I'll do in a lot of
examples that you'll see, then this is the place to do it. When I say manually,
it's by going down here, typing slash Imagine, and then just typing in
your prompt from here. Right here, you can
also see there's a lot of different
functions as well. If I wanted to get
something done really quick and because I have muscle memory based on using
it so long in this platform, then personally for me,
I think this is faster. I'll introduce you to some
of the functions here. Now, of course, you can see
the frequently used section here is slash Imagine. This is where all
the magic happens. You type slash Imagine, and then that's where you
would prompt your image. And the next is prefer prefer is to have
certain settings. So if you want a certain
word to always pop up or certain aspect
ratios or parameters, I would have it here
on slash prefer. And then Describe is also
one that I use a lot, which describes whatever
image that I upload, whether it's an
image that is from the Internet on a link or an image that I had dragged
in from my computer. Next is the slash settings, and this is where you
change your settings. Now, you could already see that I don't change my
settings very often. The most important
three ones would be slash Imagine,
prefer, and describe. With all of that, you can get by with creating what
you need to create. Now, of course, there's other
things here such as blend, fast modes, changing
the modes of the speed, and we could go on
and talk about this, but it would just take
up more time where you won't really use these so
much on a day to day basis. The main thing that
I recommend is to just understand
that these are the three that you need
and you really only need just one
slash Imagine. From slash Imagine, you
would have this box pop up and then you can type
in CAT in a box, for example, then it sends
this out as you can see, I already have a prefer. I had already typed in prefer
and then something here, which something here would be this parameter right here
and then the aspect ratio. I would look
something like this. But if we wanted nothing, if we wanted to get
rid of this one, I could just go on
prefer again and then send in a empty box
and then it would say, suffix is now removed. If I were to generate this image again by doing slash Imagine, catch in a box, then those parameters
would be gone. Now this is what we get,
those parameter is gone, so the style and aspect ratio look different and
this is what we get. Now the reason why I use that so much is
because you can get certain aspect ratios
or you can have a certain style because I make a lot of posts for social media, having a aspect ratio of
nine by 16 is good to have, especially if you're
making shorts. I default to that a lot. This is the mid journey UI when you're using
it on Discord. Of course, I would
recommend using the web user interface if you are new and had just
started on Mid journey. This is more of a good
fact to know or if you prefer to do a lot
more manual typing work, like using DOS on a
computer back in the
6. Midjourney Settings (Discord): So now we're going to talk
about the midjourney Settings. I'm gonna go through
every individual setting. I'll describe it to you so
you have an understanding of what to expect as you
go into the Settings, talk about the
midjourney Settings. And you can access
that by typing in the chatbox slash Settings. And then when you type that
is Settings box will pop up. So we just have it up already. But here it is again,
in this Settings box, you have access to a lot
of these different things. So we're gonna go
through each of these and explain what it is. So you have an idea
of how to think about which one to choose when you are running Midjourney. So these, the first column, you have all the
Midjourney versions. And Midjourney versions are
basically for people who have been here for awhile
and they've been creating throughout all
the different versions. And they want to tap back into it because every
different version has a different way of
rendering the certain prompt. And when they're making
their Art, for example, I, their style is
in a certain way. They're used to making something in Midjourney version
to, for example, and what version three version for the image comes
out different and even versus five admire
be significantly different than from
Midjourney version two. Those people are
going to want to still have access to
Midjourney version two. So they would choose that. Now, as a new user, I would recommend having the
most up-to-date Midjourney because that would give you
the best high-quality renders or that would be the
most capable of creating whatever it is you're trying to create because it
understands us better. Now, Midjourney has also
released 5.1 and 5.2. We're currently on 5.2 as
I am creating this video. And 5.2 is a small
upgrade from five point 1.5 for one is a minor
upgrade from version five. Now, that shouldn't
concern you if you're new users just use
the newest one. That raw mode mode
is interesting. You don't have to do it. If you want to do it. Raw mode is when
you enter a prompt. For example, if I type
in blues, blue skies, that blue skies might
come up with blue skies or it might come up with its own creative
interpretation of it. So with Ron load on, it would be more
literal and it would be more towards the blue sky versus having Midjourney come up with something completely
random and crazy. Now, they've also included niger version four and
Nietzsche version five. And these versions are basically this way of creating more
animated style images. So if you're generating midjourney and you want
something more cartoonish, something more anime style. Nietzsche is the way to go. So you would click on those. But I prefer to create something
that's more universal, not too much animated styles. So I just don't have mine on. Now, there's stylized
versions as well. And this is basically, you can have very low where Midjourney doesn't
go super crazy or stylized very high
where a Midjourney puts its creative interpretations of what you're saying into it. And with very high, you're going to see a lot
more different variations versus on very low and public
mode is all of these renders that we're making is available to be
seen on public. If you want to go
in private mode, you need to have a very
high-paying account for it. That would be their
professional account that most people are most
people will have it on public Mote Marine
mixed mode is it lets you have the capability
of remixing your renders. I always have it on. High variation mode versus
low variation mode is, as the images are
being rendered, are they going to be a
lot different from each other or are they going
to be a bit similar? So as I like to test and see how many different variations
that my prompt has, I keep it on high variation
because from there you have the most flexibility
and you can still get what low with
variation would have. There's Turtle, turbo mode, fast mode, and relaxed mode. These are the render speeds. Turbo mode is if you want to have the
fastest runner speed, like crazy fast, fast mode is
what we typically all have. It's like regular speed, but this takes out
from your hours, like you're a fast hours. And then there's relaxed mode where this is the slowest mode, but at the same time it doesn't take out any of your time, your fast hours and reset settings is to reset
all the settings. Now in the next lecture, we're going to talk
about formula for Prompt
7. Formula for Prompts: In this section, we're
we going to learn about prompts and Midjourney. Now, Midjourney uses a language model to
understand the prompt. It understands what you're
trying to tell it to make based on a language to model.
Now, what does that mean? It means it uses
everyday speech, like how we talk to generate the images based on
what you're telling it. You can speak to it as if you're talking to
another person, which is a lot more
helpful because you can actually just speak to it normally and It'll figure out
what you're trying to say. Now, the structure of how
these prompts work is, the first part of the prompt is where you are
giving it the concept. Now, the tint and the tip that I like
to give for that is, as you are building
this concept, give it a setting, like define what is going on. The first part you would have
whatever is most important. If you are trying to make
something that's animated, maybe you have anime first. If you're trying
to have something that's focused on a cat, have the cat first, because that's the first
thing it's going to build on. It's going to build first
on the thing that you are giving it and then after
that following that, it'll be coming up with what else you are giving it as well. You first off start by
building the scene, and then after that
comes the parameters. These are parameters
such as the size, the references, the type
of systems it's using. Maybe it's using an old version a newer version of Midjourney. Basically, you're building
from giving it the scene. You're building this image out, and then finally you're
putting these parameters outside of what
you're building so that it follows these rules. Now, once you understand
that creating Midjourney images out of prompts is going to come
like second nature. Now in the next part,
we're going to talk about exactly how to create an image and I'm going to run you
through making an image based on a prompt that
I give it and actually, many prompts that I give it because you're going to
learn that mid journey sometimes take many different
prompts and editing of prompts to finally get to the image that you
want to create [MUSIC]
8. Midjourney Basic Parameters: We've got the basic instructions of how to generate an image. Now we're going to go through
these specific parameters that you can add at the
back of your prompt so that it controls and gives it a better control over what
your images turn out looking. Let's start by creating a prompt again and I'm going to do cat surfing at the beach
just to be simple. Now we'll add in the first parameter
that we talked about, which was aspect ratio. Aspect ratio, like I said, can either be wide,
square, or vertical. Back in the day with the other Midjourney
versions like Version 3, you're able to have
a wider range of different aspect ratios
but as of current, in Version 4, there is only 3 width and 2 up. 2 width, and 3 up or
1:1, which is a square. We saw already 3
width and 2, 3 by 2. Now let's make a vertical
image and make it 2 by 3. We're going to press
"Enter" and it's going to start generating a 2 by 3 image of this cat
surfing at the beach. Here we have our cat surfing at the beach images and you get to see a couple of cool
little renditions. Right here, we're
going to go and edit some of the background. Let's say you don't want
any clouds in here. Let's go and add
another parameter, which is the no parameter. We're going to imagine prompt is cat surfing at the beach and
then for this parameter, we're going to add a no. Now the no parameter let's you make sure it
doesn't have something. For this example, we're
going to have no cloud, and depends what else
you want on the image. Maybe it's no boogie board, no designs on the
surfboard or something, but we're going to have no
clouds because there are some clouds on these
images and it's an easy way for it
to just come up with a new image that shows
exactly what it does. We're going to add
no clouds and we already did the aspect
ratio so I'm just going to show you no clouds and then we're going to generate
it and see what comes up. Here is what our image
came up with and it is a bit more sandy,
it's on the beach. This one does contain
a little bit of cloud. This one doesn't,
this one doesn't, and this last one
doesn't as well. So it did follow what we said. We didn't want any clouds and we still wanted cats
surfing at the beach, so it gave us what we wanted. Now there's also another
function that we should know, which is the quality
function and quality adjusts how these images
come out looking. I'm going to show you
two different ones and then we can
compare the quality. Now, I'm going to
start with opening up prompt again and then
I'm going to type it cat surfing at the
beach and then we would do double dash and then q and that is quality
and we're going to do 0.25 and then launch it. Then we're also going
to do one that is five. Cat surfing at the
beach 5 and go. Now we have two loading
and we're going to compare the difference once
it finishes rendering. This is the first one. This is 0.25 quality, and then this is the second
one with five quality. Now you can see the
difference is that there's a lot more detail in the images. Like there are
details on the fur, the face of the cat, this cat has a reaction like an emotion to it
whereas the other one, the 0.25 quality is more of dreamlike and more
smooth in a way. Depending on what type
of image you want to do, take note of the quality
that you want to add into your prompt and to
your parameters. Now I'm going to show you
one called weight and weight is what puts emphasis on
certain parts of your prompt. Now, for example, the ones that we've been making have been cat at the beach, but maybe I want to
do an emphasis on the beach with the cat just
being part of the beach. I'm going to do a prompt
where I would imagine, now if the focus
is on the beach, let's put beach first. Beach with a cat surfing. Now the cat surfing we'll put a smaller emphasis
on a cat surfing, and then we'll put a bigger
emphasis on the beach. The way it works here
is that there is four emphasis on the beach and then there's one
emphasis on the cat. What that is, is
like the beach has four times as much
emphasis as there is cat. The thing with these
two is that I had the beach show up
first so that it understands that beach
is more important than having cat first and
your goal really is to make it as easily understandable by the
Midjourney Bot so that it can understand
what you want to do and spit out an image
that works for you. Here we have the emphasis on beach with a bit of emphasis
on cat and surfing. We're going to press "Enter" and see where this
prompt takes us. Now it shows us this prompt with a couple of interesting images that cannot really relate
to what we wanted to do. We wanted a beach scene with
a surfing cat in it and I guess having with a cat
surfing is confusing. We should rephrase this. Now, it did put weight on
the beach so as you can see, there is a lot of beach in here, but there is no
more surfing cat. We're going to go back
and do this again. We're going to do beach with a four emphasis
with surfing cat. Now surfing cat maybe
we'll give it a 1.5 and we're also going to
add the no parameter. We don't want any
humans in there. No people or no humans, so we'll put no people and we'll make sure that
everything is correct. So beach emphasis
and surfing cat. Now, let's see what we get. This is the prompt that we got. We ended up getting a couple
of interesting images. This one has a cat
holding a surfboard. This one just a cat
or dog at a beach. None of these really
have that cat that is surfing at the beach. Let's change this up a little
bit more so beach scene and then we're going
to put an emphasis on that with surfer cat. Now we want it to be as easily understood by the
AI as possible. Now we'll put an
emphasis on the cat. Then we'll also
add no people and no dogs because we want the
focus to be on the cat. Then we'll let it run again. Then here we get this scene
with a cat on a board, the scene with a person
holding a board, and a whopping cat. Now the closest
one is this cat on a board but there is
a human over there. We need to get rid of that human somehow. Why is
there a human there? We're going to go and revise this and then we're going
to make sure no people, no dogs, no humans, characters, or surfer cat
and then we're going to add only surfing cat in water. I guess we put emphasis three
on the cat this time for a 50/50 weight between
the beach scene and the cat now because I guess earlier there wasn't enough cat. Now we have a surfing cat with three in water
and only cats, no people, no humans, no characters, no dogs. Now, let's see what we got. Now we have a cool rendition. This is what it came out with. There is still some
humans on these ones. Strangely, this one is maybe
a boat in the distance. That's nice. This one is
a rock in the distance, so that makes for
the most sense. Now, this does work, but it has something weird, which is the hat. We're going to re-roll.
We're going to re-roll that one.
The second one. We'd like that one the most,
so we're going to re-roll it and see what else
we come up with. We're also just going to
throw no hats. Surfing cat. Now a cat in the
water would be nice. Beach scene with surfing cat. Now, maybe we do a dash
surfing cat in the water. Now we probably don't
need only cats, no people, no human, no hats, no characters, no dogs. Then we'll submit just
to see what we get. See sometimes it does take multiple renditions to get
to where we want to get. Well, this came out
a little weird. I don't know what's
going on here. Sometimes it does get
really weird with these renders From here, we might need to just
go back and redo it. Now we see cat surfing at the shore break and there is
an emphasis on the sandbar. So you see a bit
more sand on here. As you can see, I put some
emphasis on the sandbar, and these images
that are generated have a bit more sand
than the previous one that it came from while also showing this cat surfing,
which is what we wanted. Now this first one
is my favorite. He looks super cute. If we want, we could do some more versions of it
or we can upscale it. I think this is
already really nice. I do want a wide
version of it though, so I am going to do a variation
and I'm going to make this aspect ratio 3:2 and I'm going to submit it
and see what we come up with. As a reminder, there
is weight on sandbar, so it's prioritizing
sandbar a little bit more and adding a
sandbar to the image. As you can see, more sand here and here it is just
building up our image. Here we go. There's our
surfing cat. It's so huge. There's a cat just getting
smacked by the water. Then if we want here too, we can add some
more quality to it. We can upscale it, whatever we want with it
and it looks pretty good. I like how it came out, so I will upscale the second one and if you feel like there is
not enough quality, we're going to go back one
last time and we can add another one to this,
another parameter. This one we went
over earlier too but it is the quality parameters. I can put quality at five. Then I'm going to
submit it again and then see what we get. Right now it's working
on two different jobs. It's one, upscaling
one of our images, and it's also
generating another one. Here is our newly generated
image with quality five. This cat is getting
smacked by the water. It's getting scooped out. This one is jumping. First one is my favorite. Actually, I still do
like the ones that aren't as upscaled so much, so the ones back here
were my favorite. We've got the version
1 wide aspect ratio. These are some of the parameters that you need to keep in mind as you build your first
Midjourney prompt.
9. AI Art Generation Process (Discord UI): Let's get to the
funnest part and that is creating your AI art. Now, how are we going to start? I'm going to guide you
through the process, the thought process
that you have to go through as you're
creating your art. Now, the first thing
to keep in mind is we need to create our center of attention or main attraction. What is our main attraction? Now, through this example, I'm going to be making
my own as well. I'm going to be typing up
a prompt so you can follow along and see my thought process and work through it together
so that we can together make an amazing art prompt that comes out to be
something amazing. For our center of attention
or main attraction, we're going to start
with maybe a man in the jungle walking through
a tropical forest, waterfalls in the background. Now what you want to do here is you really want to think about what you want to create and the more
detailed, the better. Here I am doing a
man in the jungle. I'm not doing a
jungle with a man. I'm want to focus on the man in the jungle and he's walking. You have to think
about what he's doing specifically
and he's walking with waterfalls and a tropical
forest type of scene. Now you could even get more
specific that he's man in the jungle with a
hat or with goggles. You really want to imagine
this as best as you can. The more specific the better. But if it's too specific, sometimes it could
throw the AI off. It's a balance of how
specific you can get without confusing the AI and that's where the art process is. We'll continue from here. Waterfalls in the background. Small pond. Now see, this might confuse
the AI, the small pond, but let's see if it read it and does well with it. We have that. Now, the next part you
want to consider is the composition
or the viewpoint. Now, I want something
that's grandiose feelings. I'm going to write massive
scale and I'm going to add intricate details too
because I want to see lot of intricate details
in this piece of work. You also want to
think about lighting, like what type of lighting
you want this to be? Is it twilight? Is it afternoon light? Is it maybe lit by artificial
light because you're doing a scene in the city for example or city light, night light? Think about how you want
this scene to be lit. For this part, I probably
want an afternoon scene. I liked it being
in an afternoon. Afternoon and sunny just to make it less
confusing for the model. Then one of my
favorite concepts is, as you could even see here, is this animated type concept. I'm from the '90s, I was born
in '92 so I want to do a '90s animate concept because it evokes a sense of
nostalgia for me. I want to put '90s
animate a concept. Now I have the angle, I have a massive scale angle. I'll have details on what the forest street and
what the scene looks like. It's afternoon, and the art
is done in a '90s concept. Now you could even get more
in-depth and specific. Some people do that by
having maybe artists. I could have in the style of, sorry if I pronounce his name
wrong but Hayao Miyazaki, who is the person in
charge of Studio Ghibli. We could also add style
of Hayao Miyazaki comma, style of Studio Ghibli, that has these parameters or actually not parameters because we'll get to
that in a second. But these guidelines
to reference as it is creating this
art. I liked that. Then I'm going to finish this
off with the parameters of aspect ratio being 3.2 and
you don't have to add it, but it is Version 4. Now I do like this a lot. We're going to go and
make this happen. Now, I want to copy
it at all and slash, imagine the prompt pop up, and here we go. We came up with this
art and it looks nice. Let's open in
browser just to see. It's in their browser. This is what it looks like. Which one do you guys like best? Nothing with a waterfall. I do like a waterfall. Let's go with a
little reroll and see if we like anything
with the reroll. Here's our rerolls
and still does not. This one right here
has waterfalls. Not the type I like. Let's go with another reroll. Sometimes we have to do that. Anyways, this is what
the images look like. Actually feeling these
look pretty nice. The second one has waterfalls in the distance but barely see it. First one is cool. Third one is interesting. Fourth one is cool too. One thing we could
do is we could put some emphasis on the waterfall. We can copy all of
this and add dots. Imagine, I'm going to add
emphasis on the waterfalls. I'm also going to
edit this prompt. I don't need background
probably because the main subject is already man in the jungle walking
through a tropical forest. But now that I'm looking at it, I don't actually need
to write in the jungle. I could probably do
man walking through a tropical forest
with waterfalls, small pond and a massive
scale with intricate detail, afternoon and sunny and '90s animate concept
art and the style of Studio Ghibli and the
aspect ratio of 3.2. I like this. Let's
see what we get with a re-edit on our prompt. Here is the re-edit of
our prompt and cool, the second one has
the waterfall. Let's go in browser just to
take a look in more detail. This one too the first one has waterfalls in the distance. But this second one
is really cool. I actually do like
this second one a lot. When we find something
that we like, we can upscale it. The second one, I like that, so I'm going to upscale
the second one. Now, if you do want to
see some variations, you can also click on one
of the variations and then go and choose from the
variations which one you like. But I do like this
second one already, so I'm going to
upscale it and then see what we get with an upscale. We got this with our
upscale and it looks pretty good aside from the fact
that the protagonist, it looks pretty good
too, I was going to say he looks a bit
stretched out. But if you do feel he does
look a bit stretched out, we could go back and give it a another upscale
or some variations. Now, I do like how it looks, but let's make some
variations just to be safe. In this part, we
could add small man. As we just did that, our first upscale came in. We had to do it again
since it was paused and our first upscale
actually looks really good. I could definitely use
this for something. Although it doesn't
hurt to look at what our new variations did and it is not the style
that I like so much. I'm glad we did the upscale and that the upscale here
worked out really well. Now, this is amazing. This is a piece that
I declare finished. Here it is. Here's our finished
piece [MUSIC].
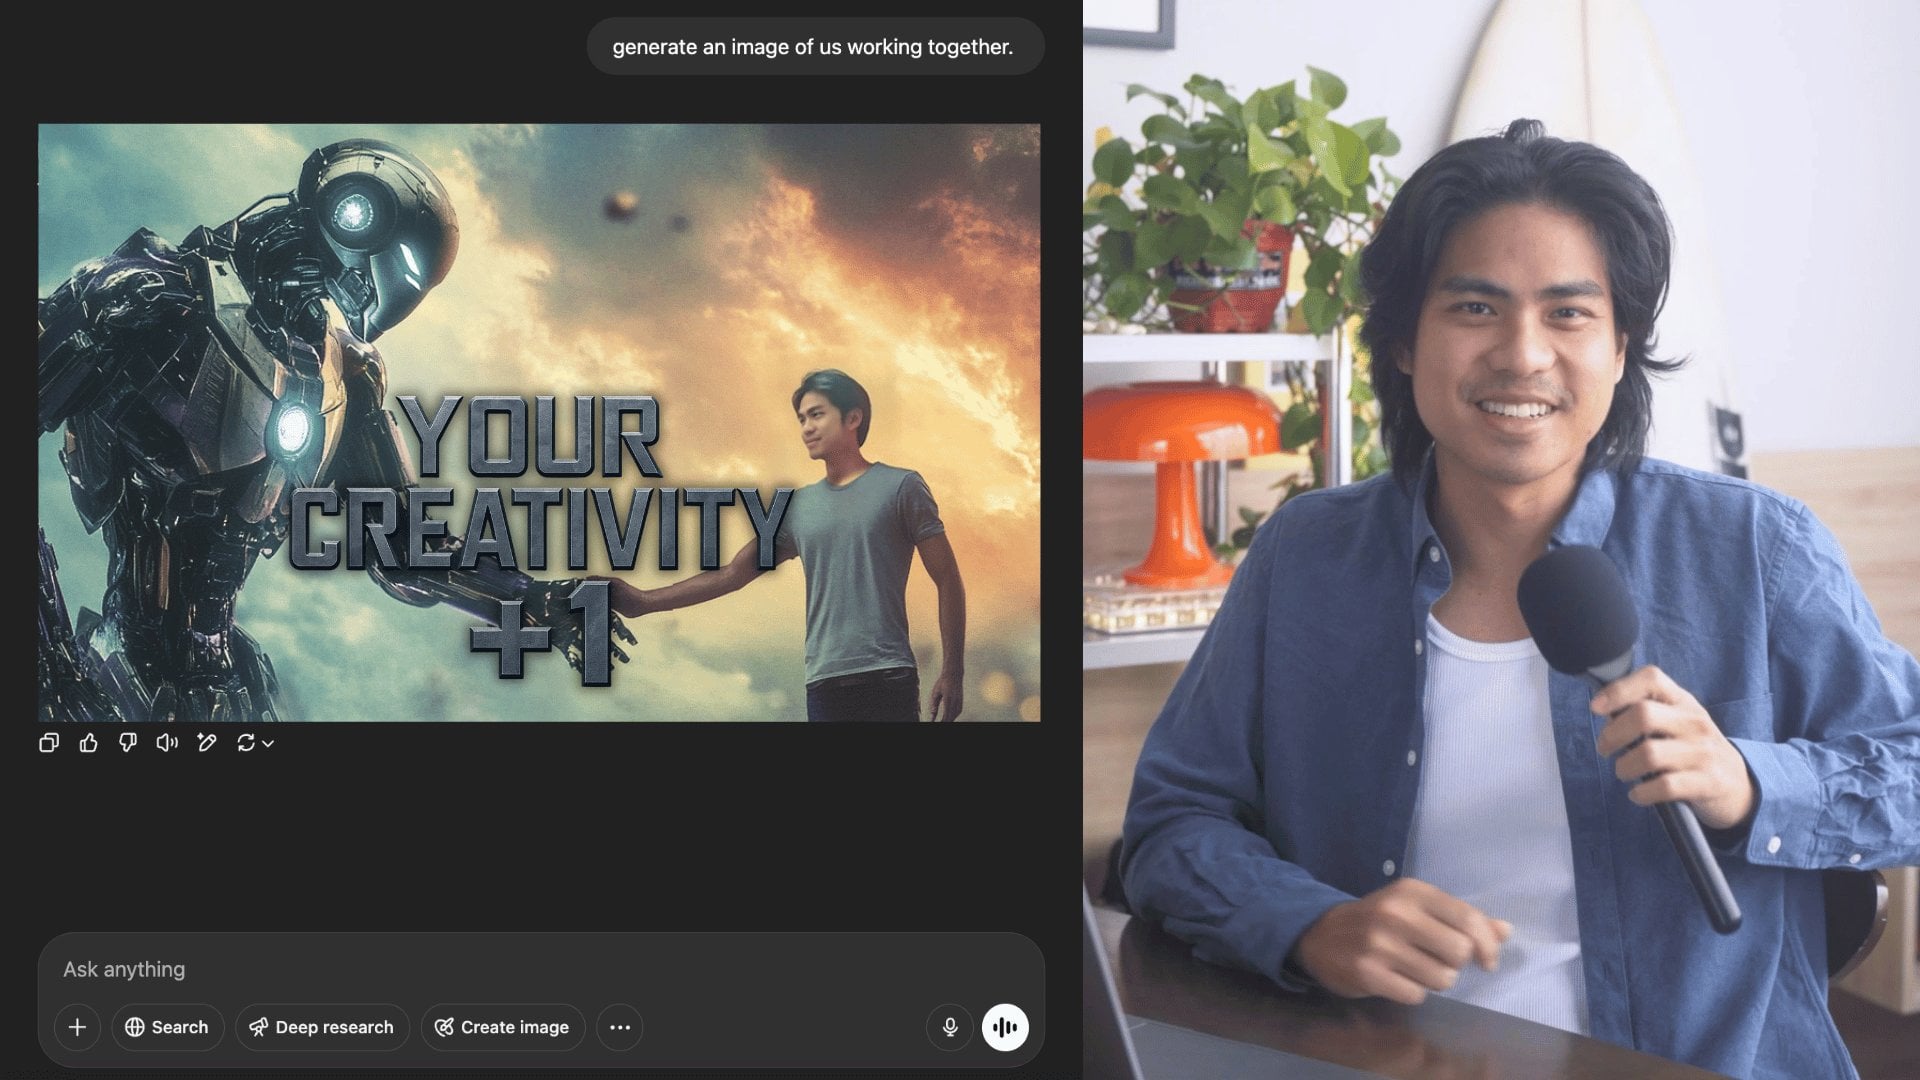
10. AI Art Generation Process (Web UI): Okay, this is one of the most
highly anticipated update that Mid journey has had for us. And this is being able to
imagine on the browser. So just the other day, mid journey announced that the mobile or the web browser
features are available. So now you can go on the
browser and you can create images with this
bar up on top here. So right now I'm on the mid
journey alpha explorer page, or mid journey Explorer page. And I can type in here to imagine whatever I would type
in previously into Discord. So here for example, I would type a cat riding a spaceship in space
with a view of Earth O, with a view of Earth right here. We also have these parameter
controls on the right. And let's go through them so you can understand what is in here. It's very similar
to what we used to have or what we
still have in Discord, except now it's a lot
more user friendly. So we'll start with the left. This is the image size. You see a couple defaults, which is portrait mode,
square, and landscape. So with portrait mode you
can do three by four, which is standard Instagram
size two by three, or nine by 16, or one by two, this
one's really vertical. And then on the other end, you could also do six by five, and this will make it landscape. And then four by
three, which is one, I typically use three by two, 60 by nine, which I also
use a lot for video edits. And then there's two to one, which if you do cinematic
stuff a lot of times is one to 2.5 So you can use
something like this for cinematic type
of generations. Now moving down there's the mode and just like with
the Discord version, you have standard or you
have raw with standard, it's going to do its own interpretation
of what you wrote down. With raw, it's more
going to listen to exactly what you wrote as
in what's in your prompt. And then on the right side with aesthetics stylization
is how much style mid journey is
going to put in it. If you have it at zero, it's not going to
go too wild and put its own interpretation
of what you said onto your generation. But if you put it
all the way up at 1,000 it's going to
go wild and crazy and have its own interpretation
of what you put in there. Now, weirdness is different. It's kind of the same, but
different Weirdness is also its own interpretation of what you're putting
into the prompt. But this is putting
its own sauce on how creative and wild
all of this gets. Now moving down,
we have variety. And variety will show up as
something different actually. But I'll mention that
in a second variety. If you have it at zero, then the images are going
to be a little bit similar. But if you have it
all the way up max, the four images
that you generate out would look very
different from each other. So you also have a couple
options here for speed, which is relaxed mode if you
have the plan that lets you have relaxed mode
and then there's fast mode and there's
turbo mode, obviously. Fast mode and turbo mode
takes up more credits. So you might finish a run
out of credits sooner. So I'm going to have a
variety of max to 100 and then I'm going to have
just stylization at 500. And I like to keep
it raw so it listens to what I write exactly.
And then weirdness. We'll keep it here at 300 just to be on the safe side of things so it
doesn't get too wild. And then we're going
to generate this, and then I'll press Enter. And then once I press Enter, it's going to show up
in the create side. Over here on the create side, you'll see the progress of the image that
you're rendering. And you'll also see here that the chaos parameter
is actually 100. Chaos is what is on
the variety side, as I mentioned earlier, variety here is at 100, it will show up as chaos
because this is what we had on the discord when
we had chaos at 100, that would give
the most variety. And here's the image that
it generated for me, a cat riding a spaceship in
space with a view of Earth. So we've got a couple
interesting cats here. They're off super different. There's like a little baby cat. I like it. These
generations are cute. As you can see, you have been
doing a lot of generation. So now let's try again and do something with a
lot of weirdness. And we'll turn the variety
down to 50 just to see if the options that we have are wild and super mixed
up and different. Or if it's kind of
50, 50 in between, like the last render we did had a lot of very different images. And then I'm also
going to change the image size just so
you can see how it turns out Square was the
default on the discord, so we would always have
to have a suffix to be a certain aspect ratio
if you wanted to change it. Otherwise you can just do it here which will
keep it at that level. So it's actually a
lot more helpful. Okay, so for this one I'm going to do something
more cinematic and I'm going to have this
aspect ratio as 235 to 100, which essentially translates
to one by 2.35 up in here. Let's generate
something that would be a cinematic scene of a cat, cinematic scene
running on Mars with a space suit shot on
cinematic camera. Okay, so let's run this
and see where we get. All right, so here's the
generations that we got and as you can see they
aren't too clear under Y. So let's just rerun this again with this
it's also similar to how we have it on our discord
where you can re run it, copy the prompt, hide it, or a couple of
other options here. So if you press Copy, you'll see that you
can copy the prompt. If you press this,
I'll copy the prompt. If you press this, it'll copy the job ID and also
this one for the seed. These are the two
things that you typically see when you would use the envelope function as you react to a
generation on discord. And you have the
envelope function, it'll send you the
job ID and Ed. And then the bottom two is
the image and image URL. And if you want to
download these images, you could also press
on more and download. Now, I thought this
generation wasn't the best, so I'm going to re run it. Okay, so this one looks better. I like this, this looks
a lot more sharp. And then here are
the other images. These are just kind
of strange looking, definitely the
weirdness kicking in. But let's go with
this first one. So we'll have a couple
different options here, which is also very similar
to Discords Mid Journey. First, you have vary. So if you want to vary this image and have
different variations, you can have a subtle
variation, a strong variation. If you want to upscale it, you could have a subtle
or a creative upscale. Typically, I would just use the subtle upscale which
doubles the image size. But if you want to add
a bit more details, then the creative upscale
is a good option. Again, you have remix if
you like, this image remix. Remix is good for
if you want to use this initial prompt and just
change it a little bit. It'll take the structure
of this and then it will change it into
whatever you add in here. It's a bit similar to vary, but you have more control over what type of remix
that you want to do. As we go down, we'll see Pan is when you want
to extend the image. If you want to extend
a top portion of it, you can press this up button. If you want to extend a
bottom portion of it, you can press this down. And then same with left
and same with right. It's very similar to zoom,
which is right under it. If you want to expand
all four corners, then you can with these two, X would double out the edges
of this image to fill in, in this example, more terrain. Then you could also
have the aspect ratio. And this is important if you
want to make your image a square because sometimes
square images are necessary. Or if you want to just change your image to a
different aspect ratio. And moving on down here we
have re run to re, run this. And very region, very region is actually one of
my favorite features because with very
region you have the ability to change
something in the image. For example, Va wanted
to change the sun into a moon or a different
object for example. Or a spaceship. Which will probably be more relevant
in this context. And so I just submitted my job to change that
into a spaceship. Now of course, this isn't always going to be 100% perfect. That's what I found
my experience to be. But they're updating and
upgrading every single day. Now, on the bottom
two, you have these three which is to
reference this image. If for example, you want to run another prompt and you
want to reference this image, you could press Image
and then el go here. It's essentially
having slash imagine and then the link to the image. Now you can also copy
the style which is like the style reference
feature which is REF. Then if you want
to copy the prop, you can press the
prompt to button here. And then the prompt
will pop up here. Now we like this
realistic style, so I pressed on style here. We'll just run something
else that's similar scene of a cinematic interior scene of cat astronaut in spaceship
shot on cinematic R camera. And let's run this. Here are
some of our other renders. Like I mentioned,
this is our remix. With the remix I put astronaut
cat and as we see here, there's more of the cat
wearing an astronaut suit. And I love this,
this is so cute. Moving up, we have also the expansion thing where we
changed the aspect ratio. So here you see that it filled
in the top and bottom and made this a vertical
video or image. So now it's nine x 16. And then here, like I said, with the very region, it doesn't always
work 100% correct. Let's try again,
and this time let's try on this right side and
have a spaceship there. So here's the one we made, copying the style, and it
also referenced that image. These are prettier, right? Except this one is bit
blurry, so I don't like that. But this one looks cool, got some potential to use this. And this one actually looks
pretty magical actually. I love to style this and how, how actually like CGI
cinematic this looks. So that's a cool
generation and as I said, the very region doesn't
work perfect all the time. And as you see here, we tried spaceship multiple times
and it hasn't come out. But sometimes you just
got to keep trying. Maybe we'll do sunglasses. I just want to show you an
example that it does work. So we submitted this job, let's see how it shows up. After a couple more tests, we finally got something. But I had to do astronaut and it completely replaced
the Cat character and gave me an astronaut, which is fine, but this
is how the future worked. So I did a very region and I selected this entire
area which was the Cat. And then I also tried to
do Cat astronaut instead, but it just gave me a lone cat. And as you scroll here, you could kind of see that
editing magic in action. So this is like more
of the original ones which we asked for sunglasses
but got this instead. And here there is not
much change at all. So definitely this feature
still needs to be worked on, but everything else
essentially is there. And that's about it for using
Mid Journey on the Web.
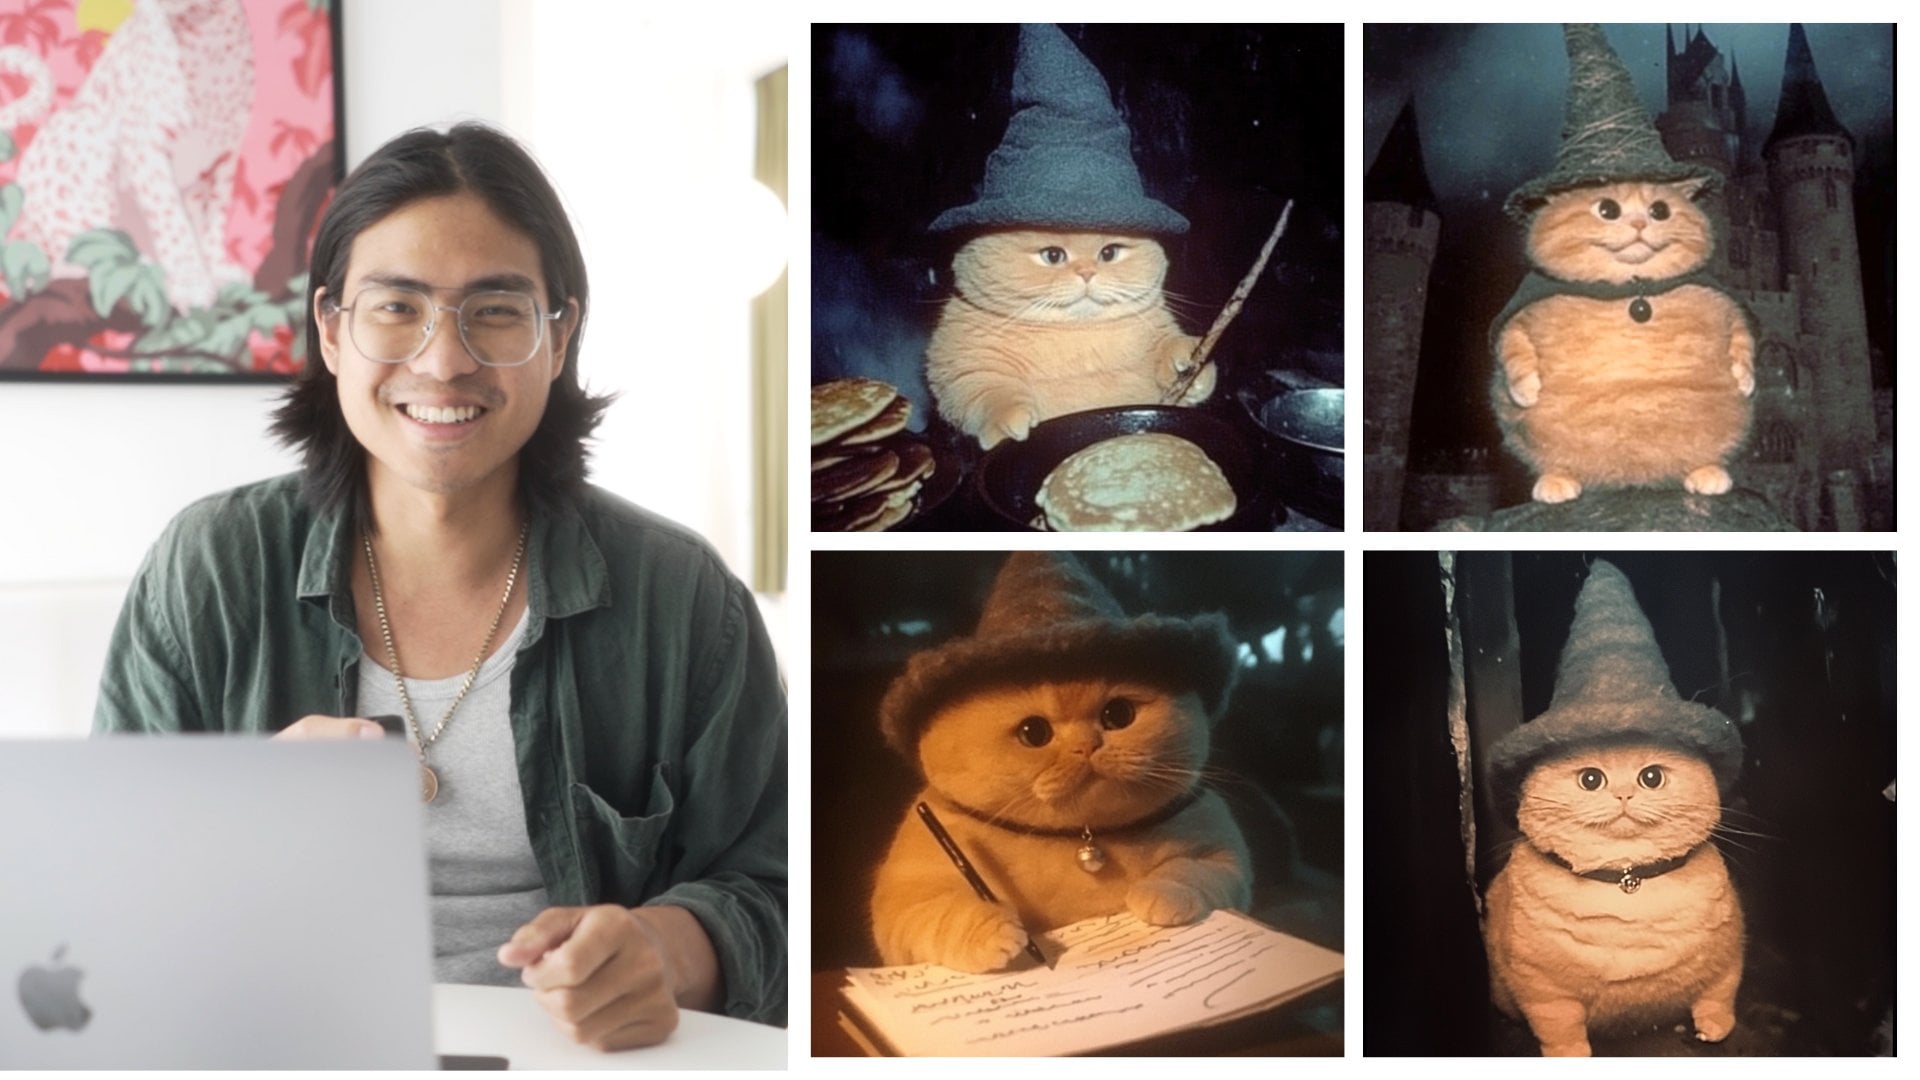
11. Examples of AI Art (Studying Prompts): In this section, I'm
going to show you the midjourney.com feed and how
to get inspiration from it. So on the feed, this is the hot new
photos at the moment. If you scroll
around, you can see different stuff that's going on. You see all these different
styles that you get, these really realistic
style like this. You could also get some very
creative stuff like this. You can also get very
painted work like these two. Full of color stuff like this. This is a beautiful
one here too. If you scroll around, you'll find many different
types of inspiration, and it shows you the capabilities
of this application. Now, cars are some of my
favorite and animate stuff, so I really like these, but the main thing
on this website that is important to note is
that with a paid membership, fortunately it is paid, you do have access to
seeing what the prompt is. For example, if we scroll down and we see
something we like, then we can go and click on the information and
look at the prompt. For example, let's
look at this one. This one is amazing because
it looks like a photo. Now, if you look at this, you can click on that
and open in a new tab, and then it'll show
you the whole photo, but also you can just click
on it and then I'll show you the different
crop that are used. Here, let's just break
down what the prompt uses. It starts off by highlighting the mustachioed
general inspecting the rank and file troops. Prussia 1900, Hasselblad photo. Now, what this
does is it centers its main subject is the
mustachioed general, and then around it is the inspecting the rank
and file troops. Then this is the Prussian
uniform and 1900s. Now, the Hasselblad part of it gives it this look and feel. This is like shooting it
out of a Hasselblad camera. The photo just makes it
seem like a photo element. So this is a very
interesting way to use mid journey to create
something like this, like a photorealistic
type of image. Now, if we scroll down, we'll see some more
fantasy type stuff, so let's go and take
a look at this one. This one's super fantastical. Just to see what they
use to build it, let's look at this prompt. Sometimes you're
going to see super long prompts like this. This is a very
interesting one for us to look at and to break down. Let me zoom out a bit so you can get an
idea of the image. First off, I'll start off
by describing this girl, the protagonist in here. It says flirtatious, frisky, anime girl in her living
room in a futuristic space. So that's the setting, space station.
That's the setting. She's at her room in a space station and she's got the
flirtatious look on her, the anime girl look. Then they start
adding rank and file, cinematic shot,
dynamic composition, perfectionalism,
ultra detailed hair, ultra detailed skin, ultra detailed eye,
and closed mouth. It's starting to go in and
add all these little details. It gives the cinematic look. You can see there's a bit
of blur in the background, a dynamic composition, so if she's posing,
not just resting. Perfectionism, this project
gives it a perfectionist look, and also detailed hair, skin and all these
facial features. It gives this very
detailed hair in here. I wouldn't be
surprised if they add detail later down in
the prop as well, although it's not mandatory, and a closed mouth. That's what the prop here did. Then there's a dress
and super hot culture and future dress for women,
high fashion makeup. It's giving this whole
look based on that. Then finally, it adds art
by Emil Memmoth, Giger, Marcin Nargaba, Rebecca Millen, and award winning realism
and close-up shots. This pulls inspiration from a couple of these
different artists and it adds the element
of award winning realism. That's why you can
see that it's real. It doesn't look
completely anime, which was the
original reference. It gives it a close-up shot-ish, but it's super close-up. This is probably
a 50 millimeter, so you could also
probably type 50 mm in there to get a similar
type of framing. Then the composition is
balanced and dynamic, futuristic soul in
the background. Now, these are more of the extra details and sometimes the majority
doesn't use them. As you can see, there's no
soul in the background, so was in part of Korea, but the composition
is pretty balanced. It has the subject
in the center. It covers about a third of it, but it also expands
to the side a little, so it does have a pretty
balanced framing. Now, the image is shot with a Canon EOS 5D Mark IV and Fujifilm Superia X-TRA 400 film. Now, this is two things
that don't really belong together because the 5D
is a digital camera, while this is film. What I take the
Midjourney took from this is that it gave
a color processing that the Canon 5D
Mark IV had and it gave also the look of the X-TRA 400 film as a color emulation based on what the 5D Mark
IV would shoot. This is what it came out with, beautiful work of art. We could also scroll
down a bit more, and let's look for
something that's cartoonish because we have been looking at all the other stuff already. Now, these are cartoonish, this is cartoonish, this is very nice little
cartoonish looking thing. Let's go in and look at this. This one has a street
wear girl with a pearl earring painting in street wear clothing in
Tokyo, raining lightly. A very simple prop, just street wear outfit. As you can see, these
pop their colorways in the street where
we're all right now. Pearl earrings might
have been implemented. It's not super obvious. Street wear clothing, yeah, this is a street where design, and in Tokyo probably
gives it this back city lighting
and light rain. This doesn't get too in depth, but we can find something they
gets more in-depth because we can that way learn more
from how things were built. Now, this is a Ninja Pikachu in watercolor art style,
very interesting one. This is also very
interesting night vast landscape award
winning concept, so let's take a look at
what they used in here. Not surprised that they use a lot of different props for it, so let's break it down. Now, the first part is they
used a night vast landscape. This is a landscape
type of photo. Setting the scene for that, award winning concept are in a highly detailed angularium
huge gothic castle in exploding seawater, stormy windy sea, huge waves, floating
lights all around. Great. So that is building
this entire scene. Nebula sky, chiaroscuro, hyper real surrealism, luminism, ultra-wide angle. Now, this is giving the framing of how
this is coming out. This is a wide
angle type of shot, and this is what's
creating for that. Then now the effect of it, ultra detailed, realistic,
ultra photorealistic, hasselblad, high-definition 64K cinematic in color grading. So now this is what's
giving it this effect, what it looks like. The ultra detailed and
photo-realistic look is giving it this drawn on, but also photo-realistic look. Now, it also adds the cinematic and
color grading aspect, which gives it this type of dark blue and teal
orange effect, they would call it or teal
and orange sometimes, which is what this look is, and then it goes
into add depth of field for realism again, film lighting, rim
lighting, intricate. This is giving it all the
different types of lighting, and it adds in some realism, maximalist detail,
very realistic. Photography by Carli Davidson, Elke Vogelsang, Holy
Roman, and warm colors. Those last few were probably
not highly referenced, but it does play an effect and
how this came out looking. So this is a beautiful
piece of work with a lot of intricate detail into
it. There you go. If you go and reference
the mid journey website, you have a lot of
different things to reference and check out and
to look at how they made it. It's super important to look
at different prompts just to show what's possible. In doing so, you can get
some inspiration yourself. They're things like this with a lot of
interesting colors. Now, this doesn't have
too much going on, so it probably did
rely on a bit of luck, but there are other very
colorful pieces that don't rely on luck and that are very much crafted in the
way that it's crafted. So, yeah, play around
on the website, see what you like, and then draw some inspiration from it. It's one of the best
resources out there. [MUSIC]
12. Replicating Art Styles (Dissecting Prompts): Now that we have some
inspiration that we just found, let's use that inspiration to create our own version
of something similar. We'll start off
with the first one, and we'll start and
imagine and then prompt, so let's go and say, an anime girl in a futuristic space station or space office or
laboratory vehicle, and then we'll add
cinematic shot and a dynamic composition. Will also add ultra
detailed hair, ultra detailed skin, ultra detailed eyes, smile, and then we'll
give her a dress. We'll maybe we'll add a
they had hot culture, which I'm not too
sure what it is, but we can add our
own style of dress, so maybe our own
futuristic will do dressed in futuristic
uniform, high fashion makeup. Then we'll do reference some of these artists
that they had, so I'm not quite sure what the three artists they
had was Emil Melmoth, and Geiger and Mason OGrabber, but we'll reference
one of themself. Would do art it by Emil Melmoth. Then we'll also add
award winning realism, so maybe that gives
a cool touch to it. Then it will go close portrait, composition is balanced
and a dynamic, futuristic Tokyo vibes, and we'll do Fujifilm
superior extra 400. That'll be like the film
colors that it had, so let's see what
it comes up with. Cool so here are what we
rendered up and we got our own anime girls are
futuristic, anime girls. Now, let's go and
upscale one of these, so I do like maybe
the second one, it's got some really cool
details within her hair. Maybe it's a uniform thing the first one is also
really cool too, me let's go with this first one. We'll upscale the first one, so we'll press U and
we'll upscale it. Then the journey
is working on it, and then it's going
to come back with an upscale version of it. We have our upscaled version. Open it in browser
just to be sure. Now this is what it
looks like. Super cool. As we're looking at it, let's talk about some of
those parts that were used, so as you notice, it referenced the
anime girl part, and I think it also referenced the Tokyo virus because
it is an Asian character. As you can see too, it's
placed in a laboratory, so it's an anime girl in a futuristic space
for laboratory. Now, it's also cinematic
shots, as you can see, it's cinematic lighting, and then the hair is detailed, skin is detailed, and eyes are detailed. Not quite as smile,
but it's okay. Sometimes it doesn't
get exactly it. We could go back and put some weight on the
smile but for now, I do like how it looks. Then dress in futuristic
uniform, high-fashion makeup, and then art by Emil Melmoth, not too sure what
she looks like, but we can look her
up just to reference, and then award winning realism. It does look pretty, it's got that
realism field to it, and then it is also
a close-up portrait, like I mentioned here, and composition is
balanced and dynamic. It does seem very dynamic. It's in a laboratory that is a fast-moving hallway
and she stationary, then futuristic Tokyo vibes and also the Fujifilm
superior color, so not exactly sure how the
superior works in there, but it does have filmish tones, which could also have gone with the Tokyo vibes or the cinematic
and dynamic composition. But I do like how this looks, I'm really happy with it. But let's move on to the other
inspiration that we have, which is a landscape type. We're going to go and imagine another prompt,
so slash imagine. Then we're going to go and write vast landscape of the ocean. Award winning concept art
highly detailed castle. Maybe should we do
an Asian castle? We could do a Japanese
castle or it's probably pagoda and then
exploding seawater. Huge waves, floating lights, nebulous guy, and these are just examples that were
taken from the inspiration. The sky stuff is going to
be pretty interesting. Then we'll do some more
hyper realism, luminism, and then will give it
the ultra-wide angle, and ultra detailed,
and photo realistic. Hasselblad is also
another cool one as well because they are
some amazing cameras. It does come up to be a
very beautiful looking type of image that will do HD, cinematic color grading
maybe, that the field. Then we'll do photo-realistic
and film lighting so that we'd get
some cool colors, and then realism, and then we'll go from there. Warm colors even.
Let's see what we get, and also let's make it a wide. Give the aspect
ratio three by two, and then let's go. We're starting to
see it generate, see the outline of everything. Looking pretty cool from
this preview so far , 93% almost done. Getting there looks
pretty awesome, excited to see what
it looks like. This is what it came out
to look like beautiful, got this pagoda looking
thing in the middle of a crazy roaring ocean. Now, my favorite one
is these first two, so let's go and upscale it
and see what we can get. Now, I do like this
lighting here, this volcanic looking lighting. The second one is the
Hasselblad film looking light, which is also beautiful, but I do like the first one, so let's upscale the first one. This first one was upscaled, and this is what it looks like. It's super realistic, beautiful, got a lot of things going on at the same time, It's
pretty amazing. Now, we'll also run it
through a remaster and a detailed upscale redo just to see what it ends
up looking like. The first one is going
to be a remaster and the second one is a
detailed upscaled redo. This is the remastered. This is what the
remaster looks like. Very cool, very artsy and no weird like fantastical away. Very beautiful. I
really like this. Then for the other one, we have this other
thrashing water has that gray texture to it. It looks like an actual
painting with real paint. Very awesome in its own
unique way as well. These were what we got
from our previews. This is what we got
from our inspiration. Hopefully you can draw some
awesome inspiration as well, and I'd love to see
what you make. [MUSIC]
13. Expanding Images (Discord): We're going to talk
about expanding our image based on what
mid journey gives us. We can add directions to it, left, right, and make
our image a lot bigger. First of all, let's start by generating an image
that we like. And it could really be as
simple as portrait of a cat. Now once we have that portrait, I'm going to show
you what it's like when we expand that image. And the expansion has many
different ways to expand. Okay, so as you see here, we have these generations
of cats, the portraits. So I'm going to pick this one right
here on the top right, because it's the only
real looking one. The rest are kind of fictional. Like Circa Cat. So yeah, let's just go
with the most real one. I'm going to upscale it, and once you upscale it, you're going to have the option
to expand this image I'm going to show you right
now, which is here. So you have the
option to zoom out, and that means it's going to build a scene around this cat. And there's a couple
different ways to zoom. You can zoom out 1.5 times, you can zoom out two times, or you can zoom out a
certain custom amount. So if zooming out
1.5 x is too much, then maybe you can do 0.5 x. Now just for example, I'm just going to
zoom out two x so you can get an idea of
what it looks like. And when it is doing this zoom, it's actually basing off of what is already
in this image. So it's going to add
onto this image as well. So it's using AI to
understand what's going on in this image and
then build on top of it. So as you're seeing here, you could see that it's built in the center and then
it's expanding outside. And as we're starting to see
this image come together, you see the legs, you know, some more
legs on these ones. A bit of a tail in the back. So it gave us like a more
of a full view of this cat. So some of it he's
standing on a box. Some of it is him just standing, you know, But now we have legs. And that was built,
that was built off of the one portrait that
we have of just a face. So my favorite one here is
also the top right, this one. It's the most realistic. But let's go back into our expansion section,
which is right here. And then explore the
other options as well. So as we're here, you also see these arrows. So what does these arrows mean? Well, what it means is you
can expand that image. But instead of expanding
out like we just did here, you know how it was at first
just a portion of the cat, but it expanded on the top. It expanded on the
left and right side and it expanded on the bottom. Now if we use just this arrow, it would only expand down
that certain direction. So if I press down, and then it gives me this
pen with the new propped. So you can add what
you want here. I would just do furry paws and then it will expand into
some furry paws down here. Now you could also add whatever customization
that you want for it, but for example, then
we're just going to use something simple just so you can get an idea of what it's
going to look like. Okay, so as we can see, it generated some paws. Now these look nuts. Like these are kind
of unrealistic. The first two are
very unrealistic. The bottom two are
also, you know, this one looks all right, but the bottom right one
looks very unrealistic. So if I were to choose
one of these photos, I would upscale the third one. And then I would have
this one with the cat, the portrait that we had earlier with his expanded
paw on the bottom. And so at this point, I have this one done
and if you want, you can also zoom out on this. And then there's also
the neat function to just make it a square if you want to make
it into a square to post somewhere online. Since sometimes it could
get very complicated. Say for example, you had
zoomed down a couple times. If you're making like a scene
where it's like a building, a very tall skyscraper
or something, you might have zoomed up or
down many different times. For this example, we
only zoomed down, but depends on the situation
that you're using it for. So as you can see here, since we use the
make square option, it's building out
this image to become a square because there's relatively not much
information on the sides. It didn't build much
on the outsides, but if you were doing
a very busy scene, it would also build
on top of that scene. So it will look at what's around and then it
would add on top to the sides and have something that is fitting to
what you already have. So here's our cat, and he's looking really cute. So just to summarize
this section, you learned about how to do expansions in your up
scales on mid journey.
14. How to Upscale Images: Now in this section,
we're going to talk about how to Upscale an image. So what we have to do
is first go on Discord. Alright, let's talk about
upscaling on discord. Now, we have this image here, these four that we
have just rendered. And you have the option of U1, U2, U3 for now, what this is, is when you click
on one of those, it would correspond to the image here and then
make it a higher-quality. Now these images aren't
exactly high-quality yet. It's just a preview
for you to see and understand what
was just rendered. But for you to pick one and
want it to be high-quality, you have to Upscale it. Now, the first image on the
top-left is the number one, the top right, this number two. The bottom left is number three, and the bottom right
is number four. So say for example, we want to Upscale the bottom left one will press
Upscale three. And then as that's happening, you press that this
is going to pop up and your Upscale is going
to pop up right afterwards. And then you have this image. This is a lot
higher quality than if you had just downloaded
straight from this. Okay, So after you Upscale it, you have these extra
options as well. I'm going to explain
it as well so you can understand
what's going on. Now, you have two options here, very, where you can
change this image up. It's gonna be kinda similar, but it's got to change up a lot, which is very strong. Or you can vary it again and
have it be subtle changes. Now, Midjourney has had
some exciting updates. And these are some of the most
exciting update features. The zooms right here, which makes it a
certain zoom tool out, is to zoom out of this scene. I'll just zoom out so you
can see what's happening. But when you press that,
it's going to zoom out and build on
top of this scene. So it's going to add to
the different edges. So the sides and the top and bottom and it's going to bring this image out. So this would have use cases
wherever you want to make an ad and you want to put
some text on this image, you could, because you
have extra room to now. Then these arrows, these arrows correspond to increasing a side. So if you want to increase more, like build out more
to the left side, you would press the left arrow. If you want to build
out more to the top, you would press the up arrow. If you want to build
out more on the bottom. Like if you want to add
his legs and his hands, you would press the
bottom button here. Or if you wanted to build
out on the right and just add more detail over here, then you can press
the right side one. Now with this one, we just zoomed out and you
can see that it's showing more of the door on the sides and a little bit more
of the tree here. That will give it
a few more seconds and this has got
to finish loading. So this is where we got. And it's added a lot more
different details on the sides. And you can choose whichever
one you want to Upscale. Now, let's look at it and
I'll show you some things. Now the hands aren't
always going to be perfect right here. So you have to look around
and phi the best ones. Midjourney is still developing. This one looks
like the best one. So if I were to keep
one, I would use this. But it does help
sometimes to go into a different software and then do the edits on there
just to clean it up, like Photoshop, for example. Now, that's all you need
to know about upscaling and the different functions
in the Upscale section. Now, I just mentioned these two, but the Custom Zoom is if
you want to do zoom out 1.7, you would enter it in
Custom Zoom right here. And then with make square, this would make
this into a square. And that's it. Up next is our conclusion.
15. Conclusion: Welcome to the final
lecture of this course. Before we get started though, make sure you post your project
into the project gallery. That way I can help you out
by looking and giving you feedback on your work,
and also congratulations. We went through three
important concepts, the first one is how to set up Midjourney and navigate
around the platform. You should have a
clear understanding of the settings and how to use the basic
functionalities of the program. Two, we went through looking at inspiration and learning from others how to use their prompts
in our own work as well. That way we can take
inspiration from everywhere and use it in something that
we want to create. Then finally, the
most important part, we learned about how to write prompts,
prompt engineering, and as a quick summary for you, writing a prompt involves
having your main image, building the scene around it, and then you add in
your parameters. The key big takeaway
from all of these, is that you should
have learned how to craft an image using Midjourney. This will give you a significant
leg up against everyone else that is only just learning Midjourney and creating
random images. You have the power now to create images exactly like how
your mind imagines them. Again, congratulations on
finishing the course and remember to submit your project in the project gallery [MUSIC]
 Arnold Trinh, Multi-Disciplinary Creative