Transcripts
1. Course Intro- Digital Notetaking using MS OneNote like a pro: If you are a student
and still making notes using simple old-school
pen and paper, then this course is going to
be a life changer for you. This one course is
going to take you from old-school
paper-based note-taking towards digital note-taking
using Microsoft OneNote. Using Microsoft OneNote,
you can handwrite notes or type it up
using your left off. There are so many ways, but this is going to transform
the way you learn things, the way you memorize. And there are so many
small trips and tricks for exam focus studies and note-taking that I'm going to discuss in this one
course right here. Some people try to jot down
every single thing that is being discussed in
earlier lectures into their note-taking. But I will teach you
how to make sure your notes are
customized towards acing your exam and learning
the content which is most important and
relevant to the course. We all strive to be
the perfect student and make those perfect notes. And in this course we will
learn using Microsoft OneNote. How can you have the notes that will help you ace your exams? Welcome to my Skillshare
course on how to take digital notes using
Microsoft OneNote. My name is Sam from
teachers contests. And by end of this course, I will make sure that you learn, number one, how to
get started with Microsoft OneNote,
how to download it, and what are various
features and options available in Microsoft
OneNote number two, how to print lectures
in Microsoft OneNote, so you go completely paper free. Number three, how
to use OneNote on iPad as well as on
laptops and MacBooks. Number four would be
taking notes during the lecture using Microsoft
OneNote of course. And after lecture, how can you
define those notes and use a modified called loose
technique to take your notes. Number 5, we will go over an amazing technique
of mind-mapping, creating flowcharts and creating tables using Microsoft
per node so that you are notes are even more summarized
and up to the mark and number six is going
to be learning about audio recording feature. How can you record
lectures and sink the lecture recording
with your notes so that later you can come back to those notes and see, okay, what the structure
was talking about when I jotted down
this particular node, all these features
make Microsoft OneNote and amazing and versatile
tool for note-taking, which you will learn right
here in this course. So why we it Let's learn digital note-taking
using Microsoft OneNote. Welcome to this course, and I'm looking forward to see
you in the next video.
2. Download, Install, and getting started with OneNote: The first video is
going to be an acme of Microsoft OneNote in which
we are going to see what are the different structures and features that are offered
in Microsoft OneNote. I'm not going to sell you Microsoft OneNote because
of anything special. Many note-taking apps have
the similar kind of features. It's just that Microsoft
is more versatile. I feel that
universities, schools, and colleges are using
Microsoft platform and so many other reasons. That is why I think that Microsoft were known as
amazing as a note-taking app. So let's just dive into how
the Microsoft OneNote looks. A quick Google search
on Microsoft note. And this is the option. If you live in the
United States, you will click this one. I live in Canada, I would go
to the Canada English one. And if you are in India, of course you would click
India or any other country. This is where you would
find Microsoft OneNote, how to sign up for it. To start with. It's going to be free for you. And once you get
into university or in any higher secondary
education program, then you can use your, the program provided
by your school, which will give you
like 200 gigabytes or terabytes storage
anyways, and if not, then if you use it wisely, then you can actually keep your stories always limited
to five gigabytes clear. I see that how you
organize your notes, how you can use a pen
or Apple pencil to annotate on the
Microsoft OneNote or draw things or write
in your handwriting. And you can also share and
collaborate with other people. Multiple people can use the same Microsoft
OneNote so that you can create documents or nodes as
a team and you can organize, you can create tags
which are amazing. Tags are an option when you feel that this thing
is number b's. This thing is fact-based. This thing is something
that you have to memorize. This thing is something that
you want to come back to, or this thing is
a tricky concept that every time you
struggled with it, all those different types
of tags you can create, you can customize them, and then you can
put it on the node so that once you
review it later, you would just go through a quick summary
from the tag only. Also, you can cross-reference different things across
the disciplines. If you have, like
few different horses or few different disciplines, then you can cross-reference
them using the tags. Ink is amazing. You can draw things honestly. In some time, I have
been weaning off from using ink with my Apple
iPad as well as pencil. I've been trying, I've been
doing less and less of it. It says that my use of
Microsoft OneNote with my laptop or with my
MacBook has been so more, more efficient in some way and really don't
need so much of ink. Because when you type something
it's more searchable. When you write something, your handwriting mean
compromise with it. So when the lecture is going on, if you were in habit of taking
notes with your pencil, then that's an excellent way of being engaged
with the lecture, as well as making sure that what the
instructor is saying, you're jotting it down. And it's a very active process
where it keeps you a week. You do not news off
during the lecture. And it also helps you to, later on in the post
lecture note taking part, you can actually transcribe
all those nodes into, into proper text format
using the typing keyboard. The more you get
worse with typing and writing down things and creating tables and creating flowcharts, then you would
actually move away from writing notes are
handwritten notes eventually. But that comes leader in this, in this course or in
this video series. Then you can also record videos as well as audios
into your OneNote, you can clip an EV YouTube
video that you find. For example, there
was a question, there is a slide from
your instructor. Then you can also put a
video next to it from YouTube which help you
understand this concept better. So that next time it's
in your notebook, like if you had a
physical notebook, Would you be able to
associate that note with a with a YouTube video or with certain
kind of video link? No, right? So that is a wonderful option that one node gives you
that right there into your notebook you would
have a video of blog post and in clipping from
another article and the Wikipedia link, all those things can
be associate again be raised right in front of you
in that one notebook peach. So how cool is that? Also, you can clip
and save one of the most active process which I use during online lecture
this clip and see I avoid, avoid printing out
my PowerPoints ahead of the time because that's not an active
process for me. If it's already there, then
probably I would snooze off where I'll be
distracted for some reason. But what I do is I clip and see when a clip, I
take a clip short, I take a screenshot of this lecture slide and I
paste it in my OneNote. Sometimes instructors
annotate on their PowerPoint slide while
they are giving the lecture, they would draw a
new diagram which suddenly boom, oh,
that's amazing. I want that you would take a
screenshot of your screen. Or if it's on a whiteboard
in front of you, then you can actually
take a picture and transfer it right there to
your Microsoft OneNote. If you're using
iPad, you can just click on the camera
button, insert camera, and it will take
that screenshot from the white board straight
into your Microsoft OneNote. If it's too complicated to draw or if it's gonna take
you a long time. And this is a good idea. And you can share your
notes and notebook, you can export it in PDF format. There is a lot,
lot more to offer. The cool thing is OneNote
runs across your devices. You can use it on
your cell phone to browse like when you
are somewhere away, then you can use
your cell phone as your notebook and start reading
through your cell phone. Is it works on iPad, on Microsoft Surface and
Microsoft devices, of course, any Android or iOS device, you would not see a
download button here. So I always know that
Microsoft is sneaky this way. They want you to buy
the Microsoft Office, which we don't have to. So what I do is I write, download OneNote here on
my Google search and boom, right here, this is the
place where you can download Microsoft OneNote on your
Mac or your PC for free. Okay, so you'll click
the Download button, you'll save it, and I'll
see you in the next bucket.
3. Creating notebook and sections in OneNote: Once you download your
Microsoft OneNote, you can open it. And this is how our
random panel of Microsoft OneNote will look
like, mine is completely full. You will see I have
tons of notebooks. I have a notebook
for my DDS year, fall term, then I
have a DDS here, DDS second year, then I have a notebook for the NDEB AFK exam, which is the exam I gave. And then I have one
for winter term. Then there is my personal
one personal note book in which I have like
everything that I do. I would have my taxations, my YouTube video Concepts, my courses on Udemy,
on Skillshare, whichever I create,
and my website, my tax in other confidential
documents as well. I keep everything in my
OneNote and I can even lock this notebook
so that only I can access it and nobody
else can access it. So it is amazing like your ideas can be right here whenever
you're thinking of, okay, right now my
mind is running. I want to create a new idea. This is a perfect place
where you can start writing things and
you know, just, just get your ideas out on
the paper and you will, you will find it
as an amazing tool which helps you put down things. Get you into practice of journaling or
writing things down, or typing things down at one place so that you
can review it in future. So that's all about
my notebooks. I wanted to show
you from stretch how to create a notebook here. So this new notebook, it's going to be a
notebook like this. Only. Just imagine this kind
of notebook which will have different sections. For example, I'm in dentistry, I have over 28 courses. I'm going to have 28
different tabs right here, just like you see
these different tabs, I'm going to have 28
taps or 28 sections, I would call it under
my one notebook. So for each year, say I'm DDS year three now, So for DDS year three, I would have one notebook for the entire year or at least one notebook
for the entire term. Whenever I have a final exam, I want to complete
that notebook, call it done, and move
on to a new notebook. So thinking this way
when you are planning to keep one notebook for
everything in your life. If you are working than your work notebook would
be completely different. In which you might want to
jot down meeting notes. You might want to
write down your, your ideas or any formulas or anything that
you use very often. But when we're talking
about studies, you want to keep one notebook
for one term or one year. I hope, I hope I'm clear there. So let's get into it. So my first notebook, let's try it here. I
have three options. I can open one of
my old notebooks or I can create a new
notebook right here. When you see the new icon, I'll click this new icon. I can pick, pick any color. So which color do
you like the most? Like, I like blue. So I'm going to grab the blue one and I'm going to give
it a name right now. My name is going to be digital Notetaking. That should be one word,
notetaking, of course. And that's going to be my notebook for digital
note-taking course. So, so I have a few options where I want
to save this notebook. Either it can be on Cloud or
it can be on my desktop It again, depends on what
kind of user space you have. If you have a lot of space on your laptop or on your MacBook, then you might
want to save it on your desktop so that
it's easily accessible. But if you want to
save it on your Cloud, lake iCloud or
Microsoft Office Cloud. If you have Microsoft
Office account from school or personally, if you have any other
kind of storage, you can save it there too. I'm going to keep it right
here in my OneDrive, which is my Cloud
Storage for Microsoft. And here I go, Create,
boom, boom, boom. It's creating the
notebook for us. This notebook has like this
is going to be one notebook. So as I said, this is
represented right here, one load book with a course on digital note-taking
on Skillshare, as you see right there. Now these different tabs
that you see on it, these sections divide my notebook
into different sections. The first section for ....... and
the second section for........ And what's the
third section for? Same way, I have
these sections here. So my first section, if I'm studying dentistry or
dentistry student, I wanted to rename it so I right-click on
it and rename option pops up and maybe I'll
call it endodontics. And that's going to
be my first section. What would be my second section? So I can just right-click
here and say new section. And that could be
operative dentistry. My another section
could be oral surgery. Next one could be
oral pathology. Now, if I have this kind of setup where these two courses
belong to one section, or if I wanted to
keep another section, one section for winter dome and one section for fall term, then I can create a
new section group. That group would be called
Winter Term Courses. And in, under those courses, I can keep oral surgery
well pathology. So this is my fall term . course, this is going to
be my Winter Term course. I can drop down and I can open my courses under
fall term courses, I might want to create
another subgroup. So if I'm creating a subgroup, then I would click
on the course. And I would create a subgroup right under
there, like this. That subgroup is going to be under the Winter Term Courses. So maybe I can call
it a quiz material. And that's going
to be a subgroup. And under that quiz material, I might add a new
section which will be, let say questions
from Professor. So those questions,
like maybe he gave us some question and that can
be a subsection under it. While the main sections
are the courses, again, just throwing random ideas, you would know what would be
the utility from your end. I'm just giving you
random ideas, how I can, how we can organize the
sections in Microsoft One note, I hope this
part was clear for you. How to create section, how to add a new section, and how to group
sections together so that you are more organized and things had it easy and
very neat and clean way. I just close a drop-down menu and I don't see
anything anymore. I just see fall term courses
in Winter Term Courses. If I never want to click
the fall term courses, I can just keep this drop-down menu open and I'm reviewing those
courses only. Alternatively, if your
courses are huge, like in dentistry, I
had a lot of resources. I do not want to slow
down my one section. So if I show you my
notebook right here, you would see that I
have different notebooks for winter term
and for fall term. Dds 2 this is the fall term. This is dds 2 winter term. So that's another way you can create two different notebooks, or you can create different
sections under the notebook. Just imagine a notebook
like this one and make it according to how you would create a notebook
for your courses. I hope this was helpful. Let's see you next section
when we create a page and learn about different
features of Microsoft OneNote.
4. Adding new pages to notebook section : Alright, so we know what
are the different sections, this part, this tab is clear. Then we will go to the next part which is Lakes for example, I'm in endodontics right now. Today is my first lecture. So you will see that there is always a timestamp under it. If it is Thursday, December 23rd at
08:00 PM and B are attending a lecture that this is going to show me
that date already. So always start just a day
before or on the D a new page. And that's how you would know
that HDD is which lecture. And you would see that
these pages can be arranged in the
order of chronology. So it's going to
help you further. For example, today
is my first lecture. So I'm going to write
Lecture 1 here. And maybe I knew the topic that it is
going to be introduction to endodontics and that's how
I would start my lecture. This is going to
be a clean canvas. Now different people prefer
it in different ways. Some people like it plain white, while other people might
want it to look like some rule pages like old school that you wanted to see how
a notebook would look like. And if you are going to
jot down your notes, this might be very
filing for typing. It might work perfect.
Even for typing. I think this has, this is way too thin. I would have to reduce
my phone considerably. So there's 16 right now, so I can go to 12 and then I, I feel like if I am
using 12 or maybe 11 is a more standard format
for typing this page. Setup. Looks good. So if I want to jot down
notes with my hand with an Apple pencil and iPad or on an Android tablet
and a stylus, then I would want to have
bigger size rule papers. For example, this one. You can see that now the rule
is much bigger, much wider. So a lot of space
for you to draw. Some people use OneNote for graphing purpose,
mathematic purpose. There are so many
different applications. Different engineering
students or any other program students might want to use it
in different ways. So you can have all
those options under, under the View area where
you find the paper style, there are again,
different colors option. I will discuss later in detail, but this is how you
will create a peach in Microsoft OneNote
under each section and for each lecture, you can have another page. I never feel shy to add
pages again and again. Some people put
Lecture 2 bar point there and right
off the that they would put a handout,
which I never do. I would say if it was Lecture 2 and then
I have to find out, then I would create a new
page for that handout. So there everything
is separate and I can just see from a
quick look right here, this tab can make I have this
option to expand the bar. And I can see that lecture
when into the endodontics lecture two and lecture to
end handout is right here. So once I click it, I
can point the handout. I hope that was easy.
The next step is to know how to import a PowerPoint, a PDF, or Keynote, or any Word document
or any kind of document into your
Microsoft OneNote, because that's something
you're going to do every time before
you lectures, before you assassin or
two steady anything. So see you in the next video.
5. Insert / Print lecture ppt, pdf, or handout to OneNote : Welcome back. Let's look at the fall term courses offered
food industry, for example, today is my first lecture school and I'm going to take my
first time digital node. So I will click on this height navigation
button that you see on the very left corner. If you click it, all
the navigation is gone. If you click it again, all the navigation opens. There are certain settings, how you can actually make
sure what you want to see. Do you want to see
the notebook section every time you want
to see the section? Every time Do you want us to
the page index every time? If not, you can
always close them. Just under that is a search
feature which is amazing, but we will talk
about that leader. And below that is what are the recent nodes
that you have taken? For example, if you
just don't remember, if we're Did you print that certain document
or where did you jot down that
little note of yours? Then this reset
button will help you big time because
eventually you are going to have a lot of notes and pieces
under your sections. So it's not easy to
find something that you just jot down
randomly of Vk ago. It's a good way
when you can just see through the recent notes. Way below here is your
Microsoft detail. Nothing much fancy. And right now we're
going to jump into importing my PowerPoint slide. So I'm gonna go to my Finder
and I'll see for example, this is my Dehaze D, D is 3 fall courses. And every time I
open Brightspace, we are given a lecture slide. You know how it works
these days after COVID, specially all the lecture slides are posted somewhere in Cloud. It can be Google Classroom, it can be Brightspace, it can be Blackboard. There are so many different
platforms available rate. So wherever your notes Are, you would go straight
into your notes. And for example, this one is going to
be operative industry. We do not have exactly
operative dentistry this year. So I'm going to quickly change my plan and I'm going to make
it into a general medicine. So I just remember we don't
have operative industry, so I'm going to
add a new section. So I'm just going to
create, add new section. And this new section is
going to be known as general Madison and
general medicine. This is going to be my
lecture in general medicine. So I will hide the
navigation again. I will go into
finder for example, I have downloaded certain
lecture notes right here, the first PowerPoint slide, which is introduction to, introduction to
digital medicine. Then I will hold this. I have two options. Either I drag this file and
leave it on my notebook. And it will give me
these options that how can insert the files. Or my other option
is go up here, press insert command
is insert a file. Now when I see insert a
file and for example, I go back into my DDS three, and I go back to a
general medicine, which we were going
to insert earlier. And this is going to
be my first lecture. So if I insert a file this way, if I click on this file
and I want to insert it, it will ask me these
options again. Do you want to upload this
file as a OneDrive link only? If it's a link only then I do not want this file to
lie in my OneNote, this will take x's
storage away from me. I just want that file to
be there for reference. I do not want every content of that file right
here in this section. So there will be
options for that. For example, that
reference text. If you have reference textbook, you do not want to print a, print an entire textbook
into your notebook. You wouldn't do that, right? If you have a notebook
for your school during want your textbook to
be in that notebook. You only want your briefly
take notes, right? So in the same way, if there is a text or if
there is an offense article, you do not want that
entire article here, then you will just
keep it as a link. I hope that's clear. The next option is
insert as an attachment. Now if I click this one, insert as an attachment, then this file is going
to just stay there and lie there as a file only
when I double-click on it, it will open up as a PDF. But I don't want that. It's already in my
computer as a PDF. I do not want that
as a PDF here. Rather, woops. Rather, I want this file
to be printed here. This is my notebook. This is where I'm going to take notes and I'm going to read it. So once again, I go into either insert file or I can
also insert as a printout. Then directly, I would be able to print this
file on the speech. Well, I'm going to
use insert print out to print this
file right here. Now you would see
something interesting. If it's a PowerPoint file, then it's going to be converted into PDF first automatically, and that it's going
to be printed because I want the format to be seat, and there are a few
options to do that. So now you see this entire file has been printed right here, and you would see that I do have my original PowerPoint file as a reference in case I want to
change something in there. And I also have a
convert a PDF file that Microsoft OneNote did
for me, which is also there. And this PDF is
what's present here. Similarly, for an
in Keynote file, you would first convert
it to PDF before you print a Microsoft OneNote. So you would see if you print this kind of
PowerPoint slide, then you cannot
select the text here. It's not possible
to select the text here because it is printed. It's like, just like the
black and white printer. It has printed this
entire thing here. Okay, so once you have
printed this file, now it is ready for you to use. In the same way you can print any Word document
and in Keynote file, PDF document, or any pictures, any, any clip arts. So I hope this was clear
for you how to transfer files and print them into
your OneNote book page. In the next part, I'm going
to show you how I would take notes on iPad to start with. In the next video, I'm going
to show you how you can take your notes using this
iPad and Apple pencil. Or if you have any
other Android tablet or Microsoft's our face and the
stylus that comes with it. And how can you actively take
notes during the lecture? And how can you define it later? If you do not have an iPad
and if you do not have a tablet and stylus
or Apple Pencil, no need to worry. I rarely use these distinct
anymore because I have been I have avoided my
note-taking in a way that I do not need any other
device except my laptop. So I will also show you how you can actively take notes in a very efficient and
very pretty creative way and very, very decent notes. Using your MacBook only. You do not need this, you do not need that
handwritten note that much, but that, let's save it
for the further videos. Right now let's dive
into how to use iPad and an Apple pencil to take notes on Microsoft OneNote
during the lecture.
6. Quick overview of many OneNote features : Let's quickly go over
all of their features of Microsoft OneNote for
the sake of completion. If I click on the
Home button there is Cut Copy Paste
button right here. You can change forms
and do all kind of settings using this
option right here. If this is going to be
my heading implants, then I can choose if it's
going to be my first header. My second header, if somebody is into writing
books or writing long papers and you want some headings and subheadings
ends a third headings, other interruptions
and text format. So this is going
to be a very good important thing for
you when you can find the formatting of your
choice in a quick function, there are many keyboard
shortcuts for it. And lastly, these
tags are amazing. I did not include this tag yet, but if you want to learn
more about these texts, go to my course on how to
prepare for competitive exam, where I have used these tags exhaustively while preparing
for my competetive exam. I have this to-do list, then I have these important, this is a question that it is going to be
an exam question. So I always keep
this as a question. So these are all
my personal tags. Then my next one is remember four liter that it's
going to be useful reference when I go
to the next year or into the patient
or into the clinics. This is definitions. I want to know what all definitions I
have remembered so far. These are mnemonics. Every time I create
a new mnemonic, I give them a tag so
that towards the end, I just want to search
all the mnemonics I can, I can look at all my tags and I'll be able to review
the mnemonics only. This is for numbers. Here you can create a new tag. You can delete a tag
and you can find out what tanks are
used in this notebook. This is a fresh notebook
that we created, so there are no tags here, but you can see what tanks you
have used in this notebook and just get somebody off all the numbers
that you remember, all the mnemonics
that you created and you want to just review
them real quick. Tags is an amazing feature
in the home section. And then in Insert option, there is something for
those who are shedding met, there is an option for
creating equations, and this is at Stamford
data date and time. Here is again, audio recording, Meeting Details and
stickers. If you need any. Data are all the
options for drawing. And this is option to view. You can open a new window
and you can compare or review those two windows
side-by-side if you've wanted, then this is to
switch background between night vision
and division. This is an immersive
Reader, as I said, it will just help
you read the texts, but it just excludes
all the formatting and all kinds of pictures
from your thing. So I'm not a big fan, but I like it because
somebody reads for you, then there is deleted nodes. If you have deleted something, this is Zoom option. Sometimes you want
to see something, maybe you are way too zoomed in and you wanted to bring
it to the piece with you click this and it will
bring you to the piece with this is my favorite
password protection. As I said, I keep
my text documents and all other information, all of the records
contents here as well, so I can protect my content by creating a password for it. Here is paper color. Here is paper design lake up, like graph paper
or other things. Here are other authors. If I'm collaborating
with somebody, I can always add a new author
or share it with somebody. And many accessibility features.
7. Using ipad and pencil to take handwritten notes during lecture on OneNote: Describe our iPad and get
started with OneNote. If I click on this one
note option right here, Here's my digital
note-taking course that I was talking about. So you can see that this is
going to be the lecture one. Whenever I were to
type something, then I would always click this last icon right here
next to the Settings icon. So I will show you quickly
what settings I can have, but this is going to be
my full screen option, and this is going to be my
show navigation option. Navigation, full-screen,
full-screen navigation. Easy peasy. All right, let's jump
into it. Take notes. For example, I went to
start here and I would, I have all these
options in the top. The first one is
undo redo button. So if I draw something, I can quickly say undo and redo those things right here,
the regular bonds. This is text options. So if I click here, I might start seeing a virtual
keyboard on my keyboard, on my iPad, in which I can type something right away
if I don't want to draw. Then later I have
this selection tool. Now this selection
tool can select any area that I'm working on. How is it useful? I'm going to show you
quickly in a few seconds. Next is insert. This is going to be my favorite, favorite tool right here, because every time I
want to draw subtle, jot down some notes, I'm going to insert
some space right here. And my question could
be, Course Director. The feeling of writing with this Apple pencil on
an iPad is amazing. Just so you know, it's as good as writing on pen and paper. People keep saying that
it's not the same feeling, like you are wrong. You have to stop being so Fauci and just accept that this
is amazing technology. Okay? So for example, I just wrote down Corps
Director here and you just learned how
did I create a space? Now I will go back to this selection tool
and for example, I just do not want to
keep director here. I later decided that
I wanted to keep director under the course so
I can drag them like this. And if I hold the corner, I can minimize this content and I can keep it right here so that next to it I can
write dr. Record, whoever my instructor is. So that was a quick way to show you how I can move
things around. And here's an eraser. So if I don't want
this information here, I can just get rid of it. These are different kind of pen options that I have available. If I hold the thing there
with my pencil like this, then I can move this, this menu all the way across. And here you will see I have more options for pen
or highlighters. Highlighters are amazing. You can just highlight that. Okay, this thing
is very important. Highlighted. This thing is very important for
me. Highlight it. This is the most useless thing
that is going to help you. It's never good to highlight things in your notes because
whatever you highlight, what was your question like? Are you highlighting it
because it's important or highlighting because it's
something that you forget. Whatever it is.
Highlighting does not help you remember
that information. It's a myth that
if I highlight it, I would remember it. So that's just a
personal tort or if there is some research
behind it for short, It's up to you if
you take it or not. So I don't use
highlighters at all. I love using pencils. And you can see that right now I'm using a
black background, but in my MacBook I showed you, I was showing you in
a white background because I just use this kind of features
on iPad that I always keep everything
in the black background, in the dark,
immersive background. So I use red as a neutral color because red works great on
black as well as white. So I take all my notes with red. But if you'd like to
change something, if you want your pen
to be more taker or thinner than these are
the points you create. So this is going to
be the normal one. This is going to
be a ticker one. And this is going
to be already 1001. So you get appreciate
the difference, whichever feels more
comfortable to you, and you can pick
your favorite color, whichever gives
you a good feeling off writing notes,
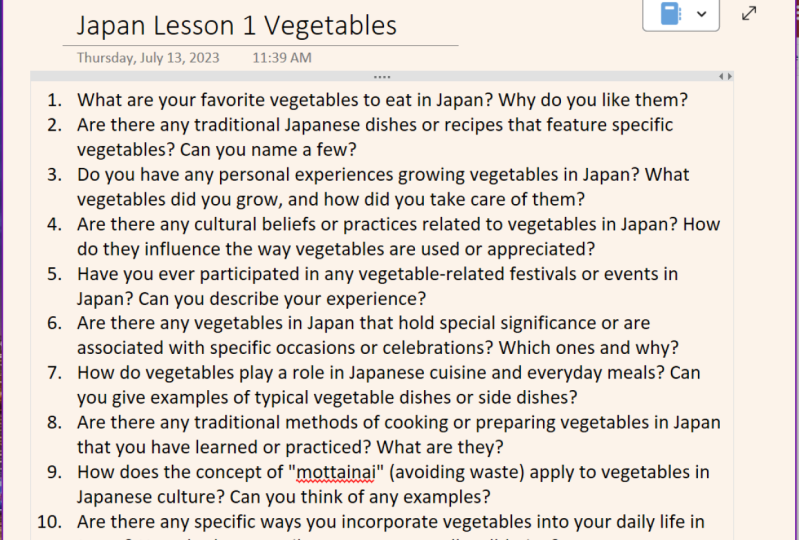
and there we go. So one thing that I do all the time is active note-taking. There is a corner technique. I will give you a little bit
more information about it. But the colon techniques
is that every question or every topic has to be associated
with certain questions. And in this world, we
need to make sure that we are memorizing only
relevant information. We do not want to remember information which is not
going to be asked in exams. If tax not important enough, then I do not need to occupy certain part of my brain to store
that information. So what I'll try to
do is we've tried to write down questions
for each of my slide. So let me just scroll
down here and find out certain thing which
might be asked here. Histories, allergies, including details off
reported allergy, 10 percent patients self-report, 90 percents are not. Okay. I just picked
a random line. But this gives me an
option that okay, there are certain people who report allergies
uncertain do not. So I might get a wrong
information from a patient. What is the question that
my examiner will ask me? The question will be, how often would you see
patients with true allergies? And the answer to
that would be 10% That's a cool question. That's how I create
questions with every slide. And now I want to write
down that question. So how do I do that? I go into the Insert space
option up here again. You can see it's highlighted. That means it's working. And then I would create
some space right here. Insert and I would create space. So you lake. We're scrolling down this slide. Before I go to this
part, this slide, I want to ask myself
this question before I reveal the slide to me, I want to ask my question. 10 percent only self-report
their allergies, 80 to 90 percent never report or self-report
their allergy. So that's an amazing
question for me, that 80 to 90 percent people
do not self-report allergic. So I just created the
space as I showed you. And now I'm going to type
my question for write down my question using
my notebook right here, that how many patients
self-report their allergies? And that's it. That's
going to be my question. And now when I'm trying to
scroll down this notebook, now when I'm trying to scroll down this notebook like this, I would stop by at this
attractive looking color, how many patients
self-report their allergies? And before I see the slide, I need to answer this to myself or say that I don't
know this answer. And then I would see okay, 10 percent, that's great. And I move on. If I see multiple
multiple questions that can be created from this one slide that I'm going to use all the space available. And I'm going to ask
that question to myself. So for example,
one to 10 percent have reaction like
rash or vomiting, and only 0.004% to 0.015% habit true type one hypersensitivity reaction
or the two type of allergy? That's another question
that I want to ask myself. So once again, I'll create
some more space right here. So you can see I just
created an extra space. I need little bit more. So I have created
some more space here. So I have sufficient
space available now. And then I'll go back to
my question and maybe I will just draw a line here
to separate this question. And then I would say how
many have a true allergy? Just to keep it
simple to myself, I can also write how many have hypersensitive reaction type
two hypersensitivity action on duty reported allergy. But that's how I would create questions for every
single slide. So let's go to next one. If I see here, gather information
about the systems, cardiac system, okay,
these are normal things. Vital signs, how vital
signs include pulse, respiratory rate, blood
pressure, SPO2 when temperature. So I need to ask myself what all are included
in vital signs. I should memorize it
information really well. I would create another
question right here. And my question is going to be, what are the five vital signs? That's how I would
review any lecture. This is the way when I
would actively asked myself a concept because if I keep scrolling down
like this, okay. Pulse, okay, pulse, okay. There's sometimes
we don't even pay attention to half of the
texts in the next slide. So this way, once we
create questions for it, we are actively
learning something.
8. More features and options with ipad or any tablet: Alright, let's review some
more features often not. You can always
draw diagrams here or you can create any
kind of pictures. Sometimes you want to go into this Insert option and you want to click on this
online Picture option. And then you want to
say that I wish that at this place I knew what SPO2 is. Then you would
just type SP 0, 2. And you will search and
you'll see what you can find. You will find a pulse
oximeter right there. Then you will say,
I want to insert this pulse oximeter right here. So that next time
when I see what SPOs do is I would I would look at this pulse
oximeter right here. If it's too big, make it small. And then maybe you
want to give yourself a reminder that it's
measuring SPO2, not SP CO2, because that can be a trick question
that the instructor might put SPC or two and
options, not SPO2. So you can see how you can
insert pictures right here. And there are other
options including Lake, if you want to insert a picture
from your camera and you think that sort of information is going to
be very useful for you. Then you can say that, for example, I was looking
at the whiteboard. Then I'll take a picture
of the white board. And I will insert that picture right here next to this not. So these are a few
options that are available when you're
using iPad or tablet, and writing and
typing and drawing. Everything is pretty, pretty
amazing when you do it here. Right now, I don't
want this guy, so my friend, How
about you go away? So I will just click
on this thing and I'll say delete and it's gone. If you go to the View option, you can switch the
background to white color. As I said, I use the red, red color specially
because red stays equally vibrant on
the black background as it is on the
white background. So it helps me big times
I can still see my notes. Sometimes people use white
color on the black background. And when they switch
the background and they can never see
their white notes. Immersive reason reader
is an amazing option, but it only works when
the text is readable. So, so at this point, the Microsoft
OneNote is going to try and read all the
text available in your, in your entire notebook. But it's never to organize,
but give it a try. It's a very good technology
and like I have some ADHD, so it always helps
me when I'm able to focus on what I'm
reading right now. So that's another feature
that you can explore. You can always go for
different people's styles. So right here, I will switch the background to show
you different styles. So you can use the graph paper, you can use broad lines, you can use more broad lens, you can use narrow lines or you can keep it
as a blank sheet. So these are all
different options that are available to you. And you can also change
the color of the paper. Probably a little bit pinkish, probably a little bit bluish, probably a little teal
color to it, whatever. Use to you, that can be the color of your
page right here. I hope this was a quick and
nice review on how to use iPad as well as your Apple pencil men taking
notes on Microsoft, OneNote. But as I said, it's
not going to be super important that you have
this iPad and Apple Pencil. A laptop or a MacBook
can work equally, equally better without
any handwriting device. Let's see in the next
video how you can make notes in a very interactively
only using laptop.
9. Using Macbook / laptop with OneNote for expert notetaking : Welcome back to this part. Let's see. The same thing that we were learning
earlier using the iPad. We can also do the same thing while we're using only laptop. I didn't want to write
all these things with my pencil and iPad. Maybe it's honestly,
it slows me down. So let's see if I want to
review this slide right here, my lectures going on. And they say there
are three main ideas. Critique pulse,
which is scattered, brachial artery, carotid
artery, and radial artery. This is an excellent
exam question. I'm pretty sure my
insert is going to ask me. So what would I do? I will go into draw and here is the insert space I can that I just showed
you on the iPad. You leave it wherever you
feel is the perfect place. Click on your mouse, sped. Drag it down. How much you feel is going to be enough to write
their question. And here you go, you can type
your question right here. My question, if I want to draw, I can still draw
using my trackpad, but that would be horrible. That would be of no use. So I'm simply going to
type my question that how many areas are
there to take pulse? What are those areas? So that I don't even
remember anything about it, but I should be able to answer this question before I
move to the next part. So when we scroll down, we always see the
question first, how many years are the
critic pulse mindset astray, what are those areas? I would say those
are three arteries, carotid arteries, brachial
arteries and radial arteries. And that's how I
would even be able to remember this information rather than just skimming through it. Same way, if I want to do
some research right here, then I'll say, okay, now I know that this is
how the pulses measured, but I won't kind of picture
which talks about polls. So I would go into Insert, then I would click picture, and then depends where I
want the picture from. Do I want a picture
from my file somewhere, or do I want the
picture from internet? But now this is a difference
between using iPad and using using the laptop. That you cannot just take a
picture from the white board. Like it would be
really tedious for you to move your laptop towards the whiteboard
and try to print a focus so it's not
even going to work. So they don't even give
you an option that you can take a screenshot
of the whiteboard. Rather, if you have an iPhone
and you have a Mac book, then you can transfer the pictures here in some
way and stuff like that. But the quick way to
do it is for example, I want to find out, okay, this is how
we measure pulse. And I just want to find out
a quick diagram for pulse. So I would just write
pause and I will go into images and maybe this image clicks me or this one
clicks me that okay, That's a perfect
image which shows how they are taking pulse. I like this picture, so I have an option of
pressing Command Shift N for, and I will take a screenshot by holding the Control
button right here. And once I take this screenshot, I can paste it right here. And that's going to be next
with Apollo's options. Like if it, if it
helps my notes, whatever helps my
note be right here. And often I'm watching
any YouTube video. And I'm watching the video on Paul's Measure and techniques. And like for example, I go here and I like the
slide that was shown by them. I think carotid pulse. Okay, That's a perfect place. Then I go again Command Shift 4. And I hold the Control button and I take a screenshot
of that area, is maybe I can paste
it right here, just if that helps my notes. So that's this
feature available to your desktop version of note. Other than that, there
is also an option of inserting any link that
you think is important. But as I said earlier, you can also insert the
entire YouTube video. For example, I'm watching
this video right here. I want to insert
this video here. This video is maybe next time when I'm trying
to learn about Paul's, I would go back to this video
and I'll see how it works. Hi, Today we're talking about C. This video is going to be
right here next to my notes. And anytime I'm reviewing
my notes, I'm like, okay, I don't think my instructor
explained this very well. And I remember that I'll use this video to learn
that certain concepts. So I'm going to review that
YouTube video right now. So that is a very
lifesaver if you have a lot of
content to memorize, that's about the Insert option. There is also a
very cool feature which is audio recording.
10. Sync Audio recording of lecture with notes using OneNote: There is also a
very cool feature which is audio recording. For example, I will
click here and I will click audio recording to show you the lecture is going on. My instructor is talking. I will start typing notes. Here. I am typing my notes now. Here is another important point that my instructor mentioned. When I would stop
this recording. Now next time I'm going to come here and I would see,
okay, respiration. What did I type as Min
nodes right there. Then I will see this
little Play option. You can see display
option right here. I'll zoom it in so that
you can see it clearly. So next respiration
here is a play option. And when I play this, I am typing mind loads. Now, I am typing my loads now. Example, it was a long lecture. For example, you, there were, there was one hour lecture, but you can still
just hover over this little point
and know that, okay, at this point, when I said, here's another important point, what did my lecture
actually see? Air is another important point that my constructor I mentioned. So at that's how I would stop. That's how you use this
audio recording option into your Microsoft OneNote. It is, It is amazing. It does not work very well
in a classroom setting because the audio is not to create and you would
hear a lot of echo, you would hear yours and
everybody else is typing or other kind of
conversation voices. But when you are
in online lecture, I would highly
encourage you to use this option as exhaustively as possible in online lectures. So when you are in online
lecture, to do that, you can go into settings and
you can switch your settings to listen to the system rather than listen to
your external microphone. And that's how you
can actually record the lecture given
by the instructor. It works great when you
are in an online setting. So when you lecture is
going home via Zoom or via Google Classroom or via Brightspace calibrate
or any such feature, then this is an amazing feature. But if you are in classroom, then there might
be some issues in the audio quality of
your note-taking. But anyways, it's a good way. Caution one that asks your
instructor for permission, that you are going to
record it on one note. And number two is you don't have to if you're not going to
share it with somebody else, if it's only for
your personal thing. I never went ahead
and asked permission from someone that can record it, but I make sure that my notes are kept in a very confidential. We only I'm going to listen
to those audio recording and only related to that
particular text format. So that's how I do it. I hope this feature is
something that you might use in your lectures and
this can help you make. The next part is going to be Cornell techniques
of note-taking.
11. Modified Cornell technique for expert-level note taking : Welcome to this part. If you stayed so long, I'm pretty sure that you
enjoyed this course so far. If you did, please do
not remember to give me a five-star rating and
share it with one friend. At least there's a link below. If you share it using
the link below, then I get a small percentage, like $5 or $10 of incentive. And that helps me to make
more of this kind of content. It's absolutely free
for you if you have Skillshare subscription or you can cancel the
subscription at anytime. But if you share this
link with a friend who want to learn how to do
digital note-taking, then it would help me and financially helped
me to keep gone. Creating this kind of
course is further. All right, So what is called
technique of note-taking in Cornell technique
order to explain that notes can be taken in
this following way. So it's meant for
while sitting in the lecture room and absolutely meant for
handwritten notes, naught for time
nodes or something. So they say that in your notebook tried to
create this kind of section, 30% section and then a
70 percent sections. The top bar is going to be the topic of the day or what
topic are you working on? And the bottom seven
lines are going to be summary of the topic
that you learn. Paraphrase it in,
paraphrase it in your own words and just see that what did
you learn today? The notes, the active nodes are taken in this 70 percent part, and in the left part, which is 30 percent
part, is the Q. The Q is equal to question. Just how I showed you, I write the question on the
top of every slide corner, want you to lie right on, left off every page. But CB are not dealing with
clean notebooks anymore. These, these notebooks, these clean phases, they are gone. So we don't have these pages and these notebooks anymore we're dealing with is a PowerPoint or a lecture slide
or a PDF handout, or some kind of
document in which we are studying certain topic, a certain, a lot of texts
and lot of content from it. So we need to follow Sam's modification of
Cornell technique, just how I showed
you earlier that you are going to create
a question for you. This is going to be
your cue, which is, which will be answered
by the nodes that your instructor provided you or you have written down that, okay, It's SPO2 and
not SPC or two. And here's a little diagram
to understand this better, but that's exactly what we
do in Cornell technique. Now the only thing that we are not able to do very well as summarized this content
and write a topic. So the topic is what we have in the top of the
piece right here. This is going to be Lecture 1, Introduction to history and history taking and physical examination or whatever it is. But we are not going
to summarize this. Like we are not going to
keep a title on the top and a summary in
the bottom anymore. That's why it's a modification. Every single slide
is a question. Every single point given in the lecture is a
possible question. So we need to memorize all the content given
by our instructors. The East that exam or is the course that we
are into right now. So that's why Sam's
modification technique will be super-helpful for you
and give it a try. Let me know what kind
of effect you felt. And I hope, I hope this
is very fruitful for you. Many people still typed
down every single thing, transcribe the entire
lecture which is happening, which is not productive, which is not efficient. It does not help you
retain anything. Rather than that, listen to
what the lecturer is saying. Look at the slide and think about a question
that will be asked in the exam or it can be asked in a Weibo that why are you
learning this certain thing? And to answer that, you would always have this
question was his answer. Honestly, when I gave my exam, half of the questions that
showed up in the example per were what I created because there cannot be a new question
and this is the content. These are the questions
that they will ask us. So I would really ask
you to give a try to Sam's modification or
corner technique and let me know in the comments below
how it worked out for you. I'll see you in the
next part we are. I'll give you a little
bit more in detail on how to create questions. The Art of question creation.
12. Art of creating questions - My fav exam preparation tip: Another thing that
I will teach you is an art of creating questions. So it's not an easy thing
to create a question. You need to think very analytically when you are trying to create
certain question. To create question, you
need to know what kind of format your exam is going to be. So when you are trying
to learn something, there has to be two
things given to you. First is a learning outcome. What are you going to learn
from all this, this here. So according to me, what the lecture title suggests
that I should be learning all the important
things about history taking and physical
exam of a patient. You, it could be
certain different thing in any kind of discipline. So that's going to be
my learning outcome. I'm going to learn how to take history and how it would
work physical exam in that I'm going to do a patient assessment,
risk assessment. I would look at the
cardiovascular diseases, respiratory diseases, and gastrointestinal
disease of the patient, other systemic disorders or any other conditions
that I should remember. I should know down in
my history and try to treatment plan based on that. So that's going to be my first thing, my learning outcome. My second thing is what is
going to be my assessment? That is only motivation. We have very few
offers have this, this desire to learn new
things every single day. I know for the first few
lecture you feel excited. After that. You are like, Oh, what do I learn? Ot is going to be 200 slides
today in one lecture. So that's like but then uni, or motivation to
memorize that stuff, to learn that stuff, to
remember it for the long term. What is that incentive? What is that motivation
is the exam. You need to clear the exam that instructor is
going to assess you. They are going to
test you and you had to perform
good on that test. So that's the only
motivation for you to make sure that
you are performing and you're learning
and you are actively absorbing the content
and the information. And you will be able to
retrieve it and present it to the somebody
went asked given time, whether it's in the exam or whether it's in the
real life scenario. If you know what kind of format
your exam is going to be, that's going to solve
the problem for you. If the exam is going to be
a multiple choice question, like our exam mostly on
multiple choice question. The reason is the boards,
the National Board, that national dental
examination board is a multiple-choice exam. There is ascii, there are
different formats to it, but overall, it's a question. And so multiple
options and I have to click either one correct option or multiple connect options. And then if I click the
incorrect option than I, there is a point gone, like there is a negative
marking them as well. So I cannot answer in correctly. I have to make sure
that I answered correctly or do
not answer at all. So those are different
options available to me. Maybe your answer
is a short exams. There's short answer question. Maybe you are also
long answer question. Maybe there are more
fill in the blanks. Maybe there are more
true and false. Whatever it is you have no what kind of exam
you are preparing for and create questions
for that particular format. Actively, keep on creating questions for that
particular format. For example, I'll come
back to the same example, the phi vital signs that
we check, our pulse, respiratory rate, blood
pressure, SPO2, and temperature. What are the five vital signs? A simple question I created and I should be able
to answer this. But if the question is a
multi-select question, then it's on me how I can
create a question like this, for example, I can say What are. So I can actually say which of the following is
not a vital sign. This is the most common way of assessing what the student
know or what they do know. Give them what is there and asked them which of the
following is not in there. That's the best way. That's
the best griddle creation or something of
question asking me. So I will give myself options. I will say first one
is going to be pulse. I'll say second option is
going to be temperature, just to be, just to keep it
separate from here and there. Third option is going to
be blood sugar, right? Fourth option is
going to be SP, CO2. Fifth option is going
to be respiratory rate. Six option is going to be,
alright, five options. Now, which of these
are not a vital sign? So Paltz is given right here, temperature is given right here. Blood sugar is not here. So that's incorrect. Sp CO2 is not here. That's incorrect. Respiratory rate is here. So that's correct. So the
two incorrect answers are, so here I would just click a few space so that I
don't eat my answer. And the answer is C and D. This is how I keep these notes so
that when I scroll down here I see what are
the five vital signs. And here I can quickly
look at the question. I tried to answer those
questions before I scroll down further and look
at the final answer. So this is how we create
question out of nowhere. You can try to create,
fill in the blanks. You can create true or false and so many
different options, whichever type of assessment your instructor is
going to ask you. So remember this art of reading question because Well,
as soon as you do that, you are pour fuel levels
above everyone else around you because you are not just learning the information, you're asking yourself
a critical question and answering that question. So I hope this part was clear. The last two lectures I will
need to be super amazing. First one is going to be on
mind-map and flowcharts, how they can help you summarize a big complex information in
a very, very singular way. And the second one
is going to be on creating tables and
comparing different things. So that the more
tables you create, the smaller amount
of content you have to study and have to memorize. And it's just more
efficient that way. Let's review the last two
lectures of this course.
13. Mastering Mindmap and flowchart to summarize notes : All right, So welcome to this
part when I show you how to create a mindmap
and flowcharts. Also, one thing that we
do is a decision tree in dentistry and medicine and nursing and all other
health care fees. When we have to know that if this does, this is happening, what kind of decision
and men coming to, or how can I see my decision-making from
a bird's-eye view? So to do that, this is just an example
right here on the screen, how we do analysis
of any lesions or will that be seen in the mouth if it is on the
surface of mucosa. And if it's white in color, then we think it's
either epithelial thickening or its surface
debris is audits. Epithelial if it's
surveys diabetes, then it's candidiasis
or burns and so on. If it's white lesion, then I would see what kind of lesion it is externally
pithy little thickening. Is it surveys or is
it's epithelial? And based on that, I would
see if it's candidiasis or if it's a scar off for
this granuloma, whatever it is, there are different ways that I can
write this information. I can just listed in bullet
points or I can keep it very systematic and
more visual like this. I will show you how can
you create something like this using
Microsoft OneNote. I'm going to scroll on the left. And let's start from here. I'm going to say that there
are two types of note-taking. So here is my first bullet. Different types of note-taking. So what I did is I went
into the insert or draw sine and there
are multiple options. So when I'm on keyboard, it's easy for me that
I'm just going to use the Insert option. And I have all these shapes available right here
in front of me. Then these are all the
shapes that I can see. And pretty much you can do anything with
all these sheets. So let's look here. This is going to
be my first arrow, and I'm going to
draw this arrow like this right here. Note-taking. How many types of
note-taking are there? So I will create
another line like this. Another arrow here,
another arrow right here. And I will see there are
two types of note-taking, so I'll pick a text
here, digital paper. To make it look prettier. I would actually insert maybe squared again just to make sure that
this looks nice. And then insert another
square right here, like this. So that's going to be note-taking,
digital, paper-based. Then I want to see in
digital note-taking, What are my options? Then I would say there are multiple options
available OF US. Option right here is going
to be Microsoft OneNote. What is going to be
my second option? Then I'll click
another arrow and I'll say my another
option is going to be, let's call it Evernote. What's my third option? If I what's my third option? So I can click, put another arrow right here, and I can see my third option is notion and so
on and so forth. So this is how I can create a map of different
things that I'm working on. Or I can create a flowchart that after one step
one, step two. Step two, step three happens. How I create a flowchart
sometimes is by patient enters the operatory. What happens next is you take this arrow and you downward, and then you write
the next thing, OR gate and walking. Just to know that how
the patient is walking. After that, you will click another and then
you will go down. And you will say, then perform
overall physical exam. If you want to make
it look broader, here that goes, and
so on and so forth. You can create a flowchart and
maybe after physical exam, you have two options. So either you can do a step one, call, you can do step two. So depends on what you have. So that's how on
Microsoft OneNote I can create these
flowcharts or mind-map, but you are using iPad again, it's a very good way of just
putting all the information, all the thing that you
load into this one place. So for example, I would say note taking and I will
create a bubble on it. It's pretty easy that I can actually create
arrows with my leg. Draw the arrows
down and I'll save. There is one which is digital and one which is paper based, and so on and so forth. So you can create
mindmaps like this. There is also an app called Miro mind-mapping app,
which is amazing. Again, it helps you big tanks, but depends how far you
are in certain thing. I would not want to use Miro unless I'm doing
a mind-mapping, something like
this decision tree that you see on the
screen right here. Because this is quite a
complex decision tree. And for that I would
actually use Miro so that I can play
around much more. But for simple nodes like Lake tried to
summarize your notes, I think this is a
pretty good option. So I hope you I hope this mind-mapping and
flow charting option is pretty clear to you because I would want you
to use it exhaustively. In the next, in the last video, I'm going to talk about how to compare things in
a table format.
14. Create Tables to compare notes on multiple topics on OneNote: So in this part, I
will show you how I compare different things
to meet down proper notes, notes in a way that
it is more organized. It is more easy and
understandable, especially when we're
comparing different things. So this is our lecture on
implant dentistry right here, where I have to compare between a narrow diameter
implant, a mini implant. And then there is also a ceramic implant that is short implant and there
is white implant. And I wanted to know, okay, there is a lot of
points given for it. I can see that they
all have some number, like with the respect to
their diameter or length. And then I want to know what
are the different features. So this is how I would
create a comparison for these different type of for these different
types of subjects. In order to make sure
that I have a table in which I can clearly see
this at data information. So a quick way to do that
is by inserting a table. So here on the top I
have Insert option, and then this is the
first option right here. Insert a table, then I would think how many things
I'm comparing. So I need the first column
to be four features. And then first column
is for features, then I need a column
for narrow diameter. I need a column for the implant, ceramic implant, short
implant and white implant. So and then I would
give myself like five to seven
columns right here. So that's how my
table is created. I know I'm going to write a lot, so I've made it wide enough, and then I will leave the
first column as it is. And then the next column
I'm going to write narrow diameter or just narrow diarrhea
then many implant. Then I would write
ceramic implied. And I would write short implant. And lastly, wide
diameter implant. And now whatever we want
to compare them on. So each feature has to be written on this
left column so that I know that I am
comparing them in a very systematic manner. For example, size
of the implant, then I'll say narrow
one is less than, or a user sign less less
than 3.5 millimeter, then a mini implant is again
less than three millimeter. Then a ceramic implant
is made of say, Konya. So I don't have to worry about size than a short
implant is made up. It's short, so the
length is going to be less than eight millimeter. And then a wide
diameter implant, the name says
itself, it's wider, so it has to be greater than
five millimeter in diameter. So then I would go with,
I would read here. So it sees benefits
in this slide. Benefits here. Then for zirconia, I would find out
some benefits here, short implants, I
have some benefits. So benefit is going to be
my next option to compare. So I would write
benefit right here. And then I would say
this is treatment worse than if I'm
using a mini implant, then it's single piece of piece construction
and it's cheaper. So I would just enter cheap and then grab people
and all those things. So that's how I would, I would keep on
creating this table. And that's how I'll keep
on creating this table. And you can see I just ended up creating a complete review on size benefits US and some important points for
all these different plants. So that when the
question shows up, I have a very thorough
comparative study of these different
types of implants. This is just one example, but peoples are amazing feature which you should
use exhaustively when you want to create a nice overview look on the
data so that you know that, okay, for all this data, how can I see them
against each other, against certain kinds
of characteristics? So you write that on the
left column and it's like a universal simplest way of learning something in
a more efficient way. So that's was the last
video on Microsoft OneNote.
15. Thank you for joining this course- Happy notetaking with OneNote: I hope you enjoyed
this course on digital note-taking
using Microsoft OneNote. Whether you are using an iPad
with a pencil or a MacBook, I think that one node is a very versatile tool for you
and you should definitely switch to digital
note-taking and this app if you have
not done so already, posting the questions below, what are some questions
that I can answer for you? And I'll be happy to
create a new video and post it right here in
this Skillshare course or in the YouTube channel
where you can get answers to anything related
to Microsoft OneNote, I wish you happy
studying and thank you so much for joining
me in this course. This is sent from
teacher and he said It was a pleasure
to see you here.
 Sam Soni, A dentist, teacher, and entrepreneur