Transcripts
1. Microsoft Designer course on Skillshare: This is a course about
Microsoft designer. Microsoft has combined all the online conventional
tools for designing in combination with AI generated images and
AI generated text, which in one platform makes it a very powerful design intuitive. I really recommend you for oil. You can use it for your
social media presence, for images on your
website or blog, or for design working
everyday professional life can also use it to enhance existing images and adapted
to a new style you'd like it to be or use it to
create your own brand kit. That has so many ways
how you can use it. I'm going to show you
all the tips and tricks how to use it or not. You do not need to be a designer already in order
to use this tool. In fact, it is made for
people that are not designers but still need to design things every
now and then. Oh, people were just too
time for it to create a social media post
from time to time. And this tool really provide you all the ways to create
social media posts in. So watch. Now, I'm Victor David. I have many years of
marketing experiences. Ac side, client-side, word-for-word designed
to move into past. And I'm going to
show you how I use my visit designer for my own social media
posts, for my website. And you can do it too to create stunning designs that I really want to impress
your audience. So I hope you'll sign up the discourse here
on Skillshare. I'd love you to be underscores
and let's get started.
2. Your Project on Microsoft Designer: Now as part of this
skill scale scores and Microsoft designer, I would like to do
a project with you. I'm going to take
you through all the steps of Microsoft designer, how to use it in the right way, all the features that it has. And it ended the course,
you will be able to create a beautiful social media. You can use it for Instagram, for Facebook, or LinkedIn, whichever platform you prefer. I'm going to show you
all the different ways, how you can enhance
it and you will choose which one is most
suited to your brand. Personal preference. You can choose the
generated images or images already have. You can add some
branding through it. I'm going to show you all the different ways
you can enhance it. And you can choose whichever
one suits you best. Alternatively, you
can also choose to create your own brand toolkit. Like if you're just starting
out with a new online brand, you can use Microsoft
designer to make it very consistent
and very beautiful. So that's another
way that you can use this project into a social
media post or a friend. You can choose
whichever questions. I hope you're very enthusiastic
about the schools. I really love to take you
through lots of designer
3. How to get your Microsoft Designer account: Now how do you get your
account as Microsoft designer? You just go to
designer.microsoft.com. You'll see this page. It gives you a few examples
of everything that has been created with Microsoft
designer and it's of course, growing and growing. Now, by the way, I'm not affiliated
this Microsoft, I do not get paid for
greater than discourse. If you or any advice that I provide to create your account, you just go to, try to
design it for free. You click here, you just sign in with your
Microsoft account. It does not
necessarily need to be a hardware address or a
Microsoft owned email surface. It could also be Gmail.
It doesn't really matter. This will take you
to a sign-up page that we'll see in a second. Once you sign in, you
have your account, it is that easy?
4. Introduction to Social Media posts with Microsoft Designer : In this part of the course, I'm going to show you
everything how to use Microsoft designer for
your social media. I'm going to show you
how to use it for your social media
posts and easy way. Then I'm going to show
you how to use it anymore bespoke way that is
really not hard, but just gives it a
little bit of a more, Grossman talks a bit of a twist. And what's it going
to show you how to use it for some integration. So then you can post
directly onto Facebook, Instagram, LinkedIn, just
directly from Microsoft Design. And it makes it
really easy for you to use your social
media strategy. Because let's face it, if you are like me, you always do time for, I also think you guys
should have created this boastful my online brand, but I run out of time, but let's do visit
and, and don't do it. But now as Microsoft designer, it makes it really
easy and I'm going to show you multiple
ways on how to do it. So let's get started.
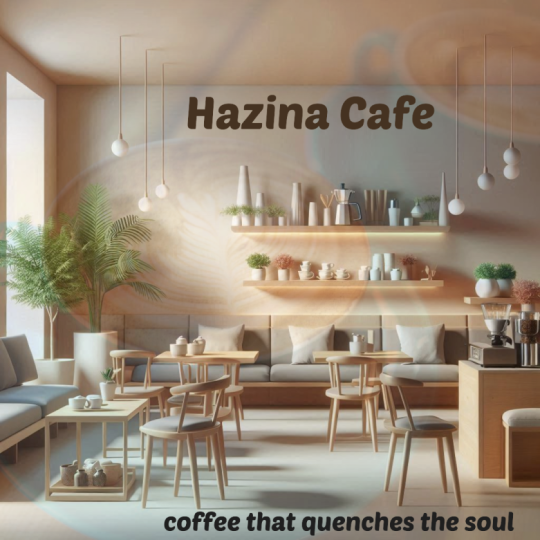
5. Easily Create Beautiful Social Media Posts: We're going to look into social media posts with
Microsoft designer. And I'm first going to show
you the easy way to do it. And later I will show
you a few variations and also more complicated things
with generative images. But for now we're
just going to start with the simple version. As you can see here, I typed in a Facebook post about an
upcoming Garrett said, I'm just going to press
the Generate button. And now Microsoft designer is learning and looking
online and on the whole library to happen
to backend suitable images and suitable designs that are perfect for my Facebook post. And as you can see here
on the right side, we see the garage sale, various basic
suppose that I could use I could just download it straight away
and posted on plays with and I'm done
in a few seconds. Isn't that great? Now I can scroll through
all the options here. I think there are,
a few of them are quite good and funny, like this kind of grabs the eye. But if you'd like, okay, I'm
not selling televisions. Maybe I'd rather go
for something like that or I rather go
for a larger picture. I got anything that
you'd like to do. Now, by default, Microsoft
designer starts off with a square that's the most
common format on Facebook. You could also do is change
the size of the canvas. So now it is square. You can also, okay, Now I
wanted to not landscape format and now generating
designs in that format, so you don't need
to download it, to crop it, resize it,
all those kind of things. I mean, you could,
but this is even easier if you want to
have a Facebook event, so you need a wide scale image. This would be a very
easy way to do it. So you can invite
your friends and you enabled for your garage sale. So heavy scroll to
all the images. I think most of them are
pretty good actually, e.g. I think this looks it
looks professional, it looks nice and
beautiful shot. You can always zoom in like
this if it's a plus sign, see, okay, this is
somebody I'd like. It looks a bit quirky,
a bit old-fashioned, but in a nice way
and it's not too clunky or like lots of stuff, but beautiful things is people possibly
would like to buy. So what I can just
do, select this one. I just can download it and
I will get it straightaway. It removes the watermark automatically in the
current version. And I can download it the
other way I could do and get back on that later in the course is going to automatically, but that's a later
part of this course.
6. Example of How to Create a Social Media Post: Now let's say I want
something different. I wanted to Instagram post
about a wine and cheese night. I can also add here,
I just clicked a Generate button and it'll generate stunning designs for me about a wine
and cheese night. It takes a few seconds to
come up with some ideas, but it doesn't usually within seconds and it's
currently thinking and crawling through
all the database if all relevant images
and hairy goal, we have quite a few
beautiful designs that I could use for my upcoming
wine and cheese night. So all I need to do is
just select the one at alike next book sample.
I like this one. And I could just
download with here. One additional thing I would like to highlight here is that Microsoft designer shows you both static images like
I have selected here. But it also has videos like this one that gives a little
bit of an extra touch to it. Like it's more speaks to the
eye when something moves. And that catches more attention, especially if you're using Instagram for business purposes, like you want to sell tickets for your wine and cheese night, that usually helps to
get more attention here, isn't a beautiful,
What a great tool. Now I'm just going
to select this one, e.g. just click Download. And the watermark
is already removed, like it's already ticked. Download. And then
isn't it beautiful?
7. Create Social Media Ads and Announcements: So far we have looked into
ways to generate images by Microsoft Design
at it creates you a beautiful both you
can use directly. But now we're going to look
into a more bespoke way. So let's say you really
wanted to start from scratch. So we started with a blank
canvas here on the left. Now you can choose a size like the most common ones
are already pre-filled, like Instagram posts, Facebook
ads, instagram stories. Let's say for this example, we want to start off
with a Facebook ad. So I'm going to click this one. Now. It will generate
a canvas that is hidden right size
that I just selected. So it's more of this
rectangle shape. And if I want to, I can just scroll through
all the templates. I'm going to start off with something that's
already out there. But if that's not what
I was looking after, I can just start
really from scratch. We're starting off with visuals, but these are premade designs, pre-made shapes that I could
build my own design with. You can just keep on
scrolling until you find something that you like. And then on the right here
on the campus, e.g. I. Started with this image and then I'm going
to add some text. I'm going to add maybe
some additional images, some details about my open bay until I have a beautiful design. So I'm going to do
that in seconds. So now I selected this image. Microsoft designer already knows the dimensions of the canvas. I'd like it to be in. The actual image is much
larger, like you see here. Purple lines around it. But it just keeps
it to the canvas at the people are
actually going to see. So that's pretty handy. I added some text here on the left and yoga studio open day you
try a free classes Saturday. Of course, I'm just
making this up, but could be any
other information you'd like to share
with the audience. But I like about it that if
you click it, it will move. You can move it
around a little bit like a from left to right. And it will tell you, you see here this purple
line in the middle. It's quite subtle that you now in the middle of the Canvas. So if you notice the
outline to add spacing on the left and right
side is just right, I just rightly or in the middle. Now, this tool, because it's specifically made for people
who aren't a design as well, maybe not a pro in
Adobe Photoshop, e.g. but it just shows you different ways how to
do a beautiful design without having directed back around knowledge on years
and years of study. Now, one thing you
probably should know at this stage is that it always helps if you use
the fonts and colors, especially that really align well with the background
image, like e.g. here we have a very serene, subtle image, soft
colors, soft tone. So I do need a bit of contrast, so I'm using the black on
a more lighter background. If I had more Colin image, I could also use more
color in my font. But you always want to
have the contrast between the lettuce that you have
the background to be quite outspoken so people
can really read it because when we try and make
the beautiful design here, we are really focused on it. But when it is on Facebook, like with all other
things popping up on the social media website, it kind of loses attention. So you want it to be clear, you want to be very legible. That's important. Now, I think this is
already good to go, but let's say it wasn't
really that happy, then market's up design, it gives you some additional
inspiration here on the right-hand side of this
two ideas here, function. So instead of doing this post, which I think is so
bad, they could also, okay, let's instead, I want to try out this one
here on the right. There's all these ideas here that you could potentially use. So now it has kind of
changed my reaching a design into a version that Microsoft designer
things could work. I think this is also pretty beautiful and here
there's a tagline. I try free classes, however, like boom, writing your face. So this is a bit more
sales, it a bit more pushy, but well, it's a free class, so I think people would like it. So it also depends a
bit on the kind of message you would like to share with your target audience. Do you want to really
push a product or like get as many people
to your open day, then a message like
this would really work if you wanted to
be more informative. Like people are just
getting to know your brand than the previous image would
probably be more suitable.
8. Easily Resize your Social Media Posts for all Platforms: Now let's say we
landed on this design. I think it already
looks pretty good and stunning and jumping to the eye. But let's say I want to give
it one more extra touch. Maybe I want to change
the background here. Let's give it a bit
of a warmer color, a bit more saturated, or maybe a bit or lighter, but then the light gray just as a bit more contrast
from the white on the social media platform, that would be a good away. I can also change the opacity, which basically means like
these MHC on the ride, but they're going
to fade in or out, I think currently
is pretty good. What I can change that to
make it a bit lighter. So it just gives a bit of a
see-through effect basically. So it gives it more
whitewash like a little wide blow over it. Another thing I could do, like I think this
really beautiful, but let's say I don't want to go through all the
design steps before. It's going to click on re-size. And now I have an option here to change it to all kinds
of other options. Like now it did Facebook ad, but now I want to change it
to Instagram square posts. I'm just going to
click continue here. And now it is resizing the
same template for me so they can use one design that
I made for Facebook ads. I'm going to use
it for Instagram. This one, only one thing
that I need to change is that some of the text is not really aligned
with the images. Does one thing that Microsoft designer hasn't
really done for me, but it's really easy to adjust. Funny thing is it always
opens up in a new tab. I'm not sure what
it is the case. It probably will
change in the future. But now it will
open up, which is only just a few seconds
of waiting time. And we have to
design in a second. Here we go. It is allowed in the same image from Facebook ad, like rectangular into a square. I think that this needs to be a little bit
more to the left. Not that far. Let's
say it's pretty good. And I don't know what a
block is here in the back. Well, actually I don't mind it. I could make the
image a little bit. There we go. I can delete that.
Black is gone. Now it is a very clean post. I can add more details
to it as I said before, but now it is beautiful in a square ready for
Instagram and it can keep them
chasing it for audit blaster that may have or
even accustomed design, you only need to create it once. And once you have
that, you just got to write it to all
the other design, so all the formats and you don't need to redo it every time. So it makes it really
fast and efficient
9. Introduction to Images with Microsoft Designer: In the next part of the course, I'm going to take
you through images. You can use existing images
that you already have. You can use stock images
that are available on the website and that is
integrated as Microsoft designer. Or you can use generated images with artificial intelligence. Going to show you exactly
how you can generate images on this platform,
upgrades, beautiful designs, things that are
blowing your mind, that looks really fantastic, out-of-the-ordinary
or just very bland, but just right for life. So let's get started
with images. It's going to make
it very beautiful there multiple ways,
how you can use it. And this gives me go
10. First Steps with Image Generation in Microsoft Designer: Now we get to doing
something very exciting, and that is image generation. So far, Microsoft designer has looked for
images that already has in their database that would match with like
you had in mind. And those are existing images that it has a huge database. Well, what does it can also
do is generate an image for you that is just
like you describe it like you imagine Indian
monitory have in mind and into sulfur courageous for you
with artificial intelligence. How we get there, we
go here to generate image, heal this button. And here we see a few
examples of how people got to these kind of artworks by the descriptions that I
gave, you hover over it. E.g. here, a sailboat
inside a glass paperweight. I have generated this
image for this person. Now, let's say I have
a business travel and there's nothing wrong
with posting pictures of the Eiffel Tower to get people interested in my travel offers. But, you know, all
the competition does probably the same thing. So I just wanted to do
something different, something that is more excited, that really stands out
and catches the eye. Let's say Trump Europe. And now it's going to be
suggestions already of how I could kind of prompt. I could use e.g. here from below, fantastic
extreme close-up. I like this, like
in his tough PR because we're not
an Andy Warhol. I'm just using the
existing Aidid and Microsoft designer gifts me. If that's not for me, of course, guy can
do something else. I can make it very descriptive. Write it in exactly the way
I would like to have it. And while we're
waiting for monks of designer to come up
with the results, it's already shows me here
a few of other images that are created with
the same software. Now it's currently
working on it, and now it gives me
a few options of traveling in Europe in
the staff yourlist. I think this looks pretty cool, but this is maybe not yet what my audience would like to
have. So it doesn't matter. Just going to say Cancel that. I'm just gonna do it
a different thing. So generate image again. Webpage's up with here. And we're gonna say, I'm just going to say Destic. I'm, I could do maybe are
like I did last time but could also say rare stick. Um, and yeah, for gray. Okay. Let's start with this and
let's see what a generates. And then based on that, I can adjust it. And more than, than
sculptures further. Now it's thinking for
me to ask grading it, but for me it is
artificial intelligence crafting what I've typed in. This looks pretty starting out. Let's say this is a beautiful picture of the Eiffel Tower, is as beautiful
dramatic backdrop. I think that looks
right like e.g. here on the right here. I think it's not. So
I can select that and continue with
that for design as the base for for the trip that I would like
to sell as a travel agent. It's going to be thinking of a few options here on the rod, like you can see it
is thinking out loud. Now it will craft like a few options here for
my Instagram post or my Facebook post for my trip to Paris and
I would like to sell. Now I can add more, especially of a trip to Paris. You should have used a
capital letter, but, oh, well, it is now generating
this form here. And it will in a moment
give me a few options. If I wanted to sell this trip to Paris based on this
image I generated. Here, we have it on the right. I think it looks quite
arty with what has generated a bit dramatic with
an EHR. But I think e.g. something like this
looks quite stunning. I'd say. What alike
is that address? Already? Use the font and this really goes well with the background
and it uses the text, especially on this,
this darker piece of air so that the white
letters come out well, it does it pretty well that I think this is
already a good base. I can now further scope that. Okay, if I write a
few other options, I could bake that are not bad. And I could continue
in that way. So in this way, we started
off with a generated image. And then from there
we sculpt it into a social media post or an Instagram post or whatever
size scans if you'd like. And there we haven't a minute. We have a beautiful
picture here of the Eiffel Tower is
my special offer
11. Prompt Engineering for Image Generation: I would like to take
you to a few things around prompt engineering. We're using images. Prompt engineering is basically what You're right here
in this thing here. So e.g. a business person at a conference and I'll
generate it right away. So this is very basic. It's because it's also
something that I could just download a stock
imagery website, but it will create it for you based on what you wrote here. This is a quite a basic one. You can add more
things like fork, a realistic sharp blurry
from a far, from close up. And as you can see here, it looks very good already, like as a businessperson
at a conference. But if you look really closely, if he downloaded and I invite
you to try it for yourself. If you download them,
look really closely, you will notice that
it doesn't look exactly like a human
person would have like, because there's something
about our human recognition, like where there's
something in the eye, something interface that
you look really close. It's okay, it is
not a real person. So if you want a very
close-up of her face, you're better off using a stock
image from the left side. However, when I look at
these three examples, I think it already,
it looks pretty good. I'm just going to
gas or just for now for an example because there's
one more thing I'd like to show you and
that is a prompt. When the prompt is basically like a set of texts like a cell, but inside the
glass paperweight. Collect a try. Now obviously this image here, but if I use the same text, it will not generate
the same image, one on one, it will not
be exactly the same. If you found some
vague, you find really beautiful and
stunning when a key, but just ensure you download it, save it somewhere
on your laptop, on your server so that you
can't get a lose it because if you type in the same prompt
that will not generate the same image as it was before. Quite interesting to
know what English is, glass paperweight. Three images. This is different from
what we just saw before. And now we go to the very exciting part of prompt engineering V is going to cancel this
for the moment. Go back to a generated
image and you can just keep on adding
things and things to it, even if it is something
that couldn't really exist. E.g. I'm going to say, people in, people on the laptop
in medieval times. Which of course back then
laptop didn't exist. So let's see either go.
But now I'm going to add, even in the style of art deco, lucid just gives me a few ideas here that
you can try out. If you want it in
a different style. Obviously, you can
definitely try it out. And designer will give you a few ideas here as well as you see here in the bottom part, like hot air balloons
in watercolor, that looks like something or something that
someone could have made. Like the gold stake, your cheeseburger that
we saw a second ago. It's probably a bit
unrealistic, but about funny. So here we see people in
medieval times at a laptop. I think it's quite funny
and Art Deco style depends, of course, on the purpose
you have it for a few, wanna get your attention on social media because
it's often there's so many things on socials
and hard to get attention. Something that is put
probably catch people's eyes. You can use that. And depending of
course your purposes, you can base it off that. So I invite you to start
off with a few prompts, try things out of
their relevant for your brand or your
product as you have. Just keep on adding things like the designer will give you
a few ideas, like for k, hyper-realistic into
starving artist in style for certain
era, back into past. And based on that, you can come up with new
creative ideas so that you're both really stunning and
outstanding on the socials. Try it out for yourself
alone and also the resource on
prompt engineering have a bit of fun with it. And that way you can
develop your own style
12. Explore Creative Prompts when Generating Images: Now let's say I wanted to
have it a bit more arty, a bit more extravagant. And I just tried to prompt here with the mountains in
Switzerland, quite dramatic. I think that looks great, but maybe not yet
suitable for sales. So now I'm gonna make it
a bit more pop artists. I'm just writing hiking
mountains in both style. Fill panoramic and
vivid. It looks nice. Right way. Like the suggestion is
that designing issue. Because guess what inspiration, how it could be different
like outside of the ordinary. Look, if you don't like
it, it doesn't matter. It we can just rerun the same problems again
and then it will give you a new series of images so
it can just be as playful, as imaginative as you want. So now I gave it a more
folk art style prompts, which is very colorful,
very quite intense. It may not be
everyone's cup of tea, but this probably
catches the eye more than just another
stock which are not a standard image that already is out
there on the web. So awesome. I can use,
to use this one e.g. I think these colorful,
I select that. And on that basis, I'm now going to create the social media posts like
I've shown you before.
13. Example of Image Generation for Social Media: Hi, What a great,
one more example for you just to get
the feel for it. And I'm going to say sailboats. I gave it a few, few
directions here, so I wanted, It's kind of odd is odd
Nouveau you can still style and what it's very detailed and wanted
it to be colorful. If it is too many prompts and eventually it'll say
audits too much. I can't comprehend
that amine author also the humerus machine that needs to balance all the different things
you tell them to do. But now, like with the
Jurgen, so detailed art, it gives me a different kind of a sailing boat perspective. Then if I use a real
image and if I use e.g. this one, I think it looks
quite nice, quite outspoken. Maybe it's too much
for your brand. Of course you can
downsize a little bit. And I'm going to
start with this one. And we're going to
generate a post for this syllabus, generating
designs for me. I can add some text here
if I like about it when it comes up with the designs that I could
possibly use for it. And dairy go sailing away. Uses design. And then we go into
the editor mode, and then we can
add a few things. You can add some text
here on the left. And then eventually we'll
have a beautiful post about sailing if you
sell a sailing holiday. So now I've added some texts. We can sailing trip. I can add more
details on the cost, departure time,
anything I would like. I think this will
look beautiful. But if you're not entirely
happy, like you can, all these elements are just
changeable if you want to, so you don't have to have
it in this background. You can just move them
around if you wanted to and then replaced him
for audit images or for other backgrounds?
14. How to apply Filters and Effects on your Image: Now I'd like to show you
a few additional things that would really help
you with your images. You can create different
kinds of filters. You can apply different kinds of adjustments to your image, or you can even remove
the entire background. Now as an example, I generated this image for a
business large list. So let's say you wanted
to get together with your colleagues in the
office, overfund lunch. Everyone brings
something and you having fun having lunch at the office. This image, you can say, Okay, here are the filters. I want it not this time, but one of the big
more punchier. And then it's graded
like indepth way you see the colors are
popping out a bit more. You can make it a bit lighter. You can just use any
filter you like. That already, fills it for
you in one go, which is good. But if you'd like now,
I really want to be very precise in a
way and one a habit. So I want to have if e.g.
you can up the contrast a little bit and this
bit more outspoken, I wanted even more brighter
than had it before. Or one of them more
saturated colors, I can add that. Or I wanted like more sharper colors or maybe
less have more blurry. I mean, this may a bit much, but you can play around with
as many times as you want. Now, if this is like Okay, There was a nice try but it
didn't really work for me. I'm just going to press
restore original and then it's back to
how it was before. So nothing is wasted,
nothing gets lost. Play around with
it a little bit. Now let's say you want
to use this image, but you don't want
that blue background. You just want it on a
white background so that you can add it to a
wide existing piece of paper that would work well with
your template you use for your office or the
e-mail that you'll want to send out or
your Speech to Print. Now click Remove Background. So now it is transparent. It's not just swipe
this transparent. I'm going to go to Download
here on the right. Of course I don't want to end
before wasn't a PNG image. And it won't say click, Make
background transparent. And now if I download it, it will be transparent. So you can just add it to the image of the background that you
want to have it in. Maybe add to accompany color
that you already have and it looks very bespoke
and very well might
15. Introduction to Generative Text with Microsoft Designer: Now Microsoft designer
is integrated with a very powerful artificial
intelligence decks generated to work
similar to deci be D, but just in a different way. And it's integrated together
with the design mothers. Because you can generate
a text that comes with your social media post or
you may use this platform. I'm going to show you all
the ways and how you can generate text or
hashtags and how it integrates together with the social media
generation function when you post online and
how you can add as well. So all combined, it makes
it very powerful tool. And I'm going to
show you exactly how
16. How to add Generated Text to your Social Posts: Now let's say I have a
version that I'm happy with. This diverge you want to use. You're probably already
thinking, okay, I'm just going to add some text on people wanting
to lunch to get it. But if you're just out of inspiration, I don't
know what to say. You can also just add
the texture on the left. So I just wrote, I want my colleagues to attend
our office lunch. And now a generated all
this text here for me is I could use with the post busy, probably quite a simple example, but you can take some
inspiration for it. Goes, well, what is the
right tone of voice? Especially along body texts
like what do you like? Jones, fun, enjoyable
office lounge at brings his clothes to get it
and all that kind of things. So you can just copy, paste this into the fields
on your social channels. It just makes it a bit easier. I mean, of course, you can
come up with it yourself, but if you add of inspiration or if you
don't want to type adore, just Copy to Clipboard
and copy paste into your social media profile and
you have it straightaway. So it just makes it
a little bit easier.
17. Next Steps with Generative Text and Social Media Integration: Now I'd like to show you
an interesting thing about next-generation
with Microsoft designer. Here I generated a image of a business networking
events with lighter colors, close up, feel like
this one best. So I'm just going
to select this one. Select. And now it is grading all the different variations
here on the right side. And out of all these designs, Let's see what it comes
up with and kinda select one in a moment. Pretty good already. Like, uh, like that is like this
Polaroid kind of style. That's not bad. It gets a bit of a more edges. It's maybe too arty. That is not bad. Let's say I use this one. Okay, so what I'm now going
to do, click a download, but instead of using a
download button here that I would do in
other situations, I'm not going to use the AI
for captions and hashtags. I'm just going to click Try it. So let's say I have this
pose that I would want to post on my patient
and adverse experience, which is a page about networking that have events on for
business networking. I want to raise awareness,
but I want to get, I want to get more engagement of people that want to
come to my event. And I'm just going to say like, so this is what I want. It's always something
that's a bit difficult to come up
with the right decks because you have
something to sell your tickets to sell,
their product to sell. And then getting
the right wording without it becoming salesy or a bit uncomfortable is it sounds a bit hard to
get the right deck. So here it just gives me a few captions that could
work for this type of pose. So just told you the software what I would like
to get out of it. And now I have generated for
me, yeah, what a good box. So let's say unlike this text, but if it's not that
text actually want, I can always generate more. But I'm just gonna
go for this one. By the way, it looks a little
bit small here on the top, but in actual pulse it
will look much better. Trust me, I'll show
you in a moment. I'm now going to go to hashtags. So out of all of the
texts I've generated, it will now select them what the hashtags that the
software thinks are relevant. I think networking
events is relevant. Business bit too generic. Networking makes sense. You don't want to overdo it
because then it's good work. Because they like if you
have too many hashtags and it's also look a
little bit spammy, but just a few of the
relevant would work. So all the ones that I've
now added here on now added here as well in
the bottom part of this boast, not
going to review it. So this is the caption
that I've generated with the software and then
all the hashtags. Now, maybe one thing I
want to change is events. I do want that exclamation mark, but I don't want the APA style. So the beginning of the
end, it's a bit weird. I think this is a
good post already. And maybe add a bit of separation between the
Aztecs and the text. I think it was beautiful.
So now I'm just going to click
Publish to Facebook. Now I selected this account, I already connected my account. There's my page on Facebook
network experience. I'm going to scroll down
and I've just posted this event through Microsoft
designer and is detected. I've generated, it
looks much better in this view than it did before because there's
more space here. It is already posted. So
I didn't even need to go to Facebook because I
connected this two accounts. So here it is. And I can boost it if I
wanted to spend some money for spreading it on
Facebook with ads, I don't need to do that, but as you can see from
Microsoft designer, I can post it directly
onto Facebook. And that way, yeah, it isn't Facebook without even needing to be
in the platform, isn't that a wonderful tool? Now, if you don't feel
comfortable about sharing your credentials with
Microsoft designer, I get it. You can also just use
the old-school way. Just download it, go to
the website of LinkedIn, Facebook and just upload it there and just ad tech
space you'd like. So there's only
just a handy tool. You don't need to use it. But so far I've not noticed
any problems with it. Like it's not going to post on your behalf or do funny
things with your account. I feel uncomfortable. You can just click
disconnect account here. And then this connects and done. It is removed it in one click. So if you only want
to use to onetime and you're a little
bit worried that it may keep your credentials
just disconnected here. And it's profiles,
disconnect accounts, and it is disconnected
now Facebook, it's gone as well. Now I need to redo
it again because I really love the way it works. But I just wanted to
show you how it works, how you can connect and
disconnect it here. So check out these
options in this way, you can really automate your social media
because you don't really need to leave
market's up designer to post them socials. You can just post directly
from Microsoft designer. Once you're connected. There's a very handy tool
18. Introduction to the Brand Toolkit on Microsoft Designer: Now the next part of
the course are going to take you through
the brand toolkit. Now, what is a brand
toolkits rental good is basically the online
presence of your brand. And it's just very specific way. Because if you think
of some iconic brands like Nike, McDonald's, Google, Microsoft, they look
in a certain way, it makes them instantly
recognizable, and that is just a
combination of colors. They use certain form they
use the way it is written. It just makes it that brand
instantly recognizable. And if you're a ruling on your online brand, you
should do the same. You should have a
brand tube it at exactly shows how your branches. It's online or in print or whatever media you may have
for your marketing strategy. I'm going to take you
through all the tools for the brand toolkit. So you have a very
consistent brand is instantly recognizable. You can use for your
marketing strategy. Microsoft designer has
great tools for that. So let's get started.
19. How to use the Brand Toolkit and Develop your Brand Presence: Now I'd like to take you
through the brand toolkit. With the brand toolkit,
you can ensure that you always use the same color, font, style across all your posts, whether it's on the web or
whether it's in print or any other outing
way of marketing. Message is shown. Here we have a few styles are ready that are pre-made for you. So if you do not yet have a branding or do
not yet have a logo, you can use oldest pre-made brand gets as a starting
point for your brand. Now, when you're
choosing your brand kit, some of them are more
outspoken than others. And maybe at first
sight you think, okay, I'm going to use one that
is really quite out there. There's really flashy colors
because I want to be seen. And yes, on the one hand that does sketch
the parabola on it. It can get tired quiet easily. So I would recommend to
have more subtle colors, more softer colors like bluish, yellowish gray tone with maybe one or two
sparkling colors like red or strong pink
or darker color. Because it is easier on the eye and it's
something that people are more comfortable
with to watch. So here I've selected universe. I think it has quite a few
colors that fit well together. And what I like about it is
like if I create my design, so you can always
start off here, but you can shuffle the colors if you want to start it with a different background. But if you always start off
with the same color palette, then you assure that across all your social media posts and your older marketing material, you always have the same colors. So you can just copy
that and then you can get started with that brand kit. Now, if you already have one or you want to
create on your own, you can definitely do that. You can just start off here
with the right colors. You can place in the callers take you already
have pre-existing logo, existing designs as
it goes, if you like, you'd have at least
three colors because if you just do a little,
it seems recognizable. If you only have to just
add a black or a white, just to complete a three. As you can keep on adding
different colors here. And according to the
logarithm already have. Or if you do not have a local, I'll show you in a moment
how to create one. Now, if you e.g. have an existing brand, but you're not quite sure
what other bright colors. Let's say I have a yoga studio. Wanted it to be modern, want light color palette. And now it is going
to use AI for me to create my brand toolkit
that is relevant for my brand. So now it came up with this
color palette that will work well for yoga studio based on that because I like it, but something's
happening for me, so I'm just showing it
more color palettes that this could also use. That is just based on one search like getting your brand to get ride is very important because you're trying
to keep it forever. So you may want to play around with it a little bit to see
what works out for you. Let's say I have a dog
rooming business instead. And now it's going to
generate a color palette that is right for a dog
grooming business. I'm not entirely
sure about a yellow, this playful, that makes sense. So it does get it to
some extent, right? But you may want to add a few colors or
remove a few colors. Cycle is a bit too, yellow. Duck. And see, well, I'm going
to add a few words. That brings it more
to life than to tell the machine what kind of want I want
something that's fancy, that is Bespoke, that people are happy to pay for my
dog grooming business. So you can add more words to tell the machine what
you, what you want. And here you can see it comes
up with very subtle colors. That is usually stands for
more subtle high-end designs. Let's say I don't like ago, let's say I don't
like it yellow. I'm just going to remove that. And you could just going to add a different color that I
think hard and what is purple and wants to stay when
a green as my brand to it. Maybe I want to
start off with this. Maybe the green is
a bit too much. You can move it here
or you can just say, Okay, I want a darker
color, green here. Green is more for outdoors. Dots bringing that up, I'm just making it up for now. Click, click Next, and then that will become my brand kit. Next thing you'll want to
look into is some kind of farm that you
often use was like, yeah, you always want to
use the same type of font, the same branding
across the web. And it has a few options
here, like if you like e.g. handwritten and there's multiple hand-written fonts
that you can choose. More formal writing. In general, I would recommend to have a font that is very
legible but easy to read. Handwritten is fun and it does catch attention,
but it's awesome. It's hard to read or
it gets a bit dated or a little bit boring. I would almost say after
a while, you want, you want to have an easy to read font and just select which
ones don't work well. Often for heading,
it works to have a very strong forms like e.g. like a bold font and then a
more subtle text for your, for your body text below it. Now play around, look
around for what is here. It can go quite well, but not too wild so that you
don't get bored with it that's consistent and
speaks to your brand. You may want to
give it a few days. Try something out, see how
it works in your posts. Once you have that, see if it is versatile enough so that you are not going to
get bored with it. It's consistent, it's legible. Feel free to change
it quite a few times you do get a
ride because you want to ensure that your brand across the rep is very solid. So have a look rounded
and brand kit format to want to queue that you like. And then you have that to get it and you can save
it for your future. Use.
20. Create a Logo: You probably already have
a brand and your logo, but if you do not yet
he just starting out, you can also use the image generator to
create a logo for you. So here e.g. I. Have asked the
software to create a distinct logo for
my yoga studio here. Let's say I like this one. It looks quite good for it. And I just want to use this one to have it as my logo and also use two colors
for my brand toolkit. Now in this case,
because it is a logo, I do not need it as opposed. So everything I see on the
ride may not all be necessary. I'm just going to use
to most blank one. I'm just going to download that. And what I want is I want, wanted transparent
so that it also uses works on different
background colors. Just going to download that
and save it as my logo
21. Maintain Brand Consistency: Now, one more thing I would
like to highlight about brand consistency and
your brand Kate is that aside from your
logo, your color scheme, and font that you use
is to also think about the style of imagery that you
use on your social media, on your website and all your
other marketing outings. I e.g. I. Have here created the prompt dog
grooming, flat design. And flat design is, as you can see here, an image. It's almost like it's
glued to the campus. I personally like it quite well. It's not just totally okay. You can go with a
different kind of thought. But I would in general
recommend you to stick to a certain style and use that
surrounds your socials. You can make some
variation of course, but if it's like Dan, vary because of art style and
then it is very realistic. And then it's more imaged style. And then it's designated stat. Be available for
the field width. Confused because in
marketing you want to have this emotional
connection with the brand. And that's why people
like you and follow you. And if it's something
different every time, it may feel a little
bit unprofessional or people not really sure
what your brand is about. Now, of course it
is fine to every now and then shake
things up a little bit. Or if your brand
is so outspoken, so outlandish that every
time or something different and that is the
consistency in your brand. That's another way
to look at it. But for most brands that
would make sense to stay quiet specific to a
certain style that you use. So here I use flat images on, you can use any other style, but try to give it a little
bit of the same data, same feel, the same look and
feel across your socials. And that will make it
look very professional.
 Victor David, Business coach and public speaker