Transcripts
1. Introduction: Hi, I'm glad you chose to
learn motion design with me. In this course, we're
going to learn all about working with basic
shapes in after effix. And the great news is
that we're not only going to learn how to
create and animate them, but we're also going to
learn how to apply them in the real world projects that you can offer
to your clients. In the first lesson, we'll create a basic shapes animation and learn how to export it
into a lot or JSON file, which is perfect for
websites and apps. In the second lesson, we'll create a complex
animation that will turn into a professional
email signature. In the third lesson,
we'll turn layers into three dimensional
layers and learn how to create an isometric
camera angle. In addition, we'll
learn how we can integrate the animation
into longer videos, such as podcast, video
games, and more. In the final lesson, we'll create a super cool
loader animation and learn how to showcase it in our
portfolio like approach. In each lesson, we'll
learn how to explore our animation for sharing
on social networks, so you can share it on your social media channels and
on your portfolio website. But wait, there's more. To give you the best
learning experience, you'll get a clear notification
on when to work along with me and when to just listen without
touching the computer. You also get a mid
class question to help you memorize
the lessons better, and I even tell you when to take a ten minute break just
like in a real classroom. On top of all, I created a
free course for beginners, in which you learn all the
important fundamentals and gain an understanding of what it's like to
work in after affix. So if during this course, you come across a topic that interests you and you want
to learn more about it, you are more than welcome to watch the free
course I mentioned. You can find the link in the
description of this video. Oh, and don't worry. You won't have to
hear my funky and exotic accent
throughout the lessons. This course is voiced by
a professional voice on. Okay, no with a token, let's start with
the first lesson.
2. Section 1: Lottie and JSON Animation: Hi, everyone. In this lesson, we will create a cool animation using basic shapes
and learn how to export it to Jason or Lodi files that are perfect for
websites and apps. This lesson is divided
into seven parts. In the first part, we will
understand what Lodi and Jason files are and why it is important to know
how to create them. We will create a main
folder for the course and install the fonts we
will use in this lesson. We will enter after effects, create our first
composition and adjust the software settings
for a better workflow. Then we'll learn about
the basic parameters of a layer in after effects. In the second part, we will design the scene from
scratch and after effects, and we will learn methods
for more organized work. In the third part, we will learn what key frames are and
start animating the scene, and we will learn
how to time and synchronize the
animation we created. In the fourth part, we'll learn to create a
loop animation. The fifth part, we'll improve the animation we created and learn about
the graph editor. In the sixth part, we'll install a free script
and learn how to use it. We'll identify any problems
that might come up. Then we'll solve those
problems and export a finished video file that can be used on websites and apps. Finally, in the final part, we'll learn how to render
the animation we made into a high quality MP four file
to share on social media. After that, at the
end of the lesson, you will get a small
task for you to do. The task is meant to
help you remember and understand what you've
learned. Don't worry. The task won't take up
too much of your time. It's designed to be
doable in 2 hours only. If you have any
problems or questions, feel free to ask me or your classmates for help in
our closed community group. All right. Enough with
the talking. Let's begin.
3. Let's Begin!: So what are Lodi and
JSN files anyway? Lodi and JSN are lightweight animations that
can be used on websites, mobile apps, and other
digital platforms. Knowing how to create and
render animations in Lottie and Jason files can help designers and developers
create high quality, engaging animations that
improve their platforms, user experience and performance. All right. Enough with
the talking. Let's begin. As a professional
motion designer. I can tell you that working with organized folders
is very important. When you're working on a
motion graphics project, there are many different assets that you need to keep track of, such as images, video footage, audio files, and so on. Organizing these files into
folders lets you quickly find what you're looking for and keeps your project
super efficient. Addition, an organized
file structure becomes even more important if you're working with a team. Everyone on the team
needs to be able to find the assets
they need quickly. Having an organized project can help ensure that everyone
is on the same page. Let's see what folders
we need to create. But before that, remember to download the folder
for this lesson. For those who still need to install the after
effects software, you can see how to do it in the free course I
mentioned earlier. You can find the link to the course in the
description below or in the PDF file found in the folder you
downloaded from me. Okay. Now let's find a folder on the computer where
we will create the main folder for the course. Find a folder that suits you. Now let's create the main
folder for the course. Let's call it DM
micro animation. Now inside this folder, we need to open
three more folders. The first is A. We will save all the after
effects files here. The second is assets. Here, we will save all the graphic assets
used in the project. The third one is
renders or samples. In this folder, we will save all the renderings and
tests of the project. Now let's open the assets
folder and transfer to this folder the assets
that we need for this lesson. Open the folder you
downloaded from me. Right. And copy all the assets to the assets folder
you just created. You can close the
folder now if you like. Now, let's install the font
we will use in this lesson. I will show how to install fonts for Windows and
Mac users as well. The name of this
font is Montserrat, and we will use it for
educational purposes only. Open the folder and enter
the folder called static. For Windows users,
select all the files, right click and choose Install
for all users or Install. I already installed this font, so I will not install it again. Mac users with finder
selected, click on. Go. Now, click on. Go to Folder, and
type this line. Then press Enter.
This will bring you to the fonts folder
installed on your system. Now, drag all the fonts from the course folder
to the fonceFolder, or you can copy the font
and paste it there. So after installing the font, we can close the folder. I'll move this folder
to the side real quick, and now let's lunch
after effects together. We can exit from this window. I will maximize the
window, and first, let's click on default so we all see the same
panel arrangement. And now, as with any
editing software, we need to open a new file. To do this in after effects, we must create a
first composition. Let's click on new
composition and now define the settings
of our first composition. We will call it
animation for Lt. Here we will set the
size of our composition. This time, we will work
in a square format of 1080 pixels in width and
ten 80 pixels in height. Here we will choose
the number of frames our animation
will consist of. We will write down 60, which means to create
1 second of animation. We will pass 60 frames. Why? Exactly 60? Because this animation is
designed for websites and apps. Those who don't know
what frame rate means is welcome to see the free course
I mentioned earlier. In this course, I explain
in depth about this topic. You can find the link
to the course in the description of
this video or in the PDF file located in the main folder of the course that you downloaded from me. All right. Let's move on. Here, we will
choose the duration of our first composition. 10 seconds is enough
for us this time. Finally, let's choose the background color
of the composition. It is important to note
that we can easily change all these settings at any stage in the animation later on. Now let's click. Now
before we continue, I would like to make
a few important notes for those who see the
screen in this way. Don't worry. See it that way because your
caps lock key is on. Turn off the caps lock key so you can see
the screen normally. Now, when we work on a
project and after effects, it is important to change the language on our
computer to English. That way, the keyboard shortcuts we will use in the course
will work properly. Next, if you see
the preview screen differently than I do,
you can click here. If you see the numbers here
differently than I do, you can hover here
with the cursor. Then hold down the control key and click on the numbers here. Okay. And if you see the screen smaller
or bigger than mine, just come here and select fit. Finally, set the preview
quality here to full. After creating our
first composition, the first thing we
need to do is to save the project
and give it a name. Because currently,
as you can see, After Effects file has
no name right now. The name we gave was the name
of our first composition. The composition we are in now. Let's go to file
and click on Save. Now let's find the folder
we created for the lesson. We will enter the A folder and name the after effects
file we are working on. You can call it the same name as our main composition or
any other name you like. After that, click on Save, and our project now has a name. After the first saving
of the project. Besides giving the
name to the project. We also activated the
autosave function. This is very important
to do because now after effects will automatically save our project every few minutes. Now, let's go to
edit preferences and set the best settings
for a better workflow. Mac users, you can go to
preferences this way. Click on General and now select the settings
exactly like I did. You can stop the lesson and continue it once you have
selected everything. In the meantime, I will
continue to the next column. And here is the auto save. Here we decide how often after effects will save the
project automatically. I chose every 5 minutes. Finally, let's get to script and expressions and select
everything I selected. And now we can click
and start the lesson. Note that you don't
need to change these settings every time
before starting a new project. Okay. So the first
thing we will do is import the color
palette into the project. To import assets to the project, we will double click on the gray area in the project panel. Now we need to
find the folder we created for the lesson and
enter the assets folder. Now, select the color palette. Ensure PNG sequence is not
selected and click Import. Now, to see the color
palette in our composition, we must drag it to the
composition panel located here. To do this, we will drag the palette into the
composition like this. Here, we see the palette
in the preview screen. We can reduce this layer manually by grabbing
the edge from here and holding the shift key to reduce the layer
symmetrically. Now release the mouse click and then release
the shift key. Also, we can reduce
the layer from the composition panel
through the layer itself. If we click on the small
arrow of the layer, we can see the basic transform
properties of the layer. If we open these properties, we can see the basic parameters for each layer in after effects. Here we will see the
scale parameter. We can change the value of
this parameter manually, or we can click on the value
and enter a number we want. Write down 30 and
click on Enter. Let's close the
parameters from here. Now we can move this layer
over here to the side, and so that it doesn't
bother us later. Let's lock it from here. That way, we won't be able to touch or move it during work. Now, so that we don't see this layer in the
composition panel. We can make it disappear using the shy
function found here. Let's click on this icon. For those who do
not see the icon, you can click here and see the same arrangement
of functions as I do. Let's select this layer
as an invisible layer, and to perform the function, we will also click on
the shy icon here. And now we don't see
this layer here. It doesn't bother us
and we can't move it. Okay, now let's start
designing our scene. To do this conveniently, we can open a grid adapted
to our composition. Now, let's adjust
the preview screen to fit the size of our panel. We will go here and select fit. Make sure the quality of your
preview is also in full. If you don't see the
background color you chose at the beginning,
click here to see it. If we want to change
this background color, we can do it through the
composition settings. To get to the composition
settings we are in now, we need to click Control
K. I note again that all the shortcuts will work when the keyboard language
is set to English. Let's click Control K. Here, we see the composition
settings we created earlier. To see the changes we are
making, click on preview. Now you can change the background color
to any other color. All right. Let's click on Cancel and start
creating our scene.
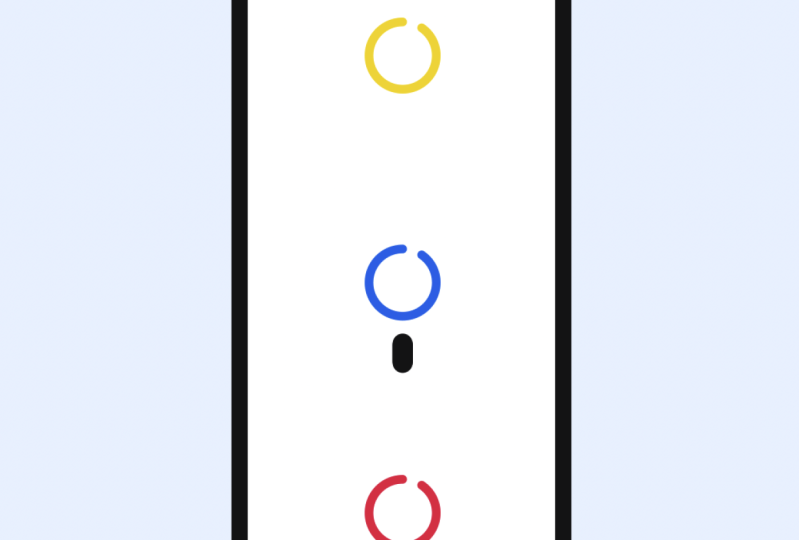
4. Designing the Scene from Scratch: So let's create our first shape. For this, select the Pen tool, then click on fill
and D select it. Now let's click on
stroke and choose a light color from our
palette using the eyedropper. Click Okay, and let's create
the shape from the center. Place your cursor here and
create the first point. Now, hold down the Shift key and click here to
create a straight line. We can choose the thickness
of the line here. Let's click on the number, type in 40 and press enter. Now, let's go back to the selection tool
using the shortcut v. Let's select the layer and using the scroll
wheel on the mouse. Let's zoom in into
the preview screen. For those who don't have a
scroll wheel on their mouse, you can zoom in and
out using these keys. So after we've zoomed in
to see our shape up close, we can see that the end
of this line is straight. Let's learn how to round it off. For this, let's open the
properties of this layer, open contents, open
shape and open stroke. We can enlarge the
panel like this, and here in stroke, we can round the edges
and connections. We can now close everything, minimize the panel, and learn how to move the preview
screen while in Zoom. To move the screen,
we need to hold down the space bar and
then move it like this. Or we can move the screen by clicking on the middle
click of the mouse. Now, I want to talk about an important topic
called anchor point. Please don't touch anything
and just listen to me. I'll open the rotation
parameter and change the value. Pay attention to how
the layer moves. It rotates not from the
center of the shape. It's because the anchor
point is located here. As you can see, there's
a small icon here. Let's move it to the
center together now. For this, let's select
the anchor point tool and drag the anchor point of this layer to another location. If we move the anchor point while holding down
the control key, the anchor point will
move symmetrically. This way, we can easily center it in the
center of the layer. After placing the anchor point, let's press to switch back to the selection
tool and go to a line. For those who can't find it, you can open it via a window. Let's click here to center our shape to the center
of the composition. Now we can set the preview
to fit and cancel the grid. However, this time, let's
not cancel it from here. Let's cancel it
using the shortcut. Press the apostrophe key. Let's press it a few
times to practice. We will use this grid often. Now let's create this sphere. To do this, we will click
and hold the rectangle tool. Now release it and
select the ellipse tool. Now, don't do it with me because I want to show you
something interesting. Let's see what happens if I try to create
this sphere here. Note that the sphere is
created on an existing layer. I'll press control Z
to undo the action. Now let's do it together. If we want to create this
sphere in a new layer, we need to make sure we are
not selecting any layer, and then we can choose
the color for the sphere. Let's choose the blue color. And we will cancel
the stroke this time. Now, when we create this sphere, it will be in a new layer. Let's create the sphere
here while holding down the Shift key to
make it symmetrical. Now let's release the mouse click and then release
the shift key. Next, let's align the
sphere to the center, using a line and
move it downwards. We won't be able to grab it because we're still
on the ellipse tool. To move this sphere,
let's switch back to the selection
tool by pressing. Now, let's select the
layer and grab the sphere and move it down while holding shift for symmetrical movement. Okay. And now let's
name our layers. To do this, we need to select
the layer and press enter. We can change the
name to stroke one. Press enter to
complete the action. Let's do the same
thing for the sphere. We'll call this
layer sphere one. Next, let's create
the text scale. To do this, we need to
select the text tool and choose the font Manst
that we installed earlier. Click wants to open the text
line and then type scale. Press shift to capitalize
the first letter and continue typing the rest of the word without
holding down shift. Double click on the
text to select it. Change the size to
30 and press enter. Select the font style to bolden the toolbar or by using
the arrow buttons. Finally, let's choose the
text color from here. Now, let's say we want
to move the text. To exit the text line, we need to press control enter. Now we have exited
the text line, and I can press V to return
to the selection tool. Now go to the paragraph and make sure that the text is
left lined and centered. Let's move a little
closer and center the anchor point of the
text layer to the center. This time, we won't use
the Anchor Point tool. We'll do it with a super useful shortcut Control Alt home. Mac users, pay attention to how to do this
on your keyboard. Let's use the short
cut together. And a, the anchor point
jumps to the center, and now we can
center the text and bring it down while
pressing the shift key. Now, let's bring back the grid by pressing the apostrophe key. Now let's select all
the layers and move everything up using the
arrow keys on the keyboard. For larger movements,
we'll press the arrows while holding
down the Shift key. Let's place the layer here, and to assign them all
to the same group, we can click on the
square here and tag all these layers in blue. Now let's duplicate
all these layers. To do this, we will select
all the layers and press the shortcut control D. Next, we will select them
and move them down so that they are
positioned side by side. To differentiate them from
the first three layers, let's tag them in yellow. And now, while all the
layers are selected, let's move them to the left. We will hold shift
and move them with the left arrow key
on the keyboard. Okay, one more time, let's duplicate the first
three layers again. This time, we will position
the layers upwards. Let's tag them in red. While everything is selected, let's move all the layers to the right while
holding the Shift key. All right. Now let's change
the words we have here. We can leave this
text layer unchanged and replace its name
in the layers panel. Press Enter and delete
the number two. Now let's double click on this word and change
it to rotation. Don't forget to
press Control Enter to exit the text line. Finally, we'll change
this text to stretch. Press Control Enter and then V to return to
this selection tool. Now, I want us to move the layers to be a bit further
apart from each other. This time, we'll use a grid
called the proportional grid. I'll turn off this
grid for now and show you how to open
it using a shortcut. The short cut to this grid is
Alt and the apostrophe key. Now let's move these
layers over here. And those layers over there. Now we can cancel the grid, so let's press out and
the apostrophe key again. Next, let's set the
preview screen to fit and change the colors of the
spheres. This one is in yellow. But this sphere will be red. Now, let's create the letter A, which is supposed to be up here. To do this, we'll
select the text tool, click once here, and then press Shift A to make
the letter uppercase. We'll select the letter
by double clicking and change the font size to 300. This time, we'll choose
the black font style. Now, let's click here. To exit the text line, we'll press Control Enter and V to return to the
selection tool. Now let's center
the anchor point of this layer using the
shortcut we learned. Question, what is the shortcut to center the anchor point. To do this, press
Control Alt home. Now, we will go to a line and center the layer
in the composition. Let's bring back our
grid by pressing the apostrophe key and
continue designing the scene. In my opinion, we can
enlarge this layer a bit. This time, we won't enlarge
it through the font size, but we'll enlarge the layer itself through the
scale parameter. Let's select the layer and press to open the
scale parameter. Let's change the size to 130. Now, let's raise this
layer a bit. It's too big. Let's change the size to 120
and raise the text again. Now, I'll press to open
the rotation parameter and rotate the layer
to check that it doesn't touch the other
shapes in the scene. Great. Okay. And now, I'll bring the rotation to zero. Now we can close the parameters
and let's place the layer above all the others and
change its color to none. This way, the layer
will be gray. All right. We have finished
designing the scene, and now we're moving on
to the animation stage. But before that, I highly recommend taking a
ten minute break. Get up from your chair,
do some light stretches, make some tea or coffee, and come back refresh
for the next part.
5. Your First Animation!: So at this stage, we don't need the color palette, so we can click here to see all the hidden layers and simply turn off the
layer from here. We can also unlock
and completely delete the layer using the
backspace or delete key. The layer is deleted
from the layers panel, but it is not deleted
from the project itself. So don't worry. We can use the palette
again if we need to. All right, so for
now, I'll delete it, and we can also close the grid by pressing
the apostrophe key, and now we're ready to
start the animation. The first thing we're going
to animate is the spheres. In order to make them move, we need to create key frames. Key frames are a
fundamental concept in animation and
motion graphics. In after effects, keyframes
are used to define the starting and
ending points of an animation or transition. They are points in time that
mark the position, size, rotation, opacity, and other properties of
an element or layer. Key frames are also used to control the speed and
timing of an animation. By adjusting the distance
between key frames, you can control the
speed of an animation. I cover this topic in depth in the free course I mentioned in the beginning of this course. If any of you guys want
to learn more about it, you're more than
welcome to watch it. You can find the link
to the free course in the description below
or in the PDF file. That's in the main folder of
the course you downloaded from me. All right. To begin, let's select all
the spheres while holding down the shift key
so that we can select multiple layers at once. Next, make sure that the time indicator is at the
beginning of the timeline. And finally, press P to open the position parameter because this is the parameter for which we will create key frames. Now, we will tell
after effects to keep the spheres in their current position at this point in time. Therefore, we will click on the stopwatch and create
the first keyframe. Next, we will move
the time indicator to the second number one
and move the spheres to the desired position
while holding down the shift key to ensure a
straight axis movement. This action will automatically
create a new key frame. Now, to preview our work, let's move the time indicator to the beginning of
the timeline and press the space bar. Good job. You have created your
first animation. Let's place the time
indicator at the beginning. Now, I want to time
this sphere's animation differently so that they
don't all move together. I want the first sphere
to move to be yellow, then blue, and only then red. We need to create an overlapping
action or an offset. To achieve this, we need to move our key frames
in the timeline. We will leave the yellow
sphere where it is now as it will be the
first sphere to move. Now, we'll move the layer
of the blue sphere to start only after the yellow sphere has reached its second point. But because I move
the entire layer, there is an empty part
in the animation, and I can't see the blue sphere. To prevent this from happening, we will only move the key frames and not the entire layer. To do this, let's select
all the key frames, or we can click the
parameter here. Now we can move these keyframes here while holding
down the Shift key. This way, the key
frames will stick to the end of the yellow
spheres key frames. Now let's do the same thing with the key frames of
the red sphere. We will select all of them
and move them to the time when the blue sphere has
already reached its last point. If we watch the animation again, we will see that
the spheres are now moving one after the
other as we wanted. The next step in our
animation is to match the animation of the letter e to the scale animation we created. Doing this for scale and
rotation is very simple, but creating the
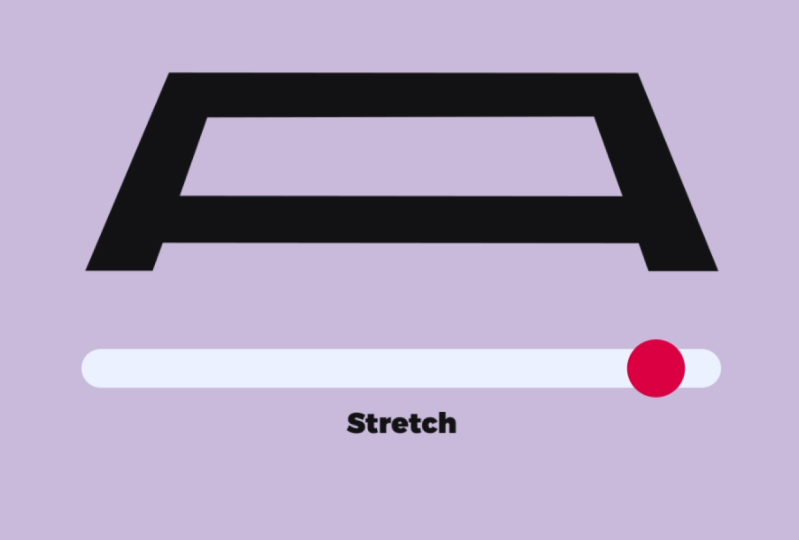
stretch text animation can be a bit more challenging. As you can see, if I stretch
this layer in this way, I won't be able to create
the effect I want. Let's see how to
create this correctly. As you can see in the example on the screen, an illustrator, using the create
outlines function, we can turn any text layer
into a shape with a path. After that, we can move and
change that path. All right. And now, in order to do
this in after effects, we need to right click
on the text layer, go to create, and choose
Create Shapes from text. Now we have a new layer
in which the text has become a simple
shape layer with a path. We can delete this text layer. Now, let's change the color
of the layer to none. Now we have a path that we
can change the shape of. Let's see how to do it. Before we begin, let's
get closer and position the screen in a way that will be comfortable for us to
work on this part. Let's open the grid and
select the pen tool. At the moment, we can
see small points, and if we select one of them, we can move it wherever we want. I'll press control Z. I can also choose
multiple points. I'll hold down the At key, and now I can select
several points. Okay. I can also move all
four of these points. I'll hold down the Alt key, and now I can select all
of these points as well. Now let's see what
happens if I want to move the entire right
side to the side. I'll press Alt and select all the points in this section and then move the points here. Note that the letter is
stretched incorrectly. It happens because there
are not enough points here. Let's create these
points together. To do it accurately,
we will use guides. Let's get a little closer. We can enlarge this
panel like this. Now to create the guides. We need to bring out the rulers using the control our shortcut. Now, to create a guide, simply click here and
drag the mouse down. And now we need to lock them through view and then
choose lock guides. And here, the guides are locked, and we can create the points. Let's position ourselves
on top of the layers path. When we see the mouse
icon change to a plus, we'll know that clicking on
the path will create a point. So let's create a
few points here. We can select and delete points using
backspace or delete. We can zoom in a bit more
and align the points. After that, to hide the guide, we can use a useful
shortcut control in the semicolon key. Pressing the keyboard shortcut again will bring
back the guides. Finally, let's press control
to hide the rulers to. All right. So now let's
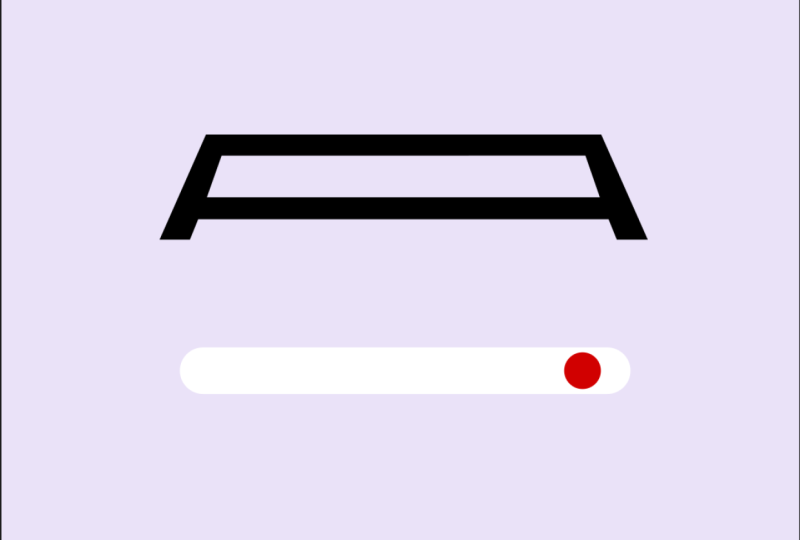
stretch the text. First, I'll explain
how it works, and then we'll animate
the path together. I'll move here a bit so
I can select the point. Now I'm holding down the Alt key and selecting all the points on this side. Except for this one. Next, I move the path sideways while holding
down the Shift key. Cool. I will press control
Z to undo the action, and let's animate
this path together. So the first thing we need to do is find its parameter
in the layer itself. As you can see, there
are two paths here, one for this part of the letter, and one for this
part of the letter. We need to animate
both of these pads. Instead of manually opening
all of these parameters, we can simply select the layer and tight path in
the search bar. We will then press enter and see both paths
open conveniently. Now we will time
the animation of the letters paths to the
animation of the red sphere. Let's set the preview
back to fit and see where the animation
of the red sphere starts. To do this, we will
select the layer of the red sphere and press the
U key to see its key frames. Now, we see that
the animation of the red sphere starts from
the second number two. Let's move the time indicator to this keyframe while holding
down the Shift key. Now let's select the
layer of the letter A, and tight path in
the search bar. Press Enter, and now we'll tell after effects
that from the second, The path will be in the
shape it is currently in. Because there are no
additional key frames before these key frames. The letter will be in this
shape throughout this time. Now let's move the time indicator
to second number three, at the same moment when
the red sphere finishes its animation and change the shape of the letter to
the shape we want it to be. We will hold down the Alt key. Select all the
points on this side. Make sure we are not
selecting this point. And now let's drag the path here while holding
down the Shift key. After that, we will
now press and hold the alt key and select all
the points on this side. Let's move these points here. We can also change the position
of these points upward. Let's select this point, hold the shift key, and also select this point. Now let's move both of the points we selected
earlier upward. Now let's select
only this point. Hold the alt key, select only this point and move it
while pressing Shift. Finally, let's select this point and move it here
while holding shift. Now, these two keyframes tells after effects that at
this point in time, the design of the letter's
path will look like that. In this keyframe, the design of the letter looks like this. All right. Let's move on. Let's close the layers. Set the preview to fit
and close the grid. And now we can switch to the selection tool and see all the animation we
have created so far. Looks nice. The next step in our animation is to synchronize the scale and
rotation animations. Let's begin by timing
the rotation animation. First, we should
select the layer of the blue sphere and press
to see its keyframes. As we can see in the
final animation, the letter should be upside down from the start
of the animation. The letter rotates as the
blue sphere rises upward. Therefore, we need to reach the point where the blue
sphere is already up, then press R to see the rotation parameter and set the rotation of the
letter at this time. We will then click
on the stopwatch without changing the
value of this parameter. And at this point in time, when the blue sphere is at the bottom, the
rotation will be, let's say -180,
During this time, the letter will be upside down, and after this keyframe, the letter will start
rotating until it reaches the value we set
for it at this time. Now, both animations are synchronized at the
same time points. Let's see how it looks. Looks great. Now, let's
animate the scale animation. We already know that
the size of the letter should be this size to when
the yellow sphere rises, and we also know that it takes 1 second for the yellow sphere
to complete its animation. Therefore, we will set the scale parameter of this
layer to the current value. Now we go back in time, which is when the
animation begins at second zero and set a different value for
the scale parameter, such as 50 or 60. Next, we will close the layer, expand the panel, and show all the parameters
of all the layers. To do this, we need
to ensure that we don't select any layer
and then press you. Now let's move on to the
next part and learn how to make this entire animation play seamlessly in
a perfect loop.
6. What is a Loop Animation?: So to make this entire animation play seamlessly in
a perfect loop. First, we need to understand
what is a loop animation. A loop animation is a
type of animation where the beginning and
end of the animation seamlessly blend together, creating an infinite loop. In other words, the
animation plays continuously without any
discernible start or end point. There are several ways to create a loop for
this animation. We will do it in
the simplest way, which is to create
a reverse animation for everything
that happens here. Let's see how to do this. To make it easier, let's
hide the layers without key frames so they don't disrupt our workflow
in the layers panel. Just like we hid the
color palette earlier, so we can select this layer as it doesn't have
any key frames. If you don't see the
shy icon, click here. Okay, we will click here
and select this layer two. This one two. Since there are no
keyframes here, let's select this layer as well. There are no keyframes
here either. Let's select this layer
two. There are none here. Let's select this layer as well. Cool. And now we need to click here to activate
the shy function. Great, so now we see only
the relevant layers, and we can move on
to create the loop. Okay. So the first
thing we need to do is to create the
reverse stretch animation. That is, we need to create a return animation for the red sphere and also for
the path of the letter A. So first of all, let's decide at what point in time we want
to return the red sphere. We want it to return after it reaches the top in
the third second. So in the fourth second,
we want it to go back. So we can simply copy
this keyframe and paste it to the position
of the time indicator. So let's select it and press
control C and then control V. Let's see how it looks. So the sphere goes up and
immediately comes back down. Now, let's create the reverse animation
for the blue sphere. I want to bring the
blue sphere downwards only after the red sphere
finishes the animation. Therefore, I will go to
the second number five, copy the first key frame of the blue sphere
and paste it here. Let's see what I got. Note that after the blue sphere
reaches the top, it already starts to go down, which is not what I wanted. I needed to stay up
all this time and only start to return
from the fourth second. What we need to do is
to create a pause. Let's learn how to do it. The pause will only
be created if there is no change in the
value of the key frame. Therefore, we need to copy its last keyframe and paste
it at the fourth second. These two keyframes are
completely identical, meaning they have
the same value. This way, we know
that there will be no change in the animation
throughout this time. The change will only
start right after these keyframes because there are key frames with
different values. Now, let's create the reverse animation for
the yellow sphere. First, we need to
find the point in time when we want the
sphere to start returning. Second number five
is great because the blue sphere completes
its animation at this point. We also need to create a pause, which means that
the yellow sphere will be in the same
position as it is now. We can copy this keyframe
and paste it here. During this time, there will be no change in its animation. Next, at second number six, we will return the yellow
sphere to its initial position. Let's copy this keyframe. And paste it here. As a result, the yellow sphere will return
to its starting point. In both cases, we copied the last keyframe
and pasted it here, and then we copied the first key frame and pasted it here. In other words, we took these two key frames
and reversed them. Let's see how we can
apply this knowledge to create the reverse
animation of the letter A. We need to time the
reverse animation of letter A with the reverse
animation of all the spheres. First of all, let's match the reverse animation of the stretch text
with the red sphere. In this case, it's very simple. We simply copy the
first key frames when the letter is not stretched and paste them at this point in time when the red
sphere goes back down. Let's copy these
key frames using Control C and paste
them with control V. Now the letter is stretched and returns
to its original shape. And now, as the blue
sphere begins to return, we need to rotate the letter back to how it was
at the beginning. That is, from a value
of -180 to zero. But now we need to do
the reverse animation. Therefore, we can copy both
of these keyframes with Control C and paste them here
with control V. And now, when both keyframes
are selected, right click on one of them. Go to keyframes assistant and
select reverse keyframes. Now we have reversed
the animation of the last key frames. Next, from this point on, as the yellow sphere returns, we need to reverse the
scale of the letter. Again, we will select
both key frames of the scale parameter and paste them to the position
of the time indicator, as this is where the yellow
sphere begins to return. Now let's reverse
these key frames using reverse key frames. Let's see how everything
looks together. Okay, now I want to teach
you another useful shortcut. Instead of manually placing the time indicator at the
beginning of the timeline, we can simply press
the home key. Mac users, pay attention to
the keys you need to press. Cool, and now let's learn how we can
improve our animation. But before that, I highly recommend taking a
ten minute break. Get up from your chair, do some light stretches, make some tea or coffee, and come back refresh
for the next part.
7. Improve the Animation: Now, we will improve the
animation by converting the keyframes from
linear key frames to easy Ease keyframes. Easyse is a feature in
aftereffects that helps to create smoother and
more natural animation. It works by gradually
slowing down and speeding up the animation
between two keyframes, making the movement more
organic and less jarring. I cover this topic in depth in the free course I mentioned in the beginning of this course. If any of you guys want
to learn more about it, you're more than
welcome to watch it. You can find the link
to the free course in the description below
or in the PDF file. That's in the main folder of the course you
downloaded from me. So to convert the
keyframes to EsEs, we need to select
all the keyframes. Right click on one of them. Go to Keyframe Assistant
and choose Ess. Or we can use the
shortcut F nine. Let's do this and
see what we got. As you can see, the icon of
the keyframes has changed. Let's press space bar
and see how it looks. Meanwhile, there is a
very small difference from the animation
we had before. Let's try to improve
the animation even more by changing the speed
of the animation over time. We will do this with the
help of the graph editor. Let's see how to do it. Select only the
keyframes of this layer so that we can see the difference
from the other layers. Now, let's click on
the graph editor. Then right click to ensure that we are
in the speed graph. Make sure this icon is selected. If you see the graph slightly different from mine, click here, and you will see
all the key frames. Let's zoom out a bit. Now, let's select the
key frames again and drag this handle here while
holding down the shift key. Pay attention to the
influence percentages. It should be around 88%. Let's also drag the other side until it reaches about 88%. Now, notice the timing of the yellow sphere animation compared to the other
objects in the scene. The duration of the
animation did not change, but the speed of the object at the beginning and end of
the movement did change. This causes the yellow
sphere to move in a much more interesting way
than the other spheres. Let's apply this movement to
all objects in the scene. As we saw before, when
we moved the handles, we actually changed the
influence of the key frames, which was around
88% on both sides. Let's learn how to change
the influence more accurately without having to go into the graph
editor every time. Firstly, let's revert
these keyframes to regular EasEs by
pressing F nine. Now, the influence
of the key frames has returned to its
original state. Next, let's select them again, and instead of entering
the graph editor, simply hold down the Alt key and double click on
one of the key frames. This will open the
keyframe velocity panel where we can input the
influence percentage. Let's start by
setting it to 85% at the beginning and 85%
at the end. Click Okay. And if we check the graph, we'll see that the influence is now equal in all the keyframes. Now let's change the influence
for all the key frames. Don't do it with me because I want to explain
something important first It's important
to note that we can only change the influence for one type of parameter. That is, we cannot select
all the key frames, enter key frame velocity, and change them all
to 85% at once. Note that even though I selected all of them
and changed them, if we check the influence
of these keyframes, we'll see that it hasn't
actually changed. We cannot select two
different parameters. We need to select either
the scale parameter or the rotation parameter. In the free course, we
learn how to change the influence of all parameters at once using a free script. For those who want
to check this out, you're welcome to
watch the course. In the meantime, let's
practice doing it manually. Let's select all the key frames of the position parameter. Now, hold down the Alt key and double click on one
of the key frames. Then let's change the
influence to 85% on 85%, click and repeat
the same process with the rotation parameter. We will select those keyframes, hold down the Alt key and double click on one
of the key frames. We will change the influence
to 85% on 85% and click. Let's do the same thing
for the scale parameter. We need to select the key
frames of the scale parameter, hold down the Alt key and double click on one
of the key frames. We will change the influence
to 85% on 85% and click. We also need to
do the same thing for the path of the letter a. So let's select all the key
frames of the path parameter. Hold down the Alt key and double click on
one of the key frames. We will change the influence to 85% on 85% and click Okay. Finally, let's see how
everything looks together. It looks great to
stop the preview, we need to press the space key. Then to go back to the
beginning of the timeline, we need to press the home key. Now, make sure that we are
not selecting any layer, then press you to
close all layers. Next, we need to restore
all hidden layers, disable Shi for all of them, and let's continue with
the lesson to learn how to render the animation we
created as a lot file.
8. Convert the Animation to LOTIE and JSON files: So in order to
export our animation in a file that is suitable
for apps and websites, we need to install the
free Lotti plug in. Before doing so, let's save the project by
pressing controls. After that, close the project and proceed to
install the plug in. First, we need to go to the
official Lotti website. You can find the link in the
lessons description or in the PDF document located in the main folder of the course
you downloaded from me. Or you can search
for Lotti files on Google and visit
the first website. Now register to the website. Once you are registered, go to design and select
Create with After Effects. Now, we will learn two different ways to
install the plug in. The first method is using
Adobe Creative Cloud, while the second
method is suitable for those without an Adobe
Creative Cloud account. Important to note
that both methods are identical for both Mac
and Windows users. I will start with the
first method from my PC, and then I will show the second
method using my Macbook. Let's start with the first
method and click here. You need to make sure you are
logged into your account. Now click on Manage and install the plug in using
Creative Cloud app. You can open the app from here or search for it
on your computer. If you don't have this app, you can access
Creative Cloud through the Internet browser and
download the desktop version. Since I already have the app, I won't download it again. After you download
and install the app, log into your account, go to stock and marketplace,
then future in. Now type in the search bar and install the version
for after effects. Click and wait for
a few moments. Now let's move on to
the second method. This process is identical for
both Mac and Windows users. The first thing we
need to do is click here and download the ZXP file. If we try to open this
file, we won't succeed. To install this file, we need to use
extension Manager. We can find the link to download the extension in the Li
files installation guide. Now, if we scroll down, we'll see a link to the Anastas Extension
Manager website. Let's click on the link. Download the version
that suits us. Since I'm doing this
using my Macbook, I'll download this version. Now, let's extract this file and delete the zip or win file. Next, let's open the extension. If you're using a Mac, you can mark move two
applications folder. Here, you can select
check automatically. You should now see the names of Adobe programs installed
on your computer. Let's choose after effects. And now to install the plug in, we just need to drag the ZXP
file into the extension. Click and wait for
a few moments. Then click again. The plug in is now
successfully installed, and we can see it
in after effects. You can close the extension and other windows and
return to our project. After installing the plug in, let's go back to the
folder we created for the and to the AE folder
and open our project. You can now close this panel. Next, let's open the plug in. Go to window, then extensions, and choose Lottie files. Click on it and the
Lottie panel will open. Now, let's register
through the browser. After that, you can close the browser and return
to our project. Here, we can see the name of the composition
we're working on. And now, click on the green button and wait
for the Lotti to be ready. And here we can see our
animation is ready. By the way, we can grab this panel from here and attach
it here for convenience. Now we see that we
have an error note. If we click on it, we'll
see the errors we have. Due to these errors,
the animation will not work on the
devices displayed here. Let's start by fixing the
lottie file error for the web. We can come back here to the composition and
make some changes. The first thing we'll do is
delete the live text layers. To do this, we can
convert these text layers into shapes with path like
we did for the letter A. We'll select the layer
we want to change. Right click, go to create, and choose Create
Shapes from text. Now we can delete this text
layer and change the color to red to know that this
layer belongs to this group. Let's do the same thing for
the next two text layers. Now we can delete
this text layer two. There's no need to change the color here because
it's already blue. Let's do it one more
time for this layer. Right click, create, and choose
Create Shapes from text. Now we'll delete the text layer and change the color to yellow. Now, we need to get
rid of merge paths. After converting the text
layer to a shaped layer, a parameter called
merge paths is created, which we need to delete in order for the
lottie file to work. We can find merge
paths under contents. Select it and press
backspace or delete. Now, instead of opening
each layer manually, we can simply select
the relevant layers. And now, type merge
in the search bar and see all existing merge
paths in the project. Let's delete them all. And now we can click the
green arrow again. As you can see, the error
message disappeared. Now, let's address
another issue we have. Note that when the
animation ends, we see the entire
scene standing still. That is, we have many
unnecessary frames where we do not see any changes. In order to fix this, we need to shorten the duration
of our composition. Let's go back to the composition and see where our
animation ends exactly. To know exactly where it ends, we need to find the last
keyframe in this scene. For this, we need to see all the key frames
in the project. Question, which key
should we press to see all the key
frames of all layers. So to achieve this, let's make sure we're not selecting any layer
and press the U key. If we expand the panel, we will see where the last
key frames are located. Here it is in the six second. We need to shorten the work
area to the six second. We can do this
manually by dragging the work area or by
using the n key, which will shorten
the work area to the location of the
time indicator. And if we press the
create button again, we will see that the animation now plays in a perfect loop. Okay. Now let's learn how to render this animation
to a Lotti or JSON file. We will also learn how we
can preview the animation we created in a web browser
or on a mobile device. To render the animation, click here and choose which
format to render it in. But before that, let's
see what it looks like in the web browser
and on a mobile device. To do this, let's
click on Upload. Now we see the name
of our composition. Here, we choose which folder to save it in on the Lotti
account we signed up for. Let's click upload.
Wait a few seconds. Now let's go back to
the Lotti website. If you have already signed
up, you can click here, go to my dashboard, and see the animation
we just created. Let's open it and see
what it looks like. From here, you can view how
it appears on a phone or tablet by simply opening the camera and
scanning this QR code. From there, we can render the animation into a
lightweight JS file. We can also download it
from here as a lottie file that weighs even less and
save it to your computer. However, let's close
this because we will render the animation
through after effects. Another important consideration
before rendering is how your animation will appear on different background colors. By chucking it, you can make adjustments that are best
suited to your needs. By pressing this button, we can view the animation
in full screen mode. In my opinion, it
looks fantastic. Okay, press the escape button, and let's return to after effects and continue
rendering the animation. Let's click here and
render it as JSON file. We'll save the file in the samples folder
we created earlier. Make sure the name is good. It's the same name
as the composition. I'm good with that, so
I'll click on Save. Now let's open our sample
folder and check the render. The file is there, and it
weighs only 32 kilobytes. Now let's save it as a lot file. We're already inside
the sample folder. This time, the extension
is L, which is great. Let's click on Save. Let's
go back to our folder, refresh it, and we can see that the Lotti file
weighs 5 kilobytes. These are the files you can
send to your client or to a programmer or to whoever is working on your website
or application. Now, let's go back to the project and continue
with the lesson. Regarding the plug
in, we can either drag it here so it
doesn't bother us. Release it from the panel, or close it in this way. Now let's prepare
our animation for sharing on social media
and in your portfolio.
9. Render the Animation For Sharing on Your Portfolio!: So in order to share
the animation we created on social media
and in our portfolio. We need to render it
in an MP four file. So now let's learn how
to render this animation with a background as a
high quality MP four file. As you can see, the background we have here is not
a real background. It is made only for
the preview screen. To create a real background, we need to create a new solid by right clicking
on this gray area. We'll go to new
and select solid. Or we can use the
shortcut Control Y. So let's press control y and
create a new solid layer. Now, let's choose the
color of the solid. Before we press okay, let's make sure
the solid will be the same size as
the composition. We can click here
to make it happen, and now let's press okay. Here's the solid. Let's drag
it below all the layers. Before rendering, we ensure
that the work area ends on time to avoid rendering
unnecessary parts. And now to render the video, we navigate to composition
and choose add two render Q. We are now in the
after effects render panel where we can see which composition
we are rendering. Here, we select the file format we want to render the video two. We will choose H 0.2 64, which is MP four file. In the format options, we choose VBR and make sure hardware
encoding is selected. Here we choose the
quality of the MP four. Set it to 40. This will render a slightly
larger file size, but with better video quality. Now click and choose
where to save the render. Let's select the samples
folder that we created and use the same name as the
composition for the file. Finally, we click Save and then the render button to begin
the rendering process. Now, let's wait a
couple of seconds. And now to see the render, we can either find
the folder manually or click on the link
here in the output mode. This will take us directly to the folder where the
video is rendered. Let's open the video
and see how it looks. It looks great. Now you can
share the animation you created on social media and display it on your
portfolio website. And if you enjoyed the course, I would really
appreciate it if you rate this course according
to your experience. Also, don't forget
to leave feedback, so I know if you learn anything interesting
in the course or not. Okay, let's go back
to our project. Let's return to the composition, and before we exit the project, let's save it. Press controls. And now you can
close the project and join me to the
next lesson where we will learn how to create a cool animation and use
it as an e mail signature. I am very proud of you. You learned a lot today. You can share your animation in our private community group. And of course, you can
ask me questions there. I promise to answer
any question you have. I hope you enjoyed it, and before jumping into
the next lesson, I highly recommend that you
take a ten minute break. Get up from your chair,
do some light stretching, grab a cup of coffee, and recharge your brain
for the next lesson. Okay.
10. Section 1: Project Task: All right. And now to
practice what we learned. Please create this animation. You can use different
colors than mine, but try to keep the
animation the same. This task is meant to help you remember and understand
what you've learned. Don't worry. The task won't take up too
much of your time. It's designed to be
doable in 2 hours only. If you have any
problems or questions, feel free to ask me or your classmates for help in
our closed community group. M
11. Section 2: Animated Gmail Signature: Hello, everyone, and thank
you for joining me back. In this lesson, we will create a super cool animation
that will be converted into a professional
email signature. This time, our animation will be composed of three
separate animated parts. We will learn the
correct workflow when working on a bit more
complicated projects. This lesson is divided
into six parts in which we will learn.
In the first part. We will design the
first animated part of the animation and
learn how to create a basic rig to control
the shape we have created easily. In
the second part. We will learn how to group
all layers into one group, and we will learn about
the concept of precompose. Then we will continue to animate the scene in the third part. We will design and animate the second animated
part of the animation. We will use and
learn a cool effect. Then we will create the third animated part and synchronize between all parts.
In the fourth part. We will prepare the animation we created for rendering
and learn how to create a gift file using
Photoshop. In the fifth part. We will learn how to design the Gmail signature
using Google Docs. We will learn how to transfer the signature we created
to the Gmail account. Then we will identify any potential problems we
may encounter and solve the problems and export a proper gift file.
In the sixth part. We will prepare the animation
we created for sharing on social media and
render the animation we made in a high
quality MP four file. Finally, we will organize the
project before we close it. After that, at the
end of the lesson, you will get a small
task for you to do. The task is meant to help you remember and understand
what you've learned. Don't worry. The task won't take up too
much of your time. It's designed to be
doable in 2 hours only. If you have any
problems or questions, feel free to ask me or your classmates for help in
our closed community group. All right. Enough
with the talking. Let's begin.
12. Let's Begin to Design the Scene: So first, let's open the
After effects software. We can exit from this window, enlarge the software window, and to see the same
panel layouts. Let's click on default. Now, let's click
on new composition and create our
first composition. We'll call it
animation for Gmail. We'll work in a square
format of ten 80 by ten 80 pixels at a frame rate
of 30 frames per second. The duration of the composition
will be 10 seconds. We can leave the background
color in white and click. Great, now that we have
created our first composition, we need to save the project
and give it a name. Let's go to the folder we
created for the lesson. We'll go into the
A folder and name the after effects file
we're working on right now. We can give it the same name
as our main composition. Now, let's click on save. Now, let's import the color
palette into the project. For this, we will
double click on the gray area in
the project panel. Now we will find the
folder we created for the lesson and enter
the assets folder. We will select the color
palette and click on import. After that, let's drag the
palette into the composition, press and set the
layer size to 30. We will place it here, so
that it doesn't bother us. We can lock the layer and hide
it from the layers panel. For those who don't see the
shy icon, you can click here. Let's select the layer
as a hidden layer and hide it by clicking
on the icon here. There, this layer is hidden
from the layers panel, but we can still see
it on the screen. Okay, now let's start
to create our scene. The first thing we'll do is
select the rectangle tool. We'll turn off the fill. We will select the stroke and the dark color from our palette. And now we will create
the rectangle while holding shift to create
a symmetrical shape. The anchor point of the shape
is automatically placed in the center because we selected this function in preferences. For those whose anchor point is not in the center
of the shape, you can select the anchor
point tool and drag the anchor point
to the center of the shape while holding control. Don't forget to go back
to the selection tool. Now let's bring out
the grid by pressing the apostrophe key to see the
center of the composition. Now let's align the
layer to the center of the composition
using the align tool. Click here and here. Now, let's make the
corners of this shape free so we can move
each one separately. To do this, we need to convert the path of this shape
to a bezier path. Let's open the
contents of the layer. Open the rectangle until
we see the rectangle path. Right click on it and
choose convert Tobi path. Now, if we select the pen tool and select one of the corners, we will able to move it
separately like this. Now, we need to use a free
script from Aftereffects. That will help us
move the points in a more convenient way. But before using the script, we need to open the
path and select it. Now we can go back to
the selection tool. Now we can go to
window, scroll down, and choose to open the script called create nulls from paths. While the path is selected, we need to click on
points follow paths. Now we can either close
the panel or move it here. We can also close the
window from here. Now we have four nulls, which are four empty layers that allow us to control the
corners of our shape. Now let's create the
small spheres that are supposed to be in the
corners of the shape. Let's make sure we
don't select any layer. Click and hold the
rectangle tool and select the ellipse tool. Let's change the color to
blue and turn off the stroke. Okay. We'll create the sphere while holding down the shift key so that it will be symmetrical. Okay. Now let's change
the name of the layer. We'll select it and press enter. Let's call it sphere one. Press enter to
finish the action. Because we changed the name. We can now see the secondary
names of our layers. To go back to seeing the names normally. Let's click here. Now, let's place the first
sphere next to the first null. Because soon we will
control and animate the corners of the shape from the spheres and not
from the nulls. Let's select the null to
see where it is located. Now let's move the
sphere to this area. Let's go back to
the selection tools so that we can move the
layers in the composition, and let's move the sphere here. Our goal is to locate
the anchor point of the sphere to be located exactly in the
corner of the shape. To do this, we can use
the snapping function. Let's click here and activate the two functions
located next to it. Now when we move the
sphere from its center, it will move in a snapping way. We will release the
mouse when we see that the sphere has been
placed where we want it. Now let's duplicate this sphere using the shortcut control D. Let's move it down a bit and place
it next to this null. Let's also change
the position of the layer in the layers
panel for convenience. Now let's grab it
from its center and move it towards the
corner of the shape. Let's duplicate the shape again using control D. Move it to the location of this null and place the sphere next to
it in the layers panel. Now let's move it to the
corner of the shape. Let's repeat this
action one last time. Control D to duplicate. Move the sphere to the
corner of the shape and place it next to this
null in the layers panel. Now we can cancel the
snapping and continue. As you guys know, we move the path of our shape
using the nulls. Now I want to move the path using the spheres
and not the nulls. We can connect the null and the sphere using the
parent and link function. Parenting and linking are both powerful tools and after
effects that allow you to control the motion
of one layer or property based on the
motion of another. Parenting is a relationship between two layers
in which one layer, the child is attached to and follows the motion of
another layer, the parent. When you parent a layer
to another layer, any motion or
transformation applied to the parent layer is also
applied to the child layer. This is useful for creating
complex animations, such as characters or vehicles, where the movement of one part affects the movement of another. Linking, on the other hand, is a more flexible relationship
that allows you to control one property or parameter of a layer
based on another. I cover this topic in depth in the free course I mentioned in the beginning of this course. If any of you guys want
to learn more about it, you're more than
welcome to watch it. You can find the link
to the free course in the description below
or in the PDF file. That's in the main folder of the course you
downloaded from me. So all we have to
do now is simply drag the pick whip of the null
layer to the sphere layer. Now you can see that when we move the sphere,
it moves the path. Let's do the same with
the rest of the nulls. We'll connect null
three to sphere three. See that it works. Then do the same with null
two and sphere two, null one and sphere one. Now we don't actually need
to see these nulls anymore, so we can select them all
by clicking their tag, choosing select label group and hide them all from
the layers panel. Now, let's tag the
shape layer with any color to differentiate
it from the sphere layers. So after we created our scene and we control the path of the
shape through the spheres, we're ready to move
on and start to animate the scene. Okay.
13. Learn How to Group Layers ( Precomps ): All right. So first, let's
select all the spheres. We'll select the first sphere, then hold the shift key and
select the last sphere. At this stage, I know
that the spheres in my animation need to be placed
where they are right now. Let's say it will happen
in second number one. Now we'll press P to open the position parameter
and create a key frame. And now in the second zero, which is at the beginning
of the animation, I want them to appear
from the center. We can place them in the
center using the align tool. Just make sure that the align is according to the composition, and then click here and here. New key frames
were automatically created with the new
location of the spheres. So what will happen now is
that in second number zero, the spheres will be here and in second number one the
spheres will get here. Now, in second number two, I want the spheres to
go back to the center. We can do it by using
the align tool again. Great, and now let's
improve the animation. Question, how can we make our
animation more interesting? To do that, let's select
all the keyframes and convert them to easy ease
by pressing the F nine key. All that's left to do now
is to create an offset for the animation of
the spheres so that they don't all move
together at the same time. Let's decide that the four
sphere will go first, so we'll select all
the other spheres. Now we'll move with
the time indicator four frames forward and
move the keyframes here. We can also select the key
frames we want to move in time and move them
using a cool shortcut. We'll hold the alt key and move the keyframes to the side using the arrows
on the keyboard. Let's do that with
these keyframes, too. Hold the alt key and move the keyframes four frames
forward with the right arrow. Okay, let's see what we got. Look sweet. Let's just change the thickness of
the stroke real quick. We'll select the layer and
change the stroke thickness to ten or even 12. Yep, 12 looks better. So after we finish the first animated part and
before we go any further, let's group all the
layers related to the animation of the first
animated part into one group. In after effects, we
call this precompose. Precomosing is a
technique used to group layers together and
treat them as a single layer. It is a very useful tool
in after effects that can simplify your timeline and help you organize your project. You can then treat this
precomposed layer just like any other layer in your
composition and apply effects, transformations, and
other adjustments to it. I cover this topic in depth in the free course I mentioned at the beginning of this course. If any of you guys want
to learn more about it, you can find the link
to the free course in the description below
or in the PDF file. That's in the main folder of the course you
downloaded from me. Okay, so let's see
how it's done. First, let's hide
all the key frames. Make sure we don't select
any layers and press you. Now, let's show the
nulls we hit earlier because they have
an essential role in this animated part. Let's select all the layers, excluding the color palette as it isn't part of
this animated part. Okay, now let's select
the relevant layers. Right click on one of them and choose precompose or use the shortcut Control Shift C. For now, let's click precompose. We'll call it animation
underscore one. Now, let's make
sure that both of these are selected
and press okay. We can also see the precomp
we made in the project panel. Nothing has changed
in the animation, and if we double click the
precomp, we can enter it. Let's turn off the
background and the grid. We can use the shy function again to hide the nulls
and continue the lesson. Now, let's get back to
our main composition. As you can see, the size of this precomp is the same
as the main composition. I actually don't
need this precomp to be this size because there's a lot of empty space here. I'll turn off the grid. Since I don't need
all this space, I need to decrease
the precomp size. To do that we need to go into the precomp and
change its settings. To get to composition settings, we'll press control K. Now, let's make sure that preview is selected and
decrease the size. We'll change it to 800
pixels by 800 pixels. Let's make sure I didn't
make it too small. And when we go back to
the main composition, we'll see that we now
decrease the size of the pre comp and this will
make our work more convenient. The precomp we created automatically becomes a
regular after effects layer. Like any layer and
after effects, the precomp layer has
the basic parameters. In this case, we'll animate the scale parameter to make our animation more interesting. To see the scale parameter, let's select the
layer and press. We can hide the color palette
so it won't get in our way. Now let's decide that in the
beginning of our animation, the size of the
precomp will be zero. So I'll create a key
frame with this value. I frame 15, this layer
will grow to 100%. Now let's select
the key frames and convert them into
ECEs using F nine. Let's see how it looks. Okay. Now let's
decrease the size of this layer when the animation inside this pre
comp is finished. Let's get to second number two. As we learned in the
previous lesson, we can copy these keyframes using Control C and
paste them in place of the time indicator using Control V. Now let's flip them with a
right click on one of them, go to Keyframe Assistant and select time
reverse keyframes. Let's check that the timing of the scale down animation
matches the animation. I think it should
start decreasing a bit earlier around here. So let's move the
keyframes here. Okay, now let's check it
out again. All right. Let's move on. As you can see, the animation of this layer
is already finished here. That is, from the second, we don't see anything, but the length of this
precomp is very long. We don't really need
all this length. Let's learn how to
shorten the precomp. We'll go to the end
of the animation and drag the layer by its corner like this or we can shorten the
precomp for real. To do that, we need to
go into the precomp. Now we need to find the point in time when the
animation is finished. That is where's
our last keyframe. For that, we'll
make sure that we don't select any
layers and press you. Here's the last keyframe. We'll place the time
indicator here and bring the work area in place of
the time indicator manually. Or using the shortcut
we've learned. Press. Now to get rid of
all the unnecessary length, we need to right click
the gray part of the work area and select
trim comp tio work area. And here, the
length got shorter. And if we go back to
the main composition, we'll see that the length
of this prec is shorter. Let's see how it looks. The only thing
that's left to do is move these keyframes to
the end of the precomp. Now, I want to create
the same animation, but with minor changes
in the color of the spheres and the thickness
of the shaped stroke. We can duplicate the animation and do everything we planned. Let's see what happens if I duplicate this precomp
through the layers panel. Now I'll enter the precomp and change the color of
one of the spheres. When I return to the
main composition, I'll see that the color has
changed in both precomps, which is not what I wanted. I only wanted to change the color in this precomp
and not the other one. Okay. I'll press control
Z to undo my actions, and let's see how to
do this correctly. What needs to be done is not to duplicate the precomp
from this panel, but through the project panel. In case we have many precomps in the project and we want
to find a specific one. We can right click on the
precomp we want to find, go to reveal and select reveal
layer source and project. Now we will press Control D
to duplicate this precomp. The precomp is not currently in our main composition because we haven't dragged it there yet. We can do that after making
the changes we planned. For now, let's enter
this precomp from here. Now let's select
our color palette through the project
panel to see the colors. Let's select all the spheres and change their colors
using the eye dropper. Let's sample the red
color from our palette. After that, we can change the color of our shaped
stroke to yellow. Let's also set the
stroke width to eight. We can restore the background
to see how it looks. Now let's decrease the size of the spheres in this precomp. I will close all the layers and display the scale parameter
only for this layer. See what happens when we
change the size of this layer. Because it is linked to the null and the null is
linked to the path, this ruins the
design of the shape. Let's see how to
do this properly. Let's open the layer.
Within the shape layers. There are two
places where we can control the size of the shape. We can control the size
of the shape using the basic transform properties
of the layer itself. However, we found that it
didn't work for us this time. Fortunately, in shape layers, there are also basic
transform properties for the shape inside the layer, which is called ellipse one. This way, our shape
will shrink properly. So we'll shrink all
the spheres through the shapes transform and
not the layers transform. Let's shrink it to maybe 50. Or 80. I think 60 would
be the best option. Let's do the same for
the rest of the spheres. In order not to manually open the transform
for each sphere, we can simply select the
layers we want to shrink and type scale in the search
bar, then press enter. Now, we see that each layer
has two types of scale, the shapes transform and
the layers transform. In our case, we'll
use the shaped scale. Let's write 60 here. Now, we can delete the word from the search
bar and continue. Now let's go back to
our main composition and drag the new precomp here. Let's turn off this precomp
to see the new one. As you can see, this
precomp doesn't have the scale animation that
exists in the first one. We can select the
parameter from here. This way, we'll select
all its key frames. Now let's hit Control
C to copy them. Then we can paste them
onto the new pre. Let's press control V. Now, let's press S to see
the scale parameter and the key frames
we just pasted. Note that the key
frames were pasted in the same place where
the time indicator was. Let's move the keyframes to
the beginning of the precomp. Finally, let's turn on
the first precomp again. All right. Let's move on. Now, we'll create an offset
between these two precomps. Let's select this layer
and move it forward in time. Let's see what we got. Looks great. Let's just position this layer
under the first one. Now, to create a more
interesting animation. Let's create a rotation
animation for the first precomp. For this, go to the
beginning of the animation and press R to open the
rotation parameter. Now, let's create a key frame
with the current value, which is zero degrees rotation. At the end of this precomp, let's set the layer to
rotate one full rotation. Let's see how it looks. Now, we'll select the key
frames and convert them into EasEs Looks better now. Let's do something similar
to the second precomp. We'll go to the beginning
of this precomp, press R, create the first key
frame, and this time, set the layer to
rotate 180 degrees. Let's select the key frames and convert them to asys as well. All right. Let's see how
everything looks together. Let's see it again. Looks nice. Now, let's close the layers and slightly change the timing
between the two animations. Okay. Looking good. And we are ready to move
on to the next part.
14. Moving on to Design and Animate the Second Part: So now, let's create the animation of the
five rotating spheres. To do this, enter the
first pre comp and copy one of the spheres and paste it into the
main composition. Let's also copy the sphere
from the second precomp. Now let's turn off the precomps so that it doesn't bother us. Now, let's delete the
animation on these spheres. Select both layers, press you, select the key frames, and use the backspace or the delete key to delete
them from the layers. Next, let's center
these two spheres in the composition
using the align tool. Make sure composition
is selected. Then we'll click here and here. Now, let's design
the entire scene. Let's zoom in a bit
using the mouse wheel. For those who don't
have a mouse wheel, you can zoom in from
here or press this keys. Okay, let's move this sphere here while holding
down the shift key. Let's duplicate the blue
sphere and move it here. Let's also duplicate the red
sphere and move it here. Now, let's select both red
spheres with shift and tag these layers and pink so we can easily distinguish
between the spheres. Now let's see how
we can check if the distances between
the spheres are equal. To do this, we will open the proportional grid by pressing out and
the apostrophe key. Now we need to go to edit and then preferences and
select grids and guides. Here, we can change the number of lines in
the proportional grid. Let's set it to eight on the
vertical axis and press. Now we can adjust
the positions of the spheres according
to the new grid. Press salt and the apostrophe key again to close the grid. Now we are ready to
animate the spheres. So let's zoom out a bit. Select all the spheres. And now go to second number one. Press P to see the
position parameter and create the first key frame. Now go to second zero, center all the spheres
using the align tool. Make sure we are selecting composition and
click here and here. After that, move to second two and center the key
frames again with a line. Now, let's cut these
layers to the position of the time indicator
because this is when the animation of
these layers ends. To do this, we'll use the shortcut Alt and
the right bracket. Now, let's change
the keyframes to easy ease and adjust their animation with
the graph editor. Select these keyframes and
drag the handles here. Let's see how it
looks. Looks nice. Now, let's place the red
spheres under the blue ones, close the layers, and move on. And now, I want to add a rotation animation to all the spheres as they
open to the sides. For this, we can
use a null object. In after effects, a
null object is a type of layer that does not
render or appear on screen, but can be used as
a reference point for other layers in
the composition. It's an invisible layer that can be used to
control the position, rotation, scale, and other properties of other
layers in the composition. One of the main advantages
of using a null object is that it allows you to control
multiple layers at once, rather than having to adjust
each layer individually. For example, you can
parent several layers to a null object and then control
the layers with the null. I am talking about
this topic in depth in the free course that I mentioned at the beginning of the course. For those who want to
understand this topic in depth, feel free to watch
the free course. You can find the link to the course in the
description below or in the PDF file in the main folder that
you downloaded from me. So let's do this. We
will right click here, go to new and
select null object. The null is centered in the
composition, and it is great. Now we can select
all the spheres and link them to the null. Let's cut the null to the length of the
layers of the spheres. To do this, we'll
use the shortcut, Alt and the right bracket. Now let's get to the
beginning of the animation, press R to bring out the rotation parameter of the null and create
the first key frame. Let's move on to the
second number two, and we'll set that
in the second, the null will make one rotation. What we just did was add an additional animation to all the spheres with
the help of the null. Therefore, all the spheres rotate while opening
to the sides. Now let's make these
keyframes easys let's change the
animation behavior of the rotation to
something like this. The nulls rotation
will start slowly, and towards the
second key frame, it will increase in
speed. Let's see what Like. Now, so that the spheres don't
just appear randomly. Let's add a scale
animation to the null. We'll select the null, press, set it size to zero at the
beginning of the animation. Now go to second
one and set it to 100 and back to zero at
the second number two. We'll change the
keyframes to *** and adjust their behavior
using the graph editor. Let's see it again.
It looks great. Now let's improve our animation with a cool effect called echo. Let's go to the effects
and presets panel. Type echo in the search bar, and now drag the effect
onto the sphere. Next, in echo time, set it to -0.001. 30 for the number of echoes, and here, change it to maximum. When this sphere moves quickly, we'll see a cool trail effect. Now let's copy and paste the effect onto
the other spheres. Be careful not to over use this effect as it may
slow down your computer. Okay. It's a good time to save the project by
pressing control less. As you can see, because
we use the effect, we jump to the effect panel to return to the project panel. We can click here or use the arrows and select
project panel. Now, to maintain an
organized composition, let's group all the layers we
have created now into one. To do this, let's select all
the new layers and press Control Shift C. Now, we will name this pre
comp spinning spheres. Make sure both options
are selected and click. We can find this pre comp in
the project panel as well. All right. Let's move on. If we take a closer look, we can see that this pre comp is large in relation to the
animation it contains. Let's enter the pre comp itself and turn off the background. And now let's take care of it. Fir press Control K to access
the composition settings. Now let's reduce the
size to 500 by 500. Click and return to
the main composition. Now, let's create
the gray sphere. For this, let's
make sure we don't select any layers and
choose the ellipse tool. Select the fill color to be
black and disable the stroke. Now, let's bring out
the grid by pressing the apostrophe key to see the
center of the composition. Now, let's create the sphere while holding down
the Shift key. Let's center it. Now, let's
switch to the selection tool. Finally, let's change
the name of the layer. Select it, press enter, and call it big sphere. Then we'll press enter again. Now, let's bring up the scale
parameter of this layer by pressing S. We can
turn off this layer. At the second zero, the size
of the sphere will be zero. At the second one, the
sphere will reach 100%. At the second two, it
will return to zero. Let's convert the keyframes to *** and adjust them in the
graph editor like this. Let's see how it looks. I think it's very slow. Let's see how we can
speed up this animation. Let's say we want
the duration of the sphere animation to be 1
second instead of 2 seconds. Instead of manually moving
the key frames one by one, we can simply select
the key frames, hold down the alt key, grab the last keyframe, and move it to another position. That way, all the
keyframes move together, maintaining an equal and
precise distance between them. Let's place the last
keyframe at the position of the time indicator while
also holding the shift key. That way, the key frames will snap to the position
of the time indicator. Now this animation lasts for 1 second instead of 2 seconds. Now let's cut this layer here
because this is the moment when the animation ends and we can no longer see the sphere. We will use the short cut
alt and right bracket. Now, let's create the
yellow ripple. For this. First, let's duplicate this
layer using control D. Then let's press S and change the value of
this keyframe to 200. Now, we will enable the stroke in this layer and
color it yellow. Finally, we will
turn off the fill. This is how it looks for now. I think the stroke is too thick. Let's reduce it to five. Now let's move this
layer a bit forward in time to create a nice offset. Let's see how it looks. It looks better
now. Finally, let's position this layer
under the big sphere. Let's see it again.
Looking good. Okay, now and rename
this layer to big stroke and tag it yellow. We can tag this layer in gray. Now let's time and sync between
all the animation parts. The animation of the
rotating spheres is the first animation
that opens the video, so we'll leave it here at the
beginning of the timeline. When this animation is finished, the animation of the
big sphere will begin. Let's drag these
two layers here. Let's activate them and see where it's best
to place them. I think here is a good time. Let's see how it looks. It's better from here. Okay, it looks better now. And after that, let's start
the animations of the shape. Let's move this pre comp
here and see how it looks. It's better from here. I think it looks great. Finally, let's create
the square that is supposed to be behind
the entire scene. Now we can cancel the grid. Let's turn off the
background and make sure no layer is selected. Then we'll go to the
ellipse tool, press, and hold, and select
the rectangle tool. We'll activate the fill
and choose white color. Then we'll turn off the stroke. Now let's create the square at about this size while
holding down the Shift key. Now, let's center it in the
composition using a line. Next, we'll place this layer beneath all the other layers. I see that the square
turned out a bit too large, so let's press S and scale
it down. Let's write 85. Now let's round the corners. For this, we'll close the layer and open it again to
see all the properties. We can close the transforms. Now we'll open the contents,
open rectangle one, open rectangle path, and here we'll find the parameter
to round the corners. Let's set it to 130. Okay, now let's see how
everything looks together. Looks great. And now we're
ready to render the scene. But before that, I highly recommend taking a
ten minute break. Get up from your chair, do some light stretches, make some tea or coffee, and come back refresh
for the next part.
15. Learn to Creat a GIF: In this lesson, we
will render the scene and use photoshop to
convert it to a gift file. For those who need to install
the photoshop software. You can see how to do it in the free course I
mentioned earlier. You can find the
link to the course in the description below or in the PDF file found in the folder you
downloaded from me. Let's prepare our
scene for rendering. First thing we can
do is to delete the color palette
from the composition since we no longer need it. Let's select the
selection tool and click here to see
the hidden layers. Now, unlock this layer and delete this using
the backspace key. The next thing we
need to do is to adjust the work
area to the end of the animation so that we do
not render unnecessary parts. The animation ends here. So let's bring the
work area here using the shortcut we learn by
pressing the end key. Let's see that everything
is playing perfectly. As you can see, we have a
perfect looping animation, meaning the video ends
and starts smoothly. The next thing we
need to take care of when preparing
an animation for the G mail signature is to adjust the size of
our main composition. If we leave the
size as it is now, we may encounter a
problem in the next step. The video borders
will interfere with placing the animation
correctly in the signature. Therefore, let's enter
the composition settings and adjust its size. Question, what is the shortcut to access the
composition settings. To do this, we will press control K and change the
size of this composition. Let's set it to 900
pixels by 900 pixels. Now click and make sure we
haven't reduced it too much, meaning that all the animation remains within the
composition borders. The last thing we need
to take care of before rendering is to click on the collapse function
located here. For those who do not see this
icon, you can click here. Let me explain what it does. I'll zoom in so we can
take a closer look. See what happens when I activate the function on this prep. The quality of the
objects will improve. Look at this sphere up close. So let's activate it on this pre comp and also on the
rotating spheres precomp. Everything seems fine, and
we're ready to render. To do this, we'll go to composition and click
on add TO render Q. And now we are in
the render panel. Here, we see the composition
we're rendering. To turn this animation
into a G mail signature, we need to create a gift
from this animation first. So first, we need to
render our animation as an MOV file with a
transparent background. Let's see how to do it. Let's click here and in format,
we'll choose quick time. Now, we'll go to format options, and in video Codec,
we'll choose animation. We'll click. In channels, we'll select GB Alpha. This way, after Effect knows
that we want to render the video with a transparent
background, we'll click. Let's click here and decide
where to render the video. Of course, we will choose
our samples folder. Let's make sure
the name is good. Click on save, and
finally click on Render. Now wait a few moments. As soon as the
rendering is completed, let's open the photoshop
software because that is how we will turn the
rendered video into a gift. Let's go to file, click on Open, and find the animation
we just rendered. It is, of course, located
in our samples folder. Let's select the animation
and click on Open. We'll wait a few seconds. Then here is our animation. Now let's go to file, then port, and
then save for web. We'll wait a few seconds. Okay, so here we need
to change a few things. First, we will choose gift here. We'll make sure the transparency
checkbox is checked. In colors, you can
select the maximum. This means that the gift
will be of maximum quality, but the file size
will be a bit larger. If you don't want the file to be too large, then select 32. I will select 256. Here we will choose none. And because we don't need
this video in this size, we can click here for 50% to
make the gift half its size. Now, let's wait until
the render is complete. Here we can see how much
the final file will weigh. Now, let's select
forever and click Save. Let's choose where
to save the gift. Let's save it in
our samples folder. The name seems appropriate. Let's click save and
wait a few seconds. Now let's open our
samples folder. I will just enlarge my view
here to see it as icons, and there's the gift
ready. Looking good. Okay, let's go back
to our project. Don't close it for now because we'll come back to it soon. Now, let's learn how to create a professional
GML signature, using the animation we created.
16. Create a Gmail Signature: So the first thing they need to do is to access Google Docs. Now, let's sign in with
our Gmail account. If this document doesn't open automatically for you and you see the browser in this way, click on the large plus sign
and create a new document. Okay, you can close this now. Now, let's call this document Gail signature and press Enter. For our convenience,
let's go to file, and then page setup. Here we will choose that
the document will be borderless and we will color
the page with this color. Press ok and let's
prepare the signature. To do this, we'll go to insert and create a table
with three columns. Now, we'll make sure that our text line is inside
this part of the table. We'll go to Insert again and then image and choose
upload from computer. Now, let's find our gift. We'll select it and click open, and here the gift is
playing perfectly. Now, let's select the image
and go to image options. Then we can reduce the size
to five or even three. We can close the image for now. Next, let's strength
this section and add the text we want. If we are writing
a website address, we need to hit Enter
after finishing writing to make the
text line clickable. Then let's select all the text and change the font
to Montserrat. For those who don't see
this font in their list, they can go to more font, search for this
font, and select it. Or you can search for
it on Google Fonts. Go to the website, select
Fonts, search for the font. Click on it and download
all the styles to your computer or click on the plus icon of the
font style you want. Now, let's go back to our signature and change
the font Mont Surat. Then we can change
the title to black. Next, let's shrink this
section and select it to increase the stroke
thickness to three. After that, to remove the
other lines of the table, we can go to table options, type zero in alignment. And select zero in
color and table border. The thick line will disappear, but that's not a problem. We can select it and return
its thickness to three. Finally, let's click here and
move the text down a bit. If we want to enlarge the
gift, we can select it, go to image options and
change the size to five. Once we confirm that
everything looks good, we can proceed to turn it
into a signature in G mail. To do this, let's log
into our G mail account. Open the settings, click on see all settings and scroll
down to signatures. Now click on Create New
and give it a name. Next, we need to copy the signature we
created in Google Docs. Let's select everything manually or use the shortcut Control A. Now, press Control C to copy it. Let's go back to
the GML settings and press Control V to paste it. If you have additional
signatures, you need to select the new
signature you created. Now scroll down and
click on Safe Changes. Finally, let's
create a new message and see how the signature looks. In my opinion, it
doesn't look good. The animation is too big
in relation to the text. Let's fix it. For this, let's go back to the settings
and edit the signature. To scale down the animation, we need to go back and
edit it on Google Docs. Now select the gift,
open the image options, decrease it to three, Move the text up by
deleting these lines, and I think we should
scale it down to two. Let's move the line closer. Now select everything
using Control A. It can be closed. Then
press Control C to copy it. Let's go back to
the Gmail settings, select everything using
Control A and delete it. Now delete all the empty lines until we reach the beginning. Now press Control V to paste it. Scroll down and click
on Safe changes. Let's create a new message
and check how it looks. As you can see, the signature
is not aligned to the left. In order to fix this, we need
to go back to the settings. We will select our
signature by using Control A and choose
left alignment. Let's do this again and now the signature is
aligned to the left. We'll scroll down and
click on Safe Changes. Let's create a new message
and check how it looks. It looks great. But now
let's say the client has decided to change something in the animation of the signature. They asked us to change
the color of the square in the background so it doesn't blend with the white
color of Gmail. Let's see how we deal with this. The first thing we need to do is go back to our project
and after effects. Now, let's select the
square and also select the palette in the project panel so we can sample the colors. Then let's change the fill color to a light gray color
from our palette. Finally, let's render
the animation again. Let's go to composition and click on add to Adobe render Q. We will render everything with the same settings as before. Let's save it in the location
of the animation we have. Now select the video
here and click on Save. After effects,
we'll ask us if we want to replace the old
render with the new one, and we will say yes. Then click on Render
and after effects, we'll ask us if we are sure,
and we will confirm it. However, after effects cannot render the animation
even though we click. This happens because
the file we want to render is still
open in photoshop. So we will click and close
this file without saving it. Then we will try to
render it again. This time, let's use
the shortcut Control M. We will select all
the settings as before. And now it will work. Let's
go back to Photoshop, open our new video, and export it again as a gift. Okay. This time, Let's
render it with 64 colors. We will reduce it
like before to 50%. Click here to
activate the action, wait a few seconds, and save this gift in the
place of the previous one. We will select it, click
on Save and Replace. Now, let's go back
to Google Docs. We will select the old gift, click on Replace image, and choose upload from computer. We will select our new
gift and click Open. Finally, let's
change the color of the page to white so that
the new color blends well. Now, let's select
everything with Control A and press
Control C to copy it. Now go back to the
G mail settings. Then select everything here
with Control A and delete it. Now, delete all the empty lines until we reach the beginning. Now let's press Control V. Next, select the all signature with Control A and align the
text to the left twice. Finally, we'll scroll down
and click on Safe changes. Now let's create a new message
and check how it looks. And here's our signature
finally ready. And this is how it looks
on G mail in dark mode. Now, let's go back to the project and continue
with the lesson. You can also close photoshop. There's no need to
save this file. Let's go back to our
project, organize it, and render it for sharing on social media or your
portfolio website.
17. Render the Animation For Sharing on Your Portfolio!: So now, let's render
this animation with a nice background as a
high quality MP four file, so we can share it
on social media. To create a background, we will create a new solid by right clicking
on this gray area. We'll go to new
and select solid. Let's choose white as
the color of the solid. Let's drag it under
all the layers. And if you want to
change the color of your solid to a different color
from our color palette, you need to press control shift. This will bring up
the solid settings where you can sample a
different color and click. I like the previous
color better, so I'll press control
Z to undo the action. And now to render the video, we'll go to composition, select Add two render Q. This time, we'll choose the high quality MP four
preset that is here. We'll click here
and choose to save the file in the samples
folder we created. For the name, we can
delete number one, click Save and render. To view the render, click on the link located in
the output mode. Open the video to
see how it looks. It looks nice, but I
remembered that we rendered the video in a composition size that was suitable for a gift. Let's return to our project
and render it again with a size that is
suitable for social media. If you want to delete
the last renders, select them and press backspace. Okay. Now, close everything until you reach the
main composition. So as you can see the
composition size is too small. Let's press control K to access the composition
settings and increase the size to ten 80
pixels by ten 80 pixels. Now, since we have increased
the composition size, we need to increase
the solid accordingly. Here's how we can do it quickly. Select the solid, right click, go to transform
and select PitoCm. You can also see the
shortcut for this action. Click on it, and the solid will now be the same size
as the composition. Now let's render it again
by pressing Control M. Select a high
quality MP four format. Choose to save the file in
the last render location. Click Save replace Render and. Check the video
now. Looks great. Now you can show the animation
you created in this lesson on social media and share it
on your portfolio website. And if you enjoy the course, I would greatly appreciate it if you rated according
to your experience. Also, don't forget
to leave a review, so I can know if you learn something interesting
in the course or not. All right, let's go back
to our project and learn how to organize the project
panel using folders. A folder like the
one that was created automatically when we
created the solid. Let's make sure we
don't select anything, click on the folder icon, and now change the
name to precomps. This is where we'll
save all the precomps we created for this project, except for the main composition. Let's tag it in blue and put all the other precomps in
the folder we created. Now we'll save the color palette in another folder called assets. So let's make sure we
don't select anything. We'll create a new folder, change the name to
assets and drag the color palette and the
solid folder into this folder. That's the end of the lesson. Let's save the project
before we close it. You can share your animation in our private community group. You can also ask me
any questions there. I promise to answer any
question you may have. I hope you enjoyed it. I'll
see you in the next lesson. But before that, I highly recommend taking a
ten minute break. Get up from your chair,
do some light stretches, make some tea or coffee, and come back refresh
for the next part.
18. Section 2: Project Task: All right. And now to
practice what we learned. Please create this animation. You can use different
colors than mine, but try to keep the
animation the same. This task is meant to help you remember and understand
what you've learned. Don't worry. The task won't take up too
much of your time. It's designed to be
doable in 2 hours only. If you have any
problems or questions, feel free to ask me or your classmates for help in
our closed community group.
19. Section 3: 3D Animation for Long Videos: Hi everyone. In this lesson, we will create a
very cool animation by turning the layers into three D layers and creating an isometric
camera angle. We will also learn how to
integrate our animation into long videos for YouTube
channels or long podcasts. This lesson is divided
into four parts. In the first part. We will design the frame in
the second part. We will create a
camera and learn how to create an
isometric angle. Then we will turn the
layers into three D layers. The third part. We will animate our scene
and render it in a high quality MOV file with a transparent background
in the fourth part. We will learn how to make the
animation play endlessly. Then we will organize the
project before we close it. Finally, we will render
the animation as a high quality MP four file
for sharing on social media. After that, at the
end of the lesson, you will get a small
task for you to do. The task is meant to
help you remember and understand what you've
learned. Don't worry. The task won't take up
too much of your time. It's designed to be
doable in 2 hours only. If you have any
problems or questions, feel free to ask me or your classmates for help in
our closed community group. All right. Enough with
the talking. Let's begin.
20. Let's Begin to Design the Scene: First, let's open the
after effects software. As usual, we can exit
from this window. Let's click on
default so that we can all see the same
panel arrangements. And now let's click
on new composition, and now we'll
define the settings for our first composition. We'll call it animation
for a channel. Again, we'll work in a square format of ten
80 by ten 80 pixels, and at 30 frames per second. The duration of the composition
will be 10 seconds. Finally, let's choose the background color
of the composition. We'll choose a gray
color and click. I remind you that if
you see this red error, you need to press the caps
lock key to turn it off. All right, now we click here
to see the background of the preview screen and
maximize the software window. We can now save the project. Let's find the folder
we open for the lesson. Go into the AE folder, and name the project
animation for a channel. Now let's import our color
palette into the project. Double click the gray area
in the project panel. Find the folder we created for the lesson and go into
the assets folder. We will select the color
palette and click on Import. Let's drag the palette
into the composition, now press and reduce the
size of this layer to 30. Let's position it here and lock the layer and hide it
from the layers panel. For those who do not see the
sh icon, you can click here. Let's select the layer
as a hidden layer and hide it by clicking on
the icon located here. Now, let's design the
first object in the scene, which is the blue window panel. We will create it using
the rectangle tool. We will color it in the blue
color from the palette. Let's turn off the stroke
and create a rectangle. Now let's center it
using the align tool. For those who do
not see this panel, you can find it under window. Okay, so let's click
once here and here. Now, let's round the
corners of the rectangle. To do this, we'll
open the rectangle, also open the rectangle path, and here in roundness, we'll change it to 40. Now you can close all the
properties of the layer. Now let's press enter to
change the name to main shape. Press enter again to
finish the action. Now, let's go back to the selection tool
using the V shortcut. Now let's create the top
part of this window. The quickest way
to do this is by duplicating this
shape using Control D. Let's change the name of
the new layer to up shape. Now, change the color to
dark gray from our palette. Then we need to cut off the entire bottom
part of this shape. If we drag this shape
from here, it won't work. To do this in the right way, we need to turn this
shape into a bezier path. Let's open all the properties of this shape until we get
to the path itself. Right click on it and
select convert Tobi path. Now we have points that
we can move and modify. I'll in so we can take
a closer. All right. Let's move on. Let's erase this point using
backspace or delete keys. Delete this one as well. Now, let's get rid
of the curved edges. To do this, we can hold down the alt and control keys and
click on this point once. Let's do the same for
this point as well. Now, let's select
both points using shift and move them up while
holding down the Shift key. Looks nice. After finishing with the design of the top part, let's center the anchor point of this shape to its center. As you can see, it is not located at the
center of the shape. Instead of using the
anchor point tool, we can use the shortcut we
learned, Control Alt home. And now the anchor point of this shape is centered
at its center. Now, let's create the three
points that are located here. To do this, let's make
sure we're not selecting any layer and click and hold the rectangle tool and
select the ellipse tool. We'll color the first
sphere in blue. Now let's zoom in
a bit and create the sphere here while
holding down the shift key. To create another sphere, we could duplicate the
layer itself and move it. But this time, I
want to teach you another method so that all the spheres are on
the same layer. To do this, we can duplicate
the shape inside the layer. Let's select the ellipse here
and press Control D. Now, let's open the properties of the new ellipse and move it through the position
parameter like this. Now close this and open the fill and change
the color to yellow. We can close this now. Now, let's duplicate
this sphere again. To do this, we need to
select the ellipse path. Now we can close it, select
the ellipse here and press Control D. Let's move
the new sphere here. Finally, let's change its
color to red from the palette. Now let's change the name
of this layer to spheres. Let's also center
the anchor point of this layer by pressing
control Alt home. We have created one layer
with three spheres inside. Now, if we want to
scale down the spheres, we will press S. This way, we will scale them
all down at once. Let's scale the
layer down to 80. Now, let's create the text layer that is supposed to be here. For this, we will take the
text tool and write design. Now, let's select all
the text and click here so that all the letters
are in capital letters. I will change the font style to light and the color to white. For some reason, the
font did not change. If this happens to you, too, just look for the font name here and change the font
style from here. Now, let's click here and press Control enter to
exit the text line. Now let's press V to switch
to the selection tool. Next, let's change
the font size to 100. All right. In the
second thought, I will change the
font style to thin. Now, let's center
the anchor point in the center of the layer. And position this layer in
the center of this shape. For this, let's activate
the snapping from here. We will drag the layer from the anchor point and try to
find the right position. Here, this looks good. We can now turn
off the snapping. Let's set the preview
screen to fit, Enlarge this window
a bit and continue. Now, I want to change the
shape of the panel we created. We won't be able
to do it that way. Pulling it through its
corners won't work because it will ruin
the rounded corners. Question, what do we need to do to make this
shape editable? To do this correctly, we need to convert the
path of this shape to a bezier path as we did
before for the top shape. Now, we can select
one of the points, then select the
bottom points and change the shape of the
window to how you like it. This way, the rounded
corners will not be affected. I'll
leave it as it was. What's important to
remember in this process is that after we change the
path to a bezier path, we won't be able to change and control the rounded corners. As you can see, the
roundness parameter no longer exists here. Just keep that in mind. Okay, so after we are
happy with our design, let's select all the layers
and test them into one prep. We'll use the shortcut we
learn Control Shift C. Now, let's name this precomp
window panel underscore one. Make sure both are
selected and press. As you can see, the size
of the precomp is too big. We have a lot of empty space. Let's trim this precomp. For this, let's go
inside the pre comp. We can turn off the
background here. Now let's open the
composition settings using the keyboard
shortcut Control K. Let's check preview so we
can see what we're doing. Now let's reduce the size
of this composition. We'll change the width to
800 and the height to 400. We'll type in 400 and press
enter. That's a bit too much. Let's go back to the
composition settings and change it to 600. I think maybe 500 is better. Yes, 500 is great. Let's press k or enter. Now when we return to
the main composition, we can see that the borders of this pre comp have been reduced, and we're ready to move
on to the next stage where we'll create
the ymmetric angle.
21. Camera and 3D Layers: To create the isometric angle, we will use the camera of After effects. Let's see how to do it. First, let's create a new
camera by right clicking here, going to new and
selecting camera. If you want to learn more about the camera
and after effects, you can watch the
free course that I mentioned at the
beginning of this course. You can find the link to the free course in the description below or in the PDF file in the main folder that
you downloaded from me. All right. Let's move on. In type, we will choose
a two node camera, and here we will
choose 50 millimeters. Then we will click. Now let's open the camera
options from here. In Zoom, we will write 10,000. Now, we'll open transform, and in position, we'll
change it to -10,000. And now let's close the layer. Next, we will create a new null. We'll link the
camera to the null. We can enable collapse
for the null layer and turn off the layer because we don't really need to see it. We will only use the transform
properties of this layer. But before that, it is
very important to convert this layer to a three D layer so that it can work
with the camera. Now we'll change in orientation
to 45 here. 35 here. And 30 here. Let's
close everything. Now, all that's left to do is to convert our pre
comp layer into a three D layer so
that the camera can see and interact with
it. There it is. We've created a camera
with an isometric angle. Now let's create two additional precomps of the window panels. But as we learned, in order
to duplicate the precomp in a way that we can make changes without affecting
the original pre, we need to duplicate the prec
through the project panel. Let's find this precomp in the projects panel
by right clicking and selecting reveal and then reveal layer
source and project. Now let's press control D. Let's enter the new pre comp and change the text two in. Now let's duplicate
this pre comp again and change the text in the
new prec to motion. Now, let's go back to
the main composition and drag the two new
precomps into our scene. Because these two layers
are not three D layers, the camera does not see them. Let's click here and convert these layers to three D layers. Finally, let's go back
to the selection tool. Now, if I move this layer here, and that one there, we will see all the layers from
the isometric angle. Okay, let's press Control Z
and now let's eimate seeing.
22. Animate the Scene and Render it: First, let's animate this layer up and the bottom one down. We will leave the
middle window panel in its place without moving it. Let's select this one and
while holding control, we will also select that one. Now let's press P to bring
up the position parameter. At this point in time, we will set that these layers
will be located here. A second number one, we will
select only this layer. Open the grid and drag it here. Now let's select the bottom
layer and drag it here. At second number two, I want both layers to return
to their original positions. So let's simply copy this
keyframe and paste it here. Same thing with this layer. Let's see how it looks. Now I want these windows
to rotate as they move. This time, we will also move
the window panel in between. Let's select all these
layers with shift and press R to bring up the
rotation parameter. Because these layers are
three dimensional layers. We have different rotation axis. We can rotate the
layers on the x axis. It looks like this
on the y axis. It looks like this, on the
z axis, it looks like this. So at this point in time, at the beginning
of the animation at the second number zero, all layers should be at
this value on the z axis. Then in the next second, when they are already open, we will rotate all
layers 90 degrees. Now, in the second number two, they will return to zero, just like at the beginning. Now, let's select all
the layers and press you to see all the key frames
we have created so far. Now let's improve our animation using *** and the graph editor. First, let's click here to isolate this layer so
we can see only it. Now let's select all
the keyframes and press F nine to
convert them to ***. Let's see it again.
Now let's change the way this
animation moves over time. Let's see what I mean. First, select the key frames for the position parameter and
go to the graph editor. Now let's select the
middle key frames and drag the handles like this. Now the layer will
start to rise quickly, make a small pause
when it's in the air and then quickly return
to its original position. After that, let's select
the key frames of the rotation parameter and
perform the reverse action. We'll make the layer
start spinning slowly and return
slowly as well. In case you don't see
the graph like me, right click and make sure
you're in the speed graph. Okay. Let's exit the graph
editor and see how it looks. I love it. Now, let's do the same thing for
the bottom layer. Select this pre comp and press
you to see its key frames. Then we'll select
all the key frames and convert them to ECEs. Now we need to adjust the keyframes for the
position like this. And the rotation to
behave like that. Let's see how it looks. Now, let's select
the middle layer, press you to see its key frames, and unhide all the
layers to see them all. Now we'll select all the
key frames of this layer. Change them to Ess using F nine and adjust the handles in the graph editor like this. Let's see how everything looks together. It looks excellent. Now, let's create
a nice offset for all the layers to create a
more interesting animation. But this time, we won't
move the key frames in that way because then
the layer animations will end at different times. In our case, this time, I want all the windows
panels to go back to their original positions
at the same time. Therefore, in our case, it's enough to only
move the key frames of the rotation parameter
of this layer here, and the key frames of this
layer here. Let's see it. Okay, I think we need to
move this a little bit here. We can also move this
keyframe a little bit. Now, let's create a shadow
overlay on these windows. To do this, we can use
an effect called levels. Let's drag this effect
onto the middle layer and change the output
white value to 200. Maybe 209. Now let's copy the effect and paste it
onto the bottom layer and change the output
white value here as well. Our goal here is to create
an illusion of shadow. 170 looks good. All right. Let's
turn off the grid. We can also close the layers, and let's see how it
all looks together. Now let's see where
this animation ends. To do this, we need to see where the last keyframe
is in this scene. Let's make sure no layer
is selected and press you to see all keyframes
of all layers. The animation in this scene ends in the second number two. Let's stand here with the
time indicator and press to shorten the work area to the position of the
time indicator. Now let's see our
animation a few times. Okay. I think the animation
is moving very fast. Let's see how we can slow down
all the keyframes and make the animation play for 3
seconds instead of 2 seconds. For this, let's move the
work area here for now. Now let's place
the time indicator at second number three. Now, we will select
all our key frames. Hold down the ult key and drag one of the last
keyframes to the side. In order for the keyframes to snap to the position
of the time indicator, we need to press shift. Now let's press, again, to shorten the work area to the new position of
the time indicator. Let's see what it
looks like now. I think it's much better. Now we're ready to render
the animation we created. But before that, let's press you to close all the keyframes. Let's unhide the
hidden layers and delete the layer of
the color palette. Then turn off the background
of the previous screen. Now let's press Control
M. In the output module, we choose quick time. Here in format options,
we choose animation. Let's click and in channels. Question, what do
we need to choose here to export the video
without a background. We need to select GB plus Alpha. Let's click and choose to
render it to our sample folder. We already rendered a
file in MOV format, so we can see this video here. Let's make sure
the name is good, click save, and render. You can click here
to see the render. And now let's learn
how we can integrate the animation we rendered
into a long video. So let's go back to
our main composition. Bring back the project panel. We can already close all the
open precomps from here. Let's also close
the effects panel, and we are ready to move on.
23. Make it Play Endlesley for Long Videos: So in order to see how we can integrate this
in a long video. Let's create a new composition using the shortcut Control. We will call it
video for a channel. Let's set the dimensions
to 1920 by ten 80 pixels, leave the frame rate at 30, and change the
duration to 5 minutes. Now let's change the
background to black and press. Now, let's say we are currently working on a completely
new project. So let's exit this
composition and import the long video of the CT located in our
assets folder here. Let's drag the video
into our composition, and here we see
the entire video. Now, let's trim the work area
to the end of the video, we will cut out all
the unnecessary part by right clicking on the work area and then selecting
Trim Comp to work area. Now, let's imagine that
this is a video we want to upload to one of
our social media channels, and we want to add, let's say, a logo animation to it. Let's use the animation we
created to learn how we can make the animation play seamlessly till the
end of the video. So first of all, let's
import our render. We can find it in
the samples folder, select it, and click Import. Now, let's drag the render into the composition above
the video layer, there we see that
the video is indeed without a background,
which is excellent. However, because the duration of the animation is only 3 seconds, we stop seeing this
layer at this point. I need this animation to play
until the end of my video. Let's zoom in a bit on our timeline and
see how to do this. Since our animation
plays in a perfect loop, meaning it ends and starts
exactly at the same point, we can use a cool trick to
make it play endlessly. For this, we need to place the time indicator here
while holding the Shift key. We can turn off the
video layer for now. Now, let's right click, go to time, and choose
enable time remapping. Now we need to make
sure that the time indicator is one frame before
the key frames we see. If you are standing
on the keyframes, move one frame back like this. And now we will create another keyframe at this point
in time by clicking here. Now we need to delete
this keyframe. And now we will create an
expression for these keyframes. Expression is a piece of
code that you can use to automate and control various properties
of your animation. It is a powerful tool that
enables you to create complex animations
without having to manually keyframe
every single element. In order to create
a new expression, we need to hold down
the Alt key and click on the stopwatch of the
time remap parameter. This will open up the
expression line code. Don't worry. We don't
need to write anything. We will use a built
in expression. To do this, let's click
on the small arrow here. Go to property and
choose this expression. To finish the action, let's
click here on the side. We can step back a bit, and now let's extend this layer to the end
of the composition. Now, everything that happens
between these keyframes, which is basically
our entire animation will repeat itself until
the end of the composition, and there you have it, our
animation playing endlessly. We can now turn
back on the video, and now let's press S and
scale down the layer. Let's move it here to the side. We can shrink it a bit more. Let's press the apostrophe
key to see the grid. This will make it much easier for us to know where to
place the animation. And here on this side, you can add the address
of your website. You can place it here.
Let's close the grid. So basically, we have created an animation that can
be your channel's logo, which can play until
the end of your video. Okay. Now, let's create
the infinite loop again. But this time we'll
use the composition of this animation instead
of the rendered file. Let's turn off our
render file and insert our main composition called
animation for a channel. But before that, let's enter
it and trim the work area to the end of the animation because we don't need the
rest of the timeline. Otherwise, the
expression won't work. So right click and choose
Trim Comp to work area. Now, let's go back to the video composition and
drag the animation here, just like we did with
the rendered file. We need to place
the time indicator here while holding
the Shift key. Now, let's click, go to time and choose enable
time remapping. We need to make sure that the time indicator is one frame before the
key frames we see. Now, we'll create an
additional keyframe at this time by clicking here. Now we can delete
the last keyframe and while holding
down the Alt key, click on the stopwatch of
the time remap parameter. Now, let's click on
the small arrow here, go to property, and
choose this expression. To finish the action, let's
click here on the side. We can zoom out, and now let's extend this layer until the
end of the composition. Now, you may be asking, why didn't we do this
from the beginning. Why did we have to
render it as a MOV file without a background and not
use the composition itself. The reason is that if we use
the original composition, it will slow down your computer and your editing workflow. Especially when you are
working on long videos, such as screen recordings of
computer games or podcasts. Therefore, I do not recommend using
compositions directly. It's better to render
your animation and use the MOV files in your
video editing projects. Okay, so I'll place
this composition here. And before we finish, let's organize the
project panel. First, let's make sure we don't select anything and create a new folder called assets where we will put
the solids folder, the color palette, the video, and the render of our animation. Next, let's make sure
again that we don't select anything and create
another folder called prep. We'll put all the precomps we created in the project in it, except for the main composition, which we in blue. Now we can close this
composition from here. Now, let's render
this animation as a high quality MP four file that we can share
on social media. But before that, let's
create a background. To see the palette, we will open the assets folder and select the palette so that we
can see it from here. Now, let's create the solid
and color it in this color. We will click Okay, move
this layer below all layers, and now let's press control M. We can see here
the previous render. We can close it now.
This is the new render. Let's choose H 0.2 64 40 MBPS, and now we will choose to render it to the
samples folder. We will delete the
number one from the name and click
Save and render. Let's see what we've
got. It looks excellent. Now you can share the
animation you created on social media and post it
on your portfolio website. If you enjoyed the course, I would greatly appreciate
it if you could rate this course according
to your experience. Also don't forget to
leave a review so that I know if you learn something interesting in the
course or not. All right, let's press
escape to exit the video. We will return to the project, exit from here and close it. Before you close the project, let's not forget to save it. Let's press control, and that's the end of the lesson.
I hope you enjoyed it. You are welcome to share your video in our
private community group, and of course, you can
ask me questions there. I promise I will answer
any questions you have. We will meet in the next and
final lesson of this course, in which we will create an
exciting loader animation and see how we can present it on our portfolio website
like a prose. But before that, I highly recommend taking a
ten minute break. Get up from your chair,
do some light stretches, make some tea or coffee, and come back refresh
for the next part.
24. Section 3: Project Task: All right. And now to
practice what we learned. Please create this animation. You can use different
colors than mine, but try to keep the
animation the same. This task is meant to help you remember and understand
what you've learned. Don't worry. The task won't take up too
much of your time. It's designed to be
doable in 2 hours only. If you have any
problems or questions, feel free to ask me or your classmates for help in
our closed community group.
25. Section 4: Loader Animation for Your Portfolio: S S Hi, everyone. In this lesson, we will create a super
cool loader animation and learn how to present it
in our portfolio website. This lesson is divided
into four parts. In the first part. We
will design the scene and start to animate
it. In the second part. We will learn advanced methods
to improve the animation. In the third part. We will create the ending of
the loader animation. Then in the fourth part. We will prepare the animation for sharing in our portfolio. Finally, we will render it in high quality MP four format and organize the project
before we close it. After that, at the
end of the lesson, you will get a small
task for you to do. The task is meant to
help you remember and understand what you've
learned. Don't worry. The task won't take up
too much of your time. It's designed to be
doable in 2 hours only. If you have any
problems or questions, feel free to ask me or your classmates for help in
our closed community group. All right. Enough with
the talking. Let's begin.
26. Let's Begin to Design the Scene: Okay. Let's open the
after effects software. As usual, we can exit
from this window. I will enlarge the
software window. Now let's click on
default so that we can all see the
same panel layouts. And now let's create
our first composition. We will call it
downloader animation. We will work in a
square format of ten 80 by ten 80 pixels. This time, we will work
at 60 frames per second. The duration of the composition
will be 10 seconds. Finally, we will select a gray background
color and click here. Now, let's bring back
the project panel. If you don't see it from here, then just click on the
arrows and shoes Project. Now, let's save the project. Let's find the folder we
opened for the lesson. Go into the A folder and name the project
animation for portfolio. We have no problem with
the file name being different from the name of the first composition
we created. Now let's import our color
palette into the project. Double click on the gray
area in the project panel. Now we can find the
folder we created for the lesson and go into
the assets folder. Let's select the color
palette and click Import. Let's drag the layer
into the composition, Press and adjust the size
of this layer to 30. We'll place it here and to
avoid it getting in the way. We can lock the layer and
hide it from the panel. For those who don't see the shy function icon,
you can click here. Let's mark the layer
as a hidden layer and hide it by clicking
the icon located here. Now, let's start creating the large circle on which the
smaller spheres will move. To do this, we'll press and
hold the rectangle tool, then select the ellipse tool. Let's turn off the fill. And color the stroke
black from our palette. For now, we'll change the
stroke weight to ten. Of course, we can
change this later. Okay, let's create
the circle while holding down the Shift
key at about this size. Now let's center the circle to the composition center using
the control home shortcut. Now let's increase
the stroke weight. We'll change it to 30. Now we can go back to
the selection tool, so let's press V and change the name of
this layer to stroke. We can close the
layer and lock it because we won't touch
it anytime soon. Now let's create the
first small sphere. Let's select the ellipse tool, and this time we'll
turn on the fill. We'll color it blue and
turn off the stroke. Now let's zoom in a bit to the large circle and try to
create the small sphere with the same size as the
stroke weight of the large circle.
Something like this. Let's press V to return to the selection tool and change the name of the
layer to sphere one. If this circle doesn't come
out at the right size, you can press to scale it down. I will not change the size, so I'll press control Z. Let's return the screen to fit. Now, let's animate the sphere. It will move to the big
circles form like this. Okay, let's get closer. Press the space bar, hold it, and drag the screen down to see the top part
of the screen. Press the apostrophe
key to open the grid. Now let's place the
sphere here and use the align tool to center
it in the composition. M get a little closer and
move the circle here. And now to make the sphere move, we will create key frames
for the position parameter. Let's select the layer and press P. At the beginning
of the animation, we know that the sphere needs to be in the position
it is currently in. Let's create the first
keyframe at second zero. A second one, let's
move the sphere here. To place it exactly in the
center of the composition, we'll use a line, and
now at second two, we'll move the sphere here. Again, we'll use the line to center it in the composition. Now let's get a
little closer and move the sphere
slightly to the left. All right, let's move on. So now at second three, let's move the sphere here. And with the line,
we'll position it exactly in the center
of the composition. We can lower the
sphere a little. And now at second four, we want the sphere to return
to its original position. To do this, we can copy the first key frames
and paste them here. Let's see how it looks. Obviously, it doesn't look
very good because the path we created for the sphere animation is straight and not rounded. Let's see how we can round
the path of this animation. First, let's go to the point on the timeline where the sphere is not on any of the keyframes, so we can see all the
points of the path. Now to round the corners, we need to use a tool
called convert vertex tool. Let's long press on the
pen tool, and here it is. We can choose the tool from
here or use a shortcut. Let's do it using the shortcut. Let's say we didn't choose the Pen tool and we're
using the selection tool. All we have to do is
select one of the points. Hold down the control
and Ault keys, and then click the point once. And now this point
has become rounded. With the handles we have now, we will control the
curve of the corner. We'll do this again in a moment. Okay, so for now, let's also select this point. Hold down the control and Ault keys and click this point once. Now, let's drag this
handle to the right while holding down the shift key to move the handle in
a straight line. Let's do it on this side too. Let's do it here as well. We can press alt and
the apostrophe key to bring out the
proportional grid. That way, we can see that we move the handles
relatively accurately. And besides that, we can always check how it
looks while in motion. I see that in certain parts the sphere is deviating
from its path. For this, we will continue
and arrange its path. In the meantime, let's
turn off this grid. Let's press alt and
the apostrophe key. Now, let's get a little closer
and see how we can fix it. Okay, so at this point, this sphere is already starting
to deviate from its path. So let's grab this
handle and adjust it. If we can't adjust the path
properly with one handle, we can also make this point rounded and navigate the
curve with its handles. Let's select it, hold Control and Alt and click
on this point once. Now we have an additional
handle that we can control. Let's do the same on this side. Let's select it, hold control and alt and click
on this point once. But as you can see, we didn't
get a handle like before. That's because there are two points one on
top of the other. In the meantime, we can
move this point here. Let's make it a regular
point and not rounded. Let's hold control alt
and click on it once. Now let's select this
point and make it rounded. And let's adjust it
together with this point. And most importantly,
when we're done, we need to return this point exactly to its
original position. This way, we avoid jumps in the animation loop
we'll create soon. Okay, let's set
the screen to fit. Let's stand here with
the time indicator and shorten the work area
here using the n key. Now let's see the animation
playing in a loop. I see there's a
little problem here. We can zoom in and
rearrange the handles. Now it looks great,
and we can move on. Now I want to shrink
this sphere a bit. Let's get a little closer. Select the layer, press, and let's shrink it to 85. This way, this sphere will always appear within
the circles path. Okay. So after we've fixed
the path of the small sphere, let's improve its animation. We can this layer, set the preview screen to fit, and move on to the next part.
27. Advanced Animtion Methods: So in order to improve
the animation we created, we will first smooth
out the keyframes by convert them to
EZ Es keyframes. Let's select the layer, press you to see
all the keyframes, select them, and press F nine. Let's see how it looks. Okay, now the animation
doesn't look so cool. Let's see how we
can improve this. Let's get closer. We'll move the screen over here
and learn how to do it. First thing, I know
that in this keyframe, this sphere needs to move
very quickly upwards. To do this, let's go
into the graph editor. Make sure we're on
the speed graph. And now let's drag this handle over here and this
one over here. This caused the sphere to move very quickly at the
beginning of this keyframe. Now I want this sphere to descend quickly when it
reaches this keyframe. Let's select this keyframe, drag this handle over here, and this handle of this
keyframe over here. Let's see how it
looks. Looks great. Let's change the sphere's
color to white for now, so we can see it better. Now let's select the position
parameter again from here, so we can see the
keyframes and continue. Now I want this sphere to
not stop at this point. To do this, let's
select this keyframe, press it twice and
select continuous. Click Okay and
move this keyframe upwards. Let's see how it looks. I raised it too much. Let's get closer. And now
let's lower it a bit. Now it looks great. After that, at this point, the sphere needs to continue its
movement quickly. Let's see how we can do that. Let's exit the graph editor. We can turn this keyframe into a continuous keyframe
to achieve this. I will zoom in on the keyframe so we can see what we're doing. As you can see, the keyframe is currently an
ease and keyframe. If we hold down the control key and click on the keyframe once, it will return to a
regular keyframe. But if we click on it again
while holding down control, it will change to a
continuous keyframe. So let's see how it looks. So when the sphere
reaches this point, it doesn't stop, it
continues its movement. Now, I also don't want there
to be a stop in this part. So either we will turn
this keyframe into a continuous key frame or return it to a regular keyframe. We'll hold down control and
click on this keyframe once. Let's see how it looks. One more time. It looks good. But now let's try to
make this keyframe a regular keyframe and the other one, a
continuous keyframe. I think it will be
better this way. Let's leave it like
this and move on. We will turn the last key
frames into a continuous. We'll hold down control
and click at once. Let's see how it looks. Okay, I think we'll return this keyframe to continuous
and this one to normal. I intentionally show you this process because when
we animate something, we always change the key frames until we find something
we like better. This is a normal workflow
and after effects. Okay, after we're done
with the keyframes, let's time the animation
and move them on the timeline until we reach the animation speed
we're satisfied with. So, first of all, right now, this animation lasts
for 4 seconds. That's too long, which causes the entire
animation to look slow. Let's shorten this
entire animation. For this, let's select all
the key frames we have. We'll stand at the second number two with the time indicator, hold down the alt key and drag the last keyframe while also
holding down the Shift key. Let's see how it looks. Now, I want all the motion happening in the lower part
of the circle to speed up. For this, let's select the
last three key frames. Now, hold down the Alt key
and drag the last keyframe. Let's say to frame 30. Let's see how it looks.
I think it's great. Now, let's make this sphere repeat the same animation again. I want this sphere won't stop
when it reaches this point. I want it to keep moving upward. For this, we can select this keyframe and all the
keyframe that come after it. We'll copy them by
pressing Control C, and paste them here for
now in the second two. Let's see how it looks. Looks nice. Now, for
better movement, let's convert this keyframe
to a continuous key frame. Question, how can we convert a key frame to a
continuous key frame? To do this, we'll hold down the control key and click
on this keyframe once, and then again. Let's
see what comes out. I also notice that there
will be a small problem here because the keyframe
here are of a different type. Let's make it continuous too. And the last one continuous. Let's see what comes
out. Now let's make the sphere do
in another jump. First, let's extend
the work area. And as we did before, when we copied all the
animation from this key frame. We can now copy
these keyframes from here because it's when the
sphere starts to rise, stays in the air, and
then quickly descends. Now, let's go to frame
30 and paste them here. Somehow these keyframes
became easy ease. It's not a problem.
Let's convert them to continuous keyframes. Now let's see how
everything looks together. In my opinion, the
animation is slow. Let's shorten it a bit. For this, select
all the key frames. Let's say we want
the entire animation to last until
second number four. Hold down the lp key and drag the last keyframe while also
holding down the Shift key. Note that as we
move this keyframe, it became easy ease. For now, it doesn't bother us. We will take care of
it later if needed. For now, we are just checking the speed of
the entire animation. It looks great. Now I want the animation that occurs in the bottom part to
be fast and smooth. What we can do is to bring these keyframes close to
each other like this. Let's do this in
all the parts where the sphere is in the
bottom of the animation. Let's see how it looks. In my opinion, we can
speed this up even more. Let's get those key frames
close to each other even more. Let's see it again. Okay,
now it looks much better. Let's make this sphere
do another rotation. For this, let's go to
second and 30 frames. We will copy all the key
frames from this sphere and paste them to the position
of the time indicator. Let's change these keyframes
to continuous key frames. After we finish with
this animation, let's make the sphere enter the frame in some way because it can't just stand here and then jump. It doesn't look good. For example, from
this point in time, we can create a scale
animation for the sphere. Let's press S and create
a first keyframes here. Now, let's press you to see all the keyframes
on this layer. Now, let's go back
in time a bit, for example, to here and
make the sphere size zero. We'll convert these keyframes to asyEas and see how it looks. I think it looks good. Now that we're starting to see the
sphere from this moment, we don't really need
all the beginning part. But to save the animation
and prevent damage, we won't delete the key frames. We'll just shorten the layer. We can either manually
shorten the layer or use the short cut
lt and left bracket. And now what we can do is create an animation of the
disappearance of the sphere. For this, we can
copy the key frames of the scale parameter that
we previously created. After that, paste them at
the end of the animation and reverse their order by right
clicking on one of them, accessing the keyframe assistant and selecting time
reverse keyframes. Because at this
point, we no longer see the sphere, we
can cut the layer. Let's stand here with
the time indicator and press Alt and write bracket. Now let's improve
our animation with a cool effect that we used in the previous lesson,
called echo. Let's go to the effects
and presets panel. Type echo in the search bar. Drag this effect
onto the sphere. Here we write -0.001. Here we write 30, and here
we change it to maximum. Now, when the sphere is
moving at high speed, we will see a cool trail effect. This effect can be a bit
heavy on your computer, so be careful not to overuse
it with too many duplicates. Now let's color the
sphere in blue, just like it was
at the beginning. We'll select the layer, go to fill, and sample the blue color using
the eye dropper. Then we'll press enter.
Excellent. Let's zoom back in and now let's duplicate our sphere two more times. But before that, let's arrange the preview screen for
a better workflow. And now, we'll select the layer. Next, we'll press
Control D. Finally, we'll color the new
sphere in yellow. After that, we'll duplicate
it again and color it in red. Now let's create an offset
between all the spheres. Let's move those two
layers over here. To be precise, we can count how many frames we moved
exactly, using a shortcut. We'll hold down the
control key and press the right arrow
on our keyboard. Okay, so we move
ten frames exactly. Now let's select only the
layer of the red sphere. Now, move it ten frames using control and arrow
keys on the keyboard. Now let's move the
layer over here. Let's see how it looks. Looks great. Now I want to
teach you something important. Let's say we decided to reduce the thickness of the stroke
of the big circle to ten. Now the smaller spheres are too big compared
to the new stroke. If we reduce these layers
through the scale parameter, because this parameter
already has key frames, we will create
unnecessary key frames and ruin the animation. Let's see how to
do it correctly. The right way to do it is
to open the contents of layer and reach the transforms
of the ellipse itself. We can do this quickly for all layers together by
selecting all of them, typing scale in the search
bar, pressing enter, and shrinking the spheres
through the transform of the ellipse and not
through the layer scale. You see, there's no keyframes
on the scale parameter. We'll write 50 here. We'll write this also in the
second and third spheres. Now we can close the search bar, and there we have
shrunk the spheres without affecting the animation. All right, let's move on. Now let's increase the stroke thickness of the large circle. Maybe to 20. It's too
big. Let's write 15. 15 is excellent. Now I see that the offset
I created is too large. So let's bring the layers
closer together like this. That's better. Looks nice. By the way, if you
don't like the effect, you can turn it off from here. Let's see how it looks. Okay, I like how it
looks with the effect. That's it. We have
animated the spheres, and now let's proceed to animate the stroke
of the large circle. But before that, I
highly recommend taking a ten minute
break. Get up from
28. Finishing to Create the Loader Animation: So first, let's label
this layer with any color so we can distinguish
it from the other layers. Now to animate our stroke,
we will open the layer, open the contents as well, select the ellipse, and add
an effect called trim paths. Let's position the screen
so we can see the circle. Now, when we open the effect, we see a parameter called
end, which we will animate. Let's go to the beginning
of the animation and set the value of the
n parameter to zero. In second number one,
we'll change it to 100. Let's see how it looks. Excellent. Now, as you can see, the corners of our
stroke are straight. I don't think that
looks very nice. Let's see how we can round them. To do this, we will open the stroke parameters and
change the line cap to round. Let's change it here
to round as well. Now it looks a bit better. Okay. Let's close the stroke and improve the animation
we created with ***. Select the key frames
and press F nine. Now, let's hold down the
Alt key and double click one of the key frames to
access keyframe velocity. We'll change it here to
85 on 85 and click Okay. Let's see how it looks. Okay, let's close it and continue to create
the V icon animation. The animation of the
V icon is supposed to start when the small spheres
finish their last rotation. Let's stand at the point where the blue sphere
finishes its animation. Let's get closer.
Make sure we are not selecting any layer and
choose the pen tool. From this point, we will create
the shape of the V shape. We can move these
points later on. In the meantime, let's turn
off the fill for this shape, and let's choose that the
stroke will be in blue. Next, we will change
the thickness to 15, and we will round the corners of this shape as we did before. For this, we will open the stroke parameters and
change the line cap to round, and so that the connection
will also be round. Let's change it here
to round as well. Now it's rounded here too.
Let's close the layer. Now, press enter and
change the name to V one. This layer is supposed
to start from here, so we don't need all this
part here at the beginning. Let's cut it to the position of the time indicator by pressing
Alt and left bracket. And to animate this shape, we will use the trim paths
effect again as before. So let's open the contents, select the shape, go to
add and choose trim paths. Again, we will create keyframes
for the nd parameter. We can adjust the
composition panel for a better workflow. At this point in time, let's create key frames
with a value of zero. And now let's move
1 second forward. If we are now on the
fifth and 19th frames, let's move to the
sixth and 19th frames. Let's create key frames
with a value of 100. Now, let's make the key
frames as this time, we will change the velocity through the graph
editor in such a way. What we just did now is
time the animation of the v icon to the animation
of the sphere's ending. That is, when the blue
sphere shrinks down, the first v shape
begins to appear. Now, let's focus on
this part of the shape. We don't want this
part to stay here. This part needs to be
inside the sphere. Let's see how to do
it. First of all, let's go back to
the selection tool. And now let's also adjust
the start parameter. We want the shape
animation to be as it looks now
up to this point. So let's create a keyframe
here with the current value. And when the shape
completes its animation, we want this part to move
inside a bit. Let's write 20. Let's also convert
these keyframes to Easy Ease and
see how it looks. I think this animation
should start earlier. That looks better. And now we can also
change the velocity of this animation through the graph editor
like we did before. Let's check how it looks. All right. Let's move on. Okay. So now if we want to
change the shape a bit, we can take the pen tool, select one of the points, and move it wherever we want. Let's move this to,
something like that. Now, let's duplicate this
layer two more times. But before that, let's cut this layer to the point
the animation ends. The animation ends here. Let's press alt and the
right bracket to cut it. Now close all the layers. Go back to the selection tool, and duplicate the shape. Now let's change the color of
the new V shape to yellow. One more time, let's duplicate this layer and change
the color to red. And now, I want the blue v
to be on top of everyone, so let's move the layer of
the yellow V underneath it, and we'll place the red V
below the yellow V. Next, let's create an offset for
these layers in this way. Let's move it a bit further
away. Let's see it again. I think this whole animation
is running very slowly. So let's select all of
these layers. Press you. Select all the key frames. And now, hold down
the Alt key and drag the last key frames
of these layers here. Now it looks better. If you want to keep these
layers for a bit longer, you can extend them like
this. Let's see it again. Okay, now let's finish this animation by
closing this circle. We'll do it using the
trim paths effect. Let's adjust the preview
screen and close these layers. Now, select the circle and adjust the composition
panel like this. Now, let's open
the layer and for those who can't see
the trim paths effect. You can open all the parameters here until you see the effect. This time we will animate
the start parameter. Let's decide that the
closure will start at the point where all the
V shapes disappear, which is at 6 seconds
and 50 frames. At this point in time, we will create key frames
with a value of zero. Now let's adjust the
work area a bit. Now we'll move 1 second
exactly forward. If we are now at 6
seconds and 50 frames, let's reach 7 seconds
and 50 frames, and we will create key
frames with a value of 100. Now let's convert these
keyframes to asys And this time will change the velocity through the graph
editor in a way that the animation will start
slowly and towards the end, it will increase in speed. Now, in order to make the animation we created
play in a perfect loop, let's go to the point in
time where we can still see a small part of the
stroke of the large circle. This is a good point in time, because as you can see, we see a little piece
of the stroke. And now let's shorten the work
area to this point in time by pressing in. Okay. Now let's go back
to the beginning. Press you and move those
two keyframes back a bit so that the animation
starts where we can already see this small part. What will happen now is that
when the animation ends, it will start smoothly from
the same point it ended. Now, I want to show you what it would have looked like
if we didn't do this and finish the animation when the stroke completely
disappeared from the screen. Also in the beginning, if we didn't move
the keyframes a bit. I will bring the animation back to how it was
in the beginning. You don't need to do it with me. It would have looked like this. Pay attention to the animation
when the video ends. There is a small and unpleasant
cut in the animation. Let's see it again. That's why we finished and started the animation when we
see this small piece. All right, I will bring
it back to normal now. And with this, we've finished preparing
the loader animation. Let's press control to
save the project and move on to see how we can present this animation in our
portfolio like a P.
29. Share it on your portfolio like a pro: In the first step, let's create
the shape of the iPhone. To do this, we will use
the Rectangle tool. Now, let's make sure
we are not selecting any layer and change the
fill color to white. Next, we will color the stroke in light
gray from our palette. One important thing
to know before creating the iPhone
is that if we want to create a shape and specific dimensions,
in our case, 1,920 pixels in height
than 1080 pixels in width, to create the shapes
symmetrically and then change the
dimensions of its path. I will show you what I mean. So let's create a
symmetrical square shaped by pressing the shift key
regardless of the size. Now, let's open the parameters of the shape we created here. We will open the path and enter precise dimensions in the
parameter called size. Let's open the lock
of the dimensions. And now here in width, we will write 1080 and in
height we will write 1920. Now, let's lock the dimensions back again and reduce
it through one of the values. That's enough. From here, we can
round the corners. 60 seems perfect to me. Now, let's increase
the stroke to 30. After that, Let's press Enter and change the name
of the layer to iPhone. Let's move it below all layers. Now centered this layer to the composition using
the aligned tool. Let's see if it fits
well with our animation. In case we want to increase
the height of our iPhone, we can go back to the size
parameter of this shapes path, will unlock it and change
its height from here. Now let's lock it back again and close the
layer and move on. The next thing we'll
do is to group all of these layers
into one pre-comp. So let's select all the layers. Press Control, Shift C, call this pre-comp
iPhone screen and press. Okay. Now let's go back
to the selection tool. And as you can see, we have a lot of
empty space here. Let's reduce the size
of this precomp. For this, we'll
enter the pre-comp. We can turn off the background, then press Control K and reduce the width of
this composition. 540 looks good to me. And now, since this
entire section in the timeline is unnecessary, we can cut it off. For this right-click on the work area and choose
trim comp to work area. Let's go back to the main
composition and move on. The next thing
we'll do is change the size of this composition
we're currently in. For this press Control K, change its width to 1920
pixels and press Enter. It's important to
note that we didn't change the size of
the iPhone pre-comp. This pre-comp is the
size we set it earlier. We change the settings of the composition called
downloader animation. Alright, let's move on. Now let's enlarge this
pre-comp selected and process. Let's scale it up to 200. Let's place it here. And now, if I get closer, Note that the quality of objects within this precomp
has decreased. Question, what should we do
to maximize the quality? For this, we need to activate
the collapse function, which can be found here. Let's click here and immediately we can
see the difference. Okay, let's continue. I think this size is too big, so let's reduce it
to 150 or maybe 130. Now let's press the apostrophe
key to see the grid. This will make it much easier
for us to design the scene. Now let's create
three spheres here. We can create it using
the ellipse tool. Let's press and hold here, released to click and
select the ellipse tool. Now let's make sure we
don't select any layer. Because if we select
a layer and tried to create a sphere will
end up with a mask, and that's not what we want. Let's press Control Z
to undo the action. Now, let's make sure
we don't select that layer and create
a sphere around here. Let's turn off the stroke. Choose the fill color and blue. Next, let's select
it in process, then change the value to 50
or 30. That looks better Now let's go into the
contents of this layer, select the Ellipse
and duplicate it. But before, let's zoom
in a bit and adjust the preview screen so we can
see the sphere is better. Now select the Ellipse and
press Control D. Next, let's open the transform
of the new ellipse and move it using the
position parameter. Finally, let's change the
color of the sphere to yellow. Before we duplicate it again, we must select the
Ellipse Path first, then select the Ellipse and press Control to duplicate it. Finally, let's move
the new ellipse here and change
the color to red. Now, let's change the
name to three spheres. Next, let's take the text tool. Set the preview to fit and write loading screen for an app. Let's press Control a
to select all the text, choose your font we like. Change the size and
adjust the leading a bit. Now, let's press Control
Enter to exit the text line. Let's color the text with
our light color from the palette and place this layer below all
the other layers. Finally, let's go back to the selection tool and
move the text down here. Let's align the spheres here. We can center them using a line. Now, let's duplicate
the text layer. We'll move it up and here you can change the
text to your name. Will reduce the font size, will change the weight
to something lighter. Now, let's click here. We'll choose the selection
tool and move this text here. At this point, we no longer
need the color palette. So let's display it in the layers panel and
delete it from here. Now we can hide the grid. So let's press the
apostrophe key. Now, let's create a
solid that will serve as our background. For this. Let's press Control Y will make the background color
blue but slightly darker. Finally, let's place
the solid layer below all the other layers. Now let's improve the look of our scene using an effect
called drop-shadow. We will apply this effect
to the iPhone's precomp. Now sample the background
color and make it darker. Next, Let's increase
the opacity up to 100. Distance, will change it to zero and will increase
the softness, let's say up to 300. I think the color is too dark. Let's brighten it a bit. With this. We finished the
design of this scene. Before rendering
it, let's review the entire animation
from start to finish to check for any errors. I noticed the spelling error. So let me fix that quickly.
Let's see it again. And now let's use this
opportunity and practice one more time to adjust the thickness of the
stroke of the big circle. So let's select
the Selection Tool and go into the iPhones precomp. Now let's zoom in a bit, select the desired layer and increase the
thickness to 25. And now, we also need to increase the size
of the spheres. Remember, we need to
enlarge them through the transforms of the shape and not the transforms
of the layer. To do this quickly
on all layers, Let's select all the spheres, layers, and type scale
in the search bar. And of course, we won't scale it through
the layers scale, but through the shape
scale. Change it to 85. Let's close the search bar. Now because we
enlarge the spheres, we need to adjust the size
of the V shapes accordingly. So select that layer and
increase the stroke to 25. Finally, let's also change the stroke size for these
two layers and see how it looks. It looks great. So now we can close
this pre-comp from here and rendered
the animation we made. So let's press Control M to
access the render panel, we'll choose to render it in high-quality h
point to 64 format, which is high-quality mp4 and will choose to render
it to our samples folder. Let's just change the
name to animation for portfolio and
click on Render. Let's wait a few moments. Okay, now let's see
what we've got. Looking good. Now you can share the
animation you created on social media and post it
on your portfolio website. Presenting a loader
animation like this is much more impressive than
using it as a static image. And if you enjoyed the course, I would really appreciate
it if you read it, it based on your experience. You can also write a
review so I know if you learn something interesting
in the course or not. Okay, let's go back to our
project and organize it. Before we close it, Let's
create a folder called assets. Next, let's make
sure we don't select anything and create another
folder called pre-comps. Now inside the Assets folder, we will drag our color palette
and the solids folder. And into pre-comps, we will
drag the iPhone pre-comp. Finally, let's label our
main composition in blue. And now you can click here to make the arrangement
even more organized. Now let's press Control
S to save the project. And now you can close it
30. Section 4: Project Task: All right. And now to
practice what we learned. Please create this animation. You can use different
colors than mine, but try to keep the
animation the same. This task is meant to help you remember and understand
what you've learned. Don't worry. The task won't take up too
much of your time. It's designed to be
doable in 2 hours only. If you have any
problems or questions, feel free to ask me or your classmates for help in
our closed community group. M
31. Closure: And with this, we have
finished the course. You can be proud of
yourself because you have taken the first
step in the world of motion design and
have learned a lot of new things that you already
can use in your next project. You can share your video in
our private community group, and of course, you can ask
me any question there. I promise to answer any
question you may have. I hope you enjoy this course, and I can wait to see
you in the next one.
 Valeri Visuals, Adobe After Effects Instructor