Transcripts
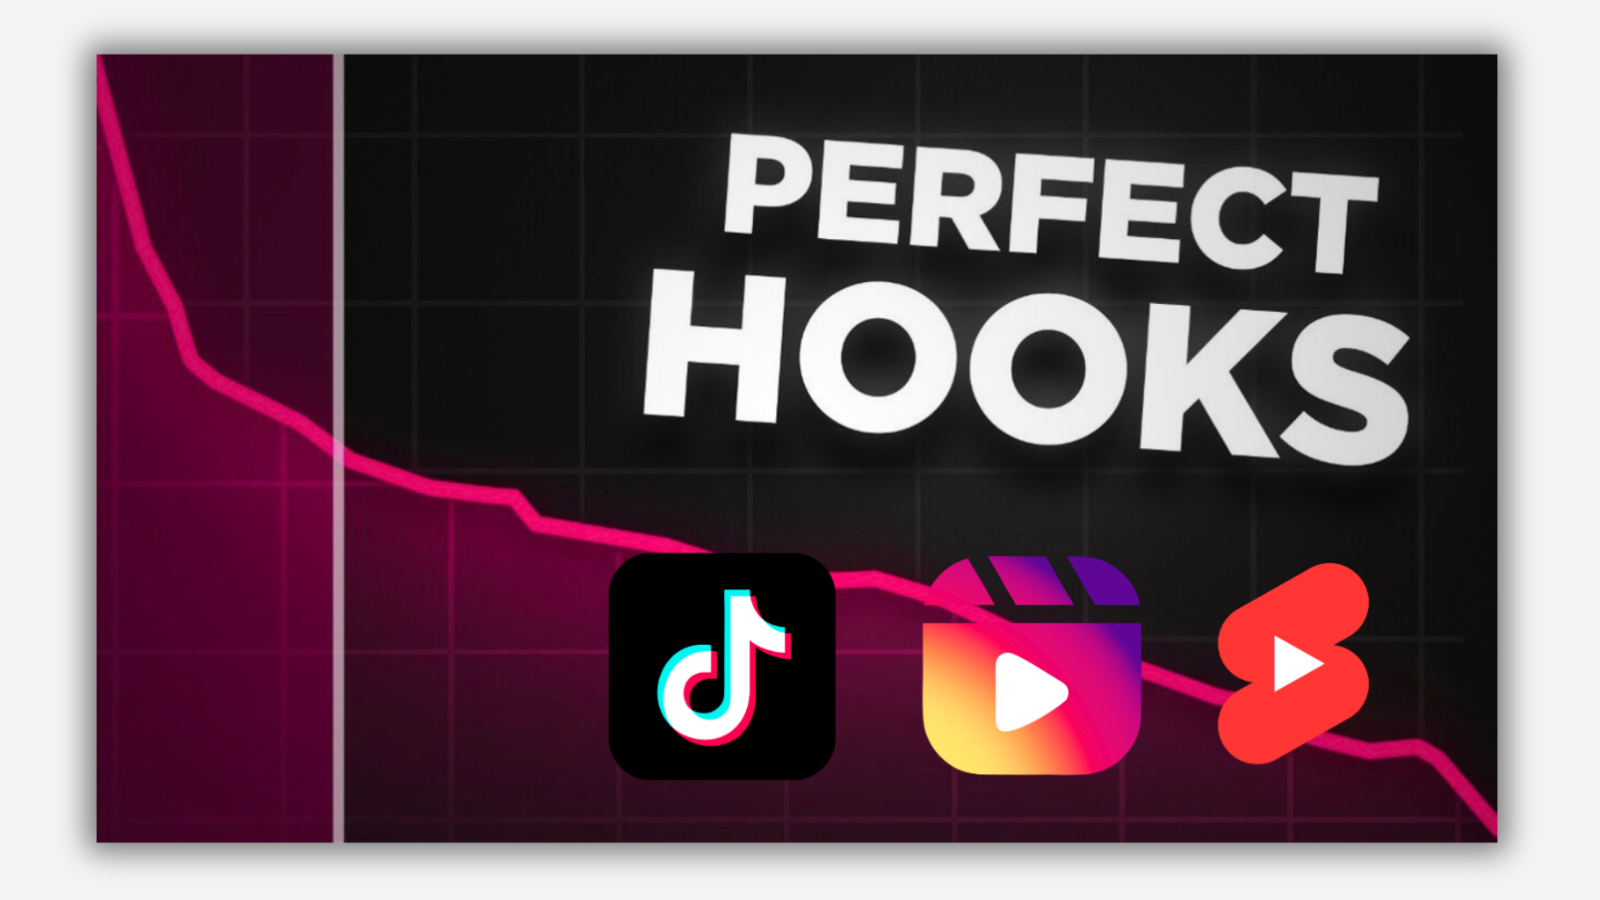
1. Intro: You ever wondered why
these short videos go viral on Instagram
Reels TikTok and YouTube and get
millions of view whilst others struggle
to get a single click? Well, the answer isn't luck. Instead, top creator
knows how to grab their audience attention that keeps viewer watching whole way. In this class, you'll discover
how to create viral hooks, edit scroll stopping
videos using Capcart and strategically use these
clips to grow your audience, whether you're content creator, entrepreneur or
just starting out. This course is designed to
give you actionable skills. The end of this class, you'll have tools and knowledge to turn your content into a magnet for views, engagement,
and followers. You'll know how to
grab attention in the first few seconds and keep viewers coming
back for more. So are you ready to
take your content to the next level and
start going viral? Let's dive in. Can't wait
to see what you create.
2. Class Project: Thank you for
joining this class. Here's what I would like you
to do for the class project. First of all, go
ahead and follow along with the course and
complete all the lessons. Once you have completed
all the lesson, you will end up with
your own video. I would like you to go ahead and upload it to any
platform that you like. Personally, I like
YouTube shots, but you can upload it to TikTok, Instagram,
wherever you like. Once you have
uploaded your video, I'd like you to go
ahead and share the link of your video
in the class project. But don't stop there.
Take a moment to check out videos from other
students project. Keep them like leave a comment, and follow subscribe if you can. Initially, this also
helps the algorithm of your platform to boost
your video furthermore. This way, we're
not just learning, we're helping each other
to build a community, inspiring one another
and growing together. Let's create something amazing.
3. Set Up: Welcome to this lesson, where I will guide you
through our simple step by step plan to create a viral
video using powerful clips. This process is designed
to be straightforward, even if you're new to this video editing or content creation. So our first step is to download the clips provided under the project and
resource section. These are pre made
attention graphing intros that will help to set the tone for your video
and instantly engage viewers. Simply click on the link and save the file in your device
and you are ready to go. I suggest if it's possible, create a new folder
and save them there so that you can
use them later as well. Now, if you haven't
already download Capcud, it's free, beginner
friendly video editing apps available for both
mobile and desktop. Capcot will be our editing
tool for this course. So make sure you've got it
installed and ready to go. I will also leave a link so
that you can download it. You will see just how easy and powerful it is in
the upcoming lesson. Our final step is to find a viral clip to
pair with your intro. Think about your
favorite creator, people like Chris Williamson, Alex Hammurzi or Joe
Rogans who have always producing lots of
videos that are very attention grabbing that
is very meaningful. So go ahead, look for
a podcast snippet, impactful one that
is very interesting. You know, it could be
in different niche. You probably have
different creator, so you can go ahead and find some other
creator that you like. And copy the video link. I'm talking about here YouTube. So copy the link of that
video that you'd like, and then go to Google search for download
video from YouTube. Choose a website. If you have another one that
you'd like to use, you can go ahead and do that, or you can choose that I'm using. Once you paste your
video link here, and then it gives you
a couple of options. I would suggest minimum get download the video
in ten ATP at least. So these websites are
only able to give you videos in ten ATP quality. If you want higher
quality, such as four K, two K, and the higher
quality, the better it is. There is another option
that I have for you. So it's called four
K Video downloader. I'll leave the
link in a section, so you can go ahead
and click on that. Once you go to this website, this will allow you to
download the free version. The free version allows you
to download daily ten videos. I'm sure you don't need more than ten videos
at the beginning. So you can go ahead and
install this after installing, there is an option
called Paste Link. So just click on it, and the link that you copied
earlier will be pasted, and then it gives you the
options for you to download. Normally, I use this
to download videos, so you can go ahead
and do that as well. Once you download them, and then we can move on
to the next one. That's a plan. Simple, effective and designed to get result. In the next lesson, I
will walk you through the Capcud basics
so that you can hit the ground running
with your editing. Let's make something
viral together.
4. Quick Start With CapCut: Welcome to the Capcut
Quick Start lesson. In just 5 minutes, I'll show you everything you
need to know to get started with this powerful
yet easy to use editing tool. By the end of this lesson, you'll be confident in editing using this tool.
Let's just get started. After you have downloaded and then installed
and logged in, and when you open your cap card, you will end up with this here. And then you will be offered for seven days premium
Capcard, but in this case, I'm not going to use
any premium features, so you don't need to,
but since you have you are welcome to use the premium features
that you like. There's another way you
can get premium features after seven days if
you want for free, which is by inviting
your friends, Capcard will give you a
link which you can copy, and then you can
invite your friends. And then when they use your code and then they
will be able to, you'll be able to
get seven days. They will be able
to get seven days of with this interface,
first of all, you need to go ahead and
click on Creative Project, and this is the main
interface where we work. So this is on the
left hand side, top left hand side,
you will see there is a button call input. This is where you bring
your assets such as video, audio, images, whatever
you like to work with. So this is where you bring it. And there are other options available on the left hand side, you can go and explore these
are provided by cards, some of them are
pros, some of them are normal free to use. Normally, I don't use this, but you can go ahead and check. I'm just going to
click on Input and then go to the resource
that I would like to. I'm just going to
bring these two. Now we have them. So
you can simply click on Plus to bring them to
your timeline here, or you can drag them
wherever you like to. So when you bring them here, this is where you work,
this is your main truck. You can go ahead and work here. And the next thing
what you need to know, there is an audio option. This is the most of them are premium music that
you can click on and add. However, most of the time, what I use, I like to use. These are the sound effects
that you may need to use. Text option when you would
like to add something. So you can click on text, and then you see a
text layer comes in, and then you can use the
right hand side here to use text such as you can write something and it
will appear on the screen. Let's just leave it as
it is for now here. Then there is sticker. Sometime you will see that
I use some sticker to highlight something
in the screen that need to be highlighted. You probably saw one or
two of these already. Okay, so the effect is effects. So this is such blurry effect. So let's say I want
to make this blur, so you just drug
and leave it there. You see this has been blurred. You can also choose how you like how much of
the blur you want, and then you can experiment
with other the pro ones, as I said, you can only use if you have a pro
version of Capcot. There are a couple of
mores that you can go ahead and see these
are very useful. The next one is transition here. Transition is when
you need to build two bring two videos together
with a smooth transition. For example, let's say,
I use this she lot, so I'm going to bring this and then leave it in the middle. It's saying the duplicate frame, there is not enough time here, so that's why it's
showing this message, but it's not going to but
you can see how it's using. I'm just going to you can see how this transition
is made here, so yeah, using the wish. So you can go ahead and explore a little bit more using this. Okay, now, there is other options such as
caption and the filters. I'm sure if you go through
them, this is very easy. And some of them,
I'll go through in the next lesson as well.
We work on the options. So here, whenever you click on a video that
you were working, this side on the
right hand side, this will give you the
tools that you can work on. For example, let's say
we went to Zoom in, something like that,
scale up, scale down. Then there is other options
such as if you would like to go to the speed
options to quickly speed up. So you see this got very quick. Is very handy. You can
go ahead and do that. And then there is other option that is not necessary
for this big nerve one, but you can go ahead and
see, which is animation. So let's say, let's bring
it back to how it was. Animation is very handy. For example, let's late this
here so I can show you. So select this video and go
ahead and click on animation, and then you can choose
the one you like. Famle let's say this one,
you see the actions. You see? When we
start, it's jump. The video itself jump. And then you can go
ahead to animation, and there is the one we did, it's in animation start
and then we have out, such as you can do
something like that. You see that the black
screen comes in. And you can do combo, which
is like throughout the whole, do it to be doing something. You see that there's
effect as well. So say you can go and experiment with this. This is
very interesting. And then what I want you
to listen here is to, first of all, whenever
you open a video clip, you need to go and
set the ratio. In this case, we are
going to work with this nine by 16. This is
what we are going to work. If you're working
on a long video, like you normally you videos, we normally choose 16 by nine. This is all for this video, and in the next one, we'll go through how we can
work and then make our video. I hope you learned a
little bit from here. I was very quick, I know, but this is just a brief
explanation of cap cart. I'm sure most of you
know how to use it, but this is to keep this course shot.
See in the next one.
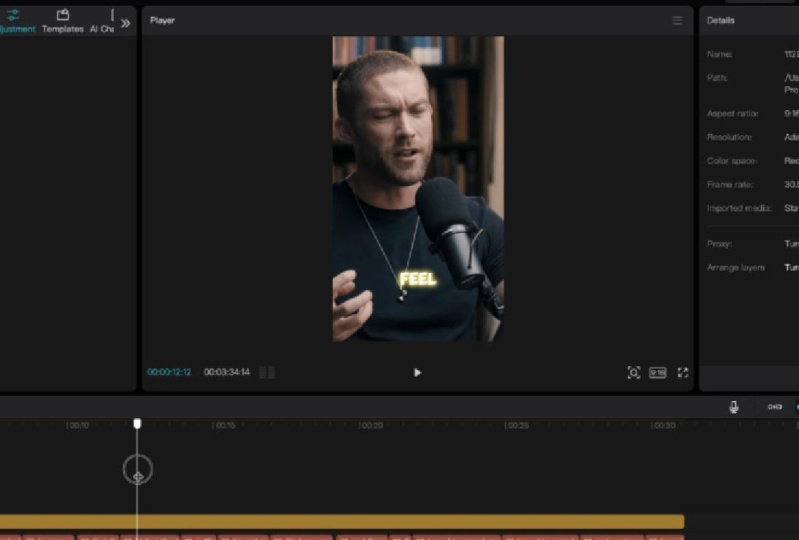
5. Viral Short Video Editing On CapCut: We left in the last video. So what I'm going to
do in this video is to actually create the video
that we are about to create. So first of all, we don't
need this layer here. If you want, you can leave
it, and we don't need this video because
I'm just going to focus on using this clip. So I can get rid of
this one as well. Click on this one. There is a special effect that you can see that on the
left hand side. It's a special effect
and you can click on it, and you can also just get rid of it by
clicking back space. Okay, so this is how it is at
the moment, as you can see. Now we need to bring
the other clip, the actual clip that we
would like to pair with. So obviously, we need to go to our resource folder
and bring this. So just normally don't spend too much time on
finding the right clip. At this time, you need to use whatever available
for you to do it so that you actually do the work other than spending time
on finding the clip. Because at this time, I believe consistency
is the key. So here is our clip. As you can see, this does
not go well with other one. Uh, as you remember last time, we fixed the ratio of this player so that you can see that you don't
need to do it again. This is how it looks, whatever the clips you bring in. So, obviously, I'm going to find out the clip
that I would like to use. I'll show you in a bit,
but what I want to do is first to match this clip. So what you can do, you
can just use your mouse, and then you can just
zoom in however you like to this and also
use this scale to do it. Then you can also just
press and hold the mouse, and then you can just bring
the main character in the middle of the you're
choosing a different clips, obviously, you have
to do it as well. And then I'm just going to take a couple of minutes to
find our right clips. I'm just going to
speed up this bit. So here's what I would
like you to know. For example, this is
one of the shortcut, which is just click on the video and then press
Q on your keyboard. So left hand side of this
video will disappear. Let me show you again,
screening it back by command set and just going to select
it again and then press Q. So it disappears on
the left hand side of the video which you selected. For example, I want to get
rid of this middle part, so you can press Command
B to select this part, and then you can go on the
right hand side of this. That's I want to get rid of on this bit on the left hand
side, you can press CQ. So this is how I can cut the
clip wherever you need to. So I'm just going to go
and find or clip here now. After a little bit of research, I found out where Chris
Williamson says his coat, it's around 1929, 30 seconds,
something like that. So since I'm using another clip, so it's around 1950
29, 52nd here. And then I found this clip
where he's using a great coat. What I do here now is going
to try to fix this angle. So I'm just going to
bring him at the middle. And then since I don't need anything from
the left hand side, I'm just going to press Q here. Obviously, I don't need these bits that I was showing you. So he started saying
the quote around here. I'm just going to click Q. And then trying to figure out
how long I want the clip to be so he goes ahead and explain
a little bit more here. So what I can do here
is work on this clip so as you can see that this is only a 32nd video so far,
including our clips. So what I'm going
to do, I'm going to continue to see if there is interesting part still there that I can add
with these clips. So this is where that he
stopped talking about this. And what I'm going to do,
I'm just co clear this on the right hand side by pressing W. So this is our video here. It's around 33 seconds. From there, what I want
to do is to get rid of some of the bits that
I don't need to use. Okay, so what I can
do I can actually make you guys to
listen this, as well. This is a quote he
says in this clip. The magic you are looking for is in the work
you're avoiding. ****, dude. The magic
you are looking for is in the work you're avoiding
every single time. There is something in front
of me. So you got it. So here what he's explaining the code as well in the middle. You see that we don't need these bits where
Steve agree with him, so I'm just going to get
rid of this part as well. One more thing before I do that, I'm just going to click
Control or Command C here so that we got back. There is another thing
you can do is to extract the audio
from this clip. So you can click on it, and then there is a double click on it, and then there is an option
called extract audio, and you can do the same
for this one as well, so I'm just going to
do this one for now. You see that audio is extracted. So you see this
bit where we don't need to add it in this video because we want the maximum engagement
from the people, so we wouldn't need any clip or anything
that doesn't require. And then I'm going
to select this clip. You can do another thing which is select both clip together, the audio and the video file by holding command or control, and then selecting both. Okay, then you can press Q. Okay, so this is jumping in here because this
is our main truck. What you can do
to turn off this, you just click on
this hair magnet. So this will use
however this is freely. So you can bring
it here as well. So when we listen to this again, is in the work you're avoiding. Ste. The magic you are
looking for is in the work, you're avoiding it
every single time that there is something in
front of me that Okay, so you see that there's
some blank space. What I'm going to do,
I'm going to get rid of this blank space as well. Okay, so I'm going to select
the top bit as well, here, and then this, as I said, command on control, and
then you can select both clip and cube so
that you get rid of this. And both are selected, you
can move them together here. And every single time that there is something
in front of me, I feel like things aren't coming my way
sufficiently quickly. I'm not making the progress
that I is the clip. Actually, you can go ahead and make it more advanced
however you like it. Okay, so this is what I'm
going to work with you for this purpose of showing
without wasting your time. Then you can extract
this audio as well and also
increase the volume. So you can just use
this handle here, bar here to do this, or you can go to the
right hand side. You see the volume here, you can increase a little bit more. And also, you'll do this. So I'm going to select these
clips, the whole clips here, and you can you can also
select all of them together, and then you can
make it compound. So bring it all together. So you can double click on
it and create compound clip. When you do that, this is going to be together, these bits. And then you can go ahead and increase the
volume hair as well. For this was one as well. Just make sure that you
don't do it too much because people don't want
to hurt people's hair. So this is the clip
for now. Magic. So now we are going to include a transition
in the middle. So you can go transitions and which one you like to add. Try with
the different one. Different clips goes
with different one. I'm just going to
use pull in here, and then I'm going
to drop it here. And then you are looking. Okay, so now there is
another thing you can do is you can add the captions. You'll have caption
options available to you. You can just click on Generate. I would say, once you have final clip ready and
then click on Generate. And this should allow you to
give you the text, as well. I would say, go ahead and
read them and see if it's getting clear and exactly how
Chris Williamson saying it. Another thing is when
you click on this one, there is a option called
apply to all basically, if you change anything now, this will change to
all of the text. So you can select on one. Let's select on this one. And then we can go
to, for example, templates here, and
then you can select, for example, this
one. Logic, love. You see, this is a
different style. You can go ahead and use other
ones that you like to use. If you want, you can
go back to basic and then also you have other options that I think you
should be able to explore a little and
then see how it works. Make sure that if you have
the pro version available, go ahead and explore if not, then you can use this
one and then also increase the intensity
of this glowing effect. I can make it more
the range as well. There are other options
available for you to do as well. You can go ahead and apply
the animation in this text, but if you're using a
template from this option, then I don't think you need
to use animation here. Okay. So now we almost have
our our video ready. What I would do here
is add a music, a trendy music here. Obviously, you need to go
ahead and find one that is trendy going on at
the moment that you think is important to add. So you can go ahead and
find an audio download it. You know how to download it. Then or you can use
something from here as well. If you find something, you
can go ahead and search, and then you can
import the one if you download it and
then bring it here. And then this should make more interesting for your video. Okay, for the text, I'm going to leave as
it is for now because I think this is a good
position for the text to be. If you want, you can bring it down up and down
however you like it. Make sure you click on
Applied tool so that all of them are aligned
with each other. Okay, now I'm going
to go ahead and bring a music to add this hair.
6. How to choose Music for Short Content: In this lesson, I'll show
you how you can find music that goes with your shots that you are creating
at the moment. So for example, if I go to YouTube and then
scroll down and I find a shots where they're using music
which I like, obviously, you can go ahead and do that
from your phone as well, since I'm using my computer, so I'm going to go ahead and use the YouTube shots
on the website. So here, when you find music, for example, I found this one from this channel
that they're using, and I like this
music that goes with this video that I'm watching here and the one
that we are creating. Simply go at the corner
right hand side, corner down, and then
you see there is a logo, just click on that one. And then you can
see that this short contains way down this song, and then you can click on it, and then you can go ahead
and click on the song here. And then when you
have the song here, then you can simply
go and click on the ink here and copy
the link and then go back to the four K
downloader that we used or you can use the website that allows you to
download from YouTube. Since we don't need
the video itself, we just need to download
the MP three file, the audio file, so you
can do that as well. So when you come to
fork a Downloader, and then you paste the link and this will
come up like this. And then you have option here. Download video, you can go ahead and click on Extract Audio. When you click on Extract Audio, this will give you the option
to download the audio from. I would say, just go and
download any quality you like, and maybe normal one is better. And then we can go ahead and
import it in our cap card. So go ahead and input
it to cap card. So now we have the music
here. You're avoiding. ****, dude. The magic you
are looking for work, you're avoiding it every single time that there is
something in front of me. I feel like things aren't coming my way
sufficiently quickly. I'm not making the
progress that I want. It's because I'm dicking
about over here, and there is a large frog in front of me that
I need to eat. I need to spend another
half day reading a book. I need to spend more time
researching online and ppping my skills into
I need to do whatever. Okay, so I'm just going to
choose this bit, to be honest. You can go ahead and find. I like the bits here so far. This will be our final video. So this is the best
as it gets now. I'm not going to
go and edit more. If you want, you can
do more editing, such as you can bring
the adjustment layer. So as I was going to show
you adjustment layer here, and then you can expand
as far as you want, and then what you can do. You can see this
panel open here. Now you can go ahead and
change how your video looks. So if you want, you can give
it a bit more less of this. You can see that there
is a bit darker version. I think this goes with
this sort of video. If you want, you
can make it better. I'll show you if you go with it and there is a better
option that you can do. That's it for now,
and this is it. And let's move on
to the next one.
7. Export shorts video in the right Settings : Is ready to upload. So what I'm going to
do, I'm just going to get rid of the bits,
which I don't need. So as you select and press D. This will get rid of the
right hand side, everything. If you want, you can adjust
a little bit of this volume, if you want to make it up and down or however you like it. What you can do now
is to export this, you can just click on File
and then click on Export. From here, this is
showing me because I use a premium feature which
is the caption auto caption. So this will allow me
since I had one use left, so you can go ahead and
click on Try for free. Then this will
allow me to export. Sometimes it will not
allow you to export if you don't have the
premium features available, as in you already used or you no longer have the
premium available. So you can go ahead
and click Video, you can update name,
something we like it, and then you can go ahead and check what's
the quality you'd like to video shots video,
you can go ahead and ten NTP is fine. I think. If you want, you can
go better quality as well you can also see
what's the size of it. For example, 59 MB
here for 32 seconds, you can also put the frame rate, which is the 60 frame rate is normally better for YouTube. But if you don't have a
better quality of a video, then I would suggest
just leave it to 30 frame per seconds. And then you have
the video selected and you can go ahead and
just click on Export. This will not take long
depending on your machine.
8. Congratulations & Next: Congratulations on
completing this class. I truly appreciate
the effort that you put in to
complete this class. I would really
appreciate if you go ahead and submit a project. Also, if you found
this class any helpful or anything that
you would like to mention, please go ahead and
leave a review. It only takes a minute, but it means well. You are someone who is looking forward to have the viral clips, you can go ahead and find these clips all
over the Internet. However, to save your time, I have put a package. I'll leave a link
under the discussion. You can go ahead and save
your time and download more than 150 viral clips that will help you to keep
your viewers engaged.
 Sid, Teach Skills That Make U Money