Transcripts
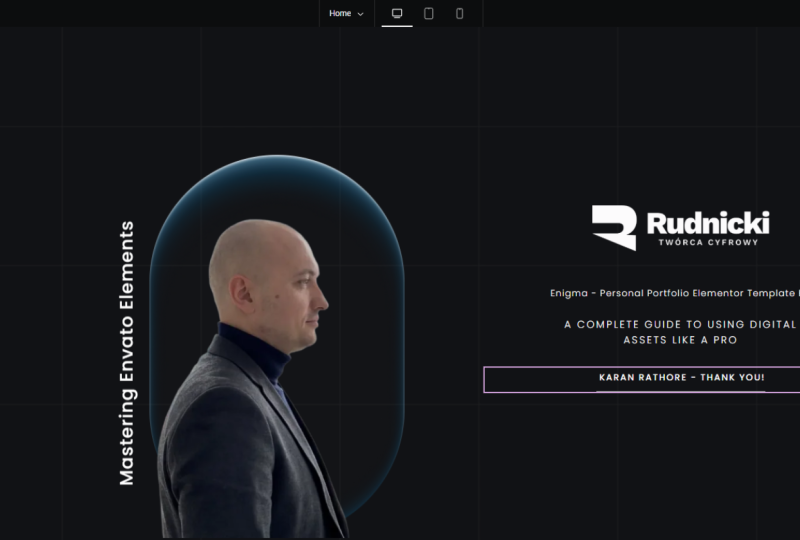
1. Introduction: In this class, I'm
going to show you how to use full power
of N Wato elements. The ultimate library
for creative like us, whether you are into
graphic design, video rating, website design. This course will give you
step by step how to use Envato Elements asset library for your project to
save a ton of time. We will create LWA project from a logo design to a
promotional video, a social media banner, and even building a website. T press all using assets
from Envato Elements. I'm current a creative
specialist with over ten years of experience in graphic design
and video iting. You will learn
practical skills like navigating the
vatoElements platform, understanding licensing rule, optimize your creative workflow, and finish client project
faster than ever. This course is perfect for freelancer,
creative professional, business owners and
anyone who want to speed up their content game
using high quality asset. Before you dive in, here are the few essentials you must have to get the most out of this course, basic
software skills. You should have basic working knowledge of the
following tools. Adobe Premiere Pro, WordPress, after effect, Adobe
Photoshop, Adobe Illustrator. You don't need to be an expert, comfortable navigating the
interface and doing basic tak. That's all. To follow and download the templates, stock asset, music, and more. You will need an Envato
elements subscription. This course is
entirely built using Real World license
assets from Envato. Once you have the
subscription, don't worry. I will show you how to explore, license, and download
everything step by step. We will be working on Real
World project in each module. So be ready to explore, try new templates, and put
your creative skills to work. So let's get started in the
2. What is Envato Elements? A Creative Game-Changer: Before we dive into
exciting creative project, it's super important
for you to understand how Envato elements
work because this is the thing we are going to
use most of the time to complete our projects or I
can say, real world project. Envato is like a tazzar chest filled with high quality
assets, video templates, images, assets, after effect, dawns Premiere Pro,
WordPress, website design. Themes, graphics, font, audio, everything, you just name it. In this lesson, I will show you how to explore
this platform, find what you need,
and stay organized. The process of Envato
elements to create account is like another GL
account making process. You don't have to worry about the account creation
process, it is very simple. You just have to log in
through Google that. Once you login into
nvatoelements.com, you will land on this
clean dashboard. Once you log into
Envato Elements, you can see a dashboard, a clean dashboard
in front of you. First of all, you can
see a big search bar in front of you and
Envato Elements logo. After that AIAbsUgrade
and your profile. So I have bought the basic
monthly subscription of Vato elements and time to time I buy monthly basis Vato elements
and it depend on you. You can use it. You can buy
according to your need. I buy according to my
needs for monthly basis. In some months I don't use vato elements, so
I don't buy it. And in some months I have
another project which I have to complete early as as
possible on urgent basis. So I buy Nvtoelement
to ease my work. As you can see on
your dashboard, on the upper side, stock video, video template, music, sound effect, graphic
templates, graphics, three D presentation, photo, fonts, add on, and more. In the more Saxon, you can
see web templates, CMS, orpresEtension, Pis, popular
searches, et cetera. Once you scroll
down, you can see Premiere Pro extension,
Figma plugin. These are some extension
you can directly use into your Premiere
Pro and these are some extension you
can use directly from Figma plugin in
the Figma software. In the top category, you can see stock video, video templates, TD
presentation photos. These are the recent
search that you have done. Recently, I have used five star rating for
feedback for my client. According to my last search, it gives me another example of similar stock videos
that I have used. After that, topics
in the topics, you can see illustration, preset alerts from Pema Pro, font pitch deck, these are
the PowerPoint presentations. You can use presentations
for your course creation, real web model, real
estate, STML design. These are the STML templates you can use for your
website design, authors spotlight
web music studio. These are the author
seen where these are the topics that are spotlight
in the Envato elements, whose assets are frequently buy or frequently used by
the users like us. And after that,
there is a footer. First of all, so there is a pro tip for you
and note it down, how to download the asset. This is the basic asset
I'm trying to download. How you can download the
asset, let's dive in. In the stock video,
search for stock footage. Once you click the stock footage
3. Downloading Assets and Starting and Register your First Project: Once you go to stock footage and hover your mouse on any of
the stock footage, you can see a
overlay of download similar and ad collection. First, we are going
to download it. Once you click on Download, you can see a projects
and here is the protip. You can save your
project according to your client for
which you have used. Right now, I'm trying to
create a new project that is project name course material. Now, these are the download add, so here is the project
that has been saved and download link will appear. Once you save it, the
download will start. Now, once again, if you are
downloading another asset, you have to click on Download and you can see a
project course material. Just click it add to Download and the download
will appear again. Now, once you click
one of the asset, let's colct this asset now. As you can see here
is a video that is playing in front of
you in a media player, and here you can
see a audio button. Once you toggle it, you
can hear the voice. If the video has voice or the
audio, you can hear it out. And if you don't
want to hear it, you can just mute the sound
and you can see the footage. Thus file size on
the right hand side, the resolution of the footage, resolution and the length
is 35 second on 29.97, frame rate Alpha channel, no. Alpha channel means there
is no removed background. That is video is a PNG
version. Is there any loop? No, there is no loop,
video encoding as 24, orientation, horizontal, commercial license,
further information. Now here you can see
a download preview and download and
add to collection. Download preview and download
are almost the same thing. In the download preview,
you will download a video with Envato
logo on the video. Right now, we have paid
the Envato element, so we don't have to download
the preview version. We only have to directly
download our material. Once you click it, same
window will pop up and same step will have to use and same step
you have to follow. Here is the sum tags, you can check
according to the tax. Once you scroll down,
there are similar videos, you can see the aerial view of anything, you can see here. Now, as you can see, there are stock
videos similar to this aerial view of Dubai are 1.4 million video assets are
available in the Nwaomrket. It is a huge number and
these are totally free, not totally free,
but at this price, it is very cheap to use.
4. Class Project Follow the steps and Navigate Envato Elements: Now that you know how to
explore the platform, it's time for your first
practical challenge that I call asset
discovery challenge. The task is to find and
bookmark three sets of asset for for a
graphic design project like a branding or a flyer, a video project, like
a opener or a slide a website project like a
WordPress theme or a STML theme. For each one, you have to select at least one or two asset. Take the screenshot
and share with me. Before that, give a
one or two liner that why you have selected and for those you have
selected the asset, for example, go to
video templates. Select for after effect, once you click it and see. Here is the logo design or
opener. Search for opener. Once you click opener, you can see many videos
dedicatedly for after effect. After that, you can apply
a filter here if you want to search for
after effect or a premiere pro, you
can check it out here. Just simply uncheck
it, select openers. Now Premo pro after effect,
they depend on you. Sus for after effect,
as you can see, it is dedicately on after effects according to our filter in the categories section. Once you click it,
you can just hover the mouse here and
the video will run. After that, you
just have to click Download for which you
are downloading or you can create another
project and add download and add and download. Simply take the skin shot and share with me in the
project section. For the WordPress template, you have to go to more,
search for WordPress themes, plugin, template kit, all Wordpress anything you
have to click and download it. Skinsht share the
skin shot with me. Now, when you complete
this challenge, you will already be thinking like a creative professional, curating assets with purpose. Go ahead and complete your
asset discovery challenge. In the next video, we will
look at licensing and best practice for assets paid or commercial
work. See you there.
5. Freebies Every Month from Evato Elements: How to Access and Use Them Safely: Understand. All the template
that I'm using here, I can't share it with you. If you have a license to use Envato elements,
you can good to go. If you don't have Envato
Elements subscription, and so there is one
more option we can use. Each month, Envato
elements provide free files so that you can download them and use them
for your own project. As a class project, right now, I'm using file from Envato element that is
this month free files. Envato element
provide free files. Every month, you can download them and use them for
your own project. Let's understand
how to use font, which you can download
from Envato Elements. Where you can find
months free files, you only have to go
to Google and search for Envato free files. Once you click it, you can
see there is this month freebies option or this month freebies link. You
just have to click it. Once you click it, it will redirect you to this
month free files. Here is the this month
free files option. Let's understand how
to use font first. Here is the font
inspirational handrawnFont, click here, download,
I agree and download. Once you save it, you
have to find it in your Download secon Double
clcate inspirational, Double clcate, install it. Remember the name inspirational regular Double
Calcate install it. You have installed the font. It is that's easy. Once you install it, you only have to go
to your Photoshop or any software it will
install within it. You only have to
go to Photoshop or any software that you are
using in your computer, even if it's Wordpad,
you can use it. Let's take text, click
it, course, WTO, Elements course, and
search for NSP eration. Here is the font. This
is the font that we have downloaded and now you
can see, it's look cool.
6. Understanding the Envato Elements License: Now let's talk about something
that might sound boring, but trust me, it's
super important. Licensing means license
for your assets. Assets that you are
using and going to use, you must license them
so you can use them legally and you won't get any copyright
issue in the future. I know legal stuff isn't
everyone's favorite, but don't worry, I'm going
to make it really simple. This will save you a ton
of headache later on. Especially if you are working with clients or
posting your work online. What is a license? Let's break it down.
Every time you download something
from Envato elements, a video template, a font, even a stock photo, you are getting a
license to use it. It's like a permission slip, but you need to know how
and where you can use it. That's the difference
between using something legally or getting
into trouble later. Here's the short
and sweet version. You can use any item for
commercial or personal projects. Each time you use an
asset in a new project, you have to register
a new license. The license is single use. That means one asset
equal one project. Let's say you download
a logo reveal template. You use it for clients video. Now you want to use same
template for client B, you will need to
register it again. Same file, new license,
that's Envato rule.
7. How to Register Licenses for Individual Assets: So let's go to logo Reveal. Go to Template. You want to download it, you
can download it. You have to add download, and it will create a license. Now for course material, let's download it.
Add and download. Now, here's the footage
that you have to download. You have download
it and license it. Now, you have to download
it again for client B. You have download it two times. Now go to your
downloads, M Projects, my download, view license, download license,
course material. View licenses, click it course material,
download license. Now you have downloaded the license for this
material, as you can see. Now you have downloaded
it two times, you have to create
a new license. Simply click here, project name. Let's say you have used for
someone client material. To create license. Now you can see view license. Here is the license
for course material, here is the license for
material to, download it. Done. Now you can see the difference between them. Can you
see the difference? Difference is license code, item code is different and
the course name is different. Register project
name is different, item license code is different.
8. Do’s and Don’ts of Using Envato Assets in Your Work: What you can do?
Use templates in YouTube videos,
Instagram, reels, or ads, Edit stock videos and mix them with
your own footage, customize website
template for client work, use font in logo design, combine assets into final end
products like presentation, video, promos,
website, et cetera. You can even sell
your final output like a video made using assets as long as the
asset itself isn't being resold as is
what you can do. You can't resell or
repackage the asset itself. No uploading and to
elements on stock website. No using asset in March unless
it's heavily customized, no using templates as it is, and calling it your own work. You must download and register a license before you use
an asset commercially. Time for a mini project to make this stick license
practice task. Pick any one asset from
your bookmark collection, download it and register
it to a sample project. It can be a real
project like branding for my own personal profile
or an imaginary project. It's up to you.
Take a screenshot of the license
registration window, upload it as part of
your course project. This is all about getting
comfortable with the workflow. When real clients or job
come in, you are ready. I hope this was easy to follow
and now you are one step closer to using warto elements
like a Total BU next, we will start getting creative. I will show you how to use your bookmark asset to create a real world
design in Photoshop. Let's go build something
9. Overview of After Effects Templates – What You Need to Know: So now we are going
into another file. Let's download the picture. Click, click. And one more thing, you can use this asset as per
Envato element policy, you can use them for one
time in your one project. Let's save it as you can see. Here is the high quality image
that we have downloaded. You can use anywhere
in your project. Now let's understand how we can use Envato Elements Dopener. Let's click it, download it. Now we have download it. This is a opener file. Once you click it, you can see the details where we can use it. It is the file
that we can use in after effect and here is
a file, you can check it. The After effect file
is download right click extract all happy
Mother Day extract. Here's the file that
we have downloaded. Double click it, Double click. Now, here is the After epacFle. They have shared two
version of After epac which is Afterpax CC and
After effect 2018. You can use one of
them according to your need depending on
the software you have, the software model you have. These files are just
an overview how you can use the Nwato
elements files. I converted into smaller. As you can see, my
file is now open. How we can edit this
after effect template. Once you go to editable, you can see slide one, slide two, slide
three, slide four, slide five, slide six,
seven, till eight. Now, here is the media
and here is the text. Once you check for
the slide one, double clicate, here's a
slide one, text and media. Let's add text here, double clcate happy
Mother's Day. Here's the text is
already edited. Let's add here, happy Mother's
Day, course Wato elements. And this is how you can add
text or change the text here. For slide option, there are two ways to change the
text and media files. Once you click in the slide, you can see a composition
that is pop up. Now you can double
click on the timeline, change the media here or you can select directly from here. Double click it and the
media file will open here. Now I'm changing the
file here that I have downloaded from Wato
element. That is it. Let's change it and
it looks funny to me. Now, let's zoom out. Now, it looks cute. Once you change it, you simply have to go
to your slide one. Now you can see the media
file has been changed. For the slide two,
double clic it, change the text or
change the media, or you can directly
change the media here, slide two media slide
three media, slide four. You can directly
change text here. As you can see, here is a
text. My mother is walking. This is how you can change the files in your
after effect project. After changing all the files, you simply have to
go to Control plus a shortcut select the path where you can render the video, simply select the path here, save it, and now render. Once you click Render,
your after effect template will render out and you can share it anywhere
on the Internet.
10. Overview of Adobe Illustrator Files – Customization Tips: Now let's check for another
asset that is free to use. This is the video,
you can download it, click here and download. The steps are simple and same as previous one. Here is the MB. This is the video file size, as you can see here, and this is a Mother's Day flyer. Click it. As we don't have details
here, where to use it. Let's open it in a new window. As you can see, it is a
PSD file for Photoshop. Let's download it and
use it in Photoshop. Now let's download here, go to Mother's Day, right
click Extract tool, same step we are following. Now here is the file, Photoshop. Let's double click it. Now here's the
file of Photoshop. Now, as you can see, your presents, Mother's
Day, here's the image, here's the graphics,
here's the graphic, here is the graphic,
as you can see, we can change it
according to our need. We can change the font right
now we don't have this font, so we are going to
change this phone to another one. Let's use it. This is the font
that I have changed here if I want to
change the date here, let's double colic it,
replace with another font, and I want to
change it for 2025. April, now let's change
the font to another one. As you can see, the
font has been changed. You can add a social
media icon here, you can change the website. Anything you want to
change, you can have it. If you want to change
the color also, let's just simply click
it and here is a file. Double click it and you can change the color
according to your need. This is how you can change a simple PSD file that
ato element given
11. Overview of HTML Templates – Using Them in Web Projects: Now let's go to STML template. Here's the STML template, download it, click and download. Let's save it, open the file
where you have downloaded. In your downloaded folder, you can check the STM
file, extract it. Now, once you file extracted, you simply have to
check for the folder, STMLole click, check
for the folder, STML Double click, and
here is the index file. Double click it and you can see, select the Demo page. This is the STML file, you can check for it and now simply this is
the homepage one, click it and the file is opened. This is the file that is
downloaded into your folder. You can change the file here. Anything you want to do, you
can do here, Add to Cart. There is no Add to Cart
option while because there is no DMS connected to that
is data management system. We can do it by using WordPress. So as you can see, you can change all this
information anytime. You can check this
also, page two. Product page. Block main. This is the block section. Here is the login details. This is the overview for the STML template that we have downloaded from
Envato Elements. Now let's check
for another asset that Envato offers for free. This is the Doodle template. Double click Open it in New tab and you can
see it is AI template, which is Illustrator
template, EPS Illustrator. This is a Illustrator template. You can use it for yourself.
Let's download this. Save, right click extract
all, open Adobe Illustrator. Here's the Illustrator file that they have shared with us. This is a doodle.
This is Doodle. You can use this
doodle for yourself. If you know the
illustrator and know how to use graphic
designing, you can use this. For the graphic designer, these assets is a treasure. Here's the light room preset, you can use it in
light room software. I don't have light room
software because I don't use it for project. I'm not downloading it right now and if you know how
to use Light room, you can use this preset. This is their mom song
or you can download it. It is a soothing sound according to the topic that they have
shared, Mother's Day. Now
12. Overview of PowerPoint Templates – Make Presentations Shine: BBC presentation. It is at PowerPoint templates. It is kind of a
transition, I think. So let's download this
freebie from Envato Elements. It is a presentation. Let's open this presentation and understand how
they are shared the example extractl Double click presentation,
double click. Enable editing. Here's the PowerPoint
presentation. We can change anything here. If you want to change anything
in here in Wato elements, curan, course, you can do
anything with this template. Here's a PowerPoint
presentation.
13. Lets Recall what we learnt: For the practice project, we have looked into
Mother's Day project. Before we dive into this
awesome real world projects, I have showed you a
super helpful tip. Every single month
Envato Elements offer a selection
of free assets, no subscription required
and totally legal to use. This is perfect if you
are just starting out. Or if you want to practice without investing in full plan. Here, you will find
a curated collection that changes every month. It usually includes stock photo, video presentation template, website theme, graphic template, font, even video asset for
after effect or Premiere Pro. Bookmark this page and check it at the start of every month. Each of these free
files come with a commercial license
just like a paid one. You only need to register for a free account to
download and use them. What you can do is redistribute
the asset or resell. But using it in
your YouTube Intro, social media post, or even a class project
is totally fine. In the next section, we will start exploring real
world projects, creating full Bankit, promo
video, website, and more. But for now, use this free asset to play explore and build
confidence. Let's go.
14. Creating a Logo Using Envato Elements Assets: Let's kick off our
design journey by creating a
professional brand logo. Whether you are designing
for yourself or a client, a good logo is the foundation
of a visual identity. Thanks to Envato elements, we can escape the
blank Canvas stress and start with editable logo templates and
design elements. All right, let's head
to Envato Elements, search for logo templates in
the graphic design category. This is the paid
dashboard, as you can see, I have paid to monthly
subscription of Envato elements. Once you search in the
Iwato element that is logo, you can check the
graphics template. Go to your Graphics
Samplin show all. Let's say a modern
coffee shop brand called Bean neestCap. Now let's check for logo. You can see CAF logo. Here's the logo. Here's
the logo. Here's the logo. Here's the logo, and all these are logo we can
use for our fictional brand. Let's say it is a modern
coffee shop brand. Let's check for modern logo. There are so many assets. Keep it simple and clean. Here is our company
logo. I like this one. It is simple, elegant
and with a smiley face. Let's download it. Go to our
course material, download. Now, save it. Now, right click
it, extract all. Done. I can't share all these files with you
because of the Envatos policy, but I recommend you
you can check for my dashboard and understand how I have downloaded
all these files. Now let's go to Happy
Coffee main file. This is the AI file that is Adobe Illustrator.
Let's Double click it. Now, here is the file, you can check it out,
and this is the file. You can change the color here. If you want, let's
double click it, double click it and change
the color from here. You can change any
color from here. Let's give it a blue color. No, give it a brownish color, press escape, that's all. Company name, double clic it, change the company
name bean Nash care. Here's the company
name tag line, wake your cell up. It is awkward
tagline that I used, but it is just give you an overview for the
project. That's all. Now, move it here, selectolGroup, and now you can save it as for
your own project. If you want to export this file, go to File and go to Export. That's all. Export and export
for anything you want. Let's export as PNG, export it. Then here is our PNG files
that we have created. This is how easy it is for you to create a brand
for your client.
15. Designing a Business Card with Envato Elements, Illustrator & Photoshop: A designer. Now that we
have created a sleek logo, let's take things
a notch higher. We are designing a
complete brand kit. This includes a business card, letterhead and
social media banner. Perfect for any business
starting fresh or rebranding. Now let's get back to
Envato Elements Jazz board. This time, search for
business card templates and select all items, search. In the graphic templates, show all, select the template
which you like the most. This one is in the brown color. I'm downloading this one, select for course material
and download. Once you download
it, simply export all here is the
business card template, business card template open
in AI, Adobe Illustrator. You have to delete
this extra font. You can add the
website link here. Simply double click it. Once you double click it
and change being Nast cap, this is the extra bold. This one is our website. Let's add a logo here.
Here is our logo. Let's add it here. Let's change the background
to white in color. This one looks odd to me. Let's simply, yes. Now this one looks
simple, elegant, nice. You can change the QR code here. You can use QR code
generator online. You can search for QR code
generator from Monkey. It is a free website where you can where you can create
your own QR code, you simply have to
paste the link. Here is the link.
Simply copy and paste the link or text
here and create a QR code. It will automatically
create for you. This is not valid URL
TTPs create code. Yes, this is how it created. Now you can download this and
replace it here directly. Simply paste it. That's all. Dragon Dp es PC. You can change the text here. So here's the text,
I have changed it. Now you can create
your own business card easy and simple. Let's save it. Go to Flexport,
export as search for JPEG or PNG or PSD as
any format you want. Let's Control plus Chip
plus S and save it as business card
template as PDF. Now let's check
our business card. Here is a business card
that we have created. The business card is ready. We have created
the business card using Adobe Illustrator. For Photoshop, you can
select only Adobe Photoshop. Now all the business
card you can see here is created using Photoshop and you can open it in
Photoshop anytime. Now, business card CAF
business card template. Let's search it,
Adobe Photoshop. You can use it here,
simply click it, download as PDF ad to download. Now our business
card is download. Right click Extractle. Same process we are using here. Now let's open it. Now our ready made
business card is open. You can simply delete this
Delete. Add your website here. Let's delete it.
Add your website, www.bestcab.com,
size of the text. Let's bring it down. Now, add our logo here. Here is the logo. Here it is. Now I want to change
this color to this one because client
like consistency. Let's double click it. In Adobilataor, let's
slack this one, select this one, press
I I for ice cream, select this and simply check
the color has been changed. Select this one, press I, you can select the dark color. Now, select this one, press I, light color or dark
color depending on you. Now, let's delete this one
and simply Control save. In the Illustrator file, there is a dynamic link between Photoshop
and Illustrator. In Photoshop, you can
directly change the color. Once you change the
color in Illustrator, the color in the Photoshop
will change automatically. Now our front is ready, back is ready, and front
here is our front. Bleed bleed. This is the bleed. You can see, you can just crop it here. You can ask for printer that this to be in
this dimension, you can just give the dimension
to him and the person who are going to print your card will cut
this out, that's sold. This is the extra bleed. Here you can change
the name simply. You can delete it
or double click it. Once you double colic
it, here is the name. Once you change the name here, you can change the
name here also. Let's example, let's be nest. Let's enter an AUE. I like this font, so I'm
using control as save. Now for this one, let's select this curve
and dowel click it. We have changed the
name. After that, we are going to
change this color. Let's go to this and
select to logo again. Simply, press I. No. Once first we have to select press I and
select the color. Again, select this, press
I and select the color. Simply press S, once you change the color there and you can
change the color there. Also for the logo, this is
apply same for the logo. Once you double co it, the logo will appear here, you can delete it out, the
logo will disappear there. But I recommend you
to add the logo separately because
of the dimension of this logo and our
logo is different. That is why. Simply,
you can delete it out and add our
logo here directly. You can change the
icon color also, select it, double colic it, and by using the same steps, you can add or change the color. Change the details
and the color of the icon, select this icon. I slack this, that's all. Slack this, press I
automatically change the color. Select all of them, press I. You can change the
color directly of every icon that appear. You can change the text like
we have discussed earlier. Now we have changed
the color here. Let's save it, Control S, and you can see the
magic appear here. In this lecture, we have
covered our business card. Our vary on business
card we have
16. Create Letter head of company using Envato Elements: Now, by using similar steps, we are going to create
our letterhead. Now, go to your graphics
template again. As you can see, there is no
Word document here, right? So let's go to your
graphic design again and select for the
template that you like the most. I like the simple one. So I am using a simple graphical template,
letterhead, leaf love. Let's use this one, download it, course
material, and download it. Download it now.
Go to letterhead, right click Extract O. Now you can see there are so many template that
I have downloaded. So here is the letterhead
for the Microsoft Word also. Can you see the power of
this asset management tool? So this is the power
of N Wat element. They have provided the word. Right now, as you can
see on your dashboard, they have provided a letterhead in the template using Wordpad. So we can directly double
click it and change it. So we have the power to
change the letterhead. Let's see. It is kind
of a image, I think. So can't just change the
color directly here. We simply have to change the
letterhead details here. So to change the
letterhead details, you simply have to
open it, close. So here we have to
change the color. The same step we have to follow. I can change the color, press I and select any of the color. You can directly change
the color anytime you want. Let's change it again. Let's add logo here. So as you can see,
simply towel click it. Here is our shape layer. Press I and select the color. Press scape and
here is the color, you can see the color
has been changed. So here is the color that is, I think, a little
bit light, right? So let's change a
color of this shape. Press I and select this one, or you can select I and select the color
here, press Copy, press Control pillar C copy
this one and change color, you can directly here if if the pointer or color
picker is not working, you can use this
alternate method. Double click it. I have
copied the code here, simply double click
here and paste it here. As you can see, the
color has been changed. Also, one more thing,
there is a logo. So you simply have to change the logo here also, drag it out, drag your logo here, and sincerely
everything is same. Now let's delete
this extra margin. Double calc it, delete
this one extra. You can change the details
according to your need, according to your client's need. So right now, let's
save it as PNG. Let's save it, control, go to Pi export, export as JPEG, search for PNG, copy the path, so you can
directly open it, export it. Now, here you can see
it is transparent and just export it. That's all. Now go to your file
where you have exported, now simply have to
go to letterhead, delete this extra margin. This extra logo, I don't need this extra
logo. You can delete this. You can delete
this, delete this. Now, drag this one here. Right click. Now select this Layout, rap text. As you can see, behind
text. That's all. Wrap text in front of text, behind text. That's all. Now you can just
drag it out here. Increase the size of our image. So this is how it
will look like. They have separately ddied
the image, and I can hear. As you can see, we already
have the icon in our image. So we have to remove
this image or icon here so that we
can work accordingly. Let's delete, delete,
delete, delete, delete, delete, delete, delete,
delete, delete, delete. Let's now save it again. Control S. There is
no option of PNG. Let's go to our file export, export select PNG, double
calc it and replace it. Now let's drag it
out here again. We have to delete this
one, drag this one. Drag this one, Selag this
and wrap behind text. As you can see,
here is our image. Now it's working perfectly fine. So we have changed our logo. We have created our letter
had for the company. You can change anything here. As you can see, this is how easy it is to
use all the assets. Now let's get back to you have to save or manage this file
according to a folder. Next, we will enter the
motion design zone.
17. Project Details for the class: Congratulations on making
it this far in this class. Now it's time for you to roll up your sleeves and apply
everything you have learned. For your class project, I'd like to create a simple,
clean branding package. Your task is to
design three items, a logo, a business
card, and a letter hat. You can either use same imaginary company
that we have worked on together in the lessons or you can create
your own brand. Be a creative as you. Here is the flow I recommend. First, Bin storm your
brand and its style. That is name, fun,
corporate, luxury, anything. Next, use Envato
elements to search for graphic design templates or elements to help
speed up your design. Then customize your logo, business card and letterhead, using tools like
Photoshop or Illustrator, just like I showed
you in the class. Remember, it's totally
okay to keep it simple. Focus more on
practicing the process. Searching, selecting
assets, customizing them, and creating a polish
project. Once you are done upload your project to
the project gallery. Feel free to also share a few lines about why you are
choosing your brand name, what style you were aiming for, and which style you found most helpful from Envato elements. I will be checking your
project and would love to give you feedback
and cheer you up. Now it's your turn to get creative and bring
your brand to life. I can't wait to see what you
18. Social Media Banner Assest for Photoshop: Let's create a social media
banner using I Wato elements. Let's go to Invato Elements Dash and surf for social media. And for social media, you
can see a graphic template. Here is a graphic template for Instagram graphics
graphics template, and let's check for Show All. Now in the graphics template, you can search for coffee. Once you go to coffee, you can see many images save. Now let's understand how to create a coffee, Instagram post. I'm just finding another post so that I can work
with it and I think, yes, I like this one. Let's download it and save it. Like any other files, it's always download
in zip folder, you have to extract every time. Right click extract all. As you can see, here
is the coffee file, you just have to flyer. I think this one is
the coffee flyer, not coffee shop flyer. Yes, that's coffee shop flyer. Now before that, you
have to understand the dimension of the
Instagram for post. Let's say Instagram is
1080 tent a square image. Let's open this
file in Photoshop. Right now I'm using
a Photoshop file so that we can easily work. Let's create another image with the dimension of 1080
tent a square image. So that we can post it
easily on Instagram. It is depend on you in which dimension you
are working with. Let's delete this logo, this one, and this. Let's drag this image here, bring it here, done. Let's change our background
to a lighter color. As you can see,
here is the color, we can change it
according to our need. The lighter, the better T.
We can change the text here. Also we can change
the color here. This is same as usual. Like we have discussed before, you can change
this text here and let's drag everything
let's copy and paste everything
in teneti format and simply transform this here. Now let's transform
this into it format. Once it's done, what you have to do simply have to change the
dimension of this square. That's all. Simple, easy. Change the dimension
of this square. I believe you know the
basics of Photoshop. Change this square,
as you can see, here's another square
and here is another. We can change the size of this. As you can see,
the background is, let's lock the background.
Change the size of this. Min text. Select all this and increase the
size a little bit. Increase the size
of our logo also. Let's give it a shadow
or a stroke Yes, it looks like pop up. Now, all done. We can change the
fresh coffee shop, net cap, awake yourself, best varieties open 247. We can change the
address here and we can change the location
or shop name. Our Photoshop social media
post is ready. One more thing. I think that a little bit of change might appear because it's not look
like aligned to me, so that is why I'm just
align it a little bit. Yes, align proper aligned
to me in the center. We can save it, just
save it. That's all. There are unlimited assets you can download and use them
according to your needs. There are some assets that are directly Dragon drop
or ready to use, you can search for Instagram and check for graphic
templates and as you can see, here is a adid square
post or real style post, you can just use it directly, as you can see, Hes the post. Now we have created
social media Banner. Next we entered into
the motion design zone. In the next submodule, we will create an event
promo video using after effect with templates and
assets from N Wato elements. Want me to move ahead and
create this Skip two. See you in the next lecture. Thank you for watching.
19. Logo opener for brand in After Effects: Here video creators. Now it's time to bring your message to life with
motion in this session. We are going to create a
sturning event promo video using ready made
after effect template from Envato elements. These templates are time
saver and game changers. All you need to do is plug in your media and text. That's all. Now let's head over to
your search section and search for video templates. Here is our video templates
and search for logo reveal. First, we are going to animate
the logo for our brand. Let's check for logo. I like it. Like this one. Yes. Everything looks fine. Yes. Yes. Yeah it is
simple and elegant. For the coffee, I think liquid type logo
reveal might be good. Let's find that type of
or in the background, let's create another
asset. It looks good. Let's download it. Course
material, download, Save as. Now for the liquid
logo, let's export it. But before that, as you can see, we have downloaded so many files and to manage all these files, what we have to do is we have to understand file
management system. Let's create New folder
and in the folder, let's Photoshop New
folder, after effects, new folder, premiere pro and after effect
five will go into after effects and
the Photoshop file will go into Photoshop
or Illustrator. All these files, as you
can see the fly visual, cosmic, happy Mother's
Day doodle, Baby Kat. This is the pawpun template, this is the Coffee template. Logo reveal will come into after effect and this logo
reveal also come into after effects and about
visual creations and visual, all the images or anything that is visually PSD or AI fils, all will come in Photoshop. It depends on you if you want to create another
folder for that, let's photoshop it in Photoshop. In the Photoshop, let's
create another folder and name it being NAS cape. For Best cafe, the template
that we have downloaded for business card and coffee
shop flyer will come into this and logo template
will come into this. Now, this is the liquid logo. This is a after effect file, so we have to create so
we have to move it to our after effect folder here. At least now it
looks a little bit of you if you want to use it, you can use it or
save it for later on. I just want to delete it so I can delete extra
Zip file I'm using. I'm only saving the
folders that I'm using. All the extra Zip file, I have deleted them.
It is depend on you. This is the opener
for after effect, so let's keep it in after
effect folder and right now it's open in somewhere in after effects so I
have to cancel it and, as you can see, it is open
in after effect itself. I'm just remove the
app of after effect and move it in after fac folder. Try again. No, it's
not loading again. No problem. Let's use liquid logo here and after
effect template liquid logo. Let's open liquid logo. Like before we have
used after effect. This is how you can edit. In the edit comp, you can
simply add your logo here. It is very simple to use. And in the Photoshop, we have a B nest cap, business card, cafe template. This is the template
here is the template. Let's drag it out here. Delete this extra
file layer and simply act it, decrease the size. Let's go to a final comp and check if it's
working or not. It's working perfectly awesome. As you can see, we
have created our logo. But right now, I just want to remove this white
background to a coffee. Let's do it by just clicking it. This is the hide all layers
toggle in after effect. If you want to see the background
or all the information, you can just change it here. Let's white solid,
let's remove it. Here is a white solid and I want to use a background
other than white. Let's go for coffee. Find video. I like this one. Let's
use. Download it. Wait for some time. The download speed
is really good. Now let's open an coffee and let's add the
background here. Move it to the
back of the image. That's all. Now, as you can see, we have a background
of our coffee. Let's decrease the opacity of our copy by press
T for opacity. In after effack
it is a shortcut. Move it forward and
zero. That's all. Right, click key fame
assistant Es in. That's all. Now let's go to ten second
and press N for shortcut, now let's Control M. Not yet specified. Now let's render it. Now you can see
the final output.
20. Understand Essential Graphics Panel in Premier Pro: The last lecture,
we have discussed about how we can edit our logo. We have ted Our logo. Here is the sample,
you can watch it out. This is right now without sound, you can add any sound
using Iwato element, the downloaded and ART video. The way we have added the background from using Iwato element is really amazing. You can see these are
beans in the background, bean Nest care. This is awesome. Let's not waste your time. Let's move forward into the next lecture,
into the next module. How you can edit a YouTube video or add video for yourself. Let's do it, how we can do it. I'm going to explain
you next about that. Let me explain you
how you can do it. It is really simple to edit your videos using Wato elements. How? Because they
provide you presets for Premiere Pro and they also provide you high quality titles, text, animated text, they
provide all of them. Presets, erts, they provide
everything for Premiere Pro. You don't have to worry
about creating any kind of animated stuff
for your video. Don't have to create them, you just have to download them and use them for yourself. Okay. So how you can do it, it is really simple to do that. Everything we have done
so far is really simple. Right now, these also things are really simple to do that. How we can do it, let's go to our Nato element dashboard
and see how we can implement our text animation or any kind of
transition we can use. So let's go to our
essential graphics. This is the essential
graphics and all of these things are downloaded
from Inato elements itself, as you can see, all these things are downloaded from
Inato elements itself. These all are texts
that I have downloaded. These are animated texts. Let me share how
we can explain it. So let's go to our new composition and project
create our new project, right click select
new item sequence. Now, this is a 10801080. This is a normal video format
with 1920 exenety format. So you simply have
to drag this here, that you have to do. Now, once you drag it, go to our tile. If you can't see
essential graphics, you can go to Window and check for essential
graphics, That'l. The window will pop up
and what you have to do, you have to change the text. First of all, change the
challenges to course. You can change the font here. And for the second text, drop down this make you grow, course make you grow, it
is a perfect line for me. I keep this as is now mont
extra bowl, let's do it. Now on this one, there are two types to reduce the size of this right
click scale to frame size, or you can do
directly from here. It effect control scale
down to this one. Now let's play Coors
make you broke. Behind this, you can
add any footage. Let's add this footage. This is just a sample. I'm
just sharing an example. As you can see, move it now. As you can see, scores make
you grow. Can you see? Now you can add any text here. Go to essential graphics, go to browse, add any
text, anyone you like. You just have to dragon db. That's all right click,
scale to frame size, Cis this is really amazing. Simply dragon drop, edit it and use it after
render. That's all.
21. How to use MOGRT files in Premier Pro: Now, how you can do it? How to install all this? First, you have to go to your
Iwato Element dashboard. In the Envato elements,
what you have to do, you simply have to search
for video template, title or text, anything. Title, search for Premier Pro. Now all these titles, you can see here. That's
all you have to do. You have to download them, review them, download them, and just use drag and drop. This is this easy. Let's use any of them. Any of them, you
just have to use it. Use Mogret MGRT. These are just a
the made template, you can just drag and drop. These are easy. Can you
see how class it looks? You have to download
this, download in the course material,
and download it. Now in the course material, what you have to do
now it's downloading. Once it's downloaded, you have to go to your course material. Here is a file Zt click
export or export it. As usual, we export every time. In the titles you have to go to Mogret and Video tutorial. You can see, here is
a video tutorial, how you can use it, they have shared files and also they have
shared the tutorial where you can upload
them or where you can save them so that
you can use it directly. How to install them. They have shared a video. But for me, how you can
install them. Let's do. Go to Title. Video tutorial, let's not go to video tutorial. You can follow them or you
can follow my lecture also. Let's not worry about that. Go to Mogret. Here is the five. What you have to do,
you have to copy the path here and in
the premiere pro, let's right click and
manage additional folders. Add let's paste the path
that we have copied. Here is a moderate file. You simply have to select
this folder. That's all. Once you select this folder, you have to press. Now, it will just
repress itself, as you can see, it
repress itself, and if and if not, you have to restart your
PaymoP software. That's all. Now you can see, as the
name suggests, titles 01. Let's type it title. 01, Tita 01. It will appear here
automatically. Let's scroll down little bit,
title weight, tilewtalwt. Is here. These are not the one. I think the name are same. Here's the title. Title 01, you just have to drag it. As you can see,
this is the same, and this is the same. There is a simple difference
of font, that's all. What you have to do, you have to change the font. That's all. Mont extra volt,
and let's x hide this Kim and beside
that, Mont extra boolt. That's all right click
scale to frame size. Here is our text animation. As you can see, Kim
follow me, let's move it. Let's play, Kim follow me. Here it is as simple as that. That's all. This
is how you can use text animation in Premier Pro and use it in your video itself.
22. Class Project for Motion Graphics: For your YouTube video as well as for your
social media video, these graphic design make your content creation
a top notch. Using Premiere Pro templates, just like after
effect templates, you can download the
Premiere Pro templates and edit them accordingly. We have discussed
about after effect. In the same way you can edit
your Premiere Pro templates. This is how you can edit
your video professionally. Now it's time for a project. I love to give you a
project and I love to see your videos or your projects
in our project section. Let's share it with me. In this project, you have
to import or download a Premiere Pro opener or
a Premiere Pro text edit. Titles, anything
you want to use, you can do use dot MogRT
that is MoGratFle, grab some stock asset like
stock video or images, compile them with the music, compile them, add text, and add a music behind them. For example, use a city shot
or aerial view of a city. Add text on it and share with.
23. How to download music from Envato Elements: Now let's talk about how we can add music behind our videos. It is really simple
to do that also. In the search panel, you just
have to search for music. You simply have to press
Enter. That's sold. The music gallery will
appear in front of you. You can select any of the abit
or cheerful type of music. You can select any filter
here, like cinematic Ubit. Once you select it,
play the music. And if you like the music, you simply have to download it. How you can download
it, you just have to go to this icon
that is download. Once you download it. Course
material ad to download. Now, about the music, there is one more catch. For the music secon you have
downloaded the music, right? Here is your music. You
have to extract them. Like always, we
extract the Zip file. Let's extract them and play the music. It's
working fine, right? But what is the catch? You have to register your
music or you have to download the registration
license for the music itself, because if you are going to
use it on your social media, the copyright will
appear each time, right? And it is really
frustrating for everyone. What you have to do in
your download section, where you have to go, you
have to go to your dashboard. And in the M download section, you have to go to your music, where you have downloaded
the music and view license. Let's click on View License,
download the license. It is same as usual. Save it and use it. That's all. If you get any kind of copyright on YouTube or
any kind of social media, you can upload this Verif and verify that
this music belongs to you and you have
the right to use all the music that you have downloaded from
In Wato Elements. That's all. And this
is how easy it is. That's all you have to do. Thank you for watching. See
you in the next lecture.
24. Promotional Video using Premiere Pro: Now we are going to build
our advertising video using Iwato elements in PameoPro
by using stock footage. Now let's head over to our Envato Element dashboard and use the asset from this vast world of asset management system. Now let's go to our Envato
element dashboard and search for Aisment video. Now go to our video templates. In the video templates,
select for PameoP. Let's check it out.
Let's directly search for coffee
shop, promotion. Let's see if we can find it. I think we have found
it. This is cool. Let's check for promotion. Now let's check for
this type of promotion, coffee shop, Instagram stories. We have a stories material. Let's download
this, download this our Nwao element course material and this is a title for coffee premiere
Levitan coffee shop. Let's check for this
one, Logo and title. Cool. Let's download this one
also, download this. Now we have
downloaded our files. Let's export it. But first, we have to
manage this asset. Let's move it to
our Premiere Pro, both the files and export
it in Premiere Pro. Export extractor. Extractol same steps. Now let's go to our coffee shop Instagram
Stories and open it. These are the MoGrat file. How we can use that, we simply have to copy
the path from above. In the Premiere Pro, right
click Manage AiginalFolders, add and paste it here. Now, this is the folder. Let's the folder and
this is the name 123456, this is the name and
let's scroll up, go to browse and search
for one. Yes, here it is. This is the MgretPle
that we have downloaded. Now, right click
scale to frame size. Right now, our frame
size is different and the Mt frame
size is different. We are going to create a new
sequence with the settings of customized settings of
1080 tab that is 1920. Sequence, we have
created a new sequence. Now let's copy and paste. Now let's play it out. Cool. Now let's be Nest
cafe. This is the project. Now this is the font, decrease the size of the
font and change the color. If we can change the color, no, there is no option of
changing the color in it. Enjoy your coffee. Moon extra port. Increase the size little yes. Now let's see. I don't know why there is no
change in the color. There is no option of
changing the color in it. There might be some problem with the pies. We don't
know about that. Right now we have another file. Let's check it out and
we have a PaymeP opener. Let's copy the path and
simply right click, manage original folder,
add, and paste this. Select folder. Okay.
Now search for shop. Here is our opener. Now simply drag this down here. Keep existing setting,
change sequence setting. Let's cut it out why because we have to use
it in this file format. In this dimension,
not file format, in this dimension, Let's use it. Here is the image. Let's change it. NEE. Bold calf. Select the font and U E. Now, this is how it's done. Let's remove this jogs and
remove extra text we have. Yes. That's all. Now let's play it out. BNS cap, B nest cap B Nest cap. This is now, as you can see, we have created a basic level of our promotional video
for our B nest cap. You can use any type of fis
and use it for your project. Now it's smooth and ready to
upload anywhere on Internet. There is only a sound
that is missing and I can't use it because of the
Invato elements policy. Now you are ready to go create your own advertisement
video for using InvtoE assets for your
social media and Instagram, YouTube, and for your brand. See you in the next module.
Thank you for watching.
25. Website Development using WordPress and Envato Elements Plugin : This module, we
will be diving into creating a website
using Envato Elements. Like we have discussed about
the STML template that is free on Envato element as
a freebie for a month, but that is created
on STM and CSS. Now we are going to use a
WordPress website and creating our own website using WordPress element
or Envato elements. By combining all these assets, we are going to create our
website within just seconds or under 1 minute we can create our website or any
kind of website, we can create it using
Envato elements. How we can do it, let's dive. When you go into your
dashboard of Nato elements, you simply have to search in all items and select at
the bottom What press. In the Wordpress, you have
to select for portfolio. Now select the theme that
you select for live preview. This is a What press
theme, as you can see, and you have to check
for the details, what type of fs it
provide you JCSS STM. This theme is created
on this language. Compatible with Botstep no. It is not for us. Right now we have to check
for the Template kits. Once you click on Template Kit, once you click on Template
Kits, you can see, there are lots of website
that is created on What press plugin that
is known as Elementor. Whichever theme you
like, you simply have to click Select for portfolio. Now you have to click
on Live preview, like the other one
we have selected. Now here is our website that we can create, but I don't like it. I have to check for
another website. A simple and elegant
website I'm looking for. Let's check for live
preview for it. Here in the section,
you have to select for relevant to popular
or new website. It's up to you. Let's check it. Hello. This is the
basic website. Let's enigma. Let's select this one live
preview. I like this one. This is simple and elegant and modern style
of design it has. Now, you like this one. First, you have to log into your tpress dashboard and I believe you know the
basics of Wtpress. First, you have to go to
your tpress dashboard. In the dashboard, you have
to select for appearance. Under appearance, you have
to select for plugins. Install plugin or
add new plugin. We have to select
for add new plugin. Now in the plugin Saxon, you simply have to
search for Envato, and you will see a
plugin Envato elements and elemento templates.
Install now. After installing it, you have to plug on Activate once
you activate it, and make sure you
have logged into your Envato elements and
you have the subscription. Once you activate the plugin, Invato element will ask you
to connect with the website. How we can do it.
As you can see, here is a new tab, here
is a new option pop up, which is elements,
template kits, click on Template Kits. Now it will ask you to get
started. Let's get started. I have already signed in my
Nato elements dashboard, it will automatically
generate a token. I have to copy this
token and paste it here. Once you verify that token, you simply have to select the theme that you like
the most. That's all. Like we have selected
this enigma, I have to copy this
name and paste it here. As you can see,
it's appear here. You have to install the
kit that is installed. It will ask you to install
some extra plugins. It will automatically install
extra plugin for you. You have to select
for the view kit, as you can see, all
the pages appear here. Click on Import
template or if you want to specifically
install a single page, you can do that also by
installing template or I want to install the
whole theme itself. So I'm just importing
everything. Is the required missing font? Yes, it required a missing
font that is Envato elements. Sorry, data spectra, that is API code missing
required plugin. You have to install a plugin
that is called Alimento. Once you install it, it will automatically
start importing. Install plugin, that is
you have to select for Install plugin and search for now you have to
select Add new plugin. Go to your feature plugin or popular recommended
plugin, whatever you like. You simply have to
select for lmentor. Once you click on Alimentor, you have to install
this by this plugin. It is a website plugin. Now let's activate. This is the first method
that we are talking about how to install
a template kit. As you can see,
there are option pop up that attention there
are seven requirements. So there are seven plugins
you have to install. So to install that, you
have to click on Install. Now, all these are plugin
that you have to install, install above selected
requirements, and it will automatically install all the plugins
for you. That's all. We have installed only
Elementor after that, all the plugins will
automatically installed. For the plug in that
is already installed, automatically, you can see
a plugin installed fit. Elementary is already
installed in our system. You have to close it. Now first you have
to import template. Now the template
has been installed, you have to click
on View Template. Once I go to our visit website, I can see my template also. First, we have to install a theme that is hello Elementor. According to that, we
can use this theme. First, you have to
select the element and select for hello theme. Premium theme Wordpress
organist Rg them. You have to go to Wordpress ORG themes and select for Hello. It is a elemento theme, so you have to
install this theme, hello piece, install it. This theme is fully compatible
with elemento plugin. It's install, you
have to activate it. It's look like a mess write, but in some time you will see there is a change
in our website. After that, you have to go, now, everything is mass. You simply have to go to
your Elementor dashboard, go to all pages. Select for all pages. See if there is any page
that has been created. No, there is no page created, first you have to go to
your new page at New page. You have to create a new page. After that, you
will see the magic. Envato course, Add
with Elementor. I have added the title for
my page and simply click on Ard WElementor now our page is published and we are now editing using elemento plugin. But first you have to click. Now you have to go
to your Envato. Install element kits,
install kit and all these home page one, two single portfolio
portfolio will appear here. You simply have to
insert template. First, what we have did before, we have used a global template. That is, we have changed
the color and font of our WordPress website as a default using
this template kits. Right now we are installing all the elements
within the page. We are creating page one by one. Right now it's importing. It's all the information about the page
about the homepage. After that, you will see
this very same page on your website and it is creating just within
minutes. That's all. Let's wait for some time
and you will see the magic. As you can see, this is the same website
that we have seen in the demo and right now you can see it is
in our dashboard. As you can see. Now we can
edit them as whatever we want, we can edit them
according to our needs. We can change the image,
we can change the text, we can change the
slide, at post, anything you want,
you can do so. Here, as you can see, let's change tracks to Keren. Now, this is how you can create your own website using
Inatoelements, in WordPress.
26. Create presentation using Envato Elements templates: We have to check about the deck, how we can edit our deck,
a presentation deck. There are lots of presentation
deck that are already available and pre made templates are available within
the N Wato elements. Let's explore that section also. There are so many sexon.
I'm just covering the main secons that
will help you out. Old presentation templates. Let's go to your
WordPress dashboard, presentation templates, old presentation templates,
Hes presentation templates. All the templates
are up here here. You simply have to open the
templates, check for it. If you like that, you
have to download that. Simply click the
download button. Course material, like always. Again, once you download it, you have to extract always, simply extract and open the
file in your PPT. That's all. That is animated version,
that is a main file. Let's open the animated version. Here is our presentation. That is already
premiere presentation. We only have to change the image if there is an image
and there is the image, you can select any of the image. This is the image that I have generated using AI
and I just use it. Simply calc it,
change the image, that's all you have
to do. That's done. You simply have to
delete the image. I don't like this one right now. This is really simple to do. A premed template,
you can use anytime.
27. Gen Ai introduction within Envato Elements: Now let's explore the features that I Wato elements
provide that is AILlab. You can generate image. Image it, video generation, voice generation also
spot generation, find what inspire
real world project and spark your creativity. Search AI, find the
best humane asset with the power of AI. You can simply open it. This is something
like any kind of image generation and it is
really powerful to create. As you can see, these
all are images that is created using inato elements. What you can do, you can create
a landscape or portrait. Let's create a landscape. Find Indian god looks very powerful with trident. Let's generate or use AI, you can use AI to enhance
your prompt. Let's generate. Powerful Indian DT welding. Yes, it is yet powerful
feature you can use. You simply have to type and
it will enhance your prompt. That's all the.
Let's generate it. Now for the image
generation part, for the edit and for
the music generation, people are generating
images already. These are the images
that is created and yes, It looks amazing, artistic
style. It's a given ship. It has given so many
style we can use and this is what I
love. It's amazing. Looks cool. Yes, Indian goal. Perfect. Define. You can download it or edit it
according to your image. According to your
need. Image edit, you can use the edit feature. Video generation. Remove
background, upscale your image. Erase, you can erase. You can crop you can
generate similar images. You can replace object. You can expand the images. This is the power of AI. You simply have to
upload the image and you can simply
edit the image. Envato elements also provide you the latest technology
that AI provides. Just like any other
features you find online, Envato elements also provide that upper edge for NwaTo
elements if you buy. Video generation. I
have generated a video, as you can see, these all our videos
that I have generated. This is a low quality video. This is the high quality
video that I have generated. Can you see the details
about music generation, you also can generate the
music according to your theme, angry, genre, theme,
tempos, energy. You simply have to
type emotional piano, but let's create a violin cinematic music ansopm Now, let's theme add
and trailer Genre. Cap, mood. Mode, epic, tempo, high
energy, very high. Let's generate it. So this is the music that
has been generated. Can you see this is the
power of Watoelement. You can generate music
according to your need. Now you can generate voice also. You simply have to type here and you can generate
any type of voice. I'm Ogan and I'm
wearing the code. The next app that can
make a real difference. I'm Blake, and nothing
beats that feeling. I'm Sophie, am I ideal
after you can see the quality that it provides in their voice generation
is really amazing. This is spojan. This is where you can inspire yourself
using in Watoelement. Press R, one you
press R, you can see. It is kind of a amazing thing, right? This is how. It's really amazing. A three D space. This is just an
inspiration, right? Let's roll back. Inspiration. You can see, you can
just create your boat. It is just a Pinterest thing. If you're very well aware
how Pinterest work, you can just use this spojen. With this modern touch of
website, I really loved it. Once you start using
in Wato elements, you will amaze how
amazing it is. For me, it's really amazing. I'm using it on daily
basis for all my projects. So that's it for this course. Thank you for watching, and I hope you have learned
something from this course. I really appreciate if you
share the feedback and also share the projects
in project section. Thank you for watching.
28. Real world website development project using Envato Elements work smartly: Right now, I have a requirement
for the website that I want to create a website page for my client and
I don't have time right now it is on
the urgent basis, so I'm using Elementor Pro. I'm using Envato element
to create a website. Right now, I'm on the track
of creating a video template where we can show our client videos in a
single dedicated page. I have simply search video in the search panel and
selected WordPress. In the categories
section, I've selected template kits and
in the industry, I have not selected any
specific thing right now and compatibility with Elementor Pro because I'm using
Elementor Pro right now. What is Elementor Pro?
Elementor Pro is a plugin, which is a paid plugin
to create a website. If you know how to create
a website using WordPress, I'm pretty sure you are familiar with the
Elementor plugin. I'm selecting a web page where
we can create a website, so movie studio filmmaking. In this, let's select for
this one and live preview. Details, pages. I have to select for pages, single block, how we can
share the information. Let's see about single
block page or block page. This is how our block
page will look like. I actually don't
really like that. Let's check for this. Next GO gadget live preview. Here are the video section. Let's check for the video how
our video will look like. Behind the scene.
Okay. Latest videos. It is just a block system where the video will pop up articles. I like this one, Let's check for pages for blog archive page, and single post page,
what it will look like. Article and news section
will look like this. I look professional
and about this, it's look professional to me. Let's about the
podcast will appear. Okay, this is how
it will look like. Latest podcast, latest post, NextN article and news, latest video will look like
this. I like this one. Let's implement this
into our website. Let's download this into the course material,
I'm downloading it. In our website, I have
to install it directly. As you can see in our website, as you can see in our website, once you install the
Nato elements plugin, simply this link appear in the elemento section in the Elementor
editing dashboard. You simply have to
click on Install Kit. This is the Install kit I have already used
in our website, and I'm going to install
another kit here. I have to install
another template. Let's use it simply. I simply selected it and
now it's installing, wait for some time
and attention to requirements need to cyboot
custom icon for elementor, plug in template kit. Let's import it. You have to install this requirement because if you don't install them, there might be some changes when you start implementing
the template. It will not look the same, they have shown to
you in their website or in their live
preview homepage. After installing I have to
loop post article medium, home page, loop podcast, loop post video medium. This is the page template, I have to install, install it. This is how it will look
like. Add template. Let's publish it. In our dashboard, I have to change the settings of my page where I have to make it a
full wit page in our setting. See you. Now repress it. Now what you have to do
after this installation. You simply have to
click any of it, click it Into
elements, Install Kit. Sorry, there's no install kit. I think we have to reload it. You simply have to go to plus
Inatoelements, Install kit. Now it's up here, V install kit. After that, insert template, loop post article medium.
Now what you have to do. You simply have to
create loop post for each one like
import template. In the import template, click, choose the one that
you want to import. Now you simply have
to add template, go to new add template, click it video template
to add with Elementor. I'm simply adding element
templates. That's all. Go to elements or template, go to Next Gen,
click on homepage, Article video
medium, video small, video podcast, loop item, video small loop item,
insert template. Import it. Now, our template is ready here. Let's change this color to our primary color and this color to our text color is white. And here, text color
is white text, white. That's all. Now, publish it. This is video template too. Now let's go to
our template area. Now let's go to
our template area. In the template section,
you have to add here, post, here is the post
that I have added already and here is the
post that I have to add and here is the video
template too, I have to add. That is small. As you can see, next Zemo post small that we
have already installed it. Let's add it small one. Now you can see here
is our template. So the steps are the same
as for the template three. You just have to add it with
elementor and after that, yes, it will appear here once you select
the template here. Now for the video
template three, for this one, I'm using
again Wato elements. Here's the template kit with the template gait Let's
view install kit. Again, for the video
section, let's add podcast, loop small video, paste
template, loops video blog. What I have to add
here, loop post video. Article post video,
loop post video. Here I have to add insert
loop item. Let's add it. Let's save it again. Now here, I have to
add the template. Let's ed the template. Save and You have to add a name here that
is Video template, three, post video
template small, post video template, template. This one, I think it
is the right name. Let's add it here. Okay. Add template. Post. Here it is, as you can see, now you can add the video template
here. Let's publish it. Here we can change the post type here and if we want to add any specific query or any current query related query and if I want to show the video, specifically, I have to type
video and all the post that include the term in the
post section that is video, it will appear here
automatically. I don't have to
worry about that. I can later on add the video and adjust according to that. Let's publish it again. After that, I just need
to add a article here. For the article, I just need
to add post type here again. What I have to do,
what I have to do. What I have to do, I have to add a new template here
that is a new template. I have to add a new template. Same step I have to follow
this time I'm using articles and let's save it or
post one using element. Now, go to In Wato elements. View installed it in
the post section, right now, we are going
to add post here. A single post, template
for elementor. This is item we display
single post template. This is a single post
template and blog archive. This is the blog archive. I have to add a post here, loop video post,
video, next and video, loop, video, podcast, podcast, next and article, medium. And let's add this article,
medium size article. I have to add Now it's ready. Let's publish it. After that, I have to add another post. Let's add a new template again. Post two article, post
two, Arividelementor. Go to and Wo elements. Again, same step I'm
following, right now, I'm just adding single post
error loop post A, insert it. And here you simply have
to search for post. Video podcast,
video, post article, medium, post article template. That's a I think I don't like this one. I have to change this template. Let's add again. Post, publish. Let's this article type, we have to change
the format here. Uh, Archive. This is what we want.
It will look like. The article will look like this. I have to change
the format here. Let's change the format. I Let's post article side. Yes, this is the right
one that we want. Now, it looks more
professional to me, and the image will appear here. Okay, publish it. Now let's publish this
one and I have to change the image here. Or sign up form
here advertisement. If there is any advertisement
we want to show, we can do so just simply that. That's all. Now we can showcase our template to our client. After that, I have to
edit this template also. This is this template, I have to edit this template. To edit this template, I have to defrahate and search for the template
that I want to edit. Now, next send video now this is let's see
what it will look like. Here's a template structure, loop grid. Add template. So I have to change
this template. Let's add it style, change it to prim color. Got it. Now, change this to white. Got it. Now, this to white. Now, change our icon. Is there any icon? We have to simply change the icon
color, that is white. Yes, nuts look
more professional. Let's change it to blue or
let's change it to white. That's all. White color. That's all. Now, here we have to add advance. Is
there any bottom? No. Let's layout
black background. Let's go to background and
change it to primary color. With this, do we have to change the height no height is okay, width is okay about the gap. Let's publish it and
check for yourself. Now, refresh. Represh it. Now go to save and bake
B. Now go to page. All post pages. Search for video. Search it. View Paste. Copy Paste Copy Paste. Okay. All right. This is the template
that we have created, and this is the same template, which is known as
Nx and Zo video. In the page now now we are going to implement
our save template here. Let's go to our
template at template, my template and search
for Nx and Video. This is I think this
is the template. This is a page, let's insert it. Apply Here's a
template. We have a it. So this is the template
that we have it. Now it look fine, right? Now let's add another page, which is also known as
our video and blog. Video page is done. Let's add a blog
news and event page. Our video page is done. This as you can see, this is our video page.
This will look like this. Here is another project
for you from my side. You simply have
to create a page, use a template from
Invato element and implement that template
in your following page. This can be any page. It can be your home page, it can be your blog
page, anything. So that's it for this lecture. See you in the next lecture.
Thank you for watching.
29. Unlimited Ai Video Generation in Envato Elements: Is a offer is going on
in the Envato elements. You can check it out
on this if you have a subscription in
Invato elements, so you can generate unlimited
videos in Envato elements. If you want to
generate AI images, then you have to simply click
on Start now or you can go on Envato element Gen AI, that is Video gen. Simply click here or click
here and it will redirect you to the main window
of video generation. This is in ta version, you can check it out
and you have to Oh, this looks nice and select
the dimension here. This is the dimension.
Click here, sound, yes, try to add a sound, a speech, yes, try to add a speech and start
from your frame. If you want to select a
frame, you can do so. If you want to generate
a image, you can do so. Right now, there
is one condition. If you have a speech
video generation, then there is a
limit of generation. So let's try not to
use sound right now, your generation with the speech, there might be
generation cart that will going to be used
up in your plan. That is within your plan. Zebra is digging into ground using a drill
machine that generated. This is the video that
has been generated. Let's try to download this. This is really nice. The video
generation is really good. I loved it, so I'm
going to save it.
30. Using 3D assests from Envato Elements in Blender: Let's try some three D
and three D elements, how we can use them and if they are working or
not, let's try them. Let's download this one
dynamic web balloon. Let's try this template
if it's working or not, and let's download this. I have downloaded this one, have to open this file and let's see if
it's working or not. I don't know how
to open this one. So this is the SP line. We have to open, I think we
have to open this file and let's see how we can
open polygon count, polygon, png spine dot gAP. This is, I think,
illustration part we can use in web website. We can use this in website
like this and like this. This is how we can
use in our website and to make a website
page creative. This is how we can use. They have shared
this specific image with us in the PNG format. We got it, and this
is the dot pine. How we can open it, let's
see in this software, we open SP line. This is a three D design tool, the SP line, all
in one platform. In this software, we can use. Let's try to explore another asset that is green
background, yellow spin bag. Let's see how we can open it. This is dot OB so this is the object we can open
within Blender also. Let's try to download this one. It's downloading and right click Extractol and we can open
it within the Blender. Both of these files are
supported within the Blender. Let's open Blender right
now, open Blender. Let's video editing Vapex
normal general, let's open it. And let's try to drag this
file here and import. This is how it will look like. About the color, I think we
have missed out the color. Let's try to add
this one and delete. Let's delete this one,
try to add this file, normal standard texture package,
bound, pipeline, import. This one is working
really perfectly fine. You can see we have P bag that we can use
within the Blender. The TD set is really amazing. Just selact this one, Control J, and you
can move it out. I simply parent everything
or joint everything. I think I missed out
this one, no issue, but at least I have given you the idea how
we can use this. So let's try another one. Let's see what is this
and how we can use. Okay. So this is within
the Blender file, we can try to download it and
try to use it in Blender. 343 MB, let's wait
for some time, or simply jump to the future. Meanwhile, we have a
corridor PNG, OBJ, JPG, MLT, so this is a corridor that has been created within
the Blender, I think, or we can use it in Blender
because it is OBJ file, and there are so many three D assets that has been created. This is the obj file. We can use it in Blender also. MLT, I think ALT is also
supported in Blender. I have not used it yet, but I believe it is. This is the three D asset
you can use and try to weigh PNG JPG it is not
supported within the Blender. If you already know
the spine software, do let me know in the comment. This is the PSD and PNG, it looks cool and there are so many assets, you
can check it out. File types, OBJ. You can actually simply select the specific blend
file if you want it. These are the Blender file, you can use it directly, import it within the Blender and use it in your
specific project. Let's try to import this one. This is the interior warehouse and it is the Blender file. Let's try to import
this one also. Meanwhile, it's downloading. Let's try to second use the previous file
that we have already downloaded, Extract All extract. So this is the file.
This is the extras. Let's try to open
this file. Cool. Let's write into
material preview in the layout, material preview. The material is missing. How we can add the
material here. Let's try to add a material
here. In this shading panel. There must be a folder
that is missing. We have to find the dinosaurs
glossy and I think it is not here and let's try
to find it in the extras. Let's copy this
path and paste it. Enter and you can see there
might be a glossy name here. Yes, there is, let's open it. One thing is added, let's try to add this one also, copy and paste the past here. Path has been created. Yes, you can see the texture is automatically applying and
let's try to open this one, select this, paste the path, and let's open it, open it again and you will
see the magic. It's taking a little
bit of time, I think. Let's try to add this
one also, paste it. Cool. Now you can see, we have a dragon here and
it looks really cool. Wow. It's not a dragon sorry. It's a dinosaur. Taxosaur I think this is
the name of this creature. Let's play this one if
it's moving or not? No, it's not moving at all, but we can use Adobe tool. I think we can move it
using the Adobe tool. Xsamo.com. It is from
Adobe and you can simply drag the director here
and select the movement, and it will
automatically create. This is how you can use TD asset in the Inato element and
use it in your project. Once you press zero, this is the camera that
already setup and let's go to Render in the cycles in
the cycles, GPU computing. Let's try to set a limit of 3 seconds so it might not take so much time
for the render, let's press F 12
once you click F 12. This is the effect that
has been applied on it, but I think the color, we have to change
the color in it. I think there might be something that has
been missing also. Let's try to add this. Let's try to add another
image if we have missed. Yes, this is image I
think we have missed. Let's try to paste it
here and try to open it. It's takes some time for apply. I think that has been applied and now let's check this one. No still dot Exar. Let's try to paste it here, Exar, as you can see, no, there is no AR here no
file directive here. There is no AXR available
within the file. That is why it looks a little. Let's try to remove this one and see if there is any change. Let's try to remove this one. Knob control that dot PNG. Okay I think is working fine, but I can't see any
EX or file here, there might be some
error with the file. There is mit limitation with some texture that is
not available within the Envato element and you have to actually check if it's
working for you or not. Let's go for the E. I
think this is the texture. I think I have found
a texture here and I have check for the
replacement for this texture. Let's delete this one, and let's see if it's
working or not. No, the texture is not
actually working here. We have to I think we have to check for the
output displacement. There is no output here. No, it's not working at all. So there is a texture that
is missing within the file, and we can ask Envato Elements
or in the customer Emil, we have to ask for
this specific texture. There is a limit for this
specific structure right now. Now let's go for this one
that we have downloaded. Now, a warehouse, let's try
to export this one, extract, and in the warehouse, let's open this interior and
let's try to open this one. I this will work. In the material preview,
let's enable it. Let's go to aero and cool. Yes, it's working perfect fine let's try to change
the setting of the scene, yet GPU come and try
to make it limit with 3 seconds and see it's really
working perfectly fine. I love the texture that
already had been working. Let's try to press zero. Where is the camera.
There is no camera. Let's try to ran this out. No. No camera found
in the scene, let's try a camera here
and go to right click. Let's shift a camera
and there is camera. Let's try to find
the camera again. Here is a camera,
here is this one. Let's try to adjust the
space of this camera. Let's try to press zero and
try to adjust the camera. In the camera settings, let's try to change
the focal length so that we can cover
our whole area. This is 22 millimeter. Let's try to 12. Let's try to render this one. There might be some error
with the render also in here. We have to find the error
and see how it will work. Let's try to press app
12 again if it's not, and I believe it will
work in the cycles. Cool, it's working, but there might some error
with the lightning. We have to check what will be the error
and we have to rectify. If you know Blender, you will
understand how it will work and you can rectify it
within the shading section. As you can see, there
is also a base color, a linear, a wire frame, and you have to find
it in the texture. We have two, four, eight K. You have to
find it and replace all those files like we did
with TRx with the dinosaur. That's all for this lecture, see the next lecture.
Thank you for watching.
31. Ai Video Generation in Envato elements : This one, let's try
to close this tab, and with the video generation, you simply have to use a
prompt and play the video. This is how you can use it. Let's try to use prompt. This is the prompt
anime style movement then near this SC speedways, you can actually
create the video using this one and how many
frames they are creating. With this one, let's
with this one, let's try to generate a image with this
one, use this prompt. And I want this to be
in 1916 in 916 preset. If I have Pacific preset, I have in mind, this one, a cinematic medium sort
of a young man sitting in the subway train between
not in a subway, uh, Mumbai local train between
ethanm skin figured, not blue and orange figured
and glossy green alien. Let's try to make it
glossy, yellow alien, all staring instantly at
each other in silence the atmospheric is dominating by cool sina and vibrant mesenta neon lightning
that reflects off the damp floor and metallic surface as the
train move through a dark, rainy city night, the camera maintains a steady
observant angle capturing the uncanny sinss of the trio against the blood motion of the urban landscape
outside the window. Now let's try to add this one. And also, let's add apple pie comes on apple pie
as orange alien, orange skin figure smash apple smash cake onto
the yellow alien. Now let's try to add this one. Now with this one, let's
try to use it with sound. And do I have hand frame, I do not have and frame. And let's try to remove
this one and generate. Because if I use this frame it will automatically
generate the same results. That's I don't want. So within some time, the video
will generate. Let's wait for some time, or let's try to jump to the future. So it has generated a video. It's look cool. Now let's try to
download this video, and you can upload it on social
media and make it viral.
32. Artistic Image generation: And you will see so
many examples here. Let's try to use
Graphics generation, and let's delete all this one and go for
graphic generation. And you will see there
are so many style that has been updated here. Now, if you want to see
any of the generation, you can actually refer the style if you want anything in general, let's try to generate something exclusive or something
awesome, Nosumi. Now with this one, I use it for portrait and with the solid
transparent and solid, it's up to my choice if I want the background to be
solid or transparent. Now let's try to describe
anything you have in mind. This is what I typed
that is samurai with a glowing sort
in a red fire wave. Let's try to generate it and you will see three variant of
this image. It's look cool. What we can see, it is just like a watercolor that has
been described on the paper and we can see how
beautiful it has created. They have created
three variation of it and all these are generation
that has been generated. I love this one the most and these are the
same. These are the same. But the wave of the
Samurai with the sword, with the fire assays, with the fire wave, I
like this is the most. This one is really
amazing to see. Now let's download this one. Here you can download
the original and upscale if you want to
do it, you can do so. Let's download original, save this one,
download this one, original size t. So this is the image that
has been downloaded. Quality is acceptable. Now let's move on to the
further part that is
33. Get Better quality prompt: Me share you a prompt that I simply copied
this prompt from here. From the open art, I just open any of the images in the videos in the
explore section and it just gave me a prompt. And they have used a reference, but I have not used it. Got it. So what I did I
click on Seymour, copy the prompt and
simply paste it here. That's all I have
done, and you can see the result is good. Now let's delete this
one and now you can see the video that
has been generated. It's good to see,
it's really good. Now let's try to
download this one. But let's see if it
has audio or not. It's good to see.
I love the rest, but it's not like the one that has been generated
within the open attack, but the results are amazing, no doubt, with just a prompt. So you have learned a new thing today, see you in
the next lecture. And if there is any update, I will go it covered.
Thank you for watching.
34. Music Generation in Envato Elements Ai: Now let's try to use
voice generation, music generation,
video generation. We have talked about
video generation before and image generation Image Gen. This is where you can
generate a voice like this. I'm Logan, and I'm driven to
code the next big app that can make if you want
to generate I'm Jade, and I'm all about
exploring new I'm Lydia, and there's nothing This is
where you can simply you have to text or you have
to add the script here, what your Aptar want to add. Let's try to select this one. This is how you can select it. And if you want to generate a podcast into with a
professional voice. This is how you can
simply generate it or if you want to
specifically select the text and you want your
Aptar to generate a voice. According to that
script, you can do so. You can test it out. It is
fun playing with this tool. Now let's try to move forward
with the music generation. Let's try to test with the
music generation here. This is the music, a metal. It is some kind of a
natural healing music. I love this music. This
is smooth groovy music. I love this one also.
Let's try to use dramatic violin for
intro of course. Let's try to generate
with this one. And with a genre, if you want to use
violin or genre, you want it, you
can use cinematic. It's up to you. If you
want a theme, Broadcast, cinematic, let's try to use cinematic ads and trailer
and Broadcasting, fashion, gaming, no, autographic
technology, tutorials, let's try to use tutorial
here and with the energy, auto, low, medium
high, very high. Let's try to make medium. And do you want to add
lyrics? You can add lyrics. If you have a specific lyrics, you can simply add it
like this and type, blah, blah, blah, and it will work
according to your script. Let's try to use no script
and let's try to generate it and wait for some second and it will generate
some variation for you. Let's try to play this
one that's in created. A cinematic upbeat music. I love to hear that. This is how you can create the music for your
perfect video.
35. Product Mockup generation using AI model: Diving into a new session
that is JanaI using Envato. Whenever you go to
Envato Elements, you will see this JNAIOce you click it and you will
see so many epsons here. So I'm starting from the bottom of the Janai where
I have to upload a logo. Let's try to upload a logo. But first of all, let's
download the logo. So I simply search for the logo. Into the graphics section, I will find the logo. And once I go to Graphics, there are so many logo I can
actually directly download. Let's try this one.
I like this one. This one also, this one. Yes, I like this one. Skull This is cute.
Let's download this one. Once you download it
I simply extract it. Here is the logo, and I simply drag it into
the website. Let's paste it. Oh, let's drag it
here and drag here. Once you drag it, you simply have to select upload
a mockup template. If you have a specific
template, you can upload them, or if you have not, you can test it out on
different subject. Right now, I want it on let's
see I want it on this one, you can see, and it's optional if you want to describe
it, you can describe it. If you want to describe it
like the size of the logo, the space it will take on
the Hodie you can do so. And if not, you simply
have to select generate. Once you click it,
you will see a magic. So this is what
it had generated. A simple image that has
been reflect on the Hudi. You can download it
and if you want to add or edit something,
you can do so. It's up to you describe,
add, remove changes. If you want anything, you
can do so and you have the remaining generation
left in your account.
 Karan Rathore, Creative Technologist: Video Editing, AI, and 3D