Transcripts
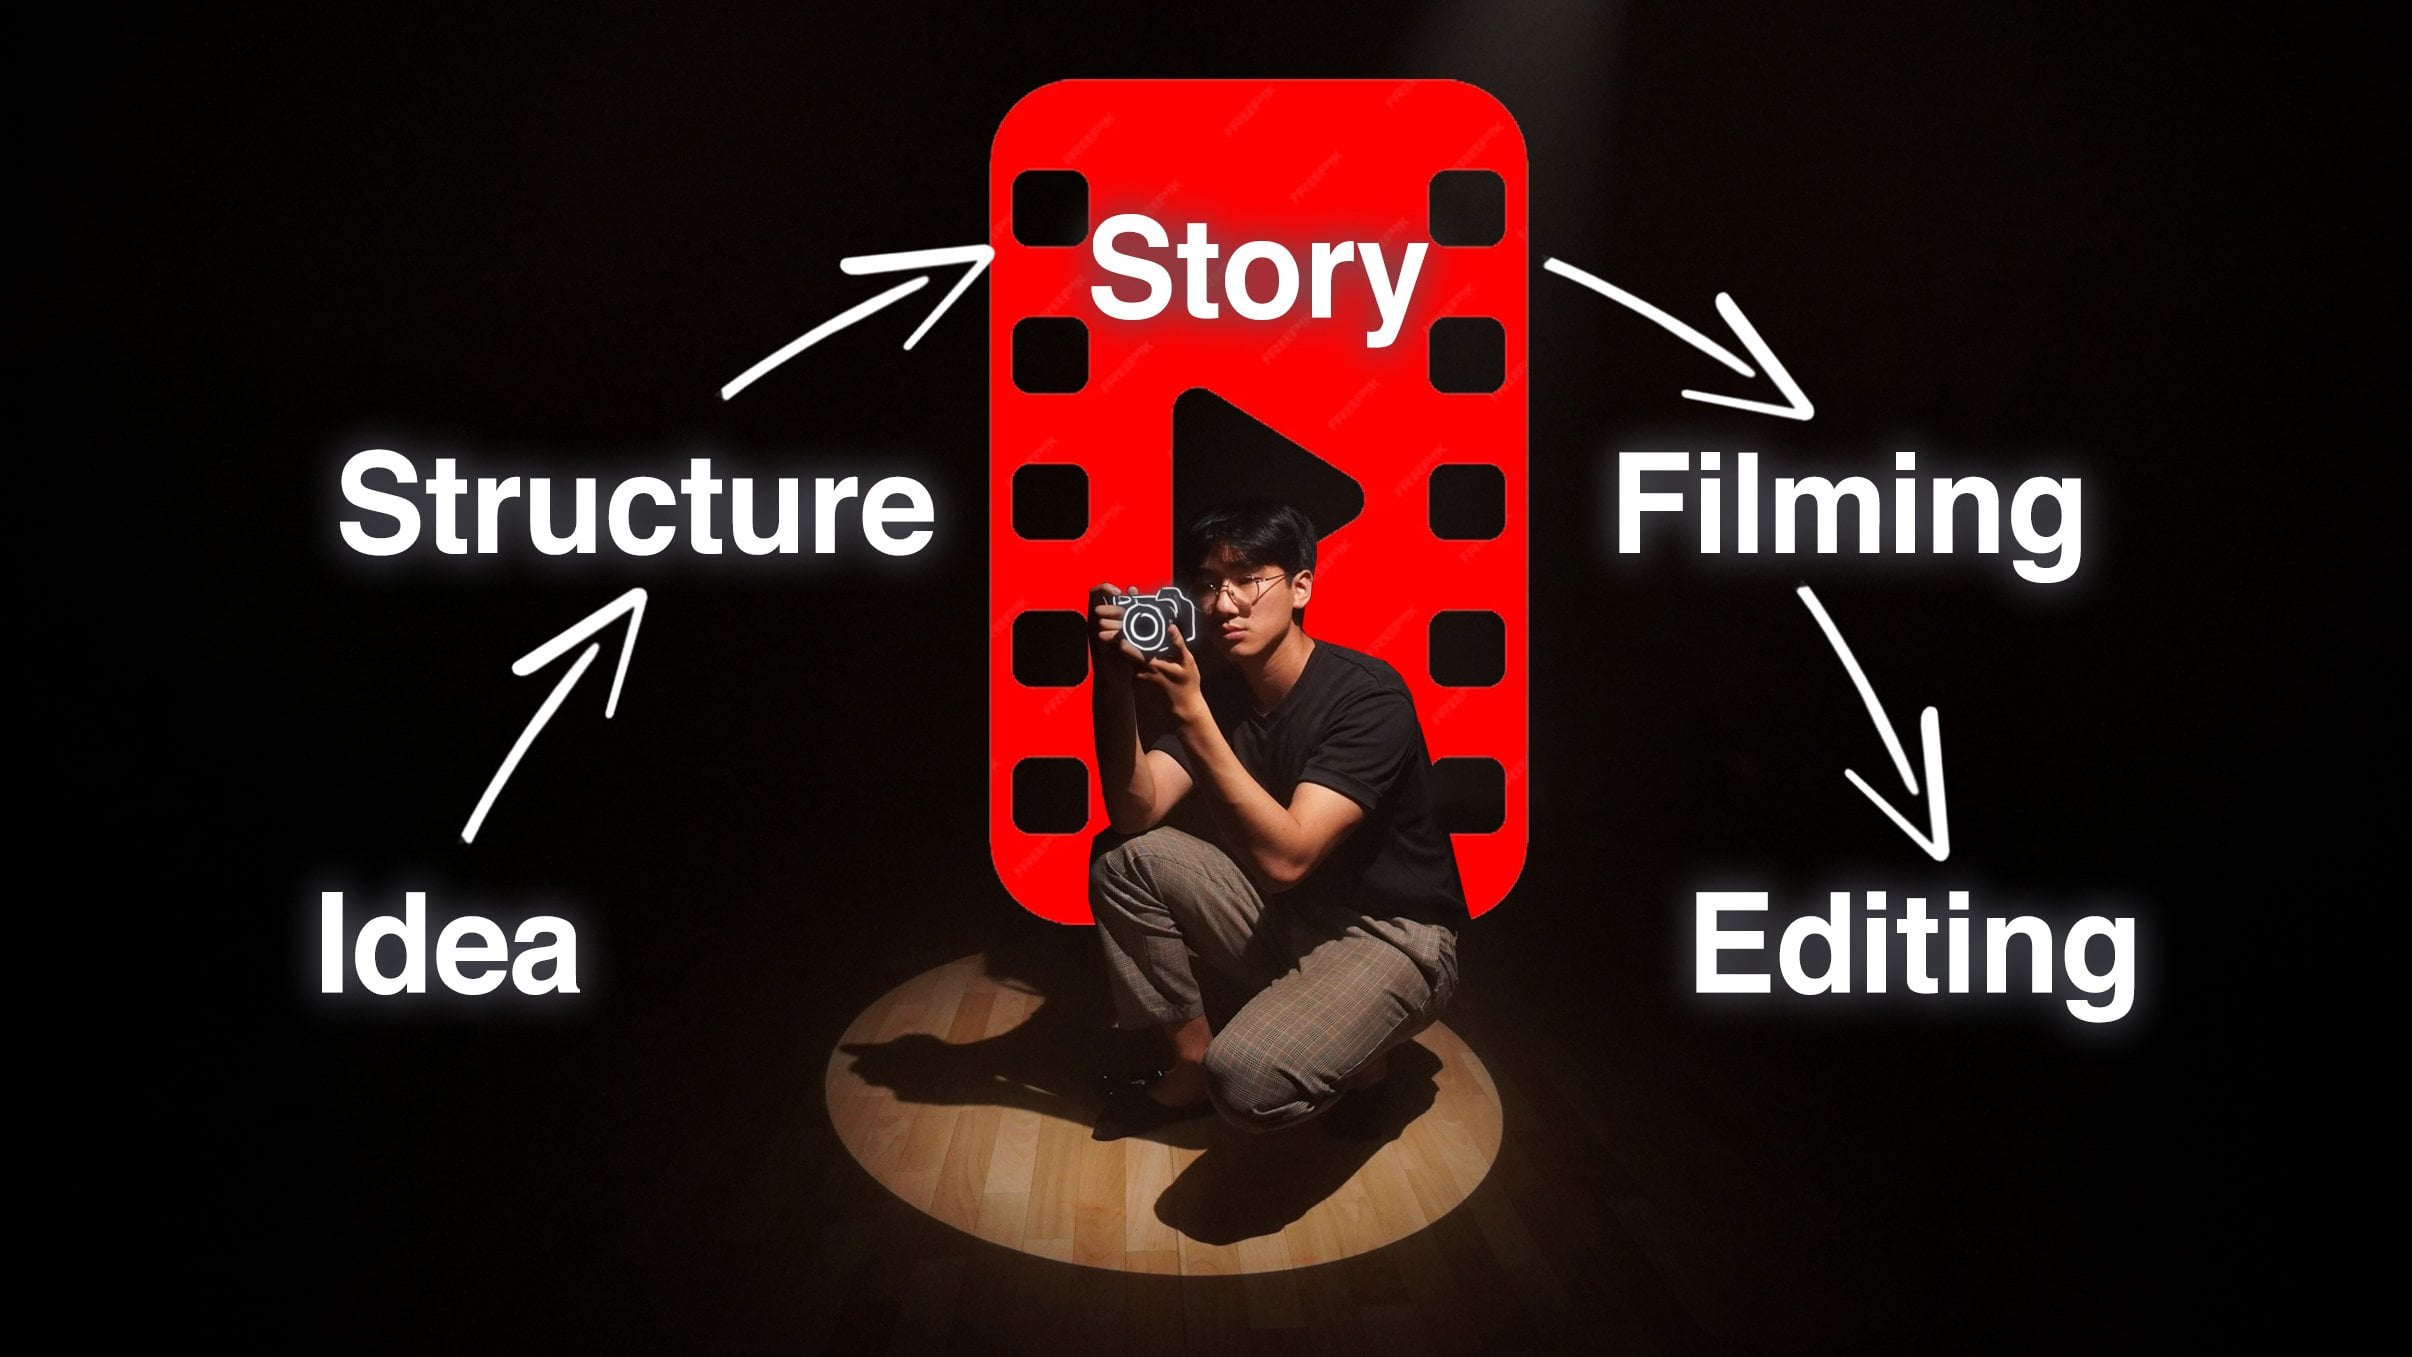
1. Welcome to the Class!: When we watch a beautiful film
or an eye catching video, we often don't realize how much thought goes
into framing each shot. How elements are arranged
within the frame is what turns an ordinary image into something mesmerizing. Hi, I'm Eddie. And since I got my first camera, I have been nonstop learning
how to take pictures. And for the last five years, I've done 200 videos,
and trust me, composition is
handy for drawing, photography, and even video. In this class, we're diving deep into the
art of composition, exploring themes
beyond the frame that will help you
capture attention, tell a story, and evoke an
emotion in every frame. How you think before
drawing or how you position your camera Composition is the foundation of great
visual storytelling. We will go step by
step from where to position your camera all the way to thinking beyond framing. How to lead attention
and portray better than before the story you want
to tell in a picture, drawing or even video. For the class project, I would
like you to post any photo or video explaining why
it's framed the way it is. And most importantly, you'll
have the opportunity to ask any questions and
get feedback from myself or any other students
that are taking this class. There are no prerequisites. If you're ready to unlock the potential of
this amazing tool, then I'll see you in
the first lesson.
2. About Distance: If you're shooting
a photo or a video or even thinking about how a
painting should look like, the first thing you should
think about is the distance, the distance between the
camera and the subject. And the subject doesn't
necessarily need to be a person. It could be an object or
something you want to focus on. And the distance between
the subject and the camera will mostly determine
the feeling and what the viewer can see. There are essentially
three types of shots at three
different distances, white shot, medium shot,
and close up shot. White shots establish
the setting. Well used, it can portray the feeling of
loneliness or awe. But we'll go there
in just a second. Medium shots are
the normal ones, what you're seeing right now. It balances the focus on the subject and the
surrounding environment. Neither too distant
or too intimate, it feels natural and relatable. And close up shots
capture emotions and details that are
important to the story. So easy, right? There are
three types of shots, and if you want to think more on the compositional
side of things, we have to divide the
frame into two parts. The area of the subject
is called positive space. And in contrast, the area outside the subject is
called the negative space. How much of each space
occupies the screen will mostly determine the feelings that the viewer might
have while watching. What emotions come when
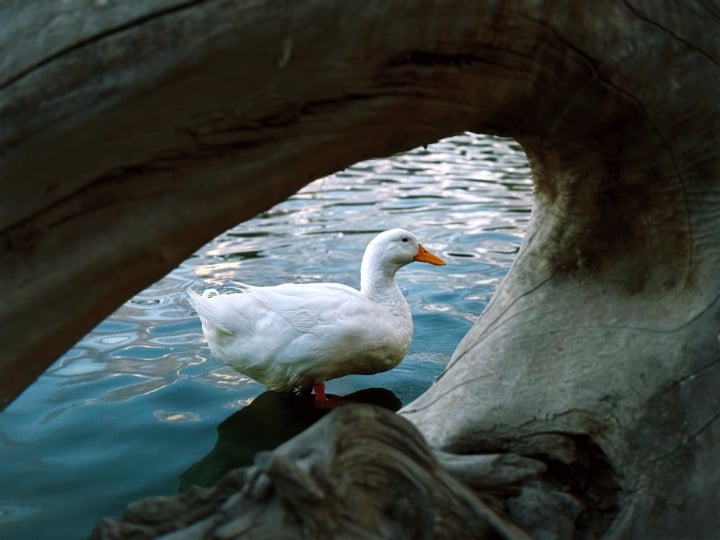
you watch this one? Here I'm just walking from
left to right to the beach. You see that I'm pretty distant from the camera,
so it's a wide shot, and the positive
space is very small, compared to the negative
space all around me, it makes the shot feel lonely. So frames where there's little positive space and a lot of negative space
might feel lonely, but doesn't need to
necessarily feel that way. It all depends on the context. If we take a look at this one, we see that I'm even further
away from the camera. So the positive space
is even smaller, and most of the
frame is actually occupied by the negative space. But when you watch it, the feeling is different. It's not so much as loneliness, but a feeling of awe. And that's mostly
because of context. Even though in the
first example, there was not much to it. The sky was more monotone. My body language showed
more loneliness, in a way. Whereas in the second example, we see that I'm directly
looking at the sky. The sky is more colorful
opposed to the first one. And just this simple act of observation makes it feel that all this negative
space will contribute to the vastness and
the off factor, the surprising factor
that this shot gives. So these are two examples where you see a lot of negative space, but very little positive space. So let's take a look at
the opposite right now. So this shot, you see the
subject isn't a person. It's a clock, and
it's so close to the screen that it occupies
100% of the frame. It leads to seeing
a lot of detail. We're focusing so close, and if it used correctly, we can show the feeling of
chaos or sensory overload. So the proximity of the
clock to the camera, plus the sound effects really
add up to the overload, this stimulus of chaos. But again, it's all
about the context. These close up shots don't always necessarily
need to feel chaotic. If used correctly, it can also reveal intricate
feelings and details that you would never see in white shots
or medium shots. Faces show a lot of emotion. And by having a
really close up shot, it creates a good
sense of connection. Isn't it fascinating B just
tweaking the distance, we can change so much of the feeling that the viewer will have while looking at it? Next time you're shooting, taking a video or just drawing. Think about this one.
Think about the distance. What feelings do you
want to portray? If you haven't tried,
so try mixing them up. Maybe a wide shot to
establish the scene or a close up shot to
really show detail. With that said, best of luck.
3. Focal Length and Distortion: Is something that I decided
to include because I thought many don't actually
fully understand it. In this lesson, we
will focus the effects of shooting all the
way zoomed out to all the way zoomed in and what effects it does to
our image at the end. Let's pretend this
is our subject. This is the thing
we want to shoot. The shot you're
looking at right now is the camera with the
zoomed all the way out. And as we slide the
camera further away, I'm going to slowly zoom in to make the subject have the
same size in the frame. Can you notice the background getting more and
more compressed? These are physical
optical properties that you can try even
with your phone. To experiment, you can place an object that you want
to take a picture, and you first want
to take a picture with your ultra white lens. Then switch to your normal lens. You'll notice that
with the normal lens, you need to go a
little further away to have the object at the
same size in the frame. But if you swipe between
the two pictures, can you see the difference
of the background? You'll notice that
the ultra wide lens captures a lot of
the background, whereas the Zoomed in lens or the normal lens will
compress a bit more. You'll see less of what's
on the background, and it's more focused
on the subject. People quickly think that, Oh, white shots are better or the
Zoomed in shots are better, but they have their
differences and they're use for
different occasions. So a wide lens makes spaces
and environments feel larger. Often evoking an awe
or sense of openness. This is why it is used for landscapes or dramatic
architecture shots. This is especially helpful when the space is limited
and we want to use the ultra wide lens because we cannot go physically
further away back. Or in the case you want a
nice wide establishing shot. Having an ultra wide lens makes
it easier to capture one. You don't have to
go so further away. Now, if you zoom all the way, the background is so compressed the focus isn't about
what's around the subject. Instead, the subject
is the main focus. For example, on this
shot in Portugal, I wanted to capture
the train going from the right to the left.
That's the subject. And because the background
didn't really matter, I zoomed all the way in, compressed the background
as maximum as possible. And as you can see
around this area, you really just see a blur. Meanwhile, the subject is
the only thing in focus. So remember, the smaller the
focal length of your lens, the wider the shot, the more of the background
it captures. The longer the focal length, the more zoomed in it is and the more it compresses
the background. I actually learned
this when I was taking a picture
in the mountains, and you can see the
first picture here, I had a lens that
was all the way zoomed in and it compressed
so much the background. All you can see was
this tiny part. So I switched the
lens to a wider one, and the difference
is night and day. The first picture was unusable, but the second one was perfect. You could see much more
of the background, and the picture
turned out beautiful. I hope you got to understand
what the focal length does, zooming in or out and what uses it does and what does
it do with the background. If you haven't
done so, maybe you have a spot where you
usually take pictures. Try taking pictures with
a different focal length. Maybe you're used to
taking white pictures. Maybe try all the way zoomed in, you just have to
take a few steps back and see the
difference in the results. With that said, best of luck.
4. How to Frame Your Subject: Now that we have set the distance between the
camera and the subject, the next step is,
how do you frame it? You could frame like
this, like this, a bit to the left,
a bit to the right, a bit more zoomed in or out. How do you know where in this frame you'll
have your subject? When me and my friends
were at the beach, we saw this person with this huge camera and we wanted to take a group
picture just from memories. So I asked him to
take a picture, and this is the result. And honestly, I didn't dare
to ask another picture, but I was kind of disappointed. The framing was not the best. I understood what he
was trying to do, but in the context, it just didn't make sense. Fun fact, I actually
explained to them why this picture wasn't so good because they
couldn't understand. And this whole
explanation sparked the idea of actually creating this whole
composition course. So in order to position your
subject within the frame, there are in the camera settings these guidelines that
might be helpful. In the camera, there
should be a setting to change what type of grid
you would like to use. And the most common one
is the rule of thirds. It divides the frame into three by three
equal rectangles. Basically, two horizontal
lines and two vertical ones, and it creates nine
equal sections of area with four cross points. The idea is to place
your subject or important elements
along these lines or at the intersection
instead of centering them. This creates a more visually pleasing and more
balanced composition. Let's take a look
at a few examples. So let's add the
rule of third grid. So can you see where I'm
biking right now in the fog, I'm biking throughout
the line of the bottom horizontal
rule of thirds guide. If you were positioned
in the middle, you see that it
doesn't look as good. It loses a bit of its natural balance
or in this next shot, where I decided to put
the camera very far away, and I framed it so that me with the flashlight would be in one of the cross
section points. Those are the important points where you can position
your subject, and it will look good. You see how balanced everything looks and how
aesthetically pleasing, just by placing the objects on the certain lines
or focal points. This also works for photography. Usually, if I'm
taking a portrait, the top line will cross my eyes. That's the
important part. And that's how you frame
a person in the picture. So we learned that in the
rule of thirds by placing the subject or the object in one of the lines or
one of the points, it creates this balanced
feeling if you use properly. There are other grids
that might help you, and the next following one
is just the centered one, where you focus in
the middle point. That's where the eye
naturally tends to go. So placing the
subject in the middle creates this natural
symmetry feeling, which makes it
aesthetically pleasing. But now the common question is, when do you center your subject, and when do you
don't center it and place your subject maybe
in one of the lines? And that's a good question, and it really depends
on two things. The context and the balance. Remember the photo that I showed you of me and my
friends badly composed? Well, after thinking about it, I understood that he
decided to put us in one of the points in the rule of Thirds grid instead
of centering us. But if I expand this picture with a
little bit of Photoshop, doesn't this look a bit better? That's because the context is
just a normal group photo. The background is pretty, but that's not the
other focal point. We see that us being in the bottom focal
point has nothing to do with the background on
the opposite focal point. Let me give you a good example. So, this one is me and my
partner sitting in the car, and we're looking to
the right and so I decided to frame and
move the camera a bit, shift the camera
so that we're not centered and we are
instead on the left. So because we're on the left and we're looking at the right, we're looking at the sunset, it all feels more balanced. It tells a story. I connects us viewing
that direction, and what's on that
direction, there's the sun. And all of a sudden, putting ourselves in the first
vertical line of the rule of thirds makes sense
because there's a context, whereas the group photo the focus was supposed to be just on us and not on the beach. That's why this picture, when you look at it, it
really feels unbalanced. The context is not there. We're not looking away there. We're just looking at the
camera as a normal group photo. That's why it looks much
better if you center it. Let me give you other examples. There was a phase where I was just doing a lot
of photoshop art, and I always took into
consideration the rule of thirds. So in this case, I'm grabbing my face and I'm
looking at the left. We see that because I'm
looking at the left, I have to be positioned a
little to the right so I give more space to the left because
I'm facing that direction. This next one where I clonee myself sitting
in two chairs, you see that the
first horizontal line of the rule of thirds crosses our heads and the
two vertical lines crosses each of our bodies. That's why this picture looks so dynamic and so balanced and
so aesthetically pleasing. The same goes for this one, where I'm on top of a hall, the first horizontal
line crosses my body and the bottom
crosses the hay roll. So if usually there's a context or a person is
looking at this direction, then maybe I should be
positioned more here. It feels balanced. Instead, if I was
positioned like this and I look this direction,
it feels off. It doesn't feel balanced. And right now, as I'm
talking to the camera, it just makes sense to be symmetrical and
I'm in the middle. But at the end of the
day, most importantly, the golden rule or
just being center, symmetry and all that, they are just rules. You learned about them.
You can use them, but sometimes you don't
have to follow them. For example, on this shot
that we saw previously, the horizon line doesn't really match with one of the
rule of thirds grid, but I really wanted to emphasize the negative
space on top because I'm looking at the sunrise and I'm so awe and, like,
super mesmerized. That's why I decided to position the camera
and angle it a little bit more up just
to make that more clear. And I think it's a good shot. As long as you're thinking
about the framing and they make sense within the
context and it feels right, the you're doing it correctly. Now that you've learned these
two fundamental topics, the distance and how
you frame stuff, next time you're
shooting, drawing, or even taking a video, try and think about these
things. Best of luck.
5. What Angles to Use: Most of the times
you see shots angled like this where the camera is at the same level
as the subject. But this lesson, we will
explore what happens if we raise the level of the camera so high
or lower the angle. For the most natural
feeling shot, you want to just
put the camera at about the same level of
height as the subject. If you lower the camera a bit
and pointing more upwards, you're using a low angle shot. There are many
feelings that we can feel when looking
at such a shot. And in the previous
lesson where we covered why the subject
should be centered or not, and it mostly depends
on the context, the feelings you get when
looking at a low shot, also depend on the context. Because if the subject,
me in this case, is higher in level
above the camera, it feels like I'm
more important. It even might give you the
feeling of intimidation. With the right context, a lower angle could very well
portray inspiration or awe. Here we see that the
sky is so colorful and beautiful that it really
within this context, within this frame, it
makes sense to just put the camera a little
lower and look upwards. But if you're the subject and I raise the camera a little
higher and pointing a bit down, we're using a high angle, and there's a lot of feelings
that could be portrayed. One of them inferior or vulnerable when
we see these shots, as the subject is literally lower or inferior in height
compared to the camera. With the right contacts, having the subject now
looking at the camera, it even evokes feelings
of detachment, like you're even
just observing them. In this shot, actually,
in this room, I was doing a little
bit of embroidery, and I decided to put the camera really high
up pointing down. When I don't look at the camera, like I don't even
acknowledge it, it feels like when you look
at this frame that you're just it feels like you're
really just observing someone. People often make this rookie
mistake when they're taking a picture with a high
angle out of laziness. What it accidentally
does to pictures of dogs or children is that it
makes them feel inferior. Just crouching down and having the same
level of the camera as to your subject makes
it feel much more natural. Just doing this extra step makes a whole difference in the angle and the feeling that
the shot conveys. The Dutch angle is when the
camera isn't really leveled. It gives this
really easy feeling and it creates all this tension. It's often used when the character has some
psychological distress. I personally don't
really use this because my stories don't really
involve these kind of topics, but here you go. This is something you can use. Now, if the camera is at the
same height as a subject, we give this subconscious
feeling of equality. It is the most relatable one, the most natural feeling one, and it is the most easy to
connect with each other. It doesn't impose dominance
or vulnerability. And hopefully, for
a course like this, that's the message I'm
trying to transmit you. That's why I chose for all
of the courses this height and this angle because it really is the most
natural looking one. With that said, angles are another tool in the
box that you can use. When you first think
about something, you think about what feeling
you want to portray, and then you position
the camera with the distance and
now with the angle. And this concludes the
framing part of this course. Basically, everything you need to do to set up the camera, where you set up the camera, which angle, that's
the framing part. From here on, we'll go
even beyond the frame. What I mean by that is, how can we manipulate
stuff within the frame to make your viewers
look at a certain area. With that said, have fun
shooting with different angles, and I'll see you in
the next lesson.
6. Use the Background to Your Advantage: Now that we cover the height, distance, and angle, in
the following lessons, we'll cover how to direct the viewers' eyes on if you
want to focus over here, or here or here or here. And first of all, I'm going to show
you a bad example, something one you don't
take into consideration. I took this photo
a long time ago. Random photo, at the time,
I thought it was cool. But now that I look
at it, at the time, I thought this was a really
cool picture because of all the people going
around here, here. At the time, I
thought this picture was really nice because it had so much depth and people here and the right in
the middle just walking. But there are so many
distracting elements. There are so many lights. First of all, these two
vertical lines on the right. There are really distracting your eyes because am I supposed to look
here in the middle? Am I supposed to look
here on the right, or am I supposed to look at
this word here on the left, top left with all the lights? It is really distracting. There are so many
elements that are pushing my attention that I don't know
at the end where to look. Where is the subject, and
where should I look at? So the first thing
you want to do is to understand where the subject is or what do we
want to focus on? And the step after is to
look at the negative space. What is around the subject? That is also very important. And in this specific lesson, we'll talk about lines. Lines are created naturally
through the background, and we can use them to our advantage when
composing a shot. For example, in this
picture in the mountains, I just finished hiking and I positioned myself
in the middle. This is where the focus usually is where the eyes
tend to focus first. So what helps is what's
actually behind me. We have these
beautiful mountains and see if I draw
these natural lines. They all coincide to the middle. These are called leading lines
that are naturally made in the background that tend to
converge into a single point. And if your subject is
in that single point, it just makes it so aesthetic
that the eyes naturally just converge in the middle and you know immediately
where to focus. And maybe something less natural is this picture
shot in the train, and we see the
repetition of the seeds, they make this natural line that coincides in the middle also
where I am the subject. It creates symmetry and the leading lines guideus
to where to look at. And opposed to the
other picture, there are so many
distracting elements. I don't even know
where to look at. These ones are really obvious, and that's a big major
point to why they are good shots and why
they are well composed. Another point I would like to emphasize is the horizon line. Usually in the portrait or
if the subject is human, we don't want lines crossing our head because it is just
a distracting element. And how you do that
better is just by lowering yourself
or a little higher. So you can change where the
horizon line will cross. I really hope you can
understand the power that leading lines can
have within the frame. It leads the viewer
somewhere specific, and it makes it so much more obvious where the
person should look at. It makes it therefore, just much more
aesthetically pleasing. If the viewer knows
where to focus on, there's less confusion. The less confusion there is, the more aesthetically
pleasing it is. For drawing, it is
easier to create these leading lines for
photography or even video. You have to frame
and think about what's in the background because you cannot create these things. You have to look out for them. With that said, try them. They're really fun
and best of luck.
7. How to Add Depth: Depth is a great way
to separate the frame into different
parts and makes it more digestible to
interpret the frame. Essentially, you can categorize your frame into three parts. The foreground, the middle
ground, and the background. For example, the
foreground would be the computer that's
more close to you. The middle ground
would be where I am. And the background, which
is the wall behind me, isn't that far away, but it's considered
the background because it's what occupies this space. It just creates a
bit more depth. It creates this
interesting factor. It gives more to digest or
more to see and interpret. And if done well, for
example, this shot, I'm just in the
middle with my bike, and you can see the
foreground element. There are leaves
from the corn plant, and the foreground already tells us something
about the environment. It kind of frames me in a way and leads me to focus
what's in the middle. The middle ground,
it's me with the bike, and the background
is just the weather and what's in the background. But the foreground element really glues
everything together. It puts the attention
in the middle and gives also a bit of
detail to what's around me. Not all shots need all
three levels of depth, but adding them will create more interesting parts to your
story and how you show it. Now, another way to create focus is by using
shapes or frames. Doors and windows are naturally good shapes to shoot through. For example, I took the extra
work to put the tripod with a camera outside and position
it where I would be. And this frame immediately makes it obvious
where to look at. I'm right in the middle
and it frames me. It's a frame within the frame. It gives more context
that I'm in the house, and it also adds that depth,
the interesting factor. And I think this turned out to be one of my favorite shots. The extra work to go beyond the natural shot and to add more depth is
always worth it. It adds always some
interesting elements. It tells a bit
more of the story. It creates more context. And more importantly, it leads the person to
know where to look at. With that said, have you ever
tried putting the camera outside or the perspective of your drawing in another way? This might give a little
more interestingness and might frame and glue everything together to tell your
story in a better way. With that said, best of luck.
8. The Importance of Light: Light draws attention to
where you point it at. So once we have the camera in a certain distance
and a certain frame, the light can help
also glue together and emphasize what you want to show by making it the brightest
part of the frame. In this example, it
was a dark corridor, but I positioned
myself or I mean, the ghost in the middle of the corridor where the light
was shining the brightest. This created a bigger contrast between me and the background, which made it immediately
obvious where to look at and it glued the
picture altogether. It was a smart move. And here in this shot, we see that the whole
classroom is just dark, and me with my flashlight was the only source of light
basically over there. And because of that,
our eyes immediately go to where the
brighter spots are. And these bright spots are exactly where you
want the focus to be. Remember that picture I
showed in the last lesson? I had all these
distracting elements, all these lights, and I didn't even know what
the subject was. I just shot the picture randomly, and I
thought it was good. I didn't even know
where to look at. There were too
many distractions, lights here, lights there. It was not that good. But here, you know
exactly where to focus. And of course, the
way I position this circular light
was for me to be in the center
where the focus would go and not over there or there, and creates a certain balance, and I think it glues the
whole frame together. And the opposite is also true. The light if behind you, it creates a certain
contrast with a little backlighting
and the focus, again, tends to go over there. So remember, if
everything is dark, the first thing that stands
out is where the light is. Before I actually
framed this one, it was a different time of day, and there was a little
bit more light outside. And you see it
doesn't look quite as nice as when it's nighttime, and the only source of light is where you
want to focus on. Before, everything was bright. So you didn't know
exactly where to look at. But now where it's night and
I can put a light inside, and the only part that lit up, it's in the middle, Immediately the eye knows where to focus on, and the shot becomes more aesthetically pleasing
for that reason. Light, if used correctly, can make a wonderful
tool for composition. Use it to your advantage. With that said, have
you ever thought about the time of day you're
shooting and how the light could be
advantageous to maybe a place indoors
or just outside? Maybe like last one, waiting a bit more to get darker so you get more contrast
between lighting. Have fun, experiment, and
I'll see you in the next one.
9. The Importance of Color: In the previous
lesson, we talked about the contrast
between light. In this lesson, we will talk about contrast between color. It is another tool that can play a significant role if used correctly to grab attention
within the frame. For example, in this shot, this whole area is bright. And specifically on that day, I decided to wear
something more dark, something that would contrast with what's in the background. And really quickly, you can
see that I really stand out within wherever
I was in that place. And the focus was more on me. Now, in contrast, if the
focus is on something else. Now in this shot, we have
this beautiful sunrise with all of these colors, it wouldn't make sense
if I use a neon pink or green shirt that
would only compete attention with me
and the background. Instead, I decided to
wear something dark that would just stay away from
what you want to focus on. You see me all in dark and everything else is in
beautiful bright colors. This contrast makes it more
aesthetically pleasing, instead of having the colors being another
distracting element. Color, if used correctly, just like light can be another important element to guide the viewer to know
where you should look at. With that said, if you're going on a photo shoot or if
you're drawing something, the color you choose
might actually play a big role on how the shot feels and pay attention
to where the focus is. If you want the subject
to be really in focus, then make it contrast
with what's behind. If you want the focus to
be on something else, make the subject wear something more dark
or more discreet. With that said, try
the colors and best.
10. Different Aspect Ratios: In modern days, everything
is shot at 16 by nine, at 30 frames per second
or even 60 sometimes. This is something
we're really used to. But what if we change
the aspect ratio? And what about the frame rate? Whoa. Doesn't this feel
a little different? Aspect ratio is the relationship between the width and
the height of the frame. Because nowadays we have
powerful phones where everything we see on the
computer is with 16 by nine. We're so used to this, we think this is the
most modern thing. But if we change it
up to four by three, on the other hand, it feels
nostalgic and even intimate. The box ear shape, it goes back to the classic television days where it was everything
in this area. All of my childhood cassettes videos were shot
in four by three. That's why in my videos, every time I talk
about memories or I want to evoke this
nostalgic feeling, I tend to use a
different aspect ratio. I cut from what is the modern 16 by nine
to four by three. And sometimes I even lower the frame rate because having a frame rate that's
a bit choppier, a bit lower gives the
sensation of, like, these memories you had that you don't quite remember 100%. That's how you kind of
look at them back then. It gives this old feeling. So in this lesson, having just talked about the frame itself, maybe it is something
that you might want to try and utilize. If used well, you can evoke
the correct emotions, and it visually tells a story better than just using
the normal aspect ratio. With that said, maybe try, maybe don't, but
that's the luck.
11. The Importance of Movement: And the most important aspect
of attention that I don't see other people actually referring that much is movement. This is really internally biological wired for
generations for survival, and it is also vital to what you pay attention
within this video. If the frame contains excessive
distracting movement, it confuses the viewer. It makes it unclear where
their focus should be. This is exactly the
opposite of what we want. If everything is still and
only one thing is moving, that moving subject
or object will get all the focus while the
whole frame looks pleasing. This is why shaky handheld
shots are so hard to watch. I try to keep shaky handheld
shots up to a minimum, but sometimes there's
no other way. Here, I had to
actually cut this shot out of the video because
it was just too shaky. Shakiness if used moderately
can create a lot of tension, a lot of suspension. But if you're just trying
to show something, putting the camera
somewhere using a table, a chair, or a tripod
and making it still makes everything
much better. For example, in this shot, everything is still except for the electric
that's going down. With the symmetry and
the rule of thirds, it makes everything that much more aesthetically
pleasing. You know immediately
where to look at, because that's the only thing that it's moving in this frame. There is this shot where I fix the camera at
the backside of the car and when
placing it fixed, it creates still areas in the frame and predictable
moving places, making the shot that much
more pleasant to watch. If it was a shaky handheld shot, this wouldn't have
the same effect. So you see here, all the benches and everything
that we're inside, they're all the same place. They're really predictable,
and everything outside is what's moving
just like in the car. That's what made this shot
truly one of my favorites. And, of course, just like light, just like color, the
opposite also is true. So if everything is moving
around and in the middle, there's one thing
that's completely still that will get
the most of the focus. So, for example, here, I was at the airport, and by complete luck, of course, I didn't direct
any of these people. I just decided to go in
the middle of the frame. I would go look at the screen, point at the screen,
and then get out. And exactly at the point where I was looking in the
middle of the screen, just being still, just looking, everyone was moving left
to right or right to left, which made the shot
look that much better because he knew
exactly where to focus on. I was in the middle, still, and everything else was
basically moving around. This is truly an
important aspect, if you think about video. The change in position or movement really draws attention. It catches the attention and it leads to where the
viewers should look at. Too many movements, too
many distracting things happening at the same time
doesn't make a shot look good. Usually, the
simpler, the better. Next time you're shooting
around, think about this. Think about how you can frame. If you zoom in, maybe
you can cut some of the distracting elements
off or you can go to a special place that there's not many people and have a
specific angle that you want that extra work of cutting
the things off and putting the things that
you want in focus makes a big difference in
how you compose the photos, and that extra work
makes it all worth it for the composition of
the shot. Best of luck.
12. How to Fix Distractions (Photo & Video): Sometimes there are just
things that we cannot control when we're shooting around or we're
taking a picture. For drawing, that's a little
bit different because you're in control what
you put, where, and how. But for photos and videos,
that's not the case. For photos, it's actually much easier to correct
for these mistakes. And for video is a
little bit harder, but it doesn't mean
that it is impossible. But still, you should always strive for the best composition
in the first place. You cannot fix a bad photo. But you can only enhance a good photo into
an excellent one. The same goes for video. A really bad handshake
video will have no use. Even if you try and fix
the shaky video with all this digital stuff to make
it more smooth, it won't. A bad shot is always a bad shot. You cannot fix it.
But you can enhance a good shot into a
really good shot. So there are shots
that you already saw, and you might not
even have noticed that there were some
corrections made to it. Let me show you what I mean. So for example, this snow shot, there were a lot of distracting
elements, I thought. And in Photoshop, it is easier to remove them
or change color. You see that there's less
posts, there's less signs, there's less stuff
in the background, and the focus, it goes
into where we are at. Again, the leading lines and just the overall lighting
makes sense in this framing. And by taking these
distracting elements, it made a big difference to what made a good photo
into an excellent photo. For video, you saw this shot. But what if I told you that the original shot
looked like this? So the trick is to film at the same position
a little bit longer. So the people on the right, they were just resting and they were walking down eventually. But I kept filming, even when the electric
wasn't there. And I used that information
to mask it on top. That way, I can make
the shot seamless. And without the masking, with
the people on the right, you see that it creates
this competition between the people and the electric where
the viewer thinks, Where should I see?
Where should I look at? Should I look at it electric? But there's also
people on the right. It creates this confusion. So by removing them,
all of a sudden, the focus turns everything
into there in the middle. That's where the
focus should lead on. Making these small adjustments
that sometimes you cannot control really does create a good shot into
an excellent shot. And the same goes
here at the beach. There is nothing in the
background except for these two people in the left. And by just, again,
the same technique, masking, using another part of the clip where they're gone, we just put them on top, mask, maybe use a
bit of feather, so it looks a bit more seamless, and all of a sudden, the shot the distracting
element is gone, and we can focus where
we want to focus. Good composition at
the end of the day is the distance you want to convey the information
you want to convey. The focus should be where
you want to focus should be. If there are too many
distracting elements, the photo or video or artwork just doesn't
become that good. So by fixing up these
little tiny distractions, if possible, makes
a big difference to how a shot feels and
how professional it looks. With that said, if you have any shots that could
be slightly improved, taking the extra time is
always worth it. Best of luck.
13. Let's Mix Everything: The best compose shots have a mix of all
of these elements. First, you have the
distance, then the angle, then what focal
length you're using, then you can use the
light to focus where you want to focus
and the colors. And if everything is mixed
together in a good way, then it makes the whole shot
much better to look at. If many of these is new
information to you, I understand that it might
be a little overwhelming, but what I can advise you
is to pick one technique. Pick one variable,
so the distance, and you practice with it. You see what you can do and
change a bit here there. And then once you
feel comfortable, you try another aspect. Why not think about the rule of Turns or about
centering the image. And once that's comfortable, why not incorporate
an external light? It's these little things, this little step
by step that you get more comfortable
and you master these elements that
you at the end can mix all of them together without really
thinking about it. I just sometimes it
comes up naturally, but it only comes with practice. And to help you with this,
I'm going to show you a beautiful video with
well composed shots. And I'm going to
explain every shot the composition type I use and my thought
process behind it. I would advise you
maybe to look at it in one go without pausing
just to enjoy the shots. And then a second time
where you actually pause and read what's behind
the thought process, and maybe you can
learn a thing or two. Also, I was born and raised in Portugal and I wanted to show in this video the beauty of many
parts that I grew up in. This video actually means
a lot to me yeah, enjoy.
14. Mistakes Were Made: I'm going to tell
you that not even I after doing it for
years, do it perfect. I still make some mistakes. And what I wanted to
do in this lesson is show you a
picture or a video, and I'll give you some time
to identify the mistake. See if you can spot it. So you've probably already seen this clock shot in one
of my previous lessons, and the mistake here that really bothers me is I didn't
care about the background. I can see something there
blurry with another color, and it just takes
away the attention from the subject. It
makes it confusing. I want to look at the clock, but something on the
left, there's a blur, a blob of color that if I just took a few
seconds and took it off, it would have made the
shot that much better. After doing so many portraits
and abstract pictures, here I failed to
put the tripod with the right angle and the
horizon line crosses my head. If only I adjusted the angle a little bit more up or down, it would have made
a big difference. This shot is a great one. It's just that I couldn't control when people go
from left to right, passing by in front of the car, and the movement itself
creates a lot of distractions. Of course, I could
have masked out, but with all the intricate
details of the cars, it would have just
taken way too long. So instead of masking, I
just took a few fractions of moments that there was
no movement behind me. This one's a bit harder to spot. Maybe it doesn't
really bother you. But for me, what
it bothers is that I cut off the photo in
one of the joint points. Anything that rotates and moves around our
body, so shoulder, elbow, hands, ankles, it just feels weird when
you cut them there. But I guess the
attention so much on the face that it doesn't
maybe really matter. But if only I would have just
put my hand a little bit higher So this one's
actually easily correctable, and it's kind of hard to spot, but the photo isn't
completely straight. It is 0.7 degrees kipped. When I first shot this and I posted my video and
I re watched it, I noticed afterwards, and it's
something that's so small, but you just notice it
when you correct it. Unless I'm going for
an uneasy feeling, we have to correct for
any crooked shots. So you see, even though I
know these rules for ages, I still make them,
but it's good to identify them and try and
avoid them next time. I hope you'll learn something, and I'll see you
in the next one.
15. Breaking Down Composition: Photography Examples Explained: After some very nice
feedback I received, I decided to complement this course with another
extra class that focuses more on photography and photography with
people, maybe on trips. So for this class, I compiled a few photos I wanted to
show you what went right, what we wrong, and maybe the thought process behind it so you can better understand. So this is the first photo
I wanted to show you, and I think it's one of
my favorites, actually. It has a lot of
elements that add into it and make the
photo overall great. And there were a few things
I would like to talk about. And the first one
is focal length. We covered already what
focal length does, and in this case,
is a 35 millimeter, which means it will compress
somewhat the background, but not all the way,
like a 50 millimeter. That's why when you buy
a 50 millimeter lens, that's usually considered
the portrait lens because the background
is so compressed, you can basically not understand anything
that's what's around it. And for this photo, I think it's a great focal
length to use, because if you take a
look at the background, you just have vertical trees
with branches and no leaves. Nothing too special, nothing that you would like to focus on. I'll go into later what happens if you want to focus
something in the background. But in this case, I want the
focus to be in the person, in the subject here
in the middle. And the second
thing I would like to talk about is aperture. The wider the aperture
is, the more open, the more blurrier the picture
gets in the background. I feel like this is a
really common mistake when people buy their first
prime lens is that, oh, my lens can go to F
1.8, so really blurry. And all their pictures that
they take from there on are always in 1.8 or 1.4,
whatever it's widest. And the problem is, they often don't really think
about which kind of situations they should
use 1.8 or maybe F 8.0. But in this case,
here in the photo, we see that the background
really doesn't matter. The background adds
to the picture. It gives some sort of context, but really the
focus is not there. It really doesn't matter.
So it's good that it's separated by a little blur. And in this case, I asked the subject to pick
up some leaves and then throw it against me
up and in my direction, so that all these leaves here, here, here, they're really
close to the camera, and it creates this
sense of depth, which is really good because we have a foreground element. A middle ground element
that's where he's standing, and then a background element
here where the trees are. This is really crucial. It creates this really
nice sense of depth and three dimensionality that makes the photo really nice
and pleasant to watch. Of course, we see that it's symmetric and that the
hands are not cut. And I'm cutting the photo
here about the thigh level. And I believe we already
talked about it, but in any photo, you really shouldn't cut where any rotational joint
is in your body. So your hands and feet are there your neck or your elbows, knees, anything that rotates,
you shouldn't cut it there. So in this case, the
knees are way below, and I just cut here. Otherwise, it wouldn't
feel balanced. Last point I wanted
to talk about here is that this was taken
during midday, which means the sun
was pretty harsh. So in this case, I
strategically placed the person where there
was a shadow here. So you see the face,
there's no harsh shadows. This is something I wanted
to show in the next picture. There's a lot I don't like
this picture, by the way. There's a lot of bad things. It was just we took one picture, it's like, Okay, it's
done. It's not worth it. Sometimes it's not worth it. First of all, see the shadows is just really hard to
look at the camera, especially when the
sun is so bright. There's a lot of
distracting elements. The lamp is cut here.
I don't like that. My feet were cut in the frame, and you can immediately
see it doesn't look good. And as you can see, cutting on any of the joints
and the feet hands, especially, really makes
the photo unbalanced. And there's really no symmetry. Rule of thirds should be
here, and I'm not there. It's just overall a bad photo. Also here in the background, we see a lamp that's pretty distracting.
It shouldn't be there. It takes away the tension
to where you want it to, which in this case, is me. We first of all, see that the focal length is
completely different. Comparing the first photo, we see that it's
on 35 millimeters. The background is
more compressed. In this case, it was taken with a ten millimeter, an ultra wide. So in this case, on your phone, it would be an ultra wide lens. And we see that everything
in the background is mostly in focus,
which in this case, is something I really
wanted to portray because it was the focus
should be on the person, and the flowers also take
part of the picture. So what's on the background? So something to
generally note is, the more zoomed in you are, the more compressed
the background is, but also the more
blurrier it gets. So if you have a zoom lens, if you have constant aperture, if you zoom all the way in, you'll get more of
this blurry effect. In this case, I
didn't want that. I went all the way out
almost fish eye lens, and you see almost everything you can see that's in focus. The hands was something
I found interesting because before her
hand was like this, and it would cut here, which wouldn't be great. You never cut it where the hands are or elbows or
anything like that. That's why having
your hands more up, it creates more of this dynamic movement and
more balance overall. Here is an average photo.
Nothing too special. I don't like these
distracting elements here, here, here, here. I would take these
out in Photoshop. But it really is just to show the difference between
the focal length. The first one you see really
compresses the background. This one is an ultra wide lens, so you really see
everything that's around. This is another example where you see a wide angle lens
makes a big difference. You see that the
focus is on them, but also you can see
what's in the background. If this were taken in maxim
50 millimeters or higher, you wouldn't see
all these pretty buildings that's
in the background. So this is something
to really care about when you are
going on a trip. Thus, I wanted to show
you the next picture. I took my 56 millimeter
length, so really zoomed in. And basically, you see almost nothing from
the background. It's really compressed. The mountains are all here, and you can barely see what's happening
in the background. It's so compressed with
the 56 millimeter. So the focus
immediately goes here. And I would say, also, I would edit the photo, so I would crop this
until maybe here, something like this because
the knees here are cut, which is not very nice. So I hope you got to understand
that maybe for a trip, I would maybe prefer to use a wider zoom lens
so I could have more flexibility into
different types of situations and also think about the aperture
you're going to use. If you want the focus to be more on the subject, of course, open more the aperture so
there's more of a blur and depth but if you want to
show what's also behind it, I would go a lower focal length for the phone, for example, would be maybe an
ultra wide lens so that you really see what's
around it and more in focus. I've seen, for
example, in Paris, where they would take
their 50 millimeter, which is really zoomed in, and they would take a picture of the person and the Eiffel tower behind so what will happen is it would be so compressed
and with F 1.8, it would be the person
and a little blob here of blurness which
shouldn't be the case. So be careful with the
aperture you choose. Having to think about
these things prior makes a really good photo into an excellent one when you go
into the editing process. With that set, I
hope you understood a lot of these things
that go into my mind before I take a picture and best of luck for your
very own pictures.
16. The Importance of Balance: So a friend of
mine actually took this course because he was
interested in photography, and he wanted to learn
more about composition. And he actually went
through the whole course. He had a vacation and took his camera and
took a few shots, thinking about the things he learned throughout
this course. And he sent them to
me for feedback. There are a few things
I wanted to emphasize more because the improvements
that he made now, I wanted to also add this as
an extra part of the course. The importance of balance
was already covered, especially when we were talking
about the rule of thirds. But in this case,
I wanted to really solely focus on really
the importance of it. Balance in the photo is
something that you feel. If something is not balanced, if I'm sitting
here all the time. Then the frame doesn't
really feel balanced because you have this
circle in the middle, but I'm not in the middle of it, and it feels a little bit off. So me being in the center makes sure that this whole frame feels balanced. And when I saw some
of his photos, which I got consent, of course, to show to you guys, I
noticed that some of them, I understood why he took
the photo that way. Let me just show you
so you understand. So this is the first
photo he sent me, and I understood what
he was trying to do. For example, here with
the Rule of Thirds, I understood that
he put the subject, which is the spot in one
of the focal points. I understood why he took it
that way the same way that the person that took our photo that the one I didn't
like took it that way. They learned to put maybe a subject in one of
the focal points, but they didn't
think the next step. The first step was done, rule of thirds, but the
next step is balance. So, for example, here, we see that it's in one
of the focus points, but there is no balance. If you look at the
opposite focal point, there is nothing that
we want to look at. When you look at
the picture, you have this feeling
that something's off so when I was
explaining to him, I explained that, if you have your subject
in one focal point, you should have something at the other focal point that
you want to focus as well. So there's a balance. If there's weight in one
side of the balance, there should be
weight at the other side of the balance as well. So everything becomes
evenly distributed. So you see here, I'm
at this one point, and the other point,
there's the land post. So it feels balanced that way, especially because I'm
kipping in this direction. I also explained for this
photo of me in the car, I'm in the middle, so
it creates balance. If I was in one of
the focal points, something at the other side
should be interesting. But this is not the case. That's why I decided to center. And I stay here
in the middle and at the lower line of the
line of the rule of thirds. Showing more of what's up to us, the sky feels usually
more natural, just like this frame
here right now. I'm showing you more what's up because sometimes I add text, or if I was sitting like this, it would feel a bit too
tight on the frame. That's why I usually
add the subject in the bottom horizontal
line instead of the vertical one because it
adds more balance to it. Having a little bit of room to especially if I add text
or any sort of animations, it feels more balanced. Since we're here in Photoshop, and we want to fix the
photo, something like that. I'm not going to go more into detail in terms of
fixing the photo. But you see that the photo
now feels way more balanced. You see the rule of thirds. It's at the bottom third. It has more breathing
room at top, and the subject
is in the middle. Another example is this photo, which I think it's a great
photo of so a person. We see great use of the color. The red dress really
pops out of the frame. You immediately know
what to look at. But it wasn't quite there. I only the subject would have been centered
within the frame, you see the door creates this natural frame
around the subject, but the subject isn't centered
around that natural frame. So all of a sudden, the photo
feels a bit off balance. It feels a bit weird. If
you could go back in time, I would ask the subject to be in the middle of
the door instead. So it would feel
really balanced, a frame within a frame
and popping red color, it would have been
an amazing picture. But unfortunately,
it wasn't the case. It's a mistake to
learn for next time. Think about the frame, the subject, the composition. The rule of thirds is great, but just what's in the
background is also very important and what adds to
the balance and textures. So I hope you got to learn a lot more about balance
and how to correct it and how to think about maybe the background and how everything goes
together in one piece. So the rule of thirds,
the composition, the framing with the
framing and the color, how everything works towards the balance and how
important that is. Don't worry, it's okay. You can always learn from
other people's mistakes. You can always look back and
interpret and of course, you can always post any pictures you'd like some feedback. I'll always watch them, and I'll always give feedback
to other students as well. So with that said, I'll
see you in the next one.
17. Black and White: So this is a follow up
from the last lesson, and my friend also sent
me a few pictures. Some of them were
black and white, and this is a theme I thought
I didn't really touch. I have a few things I
wanted to tell you, a few examples I wanted to
show you some examples, and mistakes that maybe you might want to think
about when you're taking black and white pictures
because black and white often is used to look trendy or
to look more creative. It can look really well. It can look it's a
great feature to have, but sometimes it
might be misused and you take away stuff
from the picture, information that you might otherwise would have helped you. I will show you a few examples. My friend took this picture, and it was in black and white. Honestly, I think it's a great black and
white picture because it has these
different textures of the rocks and the fluffy texture from the trees with
a nice little road. But I would say, again, touching the last
lesson was the balance. You see this house here
pops up immediately to me, but it's so far off left that it feels a bit weird this photo. If you were to be
framed differently, maybe it would have been
a much better photo. But about the black and white, this is not the worst
example because there's a lot of high
contrast elements. You have the really blacks
and the really whites. And that's what
it's really about. Let me show you a bad example. For example, this photo would otherwise be better if it
were to be shown in color, because the houses
would have had a different color
to the mountain, and they would have
really popped. The use of color
here would be really important because it
would really pop there. And by just taking it
in black and white, it takes away the information, which all of a sudden makes all of the whole mountain
seem kind of the same. You see the houses, yes, but I would still put color because they would really
pop out from the mountain. To have a great photo that
it's in black and white, you first must have high
contrasting elements, so really darks
and really bright. The second one is that the color palette
is boring anyway. So, for example, the
photo of the house, we're losing information because the houses are
maybe bright color. They have roof, they
have red roofs, which would have been really
interesting to see in color. But if the photo has
a boring palette, it's okay to be black and white. You're not losing much
information anyways. If the photo is all
about light and shadows, it also adds to the
contrasting elements of dark and bright. And the last one, if the color distracts
from the subject, there's a lot of distracting
elements of color. Then if you use black and white, it flattens the whole thing and it doesn't distract
the image as much. Let me give you a
few good examples. For example, this
one is a photo of the Allianz arena I
took a long time ago, and you see the high
contrasting elements. The light and shadow, you see how the light hits the outer shell of this
beautiful stadium. And this is a great example
of a black and white picture. Another one is this one
that was black and white. I might have had some
color from, like, some elements here and there, but because the color palette
was so boring already, I decided to just
put black and white to not make the colors distract from the
textures and the viewer. You see it has this
diagonal line, and it works with the balance. If you have here a focal point, you want to have a focal point
in the opposite direction, so it's more balanced. And you see the high contrast elements and
the textures make it really interesting to be transformed into a
black and white photo. This photo was taken
a long time ago, and if I were to take it now, and something I would
improve on is to have a lower aperture so that
Everything would be in focus. So you see here, the focus is on this stair, the
second stair here, but the top stair is
a little bit blurry, which is not great for
this kind of thing. It's great if you
have a portrait, and the focus is on the
person and not anything else. But here you see the focus should be on every single step, but not everything is in focus. So I would take differently. I would have a lower aperture so everything would be in focus. Having all those elements
that there's not much color already to begin
with color is not important. Having great contrast so you can understand what's going on and the play with light and shadow. These are all four
elements that indicate that maybe the photo should
be in black and white. I hope you got to
learn a lot more about this theme and this topic, and I hope I see you in
the next one. See you.
18. Active Framing: Make Every Element Count: I'm very grateful for
this course because a lot of students
were very proactive. They submitted and questioned how could they improve
their composition? But I noticed one key, very common point that could be improved
for most of them. That's why in this lesson, I decided to print a few of your examples so that I could best demonstrate
you this concept. And it is to think
about your frame. Is everything in the
frame necessary? Because chances
are if it is not, then your photo
or video could be improved by changing
slightly the position. Let me give you an
actual student example. But you see, the
focus that we have in this photo is this
cloud in the middle. And I think in itself,
honestly, it's an okay shot. Your frame is basically
this rectangle. And do you think everything in the frame is there
to tell the story? The story being the cloud, which is the main subject. Big part of the frame. You see? Actually, more than half of
it are occupied by the trees. One, the focus is
this middle cloud. So to better compose this shot, we want to enhance
the subject while telling the story of what
is in the background. The trees are
essential but not so essential to have more than
half occupying your screen. And quite quickly, if I just
quickly crop like this, you see now focus is
much more on this cloud, and it also tells a story
that is surrounded by trees. The cloud is centered. There's a foreground element. This is our next example. You clearly see that the main subject is
this house temple here. However, the elements outside are necessary to tell the story. They're there, and
they're beautiful. However, the house
is slightly shifted. In this case, we
have this part of the frame not actively thought, and this is just
extra information. We just cropped a little, and all of a sudden,
the house is centered, framed beautifully by
this foreground element, and by the rocks here, there, this little tree that maybe could be
photoshopped out. You see the difference
before and after, thinking about the frame that this part has a little
extra information. You crop, so you center it, and it makes a much better shot. This is a really cool shot. However, you see, there's
these elements here, these branches so the following what you see isn't what I did, is what
they actually did. They removed the
distracting elements and all of a sudden, Wow. Isn't that a much better photo? Also, the previous photo
felt a little unbalanced. That's why we cropped a little
here on the right side. And I save the best
example for her last because this
shot feels more like, for example, a tourist shot I think in itself is
a good memory shot. There are photos
you take because you want to remember
them for later. But if you're talking
about composition wise to be more
aesthetically pleasing, there are just too
many elements. There's this I'm not
sure what it is Paul. There's palm tree. The lights of this car is very distracting. The
car here is cuts. It's also pretty distracting. This building is
here. It's all right. It feels like the main
subject could either be this tree or this building. But they both kind of
compete with each other. The trick here is to realize
what do you want to show? What elements in the frame are there on purpose
to tell the story? All of these elements
are not there. It just creates a distraction. That's why this photo feels, you know, a bit random. But it is very positive to know that there's a lot of
photo opportunities. If you were to walk maybe
a little closer and you focus more on this
part of the building. Well, this busilding
is actual quite beautiful to maybe
you can walk around this building and
zoom in a little more and see which
part of the frames. Maybe a side shot here where the palm trees are
on the street. Might get very interesting. It's a lot of trial and error. You try you shoot, and
then you review it. See what parts of the frame are there because they're
helpful to tell the story. All photos are stories. Is everything around the frame trying to be there to
complement the story? If yes, then you should add it. If no, maybe you
can walk around, maybe you can zoom more or less depending on where you are. This is an excellent
exercise for you to maybe review older shots or maybe when you're on
site with your camera, it really helps to know
where and what to frame. I hope this helps, and I'll
see you in the next one.
19. Five Best Frames from Japan: To wrap things up, I want
to not only show you the best five composed
footage I shot in Japan, but I want to explain
what thoughts were behind it and even the process
behind these shots. These are videos, but great
looking photos can also be achieved using the
exact same methods. Let's start off with me in
an Internet cafe in Japan, entering my private room. What makes this shot
so appealing to me is the clear guiding lines throughout the floor
and the ceiling. These are naturally
created by any corridor, and they lead the attention right in the middle
where I am at. That's where your
eye should focus. How did I get this shot? Luckily, in the end
of this corridor, there was a microwave. And yeah, I would just
have to pray that no one would come because I would just put the camera there, go there, fill my
shot, and come back. And combine that shot
with the following one is the actual shot where I
enter my private room. The place where I would stay for the night for very cheap. I think what makes this shot so interesting is the
play with light. The door just opens. You see a little bit of light, and then I turn the light and
everything reveals itself. Of course, the camera being
that high creates also a very unique guiding line
that goes right in the center. And as to how I got this shot, luckily, there was
a piece of metal, and I put there my magic arm and basically hang the camera
there with an ultra wide lens. That's how I got it. For
the third set of shots, of course, I had to include
these nice train shots. And what makes
them so aesthetic? Well, there's two things. First of all, the train goes
alongside the lower third, and I decided the lower
third because you have more interesting things you want to look up instead of down. It wouldn't feel balanced
seeing the train on top, while you'd see maybe a
few things at the bottom. Of course, the train being
the only thing that is moving makes it so that it's super aesthetic
while looking at it. It creates all that
attention in the photo. Both of these charts for
video and photography require a tripod because
if you film with a tripod or you take a
picture with a tripod, everything in the frame moves and it doesn't create
that same feeling. Here, I got an example. It was raining and I had no
chance of using the tripod. It is not the same as putting the camera on top of something where it's
completely still, or if you don't have
anything, the tripod. Why everything in the
frame is so still, but only the train moves. That makes it so beautiful. The store name is somewhat in the middle of the frame where
it should be focused on, but more importantly,
it's the depth. I purposely decided
to put the camera on a tripod on the other
side of the street, zoomed in so I could
create this depth feeling. Basically, we have a
few cars passing by while I go in the store,
right in the middle. The road is slightly inclined, but I framed it so that the
store would be straight. If there's anything I could
change would be the tree, but I couldn't control
that, so I had to be there. And in this last shot where I had a rental friend in Japan, this was the final scene
where we said goodbye. I was just explaining to him, how would we go part ways for the final scene
of the video? Cameras on the tripod, were the only
things moving here. There's no people
in the background. There's leading lines leading to the center where
we're standing. This shot is nice. A general rule for
photography or video is you know where
you should focus on. And that's why we
combine everything, centering it, maybe the rule of thirds, leading lines, light, all of these things that
we learned throughout this time was to only make
sure that the viewer, me or you know exactly
where to look at. And especially for video, the best shots are
the ones where you put them on the bench
or tripod because still and clear shots
elevate them so much more. Thank you so much for watching, and I hope you
learned something. I'll see you in the last one.
20. Thank You for Watching!: Thank you so much for
taking this course. I hope you understand that by mixing and combining all
of these tips together, we'll raise the potential and how well composed the
shots will look like. The best way to
level up your skills is to actually get
good feedback. So always feel free
to share any shot, any artwork or any
video with us, and I check all of them. And if you want, I can also
give some pointers and feel free to ask any questions also in the discussion tab. Feel free to post a
review. It really helps. I also created other courses about video and other aspects. Feel free to check them out. I also post weekly videos on my YouTube channel with really detailed videography
and storytelling. Feel free to check them out. With that said, thank you so
much for taking this course and best of luck with your
future projects. See ya.
 Edi Liang, Physicist + YouTuber