Transcripts
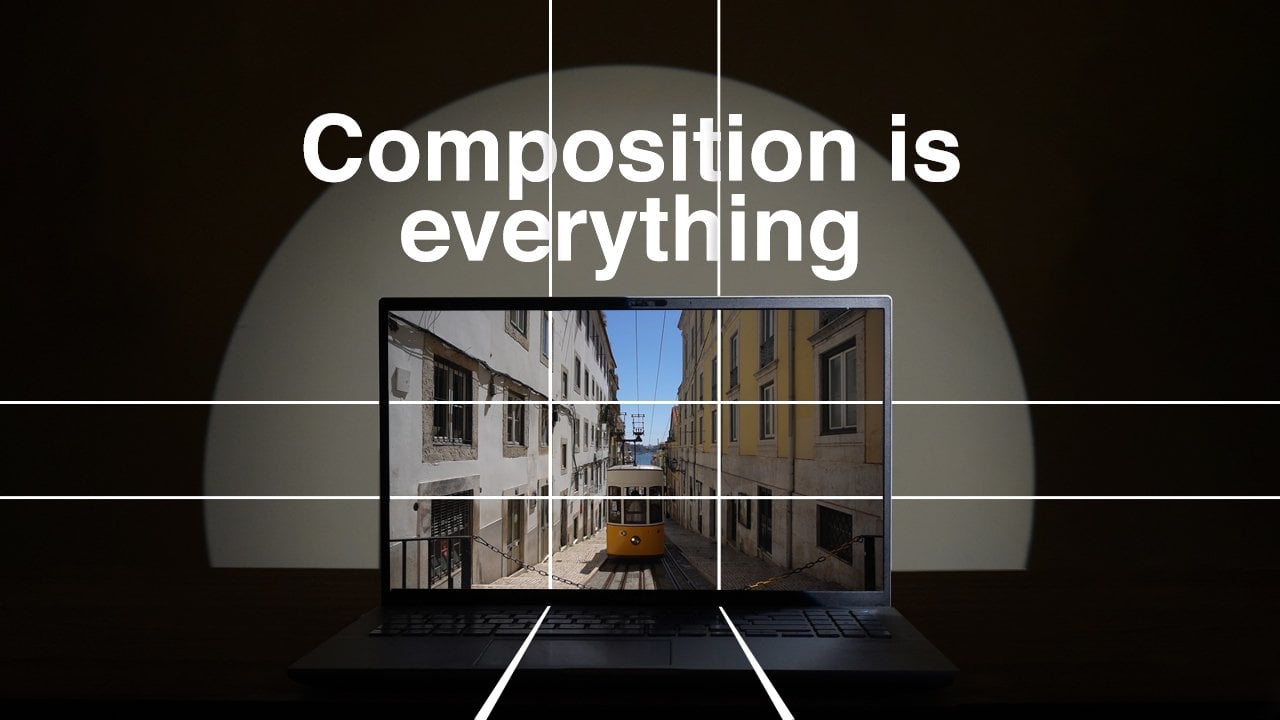
1. Welcome to the Class: Good creative shot
can immediately tell the audience that your video
is a high quality one. An unexpected angle can
surprise the viewer, making the audience intrigued, fixating their eyes
to the screen. And, hey, I'm Eddie. I've been doing creative
videos for years. Through hundreds of videos, I got to evolve my
creative camera angles, ditching the ones
that didn't work, and keeping the techniques
that worked really well. This course condenses
everything into an easy to follow step by step method onto how to get your
shots looking like this. And this box, you might ask, it actually contains the
first level of five for you to progress more creatively in a short amount of time. If you are creative, all
you need is a camera. You don't need all
this fancy equipment. I started off with level one. But it is crucial to
learn what the other gear does and to know what's
worth investing in. Also, throughout the course, I will suggest cheap
alternative methods to the shots with the proper equipment that I use myself for
a very long time. No level is better
than the other. I use them all personally. It just goes from more basic to very
creative, very niche. And at the end, you can
submit a photo or video as a project demonstrating
any technique that you'll learn
throughout this course. And there you can also ask
any other questions for me, myself to give you feedback or from any other
students as well. With that said, let's
see what's inside this box for level number
one. See you then.
2. Level 1: Surroundings: H, it's actually nothing. What I actually meant by that is to use
your surroundings. This might sound
basic, but trust me, there's a lot of
untapped potential that you might not see. This technique is very useful outside because with
the other gear I have, I don't really use it indoors in a more controlled
environment. Because I might not expect
to actually shoot something, but I want to get
creative sometimes. I see a good moment, a good shot, and I
have to get creative. I use my surroundings
like chairs, tables, or garbage cans. And here is step by step
to actually do this. Simply place the camera
on the desired place, check for composition,
brightness, or focus. Press record, run to
the place you need. Do the action, run back to the
camera and stop recording. One big advantage of
this technique is that using anything else just
creates a lot of attention. This is why sometimes you just got to use
the camera itself. It's this way. Let's just take a look
at some examples using level number one that wouldn't
be possible otherwise. And fun fact, I was actually
born and raised in Portugal. So a lot of shots will be there, and this one's in Lisbon. In this case, I have
this beautiful setting. The weather's perfect. I have a symmetric shot
and an electric. However, I was really
just strolling around, and I only had my camera, but no tripod because you don't want to break this
in the city all the time. And it was very casual. I was just looking around. So in this case, I knew a handheld shot where I'm just holding the
camera as steady as possible wasn't going to cut it because your hands
are just not perfect. It will jitter. It will tremble. If you see handheld footage, you just know it's not from
a tripod or a static point. You know it's handheld. Unless you use a
lot of slow motion, but in this case,
I didn't want to because the shot of the
electric going down. I want it at a normal speed, so slow motion is not an option. This case, there was
a safety railing. And what I did was
pose the camera, see the composition was
right, zoomed in out, see if the exposure is
correct and press record. And the shot looked beautiful. And when the electric was gone, I actually used my
phone to position my camera and angle it a
little more up like this, and I could get a
different kind of shot. More zoomed in, zoomed out. I just tried to get as
many different shots that would look beautiful. Of course, other
equipment would work. But in that place is very busy, and there's a lot
of people going by. So in this case, level one is the best choice. Another option here
was in the airport, and I wanted to film myself
looking at the screens. So all I did was pose
the camera on the floor. I used my phone again to really
angle it up. I made sure. I manual focus to the screens, and the movement, and
the timing was perfect. I was just centered just right, and the shot came out beautiful. And the next example
is at the beach. I was with friends, so it
was a casual environment. I wasn't planning on
shooting anything. I just brought my camera. So all I did was to
actually put the camera on a garbage can that has
the perfect height for us. And as you can see, it
turned out really good. It looks like as if
I used the tripod, which I really didn't. It's not every time I bring the tripod as it is
pretty cumbersome. It's a pretty big object
to lug around every time. So sometimes you just
have the camera, and you have to get creative. And sometimes I'm actually filling myself in a supermarket, so I want to close my
camera on different places. And in this case, it
was from the baby seat. I just angled the camera
up and strolled around. It's a very simple,
but very creative, a unique angle that
people don't really expect to see when shooting
with a shopping cart. Now, it is your turn. Next time you're outside and you don't bring the tripod
or anything else, you only have the camera Just know that good shots
are always possible. You always have to think
where you can safely put the camera on and what
angles you can do. Don't forget. Maybe you
always have the phone. At least me, I always
have the phone so I can angle the camera up or down
at several different angles. That helps a lot. You can have beautiful shots
more often than you think. If you do this
exercise a lot and you see what environment
you have, the time, where you can place the camera, you'll truly understand that you don't need all that gear
that you think you need. So practice and guck.
3. Level 2: Tripod: Level two is the single most
important piece of gear. I recommend anyone to have, and it is the tripod. Tripod because it
has three legs, and you can put it
basically anywhere. You can adjust the height
up or down, high, low. You can put it basically
almost anywhere. Instead of being limited to a few points where your
camera can be positioned, the tripod allows your camera to be truly almost anywhere. You can be in a
place where there is absolutely nothing
to put your camera on unless it's on the floor and your tripod can help you get
that height that you want, or the perfect composition that you want anytime, any place. Now, if you already shot around, you might have experience
with the tripod, but there's a few
things to consider to actually and truly unlock the potential that this
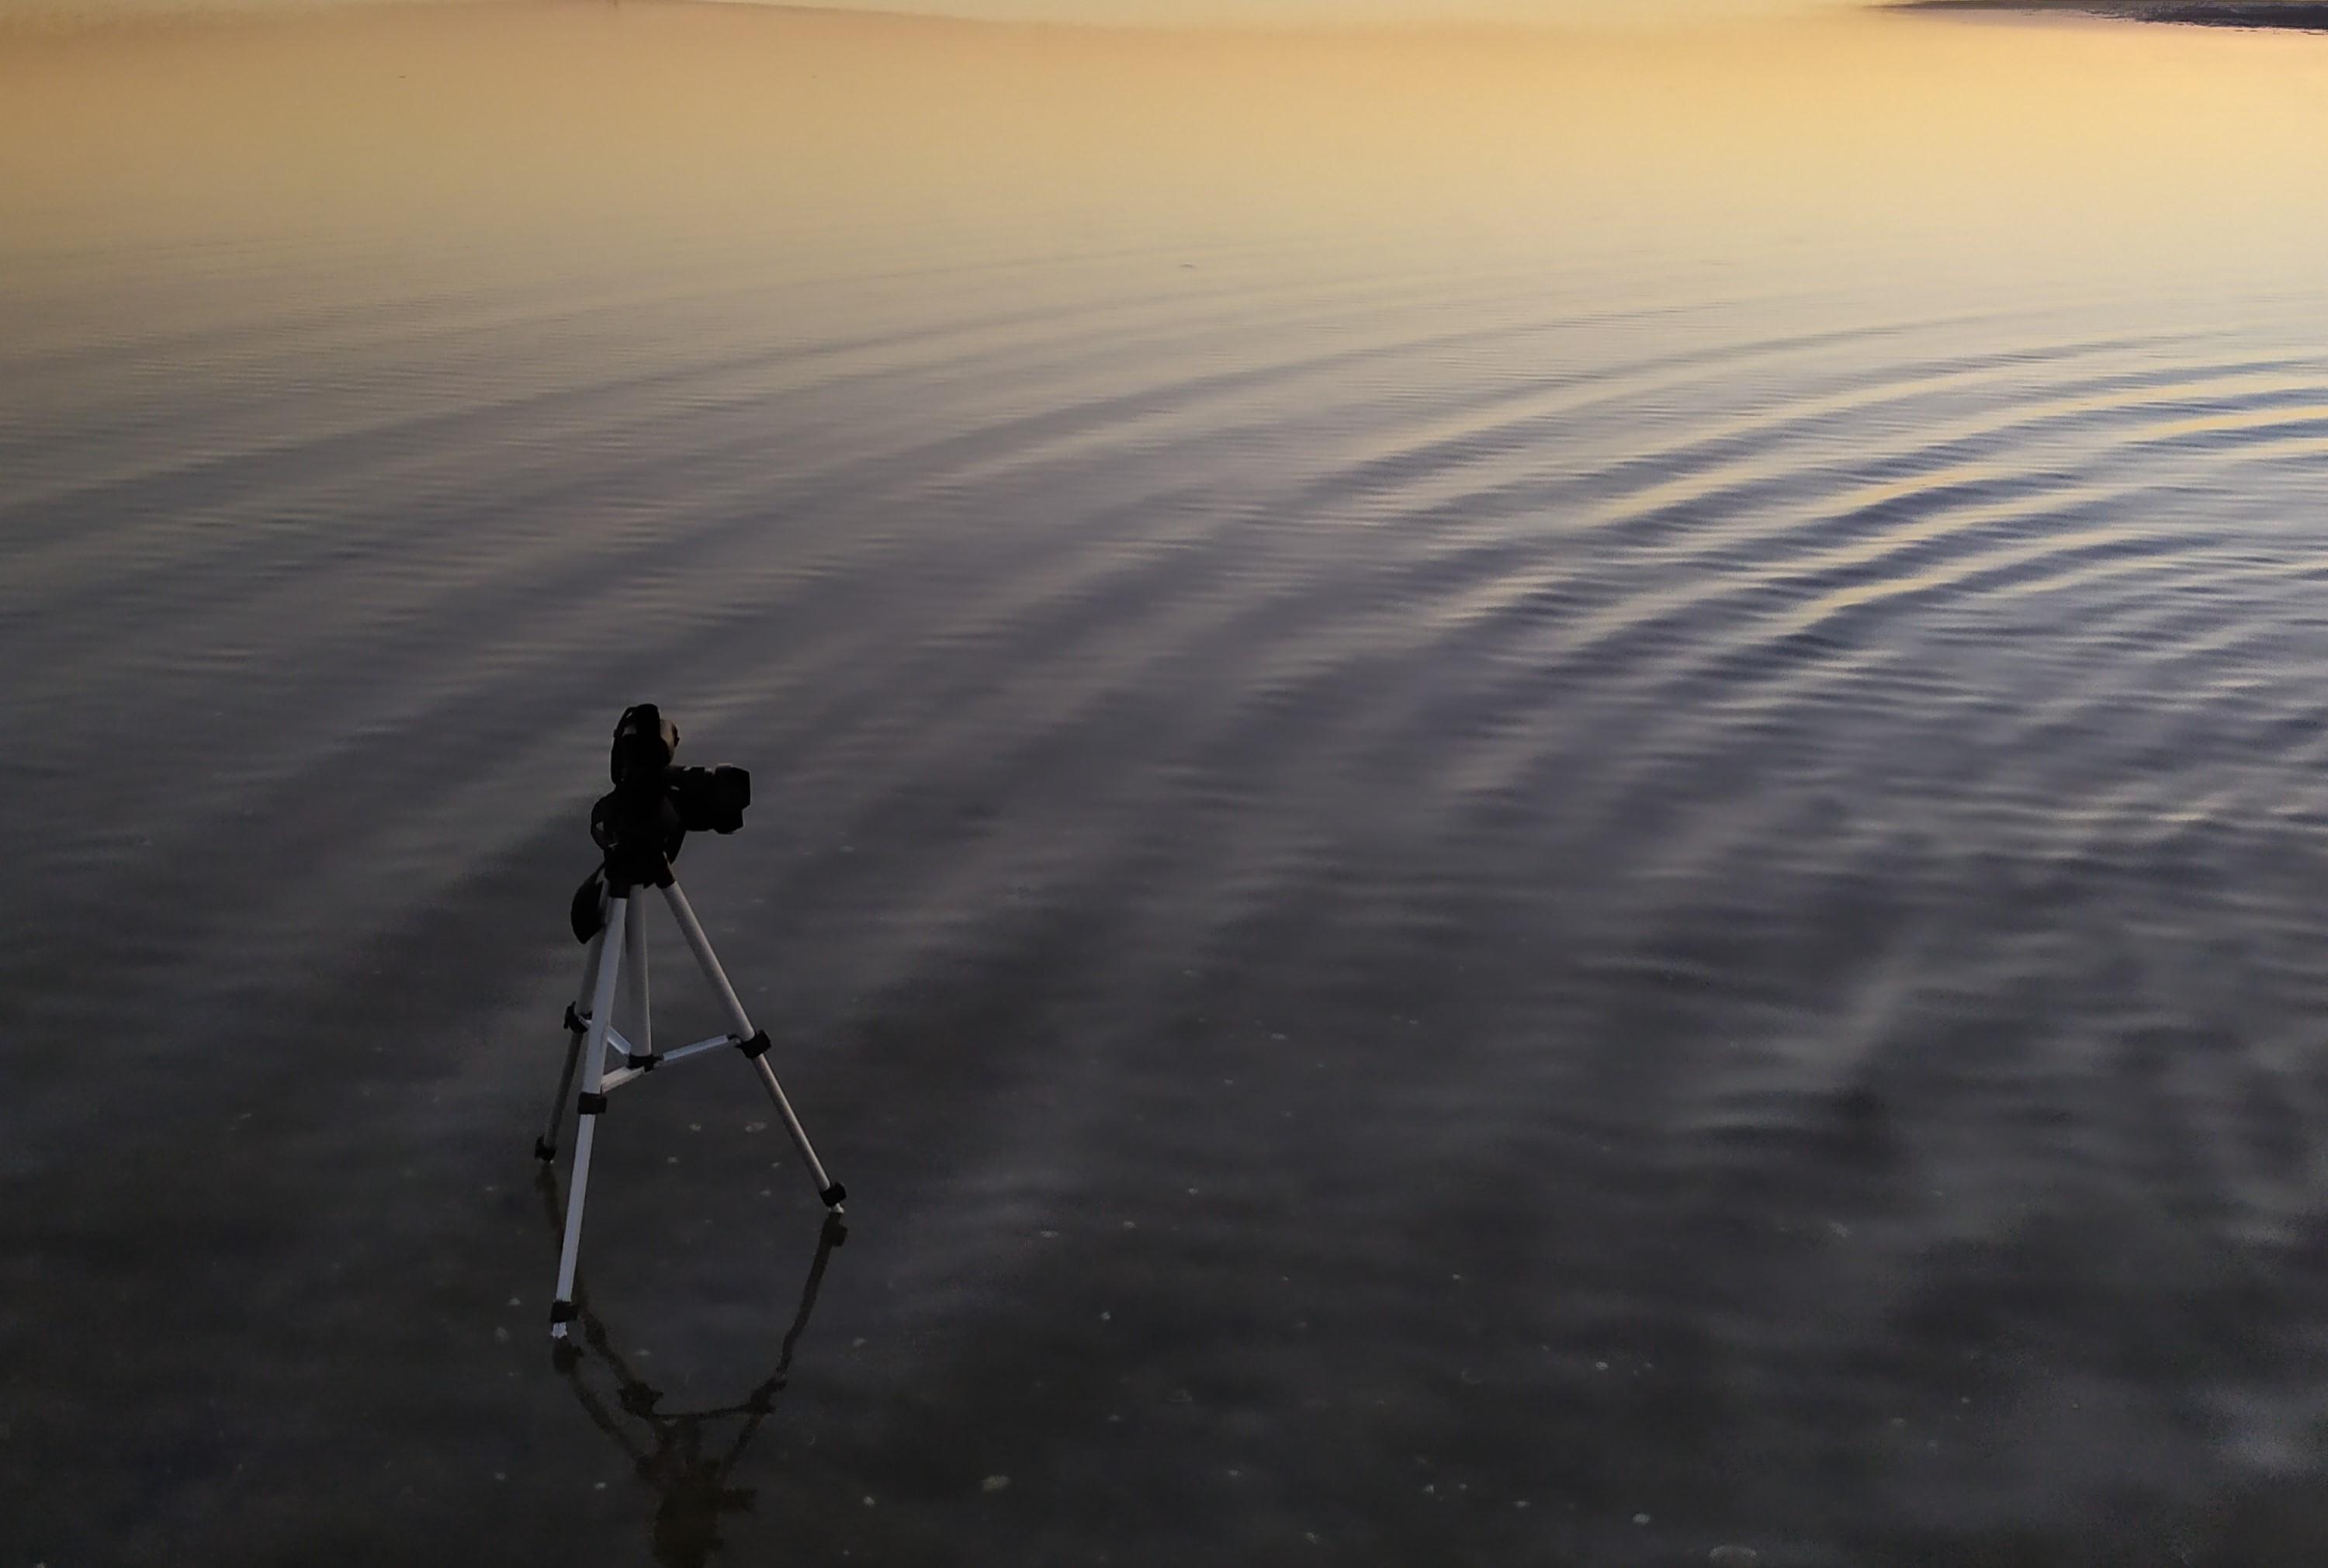
piece of gear has. Have you tried to
position really far away, like at the beach? In this case, I put the camera on the tripod angle
it correctly, and I ran to the point just
walking and doing my action. Be aware I could only do this
because it was 5:00 A.M. In the morning, and there
was absolutely no one. In your case, maybe you can
ask a friend or someone you trust to look out for the camera while you run away
and do the shot. But sometimes that's just
not always possible. And you see, I was truly alone because after
I did the action, I started running back
because I wanted to save memory and not let the
camera roll too much. Or have you tried really close? The tripod truly allows
for you to get any angle, any composition you really want and show any kind of
detail with a close up shot. The tripod is a tool that
can do almost anything. The trick to unlock its
potential is to actually think about where you can
and how you position it. Usually, the harder the shot, the more creative it will be. Since us viewers are so used to this medium
angle like this, like right now what
you're seeing. Putting your tripod in the other positions,
maybe really tall, really low, really far away, or really close, really
changes things up. Of course, those shots
shouldn't be the only ones, but having a few here there really mixes things up and
makes the viewer go like, Wow, this is different. This is actually
really creative. And using all of these
different positions, you really catch the
viewer off guard with this very unique angle and keep the attention
going within your video. So let me give you some examples of some really creative shots. Maybe you can inspire
from these or take note, some ideas. Let's take a look. So in this case, I was
filming myself, studying, or doing something
on the computer, and I wanted a very
different shot. Of course, I could put the
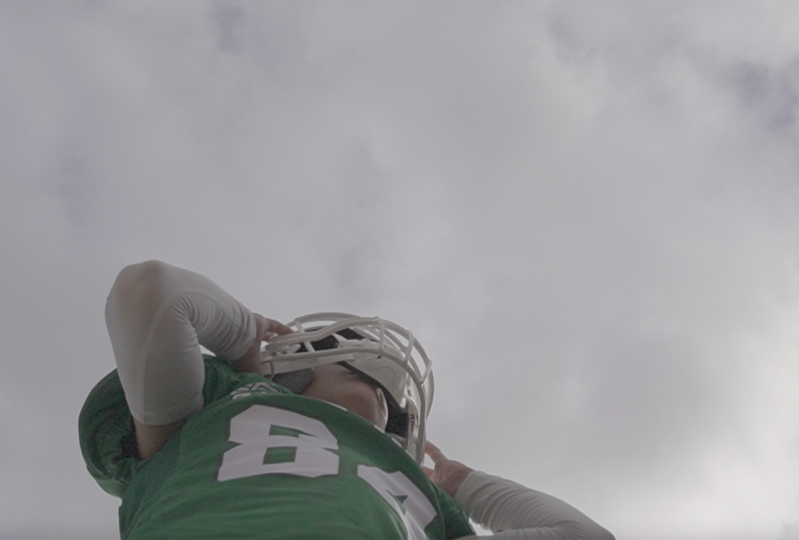
tripod inside the room, but that would be too easy. For a really creative shot, I decided to actually
think outside the box. In this case, outside the house. To give a feeling of depth, I decided to put the
tripod actually outside, pointing the camera inside
the window. This is it. I think it looks great because the window creates a
natural frame around me. Or for the feeling of the video, it actually gives also a slight sense of loneliness
because the subject, me, is very actually far away. It occupies not a
lot of the screen, and you have a lot
of negative space, the space that surrounded. Not only that, but it also gives information of
the surroundings, the time of day, where I am. It is just a really
creative shot. Doing the extra work of
actually going outside, putting the tripod,
click record, going inside, and do the action. This is what really
sets apart from a mediocre shot to a
really creative shot. And in this example, I wanted to film myself, driving the car,
arriving into the beach. So what happened was there was literally nowhere
my camera could go, unless if it's on the floor. But the shots on the floor
have a different feeling, and I just wanted a normal hide shot where it would only be possible if the camera
would be on the tripod. So in this case, I went
to a more secluded road, slightly more away
from the beach. And I set up the tripod
in the middle of the road and I ran. I drove the car into the
middle of the screen. It actually took a few shots
to actually get it right. Yeah, that was it. This shot gives continuity to what
the previous shots were. It also again gives this
feeling of where am I? This wide shot gives
a lot of information. Again, going the extra mile
just for that nice shot, it really gives that
creative feeling when you actually see it. These do take work, but it is always worth it. This next example, instead
of doing this normal height, I decided to set the
tripod extra height. So many people actually
don't know this, but if you want
to go extra high, you open all the
legs all the way up, and many people set
the tripod like this with all three
legs like so. What you want to do to
get that extra height, you go everything on the max, the legs and this middle
part all the way up, and instead of setting
the tripod like this, you can set the tripod like so. What you're doing is you're
making it slightly higher, but you're trading off
a little the stability. So be careful. It's a
little more unstable, but you do get that
nice height that you wouldn't get otherwise if you'd set up the tripod normally. So, from some shots, I really like to chain things up and use a really high
angle with the tripod. It's a really unexpected
use of the tripod, but that's what makes it created because not
many people do it. I hope with these examples I got to broaden your horizons. Yes, the tripod is
the most basic tool and the most versatile
tool. Everyone has it. But how you use it makes a difference in the world
to how your shot looks. Now, it is your turn. If you don't have a tripod, I seriously recommend you to
get one, even a cheap one. Those work perfectly
fine for video. And if you do have one, I recommend you think maybe
a little outside the box, or what kind of shots
are you used to do? And do the opposite. So if you're used to doing
these type of shots, maybe a little higher
or a little lower. If you're used to
this distance may be a little closer or
a little further away. The extra work
you're putting into your shots really
show up at the end, and it's always worth it. And when the shot
is so beautiful, it's just pieces of eye candy, that's what I like to
call and makes the viewer engaged and more attentive
to your content. Never underestimate the power
of the tripod. Good luck.
4. Be Careful About This: This lesson will be about the mistakes to avoid.
Please don't make them. My lens just fell, and it broke. I'm really mad
because look at this. The tripod is the
single most use piece of gear, especially outside. If I'm filming something,
I'm not leaving without it. But there's a few
things to avoid. I wasn't mad about the
lens being broken. I was fortunately the kit lens. At chip lens, you can find second hand for less
than 100 euros. I was mad because I
woke up at 5:00 A.M. I came to the beach
before sunrise, and the moment I
started filming, I guess the wind
knocked it over. All of the planning and
the work for nothing. New land was ordered
and back on track. This time, avoiding
these simple things. The first thing to note
is your surroundings. Where you place the tripod differs a lot from the
type of ground you use. Softer grass is a little safer
in case of any accident, but a little more unstable, compared to solid rocks
where it doesn't wobble, but in any case of accident, yeah, it's pretty bad. Filming on sand is
something different. Just be careful that the sand might get stuck
between the grooves, but apart from
that, you're fine. The second thing to note is to always extend the legs first. Always the legs first. If you extend the legs, it provides a wider base. The wider the base,
the more stable it is and less likely
it is to tip over. However, if you instead are extending the
vertical middle part, you are raising the
center of mass, which only adds to more
instability and shakiness. Some tripods even have a hook where you can
put the backpack at the bottom for more weight and lowering the center of mass, making the whole
thing more stable. Light tripods like this
one are good for travel, good for hiking, but
they are more unstable. The third thing, and this
is what I didn't take into consideration is
where it might tip over. When I was at the beach, I placed the tripod
pretty randomly, and I didn't think about
the leg positioning. I placed the camera, of
course, in the middle, and the two legs parallel
to each other, like so. Problem is the tripod
is pretty light and the wind was blowing pretty hard into the wrong direction, which made it tip over. So the next time at the beach, I made sure to be correct. So the level the
level isn't as high. I only use one level instead
of two, so it's more stable. And this time, I put the
third leg here in front, so it doesn't tip over
forward like this. If it tips, it has to tip
this way, which is easier. And I used the bag as a pillow for some sort of
protection for the camera. This time, I think it's safe. But still, don't be
afraid of filming. Your camera is safest at home, but it is not what your
camera is made for. For your next outing,
keep these tips in mind, and everything will be
fine. Best of luck.
5. Level 3: C-stand: The main limitation with a
tripod is that you cannot just film a nice overhead shot like this with this
piece of gear. So with this, you cannot
just film directly upwards to downwards,
with the tripod. Now, I know it's not very common for people
to own s stands. They usually a little
bulkier, a little heavier. They occupy a lot of space, a little more hard to set up. But that's completely okay because knowing what it can do, the potential it has not only unlocks your brain into
more kinds of shots, but it also might help you in the future to know if you
want to invest or not. This was a piece of gear that I thought about it
for a month if I should buy or not because I used a lot of overhead shots
to show a lot of things. And I can tell you when
I actually bought it, it was totally worth it. So a C stand is basically
like a very big tripod. The biggest
difference is here at the bottom where you have
three different legs. In this case, it has wheels, but most C stans don't
actually have wheels. And the big difference,
you can adjust the rot any height or angle you
want, just like so. This is not only for cameras, but it can also attach lights, or if you use the rod like this, you can attach a curtain to diffuse the lights,
some like that. In this case, I use for a overhead shot where the camera is pointing
directly down. So if I were to have
the table here, it would be perfectly level
90 degrees towards the table. And with this, I
can really go high. Really goes way high. It touches the ceiling
eve and I cannot. That was just one
level, by the way. And just compared to the tripod, you cannot lean it that much. To have such a vertical angle. It's just not possible
with the tripod. So if you have the table, you can of course, have a
static shot, a static shot, is a shot that the
camera doesn't move, but you can also incorporate
some movement to it. So if I unlock this lever, it unlocks this sideways
movement, just like so. And if you do it slowly enough, you can do shots like this. With the C stand, you can unlock so many other potential shots. You're working at
the table and you go pick up something
else, you rotate it. Or if your C stand has wheels, you can slightly move like
so translated in space. Now, it is your turn. If you do have one, maybe trying a shot like this
from time to time, just don't overuse it. The C stand will provide a very unique angle that not many people
are able to do it. And that's why it would
look so creative. And I know SE San
isn't very common. If you made it
this far, I really recommend you to think
if it's worth it or not. In the next lesson,
I will give you a cheaper alternative
to an overhead shot, but this comes with
some limitations. With that said, good luck.
6. Level 3.1: Unlock the Full Potential of Your Tripod: So in the previous lesson, we went through the C stand, what it can do,
what's the height, what type of shots or
movements it can do. But I know not everyone has one. So I dedicated this lesson
to a cheaper alternative. I personally didn't have a C stand for many years
because of this cheap method. That's why in this lesson, I want you to use
the cheaper method, a piece of gear that
almost everyone has, which is the tripod. With this, you can
have an overhead shot. I will also cover how
I obtain this shot. Which is a nice lighting one
by just using the tripod. For a top shot, you could use the C stand where the camera
is pointing directly down, but the cheaper method is
to actually use the tripod. You unlock all the legs to make it at as
extended as possible. You open it up. We want to lean the tripod
slightly like so. This is how I'd be optimal. In order to do this, we need to decrease the length of
the front two legs. With these front two
legs slightly decreased, the tripod naturally
already inclines forward. You extend the middle part, and then if you put
the camera here, and you rotate it like so. You can already see
a top down shot. Of course, this is only possible if the tripod is
leaning into something. Otherwise, it
doesn't really work. If you're doing other types
of shots that are top down, this is not very flexible. This is only good
for a limited space. It's very limited,
not very flexible, but for many years, I've used the strick to
get a overhead shot. Without having to
really buy a stand. To get a shot looking like this, you actually need to change the angle to look at the floor. To make this work,
we need an object that slides around
easily on the floor. In this case, it's
just a sweater. You can also use a carpet
upside down so that the part that slides in
ice is facing the floor. All we need to do is to
put on the floor like so, make sure all the three
legs are connected, and all of a sudden, you can
slide it easily like so. It's so simple.
It's that obvious. And if I'm rolling something, if I'm putting an object, let's use this camera. I would literally just use
the same movement like so. And of course, this uses a lot of tries
because it isn't perfect, your hand isn't perfect, like so compared to a slider. But this works on the spot. I usually have to do a
few tries to make it track directly with my
hand or a rolling motion. But if you try and try, there's just going to be one
time out of so many that's going to fit perfectly and
roll exactly like the object, and it's going to look great. With a simple sweater
in this case. Now, it is your turn. If you do have a tripod, I really suggest you're practicing a little
with the camera. Be careful with the
angles and the balancing. Not too much forward, so it one tip forward,
and not too much back. It really doesn't look
like an overhead shot. Really find the balance. And about that sliding
shot, isn't that cool? It is a lot of extra work just for a few milliseconds
of footage. But those few milliseconds of footage is what really makes
a difference to your video. So consider if you want to incorporate one in your
next project. Good luck.
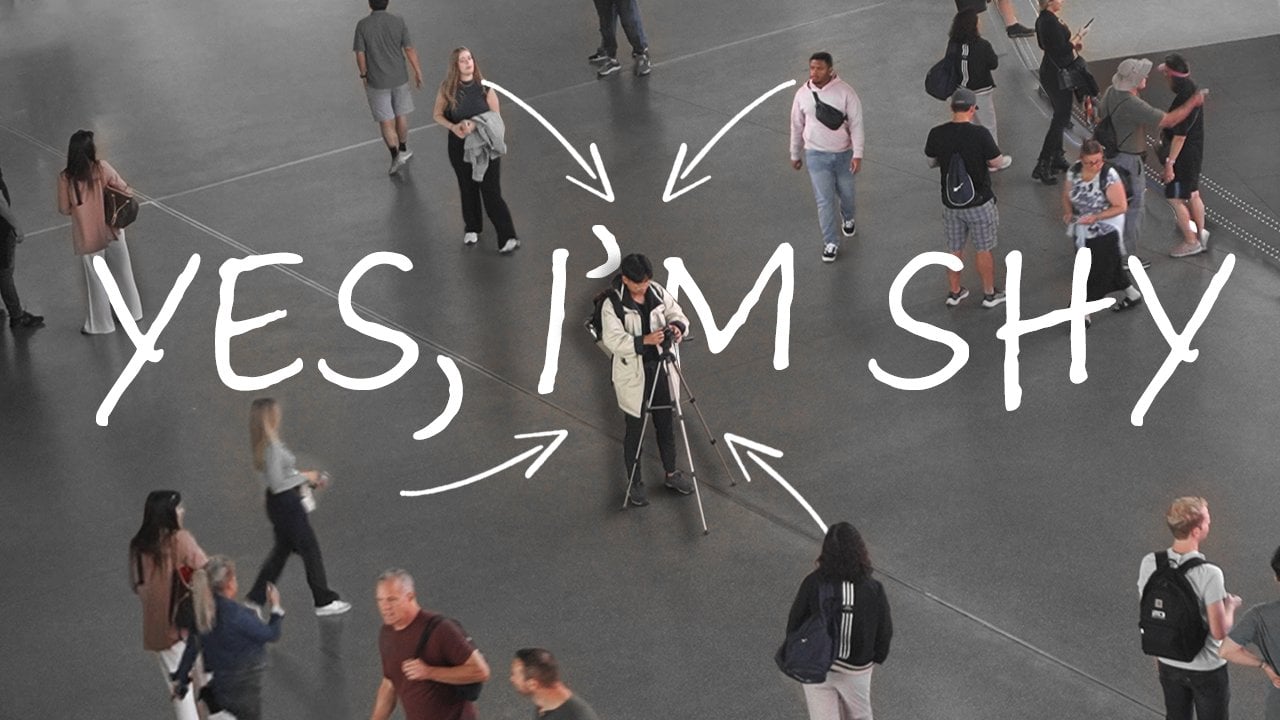
7. Level 4: Action Cameras (Not for action): There are certain occasions
where it is physically impossible to really get the shot with a
normal sized camera. Sometimes you're in
public and you can't really have big cameras to
make people uncomfortable. Sometimes you're outside,
and most importantly, sometimes when you're capturing with a normal sized camera, it captures a lot of
attentions from other people. You see people
looking at the lens, and that's actually not good if you want to capture
genuine moments. Like going through
the security of the metro in Beijing, camera. Or when I was giving away photos with this
printable camera, I wanted to really film their honest and genuine
reactions without me filming like this and
making people uncomfortable. Oh, yeah. This is cool. Thank you. I just do this for f. I wanted to make
something seamless, just a normal interaction, without making too much fluff, without actually
having a big camera pointed at them like this. So this was actually only
possible with a small camera, a small action camera. The metro was insanely packed in Beijing
at that peak hour, and I would really find it uncomfortable both for
me and the other people. I I went around filming
like this in public. It would just get too
much attention and the reaction of people looking at the camera is not
something I want. So I want the genuine emotion. I want the actual real deal. Yeah. Yeah. Good job. In this case, this was only possible with a
small action camera. This one specifically can even separate itself to
make it even smaller, and it's magnetic, so I can
put it on my chest like this. This is how I was able to get these POV shots
without people really noticing the camera itself and getting the genuine
reaction I actually wanted. Because it has magnets, it can stick around any
magnetic surface I want. So for example, this overhead
shot where I just stick the camera on the metallic
part of the freezer, and it also allows for a POV shots like this if you
attach it to your chest. Which makes it the
perfect camera to film POV shots,
like, for example, here in this sunflower field, where handling two cameras
would have been too much. Oh, Kind of looks cool, but kind of weird. And also, in other
situations, more in public, where I want to foster
these genuine reactions, where I give the photo
to the people and see them genuinely
positively surprised. But the biggest downsides
with these action cameras is because they're so small,
they're physically limited. They have amazing technology, but their sensor
size is just small. It's comparable to a foam. So the quality isn't the best compared to a
normal sized camera. You can definitely tell the
quality between these two, but if most of the video you use the nice quality camera and you sprinkle a few very creative
shots for here and there, people won't even notice. Actually, the most
important aspect of your video has
to be the story. So first, if your story is engaging, you're
doing it right, this will only help to aid the video to make
it more creative, sprinkle a few shots
that you would never see otherwise with
a normal camera. So a mix of these two is
actually the best idea. Now, it is your turn. I hope I got to broaden your horizons to what
action cameras can do. Most people think they're
just used for action, but you can use this for many other things
due to their small size, you can attach it to
many different places. Many shots just wouldn't
be possible without this. So if you have one,
maybe decide to incorporate them a few
shots here or there. I would say, don't overuse it because the quality
is not the best. But if you use it correctly, most of the shots with
this normal sized camera, and a few very creative shots
with the smaller camera, then you got yourself a nice mix of different perspectives, and just overall make the
video that much nicer. A few sprinkles of this
makes a huge difference. So good luck.
8. Level 5: Magic (Literally): For the last level,
I saved it up for the piece of gear that
allowed me to have the most impressive shots
without almost no downsides. For example, you don't
have the loss of quality from the previous lesson
with the action cameras, and it's not that bulky like
a C stand or even a tripod. The piece of gear I have
is actually this thing. Let me show you the type
of shots you can produce. Drive down for him
with the windows down. Feel like we were on this town. S on the radio. The one you always like
the one that always gets you sighting Drinking
on a cheap one A. That a stupid by the fe This thing is actually
called the Magic arm. And how it works is actually you attach the camera
on one end like so. And on the other side. What makes this so
special is the hook, because you can attach this
to practically anything. And once you're
happy with the shot, you lock everything by
rotating the middle part, and it stays fixed to
whatever angle you want. So let's take a look
at a few examples. In this first one, I
use the hook to attach it to the metal bar
of the car seats. Oh, close it right here.
Make it tight as well. And with this, you can see you have all the
freedom you want. You can rotate any
angle like this, you can point it
down, you can point it forward, you can point it up. But in this case,
I wanted to point exactly like so directly
to me as I'm driving. And once you're happy
with the position, all you need to do is
rotate this middle knob, make it really tight. And as you see, it
stays in position. And it allowed me to have a
very stable shot like this. If I were to use the tripod, it would probably be unbalanced, and with the
movements of the car, the tripod would
probably tip over. But having this attached
to the car itself, it became actually
really stable. And the shots came
out incredible. For the shopping segment, I used the magic arm again, but for more creative shots. I attached it to the bottom
side of the shopping cart, and it allowed me to film the wheel in a
very creative way. And in the photo,
you can see you can basically attach
it to anything. Compared to a tripod, this thing is huge, and it attracts a
lot of attention. Compared to a setup like this, it's very much so the opposite. People don't even notice it, depending on where you put it. If you remove the hook,
which you can do, you can attach two
cameras, one on each side, and this allowed me to get
this very creative POV shot where one of the
cameras is here and the other camera that actually filming is on the other side. I hold the camera and it
almost tracks the camera, making it for a
really creative shot. Another use for the hook is to actually just hook it to
other objects as well. For example, a pan, like so, or you can also use a fork or any other kinds
of objects as well. The uses of this arm
are almost endless, and the creative shots
you get are incredible. This is truly a piece of
gear that's really cheap, and it allows you to expend so much of the type of shots
you could actually have. And actually, some other days, I don't even use the tripod. I bring this instead of the
big tripod that I have, because this is
that much smaller. Now, it is your turn.
Isn't this awesome? The type of shots
you can actually have are almost endless
and very creative. If you don't have one, I strongly recommend
you to buy one. As it broadens so much of the potential cinematic
shots you could have. And if you have it, I
hope these examples inspired you to try new things. Try new type of shots
for your next project. With that said, Good luck.
9. Level 6: Let's add some motion: Now, you might be wondering, Eddie, why is there
a sixth level? Wasn't it just
supposed to be five? And to that, I say, Yeah,
you're definitely right. When I originally
scripted this class, I included five levels. But as I'm continuously
learning more, I'm adding extra levels
that provide value to you. One example actually was
the tripod that fell, and I thought simple mistakes could be taught and
avoid in the future, not only for me but to anyone taking this
course, as well. Well, today, I'm
going to introduce you to something I always
thought about investing, but never did until now. And well, it was worth
every bit of money it cost. You've seen how different angles can completely change
the feel of your shots. But what happens
when you add motion? This is where sliders come in a game changer for taking your creativity
to the next level. So the first thing we
can already notice is I can adjust
completely the speed. Right now is at
the slowest speed, and you can see it's slightly just going left really slowly. And the snob, if I rotate it, it goes faster, faster, faster until the
max speed like so. Like this, the camera can
use side shots for panning. But if you just
rotate it like so, you can use for shots that
you're panning just forwards. With all motorized sliders, you can also adjust from which point you start and
which point you finish. It doesn't need to go all the way from the
beginning to the end. Motorized sliders also
have the capability not only doing this in
the horizontal plane, but if you tip over vertically, it also works, which makes for a nice upward spanning shot. Something really neat also
this motorized slider has is that you have the
ability to adjust the tilt. So, for example, like so. And instead of just sliding
left to right, it will, in this case, also rotate
like so. You'll see. You see how it rotates
the plane like this? If you adjust the speed, really slow, the advantages, it goes really slow
but very uniformly. And what you can do is you
can do time lapses around this activity around this area while this thing
moves really slow, like, so making a
tracking motion, which becomes a really
good shot at the end. If I stop and adjust
the opposite way, you'll see instead of
doing the inwards, it will point outwards
like a panorama. This is really good
for landscapes. So as you can see,
this motorized slider, you can use it for so
many different occasions. And this one
specifically is really to use and you don't
need to use an app, which is a plus for me. And especially if you're always filming at
the same place, which I am right
now in this room, the slider is a fantastic tool to diversify your shot options. All of a sudden, with this, you can do cool transitions or you can do really
neat time lapses of anything you're doing. With that said, now
it is your turn. If you're willing to get your
shots to the next level, consider trying the slider. I hope you got to
learn everything that a motorized slider can do and how such a
simple motion can make your shot look from
just being static to something more dynamic and a little that much
more interesting. Remember, motion can elevate
even the simplest of angles. Good luck and keep creating.
10. Level 7: The Power of Fog: This is a tool that
is often overlooked. It's simple and easy to use. You can take your
shots from looking bland to cinema levels. When we're outside
and it's a foggy day, we can see how fog adds depth. But with the machine, you
unlock the potential of your shot indoors to
look that much better. So, you see, this
is the living room. There's some sun
from the window, and there's no fog whatsoever. So I'm going to use
the fog machine and see what will happen. And to disperse a little
the fog, it's quite dense. I'm just going to wave my arms around and
see what happens. Turn down the exposure a bit. The difference you
can see immediately. I mean, dispersing
a little more. And the before and
after is shocking. Just by having a fog machine, all of a sudden the scene
looks way worse cinematics. This is called Tindle effect. I know because I
have a degree in physics, but that's irrelevant. Just like how you see
the beams of lights of the cars when it's foggy at
night, the same happens. You see, you need to be careful because if you spend too long, the fox starts to dissipate. And the more it dissipates, the less effect you have. You also have to play a
little bit with the exposure. The higher the exposure, the more brightness you'll get, and the more of the
sulfactor you'll see. So you just have to
find that sweet point. If it's too dark, then
you cannot see anything. If it's too bright, then
it's just too white. The perfect spot is
something like this where you can see
the streaks enough, but everything else is exposed. You're adding
particles that float around where the
lights can bounce, making you and the camera able to see the
paths of the light. Doesn't this just look much
better and more cinematic? If you have your own lights, you were able to see the
trajectory of the light. And with the right angle, it makes for quite
some striking shots. Now, it is your turn. Convinced, it's a
cheap device that really ups your video
or photography level. Maybe consider using it.
11. Thank You for Watching!: Thank you so much for
taking this course. I hope I got to
teach you a lot of new techniques with
gear that you might not have known otherwise
or to unlock the potential of pieces of
gear that you already own. Please do leave a review. This really helps. And if you have any doubts, you can always post them in the class projects or
in the discussion tab. Apart from creative shots, the most important thing
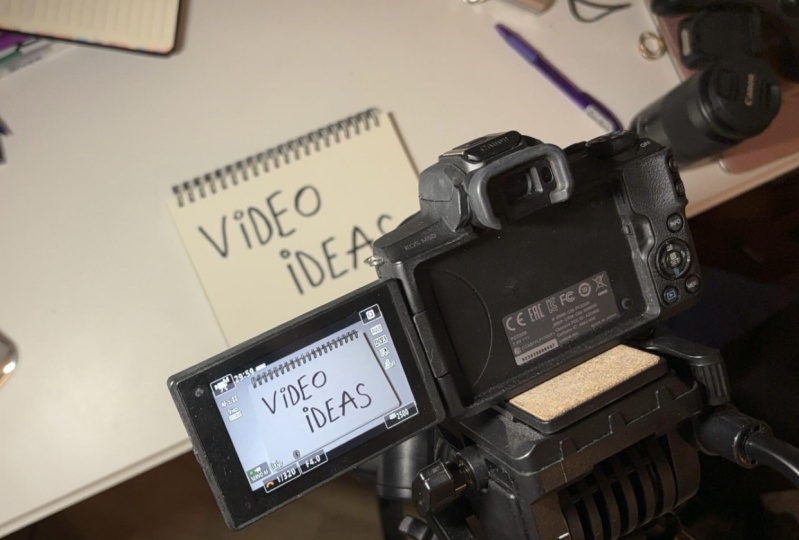
in the video is the story. I've made a course
about it going from an idea all the way to writing a script of the
story, filming, and editing. Feel free to check that out. I also post weekly on YouTube with really
high effort videos. Feel free to also
check them out. With that said, I
wish you the very best of luck for
your next project, and I hope this
class could shape or optimize the way you
should video. Thank you.
 Edi Liang, Physicist + YouTuber