Transcripts
1. Why Should You Watch This Course?: My name is Michael Moore, founder of WMD game dev. And my goal is to
make you the best game developer and the
most fun way possible, developed a strategy that
has helped thousands of aspiring game developers achieve their goals of creating
real-world games. And I want to do
the same for you. What I've learned
is that it can be very difficult to
know where to start and what steps to
take to go from beginner to intermediate
to professional. Not only in game development, but in programming and
learning how to code. And this is where the
strategy comes in. We start off by learning the very fundamentals
of c-sharp programming, Unity engine, and game design. We then delve deeper into
every single aspect. So your game goals
from boring cubes, who epic weapons,
your code from basic, advanced and your game
developers skills from complete beginner
to absolute master. And I can say with
absolute confidence, the scores makes it easy
for any beginner with a 0 coding experience
to jump in and start learning how to
create incredible games. I've helped thousands
of people create real-world games and I want you to be one
of those people. So how are we going to do this? We delve deeper than any
other course into animations, gold or deans, character
control, particle systems, gone systems, enemy AI,
first-person mechanics, health system, weapons system, and all of those are just
the tip of the iceberg. So what should you expect
might be under the scores, you'll become a master
problem-solver. You'll understand
the fundamentals of coding and learn how to program games just like the ones you're seeing
on the screen right now. You'll also have the chance to flex your game developer muscles because with every
video there is a mini challenge for
you to complete. Even if you can't
figure out how to do the challenge, Don't worry, I will be there
to help you after you've tried and
complete the challenge with everything in our game will be configurable
so you can tweak, play around and
give the game and individual and special
feel about it. You'll be putting
your own creativity into it and really
making it your own. I'm so excited to get started. And OPO R2, this is the perfect time to start
learning how to code. So dive in with me and
I will help you along every single step of your
game development journey.
2. How To Use This Course: Hey, welcome back, my fellow game developers. So I've created this video in order to set you up for the rest of the course. I wanted to create this video in order to maximize your learning potential from the scores. So you can leave this course with the maximum amount of learning that you can possibly squeeze out of it. So let's get started with the Q&A. Or in our case, it's going to be the Discussion tab right here. So let me turn on my laser. So this is our discussion tab. So under every video, you have the option to ask me a question, start a conversation, or you can even share the project that you are going to make at the end of this course. So for example, let's say you have some complicated question that you want to ask. You can ask me in the discussion. If you have maybe a small recommendation that you want to add, that is very possible. You can also add it right here. If for example, you want to share the project that you've come up with at the end of this course. You can also do that right here through the discussions. And before we move on, I just wanted to make everything clear right here because sometimes you everybody gets into a certain position where they don't completely or fully understand what they are doing. So I want to make sure that you understand that. It's really it's really easy to ask me any question that you have. Don't shy away, don't be afraid. But keep in mind that what I want is I want you to go out there and try to figure out the solution for yourself. And if you feel that at some point you have exhausted all possible solutions, then you can come back and ask me anything that you want. Remember there are no bad questions. There are only students that are afraid or don't have the courage to ask the questions. So always be courageous. Always. If you've exhausted all the possibilities, there are things that should not understand or want help with. Then go ahead and ask me in the discussions. One more thing. If you feel that your answer has been solved, you can go ahead and edit the question and add this solved right here. And what this does is, first of all, it helps other students, just like you, find solutions to their problems if they are already there. And it also helps me know that the questions in that you wanted to ask is already solved or if it needs more delving into and solving. And now let's talk about the Discord server. And this is where you can go deeper into the community that we've created here on WMD game dev. So you can go either to the link in the description of this video or you can visit my profile and find the link somewhere in there. And I do recommend that you join the discord. Why? Because most of the time it might take me a couple of hours in order to reply based on where are you from. So maybe our we live in different time zones. Maybe when you do ask me the question, it's midnight and you need a solution fast. I might be sleeping, I might be not able to get to my computer. So it's very beneficial for you to join the discord channel that we've created. And let me just show you the score channel right here. This is the beginning of our underscore channel. You can see that we have the general community. We have the C-sharp chat, we have the game design chat, we have the show off your game. We have the general game development questions. And you can see that we still don't have anything in here because it's fairly new as I'm recording this. But later on, when you go in here, you'll notice that there is a huge community of people waiting to help you and maybe people waiting to get help from you. And it's very beneficial to try to solve other people's question. You wouldn't believe how much I've learned from just helping other people. And you can see here that we have multiple courses. These are all the courses that double m gamma game down has or I've created. And we can see also we can share memes and here we have general game discussions, AAA games, I don't know whatever you like to play. We can discuss them in here and the social channel or category and so on and so forth. So I do recommend that you join our discord server. It's very fun. We are going to have a lot of fun there. And that's it. That's all that I wanted to say about Discord server, the challenge slides. Now what are the challenge slides? These are slides that you are going to be encountering almost every single video. And this is your challenge slide. When you see this slide, you pause the video and do the challenge on it. So whenever you see this kind of slide show up, you can see that it has a main title, for example, the download Unity and Visual Studio. And then it will have a couple of instructions for you to follow. And sometimes I also give you a couple of hands to try and do them by yourself. So whenever you see the slide, you see this pause, read big, big red pause button. You need to pause the video and then go try and do whatever the challenge tells you. Why are we doing this type of challenges every single video? Well, because personally, me, Michael, I've went through a lot of courses, a ton of courses. The problem is that I always see as that the instructors go through the motion and they keep talking and doing and talking and doing, and you follow along and by the end of the course you have a very good game and it's working and everything is fine. But what I found is that in the long-term, I actually haven't learned how to do anything. I just learned how things are done. There is nothing for me to, there was no incentive or nothing very concrete that I've learned from these courses. So this is what I wanted to do. It's a much better way to learn when you pause the video and you actually go out of your way, do the challenges. Even if you have no idea how to do the challenge, you need to pause the video and at least give it 510 minutes to try everything in your power to do that, because doing is always, always better than watching. So let's say you get a challenge. You have no idea how to do that. Try your best. It doesn't work. And then you can continue the video. You see how I do the challenge, how I completed, and it will be ingrained in your mind for other. Whenever you try something and you fail at it, you then have a much better chance of learning after you've tried. So I encourage you to always pause the video, always take the time, even if it seems impossible and you have no idea how to do it, maybe search online, do your best, try to do the challenge. And usually what, whatever the challenge is, I usually do something in a previous video and then a couple of videos later, I do the challenge. I give you the challenge to do something that we've already covered. So it's never going to be something outside of your boundaries of learning. Okay, Great. So let's talk about the course structure. So in section one, which we are currently on, we're going to do a bit of an introduction. So we'll talk about how to learn from the scores, will download Unity and setup with Visual Studio and we are going to be setting up our world. We'll also learn about a very powerful tool, which is version control that will allow us to set up everything. And It's a tool that is used by very professional developers, not only game developers, but any kind of programming developers. So if you already have unity and you already know what Visual Studio is and you have version control set up. Then I recommend the To move to the last video in this section, which is the setting up where we will set up our world. And then you can move on to the next section. Section two is where we are actually going to start building our cyberspace 2087 gain. And we're going to start off by adding, our player will be setting up the character controller, allow us to move. We are going to start moving our player from the inputs of the person that is playing our game. We are going to take our first step and we are going to set up the first-person camera on top of our head. So will begin to move our mouse, looking around with a camera and moving our entire player body, but it will be a small capsule around our gain. Next thing we'll start with the section three, where we'll introduce shooting into our game. We're going to create bullets, will be firing these bullets. And we're going to create a way to actually point our boots to a certain location that we are looking at using something called a re-cast, which is going to be very exciting. We'll also create a couple of enemies that we can shoot down. Next thing we'll move on to section 4, which is advanced moving. And this is where we'll be adding. Gravity, will be jumping, sprinting, crouching, and sliding our way into destroying all of our enemies. Next we have Section five, which is advanced shooting. And this is where we're going to create a con, system. Now, in the normal part of shooting, we're simply going to have a small block, but an advanced shooting. We're going to have multiple weapons, like a pistol, a very advanced and good-looking pistol will add ammunition to our game. And we are going to create ways to aim down our site. Next thing we have the enemies because of course now we have an amazing movement. We have amazing shooting, but we don't have any smart enemies to shoot that. And this is where the section 6 comes in. And it's about animating our enemies will create a i for our enemies that will chase us if we get close and if they catch us, they will start attacking costs. And then we move on to Section 7, which is the health, health system. Because currently at this point in our game we have enemies, we can shoot them. They can hurt us. The well actually they can hit us, but they cannot actually hurt us and we cannot hurt them. And this is where the health system section comes in. And we'll add a health system to the enemy. And we'll add the health system to our player. But not only that, we are also going to be displaying these health systems using a Health Bar, 14 us and one for the enemies on top of them will also learn how we can actually respond our player whenever he dies. We then move on to weapon system in Section 8. And it's where we're going to be adding more weapons, will be picking up more weapons, and we are going to add a rocket launcher to our game. We'll also add a mechanism for reloading and animations for reloading. All of that will also create a system for picking up health and ammunition as we go through our gain. Section 9 is the very exciting part because this is where our gain will come to life. We'll add audio in the background. We'll add audio to our guns. And we are going to create a very good menu that looks amazing. We'll also learn how to create pause menus and all of that. And we move on to Section 10, where we'll need to create a world for our player to kill monsters. And so we'll be adding world assets will add different ways that we can actually make our game look much better using post-processing. We'll also learn about how lighting immunity works. And we'll learn how we can transition between different levels when we get to a certain point and our game. And finally, we'll have the bonus section. And why did I call this bonus section? Well, because all the core game mechanics, we'll be finished by Section ten. And bombs section, which is a grappling hook, will allow us to, well create a grappling hook that we can put onto the buildings and then we zip to that point that we've chosen. And it's going to be very nice, It's going to be very cool and it will really make it feel like you're Spider-Man. Anyways, as you saw, the scores is packed with information. Et has a lot of things to do. And before we start, I just wanted to say something that if you put in the work and to the scores and you really give it your all. You will come out of it on the other side with incredible Unity and C Sharp Skills. And this is my goal. My goal is not just to sit here and create a game and let you watch it. You can do that anywhere you want. My goal is for you to end the scores. Being a master problem-solver, I want you to be able to create this game from scratch by your own. And this is why urge you to put in 110% effort into every single video and always make sure to do your best with the challenges. Never shy away from asking me questions, but also try to figure out things for yourself. And if you can't find out, find out how to do it or something is a bit too complicated for you. Never hesitate to go into the Q&A and ask me any questions that you want. With that said, I hope you enjoyed this little video where I talk about the course. And in the next video we'll start, we'll start downloading unity and integrated with Visual Studio. So I'll see you there.
3. Download Unity and VS: Welcome back, my fellow game developers. In this video, we are going to be downloading unity and stalling it, and integrating weathered the Visual Studio tools that we are going to need for the scores. So let's get started. First thing you need to go into Google and NGO called simply type in right here, download unity. It's as simple as that. When you type in, you will get a lot of suggestions. So make sure you find the one with the Unity 3D.com and the Get Unity of course, and click on the download unity, which will open this page right here. So in here you will need to download unity help if you have never before used Unity. Now, what is unity Help? Unity hop is like a place where we will keep all of our versions of Unity and also all of the projects that we make. Now before unity help, our project will be all over our computer, somewhere in different directories and so on. So we need to help really makes it much easier to go through your project and really have, if really good organization. So make sure that you download unity based on which operating system that you have. So if you have the MacOS and need to make sure that you download the unity 40 MAC OS. And if you have a Windows seven, then you downloaded for Windows seven. So simply click on Download unity hub. And when you finish downloading, Q should have this installation folder right here. When you double-click on it, it will ask, do you want to? Yes. So you continue on, you click on Agree, you choose the destination where you want to put your unity hub. And then you start the installation. Now because I already have unity husbands told I will not install it again. So make sure that you install everything and I'll see you in just a ow. Kay, welcome back. So if you've installed Unity help correctly, you should get a message or a window right here that looks something like that. Now, we don't have any projects yet, but this is where our projects will all be present and we can access them at our leisure. Now, before you continue on, humanity will have to make sure that you have an account. So this is my account right here. I used my Google Gmail to create an account on unity. You can either create a new account or you can also use your Gmail or Facebook. I'm not sure if they allow that. And once you've created an account on unity, you can go right here into the Installs. And this is where we download different versions of Unity. Now, for this course, I'll be using the latest version of Unity that we currently have. Now, if you want to install a new version of Unity or any kind of version of Unity, simply go right here into the ad. Click on add. And here you can see that we have different types of unity that we can install. Now, first of all, we have the recommended releases. These are the ones that have already been tested and thoroughly tested and they work perfectly. But you can also go and look for the official releases. Now, we are going to be using this version right here. And this is a very good version. You can install it. And you also have the pre-release is now pre releases are do work the same as the official release and the recommended releases, but they are sometimes a bit buggy and you may encounter a couple of bugs on the official releases. There also might be able to bugging issue, but they are not as evident as in the previous releases. You may not encounter any problem, but I would recommend that you use the official release because they are newer than the recommended releases and less bloody than the pre releases. So download the latest version that you have on your computer. Or currently maybe you are from the future and you have a newer version than me. So download the latest version and don't worry, discourse works or the project that we are going to create will work on any version of humanity and the future. Now, we are going to click on next right here. And this is a very important part of downloading and installing Unity now. And here we have modules, and these modules are like add-ons to our unity that allow us to create games on different platforms. So for example, in here you can see that we can now load modules for different platforms. So for example, if you want to create a game on Android, you can use the module for Android. Or if you want to create a game for the iOS or iPhones and so on. You may also be looking to create games for Linux or Mac OS or what. So, based on what you want to create, you can choose one of these model modules, or you can just wait later on, you can download these at any point. You also have the documentations which I recommend you download. These documentations are the unity documentations and they are very important. Maybe sometimes you want to look up certain things. And finally you have the language pack. And maybe if you're Chinese or Korean, I'm not sure what these are, honestly, I have no idea. Maybe you can use one of these language packs. But the most important thing, and you need to make sure that you have the Microsoft Visual Studio Community 2019 or newer installed with your unity. Because we are going to be using Visual Studio to code everything, everything, and all the behaviors of the objects that we create in Unity. Now, this is all you need to do. Simply click on next and you will begin the installation of your unity. So with that said, it's time for your first challenge. And your challenge is going to be to download your unity and Visual Studio. So download unity hot, just like I showed you, make sure that if you have a Mac, you download the Mac version. If you have a Windows, you download the Windows version. Then you need to download the latest release. And finally, make sure that you also download Visual Studio with unity. So pause the video right now and go ahead and download unity with Visual Studio. And in the next video will simply go over the interface of unity and Visual Studio. And just so we can get over our initial fears. So I'll see you in the next one.
4. Unity & Visual Studio 101: Hello and welcome back, my fellow game developers. In this video, we are simply going to be explaining what Unity is, what Visual Studio is, how they communicate with each other. And we'll explain a little bit about the interface of both these amazing tools. So first of all, what is unity? Let me put on my laser. Laser, please. Okay. So unity is a cross-platform game engine developer by, developed by Unity Technologies. So what do I mean by cross-platform? Cross-platform means that it can be used on different kinds of platforms. For example, unity, Windows and Mac OS will be using Unity to develop our games. And we of course going to be using this Unity engine right here. So before, let me just show you the interface of unity and we will move on to explaining Visual Studio, and this is unity. Congratulations, you've made it this far. So first of all, we have our toolbar right here about everything. And this toolbar provides access to the most essential working features. On the left, we have the basic tools for manipulating the scene view and the game objects within it. In the center we have the play and pause and step control right here, which allows us to play our game, pause our game. And then we can also add a step frame by frame. The buttons on the right gives you access to unity, collaborate, and the Cloud which will not be using and the accounts. We also have the layers right here that we will be using a lot in this course for our project. And we finally have the layout and bi-layer. This is our layout right here. So we can change the layout, for example, the two by three or the four split. Or we can basically use the default and this is what we are going to be using. So if you don't have the same interface as me or different kinds of layouts. Simply click on here, go to default, and we will both have the same interface. Now, next thing I want to talk about is the hierarchy window right here. So if we click on this right here, we can see that we have a main camera and this is our scene view. We'll get to our scene view and we have the directional light right here. But this hierarchy, hierarchy right here represents every game object in our scene. So each item in the scene an entry in the hierarchy. So the two windows are enhancement inherently linked. The hierarchy reveals the structure of how game object attach to each other. And you will see in more detail what I mean by attached to each other. Now next thing we have the scene view right here. And if we right-click on our mouse button, we can actually move around using the a WASD keys right here. And you can see that we can move around our world. And in here we are going to be building our games. We also have another window right here that is the game, and this is our game view. So this is how we see our game. From the camera's perspective, will be changing everything around. And this is where we are going to be most focused on later on with our game creation. Next thing we have the inspector window on the right and let me go back scenes. So in an inspector window, you are allowed to view and edit all the properties of the currently selected game object. So as you can see right now we have the directional light selected. We can increase and decrease the intensity. We can change the color, we can play around with everything. And we also have the main camera right here. We can also change and play around with various properties. And the inspector right here. And these technical words are very important because I will be using them throughout the course. So remember a hierarchy inspector, the scene view, the game view. And finally, we have the project window right here. And this is where we display the libraries and assets of our game. So if you click on assets, currently, we have nothing else besides the scenes. And if we double-click on scenes, we have the sample scene right here that we can double-click and enter, we can save. So we don't have anything besides our scenes. Next, let's talk about Visual Studio and what it is. Oh, okay, so what is Visual Studio? So Visual Studio is actually Microsoft Visual Studio and it's an IDE. What is an ID? It's an integrated development environment. And what that means is that it's like an environment for us to develop integrated code into Unity. So this is a very complicated explanation, but this basically is where we are going to write all of our code. And VS will help us write the code use to manipulate game objects in Unity using scripts. So what our scripts? This is the way we use Unity with Visual Studio. So we want unity to communicate with Visual Studio and unit. You are going to be creating game objects. So for example, the car that we want to move while not got the player that we want to move around. The maybe objects that fall down, maybe some kind, the weapons that shoot the monsters that attack us. We put these, all of these objects in Unity. But whenever we want to manipulate them, we are going to use Visual Studio. But unity and Visual Studio don't automatically work together. The way we make them work together is through these scripts which are dot CSS files. And this is where we write all of our codes in the dot CSS files in Visual Studio and there, and from these scripts we are going to manipulate the behaviors. Of the objects that we have inside of Unity. So let me just show you how Visual Studio looks. So this is Visual Studio. Let me just zoom in a bit. And in here you can see that first of all, we have these three lines which are using something, using something and using Unity's engine. Now these are called namespaces. And what these are, they are a collection or a library of codes that allow us to use certain things in our game. So for example, the Unity engine allows us to use different aspects of unity. For example, the physics in Unity. It allows us to access various details in Unity that without this. So for example, if we remove this line right here, we can no longer use mono behavior. And because we are not using 10 behavior, which we'll get to in a second. We can no longer use start and update. So we'll turn this back on and we can use mono behavior. Before we get to that, let's first talk about what public means. Public means that it's for everybody. There are two types. There are public and there are private. We'll get to that also. Later on. We have the class and we have the class name, and this is actually the name of our script. And we will learn that we have to always make sure that we name our class correctly the first time, because it will create a lot of problems for us. So this is how we create a class and all of this code will be written automatically so you don't have to worry about it. These two points right here means that we are inherited, inheriting mono behavior. So what is Monte behavior 10 behavior are, well, we use behaviors that are already built into Unity that allows, allows us to control the various game objects. And because of money behavior, we can use two methods or functions, which of course will be later on getting into like start and update. And actually in here you can see that we have this green line. And this green line means that this is a comment. And whenever you want to create a comment, you simply put these two back slashes behind it. And whenever we put two backslashes behind any code, it means that this is a comment and it will not be executed in cold. Great, so what is start? Start is called before the first frame update. So when ever the game object that has this script attached to it starts, the code inside of this start method will be executed. And similar to start update is called once per frame. So every frame our game goes through. This method, update will be called an everything inside of it will be executed to put it more simply, start is where we put our initial conditions. So for example, the weight of the car, the speed of our player, the climate maybe. And then update is where we make our car move. We make our player jump, and we make the climate change, for example, the wind blows up or something. And the other, I don't know. So this is how we basically use Unity with Visual Studio. Of course, in the future as we move through our project, you will have a much, much better understanding of the start and update and everything in it. So don't be worried too much if you don't understand everything right away. But now you have a challenge in front of you. And your challenge is going to go and make a mass. So open Unity and mess around. Click on a few things. And when you're finished, go to the next video and we are going to be making our first code and get started. And if you still don't know how to create a new project, don't worry about it. In the next video, we are going to create a project and make our first go. So I hope you enjoyed this video and I'll see you in the next one.
5. Your First Code: Welcome back, my fellow game developers. In this video, we are going to be creating our first game object, creating our first code and C-sharp. And as you can see right here, we learn how to clear things. We learn how to collapse stuff. When we hit play. We can see that we get one message that is hello Michael. Your name will be here. And below it we have hello Michael a lot of times and as you can see, we have this ones and here we have an incrementing until infinity. So let's not waste anymore time and let's get started. Oh, okay, so let's get started. First thing we're going to do is we're going to open up our Unity Hub right here. And we're going to click on a New. Now in here, we are going to start creating our project. We can choose the 2D template, we can choose the 3D template, we can choose the high definition RP. And this is where we create games with much higher graphics and universal render pipeline. Or you rp, where we create good graphics but not as high definition as rp. So for example, high-definition RPR for like AAA games and you RPR like for, let's say, in the advanced indie games. But for now we're simply going to choose 3D. You're going to choose the location, for example, in here. So the location will depend on you where you want to put your project. And in the project name, we are going to name this as our first project, the Hello World. So click on Create. And now we are going to wait for unity to create our project. I will use the magic of editing in order to move past through this long process and I'll see you on the other side. Oh, okay, So welcome back. I hope your project creation is finished. And if your layout is not similar to mine, you can click on layers right here and choose default. And we will both have the same layout, Correct? So first thing first we are going to, well, the whole point of this video is that we are going to be creating a object that will have a script on it. And this object that has a script on it, we'll put something to the console right here. And if you don't have Console, you can go to Window, go here to General. And you can see that somewhere in here we have the console right here. So Window general and a console click on it. You will have a window around here, so it will probably be like this. You can actually choose to dock it wherever you want. So we can dock it right here next to games. But I prefer to docket right here next to projects. Great. Now, first thing, what are we going to do? We are going to create a game object. And it's very simple. We simply go to our hierarchy. We right-click, and in here we can choose what type of object we want to create. We can create 3D objects that we'll do later on. You can create effects. We can create light, we can add audio, we can add video, we can add UI, which are the canvas and so on and so forth. But for now we'll simply going to create an empty game object that we are going to call hello world printer. Great. So as you can see right now, we have this game object. And if the way we move around the swirled is, as I've told you, right-click and move with the WASD. And as you can see, this game object is empty. It doesn't have anything. It only has these three arrows right here pointing out. And if we look to the upper right corner, we can see that the blue one is the z axis, the green one is the y-axis, and the x is the red axis right here. As you can see on the right, we have this transformative. And if we move on the x-axis, you can see that the x increases. If we move back, it becomes negative. And this is the position of our game object. Now, if we go up here in the toolbar, we can actually choose the rotate tool, or we have a much smarter way of doing things is by clicking the Iike. So when we click the Iike, we automatically go to the rotating tool and if we hit the red, we rotate around the x-axis. So now if we rotate backwards, you can see that the rotation angle changes, can also rotate down and our x rotation is positive. We can also rotate on the y-axis. We can also rotate on the z axis. And finally we have the scale, but, but for now we will not be changing around scale. It will not be as noticeable as with different objects. So for example, let's say you've created a mess right here and you move the object somewhere very far away. And you want to actually make the, well, a recent D position, the rotation and scale. We can go in here into the transform. We have these three little buttons right here. And if I click on it, we can actually reset the entire game object, The 000, 000 position and 000 rotation. Okay, Great. And in here as you can see, it disappeared somewhere. Why is that? Well, because we are, we are not selecting it in the hierarchy. So if we click on the main camera, this is our camera, and this is what we see whenever we click on the Play button right here. So endgame for click on again, we can see that this is what our camera currently seats. So backend scene, we can move this up, we can rotate this also down and up and inherit. You can see the game view. So if we move it down and keep just a little bit of white appear, Game Mode, we can see that it's exactly the same. Now, let's put this back and we actually are not going to reset. I'm using Control Z to go back from all of the things that we chose. And we also have the directional light which will not be using currently. So backend hello, world printer. If you click on the w, we go back to changing the position. Now, what are we going to do? We are going to be creating a script in which we are going to be printing things out to our console. So down here, inside of our assets, we are going to right-click. We're going to go to create. In here we have the option to create a C-sharp script. Let's click on that and stop everything that shoe are doing. Do not touch anything, don't click anywhere. This is a very important part of creating any script. Even when you become a professional game developer, you need to make sure that you know what your script is going to be called. Because if you want to change it later on, it's going to be a pain in the butt. So we are going to make sure that we name or script correctly the first time. So back in here, we are going to click on backspace to remove everything. And we are going to call this Hello. World was a with a capital H and a capital W. So hit Enter. As you can see in here in the inspector, the code compiles. And when we double-click on Hello World, it opens up and Visual Studio O k. So now we are ready to start coding. So as you can see, what we named, our script is actually our class name. So why did I emphasize the point of naming our script correctly? Because if you want to change the name of your script, you will have to change the name of your class. And there are also going to be a lot of other errors that you need to address before you continue. Okay, great. So now what are we going to do? Well, we want to simply print something to our console. And the way we print something is we'll go into start right here. And we'll simply write print. And as you can see, Visual Studio immediately starts helping us. So it notices that we are writing something that is similar to print. So it gives us, this suggests not only that, it gives us an explanation what this print actually does. So in here, it logs messages, the unity console identical to debug dot log, which we'll be using later on, but for now we'll simply use the print. So when you get to this point and you choose one of the options that Visual Studio gives you. You can simply click on Tab and it will continue on its own. Will open these two bracelets or brackets right here. And we are going to put these two quotations and site. And then here we are going to write hello world with an exclamation mark. And now, as you can see, there is something wrong. First of all, we have this x right here with one error, and we have this little squiggly red line. And if we hover over it, we can see that it tells us that the, there is an error and it expects a semicolon at the end. So let's add this semicolon. And now you can see that whenever Visual Studio finds an error in your code, it will actually tell you about it. So as you can see right now, whenever, when we added the semicolon, all the errors have been saved. All of the arrows have been removed. And finally, we need to save the script. And this is extremely important. If you look up here, you can see that there is a small asterisks next to our helloworld dot cs. And when this asterix means that we have not yet saved our script. So save that we can either go to File and click on save like like our grandpa Zeus to do, or we can simply hold Control S and we save our script. Anyways. Now that we've saved our script, we go into Unity. And now we should see here that we have no error. And if we click on play right here, well, as you can see, nothing happens. So what's the problem that your instructor may can stake to do? We do something wrong in Visual Studio? Well, actually, no. The problem here is that we haven't actually attached this script to anything. And trust me, this is a very common mistake. So let's attach our script to our hello world printer. So we simply drag Hello World into the game object in the hierarchy and in the Inspector you can see that it has been added. Or we can also take the solo world script and drag it into the inspector of our hello world printer object. And we'll add it right here or end. But now we have two scripts right here. And we can simply remove one of them by clicking on the three buttons and hit the Remove Component. Great. As you can see, the scene is not yet saved. It has an asterisks next to it, next to it. So click on Control S, it has been saved. And now when we click on Play, we should be able to see right here, hello world. It's an a message right here under the assets projects. And here you can see that we have hello, world parented. Great, This is very fun. Now, next thing I want to show you in here, let's simply make this a comment. This means that it will not be executed during, during code. And let's actually print right here, print Hello, World and update. And let's see what this does. So let's save that and make sure to have the semicolon, you have the saved, and it's inside of update, which is called once per frame. If we go back into our game, I want to show you something in here in the hello world has been printed. And if we look to the right, you can see that it has been printed once. So one time it has been printed, Let's click if you have collapsed right here, simply unclick. It makes sure that it's colors are the same as the other tabs right here. And let's hit Play. So as you can see, Hello World and update is being printed every single frame that we play our game. And this is the difference between the start, which only prints once the game has started, and the update would print something every frame. In our game. So great, That's stop this right now. And as you can see, we have a ton and ton of messages right here. So I hope you enjoyed and I hope you understood everything because now it's time for your challenge. Your challenge is going to be to print your own name. So instead of hello world, you are going to be printing your own name. So change helloworld to hello, and of course your name. Instead of these points. And I'll give you a couple of hands, even a few, even if this task is very easy, maybe some of you are just starting out with coding. So add your own name and side of the three points right here. And save in Visual Studio, go to infinity and click on Play. Don't forget to save inside of Visual Studio and check your console. And you can either put this message and size of insight of start, or you can put it inside of the update just to play around and see how all of that works and fields, fields. So pause the video right now and go do the challenge. Oh, okay, welcome back. So how did you get on with that? Let's go into our script right here. Let's remove the common. And instead of hello world, we are going to write, well, actually I'm going to write hello Michael from double and game dev. And inside of update we are actually going to write hello Michael, a lot of times with an exclamation mark and let's remove the update. And we have an asterix, that means we haven't saved, so let's save that. And back in Unity. If we hit play, we will see. And if here actually let's do something. If we hit pause, you can see that the game stops, everything stops. And now every time we hit play, mean when we hit the step button, you can see that we have a new message and the new message and the new message, and it actually gives us the timeline. So now that we've waited a couple of seconds, this should be maybe 18. So oh, whoa, that was so accurate high. So as you can see, every single step means every single frame, and that means every single frame that we go through, update prints something to the console. And if we hold our cursor right here and we move up, we can see that we, the first message which is inside of start was hello Michael from Nobel M, game dev, which was the line of code inside of start. And one final thing I wanted to show you is the collapsed button right here. We can actually clear all of our messages and we can actually clear on play. So let's clear all, all of our messages and hit the collapse. And if you hover over it, you can see that it collapses. An identical entries. Click on that, hit play. And as you can see, hello Michael from double m game dev shows up in the beginning and then you have hello Michael. A lot of times that prints well, a lot of times. And because we've hit collapsed and these are all identical, they are on the same line. So let's stop this right now. I hope you enjoyed the video. In the next video we'll talk about version control and how we use source tree, a very powerful tool for advanced game developers and advanced program and just overall. So I'll see you in the next one.
6. Version Control: Welcome back, my fellow game developers. In this video, we are going to be learning everything about version control, source tree, and creating repositories of our projects. So as you can see right here, we've created a new project. We started our big project, which is cyberspace 2087, and we've downloaded source tree. We now have a couple of commits in here, and we actually reverted something. We've created our initial commit, added a cube, reverted it. We can actually reverse this commit, a GAN. So click on Yes. As you can see, we can go back to Unity reload and we have our cube right here. We will be learning everything in my new detail. So give me your entire concentration. This is very important. It's an extremely helpful video or lesson and we'll stay with you for other as long as you are committed to becoming a professional programmer or game developer. So let's not waste any more time and let's get started. O k. So for version control that and put on my laser version controlled, it's hard to learn. It's even harder to teach, but I'll try to keep it as simple as possible. And when you get the hang of it, trust me, it's very simple and easy to use. Plus it's an indispensable skill that you need to learn if you are looking to become a professional game developer or even a professional program. So let's get started with what is. First of all, it's a system that is responsible for managing changes to computer programs. So this means that whenever we create changes in our programs, we can actually save those changes at each step of our project. This way, we can first of all check what we did. We can create different kinds of versions where we can go back and change the things that we've created. It allows for a better teamwork. So for example, let's say you have four or five people working on the same project, but each one of them has a different task that they need to create. So version control is a very good way of handling all of this. And why do we need it? Well, why we, we actually use it? Well, we'll use it to remember previous version of our game and have more flexibility to experiment. Usually, game development is a environment where you require a lot of experimentations. For example, you want to add some kind of property to some kind of game object and maybe it breaks your entire project. So you want to always have a previous version of your project before adding this game breaking mechanic. So you can always go back and start fresh from there. So this is extremely important, especially for game developers that always need to be experimenting with new ideas and things in their games and projects. And how are we going to use it? Well, we are going to be using something called source tree and This is version control. It allows us to create different versions. And its first of all, it's for free. It's very easy for beginners, very flexible, and it has a very simple interface that we can use as beginners. So let's go ahead and download source tree. Let me show you where we can do that. If you open up Google Chrome or any browser that you have, simply go to Google and right in here, download source tree. You should find a link right here, and it should be the source tree app. When you click on it, you go right here to their website. If you scroll up, you can see that you have option to download for Windows. But if you are on a Mac, make sure that you click on here and you download source tree for Mac OS or it will not work for you. So if you have a Mac, download the Mac version, if you have a Windows, download the Windows version. Simple enough. Now, when you finished downloading, you should get this file right here. And when you double-click on it, you should start the installation. Now because I already have source tree, I will not be installing it another time. I will just take you through the process of actually installing. Okay, So this is the first window that will pop up for you. First of all, you need to agree to the license, of course. And you can maybe turn this off if you don't want any e-mails your way from source tree and et cetera, Atlassian. Next thing you need to do is you need to create an account on occasion, you can go to at lysine and Atlassian is the parent company of source tree, can go ahead and create an account there, or you can use an existing account if you already have a Gmail. I personally create one using Gmail. It's much faster, It's way easier and they don't spam you with Eigen lot of emails. Next thing in here, we are going to connect it to an account. Now, this is, of course, we will not be doing this. If you want to host your code on a certain websites like GitHub or Bitbucket. We will not be doing that, so you can simply click here on skipped setup. Finally, while installing source tree will tell you that it is unable to locate get. So in order to complete this, simply click on Download and embedded version of Git and continue on. And then it may also ask you for something called a mercurial. Now, Mercurial is a different system, just like get. It allows us to save different versions of our project. We will not be using Mercurial, so you can simply click on, I don't want to download or I don't want to use Mercurial. And this should be when you finish installing. You should have this right here. And your, well, this window right here when you start source tree, if you don't simply click right here on Create and you should get. This window. Now, this is where we actually create our repository. And in here you can see that we have the destination path, the name, and the type of version control that we want to use. Of course we'll be using the GET. We also have the option to create an account, but as I've told you, we're keeping things very simple. It's our first time, so we will not be creating any account. So here we are going to choose which is the destination path of our repository. So what is the project that we are actually going to be creating a repository for and subsequent versions of. Well, let's create our first project that we are going to be using. So in here that's open up the Unity Hub. And as you can see, we already have Hello World that we don't in a previous video. Let's click on New. And let's make sure it's a 3D project. And this is going to be our cyber spy 2087. Let's go ahead and create this project. So click on Create. And I, of course, always using my magic of editing and order to speed up this process. I'll see you on the other side. Okay, welcome back. So I hope everything worked out for you. So now we have a new project which is cyberspace 2087. So now that we have our project created, we can actually go ahead and get started with creating a repository. Now, if we go back into our source tree right here, we can click on Browse and we can actually go ahead into Unity projects. And you can see that we have a hello world and we have a cyberspace by 2087. So let's select this folder. It will create a repository under this name. If we hit Create, it will ask a problem. Don't worry about it. Click on Yes. And voila, now, we have actually started creating a repository. You have the staged files right here. You have different kinds of knobs. You don't need to worry about any of them for now, just focus on the staged foils on staged files and commit up here. Now, if we scroll down in these onstage files, you can see that most of them are from the library. We scroll down to the end, we can see some of them are Tampa camp or temporarily. We can see also that we have project settings and these are all the files that we for our project. We also have assets in here for unity in the scenes for example. So this is a repository which is a version of our current project. Now, the problem here is, as you can see, there are a ton and ton of files and we will not be needing all of them. Well, actually, we'll need almost none of them. We will need only a certain kind of files. So we want to be ignoring the library and the temporary temporary files. Why is that? Well, let me show you by opening up the directory of our project. Oh, okay, So this is Cyberspace by 2080 sevens directory inside of Unity project, as you can see up here. So we have the assets, the library logs, packages, etc, and etc. Now, what is the temporary folder and what is the library folder and why don't we actually need them? So temporary is just a way for unity to open up faster whenever we start the project. And it's always created whenever we open a project. So for example, if I go into Unity right here and I actually close it, you'll see that the temporary file will disappear. And even if we delete the library right now, so let's go ahead and delete this library entirely. If we go back into our Unity Hub and open up cyber spy 287. As you can see right here, you saw that the library has been created again and the temporary folder has also been created. So of course, the project should take a bit more time now to open up. But this is evidence that a library and the temporary folders are not necessary for us to always commit and stage. And what do I mean by stage? So whenever we stage our folders, we actually create a commit from them, any version of them. And library takes up a lot of space. As you can see, if we scroll down, it takes up most of the space and we don't want any of them at all. So how should we proceed? Well, we can actually ignore all of the folders that are under the library by simply going and choosing any of the folders that have library on them. Right-click on it. And in here you can see that we have the option to ignore one of them. So click on ignore. And in here you have option to ignore this exact filename, ignore all files with this extension, or you can ignore everything beneath a library, and this is what we want. So click on Okay. And as you can see, everything under library has now been ignored, so we cannot stage it, so we cannot save it to our newer version. And if you scroll up, you might have noticed that we have a new folder in here that is the dot git ignore. And when we click on it on the right, you can see that it has the library. And, and if we double-click on it, we can actually open it up in our notepad. And in here we can add the different files that we also want to ignore. So what are the files that we want to ignore? Well, there are a ton and ton of files, but thankfully, somebody has actually gone through all these files and created a list of everything that we can ignore whenever creating version controls or versions of our project. And in order to find that file, you can go again and to Google or the front. Go ahead and search dot git, ignore unity. And you should have this link right here for the github.com. And it will be hosted on GitHub. If you open up this link, it will take you right here. So this is the dot gitignore and it's the unity dot git ignore. And these are all the files that we can ignore when creating versions of our project. You can click on row right here, and it will open up this window or this tab. Let's go ahead and select all of them by clicking on control a. We will copy all of this using control C. And we are going to paste it in here in our dot gitignore notepad. And now we have this git ignore note packet filled with all the files that we will not use for our repository. We will save that using Control S. And now back in Unity or I mean pack and source tree. You can see that when we had the gut ignore, everything is ignored. We will stage all of that. And when we stage all of that, you can see that these are the files that are going to be committed. And these would be our initial commitment or our initial repository version of the project. And usually whenever you create your initial commit, we call this the initial. You can capitalize it, the initial, oops, initial commit. And we click on Commit right here. So now if you look on the left, you can see that we have branches under here and we have the master branch. Congratulations, we have created our first commitment. Very nice. Now, let me just show you how we will move further down the line, even though this video has been long enough. But I think we need to get a proper foundation for source tree and version control as we move through our project. So let's say we are in our project right here. And let's go ahead and create some kind of cubes. 3d object. Right-click in the hierarchy. 3d object, create a cube, and now we have a cube. Let's scale it up a bit. So skeleton the x, the y, and the z. Great. So now we have a cube and our scene. And now if we go into source tree, let's save that before we go. And it needs to save it to a certain scene. So let's inside of scenes. This will be our sample scene. Sure. Sample scene, yes, replace it. So we have this sample scene back and source tree. Wait for it a bit and you can see that we have uncommitted changes. So if we click on them, you can see that the on-stage files are changes inside of the scenes, which is the sample scene. And here you can look in detail what we've created now. It's a bit weird right here, but if you look closely, you can see that we've created box collider. And basically this represents the cube that we've added to our scene. So let's go ahead and stage all of that. We can click on Commit right here and name this added a cube. Click on comment. And now in our master branch, you can see that we have an initial commit which didn't have any cubed. And now in our added cube, we've added a cube. So congratulations. And as a final note, this may look a bit cumbersome. This may look a bit weird, but don't be afraid this is very simple. And more importantly, it's extremely important for us to understand as we move through our project, create versions, versions of it. And if we ever make a mistake, we can actually go back by right-clicking in here and reversing the commit. And yes, we can reverse the commit if we go back into Unity, it will ask us for a reload. We wrote, we reload, and now we don't have the cube or any game breaking mechanic that we've added along the way. And now it's time for your challenge. Your challenge is going to be to download and setup source tree and the file. So download source tree and stall and setup everything. Create your 3D project in Unity Hub, setup a repository for it and source tree ignored the library files and get the dot ignore foil and add it to your repository, create your first commit, and then create your second commit. You can even go ahead and try to maybe play around with a couple of things. Add a cube, reverse the commit, see what happens. Get comfortable with source tree. And if you're having a bit of trouble, you can pause the video on this list of things that you need to create. And you can also always go back and watch the video and see how I made everything and follow along with me step-by-step. So see you in just a bit. So in the next video, we are going to be setting up our world, creating various materials and starting our cyberspace when the 87 project. So I'll see you there.
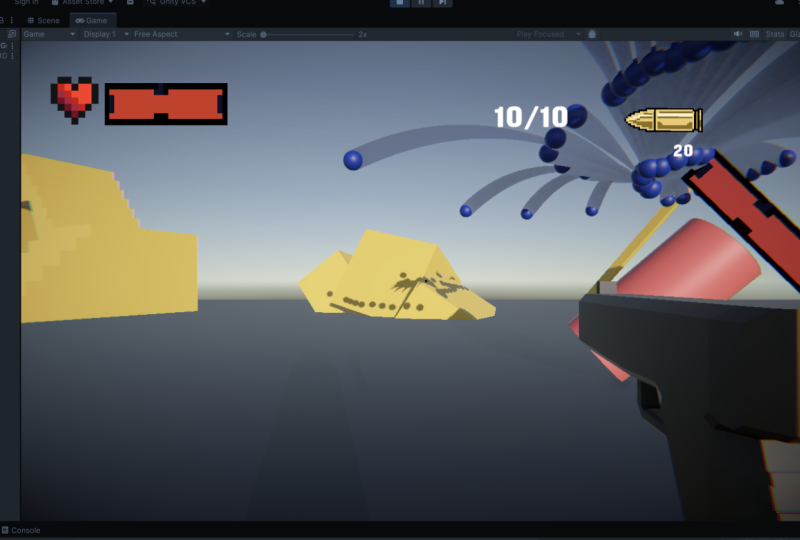
7. Setting Up Our World : Welcome back, my fellow game developers. As you can see, we've created a amazing the plane right here. We've added a couple of cubes. Right here. We've added rotation to them, we've added scale. We've played around with the directional light, we played around with the main camera. We've added this lighting and generated light. Very nice. This is a very cool video because it's the essence of where we are going to start creating and building our incredible game. And before we go, I forgot to do this at the end of the video, but make sure that when you finish this video and finish the challenge, stage, all your files and commit them. And we'll call this creating our environment or our playground. Commit that. And master branch, we have creating our playground. Great. So let's not waste any more time and let's get started. Oh, okay, so first thing we want to do is we actually want to go into the game window right here. And if you look right under it, you can see that it's currently at free aspect. And we don't want that. We actually want to change this and make it 19, 1920 by 1080. So this is the regular screen of anyone who's playing a game on the PC. If you don't have this option, you can add it from here and choose the fixed resolution. Then make this 1920 by 10 groups, can 80. Okay? So let's choose this one and this is how we are going to use our again. Great. Now that we have that setup, Let's start off by creating our environment. Let's delete this cube right here. Right-click in the hierarchy, choose 3D object and create a plane. So this will be our plane right here. And let's reset its position to be at 000, 000. Great, So now the position is at 0, 0 and 0. Let's scale this up. I think we'll scale this up to 5 by 5, not the y, sorry, the z, five by five by five. And because this is a plane. So as you can see, because this is strictly a plane when we increase or decrease, well actually decreasing makes it disappear. But even if we increase the white 250, the depth of the plane doesn't change. It stays the same. So let's keep it at one and go red. And if you look here on the plane, we have the mesh filter. So the mesh filter is what gives the object that we've created a shape. If we change the mesh filter, for example, to a cube, we can see that the shape actually changes. And these green lines are actually called the collider. We have on our object. So this is the collider right here, the mesh collider of our plane. If we turn off this component, you can see that the green lines disappear and then reappear when we turn this back on. And basically, we'll learn more about colliders later on as we go throughout the course. But for now, just know that colliders allow objects to interact with each other. So let's change this back to a, change this to a plane. And the Mesh Renderer is actually the color that we have on our objects. So later on in this video, we are going to be creating our own material. But in here you can see that we have materials. We can change it to, for example, the sky material or the default material or this space. I'm not sure what this is or flame or something, but for now we'll just going to keep it at the default material that we already had. Okay, great, So now that we have our plane, it's time to create a couple of cubes. So let's right-click in here and create a 3D object and create a cube. You can see it. It should be right here on the plane. And let's zoom in just a bit. So in here we can move our object. If we click on one of the arrows, we can move them on these axis or the axis that the arrow is in. Or we can choose one of these planes. So if we choose this one, we can move it around on the x and z positions. If we choose the swan, we can move it around on the y and z. And if we click the Iike, it starts to go into the rotation tool and we can actually rotate our cube. But one more thing that we didn't talk about is actually the scaling. So if we click on the archae, we can see that we can scale this cube in the z-direction, in the y direction, or the x direction. We can also scale it all over all the axis right here. And now we can scale up our cube and added to our playground right here. So let's put this down right about, let's say here, and let's scale it up just a little bit more. So now we have this cube right here in our plane. And just like the, the plane, the cube also has its own box collider and its own mesh render and mesh filter in the inspector. Great. Now let's go ahead and duplicate this cube and put a, another cube right here and maybe we'll scale it down. So basically right now we are creating some sort of playground to play around with. And we'll move this cube right here, put it down on the ground almost. And let's go ahead and create a, another cube and put it in here. And let's scale this cube up and make it sort of a tower ish, think and maybe add a bit of rotation. And put it around here. Okay, and let's think I want to do, maybe let's duplicate this one also and put two cubes next to it. So these would be two cubes right here. And what I want to do in here is actually create a limbo. So if you know what limbo is, I'm not sure if it's even called limbo. And it's sort of like a small piece that will allow us to just like this. So it's like a small rod that we can slide under or crouched on there later on. As we create movement for our player. Maybe we'll move this up or down depending on how much we want to crouch with our player. And finally, what else should we be adding? Well, let's go ahead and duplicate this again. And the way I'm duplicating them, by the way, I'm sorry. I'm actually clicking on one of our game objects and clicking on Control D. So whenever I click Control D to duplicate the game object. And let's delete this one. Let me rotate this a bit. Let's duplicate it again, and let's move it a little bit in here. So currently our axis, as you can see, they rotate with our object. And that's because up here on the left upper corner, you can see that we have chosen the local scale. So if we click on this, you can see that it will go into the global scale and it will not change based on what the cubes are. So let's duplicate this again and rotate it once more just a little bit, just to add a bit of variety to it. Duplicate that again, and let's rotate it. So we have kind of this artistic looking corner over here and we'll probably make the plane bigger later on. Finally, what I want to do is I want to add a ramp to this cube. Let's make this, let's make this cube a bit bigger. And I want to add a ramp to it. So let's go ahead and duplicate this one. Move it in here. And let's actually make this a bit smaller. Make it this way. We'll rotate it upwards or know what, let me see how to make a ramp here. So this sort of looks like a ramp. Sort of kind of looks like a is this a ramp this touch the ground? No, it needs to be around here. So we'll need to make it a bit bigger. So while I'm doing this, I suggest that you also create your own playground with these essential things. So one big long tower that we can jump on. One little limbo right here, a couple of squares and maybe this ramp right here because we'll be using these all for different reasons. And actually I'm going to make my plain 10 by 10 because I want to have more space in the playground. So we'll move this up here. We'll move these. Up here. So move them there. We'll move this one around there. And these four cubes, oops, nope, this one. But the plane, these four cubes, I'm going to move to the corner right here. Okay, great. So now we have our playground sort of, kind of. But the problem is, as you can see, they are all the same color and really, really bland. So what can we do about this? Well, we can create some materials. So if we go into project, let's right-click in here and let's go ahead and create a folder. And this folder is going to be called the materials. And inside of this folder we are going to right-click go to Create. And under here we can see that we have the option to create a material. So click on that. Let's go ahead and call this d cube mat. And this means the cube material. So let's go ahead in here we can see that we can change a lot of things. We can change the albedo, the metallic, make it more metallic. And here you can see what the material is going to be looking like. So we can increase the smoothness or decrease it. We can make it more metallic and we can change a lot of things. But for now, let's go ahead and click on here. And we can actually change the color of our materials. So let's go ahead and make it orangeish like and let's try to zoom in here. And the way we add materials to our game objects is actually super simple. We simply drag it over and put it on one of our game objects. So we can see that we can track our material over game objects. And the cool thing about this is that when we now try to change our material, you can see that it directly changes on the game objects that we have applied the material too. So let's keep this at orangey, orangeish. And now in order to make this a bit more, add a bit more vibrance to these colors. Let's go ahead and add a mission to them. So when you click on mission, we can actually add another layer of colors to it. And let's go ahead and also make this orangey. So now you can see that they are a lot more vibrant and you can choose to what, to which degree you want this vibrancy to be. So as you can see now, these orange colors really stand out from everything else. So now that we have our orangey material, Let's go ahead and added to all of our cubes. And in here you can actually do this to whatever you want. You can actually go ahead, for example, choose one or this one is d cube 4. You can drag the material onto the cube 4 and we can drag the material on there. Nice. Now we want to create a material for our plane right here. So we duplicate the cube material and we'll call it the, let's remove the one and we'll call it the plane material. And you can go ahead and choose whatever color you want with whatever emotion you want, you can play around with this. But I'm just going to make it maybe green and change the, let's add this to the plane and it looks very bad. Let's change the emission a bit and maybe make it a bit blue. That's true blue. And nope, that's too much blue. Please let me move this. Maybe we should make it actually entirely black. We can also change it up. Oh, well, you know, black looks really nice actually. So let's move this just a little bit here. And now we have almost everything in our playground setup. Very cool. So now one more thing I want to address is the shadows that we have on our current objects. So as you can see, let me move this up just a little bit. So the shadows weight move this. I'm not liking this ramp a lot. So let me change this up a bit, move it like this, and maybe down a bit or case. So now let me change this to local. Move it like this, and this seems to be good enough. Okay, great, I'm satisfied with it. So now as you can see, what actually you can't see because the shadows are gone, but they are very, very strong on our game objects. And why is that? Well, because we haven't actually generated any light to our scene. And the way we generate the light, if we go into window right here, and we go into the rendering, we have this lighting option. So let's click on that and we can actually go ahead and talk it next or inspector. So in here we have a lot of options for the scene, environment, Real-time light maps and bake light maps. We are not going to go into detail right now in this video. Later on, we of course will be going through almost all of these and player playing around with the lighting and our gain. But for now, all you need to know is that we can actually generate light. So if we click on generate light and we'd just a bit for it to create global illumination. You can see that everything is much, much clearer. And now we can go into material and maybe change the colors based on. So it can change based on what we have right now created, based on the baked aspects. And if we zoom in, we can see that the shadows are a bit lighter. So remember, Window rendering, lighting and enlightening simply click on Generate lighting. Now, let's go back and in our main camera, if we hit Play. We can see that all seen looks like this, and it's starting to take a bit of 4. So let's go out and we actually can change the position of our camera by moving it up and down and rotating it around. And you can see how this will look in the main game by looking at the little square right here. And it shows you how this is going to look later on. Okay, So one final thing I want to talk about is the directional light. So the directional light, we click on it and make sure that you're on the inspector. We can actually change the color that is rendered from the directional light. And this is the main light source. And as you can see, the colors of our game objects change based on what the color of our light is. Let's change this back to normal to whatever it was. And in here we can actually increase the intensity. So as you can see, we can move this a lot up. Everything looks white or we can move it down till it becomes 0, but we'll keep it at one. And another feature of this is that we can actually play around with the shadows. So as you can see, the shadow strength is currently at one. We can move it down and you can see the shadows of our blocks actually getting dimmer and dimmer until they become 0 or they can be very strong. I'll keep it at around 0.8. We'll save that. And now we have our playground and our world set up in the next video, which is in the next section, section 2, we'll be adding our player and we'll start tweaking around and learning about character control. So before we do that, I want to issue you a challenge. And your challenge is going to be to set up your own work so you don't need to create the playground that I've created. You can go ahead and create your own, create the environment on which will build on playground. Create materials with your own preferences and add them to your environment. So pause the video right now. Go ahead, play around, see how rotation works. See how scaling works. Create your own material. Play around with the emission. See what works, see what doesn't generate a couple of lighting. And before we move on, maybe some of you will have this problem. Maybe none of you will have this problem. But enlightening, make sure that the auto-generate is off. So when the auto-generate is off, you can generate your own lighting. And it's created right here in this folder, right here. And let's change this to the play ground. Yes, we can reload. And now our scene is called the playground. So as I've said, the challenge is still up. Pause the video. Oops, pause the video and go do the challenge, and I'll see you in the next one.
8. SECTION 2 - Setting Up Controller: Welcome back, my fellow game developers. As you can see, we've added a player. Actually it's sort of just a capsule right now, but, well, it, it represents our player. I think he looks cool enough. He looks like a RoboCup, but we've added a player which is a capsule. We've added to our player. We've added a Character Controller with a player script, and we've learned a lot of things like character controller, a pivot, and parent and child relationships. So let's not waste any more time and let's get started. Oh, okay, so let's start first of all, by creating a body for our player. Now, right-click in the hierarchy to the 3D object and let's go ahead and create a capsule. Let's reset its position. And now we have it on the 000, and let's move it up just a little bit now of the light gizmo and the camera here are bothering you. Just like it's bothering me. Let's go ahead and reduce the size of them or we can actually turn them off completely, but we won't do that. In here. In the gizmos, you can actually click on here and you can make them smaller so they don't look as glaring and detente distract us from our main tasks. Okay, great. So now we have this capsule right here. And let's go ahead and increase the scale around the 1.6. Let's make it 1.6, make it a bit bigger, move it up a bit. And this captured will actually be our players. Or let's simply call it the body. Great. So now we have a body that represents sort of our player. Next thing we're going to do is we're going to add a bit of personality to this capsule right here by creating a ice. The ice right-click in the hierarchy, go to the 3D object and let's go ahead and create a cube. Again. Let's reset its position and put it up here. Let's make the eyes, well actually the eyes should always be smaller. So me like this and scale it down on this axis also and these axis also. And let's move them to the front. Let's go into the materials and add the plain material to our eyes. And let's call this, let's look at that. Yes, looks much cooler. Now, let's move these opposite. So now we have this RoboCup. Doesn't he look like RoboCup? I think he does. So now, let's clean this up a bit on the left and right. Oh, cave barry, nice. So now we have the ice. Let's rename them as the eyes. Okay, great. Now, what's the problem here? Well, the problem is that our body. Remove it. It moves without the eyes, so they are not moving together. How are we going to fix, fix this? Well, we can use something in unity there is called parent-child relation. So if we move the eyes onto the body, you can see that the eyes become a child of the body. So now when we move the body, the eyes actually move with our body. And let me explain a bit more what all of this means. So what is parent-child relationship? So the child will move, rotate, and scale with the parent game object. We, it's used for creating a body of objects that move together. So just like your arms are attached to your body when you're born, your torso and your torso moves forward, your arms move with your torso. Not this is a bit of a weird explanation, but you get the point. So child moves, scales and rotates with the parent. So children can also be parents to other game objects. So we can create children to the eyes that are currently the children of the body. So we can create as much children as we want. And finally, child transform properties are relative to the parent. So what does this mean? So let's go back. So in here you can see that the eyes position is currently 00.6120.46. Well, actually, if we move the body right now, you'd expect that the position of the eyes should change. But if we go back to the eyes, you can see that the position is still 0, 0.06 and 0.4. This means that the shiny objects, the position and rotation and scale are actually relative to the parent object that we have. Okay, great. So now that that's clear, let's go ahead and create another game object. And this time it's going to be an empty game object. And this is going to be our player. We are going to reset its position. Let's reset the position on the x and the z of our body right here. And let's put it under the player. So now the player as the parent, the body is a child of the player and the eyes are the child of the bodies of now our player. When the player moves the body, the eyes move with, great. Next thing we're going to do is we're going to add a character controller. Now before we do that, let's explain what character controller is. So what is a character controller? It's used to control a first person or third person character in your game. Now of course we are using the first person. We're going to be creating a first-person shooter. So we are going to be using it for our first-person. It's a more, it's more yardstick ten, using rigid bodies. Now, a rigid body. Now we still didn't learn not rigid bodies but electron. We are going to be explaining everything about rigid body and it actually adds physics too. A certain body to move through the world. And using character controller is actually much more realistic than using a rigid body. It allows for more fine tuning. So for example, we want to jump, move, add velocity. Later on you'll see that it's much better than using a rigid body. And finally, it doesn't get affected by forces. It rigid body, when added to a game object, makes that game object susceptible to the physics around. So forces and different things will effect. We don't want to have that on our player, despite what you might think whenever you play a game, it doesn't actually get affected by the forces around it, except for ones that we want to affect the player. So this is the whole point of the character controller. Now, let's go back into Unity and let's add a character controller on our player. The way we add a component is we click on the object that we want to add a component to, which is our player. We go to the inspector. We have this add component here. So click it. And we can type in character controller and just add it right here. And as you can see, the character controller is actually under our player. And that's because, let me show you what this means. Because now if we look back up here, we have the global settings. If we click on the center right here, it becomes pivot. And pivot is actually the center of our current game object and it's where everything revolves around. This is why the character controller is in the middle of, or actually the player game object is in the center of our character controller, so we'll need to move it up a little bit. So the way we move it up in here, we have the option to move the center. So we'll move this up a bit and will increase the height. So let's make the height to fit our capture. And we can also increase, or actually not too much. It can increase or decrease the radius. Actually, that radius is good enough. And one final thing, go to the body and remove the capsule collider and go to the eyes. And OK, also removed the box collider. So the only thing that we need is the character controller that gives us the ability to interact with the world around us. Okay, great. So now we have this character controller. And as you can see right here, it also has a slope limit. So the slope means the angle at which the character can write on or move up on. We have the stub offset. So what is, for example, let's say we have the step right here. If we decrease it a lot, our player will not be able to step on it. And we also have the height and the radius and the center of our character controller. Now, final thing we want to do is we want to add a script or player. And it's actually going to be your challenge. So your challenge is going to be to create a player script. So create a folder for the scripts that we are going to be adding. Create a C-sharp script and name it player, added to our player object. And finally opened up the script and Visual Studio. So pause the video right now and go ahead and do the challenge. Oh, okay, welcome back. I hope that wasn't too hard of a challenge. We already this a couple of times or maybe just one time. So in here, right-click create folder called this d scripts. Inside of scripts we are going to right-click Create and create a C-sharp script. Make sure that you call it correctly the first time. So player, yes, hit Enter, wait for it to compile. Okay, so now it's ready. And we're simply going to go ahead and attach it to our player. We are going to save that. Click on player. And now we have the script attached to it as a component. Double-click on player to open up and Visual Studio. And everything should be working correctly. Now, before we move on, let me just tell you about something. If your Visual Studio is not working, I saw this problem in a lot of people. So go into the edit, edit, preferences, external tools, and inhere makes sure that the external script editor is the Visual Studio Community. There are different things that you can use. Maybe you have visual code or something it's called like that and it will not open up correctly. So make sure that you have Visual Studio Community as your external script editor. Okay, great, so now that we're done with this, in the next video, we are going to be adding a bit of character movement to our player. So I hope you enjoyed the video and I'll see you in the next one. Oh, before we go, I forgot to do something. Go into the source tree, stage. All of our changes, commit them, and we'll call it here, added my player with a character controller, commit that. And now we have it in our branches. I'll see you in the next video.
9. Setting Up Player Movement: Welcome back, my fellow game developers. As you can see, our player script right here has a bit of difference from before. If we look at our Visual Studio, you can see that we've created two variables. In this video, we'll learn what variables are, how we can create them, and you are going to create one for yourself. We'll also learn how our character controller can move. And on top of that, we'll also understand what vector three is and what, and how to play around with all of them. So let's not waste any more time and let's get started. Oh, okay. So let's get started. But before we start, I want to do something. As you can see, our hierarchy right now is completely filled with random stops or Q1Q2, the plane and the player and the direction of light. We don't want that. We want to put things in their perspective place and have a nice-looking hierarchy that we can look at and understand what the things that we have in our environment or our current scene or so. Let's go ahead and creating empty game object. And this is going to be, let's reset its position. And this is going to be called the and environment environ meant. I'm not sure if that's how it's written. And let's take the plane and all the cubes. And the way we can choose all of these is click on the plane, hold down, shift, and choose the cube. Now you select all of these and put them in the environment as children. So now we have the environment which has all the cubes and the plane, and we have the player, the main camera, and directions. And it's, it looks much, much nicer. Great. Now, next thing we're going to do is we're going to set up our player movement so we can later on move it, move him or her. Depends on how you want to make your player B. And we are going to set up the environment or the code for him to move. And so let's open up our script and look how are we going to do this? Well, first thing we want to do is we want to create a variable. So what is a variable? And let's talk about that. Variables are like boxes. So for example, let's say we have a variable that is a box, or a box that is called Lives. And we put inside it a value of three. So this becomes a variable with a name lives and it has inside of it a value of three. The way we write it in code is public. So public, it can be either public or it can be private. And this is the accessibility. So when we say public, it means that everyone inside of this current class can use this variable. If it's private. Only, this class can use it and nobody outside of it can access this variable. We create the type, type, meaning integer. We have many types that we'll cover in just a bit, but we have the integer right now, and three is an integer, so we'll give it a type after we give it an accessibility. Next thing we do is we give it a name. And usually names start with a lowercase letter at the beginning, and then all subsequent words will have a capitalize the first letter. And finally, we give it the data or the value of the variable. So let's talk about the different types of variables that we have. And this does not include everything, but currently for now we'll just cover the main ones. So first thing first, we have a float. Float meaning that we have, for example, 4.84.76.9, anything you want. And whenever we create a variable that is a float, we add F to the end of it in the data. So this can be used for velocity, for height, for speed, for anything that can be variable. And it's not simply 1234, it can be 4.64.9 and et cetera. Next thing we have a boolean. And a Boolean is very important in coding because it allows us to choose whether something is true or it's false. And we're going to be encountering a lot of Boolean throughout scores. And you'll see how important is a boolean. For example, in here, some, a player or your enemy can either be in two states. Whether he is that, which is that is true, or hey, he can be alive, which mean is means, is that is false. So a boolean is a variable that can take either a true or it can take a false. Finally, we have the string variable. And a string variable means it's a string of characters one after the other. So my name, as you can see right here. And the, is that the first word of the variable is in the lower case and the second word, the first letter is in the uppercase, just like is that just like my name? And this is the convention of how we name our variables. So a string variable is a string of characters where you can put in like Michael or a car or door or anything that you want to name. Any word is basically a string. So let's go ahead and create our first variable, back. And Visual Studio B go right here into our script. And we are going to create a public, public meaning that we can use this variable anywhere we wish. We are going to make it a float. And we're going to call this D speed, and we are going to give it a twelv 0.5 f go rate. Well actually I think there's too much for electron, but we can tweak it later on. So when we make a variable public, if we go back into Unity. Wait for it to compile. And in time now, so when we click on player in here, you can see that we already have this variable speed. And it's showing up right here because we made it public. And if we go back in the Visual Studio and we make this a private variable, we need to save it, of course, back in our Inspector and the speed is no longer available for us to play around with. So make this back to public, save that. And now we have the ability to tweak around and play with our speed. Now, next thing we're going to do is we want to actually start moving our player. And the way we move our player is through the character controller. And you can actually create a variable that is of type Character Controller is this is actually part of your challenge. So we've learned what variables are, we've learned how to create variables. And now it's time for you to create a character controller variable. So create a new variable of type Character Controller, don't worry. Visual Studio will help you out. Make it a public variable and name it my character controller. Make sure it appears in the inspector. And as a bonus challenge, even though we haven't covered this yet, you can add the character controller on the player to the variable in the inspector. So if you are a bit scared, don't be, this is extremely easy. Pause the video right now and go. Try to do your best. Oh, ok, welcome back. So I hope you didn't just stare at the screen and were petrified of what of the challenge that I just gave you. Okay? So first of all, we said that we want to create a public variable. So we are going to make this a public variable. Second thing we said, we're going to make this of type Character Controller. So we're going to write character even chore. And you can see that it already gives us a suggestion, which is Character Controller hold down tab. So now we have a variable of type Character Controller that is public, and we are going to name it. My, make sure that the first word has a lowercase first letter. And then controller, the second word has a big C, an uppercase, put on, put in the semicolon, save that. And now if we go back in unity and we look at our inspector, we should see that my character controller shows up right here. And this is the bonus section. We can, actually, you can see that it has none and it requires a character controller that we thankfully. Have it right here. So you simply click on the character controller and drag it into its place. And we save that. Great. So now we have a reference to our Character Controller that we can actually start moving. Now, let's try this out. Before we do, let me explain to you what a vector three is. Now, I don't have any slides, but I don't think we'll need it. Vector three. Just like the vectors that you learned in school, we have this X vector or the zed vector, the blue vector, which is called the forward vector. We have this X vector, which is the right vector. So vector three, right? And we have this y, which is the vector three OP, vector. Very good. So now that we know how vector threes work, we are actually going to use them to move our character just a little bit. And for now, oops, so we are in a challenge back in Visual Studio. So now inside of here we are going to move our character. So the way we move our character, we're going to get our character controller. And we're going to use a method that is called move. And if we read on it, we can see that a more complex Move function taking absolute movement deltas, you don't need to understand all these complex words in here. All you need to know is that this moves our character simply as that. And if you look right here, you can see that it actually takes a vector three inside of this. Well, it requires a vector three and ordered to move. So let's save that. Let's use that. And in here we are going to create a vector three dot. And we can actually choose if you want it to be up, to be right or to be forward. And we can simply add a semicolon. Let's save that, and let's see what happens if we click on play. So now let me look at my game. So this is how it looks. You can actually play around with the camera so you can move it up and, or hopes rotated down, rotated like that. So we can see our player moving, save that, hit play. And oh, oh, really, damn where that layer goal, that was extremely fast. Okay, so the cool thing about variables is that we can actually now adjust the speed at which our player moves. So back in here, we can actually multiply this by our speed. And because you saw how fast that was, we actually need to reduce the speed. So now we can make this instead of 12. Let's make this 0.01. save that. Let's try this again. And this should make our player move slower. So hit play. And as you can see, he moves slower. And if we make this negative, he should come back and let me just move him a little bit forward so we can see. Okay. Okay. Cookie come can combat, combat, combat comeback Hamburg. And as you can see, because I am manipulating the velocity of our player when it's negative is moving backwards and when it's positive is moving forward. So when now we put them to 0, so he completely stops dead in its tracks. We make it one and the full lives away. So I hope you enjoyed this video. Let us commit our changes. And I'm not going to be committing my changes every single video, or at least I'm not going to be showing you that I am committing. You need to create this habit. Whenever you get to a certain point, a significant point in your project, always go back and commit your changes. So what do we, what did we do here? Well, we set up my player or my character, character, character, controller movement without an exclamation marks. So let's commit that. Now we have a new repository. And in the next video we are actually going to start controlling our player with our WASD keys and taking our first steps. So I hope you enjoyed this video and I'll see you in the next one.
10. Our First Steps : Welcome back, my fellow game developers. In this video, we are actually going to be learning about input system and unity. So now when we hit play, instead of just moving our player, we can actually use the WASD keys in order to move him forward, backwards, the left, and to the right. Now his movement is still weird and as you can see, he has no gravity on him. But we are going to start with the basics of humanities and put system. So let's not waste any more time and let's get started. Okay, so first thing I want to talk about, how are we actually going to be moving our player. So click here on player. We've already talked about the different kinds of axes that we have. And we are going to be moving our player, first of all, on the z axis, which means we are going to be moving him forward. And we are going to be moving him on the x axis also. So this way, our player will be moving in these two directions. Now, what do we actually need in order to start moving our player? Well, of course we are going to be needing some inputs from the person playing our game to move our player. And how are we going to do this? Well, I thought about simply going through and telling you about all of this, but I, I thought about it more and I wanted to actually show you the thinking process behind actually figuring out or finding yourself in some kind of situation where you want to add a new mechanic and how you can actually do it. So what is our goal? Our goal is to create movement. And first of all, we get input from the person playing our game. Then we want to create movement along these two axes. So how do we start our thinking process as well as all great things start in our life. We go to book. We type n input unity because we want to get some kind of input from unity. And we see here that we have the documentation for the Unity 3D, which is the perfect place to get any kind of documentations. So we click on this one. We open up the link and we get the input documentations for unity so we can read, and here it is the interface and to the input system. Very nice. So this is what we need. So we read, we read, we see what's here. We can see that to read an axes, we use the input dot get axis. Perfect. This is exactly what we need. And we can see here that we have one of the following default axis, which are horizontal and vertical and are mapped to the joystick AWS d, how perfect is that? Well, in the real world, when you're doing this alone, of course, this process will take a bit more time, but I'm just showing you how the thinking process behind figuring out these mechanics actually work. So great, we need the get access. So we click on the get access and we open up the second documentation. And we look here, we can see the way we can access these. Get axes and we see that it requires a axis name that we've just saw, which is heros, horizontal or vertical. We can read the description which tells us that it returns the value of the virtual axis. And the value ranges from minus one to one. Great, not only that, we also get the option to look for some kind of example. And here we can see that translation, how this all works, and how we can use it or implemented inside of our code, we even get the hint that we need to use it inside of update because we want to be getting input from our player every single frame. So great, this is exactly what we need. We can also see in here that to setup your input, you should go to Edit Project Settings Input. How nice is that? So now with all that information, let's get started with adding inputs to our game. So open up the scripting here. Let's remove this for now, and let's start getting a bit of input from our player. So first of all, we need to get the axis on the horizontal plane. So we'll create a variable in here. It's going to be a float. And we're simply going to call it the x because we are moving on the x axis. So we'll create an input and we'll use the get axes. And in here we are going to write a horizontal and a small warning here. Whenever you are using string inputs, which string? String, I mean, inside these two quotations, you need to make sure the two write it correctly 100%. Because if, for example we write horizontal xanthan using the a lowercase h, this will not work. We need to make sure that it is the capitalised H. And not only that, if we have the option, we can also go and copy this string reference. Well, where do we copy the string reference? Well, we just saw that we can actually go into Edit Project Settings and look at the input. So let's go ahead and do that. We open up Unity. We go into the Edit Project Settings. And where is our input? Well, there is our input, we click on the axis. And in here we can see all the different types of axes that we can access in our inputs. Let's click on horizontal. And in here we can see that an order to move horizontally, we need to use the API and the Dickey and we can go ahead and copy this. Go back and our Visual Studio and paste it right here and close it off with a semicolon. Very nice. Now, next thing we want to do is we want to get the movement on the z axis. So let's go ahead and create a float zed axis. Input. Get axes. And in here we are going to be using the vertical. So back in our Unity project settings inputs, let's close the horizontal, open up the vertical. And in here we can see that it's d, s And w 40 negative and the positive. We can also use the up and down arrows to copy vertical control. See, go back here. Control V, closed-off, save that. And now we have inputs in our game. Very nice. Now, what should we be doing next? Well, next thing we want to do is we actually want to combine both, both of these movements to gather and add them to the character controller movement. How are we going to do that? Well, first of all, because we are working in factor three, we are going to create a variable which is of type vector three. And we're going to simply call it the movement. And this movement is going to be the x-axis that we've just created. And here, the input of our player times the transform dot. Right? Now, you've already saw what vector 3.What is now we are working on the transform that right? And what does this transform? Detroit, MI, You already know what right means. Let's dock this in here, back in our scene. So right is this axis right here. It's the x axis where we move to the right. But what does transport me mean? Transform is actually the transform of V player. And whenever we, for example, and here, when we write transform just like that, we mean the transform of the game object, which has this player script attached two. So because this player script is on player game object, that means that the transform that we access from our script is the transform of the player. And when we write transfer dot right, we mean the right axis or the x-axis, which is on this exact game object, which is our player. So now that we know what this means, we can go ahead and add to this transform Detroit the z, which is the input on the vertical axis times the transform. And I'll leave you to figure this out on your own. Take a couple of seconds just to know which one are we going to use the up, the forward or the right. Ok, time's up. I hope you'll try your best. And always we are going to be using the forward and we are going to add this semicolon and we are going to save that. So let's just talk a little bit about what's happening because all of this is very new. First thing we did is we got the And put on the x-axis for the horizontal. We then got the input on the z axis, which is called vertical. We then combined both of these by multiplying the horizontal input by the transform dot, right? Which will allow us to move on the x-axis like this. And then we multiply the z input or the vertical by the transform dot forward, which will allow us to move in the forward direction. Very nice, so well that established. Next thing we need to do is we need to actually add this movement to our Character Controller. And this is actually part of your challenge. Your challenge is going to be to, first of all, look up Character Controller documentations Immunity just like with it right now using Google or whatever method you want. You then find the character controller 2D move in the documentations we've already used it, but I want you to go ahead and try this on your own and really get a feel of how all of this works. And finally, I want you to add the movement to your character controller in the game. So we've already done this, but I just want you to actually get a sense of how all of this works and how we you on your own when you go out to the wild, wild west of game development can actually go through the steps and find out the documentation and use the movement. Anyways, pause the video right now and go to the challenge. Now, we've already talked about how we add movement in the previous video, but let's just delve a little bit deeper into how this actually works. So just like we looked up the input unity, you can actually also look up the character controller and unity. This is the documentation for it. So you can go ahead and read all about it. But what we are interested in is the move right here. And if we read next to it, you can see that it supplies the movement of a game object with an attached character controller component. Great, so this is what we need. Click on the moon. We open up a new script in here. And as you can see, this is the move at Texan, a vector three, and it supplies the motion to the game object. We can also see how we can see an example here of how this character controller actually moves. And you can see that we are pretty close to what the example showing us in here. The movement is the input axis on the horizontal and the input axis on the vertical. And it's pretty similar, but we are doing it in a bit of different way. So let's go ahead and add the movement to our Character Controller. We already have the reference, which is the microcontroller. So my controller dot move. And in here we are going to add the movement that we just create. Very nice. Make sure to save all of that. And let's go ahead and test this out and see if it works. So save that. Hit play. And now when we press the w, our, well, our little capsule here should move forward. Oh, gay, and it's super fast, but at least it's working. And if we move to use the W key, the a or the key, we can also move him to the right, to the left forward. And we can actually also move him horizontally, but as you can see, we have no control over our player at all. So in the next video, we are going to be controlling our players movement using our speed. And we are also going to be learning how we can detach the movement from our frame rate. And we'll also build earning about methods and so on. So I'll see you in the next one.
11. Controlling Player Movement: Welcome back, my fellow game developers. In this video, we are actually going to, first of all, start to control our movement with the speed variable that we've created four. And we're actually also going to be learning about how to make this all frame rate and dependent, which adds more dynamic movement to our game. Finally, we'll learn about public methods and private methods and we are actually going to create our own. So now when we hit play, you can see that we can move our player at a certain speed. But if we increase this to, let's say 50, we can move a bit faster. Where did he go? Ok. And if we put this to, let's say two, now we can barely move at all. So let's not waste any more time and let's get started. Now that we have movement or we have, we can use input in order to move our player. It's time to control our player. And that is part of your challenge. Your challenge, let me get my laser is to control movement speed. So you'll need to multiply the speed variable we created by the movement. And then you'll need to adjust the velocity from the inspector until it feels good enough for you. So it's your job to determine how fast you want your player to be moving through the world. We've already done this. So pause the video right now and go to the challenge. Oh, ok, welcome back. So how are we going to do this? Let's open up the scripts and end here. Before we make the movement or before we add the movement to the controller, we are actually going to take this movement. And we are going to say that this movement is equal to the movement that is already present times our speed. So now, whenever we take the movement from here, we multiply it by the speed, and then we put it back into the movement right here. And this movement gets added to our movement or to our controller dot move. So now when we hit play, we move our character and he is much slower. So we can add just this tool, let's say 0.7. And now he moves a bit faster. He's gone summer. Let's try this again. And let's say we want to make this one or maybe not one, maybe let's say 13. And he should be flying off into the distance as soon as P plus WK. Yup, that works pretty well, but there is still a slight problem. If we go back in here, we can see that update is called once per frame. That means that every single time we press D, W or a, or as it's being called, multiple times and the speed is extremely high. And You know about frames per second whenever you are playing a multiplayer game. So it's the FBS. And the problem here is that we are using very limited resources. So let's say Endgame. And here we can click on the stats. And let's hit play. And you can see that the frames per second in here are 700 to maybe 900. It will depend on your hardware. So now every single frame, this speed or movement is added to our player. And this is not good because for example, if we start lagging, lagging in our game, our movement is going to deteriorate as the progressive. Or if the frames per seconds are very high, our movement will be much faster. And this is not what we want from our gain. We want to have a steady movement no matter what the frames per seconds or so, what we want to do is we want to detach velocity of our player from the number of frames. And the way we do that is by actually multiplying this movement by the time dot delta time. And what does this Time.deltaTime means? If we hover over the Time.deltaTime, we can see that the completion time in seconds since the last frame. So this gives us the time between each frame, which means that this becomes independent of the frame rate. And you'll see now that our movement will become much slower because it does not depend on the number of frames that we are moving it. So we take our movement from the inputs. We multiply it by the speed in order to control it, and then we detach it from the frame rate. So we do that by multiplying it by Time.deltaTime. So we save all of that. Now back in unity, if you have a very low speed, you'll notice that we are going to be extremely slow right now. So when we move, we barely move. So we need to increase this to one. Maybe even one will not be helping. Yes, you can see that we are barely moving. So we'll need to adjust this and make it 12.5, just like we did in the beginning. So now we have a much better movement for our player and it's much more reasonable, it's much better. Let's increase it maybe to 20. So now we can move our player and he can even step over and climb. But unfortunately, he does not go down because he still doesn't have any gravity. Okay, great. So let's go back. Let's explain this one more time. We get the inputs on the horizontal and the vertical. We multiply it by our transforms. So transformed or try it for the x transform.py forward for the zed or the horizontal and vertical respectively. We multiply this movement by the speed in order to control it, we then multiply the movement and the speed by Time.deltaTime to make it independent from the number of frames that we have. And then we add the movement to our Character Controller. And as a final step, we want to put this code in a separate method. So. Whenever we are working inside of update, we always want to keep things clean and very simple. So for now an update, we have all this cluster of code and we don't want to have all of this inside of update because we are going to be adding shooting, crouching, and so on to our player. So we're going to extract this into its own method. And before we do that, let me just explain to you what methods are. So method structure, this is the method structure. So just like we have the accessibility type for a variable, we also have an accessibility type for the methods. So whenever you create a method, you need to make sure to know whether it's private, which means that it's only used inside of this class. Or if it's public, which means it can be used outside of the class. Next we have the return type. Now, as you saw, every variable has a type, but methods don't need to necessarily have a type. And whenever the methods don't have a type or don't return anything, they are called void. For example. The update doesn't return anything, so I would say void and Stuart doesn't return anything. So it's also a void. We'll learn about returning later on. But for now, just know that a method can have no type at all. Next thing we have the name of a verb or of a method, and we named variables by first word being a lowercase. But whenever we are naming a method, every single word is in the uppercase. That way we can distinguish between variables and methods. Finally, we have the parameter, and in this parameter we can actually send information that this method can use. Now we will not be sending any parameters if it's empty, that means it doesn't use anything. But later on you'll see that some methods will require parameters to be sent to it to use it, we'll get to that later. So let's go ahead and extract these couple of lines. And the way we create a method, we can go down here and create a void and make this the player movement. And then we take all of this code. We cut it. The way we cut this, as we click on Control X, we click on control V to paste all of this in here. And we call this method the player movement in here. We save that. So now an update. Whenever we start update, it looks and it sees that it needs to call the player movement. It looks through the code and sees that we have player movement. And we start with all of this code. So let's save that. Back in Unity had play, let's make sure that all of this still works. So now, Yup, we can still move, our player is still moves and he's still floats in the air. In here. And the masters, we can see that we have a couple of uncommitted changes. We stage of that commit all of that. And what should we call this moving player using inputs, we commit all of that. Great. So now we have movements that up. And the natural course of action later on that we are going to do is we're actually going to set up the first-person camera on top of our player. So it moves with us as we move through our world. So I hope you enjoyed the video and I'll see you in the next one.
12. Setting Up FPS Camera: Oh, case. So first thing we are going to do is we're actually going to take our main camera and we're going to reset its position so it's on the player. We are going to move it into the child of the player. So we'll move it up here. And let's go ahead and position it right in front of it. And we can actually see what the player and the camera can see. The main camera can see. So let's position the cameras somewhere around here maybe. So make sure that we do not see these two black dots. We'll fix that later on, but for now, just move it. Oops, it's not even in place. So let's move it to the center and up a bit so it's just over the eyes. Okay, great. So with that done, we'll simply save it. And because the main camera is now childhood to the player, it will be moving with the player. So when we hit Play, now when we move our player left and right, you can see that we already have a first person view of our game. How cool is that? Okay, but now we want to move to the next level. And next level is we want to actually start moving this camera around using our mouse. Let me first of all explain how this movement has gone to work. So first of all, we want to be looking left and right. And in order to do that, we are actually going to take this player and we are going to be rotating him around. So when we rotate the camera using the mouse button, we are going to rotate the entire body of the player. But when we want to rotate up, we don't want to be rotating our player the whole way up. We don't want this movement to be happening. We actually want to only be rotating this camera when we want to Lopes. I mean, when we want to look up and down, we only want to be rotating this camera. So let us go ahead and start doing that. We are going to of course be taking the input from the mouse and then we are going to be applying it to the different transforms that we have. We are going to actually be using something called the get access row and not just the get access. Let me show you the difference between these two. So this is the normal input dot get access. And we can see that the value is in the range of minus 11. So it moves from minus one to minus 0.9 to 0 or 2x minus 0.8 and so on. But using the get access row, it actually, if we look in here, the keyboard input is always either minus1, 0, or one. So it takes definite positions on the spectrum or it's not a spectrum. It either takes a minus1, a 0, or a plus one. Why are we using it this way? If you continue reading, you can see that this is useful if you want to do all the smoothing on the keyboard or the mouse input. So we want to be able to control how much we wrote it. When we look left and right or up and down, we don't want to build up to that position. We want, as soon as we look to the left, we want the camera to move that way or start moving that way. We don't want to slowly build up from nothing to moving that way. We want to be to have it instantaneously. So let's go ahead and do FET and update. Under the player movement, we are going to create a float and we are going to call this the mouse X. And in order to take the input, we are going to use input. You get accessed row. And in here, what should we be using? Well, let's go into our project settings in here. And let's see, we want to be using the mouse acts. So we'll copy all of this because it's a string reference. And whenever we have a string reference, it's usually better to copy it. And let's save that. Next thing we want to do is we want to actually be applying this rotation to our body transport. So in here, we are going to write transform, which is our current transform. And we are going to be rotating it. So we'll be rotating it. And if we let me just delete this. And if we look at the rotate, we can see that it actually takes a vector three. So we're going to be adding a vector three. And which vector are we actually going to use? Well, it's going to be the vector around which this camera is going to be rotating. So back in Unity and are seen. If you look around which axis is our camera actually rotating When we are left and right, or our player as rotating around. So if we look in the transform right here, we can see that when we hold the Y and start rotating, the player starts rotating around. So we are rotating around the vector OP. So let's see that again. So we rotate around z, y, right here. You can see it on the transform. So let's go ahead and apply it. So it's the vector three dot up. And we're going to be multiplying it by the input that we got on the mouse x. Let's save that. Let's go back into Unity. And let's hit play. So now we can see that when we move our mouse left to right, we can actually look around. So now, even when we move forward, when we look in another direction, we move in that direction because we are moving the entire body or the entire transform of our player. But there are still a couple of things that we need to fix and one of them is actually controlling how fast we wrote it. So we want to add a mouse sensitivity variable. So up here, we are going to create a public. Public because we want to be changing it from our Inspector. So this is a public float and we are going to call this mouse sincere devotee. And let's just set it out 100 F for now. And down here in the input axes row, we are going to be multiplying it by the most sensitivity. And as long as we are here, we are also going to be multiplying it by Time.deltaTime, so its frame rate independent. Now, back in our gain. Let's save that. Did we save everything in here? Yes. Hit play. And now we can look around. It's a bit slow as you can see. So let's go ahead and increase it to 200. Is that butter that see the, Nope, it's not that good. Let's make it 500. And now we can actually rotate and look around much better. Maybe we can increase it later on. We'll see that. Let's actually make it 700. See how that works. Yep, I'm satisfied with 700. Looks good enough anyways, now that we have the rotation around the y-axis or looking left and right, it's time to make the rotation up and down. And actually, I don't feel like doing this. So I'm going to issue you a challenge for you to do it. And your challenge is going to be to, first of all, get the row axis value 14, mouse Y, excuse me, for the typo right here. So get the row x's value for the mouse Y. Then you need to make sure you control it with the mouse sensitivity. And finally, you need to make it frame rate independent. Now, you don't need to apply all of that to the rotation of the camera will do it later on. All I want you to do is get the input, used, the sensitivity to control it and make it frame rate and dependent. So pause the video right now and go do the challenge. Oh, OK, welcome back. So first thing we're going to do is we're going to create the mouse y. And we're going to get the input dot, get raw axes. So whereas the get raw axis, and it's going to be the mouse Y. But because it's a string reference, we are going to actually go ahead and get it from the input manager. So I will copy that and paste it right here. We're going to add the mouse sensitivity to control it. And we are going to make it frame rate and dependent by multiplying by Time.deltaTime. Now we want to be applying this rotation to the actual camera. So we need to get a reference to that camera. Up here. We're going to create a public. And what type should this be? Well, because we are using the rotation, that means we want access to the transform of the camera. So we are going to make this variable of type transform, and we'll just call it My Camera hat, and we'll save that. So now we can actually go into Unity. Go to player. And in here we'll have the option to add my camera hat. Let's save that. Now back in Unity, we want to be able to control this camera vertical rotation. So we are going to also be creating another variable, which is private, float, camera, vertical rotation. And we are going to be adding to this camera vertical rotation minus equals mouse. Why? Now, why are we doing this? First of all, let me explain what this minus equals min means. This means that we are taking this camera vertical rotation and then removing the mouse Y from it. So in order to make it look more professional, we simply remove this and we add a minus back here. So this is the same. Now, why are we making it a minus equals? Well, because if we look in our cameras here and we want to rotate it around the x-axis so it moves up and down. You can see that when we look up, the value actually becomes negative. And when we look down, the value is positive. So for some reason, well actually it's because of the way Unity is setup. When we look down, it's positive and when we look up its negative. So we want to be actually in reversing it because when we look up with our mouse, okay, the value goes to plus one. That means that we need to reverse it in order to make it. So this value, the most Y will be a positive value and the camera vertical rotation will be a negative value. So we will be able to actually look up when we move our mouse up, does get our camera head. And we are going to be applying, not just rotation. This time we are going to be applying local rotation. And why are we doing this? Well, because now we are not rotating our camera. We are rotating it relative to the transform parent. So hover over the local rotation. You can see that local rotation as the rotation of the transform relative to the transforms rotation of the parent. So we want to only be rotating the camera. And if you look closely, you can see that the type is of type quaternion. And what is quaternions? Well, quaternions are a way for United understand rotations from vector 3s. Now you don't need to go all in. I'm not even sure what quaternions are. They are very complicated mathematical formulas. Not worry about. Simply note that whenever you want to do rotations, you need to use quaternion. So we'll take the quaternion and we are going to use ruler, and this should have pronounced Hulu. And ways new ruler returns a rotation that, well it uses a vector three and converts it into rotations. And now we can have rotation. So earlier. And in here we are going to be rotating around the x-axis. So it's going to be, first of all, the camera vertical rotation. The y-axis is going to stay at 0 and the z axis will also stay at 0. So we're going to save all of that. And let's go ahead and try it out in unity and see what happens. So and player, we have the reference camera, we have the sensitivity at 700. When we hit play. We can actually start to look up and look down. And we can move left with our camera and right with our camera. And we can start walking and we actually have a first person looking camera. How cool is that? Now before we go, I just wanted to show you something that we didn't cover before. If we change the sensitivity in here, maybe some of you have noticed, let's say we put it up to 1000000. Okay, so now we look faster up and down and left and right. But when we exit play mode, you can see that it goes back to 700. And this is a very important feature of unity. This is because sometimes we might adjust things in play mode and they might break our game. So Unity makes, makes sure that it resets everything when we get out of play mode. So whenever you adjust something, make sure that you remember what you adjusted and then apply it when you go out from Gamow. So in the next video, first of all, we don't want to be looking very much up and down, so we can look all the way around ourselves, which is, of course, a very bad idea. We need to find a way to keep it at certain angles. And we also want to remove the little jittering that we have. So this will all be done in the next video, and I'll see you then.
13. Better Camera Movement: Welcome back, my fellow game developers. In this video, we are going to make our cursor disappear. So now it's not an hour way. No, actually we are going to do much more than that. First of all, you can see that we can no longer see our backs when we move up and down. And we can actually just removed our main camera from the player and we added a head. And now our main camera follows our head as we move through our world. This makes our camera much smoother and much better looking. So let's not waste any more time and let's get started. Oh, okay, so first thing we want to do is we actually want to stop our camera from rotating behind our back up and down. And for that we are going to be using something called a math F dot clamp. So let me explain what that is. So what is math? F dot clamp. First of all, it keeps the value between a certain minimum and a certain maximum. So it fixes a value from over or under shooting. So we can determine the what value we want to change. We then determine the minimum and the maximum. And that way this value will not over or undershoot, while over and under the minimum, maximum and minimum. This is the way we write it. So first of all, we have clamp. We give it the value which we want to be changing. We give it the minimum and the maximum. We then have it return a float of the value clamped between the minimum and maximum. So let's go ahead and do that. First thing. First we have our camera vertical rotation. So we are going to get this camera vertical rotation before applying it to our camera had. And we are going to use math F dot clamp. And the reason why we're using math F dot clamp is because clamp is a formula of the math library which gives us the ability to access various formulas like clamp and square root. And maybe we'll see later on what else. So what is the value? Is the camera vertical rotation? What is the minimum? We are going to set it to minus 90 f. And the maximum is going to be 90. So let's save that. And now, if we go back to Unity, when we move up and down, we should see that we cannot move higher than a certain value that Michelle, you in Main Camera. So currently we are at eight. And if we go down, we can see that we can maximum go to 90. And looking up, we can also only go to minus 90. Great, so now we have clamped our vision. But as you can see, when we move, we have some kind of weird jittering and our camera, I'm not sure if you can notice it, but there is a bit of jittering. And the reason for that jittering is because the camera. Is trying to keep up with our player as he is moving. And that's not what we want. We want to actually have the camera move after the player finishes moving. And for that, we are going to, instead of actually building the camera to the player, we are going to create a object that is a child of the player that's called head. And then we are going to make our camera follows that object around and well, actually not follow, moved to the position and rotate with that object. So first thing first, we are going to create an empty game object and under our camera. And we are going to call this game object our head. And why are we doing this? It's because we want to have our head in the exact position that our main camera has. So we are going to remove the head from the child of the camera, put it just as a child of our player. And then we are going to move our camera out of the child. So now instead of the player having the main camera as the my camera ahead, it's going to have the head as the, well, my camera hat. Next thing we want to do is we want to actually create a script that will allow the main camera to follow this game object. So in the Scripts folder and assets, let's right-click and go ahead and create a C-sharp script. And we are going to call this the camera moves. So now we have a script called camera move. Let's wait for it to compile that. There we go. So we'll move the camera, moved to the main camera, and we'll have it in here. And let's go ahead and open it up and unity. Now, what are we going to do here? First of all, because we are going to be following or moving to the camera head, we actually need a reference to it. So we're going to create a public transform. My player had. Great. So now we have a reference to the thing that we are going to move to. Next thing we're going to do is we're going to move there and we're going to move there every single frame. And you would say that, let's go ahead and use update. But in this case, update is not good enough. Why? Well, because there will be some sort of a battle between who goes first, the player that goes first, or as the camera goes first, or should the camera go after or before or during? So there will be a conflict. So what we are going to do is we're going to remove Update and we're going to use something called the late update. So late update is just like update. It's called every frame. But the difference is that the late update is called, well, later, late update, it's called after all the other updates have been called. So what happens here is that when our player finishes. His movement, the camera will move to the position of the head on the player, and this will remove all of the jittering. So what should we be doing inside of late update with one to move to the position of our player had and will want to rotate to our, with our player hat. And that's actually part of your challenge. Your challenge is going to be to move and rotate camera with head. So first of all, in late update, move the camera position to the player head position, then rotate the camera. Rotation with the player had rotation. And I'm going to give you a small hint. So you'll need to use Transform dot position and transform dot for rotation and ordered to that. So pause the video right now. Take your time. Don't be afraid. Do your best and I'll see you interested. Oh, okay, welcome back. So what should we be doing here? And we are going to access the transformed position. And because the camera move script is on the camera, that means when we write transform, we are referencing the camera. So camera dot position is equal to my player head dot position. And the transfer dot rotation is equal to my player head dot rotation. Let's save that and now back in Unity. So now we can actually move our camera anywhere we want. So we can put it up here, save that. And when we hit play, we can see that the camera moves to the position of our head and it actually moves now with us. So now we move around and the jittering is much less evident. And we can still look up, we can still look down, we can look around and we can move around. Okay, very nice. Now, what else should we be doing? While you can see that we have this mouse right here, and it's very annoying to have it move around. We want to actually be locking it whenever we enter the game mode. So let's go ahead and do that. Back in our script right here. Let's go ahead and get the cursor. And we are going to access the lock state of this cursor. And we're actually going to access the cursor's lock mode and we are going to make it a locked. Let's save that, and that's all that we need. We get the cursor, we access, it's locked state, we go to the cursor lock mode and we make it locked. So back in our game, when we hit play, we should see our cursor disappear when we had the screen. So now we can freely move around without our cursor bothering us at all. Great, so we have first-person moving. We, or I mean first-person movement. We have first-person camera movement. The only thing that we need to add an order to finish this is adding a bit of shooting and that's what we're going to do in the next section. So I'll see you there. Oh, and before we go, we of course need to stage of our files. So stage all. Let's go ahead and call this commit applying first, oops, first person camera to my player. And let's hit commit. We now have everything in our project looking at it. It's starting to come to life. I'll see you in the next video.
14. SECTION 3 - Creating Our Bullets: Welcome back my fellow game developers to a brand new video. And as you can see, we've added a big red bullet with a huge collider on it. And not only does this bullet hanging in the air, we actually are able to fire this bullet while not ourselves, but it gets fired on its own. And we can also increase the speed to 24. So we hit play and our bullet, oops, we didn't see that. Let's try this again at play. And our bird flies away, just like real bullets straight forward. So let's not waste and more time and let's get started. Oh, okay, so we know that African needs a bullet and every bullet also needs a gun. So the first thing we are going to do is we're going to create that gun. Now, at first we are, our gun will simply be a cube that we are going to add as a child of the hat. Now why is it a child of the head? Well, because we want our gun to move left and right and up and down with our head as we look around. So right-click on hand, create a 3D object and make it a cube. So now r cubed is huge. Let's put the game window right next to our view right here. And actually let's go ahead and child the camera to the head and reset its position. And I'll tell you why we're doing this. So now we can have the camera from the heads perspective and now remove the camera from the head position or from the child of the hat. So now if we move the cube, oops, nope, that's not what I meant. If we move the cube, we can see how it looks in our game directly next to us. So let's go ahead and scale this down a bit and scales down like this. Let's move it down, move it a bit to the left, and let's go ahead and create a material for it. So let's duplicate the plain material. And we'll call this the, let's just call it the government. So gun material. And let's drag it over to the gun, and let's make it a blue color. So we'll move this right here, make it blue, all the way blue, and will also make the emission blue. So now we have this, or you can make it whatever you want. We have this weird. Well, it doesn't need to look pretty in the scene. It just needs to look good in the game, but we're not done adjusting it. First, let's change the cube to a gun. And let's go ahead and make it a bit slimmer up and down. And let's move it a bit to the left and just adjusted until it looks as if it's coming. Sort of looking like it's a gun and our game mode. So I think that is good enough. Maybe if we move it a bit like this. And let's see how that. Looks and Okay, so let's move this game back. When we had play, we should see our gun moving with us as we move through our gain. So now what we need is we need some kind of bullet to shoot with. So just imagine that this is a really cool gun that we used to destroy giant monsters. That will be doing that later on. But for now, use your imagination. Next thing we're going to do is we're going to create a boat and to represent our book, we are going to create a sphere. So in hierarchy, right-click 3D object, and let's create a sphere. This is our sphere. It's a bit big for a bullet, so we're going to scale it down. So let's call this our bullet. And let's go ahead and scale down. So we press the key and we move it down, down, down, down, until it's about the small, so we can still see it. And it's small enough to represent a bullet. So let's maybe make it a little bit smaller desk that looks good enough and will also make it a red color. So we'll duplicate the gum material. Let's go ahead and make it red. And this red colour, it I call it read No, I meant this is the bullet material. So bullet and it's going to be red. It's not called read, so read and the emission is also very, very red. Let's add it to our bullet. So now we have a very clear red book that we'll be able to see as it moves through the air. Now, we want to move three air. That means that we want to add behavior to our bullet. That means that we need to create a script for it. So inside of scripts, right-click go to Create, Create a C-sharp script. And we are going to call this the bullet controller. So let's wait for it to compile. No, thank you. Why did that happen? Bullet controller has compiled and let's go ahead and add it to bullet. So now in here we have the bullet controller. And before we go, let's go ahead and make this sphere collider a little bit bigger. And later on will be of course, talking, going deeper into Sphere colliders and other types of colliders. But for now, just know that it helps us interact with various objects. So just make it a little bit bigger. And don't worry, we'll talk about, we'll go more in-depth into it later on. So now we have our ops, Not yet. So now we have our bullet controller right here. And what are we actually going to do with this bolt controller? Well, we want to be able to add force to it. So whenever this bullet leaves the barrel of argon, we wanted to move in a straight line forward. And whenever we want to add forces to our objects, we need to have a rigid body on them. Or whenever we want to make any game object come to life and interact with the world along around it. We need a rigid body on it. And we've talked about rigid bodies before. We haven't gone in depth into it. So now I'm going to deliver on my promise. So what is a rigid body? So it gives us control of an object's position through physics simulation. The rigid body object will be pulled downwards by gravity without adding any code. And we can also apply our own forces on them. So what this means is that we can get any game object. We can add a rigid body to it. And now it will be subjected to the physics simulation that Unity has. Let's go and add a rigid body component to our bullet. And now in Unity, you already know how to add a component. So I'll give you just a couple of seconds for you to do that on your own. You go to bullet. Pause the video if you know how to do this, time's up, add a component and type N, rigid body, not Rigid Body 2D, that's used 40 Rigid Body 2D. We are going to add a rigid body, which is used for 3D. And in here you can see that we have the ability to adjust the mass. We have the ability to adjust the drag. We have the ability to adjust the angular drag. We can remove gravity, which we'll be doing because we don't want our bullets to actually fall unless you are going for very realistic game. We can add a kinematic and kinematic if we hover over, it means that, well, it's not giving us anything. But kinematic means that it will not be subjected to the forces outside of it. And we have the interpolation. And this actually just allows for a better detection whenever it collides with various objects. And we can also change the collision detection to continuous. This is not necessary, but we can have, we can also add constraints on it. So we can freeze the rotations on the x, y, or z, and we can freeze the position on the x, y and z need to any of these. And we have some information in here that gives us the speed, velocity, angular velocity, and ex cetera. Great, so now we have a bullet that has a rigid body. And next thing we need to do is we need to go ahead and add a couple of forces and a bit of velocity to it. So back in our code, first thing we need is we need to create a public float speed, or let's make it lowercase. So this will be a variable to control the force on our body. And then we need a reference. So public. Rigid body, my rigid body. And now we need to understand which direction our rigid body is going to move. So if we go back into Unity, and here we have the speed and we can add the rigid body right here. And which direction we want. Do we want our book to move where ABI, obviously we want it to move in this direction, in the z direction. This means we are going to be using the vector three dot forward. So as soon as the bullet leaves the barrel, we wanted to shut out of his way. So back in our code and, and we of course will be doing this every single frame. So inside of update, we are going to access my rigid body. And how do we actually get the velocity? Well, I've prepared a couple of documentations right here. You can go and look them up in Unity. So simply go to rigid body in unity. And you should find this page right here. And you can see that there are a lot of properties. First of all, like I've showed you, you can freeze the rotation inside of the code, the position use gravity and a velocity. And the velocity vector of the rigid body. It represents the change of rigid body position. So if we click on that, go into the dignity documentations, we can see that the velocity vector of the rigid body represents the rate of change of rigid body position. So we give a certain value to the velocity, and this will be the rate at which our rigid body changes positions. We can give a velocity to our rigid body. So my rigid body dot velocity will be equal to, of course, we are going to be using the forward of the transport. So the transform dot forward vector times the speed that we have. And because we are working on velocities, we don't need to actually add the Time.deltaTime, which is very nice and cool. So let's save that and let's see if that works back in unity. And let's see how our game, okay, so we can clearly see the bullets or when we hit play, the bullet stays still. Who I is that well, because obviously we haven't added any ups, so we haven't added any velocity in here or speed. So let's move back a bit. So if we're able to speed, you can see that it moves slowly in the forward direction. So if we hit the scene, we can look at the direction that our bullet is moving in and it's the forward vector. So let's get out of there a bit. And let's go back and change. Oops, where's our bullet? So let's add a bit of speed. So let's make it 15 had Play. And now our pilot who flies away. So it's starting to look like a really good and bullet. And now before we go, I'm going to issue a brava challenge. Your challenge is to extract the methods. So extract the code for bullet flying from update into a separate method. And also extracted camera movement code, code, sorry for that in layer update. So if you remember inside of player here, we still have this mess inside of Update and bullet. We also have this kind of Why not such a big mass, but I wanted you to go ahead and learn how we can extract methods. So the way we do that, we actually take the scope. We right-click, we click on Quick Actions and refactoring so that extract method had extract method. And you immediately have the ability to name your method will be naming it bullet fly, hit enter, and now you have bullet fly. So now that I've showed you how to do this one, go ahead and extract the camera movement code, code and player update. Pause the video right now, go ahead and do the challenge. Gaye, welcome back. So N player will choose all of this code, will right-click quick actions and refractions. Extract method. And we're going to call this the camera movement. Hit Enter. And now we have player movement, camera movement as two separate methods. And our update looks extremely clean. So now we can look at update and no, ok, so what does our player do? He has movement and he has camera movement. Excellent. And this is the whole point of coding. You always need to have good habits at the start. So you always have clean code that is very understandable. Finally, we go in here and the Masters, the uncommitted changes. You can see that we create bullet material, we've created gun material. And by the way, whenever you see something that uses an order to recognize its own files, we also added a bullet controller. And if we click on player, we can see that we've created a camera movement method, everything in green, things that we've added, everything, read, things that we removed. And let's stage all of that. Click on Commit, created my first bullet. Comment. Go to masters. And I've made a huge typo in here. Not to worry about that. In the next video, we are actually going to be firing our bullets from the barrel and learning a very powerful tool in unity that is called prefects. So I'll see you in the next one.
15. Firing Bullets: Welcome back, my fellow game developers. In this video, we are actually going to prefab our bullets and fire are bullets. So as you can see, our bullets are getting fired from our gun or actually from a certain position. But as you can see, we still have a lot of work to do and we'll get to that. But first of all, we need to create our firing bullets. So let's not waste any more time and let's get started. Oh, okay, so first thing we need to do is we need to create a reference and a firing position for our bullet. So let's go into player. And in here we are going to go ahead and create a public game object. And this is going to be our bullet. And it's a game object because later on we are going to actually add the entire bullet, not just its transform. We want the entire bullet to be a reference to our player in order to be able to shoot it. Next thing we're going to do is we're going to create a second reference, which is going to be a transform this time. And this will be our firing position. So we want to determine a certain firing position from which the bullet will leave heap error. Okay, now let's go into Unity and create our firing position. So this firing position will be a child of the head. So we'll right-click on head and we're going to create an empty game object. And we're going to move this empty game object in front of our firing position. So let's go ahead and try to put it just in front of our gun. So this way, it will be shooting from our gun. And before we move on, let's go into r cube and just turn off the box collider. We won't be needing it for now. So let's name this D firing position. And this is where our bullet will be coming out of. Now, how are we? Well, let's go back. Let's see our players. So now we want to reference the fire position in here. So we'll simply drag the fire position here. Now we want the bullet, and you might say that yes, we have the bullet right here. But if we reference this bullet, when it should, shoots away and goes away, we'll want to shoot it again. And because we are referring referencing the bullet that is already in our scene, this is not going to work and we are going to be using the same bullet over and over. So what happens when splotch some enemy and gets destroyed or flies away after a certain time and gets destroyed. Well then we won't have anything to reference. So what we need to do is we need to actually prefab this bullet. And let me tell you about prefabs. So prefabs, a prefab is a previously fabricated game object that we can use multiple times. So pre for previously Fab Four fabricated, let's go into more details. It's a template for a certain game object. Prefab system allows you to store a game object with all of its property. So what do we use it for? We can reuse a game object configured in a particular way. For example, our bullet is red, has a certain size of the collider. So when we prefer, but all other bullets created using this prefab will have the same properties of having this collider and the script, for example, also. It can be used in order to edit many objects at once. So let's say we want to edit this bullet. And instead of editing every single bullet and arsine, we can simply added the prefab and all other bullets will also be edited. We can use the same objects in different scenes much easier. And this is what prefabs are. So lets go and prefab our pulpit. And actually, prefabs are extremely, extremely hard to make. So the first thing we need to do is we need to create a folder. We'll call this the prefabs and now comes the very hard part. And order to pretty it up this bullet, we will need to drag it right here. And that's it. That's, I just wanted to build up a bit of suspense because this is very underwhelming. This is how we create a prefab. And the way you know that a certain object in your hierarchy is a prefab. Well, you just simply need to look at its color. If it's blue, that means that it is a prefab. And you can find that in here. Now when we added the bullet right here in the inspector from the prefab bullet here will also be edited. So now if we go into player, you can simply drag this bullet in here. And now it references the prefab. If we click on it, click on it, we can see that it's referenced right here. We can even delete the bullet from the scene. Now we can add as many bullets as we want, and all of them will move in the forward direction, but for now, we'll delete them. Okay, great. So now we have our boats prefabbed, we have them referenced. Next thing we need to do is we need to shoot them whenever we press a certain button. So let's go and update. We're going to create a method that is called the shoot. And later on we'll move this method to a, another class, but for now we'll keep it in player for the simplicity, you can see it has a squiggly line because should does not exist. So we click on this little lamp here, and it gives us the option to generate the method, so will generate it. Of course it's a void, so we'll delete everything inside. And now we want to be, well, how can I say this? Instantiating the bullet whenever we press a certain button. So which kind of button are we going to be pressing? We are going to be using the input system that we learn, but not to get axes, we're actually going to be using it to get a certain a mouse button down. So if you go ahead and search for the get mouse button down and input, you can see that it returns true, which is a Boolean. So we need to remember Booleans are either true or false. It returns true during the frame the user pressed the given mouse button, so it returns true. And if we look down here, we can see that it uses an if condition in order to start the or in order to check if we did press it. Because as it says in the description, when we press it, it returns true. So that means that if we put it inside of the if condition, it will return true and this if condition will work. Now, they are not very familiar with if conditions. So let's delve deeper into them. What are if condition? Now, if conditions are used in almost every single programming language, whether it be C-sharp, Java, C plus plus, or anything else. So this is the structure of an if condition. So if some condition that needs to be true is true, then the code inside the brackets will be executed. So this is why we are using the get mouse button down, because as you've read in the description, whenever we press one of the mouse buttons will know what, which one later on, it will return true. And if we put it inside of these two brackets right here, and it returns true, a certain code inside of these squiggly brackets will be executed. And the code that we want to execute will be the firing of the bullet. And another thing that can be added to the if condition is an else. If. So, at the else-if takes some other condition that is true. So if the first condition is not true, we can write an else. If and if that condition is true, then we execute the code there is here. So if this condition, this condition is false, the code here is not executed. It will check. Else if this condition is true, then this code will be executed. But what happens if this code is false and this code is false? Well, we have a backup plan which is the apps. So if all conditions are false and none of them are true, then if it has an else, then this code will be executed. You can use if without an else, if and without an else. You can use the if with an else-if without an else, or you can use all three of them. So now that we know how if conditions work, and let's go back into our code. And inside the shoot, we are going to check if. Input, dot, get mouse, button down. And we're going to use the 0. And the May 0 means that it's the left-most button, which is used for the shooting in most first-person shooter games. All of them, I think. And in here we are going to be instantiating a bullet. Now again, will go back to the Unity documentations. So in here, we can see that we can instantiate objects. And you have many iteration of this. So you can either create an instantiate from just the objects that we presented. You can instantiate an object with its parent, or you can do these other things. And what we'll be focused on is this line right here. So we are going to be instantiating a bullet with an origin, with a position with a rotation which is quaternion. Because we already know that quaternions represent the rotation. And I need you to focus very clearly on how instantiate works because it's actually part of your challenge. So your challenge is to first of all, read further to instantiate documentation, to fully understand it, then you'll need to instantiate the bullet. Now, I've gave you a couple of things. So first of all, you'll need to use the bullet prefab as an object. Use the fire position for position and or rotation. Now, I know this video is a bit, has a ton of information we learned about preferred EPS conditions and so on. But this is actually extremely simple. And I've given you all the steps you need in order to complete this challenge. So don't be afraid. Have courage. Take your time. Pause the video right now and go do the Challenger. O k. How did you get on with that? So first thing we'll need to do is we'll actually go ahead and instantiate. So in substantiate, we'll open this up. First thing we need to add is the bullet as the game object. We then need to get the five position. And this five position is actually going to be the position from which we instantiate the bullet. And it's also going to be phi rotation, which the bullet will have. So which ever way we are facing with our fire position, which is attached to our head. That means it will be directly in front of our gun. So as soon as we instantiate the bullet, it will have the forward vector in front of it and it will shoot straight forward. So back in here are player has the bullet and the firing position. And now when we click on play, now our bullets might be able to wacky, as you can see o, and they are very wacky. So you can see that they are all over the place and we don't want that. And that's because if we click on the bullet would go down into the rigid body. We can see that we have these constraints in here. And let's go ahead and freeze the rotations on all the sides. Let's save that and let's click back on play. And now our bullets should be low. So our bullets should be a bit less crazy now. So as you can see, our bullets fly all over the place. So now our bullets are much better and they are actually getting stuck to the wall because as you can see when they have a certain direction that they need to be going. So they are getting stuck on the wall. In the next video, we are going to actually be destroying our bullet. Because as you can see right here, there are a lot of clones and all of these affect our computer. And you can already hear the fans on my PC and going crazy. So next video, we'll be delving deeper into what colliders are for these bullets. And we are going to be destroying them after they hit certain things, just to save up on a bit of CPU. So until then, I'll see you in the next video.
16. Destroying Our Bullets: Welcome back, my fellow game the developers. In this video, we are going to be destroying our bullets. And as we said, it's very important for the performance of our game. So as you can see, whenever our bullets hit a certain Collider or objects in the environment, they will get destroyed and will no longer be racking up in our hierarchy right here. But what we've also done, if we should the bullets into the air, you can see that they also get destroyed after a certain time. So let's not waste any more time, and let's get started. O k. So what's the problem? The problem is, let's say we fired the bullet right here. And if we fire a ton of bullets, you can see that we have a lot of clones in the hierarchy. And this is what happens whenever we instantiate a prefab, it creates a clone right here in the hierarchy. And you can see now, for now these, all of these are not that big of a problem. But let's say we are playing a long level and we've been playing around five minutes of shooting and all of these bullets are in our hierarchy. The performance of our computer will take a hit. And slowly but surely the game will start lagging and we will not be able to play it. So what should we be doing about all of this? Well, we need to be destroying our bullets whenever they hit a certain target or a collider. So what does a collider? We've talked about colliders. Let's add a bullet in here in our scene, and let's take a bit of a look at it. So you, if you remember, we've added this collider, which is these green lines over here. And we can actually adjust the radius of this collider. And these colliders are actually what allows us to interact with the physical world around us. So let's look at our player right here. If we go to the body, you can see that it doesn't have a collider, but our player has the character controller and it has these green lines overt. And these represent the collider or the way which are player interacts with the world. Now if we go, for example, for this block right here, we can see that it also has a box collider and we can actually edit it with this button right here. Now, it's not very obvious, but if we move this little square, you can see that we can increase the size of our collider. So let's say this is our collider right now. And let's keep it like that. And let's go into our player. And I just wanted to make this just a little bit smaller, so 300 and hit Play. And now if we want to go up on the front, you can see that the bullet gets stuck on the collider that we've just created and we cannot move towards cars. The way objects interact with the world in Unity is through these colliders. So let's set this collider down and keep it just as big as it should be, not more. So now that you have a bit of understanding of colliders, what should we be doing with these colliders? Well, we want to, whenever our bullet hits a certain collider from the environment, we want this book to get destroyed and removed from the hierarchy. So how are we going to do that? Well, we have a certain method in here. So this is the documentation for the collider. You can go ahead and read all about it has many properties, many methods, and many messages also. And one of them is the On Trigger Enter. And this is when a game object collides with another game objects object, and this is exactly what we want. So if you go to the ANC trigger Enter, we can see that in the description, well, it's when the object drugs with another object. And this method is called as soon as the object which has the collider on it interacts with a another game object that has a collider on it. In unity, we can see that we, for the sphere or for the sphere on the bullet hoops, we can make this a trigger. So if we click on here, this becomes a trigger and this allows us to actually create the trigger enter method and our script. So let's go to the bullet script, the bullet controller script. And just under the bullet fly, we are going to create the own trigger enter. So as you can see right here, we've talked about methods before and we said that it can sometimes take parameters and this is a parameter right hip. And what is this other collider? You might ask, well, this is the, well, other colliders. So let's say our bullet hits, let's say it hits this object right here, it hits the collider of this ramp right here. The other parameter that is sent through is the collider of our ramp. So what are we going to be doing here? Well, as we said, we want to have our bullets get destroyed whenever they hit a certain objects. So to destroy object, we simply write here destroy. And we tell it that we want to destroy the game object. And whenever we arrived game object, just like that, we destroy the game object that has the script of the bullet controller on it, which means the bullet in here will be destroyed. And before we move on, we need to make sure of one thing whenever we create a prefab and we want to apply to the main prefab from our scene, we need to overwrite. So up here, you can see that we have the option to override and apply all and this will change, for example, it will tell us that we've changed the size of our sphere collider from 0.83 to 0.8. So we can apply all of that to the prefab. And now the prefab and all bullets created from this prefab will have this radius right here. So let's delete the bullet and let's see if that worked. When we hit play. We should see that whenever we hit the plane or we have a certain object, the bullet gets destroyed. So now you can see that we no longer have all of these clones while we still do, because some of them are actually flying away. And we will deal with this problem also. But now when we hit this break right here, you can see that we no longer have a lot of clones around us. So when we hit the plane, some of them sometimes get through because of the speed. And you can see that our game no longer legs too much. And actually the bullets get destroyed. Some of them fly off. So what are we going to do about the bullets that fly off into the air? Well, we are going to create a timer, forties bullets. So after a certain time of flying in the air, we are going to destroy them just like we did on the, on sugar. Enter. Let's go ahead and do that. So first thing we'll need to do, we'll need to go and to our script. And in here we are going to create another variable which is a float. And you can name multiple variables on the same line if they are of the same type float. So this is going to be the bullet life. And this is the amount that the lifespan of the bullet that is being fired. And how are we going to reduce this bullet life? Well, an update, we are going to take our bullet life and we are going to be reducing it by the time delta time that passes. And if you remember, when we put this minus right here, we mean that the bullet Life Is equal to bullet life minus time dot delta pi. So this is a comment right here for you to remember in the future how this actually works. So let's save that. And before we go, we need a way to always check on this bullet and see if it goes under a certain value. We want to be destroying it. And that's where the challenge comes in. So your challenge is to create an if condition. So create an if condition that checks if Pollock life is less than 0. And if it is, you need to destroy the book. Make sure you do that in the update. So pause the video right now and go create an if condition. Okay, welcome back. How did you get on with that? Right here under the bullet life. So every frame we are taking away a certain amount of time. It's the time between each frame and we're reducing bullet live by that time. And eventually, if the bullet life as less than 0. So this means that it surpasses a certain threshold. We are then going to be destroying the game object. And let's save that. And back in our game. Now, let's go to the prefab of our bullet. And we have the option, whereas it, we have the option to add a bullet life. So let's make it a 2 second. Let's hit Play. And now let's say we fire our bullet. It gets destroyed when it hits a certain collider. And if we fired into the air, we can see the clone right here, after two seconds disappears, so 12 disappears. Great. So now we're, however we should our bullets, we can always be sure that they were all be destroyed. And hour computer will not take any hits and not get impacted with lower frame rates. So that none. I hope you enjoyed the video and the next one we are going to be adding more accuracy to our bullets. So I'll see you then.
17. Adding Accuracy To Bullets: Welcome back, my favorite game developers. In this video, we've added a small point in the middle of our screen. And that's it. Well, no, actually, as you can see, we just shot a very accurate bullet. So if you remember before we created this video, when we should at a certain point and our world, the bullet just goes wherever it wants. But now when we shoot, it goes exactly where we wanted to go. So now we have much more accurate bullets. So let's not waste any more time and let's get started. Oh, okay, so first thing we are going to do is we're going to create a crosshair in the middle of our view. So in here we want to create a small little button in front of us in order to have a point to point. So in order to do that, we are going to be creating an image in front of our player. And in order to put an image in front of our player, we want to create a canvas. So let's go ahead and do that. And our hierarchy, we right-click, we go to UI. And in here we can choose to create a canvas. So now we have a canvas right here with an infinite system. And this event system allows us to push certain buttons on our canvas. We can simply child to our campus. Now, where's our campus? You might be asking, well, this white huge line as our canvas. And if we double-click on it, you can see that this is it. And you might be wondering, why is it so big if you look closely, this is our little playground and this is our canvas. And whenever we want to be changing things in Canvas as butter to go and press the 2D right here. So when we press two D, You can see that we can handle Canvas much easier. Now, why is Canvas this huge? This is a way for unity to add images and things and easily modify them by making them to speak. But don't worry about that because let me just show you why. If we right-click on Canvas, Go back to your eye and let's go ahead and add a image. So you might think that this image will be huge. In fact, if we look in game, you can see that this is the image and it's actually a very small looking square. And this represents what will be rendered on the UI in front of us and we'll be using it a lot later on. Now, before we start changing our image, we need to go to the canvas. We need to make sure that in Canvas, instead of the canvas scaler being the constant pixel size, we want to scale with screen size. And in here we can change the reference resolution. And because we're playing in the 1920 by 18, by 1080, we're going to do the same inhere, so 1920 by 1080 and click on Enter. And now we have our canvas always set to the resolution. Okay, great. Next thing we're going to do is we're going to click on the image that we haven't here. We are going to double-click and we're called the cross. Hair. And we want to make it a tiny circle. So we can go in here into the source image. We can click in here and we can actually change how our little image in here looks. So we're going to choose to have it as a knob. Oops. So as a knob, it's a circle. And let's go ahead and make it smaller. And before we do that, let me just dock the game view right here so we can see it. And the way we make it smaller is be hogged one edge, hold down Alt, and then scale it down and it will scale from all directions. And now you can see that it's much smaller. So let's go ahead and make it even smaller. Make sure that its position is always at 0. We don't want to be putting it on the side. We wanted to be always at 0 right here, so 00. And of course we wanted to be a circle, so let's go ahead and make it maybe 25 by 25. So, And finally, let's change the color and let's make it black. So now in our game, let's see how that looks. Nope, it's, I think it's still a big so Let's make it 12 by 12. Okay, so save that. This depends on your preference. If you want, you can even not make it a knob. You can make it a square if you like. So it depends on you and you can make it as big as you want. So we hit play. And now we can see that we have this point right here. But as you can see, the bullets don't exactly go where we want them to go. They go flying off somewhere into the distance. And actually, it's not as accurate as we'd like to have our bullets. So how are we going to change that? Well, we are going to be creating something called a re-cast. So what is a re-cast? A re-cast is a ray that is cast from a certain position of your choosing. If you hit a certain collider in your world with the physics dot re-cast, it returns a true. So you should be immediately thinking that we are going to be using this inside of an if condition to check if we hit any collider. And let's explore the structure of a re-cast. So re-cast, first of all, has an origin and it's going to be the starting point of our array. We also have the direction of the ray. So just like we choose the direction of our fire point, the direction of the velocity of our bullets. We can also give the direction to the ray to follow and we have the information that we get from that Ray. So whenever we hit a certain collider in the world using this ray at actually returns information about the sway. And this is going to be very important for us in the future. And we can also add a max distance to the ray that travels. So let's go ahead and create a re-cast. So first of all, we want to go to our player and inside shoot. Whenever we actually hit the mouse button, we want to check for a re-cast. First thing we're going to do is we're going to create a variable that is afraid cast, head, type, and we're simply going to call it hit. Now, we are going to create an if condition that checks for a physics dot re-cast. And here first of all, we are going to choose the origin. So what will be the origin of our re-cast? Well, it's going to be my camera head dot position. So because we have our crosshair right in the middle of our screen, and the middle of our screen is actually the direction in which our head or the player's head is looking at. So let me put the canvas right here and make it smaller. So the position right here will be the direction in which our head of the head of the player is looking. So it's going to be the origin. Next thing we need to choose the direction. So it's going to be the my camera head dot forward. And we need to create this out head. And what out means? We didn't cover that. So what it means is that it puts out the information of the re-cast into the variable head that we've created up here. And finally, we need to add a max distance. Let's, let's just make it 100 for now. Maybe we'll change it later on. And before we continue on, we just want to make sure that we have everything set up correctly. So we're going to create a debug log. And this will print thing to our command line. And what we want to be printing is we just hit. And here we are going to take the hit or the object that we've had with our re-cast. We're going to access the transform and we are going to get the name of it. Let's save that, and let's go back into Unity and see if that works. So now when we hit play, let's see, for example, if we hit the plane, we can see in the console that we just had the playing. And now if we hit this cube, I am not sure what the number is on it. So when we hit the cube, it hits cube to, let's see, is that really Q2? So where's our, oops, let's go out from 2D. Double-click on Game Q2. And yes, it's working. So now you can see that we are hitting different objects in our world and we actually have information about these objects. And this will be very crucial later on as we move through the game because we want to know whether we're hitting an enemy and ally a big enemy, a small enemy. And as you can see, we, whenever we shouldn't the air, we actually don't get any response because at a certain distance this does not work. Okay, great. Now, next thing we need to do is we need to actually make the direction of our file position. Look at the center point. So that way we will be able to actually direct our bullets to the crosshair in the middle of our screen. Let's go ahead and do that. So back in our code in here, instead of simply printing things, we are actually going to take our fire position and we are going to be looking at it. So we have the look at which rotates the transform. So the forward vector points at the targets current position. So this is exactly what we want because as you can see, the bullet is going towards or in the direction of the fire position rotation. And when we look at a certain object, the fire position will turn its rotation towards that. So this means our bullet will go in that direction. So now we take the hit and in order to access it, we can actually use the point which the impact point in the workspace where the ray hit the collider. So we'll use headshot point. Now again, before we move on, we cast a re-cast From the camera, had positioned the camera head dot forward direction. We get the information from the hit and it has a maximum distance. When we do get a hit position, we use the five position to look at, which means we rotate towards the head or the position on which we hit with the rate gas. And we get the point which is the exact point where our re-cast hit. And then when we have the far position looking at this point, we will actually instantiate our Bullet and it will be very accurate. Let's save that. And now back in our game play. And now, as you can see, if we want to shoot at this position, if you look closely on the bullet, you will see that it actually goes to that exact same position. So now we have a very accurate gun, but there's still a small problem. And that problem is what happens when we shoot up in the air. So if there is no re-cast, what will the bullets BY doing? And the problem here is, now, you might think that, OK, no problem. The boat will just fly away on its own. But sometimes this will create a lot of errors and we want to avoid that. So back in our game, and here we are going to use the else. So this means if we don't get a true value so we don't hit anything else. We want our file position to be looking at my camera head dot position. And we're simply going to be adding a bit of my camera head forward times. 50. So let's say we had a re-cast. We don't register anything, so we have nothing to look at. So either we look at the head point or if we don't find anything, we are going to be looking at the camera, had taught position, and we are going to be adding to it in the forward direction, just a above the player certain direction. And now if we go back to our game, this might not be as obvious, but in the long run, it will be much more evidence. So as you can see, the bullet still disappears behind the cross here. And now we have a very accurate put. Okay, great. So now we have accurate bullets. We make sure that if we don't have a certain head position, we still have a direction to fire at. But there is still one small problem that may causes more problems in the future. So if we go closer to a wall, you can see that the bullet, instead of hitting a wall that should be in front of it, it actually also moves towards the center of our screen. And this is a bit cumbersome in the future. When will, when will start adding effects to our game. We'll causes a lot of problems. So we are going to face them before they get to us. So here, when we cast a re-cast and we actually hit something, we want to check for the distance between the camera position and the hit point. And if it's greater than a certain threshold, then we'll look at the position. So here we are going to create an if condition and check 40 distances. Now, how do we check for a distance? If we go in here, we have the vector three dot distance, and it returns the distance between two points, which are a and b. And what we want to check is the distance between my camera head and the head point. And that is actually part of your challenge. Your challenge is going to be to calculate the distance. First of all, check it. 40 distance between the camera position, which is my head and the head position. And then if it's greater than a certain float, which I will go, I'm going to go with 2F. Use the if condition we learned in order to actually look at under only this condition. So pause the video right now and go do the challenge. Oh, okay, welcome back. So if condition we're going to access the vector three dot distance. And we are going to use my camera hat dot position. And the other value is going to be the hit dot point. And if both of these, or if the distance between these two is greater than two f, then. And let me teach you a small trick in here. If you want to move this line up or down, simply hold down Alt and use the arrow keys, hit tab and it will go into its position. So let's make this a bit cleaner. So now only if the distance between the camera head position and the head point or the point at which the rake Estates is greater than two, then we will be looking at else we will simply be shooting the wall. So let's get back. And now again, let's hit Play. So now our pullets are still accurate. But when we, let's take a look down and when we hit, you can see that the bullets don't directly go to the far position and they actually get destroyed before they get there. And the further we look up, you can see that they then become accurate when they are at a far distance. So great. Now we have very accurate bullets. We are firing them at the appropriate distances. In the next video, we are going to be making our shooting much more exciting by adding particle systems. So I'll see you in the next one.
18. Making Shooting More Exiting: Welcome back, my favorite game developers. In this video, as you can see, our player looks cool as hell. In this video, we are actually going to add a bit of flavor to our shooting. So now not only do we shoot bullets, we also have this little muzzle flash in front of us. Of course, you'll have the ability to change up your muzzle flash depending on your preference. But we are going to have a lot of fun by learning the particle system and instantiating it whenever we shoot. So let's not waste any more time and let's get started. Oh, okay, so right now when we hit play, we have our bullets. They are accurate, but the shooting is honestly a bit underwhelming. So for example, when we actually hit a surface, we have no idea that we did. And there is no indication that argon is actually shooting something like able it. So the way we are going to change all of this is by adding particle systems. First of all, for some muzzle flash. And then we are going to add in another particle system for whenever we hit a certain object, it will create a volatile. So what is a particle system? If we right-click right here in the hierarchy, we can go into the where are the effects. And we can create a particle system has called into scenes. And let's look at our particle system. So this is it. And you can see that it's a bunch of particles that get rendered in front of us. And these are actually to the sprites that always look at the camera as we move around. So as you can see, if you've noticed that they are always moving around and there are a ton of things that we can change in here on the right. But we want to actually go ahead and add particle systems that already exist and are much better than the ones that we can create our own later on down the line in this course, we are actually going to be creating our own particle systems, but for now, we are going to get them from Unity's Asset Store. Now, if you've never been to Unity's Asset Store, it's actually fairly easy. Simply go to asset store opportunity.com. And in here you can search for unity particle pack. And when you find it, it's a bit of a big file, but don't worry, it's completely free. You have to click on add to my assets. When you do that. Next step is to go into Unity, go to window, and go to package manager. And this should open up a window somewhere. And this is the package manager where you will have all the assets that you've imported from Unity's Asset Store. Now when you add your particle system asset, you should have this unity particle pack, five times x or something when you have it downloaded right here, and then click on import. So let's do that. I've clicked on import. It will give you all of these. Simply make sure that you check all of them and then hit Import and wait for them to import into your project. I will use the magic of editing again. And I will skip this boring importing part. It may open up a window just like this one. So if it does simply click on Reload and don't worry about it. Ow, kay, welcome back. So now that we have the package year important, it's called the effect example. We can go ahead and right-click on package manager and close the tab will also close the project settings for now. And let's open up this file and see what we have here. So these are all of the different facts that we have. And we have the blood fire explosion and a lot of other things. But what we want, we want to go to the weapons effect. We have the prefabs in here, and we have this bullet impact in here for flesh big effect, we have impact for small flesh effect, we have the impact or effect and this is one that we want to have. We also have sand, stone and other things. So we want the impact of the bullet on the metal. So what we do is we are going to actually duplicate this one. We're going to rename it to the bullet impact. And we are going to drag it into our own sets of prefab. So drag the swan right here into the Prefabs. So now in Prefabs We have the bullet and we have the bullet impact. Next we want the muzzle flash. So let's go into the example Effect and back in the prefabs, let's get this muzzle flash. Duplicate that. And we'll call it our Gone muzzle flash. And again, we are going to go into our prefabs and drag this con, muscle effect into our own prefabs. Great. So now in Prefabs We have the gun muzzle effect and the bullet impact effect. And we can actually go ahead and add this into arsine and simply look at them. Let's move this up and let's play it. So when we hit play, you can see that this is the muscle effect that we are going to be playing whenever we actually shoot with argon. And this will be the bullet impact. So let's see that again at play. And this will be our bullet impact. Very nice. Let's delete both of both of those from our scene, and let's go ahead and instantiate them whenever we actually need them. So back in our player script, and here, first of all, we'll need a reference. So we're going to create a public game object. And we'll call this muzzle flash. And we'll also need a another one for the bullet hole. So now we have the muzzle flash and the bullet hole IS public game objects. Back in Unity, we click on player. Let's go ahead and add the bullet impact to the bullet hole and the con, muzzle flash to the muzzle flash. Save all of that. Next thing we want to do is we first of all want to instantiate the muzzle flash when ever we actually shoot with our gun. So this will be part of your challenge. And your challenge is going to be to instantiate. The muzzle flash. So first of all, review the instantiation in Unity documentation. Instantiate the mother muzzle flash whenever we shoot and make the muzzle flash a child of the far position. And we'll see why in just a bit. So pause the video right now and go do these shallow. Ow, kay, welcome back. So where should we be instantiating? Well, whenever we press the button, it doesn't matter if we actually find a re-cast to hit or any thing. We just want to instantiate it whenever we press the mouse button. So in here we are going to write instantiate. Here it is. And then the origins or the object that we want to instantiate will be the muzzle flash. And the position is going to be the fire position, dot position. And the rotation will also be the far position dot rotation. And finally, let me just show you why we want to have the fire position as the parent. So back in our game here. And now when we hit play, and let's see if that works. Well. Actually the muzzle flash, if you look on the hierarchy, is actually getting created, but it seems that nothing is happening. Why is that? Well, let's put this muzzle flash in here and let's look at it just a little bit. So first of all, we can actually play it and we see that it's actually real. But the first thing is that it's actually very small. So let's go ahead and make this maybe four by, four by four, and this will scale up our gun muzzle flash. Another thing that we need to do is that we need to actually click here on play on Awake. And what this play on Awake does is it actually starts playing as soon as we actually instantiate this one. So let's see if that makes any changes. And before we go, don't forget to apply all of that to the prefab that we've created. Delete the gone muzzle flash and are seen. And now when we hit play, you can see that we have a muzzle flash. And why did I tell you that we need to make it a child? Because you can see that as we move, the muzzle flash is not instantiating on our gun. It's instantiating in front of it. So, and another problem that we need to solve is these, all of these gun muscle flashes are not getting destroyed. And it's actually a fairly easy solution. So if we put it in here or we don't even put it in the scene. If we scroll down, we can see that we have the option in here to stop the action and it's currently on non. We can click on here and we can click on the destroy. So this will destroy the particle system from our hierarchy whenever it's finished playing, let's apply that and backend our game art here, or I mean, in our script right here, let's go ahead and make it the child of the FARC position. Save that. And now let's go ahead and try it again. And we shouldn't have a very nice muzzle flash. So hit play. And now we can see that even when we move, our guns still flushes in front of us. Very nice. Now you can adjust this Muslim flesh as much as you want. You can make it maybe bigger, scale it up. Maybe you want to change the position of the fire position. Maybe you one, I'm not sure what you want to do, but anyways, let's go out of play mode. In the next video, we are going to be adding the bullet hole effect. And we're also going to be learning all about layers because layers will allow us to have bullet holes, only uncertain game objects, not all of them. So until then, I'll see you in the next video. And before we go, let's go into the Masters and let's commit our changes. So I've committed the, as you can see here, I added accuracy to my bullets and now I'm going to tell it over large file detected. Ok, so let's see, and if these files are too big, let's go ahead and ignore all of them. So right-click in here. And let's go ahead and ignore everything under the effect examples. So ignore everything beneath. As assets affect examples, click on OK. And now we're going to stage all of that, comment, all of that, and added muzzle flash to my guns. Okay, great. With an exclamation marks, commit all of that. And I'll see you in the next video. We're where we'll be adding bullet holes.
19. Adding Bullet Holes: Welcome back, my fellow game developers. In this video, we are going to be using tags to have different effects when we shoot things. So now when we shoot the little cubes that we have, you can see that we are creating bullet holes that are perpendicular to the surface. And this happens to all the cubes that we should. But if we should the plane, you can see that we are having these weird water leakages upwards in the air. So let's not waste any more time and let's go ahead and get started with learning about banks. I'll see you in just a bit. Oh, okay, so first thing we want to do is we actually want to be instantiating our bullet holes. Now, if you want to take up this unofficial challenge, you can go ahead and do that. Ok, time's up. So let's go ahead and open up the script. And inside of here, whenever we actually get a certain re-cast hit, we are going to go ahead and instantiate the bullet hole. So in here, if we also are at a certain distance, we are going to end substantiate and we're going to instantiate the bolt hole. It's going to be at the head dot point. This is the position of the Eureka State and we are going to use the quaternion. So quaternion dot look rotation. And why are we using lock rotation? So you can see here that it creates a rotation with a specified forward and upward direction. And that's why we would need to use the quaternion look rotation for the rotation of our boat. Hope because we want it to always be perpendicular to the hit point on a certain surface. So we are going to use the hit dot normal and the normal, the normal of the surface the ray hits. So normal means that as the perpendicular, perpendicular axes of wherever we had a point this way, the bolt hole will always be facing the perpendicular direction of any surface that we had. So let's see that in action. Let's save that back in our game. And when we hit Play, now, whenever we shoot, you can see that we actually have a bullet hole instantiates. Now, honestly, these bullet holes are a bit small and they are not going away, or are they? Oh yes, indeed they are going away on their own. How cool is that? Now I want to make these bullet holes just a little bit bigger. Maybe, let's say maybe double the size, so too on the scale, let's see if that looks good. Just so we can see them butters or now, yep, these look a lot better. So now we have a bolt holes, nice and great. So now we have this bullet holes firing every time we are moving. But the problem is. There are still things that we need to change about because later on, for example, let's say we add, maybe we add the, some type of enemy and we don't want to have these kinds of bullet holes on our enemy. We only want to have this bullet holes when we shoot certain kinds of objects. So maybe we don't want to have bullet holes on the floor. We only want to have bullet holes on the cubes and the environment around us. So for that, we need to use something called the tax and what our tax. So if we go ahead and click on the environment, click on a cube or any object, for that matter, any object in our hierarchy, even the main camera has a tag right here. You can see that it's the tag of the main camera. And cube, for example, dqG number two is untagged. So we want to create a tag for this or a certain number of cubes that we have in here and tag them as a shoot will object. That way, only the mutable objects will get bullet holes on. So let's do that. In order to create a tag, simply click here. And you can either choose one of the texts that are already available or you can go ahead and add a tack. And we can see that there is a list of tags that is empty also have the sorting layers, and this is mostly used for whenever we are creating a game and 2D, this allows the sorting of layer. So what layer shows in front of which layer? And then we have these layers right here that we'll be using a lot in the future as the project progresses. So let's go ahead and tags. In here, the list is empty. Let's create a new tag and we'll call this the sharable shootout. So now we have a sharable tag. And let's go in here and select all of our cubes without the plane. And let's go ahead and tag them as suitable. And let's save that. And now what we should be doing is we should go and instantiate our bullet holds only if the object that we had with our re-cast is a suitable tag or has a suitable tag on it. And for that, I'm going to issue you a challenge. So your challenge is to add a condition for the bullet hole instantiation. So check for the tag on the hit and make sure that it's on the head point and make sure that it's suitable. And if you feel confident enough, pause the video right now and go do your own research and find out how you can check the tags on game objects. Or if you want to have a little hint, let me give it to you. So you'll need to use the hit dot collider dot hashtag before you instantiate or inside of your if condition to check the tag. So now that you have all the necessary weapons, don't forget that the tag is a string. Pause the video right now and go to the challenge. Ok, welcome back. So let's go into our code. And in here before we actually instantiate. We are going to create an if condition. We are going to, oops, we are going to first of all open up the brackets and get the hit. We are going to use the collider that it's on and that is on the head. And we are going to use the tag in here. And we're going to compare it to the tag on our game objects. So because this is a string reference, we need to go and make sure that we write it correctly. So Shu table, we can't copy it, but we can remember that sold suitable back in our code. Suitable. And let's move this instantiate in here. And a nifty trick that I'm about to show you is that whenever we have a single line of code under the if condition, we don't actually need these two squiggly brackets. And this will work for only a single line of code. Because when we hit enter now everything in here is outside the boundaries of the if condition. So let's make sure that all of this works. So we'll save all of that. And now we'll go into our gain, will wait for this to compile. And as we remember, the environment, the plane is untapped. So whenever we should, we shouldn't get a bullet hole on the plane, but we should get a bullet hole on our cube. How cool is that? So with that done, we can do one final thing. Let's go into our scenes in here. Or where are these? Where are the OK, the effect material? And one final thing before we go, let's go ahead and add a certain particle effect to whenever we hit a, the plane. So let's go ahead and add a water container extinguishing. What does this one? Let's see. Well, actually the water leak K9 soul or Et 1d lattice. Okay, so the way we do this, let's delete. This is the this is the one or this one, the container effect. Which one is the water leaking. Let's hit play. Okay. So this is the one that we want. Right-click on this bullet impact water container, and we only want the particle effect. So let's go ahead and click on prefab and unpacked completely. So now we can remove the water leak. And let's go ahead into our prefabs again. And in here, simply drag the water leak and now it's a prefab. Let's go back into our polar script. And up here we are going to add the water leak. Save that. And if you want to take this little challenge, you can also go ahead and create a, another tag added to the plane. And then if we hit the plane deck or the HIT Collider has a plane tag or any name that you want to give to the plane, it will instantiate the water leakage. Okay, time's done. Let's go back in here. So player will have the what leak and we'll go ahead and go to the plane here. Whereas it warps plane. Let's add a tag. Water leaker, we'll call it. Let's copy the water leaker, save that back in here. Let's go ahead and create a if condition. So if they hit dot collider tag. Or we can also use something else which is compared tag. Open up the brackets in here, and add the water leaker. So this is exactly the same as the one above, but it's just a different way of using the S1. So we're going to copy this instantiate and paste it in here. And instead of the bullet hole, we are going to call the, what was it called, the water leak. So water leak, save that. And back in Unity. Let's click on the plane, make sure that it's a water liquor. So hit play. And let's see if that works. So we up and, and it sort of works and doesn't disappear. Nope, it's not disappearing. So make sure that the water leak gets destroyed. And stop action, destroy, save that. And now we hit play. And I know it's not very not very logical to have the water leaking from the ground, but we just want to demonstrate the difference that we can make with these tags and the dynamic that it adds to our game. So in the next video, we are going to be adding a couple of enemies. Don't forget to commit your changes. And I'll see you in the next video.
20. Creating Targets To Destroy: Welcome back, my fellow game developers. In this video, we are going to be adding a couple of spheres in the air. So see you in just a bit. No, actually we are adding these fears because these fears are our enemies. So whenever we should these, they are getting destroyed. And when we should Other things, we create bullet holes, when we should the enemies which are green and scary, Not yet, but they will be later on, they get destroyed. So let's not waste any more time and let's get started. Oh, okay, so now we can shoot. We have bullet holes or shoot. Or shooting is really exciting and everything, but we still lack enemies to destroy. Let's fix that. Let's right-click and our hierarchy and create a 3D object. And let's go ahead and create a sphere. So now we have this sphere in the middle of the air and we are going to scale this little puppy up. So let's make him a bit bigger too, where his around 3.92, maybe three. Let's make this a good nice number. Three's. Next thing we are going to do. We're going to create a material for these guys. So we'll let say duplicate the gum material will add to this cube and maybe we'll make him, what should we make him? Let's go ahead and make him green because we still don't have any green colors. And let's go ahead and change the emission also to green. So now we have this bright, oops, this bright green or floating around. Should we make them lighter or darker? Let's keep him like that. Great. So now we have this enemy that is floating around. And what should we be doing right now? Well, we should go into our script and destroy any object that are bullet collides with. So before we do that, I want to duplicate the sphere. And let's make a couple of enemies right here in the air. And right-click create empty game object. And let's call this d enemies. And at these fears Under the enemies, game objects. So now they are all our enemies. Ok, great. Actually let's move this one here and move this one over there, and this one over here. Okay, great. Now we have our enemies in our playground. I'm just giving them a bit of a random field. Great, so now save that. We hit play. And we have these enemies in the air right now. But as you can see, nothing happens, our bullets simply disappear. So what we want to do is we want to go into our scripts and go to our bullet controller. And in here on the on sugar enter, before we destroy the game object, we want to destroy. The other game object. So now the other is the Other collider that we collide with. And we take the other collider, we access the game object on it, and then we destroy it. So now back in our game, we had play. And let's see. So, oops, let's hit this. And whenever the book collides with our enemy or these spheres, it gets destroyed. But there is a, just a little small problem. It's not very noticeable or anything. It's not groundbreaking. But the problem is, is that when we hit our ramp and everything around us, the world also disappears. So yeah, that's not such a good idea. So what we want to do is we actually need to give you a challenge. So your challenge is going to be to destroy only the enemies. So if you're feeling up to it, even before I show you to challenge from only this one, you should get a feel of how you need to build this. If not, you need to create an enemy tag. You need to check for enemy tag whenever you collide with a target. And I'll give you a hint that we've already done, but you'll need to maybe use the hip-hop collider and compare the tech. So use both of these methods in order to understand which one you like more, whether it's the head dot collider.compare tag or accessing the tag and comparing it with a string. So pause the video right now and go to the challenge. Okay, welcome back. How did you get on with that? So let's go ahead and add a tag. Create a tag in here, and this is going to be the enemy. So enemy tag, and let's go to our sphere, select all of them and tag them as the enemy. Very nice. Now back in our scripts in here, we are going to create an if condition and we are going to get the other.com tag. So compare tag, and in here we are going to create the enemy. But before we do that, there is something that I did not explain in the previous video. So the other dot tag, I actually written these two equals, equals. Now some of you might have been confused. Why are we not using a single equal? Well, when we use a single equal, if you hover over this, you cannot convert. Well, this is not the problem. The problem here is that whenever we write a single equal, just like in here, we are actually assigning a value. When we write two equal, equal, these two equal, equal, it means that we are comparing them to each other. And if they're the same, then we are going to return true or false. So with that cleared up. Let's go ahead and create the enemy. Let's just keep it like that. No worries both of these methods work. And because we only have a single line, we will not need to add brackets. Or if you feel comfortable with adding brackets, you can, of course do that. So we save this, go back into our gain. We hit play, and now we should the ground. It doesn't disappear. And when we should the enemy, they actually disappear. Now the problem is, you know, how guns work whenever you shoot an enemy doesn't take like five seconds before the bullet actually reaches the enemy. We need to make our bullet bullets faster. So we go into the prefab click on bullets, and the bullet speed should be maybe 300. So we hit play. And now we shoot our bullet. We shoot our bullet, but whoa, what is happening? Why is our enemy not disappearing? Are we not hitting the enemy? Yes, we are. Now he disappears. But what happened? Why was it sometimes taking so long? So the problem is, of course, when we are, we have the sphere collider on our bullet two, we have the spherical lidar also on our enemies. But the problem is because of the speed our bullets. The, the way unity works when it has colliders and rigid bodies on it is that it actually does mathematical calculations while our rigid body or the bullet is moving. And as soon as it hits a collider like this one, it starts calculating what should it do and how did these two colliders interact with each other? Now the problem is when we have very fast objects in unity, if this does not work properly. So I'm going to teach you a different way of destroying our game objects. It's not very hard, but we've done something similar already. But it's a different way. And you have the choice to choose. The choice to choose. You have the choice between either using this method of using the entrepreneur enter, all using the method that I'm about to teach you. And in here, we are going whenever we actually hit a enemy or hit with the re-cast, We are going to check if we hit the enemy or hit an object that has a tag on it. So in here, whenever we actually hit something with our re-cast, it doesn't need to be very, even if it is very close, we will start with here. So if we go ahead and get the head dot collider.com tag. And I hope I'm not confusing you with the different ways we are using the tag in here to compare it. So enemy. And below it we are going to destroy the hit dot collider game object. So we'll save that. And on the bullet controller, let's just tag both of the, both of those lines. Save that back in Unity. Wait for this to compile. And now when we hit play, we can see that the bullet is very fast, just like normal bullets are. And when we hit these objects, they get destroyed immediately. So it depends on you. Which one do you want to do? You want to have your bullets actually destroy the enemy's this will cause to have, you need to make it less fast? Or do you want the re-cast to be destroying the enemies? This way you can actually create realistic bullet movement depends on you, what you want to do. Maybe you can find a good threshold in between them. I personally recommend using the re-cast and making the bullets very fast because later on we'll be adding realistic weapons, realistic bullets. And it doesn't really feel nice when you see the bullet slowly moving towards your enemy. And it's also less accurate. And when real games or may AAA games like Call of Duty and other games are made. The bullets are actually not the ones destroying the enemies, the re-cast As the strength enemies. So with that said, I hope you enjoyed this video. I hope you enjoyed this shooting section. And the next section we are going to be creating advanced movement with sliding, crouching, jumping, adding gravity, and all of that fun stuff. So see you there.
21. SECTION 4 - Adding Gravity: Welcome back, my fellow game developers. In this video, we are actually going to be adding some gravity. So remember the good old days when we used to climb up these ramps and we would float around, well now that the fun, the fun is over. So when we step down, we actually fought. And remember we, when we could have walked around in this plane and not worry if we fall down. Well now when you walk down the plane, you start falling down. But no worries. Adding bit of rules and constraints to the game actually sometimes make it, makes it more fun. Just look at Dark Souls and how hard it is and how fun factories and width. Let's not waste any more time and let's get started. Oh, case. So currently, when we play, our player moves up the ramp and when he tries to go down, well, he actually stays in there. And you can see his shadow right here. So what we want to do is we actually want to start setting our player down whenever we go up a ramp or tried to do anything. So our goal is to add gravity to our player. Now, let's go ahead and talk about what gravity is and how it works. So this is how gravity works. I'm not sure if you remember this formula from high school, but this is the difference of the distance, which is y, xi, which is on the y-axis. And it's the g, or one over two times g. G is the gravity times t to the power two. And we have all of that. We have g as the power of gravity on Earth, which is 9.81. I believe it's a long number, but 9.81. And then we have t, which is time, which is Time.deltaTime, each and every single frame. So let's go ahead and implement this formula in our code. So first thing we're going to do is we're going to create a reference in here to keep track of the velocity of our player. So we're going to create a public factor three. And this is going to be the velocity. Next thing we're going to do is we're going to add this equation or apply this equation in the player moves. So we go to the player move, we double-click on it and we can actually scroll down and see where that is. And after we apply the movement from our inputs, we then go and create, get the velocity. We access prag dot y. And this enables us to access the y component of the vector. And we are going to write in here plus equals, because it's, the gravity increases as we fall down. Physics. Dot gravity, dot y. And this means that it's the actual physics from unit is Engine. So if you hover over the Unity engine Dot Physics, we access the gravity. And in here we can actually multiply this by math. Math F dot pow, pow, meaning that we can add power. So you can see here that it returns F raised to the power p. And what should be? Well, it's going to be the Time.deltaTime raised the power of two. Very nice. We want not be bothering with, with adding the 0.5. right now. It's not that big of a D. And next thing we're going to do is we're going to access my controller. And we're going to add this to the movement of our player. So now my controller that move is also affected by gravity. So let's go into Unity and let's test this gravity out. So let's go ahead and click on play. And I'll just note something before we continue this gun material No.1 is the material for the enemies. So let's name this the NMI materials. I hope nobody noticed that. I'll just do it without anybody seeing it. So we'll save that. We'll hit play. And now whenever we walk, we move up this ramp. And when we go down, let's click on player and see the velocity. So it's increasing and now we fall down. Very nice. And if we move out from the edge, woo, we start falling. But there's something really wrong here. If we click on play, we can see that because the velocity right here is a vector of three. So we have the 0, well, we have the X, the Y and desert. The Y keeps increasing even when we stop moving. So even if we're standing still, the velocity keeps on increasing and increasing and increasing. And this makes the falling down very fast and not very natural. So we'll need to be able to reset our gravity whenever we actually start standing on the ground. And this is going to be your challenge. Your challenge is going to be to reset gravity if the character is grounded. So find the method that lets you check if your character controller is grounded. This will be a research based challenge. You'll need to go out of your way and actually try to find a method that I have not taught you yet. So reset the gravity velocity to the character controller. What if the, this should be if the character controller is grounded and I'll just give you a hint of what the velocity should be. It should be physics dotted gravity dot y times Time.deltaTime. Now, it doesn't need to be the exact value, but you can use this pretty well and it works. So pause the video and then go ahead and do some research, find out what you need. Everything you need is right in here. So I'll see you in just a bit. O k walk-up back. So first thing we'll need to do is to check if our Character Controller is actually grounded. And if you've done your research, you would have found that my character controller has an option to check if he is grounded. And was the character controller touching the ground during the last move? So was he grounded? Yes or no? And if he is grounded, we are going to take this velocity and we'll access the y component on it. And we're going to make it physics. Gravity, that time. Oops, no dot y times Time.deltaTime. So now we have the velocity right here getting increased slowly but surely with the right physics equation for gravity. And then if my controller is actually grounded on the ground, we will stop all of this and then we will reset it. Now it doesn't have to be the physics gravity dot y times Time.deltaTime. I've just made it this way. In order to make it much more realistic, you can only set it to, let's say minus1 or something like that. But let's go ahead and test this out and see if it works. So when we hit play, we should see that our gravity as at minus 0.1, which is fairly reasonable. And now when we fall down, we fall down much more slowly and reasonably. And let's take a look at this y right here. So when we actually start falling down, this should be increasing. So it increases. But then it resets when we hit the ground. So again, it resets when we hit the ground. Antifouling is actually much nicer. But if you can see right now, when we try to fall, it's more like gliding around. And we don't want that. We want a way to be able to actually control are gravity. So let's go ahead and create a variable that will enable us to modify our gravity. So we'll open up our player script, will move up in here. And let's just go ahead and separate this and call it the adding gravity. And under here we are going to create a public float. And we'll call it the gravity modifier. So we'll have a gravity modifier in here that is public and we can control. And down here we are going to go ahead and multiply our velocity by the gravity modifier. Let's save that. And now back in Unity, we have this gravity modifier right here. So now, now because it's 0, this will not work at all. I think you will not be even floating. Ops, Well, he does float, but if we multiply it by five, he should start falling down much faster. Yep, there we go. So now gravity works stronger on our player. Whenever he falls, we can even make this maybe ten if you want. So this way the gravity will be much snappier. So now our player falls faster to the ground. So this will be a challenge for you. An extra challenge to go ahead and modify your gravity as much as you feel you want your game to have. So I'll just keep it around 30. And I think that's a good Gravity modifier. So I hope you enjoyed the video. In the next video, the obvious progression is now that we have gravity to start defined that gravity by jumping. So I'll see you in the next one.
22. Jumping : Welcome back, my fellow game developers. In this video, we are going to be defining the gravity. We are going to be defined the force of gravity by adding a jumping mechanic. Now, it's going to be a more of a hopping style jumping. So we are going to be learning a lot of things about layers, jumping, formula for the jumping. So let's not waste any more time and let's get started. O k. So first thing we're going to do is we're going to be opening up our script. And in here, after we move our camera, or it doesn't matter really, we are going to create a method called Jump. And we're going to create a void jump. And we're going to open up our brackets. And in here we are going to take a certain input from the jump button. And when we get this input, we are going to be adding velocity in the y direction. So what should we be using while we have this little method in here that is called the input dot get button down. And if you read the description, you can see that it returns the true during the frame, the user pressed down the virtual button identified by the button name. So they are asking us for a button name. And thankfully we do have in unity, if we go to the edit, will look for project settings. We have this jump button right here that is used with the positive button being space. Now we have another jump button right here. And usually the second jump is used with a joystick, so it's for a console or some kind of thing. So now we have the jump and let's go back into our game or an R script. And here we are going to write if input, dot get, but noun, get, button down. And it's going to ask us for the string name. So we'll go into the because it's a string reference and we can copy it. So we'll copy this. And we're going to paste it in here. And what are we going to do and here? Well, we're going to add a certain velocity in the y direction, and it's going to be equal to the jump height. And this jump height will be a variable that we are going to create up here. So in here we're going to create a public float jump height. And let's go ahead and set to ten. I'm not sure how much it should be, but for now we'll keep it at ten f. Very nice. Now let's go back into Unity. Let's go ahead and close this input manager. And let's play and see if that worked. So now we can shoot, we can move around. We also have gravity. And when we press the spacebar, I think our jump just a little bit exaggerated. So we're going to fix that. So if we go into player, let's reduce this to two. And we jump. And yeah, this seems more reasonable, but there are still many problems. So first of all, it looks weird. Second of all, war with walking and sometimes the jump doesn't work. So when we hit space doesn't work. So this is a second problem. And the last problem and the most groundbreaking One is that we can jump and keep jumping, can keep jumping was pressing the space bar into infinity. And then when we stop, we dropped down. Sorry, there are a couple of inconsistencies with our jumping. First of all, we want to address the ability to jump infinitely, and this will be addressed using something called an overlapping sphere. So what is an overlapping sphere? Let me just show you here in the documentation. So physics dot overlap sphere. It has the parameters of the position or the center of the sphere. It has a certain radius, which is the radius of our sphere. And it also can take a layer mask. So this Layer Mask allows it to interact only with certain types of layers. And what does it do actually returns an array with colliders touching or inside the sphere. So what is an array? While we haven't talked about arrays yet, we'll go much deeper into them. But for now, just as a simple explanation, or raise or like a table that has inside of it values. And this physics dot overlaps fear returns. These values or these objects that are inside of the sphere. And why are we using overlap sphere? While because we want to count the objects that this overlap sphere is touching. And if it is touching something under the layer ground, then, and only then will we allow our sphere or allow our player to jump. So if he's in the air and he's not touching anything that is underground, then he will not be able to jump. So we'll check how much are inside of these arrays. If nothing is there, we will not be able to jump. With that said, let's go ahead and start creating a couple, a couple of variables for all of that. So back in our game, let's move this and let's call this the jumping section. Just so we have a bit more organization will also name all of these later on. But for now, we're going to create a private Boolean. And it's going to be called ready to jump. Very nice. So now if we press the jump button and we're ready to jump, then we will be able to jump. So whenever we want to add a second condition next to whatever condition here is, we can add these little and marks. Next thing we're going to do is we're going to, before we create anything here in unity, we are going to add the center of our sphere. So this is going to be an empty game object that's called the round. And it's already at the bottom of our player. So this is where our sphere is going to be created so we can even move it down just a little bit. And in here, the sphere will be created, created around this game object. And it's going to be checking for the ground. Let's save that back in unity, and let's go ahead and get a reference to it. So public transform, and we'll simply call it the grant. And other thing we'll need is the mask. So we're going to create a public Layer Mask and it's going to be the called the ground layer. And finally, we'll also need to create a public float. Float, ground distance. So ground distance, and we'll set it to, let's say 0.5 just for now. Okay, great. So now that we have all of these, next thing we'll need to do is we'll need to go ahead and create a layer for the ground and set all of the objects in our environment to the ground. And it's actually part of your challenge. Your challenge is to create a ground. First of all, go ahead and create a ground layer. If you remember how we created layers, let me just show you if some of you forgot. So just like we created tags in here, we can go to the layer, we can go to the edit layer. And you can see that we have the option to create tags, Sorting Layers, and of course, the layers right here. So create a ground layer, set all the objects on the environment to the ground and assign the ground layer to the Layer Mask and the players and spectrum. And if you want to go even further, you can go ahead and implement this overlap spheres. Now you might get a couple of errors. You might not understand what's going on. Don't worry about it, just get to a certain point. Well, were you actually add this physics dot overlap layer if you want, if you want to take up that extra challenge. But for now, go ahead, pause the video and create a chorale. Oh, okay, welcome back. How did you get on with that? I hope you are taking the time to do these challenges because they are very important. So now we have the ground. And when you do the challenge, it's, it gets ingrained into your mind even when you fail. So back in our player, and now we need to give it the ground transport. And the ground layer needs to be set to the ground. And what else should we be doing at nothing, we're done here, I believed. Now back in Unity, I hope you try to create the overlapping sphere. So what is going to be the overlapping sphere? While we're going to create Physics dot overlap sphere. And in here, first of all, it will need the origin. Of course we have the ground dot position as the origin. We need the radius, so it's going to be the ground distance. And finally, it will need a Layer Mask, which is going to be of course, the ground layer. Now if you got to this point, very nice. I congratulate you. What should we be doing next? Well, now we have this overlapping sphere. With an origin a certain radius, and only checking for the ground. So this will return some kind of an array or the amount that we have inside of our sphere. So we want to check if the length of this array, so if the length of objects, if the amount of objects and side of the sphere is greater than 0, that means that we are touching some kind of ground, then our ready to jump is going to be equal to true. So this means that it's assigned the value of this condition right here. And if it's true, this returns true. Then we are ready to jump and we press the button, and then we jump. But if we don't have anything inside of this overlapping sphere and the length is less than 0, then ready to jump will be equal to false and we will not be able to jump. Very nice. Let's go ahead and test this out and see if we, oops, we forgot to save all of that. And now back in unity, we are going to hit play. And let's see if we can multi jump. So we jump, we jump and we are not jumping at all. So oh, okay, so the huge problem that can be made and I hope you didn't make the same problem. It was even in the challenge, we need to set all of our objects in the environment to the ground. You cannot believe how long that took me to understand. But as you can see, even the great Instructor Michael makes mistakes. So now k, So now we should be able to jump very high, OK, but because the jump is reset, let's put it back to two, or maybe even to one just for testing. So we hit play and now we jump, and we cannot jump multiple times unless we are on the ground. Now, there are still a couple of things. First of all, the jumping is weird for some reason. And the second thing is that whenever we are moving, sometimes when we hit the space bar, it's not responding very fast. First of all, let's address the problem of the weirdo jumping. Now, after the challenge, we have the height affected by gravity. So what is the actual velocity that we want to add when we jump? As this is the formula. So velocity is equal to the square root of minus two times the jump height that we want times the gravity. Now, some of you might be looking at me or at this formula and thinking whoa, minus2 and site over the square root, that never happens. Well because gravity is minus 9.81, this means that this entire value and here is positive. That means we can use the square root. Mathematics never lie. So let's go ahead and implement this formula back in our game, back in our script. Instead of the velocity dot y being the jump pipe, it's going to be the math f, a dot square root. And inside of the square root, we are going to use the jump height. We are going to be multiplying it by minus two f. And we are going to be accessing the physics dot gravity dot y, k. Very nice. And as a final touch, we are going to make it frame rate and dependent. And this will of course, change the value of our jump height. Now as a final step, or let's just test this out and see how it works. And I think we'll need to make the jump height at least 15. So he had played. And now when we move, you can see that our jump is much more natural. Let me make this 100 just so we actually jumped. So our jump is much natural, much more natural right now. But the problem is still that we are not jumping everytime you want. And it's because we have this velocity in here, so we are setting it. But as we are updating and our player move, we are also changing the velocity. So there is a conflict between the velocity that we're adding into jumping and the velocity that we're adding right here. And sometimes the velocity of the jump is getting overlapped. So the way we fix this, we simply end here, my controller dot move, and we update the velocity on our Character Controller. And now when we hit play, we should see that when we press the play button, we move. And as soon as we press the space button, we actually jump. And as a final touch, let's make this 100. Let's save that. And let me just show you a small experiment that she can make. So we'll choose this cube, will make it a default player. We'll hit play. And now we can jump on the plane, jump on this ramp. But when we get to this cube, we cannot jump. So very nice now that we know how all that works, we can go ahead and finally, go to our source tree and all of our uncommitted changes and added the ability to jump. Very nice. In the next video we are going to be creating a crouching mechanic. This changes back to ground sable that we are going to be adding the crouching mechanic and we're going to be playing around with the scale of our player. So I'll see you in the next video.
23. Crouching : Welcome back, my fellow game developers. In this video, we are going to be implementing the crouching mechanic. So let's open up the scenes right next to the game. And when we hit play, you can see our players, so he is normal right now. But when we press the left Alt key, you can see that he turns into a little munchkins. So now we can move around and as we're moving, we can start the crouching. And as you've noticed, our speed is also reduced whenever we are crouching. So let's not waste any more time and let's get started. Oh, okay, so it's time to start corrupting. Now how are we going to do this? So if we go into player, can see that in here we have the scale and we actually can manipulate the scale of our player. And that's exactly what we are going to do. So now you can see that the player has a scale of one on the X-axis, y-axis, and z-axis. And what we're going to do is we're actually going to take the scale on the y-axis and reduce it to half. So now we have this cool small little guy. And this way we are going to be able to crouch and move under certain objects like our, where's our limbo? Right there, if you remember, we created at the beginning of the course, so great. We are going to be manipulating the scale of our player and dividing it by half. So first thing we're going to do is we're going to go into our player script. We are going to create a section in here for the crouching. And under it we are going to create our first private vector three. And this is going to be our crouch scale. And this crouched scale is going to be equal to a new vector three. And on the x-axis we're not going to change anything. On the y-axis. We are going to make it 0.05. and on the zed axis, it's going to stay at one. We'll save that. Next thing we want to do is we want to get the player scale initially before we start crouching. So we'll create another private vector three, and we'll call this deep layer scale. And now what we are going to do is inside of the start method, we are going to set our initial player scale. So at the start, we are going to create the or coffee or get the variable of the players scale. And we're going to access the transform of the player and get the local scale from there. So now we have the actual scale at the beginning. Okay, well that done. Next thing we're going to do is we're going to an update, create a method. That is the crouching, crouching. And we are going to generate this method. So generate the player crouching. And we're going to delete whatever this is in here. And how are we going to get the crouching? Well, we are going to be using the left Alt key, and this is the standard key for the crotch. Now the problem with using the left old key is that we don't have any button. For this. We are going to use something called a key code. And a key code is a way to, that enables us to map the physical keys on a keyboard. And we have two types of keys. So we have the input Schottky down and we have the input dot gatekeeper up. So what's the difference between them? It's a difference that might be very familiar. So when we get the input Schottky down, this returns a true during the frame the user starts pressing down the key. So when we start pressing down the Alt, we want to be crouching and the key is identified by a name that I will show you in just a bit. And another thing that we can do is we, or another option that we have is the get key up. And this returns true during the frame that the user releases the key. Whenever we release the old, we want our players to stop crouching. So let's go ahead and do that. We're going to create two methods that are going to be the start crouching and the stop crouching. And we're going to put them inside these two if conditions. So the first if condition is going to be the input dot get key down. And we're going to access the key code. And this will enable us to get any key that we want. So if we start writing left, you can see that it gives us all of the options on the left. So left windows, left control, left. I'm not sure what Apple is. Anyways, left is what we need. And in here we are going to start crouching. And under it we are going to create another if condition. And here we are going to get the input dot, get key up using the key code. Laughed. And we are going to stop, stop. Crouching. Okay, great. So now that we have all of these established, the next natural step is to actually go ahead and create the stored crouching. So up here, let's go ahead and generate this method. And let's go ahead. And in here we're going to be implementing the crouching mechanic. And now let's generate these top crouching. So will generate this method also. And let me just move this top crouching under the Start crouch. It just feels more natural. Okay, great. So now we have these two methods and what are we going to do inside of them? Well, it's very simple. We are just going to take the local scale. So the transform dot local scale will be equal to the crouched scale. And when we stop crouching, We are going to take back our transform, both local scale and we are going to set it back to our original player scale. Okay, great. So let's go ahead and test this out in Unity. Now there will be just a little bit of a problem in here. And I'll just show you what that is. So when we hit play, and you can see that whenever we hit the ALT key, our player gets a lot smaller. And I just wanted to show you how all of this work. So our player has his gun, his cool glasses, and when we click on the Alt key, he becomes a little small leprechaun, and he actually can also shoot. So the problem is, what I wanted to show you is that whenever we are holding the ALT key and press the w is a shortcut to the windows, and now we have to stop using it. Well, we can use the CQI if you want, or you can always make sure that you hit the W key before you start crouching. Okay, great, so now we can move around. We can hit the ALT key and we also open assets when we had alt and a, but no worries about that. And maybe we should make this limbo just a little bit smaller. Now, the other thing that we want to change, let me just talk the game back here. The other thing we want to change is whenever we are crouching, we want to actually make our speed just a little bit smaller. So instead of being, of having this, whereas it the speed as a normal speed, we want to have it reduced and we want to have a crouching speed whenever we are crouching. And it's going to be part of your challenge. Your challenge is to control the crouching speed. So first of all, create a crouch speed variable, just like we did with the normal speed. Then you will need to create a Boolean that checks if we're crouching. So you'll need to create a boolean and you'll need to change it based on whether we are crouching, on whether we are no longer crouching. And then you'll need to multiply the movement by crouching speed and not the normal speed using the else condition. So create a variable for the speed, create a boolean for the crouching. And when we are crouching, so you need to create an else-if condition inside of the player movement. And we, when we are approaching the speed or the movement will be multiplied by the crouching speed. Pause the video right now and go do the challenge. Oh, okay, welcome back. So first thing we're going to do is up here or you know what, let's keep it down here. We're going to create a public float. Float, please. And we're going to call this the crouch speed. And it's going to be equal to six f just for now. And the next thing we're going to do is we're going to create a private bool. And we're going to call this the is crouching. And for now we're going to set it to false because at the beginning of agriculture, of course, the crouching will be false. So is crouching is equals to false. And now whenever we all crouching, We are going to set the, is crouching to true. When we stop crouching, were simply said this is crouching to false. And finally, and our, where's our player movement? So in here, we can see that we are always multiplying the movement by the normal speed. Well, not anymore because we'll create an if condition in here and we are going to check if is crouching. Crouching, crouching is true. Then in this case, our movement, let me just copy all of this, copy this line. Our movement is going to be equal to the movement times the crouch speed. Else, we are going to use the movement times the normal speed. And we're going to save all of that. Let's go back into Unity. Let's hit Play. And now we should see that we have a crowd speeds somewhere in here. So crutch speed is six, so now we move with a certain speed. And when we start crouching, you can see that our movement is much slower and that's exactly what we want. So you know, whenever you're playing video games, whenever you start crouching your players speed is actually reduced and it's very normal and realistic. And now the thing that we need to fix is actually whenever we are crouching, you can see that our gun is also being squished and also getting divided by two. And this is not a good thing because later on we are going to be adding really cool guns. And these guns are actually going to be squished also, which is not what we want. So in the next video, we are going to separate the crouching or the scaling down of our player from the guns and all of that. So I'll see you in the next video.
24. Crouching (part 2) : Welcome back, my fellow game developers. In this video, if you remember in the previous video, whenever we crouched, our gun became much smaller. But now when we crouch, argon stays the same size and we can see these little lines in here. We'll fix that maybe later on. But for now we are gone, stays the same size, yet we are able to crouch and go under certain objects and our speed is reduced. So let's not waste any more time and let's get started. Oh, okay, so what's the purpose of this video? During your game development journey or when you actually become a game developer, you will notice that sometimes there are different solutions to your problem. Or whenever you create a certain game mechanic, there are problems that you need to fix. And this is exactly where. Well, this is the case. Initially, I wanted to simply go ahead and create only this video. But now, as I went through this and I found this problem, I actually wanted to take you through the process of fixing various game mechanics just like this. So right now, if you remember from the previous video, whenever we crouch, you can see that our gun gets slimmer and this is not good. So this is a problem created by a mechanic that we've added. So what are we going to do about this? Well, instead of reducing the player size, we are only going to be reducing the body of the player. And then we are going to move the head down. And finally, we are going to reduce the height of the character controller. Now, all of these are discovered through experimentation, but I'm not going to be sitting here and experimenting with you. I will show you how we go ahead and think about all of that. So first of all, we take the body, we want to reduce, of course, at the scale of our body by half. When we do that, we'll notice that our Character Controller height is still the same size and still interacting with the limbo right here. And before we continue, let me just move this limbo a little bit up so we can actually make this bigger and also increase the size of this cube right here. Okay, great. So now we have the body getting reduced by half, and we have the controllers hide getting reduced by half. And then we have the head. So because the head is not attached to the body, when we reduce the scale of the body, the head will stay in its place. So what we are going to do is we'll actually also move the head, though. Great. And now let's get started with all of that. In our script, we are going to go ahead and whereas the crouching, so instead of the player scale, we are going to call this the Body scale. And oh, this is a great opportunity to show you something really cool. So let's say we want to change the player scale to body scale. How can we do that? And change also all of the different references in here. So we'll need to change this one and this one in here and this one in here. So let's say we have 100 references. How do we change all of them? Well, very simple. Double-click on the player scale, had control or R. And now this will allow you to modify this. So we'll name this body scale and all the references are changed also. And we'll apply all of that. Next thing we're going to do is we're going to create a reference to the actual body. So in here we are going to create a public transform. And we'll call this my body. And under it will also get, create a private sloped initial controller height. So now we have the initial controller height. We have a reference to the body, and we have the body scaled. Next thing we're going to do in here, we are going to change from body scale that is equal to the transform. It's going to be my body. So it's going to be the initial scale of the body on our player will also set in here the initial controller height as the microcontroller. Well, dot height. Great. Now let's go into the start crouching. And in here, the transform that local scale will be changed to my body local scale. And it's going to be equal to the crouching scale, which is half the size. And now let's change the position of our camera. So my camera head dot position will be reduced. So this is the minus equals that we've learned by a new vector. And this vector is going to stay 0 on the x scale. It's going to be reducing the height of the camera by 1.3. And on the zed axis it will not do anything. So Y1, Y1, 0.3. Well, because I've already this before, so 1.3. And here you can change the transform by actually typing in 1.3. And this will be the height of our new camera, which is perfect because our body will also be reduced. So back in our script, final thing we should be doing is we are going to get my controller. We are going to access the height and we're going to be dividing it by two. So just like minus equals works, divide equals works the same. It takes the microcontroller, height, divides it by two, and then it puts it back into my controller height. And let's see if all of that works. And of course, it's crushing will be equals to true. Uh, back in our game. We are going to hit play. And hopefully all of this will work. So now, oh, we haven't assigned the body. So in our console it's telling us that the variable my body has not been assigned and player, so backend player and let's assign it the body, save all of that. Now we shouldn't get any problem hopefully. And before we continue, let me just dock this right here so we can see the player. So now we can actually crouch and you can see we have the, so first of all, the body only changes. Oops. Okay. So stop. Stop, please. Okay. You know what? I'm not liking this at all. We are going to change the left Alt to the CQI. Okay, great. So save all of that back in our game. And we will no longer have this problem. And now we can see that when we crouched on the left side, you can see that the gun is still the same. Now, maybe we need to move the head a little bit up. And now we can move around. We can, so the gondolas disappearing under the floor, which is not good. And now we can move on this right here we are moving at a crouch speed. And when we remove the CQI, you can see that we still have a lot of problems and that's going to be part of your challenge, is going to be to finish this top crouching. So you'll need to put back the body scale to its original scale. You will need to put back the camera had positioned to its original position. And you'll need to put back the controller height to its original height. So pause the video right now and go do each shallow. Okay, welcome back. So first thing we're going to do is put back the body scale. So body, nope, this should be my body dot local scale is equal to body scale. So this will be our initial multi-scale. And then we are going to take the camera hat. So this is the camera head position and we're simply going to change this to a plus. And finally, we are going to take my controller dot height and we're set it back to its initial, initial. Initial, please. Let's go ahead and copy it in here. So initial controller height for some reason, visual studio just don't, doesn't want to cooperate. And we of course are going to stop the crouching. Let's just add a bit of space between these so they are not cramped and jammed altogether. Back in our game. Now, a small thing that I would like to change is actually the height of our cameras. So now when we hit the CQI, we are crouching. When we release, everything comes back to life and is normal. Again. Now the height of the camera is a bit annoying because the gun is disappearing under the ground, which is not good. So maybe we can actually reduce this from 1.3 to one. So save all of that back in our game. Let's see how that looks. And now when we hit the CQI, Yeah, it's a much better I feel maybe we can reduce it. Well, this can also depend on your preference. So how do you want your game to actually look like? How much do you want to crouch whenever you hit the C key? And maybe you don't want to use the CQI, maybe you want to use the peaky or elk or the exit key. I don't recommend that, but you can. So but that said, I hope you enjoyed the video. Before we go, let's go ahead and stage all of our files. So in masters, we have the uncommitted changes, which stage? All of them. We click on the commit and that, oops, a crouching mechanic, commit all of that. In the next video, we are going to learn how we can add animations and again, so I'll see you in the next Michael here from the future. So I saw that in the, whenever, when I made the intro, I noticed that whenever we are crouching, we can see this black line right here, which is very annoying. So what is this? Well, it's actually, if we go to the scene, we can see that it's our head right here and it's getting in the way of our camera. Maybe for some of you it's much bigger than this may be for some of you. It has been there for a while. I hope not. The way we fix this is we can actually go to the camera. And in here we can see that we have something called the culling mask. And this mask allows us to sometimes take things out of our vision. So if we click on the MEXT and be removed ground, you can see that in game mode we no longer see anything that is under the ground layer. So we are going to do the same by adding some kind of layer to the eyes. If you want to take this as a challenge, I encourage you to pause the video right now and go do this. Ok, time's up. So go to layers, edit layers, create an invisible layer. So visible. And now back in our eyes will set the layer for the, Whereas the invisible and visible. So now our eyes should be invisible. We go to the main camera, we go to the calling and we'll remove the invisible. So now when we play, hopefully this works first from the first time and yep, we no longer have the So some of you might have been having a lot of trouble with this. I hope not. I hope you stay safe and I'll see you again in the next video.
25. Animations 101 : Welcome back, my fellow game developers. I know this video is a bit long, but it's because we are going to learn a lot of new cool things. So as you can see, we have an Animator, we have the idle animation. We have transitions between them. We created our own animation. We've added an animator. We'd done so much in this video. And now you can see that when we will need a reference, you can see that we transitioned between walking and idle. And when we're standing still, we breathe in, breathe out, breathe in, breathe out. And when we are walking, we actually start bobbing faster. So this is all possible because of animations. So let's not waste anymore time. This video is already so long and logical starts. O k animations. Why are we going to be using animations? Well, currently, when we play, we can see that we are simply standing in here and nothing is happening. And we're, when we're walking. Also, nothing is happening. So what we want to do is we actually want to add a bit of movement, a bit of bopping and our gain. So just like you see an Call of Duty, whenever we are walking, the gun moves up and down a bit. And when we are sprinting, the Khan moves more up-and-down. And when we're standing still, Well, the gun, just, the character, just breathe up and down. So we are going to be adding animations to our players had specifically. And we are going to be moving it just like that up and down using animations. So we'll be moving him just like that and simulating a breathing. Okay, so what are animations? What do we need for them? And all of that cools things and our slides in here, let's talk about animations of 101. First of all, we have something called the animator controller. And this allows you to arrange and maintain a set of animation clips. So the animator controller is where we keep all of our animations stored and we transition from animation to the other using parameters that we'll talk about in just a bit. Next thing is the Animator component. And whenever we want to estimate a certain object, it requires an Animator component. That way we can add the animator controller that we create 2D animator component. And then we can go ahead and create animations. And animations are several actions rendered one after the other. So what do I mean by actions and why not just say position? Well, because you can use animation to modify the rotation, you can use to modify the position, scale, color, different Booleans if you want, you can do a lot of things with animation, and we'll see that later on. But for now we're simply going to be changing the position. And finally, we transition between animations using the parameters that we mentioned above. And we'll see the different types of parameters and we will also be accessing them from our script. Okay, great. Now let's go back to Unity and let's start animating our player. So first thing we'll need what we already have these two tabs right here, which is, which are the animation and the enemy taught. If you don't have them, we can go into the window. You can go into the animation and inhale. You can add the animation and the animator. Okay, great. So how do we start animating? Well, we click on the player and we click in here on the Create button. And this to begin animating player, create an Animator and an Animation Clip. So this will automatically create an Animator component on our player. And it will start creating the Eclipse. So click on Create. It will need a certain folder. So we'll create a new folder in here. And this is the assets and our project. So new folder. And this is going to be called the animations. And inside of here we are going to create a folder for the, they're animations. And the first animation that we are going to have is the idle. We save that. And now we have this little weird timeline in here. And before we talk about the Tyler, Let me just show you our animator. You can dock him in here if you want or anywhere you want. Let's just put him next to our game scene. So you can see how the way we manipulate or move around in the animator, you can actually hold down the mouse button or the wheel button on the mouse and you can move around, you can zoom in and zoom out. So we have three things or four things right here. So first of all, we have the entry, and this is as soon as we start any gain, this is the default transition that will go to the oligos. So as soon as we start the game or player will start the animation, then we have any state. And in here we can also create different animation that will transition from any state into whatever state between one and we have the exit, so on the x. For now, let's simply focus on the idle. And we actually need to create this animation and add the movement, this animation. So the way we do that, let's go back into our scene, go into our player. And in order to start animating, you can see here we can choose which animation we want. Start animating. We will click on this red button right here. So now whatever we do on this timeline, we are going to be recorded by the animator. So what is the idle animation? Well, what I want to do, we are currently our head is at 2.5, so I want to move my head a little bit up and then back down every 1 second or every two seconds. So we'll make this timeline here smaller. So this is the 2.5th mark. Or 60 seconds. And also we have the frames in here. And then this is the 1 second mark, this is the 1.3 and this is the 2 second mark. So on the 2 second mark, we are going to change this to 0.5 to 8.72. And you can see that we've added a couple of nodes in here. So this original node is the initial position. So if we can move the timeline and see how the animation looks. So now at the 0 second, we have the transformed position in here, 2.5. and as we move to the second tool, we can see that it slowly moves up until it becomes 2.7, the 2 second mark. And then on the 4 second mark, we want to go back to 2.5. but a very nifty trick whenever you are creating animations and you want to keep them as smooth as possible. You need to copy the initial nodes, copy them, go to the timeline where you want. So it's at the 4 second mark and simply pasted. So now we can hit play and we can watch as our player breathes in and out by moving his head up and down. And when you finish animating, simply click on the red button again. And now we have the animation barry. Nice. Now, let's stop this. Save this, and let's put the animator Actually, I want to put him in here. So this might not look very good. So I'll try my best. Zoom in as much as possible. So now when we hit play, we should see that our character is actually breathing. So let me get close to one of these, so it's not stable. So you can see that we move up and we move down as we breathe, but there's still a problem. I think you might have noticed that the animation is a bit clunky. So when we play, you can see that it moves up and suddenly starts moving down and it's not as smooth as we want, so we can change. So we can choose all of these, right-click and go to the both tangent and make them linear. So now the movement is much more smooth and better. Let's see that in action in our game. So now let's move to a certain reference and you can see that we breathe in, breathe out, breathe in and breathe out. And don't worry about gun clipping through the different objects. Oh, okay, great. So what we want to do now is we actually want to create another animation for the walking. So currently we are simply breathing in and out. When we start working, we want to transition to another animation, which is the walk. So the way we create another animation, click on player. We should see the animation in here. And if it doesn't simply go to console or any other tab, and then back and animation, make sure you have Player on. And then we will click in here and we'll create a new clip. And we're going to go to animation player animation. And this will be the walking. So walking, save. And now we have a blank page to start animating. Now, how are we going to animate the working? Of course, this depends on you, but if you're still a beginner, you are not sure how we animate things. I will take you through the process. So what I want to do is every ten frames, I want to move 0.5. I'm want to move the head 0.5. so on the timeframe mark, oops, let me click on the record. On the ten framework we're going to go to the 2.5. or 55. And then on the on here we are going to go back to 2.5. And then in here we are going to go to 2.45. And finally, on the 0.4. or the 40 frame, we'll copy the initial position and we'll paste it in here. So now if we hit play, This is our walking, it's a Yankee. So we'll save that, will choose all of this, right-click both tangent and make it linear. So save that. Let's hit play. Okay, so now we have this kind of breathing and walking animation. It's more obvious that we are walking, so play. And it might not be as noticeable. So we breathe. And when o, while we haven't actually created the transition. So an animator, now we have this walking animation and we can actually create transition from the AIDL by right-clicking on it and make a transition to the walking. And walking transition actually requires if we click on the arrow and here, this walking transition requires a certain condition to be met. And the way we create conditions, as in the Parameters section. So if you own layers, make sure that you're on the parameter, you can go ahead and add a parameter. So the parameter can be either a float or integer. That way we can choose whenever this float or integer gets over a certain limit, we will transition. Or it can be a Boolean, or it can be a trigger. Will see later on what booleans and triggers are. But for now, we want to transition to the Walking state or the walking animation whenever the player speed goes over a certain value. So we'll create a float and we'll call this deep layer speed. And now in our condition in here, we are going to click on the plus. And the player speed can either be greater or less than. So when the player speed is greater than a certain number. And here we will transition to the, to the walking animation. And from walking animation will make the transition back to idle. When ever? We will now i, if you've noticed, I've clicked on the second arrow. So this is the arrow going towards the walking. This is the error going from walking to the middle. And we'll add a another condition in here that whenever the player speed is less than 0, now, how are we going to actually transition? First of all, what are the values that we'll need in order to transition? Well, in order to get those will go into our code. And we are going to be printing our movement. So whereas our movement, and here before we start moving, we can print something to the console by clicking on debug log. And we'll simply print out the movement so we'll know what, what is our speed whenever we are walking and we'll know when should we be transitioning. So we'll hit play. And we can see in our console here you can see that our animation is currently the Idle. And when we're walking, Let me just, oh, there's just a small problem. If we go to the console, we can see that the movement is actually a vector three. So in order to get the absolute value or the total value of the vector, we can use the magnitude and this will give us the sum of all the vectors in the specific direction that we're moving. So now when we hit play, we should see a value and it's 0 because we're standing still when we start moving, it's about 0.3. So if our movement gets over, let's say 0.2. Let's just say if it's over 0.2, because it's never going below 0.2. Okay, so 0.2. So if our player speed is greater, let's go back to the animator. If our player speed is greater than 0.2, then we will transition into the walking. And if our, if we're walking in, our player speed is less than 0.2, then we are going to transition back to the idle. Now, how are we actually going to set this player speed parameter where you might be confused right now, but this is part of your challenge. Your challenge is going to set V parameter. Now it's your first time using animators and all of that. I recommend you go ahead open Unity documentation and look at the animator animations and see how you can set parameters. But I'll tell you, first of all, you'll need to create a reference to our animator by creating a variable of type animator. So just like we always do, create a reference to the animator, make it public, of course, and set it in the inspector and our player. Next thing you need to do in order to set the slowed that we've created as the movement of our player and a hint arrived gave you. Here is the set flow. So what I recommend you do in order to complete this challenge, we need to go to the documentation and you'll need to search for animator, set float and look for the unity documentation there you will find how you can actually set the float and it will be a string reference. So make sure the two copied correctly. And I'll see you in just a bit. Hey, welcome back. So a small remark I want to give before moving on is that maybe this will be different to you. So I've cited. This is why I made the ve debugged o'clock so we can see what the actual magnitude e is. So it will depend on your game. Okay, with that set up here, we are going to create a reference to our animator, and we're going to create it in here. So it's going to be the public. And he may, he may talk. And we're going to call this my animator. And he may Tor. And down here, whenever we are moving, we are going to go ahead and access my animator, dot set, whoops, dot set float. So we have the set Boolean, we have this a trigger, and we have the set float. And in here we need a reference. So string reference, let's go into unity, into the animator. Copy the player speed so we know that it's 100% correct. And the value that we are going to give this float parameter is the actual movement dot magnitude. And let's go ahead and save all of that now maybe some of you may have gotten to the spot right here where you can set the float with the certain parameter. And maybe you got stuck in here, although we already did this. But if you got at least two tribe search for this at float and created a reference to the animator. I congratulate you for trying. We all start at a certain point. We none of us are born professionals. Will that said, we save all of that back in our gain, less at play. And we are now and o k. So we forgot to set the animator in the player, so their egos save all of that. Now we are ready to play, so hit play. And now we're standing still. We are either so we present without and when we start walking up, oh, there it goes. So we start the walking and it's not, not spoil unless we stand really close to a certain cubes so we can get a reference. So when we stop, we can see that we breathe in, breathe out. And when we start walking at somehow takes a bit of time. But it does work. You can see it in the animator and you can see it in the game. Now, why is the transition not being smooth enough? Well, if we click on one of the arrows, we can see that we have the option to remove the exit time and we have a certain transition duration. So this will does what it means. It has the exit time after a certain time exits. So we'll turn this off and the transition duration, I recommend you put it to 1.10. This will make the transition much faster and from walking to idle, also remove the exit time and make the transition 0.01. we'll save that. And now we should see that immediately. As soon as we start walking, we go to the walking animation. And there you go. When we start walking, when we stop, we Idle. No, it's not very obvious. We need a reference point. So we breathe in, breathe out. You start walking and we start bobbing. Okay, this is not the best place to do that. In here. You can see that we are walking up gay, great. Was that none. The next step is to go ahead and create a sprinting animation, but we are not even sprinting. So that is what we are going to do in the next video. I'll see you then. And don't forget to stay Joel and stage all, commit everything added. First, animations with an exclamation mark because this is a very important part of our journey. Well, that said, next video, we'll start sprinting and I'll see you then.
26. Sprinting: Welcome back, my fellow game developers. In this video we are going to be adding this printing mechanic. So currently you can see that we can walk, we can stand idle, or we can start sprinting around. So you can see that our velocity is much bigger. So now as we move through the world, But when we hit the CQI and we suddenly come to a underwhelming bots. So let's not waste any more time and let's get started. Oh, okay, so let's get started with the sprinting. Now, I believe this video will be very easy for some of you because we've already almost covered all of this. So what we are going to do is we're going to go up here and we'll create another variable, and we'll call this the run speed. And it's going to be around 25 F because it will be faster than our normal speed. And we are simply going to go ahead and take an input inside of move. And based on that input will change the movement or will change what gets multiplied the movement. So in here, if we're crouching our movement is something like this. So we'll add a, another if condition and here, so this is going to be if we input dot get ki. So this will only return true while we hold, and this is what we want. So while we're holding a certain key code that is the left shift, then we are going to get our movement and we are going to be multiplying it by V R1 speed and will change the condition in near from F2. Else, if so, now if we input the, well, if we press the left cheek shift or we'll, we are holding down the left shift. Our movement will be multiplied by p Ron speed. Else, if we are crouching than our movement is going to be multiplied by the crowd speed. And else the movement will be multiplied by the normal speed. So if we're just standing up. So let's go ahead and test this out. When we hit play or before we do that, let's go to the player. And let's just add a bit of Ron speed so it's more obvious. So let's put it up to 50. Let's save that and let's try our new run speeds. So now as we're moving, you can see the velocity or our movement speed. So now when we start holding the Shift down, you can see it's much faster. So now we are running at a bout. What is that? About 0.8 to 0.9. Very nice. So this game is fast and you can adjust the running speed to your heart's desire and don't fall down from the edge. Okay, great, so now that we have this run Spitzer up and one more thing I forgot to show you. The problem here is that if we are crouching and moving, we have the speed, but if we start holding down shift, we again go into the ultra super speed. So the way we fix this is we actually go back into our code. And here, if we have the input or if we're holding down shift and we are not crouching, so is crouching false? So both of these conditions, and whenever we add an exclamation mark behind any Boolean, This means that we need the reverse. So if we hold down shift and we are not crouching, then we'll multiply the speed with the Ron speed. But if we are crouching, then this condition, this entire condition is false. So we move on to the else f, unless that's the sun, just to make sure I'm not lying. And we hit play. And now when we are crouching when forward at a slow speed and even when we press the left shift, nothing happens. While we're running. We can run, run, run, run. If we hit the CQI, suddenly we go back to our crouching speed. Okay, very nice. Now next thing we want to do is we actually want to create an animation for our running. And this is part of your challenge. Your challenge is going to be to create a running animation. So first thing you need to do is you need to create a running animation. And obviously, then you'll need to create a transition between the walking and running and make sure that you create also a transition from running to walking. Finally, you need to determine at what movement speed should declare be moving in order to transition to running. So go ahead and create your animation. Try your best, even if you're not sure what it should be, I'll just give you a small guide. So what I am going to do is I'm going to move the head every five frames. 0.1 units of unity absorbed on the 0 frame will have a 2.5. at the frame, five will have a 2.6, then we'll go down to 2.4 and then eventually go back to 2.5. So pause the video right now and go create your running animation. Oh, okay, welcome back. How did you get on that? Back in our player, back in an, in our animation. So the way we create a new animation is we click on here. We go to create a new clip. And we'll go to animation Claire animation. And we'll call this the running. And we are going to save that. Now let's go ahead and create this animation. We'll click on the red button. Will go to head. Who will move this five offerings. And we'll move this up from 2.5 to 2.6. And then in the next frame will move it back down to 0.5. And in the next slide frames, this will go to 2.4. So let's look at this. It will automatically move to 2.5. keep your eyes on here on the position. So from the five, it's 2.6. Then we move down to 2.5, it moves down automatically. Then finally, we are at 2.4 and eventually we'll go back to our initial state. So let's stop the recording. Let's hit play. And this is, this will be our running animation now. It's underwhelming, but if we click on the head, we can see how it's moving. Okay, great. So with that done, let's pause. This. Next thing is to create the transitions. So let's make this a little bit bigger. So we'll move idle, will put the walking, and then we'll put the running in here, will create the transition from YOU walking into the running and then from the running back to the walking will remove the exit time will put the transition duration to 0.1, will do the same on our way back. And we are going to set the condition in here to be player speech should be greater than, well, let's check. Let's go to the console. And now while we're moving, and let's go get some a bit of basin here. Oops, so this is playing all over. You can see that the animation is not actually stopping. So if we go to the animator, we had clicked on player, we can see that we are already running and we're not stopping. That's because the transition is not going back. So let's focus first of all on the sprinting. So when we're sprinting, we are over the 0.5 and never going less than 0.5. Great. So stop that back in our animation transition up. Okay, so it was 0.240 walking and we go to 0, let's make it six. And to transition back from the running, we'll make this less than 0.6 to stay on the safe side. Now back in our gain, we need to make sure that the one we're working with are never going above the threshold and we never stop running. Okay, so there is a bit of a wrong, something wrong in there. So let's even increase the threshold a bit. So let's make it 0.68. And in here let's also make it 0.68. Now we save all of that. Now we go back into our game and we should have idle. So we're breathing now when we start walking, give it so we're working, we're working, we're working and we do not run. And when we hit the shift, we start running. And you can see how the running animation is working. Now it's a bit jerky. We forgot to make it linear. So back in our player, choose, oops, nope, not the idle ND running. Choose all of that. Right-click, go to both the engine and make it linear. So now we have idle animation. So as we stand there, we breathe in and out. Let me make this bigger. So we breathe in and out to OK. So we are standing, widening, we can shoot, then we will start moving. And as we are moving, we move our camera. But so it's not noticeable, but it is when we have a reference point. How did we clip through that? So we move, we have the animation, and when we start running, you can see that the animation is more dramatic and it's even noticeable while we are moving, you can see the head bobbing just a little bit. And if you feel that you need to add more to that, then go ahead. You can increase the bobbing in here so you can make this. So we can record this and you can increase this two, maybe 2.8 and this 12, or this is the idle to the running. You can increase this to 2.7 maybe, and then take it back to 2.3. So let's try that. Let's put this to 2.7. There are many ways that chicken that this record nope, didn't. So 2.72.3 and this will be much more dramatic. You'll see. And now when we hit play, so the animations are purely based on your preference. So now you can see that the bobbing is much more obvious and you know, actually, I think we'll keep it at that. So increasing the animation makes our game much more realistic. Was that done? We can finally go and commit or changes stage all commit, added. Sprinting with animations, commit all of that. And in the next video we are going to be sliding our player. So while we're running, if we hit the CQI and start crouching, we will in fact start sliding down with a certain velocity. Until then, I'll see you in the next video.
27. Sliding : Welcome back, my favorite game developers. In this video, we are going to be some colliding, sliding away from our problems. That is, so that was probably the worst intro ever. So back in our game. Now when we run, we can hit the CQI and starts lighting. So we cannot move until our slide speeds stops. We can adjust the slide speed. Let's make it 60 and go wild with it. So now when we run, we had the CQI and it's super fast. So as you can see, this is our sliding. We can also stop it after a second step, we determine by ourselves. So with that said, let's not waste any more time. This video is long enough and let's get started. Oh, okay, so how are we going to be sliding? Well, we want to be sliding when ever we are running and we press the C key. And what we want to do is we actually want to start sliding our player in the direction that he is already moving. And we do not want to be able to control our player as he is sliding so well that established, first of all, check or have the ability to check whenever we are sliding or I mean, whenever we are running. So first thing we are going to do is we'll create here a section for the sliding. And we'll create a public boolean is running and we'll set it to false at the beginning. And now whenever we are hitting the Shift key down and player movement, and here we are going to set the is running to true. Great, that's if that. And when we are not running in the else we are going to set the is running to false. Okay, great, so now we have the is running True and then it's false when we're not running. Great. Next thing we're going to do is we're going to check if we are running, then we want to go ahead and get the plane that we are working on. And what do I mean by that? So if we go in here, let me just show you. So vector 3.What project on plane and what this does is it returns the location of the vector on the plane. So if you want to go ahead and read more about it, it's a bit confusing honestly, but let me just give you the gist of all of this. So we take a vector, which is going to be the forward vector of our head, and we are going to use the normal vector of the plane that we want to slide on. So it's going to be the vector dot up. And this will allow us to actually get the plane on which we want to be sliding or the vector, the direction of the vector that we want to be sliding in. This way, we will able to add velocity in that direction and we'll have the slides speed, but will also have to normalize. So we'll have to normalize this vector three in order to keep it at a magnitude of one. So what do I mean by this? Let's go to our handy. Paint, our good old friend, childhood friends. So what do we do when we normalize? So let's say we have this vector up here and we're moving in this direction. So this will be the APP vector and this will be the forward vector. And when we create this projection on the plane will actually create a vector that is like this one. So it will be v vector forward. So what we do when we normalize, we actually create a sort of factor that will only be one at a time. So this will allow us to have consistent velocity as we move forward. And it will not be just increasing based on our forward and upward. So if that's not very understood, you can go ahead and read about it. It's not that hard. It's not something very far out there. It simply allows us to have our vector always pointing in the same direction. But anyways, we are going to be implementing the project on the plane. And with denormalized, we'll, we're going to keep it consistent. So back in our player script, Lets go to the, where should we be checking? Well, we are going to check it whenever we start crouching. So in here, if we is running, then we are going to create a velocity, or we are going to set the velocity to be the vector three. And we're going to project on plane. So we'll need the my camera head dot transform forward. And we're going to use the vectors 3.The up. And we're going to make it normalized. And then we are going to multiply it by some kind of slide speed that will create a variable for. And of course we'll be adding the time dot at delta time. So let's save that. And let's go ahead and create this slide speed appear. So we're going to make this a public float slide speed, and let's just set it. I don't know, maybe two when? Maybe 30. Let's go ahead and put it at 13. Maybe that's too fast or too slow. Maybe you want to change it, maybe you want to make it very fast, so it will depend on your preference. Now let's test this out and unity. So now we have the is running public and we have the slide speed. So when we hit play, we can actually go ahead and check if we're running. So we have the little Boolean there with a, what's it called? Checking that we are set on true and when we stop running, it's back to false. So now when we're running and we hit CQI, you can see that we slide and oh, where did we go? Let's try that one more time. Let's go ahead and make this sliding a plus. So let's make it maybe ten. So ten just so we don't fall off the edge immediately. So we'll go here to the edge and we're stopped running and hit the CQI. And as you can see, we keep going forward. So even if we stop, we keep going forward. Let's try that one more time. You can test this out at home, even if you don't poke sit in here. And we start sliding and we stop. And yet we keep having this velocity that keeps pulling us forward. So now we need to stop that velocity. And our, I mean, stop the sliding. So how are we going to do this? Well, we are going to create a timer. So the way timers work is, well create first of all, a start slider timer. So this will be a Boolean. Whenever it's true, we will start the slider timer. And then we are going to create two other variables. One, they're both, they will both be floats. So one will keep track of our current slider timer, and the other one will be the max slide time, time. And let's just set it to two F. Now we're going to make both of these private, but for now let's keep them public so we can always see them in the inspector and know what's actually going on. So whenever we start the sliding, we are going to set the start slider time to true. And then we are going to start some kind of slide counter that will check if our slides start slide timer is true, then we are going to be adding to the current slide, slider time to the current. Let's make this the current slide timer. And it's going to be to keep adding Time.deltaTime until it reaches a certain Max slide. And when we reach the smack slide, we are going to reset the current slider time and we will stop sliding. So let's see how that's going to work. First of all, we are going to create a method down here below. And we're going to call this method the private void slide counter. And this will keep checking for our slider. So if we want to start the slider timer, then we are going to take our current slide timer and we're going to add with time dot delta times. So this will keep increasing as it goes on. And when are we actually going to stop sliding while up here, when we start crouching? Whereas it so in here, when we stop pressing the CQI or so this is the or symbol. Or if our current slight timer is bigger than, so we are exceeding the max slight time, then we are also going to stop sliding. And finally, when do we start the slider timer? When it's when we actually start sliding. So in here, let's add these brackets because we're adding another condition. So in here, we are going to set the start slider timer to True bearing ice. And before we go and test it, we of course need to stop the sliding in here. So what should we be doing when it's part of your challenge? So how many times have you finished the stop crouching? So you will need to first of all, reset the current time slider back to 0. You'll need to reset the velocities, so you'll need to set it to new vector three, that is 0002 in order to stop us from sliding or continue to slide forward. And then you need to set the start slider to false or you'll need to turn off the slider timer. So three things. Reset the current time slider, reset the velocity entering of the slider time. Pause the video right now and go do the challenge. Okay, welcome back. So what are we going to do in here? First of all, we are going to get our current slider timer. We are going to set it to 0. F will then take our velocity and we're going to set it to a new vector three, that's going to be 0, f, 0, f and 0 was disabled or harder challenge. Well, good. That means you tried and failed. And now this is what we are doing. So first of all, where our current slider has reset its time back to 0, our velocity is at 000, and our start slider timer is back to false. Now one final thing is that we need to actually be calling this slight counter. So where are we going to call this? Well, we'll just set it up here in the update. We're going to start, oops, which, what was the name of it again? So it was this light counter. So n here, slide counter will be called in the update. Let's go ahead and test this out and we'll review our code one more time. So we had play. We set it to be two seconds. We can see that we are running when we start sliding will have this little start slider Boolean check, right? We'll stop. Okay, so let's reset this back to 0. Our max lifetime will be 2n, our slide speed. Let's put it back to five. And now when we run, we had see we slide for two seconds and then our velocity is back to 0. Very nice. So this is working. Let's put the slide back to ten. And let's see this in action. So we're running from the monster and we slide down, we shoot him and then we get back up and then we continue running, running, running. We slide and we keep sliding into direction. We are, we were initially running it. So let's see, we are running. We slide, we cannot move left and right and we fall down. Well, let's try that again. So you can see just like real life sliding when you're sliding, you cannot move left and right. So this is exactly what happens. We run, we had see we cannot move left and right until we stand up and then we can move again. So back in our code, let's review this for some of you that did not fully understand it. And there's no shame in not understanding it. Honestly, even I, when I wrote this code, I was a bit confused of what's actually going on. So. Let's take a few moments to review what's happening. If you already understand how this works, go ahead and stage all you're onstage. Files, commit all of these and that sliding mechanic, comment, all of that. And let's go back to our code and let's see what's happening. So first of all, we are looking for our running. So if we are running, we'll set it to true in the movement. And when we stop running or we're not running, we'll set it back to false. This will allow us to start sliding if we start crouching. So when we start crouching, if we are running, then we will add a certain velocity that is on the plane on which we are currently in the direction of. And we also add a slide speed. So the way we get the plane is by using the camera forward vector, which is the way we are looking. And by using the vector OP, which is the normal to that plane. And in here we also start a slider primer. And what this slider timer allows us to do is it starts counting down in here. So if it's true, it starts counting up by me, not counting down. So current slider timer will start increasing every frame by the Time.deltaTime. And when it gets to a certain threshold when the current slider timers. So let's go back up here. When it gets to a certain threshold more than the max Slide Time, which we can determine from our Inspector. Then we are going to stop crouching. And in here this is the or. So if we release the CQI or the current slider timer has ended, we will stop crouching and stop crouching. We reset the time that is two seconds now, or above two seconds. Then we are going to reset the velocity that we are moving in to stop the sliding movement. And finally, we will set the start slider timer back to false, and we'll wait until we start sliding again. So I hope this is not too complicated. I hope my explanation helped you just a little bit to understand everything better. And in the section I believe is over. And the next section we are going to be adding advanced shooting. So we'll be adding better weapons or better looking weapons and we'll add better looking bullets, will start controlling our shooting rates, so will not have to always press the button. We will have like a rifle so we can go and we'll add a bit of ammunition, will display the ammunition on our screen using the canvas. And we'll learn how we can empower him down the side. So that none. I hope I see you in the next video. It was very fun section. Our movement is excellent, and I'll see you in the next one.
28. SECTION 5 - Creating Our Gun System: Welcome back my favorite game developers to a brand new section and a brand new gun. So finally, our player looks, well. Our player has a gun as cool as his eyes. So now when we hit play, we have a brand new pistol that shoots brand new Pulitzer. How cool is that? Finally, it feels as if we're destroying something with something that actually can destroy things. So, and now with our new gun, we've created a new GUN system. We've created a new hierarchy for our guns. With that said, let's not waste any more time and let's get to our cool weapons. Okay, so let's get started. The first thing we're going to do is we're going to be importing our new cool guns. So let's go into the resources and go on open up these sci-fi weapons. In here, I recommended shoe. First of all, check out the readme and this is where I got all of these assets. They are completely free and you can go and check out the website right here. They also have other very cool assets that you can download and even use in your game for free. Go show them some love. Now, we simply dragged over into our assets. So we drag them over, they will start to import. So we can see all of those simply hit Import and we'll wait for them to import. You don't have to wait with me. I will use the magic of editing and I'll see you in just a little bit. Okay, welcome back. That was faster than I expected. So now we have these sci-fi weapons or right here. Now before we continue, let me just create a folder. And this will be all of our game assets and we'll put the effects extra inside of year. And any second now, OK, sci-fi weapons, also inside of the game assets or case. So let's go into our game asset and let's look at this sci-fi weapons in the base pack. We can see that we have a sniper rifle, a pustule, heavy, and the Prefabs for all of these. So we are going to get our pistol and let's go ahead and add them into our scene. So this is our tiny, tiny little pistol right now. So I think we're probably going to increase the scale to two by two by two and make it a bit bigger, maybe will even make it bigger than that. It's currently very small, but it looks very cool. So now that we have the pistol maybe will even make it bigger, let's go ahead and add it into our game right here, so into our players hands. So first of all, we have the head and we have gone, let's create an empty game object in here, and we'll call it the guns. And then we'll set the gun under the guns and we'll turn it off for now because we are going to be using this pistol right here. And first thing we're going to do is we're going to remove this boot from it. And we first of all need to go to prefabs unpack completely. And now we go into our prefabs. And let's take v bullet here and let's go ahead and drag it right into the bullets. And actually our prefabs needs a bit of organization. So we'll create a bullets folder right here, and then we'll create another folder for the what should we call them, the facts. And we'll put the water, the gas, gun, muscle, and the bullet impact and side of the effects. Okay, great. So now we have the bullet, let's deleted. We only need the stone. And let's rename this to the postal, simply pistol. And in guns. And let's go ahead and create a game object. And we'll call this the pistol. So where is it currently? So it's there and we'll go ahead and put the postal under the pistol actually, that's named as the pistol body or prefab. And let's go ahead and reset the position of this pistol. We will put the game view right next to us, and now we will be able to see what our player C. So we'll put the pistol, so the camera's position is here and our player's position is here. So let's set the player position to 00 and the camera position should be on the head. So we'll put it at the, as a child of the head will reset its position and then we'll remove it from the child. So now we'll need to adjust the pistol position based on that. So the guns here, the pistol is here. And let's move this pistol back a bit and then move it up. And let's move to the right. And now just keep adjusting the pistol and till it looks good enough. And now, I think this is good enough. So now this is where our pistol This is how our pistols going to look. Now you can adjust it, maybe we can even make it a bit bigger. So let's go to the pistol prefab and maybe make it three by three by three. This way it's much better. We can even reset the position of it. And now we can modify from the pistol directly. So yeah, that's looks cool. And let's move it down a bit. So, yup, that's how we want our pursuit. Look, maybe just a little bit more down and a little bit forward. I'm adjusting it. Okay, great, so let's save that. And now back in our game in here, so we hit play. And now are, still actually starts shooting. Now has bullets are very weird, but we'll deal with that later. And if you're five position is not in the correct place, we need to actually move it. So we'll move this up. Back, well, back and let's put it in here. Will later on be actually changing the wafer position works entirely. But for now, let's just keep it. We had play and all we can shoot our bullets. And the fire actually looks cool now with the new gun. Very nice. Now next thing we are going to do is we're actually going to move our entire shooting system into its, into a separate script. Now, again, we could have done this from the beginning, but I wanted to show you how sometimes whenever you start creating deeper mechanics in your game, you start shifting from a single script to do everything into a separate script for more detailed creation. So in here we'll right-click and we'll create a new script. So a new C-sharp script. And let's name it the gum system. And let's wait for it to compile. Why do you keep opening up Visual Studio and double-click on Khan System. And in here we are going to move the shoot. So will go down in here. We'll move this entire method of shooting from player. So let's choose all of that. Cut by, by using Control X. And we're going to move it into the GUN system. And as you can see, there are a lot of things that we need to move. So first thing is the camera head. So let's go ahead and move that. And up here, let's see where's our camera head. So should, should be removed in here. And camera head, where is it? Camera had double-click on that. Do we use it anywhere else? So let's see, we do use it whenever we want to project. So we'll keep it in here and will simply copy this, put it inside of our Guns system. So this is a bit cumbersome, but trust me, it will pay off dividends. Save that. So now our camera hat is good. We need a far position, so in here, whereas our fire position, do we use it anywhere? So no, we do not use the five position anywhere. So we can actually cut this from here and put it inside of our GUN system. And the next thing we're going to do, we need a bullet hole. So we'll I think we'll need all of these, so we'll go ahead and put them in here. And what else do we need? Let's save all of that. What else do we need? We need the bullet. Yes, that was predictable. So the bullet we use the bullet anywhere else? Nope, we don't. So we're also going to cut the bullet. So now our player is no longer concerned with the fairing and the shooting or the GUN system is responsible for everything else. Okay, great. So an update, we are simply going to call the shoot. And now it's time to go into our spectrum in Unity. Wait for that to compile and guns, let's go ahead and add the GUN system to the pistol because each weapon will have its own KM system. So now we have my camera head. Let's go ahead and add the camera had def fire position is the muzzle flash and prefabs and Prefabs facts go to back to the gun so no piston. So the gun muzzle flash, the bullet, whole view water leak, and now it's time for the bullet. And speaking of bullets, it's time for your challenge. And your challenge is going to be to set up the pustule bullet. So ops before we do that, sorry. So we already took out the bullet of the store and made it a prefab. So your job's going to be to add a rigid body to the bullet, add the script or the bullet controller, if I remember correctly, that's what it's called. And configure the velocity and make sure that everything works. So pause the video right now and go configure the PESTEL. Oh, okay, welcome back. So in bullet, so we have these people at right here. So we're going to add a rigid body to it. We are going to, we going to freeze the rotations. We're going to add the bullet controller in here. And what else should we be adding? We should go to the pistol and add this Bulletin here. We also want to go ahead and put the bullet. We need to add the rigid body. We need to change the bullet lived two, and let's make the speed about 250. Let's say that, let it play and let's see if it's working. So now we shoot. And is the bullet actually getting created? I cannot see it. It doesn't seem to be working well. At least the shooting is working. The bullets Hall, the bullet holes are getting created, the water something is getting created. The muzzle flash is working, but the bullet, let's put the bullet in here, so it's very small. And let's go ahead and changed up. So we'll make it three by three by three. See? Yep, that looks about right. So we'll apply that. And deleted from arsine. Hit play. And now our pistol shoots this white little bullet right here that we can see flying off. A great, so now we have the bullet. And one final thing that I wanted to do is let's hit Play and let's look at that again. So when we're moving, you can see the bullet on the right and the left of the gun. And that's because the bullet is not a child of that gun. So let's child to the cone, just like we did with the muzzle flash. And in here where we're instantiating the bullet, we're going to add the parent and let's make it the far position. Let's save that. And now our bullets should be more realistic looking. So now shoot a free move left and right. The bullet does not go everywhere and you can see this white little bullet. We can even make it slower depends on your preferences. I'm gonna make it 1-20 and we're basically done. That's it. That's all we needed to do. In the next video. We are going to be controlling our shooting rates, so we'll be able to have the rifle GOP, but will not be adding the rifle just yet. I'll see you in the next video. Oh, before we go, we need to go to the masters and commit our changes and our files are too big, so we'll need to go into the assets. And we're going to right-click in here, ignore. And everything beneath the assets. Examples affect examples. Why they tell me a homemade because we created a new file. And again, let's right click in here and let's go ahead and ignore everything under the sci-fi weapons because they are too big of a file. So stage all of that, commit, all of that. Added my first new Cy5 cool-looking pistol within new GUN system. Commit all of that. And I'll see you in the next video.
29. Controlling Our Shooting Rate : Welcome back, my fellow game developers. In this video, we are going to add, first of all, auto firing. We will learn about coroutines. And finally we will add a time between shots. So let's make this more exciting. Let's put the time between shots to 0. When we hit play, we can actually hold down the mouse button and you can see we can create many photons. Now that is not practical because usually guns don't shoot infinite bottles at a second. So we've added a time between shots. So now for example, we can set it to 0.05. and even when we hold down the mouse button, it takes 0.5. seconds in order to start shooting again. And that's all that we've done. So let's not waste any more time. And let's get started. Oh, okay, so let's start controlling our firing rate. First thing we're going to do is we're going to go ahead and create two variables. The first variable is going to be a Boolean that will tell us whether we can actually can auto fire. The next one will be a private Boolean, that is the shooting. So what are these two variables this cannot fire will be either true if we have a rifle that can auto fire, or would be false if we cannot Water Fire. And the shooting will actually be the input from which we will determine if we are actually using the mouse button down or a nother import. So instead of this here we are going to put the shooting and shooting will be created by you. Yes, it's a challenge at the beginning of a video, the worst kind of challenges. So check for auto fire condition before shooting and allow the player to hold the mouse button to shoot if auto fire is true by setting the shooting Boolean as the input. So we've already covered the last part. So if the auto fire is on, then you will have some kind of input for the shooting. If the fires of then you'll have a different kind of input for the shooting. If you feel confident enough to go out and find solution on your own, pause the video and go, if not, here's a hint. Look up, get mouse button. With that said, pause the video right now and go do each Harlan. Oh, okay, welcome back. So in here we are going to go ahead and create an if condition. And if it can, auto fire has then we are going to set the shooting as the input pops. No, oh yes. Work. So input dot, get mouse button. And if you look at it, it returns when whether the given moles button is held down and this is exactly what we want. So if it's held down, we will be sharing. Else. The shooting is going to be equal to the input that get mouse button down, just like we did previously. And now, let's save all of that now the shooting will depend on whether we can auto fire. So we'll go into unity in the GUN system for our piston. We will have the option to order file. Let's open up the player so we can see our pistol and action. So guns, pistol cannot fire, hit play. And now let's see what happens when we, whoa, okay, we can Far, as much as we want. But as you can see, this is not very practical because we want to, even though we can auto fire, we also want to have some kind of rules on the auto firing. So let me just write my name in here, my code. Ok, anyways, so let's put a constraint on our shooting. First thing we'll need to do is we need to create a variable in here that is going to be called ready to shoot. And this variable will own. This variable will be the variable that allow us to shoot. So the shooting should be pressed or the input should be available. And we should be ready to shoot. And ready to shoot will always be o, or at the beginning will be true. But when we actually start shooting, the ready to shoot will be equal to false. Now, how are we going to turn it back to true? Now you might be saying maybe at the end of the shot or something like that. But no, we want to actually turn them back to true after a certain amount of time. And the way we postponed the change of something in our game is using the coatings. So maybe you've heard of coroutines and maybe you haven't, but let's explain them thoroughly. So what does a coroutine? It's a method that can suspend the execution of instructions until certain conditions are met. This suspensions are known as healed, so our nose as yield. I'm not sure how am I writing these slides. Anyways, this is spent suspensions are known as yield. In our example, we'll be spending the time until our player is ready to shoot again. So basically what we are going to do is we're going to set the ready to shoot two back to true after a certain condition is met using the yield. So let's go ahead and create a coding. Now. Nope, not in here, but thank you. Anyways, we are going to create a court in, and the way we do that is actually in here. The coroutine is of type II enumerator. And you don't need to worry too much about that. If you want to go delve deeper into it searches in the Unity documentation, we are going to reset the shot. And in here, the first thing we do is we're going to yield. So before, let me just show you it's asking for us for a certain return because not all called Path returned the value. So the way we return is actually we type in yield return mu. And in here we can do several things. So we can wait until wait four seconds where it wait for different things. What we're gonna do is we're going to wait four seconds. And inside of here we can simply write two Fs to wait for two seconds or three, or four. But because each gun will have its own time until it's ready to shoot again. So the pistol will have a certain time. A sniper, for example, will need more time until it resets. So what we are going to do is we're going to create a time between shots because each state will have its own time between shots. We'll double-click, we'll copy this will create here. So what? We're going to create a public float, time between shots. And now in here, after we wait for the time between shots, we are then going to set view ready to shoot back to true. So let's save that and now let's go back into Unity. Let's wait for it to compile. Will have the time between shots. Let's just set it to three, just so you understand how all of this is working. So three seconds, This is a bit of a long time, but this is for the testing purpose. So we should, we cannot shoot if you hear me clicking. So we're shooting with shooting. It does not shoot. We need to wait for three seconds and it's not shooting at all. Y's that. Oh, because we made the biggest mistake possible After we should, we need to actually call the skirting. So the way, so the way we call the score routine is we actually go ahead and start a Curtin and we call the reset shot. And that's it. We'll go over the code just after we test everything. So hit play. And we should cannot shoot anymore until three seconds have passed. We should so 12312312, you can hear me clicking the mouse as much as I possibly can, but it's not working. So let's add a practical use for this. So let's say we cannot fire. And the pistol we'll have maybe a shooting of, I'm not sure how much, so maybe 0.2. So now you can see that our shooting while I'm holding down is much more controllable. And this will allow us to have, well, these types of shooting. Great. So now that are shooting is working, everything is working. Let me just go over the code one more time and over an eye enumerator. So what are courting score routines are methods that work only after a certain time. So if you want to spend the execution of certain actions just like we're doing now. We want our ready to shoot, to wait a couple of seconds maybe, until it turns back to true. We use Coubertin's. So in here, we've created a co-routine and a quality is always of type i enumerator. We've named it reset shot. And whenever we create an eye enumerator type method, we always need to have this yield return new, and then we choose whether we want to wait four seconds or wait until other things. Now, mostly in this course we are almost everywhere going to be using wait four seconds. So don't worry about other things. If you ever need to, just know that you have the option to go and have different types of return. So because every gun would have its own time to wait between shots, we've created a variable that is public that we can change from the Inspector. And then when we yield return and wait for the seconds of a certain time between shots, then the ready to shoot will be set back to true. And as a final note, what else should we be talking about? Well, this shooting right here, I think it's fairly simple and that's it. So let's go into our source tree. Let's take all of that and committed. And now we have control over our firing rate. Commit all of that. And that's it. That's all that we needed to. In the next video, we are going to be adding ammunition, so we will no longer have the freedom to shoot as much as we want. As cool as that sounds, adding ammunition is actually going to be more fun and as a bit of suspense to our game. So I'll see you in the next video.
30. Adding Ammunition : Welcome back, my favorite game developers. In this video, as you can see, we have bullets available, the total bullets, the magazine size, and a certain real time. So when we hit play, we can see that we can shoot bullets until the bullets available are 0 and we can no longer shoot. When we click on the R, We can not shoot until we wait two seconds. And now we can shoot again. And we can, of course me, it's trying our enemies. We can now again reload and wait for two seconds and then we can shoot. So let's not waste any more time and let's get started with this new dynamic mechanic. Oh, okay, so adding a bullet system or ammunition. So first of all, let's go ahead and remove the can auto fire because pistols don't auto fire and the time between shots, let's make it 0.1 because we don't want to be waiting all day. Okay, great. Now to start off, first of all, we'll need of course, to go ahead and create the amount of bullets available. So we'll create a public int and it's going to be the bullets available so that they are available. Okay, so maybe outcome the salt available. Next thing we're going to do is whenever we want to shoot. If we are shooting and we're ready to shoot, and we have enough bullets are available. That means that the bullets are available are greater than 0. Then we are going to shoot. And every time you shoot, we are going to of course, reducing the amount of bullets available. So minus minus and we never did this before, but minus minus means that we are reducing only one. So let's put this back up in here. And Great. So now this is exactly what you want. Okay, so let's save that backend unity. And I'm not sure if you've noticed or did I just glance over it as if it's nothing? But we didn't do that before, but we've created an integer. So integers are not like floats, they don't, are not like 0.1 or 0.5 or 2.7. They are 12345 or minus1, minus2, and so on. So integers, basically. Now, back in our game, bullets available, let's make it five Save that had play. And we can actually look in the inspector 12341 and then we should, nope, we cannot shoot anymore because there are no bullets available anymore. Now, what is a good ammunition system without a reload? Let's go ahead and create a way for us to reload. So first thing we are going to do is we're going to create a public integer. And this is going to be the total bullets that we have. We are going to create a magazine size because of course, conserve magazine size, okay, great. And actually know what? Because these are all the same. They are integers, the integers they are all public. Let's simply put them next to each other. So we have the bullets are available, the total amount of bullets and the magazine size. Now, inside of start, we are going to set all of these sold. The total amount of bullets will be reduced by the magazine size. Because whenever we start holding a gun, first of all, we take all of the bullets and fill up the magazine size so the total amount of bullets gets reduced by the magazine size. We then take the bullets available. And of course, as soon as we start the game, our magazine size or the bullets available will be the maximum size. Now, we want to start reloading, but before we do that, we actually want to create a gun manager because later on we will have many things that we want to manage in our guns. So we'll start off by creating a gun manager. And let's go ahead and generate this method. So generate ve gone manager. And in here we are going to check if a input dot get key down using a key code that is the r, because we always reload the are and and the bullets available are less than the magazine size. So what this means is that if the bullets available are less than the magazine soils and we hit the archae, then we are going to reload. So basically this here ensures that we do not reload if we have a full magazine. So next thing we are going to do is we're going to create the reload and let's go ahead and create it under the shoot. So private void, reload. And in here we are going to, first of all, we're going to calculate the bullets that we need to add. So nt bullets to add. And it's going to be equal to the magazine size minus the bullets available. So let's say we want to reload before our magazine is empty. So we take the magazine size, which is always constant. We remove the bullets available. And then this is the bullets that will need to add. Next thing we're going to do, we are going to check if the total bullets that we have are greater than the bullets that we need to add. Then we are going to, first of all, get the total bullets. And of course we are going to be reducing them by the bullets that we want to add. Whoops. And then we want to take the bullets available and we're going to make them equal to the magazine size. So what are we doing here? Let's just stop for a moment. We calculate the amount of bullets that we need to add. It's the magazine size which is always constant, let's say 30 volts per magazine. And we reduce the bullets that are inside of the magazine. We then take the total bullets and we check if they there's more than the bullets that we need to add, which is great. We will reduce the total bullets by the bullets to add, and we will set the bullets available to the size of the magazine. So basically we've reloaded. But what happens if the bullets or the total bullets are less than the bullets that will need to add. Well, in that case, we know that the bullets to add will always be less than the magazine size. So will take the bullets available and we'll just add to them the total bullets. And we also, before we forget, we need to set the total bullets to 0. So what happens in here, if the total amount of bullets is less than the bullets that we need to add, then will simply take all the bullets that are left. We'll put them in the bullets available and then we'll set the bullet or the total bullets that we have left to 0, and that's it. So let's save all of that and let's go past reloading. So we have a lot of new things in here. So the bullets available will be 0, the maximum size of a pistol should be ten, and the total bullets will have for, let's say they are 18, just so we can test our system. So we hit play. And we look at the bullets available or no ten T magazine size is ten. And because we reduced the total bullets by the magazine size at the beginning, so now the total bullets left or eight. So we start shooting, shooting, shooting. And as you can see, the bullets are available or two. Now if we reload, let's see what happens. Well, we've added the eight that were in the total bullets to the two of the bullets available, and now we have nothing. So when we shoot again, we reload and nothing happens because there are no more total bullets. Let's try a different experiment. And what else should we be testing in here? I'm not sure. Let's make this 26. That's at play. And let's see, 84. And we'll need, this will become ten. Okay, great, so I'll reload system works, but now there's a slight problem if we start reloading and shooting. And we can reload while shooting and we can reload while reloading. And this is a huge problem FET, you'll need to solve the coz, it's part of your challenge. And your challenge is to create a reload coating. So first thing you need to do is you need to create a float for the real time. Then you will need to create a Boolean that checks if we all reloading. You'll need to create also a co-routine at that waits for real time and then resets the reloading. Finally, if we all reloading, make sure that we cannot shoot. Because of course whenever we are reloading, that means there are no bullets and we don't want to be shooting. And of course reload is not instantaneous. Later on we'll be adding an emissions to our reloading. Okay, so I know you've just learned co-routine and coroutines are usually very complicated, especially when you start learning them. So I recommend that shoe right now, even if you think that you have no idea, go back, watch the previous video, see how we are creating the numerator and how we are using the yield return. And try to do your best because even if you try a new fail miserably, whenever, when you see me do the challenge, it will just be a little bit easier next time you try to create a coating. So pause the video right now and go do the challenge. Oh, okay, welcome back. So in here, we are going to first of all be creating a variable that is the public float, real time. And then we're going to create a private Boolean. There is going to be v0 reloading. And that's the next thing we're going to do is we're going to go ahead and create an eye enumerator in here. So I enumerator and we'll call it the reload. Because we already have a reload method. We're going to call this the reload courting. Oops. And in here we are going to simply yield, return. New weight four, oops, what does this wait four seconds. And it's going to be the real time. It's that simple. And when we do wait for the seconds to reload, we are going to set the reloading, loading back to false. And when we reload in here, we are going to, after we set everything, the reload, reloading, i mean, is going to be equal to true. And we're going to start the cold. Start coroutine and what does it call? Reload co-routine, close all of that. And finally, what what was it? We need to make sure that we can not shoot, so we cannot shoot whereas the shooting in here, so we check and we are not reloading, then we can shoot.
31. Displaying Ammo: Welcome back, my fellow game developers. In this video, we are going to be delving into the canvas again. So what we did, we created a GUI. So let's click on our pistol. Okay, so we have the total bullets of 26. Let's make this 30 and the maximum size is ten. So now when we hit play, you can see that it's not only rendered on the inspector, it's also rendered on our screen, so we have 20 bullets left and every time you shoot a bullet, everything is updated. We reload. We sure again, we reload and everything works perfectly fine. So in this video we'll be delving into how to create fonts, how to add images, how to manipulate texts using code. And it's going to be very fun and exciting. So let's not waste any more time and let's get started. Oh, okay, so let's go back to our campus. And if you remember, the campus was this huge white square in the year that we press today in order to be able to edit. So the canvas is basically where we can put all of the images and texts that we want. And the first thing that we're going to put there is the image of a bullet to represent the ammunition. So let's go ahead and go to assets and maybe go to game assets or no, let's keep this in assets. Create a folder, and this is going to be our images. Let's go to the resources and get the bullet picture that I provided us with. So this picture, I actually went ahead and used Photoshop in order to remove the background. So we go to default and let's make it a 2D sprite. Now in our canvas, yes, apply that. In our canvas. We are going to right-click. And actually, let's open it up. Right-click, go to u I, and let's go ahead and create an image. Now this image is going to be called the bullet image. And let's go ahead and move it down here. And let's put the source image as the bullets, or simply drag the blood into the position. And now we have a bullet on the screen. Let's put the game view right next to us so we see where that bullet is and how big we should make it. And of course, this is all based on your preference. So you choose how big you want to make your bullet. If we want to make this bigger, simply hold down one of the edges, hold down Alt and expanded. So, or you can even set it to its native size, which is not the best idea, but at least it looks kind of good. And let's see here, it's 800 by 600. Let's go ahead and we can divide this by two and divide this by two also know, but still big. Let's again divide this by two and this by two so we can always keeping native size. Okay, so I think this is a good size for all bullet. Next thing we're going to do, we are going to download something called the text mesh probe. And we use the tech must text much pero in order to create our own fonts and add more flavor to the text in our game. So in order to do that, simply go to the Package Manager. I already have it. So in here, go to the Unity registry and you should find the text mesh pro downloaded or updated and import everything. And that's it. It's as simple as that. Okay, so now that we have our image set up, it's time to add a bit of text. So let's go into canvas. Let's right-click on here, and let's go to u I, and let's add the text mesh pero. So click on that. And now let's zoom in just a little bit. And we are going to drag this over next to our bullet. And this will represent the bullets that we have currently and the bullets that are left in the magazine. So we can go ahead and do a lot of things in here. We can change the alignment. We can change the alignment also on the horizontal. We can make it bold. We can change the font size. We can do a lot of things. So let's make this a little bit bigger. So it shows clearly. And the cool thing about text slash pro and why we're actually using it is because let me just move this a little bit to the left. Actually, I want to make this maybe divided by 1.5 and this one also divided by 1.5. So this is our bullet right here. And the cool thing about text mesh pro is that we can actually add our own font and a great resource that you can use in order to get the best phones is using the phone.com. And you can search for and use this font right here. So let's go in and this is, you can use any phone that you want. But I found that this is the coolest looking font for our consistent. So let's go into the resources. I have been gone play RG right here. We don't want to use the 3d1. Let's simply drag this into the UI. And we changed the name from images to your eye. Pattern represents what we are going to do in this file. So let's go into the window. Let's go to text mesh pro, and let's click on font asset creator. So take the econ play orgy jacket and to the source font file and click on Generate formed Atlas. This will open automatically. I'm not sure it will happen to you. This is very annoying. Let's save that and we are going to save it inside of the UI file. So click on save. And now it will open again. Annoyingly, We will move the gameplay orgy into the font asset on our text mesh pro. And now we will have this text in here in the gum play font. So let's change this to something to represent our bullets. So it will be 100 by 100. Of course, we are going to be changing all of this dynamically from our code. Let's make this a bit bigger. Let's increase the font size. And this is purely based on your preference and how much you want to actually. I have all of your text, so I'm going to multiply this again by 1.5 because I feel it's a bit small. Okay, So this looks really nice. Let's check it out in our game. Whoa, how cool is that? Okay, so now we have the bullets represented in here. And what, I'm actually wanted to just tweak this a little bit to my own preference and you can do whatever you want. Okay, great. So now we have this bullet in here. We have the texts representing the magazine size and the available bullets. So let's go ahead and start changing this all dynamically. That's shifted from text to the bullets text. Oh, okay, great. Let's go ahead and go into our scripts. Right click in here, and let's create a C-sharp script that will call the UI canvas controller and make sure you write it correctly. I hope I did. And the UI canvas controller. Okay, great. And let's go ahead and add scam UI canvas controller end to our campus. So now our Canvas Controller has this script right here. Very good. Now, next thing we're going to do is we're going to open up the script, Double-click on it, opened it up. And here we are going to add a single variable that is going to be called the Public text mesh pero. But as you can see, we don't have it available because we don't have the library for it. And the way we can add the library for it is in here. We're going to add a new namespace using DMP pro. And now when we want to create a variable, we can actually go ahead and create a text mesh parole GUI. And we're going to call this the ammo text. Oh, okay, great. Now back in our guns system up here, we are going to create a reference to this controller, but not the way that we usually do. So in here under the my camera ahead, we are going to create a private you are canvas controller. And we'll call this the my UI canvas. And usually we know that whenever we want to get a reference to an object we created and we make it public. We then set it in the inspector. But this time we are going to use a different method. We are going to go ahead and start actually find the object in our world and then we will get the reference to it. So the way we do that is we create my UI canvas and we writing here find object of type. And this will go and find all the objects of type that we give it. So it's going to be the UI controller. And there is not going to be any other UI canvas controller. And now what this does is it will actually go ahead and look for the EU, any object that has UI canvas controller on it in our scene and get a reference to. So now we have it. In our hands. Next thing we're going to do is we're going an update, call, Something that is the update ammo text. And what this method will do, let's go ahead and created, let's copy the name. It's going to be at the bottom of our script. And in here we're going to create a private void and update text. And in here we are going to access my UI canvas controller. We are going to access the ammo text and we're going to set the text. And it's going to be the bullets available. Plus, we are going to add this divide symbol and the magazine size. Okay, so let's save that. So what are we doing in here? First thing we did is we created a variable, whereas it so we created a private variable for the UI canvas. It's of type UI canvas controller because it has the script on it. We then got a reference to it by finding the game object in our world, this is a different way of actually getting a reference. Is it better, maybe more efficient? I'm not sure if you're talking about the speed in which it finds the object, but it's necessary in here because, uh, maybe we will have a different type of Canvas and another scene. So it's better to find a canvas than to actually reference it in an object. And finally, inside of update, we created a method or we are calling a method that is the update ammo. And what it does is actually it keeps updating the ammunition or setting the text of the ammo text in my UI campus. So what does the ammo text? Well, I think it's pretty obvious that the variable in here is actually going to be the bullet text. So the bullet text, oops, the bullet text is the ammo text. So this will be updated every time that we should able it and so on. So let's test this out and see if it works. So we click on play. And there you can see, let me check on the player. So now whenever we shoot, how cool is that? So now we have a URI and for some, oh, I forgot, why couldn't shoot. And now we can shoot around and reload and we can see all the text being updated. So that's super, super cool, very nice. I think I'll make the bullet a little bit smaller because it's huge and screen. So yeah, there we go. I think that is enough. So great. Now the final thing that we want to do is we actually want to put all of the available bullets next to us on the UI, but I'm not feeling well today, so I'm going to issue you a challenge for you to do it. See what I did there. So display the total bullets about. Create a variable to the total amount of AMOLED text. So you will do that envy UI controller then set the total amount of ammo text in the UI text. And of course you'll be using it throughout, through the update AML text method that we've created and Egon system. And I'll give you a small hint because you might come up to this problem. You'll need to use the two string to convert any variable to a string. So because the available ammo is going to be a integer, you will need to convert it to a string using the dot toString. So pause the video right now and go do the challenge. Okay, welcome back. So in our UI canvas, we are going to create the total ammo text. Let's save that. And the unity, we are going to go ahead and take this bullet text. We are going to duplicate it. And we are going to put this 100000 will make it a bit smaller. And we are going to put down the font size because it doesn't have to be as big as the rest of those. So if you have better UI skills than me, I really recommend that to go ahead and create your own type of style because I honestly have noticed in these things, I usually avoid creating UI. I'm not good at colors and all of that. So now let's go ahead and change this to a total bullets text. Save that. I'm more of a why didn't it change? Ok. So I'm more of a programming slash developing slash design of games. I'm not actually going into all this. But anyways, let's now go ahead and update text, which is actually the easier part in Guns system. And let's scroll down and the update ammo text. We are going to access the UI canvas. We are going to access the total ammo text. We are going to set this text and we're going to get the total bullets and convert them to a string, and that's it. And now we save all of that. We save the UI controller. Back in our game. We need to reference. So total bullets text is referenced. The now when we hit play, we should see the total amount of bullets is 16. And when we should, now we should, when we reload, we shouldn't have ten by ten and the total amount should be 120. Okay. So how much did we have amature? No, I think the math was right on that. I'm just too tired. So with that done, let's go and save all of that. And let's see maybe the text mush pro needs to be ignored. So ignore beneath the text mesh pro or K And what else? Okay, no worries. Those are small files. Let's stage all of that. Commit our changes. And we're going to call this displayed the ammo using text mesh role like a pro. Okay, so hopefully nobody will see this. So as you can see right now, this, these are all the entries that we've created and we've added a lot of things obviously, but our project is coming to life and we still have a lot to cover. So this is very exciting. In the next video, we are going to spark aiming down the site using our gun. And with that said, I'll see you in the next video.
32. Aiming Down The Sign: Welcome back, my favorite game developers. In this video, we are going to be aiming down the side. So what do I mean by that? Now are next to us, shoots it reloads. And if we want to zoom in just a little bit for more accuracy, and now we can do that. So we are going to be learning how we can move our guns position as we want to start aiming down the site for more accuracy. So let's not waste any more time and let's get started. Oh, okay, so what is our colon scheme? So our goal is to, whenever we press the left-most button, we want to put our gun right in the middle and front of us. So what I mean by that, let me just talk the game right here. And whenever we press the left mouse button, I want to move the gun position. So let me choose the gun in here. So our piston actually, and I want to move them to the 000, so it will be just in front of us, just like that. So what should we be doing in order to do this? First of all, we'll need to create a position right here that will enable us to move the gun to that position. So the way we're going to do that is we're going to create an empty game object on the pistol. That way it will be in the middle. And we're going to call this the AIM position. And we're going to unsure that from our piston. And we're going to set it at the 00. So that way this will be the destination that are gone needs to move to an order to be in the middle. So let's save that. Next thing we're going to do is we're going to create a, a reference to it in our system. So let's move appear and let's go ahead and create the aiming section of argon. And we're going to create a public transform. And this will be our aim position. Next thing we're going to do is we're going to set the aim speed. So at which speed are we going to move from the right of the left because we don't want it to be instantaneous. We want to have a certain velocity to it. So we're going to create a private we don't want to be able to determine this from the inspector. This this will be a set value. We're going to call this the aim speed. And let's just set it to f. And now let's go into our inspector and on our pistol. Let's wait for it. And they now on the pistol, let's go ahead and give the AIM position as the well am position. Great. And next thing we're going to do is we're going to go into our gun manager. And in here we are going to check for a certain input, which is of course going to be the mouse button. And it will check for the right mouse button. And whenever we press the right mouse button, we are going to move. Our guns are gunned towards the AIM position, and this is actually a function. So in here we have something called the vector three dot move towards. And what this does, it returns a new position of course, but what it does is it calculates a position between the two points specified, which are the current and a certain target. And it moves it at the speed of a max delta that we give it. So let's go ahead and implement that. But it's actually part of your challenge. So your challenge is to apply the move towards, so make sure you understand how the method works from the dogs, determined what the current and what the target positions are, and then apply them to the method with the max distance delta. So with that said, pause the video right now and go do the challenge. Oh, okay, welcome back. So because this move towards returns a certain position, then we are going to access the transform of argon. And we are going to set it's position to the refactor 3.The moved towards and what should we be adding in here? So what is the current position? While the current position is the transform dot position. So this is the position of our gun. We then want to move towards the target, which is the AIM position, dot position. And finally, we want to move it at the speed of the AME speed, but it's times time, delta time. So let's save that. And let's go and test this out and our unity gain. So when we hit play, we should see that whenever we had the right mouse button, we move are gone towards the center. As you can see, something is definitely wrong in here. So the firing position is not in its, in its right position and we can't move are gone back. So let's fix all of that. Now, the firing position problem is that it's actually not a child of the pistol. So whenever we are moving, it's actually not moving but us. So let's go ahead and child the firing position to the pustule. And this should make this all much easier. So now when we move, we should, whenever the gun is in front of us. Very nice. And the other thing that you want to fix as we actually want our gun to be moving back. So in order to do that, first of all, we'll need a reference. And here too, the guns starting position. And this can be a private. So private vector three dot gone. Start is that dot I manned space, start position. And we're going to set it in the start. So in here, somewhere. Let's put it in here. So the gun start position will be equal to the transform dot position. It's as simple as that. And finally, in here, if we are pressing the GetMax button, one, which means the right mouse or the yes, the right mouse button or else we are going to copy all of this. And I'll just give you a couple of seconds for you to complete this if you haven't done the challenge yet. So this is your chance. O K time's up. So what should we be doing here? So the current position will be the transformed position and the target position will be the gun start position. So let's save that. And because it is already a vector three, we don't need to actually put in the dot position. So because AIM position was a transform, that's why we've added the dot position two. It just wanted to make that clear if some of you are still confused. So back in our game, let's hit play. And the, something obviously is wrong. So our gun is kind of acting not like a real gun, so we can still shoot things. It aims correctly. But for some reason, when we let go of the left mouse button, it kind of moves towards somewhere and it's actually moving. Where's our gun result player? So it's actually trying to move to the position that it was in originally and you cannot blame it. Why is that? Well, because in here we can see that we are moving out transform dot position. If we're not hitting any mouse button, back to the gon start position, which we've determined so, and it's all for moving it at a certain aim speed. Our gun is always trying to move back to the gun start position. So how are we going to fix this? Well, it's actually very easy. The only thing that we need to do is we need to change the transformed position, which is the world space position, into its local position. So we're going to first of all change the gon, start position to the local position. And this is the position of the transform relative to the parents transform. With that Don, we also need to change the transformed position from the normal position to the local position. And we also need to change this one right here. Let's save all of that back in our game. And now we should have a properly working gun and not one that is floating around. So yes, argon is with us. And when we hit the left-most button or right mouse button, we can see that we are aiming down the side and everything seems to be working correctly. So with that done now we have our gun aiming down the site. We can apply this to any gun in our game. And the next obvious thing to do is to actually zoom in just a little bit. And that's what we're going to do in the next video. So I'll see you then.
33. Zooming In With FOV: Welcome back, my fellow game developers. In this video, we are going to enhance our aiming mechanic by not only moving our come to the center, but also aiming down the site correctly. So now we zoom in whenever we hold down the right mouse button and as you can see when we release it, it no longer zooms. And so now we have more accurate guns. With that said, let's not waste any more time and let's get started. Oh, okay, so how are we going to be zooming in? And what isn't a 4V? Well, if we go to our main camera and here we can see that we have a field of view. And if we try to decrease it, you can see that we are zooming in and we, if we try to increase it, you can see that we are zooming out. And this is what we are going to be trying to manipulate in our code in order to zoom n Whenever we end down side with our gap. So let's put this back to 60, and let's save all of that. And now let's open up our code. And we're actually going to go to our camera move. So in here we are going to be accessing the F0 v And we're going to be manipulating it or zooming in and out using different methods and so on. So the first thing we're going to do is inherit. We are going to create a private float. And this is going to be the starter for v and the target 4V. Now these are going to be private because we are going to be using methods in order to change them. And now in here we're going to create a public float. And this is going to be the FOB speed. So this will represent at what speed will the FOB be zooming in and out. And we're going to use a method similar to more move towards, but it will be different. And finally, we are going to get a reference to our camera in order to access the 4V. Now, we are, we've learned throughout the scores how to, first of all, get a reference using a public variable. We've learned how to find a game object, but what if we want to access a game or a component that is already on the object on which we have our script. So we have the camera moves and we want to access the component of the Cameron here. So there is a very simple way of doing this. So first of all, let's make this a private camera because we're actually accessing the camera component and we'll call this my camera. And the way we get a component is we actually go in here and we'll tell it that my camera is equal to get the component of type camera. And that's, so what this does, let's say we have the camera move, which is the script on the main camera object. And this main camera object has components, and one of them is the camera. So what this does is in here, in the start, as soon as we start we get the component of camera that is on the game object of our main camera. So this is a much easier way and it's similar to define object, but it only works if we actually have a component of type camera on our game object. Okay, so with that done, let's go ahead and start. We are going to set the starting or 4V. So the start for v will of course be my camera dot field of view. So it's already there. And then we are going to set the target I 4V as the start of for-fee whenever we actually start the game. Now how are we going to be changing the 4V? Well, in here and late update, we are going to be interpolating the camera's field of view to the target's field of view and what is interpolating. Well, let me show you in here. So we are going to use something called the math F dot. And what this does is it interpolates or it returns the float result between the interpolation of two values. So we have the start value of a, which is going to be the field of view of our camera. We are going to have the end value, which is the target of 4V. And then we are going to interpolate these using some kind of value, which is going to be, of course, the field of you speed that we've created. And what does interpolation mean? Well, it means that we move towards or not actually missed works. That's not the right way to put it. So let me just show you in here. So let's use paint. So moving towards, let's say we have a target in here. And the way we move towards is we actually go to this position using constant traveling. So these distances are the same and we keep moving until we get to our target interpolation. On the other hand, as we have a value in here, we want to get to this value in here. So we start off by moving this space. We then move at this space, at this, at this, at this and this and the distance keep getting smaller until we finally get to our destination. So this works better whenever we are working with zooming and this MOOC works better whenever we have positions that we want to move in. We don't want to actually slow down as we go, we get to our goal. So with that explained, Nope, don't save that masterpiece. Back in our script. We are going to get my camera FOB. And we're going to create a map f dot lobe. And in here we are going to set the a float or the initial value at the mike camera dot. Field of view, which is the initial value. We are then going to set the target FOB as the target value. And we're going to make this at a speed of the F0 v times time, oops, time, dot delta time. Ok, great. But we're not done yet because this will not do anything. Currently the target of a v is the startup 0V and The Startup 0V is the camera for v. So that means we are not doing anything. We are going to create two methods in here. The first one will be a public void, x2, n and its public because we are going to be x accessing it from ve gone system. And this method will take in a parameter which is the float target zoom. And in here we are going to change the target of 0V and to the target x2. And we're also going to create a method for zooming out. So this is going to be a public void zoom out. And this will simply reset the target apathy and to the starting of 4V. And that's it. Now, we are going to create a method and the GUN system that will not actually a method. We are going to check in our gun Manager for some kind of input. And when we do it that input we are going to access the Whereas it V zooming in. And we're going to set a certain target, zoom for it. And then when we released the set input, we are going to zoom out. And it's part of your challenge. So your challenges to finish zooming in and out. So first thing you'll need to do is you need to create a zoom amount variable that will be unique to African because for example, Pasteur zoom into a certain distance, then you have, for example, snipers that can zoom in even more than that. And maybe you have a very big sniper that zooms in all the way. So next thing you need to do is in gun manager, check for halting the most buttoned up or down. And based on that, you will need to zoom in and out and finally, find the camera moves object, just like we previously did. So we'll need to find the object in each condition and access the method on it. So pause the video right now and go do the challenge, even if it's a thought, especially the last part. Oh, okay, welcome back. So first thing we're going to do is we'll keep the variable in here so it's a public float, top zoom amount. And let's save that. We'll set it in the inspector and because it's part of the aiming will keep it in here. And in here we're going to check if we have the input dot, get mouse button down. That means we are pressing the right mouse button downwards. We are going to find the object of type. And of course we are going to find the camera move. And we're going to be zooming in. And because it takes in a parameter, if we don't give it a parameter, it will tell us that there is an error and we need to assign a parameter which is of course the zoom out. And if we use the input, whereas it the input dot get mouse button up. So when we release the mouse button one, we want to, let's copy this, put it in here. And we're actually going to be zooming out. And if you cannot use the zoom out and zoom in, make sure that we have these two public. So it's the first time that we're accessing a certain method from a different script, I believe if I'm not mistaking. So if you at least got to create these to checking for them and the zoom amount, I congratulate you if you went all the way and figured out how to do this, you are incredible. Keep up the great job. So with that done, let's save that. And let's make sure for the final time when we decrease. So let's see how much do we want to aim down the site is 40, no forties too much, I think from 60 to maybe 55 for a gun is enough. So Let's reset that back in our pistol. Let's make the zoom amount, the 55. So now when we press play, we can should and when we aimed on site with the route right mouse button, we should be zooming in just a little bit. And let me just make this more obvious or let's make it 50. And you can see how the interpolation works. We don't move towards the value. We actually slowly zoom in until we get to the final value or the target 4V. If that's still not clear, let me make this 40. And now when we hit play, we can zoom in the site and you can see how it slowly changes. Even after a couple of seconds, we are still zooming in a little bit. So with that done, I hope you enjoyed this video. I hope you enjoyed this section. And the next section we are going to be adding not just blame for, not just these plain enemies, these weird orbs. And here we are actually going to add big enemies, scary enemies, and most of all smart enemies that will chase her, chase our player around and shoot him and hurt him. So what that said, I hope you enjoyed this video and let's not forget to stage of our files or stage all of that. And we're going to tell it that we have created and aiming mechanic with zooming in. And let's commit our changes. And with that, I'll see you in the next section and next video.
34. SECTION 6 - Animating Our Enemies: Welcome back, my fellow game developers. Yes, this is a face reveal. No, actually, we've added two new demons into our world and they don't just sit there and stare at us. They actually, oh, and by the way, we've made our playground bigger. And when we hit play, these demons actually fly around and they are always looking at us, looking at him, he's always looking at us and bouncing up and down. So what we also created is this demon That we can shoot. Where's that demon? So He Xin looking at us where z. And now we can shoot him as he is moving around and they are no match for us. So in this video, we're going to create the demon enemies. We are going to add a bit of dynamic movement to them. And let's not waste any more time and let's get started. Okay, so currently our enemies are just spheres and they are very boring and very static. So we are going to change that very quick. First of all, we're going to add a bit of demons to our game. So currently we are going to be using the cocoa daemon and it's a monster from the game do maternal if you've ever played it, he's really cool and really scary. And the one we're going to use is actually from this website that is called the sketch Fab.com. And it's a really nice website if you ever want to download 3D models. It's by V creators at four, gee, I don't know who that is. So you can go ahead and download the model or use the one I've provided in the resources. So simply drag this file in here and make sure that you unzip it. First of all, drag it into our game assets. And now we can double-click here, and we actually have a couple of textures that we are going to be adding to a material specifically for this demon and simply drag this object in heap. So currently, our demon is very, very small. So what we are going to do is we're going to increase his scale to 200 on all sides. So 200 x 200 on the y and 200 on the zcat. So now we have a big giant monster. And, but he's currently doesn't have any colors and doesn't have any textures. So let's go in here. Let's duplicate the material that is already on the object. And this is the material that we are going to be using on this demon. So click on them. You can see that he has a mesh renderer and simply drag this material in here. And now we can start modifying the material. So first thing we're going to do is we'll add this cargo and M into the normal map. So you can see immediately he gets more Textures on him. Click on fixed. Now, next thing we're going to add the a o, which is the occassion. So right here. So you can now shift this, move it up and down depending on how you want him to look. And finally, go ahead and add the cocoa, The M into the albedo right here, and we have our monster next. Then let's add a bit of a mission to him and also add the I'm in here. So now our monster as much brighter, but he's too bright. So what you can do is you can play around with the metallic, you can play around with the smoothness. And you can play around in here. You can do this on your own and check how you want your demon to look. So I'll make him a bit darker. And yes, so this looks good enough for me. You can also change, oops, you can also change the colors on the emission, making more red or keeping y depends on how you want your demon to look. You can also play around and see what works for you. But now if we click on play, we can shoot around. But if we shoot our demon, well, nothing happens. And that's because he doesn't have any colliders on him. And the way we can add a collider is by going in here to add component. We can look for mesh collider. And we can actually add the collider that is with this game object. So instead of simply adding a spherical leader or a square colloidal, we can add this mesh collider, which is specific to this shape daemon. And finally, we need to also tag him as an enemy. So that's changed his name to the cargo demon body. And now when we hit play, we can shoot, and we can shoot daemon and he dies. Very nice. Now, next thing we're going to do is we'll add a bit of movement or Neiman. So in order to do that, we're going to first create an empty game object. And here we'll call this the Cuckoo, cuckoo daemon. And let's child the object into this cargo demoed demon object and put him under the enemies. And let's delete our spheres. We don't need them anymore. Next thing we're going to do is we'll add an animator in here. And we are going to start animating our edema. So click on the cocoa demon, Go to the animation and create an animation four, and go to the resources file of your project. So in animations, we'll create a new folder that is not the player animation. So new folder, This will be the demon animation, demon animations. And in here we'll simply create one that is idle. So idle animation, if that, and this will basically be the idle animation. And now we have the animator and an animator on the animator component of the cocoa demon. Now we want to create an animation that will move our demon up and down. So click back on the cargo demon got animation, create a new clip. And this will be the, let's just call it the moving animation. And let's save that. Great. So now we have the moving, let's click on the red button and we'll move him up every 1 second. And let's see how much should we move him up. So I think this is an appropriate height. And then at the 2 second Mark, he will come back down. So let's look at the animation. He moves up, he moves down. Let's save that. And let's make both of these linear. So let's look at the animation that we have. So he moves up and down. It's a bit quirky. You can change it and play around with it depending on your preference. Okay, great, so well that none, it's time to actually trigger these animations and create transitions. So let's go ahead and create a transition in here from the oil to the moving. Let's actually put it just like that and move the exit over the any state. So now we have moving and idle, and we're going to create actually a boolean. And here that's going to be called the move parameter. And in here we'll add it will remove any exit time and we'll remove the transition duration. And let's add the condition in here to move is set to true. Next thing we're going to do is we'll go to the cackle demon. We'll add a component in here, and we're going to create a script that will call the enemy enemy basic move. And when we write in here, we can actually create a new script. So create an ad. And we'll wait for it to compile. And this will open automatically for some reason. And then we'll have an assets the script. So simply drag it into our scripts in here. And Visual Studio again opens. So back an R script. Let's double-click on the enemy basic movement. And in here we are going to, of course, first of all, go ahead and create a Animator. And he may Tor, and we'll call this my animator. And he may torr. Okay, so let's save that. Now we'll get the components of my animator is equal to the get component and animator. And that's because the animator is actually on the same game object of our script. And next thing we're going to do in here and start, we are going to get my animator and we are going to set the boolean. And this Boolean is going to be the string reference. Whenever we have a string reference, we always go and copy it based on in here. And we are going to set the value for it, which is true. So let's save that and let's go ahead and test this out and see how our demon looks and fees actually working. So we hit play. And we can see that our demon is moving up and down, up and down, and we can shoot him and kill him. Okay, great. Next thing we want to do is we actually want this demon to be looking at our player as he is moving up and down. So the way we do that is we will go into our script. We are going to create a transforming here. And it's going to be our player. And we don't want to always be assigning the player. So what we're going to do is, and here we are going to take this player and we're going to find the object of type. And our player is of type player because he has the script on him. And we are going to access the transform of that object. So now we took this player, we have the find objects and we've X axis, the transport of this game object. Next thing we want to do as an update, we actually want to start looking at this player. So we've already covered looking. So Transform dot look at and we're going to give it the player transport. Let's save that. And let's look at our daemon right now. So he should be staring at us as he is moving up and down. So we started again, we see that he is actually looking at us, but I'm not sure if it's obvious or not. Yes, it is. So as we move around, the demon is always looking at the player and we can destroy him. Let's see that again because it's really intimidating. So our moving our demon flies around and he even goes toward and he felt, oh my God, what is that? So he is changing positions based on where our player is moving. So let's see. And yep, that looks scary as hell. Now what we can do is we can go ahead and apply root motion. And let's look at that again. So now our Neiman should be staying in place and should not be breaking our game. Oh, I was actually terrified there. Okay, great. So now we have our demon moving up and down, but we want maybe to add a bit more animations to our demon. So it's going to be part of your challenge. So you're challenged going to be to create a rotating animation. So create a rotating animation for the enemy. You can go ahead and duplicate the cackle demon. You create a Boolean to trigger that animation. Create two Boolean variables to choose between moving in, between between moving and rotating and the script. And then set the animations you want in the start. So I hope you got the challenge, what you need to do. So you'll need to create two Booleans in your script. And for each one, you'll be able to choose from the inspector whether this demon we'll be flying around or moving around or he will be rotating around. So pause the video right now and go do the challenge. Okay, how did you get on with that? So let's take our Kochab demon. Let's duplicate them. And let's move him in here. And let's move this one out there. And let's take this one and let's create a bit of animation for him. So let's go to animations and create a new clip. We'll call this in assets, animations, demon animations, and Rotating. So let's create the rotation and we'll start off by, let's look at him from the, from up here. So now we are going to go ahead and start recording on the 2.5th mark. We are going to move him here. Then on the 1 second mark will move him here. On the here. We'll move him here. And in here, let's move him up here and maybe a bit up. Finally on v2 30, so 2.5 seconds, let's put him back to his original position. And now this might be a bit fast, so let's play it. Let's see how that looks. And yes, sort of fast, but it looks good enough. So right-clicking here, both the engines make them linear. And now our movement is a bot quirky, but it is kind of demeaning, diminish that even a verb. Maybe we can make them just a little bit bigger so we double the time. So now he is a bit slower and easier to hit. Let's save that. And now we need to actually determined whether this demon we'll be flying or moving or rotating. So an animator, let's add this in here. Let's create another Boolean, and we'll call this the rotating. And we'll create a transition from idol to rotating. And we'll add will remove the exit time. We'll remove the transition. And we'll add the condition that the rotating right now should be true. Let's save that. Back-end our scripts in here. We are going to create two Booleans. And they are of course going to be public bool. And we'll create a move and rotate. And in here we are going to set the animator not just to trued whenever we want to move, but to move. And the second one would be my animator dot set wall, and it's going to be V. Let's copy this. So word-for-word script double-click on rotating, copy it, put it in here, and this will be the rotate. So now we have these booleans that our public, we can change them directly from the demon. So if you click on here, we can choose the demon to move and this demon to rotate. We'll save that. And now this demon will rotate and this demon will move because we've set them right here. So when the movie is true, this one will be true and this one will be false. And here it will be false. So our behavior or the behavior of our animator will be dependent on these booleans that we've created and here, so back in our game, we make sure that this one is rotate. This one is move. Let's hit play. And now we have this demon rotating around and flying around and looking at us the whole, OK. I think we need to make our playground just a little bit bigger. So let's make it 20 by 20. So we have a lot of space to move and that's moved these two because, why not? And let's also move these. So let's move this also. And let's stop holding the canvas. Move this up there. Move this up there, and move these four cubes in here to the corner of the, Okay, great, so save that back in our game. And now we have a bigger playground to play around in and hopefully not fall. And these are the demons flung around so we can shoot one of them. We can even zoom in with our new mechanic. And why is he not dying? Okay, we didn't hit him. Okay, great. So now we have scarier enemies, dynamic enemies. In the next video, we are going to start creating smart enemies. What that said, I hope you enjoyed the video and let's not forget to commit our uncommitted changes. Let's see, maybe we don't need the actual PNG. So right click in here, and let's go ahead and ignore the line demon, monster. Ok, stage all of that. Committal changes, added a scary demon, monster, monster. Comment that and with that said, next video will be the smart enemies. And I'll see you there.
35. Enemy Guarding: Welcome back, my fellow game developers. In this video, we've added yet another enemy, but this is not just any enemy. If you click on him, you can see that he is a smart enemy with an enemy script and a nav mesh agent. So what happens when we hit play? We can see that he starts moving around on his own and he's actually guarding this entire plane. We're not doing anything, so we're not even playing the game. You can see that we are not touching the keyboard, not doing anything, just bought, minding our own business. While our green little enemy in here is walking around with his menacingly green look, trying to find us. So with that said, let's not waste any more time. And let's go create ourselves some i o, okay, so now we want to create an enemy that will actually be guarding everywhere around here on the plane. Now first thing we'll need to address is how is our enemy or any object for that matter, know where he should be walking and guarding. Well, there is a very powerful tool in unity that is called enough mesh agent. So let me show you what that is. So let's go to the window and click on navigation. So you will have this weird tab right here that will open up. So simply docket next to the lighting. And now let me explain what this navigation means. So first of all, let's go to the agent. This is the agent that we'll be able to walk around in the world that we create for him. So it has a step height so you can increase the step that the agent can walk on. Let's reset that. You can increase the height of your agent. You can also change the radius and so on and so forth. And this will determine how, what is the angle that the agent can walk up on. Next thing we have the area. I'm not sure what these are. This is for more complicated calculations, don't worry, we will not be meeting those. And we have the bake. And this is the most important part of the navigation, is it allows us to create the world around which our player will be able to or not our player actually our agent, which will be our enemy, was able to walk on. So how are we going to create this first thing we need to go into the environment. And we'll need to choose all of our cubes. And we need to go to the inspector and make them all not static. You need to make them navigation static. So this will tell the navigation or nav mesh that these objects will not move in our world. And we do not want to bump into. The next thing we'll do is we'll click on the plane and will make a just stack. And now that we've set that up, we'll go to the navigation and we'll hit bacon here. So wait a couple of seconds. And as you can see right now, our entire plane has become this blue bright color and this blue blight. Blue bright color represents all the area that a nav mesh agent is going to be able to walk on. So who is our nerve mesh agent? Who is that? Let's go ahead and create him. So go to 3D object, create a cylinder. And let's reset his position. So where are you? Reset the position? And let's put him in here. And let's zoom in and take a look at them. So this will be our enemy. So smart enemy, that's called them smart enemy. And lets increase his Y 22. And now actually that's making 1.6. And we'll move him down just a little bit. Now we're going to add a component called the nav Nash agent. So search for agent and you will have the nav mash agent in here. So as you can see, is the humanoid, which is a enough mesh agents. So back in navigation agent, the humanoid, we can create multiple agents. But for now, let's keep this one. And as you can see, he has a certain speed, a certain angular speed. He also have, has a lot of things going on for him that we will not be bothering. We will keep everything as it is, maybe will just increase the speed a little bit later on. Now, let's get into the coding of our smart enemy. So and our scripts, we are going to create a C-sharp script that is called the enemy AI. And now Visual Studio open up on its own. See, I predict these things. So enemy AI, it compiles. Let's add it to the smart enemy. Well, Visual Studio open up on its own. Nope, it didn't. And now double-click on enemy AI. So what are we going to be doing in here? First thing first, we are going to get a reference to the enough mesh agent. But if you try this right now you can see that there is nothing corresponding to a navigational mesh. That's because we need to add the library. So using Unity engine dot AI. Great. So now we will be able to create a variable that is of type nav mesh agent. We'll call it my agent. And we'll also going to create a layer. So public Layer Mask. And this is going to be called what is ground. And we'll find out later on why we are going to use this. Actually, you are going to use this any challenge. Okay, let's continue on. In start, we are going to get the components. So my agent equals get component, and it's going to be the nav mesh agent. So now we have a reference to it, and now our agent can actually perform multiple tasks and one of them will be going to a certain destination. So before we continue on, we need to create the destination for him. So we'll create a public vector three. And this is going to be called the Destination point will also create a Boolean to check if we have already said the destination. So Destination set. And this will be false if we haven't found a destination and true when we do find one. And finally, we will create a range in which our agent can walk. So destination range. So is that right? Destination, destination. Ok, so now that we have all of that in update, we are going to start gardening. So we'll be gardening or our enemy will be guarding. Let's generate this method. And inside of guarding, we are going to be searching for a certain destination point. So if we did not set a certain destination, then we are going to be search or searching or search for destination. And let's go ahead and generate this method again. And what are we going to be doing while searching? Well, we are going to create a random point on our nav mesh. And to that point, our agent is going to walk, how do we create random points while we are going to create a float? It's going to be called the random position x_hat. And we're of course going to only have positions on these. X and y will stay the same. So the way we do this is we actually ripe random dot range. And some of you may encounter this problem. Some of you may not have this problem, but sometimes random is unambiguous. That means it's not sure whether it's using the Unity engine random or the system random. So there are two solutions. We can either the delete these system right here, but I don't recommend it. Or we can go ahead and right-click in here. It will offer us a solution and will simply check that we are using the unity that created up there. Dot range. So Is it working now? Yep, it's working. And the way we use range, we actually set the minimum value that we want and the maximum value that we want. And this random dot range will return some random float within these two values. So what is our minimum and maximum? Well, it's the destination range and actually minus destination range and plus destination range. And let's remove the plus because it is positive, it will be positive. And the, the random position x, copy this and paste it in here and change this to x and the rest is the same. So we'll call this create a random, create, a random point for our agent to walk to. Okay, great, so now we have two random points on the SAT and X. Next thing we need to do is we need to create the destination point. So destination point. Will be equal to a new vector. Three will open up the brackets and we'll hit Enter because this will be able to have a long vector three. So first thing we will get the transformed position but x. And we're going to add with the random position X that we've created about. Next thing we're taking the transformed position dot y, and it will stay the same. And finally, we are going to take the transform that position dot z, and we'll add to it the random position x that we found. A great, so what did we do in here? First of all, we start gardening in the update will of course, add more to this. If in guarding, we check if we don't have a destination, we will start searching for a destination. We'll create a random point, and then we are going to set the destination. So we've said the destination using our current position plus the random position x that we found. Now in here, when we finally find a destination, let's just set the destination set, oops, to true. So this is not the exact way that we are going to do this, but for now we'll just keep it like that. So if we're not looking for a destination, that means the set destination is true. We are going to take the agent and we are going to set the destination for him. So you can see that it sets or updates destination, thus triggering the calculation for a new path. So we'll set it in here and we'll give it the destination point. So let's save that and let's just go ahead and see if our enemy actually walks. And before we continue, let's just go to the where our materials at the Enemy material to him. So he looks a bit more enemy like. And let's put the game in here, so we have a good eye on our enemy. And let's increase the range to 100. Save that we had play. And let's see if he moves. And as you can see, our enemy has random, has a random destination point that he is walking towards. So let's increase the speed or OK, so he's done, so he has stopped. As you can see, the navigation is actually working. Now what is the next step? The next step is to actually determine if we are or if the destination that we've set is actually on the ground. And in order to do that, I'm going to issue a challenge. Your challenge is to check ground using the re-cast. So after we've set our destination, check if it's on the ground layer before moving there. And I'll give you a small hint about the direction of the re-cast. Use d minus transform dot vector as your re-cast direction. So after we've set the destination point, create a re-cast from it with a small maximum distance. And check if it's actually on the ground using the layer mask that we have created. So with that said, pause the video right now and go do the challenge. Gaye, welcome back. So before we do this, Let me delete this for now. We are going to create an if condition that checks 40, the physics dot re-cast. And in here we are going to first of all create the origin point, which is the destination point. We're going to use the direction that I told you about, which is the transfer or the minus transform. But up, that way we can look down or cast array down. The max distance will be two f, I think it's enough. And we are going to give it the layer as the, what is ground. So the ground, of course, what is ground will be set in the inspector. And here, if we do hit the ground, then we will set the destination set to equal true. Okay, great. Let's save that back in unity. What is ground? Well, it's ground, okay, but right now nothing will change because we just do this as a precautionary measure for our player or for our agent not to fall down from the edge of the world. And let's increase the speed to maybe seven. Okay, so now what we want to do is we want to get to the destination and then we want to start searching again for a new destination. So the way we do that is we'll go up here. And in guarding, we are going to create a vector three. And it's going to be the distance to destination. And it's going to be equal to the transformed position. So the position of our current character to the destination pot. And when this distance gets less than a certain value, we want to set the destination set back to false, which means that we have arrived at our destination and now need to search for a new one. So we'll create an if condition. If the distance to the destination is less than one f. So we are basically there. We are going to set the destination, set back to false and start searching again. And what is telling me this wrong cannot be applied to a vector 30. Ok, so we need to make this a magnitude. And it works very nice. So save that. And back in our game, let's see our enemy guarding an action. So we'll set the game and here we'll hit play. And now we should see our enemy just strolling around and moving around when he gets to his destination. Eventually, let's make him a bit faster. So it's making ten, so he got to the destination, it keeps going. He should get to a certain point. And then, Yup, as you can see, we have created a smart enemy. And even when he bumps into something, he then realized that and then starts moving again. Seriously, how cool is that? He has a mind of his home. We are not doing anything actually. We are just stuck and again, we're not even shooting anything. So let's see him walk around being a fancy with his smart AI. And so, so I hope you enjoyed the video. The next video, we are actually going to be not only gardening with our enemy, will actually chase the player when he gets to ace in a certain area, well close to the enemy. So what that said, I hope you enjoyed the video and let's not forget to stage or commit all of our files. Stage all. And we'll call this created a smart enemy that guards the nav mesh. Comment that. And I'll see you in the next one.
36. Chasing Player: Welcome back, my fellow game developers. In this video, we actually added the ability to our, for our player to chase us. So in here we have the chase range that we can adjust with this little cool sphere that we've created. And when we play our enemy mines his own business, where is he? He minds his own business there, but if we try to get close, he turns around and starts chasing us. He wants a piece of this pie and he doesn't die. So we tried to shoot him, he doesn't die, but he has no idea of what personal spaces. So let's not waste any more time and let's try to get a restraining order. O k. So we want our player, or I mean, our enemy to actually start chasing our player when we get close enough, because currently that we just put this came in here, hit play. If we get close to the enemy, well, he doesn't react at all. Of course, later on we'll be able to shoot him and kill him. But just for now we want to watch him walk around. So how are we going to do this? First of all, we'll need to go to our enemy and end here, or in here. Let's go ahead and create a public transform. And we'll call this the player. And what we're going to do in the start is we're actually going to find this player. So plus is equal to find objects of type, which is player, player. And that's all that we need. Oh, no, actually because its transform, we need to have it as a transport. Next thing we're going to do is we'll create a couple of variables in here for the chasing. So let's go ahead and call this chasing. And this in here will be the guard. So chasing, what do we need for chasing? Well, first of all, we'll need a chase range because we only chase something when it's in a certain range, search chains range. And we'll also create a Boolean that will check if the player is actually industry's range, so public, or we will make it private later on. But for now, let's keep it as public so we can see it in the inspector and the player in chase range. Okay, great. Now the next thing we need to create a system that will enable us to actually check around us and see that the player is in a certain range. And what we can use is actually something called the checks fear. And what this does is it returns true if any collider overlapping the sphere defined by position and radius in the world coordinates. What does all of this mean? So physics dot Czech sphere creates a sphere at the center of a certain position that we give it with a certain radius that we give it and looks for a certain layer mask and is used and it ignores the other colliders in this check sphere. So this is what we are going to use in order to check the sphere. And I didn't mean that I didn't meet what we're going to use. It's what your going to use in your challenge. Your challenge is to check if the player is in range. Using the cex fear to check if the player is in range. So I'll give you a couple of hints. So use the position of the enemy as the origin. You use the chase range as the radius, and create a player layer for the spheres Layer Mask. And of course you need to assign the player layer to the player. With that said, pause the video right now and go do the challenge. Okay, welcome back. So first thing we're going to do is inhere will create the what is Player. And next thing we're going to go into update. And in here we're not just going to be guarding. Now we're going to create a player in chase range, whereas it so player and change Chase range will be equal to the physics dot checks fear. And in here we're first of all, I told you that the center will be the transformed position or the position of the enemy. The radius would be the chase range, and we are going to only be chasing what is Player? Great. So in here, next thing will not be always guarding. So only if the player is not in chinks range, then we will be guarding. And what we'll do here is we'll remove all of these spaces. So we'll be guarding. Else. If, else, if the player isn't chinks range, then we will be chasing the player or the enemy will chase the player. Or you know what? Let's, well, what's that? So in order to stay consistent, silver guarding, we are chasing player. So this will keep the consistency and you'll know why later on we've written it. Sway. But for now, let's go ahead and create the chasing player and let's generate it. So generate method, and I want to move it under guarding. So let's look at that. And, and yes, between guarding and the searching for destination. So let's go ahead and remove this, and remove this little space in here. And in here, what we are going to do is very complicated because we are simply going to set my agent dot set destination. And it's going to be the player's position. Yep, that's it. Great. So now if we go to our game, we go to the smart enemy. And in here let's go down and see what is the player or we didn't create the layer. So layers, edit layers, and let's create the player layer. Back in our player. He is now a player. Yes. Changed the children. Where is it? Where did our little gung-ho and everything go? So for some reason, apparently, we cannot see the player. Why is that? Well, because the mixed in here does not allow us to see the Player O. And before we continue, let's make sure that the eyes are not the player, they are invisible. Ok, so with that all done, let's go back to our smart enemy. Now the player is only getting chased. And let's give him the player. So give him the player in here. What else should we be doing? O? So this is only to check 40 range. Chase range. What is the chase range? Well, the chase range will be maybe let's make it 40 or 20, or 30, let's make 30. I'm not sure what that is. So hit play, Ops, hit play. And now let's see what happens. So our enemy is moving around there. So we're definitely not in the chase range or if or it's not working. So when we get close Wo You can see that he's actually okay. Okay. Okay. Okay. Okay. Okay. So he is now chasing a so if we run away a little bit, okay. So he's not chasing us anymore. Very nice and were not. So Let's, I want to kill that enemy there. And he is not dying because he's too far for our re-cast to fix that later on in our game. But anyways, one more thing I wanted to add is we actually want to try and visualize the chasing that were chase range. So the way we're doing this is by using something called the private void on draw gizmos, on draw gizmos selected. And what this does is it enables us to draw something in the gizmos. And if you remember what gizmos are, It's the thing that annoyed me a couple of videos ago. So it's in here. These are all the icons that are on the screen. So for example, where's the camera? So the camera, let's see if we zoom in a bit. So as you can see, these two are the gizmo, so if we increase the size, okay, so these are too big. You can see that the camera and the little spotlight in here increase in size. We can decrease in size. We can turn off the 3D icons, and that's the gizmos. So we are going to use this in order to draw a little wire around the chase range. So the way we do that is we go to the gizmos. We choose color and you can choose whatever color we want by using colored dot. And I'll just make the chase range yellow. And we'll write the gizmos dot draw wire sphere because we are using a sphere. So this will be the transformed position, which is the origins or center, and the radius will be the chase range. So look how cool this would be right now. So back in our game, we should see and are smart enemy, okay, so this is the Chase range and now you can adjust it at Sure, leisure. And let's go ahead and make this private in here. So enemy AI, let's make this private. We will not use it or needed anymore. We just wanted to make sure that we are actually getting chased. So back in our game, this is our range. We hit play and everything should be working completely fine when we get close, we can see that he starts to chase us. Very nice. Let's go ahead and commit all of those. So back here, staging URL. We are going to say that in here we created a a i that chases the blur within a certain range. I'm sure I made a couple of dumb typos, so commit all of that. Great. In the next video, we are actually going to be attacking the player at a certain range. So with that done, I hope you enjoyed the video and I'll see you on the next one.
37. Range Attack: Welcome back, my fellow game developers. In this video, we are going to be adding an attack to the enemy. Now usually in my introductions, I start off by showing you what we did. But because it's so fun in this video, I'm actually going to keep it as a surprise until you get to the end. And with that said, let's not waste any more time and let's get started. Okay, so right now, our enemies simply follows our player and he guards the world around them. What we want is we want the enemy to actually start attacking when we, when he gets to a certain range from our player after chasing him for a little bit. So let's go into our code. And in here we are going to create a couple of variables. So first of all, we'll call this the attacking. And in here we'll create a public float at that range. And we'll also create a private volume to make sure that the player and range, okay, great, we're done. It's time for your challenge. So yes, as soon as we start the video you have a challenge. So check of the players and attack range and then create twist statements to check for the enemy AI inside the update to be either guarding, chasing, or attacking. Pause the video right now and go ahead and do all that. Ok, welcome back. So how did you get on with that? We already did all of this. So player right now needs to be in the attack range and we'll create a physics dot checks fear. And now the transform, the position of the enemy will stay the center. Of course, the attack range will be the radius and what is player? So what is the player? What is love? And next thing we're going to do is we'll actually change here a couple of things. So first of all, we're going to check in here if we are not in the change rate in the chase range and we are not in the attack range, but we are not in deep layer attack range, then we will start gardening. But if we are in chains in chase range and we're not in the player attack range, then we will start chasing the player. And actually I think we don't even need this else right here because we are being meticulous with our conditions. Let's add a space in here. And finally, if we are in the player chase range, and where does it end? We are in the player at Tech range, then we are going to be attacking player. Okay, so hope you got all of this solid for the blind. I didn't tell you that we'll need to remove the L's. You can keep it, you can create different types. If it's working, then it's good. You don't have to make it exactly. So now let's go ahead and create the attack method. So will generate the method of attacking a player. And in here we are going to, first of all, I want to move it. So let's move it under the search for destination. So we're guarding, chasing and then, okay, so attacking in here, let's add a space. And we're simply going to, first of all, we're going to get our nav, our agent, and we're going to set the destination as the transform dot position. And what this does is it actually stops the player, or I mean the agent, which is the enemy in its tracks. And then we will be able to start firing the projectile that will create. And one more thing we'll do is we'll need to actually take the transform and we're going to look at the player. So we want to be able to look at the player when we want to start attacking him. That's obvious. Next thing we want to do is we want to create some kind of projectile to attack. Our player with will have different types of attack. But right now we are going to create some kind of projectile or maybe a grenade of some sorts. We'll be fired from our enemy and hit the player and crushes hat. So let's go ahead and do that. So back in our game. And let's go ahead and create an empty game object. And let's reset its position. So we can see it in here. And we're going to call this the grenade. And we're going to create a 3D object, which is a sphere as its child. And we're also going to create a material in here that we are going to duplicate from the bullet material. We'll add it to the child or the sphere right here. We'll call this the maybe NMI, NMI bullet material. Yeah, sure. Why not so enemy bullet material. And let's just change the color to maybe blue. And let's make this also blue. Okay, so now we have this blue or firing at our player. And we're going to actually go ahead and remove the sphere collider from here, can be added immediately. Nope, let's remove the sphere collider from here. And let's add it to the grenade, the parent. So this will help us have a better control of our game objects. So now we have this fear. It's exactly the same text shape immediately, but it's on the parent. We also want to add a rigid body. So now it will have, it will be affected by gravity, but not only that, we'll be able to add forces to it. And we, what else you want to do is we actually want to go ahead and create a trail for this grenade. Yes, it's going to be very cool. So before we do that, let's go into our prefabs and our bullets. Let's go ahead and a prefab, this grenade bullet. So in the grenade. Let's go ahead and add a component, and let's add a Trail Renderer. So double-click on the grenade. And in here the, we can actually change the materials, so we'll choose to have it ops, nope, this is a material, so this is the enemy bullet material. And now when we move you can see that we create a trail behind us and we can do a lot of things. So I recommend you take your time and play around with all of these options and see what, which one you like the most. So first of all, we will reduce the time. So let's see 0.06 too. There are a lot of things that we can tweak around in here so we can maybe make this a bit smaller. Actually, you know what? Let me open this up on its own so we can play around and see it. And the way we do that, let's save that and double-click, whereas the prefab bullets, so double-click on the grenade And now we'll play around with it. And here on our own or we didn't apply it. So sorry for that, sorry for that up like that. And now we have a Trail Renderer. So now we can adjust in here so we can make this smaller and let's increase the time. So let's make it five, keep it at five so it doesn't go out immediately. So now we can create this trail right here. We can adjust it so we can double-click in here and maybe make it smaller as it goes. And let's just create the straight again. So now you can see that we have this nice looking affect and maybe make it a bit smaller. We can even adjust the way it goes up and down. So as you can see, we are creating this trail which is looking really nice, will not have it as five seconds. So let's keep it at 1 second. So this is it, for example. And it's not going away as soon as we want. And what else should we be changing in here? So I think this is it. So we just want to adjust the width and we want to adjust the time. So this is our bullet as it moves. And no, I think the trail is EBIT long, of course will be changing it later on as we start throwing them. But yep. So we should the bullet and there it goes through boo, boo. Oh, okay. Maybe even less is better. Okay, great. So this is our bullet. This is, this is the enemies bullet, the enemies grenade, if you were, if you will. And next thing we're going to do is we'll go to the smart enemy script. And in the attack player will want to actually instantiate when we are in the range. So when we want to be attacking, we want to go ahead and instantiate a o, so we didn't get a reference. So let's go ahead and create a reference in here. So this is going to be a public game object. And it's going to be the attack projectile. And we read projector, attack projectile. And down here we're going to get the projectile. So what back projector? It's going to be on the transform.py position. And the rotation will be the quaternion identity. And we'll use this quaternion, that identity because we are already looking at the player. So now let's save that and let's also visualize this. So down here on the onDraw gizmo select, we're going to choose the gizmos dot color to be equal to color dot read, I think yes, red is a good the occasion of attacking. So gizmos copy this, it's the same. Copy this, paste it in here. Okay, so here is attack range. Now, whereas it so change range, attack range, it's negative. So now this will be the attack range. So let's test this out. We hit play. We get close to the enemy. He goes towards us and then he stops. So when we go to the scene, you can see that he stops as soon as the player enters the attack range and watch. Also the problem is we haven't assigned anything. Yes. So, but back in the player in here, the attack projectile, we go and give it the grenade. Okay, so let's save that. Let's remove the grenade. Did we apply all of the changes? Yes. So let's remove the grenade for from our scene, save that had Play. And now I don't think this will be visible all k. So obviously, are you okay? Oh my god. So I think my game's about to crash. So as you can see, it has a bit of trails. Maybe we can change it. Whoa, seriously, come on, look. Even walk on them. How cool is that? And everything is falling down. So with that done in the next video, we are actually going to adjust these projectiles and maybe stop of the sweared movements. So obviously we need to adjust the direction and we need to add some kind of force of the norm. So I was not expecting this honestly when I tried it on my own and it wasn't that cool. So with that said, I'll see you in the next video.
38. Enemy Projectile: Welcome back, my fellow game developers. In this video, we've actually fixed our enemies incorruptible, bald throwing skills. So now he's simply throws at us and at a certain pace and with great precision. I might add so he shoots or aspect, we can still Dutch m. So in this video we are going to be enhancing our AI will reduce the amount of bullets that he can well, okay, throw at us. And it also will also direct them towards our player. With that said, let's not waste any more time and let's get started. Oh, okay, so the first step that we want to do is we actually want to go to the grenade in here. Or actually let's go to the scripts and let's go ahead and create an enemy projectile controller. So we'll create an enemy project file controller. Hit Enter. Yes, of course. And wait for it to compile. And now let's go ahead and go to our bullets, open up the grenade. Go back to the script, and let's attach this. Let's make this trail a bit smaller and attach the enemy projectile in here. So please let me add you somewhere in here. So, okay. So now we have this enemy projectile control attached to our grenade or the enemy grenade. Let's double-click and open this up. So in here what we are going to do is we'll actually go ahead and add a couple of forces to our bullet to make it jump towards the player. So to add forces will need to access the rigid body. Because we are going to use this rigid body dot add force. And it does exactly as it says. It adds a force to the rigid body. You can choose the amount of force that you want to add with a factor of three. And you can choose the mode of the fourth year of the force. We are going to be adding an impulse force. So let the force be with you, and let's start this. First of all, we get a reference to the body so we can go ahead and create a rigid body and we have it as a component. So my rigid body, we can immediately access it. And we are going to create a public. Actually, we're going to create two variables in here. So one of them will be the applied force and one of them will be the forward force. So this, these two forces will be added to our projectile and it will jump in a certain direction, which should be the player. So and here, first of all, we're going to get the components of my rigid body will be equal to the get component and the rigid body. So now we have access. And next thing we're going to do inside of start, we are going to create a method that will grenade throw. And we're going to go ahead and generate this method. So as soon as the this grenade or this projectile gets instantiated, we are immediately going to go ahead and add a force to my rigid body dot add a force and the transform dot forward. So in the forward direction times the forward force. And it's going to be a force mode of impulse. So it's an impulse, force mode, dot impulse. So it's not continuous. Adjust, hits the ball and then flies away in the direction that it needs to go. And the direction is calculated by the unit is physics. And in here we are going to add a force, so in the up direction u and multiplied by the force also, it's also going to be a force impulse. Let's save that. And now let's go ahead and assign this up force and forward force. And in here we are going to make the AP force around eight and the forward force around 32. Let's save that, and let's try this. Now. Obviously, this is not going to work. Whereas r little munchkins, so he fires incredible balls. So has balls are really something to behold, but this is not what we want. We want to actually fix two things in here. So first of all, we want to change the direction. And second of all, we want to actually control the firing amount of our balls. So let's go ahead and show you a challenge. So your challenge is to control the firing rate of our enemy. So create a co-routine that we'll wait for a certain time before it's ready to file. If you already know how to do this and we've already done this, pause the video right now and go do the challenge. If not, let me give you a couple of events. So create an attack time and create a Boolean to check if the enemy is ready to fire. So pause the video right now and go do the challenge. Oh, okay, welcome back. So into the enemy we go. And in here we're going to create the first of all, the attack time. So it's going to be a public float, so we can adjust it if we want. And then we are going to add a, where's the Boolean here I remember. So we're going to add a ready too at Tech. Save that. Now let's go ahead and create a coating. So the co-routine will wait for the attack time to finish and then it will set the ready attack back to true. So where should we put it? Let's put it in here. So I enumerator. So I enumerator, and we'll call this the reset tack. And here we are going to yield return, new, wait four seconds, and it's going to be the takt time. And when we finish this attack time are going to set the ready to attack back to true. And where are we going to set this to false and Cove the co-routine? Well, and here after we instantiate, We are going to go ahead and what was it called? The ready to attack. Okay, so ready to attack will be equals to false. And then we are going to start, start the coating and it's going to be the reset attack. And as a final step, of course, we need to make it impossible for our enemy to be able to shoot unless he is ready to shoot. So let's go ahead and create this condition in here that sets the rent, allows us only to instantiate whenever we are ready to attack. So let's go back to our game and here, go to our smart enemy. And let's make the attack time our round one. So this should be limiting our attack or the enemy's attacks. So we hit play. We get close to the enemy. He looks at us and he doesn't shoot at all. So what gives, I think it's because are ready to attack is already false. So up here, let's go ahead and set the ready to attack to be true at the beginning as its default value. And now let's go ahead and start the game. Play. Come on, hit play. And our enemies should be shooting when we get close. Oh, OK, great. But something is still wrong. So it seems as if he is not shooting at us. He's shooting in some kind of weird direction. So let's change that. Let's go into our scripts. And in here, I don't think it should be quaternion. I think it should be. Let's change this to the transform, the local rotation. So this will definitely, oops, local rotation. So this way it will definitely be pointing towards us. So now we hit play and quaternion that identity is usually for the world position, ok, so the world rotation. So now you can see that he actually shot one at us and then something weird happens. So let's try this again. We get close and nope, he shot one towards us, but something is wrong, so something is not working. And some of them are shooting very weirdly and some of them are not working. So now the problem is, is that our grenade before it actually launched words are player is getting stuck by the collider on the enemy. Now we can remove the collider on the enemy, but then how are we going to kill him? So what we'll do is we'll create a layer in here. So we'll edit the layers, will create a enemy pero jet tactile. And a very cool thing about these layers is that we can actually go to the Project Settings. And let's undock it in here. Let's go to our physics. And in here you can see that we have this big matrix. And what this matrix allows us to do is allows us to stop certain layers from interacting with other layers. So for example, we have the enemy project on here, and it interacts with everything. And because our smart enemy is on the default layer, we can go ahead and turn off. Let's turn off everything and keep the interaction only with the ground, with the player and with other enemy projectiles. So let's save that. And now I believe if we play that, we said the grenade as the enemy projectile. No, we didn't. So layer and we projectile, Yes, changed children. Let's play. And now when we get close to the enemy, he shoots directly at us and there is nothing that goes wrong with the movement of the projector. Great. With that done, I will, let's just make sure maybe some of you will encounter this problem. Go if you can't see the bullets, go to the culling mask and make sure that the enemy is, well the enemy projectile you can see it, it's not invisible. So with that said, I hope you enjoyed the video. And the next one will be adding a huge scary monsters with a huge robot. Well maybe the robot will not be that big. But anyways, I hope you enjoyed the video and I'll see you in the next one.
39. Melee Attacking Player (Part 1) : Welcome back my fellow game developers into a very long video, but it will be 100% worth because now we don't just have some stupid cylinder that's walking around trying to kill us. We have this really cool complicated robot, and we also have this really cool scary monster. When we hit play. We will see that these monster walk-around. He chases us, he hits us, and if we run away, he keeps on gardening until he finds us again. Stop that. So he finds us again and he starts hitting us again. We can shoot him and kill him. We also have this robot walking around here. So if he finds us a start shooting at us also, and we haven't added the ability to destroy him, but we will later on. So let's not waste any more time. This video is long enough, but as you saw, it's very worth it. So now we have real-life monsters and our playground. With that said, let's not waste any more time and let's get started. Oh, okay, so what are we going to do in this video? We are going to add the ability for our enemy to melee attack us. So we can either do that with this little cylinder right here or we can go ahead and add a scary MI. So the way we're going to do that is unless go in to Unity's Asset Store and search for the fantastic creature. Number one, it's a free asset on the Unity's Asset Store co-head and added to your assets. And it should show up. So and you also need to make sure that you are signed in or else this will not be working. So whenever you do add it to your assets and go into your package manager, makes sure that you're on the my assets and you will have the fantastic creature with that. Go ahead and import it. And yep, import everything. So it's under the name true horror, something. So wait for that on Port au. Okay, welcome back. So we have this true horror creature in here. So let's drag him and put him under the game assets or case. So in here, let's go into the horror creature. And you can see that we have many things in here. So this monster actually comes with his own animations, with his own mesh collider and with his own scripts. So let's go into the prefab. And this is the monster that we are going to add. So before we do that, let's go ahead and create an empty game object. And we'll call this the monster. And let's reset the position. Put him in here, and let's go ahead and add the prefab. So make sure that you are on the prefabs and go ahead and add the THC as the child of the monster. So now we have the little monster right here. So as you can see, it has a animator controller, a Character Controller and animator and some scripts. So you will need to remove all of that. But before we do that, sorry, you need to go to the prefab and unpack completely. So now you can go ahead and remove all of the components that are on the. Child. And then go to the monster and end here. Let's go ahead and go to HCI. Let's reset the position of our monster. And in monster here, let's go ahead and add a component. First of all, we'll add a mesh collider. So this mesh collider will add a collider to our monster. And as you can see, the mesh collider is the other way around. That's because of the rotation of our child. So said the rotation to 0, and now the mesh collider should be exactly on the monster. So now you can visibly see how this mesh collider works, of course will take him later on as a enemy. But for now, we'll add another component and it's going to be the enemy. Ai will also go ahead and add nav mash agent. What else should we be adding? Let's see, this is our enough mesh agent. And we'll also add an animator because we'll be animating our enemy later on. So what is ground? Let's put this as the ground. What is the player will put this as the player, will give him the player transform. We, he has destination will set a certain range that maybe will chase will change later on. Let's see, we add a chase range. And before we do that, we actually want to go ahead and scale up this enemy. So let me put this back to 0 before we do that. And all of this, reset it. And let's set the scale to, let's say maybe eight by eight by eight. So now we have a big giant monster. And if these green lines are bothering you, you can actually go ahead and close this. And we have our monster. How, how cool is that? So with that done, let's continue on. So now let's go ahead and increase the chase range. So let's make it that big, maybe bigger. The attack range should actually be a bit smaller. So because this enemy will actually not be firing anything at a certain range, you will be only attacking us using his claws. And we'll do that in just a bit. Let's also go to the NAV mesh agent and we need to make sure that it's a big, we can even increase the, increase the radius in here to fill up the entire Monster and maybe just give him a bit of a hot. Okay, great. So now we have huge monster. Let's make the radius one actually. And the next thing we're going to do, we're going to tag him as the enemy. So we add the enemy tag on here. And what else should we be doing? We need to create an animator for our enemy. And we don't need to add any projectile, but this will give us a bit of a problem later on. So to add the animations to our joint enemy, we need to first of all go into our animations. Create a folder in here, and we'll call this the monster animations. And let's go ahead and create an animator controller. And we'll call this the monster. And now we want to go ahead and get the animations that are provided with the monster. Now if we go in to where z, so into the true horror creatures inside of here, you can see that he has all of these animations and you can check them out. Let's see if this appears here. Let's put them up here. So this is the tree of the animations, and obviously it's super complicated. And this enemy actually comes with his own script and all of that. But we want to change things. So all in all we need is the walking animation and V attacking animation. So our enemy will be walking around. And as he's walking around, when he finds the player, he will come close to him or chase him. And when he is in the attack range, you will start petting him. So let's look for the walking animation. Make all of these symbol smaller using the slider in here. And let's see. So let's get the walking and let's duplicate the walking. And then we will take this. And let's go into our, where's our animations and drag it into the monster animation. So whenever you want to use one of the animations in here, make sure that should duplicate it and then set it in your own animation folder. Now let's go into our monster animations. Go to Monster. And in here we're going to add the walking animation. So this will be our default, default state for the monster. And let's go into the monster. Let's give the controller. So monster controller will be the controller of our monster. And we'll also need to make sure that we said the avatar and here. So click on the little circle and here and choose the THC six avatar. So double-click on that. And what this does is it actually allows the walking animation to go and handle all the different pieces of our enemy. So let's zoom back in here and let's look at our enemy. You can see that he has the arch armature on the top of that is so rude. You can see that he has front legs. Front legs, right? He has the key and all of the Saudi. Let's go back in here. So the avatar allows us to actually control of that. So now let's hit play and see how our enemy looks. So let's see. Yup, he is walking around, but he seems to be doing the Moon Walk. If we get close to him, he looks at us and he walks towards the player, fairing Nas. So now as you saw, wait, let me let me just try this one more time. Let's see, he is walking on his place, and that's because the destination range is 0. So let's make it 100 a up. And now he walks around in the world, but at a very slow paced. So if we get close to him, he starts walking towards us. Let's open up the muffin nav mesh agent and maybe make this ten. So let's see how that looks. Yep, so our enemy is walking around the world. Where is he? Okay, nice. So you can see that our enemy walks around. He patrols everywhere, and he also chases our player whenever we get close. So obviously, there are a couple of things that we need to fix. So we just casually walked through our cubes right here. But no worries about that for now, let's go ahead and implement the attacking when he gets to the player. So let's put this back to ten, to ten. And let's put the destination range to 100. So what are we going to be doing now? We are going to use the attack animation provided to us in the game. But before we do that, we need to make sure that this is an, a mainly attacker and not just a projectile throw. So in order to do that, we need to go to our scripts. And in here we are going to create the melee at attacking. So let's just call it the Malay. And we're going to create a public boolean that will be the Malay attacker. So this will make sure that our enemy currently is a melee attacker. Go back in here and check the Malay attack. Okay, great, so save that. And let's go to the smart enemy and makes sure that he is not a merely attacker. Okay, great. Now back in here, what we are going to do is we're actually going to go ahead and create a way. And we're going to stop our attacking a player from throwing or instantiating the grenades. If he is a male, the attacker, so if Meli attackers true, that means that this entire, this condition here is false and this entire condition will not work. So we will not be instantiating. We will be doing something else. We will be triggering an animation whenever we want to attack. So first thing we need to do is we need to get the animation and that's going to be part of your challenge. Your challenge is to add the attacking animation. So let me show you that back in Unity. Let's go to the true horror creature. You can go in here. Let's double click in here so you can see that he has multiple attacks so that one open up the preview and we inhere. So he has this attack, he has the attack to, and he has the attacks three. So we'll use the attack three because it's with both hands and it's much powerful. He has also a power hit. O. So this is when we hit him. Okay, great. So we'll use the attack three, make sure that should duplicate it. And let me go back to the challenge. So add the attack animation into the monster animator, make the transition possible with a trigger. So we've learned what a Boolean is. We've learned how to use a float and now it's time for a trigger for you to find out. Then add an exit time to the transition back. So you'll create a transition from walking to attacking. And that shouldn't have no extra time and no transition time. You will then create a transition back from the attacking and to the walking. And that should have an exit time. And I'll tell you why later on. And then use the set trigger to trigger the animation if the enemy is a melee attacker. So you'll need to get a reference to the Animator. And in your AI, a script, you will not need to set it. And then you'll need to actually triggered when we attack, if we are a melee attacker. So pause the video right now and go add the animation or the attack animation to our enemy. Ok, welcome back. So let's first of all duplicates the attack three, and let's add it to the monster animations and go to the Animator. And let's add this one in here. So we are going to create a transition from the walking to the attacking. And as I've told you, we need to remove the exit time. And let's just set the transition to 0. We'll change it later on based on how our game looks. Now we need to add the condition to do that in here. Click on this plus right now, click on the trigger and we'll call this the attack. So now we have a trigger that will trigger. So add a condition to attack. Next thing we're going to do is we'll create a transition back from attacking to walking. And let's just keep these as they are right here. And let's save that. Now we need to actually go into our code. And in here we are going to create a reference to our animator. So our animator will call this my animator. And in the start, we're going to get the components. So my animator will be equal to the get component animator. And that's it. Now we might encounter a problem in here. And that problem is that the smart enemy doesn't have actually any animator on him. So if we see that problem, we will fix it, fix it. But later on in this video, we are actually going to exchange the smart enemy cylinder to a more robot looking at. So what they've done, what they do. So this is the Malay attacker. And let's go in here. So if we are ready to attack, so else, if we are ready to attack and we are a melee attacker, then we are going to get my animator. We are going to set the trigger. And that trigger is going to be called the attack. Now this is a string reference, but attack should be a very easy word to remember. So let's make sure it's the same. And why do I tell you that? Always need to make sure that the string reference is correct because it does not show up as an error. So you have no idea why something might not be working. And trust me, takes a long time to find out that you've written one letter wrong and here, so I always try to copy a string reference. Was that done? And let's go ahead and test this out and see if it works. So back in our scene, we have play.
40. Melee Attacking Player (part 2): See if it works. So back in our scene, we play our enemies walking around, he finds us, he chases us, and he starts hitting us. Oh, okay, very nice. But as you can see, it's a bit quirky, So he's a bit weird with his attacking. So let's put the animator in here so we can see it. So you can see that it's going back and now he starts walking again Normally finding his destinations and so on. So we get close. He chases us, he starts hitting us. And the other enemy is also here. So stop that. And let's see what seems to be the problem. So I think this just needs a bit of tweaking in the animation. So make sure that the transition here is 0.25. keeps it, give the exit time as it is, as the exit time is calculated when the animation finishes. And in here, maybe we should the transition time to be 0.25. let's save that. Let's try this again. We want the animation to be smoothly, but so he walks towards us and yep, yep, so now you can see that the animation is looking really nice and we can kill him also because he's our enemy. So the final thing that I want to do is I actually want to create a method in here that I'm going to call the public void Malay damage. And we're going to fill this out later on. But if our player is an attack range, then we are going to damage the player later on and later on. I mean, in the next section when we are going to be adding the health system to our player and to our enemy. So with that done, the next step is to actually go ahead and add the role button here. So we'll wait for this to compile. Okay, great. Next step is to add the robot. So let's go into our resources and let me just show you where I got my little robots. So I went to the free 3D.com and found this cool looking robot. Now it's free. You can download it, download it as unity, or you can go ahead and use the resources. This is also a very nice website if you ever want to find nifty 3D assets to add to your game. So in our resources, let's go to the robot and you will have this type of Unity package. So simply drag it into Unity. And oops, nope, let me just go to my project. And let's now go back into the resources. Drag our robot. Where should we put him in unity and put it inside of assets and import all of that. So now this is importing and OK, So back in the assets, we have this neck match. Walker simply drag him into the game assets. So inside of game assets, we will have our neck mesh Walker that's double-click and see what we have in here. So let's make this a bit bigger. So basically we are going to do the same as we did with the monster. So first of all, we are going to, let's duplicate the smart enemy. And let's turn this one off for now, and we'll have this one and here. So let me close this tool. This will be the robot enemy. And in here, let's see what we have. So we have all of this. We will need not be needing the capsule, will not be needing the cylinder will not be needing the mesh renderer. And we'll just need the enemy AI and the nav mesh. So now we'll take this robot and we'll put him under the robot enemy. Let's look at that or nice. So this is our robot enemy that is squished. And he's squished because he has a scale of 1.6. So let's put that down and now we have this non squished robot. Next thing we're going to do is we'll actually go ahead and unpack the prefab completely, will move this robot down a bit to the ground. So, yep, that looks good. Of course we are going to remove the animator in here and we're going to be accessing it in the parent. And he is not a male attacker and he will have a grenade. So this enemy looks good. Next thing we're going to do is we'll actually go ahead and use all the animations that we have for our robot. So let's get the walking. And let's see, let's make this smaller. And nope, that did not help at all. We need to make it even smaller. So down here you can see that these are all the meshes for the legs and so on. And now let's go into the, let's go into the animations near. Let's create a folder. We'll call this the robot animations. And if you feel the true, can go ahead and do this on your own. I encourage you to go ahead and do this. We already learned how we can create animations so you are safe. That's changed this long name to the robot body, and we'll change this to the monster bot. So robot body, robot animation. Let's create a animator controller. We'll call this the robot. And we'll go ahead and add this in here. So when we put the robot and emitter, we will have it. We will also need to add the, of course, avatar in here to the animator will save that. Now let's go and see the scroll this down. Let's go to the Walker and new, let's look for some kind of jump. We have risked. We have a lot of animations in here. So if you want to go and search all of them, I encourage you if you can create better animations, I just want to do the basics in here and we can want, so let's hit play, let's look at that. So yep, seems nice. Or the walk forward or yeah, I like this one more soulless. Duplicate this one. And let's drag it into the robot animations. And let's put the animator up here. And where are we? So let's put the enemy animations in here. So now we should see when we hit play that our robot is walking. So let's make sure of that. And while he is kind of moving and walking and he comes up to me and he starts actually shooting me, so Oh, stop, stop, stop. Okay. So at least he is kind of walking. So let's go back and see what's going on. And here we hit play. Let's look at our robot. Okay, so he was walking, wasn't he? I just saw him walking weight. He is not even triggering the animation. So why is that? Okay, so this is the problem. It's very simple. We need to go to the animation in here and make sure that it's looping. So now when we hit play, the robot will be walking and he is doing some kind of weird walk. So in order to fix that, let's go to the robot. I think it's about the rotation. So some weird rotation problem. And let's see, let's see, let's see maybe his rotation should be on the y, just like that. So let's put him at 90 degrees, save that had play. And the robot is walking in the right direction. So now we have these two monsters and they actually shoots are us. But we are going to change the shooting right now from the walking because currently he's still walking and it really takes us out of the game when he does that. So what we're going to do is we're going to go into again the robot. So where z in here, let's see, he has the attack somewhere. So idle to, yep, this one looks like the one that we'll use for the attacking. Let's duplicate that, and let's move it to our robot animation. So this video is a little bit long, I know, but we are doing things meticulously. So that's moved the animator backup here. We'll add the idle. So this one will be used for the attack. Let's create a transition, a transition back we've already done all of this, will remove the exit time and we'll add a trigger that will call also the attack. So we'll keep it the same and we'll add a condition in here. Are they condition to attack? Very nice. And the animations would be 0.5. what else should we be doing? Oh, okay, so what we need to also do in here is we actually want to change the position from which the robot is shooting at us. So now when we hit play, let's see if the animation works. Also, he is not a melee attacker. So if you get close. He is still in the weird animation of is, because he's not a melee attacker. He is not actually going to the animation in here. So what we can do is we can simply copy this and put it in here. So now let's go back in here. And you can always change this, but let's see. So we hit play. The robot will walk towards us and now he's standing there and he's shooting at us. But what we want to do is we want to actually change the shooting from the, well, whatever this isn't for the robot and starts shooting from the hat. So in order to do that, we can go to the robot and right-click on here. And let's go ahead and create an empty child and we'll call this D fire position. And it's actually going to be very simple. Let's go to the animations of our robot. And they now. So we'll wait for this. Okay, so you can see that this animation is extremely complicated. So let's choose the idle and let's see if we can actually, ok, so we can play this. Let's move the fire position to the head. Let's make sure it's from the head and Let's move it in front of him. Okay, so let's save that. And now let's go into our script. And instead of the Whereas dissenters, so instead of the transformed position, we are going to shoot this from a fire position, but who need to go ahead and create a per fire position in here. So appear enter. Let's create a transform or a public transform. Dot fire position, opt fire position. And we are going to be sharing from the far position. Whereas our attack player in here, it's going to be the fire position. And the rotation will be the far position rotation. Or we can keep it as the normal one. And we need to make sure that the file position is also looking at our player. So in here, before we attack, we need to make sure that the fire position is looking at the player. And now back in our game. Let's go back from here, because this is too complicated. And when we play, we should see that. Let's make sure first of all, that he hits us. Okay, so what's the pro so we didn't assign the fire position. So let's assign the fire position. Save that back in our game. Hopefully it will not be a problem for our Pig enemy of the, so now and he is shooting, but he's not shooting correctly. It's actually going in another direction, even though we are telling it to assure us in the face. So what seems to be the problem? So maybe it's because of the direction. So let's see. So let's try v normal rotation. Save that back in our game. So maybe because the, oops, so maybe because the player is already looking at us or let's see, hey robot, shoot at me. Yep, now it's working. So the robot is shooting at us. And why was that the problem? Well, because before we used a far position, we used the local rotation of the entire player transform. But now because the file position is also looking at the player and it's a child of the, a big enemy, we want to actually use the rotation of the fire position so well that down. I hope you enjoyed the video and enjoyed the section. In the next section, we obviously going to add a health system to the enemy. So we just, we don't just simply destroy him. We're going to add a system, a health system to the player so we don't destroy him immediately at also. So we'll have a bit of health and we'll also learn how we can display all of that on our screen just like we did with our bullet. Well, that said, I hope you enjoyed all of this and let's go and apply. Okay. So some files or too big, we'll need to remove the let's see, we're going to ignore everything under assets and neck mesh Walker. And also let's ignore everything under the true horror creature. Ok. stage all of that. I'm sure these are. Okay. So let's go ahead and added a monster and a robot. So this was a really fun video. It's a bit long, but I hope you enjoyed it and I'll see you on the next one.
41. SECTION 7 - Enemy Health System: Welcome back, my favorite game developers. In this video, we've created a health system for the enemies. So now when we want to shoot our big enemy in here, he takes multiple shots. He has this blood effect, and we also added a damage to argon. So not all guns work the same. So this enemy and there also, as you can see, his praise blood all over the place and eventually he dies. So let's not waste any more time and let's get started. Oh, okay, so currently whenever we want to shoot an enemy, so let's say we have this enemy in here. So whenever we shoot him, he dies immediately. And whenever we should these enemies, they also die immediately. And this enemy in here is not dying, and he's actually floating. So let's go ahead and fix that. We didn't fix it last time. So Pack and our robot enemy, let's go ahead and because he has many colliders, We are going to simply add a, where is it? So we'll add a sphere collider to him. You can add any sphere that you want or any collider I'm ingot you want. So we'll add a sphere collider. Let's increase the radius and let's move it up so it's around here. And the reason that he is standing up is because of the let me show you the nav mesh. So currently if we move up the robot, you can see that the enough mesh of the previous cylinder is still here. So the way we fix that, let's move the base offset up a bit. And let's go ahead and increase the, Maybe we should make it 0. And let's go ahead and increase the height. So let's turn the sphere of radius, increase the radius, increase the height, and that should do the trick. Maybe we should even increase it a bit more. So we'll move the base offset just a little bit up. We'll save that. And now when we go into our game mode, we haven't tagged them as the enemy. So now he walks on the ground. When we shoot him, he should be tagged as the enemy. When we shoot him, he gets destroyed. Okay, but this is not enough. We want to create a some kind of system for the enemy health so we can actually shoot him and take out a bit of health and then he should die. So let's go ahead and do that. Let's make this a bit bigger, and let's go into our assets and into our scripts. And in here we want to create a C-sharp script that's going to be called the enemy health system. So enemy health, let's make sure, okay, so enemy health system, let's double-click on the enemy health system. And what are we going to do in here? So first thing we are going to give every enemy their own health. So we're going to create a public, and it's going to be an integer because health is not a float, it's usually an integer. So how many hits can this enemy take? So end. We're going to create this as the current health. And let's go ahead and set it to five, so it's never 0. So next thing we're going to do, let's give the start and the update for now, maybe we will not use them. So what we're going to do in here is we'll create a method that is the public void, take damage. And this will allow us to take damage. So this is, this method will be called every single time our enemy gets hit. So we are going to reduce the current health by one. So as we remember, the minus minus means that we reduce one from our current health. And then if our current health goes less than or equal to 0, so less than or equal to 0. We are then going to destroy the enemy. Destroying came object. Okay, so straw, a game object, save all of that. After we finished creating the take damage, we need to go to our guns system. And when we shoot in here, instead of simply destroying the enemy, we are actually going to get the head. So this is the information from the re-cast. We are going to access the collider and we are going to get the component that is the enemy health system. And when we do get it, we are going to take damage. So we're going to call take them each method. And if you can't find the take damage, make sure that it is public. We save all of that now back in unity and this should work. Play. And now we can see that when we hit this monster, let me just click on him so we can see in the inspector, so it's current health is eight. We should have once, twice, three times. So you can see that his health is going down. Let's reload our weapon and now we should him for the last time and he disappears. And the same is true for the robot enemy. So now he has a half of three, so we should have once, but as you can see, we didn't actually hit him. And that's because we had the bullet. So that's a good game mechanic depending on how you want your game to place over shoot him once. And he is not actually oh, so we need to make sure that he is tagged as the enemy. Because we did that while in play mode and in play mode nothing saved. So we should have once, twice, and we should have one final time and he dice, great. Now, what else should we be doing? Well, let's say for example, well, in the future we will have many guns. So for now the pistol a certain amount of damage. But for example, if you're using a sniper, Well, of course that's going to deal more damage. So we want to add this ability to every single gone to have his own amount of damage. So the way we do that is we will go into the system. And up here we're going to create a variable that is going to be called the public and damage amount about. So now each gun with have their own damage amount. And what we'll do is in the enemy health system, instead of just having the take damage and reducing one from the current health. We're actually going to take in a parameter that is going to be an integer and it's going to be the damage amount. And in here, instead of reducing one, we are going to call this the minus equals the damage amount, save all of that. One last thing. We need to go to the GUN system and whenever we shoot the enemy. So you can see that there is an error in here because we need to add a parameter. And that parameter is going to be the damage amount of our income. So back in our game. And that's why, and that's why, by the way. So lets say the damage amount of our gun is five and the health of our monster is it. So when we shoot him two times, you'd think he should die. But what would happen if we would inhere set the current health to be equals, only equals to 0. Well then when we shoot him the first time, his health will become three, when we should have the second time, his health will become minus two. So that way, the current health is not equal to 0, so the enemy will not be destroyed. So that's why we've put in a less than equals 20. So just wanted to make sure that nobody gets confused by this back in our game now. And let's go into the player, goes to the body, I mean, go to the head, you go to the guns, go to the pistol, and the amount of damage that this pistol will deal. Let's just put it at two. We save that back in our game. So now let's check the monster. And we should see that when his health is eight, when we shoot him once, it becomes 642 and finally 0. Very nice. But we have this beautiful enemy health system. We have the shots dealing damage, but still there's something missing and that's the impact of our shots. So this is going to be part of your challenge. And your challenge is to add blood effect to the bullet shots so you get the blood effect from the particle system examples instantiated whenever we hit an enemy with our re-cast and I will give you a hint for the rotation of the instantiation. So make sure that the rotation is the quaternion dot rotation and the hit Normal. So pause the video right now and go do leach challenge. Okay, welcome back. So we forgot to do one more thing is we need to add the enemy health script to the taco demons. So both of these get their own health script and their amount of damage that they can take will be six and x. Okay, let's save that. Now let's go into our game assets and let's open up the effect examples. Let's open up the lot. Let's open up the prefabs and let's see which one we will use. Maybe this is not the one that we're going to use. So. And this is the continuous blood. So you can add this or this is the pool of blood. You can also add this if you want, but these are not what we are looking for. These are not the droids we are looking for. So it's the impact, the impact weapons effect, and the prefabs in here. So we are going to get the flash. If you use the blood, it's okay. Don't worry about that, but we are going to use the flesh impacts or let's put it in here so you can see the Bloods praying out. You can use both. You can integrate this one with the blood effect from the game. So we're going to use this one. Let's delete it in here and let's take it into our prefabs. I hope you did that. So we'll take this one, which is the big blood effect. We'll add it into our prefabs and we'll add it into the effects. And this is the cocoa demon pre-fab, which is I'm not sure what that is. Do we have it anywhere? Nope. Let's delete that. And our effects, we have the blood impact. This one is the blood impact. Let's make it a little bit bigger. So three by three by three, we'll apply all of these changes and we'll remove it from here. And now what we should be doing is we'll go into our script, our consistent, and up here where we have all of our game objects of the effects. We're going to add a lot. Effect, save that. And down here when we hit an enemy. So let's increase this if condition. Let's move the head collider. And in here we're going to instantiate a blood effect. We are going to put it at the head point. So this is the re-cast, the point that the re-cast hits. And we're going to set it as the quaternion, not lock rotation, and it's going to be the head dot normal. So I hope you were able to do the challenge. I hope the blood getting confused you with the flesh impact. If you did the blood, it's perfectly fine. It's maybe is even better. So let's save all of that back and our gain. Now the only illogical thing and here is that the robot enemy is actually going to be spilling blood. And now when we shoot, Of course, of course we forgot to add the blood effect. So this is the fleshy up back to the pistol at the blood effect. And now we should have some blot effects. So now when we shoot, you can see that lot of fact coming and if it even stays, we can destroy these were the, so now when we should this enemy, it also leaves a blood effect. Let's reload and let's shoot our, okay, so he is dying. Very nice. So with that done, This is all that we needed to do. We are going to of course be committing our changes. So stage all. And in here we, what did we do? Well, we Added a health system to our enemies, commit all of that. And in the next video we are going to add a health system to the player. They are not. So I'll see you that he, Michael here from the future. Now there is a small problem with our game. And some of you may have noticed this. So if we go to our cackle daemon right now, some of you may have tried to shut him down, but he is not going down. And the problem with this is it's the way our code is set up. So if we go into our code, we can see in here that whenever we hit an enemy tag, we actually go and get the collider. And from this collider we get the component on the game object that has this collider and we access the enemy health system. Now, what's the problem? Well, the problem is our cackle demon actually has his collider on the child and the enemy health system is on the parent. So there are two solutions to this problem. First, you can move the enemy health system in here to the cocoa demon body. Or which is my preferred solution, is we can actually go ahead and remove the mesh collider From the bodies. And we're going to go into our CaCl2 human body because he is not in his proper location, makes sure that he had zeros 00, double-click on him. And in here we are going to add a sphere collider. And why do I suggest the solution and not actually going through the mesh collider? Well, because our cocoa demand in here is already a sphere, so that's no problem. And another small problem that we have, and it's with the rotating animation. And the problem with it is that we are actually rotating the body and not the actual game object. So if we hit play, you can see that the sphere collider stays in here and the body just keeps moving around. So in order to fix that, we need to change. And this is my mistake. May be you did not do this mistake. I just wanted to keep it and show it to you so you know, why sometimes things don't work and they don't work and seemingly There is no error. You think everything is working fine, but turns out, nope, there the mistake. So we'll change it later on. Let's go ahead and fix this one before we go. So we'll reset the position. And we are resetting the position because we are going to be adding the, what took this one into here. So move this up and let's go ahead and add a collider. So fear glider and will increase it. So I just wanted to show you that sometimes you add another mechanic and it turns out that something was wrong before that. So I just wanted to keep it just to let you know. And this one, it's the moving animation. It actually changes the entire body. This one in here. We need to redo the animation to make sure that the changes are done in the animation to the actual game object. Another thing that I noticed, maybe you didn't have this problem. But if we click on the robot enemy, and let's remove the animation in here because it's very junky. And the problem is when we had play, maybe it doesn't move. So it's because of the nano mesh agent being underground. So always keep it at 0, don't make it less than 0, at least 0. So let's save that. Hit play. Makes sure that the robot is walking around. Okay, great. So and the plot effects system has not been signed. Blood impact. And of course we need to tag are both Geico demons as the enemies. So now everything should be working. Sorry for bothering you. Great. So now everything's working as say, but laggy sometimes with the, all these calculation, but it works solid foreboding Gu, maybe some of you might be thinking, whoa, this guy is making mistakes. Well actually everyone makes mistakes. Even the most experienced game developers and cyber punk 2077 is the best example. Well that said, I'll see you in the next one.
42. Player Health System: Welcome back, my fellow game developers. Our monster appears to be in a permanent sitting position. But not worry about that because when we hit Play, now when he gets close to us, so hey little monster, he starts sitting as once, twice, three times end VDD, disappear and we can no longer play. That's because we died. That's because our player now is not invincible anymore. He actually dies and it only takes us two bullets to die from the robot and he just casually walks away. So that said, let's not waste any more time and let's go ahead and create a health system for our Player. O K. So what should we be doing first? Well, we are going to go into our scripts and we are going to create a new C-sharp script that's coming to be called the player health system. So player health system, and of course, every time this is going to be opening up on its own. And let's go ahead and add the player system to the player. So now we have the script in here and now let's open up Visual Studio. First thing we're going to do in here, we're going to create a public int and we're going to set a certain Max Health. And then we are going to create a private and integer and this is going to be our current health. So we don't want to always have it in front of us, or actually for now, let's make it public. We'll make it private later on and start. Whenever we start a certain game or we start a new level, our current health will be equal to our max health. Very good. Let's save that. Next thing we want to do is create a method similar to the one in the enemy health system, that is the take damage. So in here we're going to create a public and make sure that it's public take damage. And we're going to immediately give it a certain parameter. So it's the amount of damage. And in here we are going to do exactly the same. So if you want, you can pause the video and do the challenge on your own. So current taus is equal to the amount of damage. And if the current health is less than or equal to 0 has then in here we are going to get our game object and we're going to set active to false, so we don't want to destroy our player. We want to just set the game object to false, and that way the game stops. We cannot, we can no longer move. We just have the camera stuck there. But where are we actually going to call this method in here? Well, we are going to call it first of all, if we go to our enemy AI. So in here, in the Malay attack, whenever our player actually attacks the, I mean, whenever our enemy actually. Next, the player, and we are in range. We are going to remove this right here. So this is where we were going to add it. And we're going to take the player because we have a reference to him. And we are going to get the component, which of course will be the player Health System. And we are going to get the damage. So it's the Malay damage. Okay, we haven't created that's created mainly damage. Also we do have Aemilia damage. Okay, so Malay damage, okay, something is wrong. Do we not have it? Do not create it. And why did they give us the option? Also, it's using the method or case or Malay damage. Let's call this amount. And we'll remove the big M and here. So double-click on that. Let's copy that code back up here and we'll create a public. And it's going to be what, what is the parameter is an integer, so integer. And this will be the damage amount, will set it to two just for now. And this should be working. Okay, great, let's save that. But where are we actually calling this melee damage? Well, ladies and gentlemen, let me introduce you to what did I say, ladies and gentlemen, I meant my favorite game developers. Let me introduce you to something called the events. So because we have our monster as the main attacker, so an monster, we have all of these animation. So you can see in here that we are walking and we want to start giving damage when ever we actually attack. So let's go to the attacks. This will take a bit of time because of all the weird nods. So we are going to move and at a certain point when it gets to this point. So I think this point is good. We are going to add this event in here. So by clicking on Add Event, we add a event right here. And what this event allows us to do, it allows us to actually access the functions that are on the script attached to the game object that's being enemy. That's a mouthful. Okay, so the monster has an animator, some animations. We can add events that can access the script on the NMAI. So now if we click on this little, you can see it right here, this little white pill or something. You can go into the animation event, the scripts and animation event. And you can actually go and choose one of the animations and failable. So you can reset the attacks, search for destination Malay damage. And that's what we need. This is the Malay damage. And let's save that. And an hour monster, the Malay damage is too, that's enough. And our player, the max health, where is the health system? So Max Health will be, let's say six. Hit play. Let's test this out. So we have play. Let's see that. So our attacker comes here, he starts sitting US and Europe, you can see the current health to 0 and now we get destroyed, so the player is no longer active in the scene. Very nice. Next thing we want to do is we want to also add the ability to the projectiles of the robot enemy to hit us. And it's going to be part of your challenge. And your challenge is to damage player with robot projectiles. So first of all, create a variable for the amount of damage dealt by the enemy projectile. Then you'll need to take the player as declared tag. You might think so. Why are we not using the layers and so on while comparing layers and checking for layers is a bit cumbersome, especially when we don't have any collider on the player object, we're simply using the character controller. There are a lot of integers, so I figured that using tags is much simpler and easier. And there is already a player tech in Unity. And finally, you need to, whenever the projectile hits an object tagged as player, make the player take damage. With that said, pause the video right now, and I'll give you a small hint that is not even written in here. You will have to use the Onsager enter. So pause the video right now and go do the challenge. Oh, ok, welcome back. So let's go to the grenade. We are already here. And let's go to our enemy projectile script. And in here we are going to create the method of On Trigger enter, so on sugar Enter. And in here we're going to check if the other dot a game object.com tag. And if the tag is the player, and I'm doing this because I already know that player tag exists. And in here we're going to get the other, the game object dot get component and the component that we're going to get as deep layer health system. And from the player health system we are going to take damage and we are going to of course create a some kind of damage amount. So let's just create damage amount in here. Double-click on this upper here. Let's go ahead and create a public. We'll make it, of course public. It's going to be an integer and it's the damage amount. And let's just make it, let's say three. Okay, save all of that. Let's make sure that everything in here is OK. So back in our unity gain, we need to make sure first of all, that I tag my player. So I have a problem with remembering to tag objects and assign things in the inspector. And the other thing we should do is we should go to our grenade and make sure that the sphere collider is a trigger. Otherwise this will not be working. So we hit play and we can actually also destroyed in here. So we're going to destroy the game object after we've dealt some damage to the player. So back in our game, we hit play. And now let's go to our and I mean here, so he shoots us. Okay, he destroyed us. So because our health was six. So here our health was six. And the grenade deals six damage when he destroyed the city, just casually walked away and we are no longer alive. Okay, great, very nice. With that done, let's go and commit our changes stage, all of that. Added a layer Health System. Commit all of that. And I hope you did challenge. I hope you enjoyed this video. And the next one we are going to be displaying our Players Health in front of us because of course, anyone who's playing our game does not have the luxury of looking at the inspector. Was that done? I'll see you in the next one.
43. Displaying Player Health : Welcome back, my fellow game developers. In this video, we are going to be actually displaying our health right here at the top, you can see, so now when the robot attacks us 123, you can see that our health is going down and when does huge Dude start setting us? You can see that our health go down. And when we reach 0, we can no longer move because our player has been deactivated. So let's not waste any more time and let's get started. Oh, okay, so the first thing we're going to do is we will go into the 2D mode and let's double-click on the canvas. And in here we are going to be creating a couple of images. So the first image that we're going to create will represent the bar. So we're going to create a sliding bar to display the health that we still have left. So we're going to create an image. And this image will actually be one of the components that I've left you under resources. So we have the heart, the screw, some heart. I chose to make the heart more realistic because we are using realistic guns and the border in here. So click on those. Let me just see where are we going to be adding them. So in here and DUI back in, our resources, drag that in here. And now we have the border which, which should make the sprite to D apply that. And the heart also should be the, Whereas it sprite to the, apply that. So now go to the image and in here, the source image should be the border setting native size. And let's go ahead and put it up here. So maybe we'll change this later on. Let's look at that note. Actually looks good enough. Now let's go ahead and call this the border. Next thing we're going to do is we'll create a another image in here. So this will be the, that UI image and this one will have the heart as its source image will set to native size. Nope, we don't want that big of a heart, although it looks very cool. We're going to make it much smaller. And actually, you know what, let me just do this by five and maybe this by five. And let's go ahead and put it up here in the corner and we'll put the border just behind it. So that way it looks as if we are dying. Let's look at that. So yes, that looks nice. So now what we want to do is we actually want to go ahead and Canvas and will create an empty game object. We'll call the Health Bar. And because he is on the UI, he will have a certain shape or size. So what we want to do is we want to make him the exact size of our border. To do that, we can simply go ahead and child our health bar to the border. And then we can go ahead and anchor it to the in here so we can hold down Alt and we can click on this. So this way it will be anchored to the, all the sides of the canvas and it will also take the same ship. Now let's change the heart image to the, or the image to the heart. Image. And let's go ahead and uncheck the Health Bar. And then we'll child the border and the heart image to the health bar. So now we have this health part that we can move around. The next thing we're going to do is we're going to add a bit of filler right here. So the way we do that is we'll right-click and go to your eye and an image. And this image will be the filler. And this is what we are going to manipulate in order to increase and decrease our health born. So of course we're going to, first of all, child to the border. And then we'll go ahead and do the same. So, and here on the anchors hold down Alt, click on that. And we'll then on childhood from the border. And if you have the image in front of the border, so if you have it just like that, make sure that the filler is above the port. Okay, great. So now we have the filler and now we'll go to the Health Bar. And in here we'll add a slider component. So let's go ahead and add a slider component. And there are many things in here, so we'll turn off the interactable will make the transition none, and the navigation will also be none. Then we'll take our Fuller and we'll drag it into the rectangle. So now we have the ability to manipulate the size of our filler. And if we increase this from 0 to one, lets say you can see that we can start increasing and decreasing how much we have inside. Okay, so with that done, a next step that we're going to do is we're actually going to control this filler from our health bought. So because we are controlling the behavior, we will go into the script, right click in here, and we'll see that we have a canvas controllers that, okay, so this is a Canvas Controller. We already have a script for that, which we are not using for anything. And now it's time to start using it for something. So in here, the first thing we're going to do is we'll add a using Unity engine dot u. And this will allow us to get into the slider and the images. Under here we're going to create a public slider and health slider. Good, so now we'll have a reference to the slider. Next thing we'll create a method. So I don't think we'll need update. We can create later on if we do need it. So we're creating a public void and this will allow us to set V Health whenever we start the game. So we'll create a parameter for it. And this is going to be the Health. And you'll understand what I mean in just a bit. So we'll take the health slider that we have a reference to. And we'll actually go and access the value. And we'll set the value as whatever health is sent to us through the method set. So let me show you what I mean back in here. And if we go to the health bar, we can see that we have the value in here. So we are accessing the value of the slider and we are setting it to whatever health centers. Okay, great. So next step is going to be to set the max health that we have. So we're going to create a public void set max health. And it's also going to take an integer which is health. And in here we are going to access the health slider. We're going to set the max value of our health slider. And we're just going to set it to the health. And why are we doing this? Well, I'll just show you and we'll set the health slider dot value to the health that we already have. So what, why are we doing this? Let's say in here we can see that our slider actually has a maximum value. So let's say we have 30. So now as we increase the value from 0 to 30, so our player will obviously have different, different kinds of health based on the level, based on the, maybe, I don't know, maybe you create some pickups and when you pick them up, you increase the max health. So that's a possibility. And we can also make sure that these are whole numbers now because we are using integer two represent the health of our player, this will not be a problem, but you can see that this increases now from 0 to 30 without having any flows. Great. So now that we are setting the maximum health, we have a way to set the health every time. It's time for your challenge. And your challenge is going to be to set V Health Bar maximum. So first thing you need to do is you need to get a reference to the Health Bar and the players health system. Next thing you need to do is to set the bar slide to be at max health when we start the game. So it's fairly simple. The only difference here is that we are dealing with different stuff. So you already know how to get references. You can actually use the find objects of type if you don't want to go ahead and actually set it from the inspector. And you can set the maximum health using the method that we've just created with all that, all those hints that I gave you. Pause the video right now and go to the challenge o k. So where is our layer health systems? So in here we are going to create a variable which is of type UI canvas controller. And we're going to create called this variable the Health Bar. And N here, after we set the current health or before it doesn't matter, we are going to get the Health Bar. And it's going to be equal to the find objects of type. And what type is this? Well, it's the UI canvas controller. And we're going to just like that. And now we're going to get the Health Bar. We are going to access the set max health. And we're going to set it intmax health that we have for our player, Players Health system. Let's save all of that. And let's go back into our game in here. So when we hit play, we should see that the bar has filled up. And no, it did not fill up because of course, of course we forgot to set some kind of reference. So in Canvas, we will set the Health Bar slider, and here we will save that. And now we hit play. And we see that we have filled up everything. Now when we get hit, we will not have our health reduced by anything. It will not show up in here because we are not actually updating this. So let's go ahead and update. So back in here, let's go into our take damage in the where's our player health system? So inside of here, every time we take damage, we are going to access our Health Bar and we're just going to set the health and the current health. So let's save that back in our game. So now every time you get hit, in theory, we should have, our life gets reduced. And where is our player? Let me give him a bit more health because his pathetic so 20, save that back in our game. And now we should see that whenever we get hit teh robot shoot me. So 12, you can see that our health is going down very cool, so, and when it's over, well, the game is over. And finally, I just want to do one more thing, and this is purely aesthetic. You can choose to do this however you want, but let me go to the Health Bar, increase this value in here, go to the folder and we'll make a threat. So now our health, or you can even choose to have the color of your filler in here, the color of your heart. So choose one of the colors. You can see the pixels on the right, and I'll choose the threat. Ok, so this looks very bloody. We had Play and now we have our health bar up here showing us what's happening with our player. So was that done? And let's go and stage of all of our files that a player health system commit these changes. And in the next video, we are actually going to be displaying the enemies, enemies health bar. And we are going to be displaying it on each enemy that we have in our world. So I'll see you in the next video.
44. Displaying Enemy Health : While comeback my fellow game developers, in this video, we've added a health bar not only to our player but to our enemies. So now when we should them, we can actually see that their health gets reduced. And now we kill all of these and all of our enemies when their health bar gets down. So let's not waste any more time and let's get started. Oh, okay, let's get started. The first thing we want to do, we'll double-click on our robot enemy to zoom in. And on our robot enemy, we are actually going to create a new canvas. So now we'll have the enemy canvas on here. And what we're going to do if we can see it, it's ginormous. So double-click back onto the robot enemy. Okay, so now we can no longer do that. But what we can do is we can go to the enemy Canvas and we actually want to go and change the words it in here. Let's change it to world space. And now we can scale down to 0.001 on all sides, y and the z. Okay, so now it's a very small canvas and let's change the Position to 0 sides. Now let's double-click on the robot and various. Now our canvas is much smaller. And let's go ahead and make it even smaller than that. So let's click on the T button or choose this one right here, which is the rec tool. And choose one side and make it all the way smaller. Now in here, we are going to do the same thing would like we did in the normal half-baked or 40 player. So we're going to create a UI image. This will be our border. So the border. And we're going to also go ahead and whereas are you add the border as the source image? We are going to anchor it all around. So now we can control the size of our canvas and the size of our border will be smaller. We are then going to create the filler. So you image this will be the feather. And we'll also go ahead and change the color of the filler to read and anchored to all the positions and put it over the border. So now we have this kind of Your, let's put it down in here. And actually this u i, of course what, we are going to be changing it later on, but for now we just want to make sure that it's all working. Now as a final thing, we need to add a slider in here so we don't need to create the, what did we do in here? So we don't need to create the actual health bar. We can immediately add the slider component in here. We will turn out interactable, make the transition non, and the navigation none. And we'll add the filler as the fill rectangle. So now we can go ahead and move this up and down. And as you can see, it's actually from the other side. So it's from here, will change it uplift. Later on. We can actually change the direction from right to left if we feel that we need to do that. Okay, great. Actually we're going to create a very nifty trick that you'll see at the end of this video, but let's continue. One will keep the surprise for later. Actually, you've already seen it in the intro. Anyways, go ahead and create a C-sharp script, and this will be the NMI UI canvas controller. So is that correctly control controller Canvas, your enemy hit Enter. Visual Studio will open up automatically for some reason and we'll add the enemy you Canvas Controller to the enemy canvas. And now the enemy canvas, let's double-click and opens up. And it's actually going to be almost the exact same as our. Whereas it the UI canvas controller, the normal one. And we'll simply copy all of that. And we're going to paste it in here. So based that and the start will not be used. If we do use it later on, we will set it. And the slider is telling me that something is missing, and that's the namespace for the using unity engine. So now we can access the health slider. What else should we be doing in here? Well, I think this is all the beneath. Next thing we'll need to go ahead and actually tweak around with this in our enemy health system. So in here, let's go there and we'll create a NME and Canvas Controller. We'll call it the health bar. So it's exactly the same as in the player. Next thing we're going to do and start, we are going to go ahead and get the component. But this time, something different will happen because we're going to use the get component in children. Now, why are we doing this? Currently, the enemy health system, if we go back in here, is on the robot enemy. So we can just access the get component on the UI canvas. We can only access the components here. So what we do is we access the components in the children and the enemy canvas is one of the children and it has the enemy UI canvas. We have to add the slider to save that. We could have even used the Get component and here because these libraries already, but no worries about that. Now that you understand why we are using the GET children and here we are going to get the enemy you Canvas Controller. And the next thing we're going to do, of course, we are going to set the health bars. Maximum value set max health, and it's going to be Max Health. So Max Health, we haven't created this variable yet. So let's create it. So it's a public, max, ops, public int, max health. And we'll no longer required to put a five in here. And this is the max health. And the current health will be equal to the max health. And let's save that. Next thing we'll need to do is we need to update the Health Bar every time we take damage. So in here we are going to get the health part. We are going to set the health. It's the same methods as we did with the player. Very nice. Back in Unity. Let's test this out and there seems to be a problem. We forgot a semicolon up here. And now back in Unity. And lastly, let's look at our invention. And for some reason there is a problem. First of all, there are three errors and they are for each of the enemies up here that don't have a health bar. And we also don't have the Health Bar putting correctly on the robot. So let's go to the robot enemy and let's set the current health to 0. And let's, we actually need to make the current health private in here because we don't want to be accessing it. And in the player health system, also, the current health should be private, so we don't have actually access to that. So Max Health will be, let's say what was it? So it was six. Save that back in our game. And now we should see the bar on top of this, Philip. And when we shoot him, you can see that we are actually reducing the health of our enemy. Now the Health Bar looks bad, very bad. But you can adjust it to your own preference. I'll just make it a little bit bigger or smaller. I mean, so let's just try to, so we'll move this down a bit and we'll actually try to tweak it, maybe make it a bit longer. So Walters, that seems to be good enough. Let's save that. And your challenge is going to be to add the health board to the other enemies. So first of all, prefab the Health Bar with its slider. Then you'll need to add it as a child to all other enemies. Finally, you'll need to set the set V max health for each of them because currently they don't have a current health that came out wrong. Anyways, pause the video right now and go to the challenge. Welcome back. So first thing we're going to do is we will go into our projects prefabs. And in here that's create a folder for the UI. And of unthink will not be using this for anything other than the enemy canvas for now. So we'll add the enemy Canvas in here. And now we'll go to our monster, will put the campus on here. So double-click on that. It's a but high, so put it down. And of course it's a big, big, so we'll have to also change its size. So the way I'm doing this, if you're still don't know, I hold one corner, I hold down Alt and I make it smaller. So let's see, that looks good. Let's put it on his head. And let's make smaller just like that. Now we go to our flying monkeys up here. So let's add the canvas and the canvas to this one. And this one. Let's set the max health of the demons to four, so four by four. And let's double-click and see, OK, so this looks good enough. So we'll just move this down. Okay? And where else is it? So this here will move this down also. And the monster is a max health. So let's make it 12. Let's save that. Let's hit play. Let's see if we still have an error. Nope, we have no errors anymore and we can shoot the enemies and we can see that we are actually damaging them. And of course this one is still broken. And we have this robot in here that we kill when their health bar goes down. So with all of that done, the last thing that we want to do is let me just show you. I didn't show you right now. So you can see that the enemy has the Health Bar and he's walking around. But the Health Bar just just looks weird because he's moving with our and so what we want to do is we actually want to have the health bought, always looking in the direction of our camera. So let's go ahead and do that. First of all, we'll go into our script. We'll create scripts, will create a script and we'll call this the look at cameras script in here. Let's wait for it to compile and double-clicking here. And first thing we're going to do is we'll create a reference to the main camera. So it's going to be a private because we need to find the camera everytime. So it's going to be a private transform Main Camera. And in start, we are actually going to find the cameras. So find object, find objects of type, and it has the camera moves script on it. Camera move script on it. And we're going to get the transform, because this is a transform and we are simply going to go and update. We are going to take the transform. We are going to look at UPS, look at. And the thing that we're going to be looking at is the transform dot position plus V main camera dot forward. So let's save that. And now we are going to take the script. And in here we are going to add this to every single enemy canvas over at the look at camera to the enemy Canvas, will add it to this enemy canvas on the monster. Or actually what we can do is we can go to the canvas and let's see, we can apply all of that. And we'll see that each and every canvas now has the look at cameras. So this is the beauty of using prefabs. With that said, let's hit Play and let's see how that looks. So now we can see that the Health Bar always looks in our direction. How good is that and how effective is that? Now, we need to change the Health Bar heightened here just a little bit. So now everywhere we go, the Health Bar is always looking at us. Was that done? In the next video? We are going to not be turning off our player whenever we die, we are actually going to be responding each and every time. Before we go. Let's go in here. Stage all of our files. Did a enemy health bar that always looks at the layer, commit all of that. And of course before we go, you need to don't make the same health bars as Minnesota's one needs a bit of change, and so on and so forth. Make it pretty prettier, bigger, better looking at it's all based on your preference. Would that set in the next video, as I've told you, we're going to be responding. So I'll see you then.
45. Respawning: Welcome back my fellow game developers into a brand new video. And in this one we are going to be not only turning off our player whenever we die, but we are actually going to be responding him every time we dive into the scene that we're currently. So now when the robot kills us and we die, we wait for two seconds and we respond in our world back again with everything radon. So let me just show you one more time when we die, you can see that his health is at a certain point and my health is also at 0. The even the bullets are back again at Dan and his health is back again at ten. We can kill him, we can kill everyone because we have incredible guns. With that said, let's not waste any more time and let's get started. Oh, okay, so now that we are able to display our health, we are able to kill our player when he takes too much damage. Let's go ahead and create a response system. So how this response, a response system is going to work. We are going, instead of just turning off our player whenever he dies or rendering him and disabled, we are going to actually take him back and restart the level that we are currently on. Later on we'll expand the system and make it take us to a previous level and maybe even use the system in order to take us to the next level. Now what we're going to do is we'll create a game manager in here. So we'll create an empty game object. We'll call this the Game Manager. And the reason we're creating an actual object to handle this is because we don't want a certain object like for example, the player to handle this. It's always better if we are working on the entire game to have the script separate from a certain object that has already its own mechanics and behaviors. So Game Manager, now we are going to go into our scripts and we're going to create a C-sharp script that is the Game Manager. And you'll notice that the symbol will change, and this only happens for the Game Manager. So wait for that to compile. And now we can add the game manager script to our game manager. And let's go ahead and open up the Game Manager and Visual Studio. Now, what are we going to be doing in here? Well, we are going to be manipulating our. So what does it mean to actually respond? Responding means that whenever we die, we are going to go back to the scene in which we are playing. So currently we are on the playground and we don't have any other scene. But whenever we die, we want to actually start this scene all over again. And unity actually has this mechanic built into it, which is the scene and manager. Let me show you what that is. So the si Manager allows foreseen management at runtime and you can see that there are a lot of things in here. So the same count, how many total scenes are there. You can go ahead and create scenes from the code and you can do a lot of things. But one of the things that we are most interested in is the scene manager dot lot scene. And this allows us to load. And he seen based on its name or its index. So what is seen index? Let me show you that in Unity. So back in Unity, if we go to the, if we go to the file, we can go to the build settings. And in here is actually where you are going to build your game as a finished game. So what we do in here, you can see that we have the scenes in bulk. And here is where we add the scenes that are actually going to be part of our game or the levels and so on. So the way we add scenes in the build is we actually go to the scenes and we simply drag the playground in here. So now the playground is part of the built-in and you can see the index right here. So the index for the playground is currently 0 and that is what we are going to be working on. So let's start coding. In our game manager will open up the script in here. And the first thing we need is we actually need to add the names namespace that allows us to manipulate scenes. We're going to create a using Unity engine thought seen management. Great. So now we can start accessing arsine. Next thing we're going to do is let's just remove these. I don't think we'll be needing them. We'll create a public method that is going to be called the player respond. And this method is actually going to do one thing and it's going to first of all called the scene manager. So hae seen manager, we want to load a certain scene. And what scene should we be looking? Now, we can go ahead and put a 0 in here, and this will work fine. But Let's say we have ten levels in our game. How do we know or how do we tell this load scene that we want to respond at this exact scene? Well, there is a very inefficient way of doing this. We call our serum senior manager. Again, AC manager. Can you please get me the active seen so this good gets the currently active scene. And what should we be doing now? Well, because we want the index of this active scene, we're simply going to tell it the 31, the built index. And now what happens in here, the scene manager is going to load the scene. And the scene index will be the current active scene, which we get from the scene manager. And we're going to access the index of it. So, and now let's go ahead and save that. And where are we actually going to be calling this game manager? So we are going to be calling him, whereas our player health system, whenever we die, after we destroy the game object or we sat him an active, we don't even need this. We can go ahead and you know what, let's keep it. And we're going to go ahead and find game object of type. The Game Manager, and we are going to tell it that we want the player to respond. Let's save that. And let's go ahead and test this out and unity. So we had play, let's see, what is our health sorts 20, let's make it ten just to speed up the process at play. And now let's see Hale monster hour you hey, please call me. So let's see. Our health gets removed. So 12, maybe two more hits. Yes, so now we get destroyed and you can see that we are back in our new scene. And the health of the enemy has been restored and our health has also been restored. So let's try this again. So please, 1-2-3, we die. We are back in our scene with the health of all of our enemies back in their place. Very nice, but there's still a problem. So now when I die, it's immediate. It's not fun. You know, usually when you die in the game, it takes a bit of time for you to reflect on all the mistakes that you've made. So the way we are going to do this is by giving you a challenge. So your challenge is going to create the co routine that will delay the response of our players. So we've already done the Skoll Teen Challenge, I believe two times, but call routines are a complicated thing. And if you haven't done the Colton challenge because you are still intimidated by it. So this is the perfect time to do so. With that said, first of all, you need to create a variable for the amount of time to wait. You will need to create a coating of Type II enumerator. You will need to yield the time that we've added. And finally, you need to load the current scene. So all you have to do is create a coroutine and in variable b, actually, using the Scene manager to respond with that said, pause the video right now and go create a coldline. Okay, welcome back. So what should we be doing? So in here we are going to create a variable. It's going to be a private. We don't need it to be public. So we'll create a private float and we'll call this the time until player dies. So it's a bit of a long one and we're going to just set it to two F. So now in here, instead of the player immediately responding, we are going to create an eye enumerator. So I enumerator, it's going to be the layer. And respond co. This means Curtin. And in here we are going to first of all yield return. No, wait four seconds. And we're going to put in here the time until player does. Then, after we've waited for this two seconds, we are going to actually use this in here. And in the player respond, we are going to start the co-routine, which is the player respond coal. With that done. Let's save all of that back in our game. And now when we hit play, we should see that whenever we die, this robot is killing us faster. So 123, we are the activated 12, and then we respond. How cool is that? So now our responding is just a bit delay and it makes more sense with that done, I hope you enjoyed the video. Let's go ahead and stage all of that. We're going to create a response system using game man. With that done, it's the end of the section, I believe in the next section we are going to be delving deeper into the weapons system. We are going to be adding more weapons, will be adding reload animations. We'll even add a rocket launcher and we'll learn how we can create objects in our world that we can pick up for health and ammunition. But that said, I hope you enjoyed this video and I'll see you in the next one.
46. SECTION 8 - Adding More Weapons: Welcome back, my fellow game developers. I've promised you that I will give you more cool guns, and now it's time to deliver on that promise. So now we have the pistol that shoots around. But when we had tab we have the SS rifle that shoots a lot of bullets. And if we hit Tab again, we have the sniper that zooms in and shoots the enemy and you can see that it has more damage. So now we can, let's try to hit him one more time. Okay, so we're out of bullets and each gun has his own reload rate. And not only that, if we had tab again, we can keep hitting Tab and the guns keep switching. So let's not waste any more time and let's get started. Oh, okay, so first thing we're going to do is we will go into the hat, will open up the guns. And let's duplicate this pistol two times. So this, we will change this to the rifle. And it will change this into the sniper. And let's turn off this hyper, and let's turn of the pistol also. And let's work on the what's this? It's rifle. So rifle. Okay, save that. And now what we are going to do is we'll remove the pistol prefab. And let's go into our game assets, into our sci-fi weapons, the base back, the pre-fabs, the rifles, and let's add the rifle as a child of the rifle. So now we have our little rifle in here. But of course we are going to, first of all, unpacked completely and we are going to take the bullet. So where's the Bulletin here? Bullet. And we are going to Prefab it. So in Prefabs bullets. And but before we do that, before we do that, let me just make all of this three on each scale. Let's look at the game and let's put it right here. So if you already know how to do this, go ahead and maybe you can skip, do it on yourself. And then skip to the part where we actually have everything ready, a Michael here. So I decided to make this clip a bit faster, so I will do a voiceover. This video is already too long, so now I'm adjusting the gun. I'm checking how bigger it's. Now we'll put the bullet as the prefab. We are going to add a rigid body, the boat controller, and we will be assigning everything. And now we have finished. We'll change the name to the rifle pre-fab. We will adjust the firing position and we are also going to make sure on all the sides that it is pointing correctly. We're, are going to add the bullet. And here we are going to tweak a bit of things so we'll make the total bullets 1-20, the zoom amount reduced and the damage amount increased, debit. Now next thing we'll play around, see if that works. Okay, so it seems to be working as skilling. It's destroying. Very nice. We'll turn this off. We'll go back to the sniper. We'll add the sniper prefab. We will unpack it. Of course we will name it the sniper prefab, make it two on each scale. Just the position as always. Make sure it looks good at the game. Let's remove the bullet, put it as a prefab. And of course, at everything that we need to add to it, at just the things depending on your preferences, they don't have to be just like mine. So let's make sure that all of that works. And great. So now our bullets kill and destroy everything around them. Now will lead to justifying position. I forgot to do that. And I can see that I have also forgot to add a rigid body to the bullets and to make them fly. So let's go into our scripts. Let's close this down and we'll go into our scripts in here, Right-click and create a C sharp script that's going to be the weapons switch system. So weapons switch system had enter. So now what we are going to do is we're actually going to add the swapping switch system to the gun. So are the parents of all of our guns will have the weapons, which system on it? Let's double-click in here and let's start coding. So what's the first thing that we need to do? Well, we are going to create a list of all of our available weapons. Let me just tell you a bit about lists. So laser, what are lists? And C-Sharp. So it's a collection of objects of the same type. So we can create a list of integers. We can create a list of strings, but they must always be the same type. They can be accessed using an index. So this will be very helpful. Just like we access scenes using indexes, we can also access these objects that we're going to add to the list, which are going to be our guns and access them through indexes. They can have methods available to them to access, sort, search, and modify. So we can use the lists to do all of these things, which is very helpful. And let me show you the structure of a list. We simply create a list. We will put in the object type, we will put in the name of the list, and we created using the new list object type. So let's go ahead and do that in our visual studio. So up here, first thing we're going to do is we'll create a private and going to be the GUN system. And we are going to get the active. So this is the variable that will set the actual active gun and our gain. Next thing we're going to do is we'll create a public. It's going to be a list. And what type of list is this going to be? Well, it's type of Don system because each gun has a consistent on it. That way we are going to be able to recognize the gun, then will create called All Guns. And it's going to be equal to new list GUN system. And don't forget to put these two brackets, save all of that. And the final one is we need to a sort of index to look through our guns. So we're going to create a private. Or let's make it public. So we'll make it public for now. It's going to be an integer, and we're going to call it the current gun number. Okay, great, so now we have these three variables. We have the act of gun, the list of all the guns, and we are going to get the current gun number. Let's save that, go back in unity and let's see how that looks in our Inspector. So here we have the organs and currently the list is at 0. So what we can do is we can actually choose, or before we do that, go to guns. And in here you have this little lock. So click on it. And this way, whatever we press hierarchy, nothing in the inspector will change except for well, it will stay on the thing that we locked. So now we can go ahead and add each gun individually, or we can simply choose these three guns and drag them all the way up here. So make sure that should drag them to organs. The actual world word, put them in here. And now we have the pistol as element 0, rifle as one and sniper as to Seoul. And now that we have set all of these, the next thing we're going to do is we're actually going to create a loop. And we haven't talked about loops. So let's go ahead and talk about loops back in our slides. So lists and loops and arrays go hand and hand. And now we are going to be learning about the for each loop. Now, if you already have experience with four hoops, for example, you may already be in the know and this will be much easier for you, but if not, focus really, well. First thing, loops allows you to go through each thing. And we are talking of for each loop, each thing in a collection of things of the same pipe and an array or an array list. So this is the structure of a for each loop, right? For each, we put any type and we looked through the things, or we look for a thing in things. So let's say for example, we do get a certain thing. We can give it a method or we can do something. So some method, we can use it in a certain method, and we also can do other things to it. So let's say, for example, the things is, are all guns and the thing that we are looking for is a con of type began system. And we are using the for-each to go through each and every weapon or gun in our list of all guns. Let me show you an example and maybe this will become clear to you. So back in our code and here in the start, we are actually going to go through all of our guns and set all of them to false or set all of them to inactive. And then only set the index of the current gun number will be set to active. So let me show you. Let's go ahead and create a foreach loop. Then we need to give the type of the things that we're looking for. So it's the current system and it's going to be a gun. And we're going to search for it in all guns. We open up the brackets and now we will take each and every gun. We are going to access the game object on each gun and we are going to set active to false. Then after we've set everything to false, we are going to get the active gun and we'll tell it that it's the all guns on the index of the current gone the number that we are going to give it in the inspector, and then we are going to tell it that the act of gun is going to be active or set active to true. So let's go over this code again. As soon as we start you weapons switch system. We go through each gun and all the guns and we turn them off. So they are all actively off. Then we go through we are first of all, we look for the gun number that we have in our inspector or that we will be determining later on. We go to the index and all of guns. So we know that back in here, all guns have 0124, pistol or rifle and sniper respectively. We said the current gone number that's safe to one. So now we're accessing the rifle. So back in our code, the current gun number is one. So this entire value, and here is the rifle. So our active gun, which is a GUN system, will become a rifle. And then we will set it back to true. And let's test this out back in our gain. So now, even though we have the sniper on, as soon as we start the game, we should see that we have the rifle with us. So now we have the rifle. Very nice. Let's try the sniper. We put the element to hit play, and we have the sniper. And finally, let's test this with the pistol. Had play. And do we have the pistol which is too big? Let's continue on. Now what we need to do is we need to create a method that would allow us to switch between each gun. So an update we are going to check for a certain input. So input dot get key down, so a free press the key down. We are going to use the key code of the tap. So whenever we hit tab, we will be able to switch gun. And let's go ahead and create this muscle method. So generate the method. Please generate the method. And what are we going to be doing in here? Well, let's see. First thing we're going to do is we're going to take our current active gone and we're going to the activated. So active gone, that game object set active to false. Great, now the gun is off. Next thing we're going to do is will increase. The current gun number by one. So this way if we are on the 0 using the pistol, and now we are on the one. That means we have the rifle, Then we are going to actually do the same as we did in here. So when the current can number increases by one, so let's say it was 0. Now it's one. We go to the active gone. We tell it that it's one of the guns on all the guns with the index of the current number which has increased by one and we set it to active. So let's save that. And now back in our game, let's keep this at 0. So we hit play. We now use the pustule. If we had tab, we can see that now we have the rifle. We had tab again, we should our monster with our amazing sniper and you can see that it zooms in a lot. We haven't tested this. But when we hit tab for the last time, we can see that we have an error in here and the error SSE telling us that we are out of range. Well, what does that mean? Well, when we get in here, okay, so we've increased from 0 to one. Great, we got the rifle, we increased from one to two. Great. We have a sniper, but what happens when the current gun number is three? And there is no three in our list, we have three elements, which are 012 and the final number is not there, so three is not available. What are we going to do about it? Well, you are going to do something about it because it's part of your challenge. So your challenge is to go back to the first one. What do I mean by that? When we get to the last weapon, make sure we don't go out of bounds. And you need to make sure that we go back to our initial weapon. So what you'll need to do is at a certain point you need to make sure that if we do get out of bonds. So if you got that, if we do go out of bounds, then we will need to put back whatever we are increasing to its initial value. And I'll just show you a little hint that might help you. You'll have to use all guns dot count, and this will give you the number of items in our list. With that said, pause the video right now and go do the challenge. Ow, kay, welcome back. So let's clear this error and here back in our switch weapons. And before we actually switch our weapons and here we are going to create an if condition. So if our current gun number gets bigger than or is equal to all guns dot count, we are going to set the current gun number back to 0. So now what this does, let's say we have the current number is that to we increased by one, so now it's three. So now it's greater than or equal to the entire count of organs which are three. So what this does, it will turn back the gun number to 0. And that way the current gun number in here will be 0. It will access the index, the all guns, and it will return a pistol. Let's try this in our game. So now when we hit play, we can see that we have our piston. We had tab. We can see that we have our rifle. We had tab, we have the sniper, we hit tab, we have the gun back. Very nice. So with that done, let's go back and make sure we stage all of that. We'll call this a weapons switching system, commit all of that. And in the next video, we'll learn how we can pick up even more weapons. With that said, I hope you enjoyed the Swan and I'll see you in the next one.
47. Picking Up Weapons: Welcome back, my fellow game developers. As you can see, we have a weapon and the middle of our playground, because when we hit play, we have our three main weapons in here, but we can actually go and pick up a rocket launcher. Now of course, this doesn't do anything, he just shoots, it doesn't shoot any actual rockets, but we'll do that later on. But for now, let's go ahead and create a weapons pickup system. Oh, okay. So the first thing we're going to do is we're going to add a weapon in here. A. So I'm just going to skim through the spark. I've added a rocket launcher. We go to the prefabs and add the rocket launcher prefab, Of course, on packet and change its name to rocket launcher prefab. With that done, let's go ahead and put it where we want. This is based on your preference, how you want to add it. And let's simply prefab our bullet. I also add the rigid body component and the boat controller to our sniper bullet and adjust all of that. The next thing we're going to do is we'll create a game object in here. And we're going to reset its position. Let's put it in here and we're going to call this the weapons pickup. And in here, let's go ahead and add the heavy prefab again. So added THE rocket launch. Oops, I meant we will add this to the weapons pickup. And now let's go ahead and make it maybe four by four by four. Ok. We are going to unpack it completely. And we are going to rotate it just like that up a bit. And we are going to create a sphere collider around this. So we'll add a sphere collider. And this will enable us to interact with the game object. We'll also maybe make it bigger. So let's make it around this yay big. And we're also going to reset the position in here. So what is the position we're, and we're going to create a script. And we'll call this the weapons pickup. So weapons pickup create this new script and create an ad. So now we have the weapons pickup in here. And before we forget, let's move this weapons pickup into the scripts. We'll double-click on the weapons pickup and now we have the weapon speaker. But before we continue, first of all, let's go into the weapons switch system. And what are we going to be doing in here? Well, we're going to create a list that will represent the unlocked guns. So the reason we created the rocket launcher already present on the players had is that we want to actually keep it locked. And when we do pick it up, then we will unlock it for the player to use. Back in our scripts, we are going to create a public list. It's going to be of type Khan System. And we're going to call this the unlikeable on lockable guns. So on lockable guns, and it's going to be equal to the new list of gun systems. Great, now let's go and see our new lists. So in guns we have the unlikeable guns. And let's go ahead and add the rocket launcher to the unlikeable guns. Great. Now what we want to do is we actually want to create a name for each of our guns. So let's go into the guns system. And up here we are going to create a string that will determine public string, and it's going to be the gun name. So gun name. So each gun will have its own name and based on that name, whenever we actually hit this pickup, so whenever we hit this weapons pickup, we are actually going to pick it up. So let's go into our pistol called this the pistol. And these are string references, so we'll need to make sure that we always get them right in our code. So sniper name and the rocket launcher will be the name of this gut. Let's save all of that back in our WACC what and pick up. Now it's time to add a bit of code in here. So let's remove all of this. And the first thing that we're going to create a public string gun to pick up name. So now that we have the count to pickup name, we are going to go in here and the weapons pickup added in here. And this will be the rocket launcher. We already saved that, already have it copied. So rocket launcher back in our weapon. What are we going to do in here? Well, we're going to set the entrepreneur enters. So whenever we actually had the colloidal, We are going to check if the other components or other collider that we've hit has a tag of player. Make sure that player is written correctly. We are then going to first of all, go to the other game object and we're going to access the component in the children. And the children. Well, because we want to actually access the weapons pick up switch system and because the weapons switch system is on the guns, which is a child of the player. That means that we are going to access the component on the child and we are going to create a method, but let's just add it in here. So we're going to add a gun and is going to be based on the gun pickup name. So it's the first time that we do something like that. But don't worry, we will go and create the method. And finally we are going to destroy the game object. So when we do pick up the weapon. There will no longer be a weapon on our playground though. So let's go ahead and create the ad gone method. And let's go into our, whereas it happens switch system, we are going to create a method in here that's going to be the public, makes sure it's public, otherwise we cannot access it. The ad gone and it's going to get a reference of the gum name. So when we do get the gun name, first of all, let's just test this out and make sure that we are actually getting something. So debug dot log we picked up and we're going to add the gun neck. So let's go ahead and test this out. So what we didn't hear whenever we enter the collider of the weapons pickup, we are going to access the weapons switch on the children because of the guns being children of the player. We are then going to add a Khan Based on the gun to pick up name that we have on this opens back up. We will then go just printed out to our console and see if we actually pick up something good. So had play. So we should be able to pick up. So we okay, so we need to turn off the rocket launcher and let's go ahead and guns and set it to 0. So we have played, and now we have the pistol. Let's go and pick this up. And nothing seems to be working because we made the mistake of all mistakes. We didn't set it as a trigger. So make sure you set the weapons, pickups, sphere collider as a trigger. And now we go and we pick up, we picked up the rocket launcher. Very nice. Now let's go ahead and actually start picking up what? So the way we're going to do this, and here we are going to check if we actually have some unlikeable guns. So unlikeable guns, dot count should be greater than 0. If it is greater than 0, then we are going to loops through all of our tonnes. And for that we are going to use a for loop. So let me show you what a for loop is. Loops can execute a block of code a number of times. So loops are handy if you want to run the same code over and over again, each time with a different value. And let me just show you the structure of a for loop. So first of all, we create the four, we give it an initial condition, and we are going to keep increasing it by one until it gets to a certain limit. And while we're doing this, we are going to do something. So it continues to execute code inside until I reached the certain limit. So we have this guy we just created and here using, we'll make it an integer. Usually it's an integer. We are going to add one to it every time, and we'll keep doing something in here until it reached a certain limit. So we'll keep going and going and going until we finally get to that certain limits. Or we can do. Something or one thing many times until we reach the certain limit. Now let's go ahead and apply this in our code. And what do we actually need it in here? So what we are going to do, actually let me show you the code and then we will talk about it as we go on. So we'll create an integer, we'll set it to 0. The limit will of course be the number of unlikeable guns. And we are going to be adding one to it every turn. Great. Now the next thing in here, we're going to first of all check if the unlikeable guns at this position. And we're going to access the name is actually equal to the gun name that we have. We are going to add this gun to are all guns. And the way we add to analyst is by using the organs dot. And we are going to add the unlikeable guns or the unlikeable gun on the condition. And then we are going to remove it from the on lockable. So before we continue, in order to finish this loop, when we do find that we are going to set the i to be equal to the unworkable Khan, just so we don't continue on counting. So what is this weird code? And here let's just talk about it. First of all, the for loop, we've set the a2b0 0. We've set the limit to be the number of unlocked guns, and we are going to add it every single count. Why are we doing this? Because we want to check if we do pick up a gun and we want to add it, we are going to check through all of our unlocked guns. If some or one of the unlocked guns on one of the counts in here is actually equal to the gun name that we've picked up. We are going to take our organs list and we're going to add this unlocked gun into it into the list. We then going to remove the unlocked gun from the unlikeable guns, so it will no longer be there. So we know that we have the weapon with us. And then this line is an order to stop the entire loop. So whenever we set the eye to the unlocked guns dot count, that means that this loops, loop has reached, reached its limit. That means that we are going to go out of our loop. So with that said, Let's save that. Let's go back into our script. Wait for it to compile, had Play. And now we should see that we have the pistol, the rifle, the sniper. These are our weapons. So now when we go pick up the rocket launcher, we should go into guns and we can see that we have the rocket launcher in all of our guns. So now when we switch from this sniper to the A heavy weapon. We can see that we have it in here now of course, we need to do something about it. But for now let's keep it like this because this will turn into our rocket launcher. And finally, what we want to do is we actually want to be able to, whenever we pick up this heavy weapon, we want to put it in the hands of our player. And it's going to be part of your challenge. So your channel's going to be to equip the gun when we pick it up. So set the gun in the player's hands when we pick it up. And I know this is a bit ambiguous, but I'll give you a small hint. You need to reset the current gun number to a certain value. And then you'll need to switch the Gulf. So the certain values will need to find it out. I'll just give you the scent. And with that said, pause the video right now and go to each other. Ok, welcome back. So this was a bit of an advanced challenge if you want. So I congratulate you if you figure that out. If not, don't worry, this was a way advanced challenge. So inside of the ad gone, we are going to create a boolean that's going to be the unlocked equals false. So we'll set it to false at the beginning. And we're going to set it to true when we do find the gun. So unlocked will be equal to true in here. And why are we going to do this? Because if after searching through all of our guns, we do unlock a certain gone. So if unlocked is equal to true, then what we're going to do is we are going to take our current number and we are going to reset it to a certain number, which is the organs dot count, minus2, a up minus2. And I'll tell you why. And then we are going to switch are gone. So let me explain to you why we are going to use the organs that count minus2. So back in here, we have the organs as three guns, so the count is three and let's say we pick up the rocket launcher. So now the count of all the guns is four. So what happens is we take the count which is four, we remove two. So that means we are on to and then when we switch the weapon, let's go back up here. You can see that when we switch the weapon, we add one. That means that we are on the index three. That means that we are on the last weapon and this will work no matter how many weapons you have. So that say all of that. Let's hit Play. And now we have the pistol We're or we have this rifle. When we go and pick up the heavy gun, we immediately switch to the heavy gone. So I hope you enjoyed this video and the next one, we are actually going to turn our heavy into a rocket launcher. So until then, I'll see you in the next video. And don't forget to stage all come metal of those added a pickup system command. And I'll see you in the next one.
48. Making The Heavy Rocket Launcher: Welcome back, my fellow game developers. In this video, we've added a huge rocket launcher that shoots rocket and explodes. So now when our enemy comes close, we can shoot him in the face with an explosion and you can see that has health gets destroyed. But not only that, Explosions work both ways. So now when we should the floor, our health also gets destroyed. So let's not waste any more time. And let's get started the o k. So let's get started with our rocket launcher. First thing, let's get our C bullet right here. And let's put it up a bit. So this will be the bullet of our rocket launcher. We want to, first of all, what we want to first of all scaled up on all sides to eight by eight by eight. So this will give it the impression that it's a actual, actual rocket head. The next thing we're going to do is we will go into our Where is it? So our game assets affect examples, weapon effects, prefabs, and in here you can see that we have the rocket trailer. So let's move it up and you can see that this rock trailer actually shoots out a rock trick. Now this rocket trail is made up of a rocket trail, of course, the flames and the war had. So we need to do a couple of things in here. First thing, let's go into the rocket head in here, turn of the looping, turn off the go down there, and let's turn off the collision in here. Now go to flames, make sure collision is off, it is off and turn off the looping. And indie rock also turn off looping. And, and so it doesn't have finally go to the parent object and in her also turn off looping and also turn off all the collisions. Now we might need to do a bit more, but for now, let's just keep it at that. Now we need to go into our effects and simply first of all, unpackaged. So go to prefer unpack completely and then drag it into our own prefab effects. So now it is in here. Now let's go back to our bullet. Let's delete our rock trail for now and let's go to the sea bullet. Now let's go ahead and add a bullet controller will make it around 50 because, you know, rocket launchers aren't as fast as normal bullets. And we'll keep the bullet live for now. Let's make it ten, or maybe you're less, but we'll see later on we also need to add a rigid body to it. And we're going to assign it in here. So let's save all of that. Now let's go get our explosion effect. Oh, and one more thing we need to add a box collider. And this box collider will be around our bullet and let's just keep it at that. Or of course we need to make it a trigger. Okay, great. Now next thing we need to go into our effects again. And in here we are going to find some kind of explosion. So far explosion prefab and let's see which one we're going to use. Big explosion. Yep, I highlight this one, stop that. And now we have this in here. Let's see what do we need? We need to turn off the looping, of course. And we'll need to maybe also, ok, so no trigger, no collisions. Let's make the stop action destroy. And we're also going to add to this big explosion. Let's first of all, unpacked completely because we are going to make our own prefab out of this. And now in this big explosion that's made the sale, but smaller, we are going to add a sphere collider and the spherical litre will be a trigger. So let me move this object up and let's see, the radius should be about yay big. So play, okay, so this is our current radius. Let's see that again. Very nice. Let's make it two or 1.5 is good enough. Save that. Okay, great. So now we have our big explosion. Let's go down and to our own effect and add our big explosion. So now we have almost everything ready to start coding. Now next thing we're going to do is we need to go into our guns system. So where's our guns system? This is our GUN system. And we are going to make a couple of changes in here. So we're going to create, first of all, a public bool. And this is going to be our rocket launcher. So this will check whether this is a rocket launcher or not, because we will have a lot of differences. So down here in the shoot, first of all, after we check if this is suitable, before we actually check if these are all suitable, we don't want to actually instantiate any bullet holes or water affects. So if we are not a rocket launcher, then we're going to do all of these. So of course, rocket launchers will not add bullet holes or these water leaks. Next thing we're going to do is we're also going to check if we hit an enemy and we are not a rocket launcher. Save that. Next thing we're going to do is in here, we don't actually want to produce any muzzle flash or the normal bullets that we do because we don't want, we want to do something different. So let me show you. So we're create will create an if condition. And if we're not a rocket launcher, oops. If we are not a rocket launcher, we then going to instantiate the bullets and the muzzle flash normally. But else, if we are a rocket launcher, we are going to instantiate this bullet also because we'll add the bullet normally, it's going to go from the far position. And it's also going to have the same rotation. But the only difference is, is that the far position will not actually be the parents, so it will just launch and go on its on its own business. The other thing that we're going to do is we're actually also going to be instantiating a certain muzzle flash, but this will be the ROC trail. So up here we are going to get a game object, which is the rocket trail. Save that. And back in here we're going to instantiate a rocket trail. We are going to make it in the fire position or from the fire position and with the FAR position dot rotation. So hopefully this will work, save all of that. And now let's go in to our, whereas it so wait for this and to our rocket launcher. And we're going to add view rock trailing here. And we're also going to add the bullet. So where's our bullet? And we are also going to change the time between shots. Let's keep it at one. It's good. Total boats 15. I like that also. Let's make this ten. Or know what? Let's make this 0.05. and for now, let's keep the damage amount. We will change. This, will make this rocket launcher and actual rocket launcher will go into our prefabs bullets and add the C bullet in here. Do we apply this? So override, we need to apply the changes that we made to our siblings in here. And for now, let's just go ahead and delete the explosion and DC bullet from arsine. And let's just take a look and see if our rocket launcher actually works. So when we hit play, we will, oh, before we do that, we don't want to always be picking up our rocket launcher. So for now, let's go and remove the sniper from our organs. Remove this from here, and we'll make the sniper and unlikeable gun and the rocket launcher a gun that is already available to us. And we'll set this to re, too to, to save all of that back in our game. So now we have the rocket launcher and when we shoot, you can see that we have the trail effect and we can actually shoot shot. Now, you can see that there are a couple of things wrong with this. But for now, at least we are shooting rockets all over the place. Very nice. Now it's time to go ahead and add an explosion whenever we actually hit a target and cause damage. Very nice. So let's go into our C bullet and an R script. Let's open the bullet controller. And in here we are going to create a public particle effect. So particle effect where y is it not Particle System, Explosion, explosion. Fact. Save that. Hopefully we needed to add a semicolon. And then we are going to create also a public that will check whether we are actually a rock. So are we a rocket? Yes, we should be. Now on the entrepreneur Enter. Let's remove this. On the entrepreneur enter. We are going to check. If we are a rocket. Then we're going to instantiate, instantiate the explosion effect. We're going to instantiate at the transform dot position. And we're going to make the quaternion, quaternions identity. So whenever our bullet, if output is a rock and it hits a target and it's going to explode. To use the explosion effect will save all of that. Back in our game. We should have a place to put our whereas. Just disappear on me. Seriously. Where does that go? So see bullet. See bullet and okay. So it did disappear. I wasn't hallucinating, so it makes sure that this is a rocket. And our effect, let's give it the big explosion. We save all of that. And now let's hit Play and let's see what happens when we shoot. So we have the explosion. Let's see if they are synchronized. Please stop calling me. So we should. And it's kind of synchronized. Is it synchronize? Let's see a up. It is. So now we have amazing shooting mechanics and we have amazing explosions. How cool is that? But you can see that there is something wrong. So the explosions keep exploding every single time. And this is actually, well, it's kind of cool. It looks like the Armageddon, but this is not what we are looking for. We want to stop these explosions. So for that, this is actually an error from Unity. I tried to find the solution for this, but apparently there is no solution to this. So what we're going to do, we are actually going to destroy our explosions from the code using a co-routine. And it's going to be part of, part of your challenge because you are going to make the explosions to damage. So first of all, create a script called explosion damage on the explosion effect. Then you'll need to damage both players and enemies if they are inside the zone of the explosion. So we've already created the sphere collider. And before we do that, let me just go into Unity and we need to go to the explosion. Makes sure that you have a rigid body on here. Otherwise this will not be working. So let's save that. And now let's go back to our challenge. And let me just give you an extra challenge for those of you out there that are very deep into the scores, destroy the explosion after two seconds. Yep, that was it. So again, a coding challenge. I've already given you the hints. With that said, pause the video and go do the challenge. Okay, welcome back. So let us go into Unity. And whereas our scripts, scripts right-click on here and we'll create an explosion damage. So C-sharp script explosion damage. And this will open. Nope, didn't know. Nice. Finally, double-click on the explosion damage. And in here, we are not going to need any of these. We're simply going to create, first of all, a public integer. And we'll call this variable the explosion damage. K9 snow in here will create an aunt sugar Enter. And in here we are going to first of all check if the other.com DAG is the enemy. Then we are going to go ahead and get the other dot get component. And we're going to access the enemy Health System. And we are going to take damage or give damage. With the explosion. Damage will create another if condition. And we are going to check if this collider comparing the tag with the player. So we won't be needing those, will simply get the other. And let's just copy this and make a couple of changes. So instead of the enemy, we're going to get the layer Health System and we are going to take damage also. Finally, we are going to create a eye enumerator. And in here we're going to destroy object. And let's just wait for a couple of seconds In here. We don't need to actually create this, so we'll create a yield return. And some of you may have tried this a lot. I've tried this many times and you just want to see the explosion and then make it disappear. We can even make it maybe 1.5, so that's enough. And finally, destroy the game object. And we are going to call this in the start. So yup, we are going to use it. So as soon as we trigger the explosion and we have it, we are immediately going to start the Colton and destroy what does it destroy? The game object. Save all of that. And now let's go into Unity and test all of this out. So make sure that the whereas the big explosion has a radius, has a rigid body, has the explosion damage. Now when we play, we should be able to shoot our rocket. If we shut down, we get half of our house destroyed. If we shoot a walking robot, we also crushes health and the big giant enemy. Let's see, yep, they also lose. So with our rocket launcher, launcher done, let's go and stage all of our files. So maybe we have more files. No. Added a rocket launcher come metal of that. And what that none. In the next video we are actually going to be adding, reload animation to each and every one that we have. So I'll see you there.
49. Weapons Reload Animations: Hey, welcome back, my favorite game developers. In this video we are going to be adding reload animations to all of our guns. So right now when we should, we reload, we actually have some kind of Reload animation. We then should the rifle. We also have a real animation and we also have the sniper reload animation. We can also reload the sniper. Very nice. And we also have the reload for this one, but I'll keep it a surprise for the end of the video. Well, that said, let's not waste any more time and let's get started. Oh, okay, so let's go ahead and create some animations for our guns. So we're going to start with the pistol. I'm going to create the pistol animation and the rifle animation. And then maybe I'll skip through those so you can do it on your own. So let's go ahead and put the game window and here next to the inspector and make it bigger so we can see all of that. And we're going to go into the player in here, are going to go to the animations. And because the player already has an animator on him, we are going to create a new clip and here, and we're going to yes, and animations into the player animations. And we'll create a folder in here that will call the weapons reload. And in here we'll call this the distal. So the pistol reload animations, save all of that. Okay, so now what we are going to be animating is actually the pistol prefab. So this will entirely be dependent on you. So that's the way you want to create your animations. I'll just show you how I make them look nice. And then you can go ahead and do your own. So first of all, let us look at the pistol, go to the inspector and see how long it takes to reload. So it's two so we have two seconds to reload our pistol. We're going to keep this indie game view so we can see how it looks. So we click on the pistol prefab and we had the record button. So first of all, let's see, we have two seconds. Let's make the time-like two seconds. Okay, so we have all of this to work. And so first of all, let's go to the 2.5th model, which is these 13. And we are going to move the pistol in front of us. So we're going to rotate it and we're going to move it in front of us just like that. And maybe a bit of rotation in this direction just like that. So this is the position that we want at this point. We'll then move on. And at the 45 frame, we are going to open up the pistol prefab. And in here we can see that we have a couple of things that we can manipulate. So this is the cool thing about these assets. So we can choose the magazine, for example, and we can remove it just like that out of the scene and then add the 55 minute mark. We can go ahead and put it back. So let's go and copy the original. So this is the frame of the original copy that let's put it back in here. That. So now it goes back to place. Then we can also go to the maybe 65 minute mark and choose the where's this trigger knocked on the trigger, the slide beside the magazine light hammer. So the hammer and we can move it back a bit. So just like that. And then we can put it back after five frames. So let's go back in here. You get the hammer, copy the components of the hammer, and put them back in here. And then we can go ahead and put entire gone back. So we go to the position or we can copy all of these, copy them. And then the 2 second more paste. So let's see how this animation actually works and you'll see that there is, there is definitely something wrong. So we hit play and the up. Didn't you see that? So you can see that there is definitely something wrong. And the problem is that, let's say when we start and here when we start moving, all of the animations move together. So you can see that the clip is going out, the hammer is going out and everything is moving at the same time. And that's not what we want to have. We want to actually, for example, move the pistol in front of us, and then we want to move the clip, and then we want to move the hammer. And when we finish all of that, we want to put the gone back to its place. So the way we do that is we will actually have to go ahead and copy the original positions that we have and keep them until the next animation moves. So what do I mean by that? Let's say for example, we want to start moving our magazine, the magazine, we want to start to start moving it at this point right here, right, so at the 30 frame. So what we do is we'll go in here. We are going to click on the magazine which represents this dot right here. We will copy it and we will paste it at this 30-second mark. So now what happens is the magazine stays in place until it hits the 30-second, the 30 frame mark, and then it starts moving, then it goes back. So you can see that right here from the 0 to the 030, it stays in place and then it moves. Okay, great, so we're going to use this on all of the components. So the hammer and here, so the magazine, I mean, here, when it goes back to place in here, we are going to start moving our hammer. So we'll copy the original hammer position, copy, paste it in here. So now what happens? Our gun moves to the center. The magazine goes back. When it goes to its place, the hammer moves back, it moves into place. And finally we have the position of our gun. So we'll need to copy the positions and here, so copy the rotation and the position of the gun. Copy that. And we are going to paste them around here. And now when we play the animation, you can see that we reload and then we put our gun back. So now we have a really nice looking animation. We can save that. And now let's go ahead and actually trigger it from our code. So let's put that stop this first of all. And let's go and to our animator in here. And we are going to, whereas the animation, we still don't have it. Let's put it up here and let's put the game for now back in its place. And let's go to the Animator. And in here we have the idol walking and running. So let's make this a bit smaller so we can see what's happening. So what we're going to do as we're going to put the pistol reload animation. And here we're going to create a transition from the idle to the pistol reload. Now we can make this from any state, but let's just for now keep it at the idol. And we're going to then create the way back in here. We are going to remove any exit time and stop any, or let's just keep the transition duration and we can see how this all works. Great. So maybe if we see that we need to remove the transition, will do it. So let's create a trigger. And here we are going to call this pistol reload enter. And now we are going to add this condition into our reload and he'll save all of that. Now let's go into our code and actually implement this. So we'll open up our script. And in the GUN system, we are going to go ahead and create a reference to our animator. So let's put it up here. So public animator and mater. And we'll call this the my mentor. And then we are going to end the reload in here. So in the reload, we are going to go to my animator dot set, trigger, set, trigger, and we are going to copy the string reference in here. We'll copy the pistol, reload and here, paste it in here, stop all of that. And you know what? I've not something that whenever we reload the UI canvas actually refreshes before we can use the bullets. So what we'll do is we'll copy all of these are actually cut them from here. And we are going to put them in the coating. So that way when we reload, we finished the animation and then we have our bullets refreshed in our UI. So let's save that. And now let's go ahead and look how all of this while locks and, or game. So put the animator and here, let's move it up so we can see if this works. Let's hit Play. And now when we go to our pistol, we shoot a couple of shots. We reload. And we haven't referenced our animator. Very nice. So the pistol in here, we have the animator. Let's drag the player and it will automatically put the animator component from a symbol of that back in our game. And now, hopefully we don't make any mistakes or we should argon a couple of times, we reload. Very nice. So now we have our reload animations and I'm not sure if you've noticed. I didn't even notice when we reload, when we finish the reloading than our UI updates. Very nice, so great. Now that we have this done, let's go ahead and create the rifle animation. And maybe I'll just speed up the process because it will make the video a lot longer than it should be. So hey, if huge or molecule here. So first thing we did is we put on the game. We turned off the pistol, turned on the rifle, created a new rifle reload, and we are going to start animating. So first of all, I just get the positions that I want. I looked up the reload time. It turns out that all of them have two seconds for real time. So now I just play around. And first of all, I just want to have a feel of what the animation will look like. So at every point I just said the things that are going to move. So the clip, we'll go one up, one down, and then diffusion core also will go back and to the front. And finally I copy the initial positions. And now what are we doing? Well, we are checking to see which animation starts and which animation continues on. And based on that, I'm going to start copying the component of the initial position and pasting them whenever they actually need to start moving. So that way they don't move before they need to. So I'm just basically doing that right now. Trying out everything, looking at them, playing around, copying, pasting, seeing if this is the position that actually needs to have. So all of this is through trial and error. That's why I encourage you to actually pause the video. And really I cannot just as a challenge, but go and test all of this out for your own. Practice makes perfect. I've done this multiple times until I actually got it correctly. So just testing out everything. So the position I want and now the animation is almost finished. I'm just looking through making sure that the eclipse don't move too fast. I move the animation around and oh gaye, welcome back. So let's see. This is the animation that I've created. So it took me a bit of a while, it will maybe take more, but for now, let's just keep it at that. So now we have the animation. Let's go into our animator in here. And we have the rifle animation already added, will create a transition from the idle to the rifle and a transition from the rivalry lu, two idle. And now what we are going to do is we're going to create another trigger. And this trigger is going to be the rifle reload. And when we transition there, so let's go into the inspector. We will add this condition in here. So we'll make it the rifle reload will turn off any exit time. And did we keep the transition? Okay, so we kept it. So let's do the same and here, and on the way back we are going to keep the exit time. And let's make sure that everything is exactly the same. Okay, great. So now we have this transition. Now how are we going to implement this in our code? So now if we go back into our code, when we reload, we are reloading the Stu reload. So what should we be doing in here? So should we be adding a ton of if conditions and if the pistol is equipped than we can that we can do all of that, but we can do something different. We can actually go ahead and up here. And in here we are going to create a variable which is a public string, or it doesn't even need to be public. So we can make it a normal string. And we're going to call this the gun animation name. So now we have the gun animation name and an update. We are going to create a animation manager. So it's going to be, of course, the gun animation manager, but we'll just call it animation manager. We are going to go ahead and generate this method. And in here we are going to be changing the gun animation name. So let me show you what I mean. So let's copy the count animation name. We are going to use it in here as a string reference. And now we are, we are going to be changing this gun animation name depending on the name of our gun using something called a switch statement. So let me show you what a switch statement is. So similar to if statements, this allows you to add conditional code execution. So let me just show you the structure of the switch statement so you immediately understand what all of this means. So first of all, we write switch. We add the case which was which will be the gun name. And based on this gun name or the based on this case switch, we are going to do something. So if our case is one, so let's say the case, which is now the gun name. So the one will represent the pistol, for example. We are going to execute some kind of code. And in our case, we are going to put the gun animation name as the pistol reload. We then write break. We then add another case. So this will be, for example, the rifle. If it's the rifle case, then the code will execute, which will be the animation name will be equal to the rifle reload. We then break and we can add as many cases as we want. And finally, we add the default one. We don't need to add anything in here. We can add something in here. And finally, we break. So look at the switch statement, understand that, and I'm going to implement, implement it in front of you. So let's go back into our code. And in here we are going to write. So switch. The case will be the gun name. So based on the gun name, we are going to execute some code. So our first case as a pistol. So obviously we should go and always use the, okay, so our screen is a bit convoluted right now, but no worries. Let's go into our pistol. Copy the gun name so it's the pistol. Back in our code. So now when we have this case, our gun animation name will be equal to the pistol. Reload. Paste it in here. And of course, because this is a string reference, we need to put these two quotations in here and we write break. Very nice. Now the second case, if we have a rifle with the name of a rifle, We are going to go ahead and create a colon here. So the gun animation name will be equal to the rifle reload. And let's not forget the quotations mark. Very nice. And now we break. Also didn't add this break. And let's also remove this. And finally, we are going to create the default case. And we don't need to do anything in here. We can simply go ahead and break. So you don't need to have the default case, but sometimes it may ask you for the default case, so we'll keep it, we'll save all of that. And now let's go ahead. So we've added the animation name, so it will change depending on what we give it or which case we have. So when we go into our gain, oh, OK, this is very confusing. When we hit play. We will have our rocket, no worries. When we switch to the gun, we sure a bit, we reload we re reload using the pistol animation when we hit Tab again. So let me just put the animator and here. So it looks better. So we know that it's actually working. So when we were still me, should we reload the pistol animation reload works. We have the rifle, we shoot around, we reload. And of course the variable animator was not assigned. How many times will I make this mistake until finally, never make it again. So years and years of experience and still we forget to add the shoe around reload and we have our rifle reload. Very nice. Now with that done, it's time for your challenge. And your challenge is going to be to create a sniper and rocket launcher animations. So create a sniper reload animation with its own Trigger and transition. Make a switch statement exactly for it. And of course do the same for the rocket launcher and same for the rocket launcher and have fun, enjoy it, create your own animation. Maybe you want to have some wacky kind of animation. And always remember that the animations need to be on the actual prefab, not the entire game object, or else it might break it. So with that said, pause the video right now and go do the animations. Hey, welcome back. So I hope you had fun creating animations because I sure did. So when we hit play now, and I've put all the guns to be available, so I have the sniper available. So when we reload, this is our reload animation. All right, and let's look at the gun at also reloads. We look at the rifle, also has its own reload. And finally we have the rocket launcher. Now, I didn't know how to add you reload and emission to the rocket launcher. So I came up with this one. So yep, I hope you like that. It's not about animation, I think so with that done, I hope you enjoyed the video and the next one we are going to be adding and munition pickup and health pickup. With that said, I'll see you in the next one and of course don't forget to complete your changes. I will not do that right now, but you should always be doing it on your own. So I'll see you in the next video.
50. Picking Up More Health and Ammo: Welcome back, my fellow game developers. As you can see, there is an ammunition box in here, which we should have probably made bigger. And we have a first aid kit which we should also maybe make bigger. So what we are doing in here, let me just go to the pickup and to the health. And let's make them three times bigger on every side. And now we have these huge boxes. When we hit play, we can see that we have this rocket launcher for example, we have five ammunition, we should the ground, we hurt ourselves. You can see that my life is down, my bullets are down. I want to reload. So now I have three bullets left, or actually ten Bullets and three left in total bullets. So now when I pick up this box, you can see that I have now five and my health when I go to the first aid kit also increases. So in this video we are going to be creating a health pickup and ammunition pickup. And we are going to have a lot of fun. So let's not waste anymore time and let's get started. Oh, okay, let's get started. The first thing I want to do is we're going to add our game assets. So in here I have a Health Box or the first eight box and the box. So drag them into our projects and to our game assets actually. And what I'm using is this right here from Sketchfab.com. It's for free, it's from thunder. And also this first aid kit from Theo Clark, also on Sketchfab. So with that said, let's go back in here and let's go ahead and go to the ammo box, to the source, to the ammo boxes again. And let's add this. Let's create First of all, an empty game object that we're going to reset the position of and we'll move it. Let's see, move it right about here. And let's start working on it from here. So back, we're going to call this the ammo pick up. And we're going to add this box as a child of the ammo pickup. And let's say but small, maybe we can make it around. First of all, let's go ahead and prefab unpack completely. Let's make this 0.5. on all sides. If you want to make it bigger, you can make it bigger, you can make it smaller, but let's go ahead and add the material. So duplicating material called ammo, Matt. And let's add it to the box and then let's go ahead and lock it in here. Because we are going to add the first of all, let's see the normal map. So fix that and the default material base color to the albedo, the height map. So to the height map, the, the, the metallic to the metallic. And now we have our box really, well. Let we can go ahead and adjust the smoothness. This will depend on you. You can adjust the height map, you can adjust the maybe the roughness to the detail mask. Nope, that doesn't change anything. You can adjust the height map also see how you want to change all of that. Nice. Also a nifty trick that you can use is to go to the normal map and move this up. So you can see this becomes grainy or move it down. It also becomes a grainy. But let's just keep it at maybe three. Let's see, 33. Looks good. Save all of that. What you can do with this ammo box is you actually need to move it down a bit. Move it down again. So what you can do is you can actually animate it to be rotating, just look like you can do with this gun. So it's fairly easy. But for now, let's just go ahead and remove the lock. And here go to the ammo pickup and let's add a sphere collider in here. So whereas it, whereas our spherical lighter, ok, so we are moving, Make sure that you always move the entire ammo pickup, not just the ammo box. So down here. So it's stilted. Let's put this back and move the entire box down like this. Let's make it a bit smaller, so it's just the right size. And I think that's it. Make it a bit bigger, make sure it's triggered. Now let's add the HealthKit. So back in our game assets, back in our first aid kit source, this is our first aid kit. Let's go ahead and create an empty game object that will reset the position of double-click on. And we'll call this the health pickup. Hit enter. We'll add the first a2 it, and then we'll move this entire object a bit further. Okay, So not that for seriously. Okay, so in here, let's see the little box. So we have our little box and just like we did, we duplicate the material, we locked up here. You also have the textures. So let's add the first aid and here the, the normal map and here the, what else do we have increased in metallic? This is the or the roughness. Let's change. Oh, and don't forget to go and add the actual material to this so you can change it and actually see what's going on. So let's maybe remove this, put it to None, and fix the normal map. What else do we have? The r, This is the roughness. I'm not sure where we are adding this. So this is the detailed mask. So we can increase the normal just a little bit, and that looks good enough for me. And have pickup. Let's stop the lock. The first a box is right here, so let's make it one by one by one. And let's pack the prefab completely because we don't want it. And we can also go ahead and add a sphere collider to this. You can move it up if you want and centered around, meditate but bigger. So the player actually feels as if he needs to touch it. So he touches it. And there we go. So now we have our ammo box, we have our health good. Next thing we need to do is we're going to create a script for both of these. So back in our scripts, let's go ahead and create a health backup script. So health. Pick up, hit enter. Make sure it's written correctly at the script to the health pickup. So now it's in here. Let's double-click. Let's open this up. And in here we are going to first of all create a public integer that will determine the amount of healing. So amount of healing and it will equal to five. Next thing we're going to do is we'll create an entrepreneur enter. So let's remove the start and update. We have done all of this before, so I think it would be very easy for you. So if other.com tag and we'll make sure that it's only the player that can interact with it. And in here we are going to get the other get component, the player health system. We'll close that. And in here we are going to call a method which is the heel player. And we are going to heal him by the amount of healing that we have in here. And then we are going to destroy the game object. So after we've picked up everything, we are going to destroy the game object. And now we are going to create a new player method, but not with you. So you are going to finish the heel player and method. So create a method that adds health to our player. Makes sure we never go over our max health. So this is very important. And finally, update the health bat to the Health Bar. So update the health Not bad bar. Well that said, pause the video right now and go do the challenge. Okay, welcome back. So let's copy the name. So we have at exactly the same and let's go into our whereas it so the player health system. And in here we are going to remove the update because we are not using it. Keep the code clean and fresh. And in here we're going to create a public void here player that takes in an integer that's called the heel amount. And down here we are going to get the current health. We are going to add to it the hill amount that we get from our health back. And then to not go over the max health, we are going to check if the current health gets greater than Ymax health, then we are going to go ahead and set the current health. So current has to be equal to the max health. So that way we never go over. And as a final step, of course, I told you that we need to update the Health Bar. So we're going to get the Health Bar. We are going to set the Health and we are going to give it a t. Current health. Was that done? Let's save that. Everything should be working fine. Go back in our game. Let's see the health dukkha. Amount of healing is five. So with that said, let's move this down a bit because I think it's too high. So put it in here. Let's go get roughed up a little bit. So what is the actual health of our player? It's ten. Let's make it 15 so we can actually make it more obvious had played. So our goal is to go below, okay, so we can use direct to do that. So two hits go, where's our health back? So we go into it. And of course we forgot to make it a trigger. So let's make it a trigger and move it up a bit. So it looks better. Had play. And now we hit ourselves once, twice. And let's go look for our health pack. So our Health Bucks, we pick it up and we can see that our health is, well, it increased by five points. Very nice. Now, let's continue on. The next step is to go ahead and add a script in here that is the ammo pickup. And if you're feeling up to the challenge, another challenge and that is video. Pause the video right now, or you can go ahead and continue with me that see who does it faster. So let's create a script. The ammo pickup hit enter, open up on its own. No worries. We wait for the ammo pickup. We drag it and put it on the pickup game object. We are going to move this down a bit, put it around here, double-click on the ammo pickup. And in here we are going to first of all, create the entrepreneur enter. So the entrepreneur enter. Let's see, we're going to create a condition and I'm going to copy all of this being faster than you. So we paste in here, but we are going to change a couple of things in here. So instead of the other getting the component, we are going to get the component only children. Why is that? Well, because system is on the children and that's where we are going to go ahead and add ammo. And we're not going to create a variable in this ammo pickups script because we want to have each and every gun add their own ammunition. For example, we can't make an ammo box that adds 300 rounds to a sniper. That would be illogical. So every gun in organ system will have his own pickup bullet amount. So in here we'll create another variable is going to be a public integer, and it's going to be called so integer. And then it's going to be called the pickup bullet amount. So pick cup bullet amount. So if you pause the video and you wanted to actually make the ammo pickup gives the amount of bullets. That's okay. No worries. But I'm going to tell you why. It's more logical to add it in our GUN system. So back in here, we are going to create the method that will before we reload or after we reload. Although that skip the reload and the real quality next to each other. So public void at ammo. And in here we are going to take the total bullets that we have. And we're simply going to add to them the pickup bullets amount. We are going to save that. Now back in our game. Wait for it to compile. Okay, great. Now let's go ahead and hit play. Oh, we forgot to do something. Let's go into our player and into our head. Guns pistol. The pistol will get, let's say 20 rounds. The rifle we'll get 100 rounds. The sniper gets five, and the rocket launcher gets too. Save all of that at play. And now we of course need to adjust a couple of things and our rocket launcher, his overpowered, we should. And now when we had the ammo box, we can see that we increase by one. So let's try this out again with a different weapon, makes sure that it works. So let's get the rifle. We shoot around a lot. So we have 90 now they are no, Don't give me 7171. When we pick up, we have 171 and we can continue on killing all of our enemies. Ok, great. With that done, we can go ahead and commit all of our changes. Save all at our commit all of that. With that Don, this is probably the end of this section. I hope you enjoyed this section. And the next one, we are giving much, much more life into organic because we're adding audio with our gunshots, with our player getting hurt, with our jumping and with everything will also going to be creating menus and actually turning our little experiment and Project in here into a real, actual game. With that said, I hope you enjoyed the video and I'll see you in the next one.
51. SECTION 9 - Adding Background Music: Welcome back, my favorite game developers. In this video, we are going to be adding some background music and it's going to be some scary music. Not only that, we went out of our weight to some extra curricular stuff. So now we have this background music, So our game no longer feels stale. It's actually a bit scary. And we also added animations to our ammo box and to our health back. So now we have background music and we have spinning ammunition boxes. Very nice. So let's not waste any more time and let's get started. Oh, okay, so the first thing we are going to do is we're going to talk about what the audio source is, what an audio listener is, and then we'll create an audio manager. So let's get started. First of all, let's talk about the audio source, and it's a representation of audio sources and 3D. So basically you can add an audio source to a game object. Then you will be able to playback in a 3D environment. And in order to play the 3D sound, you also need an audio listener. So they are very self-explanatory. So you can play a single audio clip using Play, Pause and Stop. We will get into that later on. You can also use the play clip at point and various other methods and properties. Next thing let's talk about the audio listener. So it acts like a microphone like device. It receives inputs from any given audio source in the scene and it can't play back. So usually the audio listener is attached to the main camera. So if we go into Unity, we go to the main camera. We can see that it has an audio listener on it. It doesn't have any properties on anything. It's just there to listen to any audio that we might want to provide it with. Okay, great. Now with that, understood, the next thing we're going to do is we're going to add some background music into our game. So first of all, let's go ahead and create an empty game object. And here that we'll call the Audio Manager jer. Great, and let's reset its position so we can see in here, so it's not somewhere far away. And then let's go into our assets and create a folder in here that we'll call audio. And in here we are going to be adding our music and sound effects. So let's right-click inside of audio and let's create a folder that will call the music and will add all of our some music that we'll have. And now let's go ahead and get our background music that I provided you in the resources. So this is the background music. I found it on a website that you can use to go ahead and add your own background music. So open game art.org, if you've never heard of it, is an amazing website where you can find tons and tons of music, art and all that you need for. Game development, there are a lot of things. So with that said, let's go and get our background music. So simply drag this over into Unity and let's put it inside of music. Wait for port, open this up and you can actually listen to it in the inspector. So this is our background music. It's kind of scary, kind of ambient. So this is what we're looking to do with our gain, with all the monsters and robots and so on. We want to create a scary environment. Okay, so ambient music, how do we add it to the background? Well, Well, it's extremely simple. We simply drag it into the hierarchy. And you'll see that this creates a object in here that has an audio source on it. So you can see that it has the audio clip of the ambient background music and the output is currently non, But we will fix this later on. You can adjust the priority so we will not delve deep into this, but all you need to know is that the priority of which music plays before which one and so on. So don't worry about that. You can adjust the volume and you can adjust author thinks we can also make it loop because this is very important. We don't want our music just to stop after the entire song has finished. So this is about two minutes and if it finishes, we don't want it to just stop. You want to keep looping and keep play on awake for this background music. So we wanted to play as soon as we start the game. Okay, now the next thing we're going to do is create a child of the Audio Manager. And we'll call this the background music. And later on we'll create also sound effects and the Audio Manager, and we'll take this ambient background music and we'll child it also to the background music. So now when we hit play, when we start the game, you can hear that there are music in the background. What truly makes things much more exciting. So now we walk around, we have this music that's very scary and monsters actually change their behaviors. You feel as if you are in some kind of scary game around you. Ok, so very nice. I hope you're hearing this. Let me just turn on. We use it up. Oh, scary, isn't it? Okay, great. Now we want a way to control our audio and we can do it directly from the audio source or we can create an audio mixer. So in order to create one, let's go to the window. Let's go to audio. And in here we can create an audio mixer. Barry, nice, so now we have a way to output our audio. And now in the mixer we can hit this person here. And let's go ahead and call this the main mixer. And now we should have this object and here, the main mixer, let's just put it inside of the audio file. And here. And now in here we can do a lot of things. So you can delve deeper if you want to go all in on audio in Unity, you can do that. But what we are going to do is we're going to create a group in here. And we're going to call it the background music. Now, in our audio source for the background music, we can go ahead and check the output and we can make it the background in music. So now what we can do in here, we can, for example, let's say if we're playing the game, we can hear the background music in here. Let's say it's a bit too loud for us. So what we can do is we can turn it down, OK, so maybe we need to be outside the game, so we turn it down to like say, 30 decibels. So now when we hit Play, now this, though, this might not be obvious from where you're sitting, but for me, I can hear that the music is much, much lower. And maybe we want to make it higher, maybe we want to make it lower. So it will depend on the music that we can even increase it. So now when we hit play, it will be even louder. Ok, So that done, it's time for your challenge. And your challenge is going to set up the background music. Now, you can get your own background music or use the one I provided you with. I'm not also a, my taste in music is not that good. So maybe you find that this music is really boring, and maybe you want some exciting music. So go ahead and find your own background music added to your game. It will add more flavor and more individual feel to it. And the next thing is add an audio mixer and play around with the volume and see what works for you. So with that said, with this little video done, let me go into our source string here and we're going to stage all of that may be we can actually not. We can ignore the ambient music, so ignore everything beneath the audio music because we don't want to save that big of a file. So hit OK, stage o and added background music. Commit that. And now, as long as we have a couple of seconds, let's go ahead and animate the box in here. So the ammo pickups, let's go ahead and animate it. So we'll create an animation, will go to the assets animations. And in here we'll create the pick up. Any mentions. Double-click and here, spinning. And it's going to be a very simple animation. So all we'll do is we are going to spin it every 1 second, so it will go like this. So minus 90 or minus 180. And then on the, or know what, let's move this to the 1 second mark. And on the 2 second mark will be back in our original position. So let's see if that works. Okay, so no, it's not working the way we wanted. And in here, let's make it minus 270, so 180 plus 90. Let's see if that works. Okay, so it's still spinning, it wants to go back. So in here we'll put it at minus 360. So now we will have this spinny spinning, spinning, spinning. And let's save this. Let's make it free smooth. So both tangent, let's make this linear. I mean, so now it keeps spinning and spinning and spinning will do the same for the health for HVAC. And I've got a little apple or attractable. They're gonna mock ups girls, total volume part reactor. Save that, hit play. And now we should see the animations working. So this is the box. We pick it up for ammo and this is too high, but we can still pick it up. Very good. Well done. I hope you enjoyed the video and the next one, we are going to be managing our audio even more. So with that said, I'll see you in the next one.
52. Managing Audio: Welcome back, my fellow game developers. In this video, we are going to start managing our audio. So now when we die, you can hear that the Audio stops. And what we are going to do is we're going to create an audio manager script and we'll learn about instances, and we'll use that in order to stop our game. When, I mean, stop our audio music background whenever we die, let's not waste any more time and let's get started. Okay, so let's start managing our audio. So what do I mean by managing our audio? Let's go into our player. Let's put it ten, let's keep it at ten so we can take a less hits. We had les, let's fire our rocket down here so we are almost dead. Hey robot, please kill me. Thank you. 12. So when we die, we can still hear the music and that's a problem. So what we want to do is we want to know that there are multiple things that will need to manage. But first of all, first thing we'll need to do is whenever we dive with actually want to stop the music. And for that we need to manage our audio. For that, we are going to have to create a script. So in here let's create an audio manager script. So we're going to call this the Audio Manager. And Visual Studio. I already know what it's going to do. So now let's add the audio manager into our audio manager, and let's open up audio manager. Now, what are we going to do in here? Well, we are going to create a instance of a class. So what is an instance of a class? Let me tell you all about it. What is an instance of a class? So it's a static variable, which means it's constant across all of our projects. It can be retrieved from any other class more easily and will be using it to avoid finding the object every time we want to play a song. So what we're going to do is we are going to stop the music from playing. So it's the background music that is on the Audio Manager. And how do we know that we died? Well, it's from the player, that player's health system. Okay, so you might tell me, Let's go ahead and find the object, easy, okay, you're right, but let's say we will be adding later on around 20 sound effects. What are you going to do? Are you going to go and find the Audio Manager every time that you want to stop a sound effect. Well, of course you can do that, but eventually it will take a toll on your program and on unity and your gambled start crashing. And it's actually harder to everytime type and fine game object of type and, and so on. So what we're going to do is we'll create an instance that will instantly get us our audio manager. So let's go ahead and do that. So in here we are going to create a static variable, so a public, of course, because we are using it across other classes. So it's a public. Static. So this means that it's, it stays the same across all of our projects. It doesn't change. It's of type audio manager. So it's the same type as the class and we'll call this the instance and status. You can call this anything you want, but it's usually better to call it instance. Now in here, let's remove the start and we are going to use something called the awake. So what's the difference between awake and start? Well, they are almost exactly the same, but the only difference is that awakes, awake starts just a little bit before start. So we are going to use awake. We can use start, but using awake is usually the smoother and better method for creating instances. And the instance does not need an a in here. So what we're going to do is we will simply call the instance and we'll tell it that it's equal to this. So what this is, this is the actual audio managers. So the variable instance is now this. It's the Audio Manager and you'll see how we can use it later on. For now, let's go ahead and create a public variable that's going to be of type audio source. And we're going to get, call it the background music. And we'll create a method in here that will stop the background music. So it's going to be a public void. Stop back. Ground the music. And what we're doing here is we'll simply going to get the background music and we're going to stop. So I recommend that you go through the audio source documentation and you look at all the different things that we can use. And one of them stop which? Well, it stops the audio music when we die. And now we need to call it somewhere. And it's going to be part of your challenge. Your challenge is going to be to make the music stop when player dice, so called the method from the player health when the player dies and use the instance that we've just created. So if you want to test yourself out and see how that works, go ahead and do that, or you can wait for a small hit that I'm about to give you. The hint is use audio manager dot instance, and you'll be able to access anything you want from the Audio Manager that is public with that said, pause the video right now and go to the challenge. Okay, welcome back. So in here let's add the background music. So the background music, save that. And now let's go into our player health. So whereas our player health, player health system. Whereas so in the player health system in here, whereas it, when we die, when we die, we want to respond, but for we do that, let's go ahead and get the old yo manager. Dot instance, dot, stop. Where does it stop? Background. Stop background music. And let's save that. And it's okay. So no worries. All of this is working. Let me just maybe go to the game manager and make the respond just a little bit longer so we can actually here. So until the player dies, let's make it three. So three seconds hit play. Or Hong, wait for the script. Now we hit play. And the audacious claim, let me turn this up. So the audio is playing. We should the ground once, twice, it stops, and then we start again and the music starts again. So with that done, I hope you enjoy it. Let me just go and commit all of that. Stage o. It created a audio manager, the managers music, comment, all of that. And in the next video, we are going to start adding sound effects. What that done, I hope you enjoy it and I'll see you in the next one.
53. Adding Sound Effects: Welcome back, my favorite game developers. In this video we've added not only background music, but now when we shoot, we can hear that we have the pistol shots. And when the robot shoots arrows, you can hear the sounds that he makes. And not only that when we shoot something metal, you can hear the little metal tick. We also add shooting to our shooting sounds to our rifle. We've adding, added a explosion. Okay. We've added all of that and also a sniper shot. Very cool. So let's not waste any more time and let's get started. Okay, so let's start adding some sound effects to our game. First thing we're going to do as an audio, we are going to create a folder in here that we're going to call the S f x as f x. And inside of you are going to create another folder that we are going to call the SR effects from unity, because in the next video will be playing the sound effects from our code. So in here, let's open up and let's go into the resources and copy all of these. And let's drag them into our space affects from Unity and wait for them to import OPP canines. So here you can here a couple of sounds that I've provided you with. So let's open this up. So this is the metal sound, This is the enemy blood. Okay, so it looks nice, but see if the explosion. Ok, very cool. So now how are we going to be adding all of these? We are going to first of all, learn how we can add sound effects to things without using code. So let's go. First of all, we are going to start adding the bullets. I'll show you how the pistol shot works. So, so this is the pistol. Let's go into our prefabs and let's go into our bullets. And where? Our pistol bullet, this is our pistol bullet. Let's lock it in place and let's go back to the sound effects from Unity and will drag the pistol shot into our right bullet right here. And make sure that you turn off the loop and keep the play on awake. So now whenever the bullet is created, we will hear the gunshot. And then when the steroid, the audio source with the postal, should go, let's test this out and see if it actually works. So let's save that. So now let's see if that works. When we hit play. Let's choose the pistol. This does not have any sound. We choose the pistol when we start shooting. We have shooting sounds. How cool is that? So now we can shoot, we can kill and weekend actually adhere, are pistol shoot. Very nice. Now the next step is to go ahead and issue you a challenge. And your challenge is to add the other sound effects that I've provided you with. So add the sound effects for the rest of our bullets and other things that we have. And make sure they play on Awake and of course turn off looping. Well, that said, pause the video right now and go at your sound effects. Oh, welcome back. So what are we going to add in here? So first of all, let's go and look at our bullets. Let's unlock this. And let's go to the bullet which is the sniper back in our sound effects sniper shot in here. So it's not allowing me, let's add an audio source. It's getting on my nerves. So audio source. And now we can add our snapshotting here, make sure it's play on Awake and it's not looping. Next thing we'll do, Let's go to bullet. Let's add a C bullet. So this will be the rocket launcher audio source again. And we're going to add the, where's our sound effects? Let's add the rocket, that's this rocket being launched. So yes, it should be. Hopefully we put it in here. Next thing we're going to add, what else should we? We have the green grenade and this will be the, the one the robot throws. So everything in here is kind of weird what's happening? And let's go into our sound effects and the bulleted enemy, where is it? Running, rocket being, robot shooting, and that's added and here, save that. What else do we have the rifle shot, which is very important. So Bullets, rifle shot. And let's add an audio source again, sound effects, rifle shot. The guy not add an audio source. So rifle shot and what else do we have? The walking and the running we'll do later on. So sniper, we did this, we did Robert shot, we did rifle, we did still did explosion and the enemy blood and bullet hitting metal. So the way we add the bullet hitting metal will go into our prefabs and pull the effects. And the bullet impacts of this is it, we will go and add the bulleted. So add an audio source. Now this will be barely, we will barely be able to hear it, but it will add just a little bit of effect in the background. And another effect will be the flesh being hit. So let's go ahead and add an audio source to that also. And we'll add the enemy blood in here. So what else do we have? We have the explosion, nice. So the effect of the big explosion is going to be the in here explosion. Very nice. So all of them were play on awake. I hope I did not notice, to be honest. So let's go back, make sure so DC bullet play on Awake, no looping, looping plan awake. And everything should be working fine. Let's hit play and see how this all works. So when we shoot, nice, so now we can hear how cool this time series. How cool is that? So the sniper, Nice, very nice. The pistol. And you can hear the blood and if we had the metal that's reload, we hit the metal. Is that livable? Can we hit the water link doesn't have an effect. Can you hear it? You can hear a small pink in the background. Very nice. And the rifle up so we need to reload. Okay, nice. What else do we have? So the rocket, everything is working. Is there anything that's all we need to pass the robot who we've already killed him. So let's test this robot out. No, please don't die. Oh, okay, nice. So because he's actually every time the bullet is hitting us, he's shooting again. So the voices getting over the voice and so on. Maybe we'll deal with that later on. Now the next thing we'll do is we'll actually add steps to our player. To do that, let's go into our sound effects in here. And let's get the walking and drag it into the hierarchy. And you need to do this before anything else to create the audio source. And again, you'll need to take the running and put it in here. And then let's open up the player. And let's put both of these under the player. So now they are children of our player. And let's go into the player and into the animations. And we are going to be playing these from here. How are we going to do that? Well, as I've told you, animations can be used for many different things. One of them moving to position, one of them may be scaling up and down. And a very important part of the animations that we can actually adjust anything that we want. So we can even adjust the maximum health, we can adjust the slide speed and so on. So what we're going to do is we're going to be turning on and off the walking and running. So in here we are going to hit the record button. And when we're all done, we are going to be turning both of these off. So when we are idle, both of these are off. We will stop recording. So they will stay off as long as we are idle. When we walk, we are going to start recording. And when we're walking, we are turning this one on and we are turning the running off. Very nice. So let's save that and save this. And then when we are walking, running, running, running, okay, so we choose both of these. Both of them should be. First of all, we're not even recording. So head to record. The running is on and the walking is. So make sure that you can actually see it in here so that the walking is on. The walking, walking is off, the running is on. When we're running into walking, the walking is on, the running is off and an idle. Both of them are off. We save all of that. We had play. Let's try this out and see if it works. So now we have the postorder, we should, if we start walking so we can hear. But there's something definitely not right. So the problem I can see in here that when we hit play, I see that when we are walking, everything is good. When we're turning, we are going back to the idle when we're turning. So the velocity is just getting lower, we need to change the threshold. And when we're running, the problem is that we are going back to walking sometimes, so we also need to change the threshold. Ok, welcome back. So I did a lot of experimenting. Of course, this will depend on your game. Now when we stand idle, we don't have anything. I changed the threshold in here to be 0.3 to start walking. And if it goes under 0.01. We will stop working and start running. It needs to be over 0.68. And to stop running and start walking, we have put it to 0.42. So now when we walk, you can hear the footsteps when we hit shift. So he is too far away and this is a problem that we are going to have to address later on. So we need to change the maximum distance of our re-cast for our different weapons. Okay, so I'm not able to ship the Troodon. Okay, great. Now that we got rid of all of our enemies, in the next video, we are going to be playing sound effects from our code. With that done, I hope you enjoyed the video and I'll see you in the next one.
54. Playing Audio With Code: Welcome back, my favorite game developers. In this video, we've added a couple of sound effects. So now we have a sound whenever we change a weapon, we have a sound when we jump. And we also have a sound when we get hit. And they sound when we die. Very nice. So let's not waste any more time and let's get started. Oh, okay, so first thing we're going to do is we'll create a folder that will call the ASA facts from code. And let's go into the resources. And let's get all of these and drag them into the aspects from the code. Double-clicking here. So we have the ammo pickup. Let's just make this smaller so we can see them easily. The health pickup jump player that getting hit. And then the spot Spiderman web Should we are going to use. And the bones section. So with that done, let's add the audio into our code and start calling them from the code. So the first thing that we need to do is we need to actually grab all of these. And in the Audio Manager, create a new child that's coming to be called the effects. And in here we're going to drag all of these and put them under the ESA facts. And it's not going to let us sodas drag them first of all in here. And then we drag them under the ESA facts. Great, so now we have all of them in here, so we can start to laying them in our code. Now the first thing we need to do is we need to go into our game audio manager. I mean, and in here we're going to create an array. So a public audio source. And this is how we create an array, and we'll call this the asset axes. Great, let me just talk about arrays a little bit. So arrays, what are the solar arrays along store multiple objects of the same type in a single variable, just like lists. So we create an array, we give it a type, we give it a name, and we give it a value. And just like lists, they go from 0 to one to two to three and so on. But why are we using arrays instead of lists? Now, first of all, we could have used lists, but lists, you usually are less robust as arrays are. And whenever we have static variables that we want to use, so arrays will not change well preferably they won't change because we want to keep them, keep them as they are. Lists are very dynamic. You can remove things, putting things. That's why we use lists when we have arrays. We usually use them whenever we have static objects and they will stay there. Forever. So we are going to use this array for our audio sources in here. And we are going to add all of these arrays. So let's continue on so that the game manager or Kiss hug, let's remove this from here and go to the audio manager. So n here we are going to create the audio source array. Okay, great, that done. Let's go back in here. And now we should have this list end here. Let's simply choose all of these, okay, so AudioManager locked in place, choose all of these and drag them into the ASA facts. And now we have this long list that hopefully will not change. Now we are going to create a method in here that will allow us to play the sound effects. Let's just remove the update. We are not using it. So in here will create a public void. And we'll call this the play as effects. And in here we are going to give it a certain integer, which is going to be the ASA fax number. And using this as a fax number, we are going to go ahead into the ASA faxes. First of all, we are going to choose this as a fax number. So Y is o, so it's, it's not a teacher. So integer now as a fax number. And when, when we want to play any sound effect number, we are going to first of all, stop it. And why are we doing this? Well, because we want to, maybe if we, for example, we are going to be picking up a HealthKit. So whenever we pick up a HealthKit, let's say there is a another health, HealthKit not next to it. We don't want to have these two play at the same time and go over each other. We want to stop whatever is playing and then play it again. So this is just a simple example. This is a very standard thing to do. So to stop a sound effect and then to play the same sound effect when we do it or when we use it. So let's save that. Now what we're going to do will have to go into every single place where we are going to need the sound effect. And we're going to play the sound effect and give it the number. So I'm just going to show you maybe a couple of ones and then you will continue on with a challenge. So let's say first of all, we have the weapons reload. So let's see the weapons reload index 0. We go And here we go to the first advance Hildegard manager will go into the system. We look for the reload when we trigger the animation, we access the audio manager and we get the instance, and we play a sound effect which has the 0 index on it. So now back in our game, let's increase the volume in here. Ok, so it's good when we play our game. So you can see to do that. And so we choose all of these and let's go OK. So this is locked. Choose all of these, and let's just turn off. Play on awake so ten don't play as soon as they wake up. So hit play. So now whenever we reload, we can hear the sound effect. Very nice. Now let's go ahead and try the next one. So let's close all of these in the Audio Manager. We have the ammo pickup. So an hour whereas it the ammunition pickup. Ammo pickups. First one. And in here we are going to also go to the audio manager. We are going to access the instance. We are going to play the sound effects, play as effects. And it's going to be the one, let's say that it should work. We go back into our game play. And so let's go and where is our we pick up. Ok, so that's working. Now. It's time for your challenge and it's going to be super simple. Find all the appropriate places to play the sound effects provided and well, played them well that done. Pause the video right now and go to the challenge. Or we can even start a race where I will raise you and will most tried to see who can put all the sound effects first. So let's go. So back in Unity in here, let's see, we want to add the health pickups, so it's the element two. Back in here. We go to the layer, whereas the health pickup, health pickup, health become okay. So I'm going to use a little dirty trick that I've learned and I'm going to tell you about it. So let's go ahead and add it in here to save that next thing, element three, the jumping. So our player movement, whereas it was player, where do we jump, jump, jump, jump in here. So ready to jump? When we hit space, we start jumping. So in here we base, this is the three, was, three was malls. If that back in here, it was 33. So player, that, player, that is the force in the health system when we die, if our current health. So in here we play this for four, save that back in here, so they're getting hit the five, whereas it worse does player get hit. So the player gets hit when we take damage. So in here we play the five. Ok. Next thing, the Spiderman, keep this ok. So the element six or whatever you have at the Spiderman web shoot, just don't use it for now. We'll use later on the weapons equipped is the seven. So where do we put where did we put it in the change? So when we weapons switch. So in here, weapons switch w, What switch? This weapon pick-up weapons switch system. We add gone, we switched guns. So where do we switched guns? So in here we are going to add the seven. Okay, great, so save that. Are you done? I'm done. So let's go back into our game. Let's at play. And now when we hit tab here, just little sound engineer. What else should we add? Well, should we try actually, let's try the health pickup. Okay, great. And when we join, we can hear it. What else do we have? The ammo pickup health pickup jump layer that so let's try to dodge a robot. Oh, okay, nice. So now we have all of our sound effects playing. I hope you enjoyed the video. And the next one, we are going to create a title menu, which will, well, it will actually turn our gain from just a simple project to an actual, actual gain. Would also learn about sin management and all of that well, will actually delve deeper into seen management. Well, that said, I hope you enjoyed the video. Make sure to stage all of your files except the ones which are under the audio. So we're going to ignore everything under assets audio. Okay, so we don't want to save every time the audio that we have stage all of that and now, wait for it. So no, maybe we should have ignored some of these. So let me just onstage and ignore everything under, why did it not ignore everything on the audience, so ignore everything beneath audio. Okay, so now, okay, so that didn't work first time. Added affects feeling code for that. And I'll see you in the next video to create some really nice-looking title mania.
55. Creating Tile Menu: Welcome back, my fellow game developers. In this video, we are going to be creating a title menu. So now when we hit play, we can see that we have multiple options. So we can quit the game, which doesn't actually quit the game, but it does print something to the console. That means that works. We can go to the options so we can change the value, we can go back and we can finally hit Play to start our gain and start shooting some monsters. If we can actually hit them. Please hit, please died. Okay, mice. So with that done, let's not waste any more time and let's get started. Oh, okay, so let's get started with our main menu. First thing we are going to do is go into our scenes and we're going to create a new scene. And here we're going to call it the main menu. And we are going to double-click on it and open this up. So as you can see, there is absolutely nothing here. Now the next thing we're going to do is we're going to create a UI canvas in here. So we'll go to you. I will drop down and find the canvas. We'll call this the main Menu canvas. And we can keep it as there's no words, there will be nothing can hear almost. Next thing we'll do is we'll go to your eye and let's go ahead and import the font that I've provided you and the resources. So drag it in here and it will upload and then go to Window, text mesh pro and font acid generator. And then provided with the cyber punk regular and generate the font and save it in our yes, you are. Sdf, save there. And now we have a cyber punk font to work with. Okay, great. Now that we have that, next thing we'll need to do is we'll need to go into our scale, I mean into our Canvas. Double-click on that, go to the 2D mode, and now we can start changing things in here. So first thing we'll do is we are going to make the canvas scaler to scale screen size and make sure that it's 1920 by 1080. So it's the standard and our game and here also should be 1920 by then 80. Okay, great. Now what are we going to do? First thing we're going to do is we'll add a text in here. So let's right-click go to your eye and add a text mesh pro, and let's move it up. And here, let's hold one side and make it a lot bigger. And now what we are going to center it on these two, so the alignment on the horizontal and the vertical. And then we are going to drag the cyber bunk font into the font asset on our text. And let's go ahead and put it onto auto size. Let's make it bold. And now you can see that we can start writing in here. So let's right. Cyber spy, and that's it. So we are going to of course make it bigger. Let's make this bigger. You know what, let's remove to size and let's adjust on our own. So let's make this one huge letterbox. And as you can see, there are a couple of things that we can change in here. We are going to, let's see. So basically in here, it all depends on your preference, how we you want to make it look. You don't have to make it like me at all. So it's all based on you. So I'm going to change the color may be make this yellow and we are going to maybe add a bit of an outline and underlay. So let us see the outline. We can increase the thickness in here and we can keep it black. So I like black. We are going to increase the size in here and increase the swan so it looks big, a lot bigger. Canines. We are also going to add a bit of underlay. So this is basically like a shadow. So in here we'll make the shadow the color black and will increase the transparency. We are then going to move the x to one. We are going to move the Y2 minus1. And let's go ahead and also make the, let's keep everything else 0 and baby, just increase the softness. Let's see. So yeah, maybe make it 0.3. yeah, that looks good enough. So now we have this big, huge cyberspace die on our screen, which is very nice. Now the next thing we want to do is we want to make the background a lot different because currently it's just this weird Skybox in here. So what we are going to do is I want you to go into the Unity's Asset Store and download the galaxy box 2 added to your assets. And these are really nice-looking sky boxes. So when we go back, you will able to see in your package manager in my assets, this galaxy box right here. So just hit Import and wait for it to import het important year. Okay, so it seems to have finished importing. Let's close the Package Manager in here and our assets, we will have the galaxy box. Let's drag it into the game assets. And from our game assets, we will find the galaxy box and we can go to the resources and you can find here all the sky boxes that we have that's opened it up and our view of the project in here. So you can see if we have multiple sky boxes. So choose this one, for example, and drag it into the scene. Or maybe you want to use this one, or maybe you want to use. So I think this one looks the bust and I'm going to use it. So let's see cyberspace guy, what else should we add? Well, we need the 2087 in here. So let's go ahead and add another text, mush Pro. It doesn't have to be taxed much pro, but we'll add it in here. We'll write the 2087. And let's just make it like this on all sides and make it bold and increase the size. Of course. We'll also maybe add a bit of spacing. So we'll add a bit of spacing that's all down this and make it bigger and more spacing. So this is how I remember the game's logo looking nice. So just like that, let's look at that. Seems kind of good. I think so. Bolden off. Let's increase the font size even more. And make this bigger. Increase the font size even more. So, know that stupid. I feel. Let's change the name in here to the title. And maybe make this the let's see, maybe we can make it Italica, but so yeah, kind of looks good. So that's good enough. Next thing we're going to do is we'll add a couple of buttons in here. So the first thing we're going to do is we'll go to you. I will add a bottom, will make it a bigger. We'll put it in here. And let's go down to the bottom and just remove the text for now. Will create, will duplicate actually the title tags. So we'll duplicate it. And we're going to use this to create a, another play button. And let's go ahead and make it a lot smaller. So we're going to reduce the size of this. And what we're going to do is we'll change this to the late text. And let's go ahead and show that to our button. And when it's a child of the button, let's hit in here, hold down Alt and clicking here. So now it should, well, it should have child to it, but it hasn't. So well, it should have taken the shape but it hasn't. So let's just, just our button in here. Let's make the background completely black. And we're actually going to go ahead and you know what? Let's remove the source image. We will remove the source image completely. And in here we are going to change the color, so we'll make the normal color completely transparent. We are going to make the highlighted Carl color completely black, but just a little bit transparent. So around 70. And we'll adjust as this later on. The press will be completely black and even more darker. So maybe 120. And let's hit play and just look and see how that feels. So now we have this nice-looking title with these nice numbers. So if we hover over the play, you can see that there is the highlighted color. And when we press it, you can see that it's the pressed color, so it's a bit darker and we're finally, it goes back to its original color. Very nice. But I want to change this abuts or the play. I think I'll make it all in caps. And let's increase the size of our button. Maybe move it up just a little bit. And we, and let's go into the text and make sure that it's in the upper, not in the middle. So because of the font, of the way the font actually looks. So now we have the Play button with the, let's call this the Play button, play button. And let's go ahead and duplicate this and make the options button. So this would be the options button. And let's move it down under here. So this becomes the, Lets go to the text and this will be the options. Maybe we should make it all in caps. So options, very nice. We are going to make this bigger. And we're going to change this from Playtex to just plain text and inhere also because the tax changes based on the button. So now we have the options a bit outside. So let's anchor this to the button and actually change the size of the button. So we'll make a TA big in here, just like that movie day, but move the play button and we'll duplicate this again. And we're going to make this the Quit button. So Quit button. And let's move down the Quit button and change the, Whereas it so o, so the text would become the quiet. So the queue looks ugly. Very ugly. But let's not worry about that. Maybe we can make this Play button a bit bigger and increase the font and maybe change this also. To increase the Play button font, make it bigger. So at rivals the Options, and we also changed the text on the quit. So we're increased size. Okay, nice. So now let's save that when we go into our play mode. Nice. Now we have multiple options. Did play the, play the options and the Quit button. Very nice. Now let's go ahead and start adding a bit of scripts. But before we do that, I just wanted to do one more thing. In the main menu. Let's go ahead and right-click. And here create an empty game object. And we'll call this the main menu. It's going to be an object that has all of the Main Menu objects inside of it. So now they are part of one single object and we can move it around, scaling up, scaling down depending on how you want your game to look. Okay, great. Now, before we continue on, just let me do one more thing. Will duplicate this, and this will be our options menu. And let's turn off the main menu, the options menu. Well, it's going to have a bit of changes. So for example, the Play button will no longer be with us. So we're going to go ahead and deleted. We are going to change the Quit button to the Back button. And we're going to change the tax of course to say back. So this will be the place where we change options. Let's go ahead and make this a lot smaller. I'm not locking. The back button shouldn't be that big and will make it smaller. And here also, so the entire botanists smaller. The options button on. Let's just move out the text and then we'll delete the options button. So we're just going to keep the text in here. We'll move it up a bit. And we can also increase the size and make it a bit bigger. Nope, that's too big. So go back to a smaller option. Let me just look at, okay, so this size and we'll move it a bit to the left. And the next thing we're going to do is in here we're going to add some kind of sliders. So let's see how to add. A slider will right-click and options go to the UI. And in here we should have this option of a slider. So where does our slider? So we'll call this the volume slider. And let's move it up in here. Let's make it a lot bigger. So we'll scale it up, we'll move it in here. And if we open this up, we can see that we have the background, the fill area, and the handle slide area. Yep, it's called this handle slide area. So we'll change the background color to be completely black. So now we can see that we have the option in our play mode to move the slider up and down. And we're going to change the fill area. And we are going to open this up the Fill, it has a certain color that let's choose the yellow one here. So now when we hit play, when we tried to add this, we can see that we have a very nice color. So this is very well done. The colors are very nice sorts flag just like the outline and yellow just like the color of the words. And then let's just take this handle area and just remove it. So now when we hit play, we only have the slider and nothing on it. Let's do one more thing in here. Let's just call this all up and let's duplicate the text of the options. And this will be the volume text. And we'll just name it in here. Volume and hopes. And let's just move this text down here. Let's make it a lot smaller and will also make the entire text a lot smaller, just like that. Now what we, maybe we can even make it smaller than that. Too big. So volume, put it in here, make it a lot smaller. That's just move it in new. Move it to the middle, and just adjust this at your own leisure. You don't need to make it just like me. You, if you have a better vision of what your options menu looks like, go ahead and do that. I encourage you. So now when we hit play, Let's look at our options. Okay, very nice. So options, volume, you can adjust it and then you can go back. Very nice. Now it's time to start adding a bit of scripts. So let's go into our scripts. The most fun part is creating the script. We're going to call this the main manuscript. Hit Enter. Visual Studio will open up automatically. I already know this book. So now that we have the main menu, drag it into the main menu. Let's turn off the options for now, turn on the main menu, and let's go ahead and start scripting. Now what we're going to do and our main manuscript. Is we're going to give each button some kind of action to do. So. First of all, let's remove all of this. And what is our button going to do? So first of all, the Play button, we'll start our playground games so we need to add it. And so we need to have some kind of seen management. And because we need sin management, of course we are going to go to the build settings. And in here, let's go ahead and add our main menu above our playground. Okay, nice. So now it's inside the built index. Let's go back and here let's add the namespace of the humanity engine, not seen Management. And now let's go ahead and create the method for our plaguing. So it's going to be a public void. Play again. And in here we are going to call arsine manager who we are going to load a certain scene. And the way we'll load it. So we don't want to specifically tell it to load the one. Maybe we have something different. Maybe the person goes back and I don't know, there are a lot of things that happened, but for now, we'll simply going to tell it that it's the scene. Nope. It's the scene manager. Dot, get active seen dot. And It's this build index. And we are going to increase by one, so it will immediately go to the next scene. So how are we actually going to tell this button that it needs to actually use this method. So let's save that back in our game. If we open up the main menu, go to the Play button down here you can see that we have the onclick options. And if we hit this little plus button, you can see that it requires an option or a object. I mean, and we can actually give to it the entire main menu. And this will give it the script that we have on our main menu. Now we can choose here the NOR function. If we click it, we have the option to go to the main menu. And in here we can choose the array gain. So now when we have this one, we can save our gain. We can hit play. And you'll see that when we press the play button. Oh, okay. He hoped that that was scary. So you can see that we are now in our GameScene and here we can shoot and everything seems to be working fond, very nice. Now the next thing we're going to do is we will go and create the Quit button. So we'll create a public void who would gain. And in here we are going to go ahead and call the application and we are going to quit. But because we still haven't built our game, this will not be working. So to make sure that our Quit button works, we are going to call the debug dot log and we're going to print our skin console. I mean, that we've quit the gain. So when you do create your game and when you do bolted the application not quit well work but for now it won't. So let's save that. And One last thing we want to create also the, a way for us to go from the main menu to the options when we click it. So now when we play our game, you can see that when we click the Options, nothing happens when we click the equipped also nothing happens, but that will be your problem to solve later on. So how are we going to transition from the main menu to the options? Well, if we go into our main menu in here and actually go to the Options button down here. We can also add something to do on the onclick. And the way we move from the options to the main, I mean from the main menu options, we can actually go in here. We can give it the options menu. And we can tell it that what it needs to do is to go to the game object and set the active Boolean. And it can set it to true. So now when we hit play, we can see that when we had the options button, something above it comes on and that's the options menu. So what else we need to do is we need to add another function on the onclick, and we need to give it the main menu and go to the functions game object and set the active boolean to be false. We save that. And now when we hit play, we can see that we can choose the options button and it goes to the options menu where we can adjust the volume and we have this back in here. So now the next thing that we'll need to do is we'll need to issue you a challenge. Your challenge is going to be to finish the buttons. So finish the onclick 40 Quit button, makes sure it gets pressed. And finished the back button on the Options menu to go back to the main menu. So with that said, pause the video right now and go do the challenge. Okay, welcome back. So let's go to the Quit button in here. We're going to give it the main menu. We are going to access the main manuscript and we are going to quit our game. And in our options menu, let's make this bigger. And our Back button, we are going to add two methods in here. We're going to add the options and we're going to go to the game objects at the act of bull to be false. And the main menu for a set will go to the game. Objects will set the active bool to be false. Let's save that. Let's hit play. So now when we hit the Quit button, we can see that we can quit the game. We can see it in the console. If we had the options button, we go to our volume, we can adjust it. Now when we hit back, we go back to the play mode. We can go back to the Options adjusted volume again. So this doesn't actually do anything, it's just for static so we can have a bit of change. Now we go back. Now when we hit play, it takes a bit of wild, but our game loads and we can shoot and everything works perfectly fine. Now this video is already too long, but, you know, creating UI canvas is actually a long process. So what else we can add in here when we hit the Play, you can add a object. Or maybe, maybe you want to add the monster that we have. Maybe you want to add the player holding a certain gone. Maybe you want to just add the gun and make it look a lot nicer. But for now, this is the end of the video. In the next video, we are going to be creating a pause menu. With that said, I hope you enjoy it, makes sure to commit all your changes and I'll see you in the next.
56. Creating a Pause Menu: Welcome back, my favorite game developers. And in this video we are going to create a pause menu. So we have our game, we should our rockets, we hit escape, we can quit. Our game doesn't quit. It only prints something to our console. When we hit the main menu, we go back to our main menu. We then can go back to the play mode and everything works completely fine with that said, let's not waste any more time and let's get started before the robot kills us. Oh, okay, so first thing we're going to do, as we'll go into our Canvas, will radically can here will go to the y, and we are going to add a panel. This panel will allow us to add a like a background color was a little bit of a transparent color that will make us feel as if we are, yep, now we are indeed pause menu and this is where we are going to hold everything. So we'll change the passband. We'll change the name to the paws panel. Great. Now next thing we're going to do in here, we are going to add a button inside of the spouse. Panel. Two will go to your I add a button and you already know how to do all of this. We've learned those, so I'm going to go just a little bit faster. And in here we'll delete the text. Of course, we will add another text in here, so we'll go to our text mesh pro. This will be from our cyber punk font that we've created. Let's make it bigger. Let's go ahead and zoom in a little bit so we can see what's going on. Will change the button that let's remove the source image completely. Remove the source image completely. And we are going to change the color to completely black. The normal color will be completely black. It's going to be transparent. So we'll keep it at around 150. The highlighted color will be completely black, it will be about 58, and the pressed color will be completely black and around half way there. Then we are going to get our text mesh probes are going to anchor it to the button. So we're going to go to the text, hitting here, hold down Alt, clicking this, and now we have an anchored. Now let's go and just our texts. So this will be the main menu button. So this will allow us to go back to the main menu, will make it bold. We are going to of course, increase it in size, but first of all, let's hold down this, make it bigger. And actually this will be completely transparent, Just like we all maybe just a little bit parents. So we know that it's a button when we hit the pause. And we're going to put it in the center alignment and the Mendel may get much bigger. So yep, that way, upper, maybe a bit longer. Okay, so in the middle, we're going to change the color to completely yellow, just like we did previously. And the underlay still the same, the outline is still the same. But why why not make it even bigger? So increase the size. Note that the text, the button, yep, so now we have the main menu button. Let's go ahead and duplicate this. And we'll create the Quit button. So this will be the Quit. Quit. And we'll make the smaller. Yep, just like that. And maybe even decrease the size of our text a little bit. So right about there. And finally, let's go ahead and duplicate the text in here. Move it outside. And we are going to move it up. And we'll call this the pause menu. We're going to make it way bigger and we're going to increase the size in here. So all down, hold down. Alt makes bigger O'Kane R. So this will be our pause menu that we've created very fast. Next thing we're going to do is we'll create will start adding behavior. So we'll go to Scripts. Right-click create, a C-sharp script that is the pause menu. Now, we could have done this in the UI controller, but it's better to go ahead and create its own script. We're going to add it to the Canvas Controller. We're going to go to the Canvas controller and let's go ahead and open up the pause menu script. Great. Now what are we going to do in here? First of all, we need to get a reference to our post screen. So create a public. It's going to be a game object and it's going to be the pause screen UI. And now what we are going to do is we'll just remove this statement, update. We won't be needing them. Maybe we will, later on, maybe we will use the update. So for now let's go ahead and create the void. This will be the pause button. Oh my god, what does, what is that? So pause. That autocomplete was totally out of bounds. So now what are we going to do in here? First, we are going to get our post screen UI, and we are simply going to set the active to be troop tree. We're going to set it to be true. So now we turn on the panel and everything under it. Then let's go ahead and copy this and we'll create a resume method. So we're going to resume the game and we are going to set it back to false. Great, now how are we going to do this? Well, we'll need to create the updates that we've just deleted. And in here we are going to take a certain input. So if we had an input with the get key down and it's going to have the key code of the escape button. So usually whenever you want to pause, you can use the escape button, you can use the front one. It doesn't matter. Now, what we want to do is we want to use the same key to go out of our game and then into our game. So in order to do that, first of all, we need to create a variable in here that will check if our game is paused. So first of all, it's going to be public. It's going to be static because we want it to be true, not true. We want it to be the same everywhere. We're going to make it a bool of course, and it's going to be the game is. Post and it's going to be equal to force at the beginning. So after we've had the key button, we're going to check if the game dot paused is true. That means that we are paused than the escape will be resuming the game. And else, if we're not paused, then the game is going. I mean, the escape is going to pause the game. So pause, Why don't I have the pause? Now we have the pulse. And now whenever we pause the game, the game is paused will be equal to true, will be set to true. And when it's not paused or when we resume, the game is paused will be set to false. So now we have this variable which is the game paused. If it's true when we hit the escape key, then we are going to resume because we are in the pause menu. If we're not paused, that means that when we hit the escape key, we are going to pause the game. Let's go ahead and test this out in our game. So let's hit play. Okay, we didn't reference the canvas, the panel. Stop that. We need to go ahead and reference. So in the canvas, give it the boss panel, let's save that. Now back in our game, this should be okay. Why is it not that we not save this? We made it public. We have at false saved. Maybe we should go ahead and set this to be inactive as soon as we start. So now we had play. We should without sniper, he big monster comes along. If we had the escape Q, we go to the pause menu. Very nice, but as you can see, we can still play our game which is not good at all. So in order to change this, we need to first of all, go into our pause menu in here. And we are going to go to the time. We are going to access the timescale. And we are going to set it to be 0 F When we start pausing. And then when we stop posing or when we resume, then we are going to set it back to one F. So now when we pause the game, the game should completely stop moving around us. Let's go ahead and test this. So back in here, who we hit play. We have our rocket launcher, we have our sniper, so we zoom in, we should, when we hit the escape key, we can see that we are on the main menu and the game around us stops. But if I tell you something, we can still shoot and our game, and that's because our cursor hasn't actually been locked. So again, back in the past, we are going to go ahead and access the cursor. We're going to access the lock state of it. And we're going to set the cursor lock mode to be non. That way we will have our mouse to move around in the world. And when we resume, we are then going to go to the locked mode again. So we'll save that. We'll need to go into the GUN system. And up here and update. We're going to check if we are. If we will access the pause menu, will go to the game is paused. And if it's true, then we are going to return. And this means that we are not able to shoot or organ manager, we are not able to do anything when we have the game is paused equal to true. So we'll save that. And now back in our game. When we had play, we'll see that when we are at the escape key, we no longer can do anything in our game and it freezes completely. We have the option to go to the main menu and to quit if we hit the escape key again, we can see that we are back in our game. We can play normally. Now, it's time to actually add some action to our buttons. And it's going to be, of course, part of your challenge. What did you expect? I am very lazy. So finish the Main Menu buttons. You already did the Quit button. So now you can do it from scratch and finish the Main Menu buttons so that when we press it, it goes back to the main menu. We've already done all of that. So one small tip that I don't have in here, make sure that should reverse the time-scale. When you go back to the main menu with that said, pause the video right now and we'll do the challenge. Okay, welcome back. So into our pause menu in here, let's go ahead and create a public void, low Main Menu, Menu. And in here we are going to first of all set the time, the time scale back to one f. Because whenever we pause our game, we have it at 0 f And we're not resuming, so we're not going back to the timescale one F. That's why we need to put it in here. And then we are going to go to our scene manager. So we don't have the option to use in management. So let's go ahead and add that. So Unity engine dot seen Management. This wasn't a nice challenge. There are a couple of traps in here, so senior manager dot load scene. And because the main menu is on the 0, we are going to load the 0. A great. And now finally, we'll need to add the Quit button. So it's very simple. We can go ahead and copy it immediately from the main menu. So we paste it in here, save all of that back in our game. Let's turn on the pause menu and let's go to the button. So we didn't name this is the Main Menu button and this is the WHO IT button. And in here we're going to go ahead and access an object which is going to be from the Canvas. It's going to go to the pause menu and it's going to be liquid games. If that back in our main menu button, we're going to add an action and here, get it the canvas. And it's going to go to the part, and it's going to load the main menu. We save all of that. We turn off the panel again. And now when we hit play, we should see that we can show, we can change weapons. Okay, great. We had quit. We can get our game, and we have the quit the game, and we can go back to our main menu. Very nice. We can go to Options, increased the volume, go back into the play mode. And everything works perfectly fine with that. Don Make sure that shoe commit your changes. And in the next video or where we've actually finished this section. So in the next section, we are going to learn more about world-building and unity. We'll add more. We'll learn about lighting will add post-processing, making our graphics butter. We will add a couple of pre-fab buildings that we can. So we can create a real, realistic world in which we can kill our enemies. With that done, I hope you enjoyed this one and I'll see you in the next one. Okay, mightily or from the future. Now there is a small problem that we forgot to deal with. Now we should, we go back into our pause menu. We have the main menu we had played. And now when we try to shoot, there is no shooting. Now what's the problem? You may have encountered this, you may have not made this mistake, but we need to add in here, the game is paused, should be back to false. Because when we set it to true, and here we stop the GUN system when we press the load main menu, we don't set it back to false, which is a terrible idea because we can no longer use our weapons. So I hope you didn't make this mistake and the challenge if you didn't, I'm very proud of you. If you did, don't worry about it, look at me, I just did this mistake. So with that said, let's finish this video finally.
57. SECTION 10 - Adding World Assets: Welcome back, my fellow game developers. In this video, we are going to just go around and look at different assets that we are going to use to create our levels. So we've added this building and here we've added these building in here. We've added also this building in here and this building in here. So we are, I think a lot of buildings, but we also added a skybox. And all of this will be documented so you can go and look for your own prefabs and assets. We've also added the school looking the Lorien, if you don't know what the Lorine, as I've already suggested that to go and watch Back to the Future. With that said, let's not waste any more time. And let's go and test a bit of 3D assets that we have. Oh, okay, so let's get started. First of all, let's go into the resources that I've provided you with and you can go ahead and use all of these. Now, let me show you where I got all of this. Oh, okay. So also you can go and get these low poly sci-fi building set added to your assets. They are really good and we're going to use them to create our world. We then have this futuristic building in here. Now, this is not, this will not come with the assets because it's size is around the 150 megabytes. So you can go ahead and download it by Jonathan from the Sketchfab. So this is at the futuristic building. You can go ahead and also use this sci-fi building. I've provided you with it in the resources. It's my tank storm and this building right here. I'm not sure if we're going to use it. Maybe we can put it at the end of a level. So that way, it's like the Citadel in Half-Life two. So you can put it in the middle. And in here you will have some kind of boss battle or something so creative. I've also provided you with this really cool looking DeLorean. If you don't know what a the Lorine, as I suggest that you stop watching right now and go watch Back to the Future. It's an amazing movie. So with that said, let's go ahead and use our assets. And let's go ahead and import all of these buildings and hit import. So we have imported all of these. Okay, great. Now the next thing we're going to do is we'll leave this playground as it is. So just for the memory's, just so we keep all of our experimentation in here. And let's go into our scenes. And in here we'll duplicate the playground scene. And this will be the playground one we'll call the maybe level one, let's say. So. Call it level one, double-click on level one, and it's exactly the same. And you can make sure that you're on level one by looking up here in the level one. So for now, let's go ahead and maybe delete the enemies. So we'll delete these two flying around. We don't want them. And that's clear all of that. So next thing we're going to do is in here, we'll start placing our buildings. Let's delete everything under the cubes. So delete all the cubes. Great, so now we have only our two big enemies, the robot and the giant monster on the true whatever we have called them. Let's call him Jimmy. Jimmy and the pickup gone in here and these two health pickups. Now, let's go ahead and look at our buildings. Let's drive our buildings into the game asset. And inside of game asset, back in our buildings that's make the smaller. So we can see all of these. So we have these big buildings and you can add any of them. So let's see. If we add this one in here. Then we scaled up. Let's say we add ten to it, make this then, and add a ten over here. So now we have this building, but the problem is if we hit play. So it's not the best looking building in the world, but you can't always add very, very good graphics. Because sometimes we let me just go into the player and increase mouse sensitivity able. So let's make it 400 k. So let's remove this no-no, Stop, stop, stop. So now let me just turn the volume up. So now you can see that we do have this building. It's not the best looking building. It's okay building, but we can actually walk through it. So we are going to add a couple of meshes, and this is part of the video. I'm going to teach you how you can use all of these. Let me just close and here the tab. So let's go into this building, for example. So we can go ahead and you can unpack the prefab and here or you can keep it. So we can add a component which is the mesh collider. So we add the mesh collider. And in here you can see that immediately a mesh collider has been added and it actually comes with the prefabs and here, so every building has its own prefab with it. So let's make the Stan, though not 100. So ten by ten by ten. So this is the building snapped, the bust, or maybe we can make it even bigger. So maybe this one will be 20. Ok, now, so now this is the second building. This is the third building and you can add a mesh collider, and here it will add automatically this one too. Let's make it ten by ten by ten, and we make this 20. So now you can add these buildings as you, as you see fit and add mesh collider Student. Ok, let's continue on. And actually let's make this playground a bit bigger. So let's make the scale 30 by 30. So it's a bit bigger so we can see everything around us. And if we go to the window and go to a Navigation, and this is the most important part. We want to start choosing these buildings, making them static. So in the inspector, we go and make them navigation on static. And keep this plane as static, go to navigation and we're going to bake everything in here. So now you can see that the ground is kind of read. So our enemies can now walk around and they can can take chase us. Yes, everything is working fine. Okay, great. So now that we have this grounding here, let's go ahead and look at other Prefabs that I've given you. So let's see in here we have this cyber punk, the Lorine. Let's drag it into our game assets in here and wait for it to compile. So now we have it in here. Let's go ahead and put it in our world. Let's look at it and say but small. So let's make it even smaller. Six by six by six. Great. So now it looks good enough. So if we click on it, you can see that it currently, well, we can walk through it. But in here we can simply add a mesh collider. We need to choose all of these because if you click on it, you can see that each component has his own mesh collider. So we choose all of these. So click on the first one, hold down Shift, Click on the last one at components and the mesh collider. And you'll see that each object now has its own mesh collider. If we save it, we hit play. We can go ahead and walk to the car and we can bump into it. We can jump on it, and we can stand on it. How cool is that? Okay, great. You can also make it suitable so that you can actually shoot it and add some kind of bullet impact on it. Actually, we want to make this four by four by four and it currently doesn't drive. But what you can do is actually add some animation to make it hovered around and maybe spin the wheels around and make it look more cool. Let's increase the mouse sensitivity to 400. Okay, great. So with that Don, what else do we have? 01 thing I wanted to tell you about. So currently if you click on the cyber DeLorean or any component for that matter, you can see that all the material in here is unavailable so you can, you can't tweak around with it. Now, a very nifty way of solving this problem is let's go ahead and create a folder in here, and we'll call it the, the Lorien textures. And let's add these cyber, cyber punk truck in here. Double click in here, and when you click on it, you can actually go from the model to the RIG, to the animations if it has one and go to material. And in here you can go ahead and extract the textures and extract the materials. And when you hit extract material, you can immediately takes us to the Lorien textures select folder. So now you will have all the textures in here. So you can add it immediately. You can see that the car has changed the colors and it becomes the same as the one that is shown on the Sketchfab website. You can also extract the materials in here also. So now when they are extracted, you can go ahead and start changing them. So in here let's see, we can maybe. Turn this, oops. Let's make it black, for example. And you can see that immediately the materials in here change color. So you can do that and tweak around, play around, see if you maybe want to increase the metallic. Maybe you want to add your own textures in here into the albedo, for example, and so on. You can add a mission to make them glow. So you can add maybe white and mission and so on. And if you want to delve deeper into this, there are amazing resources in Unity documentation where you can find everything that you need in order to go full in into this. Now, I'm not going to go and Gulf deepened this. This is more of a graphic side if you are looking to do that, I encourage you a really fantastic way of learning things. Okay, great. So now we have the Lorien. What else can we add? Let's go into our game assets, go into three resources. I've also provided you with these three buildings that I've told you about. So let's drag all of these and put them in our game assets. Wait for them to import or K. So let's see, we have our buildings. So we did this already. Where is it? So let's make this smaller, whereas it's okay, so this is the first building and simply drag it in here. Whereas it seriously, what is this? Oh, so this is our tiny, tiny little building. And you can put it at a distance, like there somewhere. So when you start the game, you walk around and you see that building at a distance and you know that. So let's look at that. See how it looks. Whoa, nice. You can see that it's a huge building somewhere in the distance and you need to walk with but currently, we fell down. Let's move this building a bit. So let's move it in here and my computer is already starting to suffer. Okay, so now we can see that this is our building and it's on the playground so we can jump on it. But the problem is that it doesn't have any mesh colliders and the colors on it are also extremely boring. You can go ahead and do the same as we did before. So you can go to the building, go to the model rig animations, and in here you can extract the materials and yes, the sci-fi building. So now we will be able to tweak around and play with all of these. So this will take a bit of time out of your day in order to change all the different things in here. So the planes, the different stuff in here. And you can also go to this building and see what it has. So let's increase the size in here and you can see that it has a lot of mesh colliders on it also. You can tweak them, you can add them to different things. So let's see what we have in here maybe. So in here you can edit the material. Actually, you can add a mesh collider in here, and it will automatically add not all of the things in here are added. So you can go ahead and click on. And so for example, this plane and here of course has a mesh collider and you can change the material on it and so on and so forth. I'm just showcasing a bit of stuff in here so you don't get confused if you're trying to add your own assets. So with that building done, let's get it out of the way. What else do we have? The last building and it's the coolest one, or, and this is one of the buildings. So force, let's add it in here. So this is also a very nice looking building. You can click on it and extract all the materials so you can tweak and play around with them. So it's building in here next to sources. There they are. You can now change it and make it more metallic to make it look cooler. And to add the mesh collider in here that C, Okay, so immediately the mesh collider is available when we had play. So we can, should the building with our rocket. And nice. So how cool is that? We can now shoot our buildings and you can also create whoa, whoa, whoa. Let's reload. Okay, cool. So now we have these buildings in here. Let's get some ammunition. Let's reload. Let's shoot our buildings. So nice, Our world is coming to life. So what else do we have? Yet? It is, so the problem with this building is that it's only on one side, on all sides. And this is our building. So the problem with it, first of all, it's completely white and we are going to have to add a couple of textures to it. It comes with its own mesh collider, I hope yes it does. So in here you can see that it has this material on it. We can click on it. We can extracting material also saw in the futuristic buildings lacked. So the problem with it is that it's empty on the other side. So you need to create a way for the, well, anyone playing your game is, shouldn't be able to see what's behind this to break the game immersion. So let's go in here and let's start tweaking around in this, it comes with its own textures. So let's log this end, go to the textures. So in here we have the albedo. So let's add the albedo in here. Nice. So our building already is very colorful. We have also emission, so let's add a mission. So let's look, look how cool this will become. So we added in here. So now we can actually add emissions, make it red and it actually emits the light. This is the metal illness, mental illness. Nice. How cool is this building? Luck right now. And we also have the normal, let's add it in here and fix it. So now our building is much better. Nice. So what else do we need to have? This? A 00 means the occassion map. So let's add it in here. And to be honest, under the bus graphic designer also, so I'm not sure what does 100%, but it adds a bit of caution, which is nice, I guess. And it looks really nice. This is one of the nicest looking buildings. And now when we hit play ups, so we can shoot it with our rockets. But and it actually looks really nice. But the problem is if you walk around it and it's super weird. Okay. So can you hit it from the side you can't, but from the other side you can. And this is something built by unity specifically. We're not specifically, but this is done in order to save out of memory on your game and be able to use this building. So I'm not sure if you're hearing it, but the longer I play my game, the more it starts to suffer. And we can actually stand on this, but we can't jump because this is not the ground layer. So let's go out. And what's that done? I've just wanted to add a couple of assets. Show you what you can do. Maybe you get creative. You can also go ahead and find your own assets. I really, really encourage you to go ahead and find your own assets. It will feel amazing when you do a small idea I wanted to give you, let's say for example, we make a level where on all sides we have this, these buildings and you can't look through them. And then there at the end you have this great building and under it may be add three monsters from our monster right here so you can duplicate them and make sure to always make this a static, navigation static, and then bake the ground again so the monsters don't actually walk on top of it. So with that said, I hope you enjoyed the video. And one more thing. One more thing, I just wanted to go into the galaxy box in here that we have. And let's open this up and actually choose one of these skybox to add to our world And here. So now we are on some kind of big, huge planet. So now when we hit play at LAC lux, ten times better, how cool Does that look seriously? Now we are in space shooting monsters with amazing looking buildings and great. Our game is coming to live with sound effects with everything. If only we could drive this DeLorean and fly away into a mature, but that isn't there. So with that said, I hope you enjoyed the video and I'll see you in the next one.
58. Post Processing: Welcome back, my favorite game developers. In this video, we are going to be adding a bit more graphic style games. So as you can see, we have made a couple of changes and here we've added some effect store game using post-processing. And it's not much, but it actually increases the beauty of our game and really makes things more realistic. And we've added also some motion blurs on blue. You can see all the effects that we've added in here. And you are also going to be adding your own effects and making it your own. So with that said, let's not waste any more time and let's get started. O K. So the first thing you'll need to do is you need to go into window, go to your package manager, and the unity registry. Simply go to the post-processing and hit and stop. So this should start and stop if you don't have downloaded already downloaded, and if you need to update, updated, and then start and stop. Okay, so now that we have our post-processing installed, the next thing we're going to do is we will go into our camera. And in here we're going to add a component which is going to be the post processing layer. And in here you can see that we have a trigger, a layer which currently is nothing and will create a post-processing layer for this. So now that we have our post-processing layer, and here let's go ahead and create a layer which is going to be called well, post processing. Processing. Hit Enter and backing our camera in here we're going to choose which layer we want to have as our volume blending. We'll see what that means later on and just choose post-processing. Now we're going to create a new empty game object under camera. And we're going to call this the post for sync volume. And we're going to attach to it a component which is the post-processing volume. Now hit global in here. And we are only going to be able to notice it to right here in our game mode. So make sure you're on that. Now let's go ahead and inhere it will ask us for a profile, just click on New, and it will create a post-processing profile. If you hit in here, you can see that it's on the scenes and profiles. And now just let me changed our, the way we are going here. And let's choose a couple of cubes in here and just move them in the vicinity of our player. Oops, so let's choose this back in here. Let's make this a global. Or no, actually, let's make it local and let's move it in front of the player so we can see how this affects the various elements in our game. So let's choose Global. Did we choose the plane? No, don't choose the plane. And let's move this cube and founder of our players. So now we can see these cubes in here and we'll see what effects we have on our game. Okay, great. Now back in our post-processing, now we can actually, let's go to the post-processing volume in here and make sure that it's on the post-processing leg. Now, we can start finally adding effects. So the first effect we're going to add in here, we can choose unity and there are a lot. Now, I'm not going to go through all of them because there's a lot to cover in here. But I encourage you to go ahead and try out all of these and the best way to try anything out. So let me just show you. Let's go to bloom for example. Let's say we have no idea what Bloom is. Simply click on the intensity and turn it up as much as you can. And then you will know how much you actually want and what it actually does. And this is how I learned all of this. So let's go ahead and add a bit of blum. So you can see at 0 there is nothing. We can add a bit so we can make it maybe, let's say 1.5 or maybe even more, 1.8. Ok, so 1.8 looks good enough. We can change a lot of things in here. So maybe if we diffuse. So you can see that there are a lot of things that we can play around in here. Let's just remove the diffusion. So next thing we're going to do is we'll add another effect in here. And let's see, we can add the chromatic aberration, which is a nice one. So if we click on intensity, we can increase it. You can see that the edges of our screen become a diluted or they as if they are hyper speed. So we can just add a little bit of this inhere. So maybe 0.06 or maybe increase it a little bit. And you can see that the colors also changed. So you have this red, green, and blue colors that change so will maybe make it to 0.2. Okay, that looks good. You can add a fast mode, and here I'm not sure what that does, but you can see that it adds a bit of more stretched to the screens ACH. Okay, so let's go ahead and add a, another effect in here. What else can we add? We can change the depth of field, which is kind of like the changes the focus distance as if you're willing wearing glasses. I don't think I want this, so we can remove it. For example, let's add another effect in here. And we can add motion blur, which is a very good one. So this will only work while Will, while we are playing our games. So let's add these two that's at play and see how that looks. So now you can see that. Ok, so now you can see that while we are moving around, we have this little blur. So our world is a bit more shiny if you want. And already the graphics are better. So let's increase the sample count and the shutter speed, and let's see how that affects our game. So let's change. Is there any motion blur? No, not a lot. So let's increase this, put this all to the maximum and see how that looks. So yeah, there is a bit of a motion blur. It's not that obvious when we do build our game. I think it will be more obvious than that. So let's keep the motion blur around this much. Let's add a, another effect in here. And we can add the widget, for example. It's kind of nice. It's not that great, but you can add a, like a circle around the edges. So this can be like that or you can just, just a little bit around the corners. And there is a, another very cool effect in here that I like. And it's the ambient occlusion. And what this does is it actually adds a bit of, let's see, shadows to our various objects. So it adds depth to our object. So you can see in here the cubes got a little bit dark under them, and we can add also thickness in here so we can increase the thickness, for example. And now things are much more grounded. You can also change the color of this and you can change very smooth. So when we hit play, Let's see how that looks. Okay, so you can see now our gain is much more intense. When we shoot, when we move around, we have these cubes that are grounded. Now this is not the best graphical things that we've added, But for now they are really good. And you can see that our gun even looks much more realistic. Our enemies look much more intimidating and have much more depth. And all of that, all of that really looks and nice. So with that said, I think I'm going to decrease the widget, maybe even remove it because it got a lot darker and maybe decrease the thickness on here. But anyways, these are all things that you can play around with and test on your own. And it's actually part of your challenge. So your challenge is to add your own effects. So first of all, set up the post processing at the post-processing volume and everything to your camera. Take the time to explore all the different tweaks you can add your post-processing because there are a lot of things that you can play around with. And you'd be surprised how good your gain can actually look when you add post-processing to it. This is a very powerful tool and I encourage you to go out and try all of the effects and finally create your own effects in your level. That said, I hope you enjoyed the video and the next one we will be playing around with the lighting in unity and seeing how all of that works with that said, I hope you enjoy and see you on the next one.
59. Lighting In Unity: Welcome back, My favorite game developers. In this video, as you can see, we've turned off all the lights and our game, and we've added our own. So now when we hit play, you can see that our game as much scarier and everything around us is completely dark. And we only lit up a couple of things. For example, the monster there has a bit of light on him. We have this green light in here that really adds ambient store game. And only when we walk we have lights on our player and in front of them, we can still shoot things. We can still see a bit of outline because of these guys around us. But basically everything has been turned off. So now we can see our enemies, we can shoot that. We've added a lot of things and we are going to have fun playing around with lights and Unity. Will that said, let's not waste any more time and let's get started. Okay, so first thing we're going to do, we're going to go into our scenes in here. And let's go ahead and duplicate the playground. And we're going to call this the level two. So now we have a level tool. And first of all, let's ignore this and let's save all of that. Now, in level 2, It's exactly the same as level one. And you can be sure of it. I mean, it's exactly the same as the playground and you can be sure that when you look up here in the scene name. So now we have level 1 with our various objects and are really nice-looking the Skybox. And we have level 2, which is our basic level with our various objects. Okay, great. Now what are we going to be doing? And here we are going to be playing around with the lighting. And let me just tell you a little bit about how lighting works in unity. So if we go into the window right here, we go into the rendering and we have the lighting in here so we can see, let's add it in here next, the Inspector and the navigation. We can see in here that we have various things that we can tweak and play around with. And thanks to see. So how lighting works in unity is it's baked in. So what, what does it mean? Well, just like you bake a cake and then it's out there forever. The same shape. That's how lighting in Unity works. Now, you can create a way for lighting to work dynamically, but that will take a lot of processing power. So what it does is it creates a directional light in here and then it bakes the shadows and how things will be lit. So different materials and so on. And it will then bake everything in there and it will have the different lighting. And now we can change that. So if we, for example, let's go to the directional light in here. We can see that we can change the color, we can change the intensity, we can increase it a lot, or we can emit to 0. But you can see that there is still a lot of light out there. If we go now to the lighting, we can change the light, environmental lighting to 0. We can remove multiple things. So environmental reflections, we can change the way the light bounces off different object. And now with me generate lighting. Wait for it to generate a tool. Create a file in here that will keep all the things around the lighting in here. So let's just wait for it. It's calculating things. Okay, so now that that is finished, let me just hit play and I'll show you how everything is much, much darker. So now you can see that we can barely see various game objects. And in our case, because we have this robot and here, so let me just show you the difference. Our robot actually has a robot body, has a light on him, which is the hamming and here. And if we turn off the hammy, you'll see that everything will become much darker. So, oops, let me just go out, go to the hemi on the robot and turn that off. And you'll see that none of our objects will be visible. So when we hit Play, you'll see that we cannot see anything and everything is dark. Now we still have this sky in here that allows us to see everything. But we can also make that to 0 or maybe change, change it using the Galaxy box. And let's go ahead and do that. Why not? So if we'll go into our game, assets will go into our, our galaxies, will see in here that we have these resources. So let's choose the Skybox. So yep, now we are in complete darkness in our game. And when we hit play, let's see how that looks great. So now we can see anything very nice except the flushes. Actually really nice. And we can see barely the outline of our enemy in there. Now let's go ahead and add our own lighting into the game. So the way we do that is we're going to right-click and our hierarchy. And we're going to go ahead into our lights and we can create various things. Now the directional light is just like the sun. We already have one. We can create a point light. So let's go ahead and create one. Let's reset its position because it's summer far, far away. And for example, let's put our point like, let's just put it in here. So for example, right there. And you can see that it barely, barely adds a little light to our ramp right here. So we can increase the range. We can increase the intensity, we can change the colors so we can make it red, green, and so on and so forth. We can move it around and you can see how all of that looks in our game. We can increase the indirect multiplier. We can make it have no shot shadows or we can make it half soft shadows or make and make it have hard shadows and all of that. What we can also do is we can increase the range. That's basically it. So let's just keep this right here and will increase the intensity, for example. And this will be some kind of green areas. So now when we hit play. We can see that we have that green area. Oh, so Maisel, how rockets actually also light up the scene. So now when we go under here at sometimes take the, take the texture, texture a little bit of time, but no worries about that. So now you can see how ambience looks. We are in a green place. It's really cool, it's really nice. And I like it a lot. Now, the next thing, and besides point light, we can also go ahead and create another light which is a spotlight. So let me show you what a spotlight is. Again, Let's reset its position here. And let's move it up a bit, and let's rotate it around the x-axis. So let's make it 90 degrees, so shines downwards. And let's move it up. And we can see that we can increase the angle, for example, and increase the range does so currently it has no intensity. Let's increase the intensity. Well, so now we can see that our player is intensified and has, and has a bit of light on him. Really nice. So now when we save that, we hit play. Let's see how that looks. So when we hit play, we can see that we are under some kind of light and everything around us is dark. And a very cool things that we can do in here is we can actually attach the spotlight to our player. And now when we save this, as we move around our world, let me just show you how cool this is and just pull, you know, how much we can do. These spotlights move with us. So now as we move through our game, we can barely see in front of us. Now of course, we need to change this up a bit. And when, while we are moving, you can see that we have this in front of us, the spotlight, but only illuminates in front of the player. Now we can change the angle, for example, let me just show you if we change the angle so it's in front of the player only, we increase the rangy, but maybe the intensity can play around with all of these things and make sure and make it alter your taste. Really, really depends on your preferences. And we can change the color also, and all of that, we can add shadows a bit so we can add a soft shadows. So now our player has a soft shadow when we hit play. But make sure to remember that all of this plays a role in your performance. So now you can see that the spotlights on the eliminates in front of us. And no matter how we move around, you can see the shadows. So now when we move towards our monster in here, we can eliminate the different objects are monster attacks us and it's, can you see how scary that is? Seriously, isn't that scary? A bit. Okay, great. So now with that spotlight done, let me just show you what else we can do with lighting. So we can, for example, let's go to our health pickup and let's go ahead and add a light to it. And you can also create an area light, which is not that great of a deal. But I usually all are used as point light and spotlight and that's all. And these are actually enough. So this is our spotlight and let's rotate it at 90 degrees. Let's move it up a bit. Let's increase the range of it and the intensity. Great, so now we have it on the mat back and we can, let's go ahead and just increase the spot angle on it. So just like that. And let's go ahead and add another one. Duplicated will rotate it to minus 90 degrees, and then we are going to move it down. So let's see how that looks. And let's go ahead and increase the rangy but increase the intensity. So what we want is we want a light under it and over it. So on all sides if you want with the spotlight. So let's see, that's too much intensity, apparently, so great. So now let's see how that looks. We save that we can even make it able to greener. So it looks like a real health back. And now when we save that, when we hit play, we can see that for example, we are looking around and BC, whoa, that's a health back over there. Let's go get it. Nice and we can do the same for our ammunition box and look how cool that looks so we can pick it up. Okay, great. Now the last thing that you can do is you can actually also attach a spotlight to the enemy. So in here, for example, let's say we have our monster walking around. We can go ahead and create a. You can either create an whereas the light, you can either create a point light to be on his head, for example. So we can increase the range, increase the intensity. And let's save that. Let's hit Play. And now you can see that while you're looking around, you have that enemy. And he is walking around with his kind of lighten there. And it's very menacing and scary. You'll have to remove the light on you and all of that. So now that I've showed you how lights work in unity, I've showed you a couple of examples in Unity. You can go ahead and into lighting, go generate the light. It will save up a lot of time and a bit of calculation for unity every time you play the game. So now when we hit play, we have our various slides that we've added to our game. And of course this is not the best examples. I'm just winging this, all of this. I'm just trying to show you as much examples as I can. The really not nice thing you can do is, for example, at some spotlights or area lights to the various cubes in your environment. Or for example, if you want to create some kind of tunnel through which the player has to move, you can add likes only to the, let's say the door at the end and add a little bit of area light in front of the player. So whenever he rotates, he can only see in front of him. This is a great mechanic. Most games use. And what that set. Now it's time for your challenge and your channel's going to be to let there be light. So set up your own lighting system in unity with all the variations of lights you learn, you don't have to make everything completely dark. I just wanted to emphasize how lighting works by keeping the directional light completely dark. You can attach them to different objects in your level and add ambiance to your level. So with that said, I encourage you to go and experiment with lighting, see what works for your own game and make sure that you create a second level nom just experiment in one level with all of this great, a second, third, fourth level and play around, see what works, see what doesn't, and have fun, enjoy it. This is all about having fun and creating something that you like and to your own test taste and what you enjoy, what that said. I'll see you in the next one where we are going to actually learn how we can transition from level to level using a portal.
60. Transitioning Between Levels: Welcome back, My favorite game developers. In this video, we've created an exit door that allows us to move from level to level. So we have this door and here, and we get close at opens up and now we can move through it. We slow down time, and then we are on the other side and the next level shooting our buildings. So let's not waste any more time and let's get started. So the first thing we're going to do as we'll go and get our portal from the resources. So simply drag the portal into our game assets. Bought all of that, wait for it to import. Anytime now, it should be inside of these tests assets, and here it will be a sci-fi door. And in the sources simply drag the sulfite or animation in here. Okay, great. So now we have this sci-fi Doron here. We can go to the sci-fi door and we can extract the materials. You can extract them wherever you want. You can extract them inside of the material. So select all of that. Very nice. Now the next thing we're going to do, we'll change the name in here to be the simply the sci-fi door. Or you can limit the portal or whatever we want. And let's go ahead and scale it up to two on all sides. So now it's big enough to be a door. The next thing we're going to do is we're going to go ahead and let's go ahead and actually unpack the prefab completely and we'll go into the assets. Let's go in and change the material on it. So we've already done this a lot of time. So what I'm gonna do is I'm just going to skip past all of this. Okay? So I've skipped past all of this. So now we have the dorm here and we can maybe change the emission a bit or the albedo. So if we can make it a bit brighter, that would be just fine. So we're going to make this around zero-point seventy eight. Let's hit Play. And let's just go take a look at our door and see how it looks. So where's our law there? So there is our door. It currently doesn't do anything. Okay. Great. So the next thing we're going to do is we'll go into our sci-fi Doron here and we're going to create an animator for it. So, oh, and of course, before we do that, let's take let's go into our assets and take our what is it? Test assets, which is the door and let's put it inside of the game assets. And let's go ahead and get the animation window and here, animation. And let's talk it next to the console. And let's get also our animator. And let's keep it up there. So let's click on the sci-fi door. Let's create animations and let's create a new folder for the sci-fi door. And in here we're going to create our first animation and it's going to be the open. So we're going to open the door. Great. Now back in our game, back in our scene, I mean, we'll see in here that we can actually go and find the actual open animation of our doors. So if we go into our game assets, into our test assets in here, we can open the door. We can see these source. If we open up this, we can see that this door, if we hit Play, it's actually the open animation. So let's go ahead and duplicate it. This will be the, oops, the door open. And let's go ahead and add it into the animations of our door. So drag it in here. Now back in our sci-fi door, we don't need, actually this, we don't need it. So an animator in here, it's going to, first of all, let's delete this. That's the door open. So now we have this transition to door open. But what we actually want to do is we want to create an idle animation. So we'll create CO2, the sci-fi door. And we're going to create a new clip. And we'll call this the Idle. Save that. And it's just going to do well what it actually does. So I just wanted to show you something in here. And whenever we have the default animation, we can actually change it. So we can right-click in here. We can set it as the default layer states. So this way, whenever we start our game, it will be at the IDL. And then we are going to go ahead and make a transition in here to the door open. And we're going to create a parameter for it, and we're going to make it a Boolean. And it's going to be the opening. We'll call it the opening. And if the opening is true, then we are going to open. But when it's false, let's right-click and make the transition back. We are going to go ahead and close the door, keep it back to idle. So now let's drag the animator in here next, animations, and let's hit Play. And I'm just going to go to the scene and also who we can do that. So when we stopped, Let's go to the scene. And when we hit the open, we can see that the door opens and then it causes and then it closes. So let's see what's the problem in here. If we go to our project, the EIDL is looping. Let's stop the looping on the idol, and let's stop the looping in here. Let's see how that looks. And our game. Go to, oops, I keep forgetting that we should not hit the exit key. So now in our scenes and our animator, if we start opening, the door opens and then it closes immediately because it goes back because of the exit time that we have. So let's remove the exit time in here, set the transition duration to 0. And in here also let's remove the exit time, set the transition duration to 0, save all of that, hit play again, and go to our scenes. And let's see how that looks. So we are an idle when we are opening, the door opens and then we want when we stop opening, we didn't add the condition to go back. No worries about that. Make it false. Hit play again. And now this should be working. So when we are opening, the door, opens one we want to close it. Well, it kind of looks very weird. So you can see that whenever we stop, it closes immediately. We don't want that. We want it to go back. So all you need to do is you need to go to this transition, which transitions from the door, open the idle, and just add a bit of time in here, a bit of transition time. So let's make it, let's see, maybe just like that, see how that looks. So it's about 0.2, 25, save that, hit Play. And now in our scene, Let's look at that. So when we open the door, it opens, when we close it, it closes. Very nice. Okay, with that done, next thing we need to do is we need to actually go ahead and create a script in here. So go to our scripts and we'll make this a bit smaller. We'll right-click, we'll create a C-sharp script has come to be the portal. Door. Hit Enter. Wait for that. And now let's go ahead and add this to our sci-fi door and here, and we are going to start coding. But what are we actually going to do? Well, we are going to issue a challenge. Actually. I'm going to issue you a challenge and it's to set up the animation. So use the entrepreneur Enter to open the door when we enter a certain box collider and to close the door, use the On Trigger. Now we've never used this before, but you can go ahead and search for it. It's very simple, There's nothing too. Finally, make sure that you check that we are colliding with a player and not just anything because we don't want anything to be colliding with an opening. But that said, pause the video right now and go do the challenge. Okay, welcome back. So the first thing we need to add here is we need to create a box collider in here. So let's create that. We're going to move it a bit. So let's go ahead and adjusted. And what we want to do is we actually want our box collider to be in front of our door. So this will be the box collider of our doors. So when our player enters the vicinity of the door, oops, where's the sci-fi door? So let's keep changing this. So when the player enters the vicinity of our door, the door will open. So let's go ahead and make this a bit bigger so we want it to feel natural. So just add as much size as you possibly can to your box collider. So whenever the player enters this place in here, the door is going to open. Okay, great, Let's save that. Let's stop editing. Let's go back into our door. And in here we are going to, of course, first of all, go ahead and create a reference to our animator. And it's going to be called my animator. And we are going to get the components of my animator will be equal to get the component which is the animator, and that should do it. The next thing we're going to do is we'll create an entrepreneur entering here. And we're going to check if the other.com tag as the player. And if it is, we are going to simply get my animator and we're going to set the Boolean to what was it called. Let's go ahead and copy it. So animator copy the opening coat back to our code pasted in here and makes sure that it's true. And then we are going to create an on sugar exit. And we're going to do the opposite. We are still going to check for the player, but the opening should be set to false. Let's save that, and let's go ahead and test this out in Unity. So we need to make sure that the box collider as a trigger hit play and we'll keep the animator and here. So where is our portal door? Where is it? We put 0, so there it is. So we walk to it. It should open and then when we exit at closes, Very nice. Now it opens, it closes, opens and closes. Excellent. Now the next thing is of course, that we want to be transitioning from level to level when ever we actually go through the door and four now the door, well, we can go through it, but we will add maybe a certain object or a building behind it so that the player can't actually, or whoever is playing your game can't actually see through it. So let's go ahead and add a game object on our door. So let's create an empty game object, and let's put it up here in the hierarchy. And this will be our portal exit. And we are going to add a, also a box collider to it. And we're going to move it will make it as big as the door actually that's edited a bit. So we'll make it as big as the door because this is what the player will be colliding with an ordered to go to the next level, sony, we need to make sure that whenever our player actually moves through this door, he will hit the collider and not just for some reason, move busted. So we're going to expand it. So yep, Just like that, maybe make it a bit thicker, but make sure that the player can't actually get to it from the other side, or that won't even be a problem if you hide it. Really nice. So that done it safe. Make sure it's trigger. And then we're going to go ahead and add a component in here, which going to be the script. So we'll create a new C-sharp script which is going to be the portal exit. And okay, great, So didn't open up on its own for the first time. So let's add the portal exit and here, the portal of exit and here. And let's go ahead and open this up and see what we're going to do inside. So I think the start and the update won't be needed. We are going to be using the Scene Manager. So Unity engine bots senior management. And in here we are going to create the on sugar Enter. And we're going to check if the other is a player. So compare that to the layer. This is all now basic things that we do. And then here what we're going to do is we'll simply transition to the next level. So we're going to get the scene manager. Hey, scene manager, can you please load us a scene? And what scene do you want to load while Scene Manager, can you please tell us what is the current active scene? So get the active scene and tell us the build index of it. Great, So now that we know that, let's go ahead and add one to that. And that's basically all that bill to do. And let's save that back. And again, that's at the built index. So, nope, I didn't mean to do that. And our BuildSettings in here, we have the level to the level one is not there. So let's add it. Let's move this up a bit. So we have the main menu. We want the lay ground in here. So what was even level 2? So the playground and then we have the level one, and finally we have the level 2. Let's save all of that and let's see what was even level one. So let's double-click on level 1, 0. Okay, so level 1 was all of these buildings. The playground was our basic playground. The main menu was the main menu and the level two is the level with 0. Everything dark in here. Great. So let's save that. Let's hit Play. And now when we move to our door, a door, so it opens up and we go through it. And then we transition to the next level. Really cool. So now that, that's done, let's go ahead and just add a couple of things in here. So the first thing, we don't want it to be instantaneous, we actually want to have a co-routine in here. So if you feel up to the challenge, go ahead and create your own co-routine. Before I do. So, we'll create a level exit delay. And in here we are going to yield, return the new weight for weight four seconds. And let's just put it at one off for now. We'll change it up later on. These semi-colons should be outside. And now we're going to actually go ahead and use the scene manager to load. And instead in here we are going to start the recording, which is the level exit. Very nice. What we want to do is we actually want to start controlling the timescale of arguing. Why do I want that? Well, because we want to, because we're delaying the movement. Let me just show you what happens. If we hit Play. If we hit Play, we can see that when we move towards the door, we move towards the door that opens up. We move through it. And then it takes 1 second, but it's not very pleasing. You know, whenever you actually want to start transitioning, you want to delay everything. So what we're going to do is in here, we are actually going to access the time dot, del dot timescale. And we're going to set the timescale to be 0.1 f. So this way everything slows down. And then when we actually move through to the next level, we are going to set the time-scale back to one. So in here, we're going to go get the time, time, please, time, timescale. And we're going to set it back to 1.5. So now what happens when we hit play? Everything slows down at play. Everything slows down when we transition. You can see that everything is in slow motion, but you've noticed maybe that now. It's very cool actually. But may, you may have noticed that we are not actually using 1 second to go to the next level. And that's because we are waiting for the seconds immunity. How can we change that? Well, we can use instead of wait four seconds, we can use wait for four seconds in real-time. Save that. And now again, let's demonstrate this hit Play. And now when we go through the door now you can keep it if you think it's really nice. Now when we move through the door, it will take 1 second to go to the next level. Really cool. Well that said, I hope you enjoyed the video and I'll see you in the next one.
61. BONUS SECTION - State Machine: Welcome back, My favorite game developers. In this video of advanced C-sharp and unity, we are going to create a Q. Yep, that's all. So no, actually, when we had played, well, you can see that now we can move around. We have this cube, and now when we hit the Iike on any place we want, we can see that the cube has been transposed there, but we can no longer move. Wow, what a cool trick. No, actually, this is the first part of us actually making sure that we are getting the exact and correct point. So maybe you can't see it, but it's actually there. If we go and look, the cube is on the point where we hit with a re-cast. So let's not waste any more time and let's get started with advanced C-sharp and unity. O k. So what I didn't hear, I added a couple of blocks. I reduce the distance. Our monsters can search for a certain point. And what I've also that is I just change the weapons in here so we start off with a pistol. Nothing too much, just for the sake of having more flexibility in testing things. Okay, with that done, first thing we'll do is we're going to go ahead and open up our layers script. So in here, this is our player and this is where we are going to be handling everything. So let's close the crouching the stop crouching, the jump the camera movement, the player movement, and the slight counter. So we can focus on our grappling hook. Okay, great. So the first thing we're going to do is we're going to go ahead and create a method in here. So we're going to go ahead and create a method which is going to be called the handle hook shot. Start. And you'll see what we got we are going to do in this method is going to be, of course void and we can make it private. No worries about that. So let's open this up and let's start coding. And we are going to, of course be calling it right here. So we're going to call it the handle. Hotshots start inside of update. So the first thing we're going to do, we want to start slinging our hook whenever we input the Iike. So we're going to create an if condition and checking for the input. Get down and with a keycode of the E. Okay, Great. And what are we going to do in here? Well, we are going to cast a ray and based on that ray, the position where it hits, we are going to have a ray hitting there and then we'll do other things. So we're going to create a re-cast het. We're going to call it the head. And in here we're going to check if the physics. The re-cast and the origin will be my camera head position. And the direction will be my camera hat dot forward. And we'll simply going to output the information to the head. So to the head re-cast. And if we do, we are going to do a couple of things. Well, what we want to start off with first, we're going to create a small object, and that object will be teleported to the position that we had on our world. So let's go ahead and create a reference in here. It's going to be, let's just add this. It's going to be our bookshop. And in here we're going to create a public transform. And we'll call it hit point transport. So this is the object that will teleport. And what we'll do in here is we'll create the head point or get the head pointer, transform that position. And we're going to move it to the hit point. A great, and let's go into Unity. Wait for that to compile. And in here, Let's go ahead and create a small cube. So right-click in here, a 3D object, a small cube. Let's reset the transform. Put it in here. So this is our small cube and we'll just give it the, the bullet material. We just need some kind of material to just to see, let's save that. Maybe we can make it smaller EBIT. So let's open up the transform and we can make this 0.5 on all sides. So great, save that, hit Play. And now we have our pustule. These are our master's there. And now when we choose some kind of position, let's say here. When we had the Iike, yep, we haven't assigned the player. Let's go ahead and assign the cube right here to the player. Save that back in our game. And now we simply hit the E key and you can see that it's there. And then we can hit it there, there. You can see it there and there and there and everywhere. Wherever we hit, we can move our little block. Very nice now that that's working, let's go ahead and create a couple of states for our player. Now, what are states? Let me just show you first of all, and then we'll continue on. So we'll call this D layer states. And in here we're going to create a private enum. And it's going to be called a state. This is a numerator, which means that it has multiple, let's say, faces or sites. So we're going to create a normal state and here, and we'll create overstates later on. And we're going to also create a variable in here that's going to be a private state state that we write this state. And now we can write this state in here. And it's going to be called a state, but with a non capitalized or lowercase S right here. So what we have in here is we can add different kinds of states. Based on these states, we will have different behaviors from our player. So for example, an update. We are going to create a switch statement. And the switch statement will have the state as a switch case. So in here we're going to check indicates that our state is normal. Then we will have all of our normal behavior. So we cut this, we put it in here, and of course we will be able to start handling our hook shot. And other than that indicates of the default, we'll just break 0 and we forgot to add the break in here. And we're going to add a break in here. So what happens here is if we are in a normal state. So if we are in a normal state or player can move, camera can move, jump, we can crouch, we can handle our hook shot and we can do everything else. But when we are in a different state, we want to have different maneuvers and behaviors from our player will see that very soon. So in here we are going. Of course, whenever we start our game, our state will be equal to the state dot normal. So we start off in a very normal state. Now whenever we actually start handling our hook shot or when we shoot something, and then we want to move to another state which will be the hook shot flying player or making, or the bookshop will start flying our player. And this will actually be part of your challenge. Your challenge is to create the switch. So at the hook shot flying player state and to our enum. So you're going to create a, another state. And the way you created, as in here, just add a little comma and then create the second state. You will have to call it the hook shot flank player, or you can call it anything, as long as it represents our play of flying because of the hook shot. And then you'll need to change from a normal state, the hook shot flying player when we hit a certain point after the Iike. So pause the video right now and go do a second state. Hey, welcome back. So in here we're going to add a comma and we're going to call this the hook shot flying player. We'll save that. Now in here down. Whenever we hit, we are going to transfer or transpose the position of our hitpoints transform to the head position. And we're also going to change the state that we have into a state of the hook shot flying player. So now this state, the last time we said it will be as the hook shot flank player. All of this in here will not be working. And let's go test this out in our game so we hit play. We can move around, we can jump, we can look with our camera. But when we had the Iike and the boxes there, you can see that you can no longer move with your mouse. You can no longer move with the WASD keys and everything is stuck. And that's because we are no longer in the normal state. We are in the hook shot flying player state. So finally what we want to do whenever we are in the bookshop flying player state, we are going to actually create a private void handle, hook shot, movement. And in here we are going to create a another state, which is the state when we our hook shot flying player. And here we are simply going to call the method which is handled hook shot, movement, and we're going to break. And in the next video, ops all we need to add this one. And in the next video we are going to go ahead and implement the handle hook shot movement, where we are going to start moving our player towards the point where we have our little cube. With that said, I hope you enjoy it. This is the first video of our hook shot or grappling hook implementation, the advanced C-Sharp code, if you are still confused about states, go along and try to look at the code one more time. See how we created an enum, see how we put in the state as normal at the beginning. Then we have based on our state, we can do certain things and based on other states weekend to other certain things. With that said, I hope you enjoy it and I'll see you in the next one.
62. Flying Player With Hook Shot: Welcome back, My favorite game developers. In this video, we are actually going to be moving our player two words, the hook shot position. So when we hit play, you will see that we can actually, when we hit a certain point, we can move towards that point and then we fall down when we get to our destination. But not only that, we also added the ability to have our player stop his movement while in mid air. So now when his spine, we can hit the E key and then we stop. So now we have this kind of nice movement and the air. So let's not waste any more time. And where is that? Well, what's happening in here? So let's not waste any more time and let's get started. Okay, so now we want to start moving out layer towards the position of our little cube, which means towards the position where our hook, hooks. Let's go ahead and do that. First of all, let's open up our script in here. So this is the player. Let's move up here and we're going to create two variables. One to check the position of the hock shut position. So it's a factor three and it's going to be called the hook shot position. And another value variable to keep track of the hook shot speed. So we're going to create a public float, hook shot speed. And let's just put it at five F right now. Next thing we're going to do is we're going to set the hook shock position in here. So down here, whenever we actually hooked or find the position and transition to another state, we are going to take this bookshop position and it's going to be equal to the hit point. Pretty simple, nothing too complicated. Next thing we're going to do is in here, we are going to start calculating the direction in which our players should be moving and ordered to that will create a vector three, we'll call this the hook shot direction. And it's going to be equal to the hook shot position minus the transform dot position. So the position of our player normalized. So the normalized, well, make our vector of a magnitude of one. So let's save that. So this will be the direction. So let's just put it in here, just above it direction of our movement. And next thing we're going to do is we're going to actually start moving our players. So we already have my controller, and because we have a character controller, that means we're going to use the move and we are going to set it in the direction. We're going to multiply it by the hook shot speed. And of course we are going to make it frame rate and dependent. So we're going to multiply it by the Time.deltaTime. So let's save that. Let's go back and unity, and let's see if that works. So we save all of that. We had play and we should now be able to start moving, as you can see. But if you have some weird movement, let me just go out here and look at the scene. You can see that we are kind of bouncing. If you do have this problem, go to the player, go to the animator and remove the Apply root motion, save that at play. And this should start working completely fine. So we hit the E key and you can see top. You can see where's our player? Okay, so nice. We are moving at a certain speed to the position right here on the upper. But the problem is that in game we cannot move around. So let's go ahead and add the camera movement. So in here in this switch statements, Let's go ahead and copy the camera movement and paste it in here under the hook shot flying player. And now you will see firsthand how states actually operates. So now we have the camera move. So when we hit play, whenever we actually hook the hook shot and here so we can still move, we can jump, we can do anything, but we can still move our head. Now what we want to do, well, we actually can still shoot. And that's because it's part of the gun system. Okay, So the next thing we want to do is we actually want to have the ability to control our speed. Now currently it's very slow. We can increase it, but what we want is we want to have our speed be controlled by the amount of distance between us and the hawk shop position. So let's go ahead and do that. And here we're going to create a float. We are going to call it the hook shot speed modifier. And of course it's going to be equal to the vector 3, the distance between our transform dot position. So the player and the hook shot position. So now this will be a speed modifier and we are going to multiply it in here. So we'll, we'll be whereas it, so let's copy this hook shot speed added in here, save all of that. So now based on the distance that, that is being calculated every single time, our speed will either increase when we are very far and then decrease as we get closer. So let's go ahead and actually in here in the inspector. So now when we hit play and we should see that when we if I know, I'm not sure if you've noticed, but whenever we, Let's try this again. So let's decrease the two. Let's hit play. So now you should see that when we are flying at the beginning, it's very fast and then it slows down just a little bit. So there you go. You have now notice how this slows down. Great. Now the next thing we want is whenever we actually get to our destination, we want to, well, go back to the normal state and have gravity and all that nice stuff. So down here, we are going to also check. If our vector 3 dot distance between the transform position and the hook shot position is, oops, is less than two f. So basically we are almost there. We are going to turn back our state to a normal Ops state is equal to state taught a normal. That way we will have gravity again and we will be able to move and do all of our stuff. So save that back in our game. And we hit Play. And now we can hook the shot. When we get to the position, we start falling down again. Very nice. So let's try that again. We fly, we get there, and then we fall. We try that. We get there. And then we fall. So the falling is a bit too quick and that's because of something that's not right with our game and we are going to fix it later on. But for now, I want to do something very important. And that is, I want to actually clamp the speed of our oxygen. So sometimes this problem may be in, you may have encountered this problem yourself. It's not very obvious and here, but sometimes the speed is just too slow whenever we get to our position. So we want to clamp what is clumping? Well, let me show you. In here. We'll create a float. And a float is going to be the hook shot speed or hook shot minimum speed, and it's going to be equal to 12. So this will be the minimum speed. Now this, I think is exaggerated and then the maximum will be equal to 50 f. And what we're going to do in here is we're going to get our hook shot speed modifier will cut all of this. We'll put it in here, and let's just remove these two lines. And instead of just setting it to vector 3, we are going to actually go ahead and get math F dot clamp. And this clam gives the value between the given minimum and the maximum. So what this does is even if our speed gets below that, say 12, which I think is exaggerated, then it will stay at 12. So let's say we are flying at a speed of 0.2, which is very slow, then what this will do is it will actually put it at 12 F. And then if we are flying too fast, if we are, if we put a hook shot at the end of the universe and the distance is at maximum speed will not exceed. So this will be very helpful later on if for some reason we have some exaggerated speed or underestimated speed. So we are going to keep it. So the first value will be the actual value that we want. Let's go ahead and add a space in here because we don't want the lines to be too long. We'll add a minimum value, which is our hook shot minimum speed. And we'll add the maximum value, which is our hook shot, maximum speed. Great. Let's close this, had the semicolon, save all of that. And now we should see, while this might not be obvious because we are not. At very high speeds. Let's hook. Okay, great. So now our speed is much better, but you can see that there is something wrong. So you can see in here the velocity on the y, the gravity keeps increasing. And as we fly, you can see that the gravity increases and we are falling faster and faster to the ground, which is very annoying. It's not natural and we don't feel as if we are actually going back to a normal state, as if we are getting squished down. So what we're going to do is we'll create a method in here. And there's going to be a private void. Reset gravity. And in here we are simply going to set the velocity dot y equal to 0 F. And where we are going to call it in here after we reach our distance or we're going to reset our gravity, Let's save that back in our game. And we should see a lot more improvements. So when we hit play, we'll see that when we hoped the shot, we are going to fall down much and nicer. Again, we fall down much nicer. And you can see that the y isn't just increasing. When we hit the E key, we are there, we fall down and then it gets reset. We fall down slowly every time as we move Through our world with our hook shot. Fairly nice. So now let's continue on. You can see that when we hoped to shot, we cannot use it anymore until we actually get to our destination and our back at our normal state. So we want to change that. We want to be to add the ability to our player to actually stop the hook shot midway and then fall down if he presses the key again. And that's going to be part of your challenge. Your challenge is to stop the hook shot movement. So stop our player flying towards the hook shock point in midair. And then I'll give you a couple of hints. Check if we press the Iike while flying. If we do put the state back to normal, and of course you'll need to reset the gravity. So with that said, pause the video right now and go do the challenge. Okay, welcome back. Now, you might have used this right here, so you would be checking for the E while in the middle of our movement. But I'm going to do just a little nifty trick in here. And we're going to actually create a method to handle this. So we'll create a private and this will have NOT, will not be a void, it will actually have a return type. So this is a great way to introduce you to a, to a method that has a return type because we've never actually used one. Okay, so we're going to call this the test input down hook shot. And in here we are simply going to return. So that means we actually return a value. And because it's of type Boolean, we are going to be returning a Boolean. And what is that boolean? Well, it's going to be the input from the E key. So let's copy that. Go back in here, paste it in here, close the semicolon, and save that. So now in here, instead of checking for the 0x0, we can actually go ahead and write the test down, hook shot. Save that, and this will return true. So because this has a return type of Boolean, it will return true when we hit the Iike. And also in here we are going to test while we are flying, if the test hook shot down. If it's true, that means we hit the E key again while flying. We are going to put the state back to normal and we're going to reset the gravity. So let's test this out. And if you didn't create the mother, Don't worry about it. I just wanted to add this as a it was a perfect place to add this lesson. So we had the Iike, we fly, okay, so we hit the EQ, hit the E key again and we stop flying. We hit the E key we had, again, we start flying, right? So now we can stop in the middle of the air as we are flying. So this is the end of our video and that's what we wanted to do in this one. And the next one, we are actually going to add the ability to jump with our player. So while we are flying, Let's say we get here, we press the space button and we fly of this will allow us to get to higher places, like for example, this building right here, or this little building right here also. So with that said, I hope you enjoy it and I'll see you in the next one.
63. Jumping In Mid Air: Welcome back, My favorite game developers. In this video, we have actually added the ability to jump while hooking. So now when we hit the Iike, we fly and when we had the space, we actually jump and get on top of things. So this will require a lot of tweaking, a lot of concentration from you, especially because the code is a bit complicated, but that's what you sign up for. So now we get to this position and we start shooting and restart shooting. And we can shoot our rocket safely from this position and kill our enemies down. They're really nice. So let's not waste any more time and let's get started. Oh, okay. So let's get started with the jumping in midair. So let's go into our code and here and our player. And we are going to create a method in here that will test for the jumping. So we'll create a private ball that's input. Jump. And we're going to return Input, get keydown and the key code, the space. Great. So now while we're all, while we are flying in the middle of the air, when we hit the Space key, we want to jump up. For that. We want to preserve our momentum. So we are going to create, and here a method, I mean, sorry, a variable that's going to be the flying character momentum. So private vector 3, flying character momentum. And we're going to set it in the layer or movements. So let's go down in the player movement and open it up if you haven't enclosed. And in here right before we add the movement to the character controller, we are going to increase the movement of the player by the flying momentum times time dot delta time. Okay, great. Let's save that. Now the next thing we want to do is we actually want to add dampening to our momentum. And what is damping? Let me show you an hour hand the paint. So let's say for example, we are flying and then we hit the Spacebar around here. So we will continue flying with a certain momentum. What we want to do is we want whenever we fly. For example, let's say we press the space bar right here. We are continuing to fly. But what we want to do is we actually want to start dampening. So we want to start decreasing the velocity until we finally stop right here. So in order to do that, we are going to do a couple of things now these lines are a bit complicated, but don't worry, we will go through them. So first of all, we are going to check if we actually have any kind of flying momentum. So we are going to copy this, put it in here, and if the magnitude of this is greater than 0, so that means that we are already, we have already some flying momentum. We are going to start the dampening. The first thing we're going to do is we'll create some reduction amount. So we're going to get the float reduction amount and it's going to be equal to one. We might have to change this later on. We will have to tweak it. Maybe you will need to tweak it based on your game and your frame rate and everything else. But let's continue on. The next thing we're going to do is we'll actually start reducing our fly, flying character momentum. So it's going to be equal to minus equal the actual flight character momentum times the reduction amount times time dot delta time. Okay? So this will keep producing our momentum until it finally becomes 0. And then we are going to check if our flying car term momentum dot magnitude gets to a certain point where it's less than 1 f, then we are going to go ahead and set it back to vector 3, 0. And this means that it will become 0 on the x, on the y and on the z. So we get the reduction amount. We start reducing it. We then check if it's under a certain threshold, then we are going to immediately set it back to 0 because using, using this right here will never take it to actual 0. And finally, we going to check and our hook shot movement, handle hotshot movement. And here we're going to check if we actually, we're going to test for the input jump. And if we do have an end point jump, we are going to create a float with a bit of extra momentum. So this will help us push a bot to the front. And then we are actually going to add it to our fine character momentum, or we're going to actually create our flying character momentum. So the flyer character momentum is equal to the bookshelf direction because we need to add it in the direction. It's going to be multiplied by the hook shot speed. So the hook shot speed. And it's going to be multiplied by the extra momentum that we get. And then we are also going to also, this is a method we need to add these two brackets. And we are also going to set the state back to, well, the normal state because we want to add the gravity and all of that. So this actually stops us. And we are also going to reset the gravity. Let's save that and let's go test this out now. It will, of course, need a bit of tweaking. So now when we hit space, when we hit play, we can see that when we hooked to a place, we hit space. And you can see that we still have momentum going on. Now the only problem here is that when we stopped, we have a lot of momentum and it's not producing enough. And the other problem is that whenever we actually hit this point, we stop and we are not actually flying up. We just have forward momentum and we want to change that. So the way we change that is we're actually going to add some momentum upwards. And to add some momentum upwards, I'm going to issue you a challenge. So your challenge is to add upwards velocity. So configured the jump velocity you have. When we press the space in there, we want our player to go up a bit. So I'll give you a couple of events. Use the vector top up. So with that said, pause the video right now and go to the challenge. Okay, welcome back. So in here we are going to add another float, which is going to be the jump speed up and it's going to be equal to 40. So we'll maybe need to adjust this later on. And in here we are going to get our line character momentum, hope lying character momentum. And we're going to add it with the vector 3 dot up times the jump speed up. So save that back in our gain. When we hit play. Now whenever we shoot somewhere, we hit the space bar and nope, we don't have enough velocity. So again, we jump. It kind of works, but it needs a lot of tweaking. So let's go ahead and tweak it. Hey, so I tweaked a couple of things. So let me just tell you what you should do and what should you expect of each parameter. First of all, go into the game mode and make sure that you have the v sync turned on. This will change a lot of things. And what this does is it usually let me just show you when we hit Play, the FPS should be stable at around 60. Now this is not the best solution to have this. We are using Time.deltaTime, but sometimes frames just go up and down. This will maybe stabilize things a little bit. I've changed the gravity modifier to be five. I've changed the John Pi to 20. I kept the hook shot at two and let me show you what I did encode. So in here, first of all, the reduction amount is for and what this does, it will speed up the process of reducing your speed. So for example, if it's zero-point 85 for, let me just show you and we hit Play. So now when we hook our shot, we jump. But the problem is it takes a lot of time until it reduces your speed. So we, we were actually flown off. So if we jump in here, jump space and you can see that it takes a lot of time and we are still moving. So putting this up is much better. But the downside of this is that we actually stop very well. It's a bit interrupting as if we are cutting things off. The other thing I changed in here is this. So it's the threshold at which we put, we stopped the flying character momentum, momentum. And I put it at five. I just tried it out and so it's five and this is what the weld when you, when the momentum of your flying gets, for example, to five, it will stop. And you can tweak this around also and see how that affects. So this is the, when our movement gets cut off, you don't want it to, we don't want to have a very big because that way you want to feel the jump and so on. And the next thing down here, I changed this to a plus equals. So I'm not sure why this changes things a lot, but it does, it helps create a smoother jump forward. And I also made the extra momentum, or actually I kept it at 14 and made the jump speed 70. So this is what I have at the end. And this is all based on your preference. So I want you to go out there and test all of this out. So now when we play, Let's see. So these buildings are hard to get to because they are very narrow. But this one, for example, if we hit it at a certain spot and this is what I mean by depending on how you want to have. So maybe you want to have your player, if he has the hook shot in here and jump space, he can get to the top. For me, for example, I want to have outlay or maybe should at, around this point. And then when he jumps, he stands in here and it's actually really stable and really nice. So now we can get to high places and start shooting our, our enemies. So let's test this out. Try this narrow ridge. So I think I like this bookshop a lot. It's a very nice. You can tweak this around. You can add your own speed, your own velocity to the player. So it depends on how you want to hook shot to feel. I gave you the parameters that you need to be. So go ahead and tweak them with that said, I hope you enjoyed the video. And the next one, we are going to go ahead and start actually throwing some kind of hook shots. So for now we only have this cube that gets attached somewhere and our play flies there. No, we want to have a real realistic hook shot that touches the position somewhere in the air. And then when it touches, we start moving with our player. But until then, I'll see you in the next one.
64. Hookshot Throwing: Welcome back, My favorite game developers in this video, instead of simply putting a small square somewhere on our map. And here we've actually added this little cylinder that follows us around and looks a bit dodgy. So now what happens when we had the Iike somewhere? We can see that it goes there and when it gets there, we jump and we are on our beautiful plane. So now we have actually created a hook. So not only do we have a grapple, we also have a hook. Let's not waste any more time and let's get started. Oh, okay, let's get started. The first thing we need to do as we, while we, what we actually want to do in here is we want our to create a way to actually go ahead and send a hook out to the Red Square. And when it gets there, then our player will start flying. So let's go into our code and let's go up top and let's close the Whereas if the player movement, we won't be needing it anymore. If we do, we'll open it up. That's very simple. In here. The first thing we're going to create is a transform for the grappling hook. So a public trans form and the grappling hook. Save that. Now the next thing we're going to do is we're going to go ahead and create, and here a cylinder that will represent the grappling hook. So we'll right-click. And here we're going to create a 3D object which is going to be a cylinder. We are going to go ahead and make it 0.2 on the x-axis and 0.2 on the z axis. We are going to, oops, we are going, well, come on, come on. 0.2. We are going to rotate it around the x axis just like that. So around 90 degrees notice is not necessary, but I will do it. And we're also going to go ahead and make it just a little bit smaller on the y-axis. We are then going to create a another game object in here that we'll call the grappling hook. So the recent the position or skip it. So and we're going to chil the cylinder to the grappling hook. So now when we go ahead and change the end, we're going to also reset the position in here, so 000, 000. And now what we want to do is we actually want to be able to manipulate the zed in here in order to throw our hookup. In order to do that, we don't want to have all set to go both ways. We only want to go one way. So to do that, we are going to choose our cylinder in here and we are going to move it half way. So that means around, Let's see, Maybe it's 0.2. I'm not sure. So we look at the grappling hook, we check the pivot point and we want this to be at the other end. So we, I think we need to move it 0.4. And now the grappling hook, yep, it's on here. So now what happens when we increase or decrease desert? You can see that it increases from the pivot point. So remember. Make sure that it's at the pivot point and you move, move this cylinder to the edge. Okay, great. With that done, we have the ability to scale up our things and let's go ahead and move the grappling hook to our player in here. And let's go ahead and make it with the plain color or we can make it darker. It depends on you. I'll just keep it with the scholar. Okay, So let's put it in here. And it's a bit dodgy, but no worries about that. Let's go ahead and add it to our player in here. So we're going to give the player the reference of the grappling hook. And we'll save that. And let's go ahead and show the grappling hook to the player. So now the grappling hook will move with our player. Great. Now let's go ahead and create a method in here that will actually throw our hook and change its size. So we're going to do it in here. Above the handle hook shot movement. We are going to create a private void throw hook. And in here the first thing we're going to do is we'll get the grappling hook and we're going to look at the position which we want to actually shoot the hook at. So it's the hook shock position. Then we want to go ahead and create a float. And this will be the speed at which our hook gets thrown. So it's going to be through the hook, shot, through speed. And let's just make it for now. Turn off, maybe we'll change it later on. Then what we want to do is we want to go ahead and get our bookshop size. So we don't have a hook shot size yet. Let's create one. So hook shot size. And before we created up there, Let's go ahead and say what it is. So it's going to be dependent on the hook shot through, who shot throw speed, whereas it hook shot throw speed. And we're going to multiply it by Time.deltaTime. And then we are going to take our grappling hook and we're going to access the local scale. And we'll create a new vector 3 because scale is a factor three and it's going to be one on the x, one on the y. And because we said we are going to be increasingly zed, then it's going to be the hook shot. Let me just copy this and paste it in here. And then let's go ahead and create this variable. So we forgot to create it. And it's going to be a float and it's going to be private. We don't need it to be public. So arrive at float and hook shot size. Great, so now everything is set. Let's make sure that this is correct. Where is it in here? This is correct. So now what we want to do is we actually want to throw our hook shot, but we want to create a state in which we are throwing the snapshot. And so let's go ahead and created. So in here, we're going to create a new state which is going to be called the hook shot through. So hope shot thrown, save that. And we're going to create a switch statement for it. And this switch statement will be, let's put it in here. So in the case that we have the state at the hook shot thrown, then in here we are going to throw hook shot. So throw the hook. And now, so what's the problem here? So shot, okay, so we need to add the break. And now what we want to do is whenever we actually start, instead of handling the hook shut movement immediately in here, Where is it? So when we end here, instead of immediately starting to fly the player, we want to, before we do that, we want to go ahead and start the hook shot throwing. Save that. And also what we want to do is we want the hook shot size to be at 0 f. Save that. And now let's go ahead and test this out and unity. So back in our game. And no dodgy comments, please, if you do want to add a comment at a review. And now when we press the Iike, we can see that our grappling and goals, we can not move neither our camera nor our movement. It goes and does it continue? Continue to go top. Let me just go out here, go to the scenes and it continues to go for ever and ever. So the natural next step is to actually start transitioning to the flying of our layer. And it's actually going to be part of your challenge. So your challenge to transition to fly state. So calculate the distance between the player and the hawk shop position. And if it's greater than the hook shot size, we want to transition into the flying state. So what you need to do is you need to make sure that whenever our bookshelf size as it's in, as it increasing, if it gets bigger than the distance between the transform position and the hawk shop position, you'll need to transition into the state of the hook shot flying player. So with that said, pause the video right now and go ahead and do which Alan? Kaye, welcome back. So in here what we're going to do is we'll go down. And while we are throwing our hook, we are going to check if our hook size gets greater than the vectors. Dot distance between the transform box Xin and the hook shot. Where is it the hook shot top position. Then what we're going to do is we'll take our state and we'll transition into Ops. I mean, it's going to be equal to the state and we'll transition into the hook shot flying at layer. So that way we will start flying. And one more thing I wanted to do is in here, we can also move our player. So we'll add the layer movement. And let's go ahead and also add the camera movement. Oh, what's that? Copy this and we'll add the camera movement. We'll save that. So now back in Unity. Let's look at this and let me just put the scene alone in here. Though. I'm in the game alone in here, make it a little bit bigger so we can see what's happening. Let's hit Play. And now when we start our game, Let's see. When we had the Iike, our, oops. So our hook will go and we can move around, we can, we can jump yet, and when it gets to the point, and then we go. But as you can see, there are still a lot of problems. So let's try this again. We had the E key on another place and it's very, very slow, but at least it's working. So let me just rearrange this a little bit, close the manager and let's increase the speed. So the speed is very slow. The UK shock throw speed, Let's make it double the speed, triple the speed. So make it 30 back in here. It's a good idea to put the speed of our grappling hooks size in here. It's not bad at all. So when we hit the Iike, it goes, it takes a lot of time. We still need to increase it. So let's make it 60, again, double the speed. Go back in our game. Hit play. I just want to have a really nice grappling hook as if we are Spykman. So Hideki, it goes, we fly, we jump, and we get to the top of the building. Now we still have our big, huge grappling hook, so we will need to change that. And it's also causing us a lot of problem because we are actually creating it in front of us and we can do anything about it. So don't worry about that. We'll be fixing all of these problems in the next video. But what that said, I hope you enjoy it. I hope you had a bit of fun and had a small lab. And I'll see you in the next one where we will fix all of our problems with this weird Huike.
65. Final Touches : Welcome back, My favorite game developers. In this video, we've actually fixed all the things that were wrong with all grappling hook, but not only that, now when we hit the E key, it doesn't look away. And we had a particle system. We've added a zoom in and zoom out to the camera. This adds a lot more speed to our gain. And we actually fixed everything wrong with Outlook. So now it really looks like a real hook. So now we fly. We have this particle system. We are warping through our world. We can shoot our enemies while going down. We have an amazing game. We even have a pause menu and the main menu. So let's not waste any more time and let's get started with this very long video. Oh, case. So let's go ahead and fix our problems. There is not a lot but we're going to fixed. So first of all, what you want to do is whenever we start, we want to deactivate our grappling hook. So let's go to the grappling hook. Will need to access the game object and we'll set active to false. So whenever we start our GREP them cookies off, the next thing we're going to do is we're going to create, we have all of these right here. So we'll create a method for them. What, let me just show you what I mean. So for example, the state normal Andy reset gravity. We also want to add to it, whenever we stop moving, we want to send the game object of our grappling hook to false, so we don't want to add it everywhere. So let's simply, so we have three places where we have them. So let's go ahead and create a method for all of these. We'll call it the private void, stop, hook, shot. And in here we are going to copy these, will add a couple of things more to this and you'll see It's very important to have this end will exit the grappling hook that set active, I mean the game object dot set active and it's going to be false. And let's go ahead and call this top hook shot action. And here, and here. And also in here. And if we find another place. So we'll also need to stop the hook shot. Do we have any other place for it? I don't think so. No, we don't. Okay. Great. So where are we whenever we actually shoot in here when we start throwing, we want to go ahead and get the grappling hook, the game object, and we want to set it to active. Okay, great, Let's save that. Let's go ahead and test this out. So when we hit play, we will send our hook shot. It will go there and when it gets to the distance, it will stop. Okay, great. Now the next thing we want to do is we actually want to go ahead and keep the hook shot looking. Solve the problem right now. If we, for example, shoot a hook shock there, when we move, you can see that the hook shot starts moving around with us. So we'll need to handle that. Let's go into our handled hook shot movement. So in here, whenever we choose the direction and all of that, we are actually going to, well, after we choose the direction, we are actually going to go ahead and get the grappling hook dot look at. And we are going to be looking at, at the hook shot position. So now even as we are moving or flying around, our hook shot or grappling hook is always looking at the hook shot position. Save that. Now, let's take a look and see if that works at play. And now the Iike goes, even when we look around, we move around. Nope, there is the hook shot. It's still there. Very nice. So great. Everything should be working fine. It, if it disappears when we get to our position, doesn't appear anymore under US. It only appears when we need it, and then we jump and everything works great. Now it's time to add a couple of things like, for example, we want our FOB or the camera to zoom in and zoom out based on our while we are flying, this will add a bit of speed feeling to our game. So it's going to be part of your challenge. So zoom in and out when we are flying. So find the camera and zoom in when we are flying using bookshop and zoom out when we stop using the horseshoe. So we've already done this kind of challenge, I think a couple of videos ago. So your only job is to find where we need to actually zoom in and when we shouldn't be zooming. And so pause the video right now and go do the challenge. Okay, welcome back. So as I remember, it was the camera move. So the camera move in here and it's zooming in, and we need a target Zoom, so a target of OPV back in our player. And where should we be calling our zoom in? Well, we should be calling it as long as the hook shot hasn't actually gone, got to the position. So as long as the hook shot size in here. So as long as the hook shot size is still less than the distance, then what we're going to do is we're going to go ahead and find a game object of type. It's going to be the camera move. And in here we'll access the Zoom In. And how much should we be zooming in? Let's see. If we go to the camera, we increase this. If we, let's say go to 100, is 100 a lot. I think it's a lot. So if we maybe, oh, you know what we want, we do want to have this little like convex look. So 100 I think is really good. So we're going to make it a 100 F. Save that. And when should we be zooming out? Well, we should be zooming out whenever we stop our bookshop. And thankfully we've created a method in here. So we're going to go ahead and find the game object of type. It's going to be the camera move. And we're going to go ahead and zoom out. And this should reset the position and doesn't need any parameters. Back in our game. Let's just put the game and here we don't need to look at our scene anymore at play. So now when we start flying, ooh, nice. So this gives a bit of a zooming feeling as if we are going fast somewhere. Very nice. So it's not bad. If maybe we can make it more than 100. Maybe we can go ahead and make Where is it, Where is it? Where is it? Okay, So in here, maybe make it 120. But the problem is argon stays in position, so it's not very nice, but no worries about that. Anyways, 120. Finally, what I want to do is I want to add some kind of particle system that will give us the feel as if we are traveling through space. So we'll add a particle system. So usually we used particle systems that we had in our examples. Now let's create our own. So this is advanced unity. Good. Let's go ahead and right-click in here. We can go to the Effects and we can create a particle system. So I already have prepared something, so I already know what I'm doing. So just to be completely transparent with you. So you don't think I'm some kind of mastering particle system. This actually took me a while to do this. So first thing we're going to do is we want to actually rotated towards the player. So on the x-axis, Let's rotate it like that. So it's minus 1, 18, and it's going to be in front of our player. So we'll be able to, okay, it doesn't look in game mode. That's because it's so far away that the player can't even see it. So let's put it in here, in here and down just a little bit. So is that facing the player? Nope. 3d perspectives are so hard to work with. Okay, so now in our game, yep, there it is, We can see it. Let's put it in here and let's make it a lot smaller. Okay, Let's move it a way just a little bit. So this is a enough if you want to keep it like that. But no, we are actually going to add a lot of things in here. First of all, the start time, Let's make it 0.28. So the start time will actually delay in seconds. The particle system will wait until it emits a particle. Then we are going to go to the emission rate. And let's see in here we have the emission rate, the rate over time. Let's make it 69. So this will increase the emission rate. Of course, the number of particles that are emitted will go into the shape and we're going to maybe make the angle 0. So it will become like a cylinder. So the angle will be 0. And we are going to increase the radius. So we'll make it around four. Nice. Now we have a really cool effect. Next thing we're going to do is we'll go into the lifetime. So the lifetime in here, and let's go ahead and make it one. So these particles will not be. Just going all over the place and it will actually help with our processing power. So the more particles you have, the more processing power requires. And even my laptop right now, when I decreased the number of particles, I mean, the lifetime of the particles, it stopped going. So the fans stop trying to call my system. And let's go ahead and increase the start speed from five, and we're going to make them 20. So now they are super-fast. Now we can go back in here and put them just like that. Next thing we're going to do is we'll go to the render and we want to make them as if they are some kind of lasers coming to us and render. We'll change this from Billboard to stretch billboard. So now we have them a bit stretched. And we're going to change the length of the scale to 13. So o, as you can see, these are now more apparent as we are moving through space and time. Okay? So we're going to also change the color over time. And let's go to the color over time, and we can need to 0. First of all, turns on. We can choose between two random gradients. So we're going to choose, first of all in here, some kind of blue color. And another color in here, which is going to be some kind of red color. So let's see that in action. Okay, So there's still a bit of white. So in here, let's go ahead and make them completely blue. And in here we'll make them completely red. So let's see how that looks. Okay, that's not very bad. At least it's something, okay. Oh, we can maybe decrease the Alpha. So this is the Alpha and here we can make it go from 0 to 215. And this will have the same effect. So from 0 to 50. And this, okay, so let's see, that looks good enough. Now in our materials, Let's go ahead and create a work material. So this is the material called the warp mat. And we'll make the shader a additive legacy shader. And the texture in here will be the standard. So choose the default particle, particle as the texture in here. And let's move this alpha to be 250, case if that. Now what we're going to do is this material in our particle system. So let's go back into our particle system in here and down here in the render. Let's close this one up. In here we have the default particle. Let's add the warping here. Nice. So now this will make our colors a little bit brighter and you can go ahead and tweak all of this. I really encourage you to go and delve deeper into this. Now I know how most of these work. And to actually go and test this out in front of you and do them will take around a three videos. So go ahead and try your best, see what works for you. See what doesn't. So great. Now we have the particle system now, all we need to do. Before we continue on, we need to make sure to pre-warming this. If we don't add the supreme warm when we actually turn on the particle system, it will not start immediately. It will take a bit of time. So rewarm is always there, ready to start. It does add a bit of performance shoes, but we'll not worry about that. It's not that significant. Okay, great. Now with that done, we're going to add this particle system to our player. Now, you can either add this to your head. So however you wrote it, you keep seeing these particles or you can simply add them to the player so they move with him. And let's go ahead and reset the position of these particles so they look directly in the face of our player. And we'll simply going to move them backwards and move them a bit upwards. So now they look really nice. Now it's time to go ahead and get a reference to them and turn them on and off based on how we want them. So back in our code up here, and let's go ahead and create a reference. So we'll create a public particle system or system. And the warp particles, save that. And let's go ahead and put them in the inspector before we forget, because I always forget. That's at the particle system in here. Save that back in our code now where should we be turning them on and off? We can use them just like we use the audio we can play and we can stop. So we are going to do just like we use the zoom in, we are going to use the particle system. So in here, we're going to call the warp particles and we're going to lay them. And when we stop hooking, we are going to work particles, shot stop. And now and you know what? Let's turn the particles back on. So now when we hit play, okay, So they are always on, Let's click on these particles in here and let's turn off, Play on awake. Save that. Now when we hit play, they shouldn't be playing the whole time. Okay, great. So now when we press the Iike, we have our particles very nice. Now they are moving with the players had, if you don't want that, you can actually detach them. But I think this looks really nice. So now we can see we have the zooming n, We have the particles, we have our grappling hook feeling really nice. We can jump on top of buildings and we have officially finished with our grappling hook. So I hope you enjoyed the video. I hope it wasn't too long. And with that said, thank you so much. And I'll see you maybe in the next one.
 Michael Murr, Software Engineer | Coding Instructor | Game Dev