Transcripts
1. Why You Should Watch This Course: So you're probably
here asking yourself, how are my favorite
games created? How does the enemy know
where I am and follow me? How do they should
project files? How do have boards work? Can I create my own levels? How do I pick up patterns? How do I shoot these weapons? The answers to all these
questions becomes clear once you understand a couple
of fundamental concepts, how to add a rigid body
to a game objects, start moving it around. Add animations to
make Sprite swap in a world that we built
using a tile set, allow it to interact with the world and more from
one scene to the next. Oh, and also add behaviors
to those objects using code with over 30 scripts and
thousands of lines of code, you will become a master
C-Sharp programming. My name is Michael Moore, founder of WM game dev, and my goal is to
make you the best game developer and the
most fun way possible. I'm developed a strategy
that has helped thousands of aspiring game
developers achieved their goals of creating
the real-world games. And I want to do
the same for you. What I've learned is that it can be very difficult
to know where to start and what steps to take to go from beginner
to intermediate, to not only in game development, but in programming and
learning how to code. And this is where the new
updated strategy comes in. I call it the cyclical pyramid, where we start off by learning the very basics in Unity engine, C-Sharp programming, and game design using slides
and units documentation, we then immediately use what we learned to
enhance our game. But as we progress
through our project, we come back to the
same concepts and use those and more
complex and fun ways. Finally, we have the
last two sections where we go deeper
than any other course. First, into advanced unity, where we design a state
machine for our boss fights. And secondly, advanced
C-sharp were week we gave a consistent level
2 level gameplay loop. You'll also have the chance to flex your game developer muscles because with every
video there is a mini challenge for
you to complete. And even if you can't
figure out how to do the challenge, Don't worry, I will be there to
help you after to try and complete the
challenge with you. And the most amazing
part is that we're doing all of this with the
latest version of Unity, with the newest techniques and content and modern
game development. Many students, just like you, who didn't know the
house to wares and the y bounds the scores
to be extremely helpful. But over 10 thousand students,
hundreds of reviews, a number that has probably grown by the
time you're watching this video and a huge growing active
community on the score. And I can say with
absolute confidence, the scores makes it easy
for any beginner with 0 coding experience
to jump in and start learning how to
create incredible gains. So what should you expect
by the end of the scores? You'll become a master
problem-solver. You'll understand
the fundamentals of coding and learn
how program games, just like the ones you're
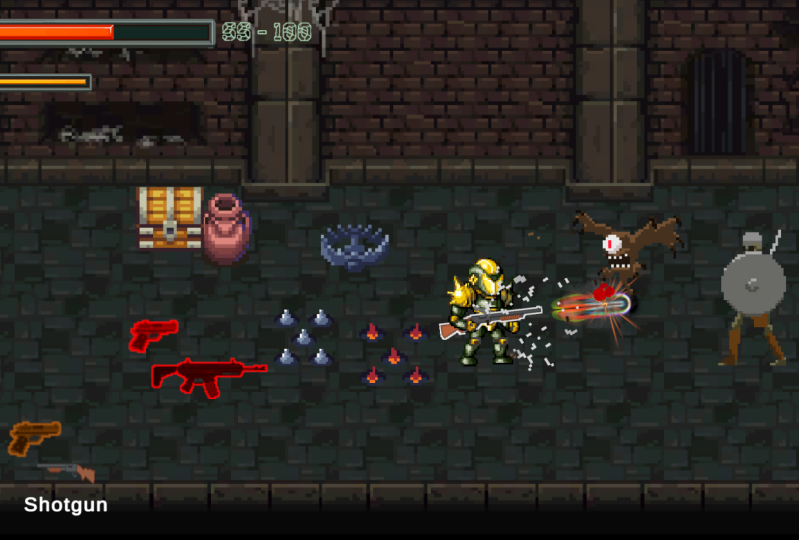
seeing on the screen right now. Everything in our gain
will be configurable. So you can tweak, play around and
give the game and individual and special
feel about it. So you'll be putting
your own creativity into it and really
making it your own. I'm so excited to get started
and hope you are too. This is the perfect time to
start learning how to code. So dive in with me and
I will help you along every single step of your
game development journey.
2. How To Use This Course: Welcome back, My favorite
game developers. And this video, actually, not in this video. I've created this video
in order for us to maximize the potential of
learning from this course. So I want you, I want to guide you
through a couple of steps that we can
use in order to fully squeeze out all
the learning energy from the course you're currently taking
because you've already, you are already spending
your time here. So why not maximize it? So the first thing
that we are going to understand is how the Q&A works. So as you are
watching the videos, you're looking through them. Maybe something comes up that should not fully understand. So what you can do is
you can go ahead and slide into the
discussions right here. And you can see that you
have multiple options. You can either start a
conversation, ask a question, or you can simply
just share a project. So in here, you can ask me
any question that you want. No question is of limit. But there is a small
step that you need to do before you ask me a question. And that is, go ahead and
do your own research. Why do I ask you to do that? Well, because sometimes
when you stumble upon a problem and you go ahead and look for a
solution yourself, and then you either
find it or you don't. When you come back and
ask me the question, it's much easier to understand. Why is that? Because you've already went through a couple of suggestions, maybe none of them
were suitable. But as you go along finding
the solution to your problem, you have gained a
lot of knowledge. When you come to me, when you ask Michael and we go through together finding
of the solution, you will understand how
everything clicks and later on, when you maybe come upon
the same problem or maybe you see this problem
for another student. You can help them out
and it's much easier. And finally, whenever you do find a solution to
your question at it, your question and add a salt prefix to it because
other students might have the same problem and they
will find a solution for their problem if they see the solved prefix behind it. And finally, before I leave, you just want to say
one thing that there is no question of limit. There is no stupid questions, there is no dumb questions. There are only non
professional game developers. Nobody was born a professional. We all have to learn
through trial and error. You wouldn't believe
how quote unquote, my questions were done because I wasn't born a professional in unity took
me years of practice, trial and error or asking
questions, Googling things. So this is a process. Don't worry, don't be afraid, don't be unsecure about some of the questions that
you might want to ask. Be brave enough to go
look for a solution. If you don't find one, don't worry about it. Just leave a question. I always, always answer all
of my students and we always delve as deep as needed in order to find a solution
to any problem. And now let's talk about
the Discord server. And this is where you
can go deeper into the community that we've
created here on WMD game dev. So you can go either to the
link in the description of this video or you
can visit my profile and find the link
somewhere in there. And I do recommend that
you join the discord. Why? Because most of the time it might
take me a couple of hours in order to reply
based on where are you from. So maybe our we live in
different time zones. Maybe when you do
ask me the question, it's midnight and you
need a solution fast. I might be sleeping, I might be not able to
get to my computer. So it's very
beneficial for you to join the discord channel
that we've created. And let me just show you the
score channel right here. This is the beginning
of our discord channel. You can see that we have
the general community. We have the C-sharp chat, we have the game design chat, we have the show off your game. We have the general game
development questions. And you can see that we
still don't have anything in here because it's fairly
new as I'm recording this. But later on, when
you go in here, you'll notice that there is a huge community of
people waiting to help you and maybe people
waiting to get help from you. And it's very
beneficial to try to solve other people's question. You wouldn't believe how much I've learned from just
helping other people. And you can see here that
we have multiple courses. These are all the
courses that double m gamma game down
has or I've created. And we can see also we
can share memes and here we have general
game discussions, AAA games, I don't know
whatever you like to play. We can discuss them in here and the social channel or category
and so on and so forth. So I do recommend that you
join our discord server. It's very fun. We are going to have
a lot of fun there. And that's it. That's all that I wanted to
say about Discord server. Now let's move on to
the challenge slides. So what our challenge slides. As you move through each video, you will notice
that at some point, I'm going to tell you to pause the video and
start the challenge. So when you see this slide, you'll wait for me to
finish all the points and then you have
to pause the video. Why am I emphasizing the word? Have to pause? Because it's much better to learn by doing and
not by just watching many courses that I've learned
from that I personally took where I felt lacking
in the Department of doing. So. You just set around you
watch somebody create again. Okay. That's very good. And now it's over. Okay? And then you finish the course. And after a couple of weeks, you notice that you don't actually know
how to do anything. So the challenge slides that
I've created is extremely important because you at this point start doing
instead of watching. And even if you can't figure
out how to do the challenge, Don't worry about it. I will be there to
help you after you've tried and help complete
the challenge with you. So you are never left alone. And an addition to that, just like looking through answers to your questions
before asking in the Q and a, when you do a challenge, you stumble upon
multiple variables that you might not have
considered before. And when you see how I
complete the challenge, you will have it ingrained
much better in your head when you encountered the same problem when you do start
creating your own games. Okay, so let's move on to the course structure and just
talk about each section. And briefly, just to get you a heads up
on what we are going to do. So first of all, we
have the section one which you are currently
seeing right now. We have the how to
use the scores, how to download and set up
Unity and Visual Studio. And then we'll just talk
about the game design and the inspiration of our game and where we are
going to get it. We'll also have just
a brief introduction into Unity and Visual Studio, just so you get that uncomfortable first
phase out of the way. Then we are going to be
setting up our world. This is just like it says, we are going to be setting
up the world that we have. We'll use a bit of
sprites with the setup, the player, and so
on and so forth. Then we are going to set up the shooting mechanics
because obviously we will have weapons and
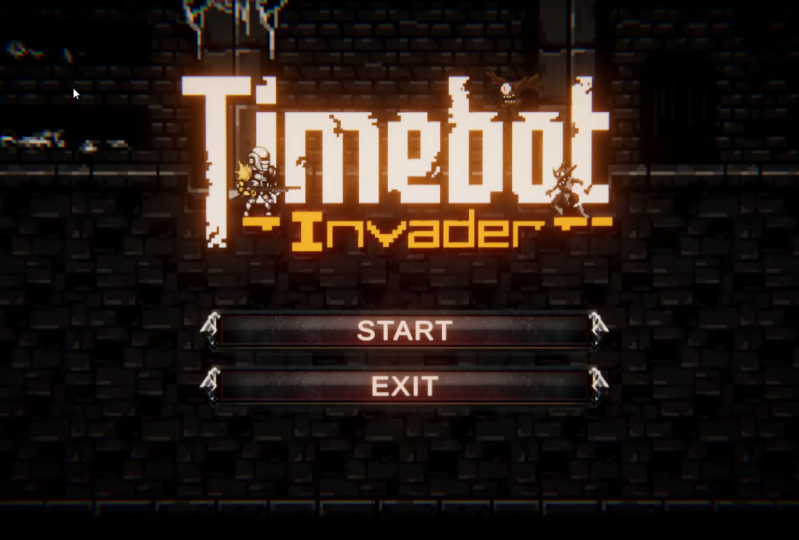
the time bot invader. So we will need some
kind of weapons. And the most important thing whenever you are starting again, is to set up the core mechanics. And this is what we are going to do by setting up the shooting. We are going to set
up the enemies. Obviously, we need enemies. This will be the first
phase of our enemy setup. Then we are going to
have a more varied, let's say, more variety
in the enemies. But for now this will be enough just to have somebody
to shoot that. We are going to be creating
rooms using tile maps. This is where we
are going to learn how to slice up the sprites. We will already
learn out to that, but we will learn how to create bile acids from the
sliced up sprites. And then we will have
the level of flow. So this is when we are going to start moving from one
level to the next, because obviously this
is a rogue like game. So we are going to
create that level flow. Let's continue on.
We have Section 7, which is the distractible
environment. We want to have crates
that we can destroy and get coins from them and
not crates actually, I think they will be
vases or something. We will get coins from them and we will get help from them. We will have advanced shootings. So this is where we are going
to create a weapon system. So back when we created
the shooting mechanics, we will only have
a pistol maybe, or a shotgun or something. Then in this one we
will have a shotgun, rifle, pistol, and all
of that good stuff. Then we will have
the health system because at this point we still don't die and we still don't kill the enemy,
it just explodes. So in this section we are
actually going to be adding a health system where our health slowly drains
and so does the enemies. We have the pickups. Obviously we can pick up
health pickup weapons, pick up what else may be coins. We will have the music
and sound effects, because what game
doesn't have music and sound effects will have
multiple enemy types. This is something that
I've told you before. We already have
one type of enemy, but we are going to
create different AIs, four different ways
the enemies will work. We will have in Section 13, the shop on and money system, as you'll see in the
next video maybe, or in the next couple of videos. Our inspiration comes from
a game that's called Hades. And there we have
a shop and all, almost all games have a
shop and money system. And this is where we will
introduce our own and the shop. You can buy health by
upgrades and buy weapons. Something else, we'll see, we'll have creating menus. Obviously, every single
game has a menu, so we will also have a menu. And then we have the Section 15, which is advanced unity, and that is where we are going
to create the boss battle. So to this point, we have the enemies, we have the weapon system, we have everything set up. Now it's time for an
actual boss battle. And I think every good game
has its own boss battles. The mechanics will be different
from the regular enemies, and it will be different through a system which is
the state machine, which is the advanced
unity part of the course. So make sure that you
get to the section. Finally, we have
the bonus section, which is the section 16, which is the room generation. So as you'll see in
the game that we're just going to play on the, actually an any rogue like game. There is always the
room generation. So we will have, let's say, five or
six models for rooms. And then as you kill all the enemies and all
the waves in every room, then you are going to move on to the next room and the
next term will be random. And you'll also have a
choice between two rooms. So you'll be able
to choose between, let's say the boss battle room and a roomful of skeletons, or the boss battle room
and a room full of spikes. And then maybe a
roomful of spikes. And I don't know, maybe the shop or something. So this will be the advanced C-sharp and object-oriented
programming because it will take a lot of work for us to have this randomized room selection. And it's going to be very fun. We are going to learn a lot. So before I leave you, I'm just going to
give you a couple of words of encouragement. But if you want
to call it, that, can call that encouragement, go through this journey, you are going to face
a lot of challenges. So make sure to always push through them whenever
you encounter a problem, I recommend that you, first
of all do your own research. So go through, go ask
the question on Google, Checkout, some
videos on YouTube, and then when you find
yourself extremely stock, go into the Q&A, look for your questions, look for an answer. And you can also
immediately asked me, I'm always there, I always
answer any question. And with that said, this is going to be an
amazing journey of, I don't know how many
hours or for you, how many weeks it will
take for you to finish the course or maybe days
it will take you days. What I recommend
is that you get to the last two sections because
this whole course is, especially if you're a beginner. So discourse starts off
at a very beginner level, we move to a intermediate level. And as you see right now, and the last two sections, we go to the advanced level. And once you get to the
last five or six sections, you will have so many skills, so many tools in
your arsenal that the advanced sections
will be pretty easy. I think hopefully I've
taught you everything right? So with that said, let's not waste any more
time and let's get started. Continue on.
3. Downloading Unity and Visual Studio: Welcome back, my fellow
game developers. In this video, we
are going to be downloading unity and
stalling good and integrating with it the
Visual Studio tools that we are going to
need for the scores. So let's get started. First thing you need to go
into Google and then go, go simply type in right
here, download Unity. It's as simple as that. When you type in, you will
get a lot of suggestions. So make sure that you find
the one with the Unity 3D.com and the get
unity of course, and click on the download Unity, which will open this
page right here. So in here you will
need to download Unity Hub if you have
never before used Unity. Now, what is Unity Hub? Unity Hub is like a place
where we will keep all of our versions of Unity and also all of the
projects that we make. Now before Unity Hub, our project will be
all over our computer, somewhere in different
directories and so on. So the Unity Hub
really makes it much easier to go through your
project and really have, if really good organization. So make sure that you download Unity based on which operating
system that you have. So if you have the macOS, you need to make sure
that you download the Unity 40 macOS. And if you have a Windows 7, then you download
it for Windows 7. So simply click on
download Unity Hub. And when you finish downloading, Q should have this installation
folder right here. When you double-click on it, it will ask, do
you want to? Yes. So you continue on, you click on Agree, you choose the
destination where you want to put your Unity Hub. And then you start
the installation. Now because I already
have Unity Hub installed, I will not install it again. So make sure that you install everything and I'll
see you in just a bit. Oh, okay, welcome back. So if you've installed
Unity Hub correctly, you should get a message or a window right here that
looks something like that. Now, we don't have
any projects yet, but this is where our
projects will all be present and we can access
them at our leisure. Now, before you continue on, Unity will have to make sure
that you have an account. So this is my
account right here. I used my Google Gmail to
create an account on Unity. You can either create
a new account or you can also use your
Gmail or Facebook. I'm not sure if they allow that. And once you've created
an account on Unity, you can go right here
into the installs. And this is where we download different versions of Unity. Now, for this course, I'll be using the latest version of Unity that we currently have. Now, if you want to
install a new version of Unity or any kind of
version of Unity, simply go right
here into the ad. Click on Add. And in here you can
see that we have different types of unity
that we can install. Now, first of all, we have
the recommended releases. These are the ones
that have already been tested and thoroughly tested
and they work perfectly. But you can also go and look
for the official releases. Now, we are going to be using
this version right here. And this is a very good version. You can install it. And you also have the pre-release
is now press releases are do work the same as the official release and
the recommended releases, but they are sometimes
a bit buggy and you may encounter a couple of bugs on the official releases. There also might be
able to bugging issue, but they are not as evident
as in the previous releases. You may not encounter
any problem, but I would recommend
that you use the official release
because they are newer than the
recommended releases and less bulky than
the pre releases. So download the latest version that you have on your computer. Or currently maybe you are from the future and you have
a newer version than me. So download the latest version. And don't worry, this course works or the project
that we are going to create will work on any version
of Unity and the future. Now, we are going to
click on Next right here. And this is a very
important part of downloading and
installing Unity now. And here we have modules, and these modules are
like add-ons to our unity that allow us to create games
on different platforms. So for example, in here you
can see that we can now load modules for
different platforms. So for example, if you want
to create a game on Android, you can use the
module for Android. Or if you want to
create a game for the iOS or icons and so on. You may also be looking
to create games for Linux or Mac OS or what. So, based on what
you want to create, you can choose one of
these model modules, or you can just wait later on, you can download
these at any point. You also have the documentations which I recommend you download. These documentations are
the Unity documentation and they are very important. Maybe sometimes you want
to look up certain things. And finally you have
the language pack. And maybe if you're
Chinese or Korean, I'm not sure what these are, honestly, I have no idea. Maybe you can use one of
these language packs. But the most important thing, and you need to make
sure that you have the Microsoft Visual
Studio Community 2019 or newer installed
with your unity. Because we are going to be using Visual Studio to
code everything, everything, and all
the behaviors of the objects that we
create immunity. Now, this is all you need to do. Simply click on Next
and you will begin the installation of your Unity. So with that said, it's time for your
first challenge. And your challenge
is going to be to download Unity and
Visual Studio. So download Unity Hub, just like I showed you, make sure that if
you have a Mac, you download the Mac version. If you have a Windows, you download the
Windows version. Then you need to download
the latest release. And finally, make
sure that you also download Visual
Studio with Unity. So pause the video
right now and go ahead and download unity
with Visual Studio. And in the next
video we'll simply go over the interface
of unity and Visual Studio you just saw we can get over our initial fears. So I'll see you in the next one.
4. Unity and Visual Studio 101: Hello and welcome back, my fellow game developers. In this video, we are simply going to be explaining
what Unity is, what Visual Studio is, how they communicate
with each other. And we'll explain
a little bit about the interface of both
these amazing tools. So first of all, what is unity? Let me put on my laser. So laser please. Okay. So unity is a cross-platform
game engine developer by, developed by Unity Technologies. So what do I mean
by cross-platform? Cross-platform means
that it can be used on different kinds of platforms. For example, unity, Windows and Mac OS will be using Unity
to develop our games. And we of course
going to be using this Unity engine right here. So before we move on, let me just show you the
interface of unity and we will move on to
explaining Visual Studio, and this is unity. Congratulations, you've
made it this far. So first of all, we have our toolbar right
here about everything. And this toolbar
provides access to the most essential
working features. On the left, we have
the basic tools for manipulating the scene view and the game objects within it. In the center we
have the play and pause and step
control right here, which allows us to play
our game, pause our game. And then we can also add
a step frame by frame. The buttons on the right
gives you access to unity, collaborate, and the Cloud which will not be using
and the accounts. We also have the layers
right here that we will be using a lot in this
course for our project. And we finally have the
layout and bi-layer. This is our layout right here. So we can change the
layout, for example, the two by three
or the four split. Or we can basically use the default and this is what
we are going to be using. So if you don't have
the same interface as me or different
kinds of layouts. Simply click on
here, go to default, and we will both have
the same interface. Now, next thing I
want to talk about is the hierarchy window right here. So if we click on
this right here, we can see that we
have a main camera and this is our scene view. We'll get to our
scene view and we have the directional
light right here. But this hierarchy,
hierarchy right here represents every
game object in our scene. So each item in the scene
an entry in the hierarchy. So the two windows are
enhancement inherently linked. The hierarchy reveals
the structure of how game object attach
to each other. And you will see in more detail what I mean by attached
to each other. Now next thing we have the
scene view right here. And if we right-click
on our mouse button, we can actually
move around using the a WASD keys right here. And you can see that we
can move around our world. And in here we are going
to be building our games. We also have another window
right here that is the game, and this is our game view. So this is how we see our game from the
camera's perspective, will be changing
everything around. And this is where we are
going to be most focused on later on with
our game creation. Next thing we have the inspector window on the right and let
me go back scenes. So in an inspector window, you are allowed to view and edit all the properties of the
currently selected game object. So as you can see
right now we have the directional light selected. We can increase and
decrease the intensity. We can change the color, we can play around
with everything. And we also have the
main camera right here. We can also change and play around with various properties. And the inspector right here. And these technical
words are very important because I will be using
them throughout the course. So remember a
hierarchy inspector, the scene view,
the game of view. And finally, we have the
project window right here. And this is where we display the libraries and
assets of our game. So if you click on
assets, currently, we have nothing else
besides the scenes. And if we double-click
on scenes, we have the sample scene right here that we can double-click
and enter, we can save. So we don't have anything
besides our scenes. Next, let's talk about Visual
Studio and what it is. 0. Okay, so what is Visual Studio? So Visual Studio is actually Microsoft Visual Studio
and it's an IDE. What is an ID? It's an integrated
development environment. And what that means
is that it's like an environment for us to develop integrated
code into Unity. So this is a very
complicated explanation, but this basically is where we are going to write
all of our code. And VS will help
us write the code. Use to manipulate game objects
in Unity using scripts. So what our scripts, this is the way we use
Unity with Visual Studio. So we want unity to communicate
with Visual Studio. In unit, you are going to
be creating game objects. So for example, the car
that we want to move while not got the player
that we want to move around. The maybe objects
that fall down, maybe some kind,
the weapons that shoot the monsters
that attack us. We put these, all of
these objects in Unity. But whenever we want
to manipulate them, we are going to
use Visual Studio. But unity and Visual Studio don't automatically
work together. The way we make them
work together is through these scripts which
are dot CSV files. And this is where we
write all of our codes in the dot CSS files in
Visual Studio and there, and from these scripts we
are going to manipulate the behaviors of the objects that we have inside of Unity. So let me just show you
how Visual Studio looks. So this is Visual Studio. Let me just zoom in a bit. And in here you can
see that first of all, we have these three lines
which are using something, using something and
using Unity's engine. Now these are called namespaces. And what these are, they are a collection
or a library of codes that allow us to use
certain things in our game. So for example, the
Unity engine allows us to use different
aspects of unity. For example, the
physics in Unity. It allows us to access various details in Unity
that without this. So for example, if we remove
this line right here, we can no longer
use mono behavior. And because we are not
using 10 behavior, which we'll get to in a second. We can no longer use
start and update. So we'll turn this back on
and we can use mono behavior. Before we get to that, let's first talk about
what public means. Public means that
it's for everybody. There are two types. There are public and
there are private. We'll get to that also. Later on. We have the class and
we have the class name, and this is actually
the name of our script. And we will learn that we
have to always make sure that we name our class
correctly the first time, because it will create a
lot of problems for us. So this is how we create
a class and all of this code will be written automatically so you don't
have to worry about it. These two points right
here means that we are inherited, inheriting
mono behavior. So what is Monte behavior
10 behavior are, well, we use behaviors that are already built into
Unity that allows, allows us to control the
various game objects. And because of money behavior, we can use two
methods or functions, which of course will
be later on getting into like start and update. And actually in here
you can see that we have this green line. And this green line means
that this is a comment. And whenever you want
to create a comment, you simply put these two
back slashes behind it. And whenever we put two
backslashes behind any code, it means that this is
a comment and it will not be executed in coat. Great, so what is start? Start is called before
the first frame update. So when ever the
game object that has this script attached
to it starts, the code inside of this start
method will be executed. And similar to start update
is called once per frame. So every frame our
game goes through. This method, update will be
called an everything inside of it will be executed
to put it more simply, start is where we put
our initial conditions. So for example, the
weight of the car, the speed of our player,
the climate maybe. And then update is where
we make our car move. We make our player jump, and we make the climate change, for example, the wind
blows up or something. And the other, I don't know. So this is how we basically
use Unity with Visual Studio. Of course, in the future as
we move through our project, you will have a much, much better understanding of the start and update
and everything in it. So don't be worried too much if you don't understand
everything right away. But now you have a
challenge in front of you. And your challenge is going
to go and make a mass. So open Unity and mess around. Click on a few things. And when you're finished, go to the next video and
we are going to be making our first code and get started. And it's you still don't know how to create
a new project. Don't worry about it. In the next video, we
are going to create a project and make our first go. So I hope you enjoyed
this video and I'll see you in the next one.
5. Version Control 101: Welcome back, my fellow
game developers. In this video, we are
going to be learning everything about
version control, source tree, and creating
repositories of our projects. So as you can see right here, we've created a new project and we've downloaded
source tree. We now have a couple
of commits in here, and we actually
reverted something. We've created our
initial commit, added a cube, reverted it. We can actually
reverse this commit. A can. So click on Yes. As you can see, we
can go back to Unity reload and we have
our cube right here. We will be learning
everything in minute detail. So give me your
entire concentration. This is very important. It's an extremely helpful video or lesson and we'll
stay with you forever as long as you
are committed to becoming a professional programmer
or game developer. So let's not waste any more
time and let's get started. O k. So version control that and put on my
laser version control. It's hard to learn. It's even harder to teach, but I'll try to keep it
as simple as possible. And when you get the hang of it, trust me, it's very
simple and easy to use. Plus it's an indispensable skill that you need to
learn if you are looking to become a
professional game developer or even a professional program. So let's get started
with what is. First of all, it's a
system that is responsible for managing changes
to computer programs. So this means that whenever we create changes in our programs, we can actually save those changes at each
step of our project. This way, we can first of
all check what we did. We can create different
kinds of versions where we can go back and change the
things that we've created. It allows for a better teamwork. So for example,
let's say you have four or five people working
on the same project, but each one of them has a different task that
they need to create. So version control is a very good way of
handling all of this. And why do we need it? Well, why we, we
actually use it? Well, we'll use it to
remember previous version of our game and have more
flexibility to experiment. Usually, game development is a environment where you require a lot of
experimentations. For example, you want
to add some kind of property to some kind of game object and maybe it
breaks your entire project. So you want to always
have a previous version of your project before adding this game breaking mechanic. So you can always go back
and start fresh from there. So this is extremely important, especially for game developers
that always need to be experimenting with new ideas and things in their
games and projects. And how are we going to use it? Well, we are going to be using something called source tree, and this is version control. It allows us to create
different versions. And its first of
all, it's for free. It's very easy for
beginners, very flexible, and it has a very
simple interface that we can use as beginners. So let's go ahead and
download source tree. Let me show you where
we can do that. If you open up Google Chrome or any
browser that you have, simply go to Google and right in here, download source tree. You should find a
link right here, and it should be
the source tree. Up. When you click on it, you go
right here to their website. If you scroll up, you can see that you have the option to
download for Windows. But if you are on a Mac, make sure that you click
on here and you download source tree for Mac OS or
it will not work for you. So if you have a Mac, download the Mac version, if you have a Windows, download the Windows version. Simple enough. Now, when you
finish downloading, you should get this
file right here. And when you double-click on it, you should start
the installation. Now because I already
have source tree, I will not be installing
it another time. I will just take you through the process of
actually installing. Okay, So this is the first window that
will pop up for you. First of all, you need to agree to the license, of course. And you can maybe turn this
off if you don't want any e-mails your way from source tree and et
cetera at lesson. Next thing you need to do is you need to create an
account on occasion, you can go to at
lysine and placing as the parent company
of source tree can go ahead and create
an account there, or you can use an
existing account if you already have a Gmail. I personally create
one using Gmail. It's much faster,
It's way easier and they don't spam you
with a lot of emails. Next thing in here, we are going to connect
it to an account. Now, this is, of course, we will not be doing this. If you want to host your code on a certain websites like
GitHub or Bitbucket. We will not be doing that, so you can simply click
here on skipped setup. Finally, while
installing source tree will tell you that it is
unable to locate get. So in order to complete this, simply click on Download
and embedded version of Git and continue on. And then it may also ask you for something
called a mercurial. Now, Mercurial is a different
system, just like get. It allows us to save different
versions of our project. We will not be using Mercurial, so you can simply click on, I don't want to download or I don't want
to use Mercurial. And this should be when
you finish installing. You should have this right here. And your, well, this window right here when you
start source tree, if you don't simply click
right here on Create and you should get this window. Now, this is where we actually
create our repository. And in here you can see that we have the destination path, the name, and the type of version control
that we want to use. Of course we'll
be using the GET. We also have the option
to create an account, but as I've told you, we're
keeping things very simple. It's our first time, so we will not be
creating any account. So here we are going
to choose which is the destination path
of our repository. So what, what is the project that we are actually going to be creating a repository
for subsequent versions of. Well, let's create
our first project that we are going to be using. So in here that's open
up the Unity Hub. And as you can see, we already
have Hello World that we don't in a previous video
that's click on New. And let's make sure
it's a 3D project. And this is going to
be our cyber spy 2087. Let's go ahead and
create this project. So click on Create. And I, of course, always using my magic of editing in order to
speed up this process. I'll see you on the other side. Okay, welcome back. So I hope everything
worked out for you. So now we have a new project
which is cyber spite 2087. So now that we have
our project created, we can actually go
ahead and get started with creating a repository. Now, if we go back into our
source tree right here, we can click on Browse and we can actually go
ahead into Unity projects. And you can see that we have a hello world and we have
a cyberspace by 2087. So let's select this folder. It will create a repository
under this name. If we hit Create, it will ask a problem. Don't worry about
it. Click on Yes. And voila, now we have actually started creating a repository. You have the staged
files right here. You have different
kinds of knobs. You don't need to worry
about any of them for now, just focus on the staged files, on staged files and
commit up here. Now, if we scroll down
in these onstage files, you can see that most of
them are from the library. We scroll down to the end, we can see some of them are
Tampa 10 or temporarily. We can see also that we have project settings and these are all the files that
we for our project. We also have assets in here for unity in the
scenes for example. So this is a repository which is a version of our
current project. Now, the problem here
is, as you can see, there are a ton
and ton of files, and B will not be
needing all of them. Well, actually we'll need
almost none of them. We will need only a
certain kind of files. So we want to be ignoring the library and the
temporary temporary files. Why is that? Well, let me
show you by opening up the directory of our project. Oh, okay, So this
is Cyberspace by 2080 sevens directory
inside of Unity project, as you can see up here. So we have the assets, the library logs, packages, et cetera, and et cetera. Now, what is the temporary
folder and what is the library folder and why
don't we actually need them? So temporary is just
a way for unity to open up faster whenever
we start the project. And it's always created
whenever we open a project. So for example, if I
go into Unity right here and I actually close it, you'll see that the
temporary file. Will disappear. And even if we delete
the library right now, so let's go ahead and delete
this library entirely. If we go back into our Unity Hub and open
up cyber spy 287. As you can see right here, you saw that the library
has been created again and the temporary folder
has also been created. So of course, the project should take a bit more time
now to open up. But this is evidence that a library and the
temporary folders are not necessary for us to
always commit and stage. And what do I mean by stage? So whenever we
stage our folders, we actually create
a commit from them, any version of them. And library takes
up a lot of space. As you can see, if
we scroll down, it takes up most of
the space and we don't want any of them at all. So how should we proceed? Well, we can actually ignore all of the
folders that are under the library by simply
going and choosing any of the folders that
have library on them. Right-click on it. And in here you can
see that we have the option to
ignore one of them. So click on ignore. And in here you have option to ignore this exact filename, ignore all files
with this extension, or you can ignore everything
beneath a library, and this is what we want. So click on Okay. And as you can see,
everything under library has now been ignored, so we cannot stage it, so we cannot save it
to our newer version. And if you scroll up, you might have noticed
that we have a new folder in here that is the
dot git ignore. And when we click
on it on the right, you can see that it
has the library. And, and if we
double-click on it, we can actually open it
up in our notepad and in here we can add the
different files that we also want to ignore. So what are the files
that we want to ignore? Well, there are a ton and ton
of files, but thankfully, somebody has actually
gone through all these files and created
a list of everything that we can ignore
whenever creating version controls or
versions of our project. And in order to find that file, you can go again and to
Google or the front. Go ahead and search
dot git, ignore unity. And you should have
this link right here for the github.com. And it will be hosted on GitHub. If you open up this link, it will take you right here. So this is the dot
gitignore and it's the unity dot git ignore. And these are all the
files that we can ignore when creating versions
of our project. You can click on row right here, and it will open up
this window or tab. Let's go ahead and select all of them by clicking
on control a. We will copy all of this using control C. And we are going to paste it in here in our
dot gitignore notepad. And now we have the
gitignore notepad filled with all the files that we will not use for our positive 3. We will save that
using Control S. And now back in Unity or I
mean back in source tree, you can see that when we had the git ignore,
everything is ignored. We will stage all of that. And when we stage all of that, you can see that these
are the files that are going to be committed. And these would be our
initial commitment or our initial repository
version of the project. And usually whenever you
create your initial commit, we call this the initial. You can capitalize it, the initial, oops,
initial commit. And we click on
Commit right here. So now if you look on the left, you can see that we have
branches under here and we have the master branch. Congratulations, we have
created our first commitment. Very nice. Now, let me just show you how we will move
further down the line, even though this video
has been long enough. But I think we need to
get a proper foundation for source tree and version control as we
move through our project. So let's say we are in
our project right here. And let's go ahead and
create some kind of cubes. 3d object. Right-click in the hierarchy. 3d object, create a cube, and now we have a cube. Let's scale it up a bit. So scale it on the x, the y, and the z. Great. So now we have a
cube and our scene. And now if we go
into source tree, let's save that before we go. And it needs to save
it to a certain scene. So let's inside of scenes. This will be our sample scene. Sure. Sample scene,
yes, replace it. So we have this sample
scene back and source tree. Wait for it a bit,
and you can see that we have uncommitted changes. So if we click on them, you can see that the
on-stage files are changes inside of the scenes, which is the sample scene. And here you can look in
detail what we've created now. It's a bit weird right here, but if you look closely, you can see that we've
created box collider. And basically this
represents the cube that we've added to our scene. So let's go ahead and
stage all of that. We can click on
Commit right here and name this added a cube. Click on comment. And now in our master branch, you can see that we
have an initial commit which didn't have any cubed. And now in our added cube, we've added a cube. So congratulations. And as a final note, this may look a bit cumbersome. This may look a bit weird, but don't be afraid
this is very simple. And more importantly, it's
extremely important for us to understand as we move
through our project, create versions, versions of it. And if we ever make a mistake, we can actually go back by right-clicking in here,
reversing the commit. And yes, we can reverse the commit if we go
back and to unity, it will ask us for
a live reload. We wrote, we reload, and now we don't
have the cube or any game breaking mechanic that
we've added along the way. And now it's time
for your challenge. Your challenge is going
to be to download and setup source tree
and the ignore file. So download source tree and
stall and setup everything. Create your 3D
project in Unity Hub, setup a repository for
it and source tree, nor the library files and get the dot ignore file and
add it to your repository, create your first commit, and then create
your second commit. You can even go ahead and try to maybe play around with
a couple of things. Add a cube, reversed the
commit, see what happens. Get comfortable
with source tree. And if you're having
a bit of trouble, you can pause the
video on this list of things that you
need to create. And you can also always go back and watch the video and see how I made everything and follow along with
me step-by-step. So see you in just a bit.
6. Hades Game Design Inspiration: Okay, So I'm going to end this video show
you the game Hades. And it's one of the
biggest inspiration for the project that we
are going to create. So let's get started. Obviously, you are going to play and I'm just going to play one of the games I
was already playing. I'm going to show you
a couple of aspects in the game and the ones that
we are going to be endless. So this is the area hub. We won't have a area hub
necessarily an hour game, but it will be just enough. So I'm going to just
walk through and go to the actual part of the
gameplay. So go here. And as you can see, the first thing
that we notice in the game and this
game, obviously. And the first thing
we notice is that we have multiple weapons
that we can choose from. This is something
that we are going to obviously have an
hour game also. So I'm just going to take the gun and here's what
I'm going to flip it. And I'm just going
to go ahead and start laying killed again. Obviously, before
we get started, our game will not be as
polished as this one. This is an NP gain that
took years to create. This is an operator
that you pick off. So I'm just going
to choose anything. So this game took years and years of graphic design and all
of that good stuff. As you can see,
this is an enemy. He just wanders around and
then once he finds you, he starts shooting at you or starts attacking
you or whatever. As you can see
right here we have, this is an isometric
style of game. We will have a 2D
platformer or a 2D game. So obviously you can
see right here we have the shooting connects. So we can shoot. You can see
the vases that gets broken. If we showed them, we will
have a similar mechanic. And if we dash, we can break them, but in our game we will be
able to break them. And you can see that we have the dash and this is
something that is regularly used and all
of rogue like games, we will also have their dash. Well, we will have
actually a torpedo, but we will have the
dashing mechanic. As you can see right here, the ability to enter
a second room. So we are going to do just that. You can see we have
the health right here. We'll also have a health bar. You can see how
the UI is set up. We are going to do
something pretty similar. So you can see right here we get the option to press the E key. I'm going to press it and
we go to the next level. We will also have doors. You can see we will have also each level harold have
its own tile map. We can see right here
that we have also spikes. So this is something that
we are going to add. We will have spikes out, obviously not as
pretty as these ones, but they will do the trick. You can see right now we have
different types of enemies. You'll notice that
when they attack us, if we are dashing, we do not get hit. And this is something
that we are also going to implement in our gain, which is the ability
to be invincible for a couple of seconds after
we dash and after we, for example, gets it. So I'm going to shoot this guy and we are
going to kill him. You can see that we have not just one enemy or two enemies that are
already in the map. We have enemies spawning, so we have waves of enemy. So in this current playthrough
and this current chamber, you'll see that only
had one type of enemy, but usually we have
multiple types of enemies. We can see that the
weapons also have different types of
attacks and this gain. So I'm going to just
shoot and you'll notice that as you can see, we have multiple waves. As we kill the first wave, we have a second wave appearing. So we killed the next one, we kill the next one. And finally we'll win all the waves or non and
all the enemies or killed. We get to have our reward
and the fighting stocks. So I'm just going to pick
anything up right here. And you can see that
the spikes stop hurting us once we are no
longer in combat. And this is something that
I wanted to show you. We have two options. We either go through option a, which is the ANOVA, that is something the
currency of the game. And the other one where
we can pick up a key. And you can also see
right here that we have the currency or the money that we are going
to use the shot. So I'm going to
play a bit through this game and just show
you how to shop operates. So you'll have an idea. Oh, case. So as you can see, one of the levels is the heart, the other level is the shop. So let's go to the shop
and see how that looks. And all of this we are going to be implementing in our game, obviously to certain
levels of degrees. Obviously we cannot create
a game such as this one. This takes years and
years and a huge theme. There we go. We are at the shop. We have the shopkeeper. We don't have a
shopkeeper and our game. It would have the noise. You can add it yourself.
The mechanics work. As you can see, we can
either buy some health, we can buy an upgrade, or we can upgrade our
health and our game. We will also have
things similar to this one where we can
upgrade our health, so increase the maximum
health that we have. We can also buy new weapons which will be
in the place of upgrades. And we can also
increase our health. So if our health is down, we can just buy some help
and then move forward. So this is basically everything that I
wanted to show you. I don't know if
there's anything else that I would like to show you. I'll just go back through. We'll also obviously have
the play the options, the Quit button and all
of that good stuff, a bit of menu and
so on and so forth. So I hope you
enjoyed this video, the small demonstration of
what's the common the future. With that said, let's not
waste any more time and let's get started with
setting up our world.
7. Section 2: Setting Up Our World - Setting Up Sprite Sheet: Welcome back, My favorite game developers. As you can see in this video, we've created a simple scene. We've added a simple background. We've added a spreadsheet with called our little guy here, Jimmy, maybe it will change his name. I don't know. Maybe we'll call him doomed Jimmy. But for now we have the Jimmy gameObject with a background of some kind of dungeon. And we've, if we play the game, you can see nothing happens, but we at least have the spreadsheet and everything set up. We've created a repository right here. As you can see, the initial commit, we've learned how to create a project using the new Unity Hub data. So let's not waste any more time. And let's get started. Okay, so let's get started. The first thing we're going to do is we're going to create a new project. So as you can see right here, we have the latest version of Unity Hub 3 better, I just now loaded today. So let's see how everything is set up. And here we have the installs. It's pretty similar to the previous versions of Unity Hub. The only difference is if we go into the new project right here, you can see that we have many ways of choosing the template that we want to use. We have the version of Unity or the editor version of Unity that we are going to be using. And we have the different types of templates. So this is a way to setup a project. So for example, let's say you need a project that is 2D mobile. This will set it up for you, but of course you are going to need to download it. But what we're going to do is we're going to choose a 2D core. We're going to have the project name. I'm going to call it the time. But invader to the ROCC. Like so you can choose whatever name you want for your game. My game is going to be called the time bot invader because that's the story of my game. So, and it's also a 2D, rock-like. You choose whatever name suits your type of game. I'm going to create a project. This is going to take a bit of time. So what I'm going to do is I will use the magic of editing to go to where we have everything set up and we can start creating our game. So I'll see you there. Oh, okay, welcome back. So now everything is set up. The project is open. We can start creating our game. First thing we want to do is go into the game window. And in here you can see that it's free aspect. We don't want that. We want our game to be 16 by 9 or a 1920 by 10 ATP. This is the standard resolution of most screens, most PCs that are going to play this game. So if you don't have this option right here, you can click on the plus button and you can add your own using the fixed resolution. So 1920 by 1080, I'm just going to select it right here. Now the resolution of our game window is fixed and we can go into the scene and we can see everything right here in our sample scene. You can see we have the main camera. We have everything set up. If we change the size of the scene window, nothing changes. It stays 1920 by 1080. Okay, great. So now the first thing we want to do is we want to add some interesting background to our game. We don't want just to have this blue screen and be adding things to it. So I'm going to go into my files in here. I'm going to select the background and I'm going to drag it into the assets right here. And now you can see that we have it, just let's wait for it to import. There we go. So I'm going to click on the background image. And you can see right here in the Inspector, we have a lot of information about it. And you can see that it's a Sprite 2D. Let's keep it at that. But you can see the pixels per unit is 100 and there is a filter mode at now, we are going to choose from bi-linear to point. This means no filter because we already have a good-looking image. And if we add the image in here, you'll notice that it's very small. So what we can do is we can click on the background and set the pixels per unit to be 50 and apply that. And there you go. You can see that it's much bigger now. And we're just going to reset the position right here, 200. So what we did, we just set the filter mode to no filter. We've set the pixels per unit from 100 to 50, and we applied all the changes and we just set the position and the middle. So now if we go and click on the play button, you'll notice that we no longer have just a blue background. We actually have. A pretty solid looking background. Now, you can see that the edges are a bit outside of our game. You can change that if you want. Let's make this maybe a bit smaller so it fits exactly the way we wanted. And we'll make sure that we also change the scale on the y. So just copy the scale on the x-axis, pasted on the y-axis. And now if we go into the game, you can see that we can see the edges, although there is a small blue line up here. If you have OCD like me, we can actually change this bar moving just a little bit up. So now we can paste it in here. Is the game looking good? Nope, still need a bit up. There you go. Now, the game looks good enough. Maybe you also need to change it down here. Now the game looks perfect. And we're just going to copy the scale on the y. Copy that because when we go out of our play mode, you can see that the scale goes back to normal, which is not something that we want. So now let's see, the game and game mode looks perfect. There we go. We save everything back in our scene. We can see that the background has the correct different scale. Let's continue on. The next thing we want to do is we want to add our player to the game. So I'm going to go into my resources. I'm going to choose the player versus player. And we are going to choose the Xanax sheet. Now you can see here that I have a different type of character. We can also use this one if you want. I've provided you that and the resources, but I'm going to use this sheet right here because we are going to learn how we can split up this sheet or slice up this sheet. If you double-click, you can see that this is a regular image of a, some kind of, I don't know, Butler, this is the one we're going to use and I'm using it from this Xenakis, ultimate smash friend. It's by the rich red shrew-like, something like that. Stephen Challenger from open game arm.com, which is an amazing website. You can get tons of free assets. And here I always use it for almost all the assets that I have. And you can go check out the exam Docs spreadsheet downloaded from here, give some love and the comments to the creator of the sprite sheet. But let's continue one. What are we doing in here? Why are we slicing? And before all of that, what is a sprite? So let me explain what exactly a sprite is. So I'm going to put on my laser. A sprite is a to the object. So just like we have the image that we've added right now, this is something a bit different. A sprite is a 2D object, will delve deeper into what those are in the future. They have graphical images on them called textures. So if we go back in Unity right here, you can see that we have this background, right? And we also have a sprite renderer and a Sprite element in here, which is the background. If I set it to none, you can see I still have the background object, but there is no longer an image on it. So I'm going to set this price of the background. They are used by adding a component called a sprite renderer to a game object. So just like you saw right now, we have the background object and we've added a sprite render to it. And on it we have the option to add a sprite. Later on we'll see that we can add also layers to the sprites so that they can render and front of each other. So back in our game, and here you can see that we have the Xanax sheet. Now if we add it to our game, you can see that we have this entire sheet and we don't want that. We want to slice it up and have different types of animations for our exam, I'm not sure how to even pronounce. I'm just going to call this Jimmy. This will be our gene. So Jimmy, we're going to click in here. We're going to look in the inspector. We can see that we have our sprite mode and single, that means this whole image is a single image. But because we are going to be slicing it up, we're going to make it a multiple. So we choose multiple. We click on Apply, and then we go into the Sprite Editor right here. We click on it. And now we have the options to slice this baby up. So how are we going to do this? There are many ways of slicing a sprite. Whenever we have a good position, the sprite usually we can do it automatically. So if we try to do it automatically, as you can see, all the sprites haven't been sliced. That's good. But that's not what we want exactly. Because if, let's say we have the animation here which is the idle. We have three animations, which are the idol and we have three animation or for not animations. This, this, these three images will create the animation of idle, and these four images will create the animation of walking. And those images will create the torpedo or the flipping or whatever. But each of them have a different size and this will be a big pain later on when we create our animations. So our goal here is to slice them up exactly the same size all together. And we can change the size of our slice by changing right here, as you can see, the cut. So I'm going to make this cut a bit smaller so we don't have the black rectangles. As you can see, we've removed the black rectangles. And in here also we've removed the black rectangles and same in here. And I just want to keep this right now so I can demonstrate what happens when we actually apply the slicing. So right now I changed only this one. You can see that the one with the idle still has black rectangles around it. And all of these have also been sliced up. So when we hit the apply key right here, you can see it up. On the right. We will close this window and we can open up the Jimmy sheet. And you can see that right now we have all of these different slices from the sheep. So we can add each one individually to our scene. And you can see the camera hiding bead jimmy. There you go. A very tiny small Jimmy. And you can see him right here. This is the cutoff, the slice that we have just added. And if we add the one with the rectangle, you can see there is a rectangle around him which we do not want. So I'm going to delete both of those. I'm going to click on the panel sheet. Again. I'm going to go to the Sprite Editor and I'm going to slice up all those things properly. Now, you can do this on your own. It's pretty easy. I'm only going to change the squares right here. So I'm going to make them smaller. This one is for the idle. So there you go. I'm making it smaller so it fits the square. We're not going to be using any of those two. I'm going to delete everything that we are not going to need and know these two we are going to need them. So I just pressed Control Z to undo some of the things. We're not going to use the flying, but I do recommend the to keep some of the things that you might want to add. So I'm going to slice all of these. We're not going to be using the shooting animations we have here because we are going to create our own shooting mechanics. So I'm just selecting and deleting all of these. You can keep this one for fun. I mean, honestly, this looks so funny. You can keep it for later use. And finally, I'm going to change the torpedo in here. So I'm going to also delete all of these. I'm going to choose one of those boxes. I'm going to duplicate it. So the way we duplicated as Control D, I'm going to make sure that all the slices have the same size. So I'm going to choose one of those. And I'm going to duplicate it again, set it in here. We need to make sure that all of them are on the same height. So this one is 513. And let's see if this fits all of the other. Later on, you'll understand why we are doing this and why it's so crucial to have all the slices be the same. So I'm going to move this right here and this one. So obviously we can see that all of these fit correctly except for this one. So we need to make sure it's in here. Let's see if it works on this one. And it's a bit small as you can see, no, it actually fits perfectly from top to bottom. That's great. And also try to make sure that the character is in the middle of this. So I'm going to move this just a little bit to the left. This one also. And what's the height on those? So lets see it's three, 513. Let's copy that. Okay. This one's correct. Paste it in here. Based on this one. Based on this one. And based on this one. And this one, we need to have them all the same height. I can see that I have an extra box in here. I'm going to delete it and now we have the proper cutouts that we need. So the idle, the walking, and the torpedo guy that we are going to use. So I'm going to hit the apply key. I'm going to look, there you go. Now we have everything set up. I'm going to use one of the, let's see which one is the either 0. And also one more thing that I forgot to say, we can actually change the name so I can change this name to idle one. I do. Idle three, and so on. We can change all of those for now. They are just called the examiner ten, Example 2 and so on. I'm just going to keep them as they are. This is not a very important step, but I just wanted to make sure that you know what is happening. So we are going to, of course, it will ask us to save. Let's just hit the apply right here. Always remember to apply. And now we can add the idle one. And here you can see it's extremely small. How do we make it bigger? Well, just as we did with the background, we can click in here and we can change the pixels per size. This will be your task. We can change it. Let's set it to 15. Where did it go? Oh, so disappeared. Why is that? Why is it not showing anymore? That's a tricky question. We will deal with that later on. But for now, let's just try to make it as big as we can. So maybe 50 is still a bit small. Let's make it 32. So I think 32 is big enough 0, so at appeared in front. Why, why is it appearing sometimes in France, sometimes in the back. How can we fix this? Don't worry, we will fix all of those in the future. So I think 32 is a pretty decent size. Maybe just maybe we'll make it 28. So okay. I think 28 is enough, maybe even a bit big. We'll see later on, I'll change it back to 32, maybe 30. I'm not sure. I don't even know. Of course, take the time to understand how you want to set it up. But until then before I go, let me issue. You ate small challenge and your challenge is going to be to create your own player. So explore open game r.org or you can also find a lot of great game assets on HI dot io. These are amazing websites. Most of the assets are for free and you can use them. Find some characters and sprites that suit your style. So as you can see, I've added my own background image. You can maybe find a different area where you want your player to be battling. Add them to your game and chop up the sprites, just as we learned in this video, and that's it. So pause the video right now and go do the each challenge case. So before I go, the last thing that we need to do is to create a repository. So we've already learned how to download source tree, how to add everything. The last thing we're going to do is we're going to hit the Create or you can open a new tab at the brows. Let's see an Unity projects. Where did we save it? We forgot where we saved all. Let's see, Unity projects backup. There we go. Find bought invader to the row like this is where we're going to select the folder. We're going to create a repository. Yes. And as you can see, everything in here is set up as we learned, we need to make sure that we have to ignore the libraries. So right-click, ignore everything on the library. Okay, so now we have the gitignore file. We're going to open it up. We're going to get that's fine. Git. Ignore. There we go, the masters. And we're just going to click on row. Control, a copy of that back in here. Select everything control V. Save that. Back. Here, you can see that the gitignore file has changed, so everything that we don't need has been removed and will not be saved. We're going to stage all of that. We're going to commit our work and this will be the initial commit of our game. Commit our changes, go to the masters, and there we go, We are set up for our journey. This is so exciting. This is the first time you create a project. Truly, this is very exciting. So I hope you do the challenge. Find your own sprites, make sure to always commit the changes is very important. You will understand why later on in your game development journey, you will thank me, trust me, and I'll see you in the next video.
8. Creating the Player: Welcome back, my fellow game developers. In this video, we have learned everything about sorting layers. We've also learned about parent and child relationship, not as in regular parent-child, as in the game object parent-child relationship. As you can see right now, the shotgun is rendered in front of the arm or behind the arm, but they are all rendered in front of the player, which is rendered in front of the background. And he also has a small shadow. So let's not waste any more time and let's get started. Oh, case. So let's get started. The first thing we want to do is we want to create a player game object. So we don't want to have this either one for now, we'll change it. We don't want to have the sprite as the main object. We want to be using a player game object that has a body which is in turn the sprite render. So I'm going to change this from idle to the body. And I'm going to right-click in here, create a new game object. And I'm going to reset its position because currently you can see we created this game object and its position is based on Where we are looking in the scene. So you can see it has a certain acts, a certain way, a certain Z. What we can do is we can click on the X, put it to 0, we can click on the Y, but if the zeros at 200, but that is a bit cumbersome at works. But there is a much smoother and professional way. By the way, I clicked controls that three times to revert all of these, we can click on the three little buttons right here, or three little points. We can scroll down and we can see that we can reset the position or we can reset the entire transport. So for example, let's say I set a rotation of a 134. I click in here, I can reset the position or reset the rotation, or I can reset the entire game object. So these are just little clues. You can even see that the name of the game object has been reset. So didn't week or week, we didn't even name it. I think. Anyways, we're going to call this the doom layer, which is also Ginny. And we're going to move the body and set it on there, the doom player. Okay, So what happened right there? Let me just redo that. Let's look at the body. What is its position? Its minus 5.60.89. When we set it under the dome player, we are making it a child. So now you can see that if we move V, don't play or left and right, notice we are not moving the body. We are moving the doom player game object. You can see that the body, which is this one right here, is moving also. And you can see that we can change its position. And the cool thing is, let's look at the body again, recently position of the body. So the body is, let's say add 0, 0, okay? If we move the DOM player, what will be the position of the body while it's still 00? So now the position and rotation and scale and everything is relative to the main game object, which is the doom player. But main game object is not the correct word. It's the parent game object and the body becomes the child game object. What does a parent-child relationship like? Now, this is not a therapy session. It's actually what's called a parent-child relationship in Unity. So child will move, rotate, and scale with the parent game object, as we saw right now, used for creating a body of APT objects that move together. We'll see what I mean by a body of objects. I mean not just the body of the player. We will add an arm, we will add a gun, we will add a shadow. And all of those will move or need to move with the player along as we play our game. Children can also be parents of other objects. You'll notice later on that we can have a child of a child. So the child becomes a parent, but it's still a child relative to the main parent. So it's like a kind of a grandparent if you want, call it that. Finally, the child transform properties are relative to the parent. That means that as you saw when we change the position of the main parent game object, the position of the body stays the same, 0, 0, 0 case. So let's get back into Unity. So now we have the body. Next thing we're going to do is we're going to add a gun and the shadow. So if we go into the resources. The player right here, you can see that we have an R and we have a shadow. And this ONE belongs to the other doom player, not this one, the one we are currently using to the other one that I've provided, you can use both. I'm going to use this arm specifically just so we always know the difference between the two. It won't look as pretty, but it's good for learning. So I'm going to select the arm and the shadow, and I'm going to drag them into the acids right here. I'm going to put the shadow and you can a, try doing this yourself. So if I move the shadow under the dome player, you'll notice that just by moving it as a child of the dune player now we have the shadow on a different position. I can reset it and I can put it right here, but it's not there. And even if I make it a bit bigger, so I'm going to make this maybe eight instead of 100. There you go. You can see the shadow is now in front. But why does it sometimes have to be in front, sometimes in the back? What gives, how are we going to fix that? We'll discuss this in just a bit. Just let me add the arm right here. There we go. Now we have the arm. Let's set it as the child of the dome players at the shadow under it. We're going to reset the position of the arm. We're going to make the armed 32 apply. So whereas the arm, so you can see the arm. There you go. It's behind the player. That's not good at all. How are we going to fix this? We're going to fix this using something called the sorting layers. So currently, we can see that the body has a sprite renderer, the arm has a sprite renderer, and the shadow also has a sprite renderer. And you can see right here in the sprite render there is something called the additional settings, which has something called the sorting layer and the order in layers. Now, what does all of this do? You can see that everything currently the background is on the default. The body, the R and the shadow are all on the default, and all are ordered in 0. This is how unity determines which sprite should be in front of which other sprite, especially when it comes to 2D games. So currently you can see that the shadow is at 0 and it's behind the player. But look closely right here. Or let's do the arm. If I get the R, it's still on the default as is the body. But if I put it on the one, there we go. Now it is in front of our player. If I put it, Let's move it to the side. If I put it on minus1, you can see it disappears behind the background. So let me set it back to one and let me set it on the plane. Now, this is great, everything is working good. I can set the background to minus1 and assure that every time I add something, it is in front or in the bank and the bank. But there is a problem. What happens when I have 100 objects or 200 objects of 5000 objects? Do I have to set all of them? Minus1 plus 1, 2, 3, 4 minus 100. Obviously not. What we need to do is we need to create a sorting layer. And if I click right here on the background, and if I click on the default, you can see that I can add a sorting layer to our gain. So let's click Add sorting layer. We open up the layer. As you can see, we have tags, we have sorting layers and we have layers. We'll delve into those in just a bit. Let's focus on the sorting layer. We can hit the little plus right here. And we can create a new layer that will call the background. So now you can see that background is rendered in front or behind the default. So if I go back into the background, this will make sense in just a bit. I will set the sorting layer as the background. And there you go. You can see that it disappears. Because let me go back. The way we go back, we go to Layers, the layers you can see here. So layers, added layers. You will get this inspector. If I move the background behind the default, you can see right now that the, everything that was on the default layer, so the shadow, the arm and the body are now rendered in front of it. So back to layer. At that layer you can see that this is how the hierarchy works. And this is very important right here. But as you can see, it makes life so much easier. Now you have a challenge and your challenge is going to be to create a layer sorting layer. So we're going to create a new sorting layer called player. Assign all the elements of the player to that layer. Make sure that the player is rendered in front of the background as we saw by changing the hierarchy in the sorting layer. And finally, as an extra challenge, if you're feeling up to it, go to the Resources, add a gun from their, set it on the player, and make sure that it's rendered between the player and the arm. We want the arm to be in front of the gun, but we want to gun to be also in front of the player, but behind the gun. So you'll need to play around with that. If you need to create an extra layer, go for it. You can create as many sorting layers as you want, but make sure the true keep things so you don't need to create a special layer for the arm and the shadow. It's all the time on the player. So don't worry about that. With that said, pause the video right now and go do the challenge. Okay, welcome back. So how did you get almost that? I hope you tried your best to do the challenge. Always do your best with a challenge, even if it's hard, even if you're not sure how to do it, you can always go back and undo what you did. You learn from the mistakes you've made. Anyways, player layer, I'm going to select the body, hold Control, select the arm and the shadow. And I can change all of those. And to the player layer, I'm going to move the shadow to be right under the player right here. Let's see. There we go. I can make the order layer. Let's keep it at 0. The body will be at one and the arm will be at two. So the arm will always be rendered and front of the body of player. Let's save the scene and let's go into our resources and get our guns. So you can see right here in our resources we have the guns that's going here. Let's go to the PNG. I'm going to select the shotgun, going to drag it into the assets right here. I'm going to what end? The dome player. I'm going to change this through the shot gun. It's extremely small. I'm going to make sure that this is a ramp third, to maybe apply the changes. Whereas the shotgun 0 or who plucks big. So I'm going to change this to maybe the gun That's create a sorting layer for the gun. So all the weapons, weapons. And it's going to be set that as the weapons. Okay. It's a bit bigger than I would like. Or we know because we are using only the guns on the player we are not going to create. So there we go. We will remove this. We will keep the shotgun on the player layer. And because the arm is on the two, we'll set it on the three and the shotgun will be on the two right now. So there you go. But obviously, let's make this a child of the player. And obviously we'll need to make the shotgun just a little bit smaller. So 32, let's make it 50. See how that looks. Maybe too small. Let's try. 40. Thanks. Forty will be good. Still at that big. Maybe let's make it 40 to 40 to apply that. Yep, I think that's shotgun is looking good enough. So there we go, save all of that, run the game. And there we go. So now we have the background, the player, we have a shadow which is a very good touch by the way, it gives the game able of depth. And we have a shotgun that is rendered in front of the player. Now I think the shotgun would benefit from a bit of change in position, but for now, I hope you enjoy it. Let's go and never forget too. Metal changes. So you can see we are going to stage all of this, but we do have a couple of things that we would not want to change. So for example, some of the PNGs or the images that take up a lot of space. For now we will keep them, but later on you'll see that we don't have to stage the images. We can just remove them. They take up a lot of space, unnecessary space. So we are going for now, we'll stage all of that, commit the changes. What did we do? We created a player and learned sorting layers. It's very important to always name your commits to something that you might remember later on. So for example, now we know this was the initial commit and the second commit we created a player and learned sorting layer. We could have added a gun, change the sorting layer of the guns, etc, etc. So I hope you enjoy it and I'll see you in the next video where we will be actually adding a script to the player and start changing his behavior. So exciting, I'll see you then.
9. Moving Using Inputs (variables): Welcome back, My favorite game developers. In this video, we are going to be creating our first script and adding it to our doom player. Not only that, we are going to be learning a lot of things, we are going to be learning what this scary word means. We're going to learn about variables. We're going to learn about inputs. We're going to learn about vector 2. We are going to be learning how start and update work separately. So with that said, this is a bit of a longer video if you want, but if you're a beginner, it's very important, very crucial to understand everything. So let's not waste any more time and let's get started. Oh, okay, so time for some scripting. The first thing we're going to do is we're going to create a script and assign it to the doom player. Now, there are many ways of creating scripts and there are many ways of assigning scripts to certain objects. They are all the same. Let's start off with the most basic one, and that is simply clicking on the game object. You can see right here that we have the transform. It is one of the components that we have. We can add another component right here by clicking on it. Now, you can see that we have many components that we can add, ranging from audio to affect, to physics and so on. But we also have this option right here of adding scripts. We can click on it. We can see through it and add whichever script that we want. Or even easier than that, we can simply start typing in the name of the script that we want to add. And the script that we want to call or create will be the player controller. So we're going to create layer controller right here and make sure that you create the name to be a single sentence without any spaces. You can see right here we have the option for a new script. Let's click on it. You can see the name as player controller. And now we can create the script, but make sure that shoe figure out correct word or the correct name for the script because it will be the name of the class inside of this script. This will be very crucial as you create scripts later on. So we're going to create an ad. Wait for just a little bit. And now we should see that we have the script ready. If we click on it right here, we can see in the Inspector what this script will look like. And now we are going to double-click. And you can see that Visual Studio is opening up. Now. One of the things many people or many students of mine keep asking me over and over. If your script doesn't open up using Visual Studio, or for example, when you type something in here and you don't get the recommendations by Visual Studio, you can go into the that, go to Preferences, go to the External Tools, and in the external script editor, make sure that you have Visual Studio Community. You can choose our IDEs like Visual Studio Code. But me personally, I like or prefer to use the Visual Studio Community 2019. It's much better and smoother than the studio. Sometimes studio just has its quirks where it doesn't show up, doesn't open up correctly. So I prefer using Visual Studio Community. That's free. It works. Let's continue on. Now. We have our script opened up right here. We have the libraries that we can use. We have the class name, the player controller. It should always have the same name as the script that we've created right here. So you can see player controller under no circumstances do you change the name of the script in here without changing the class name? Don't even try to do that. It will create a lot of problems. What do we have here? It's a public, we'll see what that means. It's a class, it's mono behavior. Monte behavior gives us the ability to use things such as start and update. What is start? Start is a method. We'll see later on what methods are. But for now all you need to know any code that we write inside of the star gets executed as soon as we start our game, if that object is turned on, of course, we'll see what that also means later on. An update, as you can see, update is called once per frame. So if we have, for example, things that we want to call every single frame update is perfect for that and we will see all of this as we progress through this course. You'll understand everything, don't worry about it. Now, the first thing we need to do is we need a way to move our player. We will do that by taking inputs from the arrow keys or the WASD keys. But before we do that, there is something that we need to take into consideration and that is the movement speed of our player. And for that, we are going to need a variable. What is a variable when it comes to C-sharp? Let me explain. Variables are like boxes. So we have a box, we give it the name lives, and we put inside that box a number three. So now we have a variable obtain lives that has a three inside of it. So this is how we create the code for this box or valuable. We start off by giving the accessibility. So where can you access this variable? Can either be public or it can be private. If it's private, we can only access it inside of the class we've created, not from outside. If it's public, we can exit from any other script that we want. We need to assign the type of the variable. So we have multiple types, we have integers, strings and so on. We will see in just a bit what other types we have. We have the name of the variable. Obviously, every variable should have a name. How else do we call it? And we have the data that is inside of this variable. So this is how we create a variable in C Sharp. And this is the representation if you want, It's just like a box that we put things and then we move on. We have different types of variables. And the first type is a velocity. So an integer is a normal number, let's say 123456. A float is, let's say 4.8. Why do we have a float? Because sometimes the speed of something or the velocity of a car isn't just five or six. It can be 6.32, it can be 6.9, it can be 6.9456. So we need a float, and this is how we create a float. We always add the data. So the 4.8 with an F on the end. Then we have a Boolean. The Boolean is usually either true or it's false. So for example, let's say we want to determine whether a player is dead or not. So as he, that he is dead, then the variable is true. If he's not dead, then the variable is that S false. Finally, we have a string. So for example, what is a string of characters? We have multiple characters, one after the other. I see h, e, l. That string of characters is Michael. So we call a variable of type string with the name my name, and it represents michael. Make sure whenever you create a string variable that is between these two quotes. Okay, now, with all these variables done with, Let's go ahead and create our own variable in the scripts right here. So the first thing we're going to do, as we are going to create something called a serialized field. Now, don't be scared of this long name. It's going to be an integer, and it's going to be called the movement speed. Now this will determined how fast our player moves as we implemented your understand and why are we using something called the serialized field. You just told me, Michael, that it's either public or private. What does this serialized field Meet? Well, don't worry about it. Later on. I will also explain why we are using something called a serialized field. But for now understand that it is something that we can see in the Inspector. So if I make this public, save this, go back into our script. You'll see that in the inspector this changes. We have the public and movement. And if we go to the doom player, you can see right here that we have the movement speed and we can change it. But if I make it private so that other scripts don't access it, you'll notice right here that we no longer can change it. But what if we want to be able to change it from the Inspector, but at the same time, we don't want other scripts to access it. Well, in that case, we create a serialized field. We save that. We go back and do inspector. And you can see right now, we can't change it, but other scripts cannot access it. We'll look into that later on as we progress when we have other scripts. Great, so now we have the variable of the movement speed. The next thing we want to get is d, movement, direction or the input that we get. So how are we going to move our player? Well, we are going to need two inputs. One which will move the player left and right, or in the horizontal direction, and one which will move the player up and down, which is the vertical direction. So the way we do that is by using the input system and we're going to get our inputs using something called the input dot get access Raw. Now, you might be confused. What is that? How are we going to get this? Well, whenever you face some maybe. Maybe a new method or some weird thing that we are using in unity and you're a bit confused. You have a very helpful friend, which is Google. And then when you look it up in Google, you can see that we have something called the Unity documentation, which is such an amazing place and it should be a daily source of information for you. So we want to use input. We want to get the axes, which are the horizontal and vertical. You can see right here, if we look for it and the documentations, we have all the information that we need. First of all, we can see how the declaration works. We can see the description so it returns the value of the virtual access identified by axis name. It also tells you how to use these different methods. And also it gives you right here a example of how to use it. And lo and behold, they use it and the update, we can even go ahead and copy this and use it in our own king. But for now, we're just going to look up the input dot, get access row, horizontal. Very nice. But where did they get the horizontal name from? Let's check it out. If we go back and our game. If we go to the file or let me see the Edit Project Settings. If we look through the input manager, we click on the axis, we can see that we have the horizontal, vertical firewall to jump, mouseX fire jump, et cetera. These are all the inputs that we can use. And if we click on the Horizontal, you can see right here that we have the name horizontal, hence why it's being used right here. Whereas here you can see that we are using horizontal. And you also have the vertical and you can see the negative button is left, the positive button is right. And you also have an out negative button, which means alternative, which is the a and the D. You also have the gravity and so on, but of details in there. And you also have the axis, the x axis, which means the horizontal. So let's go ahead in our code and implement this. So we're going to open up the cold right here. They used it an update. Let's go ahead and use it and update because we want to get access to it every single time. So we're going to write in here input dot, get access wrong. And we are going to open up the two brackets in here. But now we want to write horizontal. Let's say we write hurry xanthan. So you can see, I kind of messed it up. It's not the correct word. If it's not the exact same word as the one used right here in the Project Settings. This will not work. What does that mean? Whenever we are using the string references, we already learned what strings are. We need to make sure that we go into Unity. Double-click in here to select it, Control C to copy it, go back here and paste. This was assure that we'd not make any mistake whenever we are creating or using a string reference. This is very important because when it comes to errors, this will not be detected by the Visual Studio. That's why it's imperative whenever you are using a string reference to always, always copy it and paste. This is a rule that you will use all your journey game development. Now that we have the axis roll on horizontal. We can also add the vertical, but it's not enough. We need a way to store what we are clicking. So the way we do that is we'll create another variable in here. This time it's going to be private. It's going to be of type vector 2 and it's going to be the movement. And now what is a vector two and why we use it in order to have the movement input. Well, because if we look back in here and wait for it to compile, you can see that the position is an x, y, and z. Now, because we are not working in VC dimension and this dimension, whatever you wanna call it, we are only working in the x and y. We want to have a vector to that will take in both the x and the y. So now what we can do in our code, we can come here. We can write movement input. We can add the dot x and it's going to be equal to the input dot. Get access wrong. And just to make sure that we can see everything, we are going to write debug dot log. And in here we are just going to print out the movement, that foot dot x. We will save that. Let's also go ahead and print out the debug dot log and the whole movement input. So I'm going to write in here, this is the vector. To save that, go back into Unity and make sure you have the console right here. If you don't go to Window, go to General. And you can see right here you have the console window. So we're going to click on here. Don't worry about these small errors. Run the game. There we go. So we can see that we currently have zeros. We can click on the collapse. This will collapse all the messages that are the same. If we now try to press a or D, if we press on the a, there you go. You can see that this becomes minus 1 and vector 2 is minus 1 000. If we press the d key, you'll notice that it becomes 1 and the vector two is 110. So there we go. Excellent. Now that you understand how these work, how these look, it's time for a small challenge and your challenge is going to be to get the y input. So check in Project Settings Input Manager for the y input, what should it be? What should the string reference me? Get the input and code using the gap axis roll. You can also check out something called the get access without row. This is a good The extra resource for you to do. It's very easy, just checking the documentation, the just get access without Rob, see what's difference. And finally, you will need to display that input on the console using the debug dot log, just like we did using the movement input. So pause the video right now and go do the each gallon. Okay, welcome back. How did you get on with that? I always hope that you are trying your best. So we are going to duplicate this line. How would we do that? Simply click on the end of this line. Hold control D. Now you have the exact same line. We're going to change this from the x to the y. There you go. And then the input.txt get access. Rob, what should this be? Well, we know this should be vertical, but whenever we are dealing with string references, we go to the vertical, double-click Control C, go back in the code control V, save that. And let's duplicate this also, movement input dot y. And let's just add a bit of words in here. So this will be the x, this will be the y. Save all of that, go back into unity. That's close the project settings window. Run the game. So now as you can see both the x, the y, and the vector or all 0. And you can see how many we have in here. Once we press the w, We can see that we have the y as one, the vector 2, 0, 1. If we press the S, it's minus1. If we press the a, x is minus1 while the y is still 0, you can see it right here in the vector 2. If we press both the W and the D key, you can see that we have this vector is 1, 1 with x being one. And everything is working perfectly fine with everything. So I hope you enjoy it. I hope you understood what's happening. If you're not sure what's happening. Tried to look through this again, understand what a vector two means. We also have something called the vector 3. Whenever we are working with VC dimensions, if it's a 3D game. And with that said, I hope you enjoy and hope you also understood how update is being called every single frame you can see how many times it's being called. And just for a small demonstration, if you're still a bit skeptical of what I'm saying, Let's try debug dot log. And let's just say in here, hey, I'm and start being called once. Saved that back in our game when we run, as soon as this assembles, run the game. You'll see right here, hey, is called only once. And these are being called every single frame. And our game with that said, back in here, commit all of our changes. Commit. And what should we call it in here? Created a script for the player and learned variables. Now, this is because we are creating a course usually when you're doing a project and learned variables, isn't that important? I'm going to remove it. That's just say created a script for the layer. We are going to commit our changes. And I'll see you in the next video.
10. Changing Player Position (Game Object Transform: Welcome back, my fellow game developers. In this video, we are actually going to put the inputs we created to use and we're going to see how important variables are. So now when we run our gain, you'll notice that we don't just stand there. You don't have anything in the console. When we press the WASD key, we can see that our player moves left, right, left, up, down. And not only that, if I increase the movement speed, there we go, We are much faster. So not only do we move the player with the keys, we also can control how fast he moved. So well, that said, let's not waste any more time and let's get started. Okay, so now that we have the inputs ready, we see how they work. It's time to actually start moving the player. As we promised. Let's open up the script right here. And let's go ahead and remove these debug dot log. These were just here too. Make us believe that this is actually working. Okay, so the first thing that we need to do is we need to access the transformed position of the player. So we're going to go ahead and click Transform. And you can see right here how helpful visual Studio is already. It's telling us what the transform is. So the transform that will write right now is the transport attached to this game object. Which game object? It's the game object that has the player controller script on it. And if we look back in here, we click on the layer. Anytime now we click on the player. We can see that the player controller is attached to the player and the transform which is on the gameObject don't player as this one. So we're accessing this specific transform. So back in here, we'll write transform again, hit Tab to complete the word dot position. You can see that can access the position, the scale, the rotation, everything that is available on the transform. And we write position. Now, this is going to be equal to a new vector three. And it's going to be, let's say for now just 0.1 f. And we can also write dot 1 f. This means 0, and we'll keep the z axis on the same place. We'll save that. Now, you might be thinking why Vector3 didn't we just say that we don't want to modify this? Well, if we hover over position, you can see that the world space position of the transform as a vector three, that can also go through the documentations and see that it is actually the transformed position of any object, regardless whether we are using 3D, 2D 1D, That's impossible, but you get the picture vector three position. We always access the vector C position, but we keep it as 0 f. Now the scope is not complete, but I'm going to use it just so we learn as we make mistakes, I'm going to save this. I'm going to go back in here. And let's just get some real values in here so we know, so minus five and let's say this is minus1 will save that. We're going to run our game and let's look. There we go. So 0.10.1. Now, what seems to be the problem? Aren't we calling it every single frame? Well, the problem here is that we are simply assigning this value right here, the new vector, 30.10.10 f to the position. Every single frame we are not increasing the transform position. So how are we going to start increasing? Let me just stop the playwright here. We're going to write that we take the transform dot position of the game object and then we add to it the 0.10.1 vector 3, every single frame. So we're going to save that. And let's go back and look at our game, how it looks right now. We run the game and there you go. Very goals. The player has just left the building, as you can see, as you can see right now what happens in here. We take the transform.py position. We assign in the already available transform, but position plus the vector 3, and we do that every single frame. So let's say we start off at 0, 0. We take 000 right here, we add to this vector, the next frame we have 0.21. We take it, we add to it, it becomes 0.2. We take it, we add to it becomes 0.3. So every single frame we increase it. Now, as you can see, there is redundant code in here. Redundant means we are using it multiple times. To avoid this, we can simply remove this right here and instead add a plus behind the equals. And this is the exact same syntax as before. So if we write this again, let me just duplicate this. I'll simply add two slashes. This becomes a comment. And as we've said, a common does not execute the code, and we'll simply remove this. So as a small reminder of what this plus equals means. So we'll save that. We'll go back into our game and let's just make this a bit smaller, so we'll add another 0 and here, save that back in our game. We run the code, the game. And there we go, we can see him slowly floating away and again, great. So now we have our player moving around. But we don't want these values to be just arbitrary. We don't want to have 0.1 or 0.01. We actually want the input that we've gotten here to move the player. So this will be your challenge. Your challenge is to move the player position with the input. So you're going to access the position of the player's transform. You're going to make the position a new vector 3. And you're going to use the movement input.txt and dot y as the x and y of this new vector 3 will also keep the z axis at 0 F. And some just a bit of extra help. I recommend that you go through the Unity documentation and see the example. They were so nice at Unity company somewhere to give us an example of exactly what we are looking for. So pause the video right now and go do the challenge. Okay, welcome back. So if we scroll down right here, you can see that we get the horizontal input, we get the vertical input, and then we put all of them inside of the transformed position. This is the exact example that we need and our gain. So if we go back in here, instead of 0.01, I'm going to write the movement input dot x. I'm going to write the movement input dot y. And I'm going to save all of that. Now back in our game, we run the game and now our player doesn't move. If we want to move him to the right, we had the Dickey he moves to the right, the left, and he disappeared. So as you can see, our player is extremely, extremely fast. Why is that? Well, it's because updates being called every single frame. So if we try to play again, let me show you what I mean. If we look up here on the stats, we can see how many frames per second we have. So you know what frames per second is? If you've ever played a game and you can see right now it's almost a thousand frames per second. We are calling this a thousand times, a 1000 times. We are adding one, so we're adding a 1000 every time or every second if you'd like. So how are we going to control this? Well, there is a very simple way, and that is by multiplying this by Time.deltaTime. And what happens right now, Time.deltaTime, if we hover over it, it's the interval and seconds from the last frame to the current one. So what this does is it takes the time between each frame, we multiply it by this one and now will become frame rate and dependent. Let me show you what that means. This means that when we run the game, the time it takes from the first frame to the second one is added into the movement. And now when we hit the D key, there we go. We are much slower. And if we had the W, we move up, SVMs down, a, we move left, move right, and so on and so forth. How cool is that? What we have in other plural, who we are extremely low. This is no way of playing a game, especially when we have scary enemies following us. So this is why we had this movement speed variable all the time. This will allow us to control our speed. So now we will also multiply this by the movement speed. We will save that. So back in our gain, we can see that the movement speed is 20. Let's set it to five. Save that, run the game. And now we can move up, down, left, right, however we want. How cool is that we finally have a character, a player that is moving in a world that we've created by using simple code. Let's make this 50. Let's look at it. Well, there we go. We can even control how fast it goes. I mean, seriously, how excited are you? Maybe it's just me. Let's keep it at five. I think five. No fibers actually slow. Let's make then. Yeah, there we go. So 10 looks really, really nice. And with that done, I hope you enjoy it. Before I introduce the next video, you'll notice that we can actually still walk through walls and walk away, which is not good. That's why in the next video, we will be applying physics to our player and making him interact with various objects in our world. With that said, four, I go make sure to commit your changes. I'm not going to do with every single video because it's something that you have to become automatic. And every time you do something important in your game, make sure to stage all work, commit all your work, and I'll see you in the next video.
11. Hitting Obstacles (colliders): Welcome back, my fellow game developers. In this video, we are taking our game to the next level. When we run our game. You'll notice that not only we walk around, but if we try to leave our map, there we go. We cannot. I swear I'm still pressing the achy. I'm still trying to go down, but it doesn't work. I'm still trying to go out. It doesn't work. So we are confined in this little space. We do that using rigid bodies, using colliders. And this is really nice because finally we can feel the weight of our game. So even though we could walk, we could see we can do anything, but now we actually have weight to our movement. We can feel the world around us. With that said, let's not waste any more time. And let's get started. O k. So currently, when we run our game, we can move and all that's great. But as you can see, when we try to hit the wall or something, we just move bastard. And it's as if there is nothing in this world. It feels empty, it feels not real even though we are moving in it. So how are we going to fix that? We are going to use something called a collider. Let me show you what a collider is in the Unity documentation, as you can see, always referred in Unity documentation, you can get there through Google. It's super easy, super effective. Let's see what we have description based class of colliders. We have box, sphere, capsule, a mesh collider, physical materials and rigid bodies. Something that we will learn in just a bit of an object with a collider needs to be moved. During gameplay, you can attach a rigid body component and we'll just get the rigid body a bit of patients, you can see all the properties that we can have, the bounds, the contact offset, the material. We have public methods such as re-cast closest point. We have messages which are extremely important and we'll be using a lot of Trigger Enter on trigger exit on Trigger Stay. You can read the descriptions right here of what each method, what each property, what each message means, what it does, all the inheritance, what we can use, the compare tag will be very important. You can see that we have a lot. You don't have to understand every single one of them. It's just nice to know that you can, if you have something in mind to implement, you can always go into Unit documentations and see if what you're looking for is available right here. So with that said, let's go back in here and let's go ahead and add a box collider to one of these walls right here. Let's start with the bottom one. So the way we do this is we are going to right-click in here. Or let's go to the background. Let's add a component in here. We're going to make it a box collider 2D, because we are working into this box collider is 3D. This one is 2D. We click on it. You can see that it fills the entire room immediately, but we don't want that. We actually want to edit this, or we can click on the Edit right here. You can see we can make it a trigger. We can set an offset, we can set the size, so we can make this smaller on the y-axis, or we can simply click on these three connected dots right here and just move it manually. So there you go. So now we have this collider right here on the wall or the bottom or whatever you wanna call it, we can unclick. This will run the game. And now our player, when he moves down, oh, well, what's happening? The player still hitting the wall and he is moving past. Why is that? Well, because we don't have a collider on our layer. So this is going to be your challenge. Your challenge is to add a collider to the player. So at a collider, a capsule, it doesn't have to be a capsule. It depends on the size and the frame of your player. The one that true personally got, or if you're using the same one as I am, make sure it's only player parent object, not the body. And change the size of the collider to the appropriate size of your player. So with these instructions, pause the video right now and go do the challenge. Okay, welcome back. So how did you get on with that? We are going to add a capsule collider 2D. There we go. We have the capsule, capsule shell and not even sure how it's pronounced. So we click on here. You can see the little green line in here. So we are going to take down. There we go and make it just about the size of our layer. Now, let's see if that works. If we run our game. Now when we go down walk, we are still moving through the object. Why is it not working? I should have probably warned you about this. Now we are going to add a Rigid Body 2D. And now when we run the game, we shall see that we hit the wall. But I didn't press anything. If I move up and let go, we fall down. Why is that? What is happening? Well, because when you add a rigid body, you also add gravity. Let's delve a little bit deeper into what a rigid body is. So it control of an object's position through physics simulation. So when you add a rigid body to a game object, you add physics to it. Rigid body object will be pulled downwards by gravity without adding any additional code. And we can also apply our own forces to them, which I mean by them, it's the rigid body. You can also go into unit is documentations and delve deeper into what rigid body is. And in fact, we are going to need to delve into it. So I'm going to go in here. Rigid body unity docs. There we go. There we go. We see the docs Unity 3D. And you can see the description, the properties, the public methods and so on and so forth. So let's go back and again, we can see right here we can change the mass, the angular drag. We can change the way the collision is detected, discrete, continuous, but it takes a bit more processing power, the sleep mode, the constraints, we're actually going to use them in just a bit. You'll see why. And we can change this from dynamic two kinematic, static. And each one of those are explained right here. But the main difference, whereas it explained somewhere in here, I'm not sure where you can read about each one to delve deeper into it, but know that dynamic means to be CAN affected by outside forces. Kinematic means it doesn't get affected. And static means is just like a big rock. It doesn't move at all. You can see right here the gravity scale. Let's set it to 0, save that, run the game. And now you'll notice that we're not fall anymore. So now when we go down, you can see that we can no longer go under this. But what, what, what happened? And you can see that we move around, we need to add a box collider. But what happened in here and what's the, this jittering? So first thing we'll fix as the flipping things. So this is because we are rotating. You can see right here, it's actually because the physics has calculated that we should rotate it because of the capsule right here. So we'll freeze the rotation around the z-axis while Z, because that show you if we click on the rotate tool up here or simply hit the Iike. We can see when we rotate, it's the z-axis that rotates us and we can clearly see it when we go out from 2D, you can click on this to the right here, we go out. You'll notice that the z-axis, and you can see it. There we go. It's around the z-axis that we are rotating. So we'll stop the to the, we'll set this to 0, will freeze on the Z. And now when we run our game, we go down. And there we go. We no longer flip if we move from left to right, but we still have this jittering. And what is this jittering? Where is it coming from? Well, it's a matter of code. We can see right here that we are moving the player using his transform, that position. So we have two colliding forces. We have the transformed position trying to go through the swallow, but we have the physics from the both colliders trying to push the player away. So this is creating this jittering. How do we fix this? Well, we are going to start moving the player, not using his transform position, but using his velocity. And velocity is available on the rigid body. If you find that somewhere right here, I'm not sure what it is. Let's see. Velocity. There you go. We can add velocity in here, angular velocity, the normal velocity. We can change it right here. So let's do that. If we go and you know what, let's add it up here. We'll create a serialized field. This will be a variable of type rigid body 2D, and we'll just call it the player rigid body. Save that. Oh, and one more thing you've noticed, and I forgot to tell you this. It's the way we name our variable. The first word should always have the first letter not capitalized, while all subsequent words will be capitalized. Why is that? Let's take an example from here. You'll notice that player is not capitalized. Rigid body is by the B for the body is not. So if we save that, we'll look in the inspector. You'll notice right here, the variable, the way it's written will be player rigid body with rigid body as a single word. If we go back, we make this be capitalized. We save that. We go back in the inspector, you'll notice that now the B is capitalized and it's a separate word. So every time we capitalize one of the words, it becomes separate. But we don't want that. We want it as a single one. You can see the same example and the movement speed. When we go back, there we go. So we've just created a reference to the rigid body on the player, but we haven't added it because you can see right now that the player rigid body, and there's just not how we do that. We simply click on the rigid body right here and we drag it up. So now you can see, as the name suggests, it's the rigid body on the dune layer. We save that back in our game. And here we are going to use instead of the transform position delta and all of that, I'm just going to comment this outlet on, we'll delete it, but I just want to have this all in front of you so you know the process of what's happening. So now we take the players rigid body, access the velocity on it. And it's going to be equal to the movement input times the movement speed. And because we are using the velocity, this will not require any Time.deltaTime. We save that. We go back in here. Let's move this guy up a bit. So now when we run our game, We move around. And if we try to move through the wall, there you go. You can see that we no longer have the jittering because we have the two physics engines working. Well, not the 2, 1 physics engine working on the both libraries because of the rigid body. And finally, we'll just add a couple of more colliders to the background. So I'm going to add a box collider 2D. I'm going to make this a bit smaller. And now it's never recommended that you add multiple box gliders on the same game object, but for now we'll make an exception. This will rarely happen. So there you go. Let's add a box collider like that. Let's add another one. And this one will be to the side. So we don't go out, we'll just make it a little bit bigger. And let's add the last box collider, and this one will be the one on the other side. There we go. We save all of that. We run our game. And now we walk down. We can't walk to the left, we can't. We walked to the right, we can't. And if we try to move up, we also can't, but there is a slight problem. You can see that we still have space in here to walk up to. So what I'm going to do is I'm going to just make the players collider a little bit smaller on the top. So let's just make it around here. We can even maybe change this from a capsule to something else and making it like that. Oops. Where is it? We change the position, so we move it on the X. Yep, there we go. We run our game. And we can see that we kind of move up. We still have this bit of space. This isn't a huge problem. We can even make B instead of a capsule, make a box collider or something else. But you can see that it all works of fine and dandy with that said, make sure to commit your changes. And in the next video will be aiming our gun around using the direction or where our mouse is pointing because currently, just have this gun is not doing much. I'll see you in the next one.
12. Gun Aiming (Screen Point): Hey, welcome back, My favorite game developers in this video, our gun is no longer a static object. If you look closely, you can see that when we move down, the gun moves down. When we look up, the gun locks up. Obviously, there are still a couple of things that need to be fixed because holding the gun like that I feel is pretty uncomfortable, but no worries about that. This is the first step in naming our gun properly. So let's not waste any more time and let's get started. There's a lot of math in this. So put your thinking caps on. Now that we are moving and we're bumping into things, it's time to start aiming our weapon. To do that, we want to rotate the weapon around a certain position. We don't want to actually be rotating the exact weapon because if we look in here, if we go to the scene, you can see right now, if we try to rotate the gun as it is, it doesn't look as good. We need a point from which the gun will be rotating. So what we'll do is we're going to right-click on the dome player. We're going to create an empty game object. We are going to call it the weapons arm. And we're going to move it to a certain point. And this is the point where the gun or from which the gun will be rotating. So I'm going to put it around almost the hand or the arm of the player. And I am going to make the shotgun, a child of that weapons are. So now when we rotate the weapons arm, you'll notice that the shotgun stays in its place almost around the arm right here, and it looks much more natural as we rotate the shotgun or the weapons are. So now it's time for a bit of cold. But before we do that, how are we actually going to be rotating this arm? It's going to be dependent on where our mouth is. So let's say we are up here. We want the shot gun to point towards the mouse. How are we going to calculate that? Well, we will need a couple of points and let me explain it using math, yay math. So let's get started. First thing first we need the player position on the screen. Well, I use the term player position, but it's actually the point on which we are rotating the shotgun around. But for now, let's just keep it simple. Call this the player position, and we have the mouse position on the screen. So what we want is we want to get the vector on these two points. This is the direction which are gone will be pointing. But how are we actually going to calculate the angle we want the gun to be pointing in? Well, we know the exposition and we know the y position. Well, I meant X and Y. So what we can do is we can use something called the arc tangent. And this is something available for us in math. F of unit is library. So we can use that to calculate the arctan. And if you don't know what arctan or you don't even know what Dan is tangent I believe it's called it's the front side, which is the y divided by V x. And when we do that, we get a certain number, which is the tangent. So to get the angle, we use something called the arc tangent, which is kind of a reverse. But all you need to know is that we get the difference in the height, we get the difference in the distance. And using that, we calculate the angle in which argon should be pointing out. This is basic elementary math. I'm not sure if you're familiar with that. If you want to delve deeper into it, be my guest, I believe this will be enough explanation. So let's translate these mathematical equations into mathematical codes. So I'm going to go back and our script in here in the player controller. And the first thing we need is the two reference for the camera and for the weapons are. So I'm going to start off by creating a serialized field, which will be a transform. And it's going to represent the weapons are great. The second variable we're going to create as a private camera, and it's going to be the main camera. And the cool thing about this is that we can immediately go into Stuart and say that the main camera is equal to the camera. Dot main. And using this camera, that main, we immediately can get a reference to the main camera which we have. And here, great. Now we need to know where our mouth is in the world. So we are going to scroll down and here, and I'm just going to remove these comments because we no longer need them. If you feel you need them, keep them as a reminder for later on how we changed and moved through our code. So now I'm going to get the position of the mouse. I'm going to use a vector three. And it's going to be called the mouse position. And it's going to be equal to the input dot mouse position. And you can see right now that immediately the Visual Studio Community gives us the current mouse position in pixel coordinates. So great, that's what we need. And obviously, I already know this stuff. If you want to research this, you would have needed to go into Google, how to go get most position. You have gotten the documentations for unity. You would have found this input dot mouse position. You would have used it. This is just a shortcut. Let's continue on. Next thing we need is the screen point. So screen point, and it's going to be equal to the main camera, the world camera, world to screen point. And you can see the definition and here is the transform position from world space and to screen space. There we go. This is what we need. Transform local scale, I mean local position. And this will give us the local position of the transform, which is the player right now. And now it's time to calculate the angle. Let's first of all, save all of that. Let's go ahead and assign the arm for the player. So I'm going to drag the weapons arm right now. We're going to save that. And now the next step is to actually calculate the angle. So I'm going to first of all, show you this again so you can go back and look at it if you need to. And then I'm going to issue you a challenge. And your challenge is going to be to calculate the angle. So first thing you do is you need to subtract the mouse x position from the screen point position of the x. Obviously, you will need to do the same for the y. And then you'll need to calculate the math F dot arctangent to find that in the Unity documentation. Go ahead, pause the video right now. Go do your best. Try it. You won't lose anything by doing your best. Pause the video right now and go do the challenge. Hey, welcome back. So as you can see, I've just looked up math, arc tangent in Unity. Now I am right here. What do I do? Well, I need to see how this works. What does do? It returns a float. This is our how I use matlab.org Tange. Okay, great. Then let's go back in here. So first thing we need to do is we need to calculate the difference. I'm going to put both of these into a vector two. So I'm going to use a vector to, I'll call this the offset. So it's the offset between the two points. It will be equal to a new vector two. And in here I'm going to first of all get the mouse position dot x and subtract from it, the screen point directs. And I'm going to do the same on the why. Now I'm going to create a float because as we saw this method, the method dot arctan returns a float, is going to be equal to math F dot arc tan or no, Eta. It's called a tan two. And I'm going to use the offset dot y divided by the offset DRX. Great, so I'm going to save that. But whenever we want to assign the actual rotation to the weapons are, we cannot simply do it using a float. What we need to do is we need to use an extra method, which is the method that rad two degrees. And you can see this converts radians to degrees constant. So we will need to do that. And the final thing we need to do is we will need to access the weapons on dot rotation and now get ready for a bit of a scary world. We are going to use quaternions. So quaternion dot Bueller. And we're going to set it as 00 on the x-axis. We don't rotate on the y-axis, we don't rotate. We only rotate around the z-axis using the angle. Now, before you run away, what is Turnitin dot Hulu? If you look on the earlier right here, you can see that it returns a rotation that rotate Z degrees around z axis, x around x axis, and so on and so forth. So quaternion dot. If you are interested, you can delve deep into this. Me personally, I've been rotating objects in Unity for several years and I've never quite understood what they mean by quaternion is just a way to convert from the XYZ into an actual rotation and space. So feel free to delve deep, go look it up, make sure you understand everything. If not, if you're not bothered by not fully understanding what is happening with quaternion u dot. Trust me, you can go through your game development journey without worrying about it. So this is simply a way to convert x, y, and z into an angle into a rotation. We'll save that. We'll go back into Unity. And we are going to run the game. And let's see what is happening with the gun right now, we move up, the gun moves up. We move down. The gun moves down. If we go to the left, yep. Our gun looks a bit weird when we look in the other direction, but when it comes to the proper direction, there you go. We move and even adjusts as we walk. So you can see when we move up, the gun moves down. Always looking at exactly where our mouse position is. So great now we have a gun that is actually firing, which is amazing in my opinion, not actually firing, which will be firing in the right direction later on as we move. But obviously there is something wrong when we try to move the mouse in the other direction, it does move properly. That's what we are going to be fixing in the next video while learning something very nice encoding which is called the if statements and if conditions. So I'll see you there. But before we go, always make sure to stage all your files. Mega commits. I'm going to call this made my gun point in the right direction or not envy right angle. Because in the next video, we'll make it point in the right direction, will make the whole player point and the right direction. So, see you then.
13. Aiming The Right Direction (if Statement): Welcome back, my fellow game developers. In this video, we are going to not only be rotating the gun, but we are also going to be pointing in the right direction. But not only that, not only are we pointing in the right direction, we can also point back. And this is very important and this will be your challenge. We are going to be learning how we can use if conditions, if statements in order to rotate from left to right. And it's going to be very fond, is going to be amazing because we are making our gain much more alive, much more effective. So let's not waste any more time. And let's get started. Oh, okay. So now our gum is actually rotating. It is always pointing towards the mouse. That's great. But what happens when we go over a certain limit? You can see right now that the GAN still pointing towards the mouth. But it is, first of all, it's inverted. Second of all, the player isn't looking in the proper direction, so we need to fix all of that. But how, how can we tell our player to behave in a way when he is looking in one direction and another way when he is looking in the other direction or should be looking at how can we tell him? If it's like this, then we want to do something. If it's something else, we want to do something else. Well, this is what we call the if statement. Let me take you through it. So conditional IF statement structure. This is how the syntax looks like. We have some condition that needs to be true. It's inside of these two brackets right here. And if that condition is true, then the code inside of these two squiggly lines is executed. If it's not, then we have something called the else. If, if this condition is not true, else if some other condition is true, this code will be executed. And if neither this condition nor the second one is true, then we have something called the else. And this code will be executed if none of the previous conditions are true, you can add as many else if statements as you want so you can add. The first one is always if you can even not do an else, if you can immediately add an else or you can add 15 else ifs, if you need to, you might never need that money, but if you ever do need more than one, more than two, you can add. So we have a condition in here. If it's true, this code executes and we stop. We do not continue looking down. If this not, this first one isn't true. We look to the second one. If it is, we execute, if it's not, we continue. Finally, if we don't find any condition that is true, we execute else. So let's go ahead and implement that. So what are we looking for in here? We are looking to rotate the entire object. If so, what are we looking for in here? We want to see if the mouse position is less than because let's look at the dome player for example, this is the position on the x back in the scene. So when we are moving backwards, you can see that it's less when we are moving to the right. That means it's small. So imagine the mouse position as being a another game object. For example, We are in here and this area to the left of the player, that means the most position is less than this green point, which means we want to rotate the entire don't player to the other side. But how are we actually going to do that? Well, there is the scale right here, which makes it super easy. So if I change the scale on the x, you can see that he becomes wider and wider. But what happens when we go and negative? So when we go Negative, yep, there we go. We actually flip the player. And this is what we want to be adjusting whenever we are looking in the other direction. And this direction, when the mouse position is less than the screen point, which is the player. We want to be looking right here. And this direction we want to change the scale to minus one, not only the ACS, also the y. We will see why. So now that we have those things established, let's create our first if statement. So in here, we are going to create enough. We're going to open the two brackets or columns. I'm not sure what they're called. We're going to check for the mouse position dot x. We don't need the y. It doesn't matter. And if it's less than the screen point, the RX. Then we are going to take the transform local scale, which is the local scale of the object holding this script. That means the entire don't player is going to be new vector 3 minus 1, f 1, f 1. Save that. We run the gain. This is while the y is still positive. So if we look in the other direction, you can see that the gun is upside down. So our goal, let me just show you and the way I pause this using keys is control shift P. So what we need to do is if we grab the weapons arm, if I set it to minus one, there you go. You can see that we are back at a proper scale or a proper advertisement. So I'm going to set this to minus1, save that back in our game, run the game. And now we look up and down, the gang rotates. If we go to the other side, there you go. The gun looks properly. Great. So everything is set up. The only problem is when we look back, the player doesn't change. So how are we going to make sure that when we don't have this condition as true, how are we going to rotate the player back? Well, it's your challenge. Your challenge is to create an else statement. You'll need to add to the if statements and else statements. We already saw how that looks. This will activate when the mouse position x is smaller than the screen point x. In that case, we need to set the local scales or all the local scales back to one. And I'm going to give you a small hint, which is to set the scale to vector three dot one, vector three dot one. You can also research on Unity's documentation. It means that it's a vector 3, 1, 1, 1. Pause the video right now and go do the challenge. Okay, welcome back. How did you get all of that? I really, really hope that you are always trying to bust with these challenges. So I'm going to create an else statement in here. And what I'm going to do is I'm going to take the transform local scale. And it's going to be equal to vector three dot one. Let's save that. And I'm going to also duplicate this. So the way we duplicate it as remember Control D. And instead of the transform, I'm going to use the weapons are, I'm going to save all of that. I'm going to go back into my game. I'm going to run it. So now I look to the right, my gun rotates properly. Everything is good. I look to the left, the gun rotates properly. The player is looking in the right direction. Now if I go back, there we go. So you can see that we have fixed our problem. The player always looks in the right direction. We have the gun pointing properly, and we finally look amazing while doing it. So now we can walk around. You can see that it's much more natural because it's always pointing towards the gun. Not only is the weapon pointing properly towards the gun, weapon problem pointing towards the mouse, but also deep layer, entire body is rotating and pointing in the right direction. So that done, make sure to go ahead and commit the changes that we made. And in the next video we are going to be adding more flavor to our games. How, by creating the walking, the idling, and maybe even the torpedo animations for the player can't wait to start animating. I'll see you in the next one.
14. Animations In Unity: Welcome back my fellow game developers to one of the more exciting and long, very long videos. But trust me, it's very worth it. In this video, we are going to inject more life and to our game by creating animations. So now when we start our game, we don't just stand there like a statue. You can see that we are moving. So our player is going up and down, up and down, up and down. And not only that, whenever we start walking, look at that. He starts moving his feet around. How cool is that? Seriously, now we don't have just the player standing fair lucky statue. He actually has life, his breathing. He's walking, he's looking around, he's pointing his gun, he's ready to start shooting. He still needs a bit of tweaking, but we'll handle that in the next video. So what actually, on the end, which video? Let's not waste any more time thinking and let's get to animating. Oh, okay. So currently when we start our game, if we move around, as you can see, we are very stale. We don't have any animations in particular, we don't see the player changing states when he starts walking or when he's standing either. So we're going to change that. We are going to add animations to our player. And we already have a couple of spreadsheets and here, those that will determine our animation. So you can see the idling, the walking. We're going to put them side-by-side and play these sprites as we walk, as we stand still, as we do the torpedo movement. So let's get started with animations. First thing first, let's understand what animations are. A couple of key components that we need. First of all, we have the animator controller, which allows you to arrange and maintain a set of animations clip. We have the animator component which we add to any game object that we want to animate. We have the actual animations, which are several sprites are rendered one after the other. We'll also see that we have a another type of animations that allow us to move objects and then remember it and play it at certain times. And finally we have the sprite renderer. Now, why am I reminding you of the sprite renderer? Because in just a bit, you'll need to understand which sprite renderer would actually trying to change in order to create the animations that we have for our DOM player. Okay, enough talking. Let's get started with animations. So let's go into Unity. And the first thing that we need to do is we need to get the windows for the animation. So we're going to create the animations window. Let's dock it around here. And let's create a, another window for the animator. There you go. So the animator as where we are going to set all of the animations. And the animations as where we will actually create the animations. Let's get started. First thing first, we're going to choose our doom player. And as you can see immediately in the animation window, we have to begin animating, do player, create an animator and animation clip. Great, Let's do that. We're going to hit Create. And as you can see, we are currently in the time both invader file and the assets. I'm going to create a new folder in here, which is going to be the animations. Or animation's. There you go. And in here create a folder called the player. And we are going to name our clip. Let's start by creating a player, I think. Okay, great. So now we have our new animation. And if we look on the dome player, you can see that we have a new component next to the rigid body and the capsule, which is the animator. So if we go into the scene, nothing changes but inside of the animator, just to refresh everything, you can see that we now have these little rectangles in here. And what are these? Well, we have the any state, the entry and exit. Let's not worry about the any state and the exit. Let's focus on the entry and the actual player idling. What this means is as soon as we start our game, we immediately transition into the player idling. And you will see that every single time we have an animator, we always have a default animation that we start off with. And in this case, we have the player idling starting immediately from the entry. And as you can see, it's connected by this line with an arrow. This is called a transition. And later on we will be making our own transition to go from one animation to the other. Okay, let's continue on. The next thing we want to do is we actually want to create the animation. So in order to do that, we need to get our idling sprites right here. Those three, we want to add them to the player and start playing with them. But there is a small detail in here that we need to take into consideration. We are going to be changing the sprites of the player. And the sprites that we are changing are actually on the body, not on the immediate. Doing player game object. So through this animation, will need to add a property in here. And let me just explain this window right here. This is the timeline for the animation. So you can see from 030, this is 2.5th and 2 one right here. This is a whole second. You have the play, the go-to next keyframe, et cetera. You have the Record button here and you can create a new clip by clicking on this drop-down right here. So let's add a property. When we click it, you can see that we have access to all the components that are present on the player or the doom player game object, we can change the weapons are the Chicago, the arm, the body, everything. So I'm going to access the body. And you can see that I can access the sprite render on it. And if I scroll down, I can actually access the sprite which is on the body right here. So I'm going to click on the little plus sign here. If I make this a bit bigger, you can see that I can actually see this little sprite and this is what we're going to change. So if I hit Play, you'll notice that nothing changes because this sprite is exactly the same as this one. So let's change that. I'm going to dock the animations and here just to have a little bit of space, I'm going to delete the last one, Keep this right here. I'm going to select these three and add them to the timeline right here, and I can get rid of the first one. So now let me just make these, okay, But apart. I'll dock the animation back here. And now if I tried to play the animation, there you go. You can see that our player starts to move. How cool is that? What is happening in here? If you look closely, let me just pause this for a second. I'll just make the time between each a bit far away. So now when we play, you'll notice that we are going from one sprite to the other. And you can make sure of that by looking right here on the inspector of the body and see that we are going from either one, either to idle, want idle two. And this one right here, which is the three, is barely being played because as soon as we get to the end, we then immediately start from the beginning. So a good, let's say principal to have on creating animations is that all the time, the first frame should be copied by pressing Control C and B, the last frame also. So now you'll notice how the animation looks much better. So I'm going to play the animation again. There you go. You can see that now we are idling. We can see 1, 2, 3, 1, 2, 3 playing one after the other. So now we have the animation of the player idling. And if we run our gain, you can see that as soon as we start, the player starts either link. And even while we are moving, we are still idling. Even if we look the other way, we are still idling. And if we check the animator, you can see that all the time we are idling. I'll lock it right here so we can see it clearly and zoom out a bit. So this is the player idling all the time while we are standing, still. Great. Now, the next step is to go ahead and create the walking animation. And it's going to be your challenge. Your challenge is to create another animation. So get the walking sprites from the main sprite. If you haven't already slice that up, choose the doom player in the hierarchy and create a new clip like I showed you. Add all the walking sprites and separate them. Play around and make the walking look good. And if you are interested in an extra challenge, you can go ahead and create the torpedo animation. I'm not sure if I'm going to keep using the torpedo animation. Maybe it should be something different, maybe v, rolling around animation. I don't know with that non, pause the video right now, go try out the animation. Don't worry, even if you're a beginner, just try it out. See a couple of steps. How I created the idling. Try it yourself, have fun, enjoy. And that's it. Pause the video right now and go do it each challenge. Okay, so now we are going to create the second animation, which is the walking. So I'm going to click in here. I'm going to create a new clip. Go to the animations player, choose idling, and instead of idling, I'm going to set it as the walking. So now player is walking. Very good. Okay, so now we are going to add a property in here. We are going to access the body because remember the sprites that we are changing are on the body. Sprite renderer, the sprite because we are actually changing each single sprite. And we are going to add, let's move the animation in here. Maybe this is not the best place to add an animation, but we'll just have to do with what we have for now. Go to the project, which are our walking. So I think these last four are the walking out. Just add them in here. I'll remove the last one and the first one. That started the animation back down. Let's choose all of these and I'm going to spread them out with an interval of 10. Let's make it 10. So 10, 10, 10. And I'm going to copy the first one and set it as the last one. And now when we tried to play the animation, there we go, you can see the walking of the player. And correct. Now, how are we going to transition? And if you actually click on the animator, you'll see that we now have a new clip in here which is the player walking. But how are we going to transition from widening talking? This is the $1 million question. Before I tell you how we do that, let me just show you what we've created in this Animations folder inside of the player. So we have the doom player, he has an animator, he has a controller. And if I click on the controller, by the way, whenever you click, for example, on the don't player, you can see the rigid body where it is or the weapons on, can get a reference. We click on the controller. This is the controller and these are the animations of the player and the walking, the idling. And you can see right here, we can do a bit of a modification for the cycle offset, the loop time, the loop poles. But for now, we're not going to delve deep into that. For now, let's focus on the animator and how we are going to create transitions. How are we going to decide when we transition? This is also very important. So we are going to create a transition in here by right-clicking on the player idling. In here we have the make transition and we are going to set it on the player walking. So let me zoom in a little bit. So now you can see that we have this arrow going from player idling to play or walking. And we can also create a transition from the player walking to the player idling. So now we can go back and forth between these two animations. Let's click on one of these arrows and look and see what we have here. So we have something called the exit time. If you hover over it, you can see that this transition has a fixed exit time. What does exit time mean? It means if I go from the idling to the walking after a certain amount, do I want to automatically go from the walking to the idling? And our case, we don't want to do that. We want to transition back whenever we actually stop walking. So I'm going to turn off the Has Exit Time. I'm going to do the same on the way down. Then we are going to look for the transition duration. And you can see actually a preview, a small preview window in here. So when I play, I'm idling and then I start walking. We have the transition duration. So how do you want to finish the animation of idling before we transition into walking and our case, I think we don't need that. So I'm going to set the transition duration to 0 and also to that in the transition of the walking. So in both transitions, both arrows going to and from the walking, we are going to remove the exit time, remove the transition later on when we do need them. I'll make sure to tell you about it. Don't worry. Now, if we scroll down, we can see in here that we have something called the conditions. And this is under which condition do we transition from the player idling to the player walking? And under which condition do we transition from the player walking to the player either link? So we are going to have to add a condition. How do we add a condition in here in the transitions? If we look again to the animator, we can see that we have the layer step and we have something called the parameters. And in here we can add certain parameters that we can then access from our code and make the conditions. So I'm going to click and tried to add one of the parameters. You can see that we have float, integer, Boolean, and a trigger. Now, float and integer explain themselves. A Boolean, as you know, is a true or false and a trigger is just like what the word means, a trigger. For now, let's focus on the Boolean. So when I click on the Boolean, you get the option to call it whatever you want. So this will be the Boolean that transitions from either link to walking, I'm going to call it, is. Walking, hit Enter. And now you can see that I can turn it on, which means it becomes true, or I can turn it off, which means it becomes false. So I'm going to click on the transition, going from player ID link to walking. And I'm going to click on the condition. And as you can see, because we only have one parameter, it immediately thinks that we need the walking or determines which is true. So when is walking is true, we transition from player idling too walking. And if we are walking, we want to transition to idling. We want to have a condition where is walking is false. So now when is walking is true, we move from player Ivan into play or walking. When player is walking and is walking becomes false. We are back at idling. Let's convert that into code and add behavior to it. I'm going to open up my script. And in here the first thing that we need to do is get a reference of the player animator. So I'm going to create private animator, the player animator. And he may door. Now it's private. How are we going to add? We can't access it from the inspector in here. If I click on the dome player on the script, we don't have access to it. Well, we can use something called the get component. So in here I'm going to write player animator is going to be equal to get component. And we are going to add the component type that we want to get. So what's happening in here? Let me hover over the debt component. It doesn't have an explanation. I'll tell you what the explanation as you can also go ahead and find on Unity's documentation, it's very easy. What it does is as soon as we start, we get the component, which is of type animator attached to the game object that has the player controller as a script. So effectively what we're doing is this script is using VI get component right here. And getting the animator, which is this one. And now we have a reference to it. So now we can access many things using this animator. And you can also go through unit is documentations and see all the different types of methods, properties, and various things that we can do with this animator. So what are we going to do in this animator? We want to check for a condition. We want to check if we're walking. We want to set the Walking to true and then transition into the walking animation. So I'm going to create an if condition in here and check if the movement input is different than vector to 0. So vector to the 0 is just like vector 3 right here. Dot one, which means 111 vector two dot 0 means 00. This means if the movement input is not 0, that means we do have walking right here. We have velocity, we have movement. We are going to get the player animator. We are going to use something called the set Boolean. And in here you can see that it takes either an ID or a different way of using the set booth. If I click on here, you can see that I can use a string name. And this is what I'm going to do. And you can see that we have a string reference. And what did we say about shrink references? Whenever we have one, we always go, we copy it because if there is any mistake, the IDE will not tell us what the problem is, what the error is. The IDE, I mean the unity or the Visual Studio. And in here because we are walking. Oh, and I forgot. What does this exclamation mark mean? What does exclamation mark equals mean? So if you see right here, we've said that when mouse positions of x is less than this green point, we could have said that if the mouse position that AX is equal, whenever we want to compare two values, we can set them as equal, equal. That means is the most position x the same as the mouse point dot x. But in here we decided to keep it as less than or equal. But what if we want to say, if it's not equal? Well, then we use the exclamation mark equals. This means that whenever movement input is different than the vector two dot 0, we have the is walking set to true. Else. That means when the movement input is equal to 0, we are going to duplicate this line. And if we hold down Alt and use the arrow keys, we can put it in here. And we are going to set the is walking to false. We'll save that. Let's go over this one more time because I forgot to tell you about this and just kept on using it, which is very bad. So I hope that wasn't too confusing. Anyways, we create an if condition that we learned in a previous video. We check if the movement speed is different than a vector 0, say different than using an exclamation mark and equal. So if movement speed is different than 0, that means we are walking. We are going to access the player animator who are going to use the set Bool method. And we are going to access the is walking parameter and be setting it to true. And remember, when we set it to true, we have the transition in here that says if B is walking is true, we go from idling too walking, and we've done the same using an else. Else means when movement input is equal to vector 2, 2, 0, that means we stopped walking is working as false. We go from player walking to play or idling. Let's see if that works. So we start the game. We can see right here that we have player idling. If we start walking, there you go. You can see that now we are walking and it's evident by the way, the legs of our player are moving. How cool is that? So now we have animations. We have transitions from one animation to the other. We've created two animations. Maybe you've created the third one on yourself. I'll not do it right now, although it later on for future Michel to handle that problem, I feel lazy right now. But there is one more thing that we need to take care of if we go right here and to the dome player. And let's go to Animations. If we choose the idling, for example, and we play it, you'll notice that we have our gun and our arm standing still right there not doing anything. This is not good at all. It makes the game look very, very bad. So, and also when it comes to the walking, so you can see right here that the arm is moving, the player is moving, but the arm and gone are very rigid. In the next video, we are going to be fixing that. So before I go, make sure to stage everything, make sure to commit added and animations to the idling and walking in your case also the torpedo animation to the player, commit the changes. And I'll see you in the next video.
15. Enhancing Player Animations: Welcome back, my fellow game developers. In this video, when we run our game, our hand and gun are no longer static. And when we move left and right, maybe it's not very noticeable, but you can see that the arm that be just make the movement speed a lot slower. So now when we move, there you go. You can see that the gun moves up and down and the arm moves left and right. All actually rotates a little bit. How cool is that? Now we are no longer just a gun pointing monster killing, doom Slayer. We are actually an animated dooms layer that does of the other things. So let's not waste any more time and let's get started. O k. So what do I mean by enhancing our animation? Don't we already have a good enough animation? Well, no. As you can see, when we play the animation, the gun doesn't move, the arm doesn't move, and that's not good. So let's fix this. Let's go ahead and start with the eye-opening. Are going to watch how I do it, and then you are going to implement it on the walking. This will be your challenge. So even I like to keep the challenges a surprise, but I want you to focus on what we're doing. So we have this little red button right here. When we click it, we start recording. You can see that we have the rat and we can change anything that we want. So during this animation, I can increase the movement speed. So you'll notice that when we start at the beginning, look on the movement speed as I move on the timeline, you'll see that it increases to the point that I've said it. And then for example, I want to decrease it. And you'll notice that we have this additional property being added. So we start off with them. We move up to 72 and then we move down to minus four. So we started going backwards. How cool is that? But we're not here to change the movement speed. We can change anything we want. By the way, this, this is why animations, such an amazing and powerful tool in Unity. What we want to do is we want to move the arm and the arm will open up and down. So what we'll do is we are going to, this is our first animation. Let me just make the arm a little bit bigger because I want to cover the whole side of the player. I don't want anything to be visible behind it, so I'm going to choose the arm and I'll just make it around 30. Apply that. So now the arm is a bit bigger. It covers the arm of the player. And back in here. Oh, did I changed? Was this during the animation Aquino? So when we go down, you can see that we move down a little bit. I'm going to move down the arm and the weapon. Just a little bit. Okay. And then when we move down even more, I'm going to move the arm and weapon a little bit more. And then when we stand back up, I'm going to copy the original position of the R and gun, copy that and paste it at the end. Okay, great. When we finish recording, we need to make sure that we had this red timeline. Make sure that we stop recording. So now we have the animation set. You can see right here we have two additional properties where we change the y, the x, only the position of the transport. We could have done this by adding a property and accessing everything from here, but this is a bit fast. So let's see what we have in here. Let me close those off. What happens now when we play the animation? There we go. You can see that the arm and the gun are going up and down. But it's obvious to me and you that there is something a bit wrong. What's wrong? You can see that the player, let me just stop that. I'll play this. The arm starts going down before the sprite actually triggers, before the first small dip NT player. And there you go. You can see that the arm is faster, not faster. But the problem is when it comes to animating sprites, we have these four images, okay? So we, we have the first image. We weighed these 10 frames, then we have the second image. We went ten frames, then we have the third image. But the arm and other animations work differently. If I look, for example, on the weapons are, notice how the y changes. It doesn't go immediately to minus 0.332. It actually slowly goes from minus 28. And every single frame it goes less, less, less, less, less until it gets to this point. And then it goes down a bit less, and then it goes down a bit more. Oil goes up. Original position. That's not what we want. It looks very bad. If I run the game, you can see that it looks very bad. It looks as if the arm is not properly attached to the player. Now, if you want, if it's part of your game, If that's the quirk you want to have in your game, then go for it. I recommend you play around and create your own animation. You don't have to follow my exact steps, but I want to show you what can be done. You have right here the dope sheet. Dope sheet. I'm not sure how it's pronounced, but this is where we set the various properties. We can do also something else, which are the curves. And you can see right now that we have these very different curves. So we can change the way the sprites, the weapons are in position and how do you arms position change with time. So for example, I can select the x in here. The why, how a changes and the z. Let me just give you an example so you understand we have this lever right here. When I click on the second frame, you can see that I can adjust how fast or slow or how the curvature of the animation goes. So if I created like this or make it like this, you'll notice that the y will increase over and then go down and then go lower than intended and then get to the goal. So when I play it, look up what that looks like. You can see, there we go. So let me slow this down. So the y goes up and then it goes down and then it goes to the position that we have intended it to be at. What is the point of doing this? We can play around with these, make them as we want. But what we want is we want to take this and take it all the way until it becomes a small square. How does that look? Let me show you. Now when we play. There you go. It's not very noticeable. But again, when we move, you'll notice the gun doesn't move down only the arm. And when we get to this point, the gun falls down with the player and then goes up slowly. So we have figured out a way to make this transition just like the sprites. So again, we take this one also. There we go. So now you'll notice the gun moves up and down. Was the player exactly. Let's do the same for the arm. If we click on the why. He said that in here. Let's run. You can see how the arm works. We'll choose the second frame. We'll move it all the way. We'll choose the frame also will move it all the way. And now the animation should look perfect when we review it. There you go. You can see that the arm, the gun, and the player sprite all move together in unison. So I hope you understood what we are creating in here. Let me run the game so we can see properly what's happening. There you go. You can see that now the R and D can look really part of the player. Now, before I issue the challenge, there is one thing that we need to take care of, not actually take care of or take caution of while we're playing. You notice you've created me and do together. We've created the gun having a rotation. So we rotate the gun around to point towards our mass. If we try to add rotation to the gun right now as we are walking, or if we tried to add rotation on this animation, the pointing of the gum will not work anymore. Why? Because update and animation will be in conflict. So the animation wants to rotate the gun one way while the mouse wants to rotate the gone the other way. And what happens is the animation wins and we can no longer point are gone. So with that said, now that you know that we should not add rotation to the gun, but feel free to add rotation to the arm. And now it's time for your challenge. Your challenge is to finish the walking animation. So swing the arm around while walking so you can change the rotation of the arm, make sure it covers the real arm of the player so we don't have any inconsistencies. Make sure you do not rotate the gun in the animation if you want, Be my guest, try it out, see if I was lying or not. Maybe I was who knows. So pause the video right now. I swear I wasn't. I never do. And do the challenge. O K. Welcome back. So I'm going to go from either turning to walking. And I'm going to do the same. I'm going to click on the Record button. And let's see, I'm going to, this is the first frame we are already walking. So what should we do in here? You can be creative, do whatever we want. I'm going to do my thing and explains them by step if you haven't already understood what we did before. So the weapons on never rotating, we are going to move a, let's say up a bit. So yeah, that's around what I want. And the arm, I'm going to rotate it a bit and change its position to the right. Okay. Then we move to this position. I'm going to take the gun down and I'm going to move the arm a little bit like that and change its position. Let's see, where is it? Okay, so right about here. Then we move again, the gun up and the arm pose like this, and goes down a little bit or change the rotation. And this is all dependent on your preference. Maybe we should also make the RNA but bigger right now. Then we move to the next frame. The gun moves down a bit. And the arm moves that. Whereas the arm should the RMB. Okay, so light around that and moves up. And finally, we have the last frame where we will copy these three. So you can see each one of these squares, the inverted or inverted squares are representing the arm position, the arm rotation and the arm weapons aren't position. So I'm going to select all three, copy them and paste them on the last frame. So let's see how that looks. Okay. So the gun is moving up and down, which is kind of cool. Arm is going forward and backwards. There is one frame that I don't like too much, which is right here. And it's because the arm is a bit small. So I think the sprite actually makes the arm a bit bigger. We'll change that in a bit. We can actually even change the scale. Let's try to do that. So we're link Chris, oh, no, not that much will increase the scale to 1.2, maybe on the X and the Y. And okay, that's too big. Let's make it 1.1 and reduce the rotation a little bit. So now you'll see and it stays the same. So I'm going to see also the kale keeps increasing in hearing. Know what, let's not play with the scale. Let's just deleted. It's not good to, causes us able to from animals will just increase it from here. So if we go into the arm, Let's make this maybe a bit more. 28, maybe 29. Apply. Yeah, I think that's good enough. And I'm going to stop the animation. Now. I'm going to go into the curves. Let's see what we have in here. We have the gun. Now what I think I maybe want to keep the gun the same and let's see what's changing in here. So the position on the Y and the X. So I'm going to set these to be, choose this one, move it up so you can see right now a visual representation of what we mean. So we still have the same position all the time. Until click we go down, click we go down. And I'm going to change this one. Also. Click on the position x visit whereas the curve. Whereas the curve, okay, So it's down here. Why do you want to make my life harder? We rotate this row, this row, this, and there we go. Last one stays the same. So now let's see. Okay, kind of good. The position that's adjust the rotation. So while we are moving, the rotation around, z is changing. Okay, What, what's the matter with that? Let's see. So for some reason the scales have changed, but no worries. We will find a solution and then we will move. Oh, so we can increase this. Okay, great. And there we go. So now let's look at that. Okay, So the arm looks good enough and the gun is moving up and down. And if we try to run our game, Let's see how that looks. Okay, The Eagle is good. The walking the gun is a bit still fussing around. I don't like the way it's moving up and down. Let's change that. And the animation, close those two things. Go to the walking position, curves. What's changing? Okay, It's the y position. Where is it? Okay, So we're going to make this square, this one also. And the last one, save that, lay around the animation. Okay, so there we go. We have the gun moving up and down. Honestly, it's not perfect, but it's good enough. Let's test out the rotation. If it's working, I hope you test it out yourself. So now as we walk, there we go. We are pointing properly. We walk the gun moves up and down. We walk with our hand. We no longer have a static hand and a static gun. We actually have the player walking around. How cool is that? We have amazing animations. In the final video, we are going to be adjusting the players velocity because maybe you haven't noticed, maybe you did. But when we walked to the right, we have a certain speed. When we walk up, we have the same speed, but if we tried to walk down and left, you can see that we are a bit faster. So you can see right now that if we're walking, then we try walking up. You'll notice that we are a bit faster and I'm going to explain why that is how velocity works. A bit of mathematics on how vectors and normalizing works. So math, he Yay, can't wait for the next video, right? I'll see you then make sure to commit all of your changes. Look how far we've come. Look at everything that we've done so far. We've created, learn sorting layers, created scripts. Now the player moves. Now our player moves around using a brand new rigid body and collider. We made a gunpoint in the angle. We made the player point in the right direction. We've added animations. Now we've enhanced our animations, will also enhance our velocity, and I'll see you in the next video.
16. Velocity of the player 00: Welcome back, my fellow
game developers. This is a very quick
and short video. This is just a small tweak
that we want to make. And the way our
player moves around, we don't have major cold, we don't have major principles. We do have a little
lesson on mathematics, which is acknowledged the most exciting part in
game development. Yay, that's what you came
here for math, right? Anyways, let's not
waste any more time. And you can see that the velocity when we move
diagonal is the same as when we are moving up
or down or left and right. Anyways, let's not waste any more time and
let's get started. Oh, okay. So let's see what's
happening in here. As I've told you, whenever we are moving
left and right, we are moving at a
certain velocity. But when we are moving left
or right and we're moving up, we are moving at a
much faster speed. So if you're not convinced, let's test this out. Maybe I am lying. I'm going to go down here. I'm going to write
debug dot log. And in here I'm
going to say walking with a speed of and I'm going to go ahead and add the
layer rigid body velocity. Let's save that and
let's see what we have. Now this might not work. If I click on the Console, you'll notice that we have 00. So now if I move it, you wouldn't see it stand. When I move away, it's minus 10 when I move
up and to the right, you can see that it's 10 by 10, and that's the movement speed
that we have right here. But we don't want to see how the vector of
the velocity is. We want to see the magnitude. So I'm going to add something
called the magnitude. If you don't know what
the magnitude is, I'm going to explain
it in just a bit. So again, we run the game. Now we have the magnitude 0. If I walk to the right, we have done to the
left, we have ten. If I move up, it's still 10. You can see it
increasing in here. If I move down, it's still 10. But now if I move to the right, end up, we can see that it's 14. So Michael, your instructor, does not lie. Never. You can see that we are moving faster when we are
moving diagonally, up or down by pressing two keys. Why is that happening? Well, it comes back. Simple mathematics. You can see that we have the velocity on the y and
the velocity on the x. That's what we were seeing
before we added the magnitude, which is 10 by 10. So what happens here
is we're adding both of these vectors as we
are moving diagonally. And we have the final
player velocity, which is faster than those two. Now, if you want, you can keep this in your game if it's part
of your gameplay. But usually we don't
want the player to move faster when he's
moving in a diagonal. This is not something logical. So what we'll do is
we'll normalize. We do by normalizing
is recreate this arc. And this means this
becomes a circle, which means that the velocity on the x plus the velocity on the y is the same as the velocity when we are
moving in a diagonal. So this is a normalized vector, or when we say
normalizing a vector. So let's go ahead
and do just that. So back in our code, let's go to Visual Studio. And now let's see where do we have our velocity being added? It's right here. So I'm going to add a, another line or I'm sorry, before we add this
to the velocity, I'm going to take the movement input and I'm
going to normalize it. Save that. So now when we go
back into our game, and by the way, the
whole process here, you know that this one
is just taking a value. Movement speed doesn't change. So the only variable that's changing is the movement input. That's why I normalize
the movement input. Hence, the velocity
stays the same. So just if you were confused, why we're changing the movement
input, not the velocity. So we go back in here, we run our game. And now you can see we
walked to the right. It Stan, to the
left is still 10, up, Stan down, it's 10. When we move in a diagonal. There we go. You can see that
it is still done. How cool is that? It's amazing. On a final note, maybe
you want to keep it. Maybe you want to
make the player faster as you move diagonally. That's not a problem. You can do whatever you want. This is your game, add your own flavor to it. But this is a battle
game development habit that you should have as you progress through
your journey. Well, that said this was
a quick and short video. Make sure to commit
your changes. I forgot to commit them
last time, but no worries. I can keep this player
controller as we've only changed the debug
dot log in here. And the normalized,
I can stage these, commit these changes and
then commit the other ones. So, well that said, I hope you enjoy it. And I believe this is the end of section 2 where we are going
to be setting up our player. In the next section, we are actually
going to start using our gun to shooting by
adding shooting mechanics. So I'll see you then.
17. Section 3: Setting Up Shooting Mechanics - Creating Bullets: Welcome back my fellow game developers to a brand new video. And when we run the game, you can see that we have a bullet that travels through space and when it hits a wall, it gets destroyed. So let's not waste any more time. And let's get started. Okay, so let's go ahead and create some bullets. The first thing we need to do is we need to get some bullets sprite. Let's go ahead and do just that. I'm going to go into the project. And before I do those things, I want to change a couple of things in here. So I'm going to right-click create a folder. I'm going to call this the skirts. And I'm going to add the player controller. And here I'm going to create a folder for the first time now the sprites. And I'm going to add all of the sprites that we have into this folder. Or even before that, I'm going to create a folder for the player and a folder for the guns. Guns. There we go. So now I can open up the sprites in here. Let's take the gun and put it here. Let's take the price of the player and put them in the player folder. Great. Now we have everything set up. We have this little small error. I don't think it's a major problem. Okay, Great. Now let's go ahead and create another folder in here which will be the bullets. And let's go into the resources and get the sprites for the laser bullets. Now, you might be wondering, why did I choose to have laser bullets and not bullets for a regular shotgun? Well, first of all, look at these bullets, how cool they look. That's 4142. I wanted something to appear easily. So as you can see, we are, Let's set it on the player layer, okay, So I want something to be clearly visible to us. I don't want to have a small little bullet that we can barely see. I want to have a big shiny bullet that we can fire. So if you want, we can create a sorting layer for the bullets. Let's go ahead and do that. A new sorting layer, we'll call this the bullets and it should be rendering in front of the player. I'm going to choose this. I'm going to rename it to the player bullet. And I just chose this by random. You can choose any bullet that you want. I think maybe a red one as a shotgun. Know. Even better than this. Look what we can do. I can choose the player bullet and an I can change the sprite in here, drag the number 14 over. There we go. So it's a huge bullet. Maybe it could be changed a little bit, so the bullet renders in front of the player. And I do think maybe making it 0.50.5. No, maybe keeping it one. Yep. That looks like a big shot gun bullet. Okay, great. Now we need to add a couple of things to this. We need to, first of all add a rigid body because we are going to be, What's that, Sorry, room. We're going to add a rigid body because obviously this bullet will be moving around. We are going to make sure that we freeze the rotation. We are going to make sure that the gravity scale 0. And there we go. Then we are going to add a collider to this. So I'm going to add a collider. Let's see which one should we use? I think the capsule collider won't work because it's inverted, culminated in the horizontal. Let's go ahead and use a box collider. I think it's good enough. So where's the box collider? Let's make it a bit smaller. Yep. There we go. And I always recommend you make the box colliders around things like bullets a bit smaller than they have to be. So there we go. Oh, okay. That's good enough, I believe. And now we need to change the behavior of the bullet. We want to make it fly. How do we do that? We do that by adding a script to it. So I'm going to go into our scripts in here. I'm going to right-click and create a new script, which is going to be the player bullet controller. Let's wait for this to compile dot immediately open a script whenever you create one, just wait for it to compile. And now we can go ahead and drag the script onto the player bullet. And we can see in the player bullet we have the sprite renderer via rigid body, the box collider, and of course the player bullet controller script. So let's double-click and open the script up. So we have a brand new script. What shall we do in here? Well, first of all, we want a way to control the speed of this bullet. So I'm going to create a serialized field of type float, which is the bullet speed. And let's just set it by default 25 F because we never want to have a default of 0. So 55, but the speed of the bullet. So if it's low, but it's better than nothing. And the next thing we want to do is we want to add velocity to this bullet. So in order to do that, we need a reference to the rigid body. And I don't feel like doing this, so I want to give it to you as a challenge, you will need to get a reference to the rigid body. So create a variable of type rigid body makes sure it's private. And start get the component of the type rigid body. If you already know how to do this, pause the video and go do the challenge. If not, I will give you a small hint on how to get a component. Use get component with a type in between the two little bigger or smaller signs. So pause the video right now and go do the challenge. Okay, welcome back. So in here I'm going to create a private rigid body 2D and the bullet rigid body. Save that. And now, because we have the player bullet controller on a game object that also has the rigid body. We can immediately access it by saying that the bullets rigid body is equal to the debt component, rigid body 2D. And now we have a reference to it. Now and update what are we going to do? Well, just like we did with the player, I'm going to go ahead and say that the bullets rigid body velocity is equal to the new vector 2, because velocity is a vector 2. When we are working into the space, I'm going to keep one for the x. And I'm going to keep 0 F as the y. And I'm going to multiply it by the bullet speed. Why am I doing this? Well, because I don't want the bullet to move in the y axis. I don't want it to move vertically. I want to move the bullet only horizontally for now. So let's save that. Okay, so let's go back into Unity and let's zoom out a bit and let's make the speed the two so we can clearly see what's happening. Let's move the employer and the bullet back and run our game. So there we go, you can see that the bullet is traveling through space and when it hits, so all, it stops completely, so great. Our bullet is moving perfectly. We can split it up. We can do whatever we want. But what happens, for example, if the book is diagonal when we run our game? Let's see what happens. Yep, so that's clearly not how a bullet is supposed to be moving. What we want to do is we want the bullet to always be moving in the direction that we've set to it. So how are we going to do this? Let's say, for example, we have our shotgun right here, our arm, and it's rotated up. Our bullet will also be rotated upwards. So if we move it, It's something similar to that. But if we click here, up, up here, you can see the center and the global. This is for the rotation, this is for the, well, how the axes are represented. So if I click on the local, you can see this is the direction that the bullet is currently looking at. So this is how the bullet is going to come out and fly. And you can see that it's the red, which is the x axis, is looking up and the direction of the bullet. So whenever we rotate our shotgun, we want the bullet to rotate it with it also. So we wanted to fly always in the direction of the x. So how are we going to do this? Well, thankfully, there is a vector that is called the transform dot, right? And let me show you what that is. Oops, sorry, that's for later. So transform that right is the red axis of the transport in the world space. So we can access this axis whenever we want. And that's the direction that we are going to be making our bullet flying. So back in our code and here I am going to remove the new vector two. And I'm going to instead. Say that the direction will be transformed dot, right? So now every single time and the update, when the bullet is flying, it's flying at the speed of the bullet speed that we determined and in the direction of the transform.py, right, which is the red axis. Let's test this out. So if I run the game right now, the bullet is moving fine. Great. Let's see if we save that. And when the bullet is pointing upwards, if I run the game, yep, there we go, the bullet is moving up. How cool is that? Great. Now, one more thing. This is not how able it behaves. Usually a bullet Whenever it's like this. Let me just stretching it. Well, it works. Yep. There you go. It's just loved the building and it will go on forever until eternity. And that's a problem. Whenever you have a bullet that does not get destroyed at some point when it hits a wall. This is what we need to fix. That's the first thing. The second thing, a bullet doesn't just hit a wall and stay there. A bullet should be able to travel through a wall. Maybe, maybe traveled through a wall. So we are going to click on the players bullet. We are going to go down and to the collider and we are going to make it a trigger. So what is a trigger? A trigger whether the collider behaves as a trigger or not, that's not very helpful. A trigger means that if this bullet hits a kind of surface, it does not impact it physically. But it gives us the ability to call something called cause, something called That's very smart. And on Trigger Enter to the, so what this does, you can read the description sent when a another object enters a triggered collider attached to this objects to the physics only. So what happens if this bullet is a trigger as it travels through space? When it hits the wall in here, which is on the background. When it hits this wall, a sugar enter method will be called, which will create on the bullet players bullet controller and wariness gold, we can go ahead and do anything we want. And one of those things is destroy the bullet. Let me demonstrate. That's a lot of talking, not enough action. Let's see what happens. I'm going to write on Trigger, Enter 2D, hit the Tab key. So as you can see, it's a private void. Don't worry if you don't know what that word is. Later on we will explain everything and how we can create methods. Don't worry. And then we have the Onsager enter and we have something in here that's called a parameter. We'll also delve deeper into it. But all that you need to know that this collision is the object that we just hit. So for example, if this bullet flies and hits the player, the player is the collision right here. But anyways, what do we want to do when the bullet hits something? Well, we want this bullet to destroy itself. We want this bullet to disappear. We don't longer needed in our world. There is a very good method of doing this, would simply write destroy the game object, and that's it. So we destroy what should the steroids any or removes a game object, component or asset? And what do we want to remove? We want to remove the actual game object. And if you hover over it, you can read the game object. This component is attached to a components of a game object. So let's save that. Let's go back into Unity, that set doublet right here. And now when the bullet hits any one of the colliders, it should disappear from our scene. Let's run the game. Keep your eyes on the scene view. There you go. It gets steroid. Did you notice in the hierarchy that we no longer have the bullet? Excuse me, that's an annoying update. Let's try this again without any updates. That's tried to set the bullet right here. Run the game, keep your eye on the hierarchy when it hits, so all the bullet disappears. So now when ever we enter a zone, bullet gets destroyed because it is a trigger, which means it triggers the Onsager enter method whenever it actually hits any kind of wall, you can read more about it in here in the Unity documentation. So I hope you enjoyed creating your brand new bullet. I hope it doesn't bother you that the bullets are shiny and very futuristic at spot of the quirk of the game that we're creating. And we're also using free sprites. So we have to work around the limitations that we have. The next video, we will actually be shooting these bullets from the gun by learning what brief up is. Never forget to commit your changes. I hope you enjoy it and I'll see you in the next video. And before I go by the way, there is something that we do not want to stage and our game, which are the sprites that we've just added. So what we'll do, because this is not necessary staging, committing the sprites. What I'm going to do is I'm going to go in here. I'm going to right-click and I'm going to ignore and ignore everything beneath assets, sprites. We do not want to save anything that is inside of the sprites. Because one, we will always have the sprites on our computer to, we might never have deleted the sprites by mistake. And even if we do, we can always put them back. And 3, they take up a lot of unnecessary space. So ignore everything under the assets sprites hit Okay, Everything should be gone, only the bullets and so on and so forth. So I hope you enjoyed stage everything and I'll see you in the next video.
18. Firing Bullets (prefabs and instantiation): Welcome back my fellow game developers to a brand new ultra exciting video. We've created bullets previously, we made them fly, but now using the power of brief up, the power of input, the power of instantiation. I mean, we've learned so much in this video, we can start shooting bullets in various directions. How cool is that? As you can see, we have multiple bullets shooting from our shotgun. So let's not waste any more time. And let's get started. Oh, okay, so time to start firing hour bullets. But we want multiple bullets to be fired. We don't just want to have one bullet. So what shall we do? Shall we duplicate this bullet multiple times? By the way, I'm doing this using Control D. Well, obviously not, this is not a great idea. What we need to do is we need to create something called a prefab. What is a prefix? Let me show you. A prefab basically means it's a previously fabricated game object that we can use multiple times. There are a lot, a lot of benefits to having prefabs when it comes to create new scenes and doing different things. Let's go over a couple of important things about prefabs. It's a template for a certain game object. So just like we have the bullet with its specific components at specific collider, we can create a prefab out of it and create multiple bullets with the same components, with the same sprites, the same collider, et cetera. Prefab system allows you to store a game object with all its properties. So just like I said, you can create a prefab of the bullet and then create multiple bullets with the same properties, game components, et cetera. What do we use it for? We can reuse a game object configured in a particular way. Hence the bullet we can create multiple, but let's see, we'll see how in just a bit we can edit many objects at once. So for example, let's say we want to make the bullets faster. Should we go and change all the bullets or every single time? No, we can change only the prefab and every other form of this prefab will be changed. We can use the same object in different scenes, much easier when we start creating multiple levels. You'll know what I mean by this, and that's it. So let's go and create a prefab. Now, the process of creating a Prefabs is extremely, extremely hard. So be very, put your caps on, stop everything, and watch what I do. This is very important. First of all, we create a folder which is the prefabs. I'm going to go in here and now I'm going to create a prefab out of this bullet. So what we must do is we first need to drag this bullet in here. And that's it. That is how we create a prefab. So now what we can do is we can simply drag this bullet right here and create multiple bullets. And you can see that bullet three, Two bullet 1 all have the same components in the inspector. And you can know that a game object is a prefab by looking at its scholar. So you can see the background isn't a prefab, but the player bullet is because it is a bit blue. So let's say for example, I want to create a prefab out of the room player. There we go. So now the dump layer is a prefab and I can add another and a third one. And if I run the game, now we have three doom players walking around the a. How cool is that? There you go. We have a cool army. The Three Musketeers, we'll call them the three. I'm not sure. Okay. Musketeers, that's enough. Let's go ahead and delete all the bullets that we have. We can even delete this original one and we still can add it from our prefabs. And let's keep the player right here as a prefab. So very nice. Now we have everything almost set up and we can start creating, firing the bullets. So let's go into the player controller and start doing just that. Now, I'm going to be firing these bullets from the player controller. But keep in mind later on we will need another script to do the firing for us. Just a heads up from now. First of all, I'm going to create a serialized field which is of type game object. And this will be the reference to the bullet, or we can call it playable it. No worries. For now, let's keep it as bullet. We are going to need a reference to something called the transform or the transform fire position. And why do we need that? Well, where will our bullet come out from? So obviously it will come out from our shotgun. And where is the firing point of the shotgun? Should it come out from the middle of the shotgun, that wouldn't be too nice. What we'll do is we'll add a fire point. And this fire point will be an empty game object, which will be a child of the weapons are. So fire point. And notice what happens now, because they don't layer is a prefab. You will notice that the file bond has a little plus on it. What does that mean? If I click on the top layer here, I can double-click on him and open him up separately. You'll notice that he does not have the fire point because the prefab hasn't been adjusted yet. And you can see it from the color of the fire point and the from the little plus. So we can go into the do player. In here we have the override. If we click down, you'll notice that things that we've changed but have not applied yet to the prefab. And you can see that we can either apply the specific thing or we can, can apply all. So when we hit the apply all, now, the doom player, when we double-click on him, has the fire point, the prefab of the doom player has also the fire point. So we'll move the fire point here and front of the shotgun. But if we add another 11 of the dome players, you'll notice that the fire point is still in the middle, while the fire point on the doom player here is in front of the shotgun. Oh, and also, you can see when I click on the fire point, the transform, the position has this little blue line and this represents that we've changed something from the prefab. So I'll go into the doom player, click on override and apply all. But we don't always apply all. Keep that in mind. When I hit Apply all. If I go back to the doom player in here, I select the file pointer and it magically appeared on the end of the shotgun. So you are beginning to understand how useful a prefab can be when it comes to modifying multiple elements of prefab that we've created. Later on. As we move through the course, we make more complex things. You'll see how efficient the system is. For now we'll delete the doom player and let's continue on. So we have our fire point, we have our bullet. The next thing we want to do is we want to start firing 0. So I've added this in the wrong place, excuse me. We were working in the player bullet controller and we should have been working in the layer controller, not the player bullet controller. This is a bit confusing. I didn't notice the player bullet. No worries. We'll just Control X, which will cut them from here, and we'll paste them in here. Sorry for the confusion. I apologize for my lack of concentration. Save that. Go back. Now, we'll see that we have a reference to the bullet, a reference to the file position or fire point, that should be fire point. Save that back in our game. Please don't waste my time and nothing sticks. Fire point and the bullet will be the assets. Prefabs. Drag in the bullet. And there we go. We can also apply the changes and here. So what do we need to do? We want to, every single time when we press a button, which will be the left mouse key, we want to fire a bullet. So let's do that. We're going to create a condition and the update where we check if we press a certain mouse button. But how if we go into unit is documentations. We can see that we have an input to get the mouse button down. If we read the description, we can see that it returns a true during the frame the user pressed the given mouse button and we can even see an example in here. So if input dot get boss button down 0, we press the primary button, which will be the left mouse button, the one as d right mouse button. And the two is the middle, which is the little wheel. So back in here, I'm going to delete this debug dot log. I'm going to check if the input dot get mouse button down the 0. What are we going to do in here? Well, we want to do something called an instantiation. What is that? Back? And Unity's documentation, we can see that we can instantiate an object. Let's read the description. It returns an object that instantiated clothes or we create a clone of the prefab that we have. Clones the object original and returns the clone. This function can copy an object similar to the duplicate, etc. You can read all about it, and this is how we can use it. So we can simply instantiate the object, whatever it is without any addition. We can instantiate an object and make it a child of a certain parent that we want, which is very helpful. We can instantiated in a certain world and space. We can add position rotation and a parent. So all of these are very important. So now that you know how instantiation works, it's time for a challenge. And your challenge is going to be to instantiate the bullet prefabs. So check the example of instantiation in Unity's documentation. Objects should be or the original object should be the bullet prefab. Make sure the position is at the five position. The rotation is also at the five position. And I'll give you a small hint if you don't need it, you know how to create. Go ahead and do the challenge. If not, to access the position and rotation of the fire point, use the top position and the rotation. So pause the video right now. I know you don't know how to create instantiations yet, but this is a perfect time to test yourself, to go beyond your limits or what you think are your limits. So pause the video right now. Go to the Shalon. What we'll do is we're going to instantiate, will open up the brackets. And we can see right here all the options that we have. But we already know from the documentations how to use it. What is the original object that we'll use? It will be the bullet that we got the reference to. What is the position that we want to set this bullet add. It's going to be add the fire point dot position. And because we've added a position, we want to also add a rotation and it's simply going to be the fire point dot rotation. Save that. So now when we click the mouse button non-zero, we will instantiate the bullet, which we got a reference to at the fire point position that we've created with the far points rotation. Why are we specifying the fire point rotation? Because if I click on the far point, you can see how it's being rotated right here. If I rotate the arm right now because the fire point is a child of the weapons are, you'll notice now that this is the direction, even though the rotation is still 0. But the direction you can see right here, if you can see it changed this from global to local. You'll see how the fire point is directed. So I'm going to satisfy back to 0. And the rotations are sometimes weird. It's not about just 0. If we look at the position, if we change the rotation, you'll notice that the position also changes. It's a bit confusing. That's why we use usually quaternions rotations in Unity are very iffy. Anyways, we'll save that. We will run our game and now we can shoot our bullets. How cool is that? Look at how many bullets we have created. But as you can see, when we shoot a lot of bullets, they destroy themselves. So that's a no-no. So with that done, I hope you enjoy it. Make sure to commit the changes in the next video, we'll make our bullets far automatically without having to press the button every single time. Even though this is a shotgun, we'll make it an automatic shotgun. So commit the changes, and I'll see you in the next video.
19. Firing Counter: Welcome back, my fellow game developers. In this video, we are going to add automatic firing. So you can see right here that we have a time between shots. How much time do you want between shots? I can hear you. You want to say 0.5? Okay, sir, There you go. We play run. We had the Play button. We run the gain, and we hold down the left mouse button. And there you go. You can see that we should every single frame and you can see that they are very consistent. So I'm not playing a game and here I'm holding down the button and it keeps firing every 0.5 seconds or each have second, we keep firing able. So let's not waste any more time. We're going to learn about counters. And let's get started. O k. So we want to have the ability to automatically fire bullets when the mouse button is held down. So currently whenever we press the button, once we can shoot, but what we want is to have some kind of automatic firing while we are holding down the button, just like a rifle, even though we are using a shotgun right here, we'll just use our imagination and imagine that this is an automatic shotgun. And while we're holding down the button, it keeps firing. So how are we going to do this? Currently, if you look right here, you can see that this method, the get mouse button down, returns a true during the frame the user pressed the given mouse button. So it only returns true once in the frame that the player or the user has pressed the button. What we want is we want to use something called the input dot get mouse button. So notice this was mouse button down. This is the get mouse button. And if you read the description, you can see that it returns a true whether the given mouse button is held down. So while we are holding down, this keeps returning true. And this will allow us to keep instantiating bullets all the time, every single frame. But we come up to a problem. You've noticed that when we run the game, if you remember, we can see the stats right here. So we have about 800 to a thousand frames per second. So every single frame, while we are holding down the mouse button, we are going to be instantiating a bullet, which is very bad. So we are going to have around the 1000 bullets every single second. Now, it's fun. It's a very OOP weapon, but that's not what we want. We want to have a certain time between firing each book while we are holding down just like a real weapon. What's the mattering here? Okay, So no worries. I think this will sort itself out. Anyways. Let's start off. The first thing we're going to do is we'll create a serialized field, which is going to be a float, and it's going to be the time between shots. A second variable that we'll have as a private float and the shot counter. And what we'll do is as soon as we start, we are going to set the shot counter to be around 0, or we can set it immediately in here instead of setting it and the start. So we start off at 0. Now if we scroll down in here, we are going to create another condition. And we'll say that if the input dot get mouse button, which returns whether the given modes button is held down. And we also use the index 0 for the left mouse button. We are going to start using the shot counter and removing from it the time dot delta time. So do you remember when we use the plus equals somewhere up here when we were using the transform, now we don't have it. Well, this is similar to the plus equals. So this represents the shot counter minus Time.deltaTime. And you know what, I'm going to duplicate this, comment this out. And then I will make this a minuss equals. So you'll remember that these are the same things. And I'll even move it down next to the line right here. You can keep this as a reminder of why we are setting minus equals, plus equals and all of these things. It's much easier to read and it's much cooler and will make you much more professional looking whenever we are showing someone your game. So let's continue one, what do we need in here? While we are holding down the mouse button, the shot counter is being counted down. So what we want is whenever this shot counter ends or becomes 0, we want to fire a bullet and then refresh the shot counter back to the time between shots. So how are we going to do this? Instead of immediately instantiating, I'm going to issue a challenge. Was that a better transition than last time? Anyways, your challenge is to check if the counter has, and so create an if condition that checks the shot counter. If the shot counter is less than or equal to 0, why is it less than or equal to 0? You might be asking why not immediately 0? Well, because as we're counting.
20. Bullets Hitting Each Other: Welcome back, My favorite game developers in this video, when we set the time between shots to 0.1 and we start shooting our birds. You'll notice that even though they are on top of each other, they do not destroy themselves, but they still get destroyed when they hit any wall. Not only that, if I have a lot of bullets being fired and walk the player through them, you'll notice that the player also, or the bullets and the player not interact with each other and they don't get destroyed upon hitting the layer, which is a good mechanic. We don't want the player to use the bullet to be able to kill themselves. This is a game mechanic. So with that said, let's not waste any more time, and let's get started by learning layer and physics 2D matrix k. So now when we run our game, you'll see that we can fire our books. But the problem is if we try to press it multiple times or if we set the time between shots, for example, 0.1, you'll see that we don't see any bullets flying away. Why? Because notice on the left, we have the bullets firing and destroying themselves because they are interacting with each other. And we don't want that. We want to fix this problem. How are we going to do this? Now before we continue on, maybe it's something that you do want to keep in your game. But honestly for me, it's kind of annoying having your bullets be destroyed. So again, how are we going to fix this? Well, if we look right here on the right and the inspector of any game object, we can see that we have something called the layer. And I've showed you this previously when we were talking about sorting layers, but we haven't delved deep into it. So if I go back to layers, you can see that I have tags which we will talk about In the future. We have the sorting layers which determine which Sprite or which layer renders in front of which other layer. And we also have the layers. And you can see that we already have the default transparent affects, ignore re-cast water. You are all of these different layers that are already present in Unity. So what we're going to do is we are going to set the bullets on a certain layer. You might be asking, but why should we be setting these bullets on a certain layer? Well, let me show you by first creating the player bullets layer. Now, we want to go into the projects. Go into our where are the prefabs, the pleasurable it? And let's just set the player bullet on the player bullets layer. Okay, So this was the prefab. So all subsequent creation or clones of this prefab will also be on the player bullet layer. But still, how is this helping us? Well, if we go into our edit, into our project settings, and if we go into the physics 2D and scroll down, we can see right here this layer collision matrix. And if you, sorry, if you tilt your head, you can see, let me maximize this. You can see that we have the default transparent re-cast player bullets, water UI, and on this side also. So how does this matrix work? Let's say we have the default layer, which was previously the bullets layer. And we can see that it also interacts right here with the default layer on this side. So what we can do is we can actually turn this off. So now the default layer does not interact with the other default layers. But obviously we don't want that to happen because whenever you create a game object, you will have it as default. And maybe we do want some of the default game objects interacting with other default game objects. And that's why we created the player bullet. What we can do is we can say that the player bullet, which is right here, does not interact with the player bullet. So we turn this off. And now the player bullets should not destroy each other because they will not be able to interact with each other. Let's test this out. I'm going to go back. I'm going to run the game. And I'm going to go to the DOM player and okay, so the time between shots will be 0.1. And let's try to hold down the mouse button. Now when I hold down the mouse button, there you go. You can see that the bullets, even though they are on top of each other, are not destroying themselves, but they are still getting destroyed when they hit a wall. So you can see that clearly when we shoot towards the wall, but they are on top of each other and they do not destroy themselves. How cool is that? We have this powerful tool in our arsenal now where we can set different objects to different layers and make sure that they don't interact with each other. Now, another thing that we might want to change is the player bullets hitting the player. Again. I tell you, if you do want to keep this mechanic in your game, feel free to do it. If you don't, we are going to change the way bullets interact with the player. Now, currently, the player capsule collider is very small. What we can do is we can add another capsule collider. We will have to later on because what happens if one of the enemies shoots a bullet at our head and we don't have a collider there that does not register that we've been shot. We will fix that. But for now, let's just keep things simple and try to hit the player on his legs. So I'm going to run the game. I'm going to shoot a bullet. And if I stop there, you can see that it hits the player and can kill him. Again. You want to keep those mechanics. You want the player bullets to help the player. That's okay. But you will have to this challenge. You'll need to make sure that the player and the bullets won't interact. So create a layer, layer. Assign the player to that layer, and make sure that the player and the player bullets do not interact through the physics matrix. So that said, pause the video right now, go create the player layer. Make sure the bullets don't kill our player. Okay, welcome back. So how did you get on with that? Before I continue on, I just want to do something. I told you I wouldn't want to do it, but let's do it for now. I'm going to add a box collider to the player. This will not be where the player interacts. This will be just a box collider to determine that the player is being hit. So I'm going to make it around the size of the player and I'm going to make it a trigger because I don't want this box collider to interact with the world physically. I want to keep this box collider as a registered to if someone has deep layer or some kind of layer. So I'm going to save this. I'm going to run the game. Obviously, we'll need to override the prefab. I'm going to shoot this and if I walked towards the bullet, you can see that it hits the player. So let's go ahead into the layers appear. At layers, open the layers. I am going to add the player layer. And now I'm going to go into the doom player. I'm going to go into the Layers and I'm going to set this layer to the player layer. And you can see that when you change the layer of a parent, you get the option. Do you want to set the player, the player to player for all the child objects as well. Would you want to do that or not? I think it wouldn't harm if we set the children also. So I'm going to set this, I'm going to save this. I'm going to go into the project settings, physics, and I'm going to make sure that the player bullets and the player do not interact. So you can see where there is an intersection between the player bullets. The player. I'm going to make sure that there is no sign in here. There we go. Now if we run the game, the bullets should travel through the player. And yep, there we go. So we can shoot the bullets as many times as we want, and they do not hit the player. They keep floating until they hit some kind of enemy. So I hope you enjoy, I hope you like this new tool that you have. We can also apply all of our changes to the prefab that we have of the dome player. And in the next video, you'll notice that we have these bullets, okay, they are firing. It's, everything is nice, but when they hit a wall, there is nothing that's happening. The bullet is just disappearing and that's not very exciting. We want to have some kind of impact, some kind of effects, or we can feel the weight of those bullets hitting a wall. And that's exactly what we'll do in the next video by adding the special effects to the bullet upon impact. So don't forget to commit your changes. And I'll see you in the next video.
21. Bullet Impact Effect: Welcome back, my fellow game developers. So we've just made our game a lot more cooler. So now when we should award, we don't just have our bullets disappearing. We have our bullet's going in a puff of smoke. So when we shoot around, you can see that we have this little cool effect that gets destroyed. Notice right here that it gets destroyed after a certain time, which is something that we do need to take into consideration. So let's not waste any more time and let's get started. Oh, so time to add some weight to our bullet impacts. And we'll do that by adding an impact effect. So I'm going to go into the assets and I'm going to go into the sprites folder, and I'm going to create a new folder in here, which will be the bullets fact. And in here we're going to go into the resources. And I've provided you with a couple of facts that I found. You can use whichever one you want. Or you can also find some on the website, open game art.com or any other website. So you can see right here we have three effects. This one with a bit of smoke, this one with a bit less smoke, but it's a bit weird. And this one, now I'm going to use the OH, so you see it has the impact metal impact. Metal impact metal. No worries about that. We'll just have to do with what we have. We'll use the impact metal. I'll use the first one. Sure. Why not? So how are we going to do this? We are going to slice up the sprite. We are going to create an animation and then we are going to play it whenever we hit the object. I'm going to slice this up if you want. We can do this together at the same time and see who does it faster or better. So first thing, we select the first 1. First impact, make it multiple. Apply changes. Let's make it point. Maybe we don't need to make it point. Let's go ahead and Sprite Editor. Okay, the particle of smoke or not visible, but we are going to go ahead and slice this up by grid size. Let's see how big is this grid. So we have 1, 2, 3. Okay, so I'm going to get my handy calculator. And the way I'm going to slice this up is because we have this 960. You can see it right here down on the right, 960 on the horizontal and 576 on the vertical. So 576 divided by, because there are three lines, I believe it's 192. So on the y-axis, it's 192. And in here we have 12345, so 960 divided by 5 also 192. Great, should have seen that coming. So we have sliced up squares. Very nice. Apply the changes. There we go. Now we have all of these. I'm going to create a new game object in here, and this will be the bullet impact. So bullet impact on wall. And there we go. Here it is. I'm going to go ahead and add a sprite renderer to it. So sprite renderer, and I'm just going to give it this effect right here. Where is it? Let's add this impact of fact right here. Can we see it? Is it visible? It's behind. Should we create a sorting layer? Sure. Why not? Let's go ahead and create or we can make a deep layer bullets sorting layer. The bullets. Sure, let's keep it that because obviously it's part of the bullets, so it's logical to make it on the bullets layer that will set it in here. Is that big enough? Maybe we want to make it bigger. Let's go ahead and make them think 50 is a lot. Let's make it 75 and see how big that is. Okay, maybe we can add, make it 50, apply that, and maybe remove the point, make it bi-linear so it's a bit smoother. Yeah, I like that more. So there you go. This will be our impact. I'm going to add an animator component in here. And let's choose this one. Animations actually. Sure, Let's go ahead and create. This will be in the assets animations. And this will be called the bullet Impact wall. And I'm calling it the bullet impactful. Well, because later on we will have different types of impacts. So in here we're going to have the bullet. Bullet hitting wall. Save that. There we go. So you can see immediately because we already had the animator component, the controller gets sent here that's moved the animation up a bit so we can get all of these, set them here, and now put the animation back. Now, let's play this. Okay, very nice. I think it is a bit fast. Or maybe that's perfect. Let's see. I'll just make it a bit wider. Okay, great. I think that is enough. But I still think that 50 is a bit too much. Maybe let's make it 18 are no, save that. And animations. Let's play this. Okay, I think that is good enough. So I'm going to save this. I'm going to go into the assets, go to the prefabs, and I'm going to make this a prefix or the bullet impact now is a prefab. It's on the visit, the sprites are on the bullet layer and we have everything setup. I hope you did your best and creating this or if you didn't, I hope you followed along and I wasn't too fast for you. So now, what are we going to do? Now we need to instantiate this effect every time a bullet hits a wall. The way we do that is by issuing you a challenge. So your challenge is to instantiate the effect. So find your own impact effect if you need. So you can go through open game, our website, or through HIO or simply by searching on Google. Maybe if you're a good artist, you can create your own and get a reference to the impact on the bullet controller script. And make sure to instantiate the effect before the bullet gets stroke. So pause the video right now and go do the challenge. Okay, welcome back. So back in our player bullet in here, I'm going to create a reference to the serialized field to the bullet. Or it's going to be a game object, the bullet Impact effect. Save that. And what we'll do is before we destroy or get destroyed or before the bullet gets destroyed, we are going to instantiate the bullet Impact effect. And it's going to be where, where should it be? It's going to be on the transform position, the bullet tip, and the transform rotation of that bullet. So I'm going to save all of that. I'm going to go back in Unity. I'm going to choose the player bullet. Now we have an impact fact. We can add it right here. We can save that. We going to just check the enemy to 1 second. So what happens in here? Why are we so confident and creating this? And why there is a small problem. Still, what happens is as soon as we instantiated, you see that the default layer right here is the bullet hitting the wall. So immediately upon entry, we started bullet hitting walls, fact. So let's see how that works. Let me just remove this from here. Yeah, I think I can remove it. And one more thing I wanted to do, I've noticed that these Z was on 0, that me just reset all of these, save that, run the game. So now I should shoot a wall and upon impact you can see that there is an explosion, but for some reason you can see that it's still going. So if I have a lot of bullets, you'll notice that we have a lot of facts and none of them are going away. You can see it right here on the bullets impact on the wall. So what we're going to do, and that is because of the nature of the animation we've just created. If I go into the animations, if I go into the bullet, you can see right here that we have the controller and we have the animation. And I've told you previously a couple of videos ago when we were making the player animations, that there is this loop time right here. So I'm just going to remove it, save that, run the game. Should the bullet. There you go, it explodes on the wall. There you go. You can see right now that the impact is played only once, but there is a slight problem and that is that the bullet impacts on the wall are all still present and they are not being destroyed. So how are we going to fix that? And there is a very simple way of doing this. And while teaching you how to do this, I will show you an extremely effective tool inside of the animation. So what we're going to do is we're going to go into the assets. We're going to go to prefabs. We'll add the bullet Impact back. And here. And what we're going to do is we're going to go back assets, scripts, and create in here a new C-sharp script which will be the, let's see, impact, effect, destroyer. And it's going to be an extremely, extremely simple script. Let's hit Enter. And later on, I'm going to be reminded to put each script and a folder because as we go we'll have a lot more scripts. I'm going to add the impact effect destroyer. I'm going to open this up. I'm going to remove the start and update and I'm just going to do one method. And that is going to be a public void. Destroy. And what we're going to do, nope, not onDestroy, just destroy. And what we're going to do in here is we're going to simply destroy the game object. Great, how are we going to call this? Now, we could call this method from here, but that's not very effective. Why? Because when we instantiate the bulletin here, okay, let's just go through the logic. We instantiate the bullet upon impact, and then we destroy the game object, which is the bullet, because the player bullet controller is on the bullet. So the impact plates. So after we destroy this game object, we no longer have the player bullet controller. It is not available and we can demonstrate this. So I'm going to create this impact fact. So I just set the bullet created in here. And after we destroy the game object, I will try to get the impact effect dot get component and I'm going to access the impact destroyer. And from here I'm going to access the destroy. So this is the method. And now if I play my game, you'll notice that we will have an error. So I'm going to move this and make sure that you apply the changes. So all the bullet impact on the wall have this method and look what happens when we shoot in the console. There we go. What happens? We don't even see the impact. Why is that? Because we've been destroyed. And if we try to do this before we destroy the game object, let's look at this. Run the game. There we go. So there is no effect. It's being destroyed before we even see it. So I'm going to comment this out and we can keep this as it is. That's no problem. But I think I will remove this. And this will be for testing maybe later on you'll remember how we tried but didn't work out. So now we have the destroy method in here that destroys the game object. And how are we going to call this after we finish our animation, this is the tricky part. So now if I go to the animation while having the bullet impacts effect, I can play it and I see that at the end, you'll notice that when all the smoke is gone, we have nothing left to do. What we can do is in here we have this little key and here and I'm having, okay, so add an event. We can add an event at some point in the animation, and this will be crucial later on as we go through the course. I wasn't expecting to do the solo early, but no worries about that. We can add an event. And when we add an event, we see right here that we have animations, event and functions that we can choose from. And if we click on here, we see that we have the straw. Why do we have only to destroy? This is the destroy, which is right here. So what happens when we add an event too, the animation that we have on a certain object, we can access all the methods that are present of the public methods right here. And don't worry if you were a bit surprised on how we created this later on in the course, I'm going to go through every single step of creating methods. But for now, just know that we can access all the public methods that are available to us on the object. So what will happen now? As we play our animations, we will see the explosion, the puff of smoke. And when we get to the last frame, this event will be triggered, which is the destroyer. And what does this destroy do? It goes in here and it destroys the game object, which is holding the impact effect destroyer, which is the bullet impact on the wall. So make sure to apply all the changes and the override. I'm going to the lead the bullet Impact. I'm going to run the game. And when I shoot a wall, we should see the effect, but we don't. Why is that? Let's go back in here. Did we save these changes? Let's try this again. I think that's because we haven't saved the script. We run the game. We see the puff of smoke. And there you go. You can see that it has disappeared from the hierarchy. So now let's test this out a bit better. There you go, you can see the impact effect happening around us. And then the whole effect disappears. And it's much more effective. It's better than having a lot of game objects in our hierarchy, taking up space, taking up crucial RAM, and the clogging up the system. So I hope you enjoyed, I hope you are doing your best in each challenge. I hope you're enjoying the new things that we add every single time. I'm going to stage all of these. I'm going to say that added bullet Impact fact and destroyed it, destroyed afterwards. Using events with an exclamation mark, because this is, events are an incredible tool which you won't see very often people use. So I hope you enjoy it and I'll see you in the next video where we will be adding the trail effects to our bullets, hence, making organ much cooler.
22. Adding Trail To Bullets: Welcome back, my fellow game developers. In this video, we've added a Trail Renderer to our bullet. I'm going to make it a bit exaggerated so you can see clearly what's happening when we run our game. When we shoot our bullet. There you go. You can see that it has some kind of trailed behind it. I'm going to make it a bit bigger. So you clearly see what's going on. I shoot a bullet. Well, there you go. You can see our cool looking trail, the trails behind the bullet. Actually it's not perfect. It's not that nice. But I left the creativity part to you because while I know myself, I'm not that creative with that said, let's not waste any more time. We fix a small problem that we had, but we didn't see before maybe you've noticed it and thought moon, Michael forgot something. What is E such a burden structs you. No, no, I'm kidding. That's not waste any more time and let's get started. Okay, so we want to add a small trail behind our bullet as it flies through space. How are we going to do this? It's actually very simple. We are simply going to go into the player bullet. And in here we can add a component which is the Trail Renderer. So when we click on it, you can see that we can add a trail. How are we going to be testing this trail? As we are going to double-click on the prefab, open it up in here and see what we can do. So first of all, I don't know all the elements in here. You can play around everything. You can see that one of the things that we have as the sorting layer. So we can choose whether it's a bullet, whether it's a player with whatever you want, I'm going to choose both. So how do we see the trail? We simply take our bullet and we start moving it around. So right now, this is the trail that we have. Yep. I know it's not that good. What are we going to do about? The first thing I want to do is I want to change the material. So whenever in unity you have this pink thing behind you, that means that there is something wrong with the material. So I'm going to scroll down, find where we have material if I remove it completely, you'll see that we no longer have any trail. You can add multiple types of material in here. By the way, there are a lot and there are things that you can import into Unity such as rock, such as, I don't know, lightning or anything you want. So for example, we can add this dark some kind of dark material. I don't know what that is. It's one of the default materials that we have. I'm just going to use we can use, for example, the default particle system. So it looks as if there is a smoke trail behind it, which is not bad. I might keep it. And by the way, I'm just having fun. I'm not sure what we're going to do. And let's see what can we do? And you can see this trail is kind of weird. Anyways. The next thing I want to do is I want to change the width of this trail so you can see that I can increase it or decrease it as we move through space. And we can also add another point right here. So for example, you can start it as being thick and then having this little trail at the end, so it becomes smaller as we move forward. And let's see what else do we have in this particle? We can add this type of particles, this type of materials actually. Okay, nice, not bad. You can add this, a normal sprite. And what this does is we can actually change the color. And here you can do with even to have blend or fixed colors. So 11, single color or a blend of colors. So you can choose, for example, here, the first color should be, let's make it around red almost. And the end color should be maybe white. Okay, So now you'll notice that as we move, we have at the beginning read and then right here at the end we have a white color. You can change the width. So for example, you can see right here that it's a bit big for the bullet and this is how the boat will be moving because it's only moving in the right direction. So let's make it a bit smaller, thinner. There we go. So now we have this little trail as we move through space. Let's see how that will look. Okay? And another problem is the time. So if we hover over it, how long will the tail B? So it's five seconds. I don't think five as something we want. I think one we'll do enough, maybe even less. So there you go. This is the trail. I think even 0.5 will be enough. So there you go. Get me the bullet. Remove. This will be our trail behind the bullet. Actually white and not that good of a color. I'm just going to choose some kind of orange, yellow, something like that. Let's see. There we go. So I think it looks good enough. Maybe I would like to make it a bit thinner. Just a little bit thinner. And let's try a different material just for fun. See how that looks. Nice. Not bad, I think. No, no, Actually, no, I don't like it. Maybe I should make it a bit thicker. We can increase the thickness at the end. So it's why that the beginning, as you can see and then it's very small. You can play around tested how much you want to add, thickness you can even change right here, you can see that it starts off low goes up. You can add another point of inflection right here. So for example, like that. Remember when we were doing the animations. So there you go. This kind of fox tail behind. Look how cool that is. You can create a lot of nice effects using trail if you have the time to test all of this out, just going to delete this. And let's make it normal again. So there you go. This is our trail. Actually, the last one was was much better honesty, but no worries about that for now, Let's see what. You can also change the shadows. You can have auto destruct. There is a lot, a lot of things that you can play around with. You can go into Unity's documentation and check everything out, see what other options you have. For example, the probes, camera motion, something like that. I'm not sure. Sure. So I'm going to save this. I'm going to go back into our game and let's see if we have a good trail. So when I shoot the bullet, you can see I have a small trail behind it. It's not that good. It's not the way I would like it to be. But you can see it's just a small trail behind. So wait for the bullets to be destroyed. Try this again. And if you've noticed there is not one bullet, there are two bullets right here. And why is that? What do you think the problem isn't here? And the reason that we have two bullets is because if we go back into our script right here, you'll notice that if we press the mouse button during a frame or if we keep pressing it, we our instantiating a bullet. So in order to fix this, we are going to give the option to the player to choose whether this is going to be an automatic or not an automatic weapon. Now, I will remind you that this will be moved to another script because we don't want to handle this in the player script. We will delve deeper into why. Because let me just tell you from now, because having an automatic weapon is not the player controller job. It should be on a different script. But for now, let's just fix this problem. I'm going to create a serialized field which will be of type Boolean. And I'm going to call it is weapon auto magic. So if the weapon is automatic, we are going to change the conditions. So if the weapon is not automatic and we press the most button down, we will immediately instantiate. So just like we had the or which script, I'm not sure, was it the script? Which script that we add an or? Or we haven't all, okay, so we have the end. What does this symbol mean? Let me just finish. Is weapon automatic? And just like we've said previously, when we have an exclamation mark, this means that if this one, if the weapon is automatic, this whole condition will be false. So if is automatic is true, this exclamation mark behind that makes it false. But that understood this n means both conditions need to be true in order to instantiate. So what do we have here? If the weapon is not automatic with the exclamation mark, if the weapon is not automatically, this whole condition becomes true. Why is that? Because if the weapon is not automatic, this is automatic by itself without the exclamation mark is false. With the exclamation mark, it becomes true. And if we are pressing the button, we instantiate the bullet immediately. And if the we are holding down the button and the weapon is automatic, then we are going to have our shot counter. Let me do this again. And actually let me go ahead and print in here in the debug dot log. If the exclamation mark is automatic. So you can see for yourself, save that. So again, what's happening in here? We can go right now and choose whether a weapon is automatic or not. How does this help us if the weapon is automatic? And these two symbols right here, and we are holding down the mouse button. We will have the shot counter and we will have shooting constantly depending on the time between the shots. But if the weapon or the weapon is not automatic, that means the weapon automatic is false. Which means when we add an exclamation mark behind it, it makes it true. So this entire condition right here is true and we are hitting the mouse button once we instantiate immediately without any delay between them. And we also have this to display to make sure you understand how the exclamation mark works. You can see right here exclamation mark automatic. Back in our game. We run our game. You'll notice console, there we go. This is a small error. Don't worry about it. I'm going to clear this and you can see that it's false. False, false wild is automatic, is true. When I turn it off, you can see it becomes true. You can see the messages being sent right here collapsed upon each other. So now, if I don't have a weapon automatic as false, if I hold down the mouse button, you can see that I only shoot once. If I have it on automatic, I hold down the mouse button. I have a lot of shots. And the great thing about this is just wait for the bullets to all be destroyed. Now when I press the button, once, there you go, we only have one bullet. So we fixed the problem of having a magic bullet will save that if you want, we can adjust the trail. I just did it a bit fast. Have your time, have fun, enjoy creating some weird trail with a lot of colors and so on. And I believe this is the last video in this section, and the next section, we are going to be setting up the enemies that we want to kill. Because what's the point of having bullets if we don't have anybody to kill them with. So make sure to always commit your changes. And I'll see you in the next video.
23. Section 4: Setting Up Enemies - Setting Up An Enemy: Welcome back my fellow game developers to a brand new extremely long video. I know you're sick of that. But as always, it's extremely worth it because we learn so much. First of all, we create an enemy. We add a range to it. We add a way to draw that range. And we also run the game. We can shoot the enemy. Obviously he doesn't die for now, but we can get into the range. You can see right here the player is in Chase range. It's being sent every single time. If we get out of this little bubble, there you go, you see that the player is out of range. So let's not waste any more time. And let's get started with this long video. Oh, so it's time for some enemies. Let's get started. The first thing that we're going to do is we're going to right-click create an empty game object. Make sure that its position is reset. And the rotation and scale and et cetera. And we'll just call this the enemy for now until we decide which enemy will want to use. Next thing we'll need to do is we'll need to go into the sprites. We're going to right-click create a folder in here for the enemies. And inside of the enemies will go into the resources and we are going to drag in the monster and creatures. And let's just put it in here. So we'll wait for everything to import. We'll open this up. And as you can see, we have four types of enemies that I've downloaded from open game arts. Of course, as always, you can go find your own enemies. These are the ones that I've used and they will be in the link, in the resources. And what should I choose? I think I'm going to choose four now, the, let's see which one. I really haven't thought about this. The enemies. Let's just choose the skeleton and be very generic. So as you can see, we have attack three death either et cetera, et cetera. So I'm just going to go into the idle. I'm going to make it multiple Sprite Editor apply. And let's go ahead and slice it up, not automatically, but by a grid size. And if you were a bit confused by what I did last time, I just check the length of the entire sprite. So it's 600 and I divide it by how many skeletons we have. So we have four or one single row, so divided by four. That means it's 150 by 150, as always. For some reason, I'm surprised. So we go into the splice, slice. Splice, think that's movie splice, sure, slice. There we go. Apply. Now we have our little skeletons right here. I'm going to drag it. And the scene, whoa, that's a huge skeleton, isn't it? That's irony. If you haven't picked it up. Anyways, we'll make it 50. There we go. We still can't see him because we need to have and apply. Let's go ahead and create a layer in here which will be the enemy or enemies. And I'm going set the bullets to render in front of the enemy and also the player to render a plot of the enemy. And let's go ahead and set the enemy right here. So there you go. It's still a very small enemy. Let's save that. Let's make him a bit bigger. So an idle 50, Let's make them 32. Apply that. Maybe even bigger. Let's make him 16. So 16. Yep. There we go. Okay. That's too big. When D maybe 20. Yeah, I think 20 is good enough. That's changed this two points. See if that helps. Yep, there we go. He looks a lot better, still a bit grainy, but no worries about that. We have him for free. Anyways. Let's see, this is the body. This would be the body. And I'm going to child it to the enemy game object. So now we have the enemy right here and the body. Let's just set him to 00. The position is relative, of course to the enemy game objects or now we move around using the enemy and you can see that he is rendered behind the player, behind the gun and he should be also rendered behind the bullets. Go right. Now that we have this, next thing we need to do is obviously at some behavior or a way to control the behavior of our enemy. So we're going to go into the assets, the scripts, we're going to right-click in here, create a new folder maybe, and let's call it the enemies. Enter. Maybe also create one in here for the player, which will be the player controller. And let's see, we'll also create one for the bullets and time now. So create a new folder for the bullets. And we are going to move these into the bullet. Why? Because we have the bullet, the player bullet controller and the impact effect. So and inside of the enemies will right-click, create a new C Sharp script, and we'll call it the And EMI controller hit Enter. Wait for this to compile. Okay, great. And now in the enemy, we can go ahead and add a component which is the enemy controller. And we're going to open up the script. Okay? So something you might have noticed that all the tabs are gone. That's not because I closed them, That's because we've changed the directory of them. So we moved, for example, the player controller from the folder scripts into the folder player scripts. That's why we don't have it, but don't worry, it's still, if we double-click, we can easily open it up. Let's continue on. What do we need in here inside of the NMI controller? While we need, first of all, a variable that will keep in check the enemies speed. And we will need a variable which will represent the enemies rigid body. So I'm going to do just that. These are very simple things. No need for a lot of explanation. This is a serialized field, a float, and the enemy speed. And another variable which will be a private rigid body 2D. And I just remembered. And EMI, rigid body. The body doesn't need to be capital. Save that. And I just remember that we forgot obviously to add a couple of things to the enemy, which is here. We are going to add a component which will be a box collider. And let's go ahead and make it. So maybe without the shield, usually it's better to keep the box colliders a bit smaller than the actual body. This will make the player of your game wanted to become more accurate. And we can also add the shadow, by the way, under the enemy, which is a fairly good idea. I'm going to add another component, which will be the rigid body 2D. Obviously we are going to make the gravity scale 0. Save that, and we'll close both, both of these down. Move the script under the two components, or we can just leave it there. What's the speed of the enemy? What's the speed of the player first, okay, It's then, let's make the enemy speed 5.5 of that. Save that. Okay, great. So now we have the enemy. We have a rigid body and a collider on him so we can shoot him and interact with him physically. Now what you want to do is we want to start moving the enemy towards the player, but not all the time, only when the player gets close enough. So we need a variable for the range at which the player will be at an order for the enemy to stop chasing him. And we also need the direction in which the enemy will be moving. So first thing first, we're going to create a serialized field, which will be a float with the player or the player chase range, let's call it the player chains range. So the range which the player should be to start chasing him. And we'll create a private factor three. And this will be the direction to move in the direction to move and save that. Okay, great. Let's go back in here. And what's the chase range? And you know what? Let's keep it for later on. And I'll show you a very nifty way of how we can draw. So how are we going to know what the chase ranges? So I can, for example, start making the change range five or ten, or 21. But what does it mean? What does it mean the chase range in here. So do we have to every time calculate these little boxes in here to determine how far or close declare is. Well, of course not. What we're going to do is we're going to draw a circle in here that will only appear in the scene mode, but not inside of the game mode. How are we going to do this? If we go back and here we have something called the draw gizmos. And you can find that in the Unity documentation. And the here we go, you can see that we have something under the mono behavior, which is onDraw gizmo select. And you can see right here implement the onDraw gets selected to draw gizmo object is selected. Notice what we said, if the object is selected and you can see right here, we have the gizmos test and how we can use it. So we create a void onDraw gizmo. And in here we can create the gizmo color so we select which color we want to be drawn. And what do we want to draw, which is the sphere. So we can click on the troposphere and we can see it right here, which is the public draws fear, draws a solid sphere with center and a radius. So let's implement this. And use it to draw our own circle or sphere around the enemy and know the range of it. And if we look closely at the method and here we can see that draws fear, we need a center and we need a radius. So what should the radius be? Think about it while we create this method. So in here, we're going to say on draw gizmos selected. And we are first of all going to choose a color. So it's going to be the gizmos dot color and it's going to be equal to the color, let's say red. Save that. Next we are going to access the gizmos dot Draw wire, sphere. So why are sphere look at that draws a wireframe sphere with a center and the radius. So it's a bit different than the sphere, but because we are playing in 2D, we don't need to draw the entire sphere, we just need the wire around it. And let's see what should be the center. The center obviously should be the transform dot positions or transport is the transport of the object which has the enemy controller. I know I've said it a million times, but for those of you that are still confused, I know that I was a bit confused when I when I started doing this a couple of years ago, a lot of years ago. And I remember, so where does this come from? Well, it's the transform of the object that has the enemy controller on it, which means it's this one, V enemy. This is the transformer talking about back in here. What is the radius? Well, have you thought about it? What should be the radius? Obviously, it's the player chase range. We are going to save that. We are going to go back into Unity. And well, whereas the circle you might be asking, well, if you remember a couple of videos ago we turned off the gizmos. Maybe you already saw it, you didn't notice, but if we click it, there we go. And why did we turn it off? Because we had this camera and annoying icon of the camera. What we can do is we can open the gizmos. You can see that we can deselect a lot of things in here, but one of the most important ones is we can make these icons are a bit smaller. So there you go. We no longer see the annoying camera go, correct? So look at that big, huge circle. Let's make it a bit smaller. And you can see that it immediately changes. I'm going to make it yea big. I'm going to set the player there. And the next thing that we need to do is we need to calculate the distance between the player and the enemy and see if it's less than the range. If it's less, we can start chasing the player. If it's not less than, we do not chase the player. So what's the first step to do? Well, we have the range, we have the transform position of the enemy. The next thing we need is a reference to the player. How are we going to get the reference of the player? Well, we first of all need to understand a method that I'm going to show you, which is the object dot find objects of type. And what this does, the object t means that it depends on what the object you are looking for. So when you find the object, d becomes that type of object. So the object, the first act of loaded object that matches the specific type. So it returns the first loaded object of the type types or you can give it your type. And if we look here, we can see a couple of examples. So let's say we want to find the Canvas renderer. If you don't know what the Canvas renderer is, don't worry, we will look into it later on. But for now, look the Canvas renderer. We create a canvas renderer pipe variable with the name Canvas, and we use finite object of type and we get the canvas render. So now we get a reference to it. And because we only have one player, we can use this. If we had multiple players, we couldn't have because, well, obviously we find only the first act of one. So look this method up, find it, study it, understand it. And then you will have to do this challenge. You'll need to find the player object. So create a variable of type transformed to represent the player we want to chase and start use find objects of type 2, find the player. The type should be the player controller. Why? Because we need to find some specific type of the player. So how do we identify the player? He's just like all the other objects. What makes him unique? It's not just the name you can find through the name or the body or the on. We need to use something specific. And that's something specific is the player controller script. That's why the type of the object you want to find is the player controller. And finally use dot transform on the object you find and assign it to the variable we've created, y dot transform. You should know this because the type that we are going to create is the transform. Why is it transform? Well, because we want to get the distance. How do we get the distance? Well, obviously because it's a transform. So pause the video right now. Go do the challenge. Okay, so first thing, first, we are going to create a private transform and the player to chase. Now inside of start, we are going to say that the player to chase is equal to find objects of type. And the type that we are looking for is the player controller. And when we do find him because declared of two Chase as a transform, we're just going to access the transform immediately from me. So I hope you did the challenge. I hope it wasn't too hard. I know there was a bit of tricks in here, even though it's the first time you use find object of type, I'm sure that you were at least capable of doing this part if you couldn't have figured out this, don't worry about it was due time, will understand everything. But now, the next step is to go ahead and calculate the distance. So I'm going to create first of all, an if statement. And then I'm going to write vector 3 dot. And you can see that we have a method in here which is the distance and it returns the distance between a and B. So we're going to open this up. What is the a? It's going to be the transform dot position. And what is the B? It's going to be the player to chase dot position. There you go. And what is the condition if the distance between the transformed position, which is the enemy and the player to chase, which is the player and it's less than V player chase range. Then we are going to be moving our enemy. But that is for another video. For now, I'm just going to use the debug dot log. And I'm going to say player is in Chase range. And an else statement which we'll say that duplicate this line, move it down. And it's going to say, player out of Chase is out of chase range. Save that back in our game. Let's know what I just want to make something. I'll make this public just for now, just so we can see what happens. So you'll notice that on the enemy right now we have a player to chase, but there is nothing. We are not going to add anything. We're just going to run the game. There you go. You can see that now the doom player, if I click on it, there is the reference and now the skeleton, our enemy has a reference to the player. I can even shoot him. So I'm going to go into the console. What is this false? Let's double-click. Okay, So this one and player is out of chase range. Let me set the game window next to the scene when those so we can see clearly the circle in here. So if I come close enough, There we go, you can see that now player is in Chase range. If I go out, player is out of range. If I go and play as NJ strange, there you go, everything is working perfectly fine. So I hope you enjoy it. And the next video will be actually moving our enemy, not just printing something to the debug, to the log. Let me remove this debug dot log. Save that. Let me make this private again because we don't need to see it. I just wanted to demonstrate. Don't forget to stage all your files. And before I go, What did I also want to tell you all. I hope you enjoy it. See you next time.
24. Moving Towards The Player: Welcome back my fellow game developers to a brand new video. And as you can see, we have now a yellow circle. What does this yellow circle do when we run our game? You can see that if I go inside the yellow circle, nothing happens and just make the enemy speed a little bit less. If I go into the red circle as normal, he starts chasing us. I tried to get away. I'm inside the yellow circle, but he is still chasing us. What is happening? The only way to win is to go outside the yellow circle. Also, that's how you get away from the enemy because he started now it doesn't want to chase you anymore. So let's not waste any more time. Let's get started. And I forgot to tell you that you need to commit your changes at the end. Don't forget to do that. So let's start k. So now we have the enemy knowing where the player is based on a certain distance he is from him. When the player gets on a certain distance, a certain chase range, the enemy will know and he will start chasing the player. Well, he doesn't do that physically, but we can see from the logic and the code that he knows, how are we going to do this? First thing first, we are going to determine the direction this enemy will be moving in. So if the distance is less than the player chase range, I'm going to stop the debugging and I'm going to save that the direction to move in, it's going to be equal to the player chase range or nonalignment Eclair to chase layer to chase dot position minus the transform position. So this is just like the formula that we use. The 2 the gun and the right direction, we choose the position, we remove the position of the player to chase. We subtract the position of the enemy from the player to chase position and that way we get the direction. So it's similar to the way we are pointing our gone, you can go back and see how that works. Now what we're going to do after we know the direction that we're moving in, we are going to normalize that direction. Because we don't want the enemy to be faster when he moves diagonally. So we normalize. And then we are going to access the rigid body. So the enemy rigid body get the velocity and it's going to be equal to the direction to move n times the enemy. Speak. Save that. And now let's go back to our game. Let's see how that works. I'm going to set the game view next to the scene view so we can see how the range works. When we get into range, I'm going to run the game. So now as I approach the enemy, yep, there we go, nothing happens. Why is that? Well, because we have the small error in here and that the object, we don't have a reference to width. Why is that? Because we are trying to access the enemy rigid body, but we haven't set it. So the NMI rigid body, the dot is equal to the debt component, rigid body 2D. There we go. Okay, now everything should be working fine. Let's stop the game, run it again. And now we're getting close. And there you go. You can see that the enemy is actually chasing us. And obviously we need to fix a couple of things, but it is working. What happens if we are out of range? I'm trying to get out of range. Okay. So it doesn't work. Let me just first of all, well at least it's working. It's not perfect, but it's working. So let me set this one. Let me make the range a little bit smaller because I want to demonstrate something. And let's make the speed around too so we can escape. I'm going to run the game. I'm going to get close to the enemy and then I'm going to stop, I'm runway. So as you can see, the enemy is still walking and finally he hits a wall. So what is the problem in here? The problem is that the enemy will still have the momentum with them. So I get close, I move away. And even if I'm not and the range is still walking mindlessly, now, this would be not very bad if he was a zombie, but apparently he's a skeleton, so he should stop. Okay, I should stop though jokes. And let's see what we can do. So in here, what we should do is when we are in range, we are chasing the enemy. If we're out of range, the direction to move in will be equal to vector 3, 0. There we go. That was the direction to move in and vector three, okay, Yes, it was. So save that. So now when we get out of range, we should stop chasing the player. So let me know what. Let's use a different view, a different layout. We can use the two-by-three. There you go. This is a nice way also to view the Unity engine. So you can see right now change this from three aspects to 19 by 1920 by 1080. Now we can see it scene view clearly and the game view clearly. We run the game and we get close and to the chase range. There we go. You can see he keeps chasing us when I'm outside of that range. You can see that he immediately stops. There you go. You can see as soon as I'm in, he stops. When I'm out, he stops chasing. Okay, great. So what that done? I hope you enjoy it. Now we can make the chase range a little bit bigger because we know if we get far away enough from the enemy. There you go. You can see he stops chasing girls. Now, you can add an extra layer of intelligence to the enemy if you want, you can create a stop range. For example, let's say we have this range, we have another range. And if the player, if we can get out of that range, the second one, then the enemy will stop chasing us. And that's going to be actually a challenge for you. So how do you like the transitions to the challenge now, there are better, right? I got you off guard there, didn't I? So I hope create a keep chasing range variable. You'll need to draw that range using the gizmos. You need to create a boolean is chasing. That is true when chasing and false when we're outside the certain range. And finally, you will need to create an else if statement that checks if we're chasing and we are inside the keep chasing range. So I hope you understood the challenge. It's a bit hard. It will need a bit of configuring, but I'm sure that you are up to the challenge. So pause the video right now and go to the Shalon case. So first thing we're going to do is we're going to create a new variable in here, which is going to be the keep chasing. And we'll call it the player keep Chase range. And then we're create a Boolean. And here which we are going to call, I'll make it private or know what, let's make it public so we can see it and then we'll make it private. And public boolean is chasing. So the next step, what was the next step and the challenge that we see, draw, okay, so we're going to draw the circle right here. I'm just going to take this and duplicated. So Control D as always, let's make it yellow. And this will be the keep chases range. Save that. And now what do we have to do next? We need to create a Boolean as tracing with that. And okay, so when is it true? It's true in here when we are inside the range and we start going after the player. So is chasing is equal to true. Then what happens if we go outside this range? The is chasing becomes false. But in between, we want to create an if else or else, if. Else, if the vector or the distance of the player and the enemy is still less than v0, keep Chase range. And so this is for, is chasing. What we're going to do is we are going to keep the direction as it is. There you go. Let's save that. Let's look one more time and this code and see if everything works. So we've created the range, we've made it yellow. What happens in here is when the player enters the range of chasing, the direction will become the player to chase. And then we are going to set the is chasing to true. Then we are going to check if the player can get outside or if the player is still inside the keep Chase range. And we are chasing, then we will have the direction to move and still in the player. Else. If we are outside, both the players chase range and they keep Chase range, then is chasing is false. And what's great about this is if we go inside of the player keep Chase range, the enemy will not follow us because it's chasing as false. So let's see if that actually works. And I'm going to increase the keep Chase range. Let's make it. Yep, there we go. I think that's good enough. I'm going to run the game. And now let's see if I walk inside the keep Chase range. Nothing happens. If I walk inside the chase range, the enemy starts chasing. If I am, I can actually push him. If I am outside the chase range, he still follows me. What if I go outside both of the ranges? He stops following. And you can see right here that is chasing is false. So he doesn't chase me. When is chasing is true? He keeps chasing until I go outside the yellow circle. So I hope you do the challenge. I hope it wasn't too hard. I know when I did this challenge, I felt that it might be a bit too hard, a bit too confusing. But I hope you understood what the point of the Boolean was. I hope you understood how the else if statements here worked. If you didn't re-watch the video, I think I explained it well enough, so I hope you enjoy it and I'll see you in the next video where we will be actually animating our enemy. Because as you can see, he's very boring currently. Until then, have a nice day and I'll see you then.
25. Animating Enemy: Welcome back my fellow game developers to a brand new video where we will be adding animations to our enemy. Look, he is idling. I am idling. If I get close enough and notice that he's looking my way. If I get close enough, There you go. You can see he starts walking, starts trying to kill me. I can still push him back. I run away. He stands there. I run away. He stops. He starts eye-opening. I get close. He started teaching. I can shoot him. He doesn't feel anything. Okay, so let's stop wasting time and let's get started in animating our enemies. 0 case. So let's get to animating our enemy. So if we go into the sprites and to the enemies, the monster, Monsters, and you have the skeleton and you have all these different sprites. So what I'm going to do is I am going to go ahead and dissect all of these. And I'm just going to show you how I'm going to do this animation differently. And then you are going to do all the rest because you already know how to create animations. Now, the only difference this time, As I'm going to go ahead and do the animations immediately on the body. And I'm going to then access the animator from the enemy script writing. We're going to access the animator on the body. Why? Well, honestly, it's always better to use the animations and create them the way we did with the doom player. But for one, I think a change of the way we create things will give you a better perspective and a broader understanding of how things work. Plus, we get the chance to use a new method, which is get the component and child, which I would like to show you all the methods that are possible and just like that. So let's go ahead and add a component and then you can choose which is the better way for you. Whereas the animation window, okay, let's go to Windows. So maybe when we change the layout, the animation disappeared. I'm going to set the animation right here. I'm going to go ahead and create an animation on the body of the enemy. So create and the enemies assets animations, right-click, create the skeleton and animations. This will be the skeleton. Skeleton idling. Save that. I'm going to choose the idling. Where is it? I will choose all of those, drag them in here. So now when we run, you can see he is idling really fast. He's extremely excited to be idling. I'm going to move those. Let's see how that looks. And for some reason. So I think the first, second 1 are the same. And why is that? It's that. So let's run. No, wait. Oh, okay, so the first, second 1 for some reason that I not choose the Swan. No worries. Let's go ahead and do this. Okay, great. So you can see the last one is already similar to the first one. Or no. Let's copy this. Set it as the last one. See how that looks. Yep, there we go. This looks much better. Should we make it faster? I don't know. But we're going to save this. And this one is the entry. So I just wanted to show you how we're doing this. We are going to continue and I've written skeleton wrong, no worries about that. And we are going to continue this way on the body. And then I'm going to use the magic of editing to do all of this in a couple of seconds. But you take your time, create the animation slice of the sprites. And I'm was going to show you a challenge which is to choose one of the enemies. It doesn't have to be the skeleton. So create the ICD-10 walking attack. You have the attack of throwing a soul and you have the sword throwing animation. So I believe there is a sword throwing animation. So pause the video right now. Slugs up the sprites, create the animations. I'll see you in just a bit. Hey, how did you get on with that? So I've been slicing up sprites. I've been creating animations. Let me show you what I did. If I click on the enemy, on the body, you, you can see that I have idling, attacking, walking and throwing the sort. So I throw the sword, just like that. I attack this guy. Running and walking pretty easy. That's how I did everything. I hope it wasn't too hard for you. I hope you made sure that all of them were 150 by 150. So you can see all the slices need to be exactly the same just like I told you when we were slicing to doom play. Okay, and let me show you the animator so you can see that I have all of those four now we are not going to be doing anything. We are not going to be thrown the salt or the skeleton attacking will keep that for. Later on, we will be walking. So I'm going to create a transition from the skeleton walking to the skeleton idling. I'm going to choose both of those by holding Control, choosing both. Remove on the exit time on both, remove the transition duration on both. I'm going to create a parameter in here that's going to be called as walking. So it's the same. Oh, no, wait, I created the wrong parameter. I created a layer. I'm going to create a Boolean parameter here is walking. There you go, and I'm going to stay. Okay, so I'm in this transition, I am going to add the parameters in here. So if I am walking is true, we start walking and walking, false, I stop walking. Say all of that. Now, let's go back to our scene and let's open up our scripts in here. So what should we be doing? The first thing we need is a reference to the animator. So in the enemy controller right here, I'm going to create a private and it's going to be the enemy. And he made toward that, oops, it's of type animator. And he may, toward save that. I'm going to get the component. But as you saw, the animator isn't actually on the enemy, so I cannot access it. When I, as we've said, Get component, the components should be on the same object as the script. So to fix this, I'm going to have to access the animator on the body. To do that. I'm simply going to say that the animator, I mean the enemy animator, is equal to get component in children. And you can see right now, let me just finish this off. Let's hover over it. Okay, so there is no explanation, but I think it's pretty self-explanatory get component just like this one, but in children, so we find the animator in the children, and because we only have one animator, that's no problem. But we use this carefully. So next thing we're going to do, we're going to check for when we add a velocity. So in here, we're going to check if the direction to move and is different than vector to the 0 or vector 3, excuse me, because this one, I remember it was a factor three. Oh, there you go. How did that autocomplete? I don't even know. I'm going to access the enemy animator dot set Bool. So this is extremely easy. I believe we've all ready done this. So you just get a small peak at the behind the scenes. Copy this, paste it in here, and we're going to set it to true. Then else statement. We are going to duplicate this line for it in here and set it to false and remove the extra white-space. So what happens in here? As soon as we have direction to move in, it's different than vector 3 0. The animation is walking is set to true and we transition to the animation. If we're not walking, it's false. Okay, great. Let's test this out back in our game. Let's put the animator. Where should we put them all? Let's keep him in here. Game, run the game. Let's see. Okay, so the enemy is idling. If I get close to him, he will start walking. And there you go. You can see that he is walking, but there is a slight problem. I feel as if there is something. Okay. So he is hovering a little bit. Why is he still hovering, did we not okay. So obviously we did not remove the transition time from this one. Run the game again, he should start walking immediately as soon as he starts moving. There you go. He is walking towards us. Excellent. Now, one more thing that we need to take arrow and that is the direction the enemy is looking at. So I'm going to do a similar thing, just like here. If the mouse position not acts just like way we flipped our player, we are going to flip our enemy. But instead of looking on the screen point, we are going to compare the direction or the x of the player to the acts of the enemy. So if the layer to chase dot, the player to chase dot position, dot x is less than the transform.py position x. What we're going to do is we're going to access the transform local scale. And it's going to be equal to a new vector 3 and minus1 f. What's that? Minus1 f. And we'll keep the y the same. And the z, Z, z, Z, whatever you wanna call it, the same. And else, if the player is on the other side, the transform local scale is equal to a new vector, three dot one. If I'm not mistaken, No.1, one, what's the problem? Vector 3. Okay. So I shouldn't put, let me see. Okay, so no new, excuse me. So whenever we're not creating a new vector 1, we just have a vector one that we're setting the local scale to save that back in our game. Let's see this in action. Run the game. And there you go. You can see that he is looking in the right direction. As soon as we come close, he starts walking towards us. Okay, Great. I tried to run away. He looks at us and he keeps chasing. Now the only problem I noticed is that the enemy is hitting the walls or just like we have the problem previously. Remember when we wanted to have the enemies. So you can see because of the collider on the enemy, he cannot move past this wall right here you can see these are his limitations. If you want to make your game more detailed, I do recommend that you add two colliders, just like we did on the doom Player. One of them will be just to get heard. The second one will just be where we walk. Where is our limitation? Feel free to do that. I encourage you to do that. This is your game. You can make it as perfect as you want. With that done, we are going to obviously set everything in here. You can see how many animations I've created. I hope you enjoy it. I'll stage all of that and I'll see you in the next video where we will be actually damaging our enemy. We can currently shoot him, but he doesn't feel anything. That's what we're going to fix in the future. And I do recommend that you also create the animation for the ticket and the animation for the Deaf, which will be very fun to do next video. So I'll see you then.
26. Damaging Enemy (methods): Welcome back my fellow game developers to a brand new video. And in this video, when we run our game, when we click on the enemy, you'll notice that he has an extra variable in here, which is the enemy health and phi shoot him with a couple of bullets. Notice how his health deteriorates from 100 to 40. And if I keep shooting him from 40 to 0 and he disappears because he is dead. So we are going to learn a lot of things in this video. Put your thinking caps on and let's get started. Oh, okay, So now time to start damaging our enemies using method. So first thing we're going to do is we're going to create a way to add health or to remove health from our enemy. So I'm going to go into the enemy controller. And here, Let's open up Visual Studio. And I'm going to create an integer variable that will represent the health of the enemy. Why is it an integer? Well, because we want to keep things simple. We don't want it to be a float. So I'm going to add it right here under the speed. So we're going to create a serialized field which will be of type integer. And it's going to be called the Health. And I'm going to set it to be 100 at the beginning, so we never have the Health at 0. I'm going to look back into inspector and see how that looks. And they now, okay, great. So now you can see that I have the option in here to change the health of our enemy. Now, how are we going to make sure that every time the enemy gets hit, we remove a bill of health. We are going to create a method to do that. What are methods? Well, you've already seen me create methods. The update is a method. We start as a method and also the gizmo select as a method. But let's delve a bit deeper into the actual structure of a method and see how we use it. So let me put my laser on, and this is the method structure. So it's similar to the way we create variables in that it has an accessibility. So an access type, what is it? Is it a private, a public? We can't make it a serialized field, but we can create either a public, which means that we can access this method from anywhere in our scripts, in any other scripts. If it's private, we can only access it inside of the class where we are using. Then we have the return type. For example, void returns, nothing. What is a return type? As we move through the course, you'll understand all the different return types. But what this means is that we can actually return a value from this method. If it doesn't return anything, that means it's void. So for example, let me show you in here. This is a void because we don't return any value. We don't expect any value to be given back from this method later on when we do have a method that returns something, may, I will make sure to point that out for you. Next, we have the method name. So usually whenever you want to name a method, you have to name it by what this method actually does. And you can notice how we create the name of a method. It, unlike the variables were the first word has to always be in the lower class, or the first letter of the first word has to be lower class. In a method name, all the words inside of the method name have to be capitalized. So you can see that adding velocity, so this method is a private, so we only use it in a class void. It doesn't return anything and its name is adding velocity. That means it adds velocity to some kinds of objects. And what are the parentheses on the end? While these are called the parameter, parameter means that we can send a certain value to that method. And it can use it in order to do calculations or anything that it wants. We will demonstrate how this all works in the method which will damage our enemies. So enough talking, let's get started. I'm going to open up Visual Studio and here, and I'm going to create a method inside of the enemy controller. I will scroll down on the Earth, the update. And in here I will create a method to damage the enemy. First thing first, what do I need it to be? Does it have to be a private? So I can only use it inside of here and the enemy controller, or does it have to be a public? That means I can access it from anywhere. Well, most probably I will need it to be public because I want the bullets damage the enemy whenever they hit the enemy. What's going to be a public void, and I'm going to call it the damage enemy. And it's a void because we don't need to return anything from the damage enemy. All we need to do is remove a bit of health that we already have. And here, so the enemy health. And let's change this or no, I'm going to show you a very cool trick and just stay bit. Anyways, let's continue on with our main focus. I also want to send them a parameter of type integer, which is going to be the damage. They can. So now what I can do is I can access the health and I can remove from it. Sorry, the damage taken. So now what happens? You already know what the minus sign means. That means that we remove from the health the damage taken. And finally, we need to make sure that if the health is less than or equal to 0. That means you just add a bit of spaces in here. That means that our enemy has died and I want to destroy the game object. Okay, So let's look at another time at this. And before we do that, I think that the name health of a variable isn't that specific. I think we need to change it to enemies health. So what can I do in here? I can change the name in here to enemy health. Okay, and then scroll down here and change these two right here. But this is a bit cumbersome, especially if we have used health maybe 10 times in our code. So how can we avoid this? Simply double-click on health, click Control R, R. And now you'll see that you can add this. So I'm going to call this the enemy health. I'm going to hit Enter. And if I scroll down, you'll see that enemy health has changed. So as a reminder, control or our click it two times, hold down Control R. And you'll be able to change the variable name and change it everywhere and the game. Now, the next thing we're going to do is we're going to actually call this method. And where do we call it from? We need to go to the bullet controller. And let me just find the bullet controller in here somewhere. Where is it in the scripts? In the bullets, in the law terrible at controller. And in here when we trigger something so we hit an object, what we're going to do, we're going to let me just remove this line from here. So we instantiate the impact and we're going to go ahead and access the collision. So what is the collision right here? As you can see, this is a parameter that is being sent to the method on Trigger Enter. What is the collision? It's the object that we've just collided with. So for example, if we hit a wall, the collision would be the wall that we've hit. And in our case, the collision will be the enemy that we've hit. And I'm going to get the component, excuse me. So I'm going to get the component which is on this collision and it's going to be the enemy controller. And in the enemy controller, because I've made this method in here public, I can access it right here, which is the damage and amine. And what should I send to this damage enemy? You can see right now, here, there is no arguments, so we need to give the damage taken. You'll notice all of this right here. So I'm going to send to it the damage amount. But we haven't created a damage amount. So let's go ahead and create it in here. So the bullet will also have a variable which will be an integer. And that will just copy this, which is going to be the damage amount and I'm going to set it to around 10. So what's happening in here? Every time the bullet collides with something, we get the information of that collision. We get the collision, we get the component of the enemy controller, and we access the damage enemy method there. We sent to it the damage amount. We go to the enemy controller. It's public, everything we get the enemy health, we remove the damaged taken. The damage taken as obviously the damage amount right here. And then we check if the health is less than or equal to 0. If it is, we destroy the game object because the enemy has done. So. Let's save all of that. And let's go ahead and test it out in Unity. So I'm going to click on the enemy, make sure that we see the enemy health. I'm going to run the code. I'm going to try to shoot our enemy. So I showed it until the bullets get third. Let's see enemy health. It was done. There you go. It became 90. Let me try to shoot him two times now his health should become 70 right here. Keep that 80, 70, there you go. The enemy is being damaged. And if I keep shooting him with all my bullets, you'll notice that 70 becomes 0 and the enemy disappears. But notice what happens right now. First of all, our bullets kept on flying everywhere. Why did that happen? Let me zoom out. You can see the bullets did not interact with the wall. They did not get destroyed. And we got an error right here. And let me open the console window so we can see what the problem is. There you go. You can see that we have for errors for the four bullets right here that interacted with the wall. And let's double-click on this arrow and see what happened. Oh, so you can see it takes us to the line that we have an error and let me show you this one more time. Double-click. We are on this line. You can see right here. And because this line didn't execute properly, the destroy didn't execute properly solvable, It's kept flying. This is just a side note. Anyways, what's the problem? The problem is that we are accessing the collision, right? The collision should be the enemy because we are trying to access the NMI controller. But the problem is that right now we've just hit a wall, and this wall does not have the enemy script on it. Interesting. So how are we going to save this? Well, thankfully we have a very, very powerful tool. Let me talk this right here. Let me clear all these nasty errors. We have an extremely powerful tool that we haven't yet talked about. If I go into the edit layers, as we saw, we have the layers of the physics layers, we have the sorting layers. We also have this tag right here. And what we can do, we can tag the enemy, was an enemy tag. And then whenever we are trying to check for the enemy controller, before we do that, we can create a condition that checks if the tag on the collision is an enemy, then we can go ahead and damage it. If it's not an enemy or the object that we fit isn't tagged as an enemy, then we cannot access the enemy controller. So let me go back in here. Let me show you where we can create dagger. We can simply click on this plus button, name the tag, whatever we want, save that, go back to the enemy. And you can see right here that we can tag him with a tag that we've just created. Let me go back. Delete the stack right here. Yep. Okay. Also because the enemy was tagged that can untagged. I'm not sure why I did it. So there you go. Will be removed from this list the next time the project is loaded. Okay, So this was a big mistake, but no worries about it because now it's time for a challenge and your challenge is to tag our enemies. So first of all, create an enemy tag just like I showed you. Make sure to tag the enemy within the enemy tag. Before getting the enemy controller, check for a condition if the collision object, so you already know what the collision object is, has the enemy tag on him. And I recommend that you go through Google, you find a way of how we can check for the tag and compare the tag. If you want to go on by yourself, go ahead and do it. If not, I will give you a small hint. You can use something called the.com DAG, go check it out in Unity dogs, use your information, do your own research. There is another way of checking for the tag. I do recommend that you find it. Pause the video right now and go do the shopping. Hey, welcome back. How did you get on with that? So this is the unit of documentations, component.com, DAG declaration. It returns a bool, whether it's true or not or no public bool. Also the compare tag is a bool and we're going to use it in our if statement because as we know, a condition in the if statement is a true or false. So we can also see how it's used and it's used on the Trigger Enter, how convenient for us. So we use this other, they called it other, we have it as collision. It's the same, no worries about that. So let's see how we can do with in here. So before we check for a collision, I've added a tab right here. I'm going to see if the collision that we've just hit.com tag is an enemy. And before we do that, we must create this type which is the enemy. Hit Enter. So I'm going to make sure that we write it correctly. So enemy, and I'm going to tag our enemy as the enemy. So now in here, if it is an enemy, then we are going to go ahead and do the collision and another nifty tricks, This video is full of nifty tricks. If you only have one line under the if condition, you don't need to add these brackets right here. So if you only have one line, you do not need to add the brackets if I add another line. So for example, the destroyer is not part of the if condition. Even if I take it and put it right here, it will still be not part of the condition. And if you're a bit confused by that, no worries. You can add your own brackets. This is just a small test. You can even add a comment in here to say that this is what happens. So I'm going to save that now. And only if the collision an enemy tag on it. Well, we call the enemy controller and give them to him. Let's test this out. I'm going to run the game and I'm going to start shooting the walls. And there you go, you can see that we have no errors. If I shoot the enemy, then I will look at the damage the enemy has taken. There you go. You can see that it's at 40. I will shoot him three more times, so he becomes 30, 20, 10. And finally, I will shoot him for the last time and he gets destroyed without any errors. So I hope you enjoy, I hope you are committing all of the changes that we are making. It's very important. Sometimes I will be doing this outside of the realm of the video. And with that said, I hope you enjoy it. If you are enjoying this course, please leave me a review. It helps me out a lot. It lets everyone know that this is a good course. So make sure to leave me a review. Thank you so much for watching. I'll see you in the next video where we will be making the depth of our enemies a bit more brutal. So I'll see you then.
27. Blood Splatter : Welcome back, my fellow game developers. In this video, as promised, we've added a bit of brutality to the way our enemy dies. So now when I shoot him with DO bullets, look what happens. 1, 2, and you can see the blood splashing from him. Now even though he's a skeleton, technically he doesn't have blood. But let's use our imagination and figure something out. Anyways, let's not waste any more time. The challenge in this video will be a like, let's say me versus you who can do the challenge faster. So I need your full attention and concentration. Let's not waste anymore time. Let's get started. Which is a new kind of challenge. And who can do with faster? Why? Because you have all the tools necessary. We're doing something that we've done a lot of times before. So my goal right now is to see who can do it faster. Can you do it faster than me? And we're going to have a small cup petition before we start to create a splatter sprites. So the Animation create a serialized field of the death splatter, where should it be? And finally, before we destroy the enemy, we are going to instantiate this death splatter. So I hope you're up to the challenge. Let's not waste any more time and let's get started. Don't pause the video. Let's go. Let's go. Okay, so first thing, no pressure, no pressure. It's not like you're going against the instructor. Anyways, blood splatter, we are inside of this Brights. I'm going to go here and we have already everything sliced up. I'm going to add this file open up. There we go. You can see it right here. Let's go ahead and right-click create an empty game object. I'm going to reset its position right here. I'm going to go ahead into the animations, great animation. This will be in the assets and animations. Right-click. There you go. Side of V, right-click. Oh, no, So lot splashing. After. Enemy. A very long name for an animation. Now I'm going to choose all of the sprites, go ahead and add them in here. Let's run this and see how that looks. Okay, That's a lot of lot. So I'm going to choose all of that and maybe make the pixels per unit a bit more, maybe 120 or 150. Apply that. Let's try this animation again. Book. Oh, okay. It is a bit smaller. Let's make it ten seconds. Okay. Maybe I'll even keep it for 20. Let's see. Okay, so I think 20 is good enough. Let's go, let's go, let's go. Next thing we're going to do is we're going into the NMI controller in here. We'll get a reference to the blood splatter. I'm going to go ahead and after the damage. So serialized field, which is going to be the mature, call it a game object as the death splatter. Why does butter? I'm not even sure. I'll just keep it at the end because all the effects, it's always better to add the effects at the end. Save that. What else should we do when we get destroyed right here? Or, oh, I, well, a huge mistake by me, not in the player controller right here and the enemy, save that. Oh, okay, so you now have a head-start over me because of my stupid mistakes. No worries, we save that scroll down to the enemy. Where does he died before he gets destroyed, I'm going to instantiate the deaf splatter at the transform dot position. So I hope you are well on your road because I'm almost finished transform dot rotation and maybe you're just waiting for me and laughing. So save that everything is good. Go back in here, the game object, this is the load splatters. Save that. And the enemy also, we are going to prefer this, so we'll go into the refunds. There we go. Blood splattered, added and here go to the enemy. He gets the death splatter removed from the hierarchy, save that, run the game. Should the enemy twice? He does. And I can see the blood splatter, but oh, I think we forgot to make sure that the sprite renderer is on the where should I add it? Which, or I can add a sorting layer. Let's see, let's think about this for a second. I can add 0, so the enemies, Okay, great. So for the enemy, save that. And now when we shoot the enemy twice, we should see the blood. Okay, great. So, but as you can see, we have it on loop. So I'm going to go into the animations, blood and remove the loop time, save that, run the game again. And we should have a very nice, very nice splash of blood. And there you go, disappears. We need to make sure that there are a couple of inconveniences. So at the end, we might want to go ahead and destroy this. So to do that, let us go into our scripts in here. And we've already created some kind of script which was the impact effect destroyer. We can, by the way, let's go ahead and go into the Prefabs, choose the blood splatter. We have this little lock in here, so this is no longer part of the challenge. This is something extra that will add. I even forgot about the destruction of this. And we can go ahead and add the impact effect, destroyer, destroyer. So now I can access this right here and I can tell it that when we get to the last frame and maybe we can even keep it for maybe a couple of milliseconds right here, so the blood is on the ground. After we finish, we add this little fact, remove the lock and the animation event. What seems to be the problem here? Some kind of key, it's opened up. Okay, So we have the destroyed, but for some reason the blood splashing after the enemy. Hey, welcome back. So there was a tiny problem when I added the event, I had something different. The problem was that if you don't have the blood splatter, for example, in the hierarchy, when you add an event, it looks a bit weird. Let me show you again. So I chose the blood splatter and the animation choose the blood spatter. So you can see there is no animation. We first need to add it in here in the hierarchy and our scene. Then we can go ahead and add the little event that me just do this one more time. So there you go. And about 50, I'm going to add this function right here. I'm going to access the destroy, save that, run the game. Now, I kill the enemy with a couple of bullets. The splatter happens book, and then it gets removed by itself. We no longer have it in our hierarchy. So I hope you enjoy it. I hope you did the challenge. Maybe you didn't do it as fast as me. You pause the video, you tried a couple of things yourself. It's a bit advanced. Everything that we used, we already know the instantiation. The what is the effect that we created, the animation, the transformed position, all of that we've done, maybe the only bit of challenge, maybe you didn't know where you should have added this. Maybe you added after the destroy. I don't think that works if you've added it after you destroy so well done, make sure to commit your changes, I hope you enjoyed. And in the next video we are going to add some brutality to the way we hurt our enemy. So currently when we shoot him, he doesn't feel anything, but we will make sure that he does. And by the way, also, we have the death animation that you can create for the enemy and added to him when he dies, some kind of trigger. Maybe we'll do it later on. If you don't want too late for my lazy behind, you can go ahead and do it right now in between videos. So I'll see you in the next one.
28. Enemy Blood Effect (Arrays): Welcome back My favorite game developers to a brand new very long video. And this one, we have created animations for the blood. We have learned about arrays. And now you can see in the hierarchy when we shoot our enemy, you can see that we have different types of blood being instantiated. So for example, now the blood to then we have the blood for, then we have the three. So what's happening? We have a lot of Bloods and they are instantiating kind of randomly because we use an array. So let's not waste any more time and let's get started. So time to add some herd effect to our enemies. Let's go ahead and first of all, create all of these effects. So I'm going to go into the sprites, we have the blood splatter. I'm going to create a folder for the blood impact splatter. Maybe we should have called this the death, but no worries, we'll call this the impact splatters. So we know that the France and I'm going to go into the resources and you can see that I've provided you with more blood. You can either use these and slice them up or you can use these five right here. So let's choose all of them and drag them down into the folder right here. Why are we using all of them all? Because we want to have a bit of diversification between the 1D 2D, 3D and et cetera. So you can see each one of them is just a little bit different than the other ones. So I'm going to save this and I'm going to create the animations. And it's pretty easy I think. So I'm going to do with and use the magic of editing to do it in 1 second. So o k, welcome back. So how did you get all of that? Let me show you what I did. So first of all, I created five bloods for the 55 of blood impact that we have now they are not very different from each other, but there is a slight difference. So when we run this, you can see this is the first one. This is the second one that's a bit different. The first one is a bit more splashy. The third one, let's see. You can see that it falls down more than the second one. So you can see this is the two. This one is three. It's a bit more falling down. I'm not sure what to call it. The fourth, you can see it's very small and very concentrated. And the fifth one you can see it's very GUI. So what are we going to do? We're going to save all of that. I'm going to go into the Prefabs in here and I'm going to create a folder for the lot backed lashes splashes and I'm going to drag the blood 1, 2, 3, 4, and 5. I'm going to save all of that. I'm going to delete them from the hierarchy. And now we have the blood in here. Now I think that we will probably have to destroy them and just a bit, but for now, no worries about that. We'll fix that when the problem arises. So what are we going to do? We want to instantiate these bloods every time the enemy gets hurt? And the way we do that is first of all, by obviously getting a reference to it just like we did with the death splatter. So this will be called the damage effect. For the damage. The damage effect. Let's just keep it at that or you can call the damage blood splatter whatever you want. And now what we're going to do is we'll simply going to instantiate it every time we get hurt. So down here, we are going to duplicate this. Move it up a bit. And if you remember how we duplicate Control D, how did we move this very nicely by holding down Alt and using the arrow keys. So now we instantiate v. What should we instantiate the damage effect? And it's on the transform position of the. So I'm going to save all of that. I'm going to go back into our game. I'm going to choose the enemy here we have the damaging effect, and let's choose blue one. Save that. And now we are going to run the game. And now I'm going to shoot our enemy. There we go. You can see the blood. Obviously it's on repeat. Okay, so now we need to start instantiating these effects every time the enemy gets hurt. So where are we instantiating the effect or the impact effects of the bullets? Well, we are instantiating them in the layer bullet controller. So you can see this is where we instantiate them. Now what do we want to do whenever we are hitting a wall, we have this bullet Impact effect. But whenever we are hitting an enemy, we want to have some kind of load effect. So I'm going to duplicate this line right here. And I'm going to call this the mature. I call it the damage fact. Because this means that there will be some kind of damage when we have damage means there's blood means there's something different. And what we'll do in here is every time we hit an enemy, I'm going to open up the brackets. And I'm going to add right here that we instantiate and instantiate the damage effect on the transform position and the transform rotation. But what we don't want to have as when we're hitting the enemy and we still instantiate a bullet effect. So what I'm going to do is I'm going an else statement here. And I'm going to move this entire line down into that else statement. How am I doing this? By holding down Alt and using the arrow keys on one of the lines that I want to move. So now what happens when the bullet Impacts or has a collision and that collision has a tag of an enemy, then we will have this blood splatter and we will access the animal controller and deal damage. If not, if it's not the enemy, which means we are hitting, I don't know whatever it is. We are going to have the bullet and back effect. So I'm going to save this. I'm going to go back in here. And here, I'm going to look for my bullet in the prefabs, prefabs V bilayer bullet in here, we should have the player, but I should have the damage effect. I'm going to lock this in the inspector so you have this little login here, you can click it. Now, whatever you press, you don't change from the player book inspector. And this is helpful. Why? Because we can now open this file, choose the blood one, and let's add it in here into the damage of fact, save all of that, run the game. And now we should see that when we are shooting at the wall, we have this impact. When we shoot an enemy. There we go. We have the blood playing on repeat, which means that we will have to change the animations. And I didn't tell you that I've created animations. Can just remove that. And let me delete this folder. I had it by mistake. So splash one, remove this. Splash to remove this of the looping of the, oops, I turned it on by mistake. Turn it off. Turn off. So there you go. We have all the animations not on looping, okay, save that, run the game now when we should the enemy, we should see the blood splatter of blood one. Okay, So that's fine and dandy and everything is good. But we have five facts for a reason. How are we going to make sure that one of them is rendered? And not only that, how are we going to make sure that a random number of these is rendered? So we need multiple objects of blood in here. Now, what we can do is we can simply go ahead and duplicate this five times. Damage 123, etc. So we have five damages that we can call at randomly. That's a solution, but it's not the optimal solution because for example, let's say we want to have maybe 17 damage effects. Do we have to go ahead and create 17 variables? Well, you can, but first of all, it's very cumbersome. Second of all, it's not a good way of using the resources. What is a good way of using resources as creating something called an array? So what is an array? An array allows you to store multiple objects of the same type in a single variable. So we can go ahead and create an int. So for example, a array of integers, for example, which is the number of enemies. So I can store, for example, 4, 6, 11, and 71. And each one of these little data's in the array. You can see that we have first of all, the type just like an a variable, but the only difference, we add these two square brackets. We have the name and we have the values. And each one of those values is or has an index inside. So for example, the four is indexed at 0. And remember we always start indexing at 0, not 10. The six is at index one, the 11 is at index two, and the three is at index. I mean, 71 is at index 3 and we can have as many as we would like. So now that you have a bit of an understanding of what arrays are, and one more thing we can determine the length of an array. So for example, the length of this array is four because we have four values. So out of the way, this little explanation, let's try to implement it a little bit and you can see how that works. So I'm going to go back and unity or actually no in here. And how do we convert this damage effect to an array? We simply add these two square brackets. And now I think it's appropriate to name this not damage effect, but damage effects with an S on the end, because it's plural now. So we'll use our handy tool of control or, or, and we'll simply add an S at the end, hit Enter. Now the damage effect here is different, but you can see that the instantiation now is wrong. Why? Because we are trying to instantiate an array of effects which does not work good, but we will fix that, or actually you are going to fix that later on in the challenge. First of all, let's add all of the damage and see how it looks in the inspector. So if I go to my bullet, in the prefabs player bullet, you can see right here, where is it? So something is wrong. What is the problem? And the console? Let's double-click and see. Oh, so let me just comment this out. Save that sometimes when you have an error, the script doesn't assemble properly. So now that we fix this problem, and we can see right here that we have damage effects, no longer a single element, but we can open it up and have a list of elements. What we can do is we can say that the array size is two. Hit enter. Now we have two elements, or we can do it the old-fashioned way and hit the plus right here and add an object. But I will show you an even nifty trick. I'm going to lock the inspector in here. I'm going to go to my prefabs. I'm going to click on the first one, hold down, shift, click on the last one. So I have all of them selected and I'm going to drag them to the damaging effect. And voila, now you have why did I use water? Now we have the 50 bloods and you can see the elements numbered from 0, 1, 2, 3, and 4. Now the next step is to instantiate one of them randomly. And I can show you, first of all, this will be a challenge. I'm not sure which I should show you first. Let me first of all, show you this. So we have something called random range, which returns a random number. Go ahead, look at up. Now it's time for your challenge. And your challenge is to create a random effect. So number one, create a random splash from 0 as the minimum value and the length of the array as the maximum value. So now you're a bit confused. What is Michael talking about? Again, we go back to this one. The minimum, the maximum. There you go. Use this, look for it. Back in here. Assign that value to an integer variable that you will create locally. So create a random integer, assign it a random number. Look for random latrines 0. Okay, so I've added that. And finally, I will give you a hint. If you don't want the hint, It's about how do we get the length of the array. I'll give you the hint. If not, pause the video, go to the challenge. You want to have the hint, use dot length to get the length of the array. You can even look up a couple of examples are no, this is a bit of a hard challenge. I would add on a scale of one to 10 as a beginner, this is a 10 because first of all, you've just learned arrays. Second of all, you are using random. I know it's hard. Take your time, pause the video, use your solving problems skills, everything that you've acquired, and don't worry about it when you finish the challenge. If you don't know how to do it, I'll do it in front of you, but try. Most important, at least give yourself five minutes to try. So pause the video right now and go do your best and the Chaldean. Okay, welcome back. So whenever we hit an enemy, what we're going to do is we are going to create a random variable and locally, so locally means inside of here, every time we hit an enemy, I'm going to say that we have an integer variable, which is going to be the selected splatter. And it's going to be equal to a random range. So just like we have in the examples, and Unity's documentation is going to be between 0 and the death splatter or no, what we call it, appear the damage affects. The damage affects dot length. Save that. So now what happens in here, we have this integer. It's equal to a random range. And you can see right here that we have the minimum. So why is it 0? Because we want to choose a random number from the array that we have in here. And the first index is 0, and the last index is going to be the damage length. But there is something very important that I want to point out to you. And if we look here at the explanation, you can see that the minimum is inclusive while the maximum is exclusive. What does that mean? Inclusive? That means that we can choose a random from 0 to the maximum. So 0 is inside. 0 can be one of those random numbers. But the maximum, which is the length, cannot. And this is important because indexing in an array, if we choose the length, the length is always bigger than the last index. Because if I go back and the example in here, let me show you. So let's say what is the length of this entire array? It's four because we have four points. But if I try to access the fourth number in this array, I will get an error because we have the index is 0, 1, 2, 3 if I try to access the fourth, so for there is nothing, I get an error and I start crying. Not necessarily, but I hope you get the point. Next thing we're going to do is we want to instantiate. So now that we have our random number, what we can do as from between the effects, I can open up the brackets and I can use the selected splatter random. So now I have a random number which is between 0 and the length minus one, obviously because it's exclusive. And now I can instantiate the damage effects or one of the damage effects randomly using this number. So I could have said the 0 V1, but I've selected the random splatter. So let's save that. I hope you understand everything. If not, just take another look at it, maybe replay the video, understand everything. I've tried to be as detailed as possible while being a boring. I think this is one of the longer videos, but no worries. I'm going to go into my game. We're going to remove this right here is like the enemy. And by the way, I also made sure that all the blood you can see right here, the sorting layer as the enemy. So you can see it. And where's the enemy? I'm going to give him a thousand or 10 thousand health just so we can see properly all the blood splatters. So I'm going to get there but close, I'm going to shoot 12345. So there you go. You can see the something isn't completely right, so I'm going to shoot. And what is the problem with this 1, 0 case? So I just found the problem and the blood 5 I've added right here, the blood. Look when you play the animation, the last one is a red dot. So what I'm going to do, I'm going to remove the last one. And there you go. Now, we only have this when the blood finishes at the spears. Save all of that. And let me just choose the moon. The blood 5 and a live changes. Delete it again in the bullet. Let me see. Maybe because we changed something, maybe prefabs bullet. Okay. Still working, save that, go back in our game. Obviously we'll need to remove all of these so a shoe, the enemy, let's see. We have different bloods. Nope, it's still there for some reason. Why is that? It's very annoying. Okay. So I discovered that the blood for also has its last frame as this red annoying dots. So I'm going to delete it and save that. I'm immediately deleting it inside of the prefab. So I simply go to the prefab, double-click on the three. Let's see if this one also has the little annoying red dot that you go up. Okay, So there you go. It's also has it save that and blood to zoom and see the animation. Okay, another bloody work. This video is getting out of control. So there we go, the last one, we also delete that. And one thing I noticed, I want to choose all of the prefabs and make sure that all of their positions is at 0 so they don't get instantiated. And some weird place. Anyways, back to our game. I hope this time everything should be working perfectly. So I'm going to run the game and I'm going to shoot the enemy. There you go. This is the thick blood. Sugar them again. Again, it's a different kind of blood. You can see it's blocked. Three. Blood for Blood one. There you go. You can simplify to again, blood one. So as you can see, whenever we are shooting the enemy, we have different types of blood's getting instantiate. So you can see it's a random number getting shot out. So I hope you enjoyed. Obviously, there are a couple of things that we will need to fix with our blood not getting destroyed at the end, we might find a different way of fixing it once we learned some extra tools, or maybe we can just remove them using the events and our animations, which is also very helpful. So I hope you enjoyed, I hope you're enjoying this course. I hope you're not being a bit demotivated by the length of the, some of the videos because I go into a couple of details. I hope you like the fact that I make mistakes and keep them in here so we can fix them together and leave me a review if you are enjoying. I know I've said it before. I will maybe say a couple of times, so make sure to do the review so you don't have to hear it anymore. And make sure to of course, do the commits. I'll see you in the next video where we will be giving the enemy and ability to shoot us. So currently he is very weak. We want to give him a way to defend himself. So see you then.
29. Enemies Attack (coroutines): Welcome back my fellow game developers to a brand new video. And in this one we've actually made our enemies lightly stupid. So even though he can shoot, but only the slight problem is that he shoots himself, which is sometimes good, especially if a very hard enemy. But in our case, we will be fixing it later on. But for now, all you need to know is that we can change the time between shots to, for example, three. And you can see it takes three seconds to shoot, but we don't do that using a counter. We do that using something called a co-routine, which is a very hard scaring but in credibly powerful tool to learn in Unity. So I need your concentration and your full attention. Let's not waste any more time and let's get started. Okay, so time to give our enemy the ability to shoot the player, or at least attack the player. We do have two different types of attacks that we are going to implement in our game. One of them will be the Malay, one of them will be simply shooting from afar or throwing the sword and the skeletons example. But we are going to focus more for now on the shooting from a distance and do them melee attacks later on. Maybe in a different section, may be in the boss section where we have the giant skeleton. Okay, with that out of the way, let's go ahead and get started. The first thing we're going to do is we're going to create a couple of variables and the enemy controller 0 case. So we are going to go into the enemy controller. And in here we are going to create a couple of variables. So before the death splatter right here, we're going to add attack, just a common so we know what everything is and it's going to be a serialized field of type Boolean and it's going to be a melee attack. So if it is a melee attacker, we are going to check it in the inspector and it will attack using melee. Then we are going to create a serialized fields, which is going to be a game object and it's going to be the enemy projectile. So this is what the enemy will be throwing out of his hand if he does shoot. Finally, we are going to create a transform dot. Oh, sorry, fire position. Okay, so now we have the projectile. We will create a file position. And we also want to have a time in-between the shots that the enemy does. So it's similar to the way we handled our gun. So float time between shots. And finally we are going to create a private bool ready to shoot. So what happens here? When we are ready to shoot, the enemy shoots, and every time he shoots and between time shots is going to calculate. So we did this using, I believe the counter. We created a counter where we count down the time until we finish a certain amount of time between shots when it's finished, then we can show it again. That was an old way. Now we are going to use something called the co-routine. So before I do that and introduce you to coroutines, let me first of all set the ready to shoot in here to true. So whenever the enemy starts, he is ready to shoot and an update. We are going to go ahead and create something in here which is a condition. And if The Malay attacker, or if we're not a merely attacker, we are not. When we put the exclamation mark again and we are ready to shoot. Then what we're going to do is we're going to go ahead and say that ready to shoot as false. And then in here we are going to start a coating. So what is a co-routine? Why do we need it in here? Let's have a bit of an explanation. So what is a coltan? A co-routine is a method that can suspend the execution of instructions until a certain condition or certain conditions are met. These suspensions are know as yield. And in our example, will be suspending the time until our enemy is ready to shoot again. So let's go back to our code and see what all of that means. So currently what we have, we check in the update which is called every single frame. We check if we are not aiming attacker and we are ready to shoot, then ready to shoot, set to false. And for example, here we are going to shoot the bullet. But what we want, just like we had in the counter, we want after a certain amount of time to be able to shoot. Again, we have this set to false because we don't want to shoot every single frame a bullet and have gazillions of bullets. So the way we fix this is by using a co-routine. So let me just go ahead and create a coroutine right here is going to be of type eye enumerator. You don't need to worry a lot about what our enumerator is, just know that it's the type of coatings. We're going to create the coroutine name as fire enemy, projectile. I'm going to open up the brackets and we are going to suspend the time. So I'm going to say that yield. Okay, Focus, yield. That means we are suspending. Return. New. Wait four seconds. I'm going to open up the brackets. And how many seconds do we want to weight as the time between shots? And after that, we can go ahead and instantiate the bullet or instantiate the projectile, which is the projectile, enemy projectile where do instantiated at the five position, that position and the position but rho station. And then what we can do is set the ready to shoot back to true. And now we can show it again. Complicated, isn't it? I know less explain. Oh, and before I forget, and here after we have the shoot, we start the co-routine, which is the far enemy projectile. Okay, now you're even more confused. Let's try this again and update. What do we have every single frame update as being cold, we have all these statements right here which we will be converting into methods in just a bit. But what we focus on is here, if we are not a melee attacker and we are ready to shoot, then ready to shoot, set to false, and we start a Colton. So what happens in here, ready to shoot a set to false? That means that this method or this condition right here is false. So we don't shoot again every single frame. That's why we set it to false. But how are we going to set it back to true? We used to do that using the counter. Now we are using something a coating. And just like I said, co-routine is called Using start coroutine. You put the name in here and you call it I enumerator. No worries. Don't worry about that. For now. You want to delve deeper into that? Be my guest. You don't have to know exactly what that means. We have the far enemy projectile, then we have this expansion, which is yield. Then we have the return new, wait four seconds. So because we have an ion numerator, we have to return a new weight four seconds. What does this do? Just like it says, it waits for a number of seconds, which is the time between shots. And after it waits for this, then we instantiate the enemy projectile. Enemy shoots, and he is ready to shoot again, again and again. So what happens in here? First of all, we start, we have the ready to shoot to true. We should. It's false, we no longer shoot. And when the time between shots ends, we throw the projectile and then we are ready to shoot again. Let's test this out and see how it works. I'm going to go back into Unity. I'm going to see where do we actually have our knife 0. So we don't have a knife. So what we'll do is we'll simply use the bullet that we already have. So in the prefabs, we have the player booklets. Just use that for now, the fire position, let me add right-click, create an empty game object. And I'm going to put it right here, are run almost right here. So this will be the fire position on the enemy. We provide him with the FAR position defined between shots would be 1 second. We will save that. And now we are going to make sure that he is not a, made an attacker. Let's run the game and see what happens. So now, there you go. You can see that he is instantiating the bullet, but He's shooting himself and the face. So if I pause this for a second, you can see that the five position, that's how it's being directed. And we know that the players bullet only traveled in the right direction. I know it's kind of funny. Let's try this a different way. But in any case, let's not worry about that too much for now because in the next video we'll be creating proper enemy bullets that will actually far towards the player or not. Even bullets will create the projectile, which is the ninth of the enemy. He'll be throwing it as the player and not shooting himself. But you can see right now that this is working using the Colton. If I click back on the enemy right here, you can see that I can increase the time between shots to 2. So now every two seconds we have this attack. So I hope you enjoyed the video. I know the shooting mechanic isn't perfect, but as I said in the next video, we'll be creating better bullets. I hope you are committing all of your changes. And in the next video we'll be making a proper enemy bullets, Gentiles, or whatever you wanna call it. So I'll see you then.
30. Making Proper Enemy Bullets: Welcome back, my fellow game developers. In this video, we are going to add bullets. We call them bullets, but they are swords to our skeleton. So when we run our game, look what happens. You can see that the skeleton is actually now throwing sorts. And not only that, if we walk around, the swords start following us. And if you notice, if we change the source that are already flying, keep flying in the direction because there is something very recent that happened. They discovered that sorts don't change directions in mid air. Amazing discovery. Let's not waste any more time with our, let's not call them stupid jokes. And let's get started. Oh, okay, so time to create some proper enemy bullets. So the first thing that we're going to do is we are going to go ahead and get the sprites of our sword or the sort of the enemy. So if I go into the sprites, if I go into the enemy's, the Muslim enemies, the skeleton. And in here I have the sprite for where is it? Where is the flying thoughts? So there you go. This is the flying sorted. We create anything for it. I think we haven't. So I'm going to create an empty game object, reset its position. And I'm going to give it one of the, where is it, the sorts? So let's just give him this one. I will add four. I can simply add the sword right here. Just remove this game object and I'll call this the flying skeleton sword. There you go. And I'm going to create an animation. So I'm going to go to the Assets and animations, and I'm going to skeleton animation. And let's just call it the flying saucer. Click on Save. There we go. So now we have the animator and let me just choose all of the sort sprites. And let's go ahead and drag them in here. So now if we run the animation, there we go, you can see we have an extremely fast sword That's move it around. Okay, so that's almost okay. So there you go. You can see that this is the way our sort works. And it explodes before it will get to the enemy. So it has about 40 frames of flying time. And that's good. We do want to have the sword at least can destroy at some range. We don't want the salt to be flying all the time now, if you do want to have your salt flying all the time, you will need to add a couple of things. So for example, you can just put him on a loop and the salt will keep flying and flying without getting ever destroyed until he reaches the player. And finally, fair can get destroyed with some conditions. But let's not worry too much about that right now. What we will do is we are going to open up the scripts in here. We are going to go into the bullets and we'll right-click and create a new C-sharp script, which is going to be the enemy bullet Controller. And let's just call it bullet or projectile, but for now we will call it bullet. So I'm going to save that. And I'm going to double-click and open this up. So the first thing that we are going to need is a serialized field, which is a float for the bullet speed. And i'm, I'm going to use bullet and sort of projected as we go on. And we are going to need a reference to the players direction. So I'm going to create a private vector 3 and it's going to be the player direction. So how is the enemy bullet actually going to work? What we will do is then start, we are going to determine the players direction. So it's going to be equal to find objects of type. And it's going to be the layer controller. And from here we are going to go ahead and use the transform dot position of the player that we find minus the transform.py position dot o. That's it. No, not normalized, No, not right now. So why are we doing this installed and not an update? Because we don't want the bullet to keep following the player. We only want to have the player direction as soon as the bullet is fired. So when the bullet is fired, we are instantiating that bullet. And that bullet. As soon as it wakes up. Start. We'll start. It will find the player object, get the direction of the player. And then we are going to make sure that the player direction normalize. There we go. So that way it's not faster if it's moving in a diagonal. Okay, great. Now the next thing we want to do is we want to make sure that that bullet gets destroyed whenever it hits an obstacle. But not only that, we want to also reduce the health of the player later on when it hits him. So one of the things that we will need to do. Is issue you a challenge? How about that transition? The straw, the bullet, and check the player. So you'll need to create, this should be M on Trigger Enter to D for the bullet. You need to check if what we hit was the player by his tag, will need to destroy the bullet when it hits something. And I'll give you a small hint, you'll need to use the straw. Well, this isn't actually, it was pretty easy, but I thought that maybe because it's the first time you use destroyed, maybe you'll need that. So remember that you'll also need to add a trigger to this. Pause the video right now and go do the Shalon k. So there is something that I left From the challenge. I did mention it a bit and I hope that shoe that this on your own, I'm going to have to add a collider. So a circular collider 2D, It's pretty big. I'm going to put the radius above, take big. I'm going to, okay, So I think this radius is good enough. Let's see how this will be flying. So this is the complete circle. So I'm going to move it a little bit down, a little bit like that or okay, great. So now we have the collider, we make sure to make it a trigger. I'm going to save this and I'm going to go ahead into the o and add also the scripts of the enemy bullet controller. There we go. The boat speed will be, let's make it 34. Now, double-click on this, open this up. And now what we're going to do is create an on sugar enters, so on Trigger Enter to D. And here we are going to check if the collision.com tag. And if it's the player, obviously we'll need to create the stack in a bit. If it's the player will simply going to use the debug dot log. The layer was hit. And then we are simply going to straw this, whatever the target was, soul destroying game object. Save that. Now the final step is we want to move our bullet. And how are we going to move our bullet? Well, obviously we can use rigid body again, just like we did with the player bullet. But I think I'm this case, it's much better to use the old-fashioned way which is moved the transform of the book. First of all, there are many reasons. First of all, we can do this pretty easily and it is very effective. And the second reason is we don't want to have a lot of rigid bodies and our game, because whenever you have a rigid body, that means the physics engine is working. And when there is a physics engine is working, that means that there are more computational power. So the last we use the butter our game runs. So an update, I'm going to access the transform. I'm going to, I mean the position on the transform. And I'm going to keep increasing it. Going into the player's direction, time the bullet speed. So this speed, and I'm of course going to use time, delta time. So as soon as the bullet is instantiated, the direction of the player is found. And each and every single frame the transform is moved towards that player. And as soon as it hits the player, then the game object is destroyed. And if we had deep layer or any other object that gets destroyed, but if we had the player specifically, then the player was hit is going to be put or printed on the console. So I'm going to save this. I'm going to go back into my again. And let's see, we are going to make this a prefab. Prefab. I'm going to right-click and here and create a folder, 40 bullets. And the player bullet in here. Double-click in here, set the flying skeleton sort in here. I'm going to delete it. Let's save this. And let's go ahead and run the game and see what happens. So, okay, we didn't change the heap. We haven't changed the actual player bullets. So there we go. Let's add this flying skeleton, sort astron the game. And as you can see, nothing is happening because the bullet is on the wrong sorting layers. So at the enemy sorting layer, now we should save this. Now when we run, we should. Yep, there we go. You can see that we have these sorts flying in towards the player. And when we had the player, we don't have anything printed out to the console. Why is that? Well, let's check, will save this. So I forgot the most important step and what you should have done in the challenge, I assume that you would know what to do and the challenge, because we are checking for the player tag, but apparently by memory, isn't that great? So the problem here is that we did not tag the player as well, the player. As you can see, we already have the tag right here. So big mistake, no worries about that. We live, we learned, we apply our changes. We save all of this, we run the game. And now what we should see is that there you go. As soon as the sorted the player, we have, the player was hit and you can see it multiple times and here 4, 5, etc. Now, what I wanted to show you is if I move the player, the swords that are already going in the direction of the player won't change. So there you go. You can see that now sort follow the player as he moves and can we destroy them? Yep, we can. If you want, you can add another layer, which is the enemy bullet layer, and make sure that the bullets of the player don't interact with the bullet enemy. That's your choice. What game mechanics do you have in your game? Do that, apply it? I would love to see it if you show me. And was that none, I hope you enjoy it. I hope you are committing your changes every single video. And in the next one we are going to add a range to the enemy shooting so we don't want to let our ME sures from wherever on the map we want to have a, some kind of range in which the enemy can shoot us. So I'll see you then.
31. Enemy Shooting Range: Welcome back, my fellow
game developers. In this video, we added a shooting range.
It's pretty simple. We've already done this. You can see right now
the enemy no longer shoots us unless we stop
in this red circle. When we do stuff in, he starts throwing
his sorts arrows. If we're out, he
does not throw them. Now, let's not
waste anymore time. This video isn't just
about creating the range. We also had an extra, let's call it lesson. And here, an extra
point to create. We use the knowledge
of our methods. So let's not waste any more time talking and let's get started. Oh, okay, so time to add a
shooting range to our enemy. But before we do that, there is one thing
that we need to take care of and that is that the sword wasn't getting destroyed when it hit
some kind of trigger. And you might be thinking, well, why is that happening? Even though we have
the enemy bullet on trigger, everything
is working. There is a small detail that I should have told you
I made the mistake. We do need a rigid
body 2D in here, but we need to
make it kinematic. So now when the flying salt has a rigid body to
the end Is Kinematic, it will be destroyed
when it hits a wall with that out of the way. Excuse me for not
saying that before I told you you shouldn't
have a rigid body. We should, but it
should be kinematic. So let's continue
on. What do we need? We need to have the
ability to show the player only at
a certain range. How do we do that? By giving you a challenge? And your challenge is to create a shooting range with color. So create a float variable
for the shooting range. Before we can shoot, make sure we are in the
shooting range by checking the distance between
the enemy and the player and draw a yellow. I'm not sure why I said the yellow because we
already have yellow. Choose whatever color
you want and make sure that that is the shooting range. Makes sure that the
enemy doesn't shoot unless the player is in
that shooting range. So pause the video right now
and go do the challenge. Okay, welcome back. So I'm going to go into
the enemy controller. And where do we
shoot? There we go. This is the time between shots. And let's go ahead and added. I think this is a
good place to add it. So I'm going to create
a serialized field, which will be a float, and it's going to be
the shooting range. Save that. And then I'm going to
scroll down in here. I'm going to check if we are not a male attacker and we
are ready to shoot, then I'm going to go ahead and up here right before we
check for the condition, create a variable which
is going to be the float. Or know what, let's not
create a, an extra variable. Let's just put it in here. We'll add another condition. And that condition
will be that a vector three and calculate the distance between
the layer to chase. There we go the player to chase dot transform dot position. And we are going to check for the transform dot
position of the enemy. And if it's less than
the shooting range, then we are going to
start the condition. Now you've noticed that
this line is a bit long. So what we can do
is simply go this, hit enter, go in
here, hit Enter. So now they are on
separate lines. We can see them more clearly. If you want, you can keep
them on the same line. And this is a better way of
looking at the conditions. We can also add this right
here so we know everything. With that done, we're
going to save oh, and we need to draw
the longest most. So I'm going to go ahead and
duplicate these two lines. And I'm going to make
the color not yellow. Let's make it blue. And this is going to
be the shooting range. Save that back in our game. Let's see the enemy. Now, what do you want the
shooting range to be? Of course, it will depend
on how the game will be. So for example, you can make the shooting range a bit bigger, but maybe just maybe
you would want the player chase to
be around like that. So the enemy might need to
chase the player a bit. And when he is in the
range he started shooting, or we can do whatever you want. It depends on your game. Will just add the slide here, circled labeled bigger,
save that, run the game. And now we should see
that the enemy doesn't shoot until we get an range. So there we go. He starts shooting
at the player. If we go out, does he
continue shooting? No pay, doesn't. He stops. We are in his fruits. We are out. He stops
shooting. Okay, great. So that working, I believe we still have
a bit of time and we will use that time to arrange everything
that we have in here. So what is the problem? You can see everything
is working. We don't have an errors. But the code is very API. You can see right
here that we have this update and this
update does a lot, and this is not something
that we want an even. And the player, you can
see player controller. We have a lot of lines of
code and they are messy. What happens in here? What do we do? Do we should do a move to replay what is
happening in here. So we are going to, of course fix this
by creating or using our new found knowledge
of creating methods. What we can do is, for example, let's say where
is the player walking? So this is the movement we
normalize, we give velocity. So from the first
line to this line, we are moving the player. Let's go ahead and
select all of these. I'm going to select these lines. I'm going to right-click. And you can see right
here that we have the quick actions
and refactoring. So when I click it, you can see that it gives us the option to extract a method. I'm going to click
on Extract Method and now you have a new method. What do you want to call it? Let's call it the moving player. Hit Enter. So now you can see that all
the lines are gone, but they are stored
in this little nifty, very handy method down here. So now we know that we
start off by moving the player and then
we have all of this. So what happens in here, the mouse position
and screen point, we calculate the offset, we get the angle, we rotate the arm and
then we check if we should go from one
direction to the next. What else do we have in here? Let's separate first
of all, the shooting. So we're going to
separate the shooting. And what did we call
this the moving player. And let's call this the
layer shooting enter. That's called this
instead of moving player. That's called this, the player Moving and control
RR, of course. And how do we want to separate? We can call this animating
the player if we want. And we can call this one setting the player
in the right direction. And this one will be. But for example, what
should we call this? So honestly, this is all
based on your preference. How do you want to make it? So I'm going to call
this the right-click. And it's called the pointing. Pointing in our case. So obviously you can see
right here what happened. We have this outmost position
and out scream point. That means that we are
returning these values. Why are we returning them? While? Because we use the Screen point somewhere
else in our code. That's just said apply for now, double-click on stream
point and there you go. You can see that we are
using the mouse position and the screen point
in this if condition. But we are calculating it inside of the point in pointing. I didn't change the name. So you can see this is where we calculated and this
is where we need it. So we create this out, but I don't want this. I feel It's a bit bad. Oops. Too much. Control Z, layer. Moving enter. We save that. Now let's go ahead and use
all of these we right-click. And what shall we call
this huge method? We will call it, what
do we do in here? Pointing a gun at
mouse, at Enter. So you need the
name of the method to describe what's happening. And finally, we can
say that this is animating the player
Extract Method. Animating V player
hit Enter and whoa, what a huge difference that just made seriously
look at the update, how clean it is now, we know that the
player is moving. He's pointing the
gun at the mouse. We are animating the player
and the player is shooting. And maybe you can even extract an extra method inside of the pointing guns to
make it even cleaner. Because for example, what
we're doing in here is we are, may be rotating or pointing the player in
the right direction. You can even extract
these two methods, even make this more clean. So her time as a challenge, I'm going to give
you the liberty of extracting the methods
in the NMI controller. And I'll see you in the next video where I will
have already done this. Maybe I'll show you
whatever you want. Do it yourself, have fun. There's no pressure in here. Just have this practice of
doing things on your own. Of course, I will show
you the results later on, but I hope you enjoy it and I'll see you
in the next video. Never forget to commit
your changes. My body.
32. Game Design: Welcome back, my fellow future game developers. Why did I say futures this time not as the regular words that I say. Well, because this is the video where you decide whether you want to become a true game developer or you just want to follow the steps that I make. Because this video, everything that we do, extremely simple. We've already done that. We've already done everything. There is nothing new to learn. This video is all about using your imagination and training those game developer muscles that you have. I've told you all the time that you need to add your own creativity and to the game. To this point, you've always been following what I've done 100%. This is the time to actually think of different ways you can use or different game designs that you can use in your game. So without further ado, let's not waste any more time and let's get started. Hey, welcome back. So this video is all about gangs design. It's not going to be very long. It's just going to be an example of how you would like to design your gain. So obviously right now you already know that when the enemy is shooting at us, as you get close, you can see that we can shoot off his bullets every time the shot towards us. Okay, Great. Now, that is good enough. But what if the time between shots is, let's say 0.1 from the game again. So you can see right now that the bullets of the enemy are destroying themselves. Why? Because that's how we've set up the layers. And one more thing also, if we go ahead and try to sell it back to one, okay, So the enemy shoots arrows. Let's see what is happening. 0 times 0, 0 know, back in here we choose the enemy. If we put them, you can see right now that the enemy starts shooting himself. There you go. You can see that the bullet of the enemy actually kills him. So what's the whole point of this video? It's to issue you this challenge. And your challenge is going to be to create an enemy bullet layer. So create an enemy bullet layer, assign it to the enemy bullets or the bullets, obviously the, whatever it is, the sword or maybe you've created your own, I don't know. And then decide whether you want the enemy bullets to interact with the players bullets based on your game. If you want the enemies bullets to kill the enemy. If you want the other enemy bullets to interact with enemy bullets. Like this is the point where you decide how you want your game to look. Maybe enemy killing themselves if they are stupid, is a good idea at will enhance the realism or the feel of the game better than having the bullet just traverse through the enemy. Maybe you don't want your bullets to destroy the enemies bullets. So this will add a more challenging gameplay to your game. Take the time to think of all the ways that Sure game can unfold. So with that said, pause the video right now, go to the challenge. Okay, welcome back. So I'm going to go ahead and add a layer in here which will be the enemy bullets enter. Go to the flank, skeleton sorts like the enemy bullets. Let's go to the Edit. Let's check the project settings. The enemy bullets should not interact with the enemy bullets, and the enemy bullets should not interact with the enemy, but we don't have an enemy layer. Well, let's go ahead and added, if I check the enemy, this should be the skeleton enemy. Enter. Let's go ahead and the prefab him. Let's create a new folder for the enemy prefabs. Because maybe you just want to create another one later on. There you go. Let's set his layer as the, okay, we haven't created the layer. The enemy hit Enter. Select the dude. And let's make him yes, change children's save that, run the game. So now if our skeleton enemy has a time between shots of 0.1 and let's see how that looks. There you go. He shoots a lot of bullets and they do not destroy themselves. They are ugly, but they do not destroy themselves. That's, let's stop this for a second. Keep this at one. Maybe increase the range of fire. So their case range, where is it shooting range? There we go. Increase it a bit. I wouldn't move the player into the range. And I'm going to select the, where is he the enemy? I'm going to move him in front of the bullets. So is he destroying himself with the bullets z. Okay, so he's still is. So we need to go added project settings. And the enemy does not interact with the enemy bullets, or maybe the enemy doesn't even interact with the enemy. So it goes to you, what are your preference? I told you you are going to be adding your own creativity and to the game. This is the time if you still haven't done anything, do something different than me. Try to do the challenges all the time. Make sure that you try your best every single time you might come up with code that is better than mine are not getting. I sometimes get suggestions, suggestions from students that are incredible and things that I haven't even noticed. So I always recommend that you go do your best with that. I hope you enjoy. If you haven't left a review yet, do me the favor, do the review, make sure that you always commit your changes. It helps me out a lot when you leave a review at lets everyone know this is a good course. It's worth watching. I hope you are enjoying and I'll see you in the next section, may be where we start setting up the health system if I'm not mistaken. So that said, I'll see you in the next video and section.
33. Section 5: Creating Rooms - Introduction To Tilemap In Unity: Welcome back my fellow game developers. And as you can see for the first time, instead of go moving forward, we've moved back and we no longer have a background. We just have this weird world in front of us. Don't worry about it. We have the right tools to solve this problem. So as you can see right now, we not only have a background, but we can draw our own background. I can add whatever I want. I want to add this one and our world. Nope way. I'm going to add this one and it's currently not perfect, but it works. So I'm going to, for example, at this one and let's make it on the ground. There you go, with some blue space behind it, but no worries, we will be fixing that later on. But for now, let's understand how we convert sprites and to tile assets into bile pallets, into drawing them on the screen, as you can see, extremely professionally. So let's not waste any more time. And let's get started. Oh, okay, So now we have a solid player, we have a solid enemy. We have bullets, we have layers, We have effects, we have animations, we have everything. What we don't have is the control over the creativity of our game. So currently everything that we've created is just on this background. It's good enough. We have the box gliders, we have all of the limits on it, but it's not enough. What if we want to create our own level? Obviously, we can't just go looking for different backgrounds. This is what we'll do in this video and in this entire section. Now, let's click on the tile set. I've created a folder inside of the sprites called the pile set. I'm going to go into the resources and I'm going to use the catacombs. Obviously, if you want to use a different tile set, I do recommend that you go do some research on open game art and add your own. So there we go. Now we've added the folder. If I open this up or maybe I should open it up from here and show you a couple of things. So you can see that we have these candles, we have a sprite. Here you go. You can see this is the sprite. It's exactly the one that's used in the background. And actually I've created one, then used a screenshot and made it a background. But now we'll learn how to use these squares in order to create a map. We also have the decorations, and I've left you, let's say screenshots or pictures and the resources that you can check out and see how the world is created. So without any further or do, how are we going to do this? The first thing is we're going to go into the window. We are going to go into 2D. And you can see right here that we have something called the tile palette. So I'm going to click on this and I'm going to add it in here. And what is the Tile Palette? Well, it's the tool that Unity has that will allow us to draw different kinds of, let's say these sprites or the tiles or the tile assets. And maybe you're confused. What are we going to do? How are we going to convert this picture right here and two tiles and start joining? Well, let me explain using my nifty laser. So first thing we have the sprite sheet. You've seen this, you've noticed while I was showing you we have the sprite sheet. What we'll do is we're going to cut the spreadsheet up. And we are going to have slices of this sprite sheet. After we have the slices, what we'll do is we are going to convert them into tile assets. And after converting them into tile assets, we are going to have them in our tile palette. So you just solve the tile palette that I've added just now. You'll also see it in just a bit when we convert our sprite and to this one. And finally, we'll draw them and add the enemy and create all sorts of cool things. So before I continue on, I just want to show you the challenge right now. I shouldn't, but I will because there is the first step in here which is important what other sprites and tile you choose to use for your gain. So if you don't like the catacombs, maybe it's not your style, it's not part of your game. Maybe you have different players enemy is you need a different environment. I do recommend that true. Go look for 2D sprites. Maybe have, I don't know, some futuristic sci-fi city. Maybe you can create your own if you're that good, then you need to size them up. And finally added to the Tile Palette and create your new set. I'm not going to say pause the video because there you go. It's pretty simple. This is the instructions of the challenge. I'm going to do it in front of you. So first thing first, we need to slice up this tile map. And this is a bit of a tricky thing to do because sometimes you don't get the best quality and you'll need to determine how much or what is the size of these slices. So if I try to do automatic, There you go, you can see it is kind of sliced, but I cannot add, for example, one part of this or a small square from these pieces. So what I'll have to do is I'll have to go ahead and choose instead of automatic grid by cell size. And I'm going to use, Let's first of all try 64 by 64. When I slice this, there you go. You can see now we have adequate slices, but they are not good enough because let's say I want to draw this, I need to pick these four slices and you see that this one is not alone. I'll have to choose these two. So we need to make it even smaller. And I know the size. It should be, I believe, 16 by 16. And if I slice it up, There you go. You can see that I have a lot more control over how all of this works. And you can see how this one is sliced up, how all of these are sliced up. They are good enough, not perfect, but they are good enough, I believe maybe if you have the skills, you can go ahead and added them yourself. See what works, see what doesn't. But I do recommend you keep all of them 16 by 16 and you'll see why in just a bit. So I'm going to apply this. And obviously if you downloaded your own sprites, then you will have to, of course, find your own size of slicing. And for some reason today unity is extremely slow. So I've applied the changes, I've sliced everything up. So now when I go out from the Sprite Editor, there you go. You can see all the tiles. Now, what is the next step? The next step is to go ahead and add them to the Tile Palette. So now we have sliced up everything. The next step is to create the tile assets and have them in the Tile Palette. So what I'm going to do is I'm going to pick these sliced up Sprite and I'm going to drag it into the nothing. We need to first of all, create a palette. So what will be the palette name? Let's just call it the main catacombs. Catacombs, that's how we write catacombs create. Where should we create this? Well, you can add it either in the sprites or you can go ahead and create a new asset in here, which will be the file set or tile palette or whatever you wanna call it, enter, select the folder, and there you go. Now you can drag this. So you can drag the entire image, so drag it into the tile palette right here. Where do you want to save it? Of course, this is also your choice, but I will do is I'll go into the tile set in here, and I'll call this the File Assets folder. And let's just keep it in the sprites because we have already ignored it. And I think it's better to ignore the tile sets because already they are dependent on the sprites. So it depends on you. Maybe if you want to keep them, if you want to allocate a bit more resources in your commits, I recommend you do that. If not, I'm going to select this folder. And now you can see that the sprites are being converted into tile assets. So I'll use the power of editing and I'll do this in a second. Oh, okay, welcome back. So now we have everything set up. If I make this tile palette a bit bigger, there you go, you can see all of the sprites that were initially here are right now. Here. Now, you may have encountered a lot of problems here, especially if you try to do something different than 16 by 16, you'll notice that they are all on top of each other. It's a bit of a tricky thing to get a hold on. What I recommend is always have all the sprites sliced up the same size so you don't have any confusion and drag the entire image, not every single 11 by one. So now we have this. How do we start drawing? Well, you can see that we have a palette, we have the assets, but the active file map is nothing. So what we're going to do is I'm going to right-click in here and I'm going to go into the 2D object. So I've chosen the hierarchy to the objects, and you can see that I have the option to create a tile map. And I have many options. I can create isometric, rectangular x, ordinal, and et cetera. But I'm going to do is create a rectangular shape pile map. And you can see immediately that I have an active tile map right here. And what I can do is I actually can duplicate this and have a second tile map. And I can call it, for example, the ground. And I can call this one the walls. And now I can choose between walls and the ground. And why is this important? Because later on we will need different levels to our game. You'll see that in the next video when we start adding colliders and et cetera. But for now, what we're going to do, we're going to save the sample scene. And I'm going to go into the scenes folder. And you can see this is the sample scene. I will call this the maybe test one or something or you can call it level one, whatever you want. I'll call it the best one. It will ask us to reload. Reload. I'm going to I'm not sure. Let's keep the grid right here. And I'm going to duplicate that one. So now we have this tool. Let's go into test2. You can see the name of the scene change appears, so it was test one. Now it's two. I'm going to delete the background. So now we have the player and the skeleton just floating in mid air. And now what we're going to do is I'm going to select the grid, I'm going to choose the ground for now. Let's keep everything on the ground and I'm going to start drawing. So what should we use as the ground? You can see that this is the, and I recommend that you go look through the images. I have left you the examples that you can follow. But for now, first thing first is we are going to draw the ground. We can choose from one of these now, obviously it's not very right. But no worries. Let's talk about a couple of tools that we have in here. So first of all, whenever you want to pick, make sure that you know which tile map you're on. You'll know why in the next video. Why is this so important? Choose one of the tiles. So I'm going to choose these four. And now you can see that I can simply click in here, but they are very small. So what we always do, we'll go to the tile set, will go to the image that we've used. And we are going to end the Inspector. Let's make it 50. Apply the changes. Let's see how big that becomes. Okay, so it's not enough. Let's make it 16. Apply the changes and these should fill up the entire square. Okay, there we go. So we change the pixel per size. Pixels per unit, maybe even be, we should make them even bigger because you can see right here, there is a small thin blue line which we don't want. So let's make it around 15. Apply the changes. And there we go. So now we don't have any more of these outlines. Okay, great. Let's make sure that they are point filter apply. So they will become much more crispy. Okay, there we go. Now back in the Tile Palette, Let's zoom out. What do we have in here? We have the ground, we have the different tiles, and we have the tools appear. So if you hover over them, you can see what each of those tools mean. This one for the select, this one can be used for the move. But the most important three, I believe, is the paintbrush. So the paintbrush, how does it work? So for example, whatever you want right here, you get the paintbrush and now you can paint it on your scene right here between the squares. For example, you can use also this paint, a filled box. So what you can do is you can choose one of those or you can choose multiple obviously. And then you can create this kind of look, can create this whole map using this one. So it's a very powerful tool to draw faster. So there you go, you can see, you can create a lot more, a lot faster, but it's not very precise. Then what else do we have? We have the peak or marquee select. I've never used it honestly, the flood fill never used it. And the arrays, which is very important. So how do you do this? You've just like the arrays and if you want, you can choose a big square, select the eraser, and there you go, you can remove everything. So with that done, I hope you understood what we did. I hope you understood how we converted from the sprites to the slice, to the tile assets, to the Tile Palette. And finally how we are creating the tile map. But for now, I'm going to leave you to your own creativity. So pause the video right now and try to create a pile or tile map or any map that you want. But for now, don't take too much time because in the next video, we are going to create two different tile maps. And using those tile maps, we are going to understand why we need different tile maps for different levels. And again, so that none. I hope you enjoy it and I'll see you in the next video.
34. Tilemap Colliders: Hey, welcome back, my fellow game developers. So as you can see what I've promised you that we are going to make it a little bit better. I've delivered on my promise. Now when we run the game, you'll notice that there are no blue spots, no blue lines. And if I walked through, I tried to walk through this. It's a wall. If I walk up, It's a wall. Obviously, we have a couple of things that we can change. If you look closely in Scene mode, obviously, it's not perfect yet, but you can see when I shoot a wall, it is a wall from the back, from the front, and the enemy still chases us. Everything is good, everything works fine. So let's not waste any more time and let's get started. Oh, case. So now that we have set up everything time to use it in a proper way. So the first thing that we need to understand is the tile map and what the inspector of that tile map does. So we've created the walls, the ground, and you can see that they also have, each one of them has a tile map component and a tile map renderer. Because the tile map renderer works just like the sprite renderer, we can also choose a layer. So for example, I can go to the ground and choose the layer background, the walls, the layer background. And I can make, for example, the walls one and the Ground Zero. You can play around if you want. You can even create your own sorting layer depending on how many things you want to be in the foreground or background. So I'm going to, first of all, delete everything or erase everything, should I say? So I erase everything and you can see why is this not getting erased. So let me just make the screen bigger. Why is this not getting a raise? Well, because we are using where is it? The active tile map is the ground. So we can only delete things that are on the ground. If I choose the walls. There you go. I can now delete it because when I created this, I used walls. So let's just do a little test. Now that we have the sorting layers setup, I'm going to create this big square right here, which is, oops, not the ground, excuse me, the ground. And now I'm going to create this little ground right here. And now if I go into the walls and let's go ahead and add this one. So you remember why did we have the blue lines before? Because we had these outlines right here. You can see that they are transparent, so they only reflect what was behind. So now because these are, let me click on this one. So now because this is the walls and the walls are rendered in front of the background. When I put them here, there you go, you can see that there are no longer any blue lines behind which represent the color of the background of the camera. I can also do this right here. So I'm going to select them. And you can see because they are walls, I can immediately draw on top of them. But you can see right now to inconsistency, how do I, for example, drought is to have a continuous third wall and fourth wall. Well, in that case, we'll need to select something different, which is these lines right here. And now we can add the illusion or create the illusion that we have. Let me just create the illusion that we have these all connected together. And if you look in the game, if I run the game, Also, it doesn't matter. Let me just make this game window bigger. There you go. You can see how all of that looks at, looks as if we have everything normally setup and we can just run the game and walk around. And then you go, you can see that I can walk around on top of this. Everything works perfectly fine. But the problem is that now I can walk through the walls and this is usually not a huge problem, but having your player leave forever plus, plus when we are shooting, you can see that the bullets will keep on going forever because they are not interacting with anything. Or we don't have any more walls, they are not interacting with the walls. So how are we going to fix this? Well, we can go ahead and start adding colliders and all of that good stuff. But obviously this is not the most efficient solution of solving the problem. What we can do, on the other hand, add something called a tile map collider. So if I go onto the walls, and that is why we've created walls, not just the ground. Go to the Inspector. I can add a component in here which is going to be the tile map collider 2D. And there you go. You can see that now everything under the walls has the green collider on him. And you can see that they are intersecting. Why? Because we made them just a little bit bigger than where's the picture? There you go. We made them just a little bit bigger than 16. We made them 15. If I make them 16, I think we can start seeing cracks in between each sprite. Now you know what? It looks good enough. I think there is no discrepancy in. Okay, so let's keep it at 16. So I changed the pixels per unit to 16. And now if I choose the walls, there is still an intersection, but that's okay, that's not a huge problem. Let me just demonstrate that this works. So now if I run, you can see that I hit a wall and I cannot go through it anymore. Excellent, everything is working. They are on the default layer. You can change the layer if you want also of each tile map. But now there is something that we need to add this, adding this glider is not enough. What we do is we need to add something called a composite glider. Why? Let me show you how that will change everything and you'll understand by yourself. So now that I've added a composite Collider, you'll notice that I also added a automatically a rigid body. So a rigid body is required when you have a composite collider. And if you look right here in the tile map collider, you can see that we have something called used by compass. If I turn this on, there you go. You see that we no longer have a lot of gliders. That means just do that again, uncheck the US by composite will notice that we have a lot of colliders. When I do use the composite, we only have one collider on all the shapes. This is extremely helpful. I cannot emphasize the fact how much this saves energy and computational power from our compute. This will allow us to create a single collider around a lot of entangled gliders. So make sure that you add a composite collider 2D with that. Understood. Now, it's time for a small challenge. Or before we do that, I just want to run the game to maybe make you understand what the challenges. If I run the game. And there you go, you can see that something is definitely seriously make this part of your game some, at some kinds of mechanics of the game. So the player plays around with the game and with the map. So hey, the, let me just zoom out a bit so you can see that the map isn't behaving completely how it should be. I think that's an understatement. Let me just try to push that off and there you go. So now we no longer have a map and it keeps falling so well that understood. Out of the way, that thing we'd think I'm not fix the problem was the following map. If you don't want any hints, you know how to fix this. Pause the video right now, go to the challenge. If not, check in the inspector on the tile map, you'll see a rigid body. This means that we have a gravity being applied. Either remove the gravity scale or even better, you can make the whole object either kinematic or static. I would recommend static because static means it will never move and obviously our map shouldn't move unless you want to, I don't know, add the rotating map. Weird thing that we just experienced. So with that done, pause the video right now, go do the Chaldean. Okay, welcome back. So how did you get on with that? I'm going to go ahead and whereas the walls rigid body make the static, run the game. And now we should see that there is nothing falling anymore and all the colliders work perfectly fine. Okay, with that done, I hope you enjoy it. And in the next video, make sure to create some kind of map. It should be bigger than the camera because we will be implementing a fall camp. So why is that? Well, if I let's say add a bit more ground here, make sure that we have the ground selected. I add the ground. Let's see if I make this a huge ground. I run the game. I want to be able to walk around our map and runway, just like the game that we saw in the beginning. So I want to have the freedom to walk around. But obviously, if I look in the game menu, I cannot see anything. I can see it in the scene mode. I can not see it in our game. Why? Because the camera right here, you can see, let me just this is the camera, this is the main camera, so we will have to move it around so we can always follow the player. And that is something that we'll learn in the next video when it comes to cinema cine, I hope you are enjoying, I hope you are always committing your changes. And I hope you've left a review because it helps me out a lot. See you in the next video.
35. Creating A Bigger Room (Cinemachine): Welcome back, my fellow game developers. In this video, what we've done is when we run our game, you'll notice that as we are walking around, we can go through all the room and the camera keeps following us. And we do this using something called the Senate machine, which is an extremely powerful tool that we are going to be implementing in this video. So let's not waste any more time. And let's get to creating these cinema. Whoo, Look how cool that is now, our game is much, much nicer, feels much more professional, doesn't it? When you have a camera following, Let's not waste any more time. Let's get started. Okay, so welcome back. As you can see, I've created a sort of a, kind of a map. I think that just make this bigger me. Please undock it, please. Okay, there you go. Open this up. Okay, So this is the level that I created. It's not much, but it works. So as you can see, I've added these couple of windows. I hope you took the time to play around and understand how all of this works. It took me around two to three hours of playing around, making sure how everything looks and works and so on and so forth. But this is the result that we have. You can see I have a couple of, okay, this is a mistake right here, for example, you can see I've added a lot of black and the background. You'll know why in just a bit. I've made the walls right here that we cannot cross. And I've made a couple of walls right here are infused a couple of things together to create all of these. So a couple of black walls, a couple of natural causes, scholar, even reddish walls and so on and so forth. But the problem is if I make this window smaller, put it right here. Phi 12, run the game. So there you go. If I run the game, I can walk around and this whole map, but I cannot see myself in the game view. So imagine if we didn't have the scene view, how would we be able to see ourselves? And actually you can test it out. You can maximize on play. So when we run the game, we will have a full-screen. Okay, so now I want to walk away, but there you go. You cannot see anything. Whereas the player, please, oh, there you go. There we are. And now we try to shoot. There is a bit of a delay, a bit of a lag, but no worries about that. Anyways, how are we going to fix that? Well, what we can do is we can go ahead and attach the camera to the doom player and make it a child. And remember that the camera or a child always moves with the player. So if I run the game right now, there you go, problem fixed now we have a fall camp. I hope you enjoyed the video and I'll see you in the next one. I'm just getting. And what we're going to do is use a much more sophisticated technique in order to have our follicle. So I'm just going to remove the main camera from the doom player, child or parent, whatever you wanna call it, save that. And then we are going to go into the window. The package manager wait for Riunite to fetch our packages. And any day now. And in here we are going to go into the Unity Registry and we are going to find this machine right here. When you find some machines, simply click on Install, wait for it to install. And when it's finished installing, you can read more about. So you can see right here it's a smart camera tool for passionate creators. Very nice. So we'll have this extra tab appear, which is the cinema machine. And you can see that we can create a lot of things with cinema machine. And the one that we really want is to create a virtual camera. So let's do that. We're going to create a virtual camera. You'll see it right here. The C and V Canvas just call it the virtual camera. Hit Enter. I'm going to set it right here next to the main camera. And on the main camera, I'm going to go into the inspector. And immediately I can see right here that we've added something called the cinema machine brain. And if you still don't have this component on your camera, make sure to add it because this is what will allow us to use the virtual camera. So what is the virtual camera? You can see that it's just a transform with this component, which is a center machine virtual camera. Keep this in mind. I'm going to open up and you can see that we have a lot of things that we can add, we can change, we can play around. I'm not going to go into every single detail in here because there is a lot. What I'm going to do is I'm going to first of all, right-click and the hierarchy. And I'm going to actually set this all 200 000. And you can see that we have something that just disappeared. And what seems to be the problem in here, virtual camera. So the main camera. Okay, so if I go into the 3D mode, you'll notice that when the z is 0 means it's in front, so we can't, we actually are looking from behind. What I need to do is just move it slightly. Back so we can see the view and you can see the camera in 3D right here. These white lines represent what the camera sees. I'm going to go back into 2D, and then I'm going in the virtual camera. You can see right here that we have an option for the follow and the object that the camera wants to move with or the body and target. So what is the object that I want to move with the doom player? So I'm going to add the doom player, and I'm going to save all of that. Let's also make sure that we have these cameras nicely feathered. So I'm going to create an empty game object, reset its position is going to be the cameras. And let's just make sure that these two cameras are a child of the cameras. And now we have them set up properly. Save that when I run the game, There you go. You can see that now I have a very nice follow cam that follows the player anywhere he goes. But there are a lot of things that we can change using this camera. So I'm going to first of all, get out of clay mold, make sure that we don't maximize on play. And I'm going to go into the virtual camera. And what are all of these things right here? You can see that we can change this from transpose to other things. As I've said, Go and look up what all of these things. But one of the things that we mainly want to change is decomposed right here. And you can see the look is required. You can choose something different. You can choose to do nothing with the aim. These are all options that you can use. And in here you can see that we can change this to framing transpose. So change the body to framing transpose. If you add the lookahead, if I add the dome player and the look ahead, look what changes. So now when I play the game, you'll see something just a little bit different. I think know until now seems to be the same. You can keep the look ahead. You can change, play around with the options. I'm just going to show you the main things in here. So in the body, first of all, you can see the windows right here, the different colors in the game. It's because the game Windows guide right here in the Inspector, I can turn them on and off. So what do we have? First of all, we have the look ahead, we have the lookahead smoothing, we have the x damping, damping and so on and so forth. I don't even know most of the things what they do exactly. But a very good trick that you can do is you can actually go ahead and increase this to its maximum and then play the game and see what happens. So as you can see, yep, there we go. So the camera is faster than the player. And this is because the look ahead is very strong. So if I smooth down the look ahead, you'll notice that as we are walking the cameras starts moving in front of the player and it's represented by this yellow small dot. And here you can see that the dot predicts where the player is about to go and sets the camera to go there just a little bit faster than the player. If I set it to 0, it will simply move with the player as he's going. We can increase the smoothing a little bit increased look ahead smoothing. So now you can see it's a little bit smoother, a little bit nicer. And that, There you go. What else do we have? We can ignore the y, so that will change the way it looks in the y direction. And let's see what else do we have? We have the x damping, so let's put this to 20 and see what happens. So there you go. You can see that when the player hits the red side of this square or rectangle, you can see that then the camera starts moving and if not, it's slowly, slowly goes to the x, or you can set it to 0. And in that case, whenever we are moving, it's immediately following the layer. Let's set it back to one. Let's see what else we have. We have the y damping, V, z damping. Let's see, we have the screen x. Let's see if we move it so we can play our game with the player being able to the right. We can set it to be in the middle, or we can set the widescreen to be at the bottom. So there you go. We have the camera distance, which is a very nice touch, and it's currently not working. Maybe it's because the camera right here should have a bigger size. I'm not sure what the problem here is. And let's reset it. So back in here, reset everything. So let's keep it at 10. We have the dead zone width. So if I increase the dead zone width on the y and on the x, look what happens. If I move up and down and left and right, it stays in place. And if I go outside the bounds, then we start going while the camera starts going with the player. So this is also something that you can tweak and play around. And actually I'd like to make it just a little bit small. So for example, if I walk around, nothing happens and then when I start moving, the camera starts following the player. Okay, let's make it around zero-point two by 0.2. And there we go. So we can move a little bit around. But when we go outside the bounds than the cameras starts following us. Okay, Very nice. What else do we have? We have the zone depth that's tried to put it to 100, see what happens. Not sure what exactly does. But let's keep it at 0. See what happens now? Yep. Oh, okay. Seems to change a lot. I think Let's put it to 20. Nothing, nothing happens. Let's keep it at 20. The soft zone width, I think the South Zone is the red square. So if I set it to, let's say, being small, what happens then? I can't even get outside because of the heart or the dead zone width. Okay, no worries about that. Reset the position. Let's see we have the bias. So what happens? Okay, So now the red zone is biased towards the blue zone, and you can go ahead and search all of these yourself. And the only thing here is that virtual camera as a whole world by itself. So if I want to go into every single detail, I think I need a whole section by itself. But using Cinema machine as an incredibly powerful and one of the most modern tools that we have in our possession. So I do recommend what you do is play around with all these settings. See what works, see what doesn't. But remember as you saw right now, all the changes that we made went back or got reset. Why? Because all the changes that we make inside of the game mode are then reset when we stop playing the game. With that information, I recommend that you go through Unity's documentation of the Senate machine, see what happens, see what you can use. So for example, we have something called the noise, which we will be using in a couple of videos to make our shooting mechanics just a little bit more impactful. And was that done before I go, let me issue you a small challenge and your challenge is going to be to set up your machine. So play around with all the settings you have on the same machine. The best way to know what each thing does is by taking it to the max and see what happens then. Well, that information, I hope you enjoy it. And in the next video, we are going to be creating the doors or whatever you wanna call them, you can call them doors, or you can call them the places where we move from one level to the next to the exit levels, whatever you wanna call them. So well that done. I hope you enjoy it and I'll see you in the next video.
36. Creating Closing Doors (foreach loop): Welcome back my fellow game developers to a brand new video. As you can see, we've added a couple of rooms to our game. We've added a couple of paths to our game now our level, or actually I should have said our level. Now our level looks kind of really nice. You know that Cinna machine really did add some flavor to the game, which gave us the ability to run around and make bigger levels and more interesting ones. But that's not the only thing that is very cool. If I run the game, look at the scene, you can see that now we have doors that are blocking our way from moving. And these will be the doors that we used to go to the next level after we kill our enemies, obviously we need to kill our enemies. But this is not of our concern right now. Later on it will be. But for now, let's not waste any more time and let's get started. And we will be learning full of amazing stuff, amazing 0 case. So we are going to go ahead and create doors. What are the doors? I've created the door's already, you can see them right here. I'll provide you the door and the resources, but it's fairly simple. All I did was cropped out the where is it? The main photo? The main picture. And just use the door that was already available there. So now we can go ahead and add the door or let's add it in here. So we have the door, we set the layer maybe on the player or we can set the layer on the, on a separate door. And what those doors is going to do is it's going to go ahead and close these two pathways that I've also created and I haven't talked about those. So what is the point of our game? How are we going to transition from level to level? Just like we saw in the hades game. Every time we kill all the enemies, we will have these two barricades. We will have this door and a second one. So here two doors. And when we kill all the enemies, we are simply going to deactivate the doors. And this will allow our player to move through and to the pathway where he will find two portals here and he can go through them. But let's not get ahead of ourselves. Let's first of all start off by making sure that these doors work and what else wanted to tell you? Oh, okay. So if you go into that tile palette right here, you can see that we can add these two anchors or wherever you, these pathways here. But the problem with these pathways, if I click on the grid and wall, you can see that they will also stop the player from moving. So what do I mean? I've made sure that this is the ground and these are the wall. And if I, for example, run the game, you'll see that I can walk around everywhere. And if I go through here, you can see that I can no longer move. And that's because we have a collider under and that is something that we will have to fix in order to move through them, obviously. So how are we going to fix this? Well, if we go into our tile set right here, the cones, if we scroll down, we can find the image right here. Go into the inspector, select the Sprite Editor. Open this up. If we go from the Sprite Editor to the custom physics shape, Let's click in here. You can see that if we, Where is it, ok, so the anchor and here, if we click on one of those, we can generate. And now we have the anchor points of the physics. So this is how the collider will be rendered on this sprite. So I'm going to make sure that it's very or not even tiny. I'll make sure that it is about 0. So asset this like this, like this, and finally, lie this. I will apply the changes and wait for just a second. It will take a bit of time to change the colliders and the game Also, we might have to draw these price again. Okay, great, So this one is finished. Let's generate on this block. Also. Move it here. We don't need to move it down like the one in the middle. We can just move it to the right. Apply. Now the collider will only be on this side. And finally, find any, any day. Now, we can click on the last one, generate OK. Not last one. Actually, we still have two more to do. So. Now that you know how this is done, I'm going to do the one above and I'm wound to obviously expect you to be doing this at the same time with me. This is not a challenge. This is just us making our game much better. So generate, generate, move this to the left, I apply the changes. And for some reason it is extremely slow. I thought it might be just a little bit faster. So come on, Generate. Move this here. It's like that, just like that. Apply. And I'm so excited to show you how this is all going to work. Final one, generate how boring is this? Yep, it is. I know it's because of the waiting time that we have to wait for unity to generate physics. So I think we should have moved this down also. Let me just see something also should have been moved down. Just like that. Now we apply the changes. Now if we go back, maybe we should draw them back. Maybe we shouldn't. That's the problem with limited. If we go close when it unity than open it, maybe we won't find this problem. So let's see what we have. So there you go, the walls are still there, but if I choose this another time, and I draw that, Let's say here. Okay, So obviously there is something very wrong here. Oh, okay, so we had a small technical problem. Now if I click on the walls, I thought for a secondary didn't work, but it did. Now if you see the walls, the collider is no longer here and just on the sides that it's intended to be on. Now when I run the game, I look here. If I move up, there you go. I can walk through them. Now, obviously there is a problem which is that I'm walking over them. We will fix this in just a bit, but for now we have this working. This should maybe be on a different layer. No worries about that. Let's continue on. What do we actually need to do in here? And we need to add the two closed doors. We need to get a reference to them and we need to make sure that whenever the player is in the room, we want to close them off. So let's get started. The first thing that we want to do is we want to go ahead and add the two doors. So I'm going to go into the doors and I'm going to select in the inspector in here. And I'm just going to add it in the hierarchy, create the object first Gore fits here. I'm going to go ahead and set it as the Charlotte set it as the player. No worries about that. We'll set that as the layer, layer. So this is the door one, and I'm going to duplicate it. This is going to be the door 2 and I'm going to move it to the other side. Or you know what, let's not duplicate this right now. First we need to add a box collider around because we don't want to play or to move through this door. So I'm going to add a box collider 2D. And let's see how that box looks. Okay, I think that looks good enough. And I'm now going to duplicate this door. This will be the door 2, and I'm going to move it right into here. So now these two pathways are closed off. I will run the game. I will try to walk through the door and there you go. You can see that I cannot walk through. Excellent. Now, what is the next step? The next step is I'm going to prefab this. I'm going to go into the prefab, right-click. Create Folder, room, or rooms or wrong. This will be for anything that involves a room. And I'm going to just prefab this and I'll call this the simply the door. There you go. And now I will just add this again at the prefabs. So it's attached to the prefab. So if we ever change something, that changes are happening for everything. Okay, so let's go ahead now and create a game object in here, which is going to be called the room. I'm going to reset its position. And this room will have a child on it called the doors. And this will be the object that will hold all the doors that we have in the room. Now we are going to create a new script in here. And we're going to attach it to the room, and this will be the room manager. So scripts, right-click, let's create a folder for the managers. And in here we are going to create a C-sharp script for the room. Manager. Hit Enter, wait for it to compile. No, thank you. I don't need it right now. And wait for it to compile. Okay, So rooms, Let's add the script in here. Let's open up the room manager. And what do we need in here? Well, we need to have an, an array of game objects that will represent the doors that we want to close. So the game object and array, which is the doors to close. Save that. And now what we want to do is we want to create a huge trigger around the entire map. And then check when the player is inside this trigger room. And why do we need to be inside the sugar room? Because maybe. For example, you want your game to have just a little bit of a bigger level. Maybe when you get through some kind of doors, the doors close and then the level starts and until you kill all the enemies, then you can move out of the room. So that's why I wanted to go with this stop process of having doors close only when the player is inside the throne. So let's first of all add these two doors on coming to lock this down at the two doors to the doors to close. There we go, save that. And now I'm going to go back and my script. And in here I'm going to create a boolean which will be a serialized field. And that will be the close door on layer. Enter. Save that. And what are we going to do in here while we are going to go through all of these on the, on sugar. Enter. Okay, this should have been too deep. And actually let's create the entrepreneur enter to the immediately. And in here we are going to check if the collision.com tag is the layer. Now I'm going to cheat because I already know how player is written. And we are going to check if closed-door on player enter. Okay, So now we want to go ahead and close our doors. Now we have this array right here. What should we do? Should we go through all of them and close them one by one? So I should write door to close, for example, 0 dot active to true, and then do door one, door to door three. We could do that, but there is a problem and we don't know how many doors we will have. So what we can do is we can loop through them. And one of the first full or the first loops that I want to teach you is the for each loop. So what is a for each loop? Let's see how that structure works. It allows you to go through each thing in a collection of things of the same type in an array. So what do I mean by things? So let's say we have a type which in our case is the game object. The thing is the door in the doors that we want to close. So what we do, just like it says, for each door, which is of type game object in the doors to close, we can go ahead and do stuff with it. So for example, we can access some method on the thing. We can use the thing in some other method and we can execute other things. So was that explained what we want to do? Our goal in this video is to go ahead and access or loop through using the For Each, we want to loop through all the doors and make sure that we set all of them active to true. So as soon as the player enters the room, everything will be closed off until he kills all of the enemies later on. So with that explained, I am going to issue you a challenge to go through all the doors and close them. So create a for each loop that goes through all the doors endorsed closed. Set, each door to active. And I'll just give you a hint. Use the set active to true. I've already showed you. I tried to give you as many hands as possible. I know this is maybe the first time you see loops. This is a great opportunity to try to see something for the first time and tried to implement it in front of you without me teaching you that beforehand. I know it's a bit hard. I would drink it as one of the hardest challenges, but don't worry about it. Take your time. Pause the video, try to do your best and I'll see you in just a bit. K, How did you get all of that? I hope it wasn't too hard. So what we're going to do is we're going to create a for-each loop. And as I've said, we are going to go through the game objects. And we can call this whatever we want the doors, the doors we can call it ABC you whatever we want in doors to close. And what we'll do in here is we'll simply access the door, dot set active. True. Save that. Back in Unity. We are going to go ahead and activate these doors. So let's say they are open. First thing we enter the room. Okay, Also, I should not have clicked on here. I'm going to turn on back the room. So what happened here? And that's something that I always fall to as I've had the room and I've had it locked in. So I chose the two doors and clicked on this one. So I turned off the room. Actually, you can see right here whatever you choose, it's still the room. So what I'm going to unlock this shows the two doors. And I'm going to. Go ahead and turn them off. I'll go into the room. I'm going to add a component which will be a huge box collider. Now, the only problem here is that maybe the collider will check for the player and when he actually hasn't yet entered the room. So let's go back in here and see on Trigger Enter. When we enter the trigger, that's when this method will be called. So let's see. I'm not sure, sometimes it's because of how the script is executed. So FVA room script executed first, then we will have the room, and then we will have the player. So this way the player actually enters. So I'm going to save this. I'm going to, okay, so this is a trigger when I have an error. Okay, so this error is nothing to worry about. Run the game. Okay, So the doors didn't close. Let's choose to close the doors on player enter. Okay, So there we go. It worked. So I hope you understood what my concern was. I sometimes this is what happens when I was first creating this game. This is what happens. So I had to create something different. But I noticed that sometimes it works, sometimes it doesn't. I just wanted to let you know beforehand so you don't think Oh, Michael, every single time a mistake. Now actually, so I hope you enjoy it. I hope you did the for each challenge. I know it was a complicated, but this is a good way to practice your game developer skills. So I'll see you in the next video where we will be catching all the enemies that we have so we can kill them and then open the doors when they die. So I'll see you then. Make sure to stage all your files. Sorry for that. And make sure to leave me a review if you haven't yet. It helps me out a lot. Thank you. See you next time. Hey, Michael here from the future, you thought you got rid of me, but you haven't. When we run the game, I noticed something that you can see that I was wondering why the skeleton wasn't shooting us and if I tried to shoot, you can see that immediately. I have the bullet Impact effect. What's the problem here? Well, because we are sitting inside of the room collider, we are shooting and it's immediately interacting with it. So the problem here is obviously it's the layers. So what we want to do is we are going to add a layer. We can call this the untouchables or whatever you wanna call it. I'll just call it the room layer. Hit Enter. And I'm going to go into the matrix and here project settings. And I'll make sure that the room layer doesn't interact with the other room layers with the enemy bullets. And maybe we can even make sure that they don't interact with anything. Honestly, we don't need them except for the player. We want to go ahead. But for now, let's just make sure they don't interact with the bullets literature on if we do find a problem, this could be problematic and know what. Just for that reason, let's turn everything off, save that. Closed down from the game. The good doors should close. And if we shoot, something is still wrong. Oh, obviously we need to set it as the room layer yes. Changed children if you want to run the game or no, maybe the children shouldn't have been changed. Okay. So the door closes and we can shoot normally. Maybe the children shouldn't have been changed because I don't want the doors to be affected. Let's change this to default. Yes. Changed children. Okay. So now we can shoot the doors, but we can shoot around should the walls, should the doors. Yep. Everything is working fine. So from the future, I'm leaving. See you in the future future.
37. Catching All The Enemies (Lists) : Welcome back, My favorite game developers. As you can see now we have three enemies, x2, very scary. Let me maximize on play. And we have a wrong with not only have doors, we also have enemies, which are three skeletons. These skeletons are the guys we need to kill in order to open the doors. But for now what we do is we just catch them in the act using a list. So I've maximized on play, I should not have done that. I'm now going to run again. If I look in the rooms and today now, I can see that I have the enemies right here and I have the two doors, but the magic is that we caught them without adding them manually. You can see that it happens automatically using contact filters, using lists, using a lot of cool stuff. So let's not waste any more time and let's get started. Oh, case. So now we have the doors closing. It's time to start opening them up. How do we open up the doors? The way we will allow them to open is when we get rid of all the enemies that we have in the current map. So what we're going to do is we're going to create a variable which will first of all make sure that the, all the doors open when all the enemies are killed. Maybe just maybe the level that you created doesn't have to kill all the enemies. Maybe it's a level for the shop, for example, just like we had in Hades. So that's why we'll add this variable. So let's get started. So in here we have the enemy controller. As you can see, I've organized everything. Anyways, let's not waste time because in the wrong manager, we are going to add the volume right here. And that is to open or open doors. When and and me is dy. There you go. We save that. We'll go back in here and we'll make sure to set this, this particular room to true open when enemies die. Okay, great. Next thing we need to do is we need to get a reference of all the enemies. Well, how do we do that? We will have obviously multiple enemies. That means we will have to most likely get some sort of array. But why we don't want to use an array? Because when we have an array, how am I going to demonstrate this? So for example, you can see right here, if I click on one of those arrays right here, and if I use the minus, this will simply remove the door from our game. It does not actually delete the entire element. So we still have two doors right here, but one of them is missing. Now when it comes to the door, this is not a huge problem because we already know that we will have only two doors. We are not going to count them. We are not going to get rid of them. They are there, they are static, they are not moving. But when it comes to the enemies, what we want is we want to get a reference to all the enemies in the map. And then as we slowly kill them one by one, we are going to count them. And if we find that all of them have disappeared, then we will open the door. And this will cause a problem when we are using a rate. That's why we are going to use something a bit better, which is the list. So a list is just like an array. It represents a strongly typed list of objects. And by the way, this is the documentations of Microsoft for the C-sharp, not the Unity documentation, but it's pretty much the same. You can find examples, you can find what ever you want and lists the great thing about them as they are much better at sorting, they are much better at sorting through and manipulating. So what we can do is as each enemy dies, we can remove him from the list without worrying about any kinds of error, the list will adjust itself. So that explained, I will let you find the list, the class, find the documentation of this. And I'm going to issue you the challenge again just like the last challenge I know. So annoying when you have to do something by yourself without seeing what I did first. But it's time to grow up, time to become real game developers, look for problems and do things that we have never encountered before. This is the beauty of it. Look through the documentation and find how we can instantiate a new. Let's create a serialized field list. We want to see the list in the inspector. Later on, we obviously need to make it private, but we want to check if everything is working. And finally, the type of the list will be a collider to D. So find the documentation, go through it, create a new list, which is the list of enemies of type collider 2D. I'll see you in just a bit. Okay, welcome back. So how did you get on that? I hope you're not too angry at me. Anyways, let's go ahead and create a serialized field. And this is going to be a list. And as you can see, well, you saw in the example, let's just double-check and see how it's created. So you can see it needs the systems dot collections, which is right here. Oops, sorry, which is right here that allows us to create lists. Let's go see what we have in here. Let's say I'm scrolling down, how do you create lists, please? How do I create a list? Where is it? Where is it? Okay, So there you go. This is how you create a list. So we need to type in the type of this that we have inside these two unnatural, what they're called and say that it's equal to a new list. So back in here, the type collider 2D, I've already told you that. And you'll see why it's a collider 2D in just a bit. So enemies, and it's equal to a new list of Collider to the enemies and we close it off with these two parentheses. Now, obviously it took you just a little bit more time to find everything, maybe look through the documentation, but that's good. Now you can say that proudly that shoe look through the documentation found out by yourself how lists are created, and this will give you much more confidence as you move through your game development journey. I'm not always going to be here. Sometimes I won't be sometimes I'm don't have the time to answer you. So this is a great exercise. I love these exercises. I hope you're not too angry. Let's continue on. What do we need to do right now? We need to go into the rooms right here and we're going to create a new empty game object, which will be the enemies. And this will hold all the enemies that we have. The skeleton enemy right here that C does he need anything? Also the shooting range. Let's make it a bit smaller so we don't want the enemies to shoot us. We know everything works. That's good and we are going to make their health. But smaller, maybe three. So he takes three hits, apply the changes. And I'm going to move him to the enemies. I'm going to also go into the Prefabs and add a couple of enemies. And here, so the enemy, the skeleton will adding another one. Here. Another one, so great. Now we have three skeletons roaming around that will chase and shoot the player. We will save that. Okay, great. Now the next thing that we want to do is we want to get the, a reference to all those enemies and be able to count them. Now what we can do, obviously, as we can go ahead, select these three and drag them in here and set them manually. That would be good, that would be working. But we want to have a more dynamic way of accessing these enemies. One of those dynamic ways is using find objects of type, where we go through all the objects and we find all of them. This is also a good idea, but it is very taxing on the system. You have to go through all the elements, starting from the camera and down until you find all of these enemies of type or object of type. We're not going to do that. Instead, we are going to do something much more complicated at first, but much more effective and less taxing on the system. And it's a great way to learn something very new. And we already have the, let's say the infrastructure for that established by having the colliders of the enemies and the collider of the room. So what am I talking about? You just saw it. It's the collider, 2D overlap collider. What does this do? It takes in a contact filter, which we will look at in just a bit. And it gives us the results of all the collider 2D objects. So a contact filter used to filter the results differently. What do we mean by that? We mean that we have the collider of the room right here. So we have the collider, we have all the objects inside. We don't want to catch the player, for example, we are only interested in the skeletons. So we need to add this contact filter that will understand how it's used. But let's continue on. So contact filter and the result, that result, It's the array. To receive the results. We can use an array, we can use also a list. Don't worry about that. Let's continue one. What do we need? So it returns the number of results if we want a return, and then we are going to check what is a contact filter. So I'm giving you all the ways of how we create. So honestly, I had no idea what a contact filter was. This is the first time I encountered when I was creating this game, even though I've had a lot of experience in game development, this is really the first time that I actually used it into the, so I went and looked for it. Okay, So look, we have a lot of properties. And if you go back, we can see right here results differently. And what else do we have? We have something called bi layer mask. I know what layer mask is, so I have to look and I find. Set Layer Mask, excellent. This sets the layer mask based on some kind of provided a parameter or something. Great. I click on it, I see contact filter, layer mask. I give it a layer mask. I know what the layer mask is and I'll show you how we are going to use it. But anyways, these are the steps that even I sometimes take. So don't think that NEW, don't remember everything and you should know, no, you should do your own research. Always look through the documentation and now let's go ahead and get started. So I'm going to go back in here and I'm going to create, first of all, a private collider 2D, and this will be the room collider. Save that. And then a, another private contact filtered to D and it's going to be the contact filter to D. I'll just keep the name as it is. So now and start, what are we going to do? Well, first of all, we need a reference to the room collider. So room collider is equal to get components. And it's going to be the collider 2D. Great, So now we have a reference to the collider on the room. Next thing we want to do is we want to get the contact filter 2D. And we're going to set the layer mask just like we saw. And what did we say we need inside of the set Layer Mask, we need the Layer Mask. How do we get the layer mask? Well, we know what layer is, but what is the mask? The mask is a way to let us say to convert, to understand what the layers are. So what can we do? We can use something called the layer mask. And we can use a method in here that says to get the mask. And how do we get the mask? We can get it actually buy the layers name. Great, so now we have access to the layer's name. And what does the layer, it's the enemy. And because this is a string reference, makes sure that shoe have potted correctly, go even copy it if you have to. But what's happening in here, we got the layer name. We use the get mask, which is a method available in the layer mask library. We use this whole layer mask and set the layer mask on the contact filter. Complicated, I know. And now we use the room collider, thought overlap collider. And in here, what did we need? We need the compact filter to the, what are the results? Where do we want to throw our results? And you can see right here the arrow, if you click it, there you go. You can add it to a list or we can add it to a collider 2D based on what we give it. So if we give it an array in here, then this result will be an array. But because we're giving it currently a list, this will be as a list, save that record. So again, let's go through this one more time. We created a contact filter. We understood what contact filters are through the unit documentations. We've added a collider 2D. That's very simple. We got a reference using the get component. We already know how we do that. We access the contact filter. We use a method called the Set Layer Mask. This set Layer Mask requires a, something called a layer mask, not just a layer, a layer mask. So what we do, we looked for get Layer Mask. And this will actually be a sight challenge to you. Go look for Layer Mask, get Layer Mask and stand how we found this method. So this is a whole different process. We use the get layer mask, which is part of the layer mask and Unity engine layer mask, and we use the name of the enemy layer. So now what happens as soon as this room manager starts? First of all, on Trigger Enter it finds the enemy. Second of all, it looks through all the enemies that are already here. And as I've said, there are many ways of catching the enemies. There is find objects of type. We can have used the entrepreneur enter, but I thought this is a great opportunity to learn about lists. Learn about contact filter in never know when. Sometimes you might find yourself in a situation and programming where you just can't do it without a contact filter. So save all of that. We go back into Unity and let's look at our enemies now as soon as we run, we should see the three enemies here. Hopefully run the game. There we go. Excellent. And you can see that we've got all the colliders of skeleton one, skeleton to and skeleton three, or however you want to call it. Excellent, We have a reference to them. So now the next step is to kill all of them and open the doors with blue that in the next video, make sure to complete your changes. Make sure to leave a review and I'll see you in the next video.
38. Opening Doors 00: Welcome back, my fellow game developers. In this video, we are making the game so much cooler. So finally, this video makes everything look amazing. So we start off the game. We start running around, oh no, there is a door. It's closed. Oh, no. Let's go to the next door. Oh, no, it's close though. There are three enemies in here. Oh, they tried to shoot as they try to follow as nope, we kill the first one. Maybe he takes a lot of it's the second one. How many does it take? One hit his dies and his pleasure, blood. We call this one. We tried to kill the last one. We are shooting him as he shooting back. Nope, he's not. Wait, but Tim shu Okay, It's not shooting. So we should have, there are things flying in our direction. We should around him and he dies. Amazing. So there you go. The doors are open. We walked through and now we can go to the next level or we could use the other door because it also opens when we kill all of our enemies. So let's not waste any more time. We will fix this thing right here, seeing the blue things around us, and let's get started. Oh, case. So now it's time to open up the doors whenever the enemies are killed, let's go into the enemies right here or the room. Actually run the game. And I'm going to try to kill a couple of enemies that's opened up. There you go. Let's shoot the enemy right here. Three bullets should be enough, and he's dead. And you can see right here that he is now a missing. Very good. He is missing. The second one is missing. The third one is also missing, so we no longer have any enemies. The door should open. The only problem is that we still have these elements in here. But thankfully, when we're working with lists, we can actually remove the item very easily. So the way we do that, as we go into our updating here in the rooms manager update. And we are going to create another loop. And this time this loop is going to be a for loop. So what is a for loop? Let me explain. So what is a for loop? Loops can execute a block of code number. Times. Loops are handy if you want to run the same code over and over again each time with a different value. Now, I'm delving a bit deeper into loops than we did with the for each, but not worry for loops are similar to for-each loops. But this time instead of using the items, we use the indexes and side of the list or the array. So you can see that this continues to execute code inside until I reaches a certain limit. What does that mean? Let's look through this syntax right here and understand it better. We start off by writing for, That's good. We instantiate a variable which is an integer, most probably which is an I equals 0. We then add this semicolon. We then tell it what is the limit that the I will keep working towards. And then we stop and each time we add one to the eye. So you can see right here, this plus, plus means that it's I plus one. So we start off at 0, let's say the certain limit is three. We will continue looping through until I is no longer less than three. So we start off at 0, we do some stuff, we execute the code I plus, plus. That means I becomes one. It's still less than three. Great, we continue on. We have I plus two, as it's still less than three. It is, we continue. I equals three is it's still less than three. No, it's not because we need to be less than 3 or less than the certain limit. And we are going to be using that to see we are going to count through all the enemies. And when we are at the last enemy, we are going to go ahead and stop the loop. And at each level we are going to check if that enemy is an empty game object, then we are going to remove the entire item from the list. So let's get started. This will be a bit complicated, but bear with me. So I'm going to go ahead and create a for loop. And instead of going from the first element to the last element, I'm going to start at the back. So I'm going to have an int I equals enemies dot count minus1. First of all, what is the count? Enemies dot count is the number of items that we have in the list. And our case, this will be the three skeletons. Why am I adding minus one? Because lists work just as arrays do where we start, the counting of the indexed from 0. The last element of the three skeletons will be two. We have the skeleton zeros, skeleton one skeleton too. So count is equal to three because we have three skeletons. So the first element should be the count minus one. I hope that is understood. Now because we are starting from the back, what is our goal? We will keep looping through. While i is greater than minus one. Why is this minus1? Well, because when we get to 0, we still want to loop through the list. And one we get two minus one because let me just finish this off. There you go. Because we are going. Minus minus. So just like Plus, Plus adds a one, minus, minus removes a one. So again, what's happening? We are starting from the back of the list. We are making sure that we always are greater than minus one, which means we don't want to have 0 as the last element that we go through. And finally, we are adding I minus minus. So let's continue one. What are we going to do in here? Well, we are going to check if the enemies or the enemy at the position I is equal to null. So null means that he is missing. We saw previously in a previous video when we kill the skeletons, the element in there became missing. That means it's not. So if the enemy or the collider 2D is missing on this enemy, than what we're going to do is we're going to access the enemies. Dot remove at, and we're going to remove it at the position I. So again, let's just look at it one more time and understand what's happening. We are starting at the back of the line because we want to remove things from down to, up until we get to the first one. So we are starting from the back. We are using count minus one because count is the number of elements, but the elements inside are indexed from 0. So we start at 0, 1, 2, but the count is three, so we remove one. We keep removing one by using AI minus-minus until we are no longer greater than minus one y. I mean, when we are less than minus one, why? Because the last one is going to be 0, so minus1, when we become minus1, that means we've ended and we no longer want to continue on with the loop. And each time we find that the enemies is missing or is null, we are going to remove them from the list. Great, Let's save that. Let's go back into our game and let's go ahead and print out in here the enemies. Okay, So enemies.gov. And let's just see what happens. So back in our game, I'm going to run the gain. I have the list of enemies, I'm going to shoot first 1, second 1, and the third one. So let's wait for the books to appear. There you go. You can see a pop-up. Oh, okay. So now you can see that the list is empty. There's something I forgot to say. So we can see we have these and we didn't look at the Council even that may appear. So the number of enemies a three, when I shoot them, one of them dies, the last element is removed. That's why we are going from the bottom to the top. So the number of enemies is to 0. So the bullets that work for that kept going. Also. This one, there you go, The number of elements or the number of enemies is 0. Great. So now we know that we are able to kill the enemies. We are able to remove them from the list. Lastly, we want to open the door whenever the number of enemies 0, and that's going to be part of your challenge. Your challenge is to open the doors after the enemies die. So check to see that the enemies list is empty. This will be, I don't know, I will leave it to you. Then you'll need to go through all the doors and the doors to close. And you'll need to activate all of the doors. And I'll give you a small hint. You need to check the list length. You can use the dot count. Well, we've already done this. If you want. You can use a for each loop to go through the doors or you can try to use the for loop that we just learned and to get the length of the array, this is a good exercise in loops. We have a lot of loops. That's good. So pause the video right now and go do the challenge. Okay, welcome back. So I'm just going to keep the debugger right here. And what we're going to do, we're going to check if the enemies dot count is equal to 0. Then we are going to use the for loop. I'm going to create an int I equals 0. So we are starting from the 0. We are going to keep looping while I is less than the doors to open or sorry, doors to close dot length. When we want to access the length of an array, we use dot length when we want to access the length of the list, we use dot count. So there you go. Now you have two examples. You can even add a comment in here to make sure that you remember. And at each step we are going to add a one. So now door to close or actually door to close. Yes. And I'm going to access it using the I because I is increasing every time. So let's say we already have two doors. So we have index 0 and index one. We start off at 0. We get the door to close at 0. We set active to false. There we go. We will no longer have the door. We check is the I, which is currently 0, is less than the doors dot length, which is 2. So yes, 0 is less than 2. I plus, plus, or actually we do this and then I plus, plus. We go back here, I is, okay, so we no longer go back here I is now one is one less than two? Yes, it is. We have r equals to 0 dot-dot-dot active, sorry, I equals 1. We set active. There we go. It's false. Finally, I becomes two. Is two less than two? No, it's not. B. Go out of the loop. We save all of that. We go back into our game. We run the gain, we have the console right here, so the number of enemies, F3, you can see them. We should 12, okay, the enemies that we shoot him. Second one, how many bullets does take? One? It takes only one. Nice. Let's see why is he? Because I remember we added his life to be three. There you go. The enemy died. You can see that at 0 the doors open and we can walk through. How cool is that? So finally, everything seems to be working, okay. There are a couple of bugs. One of them is the blood is not disappearing because of the animations. We haven't still added the key at the end. The skeleton right here. How big is his life? The enemies house is three, so there seems to be a problem. He is dying immediately. Why? Because if we go into the layer bullet controller, the damage amount is 100 k. So the damage amount is standardized. Life of the enemies is 3. Think that's the problem. So let me make the half of this guy. So I just want to make sure that we are not having something wrong save that run the game. Because sometimes we might call a method too many times so we are giving too much damage. So if I check, okay, so there you go. He needs several bullets. 123 and there you go. Okay, so everything is working fine. The doors are opening whenever we are killing all the enemies, everything seems to be working. We've learned a lot about loops in this section, we've learned actually a lot of information. I hope you're enjoying. I hope you're having fun. I hope you're learning a lot. I hope you are doing your research. I hope you are always committing your changes. I hope your game developer brains are getting stronger with each and every single video. I hope you are not very frustrated, and I hope you are very happy. So I'll see you in the next section. Don't forget to add a review.
39. Section 6: Level Flow - Scene Management (Scene Manager and String): Welcome back my fellow game developers to a brand new video. And this is truly one of the coolest videos we've ever made so far, in my opinion. So what we're going to do is we're going to just run the game. And before I do that because we are experimenting, I'm just going to move this door out of the way around again. So we're playing, we open the door with some type of killing and whoa, we come here. What is that? Wow, a portal. What do you think would happen if I tried to maybe jump it? Well, What happened? Well, we are at level 2 or I mean at level one, we were at level two, should have pointed that out, but you can see right here that we do start in level two and then we go to level 1. We learned about portals, we learn about sin management, and we learn how to use a string variable. So let's not waste any more time. Let's get started. Oh, so time for some level of flow. And the first thing that we need for the level flow as the scene management and the way we manage scenes is through a scene manager, how convenient is that? But before we do all of that, the first thing that we need to do is actually create some type of portal. So a portal that will take us to another level. Now, before we do that, we need an actual other level to go to. So I'm going to go into the scenes in here and I'm going to duplicate s2. I'm going to open it up. So now we have seen three. It's the same, it's exactly the same as the s2, but all I'm going to change are the tiles on the ground. So I'll go into tile palette. I'm going to choose ground, and I'm going to make this a color of green. And I'll just change this up a bit. There you go. So that's a bout what I want to do. I'll cover this part, this part, and this part just so we can differentiate between them. I don't want to spend time creating a whole different level. It will take a lot and there is no actual purpose, but for you while creating your game, I do recommend that you go through the hassle of doing it. It's good practice if you want to create your own game from the styles. Enough talk, let's get started. Save that. Let's go back to Test2. So now we have the friends between test2 and test3. I think it's time to call this level 2 and level 3. So Level 2, level 1 or no. Let's keep this as a, this was actually a test. And level three. Actually, this should be, okay. Wait a second. Let's keep this level 3. Sure, we load, this will become level one. And this one is level two. So we have just one, level one, level two, okay, so back in level 2, and here we are going to have some kind of exit portal. I've provided you with the resources for the portals, and I chose this one. And you can see that you have 25 or 20 portals, I don't know. And you also have this green one, but I'm going to use the 15. Was it 15 year? It was 15. So back in here in the sprites, right-click Create Folder, portal at Enter. Double-click in here, and I'm going to add all of the images and wait for them to be added. Very good. I'm going to right-click create an empty game object which will be called the portal enter specter. Set z to 0. There we go. Let's move it in here. Add a component or what? Let's not add a component. Let's add a animator. We're going to go to the window. And actually, before we do that, let's add one of the images in here to the portal. Can we add it immediately? Nope, can't. Let's add a sprite render. And we'll add just this image right here. And let's set it as the player. And there we go. You can see it's a bit small. Let's choose all of the images and make them 50 apply. So it will double in size, okay, girl rate and make it point. Will it become better? Let's zoom in and see sometimes point is not the best filter. Sometimes you keep it bi-linear, it's butter, and in this case it is. So bi-linear, they are smoother, you'll notice now it's a bit smoother. I like it better, do whatever you want with it. And you know what? I'm actually because the room is already big, I'm going to make it 25. Yep, there we go. Okay, 25 is good. Nice. So there we go. We have this portal right here. Let's go into the window. Animations, animations. So we've already covered how we do this. I'm not going to go into too much detail. I'm going to create assets, animations, portal. Make sure to always create folders and keep everything small. So portal swirl. Or this will be just the animator or nano, and this is the animation. Swirled because the portal is swirling. I'm going to select all of these and drag them in here. Now when we play, there you go. I think this is good enough. You don't need to make it bigger or smaller. Excellent. So now we have this portal working. The next thing we're going to do is obviously we'll add some kind of Collider in here. So add a circle, circle collider 2D, and it's a bit big. Let's make the radius a little bit smaller so the enemy needs, the enemy, the player needs to jump into the portal immediately to be teleported to the next level or whatever level that we want to tell apart too. And this is the part where we choose which, where do we want to be teleported? Is it always the next level doesn't have to be because later on in the, I believe the section where we generate levels, I think it's the last one. We will be choosing random levels just like we have in Hades. So we'll create different types of layouts, have different types of levels that we go through. So let's go into the scripts. Let's add a script in here for the portal. We're going to call it level exit. Let's call it the levels, level flow that will slow. I think that's good. Right-clicking here, create a C-sharp script which will be the level exit. I don't even remember if we will be having other scripts related to level SOPA. Let's keep it at that. So I'm going to click on here. And of course we are going to make it a trigger. This collider should be a trigger. And let's add the level of exit. And finally, I'll go into the Prefabs and I'm going to go here and create a prefab for the, should I just make a portal in here? Let's say we can add, create in here, something like maybe, okay, let's just make the portals, portals. Open this up. Portal. And maybe portal one, maybe non port one. Let's just keep it at portal, save all of that. And now let's open up the script in here. So we have the level exit opens up and what do we want to do in here? So the first thing we want to have as obviously a serialized field, which is going to be a string of type string. This is the first time we create a variable of type string, I believe. And this is going to be the level to load. Great, so now we can go back in here, shows the portal. And we can select the level that we want to go to. And the way we do that is we need to make sure that we get the exact name that we want. So and scenes we copy, for example, level also we are on level 2 right now. And it weighs no worries. Let's go and two, we go from level two to level one. Sure. Why not? So we are going to lock this down, select level to select Level 1. Copy this, paste it in here. Oh, no, wait, wait, wait, wait. We should select this one and now we copy it here. So now this portal, when we trigger it, we should go to level 2 load. But how are we actually going to do this? I'm going to go back in here. And let's remove start an update for now. Just for now we'll later on need them course. And in here I'm going to create an entrepreneur enter d. We already know how this works. We are of course going to make sure that the collision, the tag, is equal to Player O. So now you're thinking, Oh, Michael, well what's this? What, what is the compare tag? Well, you can use compare tag is much better, but I wanted to show you a different way and now it's time to load the next scene. How are we going to do this? How do we actually move from one scene to the other? Let me show you just a little bit. So this is the scene manager and you can see right here that we have a lot of things that we can use static methods, events. I'm going to leave it to you because later on in just a bit we will have a small challenge. But what I will help you with is that I'm going to make sure that in here whenever we want to use scenes, we need to add the using Unity engine dot scene management. Save that. And now we can do a lot of things with our scenes or we can actually manage our scenes. So before I'll issue you the challenge of finding which method we are going to use or how can you use this unity? Where is it the scene manager? I'm going to show you how to actually access and because I want this challenge for you to work immediately when you start. If you go into the file right here we have something called the build settings. If we click on it, we can see the scenes in built. And this is where we actually build our game. And you can see that we have multiple options. We can use Windows, we can use iOS or whatever this is, tvOS, ios, PS4, PS5, xbox One, et cetera, et cetera. You can create things for different platforms, and the PC is the one that we're going to use. We can do different things. And this is where you add all the scenes or the levels that you'll have in your game. So for now, the only scene that is added into the bill is the scene test1. And without adding season here, you will not be able to travel from one to the other using Scene Manager. So well that clear, I'm going to add the level one. And we can also do this by AD open scenes. There you go. You can see at the scene 2 because it's an open scene. Okay. Great. Can we added another time? No, we can't. And you can see also that these scenes have indexes on them. We'll not be using indexes of the scenes right now, but keep it in mind because later on they will come up. So settings, save that again, File BuildSettings. There you go. At all of the scenes that you have whenever you want to use Scene Manager to go from one to the other, close that. Now, what are we going to do? We are going to issue you the challenge to load the next scene. So look through the scene manager in Unity's documentation, find the appropriate function that can help us go to a different scene. So this is astronaut use. And finally, make sure it's a method that uses a string as an argument. So pause the video right now and go to the Chaldean. Okay, Welcome back. So let's say I am a student of Michael Moore and I'm just more, more what everyone's saying. And I'm just learning how to use the scene manager. Okay. What is the goal, what is the challenge? He asked me that I should load the next scene. Okay, great. Let's look. What do we have? So we have seen count, seem counting building doesn't look like it helps create seen. Nope. Gets seen. Nope. I don't think that's held. Gets in at no. Building by name, gets seen. Load, load a scene, loads the scene by its name. Wait, what was the challenge? String as an argument, o k. This is a bit faster than I should, but no worries. Load scene, Let's click on Load seen. Hopefully we have Internet will do so. Declaration, okay, we load seen. We can use the symbol index or we can use the same name, excellence, you name, name. Scription loads the scene. Excellent, This is what I'm going to use. So now on Trigger Enter, if it's the player, what we're going to do as we are going to see how this is actually done. So if I scroll down in here, okay, So scene manager dot load seen them. Is there something else I need? No, nothing. Let's continue on. Or maybe at this point you might be thinking, well what is this load seen Moldau additive? Well, if you don't know, let's just try it. So scene manager, dot load scene. I'm going to open the brackets and I can see right here these one out of six. So the scene build index. Nope, I don't want that. Okay, see you name this is what I want, but we have four others and this is a good time to teach you that. Sometimes a method can take 12 or maybe even more arguments based on what you give it, it will work. So for example, we can add the mode. You can see right here, load Scene mode, this is what we were talking about right here. So load Scene mode, additive. I don't even know what that is. But in here you can see that there is an option for it. Anyways, this was a side note. What do we want to use? Which scene? Well, we already have it with the level to load. So Lovell to load as this scene that we are going to load. So everything should be working fine. I'm going to go back into Unity. Save that, make the game a bit bigger. Also, I need to kill all the enemies. And honestly I don't have time to kill all of them. That's just get the doors get swung open, run the game. Also, it's going to close in any case. And we have these lines, okay? So first of all, don't maximize on play. Now run the game. These lines are bothering me a bit, so I'm going to choose door 1, I'm going to deactivated. I'm going to walk through why it is that can I shoot it? I think I can. It doesn't get destroyed. No, it doesn't. So if I walk closely, you can see I'm at level 2, I'm off through it to 0. What happened? What happened? I am at level 1. Wo, how cool is that? Seriously, guys? This is one of the coolest things that have happened today. We suddenly moved from level 2 to level 1 through a portal. Very nice. So now everything is working, but it's very fast. And honestly we don't want to happen that fast. We want to make it a bit slow and add a bit more character to the game as we move through it. So I'll see you in the next video. Of course, don't forget to commit your changes. Look how far we've come. Look why I love committing my changes. Well, we started with an initial commit, added idling and hast animations created player added bullets, created animation for the enemy, damage, enemy deterioration. I don't even know what the lock, how much we have accomplished and we are maybe not even halfway. Well, very nice. So I hope you're having fun, I hope you're enjoying and I'll see you in the next video.
40. Level Manager: Welcome back, My favorite game developers. In this video, we are going to be not only transitioning to the next level, we are also going to be transitioning. They're in a much cooler way. So now when we walk through the portal, we don't go immediately. We wait two seconds and then we go and we can even adjust this from the level manager as much as we want. So you can see we have a central figure now which is the level manager. We are going to use coroutines, scene manager, and all of that good stuff. So let's not waste any more time and let's get started. Oh, okay, so now we need a level manager because, okay, It's all fun and games when the portal is transitioning us. But when it comes to big games, we don't want this particular object to be in control of the way we move through scenes. It's much better to have the swan determine which level we want to move through and then have a more central object, which is the level manager that will handle the process of moving us from level to level. This later on as you grow. For now, it doesn't have to be like this. You can simply just use the portal. The game will work forever. When it comes to big games, the actual object doesn't do the job. You have a more, let's say a bigger authority, a bigger head, which is the level manager that handles that. So I'm going to right-click create an empty, reset its position. And this is going to be the level manager. You can satisfy wherever you want. And you can go into the scripts right here and to the managers, right-click create C-sharp script. The level manager. Hit Enter and wait for it just a little bit for it to compile the goal level manager at the scripting here. And let's go ahead and open it up. Now, first thing we want to do is make this level manager and instance. What is an instance? The instance will allow us to call upon this level manager wherever we are and use what ever valuable as public and whatever method is public available to us are created, make it an instance and then call it, and you will understand how that works. So what we can do is first of all, we're going to make a public static level manager of that means this variable will be off type level manager and call this instance. And then in start, we are going to set the instance equal to this saved. Okay, so what is happening right now? First of all, public, we know what public is static. What is static? Static means that through all of the code, we will have this the sink. So whether we call it from the player controller, from the bullet impact, from the room manager. The level manager instance is always the same throughout when we instantiate the book, for example, every single bullet is a clone. Do you remember? So if I run the game, let me just show you what I mean. So I shoot a couple of bullets, pause the game. You can see that each one of them is a clone. So if I try to access the player bullet controller, for example, if it's not static, some variable it will access, it will be different than, for example, a variable which is here or here. But if I create a static variable on the player bullet, then whichever bullet I access, the variable which is static, will be the same. So static means it's the same throughout all of the gain, wherever and whenever you access it. That is very important when it comes to a static. So it's of type level manager that's pretty easy to understand and its name is instance. We can call it whatever we want. We can call it Michael if you want, what will keep it as instance. And then we have this ironically pun intended and what? We have instance equal this. This means the actual class. So we are using the instance as soon as we start the game. Instance is this. So now wherever we are in the code, we can go ahead and write level manager dot instance, and access whichever variable which is public obviously, or method that we have in here. So next thing we're going to do is we'll remove the update for now. Use it will create it again. And we need to create something called a serialized field. Float. And it's going to be the time to load. So, and it's going to be equal to 2 f. Why do we create a font load? What is actually our goal? Out of all of this, I forgot to tell you. What we want to do is we want to delay the transition to the next level, so we don't want it to happen instantaneously. We want to have at least two seconds, so we get to the portal, we wait two seconds, and then we traveled on to the next level. This will just add a bit of us authenticity as you know, whenever you are playing a game, you don't. And to report and then immediately start the next level. You want to have a bit of time, two seconds maybe rethink your decision, but it will be over. And how are we going to do this? We'll obviously we are going to be using a coating. So I'm not going to tell you to create the quarantine right now because you'll need to do with, I think I do have a challenge somewhere where you create the coroutine. So pay attention very closely. I know called teens are very hard to learn in the beginning. Once you get the hang of it, it's extremely easy. Let's get started. First of all, because we will be accessing this co-routine from a different script. I'm going to write public eye enumerator. So the coroutine is of type I and numerator. And we're going to call it the loading next, next level. And in here we are going to be taking in an argument. So it's going to be of type string and it's going to be the next level, just like that. And in here what we'll do is we want to wait for the time to load and then load the scene. So as we said, yield, return, new, wait four seconds. And this wait four seconds, we are going to use the time to load. How great is that? And finally, after we wait 42 seconds, we are going to go into the scene manager. We add the scene management in here and now we can access the scene manager. So did you notice what happened right now? It didn't allow me to use the scene manager until I had the criteria telling unity that we are using this. So Scene Manager, not Unity, excuse me, the script right here, this entire file that we are using, seen management. So Scene Manager, dot load seen. And as the next scene that we are going to 0 or I mean, next level that we are going too low. Okay, great. Now the next thing that we need to do is we need to go into level exit. And instead of using the Scene Manager here, we simply use the instance to start the co-routine. And honestly, I'm already very tired, so I think it's better for you to do this instead of me. So go ahead, start the co-routine. First of all, from the level of exit script, Kali, call the level manager and move to the next level. There is a small trickier you'll need to watch out for. I'm going to give you a small hint, which is you can't simply call a co-routine. You need to start a quality. So pause the video right now and go start the co-routine. Oh, okay, welcome back. So how did you get on with that? And here I'm going to remove this. And instead I'm going to say that I'm going to start a co-routine. I'm going to use the level manager. I hope this was not the hardest part if you did manage to use instance, I congratulate you, you move to the next level of game development. If not, don't worry about it, it's probably my mistake because I didn't tell you I didn't give you the hint. But we are going to be loading next level. So this method in loading next level is actually an eye enumerator from the level manager and it requires a next level string right here, as you can see as an argument. So I'm going to give it to it. And what should it be? It should be the level two lot. Save that. And one very nice thing. You can see that when we stopped using the scene manager, the using Unity's engine is no longer as wide as the Unity engine alone. So the things that we don't use are a bit grayed out. So I can actually remove this, save a bit of memory. And now the level exit just allocates or calls the level manager the central head, and tells it to load the level. This will come in handy when we have multiple portals. You'll see, trust me, it's much better to do it this way. So save that. Go back and to our game right here. Start the game, walked towards the portal. I'm playing in the scene mode. So now when I hit the portal, we should have two seconds before we vote. And we can see it right here in London manager time to load two seconds. So there we go. Here goes nothing. 112 up. There we go. So now we are in the level 1 and we didn't go to there immediately. So I hope you enjoy it. Make sure to state and all of your changes. And in the next video we are going to make the transitions even cooler. Can you imagine that even cooler than this? Make sure to leave a review for the cool transitions. I'll see you then.
41. Making Transition Even Cooler: Welcome back, my
fellow game developers to a brand new video. And in this one we are going
to do a couple of things. First of all, we've added
a cinema machine combiner. What is that? That means that our camera no
longer goes out of bounds. It's movement is a bit weird, but because we didn't give
it enough time, remember, we could see the blue lines and here we no longer see them. And now when we move
through the portal, Whoa, you can see that we move in slow motion and then we
go to the next level. So there is a bit of delay and the time
scale of our world. So let's not waste
any more time. And let's get started. Oh, okay, So now
it's time to make our transitions just a
little bit more cool. And first thing I want
to do is I want to go into the console and see
this message right here. And I'm just going
to delete this. We don't need it anymore. This was just for
debugging purposes. And whenever you have
some kind of error or you're not sure of something, use debug dot log at helps out a lot just to see if some
condition is working. Some condition is not whether the amount of enemies it has finished and so
on and so forth. So debug dot log
is best, amazing. It saved my behind
so many times. So let's continue one, what do we want to do in here? Well, first thing we want to do is once we go
through the portal. So when we go to the portal, we don't want to have our
player just running around like a crazy maniac
after he enters there, we want to actually stop him and make him just wait a
couple of seconds. Weight. So there's a difference. Do we want to completely
stop the player? Or we can do something
even better? And we can actually slow down
the time in which moves, so his movement will
become much slow. How about that? I think it's a better solution. So I'm going to open
up the level manager. And in here after we start
loading the next level, what I'm going to
do is I'm going to access the time and I'm going to access the time
scale on the world. And you can see right here
what is the timescale? It's the scale at
which time passes. So currently the time passes
normally in our game, what I'll do is I'll
change this to 0.2. So now it will be running at the 20% of its original speed. And let's see how that looks. I don't recommend that
you do this all the time because not only does
the game slow down, but everything slows down, so even the animation. So I'm going to run, I'm going to enter the portal
and you'll notice that now, whoa, how cool is that? The gun is still pointing
correctly, obviously, but the animation
is much slower. So there you go,
Michael Jackson. And we are at level two. Very nice, but we
are still moving. Oh, and look at the bullets. But the bullets, how
cool is this bullets? I recommend that you
remember this and you added a some kind of
mechanic into your game. So everything slows
down and let me just shoot a couple of bullets and get the
hell away from there. How cool is that? Seriously? Not tell me that's
not really cool. So now what we want to do
is we want to go back. So as you saw from level 2, we are moving in slow motion, but when we go to level 1, we are back at this
really bad timing. So what we do is we are going
to issue this challenge. We set the scale back. So obviously we don't want to have the timescale like this. So find where we need to set the time-scale back
to its original form. And I will give you a
hint of what or how to set it back to its original
form to return to normal, set the time-scale back to 1. A-flat means it's 100% not 0.1, or you can make it even faster. Does that out enjoy, have fun. Make sure to turn back the
scale to its original form. Where should we do that? Pause the video right now
and go do the challenge. Okay, welcome back. I hope you figure that out. Where should we do that? Well, we start the timescale. We wait for two seconds, and then after we finish, before we load, the next scene, will access the
time dot timescale and sell it back to one f.
Say that back in our game. From the game, go up,
go through portal, and do not something
that now it takes more than two seconds
to load level. So one. Two, Why is that? Well, because timescale
is slowed down. There we go. So now we are back here and
everything is working fine. So the final thing
that we need to fix is the fact that we have to wait so long for the level
to load. Why is that? Well, obviously
because here we are waiting for seconds,
the time to load, but before we do that, the timescale has
been set to be 0.2, so 20 percent of
the original time. How are we going to fix this? Well, fortunately, there is something really nice and here, really convenient that
says that we have to wait for seconds in real time. So this spends the
court in execution to a given amount of second
using unskilled time. Can you read this? Is I think
we should make it bigger. No, unskilled time. So wait for where is it? Wait four seconds in
real time, we save that. And now the co-routine is no longer affected
by the timescale. So now let's just test this out. Run, run, run, run, get to this 112 and we are in the level one. Really nice. I hope you enjoy it. I hope you're having fun. And let's see, we have
still a couple of minutes. It's a very short video. There is something that
I wanted to address. So in here when we run the game, actually let's make this a
bit bigger so we can see. So now we walk around, OK, so everything is black. We feel that we are
in the game properly, but we see this blue right here, and I don't like it. Now, we could cover this with
a couple of black boils. That would be a good solution, not a bad one, of course, but there is a much
better way and a property inside of Cinema machine that we are going to
take advantage of, and that is the confinement. So I'm going to make
the scene a bit bigger. I'm going to zoom out. And if I click on the
virtual camera right here, you can see down
here that we have something that
says, where is it? Okay, so there we go, Add Extension Center
machine confined, and it creates an additional
component in here. And you can see that we
have the bounding shape and the bounding shape
is required and it should be a polygon collider. What is a polygon? Polygon means that just like
we have a circle, rectangle, triangle, polygon means that we can give whatever
shape we want. So what does this do? It adds a bound to the way the camera or how much
the camera can move. Let me explain. I'm going to go in the where
is it the grid naming? Right-click in here. I'm going
to add maybe a component. And let's go ahead
and call it the true because of the
polygon collider 2D. There we go. I can edit this. You can see this is the polygon, so we can, there we go. Make it like this. If you hold down Control, you can see this red line. This means that it
will be deleted. So I'm going to go ahead
and make the bounds for which our camera or the
machine camera is moving in, the bounds which it
does not go through. So I'm going to make sure that, for example, we cannot look right here and
look what we can do. Actually, we can
add another point. This is why we need a polygon
collider, and there we go. So the camera will not be able to go outside
these bonds and we will not be able to see
the blue in here. Can we? Does Michael tell the truth? Not always. That's run it again
and see for ourselves. So, Okay, I am outside
the bond because there's something very important and it needs to be a trigger. We don't want it to
affect anything. And even better if we can make this grid a different player. So I think we will have to
make it a different layer, yet we will have to make
it a different layer. So that's why I wanted to call
the grid the untouchable, call it the wrong layer. And the North this object only because it will affect only the polygon
we have the walls, we may want the walls to
interact with the player. So run the game, okay, with the bullets
of the players. There we go. Now we are not interacting. And if we go up here, we used to see the blue lines. Remember, we are still seeing the blue lines because he made one of the
biggest mistakes. We didn't even assign the
polygon collider right here. So drag the grid,
and there you go. Now we have the polygon
collider, run the game. We can show it around
and then we go. So Didn't I tell you? Okay. So as you can see, I can no longer oh, and look in the scene mode. You can see that now the camera moves only with how much the
confinement allows it to. So as soon as we hit one of
the others, There you go, the camera does not work
anymore and you can see it is forced to move
up through there. Very nice. So this is a very nifty trick
that you've learned. You can go down, as you can see, we can no longer
move the camera. Look where we are. We are no longer in
the center because the camera is
confined right here. It does not move. So I hope you enjoy it. I hope you like the strict. Obviously this
needs to be fixed. I don't like it at all. We need to change this polygon
collider a little bit. So maybe make it like that, Maybe this one like that. So it's always better to
have the shapes squared up. Make sure that you
look through this. Don't just do with nonchalantly, make sure that you take time to create the combiner properly. So that done, I hope you enjoyed the video
is enough length. There is still one thing
that we need to fix and that is the blood
animation on the enemies. So I'm going to
give you that task. So here this flash
animations at the end, we want to make sure
to destroy all of these blood that come off
the player, the enemy. We don't want to keep
them in the hierarchy. So with that done, I
hope you enjoy it. I hope you are staging
everything, stage all. What did we do in
this video changed the time scale and now it's much cooler
when transitioning. And made a cinema
machine. Gunfire. Commit the changes. Look at the master. Appreciate your work. Enjoy how far you've come, and I'll see you
in the next video.
42. Fading In and Out (Canvas) : Welcome back my fellow game developers to a brand new video. And this one, you'll notice that we have the fading in and out. And what is that for? Well, if we look right here, we have a huge black box. And you can see that right now. We don't see anything in the game. Why is that? What happened? That we'd leave the game? Why is it so small right now? Why are we zoomed out? So many question, so few answers. If I run the game, you'll notice that we start off the level by fading out of the black image. And if we walk around, you can see that as soon as we enter the portal, not only do we slow down, but we fade out, and then we fade back in when we go to the next level. So let's not waste any more time and let's get to failing. Oh, okay. So now we are properly transitioning from one level to the next. We have the timescale effect where we slow everything down. The next thing that we want to do is we want to have some kind of fading effect. So what we want is B1, the image or the entire game to fade to black. And then when we enter a new level, we want to fade out. So let's go ahead do that. First thing that we need to do, or how is the fading outgoing to work? We will have a big black image in here that will fade in and then fade out as we move from level to the next. So it's all about a black image and we use the alpha on it. So let's do that. How are we going to add an image in Unity? Well, we need something called a canvas. So I'm going to create a canvas. I'm going to right-click in the hierarchy, go to your eye and find the campus. There you go. Now we have a campus. If I double-click on it, there you go, you can see it's one huge, big canvas and you might be wondering, why is the canvas so big while our game so small? Well, this is the way that Unity handles using Canvas and adding images. It's better to play around with the images right here. Instead of playing around in the images, write it and having everything in front of the player and the objects in the game. So this is a much better way or the way that unity uses to handle things. You can also see that we have something called the event system. And this allows us to, for example, let's say we have some kind of button on the canvas. We want to click it so we can add event system under the Canvas, make it a child, and keep it there for now. And this event system allows us to actually push buttons on the screen and allow us to interact with the canvas. We'll see how that works in just a bit. But for now, we want to go into the canvas scaler right here. You can see that we can scale with screen size. And we want to change this from a 100 to 1920 by then eight, which is the size of the screen which we are using or creating the gaming. Hit Enter. There you go. Now everything is done. You can see we have the ray caster and an element for the canvas which isn't that important. We won't be changing anything too much in here. We only want to make sure that the canvas scaler as scale screen size and we want to make it 1920 by 1080. Okay, great. Now with that done, next step is to add an image. So I'm going to right-click in here, go to you are, and find an image. So now you can see we have an image in the middle of the huge canvas and I'm going to, is the fading image. But even though we have it on the canvas, you can see down here in the game that we have it as a small block. And if I move it to the upper side, you'll notice that it's on the upper side of the game, and in the middle, it's in the middle where the player resides. And on the bottom left you can see it. So it's not even though the image right here on top of the game is huge. But you can see that on the canvas, It's really small and it scales down. So this is how we represent things in Unity on UI canvas. Now, what are we going to do? We want to make this image fill up the entire canvas, make it completely black. And then we are going to use the transparency on it to fade in and fade out. First of all, how do we make it as big as the screen? Well, there is an option right here. You can see that it's the rect tool. When you click it, you can drag and make this image bigger and smaller. And you'll notice right here we have a lot of things which is the Rect Transform to handle and change how the image looks. We can also hold down Alt and choose one of the corners, or army. Choose one of the coordinators and hold down Alt. And you can see that we can expand it and all of the ways. But there is an even better solution to this. And that is if we click here, you can see that we have a couple of options and these are called the anchor. So for example, if I click on this anchor, the image will scale down big and small with scale up and down based on this point right here, we can also click this one where it will scale based on the entire canvas. You'll see what I mean by scaling when we do need to scale. But what happens if we hold down Alt? You can see that we can expand the image this way. We can expand it in the middle, we can expand it to the left, and we can expand it all around so it fills the entire square. The entire Canvas immediately. And you can see that now the image has blocked the game entirely. And if I go to the canvas and the fading image, I can change the color right here on the image, and let's make it completely black. Now, how are we going to be changing the transparency? First of all, we can do this right here so we can change the alpha on the image. But it's kind of hard accessing the alpha on the image because we need to access all of the red, green, and blue colors. In other way of doing it is by adding something called a campus group. So if I go in here and add a canvas group, you can see that I have the option to have Alpha. And if I move this alpha down from 0 to one or from one to 0, you can see at 0 it's completely transparent. At one, it's not. And I can block re-cast. That means that re-cast means whenever I want to click on something, this can help block the re-cast and the interactable is this image interactable? Let's say it's not. And there you go. So now our goal is to create an animation. Using that animation, we are going to control the canvas group alpha right here. And then we are going to fade in and fade out every single time and our gain. So with that explained, I'm going to issue you a challenge. And your challenge is to fade the image in and out. So I'm going to give you a step-by-step process of how to do this. First of all, you'll need to create an animation for the fading in and fading and will be black to transparent and fading out, which will be the transparent to black. You need to create a transition between the transition between the two animation based on a trigger. So remember, we created the transition based on a Boolean. Now it's time to use a trigger. You will need to add a trigger parameter. Obviously, you need to create a UI Manager script and added to the canvas. You will need to create a method that triggers the fading. And finally, you need to call that method from the loading Colton in level manager. So we almost know all of the steps. Maybe you don't know how to set a trigger. So that's what you'll need to look for yourself. And everything else, I believe is something that we've been through we've seen with tested out. Remember the way the animation will work is by pressing the red little button in the recording on the animation so that information, pause the video right now and go do the Chavan. Okay, welcome back. So first thing we're going to do is we are going to go into the animation. I'm going to go ahead and make sure that I have the fading image and create an animation. And now I can go into the animations, right-click in here and create the fading image. So I'm inside assets animations and in here I'm going to create first of all, the fading, fading and save that. Now what did we say the fading gun should be the fading in black to transparent. Okay, great. So how long do I want this to take? So let's make it around 1.5 seconds. So I'm going to click the record button. And what did I say again, black too transparent. Oops, that's not the key that I was looking for. And where is it? Okay, back in here. So we start off at black and at the end we are recording. I want to take the alpha down to 0. So what happens now when I play the animation? It starts off as black and then fades too transparent. Excellent. The next thing I'm going to do is create the fade out. So fading out. And now we start off at 0 and then we go into complete darkness after 1 second. So we stopped recording, run the game so transparent, fade to black. Excellent. Now the next thing we are going to open up the Animator. And in here we are going to first of all, okay, so the fading in and fading in means that we are going from black to transparent. This should start as soon as we start again. So we don't just appear in the game mode, we fade into the game mode, and then we have the fade to black will create a transition right here. This transition should have no exit time and the settings should be an, I mean the transition duration should be at 0. I'm going to create a parameter which will be a trigger, and I'll just call it the Start, fade. Make this capital. There you go. And add it as a condition right here. Excellent. And I hope you did all these steps. These are things that we've already covered and already created. And before we move on, we need to make sure that this canvas is also present in the second level Y or the level 1. Why? Because if we go to level 1, where are the scenes? If we go to level 1, you'll see that we don't have a canvas, so we won't be able to fade end when we start Level 1 or when we go to level 1. So back in level 2, I'm going to call this the UI canvas Enter. And I'm going to go into the Prefabs. Where are the prefabs? And I'm going to create and here a UI folder. And in here I'm going to drag the UI campus. Save that. And now look how amazing prefabs are. Eigen don't believe we've talked about this. But if we go into the scenes in level one, we can immediately go to Prefabs UI and add a canvas and our games. So now we have a canvas right here in level 1 and we didn't have to create it all over again. This is the beauty of having Prefabs. With that done back in level 2. Let's see what we have in here. So the animations play, everything should be working now when we run our game, we should have a fading and animation. So I run the game. There you go. So you can see that I have a looping fading in animation. So I'm going to go into the animations, find the fading in and fading out, and make sure that there is no loop time. Save that. And now when we run the game and the second now we have we have a fading in an inch. Excellent. So do you know why this is happening? Well, because upon entry, first thing we do is the fading in. So this is already set up for us. Now, the next thing that we need to do is we need to create the UI Manager and added to the campus. So I'm going to go into my scripts in here, right-click and create a new folder for the UI. We much change the name of this folder, but for now, let's go ahead and create a C-sharp script, which is going to be the UI Manager or should have been in the manager's actually. And it has no worries. Wait for this to compile. Let's move it to the managers. I believe it's butter here or maybe not. I don't know. It depends on your preference. I think in the manager it's maybe better. Cancel or no, let's keep it. Let's keep it into your eye. Even though it is a manager will keep it in the UI. I'm going to open up the UI Manager, open up Visual Studio. And the first thing that we'll need is a reference to the image that we want to fade back in here. I hope this wasn't too hard because it's going to be a serialized field, which is an image of type image. Oh, so there was something that I hope some of you were able to figure out. If I tried to use image right here. You'll notice that I don't have an option for it. What I do need is I need to use your Unity engine dot u i. So I hope this wasn't a huge problem for you. I hope you found this error or found this inconvenience in the challenge and went out of your way and try to figure the solution if you didn't, don't worry about it. It was on my behalf. I should have warned you beforehand. No worries. Image to fate. Some of you might be thinking, Yeah, no worries, sure, just my confidence was destroyed. Anyways, what are we going to do in this class here and the UI Manager? Well, as we said, we need a method. Create a method that triggers the fading and call that method from the loading coworking in level manager. Okay, so I'm going to make sure that this is a public. So I'm going to create a public void fade image. And in here I'm going to go ahead and access the image to fade. I'm going to get a component on it, which is the animator. And I'm going to set the trigger. And that trigger is going to be the a string reference to the Start fade. And today, now, copy this back in here, paste it in here, close off, save that. So what are we doing? Because we created the animation on the actual image to fade. You can see that the animator is here on this game object. One of the components on the image to fade. So what we do is we access the animator on the image and then we set the trigger which is started. Okay, great. Now the next step is to go ahead and call it an Level Manager. And there are two ways of doing this. We can either go ahead and find the game object or find the UI Manager. Or let's go ahead and create an instance of this. I'm going to create a public static UI Manager. In instance. Save that. And I'll create a start here. And then start the instance will be equal to this. Save that. Now back in the level manager, where should we put this? Well, I believe as soon as we hit or as soon as we enter the loading level. So we have the time-scale at 0.2. I'm going to go ahead and access the UI Manager, the instance. And I'm going to go ahead and fade the image. Now, you'll notice something that because we've said the timescale to 0.2, the fading of the image will be slower than what we have in here. So let's test this out and see if it works. If you feel that it's a bit slow, you can go ahead and make the fading of the image a bit slower. So there we go. We start off, we run up. And when we enter this portal right here, there we go. We are slowing down and we forgot to add a hey, we forgot to add the reference. You can see right here the error. If I double-click on it, you'll see that the UI Manager dot fade image, there's something wrong. What is wrong? Well, there is no instance. Okay, so if I go to the UI canvas, I would notice that I didn't even add the manager, So I'm not sure what is being called. So let's drag in the UI Manager. Let's make sure that we said the fading image and let's apply the changes. So notice now the canvas on this level didn't have a UI Manager, right? And this is the one that we used in the level one. If I go right now to the level one, I click on the UI canvas. It has a UI Manager and it has the image already set up. So you can see again the power of using grief apps. How cool is that? So back in level to run the game, we fade in. No more errors. We walk up, we go through the portal, and there we go, we slow down. We have this sugar right here. So there was a slight problem in here. As you notice that we didn't get the time to even fade in. So I'm going to access the fade out again and the fading image. And where is this? Well, this will depend how long or what is the timescale you have right here. So I'm going to make it 0.5. Save that. And instead of 1.5 seconds, I'm going to make it around, Let's just make it around 0, maybe 1 second or 2.5th. Let's say it's about 40 from the game. Test it out, see if we have the time to fade in. So I go up, I move through. There we go, we fade out completely and then we stopped off fading. And very normally. So with that done, I hope you enjoy. Let's make sure to commit our changes. Stage all commit the changes. Created a fading in and out image using you are countless. Commit the changes. I hope you enjoy it and I'll see you in the next video.
43. Section 7: Destructible Environment - Tornado Movement: Welcome back, My favorite game developers. In this video, I'm going to maximize on play. We've added a dashing mechanic. So now as we move around, if I click the Space key, There you go. You can see that I move a bit faster of a, but actually doubled times the speed. So when I dash, I move two times faster. There we go. We can see an i can't kill the enemies to run around them and shoot them. And yeah, there we go. So we've added this really nice-looking and cool mechanic. So let's not waste any more time and let's get started. Oh, okay, so now we can go back and don't player, double-click on him. Okay, so now what we want to create, actually the first thing I want to do is get rid of this image. Now what we can do is we can turn off the canvas, but that's not very practical. But what we can do, and this is a great opportunity to teach you something new. If you click on the canvas, you can see that the layer and here is, you are. So if we go in here into the layers, you can see that we have all the layers right here. And you can see that we have some kind of lock and then we can have some kind of I in here. And if I click on the eye, you can see that everything under the UI or everything under the layer UI disappears. If I click out the player, they go, you can see the player also disappears. It's still in the game. It still works when we start the game. You can see in the game window, It's still there, but in the scene, we can't see it. What's that out of the way? The next thing we want to do is add some kind of dashing mechanic, just like we have in the game Hades. We can see that we can dash quickly. We are going to do the same in this game. It's a bit different, obviously because of the limitation and sprites. The limitation in a team. And we are going to use the sprites in here. Where are they, these playwrights sprites for the blue layer. And you can see that we have this rotating right here. And this is what we're going to use. And obviously, obviously actually in the resources I've left to another kind of torpedo you can use that It's a bit different and colors than this one, but I think that's not a huge problem. So what are we going to do? We are going to first of all explain what the tornado torpedo. I don't even know what to call it. Maybe you have a totally different way. We'll call it the dashing from now on everything will be the dashing just to avoid any confusion. So first of all, the player will move much faster. So we will increase the movement speed of the player. And animation will be triggered, which will make the player go in circles. And while the player is doing the tornado, he will be invincible so he can't be hurt by anything. This is something that we will implement later on when we add a health system to the player. For now, just know that this is what will happen when the player is dashing. And finally, he can break objects around them. So as you know the name of this section, as did the structural objects. And first of all, we need to add a way or a bit of an advanced movement to the player so he can destroy those game objects so without any further or blue. And let's get started. So the first thing that we want to do is we want to go to the layer controller, look how many scripts we have. I just noticed, that's good. That means we are increasing our understanding. Anyways. First of all, we'll need to create a way to keep track of the current movement speed. Because now we have the regular movement speed, we will have now the dashing movement speed. So the first thing I want to do is create a private float and the current movement speed. And this current movement speed will change whether we are doing the torpedo or tornado, and whether we are just simply walking. Then I'm going to create a private bool that's going to be called the can dash. And why are we creating this boolean? Well, because you'll see that now an update we want to dash. So we are going to click some kind of key and we will start dashing, but we don't want to be able to dash all the time. We want to have a cool down for the dash, and we also want to have some kind of length or the dash. So we will have this Boolean to keep everything in check and make sure that we can dash 20 times in a row. So the next thing that I'm going to do is I'm going to scroll down right here and see where the player is moving. So I double-click and I can scroll down and find the Rigo. We have the player moving and this is where we add the velocity. So it's the movement input times the movement speed. And instead of using the movement speed, I'm going to say that it is the current movement speed. And just to make sure that we have a current movement speed and it's not 0. And start, I'm going to set the current movement speed to be equal to the regular. Movement speed. There you go. You can change the name of the movement speed if you'd like, you can name the regular movement speed. I'll just keep it like that. It's not too confusing for me. If it is thick for you, then go ahead and change the name. Next thing we want to do is we want to set up the variables 40 dashing. Let me just add in here a comment that we are dashing. Dashing and movement by looks. So I'm going to create a serialized field and is going to be the float, and it's going to be the dash speed. And for now I'm going to set it to what is our movement speed? What was the movement speed on the dune player? Let's see, ten. Okay, then, so I'm going to make this at least 20, maybe even more later on. By the way, we will be able to control from the spectral. So this is not a problem. And the next thing I want to make sure we have is these two variable which is the or no, actually this should be private. Or let's go ahead and make them serialized. So the dash length, which is going to be set as 0.5 f. So this is how long we are dashing. And then we will have the dash cool down, which is going to be the time between each dash and sell it at one. So now we have the option to play around with the dashes, the dash speed, dash length, and the dashed. Cool. Now 1 second. Okay, great. Now an update. We are going to go ahead and create a method in here are not method actually. First of all, before we create the method, we are going to check for some kind of input. And based on that input, we are going to go ahead and change the current speed, make it the dash speed, and then make sure that we can no longer dash. You can use whatever button you want. Maybe I'll use the space. I'm going to use input that get key down. And you can see that this returns a true during the frame, the user starts pressing a key and identified by a key code. So hit tab, open up the brackets. I'm going to write in here key code dot space, and there you go, We can see that we have the options to map on our keys and we want to make sure that we can dash, open this up in here. So the first thing we do is the current movement speed becomes the dash speed. And can dash is set to false. So there we go. We click on the space. We check if we can dash. If both are true, the current movement becomes the dash speed, so it's a lot faster. So the current movement in here becomes 20, not ten, we move faster and we cannot no longer dash. Of course, we will have to reset these values in just a bit. But for now, let's test this out and see if it works. Oh, and we forgot to do something which is create the actual animation. And let's do that in just a bit for now, let's test out our mechanics of they work. So I am going to make this a bit bigger. So I move around. If I had the space key. Yep, no, nothing happened. And why is that? Because we have some kind of error. Okay, This is very annoying but doesn't impede us from anything. What seems to be the problem? I pressed Space, get keydown, declare controller. Okay, welcome back. So after a bit of digging and I was very confused why this was not working. And that's because the candidate was not set. So it wasn't true. I made sure to set it to true and start. And now I've also had this debug dot log. So let me just show you what I was doing. I was confused. If need be. Problem was the current movement wasn't changing for some reason. So I had the debug dot log set right here, and I was looking in the console. So on notice that it kept its state, and so I realized this method was not being caught. So I knew that pressing space was okay. They can bash probably wasn't. I set it to true. It worked out. Let me remove this, save that. This is just the power of debug. And as you can see, sometimes not everything works out perfectly. Sometimes you need to dig into things. So now when I move around, you can see the movement. You can realize how fast it is when I press the space key. There we go. You can see that I'm moving a lot faster, okay, with that done, the next step is to actually take us back to the regular speed and also make sure that the dash cool-down works and weekends then again after the wherever the dash cool down. And that's going to be actually part of your challenge. Your challenge is to create two cotyledons. So the first will be the cool-down counter where we will wait and then be able to torpedo again. And the second one will be the speed at which we move so that the end of this, we'll put the speed back to its normal speed. So those instructions pause the video right now and go do the challenge. Okay, welcome back. So what are we going to do in here? As soon as we dash we have the movement, we are going to have to call routines. The first one in here is going to be an eye enumerator. And it's going to be the dash. Cool down. And in here we are going to yield, return new. Wait four seconds. And we are going to wait for the dash, pull down. And when it finishes, we are going to say that can dash equals true. And then we are going to create another I numerator, which is going to be called the dash length. And you know what? I think that the name isn't enough. I'm going to call it the dash length counter, just so we know what's going down and the dash cool down counters. Sure. Let's call it the dashboard down counter. And I'm going to copy this. So yield, return new weight for second, but now it's the dash length. And when we're done with the dash, This means that we've dashed for, I don't know, however long the dash cool-down will be. However long you want the player to move fast. I will keep it at 0.5. Maybe we'll change it. You can do whatever we want. I'm going to set the current movement speed to be equal back to the regular movement speed. So finally, we need to start the coltan, which is the dash, cool down counter, and then start another co-routine. And it's going to be the dash length counter. Dash length counter. Okay. So I was looking and wondering why this was still red. That's because we didn't actually called the dash cool down counter. We just call the variable up there. We save that. So now we press the space. We said the current movement to dash speed. Without it, we cannot dash any longer. We start the co-routine. The dash cool down. After the cool down finishes, we can then dash again and the dash length. So save that. We go back into our game. We run the game. And there we go. We can see that now we move fast. And then we start moving slogan, so fast, then slow again, and fast, then slow again. How cool is that? There we go, everything is working. And if I try to dash multiple times, you can see that I cannot do that. I have a period of time in-between. I cannot move very fast as much as I would like to. So I hope you enjoy it. I hope you are committing the changes created a torpedo movement, I'm going to call this because it sounds really cool. Stage all created. Torpedo, movement. Commit the changes. And I'll see you in the next video where we will actually be adding visualization to this torpedo, to this dashing.
44. Animating The Torpedo: Welcome back my fellow game developers to a brand new video. And in this one, we've actually added an animation, which is the layer dashing into the animator. So when I run the game, you can see right here that we are moving. When we press the space, we don't just move faster. We actually do the really bully. What is really bully them? Something from my childhood. But anyways, you can see as we walk, we can also do this. We have the cool down and nifty thing is we've added at the last second, it was off the top of my head when we are shooting. If I do the torpedo, there you go. You can see that we can no longer should because obviously we do not have a gun, our hands. So let's not waste any more time. And let's get started. Okay, so time to animate the torpedo. Firstly, we are going to do is we are going to go into the dome player, select the animations, the idling. We are going to create a new clip and here which is going to be set and the animations layer. And let's just call it dashing because each one of us, or player dashing to stay consistent with the other name. So player dashing, save that. And now let's get started. Now, we know that we are accessing. We are changing the animations or the properties on the body sprite renderer and scrolling down into the sprites. So we're going to add this. Let's open this up so we can see them properly, just like we were always doing. So let's see the dashing 1, 2, 3. And let's actually, I want to just open this up and properly see what's happening. So we have 1, 2, 3, 4, 5, 6, 7 sprites. And we've got all of them properly. Let's see. Okay, So all of them, That's called this, the D1, D2, D3, D4, 5, 6, and 7. So I just want to avoid the confusion just so I know which are the d's. So there you go. 12345 through seven. Hold down, Shift, select them all, put them here. And I'm going to remove the first one and I'm going to move all of these to the start. And now let's expand this a bit, but let's make it around. There we go, run it. Let's see. Okay, Very nice. So even though we still have the arm in here, if you want, this is something that I was thinking a lot about. So the arm and the gon stay in place. What should we do about that? Well, honestly, I'm just going to keep it as it is. You can rotate the arm, you can vote it began, you won't be able to shoot. I think it would be a good mechanic actually. Maybe we should even add it. No, because I want to see the arm and the gun rotating during this time will not be able to shoot obviously, but we don't want to change the rotation of the gun. It will cause a problem. There we go. This is the dashing, but we can do is we can maybe turn off just as we can create a recording where we turn off the player's body and arm. Maybe just hide them for a second. At the start, we turn them off. And by the end, oops, not the body. I meant the arm and the weapons on. We turn them off. And at the end, when we finish the rotation, we need to make sure that the, this is the last one. Paste it in here. We turn this back on. Now hopefully this will not cause any errors. We save that, run the game. Also. We need to actually trigger this. Let me just go back. And should be there is a problem. So what I believe will happen, maybe this will cause a slight problem here. So you can see the weapons on. We got a reference to it and the far point. So what I'm afraid of is that when we turn off the weapons on, these will no longer be working. But let's see what happens and waste we save that. Let's go into the animator and we'll worry about that in just a bit. So what should we be doing? We are going to start dashing when we are in the player walking. So I'm going to go from player walking to player dashing. I'm going to create a triggering here. And I'm going to call it the dash. There we go. The condition in here will be the dash. Yep, So from walking to dashing, we have this. And what we can do is we are going to maybe have an exit time because we don't have an actual time for when we stopped the dashing. We don't have a condition that makes us stop bashing. If we don't go back, we will keep dashing forever. And we can also be dashing when we are widening. So I'm going to move this a bit, make them look a bit better. There we go. There we go. And I'm going to make sure that this is also under the condition of dashing. And we are going to remove any transition time from walking and the dashing. Let's go ahead and test this out. Actually, if I go into the animator run the game, we can see the idle right here. And it should not have maximized on play the game. Let's see how this works. So this is my actual process of I dash. There we go. We have it working correctly. I stopped dashing two. Okay. So as you can see, there is something a bit wrong if I tried to shoot right now, where are the weapons? So that we make some kind of mistake on the doom player, the dashing, and this one is turned off. Do they get turned on? Yes, they do. On the last frame, but for some reason it did not turn on. So I'm going to run the game again and see what the problem is. So I dash o, okay, now I know the problem we are looping. So in the animation, layer, dash, stop looping, this is the first time I forget so many times to remove the looping in a game. So let's run this again. Test this out. So I do the dash, I stopped dashing. I look at the doom player. Yep, there we go. So look what happens when we dash. Okay, So that would be dash. I didn't know 0. So we are still in the dashing animation. Great. Now we are going to make a transition back from the dashing to the player walking and player idling. And this one will have an exit time. We will remove the exit time on the way going back. So from the dash into the player, idling and walking, both transitions should not have an exit time, nor do they need to have a transition duration. And while going we will have some kind of exit time right here. So we will keep the exit time as it is. Why? Because when you are creating animations and you have extra time at sort of happens automatically and perfectly for that moment, if we have a bit of a longer exit time, the animation might be cut in the middle and then back to idling. So let's test this out. Anyway. I'm going to go ahead and run the game. So when I dash, there we go and we don't go back. Why is that? We don't go back to the eye, the link for some reason. There is something not working properly. The way this works is when this animation is playing, then we have an exit time. So it's not about this one, the one that's going towards the dashing for the one coming back. So this was a mistake on my part. Something I thought I knew or of course I know this, but for some reason I'm mistaken for the way back, not the way going. But anyways, one thing I noticed, if we play now the gushing works properly. So even if we are walking, we said the trigger, we have the splitting. Okay. So while we are working, there we go. We stop working because we are clicking on this. We will test this out inside of the game. But for now, you'll see that when we dash, we play only have the animation notice here in the dashing. So you'll see that we play have the animation and then we go back. Why is that? Well, because on the exit time and here we are playing 60% of it. So what we'll do is we'll simply increase this until it becomes around 97 or even one. And this one also, so this is a percentage. And when you increase it, you see in here in the timeline that we play the entire dashing and then we go back to the player walking around 97. I don't like to keep it at one because we will start the, again the player dashing or have something stale. So 97 percent run the game. Now when we dash, there you go. We do the dash. We do the dash, we do the dash and everything is working properly. Let's test it out when we are walking from the game. So we're walking, we're walking, we dash. Okay, it's not being triggered. Really nice. Why is not being triggered? Well, because it's part of your challenge. Your challenge is to trigger the torpedo animation so you only have one task and that is an update. When we press the buttons, make sure to trigger the animation and you should know which buttons. Maybe you use something different than space. That's why I use buttons and always pause the video right now and go make sure we dash. Okay, welcome back. So in here, when we dash, we are going to go ahead and say that the player animator set triggers, set trigger. And because this is a string reference, we go back, we copy it, we go back in here, we pasted, we close this off. And finally, I also want to add a small comment in here for later on, we are going to change or make sure that the player is invincible. So access the layer health handler because it will be a separate script. And make sure he is invincible for a while. Great, so we're going to save this now, go back into our game and we are going to run. So now we can shoot. We do the dash, we can shoot, we do the dash. And if we are dashing, we are still shooting even though the arm is destroyed. So there you go. We can also Dash while we are walking and it works perfectly fine. There you go. You can see that we can dash while walking and we go back to walking. Now, the problem here is that when we dash, we shoot, we can still keep shooting, even though we are dashing. Now, it's kind of easy. We can create some kind of Boolean here. Make sure if we can dash then we cannot shoot. This is a good idea actually. And where is it pointing gun whereas the player shooting? And we can create a condition. And here, this is really nice. I didn't want to do it right now because later on when we create advanced weapons, everything that revolves around shooting mechanics will be moved from the script. This is where we will explain how we evolve our scripts as we go on. But for now, let's just add this little condition. That's a good way to teach something new. We're going to check before we start player shooting, if we can, dash is equal to false. Why is that? Well, because while we are dashing the can dash spot, so we have this kind of counter. And we're going to say in here that return, if this one, excuse me, return, simply just that. So what does return mean? Return means that we go out from the player shooting. So this whole code right here does not execute as soon as the candle is false, we can no longer shoot. Let's test this out. I hope you understand what we mean by return. Return means that we just get out, we stop everything on this. If this condition is not true, so the dash, the dash is true alone. This means this entire condition is false. This means we do not return. So save that back in our game, from the game. We should see that when we are dashing, there we go. We stop shooting until they cool down as finished. Okay, great. So this is just a small line of how we can fix this later on, of course, this will all change. So I hope you enjoyed the video. I hope you made the commitments in here. I hope you left a review. If not, this is the perfect time to do so. Thank you so much. Stage all made the dashing animation. Now we're cooler. Commit the changes, and I'll see you in the next video.
45. Breakable Objects: Welcome back, my fellow game developers. This video will be a bit longer because this is one of the times that I really wasn't sure what we are going to make. So I wasn't sure if I wanted to make this a trigger or I wanted to make this a solid object. But anyways, when we walk through this, but nothing happens, but if we dashed through it, you can see that we can break it. How cool is that? And it disappears on its own after a couple of seconds. So let's not waste any more time. Make sure to put your concentration SCAP on. I do have teeny tiny mistakes and some hesitations during this, but don't worry, I explained everything as much as possible. So Let's get started. Oh, okay, So now it's time to add a couple of breakable objects. This is the whole point of the section. We're at the second video and we still haven't added anything to destroy. So I'm going to go into my sprites in here. And I'm going to make this slightly bigger. On this way. I guess we can even make these icons are a bit smaller so they fit nicely. There we go. So I'm going to right-click create a new folder, and this will be the breakable objects. Breakable objects, and this is why we always create folders. Imagine if we had all of the sprites altogether in a single folder, it would have been a nightmare. Anyways, we'll go into the resources, as you can see right here, we have many bots to destroy. I'm going to choose the right one. I'm going to choose the white breakable object. There we go. We sudden in here. And we can go ahead and dissect this. So I'm going to make sure that it's multiple. And I'm going to do this may be off screen and I will let you know when I finish. Okay. So welcome back. Let me tell you what I did. I didn't want to bore you with all the details, so all I did, I sliced up 32 by 32 the white box. We have three different parts here and three different breaks are used. The W1, W2, and W3 to describe the biggest pop breaking. And I make sure that we have these little three pieces in here. They will come in handy later on. So I'm going to discard any changes. I also created an animation for the bikeable parts. So there you go, you can see it breaks up. We're going to make sure from now that we go to the breakable. So you can see white bought breaking, make sure it doesn't loop. We are going to save all of that. Now the braking pot, I'm going to add a year Box Collider or a circular plus no, not a canvas. Remove the component. I'm going to add a box collider. So box collider 2D. There we go around this, I'm going to make it a bit smaller. I make the pixel size on the sprite. Let me show you what I did also. So you don't get confused. You can see that the pot is around a good size for the player. Let's keep it that way. And what we can do is we can go ahead and make it, well, this will depend on you. Do you want your object to be able to want us to be able to collide with this object, or we want to just make it a trigger. I'm going to keep it a trigger for now, later on, if you want to change this, if you want to have interactions with the pots, you want them to stop you from walking through them. Than I do recommend you make it non-trigger. Know what, Let's keep it as a non-trigger. And for that reason we're going to add a rigid body to it and we'll make it static. Okay? So it's a static. It does not move, but we can break it. So what else should we be doing in here? Well, I think that's it. For now. Let's save this and let's go ahead and add a script to it, which is going to be called the breakup bulls. So in the scripts, because we want to add behavior obviously to the spot we wanted to break. Come on, okay, so let's see enemies player UI, and let's go ahead and create a folder in here. And let's make it for the breakable. Break bubbles opens up right-click Create will probably not have a different script or another script, okay, so breakable. But the good thing about creating a folder and setting just one script in here that we can see it from the outside. So and scripts right here, we can go ahead and check the breakable so we can find it immediately. I'm going to add to the braking part. There we go. We have the break bubbles. Let's open this up in here. And what shall we be doing? Well, because we are not using a trigger, we're going to use something called the on collision enter. So there you can see on collision is when the colliders less rigid body has begun touching another collider or rigid body, and we'll make sure that it's 2D. So in here you can see that instead of other, we have the collision. So what we're going to do is we're going to check if the collision.com tag, does it have compared tag? Nope, it doesn't. Tag. Or we can access the collider.com tag. There we go. So now we have the collider of the collision. And we'll check if it's the player. And if it is, then we are going to destroy the game object. Excuse me, the game object. Save that. And we'll also go in here, check for the animator and see what kind of trigger it does. So we'll need to create an idol in here. So we'll go into the assets animations. Or is it, where is it? Where is it? Breakable? White part, idle. That means that it's not moving because obviously you can see we don't want to have it breaking as soon as we start the game, we want to keep it like that. So what we can do is right-click in here and set this as the default state. So there you go. And we'll add this right here. Create a transition which will have some kind of trigger, which is the break, Scott break for simplicity, no exit time, transition duration 0. And I'm going to go ahead and make it as the break. Then we'll go back in here. We are going to, because this is, this won't be too complicated. I'll just get the animator immediately. So in here I'm going to say if the collision as player before we destroy or actually, you know, we are going to remove this. I'm going to go ahead and get the component, the animator. And in tor dot set trigger and is going to be the rake. And I know it's a string reference and I didn't copy it, but I hope the break is easy to understand. And then I'm going to create a public void. Destroy. Well, no, destroy. Just, let's just call it destroys. And maybe we want to add some kind of cold in so we don't want the pot to be destroyed. So let me tell you what I'm looking in here to do. What without a coroutine, simply destroy the game object. What I wanted to say, I wanted to use a co-routine to delay the disappearance of the little pieces right here. But on the other hand, I thought it might be even better to just set this right here, called the event after maybe a couple of seconds, or we can choose maybe on second three, go, set the event. What's the function? Destroy, save that, run the game. So now we should see that as soon as we collide with the pot, then it gets destroyed. And there we go, the object has disappeared. And what we also can do is, for example, we can go in the animation of the braking part and the animation. So as soon as the pot breaks, Let's say it shatters right here. What we can do, we can start recording and then turn off the box collider. So you'll see that right now the box is good when you see the pot entirely and when it breaks, there we go. There is no more collider. And if we look closely, we can choose the collider and maybe move it a little bit before it actually breaks. So it seems as if we've walked through it. So save that. Run the game. Oh, no. Talk. No. Not like that. Sorry. Oh, so it record I forgot to press the right button. We run the game. We had the pot. There you go at breaks. So it feels really as if we walked through it and you can see the pop disappearing. Okay, great. So what that done, what we need to do is we need to make sure that this pot breaks, not when we are just walking through it, we want it to break when we actually dash through it. And I think that this is going to be a challenge for you. And your challenge is going to be to return a Boolean value. What I felt that was about breaking when we're running, well, when we are dashing, we want to create a method int player controller that we can access from the break we'll script. Why is that? Well, we'll need to create a method that returns a bool instead of a void. And that method should return true if we are dashing and false, if we are not and false if not, not, this is not w, it's steep. Hence, we will need to use the players, the velocity or the player's move speed or whatever you want to use. So why are we creating this return value? Because in the break bubbles, we want to make sure that the player is actually dashing. So we will add to the condition in the on collision enter. We want to make sure that it's not just the layer. We want to make sure that it's the player dashing that just hit our pot. So that information create the method that will return a Boolean value. Pause the video right now. Go do the challenge. Go do your best. I know we haven't done this type of method which returns something other than void. But I know you are up to just try to do your best. Okay, welcome back. I hope that wasn't too hard. I'm going to go into the layer controller. Okay, so what is the problem in here? You might say that, Well actually, I just want to access the current movement. And I can immediately know what the speed of the player is. But in here you can see that the current movement is private. So what we'll need to do as we are going to create a method in here. And that method is going to be a public bool layer is dashing. And what are we doing in here? We are going to check if the current movement speed is equal to the dash speed. We could have also used the candle, but they can dash isn't equivalent. Where is it? Where are we resetting the numerator. So he can dash is not equivalent to when the movement speed stops. So we can dash is just to cool down the dashing while the movement speed is immediately related to the dashed length. So back in here, if the current speed is equal to the dash speed, we are going to return true. Else we are going to return false. And by the way, we could have done something similar to this, so I can remove these. And as you can see, it's much cleaner. Why? Because we only have one line of code under the if and else statements. Otherwise we could not have used this way. Now we have it as public. We go back to the breakable. We are going to go ahead and create a Boolean inside of year 4. We destroy the pot after we check for the collision, obviously because we don't want to always know what the player speed unless it's the actual player collided with, just hit. So I'm going to go ahead and create a bool. And it's going to be layer is dashing. And it's going to be equal to the collision dot game object dot get component. So it's a bit different than when we are using a trigger. And in here we are going to simply get the player controller. And we are going to check if the layer is dashing, save that. So now this should either return true or false. And in here we're going to check if the layer is dashing. Then we are going to start the animation. And when the animation starts at breaks and destroy stick game object eventually. So one thing that I wanted to mention here is in here we used collider. In here we use the game object. We could have used the game object in here, save that, and it would have worked the same, but the collision, you can see right here, it returns a collision. It doesn't have the certain, Let's say methods that we need. So if I go for example, and on the other place, so level exit for example, in here, the collider 2D is different than the collision 2D. So collision is part of the detailed return to the physics. If we look in the level exit, the collider 2D actually returns the game objects so we can immediately access the tag while when it comes to the collision, It's just a little bit different. I recommend that you go through Unity's documentation, see what the difference between collision collider. These are small things, but just know that we are accessing the game object first and then using the compare tack. With that out of the way, let's save all of this. Let's go back into our game. Let's run the game. Let's try to break the patois walking. Okay, there you go. So it's not breaking. And if I tried to dash, oops, I forgot the bottom two dash. If I dash. Okay. It's also not working. Why is that? Okay, so it broke. There you go. Let's try this one more time because there is something that was a bit slow. And I believe the problem is with the game. Wait for a second. So I think I want to move this, the thing that handles the collider. I want to move it to the beginning. Save that because I want the collider to disappear as soon as we start breaking the buck. So there we go. You can see right now that we can simply move through. Now if you want to add a bit more, maybe I don't know authenticity that we want to keep it just a teeny tiny second before we go ahead and break it, It's your choice. Make sure that you choose whatever you want. Let me see. Okay, so if I want to move, if you move just the breakable pot, choose the second line. There you go and you can see that you can move it. So save that. Now we have everything working. Let's try to walk through it. It won't work. We walked through. It doesn't work with dash through it, it breaks. Great. Let's go and make sure that we stage everything. And in the next video, we want to show the broken pieces of our pot. So we want to have some kind of pieces that spread. That's why I created and the sprites in receivables here we have the P1, P2, and P3. These are pieces that are going to lay around this and they will add a bit more of a feeling of pots breaking. So we want to have pieces flying around a bit and then disappear slowly, making things a bit more authentic, a bit less rigid. So I'll see you then.
46. Broken Pieces : Welcome back, My favorite game developers. And in this video, when we run the game, we are still breaking the part, but you'll notice that after disappears, we have three parts. Part 1 on the ground being destroyed. We have a part 2 and part 3 and another part 3. So we are instantiating and broken parts when an object or a breakable bond breakable object is destroyed. So let's not waste any more time. And let's get started. Oh, case. So time to make some broken pieces. The first thing that we're going to do is I'm going to drag this broken piece right here. And where is it? Double-click of k. There we are. And let's make sure that it's on the player layer. And I think we should change this to have the level objects and not the player lives. But for now I'm just going to keep it as it is not worth about that. Obviously, we should change it, but we're not going to do that right now. I'm going to add a 23. So now we have three pieces. I'm going to select all of them and make them all on the player. There you go, the PS2 and the bees. Three, I'm going to save that. Before I move on. Let's change this into the Baroque and part one. Copy that broken part 2 and the broken part 3. There we go. Now, I'm going to go into the Prefabs folder and I'm going to right-click and create a new folder for the broken parts. Open it up. And I'm going to add them one by one. If we select all of them and drag we, it doesn't work. So I'm going to drag one after the other. So now we have the three broken pieces and if you want, you can make something even better. So we can add, for example, the third piece. We can rotate it around. So now we have this piece right here, we rotate it around. And this can be called, for example, the piece for, if you want, I recommend you use your imagination when in doubt with the pieces that we have. I'm going to select these three and make sure that their position is at 0. Because for example, if we have, let's say this as a six, Okay, We add them at six or have them all at six if I add them so I instantiate them. You can see that it starts off at the position 6 not on 0. This will cause problems. So I always like to keep it at 0, even though when we instantiate it at a certain transform position, it will take the position that we tell it. But anyways, let's continue on. I think you know what I meant? I'm going to delete this broken pieces. I'm going to open up the breakable script if I find it. And in here we are going to first of all, obviously get a reference to the broken part. So I'm going to create a serialized field of type game object and call this the broken part. Save that. And then before we destroy the game object, I'm going to go ahead and instantiate broken part at transform.py position and transform the rotation. Save that. Let's go back in our game. Right, for this, compile any day now. Okay, So I'm going to lock this down. I'm going to go into prefabs and select the broken pieces. And let's just add the first one, save that the game collide with the object there go at breaks and we should be left with this piece right here. Okay, Very nice. Now it's not disappearing. We'll handle that in just a bit. But for now we have the pieces breaking. But obviously, obviously we want to have multiple pieces breaking and appearing one after the other. So this is going to be your challenge, your challenge to instantiate all the pieces. So first of all, get all the pieces from the sprites we've already done that. Create an array of game objects for the broken parts looped through the pieces you using the for loop. So we've already learned how a for loop works. You'll need to generate a random number every single time. And we'll need to use the number to instantiate a broken piece. Now you might be thinking, well, this means that some broken pieces will be done twice. And that's okay. Honestly, I think it's not something very bad to worry about. If you want, you can go even deeper into this and instantiate a random angle for the pieces to have so that they may be appear different from one another and don't. Set on the same place. Now, of course there will be a small hindrance here. We'll talk about it once you do the challenge. So pause the video right now and go do the challenge. Oh, come back. So before we destroy the game object, what we're going to do is we're going to, and I think that this is not the perfect place to do this. So instead of instantiating in here, I'm going to go ahead and move this up in here. So after we start the animation, or you know what? This is also a problem. So I'm going to make this a bit bigger. And after we start the animation, I'm going to instantiate the pieces if you want. If you want, you can also create a separate method and call it using the events. But for now, let's go ahead and do the things that we wanted to do. So first of all, we are going to turn the game object into an array, and the broken part double-click in here. And this is going to be the broken parts apply that. I'm going to comment this out in order to see everything in the inspector. So breakable pots scroll down, close these off because they are annoying. And what do we have here? The broken parts. Lock this down, select all of these and drag them in here. So now we have the three broken parts ready for use. I'll go back in here. And what are we going to do? So first of all, we are going to loop through all the parts. So for I'm going to initiate at r equals 0. So I hope this wasn't too hard. Let's start again. We start off by creating the variable. We started with a 0. Then what we're going to check, or we will keep looping. While I is less than the broken parts dot, length and length because we are using arrays. If we're using lists, we use count and every single time we increase i by one. So we'll need to generate three pieces, and we want these pieces to be random. So we have a variety when breaking up pots. So int, it's an integer. We're going to call it the random broken part. And it's going to be equal to random dot range. And what's the range? The range is from 0 into the broken parts dot length. There we go. Now after we do that, we are going to move the instantiation up. And inside of here, instead of simply the parts, we are going to use the part with the random broken part. So I'm going to save all of that. Okay, so let's go ahead and test this code out. So I'm going to go back in here. I'm going to see what else do we need to do? I think everything is good. Run the game. Now we walk up to the bot, does not break. We tried to destroy it. There we go, it gets destroyed and there we go. We have some pieces are no, maybe I should not have maximize on play. Again, stop, maximize on play. Let's make this bigger. We want to see the hierarchy. We want to know what's happening. Okay, so I run into the part that gets broken up. So there we go. We have broken part two, broken part 1, and broken part two. So I can move this just a little bit and the broken parts are on top of each other. So this is why I recommended that we create a bit of rotation. So with that done, let's make sure that we stage everything in here. We stage of that. And I'm going to call this, now, we instantiate broken parts. When we instantiate broken parts, one pots are the stroke. When bots are destroyed, save that, commit the changes. And I hope you are enjoying, I hope you are understanding everything. And in the next video we are going to make sure that the broken pieces don't just stay in place. They spread out as if this has been destroyed and we have some kind of impact. So I'll see you then.
47. Spreading Broken Pieces (Lerp): Welcome back, my fellow game developers. In this video, we've created the broken pieces and we make sure that when we hit these broken pieces, they fly a bit apart. So now when I hit it, there you go. You can see that these spots moved a little bit and you can see that, okay, So for this wasn't the best example. Let's try to see when we have two parts that are the same. So there you go. Can you tell which one is part 2 and the which one is also part two? Nope, you can't because we've added a random rotation. I thought it would have been a very nice idea when I told you about it in the previous video, I thought why not implemented right now into this game. So let's not waste any more time. And let's get started. All the case. So now when we destroy our broken bought, we have the broken pieces and speciated. But first of all, they are sometimes the same even though we choose random numbers. And the second thing is that they don't move apart. So the first thing that I want to handle is the rotation. So instead of just having the transform rotation, but I'm going to do is I'm going to create another integer, random rotation. And it's going to be equal to a random range between 04, Y4 because I'm going to be rotating them around the z-axis in four directions. So the way I'm going to do that is by multiplying in here by 90 degrees. And we will have four options. So either we rotate ninety one hundred and twenty two seventy or we just brought it all the way around. Maybe this one should be 0. We start off at 0123. Okay, so instead of the transform dot rotation, I'm going to use something called the quaternion, that ruler. There we go, That's ruler. I was looking for it and see it. So you can see that this translates the three axis and to the rotation. And we are going to be obviously rotating on the, around the z-axis. So 90 half times the random rotation. There we go. Save that. You can see the instantiation right here. If you think this line is a bit too long, what you can do is hit Enter on every single line. And now it's much more obvious what this instantiation does and what the elements of it are. Okay, great. Now with this none, the next thing is we want to add behavior to our broken pots. So we are going to go into the scripts in here and the breakable right-click and create a C sharp script which will be called the broken pot. So broken part, hit enter. Okay, I don't know why this keeps happening and I'm going to go into the broken parts, select all three of them, and go ahead and add the broken part script on each one of these prefab. Open the script up and what do we want in here? So first of all, we want a variable too, after the movement speed of these parts. So it's a serialized field which is going to be a float. And we'll go to the move speed. And if you want to add a bit more variety, you can even make each one of them has a different speed and baby, depending on how fast dashes or whatever you want to do. Then we are going to create a private vector 3. And this will represent the movement direction. So movement direction. So in what direction will each piece be moving in? And finally, we will have something called a serialized field, which is going to be a float. And this is the halting factor. And it's going to be 50 of these numbers are arbitrary and I've already tested a couple of outsold. That's why I know why five-act. But anyways, what is this halting factor? Obviously, when our pieces break up, they will spread apart, but then they will stop at some point. So our goal is to make the salting factor, which will affect the pieces as they move away from each other and finally stopped them. So we will slowly be slowing down. And I'll show you how we'll be slowing down using something called lobe. But let's not get ahead of ourselves. First thing we want to do is we want to have a random direction in which each piece moves. So first of all, I'm going to make a movement direction of x. So why am I doing this and start? Because the broken part is attached to the broken piece, which instantiates. And as soon as it instantiates, the start is being called. And then start will determine what the direction is. So the movement direction dot x2 will be equal to the random dot range and what values you, you can choose any value you want in here. But just to make it a bit of fun. For example, you have the broken pieces flying off very fast. I think the direction, the randomness of the direction will be a bit more wacky, let's call it. So what we'll do is we'll use the minus movement speed as the minimum and the movement speed as the maximum. So now as the movement speed increases, if you wish to increase it, the randomness will also increase. And having a minus will make sure that some pieces just go. I don't know where some random place. So now with the movement acts downwards, that's have the movement y and it's going to be exactly the same. With that. Let's continue on. We want to start actually moving the pieces and we're going to use the transform dot position. And we're going to be increasing it by the movement direction times time dot delta time. Obviously we know plus, plus equals, so it moves slowly and the movement direction times Time.deltaTime to detach from the frame rate. So this would be more stable. Anyways. Now we need to make sure that we are halting the movement of each piece and not just having them move into infinity and going through everything. So the way we are going to do that is using something called the Learn. So I'm going to show you what is, make sure that you find it on your own in Unity's documentation. What does it do? It takes in three variables. The first one is the start value of the speed of and with its the start value. B is the end value and t is the value to interpolate between a and b. What does interpolation mean? So, linear interpolation between the two points. So what happens is we want to take the value a or any value from a to B using a factor of t Every single time. So this will be the Halting factor that we talked about that we are going to be applying and make sure that you understand what is happening in here. We are trying to move the pieces slower and slower. So we are going to start off with some kind of direction. And then we are going to be taking it to 0 to stop the pieces from moving. So I'm going to issue this challenge to use her to stop the movement. So first of all, we want to decrease the momentum of the broken pieces, of the moving pieces. We want to set the movement direction to learn. We're going to start value. We're going to have the start value be the actual movement direction, and the end value should be the 0. And finally, the speed of which we are going to be halting the movement is going to be the Halting factor. So basically this challenge as you applying, stop the movement. So pause the video right now and go do the challenge. Okay, welcome back. So in here, after our while we are moving in certain directions. So we have the movement direction as the only factor that's affecting this. So in here are going to set the move direction to be equal to a vector three bottlers. And in here, the initial value will be the movement direction. The final value will be vector 3 0, and the factor, the T will be the Halting factor times Time.deltaTime because we are learning every single frame, so we don't want it to be very fast. Okay, so let's go back in here and let's test this out and see if it works. For we do that. I'm going to go into the prefab and see what we have broken parts. Maybe we can add them here. So breakable pot. There we go. It's in the broken parts, maybe whatever it's called. Okay, broken pots, run the game. Let's see what happens. Maybe this doesn't work at all then. Oh, nice. So as you can see, each part went our separate ways and you can see we have the part one which was exactly on top of the part one or the other part 1. So they had the same rotation. Let's test this out again. There we go, we destroy it. What do we have? Part 2. 2. And so can you figure out which part the two was? So if I move this right, also still having the same rotation for some reason, did we do something not completely right, so I'm going to break the pot and let's see. Okay, so I feel that the rotation thing isn't working if I go back to the breakable random rotation. Okay, welcome back. So I was worried that there was something wrong with the code, but no, apparently, we are either the luckiest people on the world or the unlucky asked people on the world, depending on how you look at it. But every single time the rotations were the same. So you can see right here, part two is minus 180 and the other part 2 is minus 90. So again, let's test this out. And let's see, there we go. We break it. And you can see we have Part 1 and Part one. But can you tell the difference between these two parts? So you can see that this one is 90 degrees rotated and this one is the same. Wrote it. So there is a big difference between them. So that done, I hope you can see and appreciate how random rotations work. I hope you can see and appreciate how the small detail of adding a bit of velocity to the broken pieces makes everything look more and let's say natural and better. So let's make sure that we stay all of our changes and I hope you're enjoying and I'll see you in the next video where we actually will be getting rid of these part that fell apart using something similar to learn. But we'll be applying it to the broken parts to make them slowly disappear and not just an instant go away. So I'll see you.
48. Destroying Pieces Slowly: Welcome back my fellow game developers and this video, when we were as the game, when we maximize that we go, we run the game. When we walk around, when we hit one of the parts, you can see that it gets destroyed and they slowly, slowly fade out, and then they disappear from the hierarchy. So let's not waste any more time. And let's get started. Oh, okay. So now it's time to finally finish off this and destroy the broken pieces on the ground. How are we going to do this? Well, we are going to combine a couple of things that we already know and maybe one method that we don't. So let's get started. The first thing I'm going to do is I'm going to go into my scripts. And in here, in the broken part, I'm going to first of all create a timer here, which is going to be a serialized field. And it's going to be a float with a lifetime called lifetime. And let's just set it at around three seconds. Okay? Maybe even more, maybe five, Let's set it as five. And then after we instantiate, after we start moving and the position and be wild or after all, show while we are learning the direction, we want to go ahead and go to the lifetime and make sure that every single frame we are removing the time, that delta time. Okay, great. Now, what happens when the lifetime, where is it? When the life time is less than or equal to 0, we are going to destroy the game object. Let's check this out and see if it works. So I'm going to go into again, let me save that. Yes, we did run the game. Had the broken pieces, 1, 2, 3. Okay. So it's around five. I guess. I think that was five anyways. But obviously we don't want to destroy this. We want to slowly tear it apart, so we want to make sure that it doesn't just explode. We want to slowly deteriorate with time. So to do that, we are going to use something called the move towards. But before we delve into that, I want to show you something. We are going to be accessing the colors, so let's use the pot. Okay, So on the broken pieces we have the same breakable pot. Actually know what, let me just add one of those broken pieces in here and demonstrate on them. So you can see we have the sprite renderer, we have the lifetime and everything. If I access the color, I have these three colors. So the R, You can see that I can change the color if I zoom in, you can clearly see how ugly this pixel art is. No, I'm kidding. It's amazing. And then we have the red. Finally we have the yellow, and we have also the fate, and this is what we want to access. Now, as I always say, there are easier ways of doing this, but I want to test everything. I want to explore with you as much as possible. So I'm going to delete this. I'm going to go back into Unity, and I'm going to access the sprite renderer. So I'm going to, first of all create a reference in here. And it's going to be a serialized on, you know what? It doesn't need to be a serialized field. I'm just going to get access to the right, a renderer. And I'm going to call the part sprite. And it's going to OK. It's going to be private. I forgot to make it private because we don't need to see it and start. I'm going to make sure that the part Sprite is equal to get component sprite render. Okay, there we go. So now we have a reference to the part Sprite. And in here I'm going to access the part Sprite dot color. Okay, So you notice that on the sprite renderer we have the color. So we're accessing the color in here. And we're saying that it's a new color. And what shall this color B. I'm going to open up the bracket right here and I'm going to hit Enter and start typing in. So we can see right here, where is it? Where is the new color? Okay, but anyways, we have to give it the red, blue, and green. And as you saw, the red, blue and green are not going to change. So the first three will be extremely easy. It will be the parts bright color dot r, comma duplicate, duplicate, red, green, red, green, and blue. And there we go. If we hover over right here, we can see that these are three colors that we want. And finally, we want to change the a. So the way we access this is through the part dot color dot a. But obviously this time we want to change this. We want this to move from what it currently is to 0. And this is the math out dot moved towards. So as you can see, it moves a value from the current towards the target. And you can see right here, move towards using the math library. We can add the current value, the target value that we want to get to, and the maximum. So it's the maximum change that should be applied to the value. So it's just like we have any alert, the slowdown factor or the Halting factor. This is also some kind of factor that you can use. Okay, so let's go ahead and implement this move towards. So in here I'm going to write method dot move towards. And I'm going to open this up. So the current target will be the current alpha. The target, okay, So the current, the current value, I meant to say, and the target will be obviously 0 F. And we are going to be moving at the fade speeds. So I'm going to just write faith speed in here, times Time.deltaTime. And I'm going to go ahead and create some kind of fade speed variable. Copy this, and let's go ahead. Where should we added? Okay, so there we go. This will be the fate speed and set it to five. Let's set it to one and see how fast that is. I'm not sure how fast will be. I really have no idea. So we're going to save this. So what happens in here is when the lifetime, there is an error, which is that the lifetime is less than 0. Okay? So we need to add a point and come up. So what happens in here when the lifetime is less than 0? So we've finished spreading out, the lifetime is done. We are going to go through this every single time. So what happens in here? The red, the green, the blue stay the same on the part Sprite. But the color, the Alpha moves from the current state that it is n to the 0 using some kind of fade speed. So let's go and test this out. So I'm going to run the game. I'm going to try to make this bigger, to see everything. I'm going to destroy this. And now we'll see that the broken pieces after a couple of seconds. Whoa, how cool is that? So they slowly disappeared. And if you noticed, we had the three parts being part 3 and they all look different. So we didn't have any thing that looks similar. But as you noticed, even though they fade it out, we still have them right here. We need to get rid of this and it's going to be a challenge for you to destroy the pieces. Finally, so create an if statement that checks if the piece alphas down to 0. And if it is, you'll need to go ahead and destroy the game object. So pause the video right now and go do the challenge. Okay, welcome back. So in here, after we've moved towards, we are going to keep checking if the part Sprite dot color dot alpha, which is the a, is equal to 0 f. Then we are simply going to destroy the game object. Save that back in our game. Let's maximize on play. Our game is looking fantastic. I mean, except for the blue lines that you just saw. I mean, we have the enemies shooting at us, following us. We have weapons shooting properly. We have different effects for different weapons hitting things. You can see maybe the salt hitting could use a bit of help. We have blood everywhere. We have blood when we interact. Well, what did you see that? So when we should wait, when we shoot one of the enemies, you can see the blood coming out of them, which is really nice. There you go. You can see the blood. We have random blood we have now also the structural objects if you want. We can also implement their destruction when we shoot them. But anyways, when we crush them, these are the pieces. And they disappear slowly, which is a very nice addition. And I always forget too, I wanted to, okay? Okay, so remove the maximization. There you go. We can see that we no longer have any parts, but we still have the blood, which you know what, I'm going to give it to you as a challenge from I don't know. I'm not going to deal with this right now. Obviously at some point I will, but I pretty sure you know what to do. You can use whatever method we've learned. There are a lot of things, so I hope you enjoyed this section. I think it really adds to the whole atmosphere of the game, the moving, slowly destroying. We learned a lot in this section also. So make sure that you are always committing your changes. And if you haven't already, I know I bored you, but please leave me a review helps me out a lot. Of course, if you're enjoying the course, if not, not, until you begin enjoying the course. Anyways, I'll see you in the next one.
49. Section 8: Advanced Shooting - Creating A Shooting System: Hey, welcome back, my fellow game developers. In this video, we haven't changed much, but what we did is we just started setting up a proper weapons system. We moved the shooting mechanic from the doom player to the actual weapon, which is the Sharp console. As you can see, there is nothing new in here. We just did a couple of changes. This video is all about, let's call it upgrading your project so you get to a certain point. You have all the basic mechanics that you want, but now it's time to make them much more efficient. So without any further ado, let's not waste any more time. And let's make the project grade again. 0 case. So it's time to create a more advanced and the professional shooting system. So the first thing that we are going to do is we are going to move everything that is related to shooting from the player controller into a separate script that I'm going to create right now. If I go into the scripts and maybe let's make this a little bit bigger. So we can see them at least and two rows. These, okay, there we go. I'm going to go in right here. I'm creating a folder which is going to be called the gun or let's call it the weapons system. Have Enter. And I'm going to create a script in here which is going to be the weapons system. Hit Enter, wait for it to compile. And there we go. And a day now. Thank you. It was just a script. Anyways, I'm going to make the fire point a child of the shotgun, and it won't allow us will need to open the prefab. There we go, make it a child, save that. Go back into our game. There we go. So now we have, and sometimes when you want to add the prefabs, make child of things and make parents. Sometimes it will require you to the extra step of actually changing the whole prefab. And the next thing we're going to do is we're going to add this weapon system to the actual shotgun. So now the shotgun will handle all the shooting. First of all, let's open up the weapons system. And if I look in the layer controller, where is it? Let's click in here. Whereas the player controller, okay, though. So there we go. As you can see, we have so many scripts right now. But anyways, what we want to do is we want to move and this should be a separate method. What we want to do is we want to move the whole player shooting mechanic from the player controller into the weapon system. I've maybe mentioned this before. We don't want the player to handle everything. So for example, we don't want the player to handle how bullets fly, and we don't want the player to handle how weapons work. So with that said, I'm going to issue you a challenge. And your challenge is going to be to move the firing to the proper script. So couple of the firing method from player controller to the gun system script. Make sure the two copy all the proper variables with it, and set everything in unity and test it out, make sure it works properly. So this challenge is just about how you upgrade your script, how you upgrade your project and gain. Sometimes you start off your project. You don't have the entire big plan for it, so you need to make adjustments. This will just be an exercise in how to transfer things from one script, the next, making it better, I'll do it in front of you, so don't worry about it. We'll we'll make sure that everything works properly. But for now, pause the video and go do the challenge. Oh, okay, welcome back. So what are we going to be doing in here? We are going to go ahead and select all of this. I'm going to cut so Control X. I'm going to go ahead and put it in here or know what, let's keep the update and start. We might need them. I'm going to paste everything in here so you can see we have a lot that we need to handle. So back in here, we will need a couple of variables which are, let me go up. First of all, I'm going to comment this one out, save that. Then I'm going to check in here, what do we need? We need the swap and automatic the bullet the far point. Okay. So let's see as weapon automatic time between shots, shots countered, fire point. There he goes. These are. Variables and I'm going to paste them in here. Save that. Let's see what else do we have? Do we have some kind of error here? Nope, I don't think that was all the mechanics. So back in here, what else do we have? 0. So if the player can dash, now, obviously the dashing is part of the player mechanics of the player is the one that is going to dash. So what we'll need is a way for us to get a reference to the dash. So is the player dashing or not? What we can do? If we scroll down here, we can create a method. And if I look up here, the dash you can see as private. And what we can do is we can create a method in here. And these are things that we are going to be using more and more as we go this type of method. So it's a public bool and is layer dashing. So in here, all that you are going to do is return can dash. And I'll add an exclamation mark because remember how the dashes working. And because we only return one thing, this is how we are going to be writing it. Now, obviously this is not something that is like a standard. This is more like practices. So have some kind of variable in some different script that you want to access. How do you do it? Well, you either make the variable public, you make it accessible to everybody. But the problem when making it public is that you can change. So if I make this public, I can then change it from a different script, which is a very bad idea. Trust me, you never want to be able to change variables in different scripts from different scripts. So you don't want to be able to make the player dash from, let's say, the UI Manager by mistake, it happens sometimes. So a better way is to just be able to check if we are dashing so we can get the dashing, but we cannot change whether the player is dashing. So this is an extra layer of safety and this is why we always use serialized fields. We could have made them all public and it would have been the same functions. We could have seen them in the inspector and so on. But making it a serialized field means that we cannot access these variables from different scripts, and this will pay dividends later on as you go in your game development journey. Making sure that you can, not only in game development, whenever it comes to programming, you don't want different classes, changing variables, other different classes. Anyways, I'm getting ahead of myself. What are we going to do in here? We can either find the player object or we can get component in parent. And we can, let's remove this for a second. We can access the player controller and the parent, and we can go ahead and check. Is player is player dashing or what, what's this player is dashing. What's this layer is dashing, is moving. There is dashing 0, so we can actually also return this. So this method is no longer needed. And that was really not something that I noticed. But anyways, layer is dashing. At least we had the opportunity. Let's just double-check if the current movement speed is equal to the speed. Okay, so we return true. And there we go. If we are dashing, then we cannot be shooting and will not call this the player shooting. Let's changes to the firing bullets. There we go. So this makes more sense right now. And what else should we be doing? Well, obviously, we need to be calling it in here in the update, making sure that we can shoot. So I'm going to be simply calling the firing bullets method. And now we need to go back into Unity and set everything up. So I'm going to open up Unity. You'll see that the weapon system changed. And this was, this is so embarrassing. I didn't even notice it was just there and I completely forgot that we had displayed this dashing. But anyways, at least you learn something a different type. Or we have this little monologue of why we don't want access to the variables. Now, no worries. Electron of course we will be implementing a lot of these methods as we move forward and make our code a bit more professional. So with that, who Things Done? Let's go in to, first of all as 70 far point of the shotgun. We are going to make sure that this weapon is not a romantic and we'll make the time between shots around 1 second, 1, not 21. We need a bullet, so we'll go into the Prefabs, broken bullets, and the layer bullets. Save that. Let's go into the doom player and apply all the changes. And now I'm going to What else do we have? Let's run the game and see what happens. So the player, player moves around way, but so the player moves around and if we should, There we go, we can shoot. And if I hold down the mouse button, for some reason, it's not shooting. 123. Oh, it's not automatic. Okay. But the problem is so okay. Now, even though I hold down the mouse button, it's not automatic, but the shotgun still fires a lot. And this is something we want to fix because we are now talking about an advanced shooting mechanic. It's not the usual shooting mechanic. We need to make sure that our shooting is consistent. So the shotgun, if we hold down, it shoots one button, but if we keep pushing so the shotgun shouldn't be firing so much when shooting. So with that out of the way, with this whole section, Change, scripting everything. I hope you enjoy it and I'll see you in the next video. Make sure that you always commit your changes. And I'm going to make this commit move shooting mechanic from layer two, the actual weapon. There we go, commit the changes, and I'll see you in the next video.
50. Fire Rate Counter : Welcome back my fellow game developers to another maintenance video. I know it's not the most fun parts of video, but it is very important and there are crucial lessons that we need to learn and this one. So now when we run the game, you'll see that we no longer have the option to create an automatic automatic weapon. But now, if we hold down the button, you can see that we should 11111. And if we try to press as much as we can, listen to the mouse, you can see that we no longer have the option to shoot or to bypass this mechanic of taking the time between shots. So let's not waste any more time and let's get to maintaining 0 case. So this is another video where we want to fix our things. So the first thing we want to fix is let's look at the shotgun. So let's say it is not automatic. So a shoot. And there you go. We have one shot. If I'll keep holding it down, it doesn't work. But the problem is if I press a lot of times, you can see that we have a lot of shops. Now, this is not a huge problem, but for example, a shotgun shouldn't be shooting that fast. If we make it automatic and keep holding down, you can see that we keep shooting everyone second. And if we try to press a lot of times, this is not a problem. But we still need to fix the fact that if we don't have the weapon automatic, we should as much as we want. Another thing that we want to fix is the redundancy in the code. So this is not a perfect way to represent the code. There is a much better way. We can first of all, relieve ourselves of one of the problems of having to choose between automatic and non-aromatic so we can, first of all get rid of one variable. And the second thing that we can avoid, redundancy and cold. So you can see right here that we have the score that instantiates a bullet and this one that also instantiates or Ebola. So it's not that good. We want to make something much more efficient, much better looking. So I'm going to comment these out. And in here I'm going to check for something different. I'm going to start off by checking if the shot counter is greater than 0. So if the shot counter is greater than 0, then what we'll do is we are going to keep the shop counter being removed every little bit. So we are going to be counting down the shop counter. And because recall this in the firing bullets, that means this is going to work fine. Then in here, we are going to check for the inputs. And if these inputs are true, then we are going to instantiate the bullet. So what I'm going to do is I'm going to issue it to you as a challenge. So your challenge is to make sure we check for both inputs, whether we're holding down or we're pressing only once. And then we are going to instantiate the bullet and make sure to also reset the shot counter. So pause the video right now and go do the challenge. Oh, okay, welcome back. So in here the first thing that I'm going to do is create the if statement. And I'm going to copy this line right here. So if input dot get mouse button down, or where is it, Okay, so, or, or as represented by these two. Or if the input dot get mouse button. So we are holding noun, then we are going to go ahead and instantiate the bullet on the fire point. And we are going to also get the shot counter and reset it to the time between shots. There you go. So what happens in here? We are always calling the firing, but we check if the player is dashing. If it's not, then we are going to continue. If the shot counter is greater than 0, then we are going to be counting down all the time and when it does get below 0. So we are going to keep counting down as long as it's shut counter is greater than 0. When it's not anymore, then we will have the option to shoot. And the great thing about this is whether the weapon is automatic or not. If we keep holding down, we will not be able to shoot all the time. But if it's not automatic and we only use the finger to press it once, twice or three times, we are going to instantiate and we will have the counter reset every single time when we should, once it will stop and wait for the short countered to come back to less than 0, then we can shoot and as much as we want. So the only thing here is that we no longer check if the weapon is automatic or not. So we can go ahead and delete this. We created some sort of shortcut. Now, if you don't like this, if you are looking, that's what I comment this whole code out. If you want to have an automatic weapon and it doesn't bother you, allow that? We can shoot as much as we want because at the end of the day, if it is automatic, it won't be shooting very fast. Then be my guest. Keeps cold. It's not bad. But for me, honestly, I don't want this. I would much rather have this as a very simple code and have us save a couple of variables. So and I a couple of redundant code also, which is very important. So we saved all of this. We go back into Unity. We will run the game and now the time between shots is reduced. So now even if we cook a lot of times, you can see that it keeps waiting until the short counter is reset. If we hold it down, There you go. You can see that every single second we let out a shot. If we make this, for example, let's say 0.1, then we can go ahead and shoot multiple times. And if we press as fast as we promised, we will never be faster than what the shot counter will ever allow us to be. So with that done, I hope you enjoyed. And in the next video we'll be adding different weapons to the player. And you'll see how having something different than a shotgun will really make the code much more visible or the changes that we made much more important if you still don't feel it's that good. So I'll see you then.
51. Having Different Weapons : Welcome back, My favorite game developers. In this video, we've created an extra set of weapons. We've created a rifle, and we've created a pistol. So now when we run the game, we are not only limited to the shotgun, but we can also find a pistol. Obviously the bullets are also different. The firing rate is different. The, even the damage that the bullets deal and the speed of each bullet is different. So as you can see right here, I can turn on the rifle, turn off the pistol, run. Oops. So that was a huge mistake. Sorry for that. And turn off the pistol, turn on the rifle, and I can start shooting. And as you can see, the bullets of the rifle or a bit faster, they are a bit greener and let's not waste any more time. And let's get started. Oh, case. So Nile, It's time to add a couple of more weapons. How are we going to do this? So we already have the prefab for the shotgun. So I'm going to go into the prefrontal so we don't have a prefab for the shotgun specifically, we only have for the doomed player which has a shop. So I'm going to create a new folder in here, which is going to be called the weapons. And I'm going to drag the shotgun in here. Okay, so we need to open the prefab. There we go. So now we can double-click and the drag and the shotgun. So now we have a shotgun as a prefab separately from the deuterium. And you can see how the Square became a bit more blue. Now I can add the shotgun and here and we have the weapon that we are going to adjust and create something different front. So first things first, we'll need to change this pride. So let's go into the Whereas the sprites that we add, all of the weapons or blood, bullets, enemies, player tile guns. Okay, so we only have one gun. Let's go to the Resources 0 case. So let's see what we have in here. As you can see, I've provided you with a lot of things. One of them is the animation for different kinds of gun. And you can see we also have the muzzle fire, muzzle smoke. I recommended to try to add all of these. We might also do this in a bit, but for now we want to just have the basic concept. We are not very looking into how pretty the, the shooting is, although it is important when it comes to a game. But anyways, we have this rifle right here, we have this sniper, and we also have the little gun. So I'm going to select all three and I'm going to drag them into the guns sprite and add them. Okay, great. Now that we have the shotgun, let's rename it to the rifle. A rifle. And if I open it up, you can see the fire point right here. But before we do that, we want to change this pride. And for the rifle you can see that it's very small, so we made them 42. Let's select these and make them all 40 to apply the changes. There we go, we have our rifle. Now because of the coloring of the background, you can see the rifle isn't that prevalent, Let's call that. It's not that good looking, but let's not worry about that as long as there and once it's on the PLR, I'm sure it will look a bit better. So anyways, let's continue one, What else do we have defined between shots, obviously, for a rifle and it's not a rifle, it's an assault rifle, so it's automatic. It's going to be a lot less. So I'm going to make it around 0.3. And let's see, the firing point obviously needs to change so you can see where the muscle is right now. I'm going to move it right here. And what else do we have? If I click on the rifle? There we go, we can see everything is good. What else do we need to change? Oh, we also want to change the bullet that it fires so we don't want to have the same bullet as the shotgun. And I'm going to go again into the Prefabs, go to the bullets. Let's find the, okay, so the player bullet, I'm going to change this from player bullet to shot gun bullet. And I'm going to go ahead and add in our world. And I'm going to duplicate the shot gun bullet. I'm going to call it the rifle bullet. And this rifle bullet will have almost everything, has the same may be the speed should be able to better a bit more. So let's say the speed is maybe six, I don't know. The damage amount, maybe should be less. So for example, let's say the damage amount is five. And what else do we need to change in here, maybe the sprite. So let's look at the bullets price that we have. We are using currently the 14. And maybe for a rifle we can use one of the shorter ones. So let's see, let's use the little green one. So the little green one, this is the one we're going to use, whereas the rifle bullet, let's add the little green one. Okay. So that didn't work. Why? Because of that did work but we didn't see the shotgun bullet. Anyways, let's remove the Republican bullet. And this will be our rifle bullet. There we go. It is a pretty small I feel was there something also the scale 0.5? And let's make it one. Keep it as it is. Okay, great. So now we have this rifle bullet. I'm going to go into the rifle and I'm going to assign it a shot gun bullet, but the rifle bullet. But before I do that, we need to prefab everything. So I'm going to go back into the Prefabs, go to the bullets, and add the bullet. And it will ask me, would you like to create a new or original or variant of the prefab? If I click two for the prefab variant, this one will change, but I'm going to create an original prefab. I'm also going to go into the Prefabs, the guns, weapons, where are they? And I'm going to drag in the rifle also. So now we have a shotgun and an original rifle. And in this rifle, instead of using the shotgun bullet, I'm going to go into that slot this down, go into the bullets at the rifle bullet, save all of that. And finally, we are going to delete the rifle. Delete the rifle bullet. All go to the where is it? Prefabs. Okay, So weapons, it's the last one. And I'm going to add the rifle as the child of the weapons on. And obviously the rifles position should be set to 0. Now let's try this again one more time. Again, we add the rifle as the weapons are, and we will turn off the shotgun. Great. So now we have the rifle and arms, and as you can see, it's not positioned perfectly. What we can do is we can move it from the prefab. You might be thinking, why is it not positioned to write? Well, if we go back into resources right here, you can see, if you look closely that the shotgun spray can see where it ends. The rifle has a bit of space in the front and the back. So this is just a technicality and if you add this one for example, it will be even farther. So what I'm going to do is I'm simply going to maybe move this in the x-direction a bit. So there we go around zero-point 40 to copy this and add it to the rifle prefab. So now when I turn off the rifle, Let's try this again, added to the weapons on the go at fits perfectly. So remove this. Turn on the rifle. We have the firing point, we have the rifle bullets, we have everything set properly. Let's test this out, save that, run the game. Let's make this a bit bigger. Okay, so there we go. Yep, there we go. You can see right now that we have the shotgun, not the shotgun, excuse me, the actually let's maximize on play the game to see it properly. There we go. So now when should the bullets, they are much faster and the time between shots is much better. There we go. How cool is that? Don they look really nice? Maybe we should make their damage a bit less, but didn't make sure if the damage was working correctly. And you can see it turns around and does everything the shotgun was doing and it was pretty easy to create. So with that, I'm going to issue you a challenge and it is to add your own weapons. So create one or two more weapons of your own choosing. I'm going to add a pistol. It's, everything will be the same just like I showed. I will create a different bullet for it and etc. So maybe you've downloaded some weapons, sprites of futuristic weapons. And I really wanted to do that, but I didn't find a really nice set of futuristic opens, all the sprites where either you had to pay for them or they weren't that good. And I wanted to make sure that this all end. All of my courses of the assets that we use are 100% free. And finally, at least one more weapon, or add at least one more weapon with its own attributes. So pause the video right now, go do the challenge in the next video, maybe right now, I'll just use the magic of editing, create the weapon you've seen the process, you don't have to see her again, but I do recommend that you add your own weapons. Trusting it is much more fun to have weapons that you've created and not just things that you copy from me. So that said I'll see you in just a bit. Okay, welcome back. So I've added a pistol and I just had a couple of wacky things I wanted to create. You can see, so I've made a stall with a time between shots. I've made a pistol bullet. It's not a perfect crystal bullet. It's kind of big, honestly, when it comes to the way the pistol works or the size of the pistol. But let's not worry about that. This game is all about creativity and having fun. So whatever you wanna do, just make it. So there you go. You can see the little pustule. It moves around and when we should book, there we go. And you can see that the bullet is kind of big, but I really think it is really nice. So it will at least differentiate between the regular bullets of the shotgun and the bullets of the rifle. So you'll know that this is a pistol and this is the bullet of the piston. So with that done, I hope you enjoy it. I hope you created your own weapons. And if you haven't already leave me a review, it helps me out a lot. Make sure to commit your changes. There we go. Created a salt salt rifle and a pistol as extra weapons. So please make sure to leave me a review. It helps me out a ton and I'll see you in the next video where we will be actually switching between our weapons. As you can see, we have to turn on and off certain weapons and we can even turn on to weapons, which is a cool mechanic, but not one that we are looking to do, especially when it's not in our control. So I'll see you in the next video.
52. Switching Between Weapons : Welcome back, my fellow game developers. In this video, when I run the game, you'll see now that I can use a rifle, I don't need to go to the hierarchy and change the weapon. I can press on the tab and you can see that I have the pistol right now. I press the Tab again. I get the shotgun. I press the Tab again. I have the rifle. I press the Tab again, I have the pistol and so on and so forth. I can do this all day. Shoot them with a shotgun, should the mother rifle should then with a pistol, I can do whatever I want and nobody can stop me. So let's not waste any more time and let's get to switching weapons. Oh, case. So time to switch up our weapons. The first thing that we are going to do is that we are going to get a reference to all the guns that are available on the player. Now, this is a point of debate. Where do we want to handle all of this? Where do we want to have the list of information about all the guns and so on. And I felt about it. We can add a script to the weapons on and make sure that everything goes smoothly here. But actually, I think maybe the player should be the one who is handling the available guns that he has. So I'm going to go up and player and I'm going to remove all you know what, Let's keep it as a reminder of how sometimes we are not very attentive and we make mistakes. So backup here. I'm going to go ahead and create first of all, the reference to all the guns that we have. So it's going to be a serialized field, which is going to be a list of type, the weapons, weapons system. And like that. And me scroll down a bit and I'm going to call it the available guns or available weapons. Let's just call it available guns. And it's equal to a new list of weapons system. Save that. Now the next thing we want to have is a variable which is an integer that will keep track of the current gun that we have. So I'm going to create a private int and it's going to be the current gun. Save that. So what are we doing in here? What we want to do is we will want to get a reference to all the three guns that were holding or whatever, how many guns we have available guns. I'm going to lock this down, select. And before I do that, let's make sure to override the dune player apply all. So we know we have the guns on him. I'm going to lock them down and I'm going to select the rifle, that pistol, and the shotgun, and going to add them to the available guns. So as you can see now we have a reference to the shotgun rifle and the pistol. So what I'm going to do is I'm going to create some sort of a loop that activates. And this loop will go through all the weapons and turn only the one that I want. So the current postal and every single time I'm going to increase the current pustule one-by-one. So I know this explanation is a bit confusing. Let's go ahead and implement it and it will make a lot more sense. So in here I'm going to first of all create the method which is going to be or know what before I do that, let me just remove the player shooting and what does this all do? This, get it down space, okay, so dashing player, so right-click, quick action and refactoring extract method. There we go. So dashing, player or player dashing. I think it makes more sense. Control RR. There we go. So as you can see, I know all the shortcuts to solving mistake because I've made so many. Anyways, we are going to go ahead and switch the gun. I'm going to immediately create a method in here so we don't go and extract. So it's going to be a public void switch gun. And in here, first of all, we will want to check which kind of key we want to press in order to switches the gun. So it's going to be an input that get C0, get keydown was a key code. And you can use whatever you want. And let's use the tab. Nope, not the escape. There we go. So when we press tab, we want to switch our weapons and let's call this right here. So switch gun, switch guns with sharpen. I'm a bit confused. You can call it whatever you want. So gun weapon is the same. We want to have anything other than guns as weapons. Anyways, let's continue on. The next thing we want to have. We want to make sure that we actually have guns in our possession. So we are going to check if the available Ghana's dot count is greater than 0. And you might be thinking, well. Course we are going to have a gun. Michael, What are you talking about? Well, later on when we start buying guns, when we start picking up guns, you'll notice that maybe at some point the player won't have guns. So what this will avoid us a huge error. And I'm just going to add a warning in here. The debug dot warning, and no guns available. Pick some up. So this is different than the regular log. This is a log warning and we also have a log error, and this will be in a different color. And the console, as you can see, these are errors and for some reason we have the clear preview cash. This has been going on for a long while and I've looked it up. I've tried a lot of things, updating or everything. Nothing works. Apparently it's some kind of problem in Unity, but it doesn't affect our game, so don't worry about that. I'm going to clear it with this button. And you can see those are errors. We have logged, regular logs and we have warning logs. But let's stay focused. What happens when we know that we have a gun? We are going to first of all get the current gum and increase it by one. So this makes a plus, plus. After we do that, we're going to check for something that is very important. And that is after we go through all the guns. So if we are increasing and the current gun which has now been increased by 1, is greater than the available guns dot count. We want to go back to the first gun. And how do we do that? We reset the current gone back to 0. So what's happening in here? Let's say we have the three guns. That means the available guns count is three. That means that we start off at 012. The two is the last index of the last element is the index of the last element. So what happens in here, once we press the tab, we check we have available guns increased by one electron. We will be turning on that gun. But for now, we make sure that if we have the current gun, so let's say you are at index two and the available gone count is three. So we become, the current gun becomes three, which means that we want to reset it back to 0. So we then grab the first weapon and step and avoid a huge error. So what that done, what else do we need to do? Well, there is something that we need to make sure of and that is, if I go back in here. So remember how we were using the different gums. We don't just turn on the rifle. So if I click on rifle, we don't just turn on the rifle and start shooting. We first turn of the pistol and then we have the rifle on and we can shoot with it. So this is going to be your challenge. Your challenge is going to be to set all the weapons to enact. So create a for each loop to go through all the available guns, set all of them to be inactive. So all of the all of them to be inactive. And then set only the current gun to be active. And I'm going to give you a small hint if you already know what to do or you feel you want to do it on yourself. Pause the video, go do the challenge. If not, this is what you will need. You will need to access the available guns on the current gun. And you'll need to access the game object because the available guns are of pipe organ system, so we can just set active to that. We need to access the game object that holds the current gun, then set the active to true or false. So pause the video right now and go set all the weapons to an active. Okay, welcome back. How did you get on with that? Are really, really, this was an interesting challenge, using a for each turning things off and really understanding the mechanics. So first thing first, we are going to create a for-each loop. And in here this is going to be the weapons system. We will call it the weapon in available guns. Seems kind of weird, doesn't it? Know what? Let's rename this from available guns to available weapons. There we go. And we'll need to make sure to set them back in Unity. Because when we change the name of a variable, you'll see that now the list is, nope, it's still good. Why? Because we didn't save. When we save, now we should see that everything disappears. We need to set it back again. There we go. You can see it's at 0. This is something to keep always in mind. So do that before we forget to avoid any mistakes, save that, okay, Now, back in Unity, what do we want to do in here while we are looping through all the weapons. So what I'm going to do is I'm going to go ahead and use the weapon. Dot. Gameobject dot set active to false. So what happens in here? We have all the available weapons. We set all of them to false. And then what we do as recheck the available weapons at the current gun, the gameObject dot set active. True. So why are we turning off all the guns and not just the gun that we are using. This was something I was also thinking about. But also later on when we start switching amine, when we start picking up weapons, will want to switch the gun. And it's, it's much safer to turn everything off and then just turn the thing that we really need. Maybe sometimes the ordering of the weapons will be different. And just turning of the one that we have right now, maybe we'll turn on something different that we don't want. So I took the extra precaution of just looping through all the weapons, setting all of them to false. And then just, I think the one thing that we need to true, I hope that's understandable. And if you want to create some kind of more complex mechanic, I really, really would be happy to see it. You can go and discord and show off your things there. So I'm going to go back into my game right here, save that. And I'm going to go ahead and let's see, run the game and see what happens. So I have the rifle. You can see that it's turned on right here in the hierarchy. If I hit the tab, if I hit the tab, there we go. I have the pistol. If I hit the Tab again, I have the shotgun. How cool is that? You can see everything in the hierarchy. Let's try this again. Rifle, rifle shots, Pistol, Pistol shots, shotgun, shotgun shots, and so on and so forth. So I hope you enjoy it, makes sure to commit your changes. And I just mentioned this court, I hope you already knew that we had a discord going there. Show off your things that we see. Um, okay, so I haven't opened this course just to stay concentrated. I always reply there as fast as I can. Sometimes I don't reply as fast as should be. It's because of course, MyTime, we all have 24 hours and because everyone is on a different time scale or whatever, would have been different places in the world. We have an amazing community. A lot of people are there because of the way we handled the mindset that we have, that we are all students. I always learn new things when I'm helping someone and that's what you should always be doing. Don't be afraid to make mistakes. Try to help as much as possible. Joined the discord. Leave me a review. I hope you're enjoying and I'll see you in the next video where we will actually be not just seeing the weapons right here in the players are, and we will also be able to see them in the UI canvas that we've created. So with that said, I'll see you in the next video.
53. Weapons Display UI Canvas : Welcome back, My favorite game developers and this video, when we run the game, you'll see that we have the rifle. When we switch a weapon, we have a pistol. When we switch the weapon, we have a shotgun. So now we have a visual representation of which gone, we are carrying with us. So without further do, let's not waste any more time and let's get started. Oh, case. So now instead of just changing the gun, the pillars holding, we want to also display this on the UI screen that we've created. So let's go ahead and do that. First of all, I'm going to make the scene a little bit bigger so we can see properly, I'm going to double-click somewhere here on the canvas, whereas the canvas double-click on it. And there we go. Now we have the huge canvas. Let's go to the layers and let's set that we can see the UI layer. And in here this just for a moment, turn off the fading image so we see what is going on. And in here, what are we going to act? Well, we want two things to represent the weapons that we are using at the moment. We want to have some kind of image to represent the weapon and we want some kind of text under that image. So let's go ahead and get started. The first thing I'm going to add is right-click in here. And let's just first of all create an empty game object just to represent everything about gun. So I'm going to say weapons, UI. And under weapons you are, I'm going to create a image first of all. So image, this will be the Weapon Image. And I'm also going to create a text which is going to be the work. What is it, the weapons text. There we go. So now we have a weapon image and a weapon text. I'm going to click on the canvas here for a second. Just open this up. By opening up the canvas, I can, wherever I click, I can still see the borders. So I'm going to choose the image and I'm going to drag it down to the side. And you can see right here in the game view what we are going to see all the time. So I'm going to make this a bit bigger, like something about that size. And this will be the gun engineer. And then we will have the texts to write under it right here. And let's just test this out and see how it works. So in the image we will choose a source. I'm going to lock this down just so we don't lose it. And I'm going to go into the sprites guns. And let's go ahead and add the shotgun. So there you go. You can see now we can see the shotgun. We can set it to the native size to make it a bit smaller. But you know what? I honestly like the way it was before. Big and easy to see. Now the weapons text, we want to change a bit because we want to have this, for example, the weapons name. And later on we will learn how we can change or create our own font. But for now, let's just keep it as it is just for the purposes of testing. We can change the alignment in here and we can set it in the middle. We can make it bold. We can do a lot of stuff with the text, but one of them is changing the color and making it completely white so we can see it in the background, no matter what. I'm going to make it a bit bigger so we can increase the size. There you go, you can see that's how we increase the size and now we will increase the font size. So there you go. That is about how I wanted to make it. So the weapons name right under the actual weapon and we can even make the box a bit bigger and increase the size of the words. So there you go. Now we can write the shotgun and so on and so forth. Let's remove the wreck as target in here because we recurse target, as we've said, we can click on it. We don't want to click on it. It won't make any difference, but let's just keep it at that. We can change the horizontal overflow, the vertical overflow, and we can create something called the best-fit. And this is really nice because now when we change, you can see that the font will change with the, or the, the size of the words will fit as to as big V. And I'm not sure why I can say anything properly, but anyways, there you go. You understand what I mean by best fit? You just saw what happens. Okay, Let's continue on and stop rambling. The next thing we want to do is we want to have access or to the behavior of this UI. So what we're going to do, we want to first of all, assigned to each weapon the appropriate sprite and name. So I'm going to go into the weapons prefab. So prefabs, weapons, select the pistol. And this is where we are going to be setting everything. So I'm going to open up the script right here. And on the weapon system, because each one has a weapon system, we are going to add two variables. The first one is going to be a sprite. And it's going to be the gun image. And the second one is going to be a string. And it's going to be the gun. Let's keep it. A weapon and the weapon. Weapon, neck. There we go. So weapon Text, Weapon Image and what happened name. And if I go back into Unity after it compiles, There we go. We can see that we have the image sprite and image name. So we're going to choose the pistol. Go to the pistol at the image. Make this the stone. And then we are going to go and to the rifle or nano to go back to the Prefabs weapons rifle, lock this down, find the image down here. What's the name? Let's just keep it at rifle without the assault part. And what else do we have? Less choose the shotgun, know that the prefab shot gun, lock this down. Finally, shotgun image, green here, weapons name, shocked, gun. There we go. So now each prefab has its own garden image or Weapon Image and its own weapon neck. So next thing we need to do is we need two every single time we change a weapon to fill this image. Currently, if I run the game, you'll notice that I have the image right here, I can move around, but if I tried to change my weapon, the images don't change. So now it's time to add behavior to this. And we are going to do that in the UI Manager, which is on the campus. So let's open up the UI Manager and let's see what are we going to do in here. So first thing first is we need a reference to both the image and the text. So I'm going to create a serialized fields in here, which is going to be of type image. And we can use EMG because we have Unity engine dot QI using up there. We are going to call this the weapon image. Let's just keep things simple, just like they were before. And in here we will have a text with which is the weapon name. Save that back in Unity. And let's see now we can go ahead and lock this down. And we can add the weapon image, and we can add the weapons tax. We can click on the UI canvas and make sure we apply these changes all over our project. Excellent. Now, the next thing to do is to show you a challenge. And your challenge is going to be to create a method that changes the gut. So first thing first, you need to create a void method that is public and takes two parameters. An image for the gun and a string for the gun name or weapons name or whatever you wanna call it. Then you'll need to set the gun UI sprite using the image. And you'll also need to set the gun name text as the column name. And finally, I will give you a small hint if you want, if you don't and do the challenge. If not, you can use the gun you I dot sprite and the gun UI or gun name you are, or whatever the name of the actual variable was. Dot text, dot sprite to access the sprite and the text. Remember this should be weapon and not UI image. Oh, okay, so there you go. Pause the video right now. Go do the Chaldean. Okay, welcome back. So what are we going to do in here? And we are going to create a public void and change gone or change Open UI. And we said that we are going to take in two parameters. The first parameter is going to be a sprite, and it's going to be the weapons image. And know what, because we already have the weapon image year. Let's change this one to gun. So there you go, gun image. And we're going to also take in a string, which is going to be the gun text. So these are the two parameters that we are going to create and now that we have them, how are we going to change the images? While if we go in here, as I've told you in the hands, if we click on the weapon image, we can see that right here we have the source image. So if I go, I'm going to say that we have the Weapon Image Sprite and it's equal to the gun image that was provided to us. And then we have the weapon name dot text. So we are accessing. Let me go back in here and show you something. So we have the weapons relaxed. It is of type text but the component tax, but we are accessing the text on the text. So we have this text parameter or characteristic. The components. So we are accessing that by saying dot txt and it's equal to the gun text. Save that. Oh, great. Now we can actually change the UI, but the next step is to actually change the UI of the weapons whenever we switch them. And where are we going to do that? Well, we are going to do that in the switch weapon method 0 and 0. There is something here I wanted to tell you, I commented out. Let me tell you right now, if you've noticed when we play our game, as soon as we start, for example, we have the rifle, okay, so we hit the tab key and it doesn't change, not until we hit the tab key again. So what is the problem? The problem is that in our layer right here we can see we have the current gone, but we haven't assigned any value to it. So it doesn't know what the value is. So what I did and start and the player controller, we can simply write these two lines of code. And what these do is first of all, we set the current gun, which is an integer to the available weapon dot count, and then we just switch to the gun. So we start off at the rifle. So now when I run the game, or we can even something much better if you want to start off with the first weapon that we have. We can set this as the available weapons dot count minus one. So now, as soon as we start the game, we will have the first gun with us. Okay, so there we go. Now we can switch immediately and there's something wrong here. Oh, okay, so again, it's that annoying error. So back in games. So as you can see now, as soon as we start, we can hit the Tab. May want to make this public, but as I've told you in the previous video, it's not that good of a way to get access to variables. A much better way is to go in here and create two methods. The first one is going to be a public. It will return a sprite is going to be called the get gun image. You get weapons image actually get the weapon image UI. And I'm going to open up the brackets and I'm going to simply return the weapons and close it off with a semicolon. And then I'm going to create a similar method which is going to return a string and it's going to be getting the weapon. Get weapon, text, UI or name, actually name UI or not. We can't even Use the word UI. But let's keep it just for the sake of knowing why we are getting these. So weapon name, save that. So now we can access the weapons system. And from that weapon system we can access these two methods. And with these two methods, we can have the image and the name of the guns without facing the problem of changing these variables by mistake or causing some sort of error. So right now what we can do is we can get the available gun. Available weapon at the position current gun or is it the current gun? And we can get the component on this current gun, which is obviously the weapons system. And from this weapon system, we can, what can we do? We can first of all get what is it called? Get Weapon Image. And then we can hit Enter here because the line is too long. At a comma. Copy this, and paste it in here at inaugural enter. And what seems to be the problem here? Why is the first one telling me cannot convert method group 2, right? Okay. Okay. This is a method. And get the name, get weapon name UI. There we go. We save that. So now if you'd like, I do recommend that we do something here because we have redundant code. We can set this as a variable and then use the Get weapon and get an image. That would be something smarter to do. But for now, let's just keep it so we always know what's happening after we change the weapon, we set it to true, then we access the UI Manager. We get the available weapon at the current position, we get the weapon systems script and then we get the weapons image. We send it to the change Open UI, which is in the UI Manager. And this should change the image whenever we change the gun. So back in our game, Let's run and see what happens. There you go. When we hit Tab, we get the shot gun, we get the rifle, we get the pistol which is smashed for some reason because the pistol is trying to fill the entire gap. Let's see, where is it, where is it? Where is it? In the UI, the weapon image. So obviously when we set it as the gun, it's not that good, but no worries about that. As long as it works for you, we can change this, make it smaller, make it bigger. Maybe even a better idea, maybe changed the way this image is represented. Bother me too much. If it bothers you, and I do recommend maybe we'll see how we can fix this later on. But for now we can see that it is working. The only thing that is not working. As, as soon as we run. We can see that unless we switch the gun, we have the first one which is the weapons name, just like that, a blank image and a blank text. So what we can do is in UI Manager in here. So I'm going to select this. I'm going to right-click quick action and refactoring. And I'm going to call this the setting weapons. Weapons. You, I hit Enter. And now I can go and start. I'm not going to switch the gun because I just noticed something that this does not work unless we have the tab. So all that we're doing in here is just setting the current gone to, to have it work immediately. You can set it to 0 if you want. But let's remove this and instead we are going to be setting weapons UI. So setting weapons you. As soon as we start. And let me just select those and hit Shift tab a couple of times just to make them looking a bit better. We save that as I've told you, the smart thing to do is to change this and put it in one of the variables. I recommend you can go do that. And with all of that set, Let's go back into our game and let's test this out, see if it works from the game. And nope, that didn't help at first. Why is that? So after doing a bit of research, I realized something and understood where the problem is coming from. So in here we are trying to set the weapons UI, which is here, and we're trying to access the UI Manager Don instance. The problem is, and I've noticed that right here, if I run the game, you'll notice that I have this arrow right here. And you can see that it object reference not set as an instance of an object. So I double-clicked and I looked in here and I noticed that for some reason the player script is being instantiated or a starting before the UI script is starting. So we still don't have a reference to the UI Manager. Now, what we can do is we can try to make this and awake instead of of a start and await starts just a little bit earlier than the start. Let's test this out and see if it works. If it does, then we saved ourselves a lot of problem. I'm not sure this would work, but let's test it out. So in-game, run the game. Okay, so there we go. It did work. How cool is that? Who we saved so much time, I wasn't sure it will work. Now another thing is the pistol being smushed. We can go into the image right here and make sure to click on the preserve aspect. You can see the pistol will stay the same. So I'll stop the game and Presets, save that and make sure to apply the changes. So now when we run, there you go. You can see that the PESTEL is set correctly, but what's the problem? The problem is that I have a rifle and my hand yet the pistol is being depicted. Why is that? Well, because again, if we go back, we'll save that. And for future purposes, always make sure to set the instance and the awake not in the start. So now this was an amazing opportunity for you to understand the difference between the start and the awake. Awake start just a little bit before we start. Let's continue one, why do we have the pistol in the beginning? It's all because of the current gone available. So the current gun is being set to dot count minus one, which is the pistol. Because the pistol, as you can see in the dooms player, is the count minus one, which means element two. So how are we going to fix this? Well, what we can do is two things. We will simply set the current gun to be. I think maybe one. That way we will start off on the right position. So back in here, we will run the game. We are holding a rifle and we have a rifle represented. And so later on, I'm sure we will find a smarter solution to this, but for now, we'll just make what works. I hope you enjoyed the video. I hope you are saying all your files and I'll see you in the next one.
54. Making Camera Shake: Welcome back my fellow game developers to a brand new video. And in this one, whenever we start shooting, we no longer have this boring thing that happens. We actually have shaking. So when we shoot, there we go. You can see whenever we should, we have some kind of shaking, so it adds a level of intensity. Obviously, the intensity on the shotgun is just too much, but as you can see, each weapon has its own intensity. So notice the rifle, notice the gun, and notice the shotgun. There you go. So you can see we have different intensities for different weapons. So let's not waste any more time. And let's get started. Oh, okay, So now what we want to do is we want to add a bit of intensity to the way we are shooting. So currently everything is working fine. We are shooting with our weapons. We can change them to different weapons. We can kill enemies. Everything is good, but there is still something bothering me and that is that the shooting isn't that exciting. So we have the shooting, we don't actually feel it. We see it. It doesn't impact, but we don't feel it inside of us. So what we're going to do is we're going to add a bit of shaking to the camera. And thankfully, it's extremely easy when it comes to using a sinner machine. Before having a single machine, it would take a lot whenever you want to make the cam shake and it wouldn't work. It's sometimes did. So let's not waste any more time. And let's go ahead into the virtual camera and add something called the basic multi-channel Berlin under the noise. So you want to ask me, what is the basic multi-channel Berlin? I have no idea, but I know that it creates noise. So if you want to delve deeper into that beam, I guess I would be very happy. So her that out of the way. Let's see what happens in here. We have different types of profiles, noise, Let's not call it knows anymore. And we can change this to have various different aspects. You can go ahead and read about all of these. I'm really don't know what they actually do. I'm not that deep into SONA machine, but what I do know is we can use 60 shake and we have the amplitude and the frequency gain. So if I run the game, you'll notice that we will have shaking right now. Okay, So there you go. You can see the little shaking and you can see the camera how it's shaking. If I increase the amplitude, there you go, you can see that as I increase, we have more and more and more shaking until we can handle it. No war. Let's set it to 0 for now, you can see I can also create an offset. So if I set it to one and I increase on the y, I think on the Y there will be more shaking, but let's keep it at 0. We can also increase the frequency, and this will add to the frequency of the shaking. So let's keep it at one. Let's set it back to 0. And let's find a way to control this shaking whenever we are actually shooting. So to do that, I'm going to create a new script. So I'm going to go into the script, Let's right-click and create a folder for the cameras. Because later on we might have a camera controller. And let's go ahead and create a C sharp script and call it the shake, camp. Hit Enter, wait for it to compile. And we're going to add it to the virtual camera. And there we go. Now we have a script in here. I'm going to open it up and we are going to do a couple of things. So first thing, first, we need to be using cin a machine. This will allow us to access different things inside the machine, just like using Unity engine doc UI to access things in the UI canvas. The next thing we're going to do is create a couple of variables. Now bear with me. This will be a bit strange, but you will understand everything. First, obviously we need a reference to the virtual camera. So I'm going to create a private sin a machine. Actually let's just virtual camera, center machine virtual camera. And I'm going to call it my virtual camera just to keep things very simple. Next, we're going to create another private variable, which is going to be the multi channel purlin. And we're going to call this the noise. So as we said, this animation, basic multi-channel Berlin. This is the last time I'm going to save the song world. There it is, right here, and we will need a reference to it and the noise. So back in here, what else do we need? Well, I think we will need to create an instance of this because we don't want to keep looking for it and we just needed once. I believe. So, I'm going to make this a public static. And we'll make this a type of shaky, shaky cam. And it's going to be called instance in stance. And there we go. And in a way from now on, whenever we want to instantiate an instance, it's always and the awake. So instance equals this. Great. Next, let's go ahead and set up everything. And as long as we have the awake now let's set the virtual camera MD noise in here. So first thing first, my virtual camera, what is it equal to? Well, it's very simple. We are going to get the component, get component, and we're going to get the virtual camera. There we go. So now we have access to the virtual camera. Then we'll need to get the noise. So noise is equal to get out or sorry, noise is equal to my virtual camera dot get. And you can see right here that we have this gets in a machine component. So what the problem is or not the problem actually, why do we have gets in a machine component and why can't we just get a normal component? Well, because if I go in here and four, I do that, just let me fill this end. So this will be the multichannel purlin. There we go. So why do we use the get cinema machine component? 12 silane machines are a bit tricky and that's why I recommend that you go and look through the documentations and learn everything about. You can actually, by the way, you sell machines to create trailers and cut-scenes and so on. So it's a very, very powerful tool. You will learn what it does. So you can see right here that these are different, let's say components inside of the virtual camera. And what's the problem in here for some reason. Okay, So it wasn't opening up. Did we say that we needed the body? Oh, okay. So there we go. For some reason it wasn't opening up Cinema machine and make this a 60 cam. Save that. Okay, let's continue on. Now that we have access to the noise, what we're going to do is we're going to first of all delete or remove the start and update. And we're going to create a method to actually start shaking. So I'm going to create a public void and we'll call this the shake camera. And inside of shake camera, I'm going to take in a float of intensity. And this intensity will be translated into the noise. So if we look down here under the noise, we have the amplitude gain. Let's access that. So amplitude gain their ego and we have the little m behind it. But this is the name of the variable that we're accessing and we're going to sell it as the intensity. And why do we have this intensity parameter while? Because every time we shoot our weapon, we want to have a certain intensity. So for example, the shotgun should add a bit more shaking the Arno, the whatever it is, the rifle will add a bit less shaking the gun shouldn't shake almost at all. But for now, let's go ahead and call this method right here. And we're going to go ahead and first of all acts as the shaken, for instance, shake camera. And let's just give it for now 55. So we will create shaking using five intensity and we'll see how that looks. So I'm going to wait for this to compile. I'm going to run the game. And now we should see that when I shoot. There you go. You can see that I have the shaking. Now, there are two problems in here. The first one is we have a lot of shaking. The second one is that if I change into another gun, the shaking is the same. If we test it out, it will be the same. Trust me. That doesn't seem like that, but let's say I tried to use the gun. So you can see now when I shoot, the intensity is the same and we don't want that. So I'm going to issue you a small challenge. You are going to make the camera shake. So create two variables for each weapon. 14, the intensity of the shake, and one for the time we keep shaking, we don't want to keep shaking forever. Second, you'll need to add a parameter to the shape method that takes in the time. Also, you'll need to stop the shaking using a co-routine and you need to call the method shake camp every time we should become, I think the last point we've already did. So pause the video right now and go do the shallow lunge. Okay, welcome back. So how did you get all of that? So first thing I'm going to do is in here I'm going to create a serialized field of type float. And it's going to be a weapons shake intensity. And the weapons. What? Weapon? Shake time. And let's remove the weapons and make it happen. So now we have the intensity and the shake time. Next thing we're going to do, what should we do? Let's see the challenge or even forgot as a parameter. Okay, so we go back in here and we add a float time or shaking time. Shaking time, then we'll need to stop the shaking using a co-routine. So in here I'm going to create an enumerator and it's going to be called the stop shaking. So stop shaking and it's going to take in a variable in here which is no time to wait. And as always, we are going to yield, return. New, wait, four seconds, time, wait. And in here after we finish, we are going to get the noise again, dot amplitude. And we're going to set it back to 0. Save that. And we are going to start the court in up here. So start coroutine. Stop shaking, Please. And we're going to shake time. Shaking time. Say that finally, there is something in here. So there we go. So weapon shake intensity and weapon shake time. Save that. I believe this is everything that we need to do. So we call, we get the instance of the shakeup, we access the method, give it the intensity of the weapon, we give it the time it needs to keep shaking. And then we call this method right here, which takes in the intensity shaking time, gives us the intensity to the noise. It starts shaken and then starts a cold thing that will stop the shaking after a bit of time. So with that done, we save all of that. We go back in here, we have the Why does the noise keep closing? Did you notice that every single time for some reason there is some kind something not completely right with this. I hope it works. So I'm going to set it to 0. Save that, run the game. Oh, and I forgot to add to each some shaking. So shotgun, what's the intensity of the shake on a shotgun? Let's make it six. And the time is maybe two seconds. I don't know. I didn't test this. The intensity on a rifle will be four with a shaking time of one. And on the pistol is going to be a three for the shaking time of 0.5. Save that, run the game. And let's test our weapons out for the shaking. So I'm going to maximize on play to make it look much nicer. I believe this will work. I don't think we have an error. So now when I shoot with a rifle, go and i, if i computing we have shaking all the time, then when I choose the pistol, it's a bit less, so 0.5 seconds and the shaking is a bit smaller. And then we have the shotgun, which should take lot and for MLA. So boom, there we go. We are dropping some kind of nuclear bomb. But obviously these all need a bit of tweaking. I will do a bit of tweaking here. We don't want to have that much shaking. We will have a little bit less, but it always comes back to you. What do you want your shaking to feel like? Does it have to be intense? Does it not have to be intense? We are going to commit all of our changes and we are going to call this the as a shaky cam when I shoot. Comment those. And there you go. I believe this will be the last video in this section of the advanced weapons system. We've added our guns later on we will be picking sum up. We will see how we are going to be finding all of our guns. We learnt how to switch the weapons. We learned how to add them to the UI. We added a fire rate, we created an amazing shooting system and I hope you're enjoying. I hope you'll have to review it helped me out a lot and I'll see you in the next one.
55. Section 9: Health System - Setting Up Player Health System: Welcome back, My favorite game developers. In this video, we are actually going to add a health system to the player. So now, not only do we kill the enemies, but also if we get hit too much with the swords, we die. Obviously there are things that we will have to fix lecture on, but for now, all we are doing is setting up the health system of our player, making our being just a little bit closer to reality and feeling much better adding a bit of steak. So before this video, we would always run around and have fun and kill everybody and not worry about a thing in the world. But now we are dying. It's kind of like finishing college and starting a real job. You go into the real world. There are a lot of things at stake. So let's not waste any more time and let's get started. Oh, case. So currently everything is set up properly. We can shoot, we can get shot, we can do everything. We heard the enemy, we can kill him, but when the enemy shoots us, it doesn't hurt as much. So what we're going to do in this section, and especially in this video, is to create a health system. So let's get started by setting everything up. First thing first, we are going to go into the scripts, go into the player, and we'll create in here a C-sharp script that's going to be the player health controller, or should have called Player health handler because it's not actually controlling the player health. It's handling. You know what? Let's go ahead and make it the full delete. This will create a layer health handler because it handles they have and it's not that big of a problem, but I always like to keep things their health handler. So because this handles the health of the player, don't actually control it in any way. So I'm going to add it to the doom layer and I'm going to apply all the changes. And I'm going to open up the player health handler. So what do we need here? Well, obviously, first thing we need is a serialized field which will represent the current health. And this is just for debugging purposes. Obviously, we don't want to be able to always see the current health. Then we are going to create a second variable which is the max health. And then start, we are going to instantiate the current health as the max health. So whenever we start a game, whenever our player papyrus or starts playing, we will have the current health as the max health. Now, the next step is to create a method that will actually handle taking damage by the enemies. And that's going to be part of your challenge. So your challenge is to create a method to take damage. So create a method that will damage the player. It should take a parameter, the damage amount determined what type the parameter should be inside the method. Remove the damage amount from the current health and check if the health is less than or equal to 0. We want to make the player inactive. So pause the video right now and go do the challenge. Welcome back. So I believe this was a pretty easy challenge. I don't think it was too hard. So I'm going to remove the update.
56. Health Bar UI Canvas: Welcome back my fellow game developers to a brand new video in which we learned all about sliders. We'll learn about next mesh Pro and we also create our own font. How exciting is that? So let's not waste any more time and let's get started. Oh, case. So time to add a bit more flavor to the way our health gets deteriorated by the enemies. So let's get started. The first thing that we want to do is make the scene a bit bigger. And we are going to double-click on the huge UI canvas that we have. So we can see that we have the, what happens in here, the fading image that we've turned off. And we're going to move the weapons just a little bit to the right. And we can see right here that these images should be at the 0, 0, on the y and on the x. Just so we have them in the middle of the non-UI and let's move them down. This is just a bit of adjusting, and there you go. So now I'm going to set the weapon to the right because to the left I'm going to be adding something called a slider. Before that, I'm going to create a game object in here, which will represent the health. Let's just call it health. There we go. And under the health I'm going to right-click go to your and create something called the slider. So let's add the slider. So as you can see, we've created a small slider. And the slider does a couple of things. It moves from left to right. It has a background. If I open it up, it has a background, it has a fill area and it has the handle slider. If I click on the slider right here, you can see that there is a game component or components on the slider. And you can see that there are a couple of things. The normal color, the highlighted color, all of that good stuff. But the thing that we most want to focus on, the minimum value, maximum value, and the value right here. You can see that while I increase it at moves from left to right, and this is what we are going to use to represent the help that we have. But obviously, having the slider move left to right is pretty ugly. So you never want to have your health represented that way. So we want to have some kind of bar to represent the health just like we have in the professional looking gains. So I'm going to do first of all is delete the handle slider. So now we no longer have this little or no what's called the, some kind of, anyways, this circle that was moving around and now we only see the bar. The next thing that I want to do is I want to access the background. And the background. I'm going to click in here. You know what? Before we do that, let's go ahead and add these sprites, the UI elements that we are going to use. So in the sprites, that's open this folder up and let's see what we have in here. We'll right-click create a new folder for the UI elements. Double-click in here, and let's go into the resources. As you can see, I've provided you with a couple of bars and you can use whichever color you want. You also have the buttons right here that we'll be using later on and the font. So I'm going to choose the font, the red slider and the slider background. And I'm going to drag them into the UI element. Okay, Great. Now let's go to the slider. Let's call it the health slider. And if we click on the background, you can see that we can change the source image. So the source image that I want to have this slider. So when I add it in here, there you go. You can see the slider right now if I set it to native size, it's kind of a huge. Maybe we'll make it a bit smaller. But the point is that we now have this background slider. And I want to make sure that when I click in here and hold down Alt, that it fills the entire slider image, not just on itself. So we have the health slider element. If we click on the rack tools, you can see the edges of it. And before we had that, you can see that the edges are the edges. There we go. These four points, these were the edges of the health slider, but the background was much bigger. So when we click, hold down Alt and click on the stretch, we fill out the entire slider. Next thing we have the Fill area. Now currently when we want to fill the area, you'll see that it's a very ugly white line. So what we'll do is we'll access the fill. And you can see we can also change this bright and I'm going to use the red slider. So now we can click in here and you'll see it's much prettier, right? Not not so fast because we also want to make sure that the fill area when we click in here, hold down Alt, make it stretch all the way around the field area. And then the fill area should also stretch and to the whole background. But because we are working in the background. And we want to see the background. I mean, we are going to make it smaller and so it fits exactly in this background. That looks good enough. So I'm going to move it just a little bit up. And okay, so there we go. We can see that we can select the health slider and we can start from 0 and increase it until it becomes one. Now, how are we going to be changing the health based on our own health? That will be a video for later on. But for now, as you can see, we have created everything that we need for the health slider. I'm going to zoom out a bit. And maybe actually I'm going to make the slider a little bit bigger. So let's increase the size. And as you can see, because everything is anchored to those points, they grow together smoothly. Let's make it a bit thicker. Obviously this will need a bit of changing. And I'm going to move the health element down, then zoom out, see how that looks. So there we go, around here I think is good. Or maybe move it up a bit or no, let's keep it down here. To, down here is good. Let's zoom in. Maybe make it a little bit longer. And by the way, all of, all of the things that I'm doing depend on me. So if you want to create something different, please be my guest. I recommend that you try to create your own type of slider. Let's fill it up just so we can have the right dimensions. And there we go, On the left, on, up and to the left. Okay, so there we go. This is our health and it looks really nice, I think So if I maximize on play and play the game, let's see how that looks. Okay, so there we go. We have the health, we have the rifle. There is one more thing that is missing and that is, we want to also represent the health using text. First of all, this is what our zombie game, and I think it looks really nice. Second of all, it will be a good way to know how much we are actually changing and learn a couple of things more. So let's go ahead and add a text in here. But this time because we are going to add our own font, we're going to add not just a text, but we are going to add a text Mesh Pro. So if I click in here, you can see that you'll need to import a couple of essentials. Just click on the first one and wait for it to import. If this takes too much time, I'm going to magically reappear. Okay, did that. There we go. So now we have something called the text Mesh Pro. And I'm going to call this the health text. Hit Enter. And let's move it a bit to the left. So in here, let's make it bold. And you can see that currently the font used on it is the liberation sense or something. But we want to use the font that I've provided you in the resources, downloaded it from the font.com. Oh my God, that anyways, how are we going to convert this into a font? Well, if we go to somewhere in here in the windows text Mesh Pro, you can see that we have the option for the font asset Creator. Clicking here, it will ask you for the source font file. Let's drag it here. And it will just tell you to create fond Atlas. Save. And it will ask you where do you want to save it? We will save it inside of the fonts right here. Or in the UI element. Save that. Great. So now if we go into UI elements, you can see that we have the spot right here. It has a bunch of properties that I'm not going to even attempt to get into. So health texts just drag the font into its position. And there you go, We can see that we have a different font right now. Now, I recommend because as I've said multiple times, I'm very bad at drawing things. And I have a very bad taste when it comes to colors and with it comes to text and everything that's related to making something look pretty. So, I recommend that you maybe try to find a better text than this. But for now, let's try and create the sort of health system and maybe make it auto size. Auto size means that it will grow and shrink with the size of this. Yep, there we go. So I'm going to make it bigger, make it bold. And the cool thing about having text Mesh pro is that we can change a lot of things so we can add lighting, we can add underlay, we can add some kind of glow and you can play around with these. We can also add an outline. So if I add a bit of thickness, you'll notice that we have the outline, we can change the offset, the tiling, the speed, a lot, a lot of amazing things. And I'm going to make a white outline just so we can see everything more clearly. Maybe. There we go, one hundred and one hundred. This is the help. We can change a lot of things that the color and so on and so forth. And as long as we're here, I'm going to go ahead and issue you a challenge. So your challenge is to set up your own UI. So do a bit of research and find your own UI elements to use for your game. Use those elements to set up your UI canvas for the player and think of other things you'd like to display on the screen. So for example, you might want to have our ops. You will, might want to have countdown timers for the shotgun. You might want just the shotgun for the weapon, the dashing or whatever. I don't know what else you might want. Whatever you want, think of it, tried to add it. You, even if you don't know how to create the thing that should like to just put it there and then write it down. Maybe you'll find through the scores as we go on. Or maybe by yourself, you'd find a solution for it. And there's an extra challenge. I will recommend that you go ahead and convert the weapons name that we display under the shotgun. But I do have to warn you that it will take a bit of tweaking before you can actually managed to change the weapons name. So that's pause the video right now and go to the challenge. Okay, welcome back. So this video is already a bit too long, so I'm not going to go ahead and change the name for it now. Later on, obviously we will change it. I'm going to go ahead and apply all the changes that we've made to the UI canvas. And now when we run the game, and now we can see that we can change to the pistol, run around. We have the health, we have the pistol and somebody gets stuck somewhere. Oh, so we died at the, the light exactly on this weird point right here on the enemy. So there is a glitch. Obviously, we will take care of that later on. So I hope you enjoy it. I hope you're committing your changes. And I'll see you in the next video, where we will be actually accessing the UI sprites and updating them. So see you then. Hey Michael here from the future, you thought you were done with me? Nope. You weren't. So there's something in here when I came to go and commit my changes, and that is the acid stacks mesh. And if I go in here, Where can I find that in the assets, you can see that we've created this text mesh file and this text mesh. Let's see the properties on it. Can I see the size? Nope, I cannot see the size, so I think we don't really need to have it saved in our commits. So what we can do just to save a bit of space, I'm going to right-click in here. And we're going to ignore everything beneath the assets text Mesh PRO. Okay, there we go. We don't need that. Stage everything and call it added UI elements to Canvas to represent health and created my own shop. So I'll commit these changes and I'll see you in the next one. I promise I am gone right now.
57. Updating UI with Scripts : Welcome back, my fellow game developers. In this video, we not only have this bar sitting here looking pretty, when we get hit, you'll see that our health goes down. So now when we get hit another time, There we go, you can see that we die. Obviously there is this little problem that we will talk about not addressed right now, but we will talk about it later on. So without any further or do a let's not waste any more time and let's get started. Okay, so now we have a slider, we have the text. All of these represent the health of the player, but still, when we take damage, the health doesn't go down. So what we're going to do is we're going to be changing this behavior based on using the UI Manager. So let's go into the UI Manager and let's get a reference to both the health slider and the health text. Now these will be public. And why are they public? Well, because we will be handling them in a different script, which is the player's health handled. So I'm going to create a public Slider, and it's going to be the health Slider. And remember, we could not have used this slider if we did not have the Unity engine Ow.ly. So as you can see, I commented this out and you can see that the slider now it does not exist. So that's continue one, do we have now a reference to the health slider? Next, we need a reference to the text of the health vexed. And these are very basic. Now we're going to save this and remember we have an instance, a static instance in the awake. So I'm going to go into the player handler, health handler right here and then start. As soon as I said, the current health, I'm going to access the UI Manager dot instance, dot health slider dot the max value. And I'm going to set it as the max health. And then I'm going to do the same with the UI. Where is it UI Manager, the instance, health slider, and the current value, which is represented by value, will be the current health. There we go. So now when I run the game, if I go into the doom player and I'm going to set his max health for, let's say, Oh, okay, let's just set the current open because we are already setting here. I'm just going to comment this out for the reason of actually having different max value and current values. So I'm going to set this, let's say at 20. So when I run the game, we should see that this Health Bot will move. And it didn't. Because obviously, we can see right here the object reference not set and I'll know what the problem is if I double-click in here, we haven't said the health slider on the UI canvas. So back in the UI canvas, obviously we need to set this right here. So health and the slider, I'm going to drag the slider and the health flexed. There we go. Nope, not the text. Oh, okay, So this is something that we need to talk about. So the health facts here is not just any text, it's a text Mesh Pro, so we cannot be using, where is it? Where's the UI Manager? There we go. So I'm going to move it so we cannot just use the text. We need to have a text Mesh Pro, but you can see we don't have the text mesh. Why? Because before we can use the text Mesh Pro, we need to have the appropriate namespace. So using, Let's see, I believe it's the Unity engine dot txt mesh. So using the TMP, there we go, hex mesh Pro. And now in here we can use the text, text mesh per row. And there we go. We save that. Now back in our game. And unity, I mean, we can go ahead and drag the health. I mean, in the UI canvas we can drag the health down. What is the problem? I believe that instead of text Mesh Pro, this also should be text Mesh pro GUI. Let's try this again. Save that now back in our game. And today, now, I will leave that. Now, there we go. Finally, we can add, so we save that. We run the game and we should see that the health, yep, There we go. So we've set the current health to 20, V-max Health to 100. So you can see that it's about 1 fifth of the way. So we know that this is working. The next step is to have this be updated every single time we take a hit or we actually start the game. So I'm going to, and your challenge is to update the health UI. So first of all, create a method that updates the health UI. So we are talking about the book, both the slider and the Next, then you'll need to use it in the appropriate places. So you'll need to think of where can I use the update of the UI? Make sure you also access the text and the, and update it. And finally, I'll give you a hint of where you can be using this update UI. You can use it in the start and when the player gets hit. So with that out of the way, pause the video right now and go to the Sharon. Oh, okay, welcome back. So I'm going to go into the player health handler. And in here I'm going to create a private void, update layer health. And in here what we're going to do is first of all, we are going to access the UI Manager dot instance dot Health text, dot text. And we're going to set it to the current health. Then we are going to concatenate it. So I know you haven't done this yet, but this way we are concatenating. So first of all, we take the current health, we add this dash right here or not that forward slash, it's called, I believe. And we are going to set the max health and here also. So we're going to save that. But not only this, we are also going to change the value of the slider. So in here I'm also going to access the UI Manager dot instance dot health slider dot value. And it's going to be equal to the current. Oops, sorry for that. The current. So the current health, yeah, that was it. Save that. So now the question is, where do we actually use this? So there are two places. First of all, we can use it in the start and then we kind of already use it and the start because we said the current health, but we are going to remove this line and we are going to simply call the Update Player health. And then every time we take damage in here, after we remove the amount of damage, we are going to set this, but I believe it's much better to sell it after we check the health of 0, maybe not. The only thing here that I'm worried about is having the Health be negative and seeing the bar going the other way. That's the only thing that bothers me about this. So I'm going to go ahead and maybe set it in here. So after we check if we are less than 0, this may also not look very pretty. When we die, we still have a bit of health. Let's see, You know what? Let's put it in here. No worries about that. Later on we will make this small tweak it changes where we turn off also the bar whenever we deactivate the player. So with that done, save all of that back in our game. And I'm going to let c in here. Let's remove this comment, save that because we actually now have proper health. I'm going to go into the dome player and let's see. Let's remove the current health. This is just to keep track, we will make sure that it's private later on. And what did I want to do? Because the weapon that the enemy is throwing at us deals and 50 damage, I believe. So let's make this 300. So the max health of the player is 300. I run the game. And we should see that the max health, you can see that we have 300 out of 300. So I'm going to come close to the enemy. He says, There we go. You can see that the health is slowly going down. And finally the last one, we die. But you'll notice there is a small error that appeared and it is coming at us a lot. So I'm going to stop the game. I'm going to so now we have to consult when those we don't want that close one of them and you can see that there is a problem. And what is the problem? First of all, we have the enemy bullet controller can't find the player. Second of all, we have, I believe. Okay, So no, not the problem in here. Well, the problem is actually that we are still trying to get a reference of the player even though he's dead. So we're trying to change the health slide. But anyways, these are small tweaks that we are obviously going to later on take care of. But for now I hope you enjoy it. I hope you now understand and feel how nice our game is. So everything is done dynamically. Everything changes automatically using the code and our game is really taking shape. So I hope you enjoy it and I'll see you in the next video. Don't forget to of course, commit your changes.
58. Creating A Death Screen : Welcome back, My favorite game developers. And this video, as you can see, the UI canvas has an extra element, which is the death screen. So now when we run the game, we can see that we have a health. So we get shot once, we got shot twice, and there you go. You can see that you will die just like in Dark Souls. And we have this effect appearing. How cool is that? And not only that, you'll notice that we no longer have sorts instantiated by the enemy after the player dies, which is a really nice mechanic that we've added at the last second because I just remember that. So let's not waste any more time and let's get to creating the screen. Oh, okay, so time to make the death of our player just a little bit more exciting. And I've changed the pixels per unit to 15 of the tiles. So now we don't have these annoying blue lines. So I'm going to go ahead in the UI canvas and I'm going to create a new image. And this image is going to be the death screen. There we go. And let's just make the scene a little bit bigger and we are going to fit it into the entire screen. And just like we always do, we are going to go ahead and make it completely black. And then what I'm going to do is I want to get these so we haven't used these block trills yet. So I'm just going to get the 123 and the last one, select all of them. And I'm going to drag it into four. We do that, that's in the sprites. Create a folder for the blood death screen. How a nice course, a very lovely project all about blood deaf and whatnot. So let's see how that looks. And now before we do that, actually I believe we need to create a, some kind of image in here. So there we go, the image and I'm going to change this right here, and I'm going to set it to the native size. So it's kind of big. I'm just going to make this one setup donated size and maybe just increase the size of it. So there we go around. I'm going to keep preserve the aspect ratio. So now we can make it a bit bigger. So there we go. So this will splash over our screen. I'm going to create an animation in here. So I'm going to go to the animations, create and assets, animations, death screen, the screen, blood. And let's see, splash, lot on screen. Save that. And I'm going to add all of these images in here. And let's see how that looks. Let's do first, Let's make it around 1 second. See how that looks. Okay, that looks good enough for me. Save that. Let's call this the blood. And let's change all the images and make them no point filter apply. So the images should be sharper right now. And let's watch that again. Not too sharp. I would have rather making it a bit more sharpen that maybe we can change the one to 50 apply. Now they shouldn't be become much bigger. The extrude with width. Okay, so let's see what's the problem in here. Clear that, okay, so now we have the blood splashing all over soon as we start. And what I'm going to do is I'm going to add also a canvas and here. So what's the campus group that was called Canvas groups or now we can adjust the Alpha and we can block the re-cast. That's not a bad idea. We won't make it interactable. And now I also want to go ahead and maybe move the blood a little bit down, maybe rotate it a little bit. So now there we go. This is the blood that will appear. And honestly I feel that this is not really looking good because it's kind of grainy because we made it bigger. I think we might remove it later on, but for now let's just add a text Mesh problem here. Text Mesh probe and you die or capital. And make it bold. Let's see how that looks. Let's make it a bit bigger and auto size. And let's set it in the middle. And we can see that the max size in here, we can make it even bigger. So there we go, You died. Let's choose a different font, which is the one about the robot. Let's change the color of it to make it red. Let's move it up. Let's see how that looks. It doesn't look too good because of the outline that we have. So we are going to change the outline to be maybe also read or maybe just remove the outline completely. So there we go without any outline. Okay, that looks good. So you died. Okay, so if you've ever played Dark Souls, you know the reference and the, Let's continue on. So I think this is big enough. So now when the Lord lays, there we go. We can see we get the blood and we get the you died on the screen. So this tells us that the player just dive. Anyways, let's continue on now we need to actually turn this on and off. So what we're going to do is we're always going to keep the death screen off. So as long as the player is alive that that screen is off and when he dies, then we turn the screen on. So let's go into the UI Manager. And obviously we'll be changing the alpha on here also. We don't want it to just appear. We will make it slow will appear. And for that, we are going to also create an animation in here and screen blood. Let's call this the screen. Appear. Save that. And let's change this to take around 0.3 seconds and put it to one. So this is sort of the, you need to turn it on. And so this is sort of what happens. So we turn on the screen, it's starts playing. And there we go. And I'm going to just move the blood animation to when the death screen is completely dark. So we start the animation, there is nothing and then the block should appear later on. And actually we can go ahead and select this in here and just have an empty sprite. So we start off empty. Let's just see how that looks. And I'm going to turn this on completely. So there we go. Nope. The blood run this. There we go. And then we get the blood appearing. Okay, Excellent. I think this is going to look really nice. So save all of that back to the desk screen, set it to 0, turn the screen off, save all of that. And now let's go into our scripts. And in the UI Manager, I'm going to go ahead and get a reference to this, that screen. So serialized field, it's a game object and it's going to be the death screen. And now we are going to go ahead and create a method that will allow us to turn it on. So it's going to be a challenge. And your challenge is to activate the depth screen. Well, when we die. So you'll need to create a method that sets the death screen to active. And then you'll need to call the methods, method when the player dies. So to create that method and do I manager and then call it from the player health handled with that said, pause the video right now and go do the challenge. Okay, welcome back. So in here in the UI Manager, I'm going to create a public void. Turn death screen on. And all that it will do is just get the death screen and set active to true. And that's all. And then we'll go back and do the player handler and end here after we turn off the game object of the player, we are going to access the UI Manager. Or before we do that in here, the UI Manager Instance, deaf, turn death screen on. And there we go. So now we're going to start our game. Let's go to the game, make this bigger. Let's go to the DOM player will set his health to be 100. Run the game. So now when we get hit once, there we go, nothing happened, obviously because every single time I have to forget to, you know, where this is going. We forgot to add a reference. Excellent. Now we save, now we run. Now we should have everything working. There we go. We get shot once, twice, you died. And obviously we also forget the thing that we always forget. So animations, where is it? The blood? The blood or death? The death. Okay, remove the animation. Remove the animation. Save that from the game for the third time, please. No more errors. And now we get shot once, twice, we die. Nice. How cool is that? But obviously there is the one problem that still prevailing and that is the flying saucer. So what we're going to do is we're going to make sure that the enemy can only should sort or should whatever projectile he has. Only when we are visible or when we are in the game. So I'm going to go into the NMI controller and here, and I'm going to scroll down and find where we are instantiating the bullet or the projectile. So there we go in here. And the enemy fire and the Colton here we are instantiating this. So what I'm going to do is I'm going to create a condition in here that checks if the player to chase dot is dot game object out. So this is player chase range. So the player to chase dot is okay. So game object dot is, dot is active or active and hierarchy. Then we are going to shoot. If not, then we are not. So this active and hierarchy defines whether the game object is active in the scene. So what we're doing is we're turning off the player when we die. That means that he is no longer active. And the hierarchy, that means that we no longer instantiate the projectile of the enemy and we shouldn't get any errors. So let's try this one more time. Run the game. And let's see, we get sharp once, twice. Okay, You died. There we go. We can see that we no longer have any errors and the enemies don't instantiate anything. And if I zoom in to where is it? The doom, right here, okay, So we can't see anything, but you can see that we are no longer instantiating anything. Let's run this again because I believed that I saw something right here when we got shot. Oh, okay. Okay. No, everything is good. So there we go. We have our death screen. We no longer have the projectiles and instantiating whenever our player dies, let's make sure we apply the changes. We make sure that we commit our changes, and we make sure that we leave a review for Michael because it helps him out a lot. In the next video, we are of course, if you are enjoying the video, obviously, anyways, in the next video, we are going to create the mechanic of making the player a bit invincible whenever he gets it for just a temporary time. So that said, I hope you enjoy and I'll see you in the next one.
59. Adding Temporary Invincibility : Welcome back, My favorite game developers. In this video, we are going to become invincible. So now when we get shot once, the second time, we are invincible and you notice that we did a little flash, which is very cool. Now we are also going to become invincible when we do the torpedo. So nobody can hurt us while we are doing our torpedo. Obviously we didn't get there, but let's not worry about that. Let's first of all got to go and create our invincibility mechanics. So let's get started. O k. So now whenever we get shot, if we are, for example, caught up between the three skeletons right here, it might be just a little bit unfair for the player playing our game that he just dies immediately and doesn't even realize what happened. And another thing, a really nice thing that I would like to add as a game mechanic to our game is that whenever we are dashing, we have our player just a little bit invincible for a couple of seconds, maybe even milliseconds. So for that, we are going to implement this mechanic of having our player be invincible for at least a couple of seconds. So Let's go into our player health handler. And in here I'm going to create two variables. The first one is going to be a serialized field and it's going to be a float, and it's going to be the sensibility time. So how long does the player stay invincible? It's going to be added as a standard of 1 second. And then I'm going to create a private bool and call it the is invincible. So when the player is invincible, there are a couple of things that are going to happen and a couple of things that won't happen. And one of the things that won't happen is that the player will not take damage. So in here, we are going to check before we start damaging the player. If the player is invincible, then we are going to actually know what I meant to do is bow. So in here, let me remove this one. And, and an invitation to those. What I meant to say if the player is not invincible, so it's not invisible means we will add an exclamation mark behind this, and this will change the entire thing. So if he isn't invincible, is invincible is true, which means the whole condition is false because of the exclamation mark, this means we do not access this. This means whenever we are invincible, is invincible is true. We do not get hurt. So excellent. Let's continue on. The next thing we want to do is we want to make sure that we then stop being invincible after a certain amount of time. So for that we are going to have to create a coating. So I'm going to issue it to you as a challenge. So turn the player back using a coating. You'll need to create a core thing that turns the player back from his invincibility, should use the invincibility time variable and you need to call the coating in the appropriate place. So with that information of the video right now, and go to the challenge. Okay, welcome back. How did you get on with that? You know, what I love about the challenges is that it keeps you accountable. So if at this point you still did not know how a court in works after all the challenges, you will have to learn at some point because I will keep asking you to do something until it is ingrained in you. So let's take it easy bit and let's go ahead and create an eye enumerator in here. So I believe it's pretty easy now. So it's player is invincible. Or turn back to what should we call this layer? Let's just call it is in invincible. They, they're not invincible. Okay, Let's call it that. And here we are going to yield return new weight for second. I mean, by this point, it should be like just sneezing or breathing. So we yield return new wait four seconds, the invincibility time. And after that invincibility time is invincible will be back to false. And also I want to make sure that as soon as we start the is invincible is set to false. So that we are not invincible as soon as we start with that done, I believe that's everything that we need to do. So I'm going to save this. I'm going to go back into our game. And let's run the game. And let's see what happens. So when i, okay, so first off, we need to add maybe a couple of more seconds. So doom and sensibility time, let's make it two, and let's run it again. So this will be the time. So we get hit once. There we go. Now we get it twice, we still die. Why is that? Let's see what the problem is. Let's make this public so we can see clearly if we are actually changing what's happening. All we haven't started the cold in here. So I'm going to make sure that we do. In here, Where should we call it 0? So also what I want to do is whenever we do get hit, we also need to change the is invincible to true. So there are many steps that I forgot to do. And after we get it, I'm going to start the co-routine. And the coroutine will be the layer, not invincible. So there are a lot of things. So let me tell you what I forgot to do. And here, as soon as we get hit, we want to set the invincible to true. And once we are invincible, we are then going to start the coroutine. And because the is invincible is true, we no longer get damaged. So this line was crucial. And I don't even know how I could have forgot something so important, this is the whole essence of making our player invincible. So I hope you understand what's happening. I hope you're not too mad of the mistakes that I sometimes make. And let's go ahead and run the game. So there we go, we get hit once, we get it twice. There you go. You can see that the second hip did not kill us. Why? Because we had the invincibility time on. So we can see right here it was on. Let's test this out again because I feel that we should have maybe taken one more hit. So there we go is invincible and we died. I still feel that there's something not quite wrong and I'm quite right. So 50. So let's make sure that it's working. Let's set it to maybe five seconds and see if that lasts longer. Because I can see in here that this is not changing 1234, okay, so I know I think everything is working, but for some reason we aren't seeing this change right here. But no worries about that. We know that it's working because when we increase the size of the time, we are invincible. We can stand on the face of the sort a bit longer. Okay, great. Now, that is all fine and dandy. But here is the problem. We have no idea that we are invincible for a certain amount of time. So what we're going to do is we are going to try to visualize this. So do that. What I think I'll do is I'm going to access the body right here. You can see that we have the colors and when we get hit, I'm going to make the player blink. So I'll make him blink once, twice, three times, or keep a blinking until the time that we have is over. So Let's go ahead and do that. So I'm going to go in here and I'm going to get a reference to the sprite of the player. So serialized field. And it's going to be the sprite renderer. And it's going to be the player sprite. There we go. And in here we are going to create a numerator. And it's going to be the flasher. And in here what we'll do is we are going to, first of all determine how many flashes do we want to have. And then we'll create a for loop. Wait for it. You know what I'm talking about? It's going to have the int equals 0, while I is less than how many flashes do we want? Let's say five flashes. And I plus, plus. Okay. So stay with me. I'm going to leave you properly. I'm going to first of all add a bit of spacing in here and then I'm going to access the player sprite dot color is going to be equal to a new color. Open up the brackets or whatever they are called. And then I'm going to write in here, we will keep the a the same. We will keep the, let me just duplicate this line twice. We will keep the a. Then we have the ordinal. We start off by red, red, green, and blue. And finally, we will have the last one which should not take a comma. Can see right here we don't have a comma and it's going to be the, the a. But in our case, first of all, we want to reduce the a. So let's set it to maybe 0.1. Then after this, we are going to yield return new. And we are going to wait four seconds. And this is how fast we are going to be blinking. So I'm going to set it to your 0.1. When we don't have a 0 or just a point, that means we have 0.1. It's just a bit of a faster way to do things. And then we are going to go back and copy this line and put it in here. And instead of 0.1, we were going to have the one. And let me just add a tab in here for implementation purposes. So just understand everything. And then we are again going to yield weight return for 1. Second. Save that. And now we have to start the coroutine somewhere. When we get hit right after we set the invincibility to true, are going to start the co-routine, which is going to be V flasher with the parentheses also, these are called parenthesis, I just remembered. Maybe they'll carpool and parentheses and ways we save that what is happening in here. So first of all, we have the loop. We already know how the loop works. We start off at 0. We do it four times, five times actually is 4, 0, 1, 2, 3, and 4. So 5 times, we increase by one every single time and we'll loop through. So what are we doing in here? We are changing the color. We keep everything the red, green, and blue the same except for the alpha. And in here we are doing the same. So the first one we are reducing to alpha to 0.1. And the second one we are making the Alpha 1. And what are we doing in here? Well, we already know how yield return you wait four seconds works. First of all, we have the alpha at 0.1. We wait for 0.1 seconds. Then we turn it back to one. We wait for 0.1 seconds and then again start the loop and we keep doing this. So we'll go, okay, and we keep doing this and this will create a flashing effect, not believe me, that's that out. So I'm going to go back in here. I'm going to run the game and let's see what happens. So I'm going to approach the enemy. He shoots me and nothing happens because obviously, every single time we have to make the same mistake that we need to add the player sprite. Then we drag the body, we save all of that. We going to apply the changes and we're going to run. And now we should see that we, There we go. You can see that we start blinking. When we stop blinking, that means that we are no longer invincible. Now the only thing here, the only trick, tricky thing here is that we want to make sure that the invincibility time and the flushing coincide so we don't start flashing and then for some reason we stop flashing yet we are still invincible or the other way around we keep flashing, but we are no longer invincible so we die. We're not sure what's happening. So there will be a bit of a timing issue that you'll need to tweak around and make sure it works. But with that said, I'm going to issue you an extra challenge. How cool is that? I am 100% sure you did not see that coming because I want to make the player invincible when he does the torpedo or the dash or whatever you call it. So that information, pause the video right now and make the player also invincible when he does the torpedo. Oh, okay, welcome back. So what are we going to do in here? Obviously, we have the flasher right here, but we want to make sure that we call it from another method, which is the player controller. When we are, Where is it, Where is it switching gun? The player dashing. So there we go in here, we want to make sure that we call this whenever we are dashing, how are we going to do this? Well, it's pretty easy. We need to start a co-routine. So we are going to look back in here. Do we have a coroutine? We are going to go ahead and get the component, the player health. Whereas it layer handler. There we go. And in here we are going to, before we get the component, start a coroutine. And I think because this one is what's the name? And just check on No, Actually, sorry for that. Dot start coroutine. And here we are going to access the flasher. Can we know we need to make it a public on enumerator. So flasher, it's not allowing me to. Okay, So I think we have to do it like this. So start coroutine. And there we go. Save that. So as you can see, even I wasn't sure how this is going to work, but apparently we need to start the coroutine. We access the component, we get the player health handler and NBA player handler. We get the flasher. So save that. Let's test this out. Back in our game. We run the game. And now when we do the dash, there we go. You can see that we are flashing. How cool is that an phi dash? We should see that I don't get, okay, So that didn't work. Let's not worry about that. It's going to be hard maybe to time the time we are invisible with the dashing, with having the enemies shooters. Don't worry about that because in the next video we are going to be creating some spikes traps. And this is a great way to test out our invincibility when we're dashing. So if we walk through the sprites will die. If we walk through the sprites While dashing, we will not die because we will be invincible. So that's said. There is also one more thing that even though we are flashing in here on the player controller, we are not invincible. And make the player invincible was the challenge, and I just noticed that before we turned everything off. So to avoid the confusion, what I'm going to do is back and the where are we, the player health handler. I'm going to create a method which don't be a public void. Make layer in sensible what was not invisible, okay, make their invent symbol. And in here I'm going to first of all turn the invincibility on. So is as and invincible will be equal to true. Then we are going to start the coroutine of the flash one. And finally, we are also going to start the coating. Please, let me start courting of the make to what was it called? Player not invincible. Player not invincible. So now we have one method that does everything, one method to rule them all. So we can remove this one from here. We can remove the flasher and the true. And we can do one thing and that is called the make player invincible, save that, and then end the player controller. We don't need to call the flasher manually. We can just say Get Component, Layer health handler, dot, make, player invincible. There we go. So let's test this out again. Back in our game, run the game. Should us. We can't shut once. We got shot twice and we died. What is the problem? Did we make it only 1 second? Let's make it through R3. Three seconds, run the game. Again. We get shot once, twice, three times. Okay, so this is working. And then when we do the dash, there we go. We are dashing. Okay, we didn't test it out properly. In the next video, we will make sure of that. I'm sorry for the length of the video. Again, this is something good. I believe we learned how to start a coroutine from a different script. And we also learned how to create a method and compact everything into a single place. I think it's good, a good habit to them. So thank you so much for watching. I hope you are enjoying, I hope you're committing your changes. And I'll see you in the next video where we will be creating spikes. We also had an extra challenge which is very good.
60. Adding Spikes On The Ground: Welcome back, my fellow game developers. As you can see, we've created some spikes in here. So now when we have these bikes, if I stand on them, there we go. I get damaged. And if I stand and go back, I don't get damaged. And if I stand and keep standing, I get damaged. But now because I'm still invincible, I get damaged again. If I keep standing in here, so I might die, I'm going to go away a bit and let's not waste any more time. And let's get started. Oh, okay, so let's get to spike creation. And I've already created the spikes and everything. Now, this is something that I do not like to do. I don't like to do things off screen and then tell you, but because I wanted to make sure that this video is as efficient as possible, It's a long and somethings will need to be explained. So for that reason, I created all the animations and so on. I'll just give you a quick tour. So what I did, I chose one of these three traps right here. I went back in the game. I selected the sprites, I'm sure it's 32 multiple, made sure to edit the sprite and sliced up 32 by 32, made the filter, and so on. I then went ahead and created this spike trap, which has a sprite renderer. A animator will get to that and a box collider that is just around it, which is also a trigger because we want the player to walk over it. Okay? Now I created also an animation for the spike. One is idle, one is popping, so the idle just stands there, does nothing. This will be the default animation. And then we have the spikes popping, which is in here. You'll see I created one to pop this private. So there you go. You can see, and why would I make it a bit slow? I just wanted to give a chance to the player to think twice before stepping on there again. So it has nothing to do with the player wants the player stops and it starts triggering. And then he has a couple of frames. Can move this right here. He has a couple of frames to realize his mistake and then try to run away from it. With that out of the way, let's talk about the animator and what we've done here. So I created the ival, made it the default layer state, and then created the two transitions, one going 21, going from. I also created a parameter in here which is a boolean for the BOP spikes. And once the pop spikes is true, then we go from idle to Pops spikes. We don't have any transition duration, we don't have any exit time. But when we are going back from the bopping, we do have an exit time which is about 90 percent of the animation. We can even increase it to one maybe until we finish the entire animation and then we go back. I am rather make it 0.57. But for some reason when I set it for this, the animation in here disappears. I'm really confused why this is happening. I don't like it at all. So 92 maybe in 1906. 1907 just makes everything disappear, which is extremely annoying. And I have no idea why this is happening. But anyways, we have an exit time which is 96 percent of the animation. Then we go back. Well that out of the way, if you do one, pause the video right now, go do everything for that. Create all the animations and so on. Because I'm going to go ahead and start in the scripts by creating a, let's call this folder the traps. Maybe you'll want to create multiple traps. And in here I'm going to create the spikes. So right-click, create the C-sharp, and let's make it the spikes hit Enter, select the spike trap. And I'm going to drag these parks in here. Now I'm going to double-click and open it up and Visual Studio. Now, before we continue on, let me just explain what the main idea or how this spike is going to work. Because in just a bit I'm going to issue the challenge and I want you to know how the spike will work. So the player is walking around, whereas the player, they don't player is walking around. Then suddenly while the spikes are hidden, hidden, he walks over on the spikes and they start popping out. So when they do hit him, what we want is we want the animation to have some kind of event system and that event system will damage the blade. So we'll need to have the damage amount variable will have to get a reference to that layer and we have to add an event in here that will damage him. We also want to make sure that if the player is still standing on the spikes, we want to keep damaging him. Not just get damaged once and then skip standing in here and not feel a thing. We also want to make sure that when the player activates the spikes, he goes away. We don't want him to keep getting damaged because while the animation of the spikes is working and events system will still get triggered, or you'll see how everything is working when we actually create that. But until then, I'm going to issue a challenge to damage the deep layer with spikes. So first of all, create a variable for the damage and the player we should damage will need to create the entrepreneur Enter. You'll need to start the animation and make sure it stops. So make sure it stops means that we may need and on sugar exit. Then you'll need damage the player using the event system. And finally, I just want you to think of what should happen if the blur stays on the spikes and then exits. So with that out of the way, pause the video right now and go do the challenge. Okay, welcome back. So back in our script in here, we are going to get, first of all, a serialized field which is going to be of type integer and the damage amount. Then we are going to create a private void. And there's no excuse me, not a private void, a private collider 2D, and this will be the player to damage. Save that. Now I'm going to remove the start and update if we do need them later on, we can add them. It's pretty simple. I'm going to create the On Trigger Enter to D. I'm going to check if this collision.com tag is the layer. If it is, then I'm going to get the component which is the ending main door. And I'm going to go ahead and set the bool, which is going to be the letter because this is a string reference. We are going to get this bikes. Bob spikes, copy that. And back in here. And let's set this pops. Bikes, save that. And then we'll create a method in here which is going to be to damage the player, which is a public void damage layer. And also we need to set this to true. Save that. So we are going to damage the player. What should we be doing in here? We are just going to get the player to damage dot get component, the player health handler. And we are going to go ahead and damage layer with the amount of damage. And before we forget, how are we going to get access to this layer damage when the player steps in here? What's the problem in here? Amount of donors not exist. Oh, so sorry. Damage amount. Where did I get the amount of damage? I'm not even sure anyways, in here, the player to damage is going to be equal to the collision. There we go. So on Trigger Enter, we check, is it the player? Yes, we start the pop spikes animation. Then we set the player to damage as the collision because it's declared, we know that then we are going to damage the player. And finally, we are going to go back in here. What's the problem? Okay? Nothing animation and we are going to select in the scene. So there you go. We can see that it starts off, then nothing happens. And a couple of seconds we wait and then we book in here, I'm going to add the event and I'm going to select to damage the player. We're going to save that to run the game. And we shall see in here that we have a life of 600 once I stop on these bikes. Yep. There we go. It damages us. It doesn't damage us because if I go back to the spikes, we don't have anything to damage. Let's just set it as 100 for now because the life is 600. So I think he can take a couple of hits. So now we have the spikes. Yep, there we go. You can see that it removes 100 every single time. And because we have this invincibility for a couple of seconds, the second tip doesn't affect the layer. But the problem is, you can see that it keeps playing and I keep getting damaged. So the player died even though he's standing outside the perimeter of the sparks. So what we should be doing is first of all, we need to be stopping the animation On Trigger exit 2D. And in here, I'm just going to do the same thing I did in here. Check for the player. And if it is the player that just exited the collision, we are going to set this to False, save that back in our game. And there we go and run the game. So now we step in here, we get damaged, we step outside. There we go. We can see that the animation stops, but there is something when I stop and go back, you can see that even though I'm outside, so step back. I am still getting damaged. Why? Because the animation in here is still playing. Events system is still getting triggered and we do know what the player is. So to avoid that, I'm going to create a public bool. And this public bool just so we can see it in the inspector will later on set it to private. And I'm going to call this the give player or damage player, or shouldn't damage player, I believe is a better name for this. Verbs should damage player. And once he is inside, then the should damage player is equal to true. When he's outside the should damage player is false. And then inside of the damage player method, I'm going to check if we should manage the player. Then we are going to go ahead and access the player health handler and damage the player. So now back in our game, we should see that when I run the game, we should not damage the player. Once I step in here, we should damage the player, we get damaged. But if I activated and then go outside, there you go. You can see that should damage player book, book. There we go. You can see that I am no longer affected. So I hope you enjoyed this video. I hope you enjoyed this section. I hope you are always staging your files, committing your changes, creating reviews. And then in the next section we will see where this journey takes us. So I'm going to go ahead and say in here that I created spikes, that damage layer, commit the changes. And I can see right here and the masters how our game is moving along. Look how much we did, and look how much we still have to do. This game is just getting started so I can not wait. Let's not waste any more time and I'll see you in the next video.
61. Section 10: Pickups - Picking Up Health: Welcome back, my fellow game developers. In this video, when you can see right here that we have these green health pickups. So when we get hit, you notice that we are live as 500 over 600. But once I pick up these health, you'll notice that I increase my health and now we're back in business and we can shoot everybody up. So without further ado, let's not waste any more time. I do make a couple of mistakes in this video. I hope you'll enjoy the lesson from them and let's not waste any more time again. And let's get started. Oh, okay, so let's add the ability for the player to pick up some health while he is damaged. So the first thing I want to do is I want to create the prefab out of the spike trap. So prefab and what should be having here. Let's right-click in here and create a folder for the level objects. So level objects. And let's go ahead and add the spike trap and here, and let's just keep it in our world. Now, the next thing we want to do is to go into the sprites. Where are the sprites? And let's say that in here we have the health pickup or you know what, let's just call them the PEC Ops. Hit Enter. And in here I'm going to go into the resources and drag the entire PNG or image or whatever you wanna call it. And I wanted to do this outside and do it before we start the video. But I thought that maybe some of you might have been angry that I created all the animations and stuff. So I thought that let's create them together. If you want, we can go ahead and see who can do it faster. So 64 by 64 or less slides that, okay, obviously it should be 32 by 32 slice that applied changes. There we go. Now I'm going to get one of those, add them to the world in here. It's extremely small. Let's set it on the layer, layer. It's still extremely small. Let's make it 32 and the pixels per unit apply the changes so it's a bit still a bit small. Let's make it maybe 16. Apply the changes. There we go. I think this is good. And by the way, this is one of the ugliest health pickups that I've ever that I've ever seen. So if you want now, no, I didn't want to say that because maybe the person that worked on them maybe had a tough time creating the shadows and so on. So I'm sorry for saying that, but honestly, they're not that good. So I do recommend that you go find your own sprites. All I want to do is make sure that we have the game mechanics and place. It doesn't have to be extremely pretty. Anyways, we add a box collider obviously. Let's see how big that is. Yep, I think that is big enough. We'll make sure it's a trigger will save that. We'll go into the scripts in here and let's right-click and create a C-sharp script for the health or the health pickup. Hit enter. And we'll create a folder which will be the pickups. So any day now, pickups and add the health pickup and do the pickups. And then we'll add the health pickup into the health pickup. How cool is that? So health pickup gets a new component, which is the health pickup script. There we go, open it up in Visual Studio and let's get started. So what do we need in here? First of all, obviously we need to know the amount that this will heal. So serialized field, we'll make it an integer and we'll call this the heel amount endless. Just set it to be, I don't know, like maybe ten. I think ten is a good enough number. I'm going to remove the start and update for now. And I'm going to go ahead and create an on Trigger Enter to the obviously what are we looking for? Compare tag. I mean, sorry, we need to first of all get the collision and then we compare the tag and that tag as the player. So you've already seen all of this, I think about 1000 times, but anyways, this is what we should be going through. But before I do that, let me just create the animation for the health pickup. So Animation, create animation. Let's create a folder in here which is going to be the pickups. Maybe we do add a bit of more pickups. And in here we'll create the health pickup just to make sure that everything is really clean and easy to go through. So now we get the health up, down, up, down. That go to the sprite switches on. And where is it? Backup, health pickup. There we go. Let's add all of these images and we'll keep it as the default layer that's run. Okay, that's an extremely fast, maybe like that. Nope, that is boring. Like that. Okay. I think that is good enough maybe. Yeah, sure. Why not? So let's just keep it at that. I think. Yeah, Sure. As long as we can see what's happening and it's just moving a little bit. Maybe make it a bit slower. Nope, that's 2 first. I don't know. This will really depend on you. How do you want your pickup to look? Obviously, some of you have battery sprites, have better understanding of what makes an animation pretty. So I'll keep that to you as long as we have the health pickup working properly. Now let's go back in here. And what do we want to do in here after the player collides will obviously we want to increase the health of the player, but there is something that is not quite right and that is, we don't have any way of doing that. So I'm going to issue you a challenge to create a method that adds health. So first of all, and the player health handler create a method that adds health to the player. It should take a parameter which is the heel amount. You'll need to make sure that it never goes over the maximum of health that we have. So our maximum is 100. We don't want to have 120, for example. And finally, and most importantly, you need to make sure to also update the UI canvas. So with that information, pause the video right now and go do reach challenge. Gay. Welcome back. How did you get on that? I hope it wasn't too hard and I hope you gave it your all. So in here where we damage the player right under, we are going to create a public void. And it's going to be add HB two player. And it's going to take in an integer parameter, which is the heel amount. And what shall we be doing in here? Well, we are going to be accessing the current health and we are going to be increasing it by the health amount. Now for the tricky part, if we have the current health greater than the max health, what should we be doing? Well, we should be setting the current health to be equal to the max health. So this will ensure that the current health never goes over the max health. And finally, we need to update player Health Plan, Update Player health. Yep, Update Player health. You know what? Double-click in here, Control RR, Update Player health you are. And the problem is that there is something, one unresolved conflict. What is the problem? Oh, okay. So in here, it doesn't know what it should be using. And there we go. So now we update the player health you are. And the last step is obviously to inhere, we are going to go to the collision, the Get component, because we already know this is the player, so we won't face any errors that what was called at, at HP to player, at HP to player. And we sent him the heel amount of this object. And finally, and of course we need to destroy the game object. There we go. I believe this is all that we need to do and this should be working. So back in our game, Let's run this. And let's see if that worked. So we are going to stand on the spikes, get hit once, Come on, Get him twice. There we go. Get hit a third time. Okay. So now our health is 300. So now when we pick up this, we should have 310. We have 320. So why do you think that happened? Let's see what the problem is here. So the health pickup has done, it hasn't animation. It has a box collider, but the problem, Oh, welcome back. So I believe it took me just a fraction of a second to know what happened because of the magic of editing. But I went through a couple of things. Just understand if my theory was correct and it was. So what I was thinking is that we have two colliders in here. We have the capsule collider of the player, and we have the Box Glider of the Player. One of them is 2. Make sure that we do not go beyond walls. So we made one that is small so we can have the illusion that this game is more than just a two. These are the wall doesn't actually make us unable to walk through it a little bit. So if you know what I mean, I'm in here. And then the second one is actually to be able to get shot from the hat. So the problem, What's happening? I'm trying to show you, I'm going to get hit by these spikes. And now if I walk with these two colliders, you'll notice that when I get to choose one of them, you see that I get 20 because I'm picking it up with both gliders. If I just pick it up with the collider above, look at the 520, you'll see that it's just 530. If I pick it up with my head only, I get 540. So 10, which is good. And if I pick it up on from the side, there you go. You can see that it added 20. So this is the problem that we need to fix. Now, I want you to take a moment and think of a solution to this problem. So I'm just going to give you, this is not a challenge, not an efficient challenge. I'm just going to give you a bit of time. Okay, time's up. So let's see what we are going to do in here. So the whole thing that we need to make sure of is that this health pickup has been picked up at least once. So what we'll do is we'll create a private bool and this is going to be called Pick it up. So it has been picked up. And in here we're going to say that if it's the player and it has not been picked up, so we add the exclamation mark, then we are going to pick up, but we'll also set this pickup to be true. So once we pick it up, once, That's it, We can no longer pick it up another time. So let's save that. Let's go back into our game and let's test this out. So we run the game, we get hit by the spikes. And then when we walk on the sides, there we go, we get 10. So no matter how much we try right now, we should never get this increasing by 20. So now I walk through this that you go on the sides, we always get 10 and never get an extra 20 or so. I hope you enjoy it. I hope you'd like this. And I really wasn't sure what the problem was solved. Took me maybe about two to three minutes, but I remember when I first started this took me maybe back. Today's to figure out what the hell was wrong with this games or why wasn't big begin picked up? This was a long time ago. Now, because of my experience, I understand things a bit quicker and this is what I want you to know that sometimes even though I know I have so much experience, I'm teaching you the scores. I also make a lot of mistakes and things happened that I have no clue why, even though this course actually I've created this game beforehand and went through everything. But I encountered this problem, so I hope you enjoy it. I hope you like my transparency that I always make sure to show you the mistakes I made, even though some people don't like it, they say that, how can an unstructured make mistakes? Oh no, everybody tries to be perfect. I know nobody is. Trust me. Everybody uses Google to figure out what the problem was. And this case I didn't because I've already encountered it and fixed it beforehand, so I hope you enjoy it. Make sure to stage your files and I'll see you in the next video.
62. Random Item Drop : Welcome back my fellow game developers to another very long video. But in this one, it is worth it. Like every single time we get hit, we break. We can see that we have this item. We don't pick it up immediately, but after a certain time, not only that, but now when we should the enemy and he dies, at some point, he also drops and item. And we obviously didn't fix the way the layers interact with each other. But I think because this video was so long, we didn't have much time. So without any further or do Let's not waste any more time and let's get started. Oh, case. So now we have the health pickup working, but not very fun when you have all the health lying around you. You could do that. You could just set a couple of health pickups in your world and then pick them up once you find certain rooms or whatever. But I think it's much better when you can have some kind of mechanic that drops the items and allows you to pick them up. So for example, if we have the breakable right here, these urns, if we crush them or break them, then we will have some kind of health pickup or when we kill a certain enemy, then we have also the health pickup get dropped. So let's do that first things first, I'm going to go into the Prefabs where we have the where is it? Where is it the weapons, bullets, blood, bullets, enemy. So apparently we don't have anything. Oh, you know what? Let's create a new folder for the pickups. And then we are going to drop the health pickup in there. Great. So now we have this. The next thing we want to do is we're going to go into the scripts. We are going to find the pickups and we are going to create a new C-sharp script is going to be called item drop. Now, why are we doing this? First of all, I wanted to just close this for a second. So what I wanted to do is I wanted to immediately add this code right here into the health pickup or I mean, sorry, into the breakable. Where are they? Oh, we just closed it so I wanted to immediately add it to the breakable. So as soon as we break, we get a certain item. But then I thought, what if I wanted some enemies drop items that wouldn't be much efficient because we want several things. Maybe to drop items, we want different earns, maybe not just the breakable, maybe I don't know anything that drops items. I thought it might be better to just create a script which is the item dropper and add it to whatever object we want to drop an item once he dies or kills or whatever. Okay, so let's go ahead and do that. First thing. First we are going to go ahead and create a serialized field, which is going to make sure that we have the option to check whether he drops items, whether he or she or whatever drops items. The second variable I want to create is a serialized field, which is of type game object. And we're going to make it an array and it's going to be the items too drop. Now you might be wondering, we only have one item to drop, which is the health. But later on we'll create a coin and maybe even you might want to create some kind of leveling up systems or you drop something that travels up just like we have in Hades. So items to drop, we have it as an array. Next thing we'll have as a serialized field, there's going to be of type float and it's going to be called the items drop or item drop. Chance. And we're going to set it at 0.5. So it's a 5050 chance. And why do we want to have this? Well, we don't want to have all of our breakable or all of our enemies dropping this the items. So we want to have a 5050 chance of getting an item. Great. So now I'm going to go ahead and remove the start and update. We will create them if we do need them. And I'm going to create a public void drop item. And this will simply go ahead and create a random integer. And first of all, we're going to check for a couple of conditions. So the first one will be random. Dot value is less than the items chance to drop. And what is random dot value that's hover over it and see returns a random float between 0, one. So if we get, for example, zero-point for it's less than 0.5, we want instantiate. This is a great way to just avoid the whole is less than one, more than 0.5 or wherever this just gives us a random value between 01. If it's bigger, we instantiate. If it's not, then we want. So then we are going to go ahead and create a random integer. So random item number and it's going to be equal to the random dot range and range. And in here we are going to have a range between 0 and the items to drop. Dot length. So pretty simple what we're doing in here. We already know all of this and then we are going to go ahead and instantiate the items to drop. And we are going to have it as the random item number. We're going to set it at the transform dot position and the transform rotation. There we go. So I'm going to save this. I'm going to go, oh, and before we do that, I'm going to also create a condition in here that I completely forgot for some reason. I'm going to make sure that if drops items, then we are going to go ahead and do all of this. And let's just add a couple of curly brackets around it so it's better that way. I don't like having multiple lines under a single drops items. Okay, great. So with that, Don't save that back in our game. And let's go into the breakable pot. And that's get these a bit closed. And then we are going to add a item dropper in here. And as you can see, there is a problem. You can see that we don't have the deserialized fields and you can see there is something expected in here, which is we didn't close off one of the, okay, so there we go. Now we save that. Now we should see in here the great. So I drops items, items to droplets, just give it the health pickup. Let's close this down or lockdown actually go into the Prefabs. Where is it, Where is it pickups and the health pickup. So now we only have the health pickup. And just for testing purposes, I'm going to set the items to drop chance to 1. So we always drop an item, save that. And now the last thing that we want to make sure of is that in where should it be in the break bubbles? If we go, Where is it? Where is it burry? 2ls breakable. And in here we are going to check after we make sure that we, Where is it we instantiate the object. We also want to go ahead and check if the Get component and item dropper. And we are going to check and hope we have mass little thing in here that will do because it's a serialized field, Let's just create a returns. So public bool is item, item dropper. And we're going to just return here, True or whatever it is, the drops item. So this will return true if it does drop an item so we can go back and the word was it, okay, The breakable dot is item dropper. For this item dropper, once the player dashes into it, we trigger the break, we instantiate the parts and we check if he is an item dropper, then we are going to again access the Get Component Item dropper, drop item. There we go, save that. And you know what, I was thinking that maybe this if statement in here isn't that necessary. So what let's just remove it. And now I remember why I forgot it, because it wasn't necessary there. So back in here, save that everything should be working fine. The only thing that's still bothers me is that if we tried to get the component, but it's not there, so we didn't add it to some kind of breakable pot. Maybe that will cause a problem if it does, the best way to fix this is to create an extra if condition, an extra layer in here of protection if the Get Component Item dropper, and it's different than null, that means that we do have this item right here. Then we can go ahead and check for the item dropper. So this will give us an extra layer of protection if we don't have the component item dropper, if it's equal to null, then we are going to check if we can't drop items, and then we are going to actually drop an item. So save that back now again, let's see. Now this is like, Honestly, I don't like this a lot because we should be knowing how we are creating this game, Bu, but this is a worst-case scenario. So run the game. And now when we try to break a part, let me just get a destroyed. And then when we try to break the part that you see, there we go. We destroyed it. And you can see that our health just move into from 500 to 510. But there is a problem. Did you see it? Did you see the item get dropped? Nope, you didn't, but the health increased. So what is the problem? Well, the problem here is that it's extremely fast and we don't want this to happen instantaneously. We actually want to see the item that we've dropped before we immediately pick it up. So I'm going to issue it to you as a challenge. And your challenge is to delay the time before we can pick up an item. So first of all, create a new script. Pick up the layer again. Why is this? This is an amazing video for how you structure your game. Because pick up the layer, this will enable us to delay the time before we pick up an item. And we don't want to add this delaying just for the health script and then have to copy it every single time and to all of the coins, the power-ups and et cetera. So what we'll do is just create a new script of pickup the layer and added to every single item that we want to pick up, which is much easier and healthier when it comes to game development and game design structure and so on. That's why we create a new script. Then you'll create a float for the time before we can pick up, you need to create a Boolean variable that checks if we can actually pick up the item or not. Create a core team that after time, after a certain amount of time, which is the, obviously the float variable recreated in here allows us to pick up the item. And finally, where should we were? Should we can call this coating? Where should we be calling the school routine? So obviously, good thing I'm not good at coding because I'm horrible at grammar and everything else anyways, you know, what's the point of the last sentence? Pause the video right now and go to the challenge. Okay, welcome back. So one thing that I wanted to do is I want to go into the health pickup. Nope, not the health pickup, the breakable part. And I'm going to apply the changes to all of the other parts, but make sure that whenever you do add a pot, that you make sure to check whether it drops an item or not and you have to change the items drop chance obviously. And electron, of course we will be changing that. So always keep that in mind when adding new bots. And then we need to go into the, where is it the room, the enemies. We have a couple of enemies. Let's just check this one and add to him item dropper. There we go. So he drops an item. What is the item that he drops? It will be That's why we always lock it down. Then we add the item that's set it as 11. Should we be dropping an item? Let's go into the NMI controller in here. Where does he die? Damage enemy if health is less than 0, instantiate the straw game objects. So the Deaf splatter. We will also check in here if the component, now what? Whereas the breakable, we copy this one. And then we just pasted in here. So this is redundant code. But I'm going to let it slide because of all of the other efficient things that we've created. So we check if we do have an item dropper, then we check if he is a dropper, and then we go ahead and drop the item. So let's try to test this out on the skeleton enemy will apply the changes. So now all the enemies should have the script to run the game. And I know this was not at all part of the challenge, but I just want to test it out so we should the bullets finally he dies and we can pick up an item that see if it works. I get it. I pick up the item. Excellent. Now the next thing is to delay, which is the actual challenge. So let's go into the, I know this was a side note, but maybe you might have not exactly knew what to do in this case. No worries about that. Let's go into the scripts. The pickups, and right-click in here, create a new C Sharp script, which is going to be the PEC. Pick up, the big, oops, Pick up the layer, hit Enter. Wait for this to compile and double-click in here. Double-click in here. And let's see what we are going to do. First of all, we're going to create the serialized field for the float, which is the time before pick up. And let's just set it at around 0.5 seconds. Then we are going to create a private bool can be picked up. Save that now and start. We are going to make sure that can be picked up as equal to false. And then we are going to create the Coubertin And here, which is going to be the eye enumerator. And it's going to be called the pick-up, cool down. Yeah, sure, pick up, cool down. And then in here we are going to yield, return, new. Wait four seconds. And I'm pretty sure by this point, you know, co routines so well that you are bored of me every time saying yield return you for weight seconds. You're probably saying Michael, we already know how to do this. Please stop. Nope. We're going to learn. He has Gantt be picked up is equal back to true. Save that. And now we are going to go into the item dropper. And I'm sorry, I mean, the health pickup. And in here we're going to check if it has been picked up. And we're also going to check. And if the Get component, the picked up, the layer, that what should it be called? Where is it? Can be picked up? Let's go ahead and return this. So public boolean, it can be picked up. And we're just going to return. Can be picked up variable. Okay, not very creative name for this one, but it works. And here is some kind of problem that type vector definition can be picked up. Okay? So can, can be picked up. Sure, let's say has called a method. So I believe it's just because of the name. So you can't name the variable just as you name the method that you want. So we'll just call it method because we have the imagination of a small fruit fly and then can be picked up method. And this should do the trick. Now the last thing and the last part of this challenge was where do we call the Colton? I hope you thought about that and I hope to figure that out that it should be called immediately and start. So the start, we start the co-routine. That is can be, Nope, I mean, pick up, cool down, pick up, cool down. There we go. So why and start? Because we are instantiating the item. So as soon as we instantiate the item, it has the pickup D layer, we immediately start the Colton. So back in our game. Let's see in here, the layer. Pick up the layer. How many, how long does it wait? And I'm going to apply the changes to everyone. So now when we run the game, we should see that as soon as we hit the break bubbles, there we go. We hit the brake bolts. We don't pick up immediately the item. We see it getting dropped. There we go. Yep. You can see right now that it's still there. We haven't picked it up, but now we can, let's try something different. Let's add the delaying to around three seconds and see if it works. In real life. We're going to get hit. We are going to destroy this and try to pick it up. Okay, so that worked pretty fast and I'm wondering what the problem is here. Oh, okay, welcome back. So the biggest mistake that has ever been made, I changed this health pickup to 10, but the actual prefab hasn't changed. So let's apply the changes. I was wondering everything is working smoothly, but for some reason this wasn't working. So there we go with the steroid and now we have 10, 10 seconds before we can actually pick it up, but we are going to set it to about 0.5. Save that. I hope you enjoy it. I hope you liked all the different mechanics and small tweak things and the adding and removing and making sure that we can apply different things, different items. So I know this was a long video. Thank you for your attention. Thank you for staging all of your files every single time and making all of the progress that you've made. I also thank you for the refute, amazing amazing review that you've left me and I'll see you in the next video.
63. Picking Up Weapons : Welcome back, My favorite game developers. I know this is a long video, but we do a lot of things. We learn a lot of nifty small tricks in here. So when we run the game, you'll notice that we have only the pistil right now and the weapons arm we should the pistol, everything works fine. We have the shotgun on the ground. Uw, what do you think will happen when we pick it up? So I headed I pick it up. There we go. We can see that I have a shotgun and we can see the bullet of that shot gun. We can't switch off anything. We can switch between the pistol and the shotgun, but let's not worry about that. Everything will happen. Everything will be fixed in due time. So let's not waste any more time with this big long video and let's get started. Oh, case. So time to set up the way we pick up our weapons. So right now, the way we have our weapons is good enough. We are switching, we are doing everything, but this is not how we want our game to work. We don't want to just start off with all of our buttons and just switch between them. We want to have some kind of mechanics that allows us to have them or acquired them in some way. And one of those things is we can pick up our weapons at certain points and the level. So let's go ahead and do that. The first thing that we are going to do is we're going to go into the doom player. We're going to remove the weapons that we are not holding. So I'm going to remove the rifle, will need to open up the script. So remove the rifle, remove the pistol, and go back into our game. There we go. Now one thing that we need to make sure of is that we also remove them from the available weapons right here. So I'm going to remove these empty slots, save that, and let's see what we have in here. Okay, so as you can see, this is also something that we will need to change and I'll tell you why. Let's just get things out of the way. So currently we are setting the current gun at one and then setting the weapon UI, but one isn't available right here. So let's see what happens when we run our game. We should see that we have an arrow right here, and this error is argument out of range. I double-click in here, it takes me to the setting weapon. That means the current gun is out of range inside of the available weapons. And of course it is because we are setting the current gone to one while we only have one weapon. So the only index that we can access a 0. I could set this to 0 if I wanted. But then what happens is that every time we start the game, we have, for example, the shotgun and the rifle, and the rifle is on while the current gun different than you get what I mean. So the index will be out of place and this is something that we didn't take care of in the last video. So I'll show you what happens even though this will take a bit of time to understand, but no worries. I want to make sure that everything is properly understood and why we're doing all of these things. So pistol, shotgun, rifle, apply the changes. For example, let's say I turn off the pistol and I turn off the rifle. So now what we should have as the shotgun as we begin. So I'm going to run this. There we go. We have the shotgun shooting, but I have the pistol and the UI. If I click it again, then I have the shotgun that I have the rifle. So as you can see, things are weird at the beginning. So instead of doing that, what we're going to do, we're going to remove this and we are going to create a for loop. So four and I equals 0, I is less than the available weapons dot count, count because we are using lists and I plus, plus. And in here I'm going to check if the available weapon, the position I dot gameObject dot active in hierarchy, that means which show up and have we actually chosen to be available to the player? Then we are going to set the current gun equal to I. And that way everything should be working perfectly fine. So if I go back in here, I have the shotgun. I run the game. The weapon should be correct right here. There we go, shotgun. Let's test it out on the rifle. So turn this off, run the game. So now we should have the rifle. And there we go, everything is working properly. And finally, we tested on the pistol and remove the rifle, run that. And we should have the pistol. Okay, great, So everything is working good. Now, I took a bit of fun to do this. No worries, but as long as this is out of the way because it will be important when we start actually picking up weapons. So the first thing we need to do is we need to create the pickup object that we are going to interact with. And I've created these three sprites right here. And the difference between the regular sprites and the guns and these ones is that I've added a bit of white layer around the console. We can see them in the world. So I'm going to go into the sprites, right-click in here, create. Nope. Create a new folder which is going to be the weapons backup. Hit Enter, open this up. Or we could have added to the pickups, but no worries about that. Having more folders never hurt anybody. So as you can see, there is a white outline around the shotgun. So if I add it in here, set it on the player. And I'm just going to make all of these 32 and make them point. Apply the changes. There we go. So as you can see, the shotgun has this white outline around it so we can properly see it and work. It wasn't that big of a deal whenever we were holding the weapon because we have the player as the background. But now we need to make sure that we can visibly and easily see the shotgun or any pistol and weapon. And if you don't like it, honestly, it took me like, I don't know, one hour to do this in Photoshop. I have no clue how good or bad it is. Maybe some of you are cringing at the work, but personally, it was my best. Let's continue one. So what we're going to do in here is let's keep this as the shotgun. We're going to add a component. Obviously it's going to be the collider. So a box collider 2D. Let's see how big that is. And maybe we can increase the size a bit on the x and the y. Don't have to hit the weapon entirely suits to pick it up. So just a little bit and have it as a trigger. We save that. And the next thing we're going to do obviously is some behavior. So I'm going to go into the scripts, go into the pickups, right-click in here and create a new C-sharp script which is going to be the weapons backup. Hit Enter weapons, pick up, wait for it to compile to the shotgun pickup. And let's open up the script and see what we are going to do in here. Okay, so the first thing that we need, as we actually need to know which gun this is going to be. So the shotgun obviously will give us the shotgun gun. So I'm going to create a serialized field in here, which is going to be the weapon system of type urban system is going to be the actual weapon that we are going to pick up. Save that. Now, the next thing we want to do is we want to be able to pick this object up. And before we can actually add this object to the player, we want to make sure that he doesn't already have that object. So I don't want to be carrying around 10 shotguns. I only need a single shot gun to be available to me. So let me first of all like this down. Let's go to the prefab, go to the weapons, and let's add the shotgun here as the weapon. So I hope you understood what I mean. I don't want to pick up a shotgun while I already have a shotgun. I want to pick up a shotgun only if it is not being held in my available weapons. And that is your challenge to look through the layer guns. So first of all, you need to create an entrepreneur Enter and check if we collided with a player. Obviously, we don't want our skeletons to be attacking us was shot guns. Who then you'll need to create a variable inside the method to keep track of whether we found the weapon or not on the player. You need to go through all the guns deep layer scurrying and obviously check if we're carrying the gun, you've picked up using the GAN name, so we'll need the gun name and phone to access the gun name and to access the available weapons, you'll need to create a couple of extra methods. So this is a big challenge, a very tough challenge, but I know you're up to the task. Take your time, play around, do mistakes, don't worry about it. I will be there to help you after we've tried. So you don't lose anything. Pause the video right now and go do reach Alan. Kay, welcome back. So the first thing that I'm going to do is remove the start and update. I'm going to create the entrepreneur enter 2D. And here obviously we check if the collision.com tag as the player. And now we can continue on. Now the next thing and something about here, maybe we could have just immediately made all the pickups have a certain layer and make it only interact with the player layer that would have been a bit smart and maybe not have all of these f conditions every single time we want to use a pickup. So just a silent, I forgot about it. Maybe you can do it on yourself. With that said, let's continue on next. What do we want? Well, obviously we want this Boolean variable that will say that gun on player. And this will be set to false. Okay, Now the next thing we need to do is we'll need to create a foreach loop that checks. And it's going to be checking for guns so or weapons. So it's the weapon system. The weapon to check. And where are we looking for these? Well, we are looking for the available guns on the player. On the player controller, their goal, it says it right here. So we are going to look through the available guns, but obviously available weapons, but obviously it's a serialized field. We don't want to make it public and available to everyone. So what we'll do is down here, we're going to Create and there you can see the mistake that we've made. We're going to create a public list of type weapon system. So I hope you tried this, excuse me. And we're going to call it the get available weapons on layer. There we go. That's a long name. And what we're going to do is simply return the available weapons. There we go. So now what we can do back in here, and because we can immediately access it from the collision, which we've collided with the Get component. And because we already know it's the player, we can access the player controller. And from the player controller we can get the available weapons on the player. Great. So what we've done in here, we've created the ghetto available weapons by having the simple return, which returns a list. And because it is a list, we can add it right here. So we are checking the weapons to check. Now, how are we going to know if the weapon is there? What we'll do is we're going to create an if condition. And in here we are going to check if the weapon that is in here dot the name of the weapon. So obviously if I go to the weapons system, if it's in here somewhere, the weapons system, we have the weapons name, but again, it's a serialized field. So these are okay. So we do have the get weapons name, UI. Okay. No worries. That's all that we need. Yep, That's all that we need. So in here we are going to check get weapons name on the weapons or no, actually, we don't need this. Get weapons name you are. And if it's equal to the weapon to check dot get weapon name UI. So maybe UI wasn't the perfect name in here for the method, maybe it's better to just call it the name because we are using it in a different way. We can double-click create our R and just use the getWidth and name. Hit Enter. There we go. Now we've changed this all over, even in the weapon system. Down here, you can see how cool is that. So Control, double or, or, or, so if it is there, that means that the weapon is already in the available weapons. So we're going to set the gun on layer to true. And after we finish looking through all the available guns, we are going to after this check-in here, if V gun on player is not true, so that means that it's still false. We don't have the weapon, honest. What we'll do is we're going to go ahead and instantiate the weapon on the collision dot get component. And it's going to be the player controller. And why am I doing all of these steps? Well, because I want to actually make this weapon. If we go back in here, you can see that the weapon is actually a child of the weapons arm. So we need to make we can see right here that an instantiate, we can set the child. So we're going to do just that and we need a reference to the weapons on. So if I scroll up and here you can see that we do have a weapons arm. So all we need to do a scroll down and again, create a public. And what is it? It's a transform, I believe. Yes, say transform. So we'll need to create a public transform and get weapons arm. And we're simply going to return, return the weapons. Are. There we go. So that was a hard challenge, I know, but I hope you at least try to get halfway through it. So get weapons. It's not showing up because it's a public transform. Get weapons on. So player controller dot get weapon. Oh, so player bullet controller. Okay, So player controller get weapons arm. And there we go, we save that. We go back into our game. And let's see how that works. So we have the histone and we have the shotgun on the ground. We pick up the shotgun, the weapon available on it, save that, run the game. And now when we get close to the shotgun, nothing happens because if I double-click in here, we can see that, okay. And other than that in here, we get to check. Okay. So welcome back. For some reason, I didn't change anything. I just run the game now and it seems to work. There we go. You can see that we've picked up two shotguns. Why is that? Well, obviously because of the two colliders that we have on us. And also don't destroy this shotgun. But as you can see, we are still picking the shotgun up multiple times, even though we can look through this and see that we have the shotgun already honest now. So before we continue on, the first thing that we need to do is create the private boolean, just like we have in the health pickup. So we can just copy this, paste it in here, and said the pickup to true whenever we actually pick up the gun. So in here said this immediately to true. And we also check if we haven't picked up the weapon yet. So as you know, this is because we have the two collider on us. So save that back in our game. Let's see how that works. Now, we run the game. We have the shotgun. Oh, and we also need to destroy the weapon, excuse me. And after we do pick it up, if we do instantiate the weapon, where is it for each? So in here you can choose whether you want to destroy it in any case. I believe we should destroy it in any case. So even if we don't actually pick it up, it doesn't need to stay there. So I'm just going to destroy the object as soon as deep layer actually heads that object. So back in here, run the game. And there we go. We pick up the weapon, and now we have the shotgun and our hand. As you can see, the shotgun shoots and we can't switch the weapons on and out between the shotgun or the pistol. Why is that? Well, because we haven't actually added the shotgun right here into the available weapons and that is something that we will need to fix in the next video. That is also the reason why we saw right here that we have multiple shotguns being picked up without the weapon being destroyed. That will be fixed in the next video where we actually start adding the picked up weapon into the available weapons. So that said, I hope you enjoy it. Make sure to commit your changes and I'll see you in the next one.
64. Adding Picked Up Weapons: Welcome back, My favorite game developers. In this video, we've actually started adding the shotgun, rifle and the pistil, which are the weapons to our weapons available. So now when we run the game, you'll notice that when we all, we also added a bit of rotation, which makes our game much cooler. So now when I pick up the shotgun, there we go. You can see that I get the shot gun in my hand. Not only that, if I go into the doom player, you can see that it's already in here. And not only that, when I pick up the pistol, for example, There we go. You can see that even though it's destroyed, not actually pick it up. And finally, the rifle and pick it up. It's here in our weapons, are in our available weapons. We can switch between it, it does this which automatically, how cool is that? All mechanics are perfect. So let's, let's not waste any more time and let's get started. Oh, okay. So while you were moving between videos and leaving reviews for me because it helps me out a lot. I've created two more weapons, pickup 14, the pistol 14 the rifle, and obviously it's very easy. All I did is just duplicate the shotgun, pick up at the sprite and add the weapon and the weapons pickup. So I'm going to go into the Prefabs, let's see and hear the pickups. And let's call this the folder or you know what, What do that just lets the shotguns, pistol, rifle save that. Great. Now the next step is to actually start adding in the player to the available weapons. So we'll need to create some kind of method to do that. And it's going to be your challenge to create a method that adds to the available guns. So you'll need to create a method that takes a parameter, the cons to add, the gun to add, or the weapon to add whatever you wanna call it, need to add it to the list of available guns or weapons. Then I'm going to give you a small hint of how you can add to any list that you have and just use the dot add with inside of it. You can also go through the documentations of I've left you the list of documentation on how to dot to a list. So pause the video right now and go do the challenge. Okay, welcome back. How did you get on with that? So I'm going to go ahead and scroll down. And in here. And we keep these methods alone and we create methods in here. This is just an organization criteria for me, maybe you have something different and ways. Public void. Add two available weapons and open up the brackets, as I've said, the sticks and weapons weapons system. And we have the weapon to add. Open up the circles right here. And we are simply going to get the available, opens the ad, and we have the weapon to add. There we go. That's all that we needed to do. And finally, when we actually do pick up the weapon in here, we instantiate the weapon. We also get the collision get component, the layer controller. And we add two available weapons. What do we add? Well, we want to add the weapon that we've created in here. So I'm going to get a reference to the swapping is going to be of type weapons system. There we go and view weapon to add is equal to this. So weapon to add, save that back in our game. Let's run this. And they now, any day now run this. And now we should see that we have the pistol and he, they now come on. And finally we have the pistil. Now we pick up the shotgun so we can see that we can switch to the shotgun right here and you can see it in the available weapons. Finally, we tried to pick up the pistol. As you can see, we don't get the pistol, we only get the shotgun and now we pick up the rifle. We have the rifle. We can switch between them. And as you can see right here, now, there was a slight problem that you might have not noticed. First of all, when I run the game, let me just show you this again. So when I pick up the shotgun, Okay, That's good. I have the shotgun was me. But when I pick up the rifle, you can see that as soon as I start shooting, first of all, we have the pistol and the rifle. Both working, then I need to somehow switch between them to pick it up. So this is something that we will need to fix. And to do that, I'm going to go back in the visit. So at the available weapons. And in here I'm going to make sure to set the current gun and what it should be. So set the current gun. And what does it have to be? Well, I'm just going to write it and then I will explain. So the available weapons dot count minus2, and then I'm going to switch the gun. Okay? And by the way, switch the gun. Which one is it? Which? Okay, So switching. So as you can see, this will not be working. Why? Because the switch gone actually requires us to press the Tab key. So if we access this method and try to use the Tab key, it will not work. So what we're going to do is instead we are going to extract this entire method. Right-click in here. Quick action and refactoring, extract the method. And this will be the, let's just call it actual gun switch. Apply the change, save that. So now we can actually do the actual guns switch in here. And I hope that was clear why we did this. Because again, that can just show you we have pups. We tried to call the switch gun, but the switch gun does not work unless we press the Tab key. So what we'll do is we'll just extract this method in here. So now the switch gone works completely fine. But the only thing that we have is we can actually switch the gut, the actual gun switch. So back in here, where is it the actual can switch? Why do we have the available weapon dot count minus two? Let's first of all see if this actually works. So back in our game, we run the game. And let's pick up the shotgun. There we go. You can see the shotgun is the only weapon that is working. And now when we pick up the rifle, there we go. The rightful is the only thing that was working. And I press tab just out of reactions or let's try this again. Become the shotgun, pick up the rifle is the only one working. Great. Now back in here, why do we have the available weapons dot count? Let's think about this for a moment. Let's say we pick up a weapon. So let's say we had the pistil only, we had 0, we had only one weapon and the count was one. That pistol index was 0. Let's say we pick up the shotgun. So we pick up the shotgun. Now we have the count equals to 2 and we have the shotgun at position 1. So how are we going to actually make sure that we only get the shotgun? We'd get the available weapons dot count, which is right now about two, will remove two. That means we are at 0 and then we do the actual switch and the actual switch as soon as it starts. If we look up here, you can see that as soon as we start we get the current gun plus, plus. So we increased by one and this will work in any case. So let's say we also picked up the rifle. So now the count is 33 minus two is one. That means we are at one, which is the shotgun. But when we actually do the switch gun, we increase. We get two and we get the available shotgun. I know. Confusing, isn't it? You can rewatch what I said. I'm pretty sure I've said everything correctly. So this is just a way to make sure that we always get the correct and proper cup. So I hope you enjoyed in the next video, we want to just add a bit more of, let's say, excitement. Whenever we want to pick up a weapon, we don't just want to have the weapons lying around in our world. We actually want to have are no, maybe some kind of chest, chest that will open up when we get near it or press a certain button when we are near it and then have the weapon appear from it. So I think I have a couple of minutes left in this video. It's been short. So what I'm going do is I'm going to get the rifle pickup or the shotgun pick up. And I'm going to create an animation in here. So just to make it a bit more nice to ongoing to where is it, right-click in here. Create a new weapons. Backup. Hit Enter opening, you're rotating weapon, row, the thing, weapon, pick up. And this is nothing new. We're just going to do is you'll see in just a bit for the thing, weapon, pick up, save that. So get the shotgun. Stop recording. And I want to have a rotation at around the second one to be about this. Yeah, sure. So 90. And at the second, second, second, second, the rotation should be around 180. There we go. And then add the second three. We should be at 270, almost 70. And finally on second four, we have 362. Let's see how that looks. Okay, seems good enough. So this is the rotating weapon, but we can also do a couple of things right here if we choose all of them right-click and you can see that we can create some kind of tangent. We can choose both tangent and make it maybe linear. So now the rotation, we'll just change a bit. There we go. You can see that it keeps rotating, really nice. We can also do the same and here. So I'm going to leave the rest to you. This is just a way to have a bit of a nicer game. So now you can see that we have this shotgun that we'll need to pick up. There we go. We pick it up. Everything is working perfectly fine. So I hope you enjoy it. I hope you are staging your files and I'll see you in the next video where we create a just opens up and gets us, our puppets. See you then. Hey, you thought you were rid of me, but no, we still have a bit of time for something and I was just worried for one thing that you might want to go and create an animation for every single weapon. But no, you don't have to go right here until the shotgun. You can simply click on these three little keys right here, or buttons or whatever you wanna call them. And you can see that you can actually copy this entire component. So when you copy it, let me go back into the pistol. I've already done this Remove Component, room of components. So on shotgun back in here, we copy the component. We go into the pistol pickup which does not rotate. We click on any component that we want. And you can see right here that we can Paste Component as New. So when I click on the Paste, there we go. You can see that now it has the controller of the shotgun. And you might think right here that maybe this is not a good idea. We should have may be called something different than the shotgun pickup, but don't worry about it. The thing that we are looking for is the animation right here, which only affects the rotation. So it does not change the sprites, it only affects the rotation of a game object. So we won't have to worry about It's sprites changing and this is a faster way for us. Let's add that also to the rifle. So this is a very fast way for us to have rotating objects and not have to create animations every single time. So copy it, run the game now we should see that all the weapons wrote it around. There we go without changing anything and they are still working list-style. We go rifle, still doesn't get picked up because we already have the pistol with us. How cool is that? I hope you enjoyed. Sorry for coming back. I know you're already very annoyed. This is an a step just to save you maybe a couple of minutes, hours, whatever it takes you to create animation. So I hope you enjoy lever of you. I'll see you in the next one. This time for real.
65. Creating A Chest That Opens : Welcome back, My favorite game developers in this video and this long video, again, we are going to be learning how to create a chest. But this is a really cool just because when we get near it, it tells us that we can press the e to open chest. If we press the E, you'll see that we get an open chest. There we go. So this is all that we've done. So let's not waste any more time and let's get started. Oh, okay, welcome back. So now we know how we can pick up weapons. We can add them easily to the player, we can shoot with them. We update the UI, everything is working perfectly, but as we've said, we want to add a bit more flavor to the way we actually get these guns. And the way we'll do that is having a chests and our levels that we can click on. They open up, they give us the weapon, we pick it up, we continue on with our game. So let's go ahead and do that. I'm going to delete the three weapons pickup. I'm going to go into the sprites and before obviously before you delete them, we need to have them as prefabs. Then we'll go into the sprites. We are going to right-click in here, create a folder for the chest. Double-click in here and go into the visit into the resources, drag the chests. Obviously, if you can find by their chests, I recommend that you go for it. I'm going to make it multiple. I'm going to make it by point. The filter mode go to this pride, apply obviously. And now let's go ahead and slice this up. I believe the automatic should work perfectly fine. There we go, apply the changes. Which box do you want to choose? I'll choose the golden one. So the, this one and this one when it opens up. So we will need to have two kinds of sprites in here, 140, open chest 14, the closed one. I'm going to drag and add it into the world right here and set it on the player layer. Obviously it's extremely small. So I'm going to change this from the treasure chest to the weapons chest, and let's make it a bit bigger. So I believe 16 maybe 16 is too big. Is too big of a chest. Nope, I think that is good enough. Now we're going to go to the scripts right-click or no, do we have something pickups, level flow? Do we have a folder suitable for the Nope, we don't have one. So I'm going to right-click create a folder for the weapons. Just copy that inside of here. Where did we go? Weapons. But we have sorry for that. The weapon just okay. For some reason. Just opened up some different folder anyways, we create this. It's the weapons, chest. Hit Enter, wait for it to compile. And any day now we add it to the actual weapons, just and open up the script. Okay, so what do we need to have in here? First of all, we want this just to give us random weapons. So what we'll do, and this is just a mechanic that I want to have. Maybe you'd want to create something different, but for now serialized field, the weapons pickup. And it's going to be a, an array with the potential weapons. So the potential weapons, then I'm going to create a private sprite renderer. What does it, right? Renderer. And it's going to be the chest as R. And you'll understand everything. But for now, let's continue on. The obviously the just sprite render this will be, we need a reference to width. You'll understand in just a bit. Now I'm going to create another serialized field, just going to be a sprite. And that sprite is going to be the open just sprite. And then we are going to have some kind of text. And because we need to be using Unity engine Wi, now we can access the text and it's going to be the open key text. Open key texts. And I don't mean by key, the key that will allow us to open the chest. Well, I sort of do, but the key, which key do we press on the keyboard in order to open the chest? Now that I think about, maybe that's why they named the Key Vault maybe. And with private, finally, we need a Boolean to make sure that we can open. That means that we are going to be in the vicinity of this. And chest. And why do we first of all, she asked, why do we need the chest sprite renderer and why do we need the open chest sprite? Well, because when we open chest, there you go. When we see the sprite, just a second. When we see we have two sprites, one for the close 1, 1 for the open one. That's why we need a reference to the sprite renderer to change this bright when we actually open the chest. So I'm going to go ahead and add the open chest sprite, the potential weapons. I'm going to add that and just lock this down for a second to the Prefabs. Pickups, V3 weapons. Or even if you want you can add the helpful. So, so maybe you get the help from the chest and short, let's do that. Let's add also the health just for fun. Oh, okay. So it's a, it's an array of what does it the weapon system. So or sorry, weapons pickups or we can't add the health mice. That something that I did not realize. But anyways, let's continue on and start. We need to get a reference to the sprite renderer. So the chest as r is equal to the debt component sprite renderer. There we go. So now we have a reference to it. And when we actually open the chest, we want to change the sprite to something different. Now before I continue one, I remember the little hint that I gave in the previous video. We don't want every single time create the if the tag is the player. So let's go ahead and create a new layer. Layers. Oh, okay, so we need to remove this. And we're going to create the pickups. Hit Enter. And now where we can go and set all of these pickups to be working or all have the layer pickups. Save that and now go to the Edit, sorry, Edit Project Settings. Where is it? Physics, 2D, and the pickups, all the interact with the player. So I'm going to turn everything off except the PLR. We save that, we go back. Now we will make sure that this even the chest, we can make sure actually we should make it as the pickup also. So it only interacts with a player and we don't need to check for the tag every single time. So what does this out also? So now, what else do we need to do? Well, we need to create a canvas for this chest that will have some kind of word right here or texts that will display. For example, press E to open the chest or press C or whatever. So I'm going to right-click on the weapons, just go down to u i and create a canvas. Really nice. So now you can see that we have a, another huge canvas. What are we going to do about? Obviously, we don't want it to be that big. So what we can do, we can set it as the world space right here. And this will allow us to change the scale right here. So I'm going to set the scale to 0.01 on the x, 0.01 on the y. And let's just keep it at 0 or the Z at 1212 factors. I'm going to change the position to 0. And you can see how small the canvas is right now, this little square right here. And I'm going to change the x and the y to 0. Now I double-click on the weapons just and there you go. You can see that we have the canvas right here. So now I'm going to add another 0 and here, and maybe another one also on the Y. Okay, that's too small. And let's maybe try to okay. That's too much. Sorry. And maybe we just make it around 35, okay, five on the y and on the x. Excellent, so now we have it That's reset its position back on to these 000, maybe increase the height template. And we'll call this the chest Canvas. And as you can see now it's a very small canvas and we need to make sure that it's world space and now opens up. And on the chest Canvas, I'm going to go ahead and create a text Mesh pro. And this text much Pro is going to say open, press key, press E to open chest and enter this down a bit. Make it bold, make the robot font that we have, and make it auto size. And let's see how that looks. I'm going to zoom back in and make this a bit bigger. Where is the text color? Whereas the text anyways, I cannot see it. Oh, case. So what we need to do is we also need to change this to this sorting layer. And there we go, we can see that the text is, and here, and I was testing this out on the 2D. I was wondering what was wrong. And I thought that maybe if we are in 3D, I could change the Z position. But no, it turns out that on the actual just Canvas. Have it in world space. You can choose the sorting layer and we'll make it on the player layer. And I'm going to make sure that this is bold, auto sized. And we are going to move the text up a bit, so this is where it will appear. And I'm going to increase the size and we'll make sure that the max is bigger. Okay, So increase the max as much as possible and we can resize it to your heart's content. How much you want to, how big do you want to make it? How small do you want to make it? It comes back to you. So I'm going to set it up here, save that. Now the next thing is we'll go into the weapons, just let's add a couple of colliders. The first one will be a collider that will just make sure that we keep things intact. And then make sure that we don't just walk through the chest and then we'll make a second box collider. And this one will be a trigger. And I'm going to change its size to be about yea big, so able bigger than the actual box. Or if we stand in this position, we will be able to open up the box. So save all of that, make sure that it is a trigger. Now what we're going to do is issue you a challenge. And your challenge is to know what's in the box. If you know this picture, you know it. If you don't know the reference, then it's your problem. Then anyways, opened the box under certain conditions. So we want to open the box. We want to be pressing the Iike. We need to make sure that we want to be standing next to the box when we are opening it. So when we are not standing inside of the box, we don't want to have the ability to open it. And also make sure we display the text when we are next to the box. So need to have two ways. Whether we are near the box or we're not near the box, we will be displaying the text and we can open it if we are next to it or not. So the pattern formation with these conditions in your mind, pause the video right now and go do the following. Okay, welcome back. So I'm going to just get started because we are have already wasted a lot of time on simple details and ways. We are on the Trigger Enter. We won't be checking for the player tag for now. And we are going to make sure that the open key text dot GameObject dots are active is true. So we'll be turning it off and only when we are inside of the collider we are going to open it up and on the arm trigger exit 3, we are going to have the same thing and we'll just put it in here. Instead of true, it's going to be false. Excellent. Now, what is the next thing that we want to do is we want to make sure that we can open and it's set to true. And if we're not, then set can open. Well, I just make this a parentheses. Nope, can open z equal to true and can open is equal to false. There we go, we save that. And let's just have an update in here. We removed it and we're just going to be debugging. Dot log can open equal to can open. There we go. We save that. What's the problem Boolean into an object. For some reason, I just forgot all the context and the world. Okay, with that done, let's go back and check in. Here. We run the game. We have in our console. It's false, false, false, false. When we walk into the box, there we go, we'd get an error. Excellent. Why is that? Because obviously we forgot to set the result goes down, goes down the text. How great is that? O, and we also forgot to, I hope some of you picked up on this DTM probe. And this is not just any text, it's a text Mesh parole Gui. So save that, go back in here and now we should see that we add the text, save that, run the game. Oh, and one more thing, excuse me. We need to make sure that we turn of the text. Just save that. Again. Let's make this a bit bigger. So we false, False, False can open. Then we run in here, can open true. We have the press Chest E. And finally the last step we actually want to an update in here. Let's remove this. We know what works. We are going to make sure that if the input dot get key down, we open this up key code, the e. So when we press E and we can open, then we are going to get the chest as our sprite. And it's going to be equal to the open. Just sprite. Save that back in our game. Now we run the game. We stand next to the chest. If we press the E key right here, nope, We cannot do anything if we just Iike right here. There we go. We can open the chest. How cool is that? So I hope you enjoyed this little tutorial on how to create chests. In the next video will be actually popping up some weapons whenever we open the chest. So I'll see you then makes sure to commit your changes. And I'll see you there.
66. What To Spawn: Welcome back, my fellow game developers in this video, when we run the game are just does not just opened up. It opens up and gives us in random mapping. We'll pick it up and we start shooting. And the best part is that if we keep pressing the Iike, we don't have more weapons. You will see why this is such an amazing thing to do. And a couple of minutes, so let's not waste any more time. And let's get started. K. So now we have our chest opening. We actually want to spawn some kind of weapon. So what we'll do is we're going to instantiate one of the potential weapons. Where is it on the weapons just right here. Now, there is one more thing that we need to take into consideration, and that is when we spawn one of these pickups. It's on the chest immediately and the chest is solid. So what we're going to do is we're going to create a spam, spam, spam spawn point in here. And we're calling spawn point. And we'll just move it a little bit down. And this is where I can just make this bigger. And this is where the gun is going to spawn for us and we'll just put it about here. And if you want, you can also add to each of these guns the pickup, the D layer. I think it's a good idea because if the player is standing right in front of the chest, we won't even see what the gun was. So it's a good idea. It's pretty easy. Just add the script. We'll maybe do it later on. But for now, let's keep focused on what we have. We're go into the weapons just and in here we'll create an extra serialized field which is of type transform, and it's going to be the spawn point. Save that back in Unity, wait for it to compile and weapons just there we go. The spot point that now what we're going to do is in here we want to create a random number, or at least when we actually press the key will create a random number. And from that random number we will instantiate one of the potential gametes. So I'm going to issue it to you as a challenge, so you'll need to spend the weapons pick up. In here. We should have pickup. So you'll need to create a random number. You'll need to instantiate one of the potential guns. And you'll need to make sure that it's on the position of the spawn point. So with that said, pause the video right now and go do the challenge. Okay, welcome back. So after we change the sprite, we are going to create an int, a random weapon, weapon number, and it's equal to random range. And the range is from 0 to the potential, potential weapons dot length. And in here we are going to go ahead and instantiate. Instantiate opens up what is the object? It's going to be the potential weapons on the position, random weapon number, the spam point dot position and the spam point 0, 0, 1. Save that. And now let's go back and to our game. I believe this is all that we need to do. Okay, Let's go back. Let's make this a bit bigger. Run the game. Stand next to the chest, hit the Iike. There we go. How cool is that? Now we have the shotgun, we can actually pick it up and start shooting. Now, there is one more thing that we need to take into consideration. And then I can spawn as money, weapons as I want, is something that you might think is good. But in actuality, it's not. Maybe you do want to have this, maybe you don't. And I'm going to give you an opportunity to do this on your own. Pause the video if you want. This is not an official challenge. I'll give you a couple of seconds. Pause the video, figure out how we can stop this. O K time's up. So in here I'm going to add a, another Boolean which is the has been open. It opened, opened. And in here, after we actually open the chest, the has been opened equals true. And another condition in here, if it has not been opened, save that, and I want to add it to one other place. And it's in here where we set the Vicky back to true. So in here I'm going to say, excuse me, that's a lot. If it has not been opened, then we are going to turn this on. Save that. And if we're out, then we'll just set it to false and will never open an account. So we don't want to keep seeing the text when we have already opened that chest. So we run the game. We have the chest. We open it up. We have the shotgun who tried to open up another time. No, we cannot if we go back, that's it. We don't see it because we've already opened and we pick up our app and we shoot around. We have an amazing weapons spawning, chest opening, picking up mechanic that works perfectly fine. So I hope you enjoy it. And if you want to have some extra challenge on the side, maybe create some kind of animation for the chest where it may be wobbles left and right before it opens up. Or I don't know, maybe add some kind of extra animation if you have for the chest to find on yourself. With that done, make sure to always commit your changes if you haven't already, you know the drill. I it helps me out a lot when you leave a review positive 1, of course, a review on the course Atlas, the platform. Know that I am the author of this course is worth watching, worth showing to other people and joined the discord obviously, if you haven't already, and I hope you enjoyed this section. It was really nice. We learned a lot. And the next one, I'm not sure what we're going to do, but I'm sure we will figure it out by them. So let's not waste any more time and let's go to the next section.
67. Section 11: Music & SFX - Let's Talk About Music : Welcome back my fellow game developers to one of the more exciting parts. Maybe it's a bit smaller when it comes to the length of videos. I'm in the length of the whole section, but it really makes much bigger difference in our game. So now when we run the game, There you go. You can see that we have in music, we walk around, we shoot our enemies. We tried to kill the skeleton, and for some reason we die. All my god. Oh my god. How much do you feel the pressure now that we've applied fields so scary that we died. Not only do we have the black screen for you died, but we also have the music changing on us, which adds a very scary atmosphere. Okay, maybe not that much, but you feel the gravity of your death much more right now. So without any further ado, let's not waste any more time, and let's get started. Okay, so time to add a bit of music and sound effects. Of course, I love this part of the game because this is where we add the magic to the game, where we make it just a little bit more amazing. So first thing, first, I'm going to go into the Prefabs and I'm going to Prefab the weapons just and let's just add it to the Sure. Let's add it to the pickups. Why not? Why not? Or level objects, maybe level objects would have been a better place to put it. So I'm going to move these to the level objects. Okay, great, move that out of the way. Let's go into the assets. Let's right-click in here and create an audio. Just all you double-click in here. And I'm going to create two folders, one for the music and one for the sound effects. Just call it as f x. For some fact, I'm going to go into the resources. And here you can see that we have these four musics. Let's go ahead and add all of them. I'm not sure which one we're going to be using, so I'll add the all of them into the music. Wait for that. If it takes too long, I'm going to use the magic of editing 0. And now let's go into the sound effects. So as a fox, I will select all of them except for these two. I'm not sure why they are still there, but I'm going to go ahead and add them until the sound effects and wait for them to be added. Okay, great. So let's double-click on the music and let's see what we have in here. So if I click on the fly and if I tried to turn on the volume of it on my computer, I can listen to it. Listen to a preview of it. Okay. So obviously you can hear it. So now what we'll do is we are going to play that music and our game. And it's pretty simple. Whenever you want to play music, you can simply drag it in here. There we go. You can see that now Let's make this smaller. You can see that I have the fly in here. And one of the cool things that we can do is we can simply just from the game right now. And you can see we have an option here which is play on awake and the loop. So I'm going to put it to loop because we don't want the music to actually end when the actual song finishes. So now when I run the game, and obviously nothing is happening. Why is that? Well, because the music isn't actually playing on awake. Oh, okay. So it took me about three to four minutes to figure out what the problem is. I was so confused and I had the mood of your own. So now when I turn it off, when we run the game, There we go. You can see that we start playing the music. I'm just going to turn this down. And how are we playing this music? I want you to pay attention to what we have in here. We use something called the audio source. And the audio source, you can see that it has an audio clip on it. So the clip that we are going to play an output which we'll talk about later when we add an audio mixer, we have the priority, the volume, the beach, and etc. So and we also have 3D sounds that you can play around with. So as you can see, as soon as we add any kind of music to our game, we can immediately play it. But obviously this is not how we want things to work. We want to be able to control all of that. So in here we can see that we have the multiple flights or let's try the fly one and see how that sounds. Or the industry. And I think I'm going to use this fly and I'm going to call this the level music and use the fly as the death music. So music, There we go. You can see now it's the level music. It's still called fly. And the fly one will be the death music hit Enter. And now we have these two sounds. So before we go into the sound effects, Let's go ahead and create something called the Audio Manager. So I'm going to first of all remove the fly right here. I'm going to right-click create an empty. And this will be a game object. And I'm going to call it the, I call it the gameObject seriously, audio manager. I'm going to reset its position. It doesn't matter where it is, but I'm going to reset it in any case. And in the scripts right here, I'm going to go into the managers do have a folder for the managers. Nope, we don't. So I'm going to right-click create a C-sharp script called the Audio Manager. Hit Enter and right-click, create a folder for the managers. What did it not change? Managers, please. Manager. So oh, okay. We already have a folder optima managers delete that. So managers. Oh, there was a folder for the managers. Why did I not get in any case? Let's open up the managers lets the Audio Manager to the audio manager and let's double-click and see what we are going to do in here. Now, the AudioManager, something that we are going to be calling out a lot. So I'm going to create an instance out of it. So public, static or your manager instance. And I'm going to create the awake and the incidence is equal to this. Great, So now we can access the Audio Manager whenever we need to. Second, we need a variable in here which is going to represent all the music that will have a serialized field, the audio clip. So why is it audio clip? Because as we saw right here, where the unity, when we added the audio source which plays our music, the music in here, let's say we add the level music. You'll see that this is the audio clips, or we need a reference to the actual audio clips that we are going to play. So back and hear the audio clips and this will be our music. Just in this case, we will make the first letter of the variable capital. And then we are going to do a couple of things. So what we'll do, as you saw in here, if he finishes compiling any day now, you'll remember that when we added the music to our scene, we created the audio source. So for that, we are going to actually create or add a component which is the audio source, but something that I did not mention, and that is how do we actually listen? So obviously, if you want to listen to music, you need ears. You need a listener. And where is our listener? While our listener is usually positioned on the main camera, you can see right here, this is a small component of the camera called the audio listener. And I can actually turn it off and on and you can see that it has no properties. It's just an audio listener. It's extremely simple. It's always on the camera by default, so keep it there. It works. So back in the Audio Manager, now we have an Audio Source on it. And what we'll do as we are going to be adding the music that we have in here, the death and the level. And we are going to be adding them in here. And every time, for example, we start a level. We will play the level of music and every time we die, we will instead remove the clip from here and add the deaf news. So we'll need a reference to the audio source. So private audio source, and it's going to be called the audio source, simply like that source. There we go. And now and start we are going to get the reference to the audio source is equal to get Component Audio Source. There we go. Very simple. So now let's create a method that will allow us to go ahead and actually play any kind of level music. So what we'll do is I'm going to go in here and I'm going to create a public void, play level music. And I'm going to open up the right here. These two, I always forget what they're called. And then in here I'm going to say that the audio source dot the clip. So you can see the default audio clip to play right here. Clip is equal to the music. Open up the two brackets. And in here we can choose which music we want to play. So we can see right here that the music one, the first element is the death, the second one is the love of music. So I'm going to choose one in here, and this will play the music. But one more thing that we need to do is we need to actually go ahead and access the audio source and actually go ahead and play, save that. So now we will actually start playing this music. Let's save that. And let's see what shall we be doing. We also need to make sure that as soon as we start the game right Here, we go ahead and call the player that I call this the player level music. I meant play level music. So play level, lay level music. Save that. Back in our game. So now if we look at the Audio Manager, you'll see that we don't have any clip, but when we start the game, There we go. You can see that now we have this audio clip and we can run around. There we go. Now obviously this is not the most exciting game music. I believe you will find a much better song to play, but I think it's good enough and exciting enough to play around and explore. So, but that out of the way, let me stop this. And you can, for example here change the priority. So what's the priority between this audio source and another? This is too detailed. We won't get into that. We can change the volume. So for example, set it at 0.68. If you think that the music is too high, change the pitch, change the stereo pan, and so on and so forth. But now, for example, when we died, if I play around and our life is cubic, let me just select the layer and remove this one right here. Whereas they don't play us on Macs health. Let's set it to 50. Run the game, and now we should die immediately. So there we go. Kill me, please. There we go, we die. But the music keeps blink. So we want to find a solution to this. I'm going to show it to you as a challenge. So your challenge is to play the game over music. So look for music to play for when the player dies from open game art. And you can also find a lot of other levels. And I didn't mention this because I really didn't bother going through a lot of music. I just want to make sure we understand the concept and not really go and have a lot of songs and play around. You can, for example, go in here and instead of just playing the music, you can add an integer in here which will represent the music we should play, for example, and then play that music and for every level have some kind of music that we play. Later on you'll see how in Level Manager we can manage all of that. But for now, look for some music to play, especially when the player dies or you can use the one I've provided you with. Create a method that plays the game over song and call the method when we die. So with that information, pause the video right now and go do the shallow end. Okay, welcome back. How did you get all of that? So in here, I'm going to go ahead and play sorry, public void. Play game. Oh my God. Game Over. Music. Open up the do whatever they called. And then in here the audio source, that clip is equal to music 0. And in here I'm going to tell the audio source to play. So save that. And there is one more thing that we need to do, and we need to call this whenever the player dice. So if I go to the player health handler, if I look through in here and find where we die. So in here you can see turn on the death screen. And we said the game object to inactive. And we also get the audio manager, dot instance, dot, play game over music. Save that. Back end our game. And here, wait for this to compile. Run the game for fuel source. Now, when we die. Yeah, How cool is that? Seriously? Seriously, take a moment to appreciate how amazing what we've just created doesn't add more depth to the game, doesn't add a more feeling of dread doing actually die. You feel yourself, oh my god, I just died. That is so bad because of the slight change in the music. I never really felt this feeling when I previously died in this game. Now, what was the music changing with the atmosphere changing? I feel like I've just then destroy it because I really like the music change. I hope you felt This also. I hope you enjoyed and something that we need to make sure we do in here when we commit our changes. And the day now, if you please can show me. So come on any day now, let's see in here we have the committed changes that we want to do. But we need to make sure to ignore everything under the all your assets. So if I ignore everything on the assets, all DO because we don't want to save the audio. It just takes up a lot of space and not that practical. So now we stage all, commit our changes and created and all your manager that plays music or plays level music and music using all of your source. There we go, commit our changes. I hope you enjoy it and I'll see you in the next video where we will be playing the sound effects, which is a bit more fun maybe than music. So I'll see you.
68. SFX In Unity : Welcome back, my fellow game developers. In this video, we've added some sound effects. So when we run the game, you'll notice now that when we shoot, we have the bird sound. If we open the chest, we get a rifle. We have a different sound. And if we try to break this, there we go. You can see that we have a sound effect for that also. So let's not waste any more time, and let's get started. Okay, so now it's time to play some sound effects and make the game come alive even more. So what are we going to do? The first thing is obviously we need a reference to all of our sound effects. So in here I'm going to duplicate this. And instead of music, I'm going to call this the effects at Enter. Oops, not enter. There we go. So now we have a reference to the sound effects. But there is a problem. If I want to use the same method that I've used to play our music, then our sound effects are going to be replacing our music. And that's a no-no. We don't want the sound effects to replace music. That's just not while logical. So we have something different that we can do. And that is a method that is play clip at point. And I do recommend that you open the resources of the audio source and you look through everything you can find. So you can see you can change the play on awake, the pitch, the MUX using cold. And this is an entire course all by its own. If you want to go into the Audio Source, how to manipulate the music, how to manipulate different sound effects and all of that good stuff. But for now, let's focus on the play clip. At the point. This is how you call it. You need a position, a volume if you need to clip. And you can see in the description that it plays an audio clip at a given position in the world space. So this is what we need. But you can see right here that the position in world space, well, where do you think is the best position to play our music? Well, I'm going to tell you right now that the best place to play that is exactly on the main camera, exactly on the listener. So we can hear it the best way. Because I click on the 2D up here, we can see that we have this 3D. And on the audio listener, if I had to see how that works, how do I show you? Maybe on the Audio Manager, on some kind of, well, okay, for now, I'm not going to show you, or at least we can see this right here. So this is the range at which we play our music. And for now we are playing on the audio source that, so that is not bad. But if we play the clip off point and it's somewhere far away from the listener, we won't be able to hear it properly. So that's why we are going to play the sound on the main camera. Was that out of the way? Let's go back into our code right here. And we are going to go ahead and create a public void, play as a fax. And this time we're going to give it an integer which is the fax number. And in here I'm going to go ahead and open up the brackets. And I'm going to say that the audio source, dot play, clip, play, all know the actual, not the audio source that we have a reference to, but the actual audio source. So the one which has the a as capital that play clip at a point. And in here we are going to give it a sound effect or an audio clip, which is going to be the effects number. Okay, so save that. And what is the problem in here? Well, obviously we need to add the position and what's the position? It's the main camera. So remember that we can access the camera dot domain, dot transform the position. And honestly, I'm not sure if we've covered this. So I'm just going to tell you that if we write camera, that main, we immediately get a reference to the main camera. And from there we can use the transform that position. If we didn't cover this, I'm sorry, I said, Well, we already know, but maybe we already did. In any case, this is how we access the main camera. So now let's go ahead and try to break some boxes or not break the boxes actually tried to break the Roberta's. So back in our game, we can see that if we go to the breakable, so breakable, or is it the receivables? There we go In the breakable, if we are dashing, we said the trigger to break. So in here we can either immediately call or we can go ahead and create a method. And let's say for example, the method is going to be a public void. Play, break as affects. And in here if you want. Now, there is two different types of maybe thinking about this way. If you want, we can just have one breaking sound for all of our breakable. Or if you want, you can go ahead and create in here, for example, a public integer or not public actually I serialized field is something butter integer and it's going to be the ASA fax number to play, for example. And then you can choose which one you play and you can send it right here. So access the audio manager dot instance, dot play as effects and sent to the fax number to play. Close that. And then when we do break in here, after we trigger the animation, we can go ahead and play break as effects. And there we go. That's all that we need to do. Or if you want, there is a another way and that is playing the sound effects using the animation event if you want. So if we go in the bot towards the bot, no, bought, the breakable bought if we go to the animations, we can choose in here to have some kind of event system. For example, here we destroy, we can play this right here. So as soon as it breaks bam in here, we add this animation event. Maybe move it a little bit to the left. We play the animation event. We play the break as effects. And on the breakable bot will notice that we have the fax number that we want to play. And if we go to the audio manager, okay, so we have added the sound effects yet. So click in here all your sound effects, select all of these and drag them and to the sound effects. As you can see, we have 12 sound effects. One of them is the bottle breaks, so this is what we are going to be using. So let's hear that. Okay, So I think that's good enough. A bottle break as a outbreak. So what is the position on the Audio Manager? It's the 0. So I go to the breakable. I set it 0 exactly. So it was waiting for us. Excellent. And 0, save that. Run the game. And we should see, oops, there we go. And you can slightly here how that bought really broke. So with that out of the way, with all of these interesting ways that we can play sound effects. I'm going to issue you a challenge. And your challenge is to add all of the sound effects. So find all the sound effects you need for your games. All the shooting, the blood, the shotgun, the pistil, the gun, whatever you want, and call the method and all of the appropriate places and play the sound facts so well that out of the way, pause the video right now. I would not do all of these sound effects. I'm just going to a few and leave the rest to you. So with that out of the way, pause the video right now and go to the challenge. Oh, okay, welcome back. So what I'm going to do is I'm going to go into the weapons system. And in here I'm going to go ahead and create a serialized field, which is going to be int or integer. And whereas the breakable, breakable, I'm just going to use the same right here, same variable based on in here. And we're going to create a public or public whatever it is, we can make it private. It doesn't matter. Public void and play play. Weapon sound effects actually. And in here we are going to access the old your manager dot instance dot as effects. And we're going to send to it the fax number to play, save that back in Unity. Let's look at our audio manager and what we have. So AudioManager, let's see. The pistol will play the running rifle, pistol shot, which is four. So pistol as fax number for save that We can even maybe apply the changes to the pistol weapon and everything. Apply the changes. Now if I go into the Prefabs, if I go into the where are we? Weapons? Rifle, and let's see what we have in here. So I'm going to check the audio manager. The rifle sound is the seven. So seven, the shotgun sound is the shotgun. 99. Save that. And I'm going to make our music just a little bit less noisy. So the volume, Let's set it to 0 to run the game. And now we should see that when we shoot with the pistol, we don't have any sound for some reason because obviously all obviously we forgot to even call it. So in here after we instantiate the bullet, also going to play the weapon as effects. There we go, save that back in our game. We run the game. And now when we How cool was that? So now we have an actual pistol being shot. Let's see what we get in here. The rifle. So you can see if we tried to shoot around because we are on the other side of the camera. So this is the main camera if we're on the right. The further we go away. This last weekend here the shots because we are playing at the main camera position and the main camera needs a bit of time to catch up with the player. So let's try this again. Maybe we get a shotgun this time. How cool is that? So now we have sounds for our guns. There is a lot more sound effects that you can add. I'm not going to add all of them. I'm just going to keep it as it is. But for now, let's go ahead and the Prefab, the Audio Manager. And let's just add it in here next to the player. Maybe we can even create a folder for it on its own. So I hope you enjoy it. I hope you are committing your changes. And I'll see you in the next video where we will be maybe adding some kind of audio mixer. So see you then.
69. Using Audio Mixer : Welcome back, My favorite game developers. As you can see, we've become a DJ in this video, we have our mixers. Now when we run the game, you'll notice that we can play around with the music, make it higher, make it lower, and we can also control how loud sound effects are. So okay, that's barely. You can see that when we increase the sound, we can hear it better. When we decrease the sound, we hear it less. So let's not waste any more time. And let's get to mixing 0 case. So let's add audio mixer and mix things up. Yet it, Let's do the challenge or something. Anyways, audio, audio mixer, so Window audio, audio mixer. There we go. We get the audio mixer here. Let's sell it in the scene. And as you can see, this is some kind of object. And if we look at the audio source on the Audio Manager, you'll notice that it has an output criteria and this is an object or a prefab of the Audio Manager, but you didn't see this, but my Unity crashed after I finished the video. So there is our lot of weird things. If you see something weird, it's probably because of the crash. Anyways, audio mixer, what do we have in here? This is a way you can read all about the mixers. But generally speaking, this is a way to control the sound of each and every single audio that we have in our world. Now, we have the music, we have the sound effects. So we're going to create, first of all, a mixer. And this mixer will be the main mixer. Very simply hit Enter. There we go. We've created a main mixer, and you can see right here in the assets, we've created a main mixer game object or whatever you wanna call it, not a game object and audio mixer controller. So just like we have an animator controller, we also have the main mixer controller. And we can add it into the Prefabs right here. So you can see it clearly. Next thing we have is some groups, views, and snapshots are not going to go into details and attenuation and all of that. I barely know what all of these are. All I know that I can create a group right here under the masters and call it the music. And then select the masters. Again. Make sure not to select the music selecting masters. And then create in here the ASA facts. Can you please get out of the way? There we go. So the sound effect, so you can see the master controls both the music and the sound effect. And then we can change the music and sound effects level as we please. So if I go into the Audio Manager in here, you can see that I can change the output and choose one of these two. So because we are using this audio source 40 music, I'm going to choose the music. And there we go. We can see that now the audio clips that play using this audio source will be using the music. Let's demonstrate how that works. So I'm going to go into the, where is it? The volume in here? I'm going to set it back to one. And now when I run the game any day, now, there you go. You can see how loud that is, but I can reduce the sound at it in play mode. There you go. You can see that I can reduce the sound using this mixer right here. Even make it higher than it should be. So keep in mind, this is in the play mode, so when I go back, I need to change it. But as you can see now, because it plays through the audio mixer of the group and music in here, that means that I can change things around and added them as I want. So I'm going to stop this. And there we go. You can see that because it had this red button, that means it was recording and it kept it at a very low, 20 or whatever, 28 decibels. Okay, great, that's great. But now we want to add sound effects. But how are the sound effects produced? While if I run the game, this is something that we did not handle in the last video. I should, I pause? Okay, I didn't do that faster, nor should pause. And there you go. You can see that this was a one shot all you, and it has the Audio Source on its own and it plays, and it works. But there is no way for us to access the audio source. I mean, sorry, the output of this audio source, trust me, I've tried a lot to try to access it. There is absolutely no way to do this, but I did find some kind of way around it. I'm sure nobody has done this before ever. This is the first time that I've seen this, but I tried it and it works. So let's do it. So the first thing or the first understanding that we need to change about this is instead of just having the audio clips. We are going to convert them into gain objects. And then every single time we shoot, we are going to instantiate that game object. And then we are going to change obviously the output of that, or change the mixer on that game object which will have the audio source. I think nobody understood anything. So let's demonstrate how this works and you will see it. So back to the sound effects. I'm going to select all of my sound effects. I'm going to drag them into my hierarchy. So now you can see each one of those is a game object with an audio source. So what I'll do is I'll select all of these. So from the bottle break to the weapon equipped and select the output here and make it under the sound effect main mixer. Then we'll go to the prefab. Right-click, create a folder in here which will be the effects had entered, open this up. And then one by one, we will make all of them a prefer. Excuse me. There we go. Still player that player getting hit, rifle shot, running, shotgun, sniper shot, weapon equipped. And now we can delete all of those and we all have all of them as game objects. Let's make the Audio Manager also a game object. Save that. And now we should change the way our sound effects are played in the Audio Manager. So let's do that. I'm going to open up the audio manager in here. And because we are already using this kind of system where we get the parameter, we can keep it as it is. But instead of having these sound effects as audio clips, I'm going to change this into a game object array and save that. Down here we will have an error. Let's just comment this out, save this. And now back in Unity, you'll notice that we have the sound effects which are game objects. And I'm going to set this to 0 Enter. So our list is empty. I'm going to go into the sound effects folder, and I'm going to lock this down, select all of these, and drag them into the sound effect. So as you can see, they still have the same arrangement. So we can change whatever we want in the breakable, for example, or the pistol, and everything will stay the same. The implementation of the method will stay the same. So now that we have this out of the way, let's apply our changes. And let's go back into the code and see what we're going to do. Now, I'm going to issue you a challenge. I think it's a pretty solid eight out of ten on the difficulty level. So I'm going to give you a tiny hint. This is not a big hint, or just create a private game object, which is going to be V as a fax. And this is because we will be hoops. Later on, we will be deleting this game object and we need a reference to it. So I'm going to save this and I'm going to take you to your challenge. Your challenge is to instantiate the sound effects. So convert the method play as Effects. You'll need to instantiate VV. The proper as effects gameObject. You'll need to make sure the parent is the main camera so we listen properly. Why the main camera? Well, obviously because we said we want to have the sound effect instantiate at the closest listener. You need to destroy the sound effect after a certain amount of time. And we are going to use something called the invoke. So we've done coroutines, we haven't done invokes yet. And I'm just going to show you a little bit of what our invokes. Anyways, this is the invoke right here, which is a mono behavior. And you can see, you can use the invoke using the method name string and use a flow time. And if the time is set to 0, this is in book. Anyways, for better performance, you can use coroutines instead, but I just wanted to show you This invoke works. You can see right here and the example how it works. And finally, I'm going to give you a small hint. Use the clip planks for the amount of time to wait. So with that information, I know this is one of the harder videos. Challenges, I mean, if you find involve very tricky, and even I had to do it multiple times in order to get it 100% right. You can still use coroutines, it's perfectly fine. I just want you to know or have this tool in your own arsenal just in case maybe sometimes you do need it. So that out of the way, pause the video right now and go to the challenge. Okay, welcome back. How did you get on with that? I hope it wasn't too hot. So in here, what we're going to do is first of all, we're going to go ahead and instantiate. And what are we instantiating? We're instantiating the FX at the fax number that we have been sent. And we need to choose the parent. And this parent is going to be the camera, but Maine, and it's going to be transformed. So I'm not sure if we've ever access the camera dot main. Maybe we did, maybe we didn't. I hope it wasn't too hard of a challenge, but anyways. This is how we make it as a child of the game camera, you have the main camera. And then after we do this, we are going to create a method in here, which is going to be a private void. Destroy as affects gain object. And in here we are going to destroy, but what are we going to destroy? You want to destroy these sound effects right here. So I'm going to create a game object Via or no, sorry, sorry for that. I meant not create the game object. I've already created it. So v as f x will be equal to the game object that we've instantiated. And we are going to destroy the US effects. And that's all that we need to do. Then we have the invoke. So invoke or no, this is not the one that we need and invoke, this is the one that we need. In here. We need to give it the method name, so I'm going to copy the method name. But in between these two little quotes, and then we need the time and as I've said, we need to use the time of the eclipse. So how are we going to do this? Well, we can use the effects. Then we can get the component on it, which is the audio source or the o force. And then from there we can access the clip. And using the clip, we can access the length of that clip. So I'll save that though, what is happening in here? First of all, we are instantiating the sound effects based on the sound effect number that we get. We then get the camera or we make it a child of the main camera by accessing camera dot main taught transform. I believe we went through this. I just can't remember where. But anyways, we make it a child of the main camera. Why? Because we want the sound to be exactly on the main camera. Then we invoke a method that will destroy the sound effect after a certain amount of time. Because remember, the objects once instantiated need to be destroyed. And we don't want to have our hierarchy filled with sound effects that we are no longer using or even game objects that we are no longer using. And then we've created this destroy sound effect game object that destroys the v sound effect that we've instantiated up here. So that although the way save that back in Unity, open this up, let's run the game. Save all of that because I'm afraid of this crashing again. So now when we run the game, Let's open up the camera. We can see right here the main cameras. So when we should pause this, look at this. So now we have the pistol shot. There we go. So let's continue. You can see that we have 1234 and all of them. And you can see appear in the sound effects that it's being affected by the sound effects appear. Let's try this on. Okay, so we got the same gun. No worries. Let's try this again. Maybe we get again. We get again the pistol, please. Can I have a shotgun, please? Or a rifle? That's good enough. So now when we shoot, there you go. You can see that all of the shots have been instantiated in here and they are being played. So I hope you enjoy it. I hope you are committing your changes and I'll see you in the next video as you can see our gain as much better now with sound effects. So that done, I'll see you in the next one. If you haven't already lever view, I'll see you. Then.
70. Section 12: Multiple Enemy Types - Different Types of Enemies (Game Design): Hey, welcome back My favorite game developers to a brand new video. And this one, we will have the intro and the whole video altogether mashed up together because there is no need for an intro. We won't be doing any coding, we won't be doing any unity, but we will be talking about a very important aspect in game development and game design. So we always start off with creating the core features or the core mechanics. These are, for example, the walking, the jumping, the shooting, the Aiming, the bullets, all of these things, the core, the core mechanics of our game, these need to be very well-polished and it's very important to have these all set up properly before you start creating other things such as, for example, the animations or the enemies. Why? Because let's say you have some, I don't know, of course you've been through this. Maybe you have some amazing games with a lot of falling buildings and I don't know, a lot of scary enemies. The shooting is very bad. So even if whatever kind of enemy or whatever kind of, I don't know, upgrade system you have. If the shooting is boring, you don't want to play the game. If the walking and running is boring, you don't want to play the game. So it's important to first of all, focus on the core features of your game and then you can start to create the second most important thing, which are, for example, the, I don't know the enemies, the enemy types which we are going to do, right? Or not, even the enemy types, just the enemies. This is the second most important thing. Having enemies, Having level transitions, having Arnaud maybe a good set of animations, a good level design, for example, these are also very important. Just imagine an amazing level, but the walking is so bad that you can't enjoy it. So it's very important to start off by focusing on the most important things which are the core features, then you focus on the second most important things like enemies, sprites, animations and so on. And then the third most important thing to focus on, for example, the enemy variety. I don't know. Maybe the type of weapons that you have, the color of the bullets, for example, these are the third most important things. The lighting, the whatever it is. So the things that make your game just a little bit better, the little small mechanics that just tweaks or the pickups or the health. These are all the third most important things, the core features, the second most important things, the outside features and the third. So we've already created a very nice game. We have leveled transition, we have good walking, we have dashing. We have multiple and multiple enemies, sorry, multiple weapons, multiple bullets that all work different from each other. We have good animations. We have the nice transitions from rebel. I've already said transitions. Anyways, we've created a really nice game, but now it's time to focus on the second, third most important aspects of our game. And we are going to start off with having different types of enemies. So first of all, we will have the cowardly enemy. So currently we already have one type of enemy, which is the skeleton that just stands there. And as soon as the layer walks by at a certain range, he starts throwing the knives. And if we get too close, he starts chasing us and then if we get away we can stand back. So this is one type. The second type is the one that runs away when the player comes close and starts shooting from a distance. So this, the challenge in this guy is we try to attack them. We tried to shoot them. We get close to get an accurate shot, but he keeps running away. So then we need to get closer and all the time he is shooting arrows. So it's very annoying, which is a good type of enemy. And I've used the skeleton sprites on all of these because I don't know which one I'm going to use of this parts that we have. Then we have the Wanderer, which who walks around in random directions without any aim but chases the player if he gets close. And we will try to add some kind of Malay attack. Or if the player is in the vicinity or next, this enemy, he will start getting hurt. We will not be focusing a lot on mainly because we will be doing that. And the boss section, we will not be adding any melee attacks to our enemies right now currently, maybe we will, maybe we'll just add some kind of circle around the enemy. If the player gets closer, you start getting hurt every couple of seconds. But the mailer attack will be more of a focus for us. The POS system. And finally we have the petroleum. And this guy goes from 1 to the next and attacks the player if he gets close and if the player runs away, then he goes back to patrolling. So you've seen all of these types of enemies. One that runs away and then shoots from afar, one that wanders around aimlessly. But then when he sees the player, he runs towards him and tries to kill him. And then finally we have a little one that just patrols the area, rocks from 1 to the next that we will give him a specific we will give him specific points that he will have to walk in. And then when the player gets close, he will start chasing him of the player can run away, then that guy will go back to his position. So before I continue on and give you the challenge, I've already shown you the enemies I provided you with the enemies in the Resources, you can go ahead and find your own. Obviously, I'm going to create all the animation set, all the sprites because we've all ready done this a lot of times. So I don't want to keep wasting time and slicing up sprites and creating animation. So these are things that you should be well-equipped to this point. If you still find difficulty in them, go back, watch a couple of videos may be where we create the animations, but I think that we've done this so much now that you have a pretty solid understand, if you want, I will go through a little bit of how I created them just that fast, how I set up the sprites and so on. But I believe it's pretty easy. It's just like first enemy. I mean, maybe I'll just copy and paste him and use the same mechanics, everything almost. And with that said, I'm going to issue a challenge before I go and it's time to think. So. You've been watching me all the time. You've been copying what I do now it's time for you to think. So. Where is it? Okay, Thank of other movements you'd like to have or to add to your enemies, use video games that you play. So maybe you want some kind of enemy that maybe disappears and appears somewhere else. Maybe you want some kind of enemy that dashes towards the player and goes through him and damages it. Maybe you want, I don't know, sinc of things. Even if you may not know how to create these mechanics, just write them down. Think of use your imagination of what type of enemy you'd like to have, even if you don't know how to do, this is imperative. You might be thinking, well, I don't know how to create an enemy that disappears. Michael, how am I going to do this? Well, don't think like that. Think of I want to create an enemy that disappears and I will do whatever it takes to do that. Even if I don't have the full information right now, then you'll need to think of different attacks. You'd like to have enemies. So just like we said, maybe that enemy dashes through you and damages you. Maybe that enemy throws something. Maybe that enemy jumps on top of you. Maybe that enemy, I don't know what it does. Maybe he creates some kind of earthquake or something towards you, are no, use your imagination, have fun, enjoy. And finally, you can go and share it on our discord channel. So if to this point you still don't know, have a discord. You maybe you've been living under a rock or something. We actually do have a discord channel. It's an amazing community, it's growing, I believe right now we have almost 200 members. And by the time you watch this video, it's probably over 300. A lot of people are watching. A lot of people are not just asking questions, but also trying to help other people. And it's very important, trust me, when I started creating courses and answering people, my knowledge of unity went through the roof because every single day I have people asking me questions that even I don't know the answer to. So I have go research things and create or simulate the problem on my PC and then understand what the problem is. And from that, I was able to use the mechanics and all the problem-solving that I learned by answering students to create a better and then a better and even better game every single time. So I do recommend discord channel, go there, watch some of the people that are the unanswered questions, ask questions, and share your game. Share what you would like to have in your game, what type of enemy you'd like to implement. Maybe you'll even find friends there that will help you together create a game. We are already seen like three people that made a team there. And so amazing. Their names are marked cheesy and some kind of an BD, I don't know. So Mark, Jesus, and NVD now are working together to create some kind of crazy game. What? I didn't even try to put myself in the conversation because I already have a lot on my plate. But as you can see, it's an amazing community, amazing place to learn. So with that said, pause the video right now. Think, take up at least, at least give yourself ten to 15 minutes to just write down things. Have fun, enjoy. And with that said, I'll see you in the next video.
71. The Cowardly Enemy: Welcome back my fellow game developers to a brand new video. And in this one, as you can see, we've created a little flying freaking demon, but this time he is not a very brave. He is a bit cowardly, so he starts running away when we get close. So now I walk around, I get close and as you can see, he starts running away and throwing his poop at us, I think, or dirt or I don't know what that is. So as you can see, we tried to shoot him. We tried to get close, obviously his stock by the wall, but you can see that when we approach from a different direction, still his stock on the wall, but no worries about that. You see that he is running away from us. So let's not waste any more time and let's get started. Okay, so as you can see, I've created for more enemies, the cowardly flying, I, the goblin wonder one. I don't know why it's called Wonder one, but anyways, that's his name. And of course we have the skeleton and finally we have the patrolling mushroom. So we are going to be using all of these in every single video. And as I've said, I don't want to go through the process of doing this with you. All I did is I just duplicated the skeleton, change the body sprite, change the animator, the animation and all of that. I also made sure to change and here the animation and so on and so forth. So now they all chases and do the same. But what we're going to do is we're going to remove the cowardly or the goblin Wanderer, the patrolling mushroom, and the skeleton enemy. And we're just going to keep the cowardly flying I, and this is what we'll use to create our cowardly enemy. So without any further ado, let's go ahead and open up the control. Oh, and by the way, I've also created a projectile for each one of those. So each one has his own projectile. I've created that too. But anyways, and let's open up the enemy controller in here. And let's get started with a couple of goats. So the first thing that we need is we need to go up here and we'll need to add a bit of space. And we're going to say that these are the enemies that runaway and it means that run away. And in here I'm going to create two serialized fields which are going to be a Boolean for the should run away. And then another serialized field for the float run away range. So R1 way range. And obviously because we want to have a certain range at which the enemy will start running away. Now, there is another thing that we need to add because we are creating enemies that should run away. We also should know the enemies that should be chasing the player. So I'm going to again create another one in here, which is going to be the, or know what up here we've created something. And he made the attacker within the news that yet player move direction, player to chase player chase range. Okay, so in here I'm going to create this and have the enemies that chess player, enemies that chase the layer. And in here I'm also going to create a serialized field for the Boolean. There's going to be the should chase player. There we go. So now we have the option to choose one of these two. And let's see what we need to do before we continue on. We need to add this should chase player condition. So where do we add it? First of all, we need to add it obviously in when we are giving velocity. So in here we update looking animating enemy moving towards the player. So there we go, moving towards the player. And here we need to make sure that we are also having and we should chase the player. So in here we get the direction which is the player to chase position minus the current position of the enemy. And then we go there and we said the is chasing. And in here as you can see, I have redundant code. These two lines are exactly the same. So what I'm going to do is I'm going to create a variable in here, which is going to be called, so distance is a float. So we're going to create a float, which is going to be the distance, distance player, enemy. And it's going to be equal to the vector distance, et cetera, et cetera. And instead of this long line, I'm going to say that it's the distance layer enemy. Add a bit of space. There we go. And now double-click in here, copy that, paste it in here it's the same, right? So transform position, player chase dot position, exactly the same. There we go. We save that. And also in here we need to make sure that he is chasing and is the should chase player. There we go, save that. And with that done, let's continue on and see what we have. Now in here. We already know what happens if we should be chasing the player. But what happens if we should be running away from the player? I'm going to create a separate if condition in here, which is going to say. If we should be running away or we should run away. And where does it end the distance? Player enemy is less than the runaway range. So the player is in range, then we are going to create the direction to move in. But this time, instead of getting the direction from the player to chase position to the transform position, what we'll do is we'll set the transform dot position minus the player to chase dot versus player to chase their hours, player to chase dot position. So what this will do is it will create the same direction to move in, but in the opposite way. So this will be negative. So instead of moving towards the player, we are going to be moving away from the player. So we're going to save that. We are going to go back into our game. And let's see what we have in here. So we need to change a couple of things. So we need to make sure that any day now. And the new update of unity is very, very annoying. I've not so many mistakes, so many glitches in it. I've had many crashes. So you can download a better version than the 2020 0.3.15 F2 or whatever it is, make sure you do that because I'm not liking this version. I mean, look how slow it is anyways, any ways. First of all, is chasing. We need to make it private because I don't want to be seeing it all the time. We don't need to change it private. And the male, the attacker. Now what because we won't be implementing it in this area, in this part of the course. Let's just remove it just so we have a bit more space in here. So in here we can choose to chase the player and we need to make sure that we should run away. And what is the runaway range? Well, I'm going to issue you a challenge so that we know what the runaway range is. And that is to create a blue circle around the enemy or whatever they want. So find the onDraw gizmos in it, create a condition for the enemy that should be running away. And choose the blue color or any color that you want and draw, obviously a sphere. And as an extra challenge makes sure that we do not draw any unnecessary circles. So create also a condition for the chase range, for example, we don't want to see it if we are not chasing player. So that pause the video right now and go to the chat. Okay, welcome back. So I'm going to scroll down and he also mainly attacker. Attacker was actually being used in here. Okay, no worries about that. We will remove this. Okay, so back down here on the, on drug is most. So in here we can see that we get the player chase range. So if we should chase player, then we are going to, of course, choose these two and put them inside the player keep chase. This is also something that should be inside of the player chase range. Or I mean in the should chase player. There we go. If the shooting range okay, for that, Let's keep it as it is. And finally, we're going to create an if statement in here, which we'll say if we should runaway, then we are going to get the gizmos dot color and it's going to be equal to color also. We are already using blue, so let's use yellow, green, green. So there we go, green. And we're going to copy this line in here because it's almost the same except for the, of the shooting range, the runaway range. Save that. Remove the extra spaces in here. And now we have a way to measure the distance that we are going to be running away with k. So there we go. We have the blue range, which is the one for the shooting. Okay, great. And then we have the runaway range. So okay, so when the player gets in this range, the enemy should start running away. So that's run the game. And let's see how that works. So now we are in the game. We come close to the enemy. There we go, you can see that he is running away from us. If I tried to move faster, he starts moving. Well, that's because he is slow. Obviously we are going to make him a bit maybe faster because he's a flying enemy. So now when I tried to come close, he keeps getting away. So hey, well, and he even called us because as we are chasing him, he is throwing projectiles. Honest. And also one thing I forgot to mention, I changed the five position. Nope, it's the same place. I'm going to make it on top of his head or maybe, you know what, let's just keep it where it was. I think that was good. Anyways, I hope you enjoy it. I hope you understood what is happening in here because where is it? Okay? So if we should run away, instead of, we have the player position and bigger than the transformed position. Or at least not, not just bigger it on the other direction. If we choose to remove the transform position from the player to chase position, we get a positive, so we are moving towards the player. If we remove our position from the player's position, then we are moving away from the player. So with that done, I hope you enjoy it. And the next video we will be creating the wanderer. So I'll see you then. And don't forget, of course, to commit your changes every single time.
72. The Wanderer : Welcome back my fellow game developers to honestly, one of the best videos that I have ever made because this is one of the few times that something happens. We have a bug in the game, but it actually turns out to be much better than what was originally intended. So it's amazing. You'll see what I mean during the video. But for now, let's run the game. And you'll see that I've created this little goblin. So this Goblin just walks around randomly. So you can see he walks through some point, he stops, he then walks away. He stops. And if we get close enough, you can see that he starts chasing and throwing bombs that are throwing bombs on us. Look, how cool is that if we get away from him, There we go. You can see that he just continues to walk around until we get back and range. And then he starts chasing us like a freaking lunatic was that night. I seriously, I'm so lucky to have form these bright. They are so cool. So let's not waste any more time and let's get started. Oh, okay, So now we have a cowardly enemy. Time to add the wonderful. So I'm going to go into my enemies and the prefabs. And in here I'm going to add the patrolling, nope, the covalent. There we go. So we add the goblin. Let's remove the card or you know what? Let's turn off the currently fly. Maybe we'll add them later on. And then we are going to check out the goblins. So look at the government. How cool is he? So he runs around, he shoots people. I don't know with what I know what he does. Actually, he just I think he throws a bomb or something. But anyways, he is going to be a wonderful. So let's go and he's called the goblin wonder one. So let's make him the goblin wonder, apply the changes. Okay, so the name is still the same. Anyways, let's open up our scripts and let's see what we are going to do in here. So I'm going to go up and in here I'm going to create the enemies that wonder and Chase. Or let's just call it the enemies that wonder. So in here I'm going to create a serialized field. And it's going to be a Boolean. And it's going to be, should wonder, wonder, wonder, is it a, was it, Oh, no, I'm just going to stick with a. So wonder, wonder. And then I'm going to create a serialized field for two floats. The first one is going to be the Wonder length. So how long does he wonder? Wonder. I'm going to say it however I want. And then we have the pulse length. So for how long does he paused before he starts wandering again? And then I'm going to create obviously two things because it seems that it's obvious that we are using counters in here. So I'm going to create a private float and wander counter. And then the false counter. By the way, something that I believe I did not mentioned in the previous video and the game mode. I've turned off everything related to music, so I've made sure that the music audio is off just for testing reasons. We don't want to keep having background music and four for my neighbors obviously to keep them sane in the next couple of months until I finished recording and new ways back in here. I don't need the cops again anyways private. And finally, we need to obviously get the wonder direction. In here we are going to get the direction to move in and it's going to be the Wonder direction. We still have inserted, but we will. And then we're going to check. And then as we are removing from the Wonder counter, we are going to check if at any point the wonder counter becomes less than or equal to 0. We are then going to set something called the pause counter. And this pause counter isn't just going to be any post counter. We are going to create a random dot range. And this random.randrange will have the pos counter times 0.75 F, and the counter times 1.25. So you might be wondering, why are we doing this? Well, because we want to have a very random way of posing our gain, or sorry, not passing our game of pausing the enemy. So he will wait a really different time every single time before he starts moving. This will add more variety to the way he moves. And then after we check in here, so we check for the wonder counter would remove from it. We set the direction. Now it's actually time to decide which direction we are going to be going in. So in here I'm going to check if the boss counter is still greater than 0. The pos counter is greater than 0. Obviously, the first thing we're going to do is we'll be removing from the post counter, so time dot delta time. And then we are going to check if the pulse counter at any point becomes less than or equal to 0. Then in here we are going to do two things. The first thing is we are going to choose the past counter. And instead we are going to be setting the wonder counter. And it's going to be the OK, sorry, it's not the pause counter, It's the pause length. So pause length. Pause length, sorry for that. And in here instead of the pos counter, we're going to set the wonder length. And the wonder length. So this was a, something I did not know this, excuse me for that. But in here we don't just want to set the counter, we also want to set the wonder direction. And this is going to be your challenge. Your challenge is to give the wanderer a random, not end a random. So after we reset the counter, we need a new wonder direction. You'll need to set the wonder direction as a new vector 3. You will need to set the x and the y should be random numbers. Make sure that you keep the z as it is or even better, you should sell it as 0. Finally, a hint as to make the range between minus 1.551. And that's just saw that the enemy doesn't wander very far along. So for that information, pause the video right now and go do the Chaldean. Okay, welcome back. How did you get on with that? So after we set the wonder counter, we are going to set the wonder direction. And the wonder direction obviously as a factor three, you can see it right here. So we're going to create a new vector 3 and we're going to open up. Now, obviously the zed axis should stay the same. So we're going to set a random dot range and it's going to be minus1, f minus 1.551. Then we are going to set this one for the x, this one as for the y. And finally, we have zeros at the end. So let's look back at what is happening in here. First of all, we start off, we check, should we wonder if yes, then we're going to check as the wonder counter greater than 0, then we continue on which we keep removing time from it. We set the direction because obviously we are wondering, we just want to set the direction immediately. And then we keep removing, doing this loop, doing this loop, doing this loop. Obviously at this point the pos counter should be 0. But when the wonder counter is less than 0, the past counter gets a random value. And then we get this condition to true, and this one will be at false. So we start off right here, start removing from the pos counter until at 1, we get a pos counter that it's less than 0. We set a random wonder counter, and at the same time we set a wonder direction. We stopped this if statement. We go back in here and again we start removing. We have a new wonder direction that we've determined right here during the past-time. And we keep removing until again, the wonder counter is less than 0, a new post counter. We start this one and we continue on doing all of that. But there is one thing that you need to consider and that is we need to initiate either the boss counter or the wonder counter. So up and start. I'm going to create a condition in here. And if we should wonder, I remember that was the condition. Should wonder. If we should wander, then we need to set a pos counter, which is equal to a random dot range between the boss length times 0.75 and then the boss length times 1.25. There we go. So it's pretty much the same as we have in here. Up here. We initialize the boss counter. He waits or the enemy waits a bit. Then he realizes, oh, I need to start moving in here, whereas it in here. So we initialize some value, we start from moving from it. When it gets to less than 0, we start the whole chain in here and he starts chasing, I mean, sorry, wandering. And there's something because we wanted to add the chasing to the enemy. First, let's see if this actually works and then we will add the chasing. So back in our game. Let's see what we have in here. So the goblin wondering, let's first of all set everything. So let's keep these should chase away. And so the blue one is for the projectile. So I'm going to maybe make the shooting range a little bit smaller. And then the time between shots, Let's keep it as it is. Should run away. No, should wander. Yes. Wonder length. How long does he wandered around? For 1 second. How long does it pause? You know what, Let's keep two. And to save that, run the game. And let's see how that looks. So I'm going to get there but close to him. There we go. You can see that he just went in some random direction. And there you go. You can see that every two seconds he just walks around. There, he stops there. Let's see. And then you can see it's not a very smart enemy obviously. He sometimes walks and two walls. He gets stuck there. Okay, so he's running after us. There you go. He's in range. Does the shoot, is maturing. Okay. So oh, there we go. So he is shooting when he gets arranged. How cool is that? Now, the next thing that we want to add is if we get in the vicinity of this enemy, we want him to start not just drooling and us, but actually running towards us because he has a bomb, it's heavy. He needs to get close to throw at us. This is something I just came up with. So how are we going to do this? The problem in here is that we are either we have the condition for the chasing, all, we have the condition for the wandering. So if I go back in here and I just said the, where is it? Where is the little guy right here? The goblin wonder, so should chase player, then we are going to have the player chase range. There we go. So it's a little bit, maybe it's like that and the keep chasing. Okay, sure, Let's just make random like this. Strange. Let's see what happens when he actually starts chasing us. And there we go. Let's see how that would work. So I get close to him. And as you can see, is each chasing. Okay, so he is chasing, then going again and wandering. So if I stay in here, you can see that it's kind of a mechanic, but at the same time he stops somewhere. And what, I'm actually very surprised, by the way, his movement is really crazy and amazing. So you can see that he keeps chasing. At some point, he just starts wandering again. So I love the randomness in this, but just, just for the sake of understanding how I wanted to make the game or how my idea of what I wanted to do is he wonders. But when the player is in the range chasing, then he starts chasing and stops wondering. So let's see how that will look. So back in here, you can see that when we start chasing, we said the is chasing to true. So in here, we should check for two things. If we should be wondering and where's it? And we are not chasing, so he is not chasing. So back in here, we run the game and now you'll notice that he will be wondering. So we are outside the chase range. He wanders around, he wanders around, Hopi goes my way. So obviously you can see that random immunity isn't that good. So you can see that we are in range and there we go. You can see that he is chasing us. He is no longer just wondering, he will keep chasing us until we get a bit away. And there we go. You can see that he just keeps wandering around. Now, honestly, I love how he was just going between wandering and chasing and his movement was very erratic and he was not sure what's happening. I loved it. If you want, you can keep it that way. And f naught if you'd like the way he was just pausing, chasing us and then when we get away, he just keeps wandering. Then be my guest is up to you. And as you can see, sometimes you just come up with things and little bugs in the game, make the interesting parts of the game. I hope you enjoy it. I hope you are committing your changes. I hope you have loved a review. It helped me out a lot. So if you haven't already, don't hesitate, bolded may review, it really, really helps me out a lot. If not, I'll see you in the next video where we will be creating the last enemy which is deep patrol or so. See you then.
73. The Patroller: Welcome back my fellow game developers to a brand new video. And in this video we are going to create a patrolling mushroom. So now when we maximize on play and run the game, you'll notice that if we walk around, we find this mushroom starts chasing us and we get away, just starts walking around from 1 to the next, you feel as if he has a predetermined us that he is going to be walking in. So as you can see, he walks from 1 to the next. It keeps looking at us what those scary, scary eyes. And if we get close, he starts chasing us and shooting with his little red box. So let's not waste any more time and let's get started. Oh, case sold, time for the last enemy. And we have the Copeland wanderer. We have the cowardly flying I. And now time to introduce the rolling a mushroom. Okay, so what does the patrol in mushroom do while the patrolling mushroom actually has a couple of points that he walks to and from. So we will add a couple of points. So he moved from 1 to the next, to the next, to the next to the next to the next, to the next and so on. And as he does this, if the player gets close, then we start chasing him. So, and if the player gets in the range with the range of shooting, without getting in the range of the chase, we also start shooting. So let's get started. The first thing that we're going to do is we're going to go in here and we're going to add another part. So this is for the enemies that patrol. And in here, first of all, we're going to obviously like always create a Boolean and say that it should patrol, should patrol. I don't know why I forgot where's the P S on the keyboard. Anyways. Then we continue on with a serialized field, which is the transform. And it's an array of patrol points. There we go. And finally, we are going to create a variable to keep track of the current patrol point. So current patrol point or points or don't know, it's just a point because it's a private integer. Okay, great. Now if we scroll down in here where we are chasing, where we are wondering, where we are running away. We also need to check if we are patrolling. So I'm going to show it to you as a challenge and your challenge is to point and the right direction. So first of all, check if we should be patrolling. That's pretty easy. Then you'll need to determine the direction the enemy should be moving. And so it's the same way as we did actually end the chasing enemy. So you'll need to the position of the point and then remove from it or subtract from it the position of the actual enemy. But then how are you going to know when you got to this point? While you'll need to keep track of the distance between the enemy and the point he's going towards. And if he's closed so around a feast less than 0.2 F increase the patrol point so the enemy continues walking. So I hope you understand what I meant in nearby increase the patrol point. We are going to start off at a certain patrol point, and then we are going to keep increasing, setting a new patrol point using the current Patrol point that we've created. If you feel that the last one where we increase the point as a bit too hard for you, then no worries. At least tried to do the first three. I know the last one as I bit hard, but if you feel up to it, go to the Chaldean. Okay, welcome back. This was one of the hardest challenges I know. I admit. So in here we're going to create if we should be patrolling. Whereas it then we are going to set the direction to move in. And it's going to be equal to patrol points on the current patrol point. But position minus the transform of the current enemy dot position. And then we are going to go ahead and create a, or know what, let's just keep it up here. The vector 3 dot distance, it's the distance between the transform that position and the patrol point dot position. Copy that, paste them in here. So now we have the distance, and if that distance is less than 0, so we need to, first of all, so we'll call this the vector three nano, actually, sorry, sorry, it's a float. And the distance and the me point is equal to the vector 3 distance. So if the distance enemy point is less than 0.2 F, so it's very close. We don't want to have exactly 0. We want to start moving to the next point. As soon as we get to the first one, we are going to increase the current patrol point by one. And then we're going to check if we're at the last current patrol point or I mean, if the current neutral point is greater than the patrol points, patrol points dot length, then we are going to set the current patrol point back to 0. So, you know, when we have only a single line under the if condition, then we can just put it like that, save that. So what's happening in here? We check, should we Patrol? Yes, sure, we get the direction which is the patrol point of position minus transform. So we, just like we chase the player, we keep track of the distance. When that distance is less than 0.2, we increase the patrol point. That means that we again start the update all the way back here. This increases by one, we get a new patrol point. They transform, the position is removed, we get the distance, we check, is it then when we get to the last one, we start going back the first one. So we save that and let's go set up everything. So I'm going to go in, where is it? Here? Wait for the script to compile, and this guy is a trawler. So should patrol. Now let's go ahead and create a couple of points. Now, this is a matter of debate. What I like to do is just have the patrol points in here. So right-click Create. And why is it a debate point? While mainly because you want to have for each level its own patrol points. So for example, you could create it inside of the room. So you have the door, the enemies, and the patrol points, or you can just add them on the actual patrolling enemy. And then every single time you put him in a new level, you just suddenly patrol points yourself. That's up to you. I'm going to call this dV patrol, sorry, control points. And then I'm going to create an empty game object in here. This will be the first control point. So Patrol 0. And why am I adding these brackets? Well, because now when I duplicate this one, I have the one immediately inside of these. So this is a really cool trick. Set it in here. Send the second one here. Third one here, this one here, this one here, this one here. And there we go. I think that's enough points for today. So there we go. We start off 12345678, and then back at the start. And now I go to the patrolling enemy. I will lock him down. I will make sure to know before I apply the changes, let me just set everything in the Petro Points, save that. Apply the changes, run the game. And I don't want to maximize because I want to CV, I actually want to look here. So run the game. Let's see how that looks. So there you go. He starts walking. And he keeps walking. Girl. So not doing anything very smart. That's because I think we should keep track of the current point. So I'll make this public just for a couple of seconds so we know what is happening. So C, run the game and we're at 0. He goes to, should be going to the 0, which is where is it? I can see, oh, whoa, so there is a problem and what is the problem you might be asking? Well, the obvious problem, there's your patrol point, right? If I move the enemy. So this is something very clumsy for me. The Patrol point moves with the enemy. Why? Because the enemy is now a parent of the patrol points. So my smart behind is going to put it inside of the rooms. Yep. Open prefabs. We don't want it anymore. Okay. So now you are going to make me do a lot of things, right? So right-click prefab, unpack completely. Now we can move this to the rooms and now we can oh, wait a second. Patrolling. Okay. So we unpack patrolling points, set them for the room. Sorry for that guys. That was a huge mistake. I think that mistake should not be forgiven. Seriously, that would not be forgiven. So now we are going to, where is it, The patrolling enemy? If you can see right here, if we double-click on him, the prefab has this. So what we'll do is we are going to delete the patrolling mushroom and then create our own again. So there we go. So now when we run the game, we should see a much better patrolling system. There we go. You can see that he goes to the first as soon as he gets there, There we go. When he goes to the next point where all the patrol points the second, the third. Now to this point and look, as soon as he gets there, he started going to the last point, he shoots arrows. We are in the way. He tries pushing us, but we are stuck on the whatever it is. So I move away. Obviously, this is not the smartest enemy in the world, so he will be getting into things you need to make sure to put the patrol points in ways that he will not encounter any solid objects or obstacles. So as you can see, he walks around, he shoots at us, and he walked through his appropriate patrol point. Now obviously you'll notice thir, something that these spikes are rendering over the enemy, which is something that we don't want. This is why all the time I was setting every game object like the health, like the spikes on the player layer, that was very wrong. We should set them on a level object. It's pretty easy to fix later on. But just so you know, this is not something that we want any ways with that, out of the way, let's go back in here. And one thing we want to do is just like we had for the wandering enemy. We want to also be chasing the player. So in here, and if we're not chasing, and if not is chasing, we patrolled. And in here we chase the player. Should chase player. Which what are we selecting? Sorry, so patrolling mushroom should chase player. And that's also what was the yellow 10? So the yellow one was to keep chasing the player. So red, yellow. And let's see, let's save that. Let's run the game that's tried to have him JSON. So let's make the game window bigger. So we walk around. We stand next to him. There we go. You can see he starts chasing us and shooting the little balls at us. For some reason they are not shooting correctly. I feel something is definitely wrong with the balls. Maybe. I don't know. I see. Yeah, yeah. Of course there is something definitely wrong with the balls. So even though when we get out of range, he keeps patrolling, then when we are close, he shoots at us. So obviously there is a problem with the fire position. I think it's hitting the head of the enemy. It's interacting with it. I'm not sure what the problem is, but for now, this is something that we will need to adjust either extremely fast. So I don't know, maybe we do have a problem in here. But the main thing here is that we wanted to create the petroleum mechanics. With that, I hope you enjoy, I hope you had fun creating different types of enemies. Now, our gain is really taking shape. As you can see, we have the core mechanics now. We have multiple enemies that move in different ways. And obviously, games like these that are so amazing and fun need something called a main menu, a pause menu, and transitions between them. So that's what we might be doing in the next section. That out of the way, I hope you enjoy it. Make sure to commit your changes and I'll see you in the next one.
74. Section 13: Shop & Money System - Creating Money (Bitcoin) : Welcome back, my fellow game developers. In this video, we've created money, so let's get started. When I run the game. You can see that I have 0 Bitcoins. If I hit the GKE, I have 20, 40, 60, and then I can also remove them from my inventory. It's nothing very special. There's nothing to coolants video except for the really nice-looking symbol right here of the game manager. So let's not waste any more time and let's get to creating money. O k. So now we have enemies, now we have weapons, everything is set. It's time for sound money. We need to make some money. So and I believe in the last video, I told you that we are going to be creating menus. Sorry for that honesty. I don't actually remember what we have. I just go from one video to the next. Obviously all the time I know what I'm doing. Obviously, I know where we are heading. But anyways, let's continue on. We have the level manager and this is where we want to keep track of the money that we have. So first of all, we are going to create a variable in here which is going to be a serialized field, and it's going to be an end of the current coins. Okay, so here is where we will have our current coins. And now it's your job to create two methods to get and spent the Bitcoins. So you'll create two methods. One that adds, I should change this, you know what, let me check or no electron will change this to Bitcoin. So create two methods. One that adds bit coins, one that removes the Bitcoins. Then each should take in a parameter for the amount. Make sure that we never have negative amounts of money because that's very bad. So with that out of the way, pause the video right now and go do the challenge. Okay, welcome back. So instead of current coins, I'm going to call this the current bit coins. And if you don't like Bitcoin, well, you should try it out anyways. I'm not trying to put anything in your head. Let's continue on. Let's focus on the main thing. Now, something in here that you might want to consider. So it's great. We have Level Manager which takes, takes care of the whole level. But when it comes to the amount of money that we carry with us, I think it's better to have it in something called a game manager that's just for the future. It's no problem. You can create it in level manager. It does the functionality, but level manager seems like it just handles the current level that we're on. When it comes to the mind that we hold, it should be around the entire game. So as soon as you start the game, every single level you collect more coins, you go to the next level, you then add to that. So level manager is a bit of a weird one. I don't know, maybe we should move it to a game manager. You know what, let's move it to a game manager. I've convinced myself. So in here, I'm going to right-click. Create an empty game manager, hit Enter. We'll reset the position. And in here in the manager's going to create a C-sharp four script for the game manager at Enter. And this is exactly why I wanted to create a game manager just to show you this weird symbol for some reason, no other script changes except for this one. This one has this weird knob on it. I don't know Why. Don't ask me why. I'm still not sure. But anyways now the game manager has the game manager script. And as long as we're here, we have the level manager, we have the game manager, we also have the Audio Manager. There we go, the Audio Manager. So I'm going to right-click create an empty. The managers hit Enter. I'm going to reset its position so that the game manager, level manager, and the where is it? Audiomanager. There we go. So now we have a list of all the managers. And in the prefabs, let's prefab the level and the game manager. So do we have where is the AudioManager saved? I think he is in the prefabs where z. Okay, so AudioManager, his Albany himself, folder managers, AudioManager, level manager, and the game manager. Okay, with that out of the way, let's open up the script again. Whereas the level manager, we are going to take the Bitcoins from here and move them to the game manager. And then we are going to go ahead and create two methods in here. I'll keep the start and update. I have a feeling that we might use them later on. So in here, first of all, the public void, obviously it has to be public because we are going to be. Calling it from different scripts. So public void get bitcoins. And in here the amount to get. So we open up the brackets or squiggly lines or whatever. And the current Bitcoins plus equals the amount to get. And if you want, we can set it to 21 million, but let's keep it as infinite. We can get as many as we want. And then we are going to create the public void, spend coins, bitcoins. And this one is going to be an integer of amount to spend. And in here we are going to get the current coins, excuse me, get the current coins removed from them, the amount to spend. And finally, we are going to check if the current coins are less than or equal to 0, than the current coins will be. Current coins will be set to 0. Save that. And now let's just create a small Peston near. So if input and put dot, get the down key, coat gene G, so keycode. So I mean get, if, GET, then get bitcoins and let's say we get 25 or 20. Then if the same in here. But instead of a G, we use the H, H spend, but coins. And how many do we spend? Let's say 10. So we get 20, We spent ten. And finally, let's create a debug. Oh, we forgot this debug. I have current Bitcoins plus equals bitcoins. And obviously we'll be setting all of this in the UI, but for now we save, we go into our game. I think everything is good. So we set everything up. The current coins are always going to start at 0. So we start the game. There we go. I have 0 Bitcoins, so I'm going to get, get, get, get, there you go. And then I'm going to spend, spend, spend, spend, spends, but spend, spend, and as you can see, we cannot go less than 10 Whenever I tried to spend 10 because I only have 10. And this is something that we will need to keep in mind if it's less than or equal, if we set it to less than or equal than 0. Actually, I think that's a good idea. So now we can actually spend what we have problem in here, Is that, okay, Sorry. This is how we said the less than or equal. So there is something that we will need to keep in mind and that whenever we are spending, we actually need to have these coins with us. But this is something I believe will be handled later on by the Sharp script. So in here, let's see, I spend, spend, spend, spend. Okay, that's still not working. Hey, welcome back. So it was totally something very simple. When we have the collapse right here, you can see that we start off at 0, 20, 40, and et cetera. But when I start spending, when I get to 0, it's already here so it doesn't show up. And the messages I can show you if we remove the collapse. So every single line is not maximize on play, please. If I click in here, so now you can see that when I hit the gigi, gigi, 120, sell, sell, sell, sell, sell, sell. There we go. Everything is working. So it wasn't because of the less than or equal, it was actually our inability to see it. So I hope you enjoy it. Make sure to commit your changes. And I'll see you in the next video where we will be actually picking up the bitcoins and not just adding them using magic keys on the keyboard. So see you then.
75. Picking Up Bitcoin : Welcome back My favorite game developers to a brand new video and this one, instead of just adding the points to our layer or to our game manager, we actually have this coin right here. And as you can see, it rotates. It's really cool. And if you hear when we pick it up, there is a small explosion. Why an explosion? Because I didn't take the time to actually find some sound effect for the picking up of the coin. So with that of the way, let's not waste any more time and let's get started. Oh, okay. So time to start actually picking up the money that we've created. So I'm going to clear all of this. I'm going to open the script and remove what we have in here for the BBC or whatever it is displaying and adding using the keyboard. So back in here way for it to compile. And in the sprites in here, I'm going to create a new folder for the coins. Double-click, open this up and I'm going to go into the resources in here. And as you can see, we have the rotating coin, the coin blink and the coin shine. So choose whichever you want. I want the rotate because I like to see the coins rotate. So at this end here opens up. Let's see what these look like. Really nice coins, but I feel that they might be a little bit out of place with the 2D graphics that we have, but no worries, we are using free assets from open game art. So there we go. We add this in here. This will be a huge coin. Prepare for the huge Coyne. Whoa, I never thought, I really didn't know this coin would be that huge. So let's make it a bit smaller. Even more. So 400, lets see. We can, by the way, you make the scaling a bit smaller, but I like to change the pixels per unit. And even this, Let's make it 800. So we make two times smaller than whatever it is right now. That's still huge. And let's make it 1600. So come on, please. We needed a bit smaller. Oh my God. I would not expect this amount. 3500 seriously, this should be very small right now. Okay, Great. So I think this coin, There we go. So this is a small coin that is going to be rotating around and we can pick it up. And actually, you know what, maybe make it 3000. And there we go, apply the changes. Let's make it point. Point, and we don't need to make multiple. There we go, save that. Now this is going to be the Bitcoin 0 case. So now what we're going to do is we're going to go into the animation and create an animation. So an asset's animations right-click New Folder, rotating a Bitcoin, double-click in here and rotate. That's it. All we need to do. A drag these n and that's right. Okay, that's too fast. Let's separate them a bit. So every point, there we go, I think this is a good enough rotate. So and for some reason I feel that it's a bit annoying, but no worries. Now we're going to go ahead and add a new script in here. So I'm going to go into the scripts and to worship into the pickups. Right-click and create a new C-sharp script, which is going to be the go and pick up a coin. Pick up. There we go. So now we have the coin pickup. Let's make that smaller. There we go. So added to the Bitcoin and let's open it up and Visual Studio. So if I go get the health pickup, it's pretty much the same. So where is it? Where is the health pickup? So this is pretty much the same. I'm just going to copy the code. I'm going to paste it in here. And the only things that are going to change as for example, the coin amount that you will get from this coin, so I'll keep it at them. And maybe also the picked up, which is going to be good and pick it up. And k can be picked up method. Okay, so the pickup, the layer. That's obviously something that we are also going to add to the coin because later on we will want to maybe break a jar or kill an enemy. And so we want to have a bit of a delay. So at anytime now we are going to make this smaller at component the layers or pick up the layer. There we go. Time before pickup is 0.5, which is good enough for us. And then in here, what else do we need to do? We destroy the game object. We, instead of adding HP, we are going to remove this. And we are going to make sure in here, we can also remove the player will set it on the pickup layer. So pickups. And remember we stopped using the layer, layer. I mean, sorry, the player tag in order to pick up things. And in here we said the pickup true, so we don't pick up twice. And in here we should actually increase the amount of coins that we have and that is going to be a challenge. You. So add the coin and playing a sound effect. So first of all, create the level manager and add the coins to it. Dicey create, I meant get the level manager and the coins to it and play the sound effects when we pick up the coins, you can choose whatever sound the fracture like. Maybe you can even go and get your own, find some if I would then provide you with an so that out of the way, pause the video right now and go to the challenge. Okay, welcome back. So in here we are going to get the level manager, or sorry, not the level manager, the game manager, but the game manager is not an instance. So in here we're going to create a public static Game Manager. We can find the object, that's something we could have done, but because we are going to maybe access at multiple times, I believe having an instance is better. So in here, I'm going to set the awake and instance equals this. Save that. Let's remove the start and update for now. If we need them, we will create them later on. Save that back in the pickup. Game. Manager. Dot instance, dot, add coin or get coins, get bitcoins. And how much do we want? It's the coin amount. Save that, and now we want to play the audio. So AudioManager, you manager the instance that play as a fax and which sound effect do we want to play? We could create it in here. Yeah, sure, let's do it. So the sandbox to play. There we go. As a fax to play, save that. And back in our game. Let's see what we have in here. And the Audio Manager, where is it the Audio Manager? And what do we have the explosion, enemy rifles, shotguns, typer player getting hit, pistol shot, explosion. Let's add the Explosion. Sure. Why not? Because I can't find any common pickup. You can add anything that you want. It's just need some kind of metal. Actually, I think I did add something in here but we didn't add it. Anyways, let's use the explosion just for fun. Anyways, element two. So the two save that, run the game. And now when we get to the coin, we should hear nothing at all because in here, no, there is no error there. Ok? No. But didn't even destroy itself. So there is a problem. And get component. Pick up layer has not been picked up. Let's see, because this must be simple. Let's wait for this maybe timer 0.5. Nope, not working at all. So let's see what the problem is. 0, okay, come back. So we create an On Trigger Enter. That's fine, but we don't have a trigger to trigger this. So we need to add a box collider or circular collider 2D and make it a trigger. So the circle collider, I believe, is extremely huge. No, where is it? Although it's exactly on the coin, That's excellent. Save that, run the game. Now we should unmute the music. And you could hear a faint sound of the explosion in the background. I could hear it. I hope you could have heard it. We go to the prefabs, we go to the pickups and we said the Bitcoin right here. So I hope you enjoy it. Make sure to commit your changes, make sure to leave a review. It helped me out a lot and I'll see you in the next video.
76. Displaying UI On Our Canvas : Welcome back, My favorite game developers in this video, instead of every single time having to look either in the console for the debug or to look on the object of the game manager to know how much coins we have. We've actually created the UI canvas to register all of the Bitcoins that we have. So as you can see, we have 0 right now, but if we pick up a coin, we get that. So let's not waste any more time and let's get started in this really simple video. Oh, okay, So now it's time to actually display the Bitcoins that we've picked up on our UI canvas. So I'm going to make the scene a bit bigger. I'm going to find the Canvas and here somewhere. So double-click on the UI canvas. Let's open it up. Let's see what we have and click on View UI canvas so we can see everything. We have the weapon UI health, and let's go ahead and create a new empty game up. No, not, sorry, not on the health on the UI canvas create an empty game object. And this will be the coins or whatever. But coin tracker, I don't know, with corn occur. There we go. So Bitcoin tracker, and here we are going to add in the UI and image, and this will represent the image, the image. There we go. And it's just going to be, let me look through the sprites. Sprites make these smaller. There we go, the coins, whereas the coin I just saw it, coins, star coins. And let's add the image therapy goals at the sprite. We can set to native size. There we go. I think it's good enough. We put it right here just next to you can put it wherever you want obviously, as I always say, but I'm just going to set it right here. And then I'm going to create a, another UI in here. Oh, so sorry for that. We should not have put the image. Let me just set the image. Position bug will move the entire object in just a bit. And I'm going to create text much pro in here. And obviously I'm going to make it, let's say 99, 99, bold, and change the font on it, make it the one with the robot thinking, I'll move this whole object here. I'm move the image a bit to the left. There we go. And then the text a bit to the right. And this will be the amount of BDC text. And we'll keep it at my 99 just to represent everything. And we'll set it in the middle on the alignment and set it to auto size, increased the maximum. And let me change the text a bit. There we go. That looks good. I think. Yeah, that looks good in my opinion. So we have the number right here displayed above the health and every time we pick up, we should get this. Okay, great, So I'm going to save this. I'm going to go into the UI canvas and I'm going to open up the UI Manager. So in here, obviously we'll need a reference. So the first reference is going to be a serialized field of the type text. What was it text Mesh Procore, taxed mash Pro GUI. You I agree. Okay, that's it. And the BTC text. Save that. Okay, so let's go back in here. Let's get a reference to this day. Now. There we go. And let's apply the changes on the UI canvas so it's applied everywhere. Okay, great. Now back in our end here, what are we going to do? Well, obviously every single time we pick up a coin or we start again, or we spend the point, we want it to be displayed right here on the UI canvas. And this is going to be your challenge to set the value of the coin and updated every single time. So create a method that updates the coin text and the UI Manager, set it at the beginning so we will not need to know where is the beginning, where do we sell it? And also make sure that every time we add or remove coins to update it in the UI canvas. So that out of the way, pause the video right now and go do the Chaldean. Okay, welcome back. So in the UI Manager, whereas the UI Manager, and let's scroll down and in here let's create a public void, Update Bitcoin text. And in here all I'm going to do is access the PTC text, text, text. And it's going to be equal to the integer right here, which is the amount of BDC. And it's going to be equal to amount of BTC. There we go. So this does not work because you cannot convert into string. So I'm going to add the dot two string. Save that. So this is a bit of a trick. Maybe you didn't know how to do that. There are other ways around this, but this is one way that I'm going to show you for now. So back in the game manager, as soon as we start. So in start or you know what? As long as we have the awake, let's sell it in the awake. But the problem with the awake is that it might start before we have an instance of the UI Manager. So for that, let's just do it and start for now. It's a bit safer. Ui Manager, dot instance, dot update, Bitcoin texts, and it's going to be the current Bitcoins. And then when we get the Bitcoins, we are also going to update this and the spent after we sell it because we don't want to have negative, so we're not going to sell it in here. We said it after we check if we have less than 0 and then we make it 0. So save that. Back in our game. We are going to run the game. Let's make this a bit bigger. So run the game, we should see 0 in here because we don't have any coins. There we go. We have 0. And now when we pick this up, so please mute audio. When we pick this up, we should see that we get ten. Excellent. So now we can pick up our coins and we of course also can spend them. We don't have the opportunity to spend them, but in a bit we will start creating shops and that's when we will be able to spend them. So with that out of the way, I'm not sure why I keep saying this mixture to commit all of your changes. I hope you are enjoying and I'll see you in the next video where we will learn how we can actually earn our bitcoins and not just pick them up off the floor. So see you then.
77. How To Earn Bitcoin : Hey, welcome back to a brand new video, my favorite game developers. This will be a very short one because I think we already know how to do these things. So I'm going to give you a virtual challenge. There is no slides, there is no time. Just pause the video and think of how we can actually earn these Bitcoins. Okay, Time's up. And now that you've thought of it, where should we be doing it? Well, we should be doing it whenever we kill an enemy. So I'm going to turn on the wandering goblin. In here, we're busy. So turn on the wandering goblin, turn on the cowardly flying and the patrolling mushrooms. So now we have a ton of enemies and our game flying around and trying to class. Hopefully we get the rifle. And how are we going to do this? Well, if you remember, every single one of the enemies has the item dropper in here. And you can see that we have an item drop which is the half. So what we can do, we can add one right here and make the Bitcoin. And another cool mechanic is that we can create the two or add two bitcoins or even three bitcoins and 1.5 back. And this will make the game a bit more realistic because as you know, whenever you are not realistic, maybe hard. I materialistic by a realistic games. So our gain will becomes a more green, more grounded. So we, as you play a game, you know, for example, you goes through rooms or you kill enemies, but not all of them give you health. Most of them don't. So what you need to do is you need to kill a lot and tried to survive as much as possible until you get a health bot, bot the money, well, you get a lot of money. So we add more bitcoins. And if you remember, if we go into the item Docker, you'll see right here that we create a random variable integer and use that to get one of the items job. So when you add more bitcoins, you get a better shot at picking up a bit quiet. So what happened in years? So the cowardly flying, Let's add the bitcoin. Is it? So I'm adding the one that is already here. I don't think that's a good idea. Let me add the prefab and stats. So I'm going to go into the Prefabs level, not enemy bullets. Prefabs, where are the pickups? So in here that's go back into the one right here, and instead we'll use the Bitcoin, that is the prefer. I don't think it will make much of a difference, but just to make sure that we don't do something stupid. And let's add the Bitcoin right here. We add 24, the patrolling, we have a 5050 chance. So when we collate patrolling enemy, we have effective chance. We save all of that. We run the game and hopefully we get let's see, nope, not the shotgun. I want the rifle. Make things faster. Come on. Again. Let's play. Come on. Rifle called, Come on. Give me that command. We're going to try. Honestly, I don't want the rifle. I mean, I do want the rifle. Could think this video is short known of the pistol. Please come on. Rifle, rifle, rifle, rifle. There we go. So now I'm going to shoot the life out of these goblins. So as you can see, how cool is that. So life we get a life, We didn't get the Bitcoin that we wanted. Again, let's try to kill this. Okay, so again, we got a life for some reason, either our luck is extremely bad or we did something wrong. So let's see what we did wrong. So we have the Bitcoin in here, the job chance as 1, 0. Okay, welcome back. So for some reason I just played that, tested it a couple of more times and all the time we always had with console. I don't know. I guess our luck was that bad. Let me just remove the pistol from here. And let's also remove the shotgun. I just want to get rifle, run the game. Let me get the rifle. And now we should see that when I kill this little dude right here. Okay, so there we go. We get Bitcoin, we pick it up, we get ten. And have you noticed that our gain is actually pretty hard. So I have to walk around this guy and I have to kill him and look how he runs away fast and there we go In other coin. And then we go home and getting another coin. There we go. So now we have 30 coins. Now, another thing that we can also do to earn these are, where is it, Where is it The breakable pot? You can see right here we can add a couple of these. There we go. Nope, add a couple of Bitcoin so we have a better chance and let's apply these changes. Because I apply the changes, I don't know if it affected. It shouldn't have affected, but I guess maybe we break it. There we go, we get this. Let's try breaking it again. We should get the Bitcoin. So for some reason when we add a new oh, there we go. And we then pick it up and we get that. So I hope you enjoy it. Make sure to commit your changes, even though we didn't do anything. Don't need to commit your changes this time. Enjoy yourself, have fun every single time, and I'll see you in the next video.
78. Shop Items : Welcome back my fellow game developers to a brand new video. And this one, we don't do anything very fancy. We create a new scene. We have a shopping scene right now, and as you can see, we have three items in here. They are very identical. They don't do anything special, but this is just the setup for the next video where we will start actually creating things. So let's not waste any more time and let's get started. Okay, so now time to create a shop. And to create a shop, I wanted to make it a separate scene all on its own. That way we are inspired by the game Hades. We can go from one scene to the next ghetto, a shop, shop there then grow to the other scenes. So what I'm going to do is I'm going to duplicate the level two. And now we have level three and I'm going to call this the shop, can call this the shop level or shop scene or whatever. So I'm going to double-click and you can see that even though it's the same, but we are on the shop right now, up here in the hierarchy. So I'm going to first of all delete the Bitcoin, delete the weapon, shes the health pickups by dropped the breakable bought and let's open the room and let's go ahead and delete all the enemies. I'm just going to remove them from here and just keep this room as it is. I believe we will make this a prefab and be able to add it to any room we want. But anyways, later on we'll think about that. But for now we'll just delete all the enemies and will cause this will keep the layer, will keep the portal obviously because we want to get out of the shop later on. And I'm going to right-click in here and create an empty game object, which is going to be the shop item. And we're going to start off with health. There we go. So we are going to mainly have three shop items to focus on right now. Where we get health 14, the upgrade health, and want to buy some kind of weapon, a random woman, I think. So. Let's set these three. So we're going to have one here, one here, and one here. Let's start off with the most simple one, which is the regular sharp item. I'm going to add a component in here which is going to be a sprite. Or know what, maybe we want to go in the ER, know what, let's just add a sprite for now. So a sprite renderer. And we are going to go in the sprites in the, Where is it? Oh, so pickups. And there we go. This is the health. And I'm going to just add the sprite right here. And we're going to set it on the player layer, even though we said that we will not be doing this anymore. But anyways, let's continue on. Then we are obviously going to add a box collider 2D, and this will be a trigger. So whereas it is a trigger, Let's see the size and obviously we want to make it a lot bigger. So that way the player can step in here. And we will have, for example, when declare steps in the vicinity of this shopping item, he is going to receive a message appear. We will also add a canvas and just a bit where he will read. You can buy this item, for example, a health or replenish your health for, let's say, 50 coins. And this will appear only when the player stands near the button or the sharp item or whatever. And we also want to create a small box collider that will make sure that we do not hit this actual object. So a second box collider, we'll just make it a bit smaller to just be enough so we don't hit the actual object in here. There we go, close that, save that. And now what we're going to do is we'll add a canvas to this. So we'll go to the UI. We'll add a, where is it the canvas. And we'll call this D sharp item Canvas. And we are going to set, we want to see the UI, okay, So we can't see the UI. Where is it? This Is it, the big giant canvas? Let's turn on the gizmos. And it's not allowing me to remove the scale because we need to set it to world space. And zero-zero point five on the x-axis, zero-zero point five on the y-axis. And let's reset its position to 0. Now double-click on the shop item, and there we go. Now we have the little canvas around here. And let's just set it bow. Yeah, I think that's good enough up here. And we're going to add, first of all, a visit to texts. So we're going to go to UI text much Pro. This is the first one. This is for the, let's say the press press button, text. And another one which is going to be the Whereas it, this will be the text that represents the price of the item. So item, item for ice text. There we go. And I'm going to move this one down and move this one up. And let's do a couple of editing and make this bigger. Press. E to buy. And scroll down a new set it in the middle and make sure that it auto sizes. And we'll also turn this down. We don't want to see this and make it bold, make it robot. And we can't see it because we need to go into the canvas and the sorting layer and set it on the player. There we go. So now we can see everything. And now back in the button, this is the perfect fit. Well, I think we can increase the max. So when you press on the opposite side, you have the options right here to auto size option the minimum, the maximum, and whatever these are. So I just increased the maximum to fill up the whole space in here. There we go. And now back in the price item, you know what, let me just delete this one and then duplicate this one. And now we move it down. This will be, let's say, price two buttons. And then we can say, for example, 99, 99 coins. There we go. So as you can see right now is a table. Maybe it is a bit big, but no worries about that. We can actually decrease the sizes of these two because they seem a bit too bulky. So there we go. Something like that. And this one also Something like that. Yeah, Sure. Why not? So take your time to create all of these, make sure that they look really good for your own sake. And finally, I want to add some kind of platform under the soul, the player or whoever is playing your game doesn't just confuse this for some kind of item on the ground. So I'm going to go into my resources and I have this some kind of teleport, I'm going to use it as the platform. So let's drag it into the sprites right here. And it's annoying when we have the files so small. So right-click in here, create the shop platform. And let's add it in here. And we have this right now. So I'm going to make it a multiple, make it point, apply the changes go Sprite Editor. And how are we going to slice this baby up? Let's see, I believe this as a one of the bigger sprites. So you can see right here that it's 128 by 320. So back in the Sprite Editor, I think let's try automatic. Yeah, sure why not? Automatic seems good. If you want, you can go ahead and create animations for this. I do recommend it so you can play all the time. Maybe we will do this. So I'm going to go back into the item right here. And let's just add this teleport. There we go. So this will be the item plat form. And we should set it on the layer, layer. It's very small. So we are going to go in the, where is it? Okay, So here, let's make it 50. See how that looks. Let's make it even bigger. 25. Now that we have 25. Nope, that's a bit too big. Now. What's between 25 and 50? That's truck 14. Apply. Great. So 40 seems to be the right size and I'm going to set it to 00 and then move it down a bit. Well, let's keep it. Maybe if you want, you can start moving this up and down. And but I'm just going to keep it as it is for the button, maybe want to rotate it. I recommend you do that. But remember that if you want to move the actual plus in here, the green plus, you need to make sure to set it as a separate object. Because if we move this one around, look what happens on the wide, everything flips. So you need to make sure if you want to add some kind of animation to animate this also, maybe I will in later on, but for now let's focus on creating the actual item. So I'm going to move this a bit down right here. So there we go. So now we can see that this is an item. I'm going to create a script in here that will be, and the scripts, I'm going to make this a bit bigger. And do we have anything? Okay, so let's go ahead and right-click in here and create a new folder. And this will be for the shop. And inside of your ongoing to create the shop item. There we go. Wait for it to compile and I'm going to know, Thank you what this open. And I'm going to add to the what's the matter. So the new Unity is very awful. It keeps crashing, keep stopping. The loading of the game takes a lot of time. Because the script cannot be found. Excellent, Great. So we have the script, the script cannot be found. Our case, obviously there is a problem. Let me delete this. Oh, so sorry. It was because of me because I just noticed as I'm deleting it, that I added a space option, sharp item, we cannot add spaces in between them. So sharp item. Now this should work. Okay, There we go. So open the script up. Now we have this sharp item. Let me duplicate this once and twice. And now we have these three items. Let me move this a bit to the left and move this one a bit also to the left. And finally, this one also, maybe we can make them a bit smaller, but no worries for now, we have these three items later on, we will be changing them. Obviously this will be the health upgrade and this one will be the weapons. Weapons hit Enter. I hope you enjoyed. This was just the setup of our items. In the next video, we'll be starting on the whole process of scripting, changing behaviors. And before I go, let me just create an empty game object, reset its position. And this will be the shop items just so we have a nice hierarchy in here for everything. Save that. And I'll see you in the next video.
79. Buying From Shop : Welcome back my fellow game developers to a brand new video. And in this one, we pick up a couple of coins, we get hit. So our life is 200 over 300. But thankfully, we have this health in here so I can buy a couple of health and upgrade my health, but not everything works. So you can see right here because this is something different. This is not a half upgrade, I mean, a health restoration item. This one is, and I buy. But finally you can see that I have 0 amounts of money. So if I try to buy more, unfortunately, I can't blame it on the economy, blame it on whoever you want. Let's not waste any more time. Let's get started. Oh, case. So now it's time to start actually buying the items. And the first thing that we want to do is we want to have these texts in here appear when the player is standing inside of the box collider right here. And if he's standing outside that box collider, we don't want to see the text and we can not buy. So the first thing that we're going to do is I think I want to increase this a little bit. So we'll make the size a bit bigger from this. Oops. One second. Increase the box colliders on all sides, make them a bit bigger and maybe even make the box collider that isn't a trigger, which is this one, and maybe just covered the entire surface of this whatever it is, platform with a little plus green plus, and anyways, with that, out of the way, I'm going to do this off-screen is pretty easy, nothing too much. And it always comes back to you how big, how small you want to make it. But there is something that is not up to you and that is the challenge today. We want the text to appear when we get close. So get a reference to the byte text. Use the entrepreneur enter and exit to set the text active to true and false respectively. And also create a bool that checks true when the player is in the players on and false when he's out of it. So that although the way pause the video right now and go to reach shallow. O K. Welcome back. So I was just finishing up with these first thing I'll do is select these three items and make them the pickups? Yes. Make the children also pickups. So now we are going to open up the shop items, a script, I believe it's opening here, and we are going to stop. So first of all, I'm going to create an aunt sugar enter and exit. So on, Trigger Enter 2D and on sugar exit 2D. Now we need a reference to the bye message. So in here I'm going to create a serialized field of type text Mesh Pro. Or you know, what maybe what we can do is we can go ahead and just change the entire items. Or what I mean is turn off the whole canvas and turn it on. So we get the whole canvas, we can turn it on and off. So maybe that's the better way we can create a reference to the canvas. And here, we can create a reference to a game object. It really doesn't matter. But in any case, the Canvas message, let's call this the Canvas message. And now when we enter, because we just have the pickup and the pick up pickups only interact with the players of this will not be a problem. So in here, the bye message, out, Sorry, bye message. I'm still thinking of a different variable. So the Canvas message dot set active or dot game object dot set active, true. And then I'm going to duplicate it. And in here when we exit, it's false. Save that. Then we also need a variable which is going to be a private bool in by zone. And in here we are going to say that in by Zone equals true and by zone equals false. And maybe we instantiated it right here as false. So we start with false. We don't want to be able to buy when we're standing very far away. Okay, Great With that out of the way. Let's go in here. And let's select these three canvases. So 123, turn them off, run the game, walk towards it. There we go. Nothing happens, obviously because we forgot to do the most important thing, which is the assigning of the canvas. So we assign the canvas to each one of those that run the game. And now we should have fixed our problem Any day now. Then we go down. There we go. We press E to buy price 99 coin, price 99 coin and priceline.com. Okay, great. So now it turns off, it turns on. And obviously the bi should also work. We have an error which is something. Present and the current Unity version. Thank you Unity for this very bad update. Any ways, let's continue on. Now there is something to take into consideration. We have the three types of items that we can buy. That's good. Okay, so we can for example, say if this item is so on and so on, we do so, so there is something better that I want to teach you in this video and that is called the inner. I'm not going to go into the slides because it's pretty simple to understand. We can create an enum. It's going to be the item type. And we can open up the brackets in here and say that one of them is the health restore, health, restore. The second one is the health up grade, and the last one is a weapon. So what is the enum item type in on basically, in its simplest terms, allows us to create a new type of variable. So just like we have the Boolean, the canvas, and so on, we also can create an enum, which is the item type. And now we can create a variable in here, which is a serialized field of type, item type, and it's the actual item type. There we go. So as you can see, the enum has capitalized first letter and on every word, while the variable is not capitalized, it's in the lower case. So if we save this and go back in our game, look how cool this will be. If I choose the item type, let me close down the box colliders. You can see that I have a drop-down menu and I can choose one of these items. And this is something really nice. And this is an upgrade from the previous section where the enemies each had their own box to take and so on and so forth. And you have to untick something to take something else. This right here is a much better way, a much smoother way. So this one will be the half upgrade and the last one will be the weapon. Great. So now we have the item type we can choose to go from. But there is one more thing we need to add in here, and that is the item cost. So serialized field and the item cost, but this is not the thing that I was at. I wanted to focus on I wanted to focus on something called the switch statement. But before I do that in here, I'm going to create the update. And I'm going to check if I am envy by zone. Then I'm going to check if we have input dot, get keydown, open this up, keycode, key code dot e. And in here what we can do is for example, we can start maybe creating if, let's say the item type dot something and whatever, and start checking for the items and buying based on that. But we have, in this case, something much more powerful. And that is the switch case. So let me show you what these switch case is. So similar to the if statements, it allows us for conditional code execution. If we have a certain item type, we want to call something different. If we want to have the health upgraded, we should call a different method than the one where we buy a weapon. So the switch statement is going to be very effective in here. And just like the if statement, it works the same way we have conditional code execution, but it's structured as a bit different and more efficient when it comes to things like these. So we start off by writing switch. We add the case switch. So in here this could be anything we want. In our case, it will be the item type that we have. In case one. For example, let's say the item type is a health upgrade. So in case 1, one here says, for example, health upgrade. We execute some code we break. This is very important and then we go to the second case. The second case let's say is the weapon. Then we execute some different code, we break, and then we check for the default. Now obviously you can add up how many cases you want to 123, 1520, 500 if you want. But eventually we will have to get some kind of default thing. So what happens if we have no item type? This is something that will not happen, but just in case there is no item type, we need to have a default break and then We finished the switch statements. So make sure you understand it. We will see the implementation and just a bit, but just look at the structure. We then without Look what it is. And let's go back into our code and implement this. Before we create this switch statement, we need to know if we actually have them money for this. So first of all, we're going to check if the game manager dot instance dot. Let me see. Do we have an access to the current going? No, we don't. So we're going to create a public int. And get current bit coins. And this will just return current Bitcoins. Save that, go back and hear instance dot get current bitcoins. And if we have more or at least equal to, so if we have more or at least equal to the item cost, then we can continue on. And as soon as we buy the item, then we are going to go to the game manager, dot instance, dot, spend coins. And the amount of coins we're going to spend as the item cost. But then what will happen after we spent our coin, we should get an item. So we're going to create the switch. And in here we are going to say the item type. So this is the case around which we are switching. And now we are going to open this up. So in case we have the item type dot health restore and it's not allowing me oh, no, it's not. The small item type is the big item type dot health restore. We put the two points, hit Enter. Here we are going to, while in here we can either find objects of type and it's going to be the player health handler. And then we can go in here. And what do we haven't declared health handler damages the player. Okay, So at HP to player, at HP to player. And how much do we want to add? Well, we can choose in here whether 10 or 20 or whatever value you want to add, save that. Brake had this and there we go, Save that. So I paused there for a second because I wasn't sure if we should use the file object of type or if you want even better, create a variable in here for the player. So a private variable for the layer and then set it right here and the collision, this would be smarter and more cost efficient because we know that only the player can be the collision in here because of the layer that we've sat. And find object of type is sometimes a bit cumbersome. It's, it takes a lot of space from the processing, a lot, a lot of processing power because fine object of type just goes through the entire list in your scene and then chooses one of them. So it depends on you. Whatever you want to do really is up to you. So where do we have the item right here? So let's choose the first one. That's the cost to 20. Or know what? Let's just keep it at 10. And this will restore a bit of Health. And I'm going to go into the Prefabs. And in here I'm going to add the spikes. So or is it the pickups? Let's add a bit of coin and here, 23 coins. So we have money to spend. And then we'll go into the Prefabs again and add a. Where is it? Where is it? Where is it? Level object at the spikes right here. Run the game. So I want to get hit by the spikes. Okay? Pick up a couple of cones, go down here and we're visit. So there we go. We press the Iike. Yep, there we go. We get tan, tan, tan, tan. And if I tried to buy more, there you go. We have 0, so I can not buy anything anymore. There we go, so great. That seems to be working. In the next video we'll be using the health upgrade will create a separate method and the health handler. And as I've said, and by the way, this error keeps popping up. Don't worry about it. As I've said in here, the fine object of type something that I don't like particularly I don't like to overuse defined object of pipe goes back to you. I really hope that you try to create your own variable, set it right here. With that said, I hope you enjoy it. I hope you are saving all, singing all of your files, and I'll see you in the next video.
80. Getting A Health Upgrade : Welcome back My favorite game developers to a brand new video. And in this one we pick up a couple of coins, we get hit, we go down. We can either restore our health or we can upgrade our health. So let's upgrade our health. As you can see, it has, the maximum has increased by ten, and our health is now full because that's our mechanic in the game. So let's not waste any more time and let's get started. Okay, so time to upgrade our health. But before we do that, there's something bothering me and something that we need to fix. First of all, let's turn on these three campuses in here. And on each canvas I'm going to change the, whatever the price in here says. So for example, the price 999 instead we are going to save this as the restore health. Restore health. And we'll say, how much did we say it costs? How much is the cost of the health restore 10. So in here, then BTC. Okay, So in the second one, it's going to be the upgrade. So opens up, select the button, let me close those down. What was it? Upgrade health. Upgrade, health. And let's say this one will cost 30 BC. And finally the new item, let me close this down again and turn these two canvases of and finally, we have this one right here. And this will be the by weapon or by weapon. And this will be, let's say 40 BTC. There we go. Now we have everything set up properly At think in the next video, I'll also maybe add a bit of animation to each of these items and maybe something to the platform just to give it a bit more life. Okay, with that out of the way, let's drop this back down. But before we go, I want to change the actual sprite in here. And I've provided you with a couple of sprites. So we have first of all, this one, but honestly I found that a bit ugly. So I also use these ones, and it really depends on what you want your game to have. You can see there is a lot of potions in here, so I'm going to select the red. And we have this thick glass maybe should we use the thick glass? Nope, let's just use the regular glass. And I'm going to add it into the sprites in here. So inside of sprites opens up bigger. And let's go ahead and right-click in here and maybe create a separate folder for this or just added to the pickups if we have some or something for the health. Anything. Pickups? Yeah, sure. That's added to the pickups. No worries about that. Keep it in here. I think this is a good place. And then we are going to go into the item upgrade and give it this one. There we go. Nice. Very big. So I'm going to maybe make it 200, apply, make it bi-linear point. Apply. Still big. 400, 400 I think would be too small. 300 apply. And the yep seems to be good enough. Maybe we can move it up a bit. But this is why I wanted to create the actual item sprite in here for each one. Now what? Let's go ahead and do that. Some ongoing create the item sprite. And it's always better to have these bright on a different. And what we can do is select in here and click on Copy Component. So copy components, select the item sprite and select in here and basically component as new. So now I can go back in here and remove the component entirely. And now this sprite is free to move up and down and we can add some kind of animation to it freely. So I'm going to copy this and paste it for the first item and here. And then for this one also in here. And we should reset the position of each of those. And for this one. And in here, instead of having this red, we are going to add the usual sprite that we're using. And in here we'll just remove the component. There we go. Excellent. So now we can control this item sprite all on song. And what else do we want to do? And the last one in here, items private, remove this item and electron and the next video we'll be adding its own weapon. Okay, So that out of the way, also make sure to change the box gliders on each one of those, just so we don't collide with the items with that out of the way. Let's continue one and now it's time for the health upgrade. So let's go. First of all, create a method and the player health handler that will allow us to increase the max level 2. We have anything to do that? Nope, we don't. So I'm going to add it right here. So in here I'm going to create a public void. Increase max. What's that? Max health. And in here and the max health amount. And then we are going to get the max health and increase it by V-max health amount. And then we are going to get the current health and it's equal to the max health. Or if you want, you can avoid this and not do this. So we get an upgrade, but we don't get any health. Or for example, if you want, you can set instead of the max health, you can set the current health plus 75 percent or something. I believe this is something that happens in Hades or you can increase it by just ten or however you wanna do with, I'll just keep it simple like here. And then there is one more thing that we need to do, and that is we need to go into the UI Manager Door instance, and we need to update The Wait a second, whereas the UI Manager, we need to update the half bar so we need to make sure that it shows what's happening. Increase the max value and the value of our health in here, in the UI Manager Instance, we upgrade the max value, which is the max health of the slider. And this is important because this will determine how the slugged works. So after we upgrade the max health, we need to go to the UI Manager dot instance, dot health slider dot max value. And it's going to be equal to the max Hello again. So save that. And we'll also make sure to update the player health you are at the end. Save that. Okay, great. Now with that out of the way, time to actually buy the item in here. So I'm going to issue it to you as a challenge. And that is to create a another case for the health upgrade. So create a new case that takes the health upgrade item type. Then you'll need to find the player health system just like with previously or if you're using the collision, then finally increase the max health of our player. Was that although the way pause the video right now and go to the challenge. Oh, hey, welcome back. So back in the shop item in here we have a another case that we're going to call the case item type dot health upgrade. And we are going to do the same. We are going to find the layer health handler. And then we are going to increase the max health by how much do we increase the Mac South? Let's just keep it at 10. Keep things simple so we can easily understand it and then we are going to break. So back in our game, Let's see, we said that this will cause 13 Bitcoins. So anywhere let's make it 30. Save that, run the game. Now, we should see we pick up a couple of coins. We can get hurt if you want. There we go. So now we are at 200. We can either restore the health or we can upgrade our health. So if I upgrade the health, There you go. You can see that I have 310 now and I can also upgraded. I can buy it but nothing gets upgraded. If you think this is unfair that we can actually buy the item, but we don't get any benefit from it, then be my guest. I do recommend that you try to check, first of all, before we increase the health, do we actually have it at max? If you do have it at max, Let's not take it or not buy it or something like that. So with that out of the way, I hope you enjoy it and I'll see you in the next one where we will be actually buying the weapons. Next, let's set it from now, 40. Save that. And I'll see you then. Oh, and don't forget to of course commit your changes. See you in the next one.
81. Shopping For Weapons : Welcome back my fellow game developers to a brand new video, a brand new long video. But it is worth it because now when we run the game, we pick up some coins. We go here, okay, So we can restore health, we can upgrade health or we can do something much cooler, and that is by ourselves some weapon. So we get a rifle and then we can go and shoot it everywhere. So let's not waste any more time and let's get to buying weapons, visas like Paxos, any case. So time for the last item that we can buy, which is the weapon. So I'm going to go into the item sprite. And by the way, what I did offscreen is that I added a couple of animations and make sure that the item sprite is on a different level. So there you can see all of them rotate and you can see the platform have this little animation on it. Pretty simple, pretty easy. I'm not going to go too deep into that. But what I am going to do is I'm going to go in here and change these pride on the last one. And let's go into the sprites. Pickups. Nope, not pickups. Weapons weapon, weapon weapon weapon pickup. Select this one and let's just add the rifle for now. There we go. Can see it. Let's make it a bit bigger. Sorry for that. We should somehow keep the aspect ratio. Now what? Let's just increase the scale by two, by two, by 1.5, by 1.5. Okay, great. So now when we run the game, I believe this should be spinning because it has the animator. There we go. You can see that it's spins around and wait for us to come and collected. Now, the difference between the two other items and the weapon item is that we don't want to have, for example, just an item 40 rifle. We want to get some kind of random item or random weapon when we want to buy a weapon. So I'm going to go into the item script and this error is bothering me a lot. And in the shop item in here, I'm going to create a couple of lines. So first thing first, I want to create a serialized field of the weapons system. And it's going to be an array of the potential weapons to buy. That is a long name for a variable. And then I'm going to create a private and the weapon system and the actual weapon, no weapon too. By, There we go. And finally, we are going to do two things. The first thing is going to get this right because we want to change the sprite based on the weapon that we are going to buy. So private sprite, renderer. And there we go. And the item sprite, not the item sprite, the weapon sprite. So weapon, so because this is only going to be used for the weapon. And then we are going to get the serialized field, the text Mesh Pro or TMP Pro, Tempe pro, yeah, shorthand P Pro. And this is going to be the price text we want to change the price based on, okay, So we can't use this because we need TMP Pro, sorry for that. Or you know what we can do actually, we can, instead of using TMP probe dot text Mesh pro Gu. There we go. So that way we don't need to add an entire library. So this is just a novel way of doing things. And now that we have a price for each of our weapons and a sprite for each of our weapons. Let's go into the weapons system. And let's go ahead in here and create a serialized field for the price of the weapons. So int weapon price. And we'll also create a serialized field for the sprite. And this will be the weapon shop sprite. And obviously all of these are serialized fields, so we cannot access them. So we need to create a couple of methods in here. The first one will be a public and what and, and get a weapon price. And this will return the weapon price. And then we will have a public sprite for right, and get a weapon shop sprite. And this will return, return the weapon, right? Weapon shop sprite. There we go. So the weapon image and the weapons Sprite are totally different things. Maybe they shouldn't be, maybe we can have just one that returns the entire sprite. But if you look in here, I want to have the one with the white little white thin line around it so we can easily distinguish the weapon. In what you can even change this right here, this one. Let's not worry about that. Let's keep going the way we are. Those little small tricks can then at the end be adjusted and we can change all of this. So now let's go into the weapons. Were are the weapons they are in the prefabs. The residual, residual reserved, the broken enemy weapons. There we go. So the rifle that slot this down and let's see what we have in here. So the weapon shop sprite and the weapon price, how much does the rifle cost? Let's say 10. Let's say the pistol costs 20. Nope, sorry for that. Now what? Let's make the rifle costs 20. Let's go back. The pistol will cost ten, and the shotgun will cost 30. And these are just arbitrary numbers. I don't know whatever you want to use US. Law. Let's go set up the sprites. So I'm going to make this one a bit bigger so I can see the names in here faster. And what do we have in here? Pickups? Nope. Every single time. Okay. So add the shotgun sprite for the rifle. Unlock this for the rifle. I'm going to no, no, no, no. This is a bit cumbersome, isn't it? So anywhere at the rifle. And finally, we select the weapons and the Prefab, the pistol. Weapons, pick up the PESTEL, we save that. And now we have a reference to all of these. Great. Now that we have the sprite, we have the weapon price, the next thing to do is to go and start and set everything up as soon as the weapons thoughts. So in the shop item in here, I'm going to save, I'm going to create a start, and I'm going to issue you a challenge. So your challenge is to check type, select random weapons, set the sprite, and the tax. So and start check if we have a weapon type item, you'll need to select a random gun from potential guns or potential weapons. And you'll need to set the item cost as the weapon price. You'll need to set the sprite as the appropriate gun. You'll need to satisfy texts also. And I believe this is the last point. So with that out of the way, pause the video right now and go to the HL7. Oh, okay, welcome back. So in start, That's that's not what I meant. If we have an item type that is equal to the item type weapon. Then in here we are going to set a couple of things. First of all, we'll create a random selected weapon and it's going to be equal to random dot range. The 0 and the potential. What is this? The potential weapons to buy dot length. Then in here we are going to select the weapon to buy and it's going to be equal to the potential weapon to buy on the position of the selected weapon. Then we are going to go ahead and get the item cost, which is going to be the weapon to buy, that get weapon price. There we go. And finally, we are going to set this pride. So how are we going to first of all get the sprite? We are going to get component and children the sprite. Or know what maybe this one in here we won't be needing. But anyways, let's just skip it. We'll go into the sprite renderer. This is the component on the children, why the children while? Because on this item which has the actual script, the item sprite is down here. And because no other game objects, oh, we do have another game object which is the item platform. This will be a tricky one. So, you know what, for the sake of having everything properly set up, I'm going to make this a serialized field and save that. And then go back, sorry. And then go back and to every single one of those and wait a second. Weapons sprite renderer. I was and I was confused. I was confused there for a second, sorry for that back in here. So I'm going to go ahead and add the item sprite. And here the sprite. And in here also the item sprite. So we don't confuse any of these. And also, as long as we're here, let's go ahead and add also the price text. So. Okay, so for some reason I forgot to change the name of these. So this will be the item price text for some reason I thought we did change the student. Be no worries about that. And these are the things that we have to do. We don't like them, but we have to do them at some point in time. So let's go ahead and set everything up. There we go. So now we have a reference to all of these. Back in here. The weapons sprite renderer. The sprite is going to be equal to the weapon to buy that, get weapons shop sprite. There we go. Save that. And the last thing that we need to do is we need to set the text. So we're going to get the price text. The text. And what do we say in here? Let's see what was originally written in here by weapon. So instead of just by weapon, we'll start off with by. Then we are going to concatenate it with the weapon to buy dot get weapon name. And this is a string, so we can do this legally. And then we will say the price. So we'll add these two plus the item cost, item cost. And this is an integer. So remember when we had an integer previously in somewhere, I forgot. So you remember because it was an integer, we couldn't just sell it. We had to say dot toString. So and maybe I wasn't clear what this does. So toString just converts any integer or any float into a string and you can use it. But in here, because we are concatenating, concatenating means we add a plus between a string and an integer or a string and a float. So when we concatenate a string with an item or sorry, with an integer, then we don't need to add two string immediately. Visual Studio and C Sharp code understands that this, although it's an integer in here, we are using it as a string. So we save that and we also need to add in here BTC. Save that. And now let's go back into our game and see if this works. We still haven't added the gun, but let's see if this actually works are random selection. So let's go down here. Okay, so a rifle. There we go buy a weapon and it did not work. Why is that? Because we haven't added anything to the array. So in here, we need to add the potential weapons to buy. And it's a consistent so up here in the prefabs, prefabs weapons, select the potential weapons and let's just have the shotgun and the rifle because we are holding a pistol and our hand. So run the game. Let's go and see what happens. So a rifle there we go. Buy a rifle for 20 bitcoins. Let's try this again to try to get the shotgun, make sure it works. There we go. The shotgun by the shotgun, 430 bit coins. But now when we press E, nothing happens because we still haven't added any way of buying. So back down here, we're going to create a case. And this case will be for the item type dot the weapon. There we go. And now in here we are going to first of all, find the player that we want to add, the weapons too. So in here I'm going to say that we have a player controller, which is the player Who's buying the player, the player buying. So player buying. I really have a hard time with selecting names for objects of finite object of type. And as you can see, we have redundant code every single time. Maybe we should change this. We are doing a lot of finding. I don't know, I think we should change this at some point. So instead of declare health handler, we are going to get the player controller. There we go. So now we have a reference to the player controller. Then in here we are going to say that the gun that we have, so we're going to instantiate the weapon that we have. So the weapon to buy. And we're going to instantiate on the player buying dot. Get weapons are. So just like we did when we were picking up a weapon. So we instantiate the weapon on the guns arm. And the last thing that we need to do, we need to also said that weapon on the players available gun. So we are going to go ahead and get a reference to this. Because if I remember correctly, if we are buying gun dot add weapon available, there you go. You can see that takes in the weapon to add. So we need to get a reference in here, or you can actually copy this and put it in here. That doesn't look very pretty, that doesn't look very professional. If you look back at the code, you won't understand exactly what's happening. So instead, we're going to create a weapon system in here. And it's the weapon to add an equal to instantiate. And then in here we said the weapon to add and do not forget to break. This is something that we need and just in case we are going to create the default in here. This says that if none of these work then default debug, thought log, and no item type was chosen. And all. I really like the switch cases. They are really nice. If you look at them. They really look very nice. So you have a case, everything is really properly arranged. So let's go back and see what happens in here. In case it's a weapon, we get the player controller, a reference to the player controller. We only have one, so this is no problem. We then instantiate the weapon. We set it in a variable, and of course we set it on the player buying, which has an army always want to set the child, we set the parent of the weapon that we've instantiated as the arm, and then we get the player buying, we add the available weapon. Obviously we need to have, as you remember in here, we have the available weapons on the player. We add that weapon, we break and we have our Robins. So back in again. Let's see if that works. Run the game. And we pick up some coins to buy ourselves a shotgun. So now we have a pistol, we get the shotgun. How cool is that? So now we have a shotgun, and not only do we have in here, I wish I did not use the maximize on play and maximize, Let's just remove it. So not only do we have the shotgun and arms and it works and it shoots and it does everything. But we also, if we go, Where is it? Where is it on the DOM player? Unlock this one here. There you go. You can see that we have a shotgun and a pistol. So with that out of the way, we've finished creating all of our shopping items. I hope you enjoy it. I hope you like how the game is turning out to be. Make sure to always commit your changes and make sure to leave me a review if you haven't already with that said, I'll see you in the next video.
82. Section 14: Creating Menus - Setting Up Title Screen: Welcome back My favorite game developers to a brand new long video. And in this one, when we run the game, you'll see that we have the pine bought invader 2D. Why does it sound like that? But anyways, we have two buttons. The exit button that just displays this text right here, and the Start button when we choose it, there we go. We go to the first level. How cool is that? We can shoot, we can get help, we can also die. So let's not waste any more time and let's get started. Oh, case. So time to create a couple of menus and we are going to start with the title screen, because obviously every game needs a title screen. So what I decided to do is to have the title screen, the test1, and I'm going to convert it into the title screen. Yes, reload. And I'm going to remove the skeleton. I'm only going to keep the player and I'll add a couple of breakable items. So in the prefabs. And let's increase the size in here just a bit. And where is it? Pickups portals, rooms. Okay, so a couple of breakable parts. So I'll add one here and another one in here, and another one in here. And just a couple of parts that we will have fun destroying. And in this menu, we will also have the two buttons that will tell us to either start the game or exit the game. So let's go ahead and do that. I'm going to right-click in here. I'm going to add a UI canvas, and this will be the main menu canvas. I'm going to set the event system in here. I'm going to make sure that it is I'm sorry, as screen space overlay and make sure that the scale will screen size. And there we go, 1920 by 1080. Hit Enter, double-click so we can see it properly in here. And what are we going to have while we are just going to have the screen where we move around. But we'll also have two buttons and the name of the game op here. So maybe we should make this a bit smaller. I don't know. I was still thinking of how are we going to fit all of this. Maybe we can try to select all the pots and the dome player and just make all the parts a bit smaller too on the scale, maybe make them 0.30.20 to that. Still small. 0.50.5? Yeah, sure. And then they don't player is also 0.50.5. So there we go. If we try to run the game now with our little tiny dude. Or as you can see, he is still very big and he cannot pick up the items because the scale is very small. That's because the, I just realized that the animations will keep him big. So let's bring him back to one. And no worries, we'll try to fit everything in here. So back to one. Save that, okay, enemies run the game. We will have the sprite guy. You will be walking around. He can not pick up things because in here we have some kind of error. And that's because we don't have the manager, we don't have an entrepreneur enter on the coin. There is a problem. Why is that? Well, because the game manager isn't available also on the coin. So we're going to stop the game. And we're going to select all of these parts and make sure that the item dropper, Let's just remove the component for now and just keep the breakable so we avoid any errors. So there we go, we break some pots and have fun. And we'll also add two keys in here to allow the player to select whether to exit or to continue the game. So in our screen and our canvas right here, I'm going to right-click select your, I add a text Mesh Pro. This will be the title. So game title, so time bot, invader, I'm not sure I want to call this may be doomed, bought and Vader, but let's just keep it as it is. Changed the font auto size, increase the max, and let's make it a bit bigger. Let's set it in the middle. Let's increase the max even more. So there we go. We need a big, huge title 40 time both invader to d. And we can add some underlay, some lightings on glow. So for example, we can increase the or the underlay and add a color in here to make it a bit cooler. So go ahead, label this, increase the softness, the offset on the y, or something like that. So choose the colors that you find appropriate. Maybe make this one red or black or antinode. No, black is bad. Let's see, maybe increase this fully red and on the Y, increase it up. So there we go. So we have something like a time bot and Vader 2D. And it's not very pretty, but it does its job. And now we're going to add two more buttons. So in here I'm going to right-click and UI and add a button. This is going to be the start button. And I'm going to move it a bit to the left. And this is where we decide where we want to put it. So because we don't have too much space, you can see how I'm looking at the game. I'm going to set them maybe right here. Let's see if we run the game. How does that look? So having a button down here, no, I think that's not bad. That's not bad at all. So I'm going to maybe increase the size. And in the resources. We can go in here and you can find the menu elements that I've provided you with. So these are the buttons. So back in our sprites, let's see, do we have something under the UI elements, UI elements and right-click, create 140 buttons. Open this up, and let's drag the buttons all the way into Unity. And let's see what we have in here. And let's go to multiple lie Sprite Editor. That's slice these babies up. There we go. So these are perfectly sliced with the shadows. So apply the changes. Now we have these and I'm going to select the Start button. And as you can see, we have the normal React component that we are used to. And we have also the image and the button things right here. And you can add an on-click event on this button. Whenever it's clicked, you can change the way it behaves. So if the normal color, for example, can be completely black or white or red or whatever, you can change the highlighted color. So for example, if we move our mouse over this button, a free press the button and becomes, for example, green. And if we select, I don't know, selected color, I'm not sure what that is. So if I run the game right now, you'll notice that if I move over the button and becomes red, once I click it, it becomes green. So this is how buttons work. You can play around with a lot of things in here. But what I want to focus on is changing the sprite source. And let's see what kind of buttons we have in here. So something not good happened in the Sprite Editor. And how many sprites do we have? 1, 2, 3, what are these empty things in here? I don't like the looks of this, but anyways, let's try to add this button. There we go. So you can see this is the button that we've added. Let's try to set it may be to native size or maybe increase it on the Y. So there we go. We can set two buttons on each side of the title screen. And maybe you can add a different kind of button, may be this one which is a bit more clear. I think it's better. So now when we run the game, you can see that we have a really nice looking button and it even changes color when we press it. And maybe you don't want to have that kind of thing. Maybe the only thing that you might want to have is not to have this pressed. Maybe we can make it darker or something or keep it as it is, but just change the alpha on it, which is also a good idea, but I'm going to make sure to have it some kind of green color just so we know that we are pressing this button. And now with that we have the start button. Let's duplicate this and move it to the left. And this will be the exit button. So Exit button. And now what we need to do or you know what? Maybe I did this too soon. That's just delete the X button because we want to change the text. And here you can see that we have button texts. We don't want this text. We deleted. We will add our own text, which is a text Mesh Pro. And obviously we're going to make it the cyborg bold. The auto size, increased demands, set it in the middle. And that's all, that's all that we need to do. And I'm going to increase the size of this one. So let's make it a bit bigger and set it in the middle and just make sure that it fits properly. Now the only thing that might bother us here is that the when, when we tried to change, for example, the color of this one. Oh no, no, everything is working. So should we make it dark? I think dark. That's first of all, try to type the name, so start came. Okay, so apparently, having it completely dark is not the way to go. What colors should we be choosing? Maybe even we should remove the underlay. But if we remove the underlay in here, remove also the underlay up here. So this is why sometimes I don't like to use text Mesh probe because everything is kind of related. We are changing the entire shader of what detects mesh Pro is. Shaders are a whole different breed of information. So I'm not going to delve too deep into that. So back in Unity. And let's see how that looks. If I run the game, is it visible? So start the game and not very much. When it becomes red, it is more visible. Maybe we can change the background of the button. So I'm just playing around honestly, I'm not sure what I'm doing. I'm just testing things out just as you are. No, I think this one is better for our start game. And now that we have this one, now we can duplicate, call it the Exit button. And let's move it to the side. On the other side. And in here we are going to change the text to access that. Again. Hit Enter. There we go. So now we have two buttons. We have set up the menu. We can walk around, we can destroy these things, we can shoot around us. We're using the very scary buttons. There we go. And we can start the game, exit the game. But as you can see, they do not do anything right now and again. So what we're going to do is add a couple of functionalities to these. So I'm going to go into the scripts. I'm going to right-click and create a folder for the menu. Double-click in here, right-click and create a C sharp script for the Main Menu Manager. And let's just call it menu, main menu because we would have to add it to the Main Menu Manager if we did. What's the problem here? We have a problem with the sound effects, I think. Yeah, I think it's a problem with the sound effects. The problem with a couple of things. There are a lot of problems in here because we didn't add all the manager and all of that stuff, but we don't really care about it. This will not be a problem because we are not actually doing anything. And at this level, so now was the main menu. Let's add it to the main menu canvas. And let's double-click and open up the script right here. So we are going to first of all create a method for the exit game. So public void exit game. And because we are still in the editor and have not implemented the game, this will not be working. But if we write application dot close, I mean the application taught quit. This will exit from the application and quits the player application. And as you can see, but because we are in the game mode of the Unity editor, this will not work. So what we'll do is we'll just add a debug dot log. And we'll say that we exited the game. Trust me, when you do build this game, this button will work. Don't worry about it. Anyways, this will run the game. And if we go back into Unity, if we go to the exit button, we can scroll down in here and in the onclick event, we can press this Plus button and we can add, first of all, an object which we will access the functions of. So if I add the main menu, you'll notice that now I can access functions and one of those functions. So for example, I can access game object and do a couple of things in here. Maybe turn off the game object, direct, transform, change name, and so on and so forth. But I can also access the main menu. And you can see here I have Canvas, canvas, scaler, graphic, ray caster, and all of these are components inside of the main menu canvas that I've provided the button with at it also contains the main menu. So on the main menu, I'm going to select it. And you can see that I have a lot of methods that I can use. And one of them is the exit game that I just created. So when I click on this one, I run the game. I can walk around and do the things I do. And then if I click on the exit game, you'll notice that we exited the game. Why we capitalize, I don't know, but you can see that this button actually works and I can press it. So now it's time to create the start game method, and that is going to be your challenge. So set the scene and the building index as the first scene and the first-level to be the second scene. So you remember the building decks. If you don't, you'll need to go ahead and check it. It's in the File Build Settings, I believe. Yep. Yes. So we need to start the game. In order to start the game, we need to load the first level. To load the first level, obviously, we need to have a scene manager and all of that good stuff. I hope you didn't forget how to do that. It was a couple of sections ago. Create the start game method, make sure it's public. And the method access the scene manager and get the build settings of the current active seen. And then you'll need to increase it by one. And just as a small hint, You need to access the scene manager, get active scene and build index plus one. So with that out of the way, pause the video right now and go do the alone. Okay, welcome back. So first of all, let me remove the start and update. I'm not sure we'll be ever using them. And here I'm going to add in the engine dot senior management. And now I'm going to create a public void. Void star game should be capitalized and this one should not start game. That's opened up the squiggly lines. And in here I'm going to access the scene manager dot load seen. And what scene should I be loading? Well, first of all, let's go to the File Build Settings. And the title screen is already the first one. So what I want to do as I want to get the index of this one and then increase it by one. So I'm going to go ahead and get this scene. Manager dot, get active scene. And in here I'm going to get the build index and I'm just going to increase it by one. So we go immediately to the next scene. Save that. Now let's go back into our game. And let's see if that works. So I'm going to run again. We walk around, we destroy things, we exit the game, it doesn't work. Start the game. And it doesn't work because we have not assigned how smart of us, we have not assigned the stop button to do anything at all. So main menu, how many times will I make this mistake until we finally save that? Run the game. Let's start again. There we go. So now we are on the first level. How cool is that? And we know it's the first level because we have all the skeletons in here. See, even though we didn't do any changes to this level, but because we've changed the prefabs of the skeleton, they can now pick things up. Obviously, there is a couple of things that we need to change. But for now, we know that the start game works, the exit game works. We've created a title screen. We are going to commit our changes and we are going to see you or actually, I'm going to see you in the next video.
83. Having Victory Screen : Welcome back, my fellow game developers. In this video, as you can see, we've created a victory, seen nothing too special, nothing too fancy, and just have the victory. We have press any key, we collect, we go to the main menu, we start game, we just start again. We have this weird for some reason, we have the weapon not working properly. We'll deal with that later on for some reason when we move through the levels might be something got lost along the way. But there is something I want to do in this introduction and I would not think of while doing the video and that is adding the layer right here. What I'm going to do is right-click in the victory Canvas and the UI. It will be very simple. You will remember to do this. I will call this D layer. I will add the sprite to him, send him to the night upsized. And then I will create an animation which is in the assets animation. And let's see, I do believe I made the dancing player in here. Let's remove this and create my own dancing player. So save that. Yes, I want to replace them. And then I will create the animation of the dancing players or select these two, set them in here, and let's look at that. Okay, that's too fast. Stop, stop, stop, stop, stop, stop. Copy this, paste it in here. And let's see how that looks. That's still extremely fast. Let's add them five apart. And yet it doesn't look very good. But yeah, we, we would like to have the player doing the Cancun on each side. So we set one here, duplicate it, set one here, but we are going to make the scale of this minus one. So now when we run the game, I mean we run the victory screen. There you go. We have two ken, Ken's, the victory and plus NEG, and then we go to the layer. Excellent. So as you can see, obviously there is a problem here. We will look into it later on, but for now, let's not waste any more time and let's get to the victory screen finally. 0 case. So now that we have a title screen, we also want to create a vector screen. So let's go ahead and do just that. I'm going to go into my sprites, that I say sprites, I meant my scenes. And in scenes I'm going to go ahead and create a new scene. So right-click Create. Oh, where's the scene? And here, there we go. So scene, and this will be the victory screen or Vector3 scene or whatever you wanna call it, hit Enter. And let's just add it to the build settings right now. So I'm going to drag the victory seen screen right here. There we go. Open it up. As you can see, we have absolutely nothing will keep this thing simple. It's very easy. So I'm just going to go to your Canvas and this will be the victory Canvas. Nothing too much in here, so just the canvas scaler that's set to 1920 by 1080. So here we go, 1920. Then AT, and you're very familiar with what's going on. There is just one thing that will be maybe just a little bit particular. So I'm going to know not just yet, not the challenge, just yet. Let me just do a couple of things in here. So this is our victory scene. Let's see how it looks in game. Okay, so right-click, let's create a image, image here, and let's make sure that it fills up the whole screen just like that. Let's make it completely black. Or you can keep it wide, you can do whatever we want. So I'm going to set to black. And in here I'm going to say that I also want to add a text Mesh probe. The stacks. Much pro will be the victory text. There we go. Let's make it auto size, increase the max. And let's just make it a bit bigger. There we go. Let's change, make it bold. Make it in the middle. Set it to the Robo. And let's remove the underlay from here. I'm not liking that underlaid that much water, so let's just try it in here. Victory with a couple of exclamation marks and will increase the max to fit this entire screen. There we go. So factory. And then what we're going to do is we're going to duplicate this text, move it down a bit, and maybe sizes down. Oops, and this will read. Whereas it, so this will be the press any key. And in here, press any key to return to main menu. So there we go, press any key to return to the main menu. Let's just run this game and see how that looks. And there we go. So as you can see, victory press any key to return to the main menu. Very simple, nothing very complicated. So I'm going to issue you a small challenge to make the text appear after two seconds. So create an animation that makes the text appear after two seconds and do this without any code. And if you want an extra challenge that I haven't included in the slide, you can also create a way for us to press any kind of button. So we don't need to do a bit of research here. So we press any button and then we go to the main menu. That is also a challenge for you to do on both sides. So that out of the way, pause the video right now and then go to the challenge. Okay, welcome back. So what we're going to do in here is we're going to just create an animation. And we'll go into the assets animations and let's create a new folder for the victory. Text. Opened up, opened up, and hear beer. After two seconds. And I feel, look how many folders now we have. And I feel this oh, project was about creating as many folders as you possibly can. So welcome to the newest version of creating the most folders that you can. Anyways, let's continue on. So we have this right here. We're going to access the press any key text. And in here I'm going to add a canvas group. So this group. So now we can play around with the Alpha. There we go. And let's remove the interactivity and the blocking the re-cast. And in here we're going to press record and after two seconds. So we'll start off at 0. And at the 2 second mark, we are going to stay at 0 and maybe add the ticket, maybe 1 second to load. So in here this will become one. But at the 2 second mark. So as you can see, this will progress slowly. So no, I don't want it to be like that. I want to add 0, have this. And how are we going to make the salt appears on its own? Well, this will be probably a bit shocking to you, but when we run the game, this will happen all on its own. So we start the level. Then we come 12. There we go. So we have the text appearing. Obviously we do not want to have looping. So I'm going to go to the victory and make sure that we don't loop. Now the next thing to do is to have us press any key to go back to the main menu. So I'm going to go into the scripts in here. And where should we added? Let's just add it in the UI. I think this is a good place for it. And let's right-click create C-sharp. Victory. No, Actually, you know what you are is a bad place for this. Anyways, victory screen. And this will be extremely simple. But where should I put it? If not in the UI folder? Scripts, Let's see, traps, weapons, menus, yeah, monument. Sure, menu is a better place. So let's drag this victory and to the menu folder. And in menu folder, let's just add the victory to the victory Canvas. And in here Let's double-click opens up, remove the start. We don't need it for now. And because we are going to be changing from scene to scene, we'll just add the UI scene manager or seen management. And in here we are going to say the input dot get key down or not, sorry, not get key down because we don't want any specific key. So in here, I hope you tried to do a bit of research. There is something called the any key down. And we're just going to say that, and this is enough. And you can see right here returns true. The first frame, the user hits any key or even a mouse button. So then we are going to go to Scene Manager dot load seen. And we are going to load the first scene because we know that always, always, always the title menu will be the first C. So save that. We go back into our game. We are going to run the gain. So there we go, victory. Two seconds. Press any key to continue at Demos button. And now we are on the title menu scene and something that I forgot to tell you. And that is that you can actually maybe add some kind of music in here. So you can see we can exit, start the game. And there we go. We are again starting the game. Whoa, what is that? What is that? Seems like some kind of flame thrower. I think there is a small problem, but let's not worry about that for now. We'll fix the problem later on. Obviously there is some kind of error and some kind of part of the code because of the way we are transitioning, but don't worry about that later on. Maybe I believe the last section where we actually do the advanced unity or advanced C-sharp, One of those, we actually create a very sophisticated way of going through levels, keeping everything with us. So we got out of the way. Thank you for watching. I hope you are enjoying. I hope you are staging all of your files. Staging all of your files, committing all of your changes. Just made a victory screen. Commit the changes. And I'll see you in the next.
84. Restarting Level After Death : Welcome back, my fellow game developers. In this video, we are going to add a bit of functionality to our deaf screen. So currently when we walk around, we are alive and everything's good. When we die, we have the option to either restart the level, so we start off on the same level, or we have the option to go back to the main menu and cry a little bit. So let's not waste any more time and let's get started. Okay, so now we have everything. We have the title, we have the victory. It's time to do something about deaf screen. So currently when we die, you can see right now if we run the game with AI, you can see we have the UTI, we have the cooled lot, but there is nothing to do. So we've just sit there until we stop the play mode again. We don't want to do that. We want to have a continuous loop in our game. So I'm going to do is I'm going to go into the deaf screen. And here I'm going to right-click and I'm going to create a button or you know what? Before I do all of that, I'm going to issue you a challenge. And your challenge is going to be to create the two methods and the two buttons. So first of all, you need to create two buttons, want to restart the level and want to go back to the main menu. You will need to create a method for each of these buttons. And then you'll need to assign the functionalities to these two buttons. So with that out of the way, I believe you already know how to restart a level. You need to load the scene that we are currently on which we can get by getting seen active. So pause the video right now and go do the challenge. Oh, okay, welcome back. How did you get on with that? So because the current challenges are getting a bit boring because you already know everything. So I just loved the whole video to you. And I'm editing things without seeing even depth screen. So let's turn the Alpha to one so we can properly see the button. And let's see what we're going to do in here. So we have the button. Let's select this one and let's make it bigger. Move it to the left. And then in here we are going to remove the text and add our own texts. So everything I'm doing in here we have already covered. So say restart level. And let's set the proper everything, the proper everything and size, max, the max and the obviously the button right here should have the UI Elements Buttons and should have this sprite right here. There we go. So now we can increase the text and make it a bit bigger. There we go. We make it bold. Bold, I mean bold. So now we have the bold text and let's make this button. I've been bigger. Yeah, how does that look? I think it looks pretty good. So I'm going to duplicate this. Move this down here. This will be the main menu button, and the text will be the main menu. There we go. So I think that looks good enough. Let's maybe just know this, the text. I want to increase the text size a bit for the restart. And there we go. So I think that looks good enough. Save that. And now let's go ahead and add the functionalities. So in Scene Manager, we want to create everything. I mean, not unseen manager, you are a manager. We want to create the methods that take us from or restart the lover or take us to the main menu. But the thing here is, and this is a philosophy in game development. And where do you actually want to do this? So the UI Manager, what does it do? Does it take us from one scene to the next? No, it doesn't. It just manages the UI and this is its job. So a better place I believe, of doing this method or creating these methods as in the level manager, but also at the same time, we don't want the buttons to have access to the level manager. We just want the buttons to be able to change things in the UI Manager. So we are in a bit of a pickle if you want to call it that. So what I'm going to do is I'm going to trust my gut instincts and I'm going to create the methods in here. It's a public void restart level. And the way we restart the level is we simply get the scene manager, the load seen. And which scene are we going to load the scene manager, dot get active seen that build and x. So now we just load the scene of the current active scene. That means we reload the level and then public void re, return to main menu. And in here we are going to get this scene manager dot load scene. And we'll just load the scenes 0 because we know that the scene or the title scene or MainMenu scene is on the index 0. And now we'll go back into the UI Manager. And in here we are going to create the same methods. But instead of actually doing the things, we are going to access the level manager and do we have an instance? Yes, we do have an instance. So in here we are going to get the level manager dot instance, dot restart level. And let's do the same in here, but instead of restarting the level, return to main menu. So save that, go back into Unity. And I know this feels a bit redundant. I know this feels as if we're doing the same thing again and again. But I believe that this is a more proper way of doing things. So we can go to the UI Manager, restarted level and main menu. Go to your manager, and return to main menu. Save that. Let's turn off the depth screen. First of all, let's apply the changes that we've made apply. So now we turn off. First of all, we'll set the Alpha to 0. We will turn of the deaf screen. Larger the game die. And now we have the restart and main menu. If I click on the main menu, I go back to the main menu. Excellent. Let's try this again with the same of restarting the level. We die, we start level. There we go. We are back on level 2, baby. So excellent job. I hope you enjoy it. I hope you did this challenge. I hope you tried your best and I congratulate you if you did it from start to finish, all on your own. I'm going to stage everything, sage all commit the changes. Created a way to either restart the level or go back to Main Menu upon death. And not a way created. Two buttons to either restart the level all go back to the main menu upon death. And when the changes. If you haven't already leave me a review, if not, you can wait just a little bit and then leave me a review. This is the perfect time and I'll see you in the next one where we will be creating one of the cooler aspect of any game, which is the pause menu. So I'll see you then.
85. Setting Up Pause Menu: Welcome back, my fellow game developers. In this video, when we run the game, when we had the peaky, you can see that we have a balls menu. We can either go to the main menu at works, trust me, or we can resume the game. If we resume the game, We are back and again, we can also pause this again, and instead of clicking on the one of the buttons, we can hit the peaky. But we are that this is something that we'll also cover in the next video. But for now, let's go ahead and create our pause menu. Oh, okay, so now we want to add the ability for our player to pause the game. Our player, I mean, the guy that, or the girl that's actually playing our game. So how are we going to do this? Well, it's going to be fairly simple. We are going to duplicate the depth screen. And this will be the pause screen or pause menu. So pause menu and hit Enter. And here we are going to have everything the same except for the let me turn this on except for the lot. So first of all, the blood, we don't want the blood and the pause menu, it will be let me set it on the one. So we have the image in here, but we want to make it just a little bit faded so we can see the background. So let's say 0.5, okay? So we will have it at 0.5. And then we are going to move the restart button. And you just make the smaller move the restart button here, move the main menu here. And instead of restarting the level which you can keep if you want, but we're going to make this one Resume button. So Resume button and in the text in here will just resume game. So there we go. Now we have these two buttons. Obviously we'll need to change the functionalities and here. But that's something and I couple of minutes. First of all, let's open up the UI Manager. And in here we are going to do a couple of things. First of all, obviously we need a reference. So I'm going to create a serialized field of the game object, which is the pause menu. Save that. But the thing here is, as we've said in the previous video, UI Manager, okay, maybe he does turn on and off the pause menu, but he is not responsible for actually pausing the game. The level manager is the script that is responsible for doing that. So in the level manager, we are going to create a public bool. And we're going to call this, the game is paused. And obviously I don't want to make it public, but we are going to be using it a lot. You know what? Let's not make it public. Let's make it a private variable, and we'll create a way to access. So a public bool is game paused, and we'll just return. So these are sometimes a bit cumbersome. Maybe you're thinking, Well, I'm creating a lot of gold. But trust me, when you get to the higher levels, to the professional level, these are essential things to have. Don't want your game to be easily corruptible through the code. So now that we have the game is paused until I manager we have the pause menu we obviously want to access in some way, change the pause menu. So I'm going to create a method in here that is going to say that public void turn, pause, menu on, off. And it will take in a boolean which is going to be the on, off. And I know this is not the best way to represent the variable, but anyways, let's continue on. You'll see what I mean. So in here we'll just going to go ahead and get the pause menu, dots directive to on, off. So now we go back into the level manager. And in here we are going to create a public void. Pause, Resume game. And what we'll do in here is we're going to check if we are not in the game paused. So we haven't paused yet. Then we'll access the UI Manager. Dot instance, dot, pause, turn, pause menu on and off. And what shall we set it? Well, we will just set it to true. Because if we are not unopposed game, when we press some kind of key, then we want to turn on the pause menu. And else. That means if we haven't paused the game. So if we or excuse me, if we are in a paused game. Then we are going to do the same in here, but instead we are going to turn it off. And this will go to the UI Manager axis, this one and turn it off. So with that out of the way, there is something that we still need to do and that is actually turn or change this game as opposed using some kind of button. And this is going to be your challenge to resume the game using some kind of key. So check for inputs and when pressed, we should call the method and resume gain or pause the game and make sure to change the status of the game. So if it's paused or if it's not anymore, so pause the video right now and go create an input. Okay, welcome back. So where do you want to put it? I think up here. So an update, we are going to check if input dot get key down and a key code for p. Then we are going to pause, resume, the game. It's that simple. And then end here. If we haven't paused the game, so the gain is not paused. We click the peaky, we turned on. So the turn on, turn off is true. So in here we are going to say that the game is paused, is equal to true. And duplicate this and move this down here. False. Save that. So let's test this out. I hope I didn't make a mistake with the false and true. Why I believe it's correct. So in the Resume button and we're going to add something in here, which is the UI canvas. And inhere we are going to go to the UI Manager. We are going to find turn, pause menu on, off. And as you can see, we have the option to add either true or false. And this is the actual boolean right here that turns on all of the paths. So back in our game and here, let's first of all turn of the pause menu, run the game. So and here we have the peaky. We can go back to the main menu. We can also hit the peaky than had the peaky back. And then we turn off the pause menu. There we go. But there is still one thing which is the Resume button. Now I'm going to go ahead and add the onclick event in here. And I'm going to break my own rule of adding the level manager from the manager's everybody right now is like, Oh, don't break the rules. But yes I am. I'm going to go into the restored pause resume game. So run the game. And now we are going to press the key, resume the game, and everything works fine. But as you can see, if I pause the game, I can still walk around. I can still shoot enemies and I can still die. Now, if you want to create a dark souls ask type of pausing in the game where the game continues in the background. And you just sit there helplessly trying to figure out what's happening in the menu. Be my guest. If not, if you want the world stopped, then continue on to the next video. But before we do that, obviously will need to commit our changes. So see you then.
86. Actually Pausing The Game : Welcome back, my fellow game developers. In this video, we are going to be applying the changes that we've made. Not only that, we are going to run the game when we should impose, you'll notice that even the bullet freezes and mathspace, if we tried to walk around, nothing happens. And if we try to shoot, also, no bullets are produced. So this is the actual parsing of the game, not just having a menu. So let's not waste any more time and let's get started. Oh, case. So even though we have the pause screen, we can go back. We can go to the main menu. We are not actually pausing the game. The game still running, we can still run, we can still jump. We can do everything. Actually, we don't jump. The enemy still attack us. So we need to figure out a way to actually freeze our gain. And I'm not really feeling up to it. So I'm going to present you with a challenge to stop the whole word world with an l, freeze the world using timescale. So this is the only point and the challenge, pretty easy, I think you know what to do. So pause the video right now and go freeze the world. Hey, welcome back. I know you freaking hate when I give you a challenge at the beginning of a video, you're just sitting back. Yeah, finally, I'm going to learn something and then Michael just gives you a challenge. Okay, anyways, in here, once we pause the game and we will access the time, a dot a delta time. And it's going to be equal to no time that timescale 0, F. And in here when we stop the boss, the time dot timescale is equal to 1.5. Save that back in our game. Or we will make this a bit bigger, run the game. So pause the game. Excellent. There is a problem though, and that is nothing is showing up. Not only that, but we are still being able to wiggle the weapon. And what happened in here? Well, the problem is that our pause menu as being handled or is appearing using the animation. So what I'm going to do is I'm just going to go into the animator in here. And I'm just going to remove the components so we don't have animations anymore. So now when we run the game, I paused the menu and everything stops. But as you saw, I can still move around with the enemy. Not move around, but I can still shoot and produce bullets. There you go. You can see the stability and I can produce some of those. And this is not something that we want when we resume the game, everything is back to normal, but this is not enough. So what we're going to do is we'll go into the where is he? Player controller. So player, the player controller. So player controller. And in here, if we scroll up the update, we are going to go ahead and end here. Say that if the level manager dot instance dot game is paused as game paused. So if it's true, that means that we are going to simply return. And remember what happens when we simply return, we just avoid the whole object. So if we get to this line, will check it's paused, true. Then we return and then we go back to the Update, and then we go back to the update. So the player does not do anything. He cannot move, he cannot point the gun. He cannot be animated, know dashing off, switching gums, no, nothing. So now back in our game, when we run the gain, we can now pause the game. And you can see that our player no longer moves even though we can still produce a bullet for some reason. Oh, that's because the actual shooting is on the what's called the the weapons system. So we resume the game, the boat flies off. You can do this anywhere you want inside of the update whenever you have some kind of so whereas the weapons system that we go in here, an update. There we go. Now we will no longer be able to fire bullets. You can also add this to the enemy controllers where they also shoot us with moles. So I guess this is the end of the creating menus and our game. I'm going to commit our changes. We'll call this made the pause menu. Actually balls. Again. Commit the changes. I hope you enjoy it. Let's look at our masters. As long as we have here, we still have time. This video was very short. I mean, look, look how much we have achieved together. This gain is incredible. It has so many things, it has so many options, so many variables, so many scripts, so many folders as the folders that we have are I don't know what her almost at a 100 folders, I think. Probably we have so much animations dislike. Look at how many and we still didn't animate everything. We still have a lot to do. Can animate the enemies when they shoot, there are still a lot of things that we can add. So because this video is short, I want you to take the time to pray, then breathe out, and appreciate how far you've come in your game development journey. And what an amazing review. You just let me left me anyways. Thank you so much for watching. I really, really appreciate if you've got to this point. If you did leave me a message on the score, let's have a chat. Tell the community how much you've come, how much you've learned, how much you have accomplished and see you in the next one, I guess, where we will be creating a boss fight, I believe, which is like the coolest thing in the world.
87. Section 15: Boss Battles (Advanced C# State Machine) - Introduction To Sate Machine: Welcome back my fellow game developers to a brand new video in brand new section. And one of the better sections, I will introduce you to the bus Skelly boss. I'm not going to waste your time too much. First of all, we will talk about the state machine, what it is, how it is, why we are using it, how we are going to be using it, using the animator, all of that good stuff. And in the second part of the video, we will be talking about the animations that I've created just to guide you through the process. If you have created the animations, the middle, we will have a challenge. If you already did all of the animations, you can skip the second part. Or if you think that you need a bit of help, I just guide you through a little bit of what I did. So with that out of the way, let's not waste any more time. Then let's get started with the boss fight 0 case. So, uh, welcome to one of the most exciting parts of this entire project and that is the most battle. What gain is complete without a loss button? No game. So let's go ahead and think of how we're going to create a boss battle. First of all, let's talk about something called the state machine. If we look here in the animator, you'll notice, and let's take the doom player for example. You'll notice that these are in fact animations, but they also work as states. So we have the states, or I'm in the state of the player ID links or player either name. He's an estate. He can do specific things. He cannot move. For example, he can shoot, he can do a lot of stuff, but he is in a state of idling. Then we have the walking state and then we have the player dashing. So for example, when we are dashing, we have certain animations. Also cannot move. I mean, sorry, we cannot shoot with our guns or weapons. So that is a sign of a different state where we have different mechanics and different behaviors. So we are going to use the animator to produce these kinds of states. And I was the whole time calling these animations. But a lot of people like to call them states. And that is okay. You can call them whatever you want as long as it's properly describes what is happening. So let's talk more about states and what a state machine, as a state machine is a behavioral model. It consists of a finite number of states. So behavior model, just like we have the idling, just like we have the plane, sorry, the running and the dashing. These are behavioral models and they are finite. So we always need to know how many states we have. And a given input the machine performs state transition and produces outputs. So just like we have the transitions between the animations in the animator, so does a state machine have transitions? So that's why the animator is the perfect, Let's say tool to create this state machine. So let's talk about what we have in our states. First of all, we have the starting state. So we have the starting state, we transition into another state which is the a or whatever it is. Maybe we start by idling, then we transition to walking, then we can transition between, for example, and this is all an example between two states, B and C. And for example, when we go from state a to state C, we cannot go back to state a, bot from state C, we can go to state B, go to state a, and then back and forth between a and b. So this is just an example of what a state could be. And obviously on each and every transition, we have conditions. So certain conditions have to be met in order to transition from one state to another. And this is something that we've been doing all the time and the scores. So I'm just going to continue on. Let's talk about the boss state machine that we are going to have. So the first state will be the appearing. So the boss, as soon as we enter the boss room, the boss will start appearing from the ground and you'll see the boss sprites in just a bit. I provided you with them in the resources. Then we start walking. So as soon as the boss comes life, then he will start walking towards the player. So no time to lose, no idling, no nothing. The boss just start walking towards the player. Then we have the five shots. So we will give the ability to our a huge skeleton boss that you'll see in just a bit to fire certain shots adder. So just like we had the enemy bullets, just like we had the player bullets, we will also have the boss bullets that will be fired from many directions. Then we will have the melee attacks or just as I promised you, we are going to create a melee attacks for our Boss that will attack the player once he is near here. So we will have some kind of timer. And obviously we want to have the transition go both ways. So for example, we don't want to appear, walk and then appear again. So that's it. Once we appear, we never go back to the state under a certain condition. We start walking. Under a certain condition, we start firing shots and then we start walking again. And under certain conditions, we also start melee attacking, and under certain conditions we go back to walking. But then there is the second part of the fight. And that is when our enemy gets angry or our boss gets angry when we shoot him enough that his health goes down. He then starts walking angry. He starts firing shots angry. He starts angularly, mainly attacking us. He will change colors, you will change sizes. And finally, when we kill him, if we kill him, if we manage to do so, we have the state of dying where he cannot hurt us anymore. He disappears and we went. So I'm going to, if you want, you can pause the video, look at this, take this end. We are going to be doing all of these in our upcoming videos, but I'm going to give you also a challenge to create all the animations and think so, create the animations that we'll have for the boss. And let me just show you the resources. We have the appear, the attack, the dye, the idle, the walk. And if you're not sure what the Angry will be all show you briefly after I've finished all the animations, I won't be doing them live because honestly it will take a lot of time. It will take a lot of effort. I will just create a new scene, put the bars there, and create the couple of animations. Then you will need to create the appear, attack, walk, shoot, getting angry, angry, attack angry, shoot angry, walk. And now if you're not sure how to create the angry, just at least the angry walk, for example, is the same as the angry shoot, sorry. I mean, the angry walk is just the same as the regular walk. But what I'll do is I'll increase the scale of the enemy, of the boss. And I'll also make him a bit of a red color so he looks different. The angry attack is just the same as the attack. And finally, we want to set the angry state, that the angry state will just have the boss as red color, a bit bigger and scale and a bit faster animations also. So with that out of the way, pause the video right now, and I don't know, Maybe I'll show you in the next video the animations. Maybe I'll show you on this one the animations just so he can see everything, set up everything. And I'll see you in the next month maybe maybe, you know. Hey, welcome back. So how did you get on with that? I just wanted to show you a couple of things or the way I created my states and how I made the angry walking and angry shooting and angry attack and how I did the getting angry may be you can be inspired. I also fixed a couple of things. If you did the attack, you might have noticed that the sprite moves to the right, which is not very nice. So I also fix that. So let me show you what I did. First of all, I got all of my sprites in here, the Bible attack the idle we don't use. So you can see the walking. All of them were kept almost the same. I just changed the filter and make the pixels per unit 75. And what did I do, this Kelly boss. So let me show you what I did in here. So let's say we are in the appearing. Let me show you the appear. Very simple, very normal. Just there you go. You can see that we have the skeleton appearing. You can see I've added two box colliders. One of them is a trigger so we can walk as you know, where we walked through the walls. Had me see. Okay. So the one on the bottom, the one at the top, which is this one. There we go. I can turn it off and on. And you can see that's the one that we're going to make a trigger that's just so we can hit the enemy, but at the same time the enemy can stand behind the background right here. So there we go. We have the appearing, as you can see. And this structure here in the animator. I didn't create the transitions yet because I want to make them as we create the code. I didn't want to do them without you knowing because at some point we will have exit time, we will have transition time and all of these good things. So as you can see, we start with appearing just like we did in the slides than walking and between the walking and shooting, then we get angry than the angry walking, angry attack and angry shooting. So the visit the walking. There we go. Very simple. We just walk around. Then we have the attack. So as you can see, maybe in your case and even in mind still, you can see that the boss just moves a little bit so to the, upwards and to the right. So notice there we go. You can see that he moved just a little bit, but that's even though we changed a bit in the sprites. If you kept them the same, you'll notice that yours moves a lot. So to fix this, I've made sure to go into the Sprite Editor. And in here I changed the custom pivot. So this is the point where let's call it the center. It's a pivot actually. But there is a slight difference between pivot and center, but this is the center right now when the center was right here, because the whole image was moved to the right. That's why the entire enemy moves to the right. So what I did is I changed the center right here, created a custom pivot and it was 0.6554878. If you want to copy this number just like I did, or maybe you can find one that is better. Mind isn't perfect. As you can see, he moves a little bit to the right. So you can find your own value and you can see that you don't have to go and edit all the sprites. You just can select all of them. And in here, you can select the custom pivot on the bottom and then write down this number, keep it at 0.5. This on the Y, on the x, change it to 6554878. Okay, and what else did we do? So this is the attack and you can see that I leave a bit of room when he is striking. So we will have an attack on this side. And once the sort is APU, wait a little bit just to give room to our player to maybe runaway. And then we swing back down. And when we are going to be creating are mainly attack. You'll see how this is crucial because we will add events systems that will damaged the player only when the salt is at a certain position. We don't want to damage the player when soldiers up because obviously the skeleton isn't swinging. So we'll just damaged him when the source is right here and we'll create some kind of circular collider right here. And if the player is inside, then he gets damaged. That's how we will create the Malay attack. So what else do we owe to the shooting? So I've got this one from the dying sprites, I believe. Yes, there we go. So it's from the dying sprites and it's not the smartest thing in the world. I just need some particular sprite. And as you can see when we are shooting, just change the scale. The scale increases and then goes back down. You can see it right here. So I send the record button and then made them bigger, smaller, bigger, smaller, bigger, smaller. And this is when we will be shooting. We will add, just like we did with an irregular. And it means we will add points of shooting, so we will add four. And then when he is angry, we will add six and talking about angry. Let's see how we get angry. So there we go. You can see this is how we get angry. We first of all, we become bigger. So we have the smaller, bigger, smaller, bigger. And I also added the idle sprites in here. You don't have to. I didn't notice much change. If we delete all the legal sprites, nothing changes honestly, but I just wanted to have something different than just a stale image. This adds, maybe in just a little subtle movement to the player that with the enemy, I mean to the boss, to Skelly, you can see that he gets bigger, smaller, bigger, smaller, and his hand twitches just a little bit enough to just have a little bit of life and him growing bigger or smaller. And then you can see he becomes big where we have the scale at 1.3 on the x and on the y, obviously on the SAT, we don't need it. And then we just wait a couple of seconds for the player to realize what just happened. And then finally we start walking angry. So whereas the walking angry or angry walking, it's the exact same as the regular walking, but it's a bit faster. And on the first frame, I made sure to set the scale at 1.3. So in the animation, I had the record. I change the color to complete red. Oh, and by the way in here, whereas the getting angry. So they get angry, you'll notice that he becomes slowly read read her. And on here, this is where I set it to red and it slowly moves. You can see the color right here. It slowly moves to read. On the angry walking, we just set it to read at the beginning, increase the scale to 1.3 on all sides and we make the walking a little bit faster. This is what will happen when he gets angry. He will start walking faster, so the animations will be faster. We have the angry shooting, so exactly the same, the color it just changes. It's completely rad because at this point the whole NME or bosses red. And finally the angry attack. It's exactly the same, just with a bigger scale, a different color, and much faster movements. So you can see there is no waiting time when the sources up, he just keeps chopping away all the time and we will create the same thing we will have in here, the damage. This position we will have the damage. And at this position we will also have the damage. Okay, so with that out of the way, I hope you enjoyed this video. I hope you created all of your animations. It took the time to do them. That's stage all of our whoa, that's nice. Anyways, for some reason I have an error. I will fix that later on. But for now, I hope you enjoy it and I'll see you in the next video where we will be actually moving our enemy and destroying things. So see you then.
88. Setting Up Boss Movement : Welcome back my fellow game developers to a brand new video. And in this one, if I maximize on play to see everything when I run the game, you'll notice that the boss appeal from the ground and starts walking towards us. And when he gets to a certain position, he starts collaborating us clobbering. Is that even a proper verb? He starts clobbering us with his giant salt. So that's not waste any more time. And let's get started. Oh, okay, So now let's make the enemy actually walk or not enemy the boss actually start walking Towards the player. So how are we going to do this? If we go to the animator, first thing we want to do is we want to transition from the appear to the actual walking. So I'm going to create a transition into the walking. And there is going to be no condition. There is only going to be an exit time and maybe a transition duration that see how that looks. So the enemy appears and there you go. You can see that when he finishes appearing, he then transitions into the walking. You can play around in here. So for example, let's increase the exit time to 97 percent. So we've finished his appearing completely. Let's see how that looks. Okay, so there is kind of an error here. And I want to do all of this in front of you just so you can see how things happen. Maybe it will take a bit of time more from the video, but I have to show you this. I don't want any confusion anyways. Now that we have the walking, it's actually time to first of all, find the transform of the player, get a rigid body, find the direction, and so on, add the velocity. How are we going to do this? Well, as you know, we have all of these states setup right here. So what I'm going to do, I'm going to click on the walking. And you can see right here that I can add something called a behavior. So let's click on Add behavior. Let's go ahead and create a new script. And instead of boss getting angry for some reason, we are going to call this the boss walk. So adding a behavior script to a state has a different type of naming convention I'm going to use. Actually MY unit uses the underscore, so I'm going to keep with that standard, let's say. So create an ad, wait for the file to be imported. And there we go. Now we have the post-war. If we click on and see where that actually is, there we go In the assets. It's immediately in the assets. So if any day now, if I make this a bit bigger so we can properly see the folders. And you can see that it's just on the assets. And for that reason, I'm going to go into the scripts in here, right-click and create a new folder for the boss or boss system. Let's call it the POS system. Hit Enter and then backend the assets. Will drag this into the boss. There we go. And the boss click on walking. Is the script still there? So the new version of Unity is extremely valid anyways, hopefully yours doesn't take so long to compile and understand everything. So now let's double-click on the boardwalk and let's see what we have in here. As you can see, we don't have a mono behavior anymore. As you can see right here, Mano behavior is usually reserved to a script that will be attached to a game object. So something that will move. For example, in here, we don't have a motor behavior, we have a state machine behavior. And this is a script that is attached only to certain states. So Let's continue one, what do we have here? Just like we have the start and update on the mono behavior, we have the on-state Enter and the on-state update. We also have the on-state exit, on-state move and the on-state IQ, whatever that is. Anyways, we will not be focusing on the last two, so we can go ahead and delete them. And in here, I'm going to select all of these lines because they are commented out. And we can uncomment everything using the control shift or not, sorry, Control K, you. There we go. So make sure that to hold down Control and press K you at the same time. As you can see, we have a lot of errors. And that's because these lines are actually the comments. So just like in here we have over the update, the comment update is called every frame you can see in here, on-state enter is called when a transition starts, and on-state update is called each update and on exit is called on the transitions. And okay, Excellent. So now let's continue on. In here I'm going to create first of all, the transform for the layer to chase. Then I'm going to get. A rigid body 2D. So boss rigid body, no boss. Rigid body 2D. Or you know what? Let's not going to have to lead this whole game is a 2D game, so we won't need that and a vector three dot direction to move. And so just like regular enemies, we have the components of the boss walking and so on. So now that we have these, it's time for a bit of a challenge. And your challenge is going to be to find the IP layer and get the rigid body. So first of all, think of where we should be getting all the references. So usually we use the start, but now we don't have stopped. So where should we be? You think where we should be using a, where should we be getting all of our components? Then we'll need to find the player, obviously. Then we'll need to get the rigid body on the boss. And I'm going to give you a small hint. We will need to use the animator from the parameters. What do I mean by the animator from the parameters? Let me just show you that. So if we go in here, you can see that on the on-state enter, on state update and on-state exit, we have certain parameters in here, and one of them is the animator. So we have immediate access to the animator. That's what you're going to use an order to get the references. So back and forth to our challenge, this is a bit hard. Do your best, try different things, different tricks, make mistakes, do your best. There's no pressure on you. Pause the video right now and go do the challenge. O K will come back. So because we don't have start, we are going to use the on-state enter and away Allstate enter works is as soon as we enter into the state, we will set up the parameters and then we will be seeing what we want to do later on. For now, we're going to go ahead and use the player chase. What is the player Chase is going to be the game object dot find objects of type. Or actually where is it find object of type. And it's going to be the player controller. Note on top bullet the player controller. So find the object of type. I believe we've seen this before. And we used game object because we can just use game object without having the mono behavior up here. So we need the game object class. Then we get the final object of type. We get the player controller. And finally, we need to get the transport of that game object that we found. So now we have a reference to the player to chase. Next, we need the rigid bodies. So I'm going to say that the bosses rigid body is equal to the animator component. And we are going to get the rigid body 2D. And did we add a rigid body to the boss? Let's check that out and see if we did. If we click on the Skelly, not we didn't. So let's go ahead and add a rigid body 2D. There we go. So now we have a rigid body. And let's make sure that we freeze the rotation on this end. And we make sure that the grand scale to 0. There we go. Save that. If you don't want to be able to push your boss around, you can make sure to set it to either kinematic static or maybe even static. But I think he will not be able to move. Anyways, let's continue one now we need to make sure that the enemy or the boss actually starts moving. So where should we be doing that? Well, obviously it should be the opposite. So an update, I'm going to say that we have a vector two, which is the new position that we should be in. And it's going to be equal to the vector to the mist towards. And what should we be moving towards? It should be the boss dot, rigid body dot position. So this will be, as you can see right here. First of all, we have the current, then we have the target, then we have the distance max. So here we are going to go ahead and say that position rigid body. So of the bosses rigid body obviously. Then we are going to say that the player chase dot position is the target. And I'm going to create up here a public float speed. And this will be the speed at which we are going to be moving in. And then a public float back. Range, and this will be an attack range later on the tool use. So in here what we're going to do is we're going to say that we are going to move at the speed, but we are going to add to it Time dot fixed delta prime and y fixed delta time. And what's the difference? You can see in here, the interval in seconds at which physics and other fixed frames rate updates. So it's, it's almost the same as delta time, but it's fixed delta time. It just adds a bit of extra performance to the game. And for some reason I noticed when we use the regular delta time, we have some weird behavior because we are in a animator. Maybe that's the reason. I'm not 100% sure, but what I've found using fixed delta time, which is exactly like delta time, just fixed and more precise. So let's continue on. Finally, what do we want to do when we get into a certain range? We want to start attacking our player. So if the vector two dot distance between the layer to chase dot position and the rigid body. The boss rigid body dot position. If it's less than the attack range that we've created up here. While we were creating the speed. Then in here we are going to say that the animator that trigger, the set trigger and we are going to start attacking. So let's go back into our game. Let's create a transition between the walking and the attacking. And I transitioned between the attacking and the walking. And in here we're going to make sure that we don't have any extra time or not that actually let's skip that because sometimes might need it. So in here we are going to say that we want to attack. This will be the name of the trigger. The condition to transition from walking and to the attack is going to be the trigger attack. I'm going to paste it in here, save that. And now in here I'm going to see how are we going to get back. So first of all, we do, we go from The Walking, we start attacking, but then how do we get back? First of all, let's see how that will look. So I'm going to run the game and we are going to look at our player behavior. So as you can see, he appeared, but for some reason he is not moving and his slides away very easily. So let's go to the syllabus and let's see what the problem is in here. Maybe you should make him a bit dynamic or kinematic. Let's try this again. And again. He appears he starts walking. And when we are in range, as you can see, he is. There you go. Everything seems to be working. The only problem is that we are being rendered on top of him. So I'm going to go back. I'm going to check for these private and the boss layer. So this is your preference. Do you want to appear behind the boss, in front of the boss? But actually what we want is maybe to appear behind the boss. We don't want to be walking over the boss. So in the layers added, player, There we go. So now when we run the game, now there is an obvious problem in here that okay, So we are rendered behind the boss. That's good. He is fighting US, is doing one attack than another attack than walking EBIT than another attack. But here the problem is that he is still not walking towards us. That's because we didn't actually make the boss move. This was a mistake on my part. Rigid body on the bus. We can use the Move position. And in here we are going to sell it as the new position. So save that. You can see right here, Move position doesn't do, moves the rigid body to position, save that back. Now game, run the game. And now we should see that when the boss appears, he starts walking towards the layer and he starts hitting the player and walking towards him. But as you can see, he is not facing the right direction and he is stopping too close to the layer. That's because if we click on the syllabus on the walking excuse me, on the walking right here, was that you can see that the speed and the attack range to be maybe a bit bigger. So let's make it maybe five. Let's see how that looks. Run the game. And now he gets close, then you go, you can see he starts fighting us and he starts walking towards us. So that looks kind of good. I believe we don't want to be able to walk behind the boss. I don't like it a lot. So maybe this should not be a trigger after all. Maybe you should be able to just hit the boss on the head. It's not a huge deal if we can actually walk through this or you can make the, for example, the grid wall changed the wall to a certain level and make sure that the boss doesn't interact with wall, which I think is a really good idea. Maybe we'll test that out. Let's save that. But for now, everything seems to be working good. There is the problem of obviously the flipping of the enemy. And we have to do a couple of fixing for the movement, but we'll keep that for a later video. For now. I hope you enjoy it. I hope you are committing your changes and I'll see you in the next one.
89. Better Boss Movement : Welcome back my favor the game developers. In this video, we are going to be fixing a couple of bugs or inconveniences and our bosses movement. So now when we run the game and there are a couple of small tweaks that you might not notice. So for example, now, if we go away, we don't have the double attack. And we also can see that our enemy is being flipped every single time. So with that out of the way, let's not waste any more time and let's get to flipping. Oh, okay, So now that we have established the first type of walking and a pyruvate attacking. Next thing we're going to do is we're going to be fixing the boss movement and we're going to be moving forward with it throughout the entire boss state machine, SAP. So let's get started. The first thing I want to fix this, the double attack. What's the double attack? Well, if I run the game, I'm going to keep it as it is right here. As you can see, he comes close, he attacks once, twice. If I get away, he's still attacks one. So 12, this is the double attack. We don't want that to happen. So in order to avoid it, I'm going to open up the Visual Studio and here and on the on-state exit. So when we exit from the boss walk, I'm going to go ahead and access the animator. And I'm going to reset the trigger. So in here I'm going to say again attack. So what this will do is, you can see right here when we are in a certain distance, we trigger the attack. So we go into the attack. But then as soon as we exit from the walking, we are going to reset the trigger so we are no longer in the attack. So back in here, we no longer attack twice. So now if I run the game, the boss enemies should only attack once we had tax. So tax, we go away. There we go. You can see that he only attacks once. Great, Well that fixed. The next thing I would like to fix is the attacking animation. So you'll notice that he doesn't do the full two swings up and down. You're not the only one up and then he stops. Why is that? Well, because it's the exit time right here on the transition. So if I click on these, Kelly, and you'll notice here on the preview when I make the game run, he shoots once and then he goes back to walking, which is not something that we want. So instead what I'm going to do is I'm going to set the exit time to play about 90 percent of the move. Yep. There we go. Maybe even more, just a little bit more. So maybe 97 ish of the move. Let's see how that looks. And all of this needs to be calibrated based on how you want your game to feel. So there we go. We attack once, twice down and down. There we, then again, we start walking. Excellent. One more thing that is a little bit bothering in here is the exit time on the walking to the attack. So now we have everything set up. So now we should see a bit of a smoother way. There we go. So we attack, we walk, we attack, we walk, we attack, we walk a bit and we keep pushing towards the player. But obviously there is one thing still missing and that is that the enemy isn't looking in our direction, which is something I would call a huge problem because of the way our melee attack will be set up. So let's fix that. The first thing we're gonna do is obviously we are going to rotate the player just like we wrote it. Enemies. But where do we do this? We might want to do this and the walking. Well, what if we are attacking? We also want to be looking at the player and shouldn't we be also looking at the player and shooting? So this seems to be something that is more general and not state based. So we are going to create a script in here that is called the boss controller. And I'm going to wait for it to compile and add this boss controller to these Kelly boss game object in here. And in here, I'm going to first of all get a reference to the player to chase. So a private void. Void, void I had transformed. And the layer to chase. There we go, save that now and start. I'm going to go ahead and say that the player to chase is equal to the final object of type. The player controller. And I'm going to go ahead and access the transform on that. So now we have the player to chase ready to go. Now the next thing to do is to actually start flipping. The boss whenever the player goes from one side to the next of the enemy. So because we've done this already, I'm going to issue you it as a challenge. And your challenge is to rotate the boss in the right direction. So first of all, check for the position of the boss relative to the player's position. Remember, we'd get that through the transforms based on that, rotate the bus transport around the y-axis. So you'll need to flip 180 degrees. So it's similar to the way we were flipping the weapons, not just the NMI. You'll need to add the other way around, of course, obviously. And then call that method before walking the enemy. Test it out. Is there a problem? Why is there a problem? So you will obviously encounter a problem. No worries about that. Do your best. Find the flipping way, and I'll see you in just a bit. Okay, welcome back. So in the update, I'm going to check if the transform, the position dot x, which is that the boss, is greater than the layer to chase that position, the RX. And by the way, this is based on how the mass is initially looking. So if he was looking the other way around, We might have wanted to check this the other way around. So anyways, if the position of the boss is greater than the position of the player to chase, obviously on the x-axis, only. Then what we're going to do is in here we are going to get the transform dot position. And we are going to, excuse me, the Transform Rotate. Whereas it rotate. And then 0 F on the x-axis and 180 on the y-axis and 0 on the z-axis. And why is that? If we go back into our game, and if we get these Kelly boss, if we do a rotation right here, there we go, you can see that he rotates the other way around, which is exactly what we want. So we are going to also make sure that else if we transform that position, but this time it's the other way around. That means that the player is what happened. The player is the on the other way. Then we are going to make sure to flip the enemy back again. So there we go. Save that. So now if we go back in here, and what's the problem? So maybe we did a typo in here. Yep, there we go. So back in, again, we run the game. Let's see what happens. And there we go. So obviously there is a small problem. What the, what was the problem? Obviously, our boss enemy is having some kind of a seizure. And why is that happening? Well, because we are trying to flip. So notice what happens in here on the rotation, we are flipping and then we are flipping back. We are trying to flip the enemy, I mean the boss based on the players direction. But because we are calling it every single frame and because of the animation that makes us walk in a certain direction, we are having this constant flipping all the time. So what we're going to do is back in here, we are going to create a variable that will check if we have flipped or not. So in here, I'm going to create a public. And just to keep it public for now, obviously we will not keep up like forever. So if is flipped lipid and I'm going to set it to false at the beginning. So in here we're going to check if we have a flippant. That means is flipped is equal to false because this is the regular direction that we're looking at. If the player is on the left side, right here. So if the player is on the left side, we don't want to be flipped. And in here is flipped is equal to true. Sorry. For some reason, the tab isn't taken what I want. Visual Studio Community isn't keeping up with me. And then we are going to add it in here into our conditions. So if the player is on the left side and, and is flipped, so he is flipped, then we are going to flip him back to the other side. And in here, if he is not flipped, then we are going to flip him back. So I hope you understand what's happening in here. First of all, we have the is flipped at the beginning, it's false. So in here, this will not work only when the player is on the other side of the path and we have not flipped, then we'll flip. We'll set this to true, and this will allow us to not flip back again when we are obviously not needing to be flipped. So run the game. And you'll notice now that the enemy appears, he goes after us. Obviously the distance needs to be adjusted a bit. And then when we go to the other side, whereas these flipped, there we go. You can see that there we go. He is flipped. He is flipped. Okay. He is not flipped. He is flipped. He is not flipped. So there we go. Now we have butter, movement and butter and a mission transitions may be a better distance management would be good. So five I think is a lot, maybe 3.5 is a good number. I don't want the player or actually the enemy to be hitting V player. Maybe even three is good. I'll save that. We added a bit of transition. Take your time and play around with the transitions and make them perfect two-way, you would like to, with that out of the way, make sure to commit your changes. I hope you enjoy it and I'll see you in the next video where we will be setting up the actual mainly attack and start hurting our player and not just swinging MC. So see you there.
90. Setting Up Boss Attack: Welcome back, My favorite game developers. In this video, we are actually going to be melee attacking. So the way we're going to do this is we're going to create a method for the attacking. And here we are going to create an overlap circle around a certain point. We are going to make sure to call this defense system every time we swing a sword. So without any further or do, let me just show you what we've done in here. So the enemy gets up. He does once, damage twice, three times, and you notice that he only damages us when we actually get hit on the head with the sword. So let's not waste any more time. And let's get started. O k. So now let's go ahead and create the Malay attack. Obviously right now, the boss just swings around the gone, I mean, sorry the sword. He swings it around but he doesn't actually do any damage. So we are going to do an actual damage. So I'm going to first of all explain to you how to make a attack. So obviously there are many, many ways of creating melee attacks, but this is the way that we are going to be implementing it. Sorry for that. And it's the way that we will learn most out of it. So the first thing we'll do is we'll create a circle of damage to the player from a certain position. So every time the player sort is in this position in the animation, we will create a circle right here, or an overlapping circle, which you will know later on that we'll check if the player is inside the radius of the circle, he will get damaged. If he's not, if he gets away in time, you will not be damaged. So we'll make sure that we will use something called the physics 2D overlap circle whenever the pulse attacks. So remember physics to the overlap circle. And let's go ahead and create a couple of variables to do just that. We are going to be handling this attack right here from the script. So let's go ahead and get started. The first thing that we are going to do is create a serialized field. And let's go ahead and make this one private because we already know what it does. So ent damage amount and it's going to be equal to 20 as a default. Then we'll need to create a transform which will represent the point of attack. So point of attack. And why do we have a point of attack? Because if I take you back right here, you'll see that we have a certain middle and this will be the point of attack around which we will build our circle and check for the player inside of it. So we're going to obviously just divert create that game object. But before we do that, will obviously also need something called a radius, which is the attack radius. So not to be confused with the and attack range. So the attack range is the range at which we will start attacking. The attack radius is the radius in which the player gets damaged if he stays there. And then we are going to create finally a serialized field of type layer mask. And it's going to be called what is player and why do we call it like that? Well, I, since I started using Unity, all the forums, YouTube videos, other courses, and generally the Unity community always caused what is player whenever we want to set some kind of layer. So, and not only the player, sometimes it's called what is ground. So I, I am used to it. You can call it whatever you want, but this is the general consensus on this. And before we move on, we need a way to actually see that radius. So we're going to use the void onDraw gizmos selected. We've done this already. Nothing too a fancy in here. So gizmos color, color red. And let's just close this off. Hit Enter. And here we are going to go to the gizmos draw wire, sphere. We're sphere and it's going to be on the point of attack dot position. And it's going to be the attack radius as the radius. So there we go, The andro sphere, as you can see, a center and a radius. We just gave them the point of attack position, attack radius. So back in our game. And do we need to wait for anything to compile? Know that was fast. So I'm going to right-click and create an empty game object as a child of the boss. And we'll call it the point of attack. And on these Kelly boss down here, I'm going to add the point of attack. What is the player? It is the player and the attack radius. I'm just going to go into the scene to see what is going on. And there we go. Obviously, as we always do, this will be up to you. Where do you want to set your animation or, sorry, I was thinking of the animation. Where do you want to set the point of attack and how big do you want to make it? So I'm going to scroll down and see the attack. So in the attack, there we go. This is the point where we are going to attack, so exactly on here. And from this point we will be able to determine how much do we want to move the radius. And notice that because the onDraw gizmos is on the bus controller, that means that we increase in here just a little bit, just make it too. I think two is an appropriate number, but I'm going to go ahead and make it three. So just for testing purposes. So I'm going to move it a bit Skelly. And then if we see another attack in here, so we haven't, There we go. If the player is standing anywhere inside of this radius, he will get had. So without any further ado, let's save that and let's go and issue you a challenge because this time you are going to do the attack. First of all, you need to create a method and the boss controller make it public. Why? Because we need it somewhere else. Then we are going to check for the overlaps circle in the unity dogs. This will be your job. You'll need to go see how everything works. And you need to check if the player is inside the attack radius. If he is, then we will apply damage. Call this method using an event animation. So with that out of the way, remember, let me just show you something. It's called the physics to the overlap circle. And now pause the video and go ahead and do the Shalon. Oh, okay, welcome back. So in here I'm going to go ahead first of all and create a public void. And I'm going to call it the attack layer. Great. Now, what are we going to do in here? First of all, we will need to understand how the physics 2D overlap circle works. So let's say I am a clueless game developer. I have no idea how physics to the overlap circle works. So first of all, I just check in here. So the declaration, a public static, no need to worry about the static. We can do it without the static. I scroll down in here. I can see that it's a collider 2D overlap circle. We have a point, we have a radius, a layer mask, I mean depth, and a max depth. So this is for the z coordinates when we are working in 3D, I presume, or maybe something includes object O, objects that are in the z. So it also checks for the depth. We will not be needing this. If we scroll down, we can see that we can actually also get some kind of results in here. And we can also use contact photos being learned about contact filters in one of the videos, we get a, an array, but let's also scroll down. Okay, So that's it, that's all we need. We can also return lists. So this is what we need and this returns a collider, 2D collider overlapping the circle checks if a collider falls within the circular area. The circle redefines coordinates, etcetera, etcetera. And in here you can go more in-depth into the z coordinates. But anyways, this is what we need physics, the overlap circle back in our game. What do we want to do in here? First of all, we'll need to get the player that we are attacking. So I'm going to create a collider 2D. And it's going to be the player to attack. And I'm going to say that he is equal to the physics 2D dot overlap circle. And I'm going to say, what do we have in here? So first of all, we have the point. What's the point? Obviously, it's the point of attack, that position. Then we need the radius. So it's the attack radius. And then we need the what is Player because we only want to be hitting the player. Then in here we are going to check if the player to attack layer, layer. So, okay, so player to attack is different than null. So why do we say that he is different than null? If we look in here, Let's save that. That's first of all, print out the player to attack. So save that. And let's go and to regain, and let's add it to the event system. So where do we want this to be called? If I go into the attack in here, I swing the sword and just as he swings and sold, I'm going to apply the function. And which function should we apply? At that layer. And then again, when we swing down in here, we're going to add a, another option, sorry, I mean, another event. And we are going to attack the player. So save that, run the game. And let's see what we mean by null. So let him attack us. So there we go, doom player, do layer. There we go. If we swing, There we go. We can see that we have a null in here when we were outside. So because the way we are going to continue, because we are going to get the player to attack that get component though the player health handler. And what was the method than there? I believe it was damage the player and the amount of damage, the damage amount that we've created up here. So it seems that I hope you understand what we didn't. If we don't have or we don't check for the player is null. So we are going to access the player health handler, which does not exist, which will cause an error. So we have this extra step of safety. We check if the player to attack is different than null. If it is, then we attack or actually damage. If it's not, that means he is outside the radius. That means we don't. Kim and I'm going to keep this in here just for testing purposes. So let's save all of that. And let's go back into our game and here, and let's run and see what is going to happen. So the player gets close, he fights, and as you can see, he takes damage every single time. So I'm going to make the dunes player max help a bit bigger. Max health. Let's make it 500 for the testing purposes, run the game. How cool is that, that we can change the life every time we want, because we've created the game. So there we go, 202020. There we go. You can see that we get hit. We get it. We get hit every single time. We remove or get our lives reduced by 20. And you might be thinking, well, why aren't we getting hit on the swing down? Well, let me show you. So I tried to get hit. Second. Get hit. Okay, So that didn't work well because we are a bit invincible in a couple of seconds. So you can see, let me just try to do this. I know it's not working. So let me see if I can remove the sensibility time to 0. And that way we won't become invincible. You'll notice that we get hit the way up and on the way down, on the way up and on the way down. And as you can see, this is why we added a bit of invincibility to our player because this is not very fun to have getting damaged every single time. And if we keep getting damaged, eventually, the player is going to die to succumbed to his wounds. So you can see right here we have a couple of errors because of the on-state Enter. We are trying to find the player, but there is no layer. Now, we could either keep this. Obviously we should not keep this because this is an error. This might cause problems, might cause couple of lines to not be taken into account. So a vacua in here is to just check if he is available and so on and so forth. But let's not worry about that. Let's worry about the core mechanics, the small details we can work around later on. So with that said, I hope you enjoy it. I hope you are committing your changes every single video. I hope you left me a review because it helps me out a lot. And will that out of the way? In the next video, we are going to be taking our boss to the second stage, second or two, the angry stage.
91. Boss In Second Stage : Welcome back, My favorite game developers. In this video, we are going to make our boss angry. So as you can see, I've created a transition in here. I've created a trigger that we didn't use. And we can go from walking to get angry, too angry, walking too angry, attacking. So let's see how that looks in our game. I'm going to maximize on play. I'm going to go to the syllabus and make, nope, I mean, go to the angry walking and make the speed five, save that, and maximize on play, run the game. So now you should see the boss gets angry, he gets bigger, and now he walks much faster. And you'll notice that he does a lot more damage and we can get away. You can see that right now our health has been depleted. We tried to shoot him. He doesn't have a health system. What kind of game this is, and now we come to our death by dying. So with that out of the way, we go back to the main menu. We break a couple of glasses, we cry, and we try to exit the game, but it won't allow us. So let's not waste any more time and let's get started. Oh, okay, So now it's time to take our boss the next level. And by next level, I obviously mean to get him angry, not worry about the shooting. We will deal with that later on. We already know all the shooting mechanics. So I'm going to create a transition from the regular walking to the getting angry. And in here, I'm going to create a new trigger or actually a trigger. So I'm going to call it get angry. So when we are walking, we get angry and then we transition to the anger. So we become bigger, we become faster and we become stronger, I guess. Well, obviously we will become stronger. And then when we transition from the get angry, I mean, when we finish the angry transition, we will transition to the get angry. So let's look at that. We get angry. We finish the animation, breathe a bit, and then we will start walking back again. So excellent, all of this works perfectly fine. The next thing we're going to do is we'll create a transition from the angry walking to the angry attack and a transition back. And we're going to remove any exit time in here. And I'm going to make this exit time and here are around 90. How long was the previous one? So in here, 97. Okay, then 97. So when we are attacking, we attack once, once, twice, once, twice. Okay, Excellent. So we have everything set up properly and we are going to use the same trigger right here for the attack. Because, why not? We can do that, save all of that. And now we have the angry attack. But obviously when we are attacking, we want to have more damage. We want to have a bigger angry radius. So for that, I'm going to issue you a challenge to make the boss angry attack. So first of all, create a new method that handles the angry attacking of the boss. This attack should have a bigger range and a stronger attack. So you'll need to create variables just for that and add events into the angry at tech animation. So with that said, pause the video right now and go create the new angry attack. Hey, welcome back, my fellow game developers. Let me just show you what's going on in our discord server for a second. This is a person that I am going to help and as you can see, he sends me a bit of code. I sent him a bit of code back. We have a chat, we have the chats all the time in the general game development and so on. This is so active all the time. People are helping each other. I tried to help as much as I possibly can. So make sure to join the Discord. I should have talked about this earlier, but no worries about that. Let's just finish this video so I can go help mark out. So I'm going to scroll up in here. I'm going to create two new variables. The first one is going to be a serialized field in D-major and it's going to be the angry than average about. And let's just set it as maybe 30. So 30 or 40. So we doubled because we doubled the size, we double the amount of damage. And a serialized field for the float and the angry at the radius. And there we go. We save that. Let's go ahead and remove this. And then I'm going to scroll down in here. And, and by the way, if you want, you can draw the attack radius in here also. So the angry attack radius, I'm not going to do that. I don't think that's necessary. I'm just going to create a new method in here for the angry attack. And there is another philosophy to this, or another way actually enough, not philosophy, but you can call philosophy if you want to sound fancy, like I want right now, we can, instead of doing a another method, we can actually change the one we have in here, but I think it's more appropriate to create a new method just for the sake of not having any confusions. So angry at the back layer. And we are going to do exactly the same. So in here, another thing that we can do is perhaps, maybe just make this part of a general variable just for we don't have any redundant code, but we are just going to copy this, paste it in here, and we are going to remove the print in here. And in here. This was just for debugging purposes. I always recommend you use this all the debug dot log. And instead of the damage amount, we are going to use the angry damage amount. And instead of the attack radius, the angry attack radius, we save that. We go back into our game. We check the animations on the Skelly boss. The Angry, Angry attack, angry attack. So it's the first one, the slope and the scenes. We are attacking angrily and on the swing. There we go. So in here we add an event. We call the angry attack. And now we swing down on this right here. We add another event and we make the angry attack player. So save that. Let's also go in to the where Z disc Syllabus. Scroll down angry attack radius, this one was three, That's make this 16. Say that maybe even if it's not very logical when we have the soil, just imagine as if we have some kind of, I don't know, maybe some, some force field or something. I don't know. So now we save all of that. We run the game and we should see that now he gets angry and he does absolutely nothing because there is something that we forgot to do. If we go to the animator, we can see that angry walking doesn't have any behavior. So let's try to add the walking like that. Nope, it doesn't work at behavior. And we'll just the boss walk. There we go. So now we have an attack range and let's make it a bit bigger. So maybe four, because e is bigger and the speed becomes four, say that, run the game. And now we should see that he gets angry and now he is faster. So as you can see, there we go. This is attack. It's much faster at deals, a lot more damage and he is a bit quicker. Maybe we'll make him even more quick by adding a 50. Oh no, no, no, no, low-low. You. There we go. So as you can see, when the boss is angry, he is really angry obviously. But there is one problem. You might have noticed that it was not very hard to not notice is that we immediately go to the angular steak and this is not something that we want, but this is something that we will have more control of once we have a health system for our boss, which is something that we'll do in the next video. So make sure to commit your changes and I'll see you in the next one.
92. Adding Boss Health System : Welcome back, My favorite game developers. In this video, we are going to be making the layer, I mean the boss take damage. So when we run the game that's put on Skelly scroll down. You can see right now that he has a max boss health and a bus current health. So I should him once you'll notice he becomes four. Why does he become four? I mean, why does he become angry? Because halfway through his help, we are going to make him angry. So when his health as halfway he gets angry. We shoot him again. We should infer the last time. As you can see, he dies and he disappears and the end. So let's not waste any more time and Let's get started. Oh, case. So time to add a BRAF health to our boss. So let's go ahead and get started. The first thing that we are going to do is go from angry walking to dying. And we are going to go ahead and create a trigger in here called a die, and set the conditions in here to die. And then we are going to scroll down. And in here where we are walking to get angry, we're going to add a condition and set it as the get angry trigger 0 case. So with that out of the way, I think that's all that we had to set up before we get started. So I'm going to go inside of the boss script folder and right-click and create a new C Sharp script called the boss health handler. Hit Enter, wait for it to compile. And we'll drag it into these Kelly boss. Why are we doing it in here? Well, because dying is or the boss health handler or the entire health is part of the whole boss. It's not specified to a single state, just like we said, it's for the whole boss and it's going to be pretty simple. First of all, in here, I'm going to create a serialized field, which is going to be an integer and the boss, max health, and it's going to be equal to 500. And then we are going to create a public current health. And obviously we will change that later on. So boss, current health, save that. And then, and start. We're just going to say that the bosses current health is equal to the bosses max health. Correct? So now we need to create a method to allow us to give damage to our boss. So for that, I'm going to show it to you as a challenge because we've already done this. So make the boss take damage. First of all, you need to create the variable quality max health and the current health. Obviously, I did not prepare properly because I thought that you should have done this on your own. But there you go. An extra step from me either for you. Let's continue on and starts at the current health extra smart move by me, then create a method that allows the boss take damage based on a parameter. Finally, something new for you to do. When health is half the max health, we need to transition into the dying animation. Oops, I say dying. I meant to say, wait for the magic of editing. Hey, you Welcome back. So create a method that allows the boss to take damage when health is have the max health transition into the angry animation. So you know what to do when the heart is at 0, transition to the dying animation and finally destroy them both using an event system. So with all of that information, pause the video right now. Don't make any mistakes like me. And go ahead and do the challenge. Okay, welcome back. How did you get on with that? So in here I'm going to create a public void. The damage was an integer, the amount of damage. This is all pretty basic. I believe you already know how to do everything. So in here I'm going to say, I'm going to say that the bosses current health is minus equal the amount of damage. Then I'm going to say if the bosses current health as less than or equal to, less than or equal to the max boss health, bus, max health divided by two. So this means we are halfway into his health. Then we are going to get component, the animator. And he may talk. Thank you. And we are going to set the trigger. And we are going to get angry. So let's go into our animator and let's copy the get angry back in here. Paste it right here. There we go. So now we get angry. And then we are going to go ahead and say, if the boss current health is less than or equal to 0, then we are going to go ahead and do the same in here, but instead of getting angry, we are going to die. Excellent. So dy, so now we are going to create a method to die. So in here I'm going to say void, destroy, destroy the boss. And we are simply going to go ahead and destroy the game object. And where should we be calling this? Let's make this one public, just in case so we can access it from the event system. Whereas the event system, if I click on these, Kelly, we go to the animations, we die. What do we have in here? Let's see, in the scenes, there we go. So we, we have this puddle of ABA, no bone blood or something. And we should make this one a bit red obviously. And maybe at this point, just keep it a couple of seconds. And then we are going to add an event system. Or maybe we know what. Let's Move it to second two. And in here, we destroy the boss. So in the animation, we die and then we destroy the boss. Excellent, save all of that. Let's see what else do we have? Oh, so obviously we need to also trigger that take damage. Where do we call the trip take damage? Well, if we go into the layer, have bullet. If I open this up and find the player, then I say Player health bullet. I meant the player bullet controller. In here. We are going to check if we have the enemy, then we are going to damage the enemy. Let's see, do we have a layer for the boss? We don't have a lawyer for the boss, so let's go ahead and edit the layers. Create a boss layer, or you can create a boss tag. That's also something we can do. Or maybe we do have a boss tag note we don't have Abel's dark, so let's go ahead and edit. Create a tags. Boss DAG. There we go. So now if we go in here, so now, now this is the perfect example for you to understand the difference between a tag and a layer. So remember where. Okay, So I don't even remember maybe in the spikes in here, I told you that we can avoid using the compare tag player. We can immediately say that spikes are some kind of damage layer, so they are on the Do we have anything, the pickups or anythings, for example, the backups. So we can avoid using the a tag to compare it to the player, for example, to make sure that only the layer carries it. So only the player can interact with the pickups through layers. We don't need to check for a compared tag on the entrepreneur. Enter. Remember I talked about this, but now in the a bullet controller, we can say that the bullet only interact with the boss, but that is not enough because we want to also check else. If there is a collision.com tag with a boss, then we need to call a totally different component or totally different yes, component. So back in here, let's see, is the syllabus. Oh, we didn't create the tag sorting layer. No, no. Why do we have to sorting layers for the boss? The tag is so boss. Copy that. So now we have no sorry, we need to set the boss tag. There we go. We save that. Now back in our game, we check for the boss. And if it is the boss, then we are going to go ahead and get the collision that get component, the boss health handler. And from here we are going to take damage and it's going to be the bullet speed. Nope, the damage amount. So damage amount, save that. Now we have everything set up, so I'm really happy that this came up. This is a way for you to demonstrate. We could have said that the we have a bullet layer, a player bullet layer, and it only interacts with the boss and the enemy. But if we hit an enemy, the boss isn't just any enemy. He is also a boss health handler. So we'll need to access the health and the boss. If we tried to use this one, it will not work. It will cause an error so well that although the way save that, you can also go ahead and copy these two lines and we can set them in here. So obviously this is redundant code. So what we can do is right-click and here quick actions and refactoring and we can say create blood effect, extract the method, call it instantiate blood effect. And I write instantiate correctly is Dan Shi Da. Yep, there we go. Apply the changes and in here we are going to instantiate the blood effect. Save that. So now back in, our game shouldn't be working perfectly. So if I click on this caliber, scroll down and the boss Mac South, Let's make it 20. Uh, no, no, not 20, maybe 40, just so we can see the transitions properly. We run the game. So now the boss comes up. We shoot him once, and I don't want to maximize on play on again. Who should the boss? Where Z? So we should the boss. Let's scroll down. What is his health current health wise, the books. So such a new bullet. And okay, so this error is nothing also because the crystal has some kind of damage. Okay, so I'm going to make this four instead of 40. Know what, Let's make it eight. Run the game. The system is very poor, so we should at once, there we go, we scroll down, it's at six. We should, uh, twice. There we go. We can see that he gets angry and now he starts running much faster. So we shoot him again. We should him for the last time. And there we go. He goes into the bottle and he dies. But there is something a bit wrong but I did not, like you might have not seen it because I didn't do it. But when we shoot him once, shoot him twice, he is getting angry. I can still shoot him. And there you go. You can see that he still gets shot and dies immediately after he transitions to the walking. So in the next video, we are going to make sure that he is invincible while he is getting angry. And just for the sake of remembering, I'm going to add a comment in here and make, you know what, let's immediately right. If getting angry, this should not work. And this is just a demonstration of how sometimes you might want to add something in the future, just so you don't forget it. Add a comment, make sure it works. I hope you enjoyed. This was a really nice video it thought as the important lesson of the difference between tags and layers, because sometimes it's hard to explain, but this was the perfect place to learn it. So I hope you enjoy it. I hope you are committing your changes and I'll see you in the next one.
93. Adding Boss Health Bar : Welcome back, My favorite game developers. In this video, as you can see, we've added a little image, we've added a bit of text, and we've added a big health bar to represent the health of our boss. So now when we run the game, when the boss appears, we shoot him. You can see that his life depletes. When we shoot him again, he's angry. And if we shoot him while he's angry, you'll notice that he cannot take any damage. And this is a mechanic of every boss and every single game. So I shoot him again, I showed him again, the Health Bot disappears, the boss dies. And let's not waste any more time with a very long video, but leave me, it's important, and this is what happens when we are creating your eyes. So let's get started. Okay, so now we have everything working kind of good. We are able to damage the boss. We are able to kill him, we are able to remove him, but we do not have any clue of where his health is add. So what we're going to do is we're going to create a helper for the boss. So I'm going to go up in here. And in this video actually, I think there is something you can choose for yourself. So there are two types of health bars that you can add to the boss. One of them will be, for example, if you want the Health Bar to always be moving with the boss. But I personally think that is not the best idea because you'd want to have your regular enemies have that health bar on top of their heads. So maybe having a boss health bar is better to be kind of like Dark Souls, either be on the bottom or at the top. And because we already have the health and the money and the weapons on the bottom to display for the player. Then I'm going to create it up here at the top. So I'm going to open up the UI canvas. I'm going to open up the health, I'm going to get the health slider. And the, we know what cuts not used the health effects for the boss. I'm going to duplicate it. And I'm going to move it outside. And I'll need to open the prefabs and I'll need to move the, where is it? Health, slider and outside right here. Save that back into our game. Now we have a health slider 1, which is also an I by accident. Remove the actual have slider yep. Open brief up. So sorry for that. Should have moved the other health slider. So there we go. This one is in here. And then I'm going to duplicate this one. And I'm going to move this one outside of the canvas. And the one that we have greater than here, we can simply delete. So where is the health slider? There we go. This is the one that we need. Let's see, move this up. This will be the boss. Have slider. There we go. And I'm just going to go ahead and maybe create an empty game object right on here, set it outside. So the boss slide, I know this game object to the campus. False health. And then add the boss have slider under the boss health. So this is very annoying whenever you have a prefab by new want to change it, it's extremely annoying. So even if I move this one, I still need to change it right here. So US health, slider and then the UI canvas and empty game object, which is the boss health. Whereas the boss have. And let's move the slider to the boss Health. And let's set the position to be at 0, 0. And there we go. So now we have the boss slider. We are working in the prefab. So in here I also want to make this a bit bigger. So if I zoom in and let's see what we have in here. Make this bigger on the side. Make this bigger on the site. Also. Move it up a bit. And I'm just going to go ahead. And if you want, you can go ahead and do it yourself. Fill in everything. Let's see all the little adjustments. This will take a bit of fine whenever you are, I think you are. This is why the videos where we have you are are longer than usual. So there we go. I think this is good enough. Yep, seems good to me. And finally, I want to add a bit of an image. So I'm going to go into UI image. And this image will have the boss image. And we can also add in here the boss name. So I'm going to add a text Mesh probe. And this will be Kelly. Make it bold, make it in the middle. Make it bold, make it a robotic. And let's No, no, no. And let's maybe move it. You either under or over. It doesn't matter. Choose your own way of creating this. I'll make it auto size. And there we go. So Kelly, there we go, Skelly and here the image will represent the boss. So I'm going to find in the sprites, the z, whereas these candy bars, there we go. So image, Skelly and native set to native size. Let's preserve aspect ratio. And let's make it look much, much smaller. And maybe set it in here and know what, maybe this is not the best way to do this. Maybe you can just keep the head so you know what, let me just delete this or wait a second and I'm going to edit this photo. Okay, welcome back. So all that I did is just edit this photo and you'll probably have it in your resources. So I'm going to add it in here. And the buses image will be the skeleton had. So there we go. Now we have this. I know this is not much, it doesn't really make the game much better, but it just adds a bit of finance. So you know that this health bar belongs to the Skelly boss and you have a small image of his head. So now we have a good representation. So now if I go back from the prefab and for some reason it's not in its place. We have the boss health. Let's just delete this. Keep this both health. And for some reason it wasn't in its place. I'm going to go Slider and set the position 0, 0. And now we have it properly. And let's adjust the position a bit. And there we go. Now we have the boths. Skelly health. Let's just move it a bit to the left. And I think it's pretty good right now. So this is the help we can see on the boss if you want. We can also change the image of the fill. So I don't want it to be red. Maybe I want it to have it in the sprites. Let's see. You have your eye. You are you, are you I elements. I was pressing the EU, but I did not get that. Okay, so I'm going to go into the UI elements and get the blue one. So we'll use the blue one. Image. The blue, no, no, no, no, not this one. Fill area. The fill the blue slider. Okay. So now we have the blue slider moving up and down. And as I've said, this whole section or this whole video, you need to do your own research. You need to create your own UI, and you need to do things the way you would like them to be. Oh, okay. So I think this is good enough. I'm not sure if it is good enough. And there is a bit of the edges are not very smooth, but no worries about that as long as it represents things properly. So now we have the health. The next thing we need to do is to have control over. So I'm going to go into the bosses health, I'm going to go into the script. And in the UI or nano actually in the boss. There we go. Right-click create C-sharp script, and this will be the boss Health Bar at Enter. Wait for it to compile. And any day now we have the boss helpless add it to the boss health in here that's opened up the boss Health Bar. And what do we need to have in here? Well, obviously we want a reference to the slider. So serialized field slider, we need to have a UI engine, Unity engine dot u i. So now we can have the slider, then we have the boss health slider set then in here. So the first thing we do as soon as we start as we need to set the max value, obviously. So the boss have slider dot max value is equal to find objects of type. And it's going to be the boss health handler. And from the boss health handler, we need to get the max health. So we're going to go into the boss health handler. And in here create a small method which is going to be a public int. Get max health, or get boss max health. Open up the brackets, return Max, have. We go save that. Back in here. Get boss, max, health. We save that. Now we're going to slide into the Update, get it slide because we are using a slider or how often waiting on a slider. So an update we are going to all the time get the hub loss have slider dot value and it's going to be equal to find objects of type, health handler, boss, health handler. And we are going to get the current. So I'm going to duplicate this one. Get boss, current health, current health, save that. So this is just a return method of integer. Nothing too complicated. So get boss current health all the time. And now let's go ahead and assign the slider. So open this up. The slider and work is the slider. This one is the sliders save all of that. Let's make this a bit bigger, run the game. So now we should see the health slider move the enemies both so you shoot him. There we go. So as you can see, his health gets smaller and he gets angry right about the halfway point of our game. Finally, when we shoot them for the last time, he dies. But we still have this health bark. And not only that, we have this small error appearing in here, well actually not a small error, a constant error. So I'm going to collapse it. Double-click in here and see what the problem is. Find objects of type. So this is a null reference. Null reference means that we are trying to get a reference to something that does not exist or the return is not. So in here we have the boss health handler. And obviously when we die, we destroy the boss. And when we destroy the boss, the boss health handler goals William. So we need to find a solution to that, and that is going to be your challenge. Your challenge is to remove the Health Bar and make the boss invincible. Maybe your challenge isn't to fix the error. Anyways, let's see what we have in here. First of all, when the boss dies, make sure that the health bar is removed and stop the error. You'll need to obviously remove the Health Bar and remove the image and the picture. So we don't no longer have to call that every single time. Then you'll need to make sure that when the bus is going into the angry state, we want to make him invincible. So when he is getting angry, we don't want to be able to shoot him. This is first of all, not fair to the boss because he cannot attack us or move when he is getting angry. Second of all, because in every single game when a boss transitions into the second phase, you cannot hit him. This is something standard and all games. So I'm going to give you a hint of how to do the last part. You'll need to add behavior to the get anger state. And as I told you, we need to fix the problem of the error. While obviously when we actually disable the half bark at no longer calls for the players held the bosses health handler, so we no longer have the arrow. So with that information, pause the video right now and go do the challenge. So, okay, welcome back. So the first thing that we're going to do is we're going to go into the update and here. And we're going to check if the boss health slider dot value is less than or equal to 0, that means that we are going to destroy the entire game object. Now we, we don't have to destroy the game object. We can maybe set the game object to active, false, or set it to inactive. But I'm just going to destroy it just so we make sure we don't have anything anymore. So save that. And then we are going to go into the boss health handler. And in here we are going to create a variable. And that variable is going to be a public bool and is in invincible. And it's going to be set to false at the beginning or you know what? Let's not make it public. Let's make it a private. And we'll create a method in here that is going to be public, int or no, Actually, sorry, void. Set. The boss. Even subtle. And it's going to take in a parameter which is a Boolean. And it's going to be is Skelly or normal not that is boss in a given symbol. And then in here we are going to say that is invincible is equal to, is boss invincible. Save that. And in here, before we take damage, as you can see, we have the comment if getting angry, this should not work. So we're going to say, if is invincible, then we are going to help, then we are going to just return. So return means. When we do return, just like we have the return values and here once we get to the return, this entire method stops. So anything under this line of code. So in here, anything that we write will not be registered after the return. And this is exactly what we do in here. So when we take damage in here, we check if he is invincible. We open this one up. Sorry. We enter into the condition, we execute the return and none of these lines get executed. So we basically return a value, and because this is a void, we can return anything. If it was an integer, not a void, we could just return 0. So I'm going to remove this. I'm going to save all of this. And now how are we actually going to be setting the is invincible? I'm going to go back in here. I had this one running. And let's this out. First of all, the Health Bar. So Shruti, should the Shruti. Surely, there we go. And when he finishes this animation, he will die. And you can see that we no longer have a health bar and we no longer have any errors. Excellent. Now the next thing to do is to go into the animator and to the getting angry state. And why is this not becoming smaller? Okay, so in the end, get angry, we're going to add a behavior. We're going to call it the boss, underscore, get angry. New script, create an ad. And obviously it will be created in the assets in here, the boss get angry. I'm going to move it into the scripts Boss folder for file or whatever you wanna call it. So was, there we go. So both get angry. Open this one up. As we can see, the last two we will not need. And these ones will be control KU. Control key, you can control KU. So in here, what should we be doing? Where should we be making sure that the boss is invincible or setting it up? Well, I believe we should first of all, set it to true when we enter into the state. So I'm going to access the animator component. So now we have access to the boss health handler. And in here we are going to set the boss invincibility to true. And then when we exit, I'm going to duplicate this line and move it down. And when we exit the state, then we again can get hit. So as you can see, right here, we've created the set boss invincible. We have a parameter that we need to send it. We access it using the component of the boss health handler, which is also present with the animator. So we have both components on the same game object. That's why we can access the animator, get a component which is the half Handler said the boss invincibility to true. And in here, when we said is invincible to whatever the boss, invincible whatever the parameter. If it is true, then it returns. If it's false, then we do not return. The boss takes damage. We save that. We go back into our game. Who were. So up here, we run the game. We should the bus once, twice. And you can see right here that while he is angry, he does not get damaged. So I've shot him three to four times. He does not get damaged. Finally, I shoot him, he dies. And there we go. We'd have no errors except for this one which is I believe something that isn't any of our concern, something about the panel. We have this OK time. So we're going to go out, we're going to make sure to stage all of our files and now created a health bar. So I hope you enjoyed, excuse me for the long video, but this is what happens when we are creating UI. This is all based on your preference, how you want your game to look. And I'll see you in the next video. And I believe the final video where we will make the boss actually shoot after a certain amount of time. So see you then.
94. Adding The Ability To Shoot : Welcome back, my fellow game developers. I know at this point you're probably saying Michael, every single video you say this is the longest video, but this will be the longest video. I hope you are excited about that or not. I don't know, but this video will require a lot of tweaking. I did make a couple of mistakes and then fix them on the spot in front of you. So you always know that I'm transparent as much as I can, so I'm not going to waste your time anymore. We're going to get started. Okay, so now we have a health bar. We have health, we have mainly attacking, we have walking, we have state machine, we have everything for our boss, but we also need to add a bit of angry and bracket or shooting. So let's go ahead and do that. The first thing that we need to do is we need to actually create points from which our boss will be shooting. And I'm going to zoom in on the boss. And the way the shooting is going to work is we're going to have eight points around the boss. Four will be the regular shooting, and eight will be for the angry shooting. When he gets angry, he shoots more. That's logical. Let's go ahead and do that. Right-click in here, create an empty shooting points. And in here I'm going to create the first one, which is going to be 0.1. And let's go ahead and move it up here or right here to his right. Duplicate this one. And obviously this will not be very convenient. So I'm going to call this. So 0.1.2, I'm going to put it on its head. 0.3, move it down in here. And 0.4, move it right here. Now when we will be creating our shooting or the mosses bullet, it will move in the direction of the bullets, right? So we will need to rotate all of these and later on, but for now, let's just duplicate the four. Set it in here. Maybe around this point almost. And then again in here, 678. So there we go. Now we have eight points around our boss. Now, the next thing we need to do as we need to go ahead and create the connections in here. So from the walking, a transition to the shooting, and any transition from the shooting to the walking. And we're going to add a trigger in here, which is going to be the shoot. And then up here we're going to do the same. So make transition, may transition. Let's have no exit time. And yeah, keep the transition duration as it has. No worries about that. That's in here also have no exit time, transition duration, the hour. So we forgot to also add a condition in here. So the condition is they should trigger. And here the condition as the oh, shoot trigger. And then going back, we I believe we don't need to have an exit time. And in here also, I believe we won't have an exit time, but we will want to play the entire animation and then go back. Or maybe we will see, we will see what happens as we create the gain, what we will need. Now, the next obvious step is to create the buses bullet. So I'm going to right-click inside of the Boss folder. And in here I'm going to create the boss. Bullet. Bullets hit Enter. Wait for the script to compile. And let's double-click and open it up. And what are we going to do in here while we are going to be doing the obvious? So the first thing, we'll obviously be a float for the speed. And then we are going to have a private vector 2 or vector 3 actually for the bullet direction. Then we will have 14 to the thalamic damage. This should be an integer. Okay, great. Now in the start we are going to set the direction of the bullet and it's going to be blood direction equals transform dot, right? So right means if we look in here, the red axis on the transform, if we go up. So maybe I did that too fast. So the red axis of the transform and the world space. So back in the scene. And notice that this one, this is the red axis. For example, the to the bullet will fly to the right. So what we'll need to do as we need to rotate it like that, I believe. So. There we go. We can see that we have it will set it to 90 degrees. So the third to a 180 degrees said the point on the bottom to maybe 90 degrees? No, no, not 90 degrees minus 90 degrees. And we have this point right here. What should we set it? Let's see. So if you're not good path, this is perfect. There we go. So 45, I believe. Yeah, 45 is good for the six. That should be minus 45. There we go. Let's change it. But so you can play around, you can do whatever you want, and however you want. If you want, you can set all the shooting positions to be in one direction. Maybe like that around like that. Yeah, sure. Why not? So there we go. So it should be a 135. And why is it 135? Well, because I've added 90 degrees and then added a 45. This is one hundred, ten hundred goes on. Now we have a perfect angle and this would be 135. Yep, There we go. So now we have really good tooling points from our boss. So we're going to save that. We're going to make this smaller. And now we're going to go back into our script and see what else we need to do in here, an update. I'm going to go ahead and get the transform dot position and plus equals the bullet direction times the speed. And obviously Time.deltaTime. There we go. So Time.deltaTime makes sure that even though this is called every single frame, we are detaching it using the Time.deltaTime. The next thing we're going to do, we're going to check if we don't have the boss in our hierarchy. So if the boss controller dot instance to have an instance, we don't have an instance, so we're going to go ahead and find most object of type. Or maybe we should create an instance. I think it's better, or we can get a reference to the boss, which is also a good idea. But you know what? Let's just find the boss and the world. So fine. Object of type, boss controller. And if he is active and game object and is active, active in hierarchy. So if he's not active in the hierarchy, then we want to destroy all the bullets that are already flying. Destroy game objects. So the bolus get destroyed once the boss dies, we don't want to have the bullets keep client. Or if you want, we can keep the bullets flying in the world. It depends on your preferences. Now the next thing we want to do is we want to handle the way the bullets will interact with the world. And obviously we haven't created the bullets yet. But I'm pretty certain that at this point you already know and have all the knowledge. So I'm going to create an entrepreneur enter to the, and inside of this Entrepreneur Center. I'm going to, well, I wanted to say that I wanted to check for the player tag, but as we know, we will already make sure that the bullets only collide with a player and nothing else. So collision dot get component. And we're going to check for the player health handler. And we're going to take damage or damage player. And in this damage player we are going to bullet damage centered the bullet damage that we haven't here, we can double-click and make sure that is what we are working with. And then what should we be doing? Well, I believe we should destroy the game object. But the problem in here that I don't like is that if we hit anything else, it will not interact with it. So the boat will keep on flying forever. So again, we will have to check for the collision. So if collision.com paired tag and it's the layer, and then we are going to do this. And whenever we only have one line of code under the condition, we can avoid using the two squiggly lines. And why did I choose again to create the tag and not just keep it as it was because the bullet flies off. We wanted to hit a wall to get destroyed in any case, because we don't want the bullet to always keep flying in the world and have a lot of bullets and the hierarchy that will just take up space and hinder the performance of our machine. So finally, what else should we be doing? I believe this is everything, and I believe this is everything. So let's go and create our bullet. So where is our bullets in the prefab? We have bullets, we have an AMI bullets or no, we don't want to replicate the enemy bullets. Let's go into, you know, I go. Pullets player and still rifle, shot gun. Let's go ahead and duplicate the shotgun called the S1, the boss bullet at Enter. And let's see what shall we use in here that see the sprites. We can use one of these and maybe use the big, huge red one. Yeah, Sure. Why not? Let's use the big huge red one. Let's see how that looks in the world. So back in the Boss prefab? Or is it prefer bullets player? Let's move it to outside. So in here we have the boss bullet. Let's put it in the scene. There we go. This is it. What should we be DO? Bullets, of course, it's on the bullets layer. Let's see what else do we have? What shall we be doing in here? I think the bullet is just a little bit smaller. Scale one on the x also. And instead of having less change, maybe the collider, how? Because the collider not, it's perfect. Let's see the player bullet damage. Obviously, we will remove the component and we're going to go ahead and add our own, which is the boss bullet controller. There we go. So now we have the boss bullet controller, the damage amount, the point of attack. Note this is a boss control or not. I was wondering like what, what's wrong with this boss bullet? Boss bullets. There we go. So now we have speed which should be animal-like five, bullet damage will be, can save that. And when we do create a new prefab, don't worry, this one will be removed or we can just apply the changes to the boss bullet. So back in our possibility in here, if we scroll down and choose this one actually the boss, but you can apply all. And now we have the bullet regularly working. So I guess this is a good enough bullet for us. So I'm going to delete the boss bullet. Now we have it in our hierarchy. We have the script, we have the collider, we have a rigid body which is important, which save all of that. And let's see what else do we need to do? Well will lead to issue you a challenge. And your challenge is to make the boss shoot. So first of all, create a reference to the shooting points and the angry shooting points. So you'll need to create two references in here. And this is all obviously going to happen. And the boss controller, then you'll need to get a reference to the bosses bullet. Obviously, you'll need to create a method that loops through all the points using a foreach loop and instantiate the bullets. Then you'll need to create another method for the angry shooting. And you'll need to use the events to call the methods and the animations so that information, pause the video right now, all of this will need to be done and the boss controller and go do the challenge. Oh, okay, welcome back. So where are we boss, boss controller up here we are going to go ahead and create a serialized field of the trans form. This will be an array obviously for the shooting points. Then we are going to create a serialized field for the transform, also, the angry shooting points. And then we are going to create a serialized field for the game object, which is the boss bullet. And I hope you did the challenge. I hope it wasn't too hard at this point, you should be pretty well knowledgeable with everything that we're doing. So nothing is really knew. That's why I'm just going through the motion and doing everything really fast, not explaining. So I'm pretty sure you already know most of the things that we've done in here. Let's continue on. What else do we need to do? Well, we need to create the method that we want. So in here, under the angular attacking player, I'm going to create a public void shooting player. And in here I'm going to create a for each loop, or a for each loop that will loop through all the transformed point. And shooting player. What? I'm shooting points. In shooting points. And in here we are going to instantiate the boss bullet on the transform dot position transform rotation. So we need to make sure that we have the same rotation as we had with the actual shooting point that is instantiating. Then we'll need to create a public void. Angry shooting. Let me just copy this one and add angry too. It always add the angry, angry. And I know this video is long. I wanted to separate these into two videos. One for the Basel at 14, the regular shooting. But actually, I just thought there's no point to it creating just a postulate. A very simple, we already done that. So I wanted to create two videos at the same time. So angry shooting points. There we go. We save that. Now any or you can add an extra mechanic and I do recommend that you do that. It's pretty simple. Instead of having these shooting points and angry shooting points, you can just create one huge or one big, only the angry shooting points. And when we are regularly shooting instead of a for each, you can create a for loop, go through for random points and instantiate bullets from them. This will be maybe a cool game mechanic. I don't know if you want to do that. Go ahead be my guest and long. And I didn't do that because I actually want to have the direction b and these four, or you can do that, doesn't matter. This is your game at your own things to it. So in the syllabus I'm going to scroll down. And where do we have it? Okay, so shooting points, open this up. It's me. Just lock the scale it down, choose the first four. And these are the regular shooting points and then everything else is the angry shooting points. This is the boss bullet. And save that. And finally, we need to go to the animations in the shooting. So shooting, where should we be shooting? Let's see, and maybe in here. So at this position, we add an event. Let's just unlock this. What we do shooting player. Then we become smaller, bigger. Maybe at this point again, we had an event should player. And then we go back maybe one last time, and here we shoot the player. So we should play or three times. Great. So save that. Now, back in our anger shooting, so angry shooting, we become bigger. We should have more shots right here. So angry shooting player, become bigger, smaller, bigger. Why don't we become bigger? And on this point, I don't know, but obviously we made a small mistake in here, but no worries. Let's make this the angular shooting player bigger, smaller. And other event. Angular shooting player bigger, smaller. I think at this point it's good. No worries about the animation. We didn't make it perfect. Angry shooting player. We save all of that. Now we have everything set up. The last thing that we need to do is we need to actually go into that shooting. And how do we want to have this mechanic? While I think the best way to do it. As let's say the bosses walking, walking, walking, he can't get to the player. The player keeps running away. And after a certain amount of time, he just starts shooting at the player. So we're going to do exactly that. I'm going to open the boss walk. And in here I'm going to create some kind of countdown or some kind of shock counter. And why do we need to create a shot counter? Well, why not a mono behavior? Well, because when you are in a state machine behavior, you don't have dicey a co-routine. I meant why can't we create a whole routine? You can create a call within, because this is not a mono behavior, we can only create equality and side of a mono behavior. So for that reason in here, I'm going to create a private float shot counter and a serialized field for the photo shoot. I'm save that. And then I'm going to go into the on-state update. And in here I'm going to say Should time as minus equal, minus equal the time dot fixed delta time. Was the problem in here. Also. Minus equal, not equal minus, sorry. And then in here I'm going to say if the show time as less than or equal to 0, then we are going to go ahead into the animator trigger and copy the shoot trucker. Copy this should trigger, put it in here, close this down, save all of this. I believe we need a way to go back. So in here we need a way to go back. So we'll add an exit time. And we'll make sure that we play the entire animation to the 97 percent. So let's see how that looks in the preview. And there we go. We can see we play, we should, we should we issued and then we go back to walking. Okay, I think that's good enough. And in here we will also have an exit time at the 97 97 percent. I have that. I think on the on-state exit, we will also need to reset the shoot. So save that. And I think that's it. I believe this is all that we need to do. So let's see. In The Walking in here, what's the short time? Maybe after two seconds of walking. And if we go to the angry walking, after which time, maybe after three seconds of walking. So these are just arbitrary numbers. I haven't thought of if this is good or not. So I'm going to make this bigger. And as you can see, there is something wrong. First of all, we have a bullet in here which is not good. So where is it, Where is it? Whereas the scenes, this bullet that will help, Let's close Dui. What's that bullet actually doing in here? I have no clue. Why can't I selected, hey, welcome back. So for some reason I cannot find what the hell this is. Let's not worry about that. What we need to worry about is to change the bullets layer to the enemy bullet. Save that. And now let's see how that looks. When the ball shoots us are really can't find what this is. So he walks around, he starts shooting and it's very bad. Okay, great. So obviously we have something not working properly. Hey, welcome back. A huge mistake that I made. Instead of using the transform that position, I shouldn't have used the point which is right here. And the point which is right here. Sorry for that. This is very bad, doesn't, it doesn't look good. But there we go. Now we fixed all the problems. This should work right now. So back in our game, we should see that now when the boss shoots, there we go. 123. But for some reason the bullet that goes up isn't shooting a properly. So what is the problem? There we go, we even get shot. Let's try to see what the problem is when he shoots up. So upwards there is a problem. And the way I only realized how the last one worked like for example, look, we can use frame-by-frame. He gets bigger 0. Notice what happened. So let's remove the pause. And let's see what's happening when he shoots. You can see that the bullet comes out, which is the boss bullets, see, okay, so this one, this one comes out. And as soon as it comes out for some reason it just disappears. So what's the problem in here? Let's see, Maybe it's because of the collider. It may be. So let's look at the point, obviously this 0.2 and the collider. But it shouldn't be because of the collider because, well, obviously the enemy bullet does not interact with the boss or does it come? So I've noticed that when I move the point to up, this does not create a problem. So my suspicion is that the boss bullet, which is on the enemy billet, is interacting with this Kali boss, which is on the layer default. So what I'm going to do is I'm going to create a layer for the boss. So in the layers in here, create a boss Skelly layer. And then on the boss, it's the enemy bullets. So I'm going to go into the Edit, Project Settings, Physics 2D, scroll down and make sure that it does not interact with the boss. Skull. Moves, boost Skelly, boost scaly. Let's go back to layers, edit layers and not boost Skelly basket. So Muschelli does not interact with both Skelly that work. Back in here. Said the boss, Kelly. Yes, Change all children. We save that. We go back and the project settings. And the third is x to the and the bus schedule does not interact with Boss Kelly, and does not interact with the player. But we can actually move all of these honestly, but we'll just keep them. And now we should see that all the bullets, all the points fire properly, even if that point is inside of the box collider of the player, the enemy. So now we should this guy, as you can see, he shoots every two minutes to seconds or whatever it is. So we look here. We go shoot, True? True. Go in there. And let's try to shoot him and make him angry. So he is at 50 percent health. So there is a problem with the animation. So the problem is in the boss walk in here, it's the shot counter. And when the shot counter gets set to less than or equal to 0, we then need to reset the shot counter to be equal to the shot time to time. Save that. And there we go. Everything should be working properly. Now. We then again run the game. Hopefully this will be the last mistake that we make. We shoot, there we go. We finished the shooting animation. We walk a little bit, and then we go back to shooting. And is it working? No, I don't think it's working properly. Something is wrong. Okay. Welcome back. So I wasn't sure what the problem was. It turns out the shot counter was very weird. So when we were resetting the shot counter in here, whenever we transitioned into the shoot, the problem was that it only counted down when we actually were in that state. So we only count down when we are on state update of the boss walk. So the better solution is to just move the shot counter reset, which is just setting the shot counter to shoot time. Nothing the on-state update but on the on-state exit. So now the shock counter gets reset every time we actually go into another state. So in here, when we run the game, you'll see that now the boss walks up, he shoots, you'll see the shot count. And in here, there you go. Five goes back to 0. So there we go. Now everything is working fine. Now we make him angry. Let's see the shooting if it works when we're angry. Yep, there we go. The shooting as much more prevalent, 123. And I think one of them is missing. We wanted to have in the animation several shots. This is the longest video and the entire course, I promise you. So angry attack. But do we have No, I mean, angry shooting, 1, 2, 3, 4. We have that we should afford. We didn't issue the fourth. I believe that's because of the exit time. 97. Let's play let's play the entire thing. So one, save that, save that, run the game. Let's see how that looks. And I could have just done this all off screen, but I really wanted to show you how everything is working. So I hope that is good. So how many times it will be 2, 1, 2, 3, 4, so four, even though we're walking, I think that's good. That's not bad. We can shoot on the last time as we are walking. This is good mechanics, are bosses finally finished after 40 minutes of recording. That's how long it takes me after the edit, maybe it will be a little bit less. So I'm going to commit all of the changes that we've made. I'm going to say finally, made the boss. Shoot after almost 100 mistakes. This is not something that you should write. This is for me to remember how much I actually made mistakes in this video. But in any case, I hope you enjoy it. I hope you appreciate the transparency and me showing you everything that's happening behind the scenes. If you haven't already, this is the perfect time to leave me a review and I'll see you in the next video in the last section. Maybe I don't know where we will be creating the actual level flow from one scene to the next now that we have everything in place. So I'll see you then.
95. Bonus Section 16: Room Generation (Advanced C# Object Oriented Programming) - Setting Up The Rooms: Welcome back, My favorite game developers. In this video, we've just created a couple of new levels for all random level generation. So first of all, we've created the spikes level. If the scale is where we have a couple of skeletons, the shop where we have just one enemy guarding the new weapon, where we kill the enemy and pick up a new weapon, the health with health back that gives us a 120.5 cowardly level. Everybody is a coward year. And the boss level, and that's it. That's all that you need to do. That's all that we've done. So let's not waste any more time and let's get started. Okay, so welcome to a brand new section into advanced C sharp. So the first video is all about creating multiple rooms. So we already have level 1, level 2, level 3, the sharp level, and the title screen with the victory screen. The next thing that we need to do is we need to create a couple of more rooms. I'm going to do that separately because I don't want to waste your time too much. So what I'm going to do is issue you a challenge to create multiple rooms. So first of all, we want to have multiple rooms to go through. It's similar to the way we will have the hades game. So we have multiple rooms. We have the option to go through two doors in every single room after we finish killing of all the enemies. That's exactly what we want to do and our game also. So these are some of the rooms that you'll have. You'll need to have a sharp room, the health room where you just come in and pick up as much as you want. The spike Rome. So a room that is full of spikes, there isn't any enemies. You can have enemies if you want, but it's full of spikes. You need to go through that without dying. A boss room obviously, and three more rooms of various shapes. So in total 1, 2, 3, 4, and 56, 7. So almost seven rooms to pick through. And it's important to have these because we will have multiple options on two different exit doors and so on. Obviously the title screen and the victory screen are not part of the game. So that will be left for something else. And you'll need to add, make sure you add. And this would be, and make sure you add the rules to the build index, obviously. And I'll give you a small hint. You can simply duplicate the level and change a couple of things around so you don't need to actually go through the process of creating a new scene, adding grid, doing all those things can just simply select one of the levels, duplicated, set everything up, and before I go, there is something that we need to take care of. And that is that in the UI canvas we have the bosses health always present. We don't want that to happen. So we can either make this the boss room and then duplicated and create other levels from it. And other UI Canvases won't have the boss held. Or if you want a smartest thing to do is in here in the UI Manager, we can get a reference to the bus health, and then we can turn it on and off based on whether we can find a boss and the area that we're fighting. And so what all of that information. Let me take you back to the challenge. Pause the video right now and go create a couple of rooms for the upcoming videos. I'll see you in just a bit 0 case. So how was that? Let me show you what I've created. So I've created first of all, the boss scene where you find a boss. Everything is the same. I kept the doors are the portals. I what I did though do is have the portals right here in the room separate than 12 portals to be just around the hierarchy. I put them inside of the portals object inside of the rooms. One other thing that I did is in the admin, close those down. This one down in the UI Manager, right here. In the UI Manager, I got a reference to the boss menu and I made sure to turn it either on or keep it as off if we cannot find the boss controller. So this is just for T bar of the balls. What else do we do, the cowardly? Not this one is the weight. Also why my mistake. So this one should be the cowardly I, so this is where we have all of these currently eyes. Remember, these are the ones that run away and this one will be the health room. Wrong. There we go. And this health room has a halfback and this Outback restores 120 health. So basically it just restores all your health. And you can notice right here that I still have an enemy, even in the shop room, which shouldn't have an enemy. But it does. I put it in there because the doors don't open unless we kill an enemy. And I know this is a bit cumbersome. Maybe we should add a couple of more. Maybe, let's say an extra line of code to make sure that we don't always have to kill the enemies. To open the doors. We can just open the doors on a known, you know what? I didn't want to go through that because it's fairly simple, but at the same time time consuming. So I just thought let's just keep it at that. We just add an enemy we gathered as we go through the rooms and we continue on. Then I created the spikes room for some reason it's not the spikes room. We have the skeletons. Where is the spikes from? So the new weapons. So okay. So the new weapon is in the skeleton with the spikes for some reason. I don't know why. Let me rename spikes WAS just so we don't have the same name. So spikes and I'm going to remove the weapons just and in these spikes. Yes, save this one and the spikes room. I'll just keep these as the and this one. What does this one have? Oh wait, also this is the spikes, this one as the skeletons and this one. So this one doesn't have anything. I'm going to delete all the enemies in here. Just keep one just keep one of them to protect, let's say the chest. If I go into the Prefabs pickups, where is it? Level objects. Okay, so there we go. This is the chest. And then we, once we come this enemy, we can open the chest, get the weapon, and then get out of there. So now what else do we do? And this skeletons, skeletons, spikes, spikes. These are the Kelly's yes. Rename that steles. And then this one is the new weapon room. New weapons. Just new weapons. Hit Enter. Yep, there we go. So as you can see, we have a couple of levels. Obviously, we need to go into the where is it, the editable settings, and there we go. So new weapons, spikes. Let's add the boss level, the coward's eyes, the health level. The new weapon is already there. The shop level, these gullies and the spikes are already here. So as you can see, we have now how many are they? Okay, So six levels, 1234567. So seven levels, one title screen and one victory screen. And that is what we are going to be accessing in the next couple of videos, trying to see how everything works. I hope you enjoyed commit your changes and I'll see you in the next one.
96. Creating Enemy Spawner: Welcome back, My favorite game developers. In this video, as you can see, we have something a bit different. We have waves, but these waves are not just regular elements or regular variables. They have the friend variables inside of them. And we can create a another wave and another wave. And as you can see, each one of those has their own element. So welcome to the Advanced C-sharp section. Let's not waste any more time and let's get started. But I need your full concentration, your full attention span, and your fall. Patients with me. So let's get started. Oh, okay, So now that we have our random levels, it's time to create random NME waves. So we're not just going to have the regular enemies in here. I just set them up in the previous video so that we know what the general idea is in each level and just have a bit of differences between them. But in this video we are going to create an enemy spawner. So let's get started. The first thing that we're going to do is we're going to open up the managers. And we don't have managers in here. So we're going to go to one of these that doesn't have a manager and this is it. And what I'm going to do is I'm going to go into the prefab. We have a managers in here and I'm just going to add the entire managers folder so we can add managers to whichever scene that we need. So I'm going to go into the boss level that we have all the managers in here. Yes, we do. The cowards. We don't have the managers or prefab managers and the managers in here. There we go. Now we have the game level and all your manager. And let's go back and see. So the cowards, yes, save the health. Do we have managers? No, we don't. So again, we go to the prefabs Prefabs Managers. And there we go. We add the managers to the health room. Let's go see what else do we have the new we have managers top. We don't again. So find the managers at this. And if you want, you can just skip this part and go straight to the, you have in here. But this is not the prefab, so I'm going to delete this. I'm going to add the actual manager prefab should have done this in a previous one. Also scenes, what is this shop? This Kelly's see, no manager. And the managers. And scenes spikes, save managers. There we go. Boss level. Managers that we want. This is not the manager that you are looking for. So cowards see? Yes, yes. Yes, yes, yes. Okay, great. So everywhere we do have managers now it's time to actually create a spawner. And the best place I believe to start is in these Kelly's right here. So in this case, go to the level manager and let's go ahead and add a component in here or no, actually, let's go into the scripts. And where shall we add the wave spawner? And let's just add it inside of the managers in here we're going to create a new C-sharp script, which is going to be the wave spawner manager. Hit Enter, we just added the Name Manager. So again, we have an excuse to other top managers. So I'm going to go ahead and add it to the level manager. And in here I'm going to open up the script. So what do we want to do in here? We want to create another class. Why do we want to create a another class? Well, because first of all, this is advanced C-sharp. Second of all, we want to create a entire different class for the waves because the waves have named the waves have enemies, the waves has a balance of enemies, the delay between each time we spawned an enemy, and so on and so forth. So in here, I'm going to go ahead and create a public class. And it's going to be called the wave. And this wave will have a couple of things. So first of all, it will have a public String name. And obviously we don't want to have it always as public, but in this case, just so we can save a bit of time without having to create all the extra things. We're going to make them public. Then we'll have a public game object and an array of enemies. What an array of enemies and me is. There we go. Then we'll have a public and the amount of enemies that will spawn. And then finally, we'll have a public float spawn delay. There we go. So these are all of the elements, or let's say the part of the wave, all the variables inside of the wave. If you want to call that variable, because this is a class, it's something totally different. But this is not the only thing that we need to do. We also need to make sure to say that up here, this is a system dot serializable. So we save that. And what does serializable mean? It means that now if I open up the Unity scripts right here, you will see that. Okay, nothing happened. Why is that? Well, because we also need to do one more thing. And here we are going to say that this has a public wave. As you can see now we have a totally new class, an array of waves. So we save that. Now when we go back into Unity, we shall see that we have the option to create waves. And if I just add one wave in here, you'll see that I have different elements for this wave. And I can have an aim, can have an amount, can have the spawn delay and the enemies that I want. And if I add another element in here, you'll notice that again, I have a different name, different enemies, different amounts, and different delays. So as you can see, this is why recreated or made sure that this is a system dot serializable. This will allow us to create different elements of this and will allow us to create these types of variables. So basically we've created a new variable that has different variables inside of it. So let's continue on now that we have all of this, the next thing to do is to obviously go ahead and start checking wave after wave. So the first thing we need to do is in here we'll create a private end and we will keep count of the next wave. And obviously we will start at 0. So the first wave will be 0. And every single time we create a new wave with a new amount of enemies, with the new different types of enemies, we will go to the next wave by increasing it by one. Then we are going to create a serialized field where we will keep track of the time between waves. And let's just set it at five F as a default. And then we are also going to keep track of the wave count. So float wave, I say wave count, I meant count down. Okay, save that. And now when start we need to initialize the wave countdown to be as the time between waves. And then we are going to do something for later on and was thinking, but now we want to have something also as an extra. And I think this is the perfect place to create something of or something we've already covered, which is an enum. And why do we want to create an enum? Because waves will be in three separate states, we will have a spawning. So this is where we are spawning every single, I don't know the time or the delay between the enemies. For example, every two seconds we spawn a new enemy. We spawn a new enemy. At this time, we don't want to be doing certain things with our wave spawner controller or manager. I mean, so we need to create different states. So what I'm going to do is I'm going to issue a challenge. And your challenge is to create an enum for the different states that we are going to have. So we've already covered enums in the pickup section. So first of all, create an E naught for the different spawning states that will have, will need to have the spawning, waiting and counting. And finally, all you need to do is create a variable of this type so we can use it as a reference. So pause the video right now and go do each one. Oh, okay, welcome back. So as I've told you, in one of the pickups, whereas the pick-up pickup. Pickup pickup, a bilayer? Nope. Item dropper, dope. Where was it? Where was it? In the oh, okay. So in the shop item as you can see, we've created an enum for the health restore, health upgrade and the weapon. And based on each of those, we have a switch statement. We are going to do almost exactly the same thing. So in here I'm going to create a private, private enum. And this will be these pounding States. And we are going to have the bombing, the waiting, and the counting. And then we'll just create a variable of this type which is going to be a private founding states and state. There we go, save that. And in here in the start, what do we want to start with? Well, we are going to start with the counting. State is equal to spawning states dot counting. So we start off by counting down and then start also we need to make sure that we set. Oh, so we've already said the wave countdown. We want to update, start counting down on the wave. So if the wave countdown is less than or equal to 0, then what we're going to do is we're going to check, first of all, if the state that we are currently in is different than the spawning state, dot spawning. Then what we're going to do is we'll start spawning while the if else we haven't finished the countdown, then we are going to get the countdown and remove for enrollment time, delta time. So what is happening in here? Let's just do a small recap because all of this is fairly new. First of all, we have the wave spawner manager, which is attached to the level manager in here. Okay. Wait for this to compile any day now. Okay, Thank you. So then what do we have? We have a wave and every single wave has different elements attached to it. So what we decided to do is create an entirely new public class just to represent it. We could have if we want, created a separate class just for this one, in a separate script, just for this one, and not have it be a mono behavior, just a stem serializable and system serializable means that allows us to create this right here. And it allows us to change the different elements right here on how ever we want. So it can give us the ability to change the valuables much easier. So we created the waves, we keep track of the next wave that might be public if you want just to make sure we see everything appropriately, make it public. We created the time between waves, the waves come down. This is pretty simple. Then we created an enum for the spawning States because we have different spawning states. First of all, we can be either spawning, waiting or we can be counting down. And then we create one to just keep track of everything happening, just like we had in the shop item. We will later on have different out should I say, we will have different methods being executed and the update based on whether we, on which state we are in, we will be having different elements, different things. And this is the first example of it. If we are counting down, if we finish counting down and we're not in a spawning state, then we will start spawning. If we haven't finished counting down, we are just going to remove from the countdown the time, delta time until it's under 0. Then we check our responding. If not, then we will start spawning in the next video, where we actually will be spawning enemies. So I hope you enjoy it. I know this is a bit complicated, but this is what you signed up for. You came to the C-sharp advanced section in bonus one. So I hope you enjoy it. I hope you are committing your changes and I'll see you in the next video.
97. Spawning Various Types Of Enemies: Welcome back, My favorite game developers. In this video, we've actually started spawning enemies in a smart way. So now when we run the game, Let's make this bigger so you can see properly what's happening. The after the candidate finishes, the first enemy appears, the second enemy appears, and they just sit there waiting for us to kill them. So once we do kill them, Let's try to go them. Okay. That's actually, oh, okay, that was embarrassing. Let's restart the level. Wait for that. So we made enemies so good that we cannot kill them. Okay, So let me try. Let me get to a certain distance so we can no longer. So once we call them, you can see that we have the wave complete. And then again, we get the enemy spawning because we've made the amount of enemies and here too for this wave. So let's not waste any more time and let's get started. Oh, case. So let's go ahead and actually starts owning enemies. The first thing that we're going to do is obviously create in here some kind of either a co-routine or we can create also a counter. But we're going to stick with the Coubertin And this courting will be called every time we have this spawn delay. So this core team will be spawning the enemies. Anyways, let's get started and we'll see how everything is working. So we're going to create an eye enumerator in here. And it's going to be called the spawn wave. And the wave that we want to actually spawn. So wave to spot. So we already have the wave that we want to span. It will have its own enemies, its name, and the amount of enemies it has. So we're going to create a for loop. In this for loop, we're going to start with an integer I equals 0. We're going to make sure that we never go over the weight to spawn, or is it the wave to spawn, the amount of enemies? And we are also going to be increasing it by one every single time. So in here we are going to create a random enemy number. And it's going to be the random range. And this range will be over 0. And the wave to spawn enemies dot length. So there we go and remember that enemies, and here is an array of game objects. So we want to spend a random enemy in there. So I'm going in here where we'll say that some kind of method to spawn because we want to have it outside the, this right here. This will only be the spawn wave. This will be the enemy spawner in here. And what we'll do, and the way this numerator will work as we are going to yield return new, wait four seconds. And it's going to be on the wave. Respond. Not delay, dot spawn delay. So what's happening in here? This is the first time I believe that we use the yield return inside of a for loop in an enumerator or a coroutine. So we go through this loop. Every single time we choose a random number, we spawned some kind of enemy, and then we wait four seconds. And then again, we spawned an enemy, we spawned an enemy. So this will allow us to yield return and call this multiple times, this spawned wave several times. And after we do this, we are going to create also the actual method that will spawn the enemy. So spawn enemy. And in here we're going to say that we will send it the game object and the enemy to spawn. And in here we're going to say debug dot log just to make sure that we know which enemy is being spawned and everything is working correctly. So spawning the enemy. And we're going to give it the enemy to spawn. But name. There we go. And we are simply coming to instantiate. And then she ate the NMI. Too small. And it's going to be, oops, excuse me. So it's going to be all the transform dot position and we transform the row station. So what is the transform? Which transform are we talking about? So because the wave spawner is attached to the level manager, this will be the position and the rotation of the level manager game object in our scene. And later on, we will be creating several points on which the enemies will be spawning. So it will work like that. We will have some kind of array. We'll deal with that later on that's now focused on actually instantiating these enemies. So spawn enemy, the wave to spawn enemies at the position of the random enemy number that we just created. So I'm going to add an entering here. What are we doing? We need to also call the coroutine and here, so before we forget, so co-routine. Spawn, spawn, enemies, wave. Yep, there we go. And which way should we be spawning? While in here we're just going to say that it's the wave, waves at the position next wave. So it's going to be probably 0 right now because next wave, whereas the next wave, it starts off at 0 right here. So it's going to be the first wave that's for just experimenting for now, that's focused on what this does. So a co-routine which starts if we make sure that we are not spawning of the countdown is less than 0, we are not spawning, we are ready to start spawning. Then we start the coating in here we have the loop will loop through the amount of enemies on the wave that we receive. As a coroutine, we create a random number. We spawn a random enemy which just has the debug to tell us which enemy is being spawned will probably remove this later on. And then we instantiate the actual enemy on the manager. And then what happens? We yield return, wait four seconds and then spawn in other enemy. So before this loop than again is called, we have to weigh the spawn delay that is designated to us. So I'm going to save all of that. I'm going to go back and unity. And let's see what we have in here as a level manager. Wait for this to compile anything. Okay, so we go to the manager's level manager and what do we have in here? I was playing around, maybe I did not do this in the video. So we have this wave right here. It's the skeleton wave. The enemies that we have in here are the skeleton enemy and the cowardly flying high. The amount of enemies we want is to and respond lay will be two seconds. I'm going to save this. Where's the level manager and our world? It's not on the 000. Let's put it back to 0, so it's right in front of our player. And let's run the game and see what it looks like. So now 12, we should see the wave countdown. There we go and whoa, that's too much enemies. Let's see what we did wrong in here. So we save that. What's happening in here, we are checking the countdown is less than 0. Are we not in the spawning state? Well, let's see. We start off with the counting, so we're not. So obviously we need to change our states in here. So before we actually create the loop or start the loop, we are going to say that we are in a state which is equal to the spawning States, but spawning. And then when we finish spawning, we are going to go into a state, which is the weighting. So we're waiting for the enemies to be spawn. So now we start before we actually go through the loop, we said the state. So now this will not be called every single time and we will not have that many enemies. Let's again test this out. Run the game. We can see the countdown in here. I made it public. There we go. So 0, we get the enemy and he starts shooting. Then we get another enemy, and then we gave them another enemy, and it's being called every two seconds. So look at these little cowers right here. This is a really nice cool game mechanic, as you can see, every two seconds, 1212, and there we go. So as you can see, enemies are being called every single second. But you now might be wondering, why do we have so many enemies, even though we said that the amount of enemies should be only too. Well. It's because in here, we don't actually have the wave countdown resetting. Again, something that we will deal with later on. But let's first of all think of when will we be actually resetting the wave and when does an actual wave? And so we can either create a time between wave. So let's say the first wave and the second wave, there is a delay between them. Or we can have some really nice mechanic and give our layer or the person that's playing our game a chance to go ahead and kill all of the enemies in this wave before the next wave comes on. So this is what we are going to do. And to do that, we are going to create some kind of method that will keep track of whether an enemy has died or not. So let's go back down here. And after the spawn enemy, we are going to create a private. There's going to be a Boolean, and it's going to be the enemies or alive. And this will return true if all the enemies are alive or no. Oh yes, if all of the enemies are alive and false, if one of them or none of them are alive. So in here what I'm going to say, I'm going to create an if condition. And I'm going to have the final object of type. And objects of type actually not find objects, find up objects of type. And the enemy controller, I'll be looking for the enemy controller dot length. And it's going to be equal to 0. And if it is, then we are going to return false. So false, that means that all the enemies have died. And then if we go through this one and we don't return false, then we are going to return true. That means that the enemies are still alive. So now we have a wave or of making sure whether our enemies have all been depleted and we will be able to use it right here as a condition somehow. But there is a small problem that is bothering me. The find objects of type on the enemy controller is actually a very cumbersome, let's say operation on the system. It takes up a lot of resources every time to go through all the objects on the enemy controller, which is sometimes not very necessary. So what do we want to do is we want to have some kind of a timer on the enemies are alive checker. So we don't actually check every single frame if all the enemies are dead. But instead, we have this being checked every couple of seconds. So I'm going to issue it to you as a challenge, and your challenge is to delay checking. So first of all, you'll need to create a variable for the time between checking for enemies. In the Boolean method makes sure that we don't look all the enemies except when the time is done. Pay attention to where we should reset this counter. So this will be very important. So with that said, pause the video right now and go do each Shannon. Okay, welcome back. So I'm going to scroll up in here. And I'm going to create a private float. The time between enemy search, between enemy search. And let's say it's one F. So 1 second. Every 1 second we check for all of the enemies of the debt. And then in here I'm going to say that the time between search is being reduced by Time.deltaTime, every single frame, and this will be called every single frame. And then down here, I'm going to check before we actually check for all the objects. If the time between search is less than or equal to 0, then we will be searching. There we go. And then when do we actually reset this? So once the time between search is less than or equal to 0, we start by checking if all of the enemies have died. And we also can go ahead and reset this time between searches. And I'm going to set it to 1.5 because I don't think that this is something that you might want to change in the inspector, the time between enemy searches, this can be pretty standard. But if you think that you might need to change this variable, obviously this one f will not work. You need to go up here, create a separate variable if you did that, congratulations, this is the better step or the better way of thinking, the better game design maybe. But for me, I believe this will be something very constant, something that will not change. I don't think we will ever have to change the time between enemy searches. Will that finished? Let's go back up in here. And we need to make sure that we, Where is it in here and update. We are going to check the state is equal to the spawning states dot waiting. So that means we are constantly spawning enemies and we are in the waiting. So we check after we obviously finished this for loop, we check is the state waiting. Then if it is in here, we are going to check if the enemies are alive. And notice that we added this exclamation mark, which means the exact opposite. So if all of the enemies have Lloyd are going to save debug dot log, wave. Complete. Save that. And else, if it's not, then we are going to simply return. And why are we doing this? Why are we saying return? We said that returned means that we don't do anything else inside of the method, especially in update. Why? Because once the wave is complete, we don't want to go back into the wave, can now check if we are not in spawning, which we will be not n because we are obviously and the waiting and start the recording again and start creating the enemies again. So once the wave is complete, we want to stop the whole update from working. So I'm going to save that. I'm going to go back into my gain. And now we should see that when we run the game. So we get, after five seconds of Countdown, we get the count the enemy. After two seconds we can another count the enemy. And there we go. You can see that we have stopped everything so we no longer get more enemies that we have to. So I'm going to try to kill those. So we have both of them. And as you can see, again, the wave has been completed and then the enemies start spawning again. Okay, great. So with that out of the way, make sure to commit your changes. I hope you enjoy it and I'll see you in the next video where we'll be spawning points for multiple waves and completing all of them, killing all the enemies, completing all the way, and maybe having some kind of really nice message. So see you then.
98. Completing The Waves : Welcome back, My favorite game developers. In this video, we are actually going to be completing the wave, starting new waves. Once we finish all of them, we have the option to open the doors. Don't open them yet, but we will. Unfortunately, because this might take a lot of fun. I'm not going to demonstrate it in the intro, but feel free to watch the video. You will see that it is actually working. We made sure that it does. We always make sure that it does. Okay. So I think we are at a good point. So as you can see, you sought to enemies randomly spawning. The time has finished. Let me okay. So the spine on the same position we call them, we should see in the Inspector that we've completed all the waves, which means we will open the doors. So let's not waste any more time and let's get started. Oh, okay. So what is happening right now? First of all, I forgot to stage all of my files. I'm going to call it an instantiate, various types of enemies. This was the previous video, but now let's focus on what's happening in yield. So you remember that in the last one, we actually started completing waves, but not White so much because even though we finished a wave, you might have noticed that Then again, and it means start spawning. Why is that? Well, that's because obviously the wave countdown is still less than 0. We are going back to spawning. And well, obviously, sorry, we are not going back to spawning, so we are always starting with co-routine again. So what do we need? Do we need to actually, first of all start a new wave? And second of all, we need to reset all of that and make sure that at the end we stop the all the waves. We've finished all the waves. We can open the door and so on. Man. Not only that, we also in this video, we want to create several points from which the enemies will be spawning. So we have our hands full. Let's not waste any more time. What should we be doing in here? First of all, I'm going to scroll down and create a new void, Start New Wave. And what happened? And in here I'm going to say that as soon as we want to start a new wave, then we are going to set the state to the spawning states that counting. So in here we are counting for the next wave and the wave countdown will be equal to the time between waves. Folks, not enemy search the time between waves. And then in here we're going to check if the next wave plus 1 is equal to the waves got length. So that means that we are on the last way, that the next wave as the last one. Then we're going to say that debug dot log. And in here we'll say we've completed all the waves. And I just said something I believe, isn't that true in here? First of all, we need to add two equals, equals to compare when we add one equal, that means we are assigning two equals as when we comparing. And I said in here that the next wave is the last one. No, When I said next week plus 1 equals wave that length, that means that the next wave right here without the plus one as the last index. So next wave plus 1 is the size of the entire array, which is the waves dot length. So that means that we are currently on the last one, which means that debug dot log says we've completed all the waves. And we'll just add a comment here. We can open the doors, open doors, get rewards, etc. Okay, And then once we finish, so if we're not on the last wave, what are we going to do? Well, we're going to say that the next wave, plus, plus, so plus, plus, so we increased the next week by one. So now all we got to do is when we check for the enemies and update and the wave is complete, we are going to start a new waived. So I believe that's all that we need to do. So I'm going to go back into my game in here and I'm going to say any day now, please. So in the level manager, let's see, we have let's make sure that we don't have any problems. I'm going to change this to the, where are the enemies? Let's make it smaller or are the enemy prefabs, enemy? Okay, so we have the petroleum, let's make sure that the first wave only has a skeleton enemies. And we'll create a second wave in here, which is the, let's just call it high wave because we have the flying eyes and we are going to have both. Of these be the cowardly. So we will know when we are in the next wave. So I'm going to save all of that. I'm going to check in here, okay, time between waves. Let's run the game and see how that looks. So I'm going to run the game and we should only see skeletons. Skeleton, there we go. Skeleton, there we go. So now when we kill them, we should only see flying crows after the five seconds. There we go, The Flying crow, you can see it from behind these two, and they killed me, but everything seems to be working perfectly fine. As you can see, we are resetting the time. If we scroll down. If you didn't completely understand what's happening, let me just redo it once. So as soon as we start a new wave, we start counting down until we get to the next wave. Then the wave countdown is reset to the time between waves. So an update. And here we are going to remove Time.deltaTime every single frame, which means that we are starting the new wave. Then we check, are we on the last wave? If we are, that means we've completed all the waves and we can open the door. Unfortunately, our enemies killed us before we had the chance to do so. But before we actually test this out and make sure that it's working this condition right here. Let's first of all, create several points from which the enemies can spawn. Because as you can see, we don't really like having all the enemies mashed up together and 1 and having them small. We want to have some kind of diversity. So for that, what I'm going to do is I'm going to issue a challenge to create spawn points for enemies. First of all, you need to create an array to spawn bonds. So this spawn points, this should be of type transform this array. Then you'll need to create the points in unity and add them to the inspector, obviously on the level manager. Finally, when we spawned an enemy, choose a random spawn points and put them there. So I'm going to tell you to pause the video because for some reason my punk isn't just working correctly. So I'll see you in just a bit. Hey, welcome back. So how did you get on with that? Then if I scroll up here and I create a serialized field of transform, which becomes an array of the spawn points. Save that. And then I scroll down to the, let's see what we have in here. Oh, so where are responding the enemies right here, we can simply remove the debug. He didn't even use it once. So in here, what shall we do? Well, we shall first of all, create a transform of obviously a variable of type transform the transform on the game object for this power point. And hopefully this will be the last video where I have to say the word spawn, spawn, whatever it is. So between these points, and in here I'm going to say random range between 0 and the spawn points about length. So we are choosing a random spawn point. And in here, instead of using the transform of the game object, we'll use the spawn point that the random spawn point that we got. So I believe it's pretty easy if you didn't understand what's happening in here. We created obviously the spawn points that we'll be adding a new unity in just a bit. Then when we instantiate an enemy beforehand, we use to immediately put him on the level manager game object. We said that we don't want to do that. So what we do instead is we use the transform box bomb point. We create a random one using the array that we have up there, using a random dot range from 0 to this point, points dot length. And then we set the enemy, we instantiate them and respond point documentation. We save that. We go back into Unity. I'm going to create all this bond point under the level manager, since he's handling all of the spawning source points. And I'm going to create an empty spawn point, 1, 2, 3. So I will have three spawn points. Let's make the scene a bit bigger. And in here, Let's see, the first one will be here, the second one will be here, and the third one will be in here. So save all of that back in level manager. Let's see what we have in here, the spawn points. Let's, oops, Let's lock this down. Let's drag, Sorry. Let's drag the spawn points right here. We say, well, that we run the game. And now we should see as we are looking, so 321, There we go. So we spawned one here. Then after two seconds, one is up there. So I'm going to try to kill all of them. And let's see the second wave. That wave come down. Then we get one enemy which is up here, a second enemy which is down here. And then I'll try to kill them using and the view on the scene so I can catch them from a very far distance. So the current, the enemy dies. And now we have a count down. We can see right here that all the waves have been completed. If we double-click, where is it? It's right here where we are going to be opening the doors obviously. And the next video and creating also portals that will take us to another dimension. Actually it's just another level. But anyways, you get the point. Let's stop the game. But stop unity. Make sure to commit our changes. And I'm going to call this the, the, now we actually complete Waves. We start commit those changes. And I'll see you in the next one. And if you're enjoying, this is above the end of the course. Make sure to leave a review at helping out a lot. And I'll see you interested in.
99. Choosing A Room : Welcome back my fellow game developers to a brand new long video. We are not going to waste any time. And this video, what we do is when we kill the enemies, this is not very exciting. I'll just tell you, when we kill the enemies, we pick two random numbers. That's it. That's all that we do. Next video, you'll see why, but it's a pretty complicated concept where we learn a new kind of loop. We learned the truth tables. So it's very, very worth it. So that's not waste any more time and let's get started. Oh, case. So now we are completing the waves. It's time to leave the room and go to the next one. So how are we going to do this? Let's just take a brief moment to talk about that. We're going to go into the rooms, the doors. And as you can see, we have two doors with two portals behind them. And this is something that will be the same in every single level. I didn't want to add too much thing just to keep everything less complicated and understandable. So what we have in here are the two portals and the two doors. So what happens when we kill all the waves or all the enemies in the last wave, wave, these doors will have the ability to open up. But as you saw in the game Hades, we have always two options. So we have two portals that we can go through 14, let's say the sharp, the other one to another enemy arena. And that's what we want to also do. We want to have the option to go to one of these two? So we'll need to set these two portals beforehand and these two doors also beforehand. Later on we will be creating maybe some kind of maybe name appearing once we are next to the door. So when we open it, we know where we are going. But for now, let's just focus on actually changing The, whereas if we click on the Portal and unlock this, you can see that we have the level 2 goes or the level to load. So what we'll do is we'll try to change these as soon as we kill the enemies. So let's get started. I'm going to go back into our code and the first thing I will do is I'm going to go into the level of exit in here. And instead of using a string, we are going to be using a integer. So an integer. Why are we working with integers? Well, because in here we will be using several methods in the scene manager that can only taken an integer parameter that we can work with. So that's why we are changing it to endanger. Later on you'll see why all of this is happening. I'm going to make sure that this is commented out and we'll later on we'll come back and change it. But for now because the loading level is taking in an integer or you know what, let's keep it. And let's keep it. And let's go to the level manager. And in the loading next level, instead of a string, we are going to use an integer. So the next level is an integer, and the load scene can actually take an integer as a parameter. So everything is working good for now. The next thing we need to do is we need to set the two doors or the two-level exits. And because we already have everything set up and we know that there will always be two doors. To just make simple, I'm going to create a public and level level to go to underscore one. And then I'm going to copy this and make it the underscore two. So this is for the second level. And then I'm also going to create a public level exit. And this will be the level exit underscore one and the level exit underscore two. So now we have the two level exit strategy and let's go ahead and create a level picker. So I'm going to scroll down, but not too much, maybe right here. And I'm going to say that I have a public void level picker. And in here we are going to be employing a couple of things. So what we want to do is we want to pick a level. But that's not as simple as you might think because we, let say we are currently on the skeleton level. This Kelly's. Okay. Let's say we have the option to go, for example, to the shop. One of them will be the shop. We will try to choose a random level. So we have the option to go to the top on the first door, but on the second door we get the option to go to the skull is but we've already been in the Skelly. So the thing that we need to keep in mind is that every time we want to have the option to choose another level, it has to be different than the current level that we're on. And not only that, we need to also have the level. On the left door different than the level on the right door. So essentially, we need three things to keep track of. The level we're currently on. The level that will go to if we go through the first door and the level will go to if we go through the second door. So how are we going to do this? How are we going to implement this? Finding things while we are still on the same level? This is where we will use something called a while loop. So let me tell you what a while loop is and you'll see how important it is in this situation right here. So first of all, it's similar to for loops at executes a block of code a number of times. Instead of determining the number of times before hand, we wait until a certain condition is met. So this is perfect for our case right here, because we don't know how many times we have to go through looking for a level, but we know that we will keep looking while the level that we want to set on the first door is different than the current level. And we will also keep looking while the second level on the second door is different than the first one, which is already and different than the level we are currently on. So let me just take you through the structure of the for loop. You can see right here, we have the while. We open up the brackets, we put in a condition. It's exactly the same as the if statement. And if it is true, then we will do something called execute and then go back to the condition, condition change. If it hasn't, we go back. So make sure to take precaution whenever using while loops because they can cause a lot of problems. You can end up in a endless loop where the condition doesn't change and your Unity will crash. Trust me, it happens and happens to me all the time whenever I'm using while loops. So make sure you know the problem. Make sure you always change the condition and always get out of the while loop. Anyways, with that said, let's go back to Unity. And here, I mean Visual Studio. And what are we going to do in here? We are going to say that while level to go to one is equal to the scene manager, dot, get active, seen dot index. Then we are going to go ahead and create a random random number which is equal to a random dot range from 0 or actually from one. What are we using one? Well, because we know that the scene on index 0 is not something that we would like to go to. Let me show you what I mean. If I go back into the File, BuildSettings, the first one as the title screen, the new weapon spikes and everything is available except for the 0, which, and the, obviously the last one. So in here, the random we'll start at one. So from one to the scene manager, the scene count in Build Settings. And you can see right here, this is the number of scenes and the build settings. And we are going to reduce it by one, because obviously we don't want the last one in there. So now that we have a random number of our scenes, I'm just going to go ahead and print that random number. So print and let's say the room for the random number, random number is and first round. And then in here we are going to set the level to go one to be equal to rant. Okay, so what's happening in here? First of all, we say that while the level to go is equal to the current build index, then we are going to enter the while loop, chosen random number assigned the level to go if it's still the same, and then check the condition in here. If it's still the same, then again we will create another random number and assign it to the level to go. And we will keep doing this. While the level to go 1 is equal to the scene manager or the build index of the scene that is active right now. Once It's not, once this condition is no longer met, we will continue on to setting over things. Before we continue. Obviously, we need to do something which is set the level to go one to be equal to the scene manager. The just copy this one. So we're just sending it at the beginning as this one just so we can enter into the loop and then continue on. So let's save that. Let's go back into our gain o and we actually. We haven't got this yet. So to call this, where should we be calling it? I believe this is part of your challenge. Well, I think it will be part of your challenge. So unfortunately we will not be able to test it. But, or you know what, let's test it out. So if I go to where do you think if you want to, you can make it a challenge. But unfortunately, I've already shown you. So in here when we said the debug, all waves are complete. Let's just keep this, remove the common because now we can actually go ahead and access the level manager. And I believe it is an instance. And we will access the level picker. And now we can actually pick a level and we should also make sure that the waves are complete. And we also need to make sure that the waves are complete. So how are we going to do this? This is something we should have done prior, but no worries. We are going to create a private variable in here and waves complete. And we will set it as false at the beginning. So private, oh, sorry, Boolean waves complete. And where do we set it to true? Down here after all the waves are complete. So waves complete is equal to true. And where does this affect everything? Well, up here, if we look where we are spawning every single time. So I'm going to indent this using the tab. And I'm going to say if waves are not complete yet, so, right? Waves complete are not yet complete. So if this one is still false, which it shouldn't be false until we turn into true right here. So as this keep it as that, I believe this will work, but you know what, I'm going to add the two squiggly lines, make sure everything is set up properly. So now, once we destroy or finish all the waves, Waves complete is done. We are no longer counting down and we choose a level. So we'll try to see how that looks in our game. So we run. And I believe we should remove the just to make it faster. So I'm going to shoot the enemies couple of times. Wait for the second wave, which are the cowardly find eyes. I'm going to shoot the cowardly flying eyes. And there we go. And we have one still here. So once we kill it, we have the random number three. And let's open up the console and pause the game. So if we look in the console, we have the random number is three. So obviously this work for the first time. Let's see what the build index 40s, Kelly's are, its two. So three is the boss level. So we chose another level. Excellent. I really want for you to see the random number being chosen multiple times, but no worries, we will have a lot of opportunity for those things. I'm going to remove this one in here and the debug right here, because we already know everything is working perfectly fine. But there is obviously still the second level that we want to set. So I'm going to issue it to you as a challenge. And your challenge is to set the level to go to, to get it pun intended. So after setting the first-level to go to, we need to set the second one. And the second one should be different than the first level. And the first-level to go to and the one we are currently on. So you'll need to make sure to initialize it. And I'm going to give you a hint because we want to make sure that it's different than the first one and different than the one we are currently on. You'll need to use the OR for the while condition to stop. And I haven't shown you the sea yet, so I'm going to show it to you right here. If you want, you can maybe, I don't know, take a screenshot or maybe then go back and see the whole steps of the challenge. I'm going to now show you the truth table and the truth table. So let's start with the end. So the end a truth table. How does it work? If we have several conditions, as I've said right now, we need to make sure that it's different than the current level and different than the first one we've set. So it has to be a while loop which checks for using the all so while level two that we're going to set is equal to love and want to go or level two to go, then we will need to change it. It needs to be different than both. So let me show you how the true, the truth table works. If you have two true, we get a true. If we have a false and a true, we get a false. If we have a false and a false, we get a false, we have a true and a false, we get a false. But when it comes to the, OR, you'll see that if we have one false and one true, then. Answer will be true, but if both of them are false, then the answer will be false. So with that information, I know it's a bit confusing now when we do actually have the solution for the challenge, I will explain to you everything, even though this video is getting very long, but no worries about that. Pause the video right now and go do the challenge. Okay, welcome back. How did you get on with that? So in the level manager, I know this is one of the tougher challenges, but we are in the Advanced Challenge. So in here I'm going to say that the wild and level 2, oops, the level to go to is equal to the level to go one. Or how's the, or it's these two columns, or the level to go to is equal to the scene manager dot index. So the current one. Then in here we are going to go ahead and do the same exact thing. Copy this, oops. Paste it in here. And the random number 1, oops, sorry. Now, random number 1 and random number two. And the level to go to is equal to random 2. And India, we are going to save that the level to go to is equal to the scene manager dot instance. Or we can say that level to go to as equal to level to go one. But you know what, I don't want to risk that does just keep things safe. But, oops, paste it in here, save that what is happening right now. So there is a problem because we cannot use the level exit to, we need to set the level to go to save that. So what's happening in here? We've set the level to go to, to be exactly as the scene manager or the index on the current scene. And in here we check what is the condition in here, as we've said, if we go back into our truth table of the off, let's keep it here and let's see how everything is looking. So we start off by checking as level to go to equal two, level to go one. And currently the level to go to or solid level to go one will be different than the current scene manager. So this condition is false, which is good. That means we will not enter into the while loop. But we then check level to go to, is it equal to the current build index? It is. Then we have a true condition which is right here, and a false condition which is right here. So if we look in the truth table, we have a true condition with a false condition, that means the whole set of conditions is true. That means we then go back into the while loop, and that's exactly what we want. If we have 11 of these true, we want to go back and create another random number and set the random number again. And we will keep doing that until this condition is false. And this condition is false, because only two conditions that are false make a total false. So back in here, if the level to go to different than the level to go one, and it's different than the current one. Only then when both of these are false, the entire condition is false and we continue on. So let's go back in here. We will print those and run the game and lets you know what, let's remove 11 manager who has remove one of the scary guys. And let's remove this one also and run the game because we want to demonstrate this pretty fast. So the enemy will appear in just a bit so that we will have only one skeleton to skeletons actually, once we killed them, we should see that. There we go. So we call them, go to the console, pause the video, pause the game. I mean, and you can see that we run them. Number 1 is 3, the random number 2 is 4. They are both different. We've picked levels, make sure to commit your changes, and I'll see you in the next one.
100. Going To The Next Level : Welcome back, my fellow game developers. In this video, we don't do much, but we do understand something or a series of methods and dissections of strings that is very complicated but extremely necessary for our case in order to continue on. So let's not waste any more time and let's get started. This is one of the more technical videos, I believe, and the entire series on the entire course. So I need your full concentration. O k. So now we have the waves being completed. We have the levels or the potential levels that we want to go kind of being setup. Now it's time to take it to the next level and get it, take it the next level and actually start displaying the names of the levels that we can go to right here on the doors. So what I'm going to do is I'm going to go to the door one, I'm going to right-click in here and I'm going to create a UI canvas for this door. So where's the UI canvas? There we go, the canvas. And if I open this up, this will be the text display Canvas. And if I go into this canvas and you see what is the door have, okay, so, great. And the canvas right here, I'm going to select world space. And I'm going to double-click to see the whole canvas. We are going to scale it down to 0.001 on the x and on the y. And I'm going to reset the position to be at 0, 0. Now when we double-click, it's very small. So we need to make this one without a 0 and this one without a 0. And or maybe do add a 0, but make this one a2. Oh, a five. Yep, seems good. And this 15, maybe we should make this bigger. Let's make in an eight and this one. And it also, yeah, so I think it's pretty good, pretty solid. So in here we are going to be adding the texts that we will want to be displaying. And what will this TextView displaying? It will be displaying the level that you would be able to go to once you open this particular door. So I'm going to go ahead and apply the changes. And when I do apply the changes to lower one, you'll notice that the door to also has its own Canvas now and all other subsequent doors should also have these campuses. So I'm going to keep working in here. I'm going to right-click and the UI canvas and I'm going to add a text Mesh Pro. So a text Mesh Pro, this will be the level name. Hit Enter, and let's go ahead and make it a bit bigger. Let's put it up here or you know what? Let's put the level name under and the duplicate this one and add it in here. And this will simply read for us to open door. And let's change the everything. Well, everything that we're always doing, auto size, max, level, color, and for some reason I cannot see it. Why can I not see it? Shouldn't be the level name, this should be the open text enter. What's the problem? If I move it in here, but it's not displaying and here. And if I open the Canvas sorting layer, set on the player, so there we go. So I've set the sorting layer to be on the layer and because I have the front in here, I'm going to just make it one to make everything a little bit better. Okay? So I change the sorting layer of the actual canvas right here you can see I sell it onto player. And I've been saying since the beginning, we need to set new layers. I haven't done that. Maybe you did. That's better. You are progressing faster than me. So press E to open the door. And in here this will be the text level, level name. And let's change this also. Sell it to bold size, max. And okay, great, So we'll save that. We're going to go to the door and we're going to apply the changes. And there we go. So now you can see that this one also has its own level name and press the E key to open the door. So now what are we actually going to do? We want to get the level name, which should be a string and this plate right here. But as you remember. The level of exit, where is it an exit? We change this to an integer. So how are we actually going to do this in here and start? I'm going to create the start. And now you need to focus a lot, but don't worry, everything will be slowly but surely explained. So first of all, I'm going to create a string variable which is going to be the scene path. And this path will be equal to seen utility. Seen utility, but obviously we cannot use it. So I'm going to add in here the senior management. And now we should have access to the scene utility. And then from the same utility I'm going to get seen path can see right here by the build index. So now I can add this right here, and I can say the level to load. Save that. So what will this give us? I'm just going to go ahead and print this out in here. So I will say print out the scene path. And let's just seen path concatenated. Save that. And before I move on, there is something that we probably should have done and that is actually using the level exit one and level exit to two, assigned the level to go. So level manager and where are the level exits? Waves? We have spawns 0, so they aren't in here. And I'm going to select the portals. So portal has this one. So which one has the first portal? This one and the second portal will be the second one on the level manager. So there we go, we save that. So now we have access to both the portals. And now we can go back in here, slide down and the level manager. And after we get the level of exit, one dot on the level exit, we can either assign it immediately, call this public, or we can create a small method in here, which we'll say that it's a public void. And we'll make it set the level to load. And this will be the level two load. Or let's just make it level. So shortcut it. And in here we're just going to say that the level to low level looped. Save that back in the level manager that set level to load. And it's going to be the level 1. And then in here we're going to set the level x2 dot set level to low level to go to two. Excellent. So now we should have this level to load being except right here. And I'm just going to show you what we are going to get displayed on the screen. So when we run the game, we should see right here in the console, Let's pause that. And the console we shall see the scene path asset scenes style screen. So obviously, this is the path that we are getting sent and this is the current level to load. And what does the current level that we're on? It's currently being set as 0. So 0, if we look in the settings in here, you can see that 0 is the title screen, so you can see how the scene path was being displayed. So our goal is to remove everything and just keep the title screen and have it being displayed right here under the door name. So that's what we're going to do. If I go back in here, let's remove the print. And now this is the scary part. I'm going to say that the integer is the last slash and it's equal to the scene path dot last index of. And use this forward slash. Actually it's between a single quotation. So what happens in here? Let's again print and, or know what. Let's continue on and you'll understand easily what that means. So string name and it's going to be equal to the same path substring last slash and plus 1, 0 plus 1. And let's try to print the name and see what we get. So you can see the last index substring, and then we are going to run this again so we can see what's happening. So we run the game and we can see that we have right now the title screen. So what is going on in here? First of all, let's talk about the substring. Let me just show you what that is. Okay, so in here you can see the string dot substring method and definition and retrieves a substring from this instance. And you can see we can use an int 32, retrieves a substring, which will obviously a string. Then we have a substring. Substring starts at a specific character position and continues to the end of that string. So this is what's happening in here. We are getting the last index where we have this forward slash. And then we are using a substring of that. So remember how previously that would be displayed. I'm going to print out the scene path in here again so you can clearly see how the all of that is working. Well, I'm taking my time to explain everything because this is a bit confusing. So on the console there we go, Assets, scenes, and the last index where we have this forward slash and then a title screen. We have the last index, which is the integer right here. And then the name is a substring which starts at the last slash plus one. So we start immediately after the visit right here after the last slash. Now the final step is to remove also the dot. So I'm going to do that. And in here I'm going to say that int dot is equal to name dot last index of. And then I'm going to use the little dot. And then finally I'm going to print out. And probably you should do this now that you know how everything is done. Name dot substring. And where is it between 0 and the dot. And this is also another form of the substring. You can see it right here, a substring and 32 and 32. So when we give it two parameters, it retrieves a substring from this instance starts at a specified character position and has a specified length. I'm going to go back in here. I'm going to save all of that and I'm going to run the game. And they now run the game. And you'll see in the console that we have, first of all, we had the whole path, then we reduced it. And finally we have access to the title screen. So as you can see, this is very powerful and I will admit a bit complicated, but this is the only way to actually do it for actually the only way that I know maybe there is another way, but for now, it's time for a challenge. And your challenge is to set the text in a new script so make the text appear and disappear if the player is in a certain area next to the door, get a new script and attach it to the UI object. So obviously, you'll need to create a new script added to the UI elements or UI canvas, or maybe even the door if you want, immediately added to the door, use the entrepreneur enter and exit similar to the shop items, use the E key to open the doors and make sure we can't see the canvas when we start the game. So that information, pause the video right now and go do VJ alone. Okay, welcome back. So this video is getting too long. We are already about over 15 minutes into it, and I don't want to make this a huge video, so I'm going to cut it right now. I hope you did the challenge. In the next video, we will continue on with everything. I hope you enjoy it. I'll see you in the next one. Don't for the first time ever don't commit your changes because we will be doing a lot of things and the next one. So see you then.
101. Next Level The Proper Way: Welcome back, my fellow game developers. Look what we just created. We run the game. We will see one of the enemies in here. And when we kill him, we will go through doors. And you can see that we have the boss level and we have the health room. So if I open the door, I walked to the circle right here. There we go. I go to the health room. I can pick up a health and I can kill an enemy when he dies. I have something different in here. We will need obviously to change everything on every single level. But as you can see, now, everything works. So let's not waste any more time and let's get started. Okay. So you thought that I have left you, but I didn't. I hope you did the challenge of creating the actual appearing out of the name. So let's go ahead and do just that. First of all, I'm going to go into the door and here, and I'm going to go ahead and add another box collider, which is going to be the box collider 2D, which is going to be a trigger and I'm going to make it a little bit bigger. So I'm going to make it yay big. So it's right around the door. And I'm going to go ahead and apply the changes, applied changes. Now we should see a box collider right here, which is also a trigger. Both of them are triggers. And now I'm going to go to the door or actually go into the scripts in here. Make this a bit bigger because we can barely see anything. And where should we added any? Let's go ahead and create a new folder for the door. And then open it up and create a new script that I'm going to call the name fear. Hit Enter for this to compile. Today. Now we will double-click in here, open up the script, and start typing a couple of things. So the first thing we're going to do is create a serialized field, which is going to be text Mesh Pro, so using TMP Pro. So in here we're going to save the text. Mesh. Bro GUDDAT GUI is the level name UI. And then we're going to create a serialized field of the game object, which is the level name Canvas. And then we'll create a serialized field which will hold the game object, which is the door to open. So we'll keep track of the door to open. And why do we keep track of the doors open even though I'm going to immediately add it to the door, I can say transform dot SAT ACT or SAT non-active. That's what we need to door. But maybe we could add it in a different place so I wanted to keep it right here. So what are we doing? Let's make this one, the last one public and you'll know why and just take it open door zone. So this will make sure we can only open when we are in the zone. So when we start the game, I'm going to say that the level name Canvas dots are active as false because I never want to see it visible. I'm going to create a method in here that is a public void. Set the level name, which will take in a string variable, which we'll call the level name. And in here we're just going to say that the level name dot txt, file name, UI. There we go. The text is equal to the level name that we were sent. Then an update. What are we going to do? We're going to say that if the input dot get key down with a key code dot E. And we are, and the open-door zone, Zen. Zen, we are going Sue. Okay. An open door, the door to open, dot-dot-dot, active to false. Save that. Now the next thing we do is the on Trigger Enter to D and the armed trigger exit to the sugar exit to D. And I'm going to check for the parameter are actually for the collision. So if the collision compare tag, even though most probably we will say that this can only interact with the player. But I just want to take my precautions just in case, just in case. So in here are actually the door. Does the door have any layer on it? I don't think so. Not there is no layer, so let's keep in mind the player. So only the player can interact with this. And what we're going to do is get the level name Canvas dot set active to true. And an open-door zone is equal to try. And when we exit, I'll copy this, paste it on a new set, active, false, and we are no longer envy open-door zone. So I believe this is everything. I did it a bit fast, so maybe I made a mistake somewhere. Maybe we should. Oh, there is one more thing that I want to do. If for some reason, let's say the player opens the door and then he goes back and wants to open the second door. I want to close this door again. So whenever he leaves the zone, I'm going to say that the door to open, door to open thoughts, Sad, active is true. So save that. So maybe, or maybe the player actually enters through the door and then he cannot go back once he is outside the area. So this will mean that you have to make a decision before you go through. So with all of that out of the way, I believe it's pretty simple. There is nothing at all that might be complicated. I'm going to go into the level of exit. And instead of having all of this and start, I'm going to go ahead and right-click quick action and refactoring. And I will extract the method. And I'm going to say that this is the print name. Apply. And I'm going to remove from start, we don't really need it anymore. And also in here I'm going to say that there is an integer that is being sent with the level index. Why am I doing this? Because you'll see in just a bit. So the level to load would be equal to the level and texts that has been sent. So now what we can do is back and the level manager in here instead of Sunday level to load, which is on the level of exit, we can immediately print room name and I can remove this method. So print Exit, exit, this public know it's private. So I'm going to make public say that back in here. And print room name. Rent a room name, save that. As you can see, this is a bit better, a bit faster of handling things. Let's save all of that. We can actually remove the print, and instead, we will need to go ahead and send it to the name appear right here. And let's first of all see where we will add the name to appear. Let's save that. And let's see, we shall add it on the doors. We'll add it to two or one. And let's apply the changes. So now under one we shall see the everything that's lock it down and add a couple of elements in here. So the level, name, weight, this is the text displayed, this is the whole Canvas. Then we have the level name as the text Mesh Pro and the door to open, which is the current one. And in the open zone, why did I make this public? I still don't know. Let's go to the name appear and thus remove the class, make it private. I don't even remember why I decided to make public. Maybe just to make sure that everything works. Maybe, maybe that anyways, and if I apply the changes, we can see that in the door. If I scroll down and we have all of these option and it's actually attached to the door 1 and the text display is attached to the door one also, which is very bad. And everything will be at that. So we need to do everything by hand in here. So at the canvas, at the level name and it's going to oh, no, no, no, no, no. That's because we have this lock down. If I click on the actual door, we shall see that I was so confused by this because I know that when you apply the changes on the door one, you can see that only the door one is attached, but the door 2, you can see that the text is right here and the level name is the one that is right here, which is what we want. So this is the amazing work of the prefabs. And I was really confused for a second there because I had this lock down and I clicked on the door. It was the same. Anyways, no worries about that. Now that this is out of the way, we will save this. And now we need to somehow send, or is it the level of exit we need to send this name substring to the name appear. So I'm going to say that in here we have the serialized field of the game object. The door. And in here we have the name appear, which we where do we have it? Okay, so sublevel name. There we go. So I'm going to remove these two parts. And then say that the 0 door that Get component, which is the name, appear the set level name. We'll close this down and now we will have everything working. Okay, so in here in the portal one, I've assigned the door one. So for some reason we have things a bit weird. Maybe we can move the portal one right here, and the portal right here, I can just say, but so portal one will have the door one as its door. So port 1 and the door 1 and the normal portal will have the normal door. We save all of that. And now there is one more thing that we need to take into consideration. And this is something that I've thought about all the way while creating this. And that is we actually open the door immediately. I don't know if you've noticed that. Why is that? Well, because if we go into the where is it? One of the components in here, which is the room, the room manager you can see in here. If we double-click on the room manager, you'll see that in the update we have if enemy count is equal to 0, then we will set all the doors to act it. And the problem in here is that the enemies are always 0 missing, so the door is opened immediately. So what I'm going to do in here is just check to open Goldman enemies. Are that no, not that. I'm just going to remove this and we can actually add this mechanic and to the game. And maybe in the wave spawner when we instantiate the enemies. So when, when we spawned the enemies, we can make them children of the room. Where is it the enemies right here. We can make them children of this enemies. Then we can end the room manager. Instead of just getting the enemies, checking the overlaps, colliders, sorry, in here and start. We can do with an update every couple of seconds. Then make sure that we don't open the door or we don't check for this until we go ahead and kill all the enemies. This is all possible. But for the sake of simplicity, for the sake of just getting through this thing, I'm just going to go into the room manager and just comment this off, save that back in our game, run the game. And we should see now that the doors are all closed. The level name right here and the level name or IT, this is something that we do want to fix. We don't want to be able to see what the level is or having it be displayed on. You can see right here that it's getting destroyed. I'm going to shoot the enemy and we'll see once he is killed. So when he dies, now when I get, you can see that now we have the level boss and we have the shop. I can open this up if I leave. You can see that it does not close for some reason. If I go right here, I'll open this up, then go away. It does not close. This is something that we will fix, but anyway, this was the boss level. Let's see if we go to the boss level. There we go. As you can see, we clearly go to the boss. Love. How cool is that? So now that the boss is that I'm going to, there we go. So the boss dies. We will wait for this to open up. And obviously we need to change a couple of things in here. So first of all, the level name, cool back in the year and the level of exit in name appear in the start Canvas, we are setting the whole canvas to false. But then when we enter, we are setting the canvas to true and we will be fixing all of that maybe in the next video. But the mechanics work, the levels work, and I'll see you in the next one. Make sure to commit all of your changes.
102. Singleton Pattern: Welcome back, my fellow game developers. In this video, when we run the game, you'll see we have lots of errors. We don't fix all of them, but we fixed most of them. So I'm going to go ahead and pick up the shotgun, pick up some coins, get hit by the spikes, go through the door, go through this portal. And there you go. You can see that I'm on the other side was my shotgun, was my pistol with my health, but it's not visible because we haven't tweak those things. But if we go to doing player scroll down, you'll notice we had 500. We cut it by the spikes and it's 490, even though we didn't do anything. So let's not waste any more time and let's get started. The things we learn in this video are very important, a bit cumbersome, but very important. So let's get stomped. O k. So currently we can go from level to level. We have options where we choose one of the random levels that we have. Obviously, there are a couple of things that we will need to tweak with the appearance of the door and disappearance and so on. I feel there is still a bit of tweaking left, but there is a even greater problem. And that is once we pick up the coins, the weapon, and get hit by these bikes or something. Let me show you. When we pick up the shotgun, pick up some money, get hit by the spikes. There we go. So we can see our life is for 9500, we go to a number level. Maybe this will be, and you can see right now, whereas the player, if I look at D1 player, he is detached. He's not there. So you can see that his life is back to 50. If I tried to choose the shotgun, I cannot. And there you go. You can see that the coins are 0 and that is something that we will want to change to make sure that our player actually keeps everything with him as he goes through the level. So let's go ahead and just do that. So I'm going to open up my scripts in here and I'm going to go to the player controller, scroll up. And what we want is obviously we want to keep our weapons from level to level and the health of the player. So to keep that, we need to make sure that we do not destroy the player. We can save it on some other object or somewhere in the project. But obviously there is, the problem was loading a new scene which resets everything. So what I'm going to do is in here I'm going to create a public static player controller. And it's going to be the instance. And in the instance I'm going to create a private or know what, let's just write awake. And in here I'm going to say that the instance is equal to this. And then in here I'm going to don't destroy on load. And it will be this. So if I save this and hover over onto don't destroy load, you can see that to not destroy the target object when loading a new scene. And that's exactly what we want. So what will happen now? The object or the player and our case, we'll keep everything that he had with him from scene to scene. It will not be destroyed, it will not be reinstantiated. But there is the problem that the start will not be called the Gap. So we will not be setting the main camera. We will keep the player animator, but the main camera will change. And you'll see that this will produce a lot of errors that we will fix as we move on. But for now, understand the don't destroy load and what it does. Now, I'm going to go back in here. And if you look at the, where is it, the room, the portal, I've changed the portal one, which is this one, to go to level four. So we can go to the cowardly. And let me just go to the scenes because I was trying something out and I turned off the dome player in here. So there we go. That be turned him on. Let's save that. Let's go back to wait for this to load any day now, save that back to where we're serving. The skull is where we have Kelly's. Yep, We were a skeleton. So save that. And you'll notice in the hierarchy right now, and unity, the new update, sorry, it's terrible. So in the hierarchy you'll notice that we have the don't destroy it up and it has the doom play or under it. So I'm going to pick up the shotgun, become the Bitcoins get hit by the spikes, open up the door, moved to level 4. And there we go. And you can see that now I am here, but the problem is, you can see a player down and I layer up here. So now we have two players. One of them has a shotgun, the other doesn't. And you can see we have a ton of errors and the cons. So I'm going to open up the console. I'm going to pause the game. And first of all, we have the doom player. And here this is a debug I was showing. Let me delete this. You'll see what I mean in just a bit. I'm going to delete this. Next. We will have the, this arrow right here, which is okay, so this is the problems at all. We'll fix this in the later video. Then finally we have the object of type camera has been destroyed. You are still trying to access it. So I'm going to double-click in here and it's the main camera, and it's exactly what I told you about. So now that we know that our player is transitioning, and we can see right here in the scene, if I click on the doom player, which is the don't destroy, we have to do player, so we'll have to fix that. But one of them still has the shotgun. So technically, he will be able to move with that shotgun. And I look on the tomb player, scroll down to his health and you can see that the, his current health has also transition. Unfortunately, there is still the problem of the bitcoins, but we will fix that step-by-step. Let's first of all start off with managing the double layer standards. So this is something that we will need to address. And how are we going to adjust this? Well, there is a very nifty trick that we can use, which is called a singleton pattern. Let me show you using code what that is and then we will explain. So first of all, in here on awake, instead of immediately setting the instance, I'm going to say that if we don't have an instance, so the instance is amines are if we already have an instance, so it's different than null, and the instance is different than this. Then what I'm going to do is I'm going to destroy this game object. So what am I doing exactly in here? I'm going to check as soon as we await. Is the instance different than null. So that means if the instance is not null, I'm going to destroy the game object. But there is another thing if the instance is different than this. So what I'm doing in here, as I'm starting the game off, I'm checking if we either have an instance already or the instance is equal to this game object, I'm going to destroy this game object. And this will ensure that we, first of all don't create a second instance of this game object. And second of all, we don't duplicate the object that is already in here. So if we go to a new scene and we find that we have in a game object, it will be destroyed immediately. But else, in case we don't have an instance, so we're starting the game all over again, or when we start a new scene and there is no instance that is equal to this, then I'm going to say that instance as equal to this. This will just create a new instance. And this will make sure that we do not have two instances or that there is already one available. So I'm going to save that and I'm going to demonstrate how this will work and buckle up because we will have many errors. And I was testing this out to make sure I can properly manage everything. So I pick up the coins, I get hit for 90, open up the door, and I'm going to hit the portal, move away from it. And there we go. So you can see right now, I don't have a team player. The second player has been destroyed. That's because it checked and it's awake. Is there an instance? Is instance different than null? Yes, it was. And is instance equal to this? Yes, it was. So we are going to go ahead and destroy. So back in here you'll see that we have only 12 employer which has a shotgun. He can shoot. He cannot point and he cannot change his weapon, but he does have the shotgun. He is animating, everything is working and you'll notice that he is in the same position that he was in the previous scene. And that's because he will actually keep that with him as he moves. So you'll notice that when I entered the portal, I then moved away because I didn't want to stay in that portal. So with that information, after all the way, Let's see what errors we have in here. So I'm going to pause because there is a lot. So first of all, you'll see the problem with the camera, which we will fix in just a bit. You'll see that we have a problem with the cowardly enemies. They are trying to find the object which is the player, but they simply cannot. Not only that, it's telling us that the object transform has been destroyed, but you are still trying to access it. What do they mean by that? Well, as soon as they came into this world, they saw the little doom player that was here initially. And then when the scene started, he got destroyed and they were still trying to access. And if we double-click in here, you'll notice it's right here on the player chase. So the whole problem is with the player Chase. Obviously we will be fixing that also, the camera will be fixed. And finally, this one problem is also here and the player game object active and hierarchy. So all of this will be fixed and just a bit. So I'm going to unpause this and let's handle the problems one at a time. So stop this, open this up, the game start. So open the scripts up. And what shall we do? First of all, first I think let's handle the problem of the main camera. So if we go to the player controller where we use the Main camera. Let's double-click on Main Camera and scroll down, see where we use it. We use it. There we go, in the pointing the gun. So in here I'm simply moment to check if the main camera is equal to null. That means we don't have a camera. I'm going to say that main camera is equal to camera dot main. And this will only happen once we check is the camera null. That means we don't have a reference. If it is, then we will set the main camera. Again. If not, we will just continue on regular, regularly with the pointing a gun at most. So back in our game will run. The game will take up this one, opening. Anything else? We will go through this. And on the other side, we shall see in the scene. There we go. You can see that I'm able to point this out, but obviously there is, the camera in the game world isn't focusing on the player. And this is something that we will obviously need to flex. So let's get to fixing. I'm going to go into my scripts. And in here while we're shall we call this, Where should we call this? Let's see, where did we put the shape camera? Can we know? We don't know what? Let's just go into the scripts and put it inside of the managers. Managers, managers, managers. There is no managers. Okay. So managers for some reason, our cameras. There we go. So and the cameras, I'm going to create a camera control or camera camp controller. Hit Enter, wait for it to compile. Double-click in here, and I'm going to do a couple of things. So what? I'm always doing a couple of things. So what are the things that we are going to do? First of all, what we want to do in here is always find the player target automatically. So previously what we used to do is if we went into the camera right here and to the virtual camp, we said the follow player. And the problem is when we go to a new world, let me show you in detail, should have shown you before. So if I, for example, here I have the player, I click on him, he's in the hierarchy. I opened up the door, I call to another level. You'll notice right now if I open up the cameras again, which are exactly the same virtual camera, you can see that the follow is missing, so there is no player. Why? Because we have set the player before, but now he was destroyed. He's missing, so we need to find them all over again. So in here I'm going to open this up and I'm going to create a variable which is the player to chase, which is obviously going to be, let's see, the transform or no atlas just make him the layer controller layer to look at. And he's going to be equal to find an object of type. The player, oh, no, no, no, not here. Costs down and start. We are going to say that the layer to look at is equal to find objects of type, and it's going to be the player controller. Now we have a reference to the player controller that's also create a virtual camera. So, so cinema machine, virtual camera also inherit we need to double and C using cin, a machine. There we go, Save that. So cinema machine, cinema machine virtual camera, thank you. Is going to be the verb. Virtual camera. And we're going to set it in here as soon as we start. So it's going to be equal to get component. And where are we engineer? Where shall we attach the camera controller? We might want to attach it in the lecture. We will attach to the virtual cameras so we can immediately access the same machine virtual camera in here. So get component. And it's going to be the cinema machine virtual camera. There we go. And what are we going to do in here? Well, we are going to set the virtual camera up top follow to be equal to the layer to look at dot transform. So this will be at the start, but an update, we will need to create a while loop. So we've covered already while loops. And it's going to be checking for the player to look at while he is equal to null. That means we haven't found a player yet. We are going to keep searching for the player to look at. Keep finding the player controller until we finally find them. Once we find them, if we do have a virtual camera. So this is just an extra step to avoid any errors. The virtual camera not follow. Will be equal to the player. We will save that. And let's look again once what we did. So first of all, we created the player controller, which will, which is a variable that we'll look at players to look at, which is a variable of the player controller, a virtual camera. These are all private. We can name the private. I just didn't have the time. You know what, let's just make sure that we don't have any confusions in here. So private, private because we won't need them in the inspector. We can set M if we want. We don't have to. Then start. We are going to find the player controller. This is just in case. We start off and we have the player in the scene, then we find the camera, then we set the follow cam to be the player to look at. Have only one player in any scene, because we've already made sure of this right here. And the Singleton pattern. There we go. This is called the singleton pattern, keeping in mind, whenever you tell it to somebody, they will think that you're very smart. Trust me, even though it's singleton means a single object. So just in case they ask you what is a singleton pattern? Anyways, the virtual camera dot follow, we follow the only player that we find and then an update just in case this is for, let's say the player which doesn't get destroyed usually loads before all the other objects. So just in case we start off the game, we don't find the player immediately he is missing. We cannot solve him as follows. Follow then an update we will keep looping through until we find the player would check if we have a virtual camera. This is just an extra step. I don't think we will need this even, not even once because we will be attaching the script to the virtual camera, but just in case there isn't a virtual camera, we will check the condition and then we will set the virtual camera dot follow, save that back in here. Let's go ahead. And so the cameras, Let's see, shake and shake the camera controller through the virtual camera. And for some reason I can see that this is not a prefab. Is that on prefab this. So when the prefabs University, whereas the weapons you are a poor to level objects here. Nope. Okay. So I can see I did not prefer up the cameras for some reason I thought I did. But anyways, that's just prefer the camps and here. And you can see that the virtual camera will have the camp controller. So save that. Let me go to the other level. I'm not going to do this to all the levels. I'm just going to do it with the ones that we're testing, fixed everything and it will probably be the same. So cameras and here I'm going to delete it. And I'm going to go back to the prefabs and make sure I add the cameras in here in the hierarchy. Save all of that. Open this up, okay, seems, everything seems to be good. Back in the scenes. Back in the skull is save that, run the game. Go to the door, opened it up, move to the next level. And we should see, there we go. So we again found the player and now the cameras are working perfectly fine. Great. So now with that out of the way, if we look back in the console, we still have the problem of the player getting chased, not being fun. And because I see that this video has been already going long enough, I'm going to posit right here and then we're going to continue on in the next video. So I hope you enjoyed. This is a bit of a boring subject, I know, but at least you learned what a singleton pattern is. You understood why the camera was not going. I am trying to explain as much as possible even though it's very boring. But I want you to understand how everything is feeling. At first, I was also confused, but as I went through everything, I understood the things and I wanted to pass them on to you. So with that out of the way, thank you for watching and I'll see you in the next one.
103. Final Tweaking: Welcome back My favorite game developers to the last video and this one we are going to fix all of these small details related to the UI display, related to the Bitcoin coming from level to level and all of the other fun stuff. So let's not waste any more time and let's get started. Oh, okay, so now we need to fix the problem of our enemies not finding the player. We also want to make sure that we have the game manager as a singleton pattern because we obviously want to keep our bitcoins going from level to level. So for that, I'm going to issue a challenge, and your challenge is to find the player and find them on. So first of all, make sure that the enemies keep looking for the player until we find them. So this will be need to be a while loop inside of the update and the enemy controller. That's a small him. We want to keep our Bitcoins from scene to scene. So make the game manager a singleton pattern just like we did with the layer. Make sure you do the same for the game manager. Does it appear in the hierarchy and the resident destroy? So remember when we made the app layer Aidan destroy, it appeared in the hierarchy under a certain tab, which is did onDestroy. Will the game manager also appear? So test it out because we need to make sure that the game manager isn't a child of the managers. So the only way to make sure that he does not get destroyed is to make sure he is not a child of the whole managers game objects so well that information. Pause the video right now and go do it alone. Oh, okay, welcome back. So first thing first we're going to go into the enemy controller. Let's scroll up to update and an update in here. I'm going to check that while the player to chase is equal to null, we are going to go ahead and get the player to chase or set dipolar to chase to be find objects of type. Object five, sorry. And it's going to be the player controller. And it's going to be v dot transform because declared to chase, as we remember, is a transport. So we access the transform after refined the object which has the player controller on him. So this should work, but as long as we're here, let's go to the where is the game manager? Scroll up the instance. And in here I'm going to find the player controller. And it plays now, okay, So player controller, it's right here. I'm going to copy exact same code and paste it in here and remove this instance. Save that. So now we have a singleton pattern. We check if there is an instance, we destroy it. If the instance is different than null, we destroyed and we set a new instance. We save all of that. Let's go back into our game and let's see what we need to do in here. So the first thing we need to do is we need to open up the game manager in here, and we need to remove the game manager out of here. No, it will not allow me that we see in the prefab if I already have the gain managers. So Manager, the game manager. So I'm going to open the managers and I'm going to remove the game manager. So this will remove the game manager from all other scenes. And I'm going to make sure that I just have the game manager in here. So no other managers, one, sorry for that. We need the game manager only in the scene. So now we have the game manager, we have 0 but coins. Let's save all of that. Make this just a little bit bigger. Let's run it again. And let's see what happens. So we pick up the weapon, becomes a bit coins, we get hit once. Let's go to the next level. Let's see, we go to the next level. And there we go, We are on the new level and we can see that for some reason, do we have the enemies following? Nope, they are not following. There is something wrong. And as you can see, obviously the bitcoins and the health have not been updated. And that's because if we look on the player, if we look on the don't destroy the game manager, the Bitcoins also haven't been. So if we look on the player, you'll notice that his health is 490, but it's not being sent right here. Why? Because we only update, let me see, and the player health manager, we only update the player health once we get hit and not when we actually start. So we'll need to fix that also. But before we do that, there is something that is not quite right with the MS towards. So I'm going to pause the game right here and let's see what the problem is. So you can see that each one of our enemies is not being able to find us. So I'm going to double-click. And the problem is with the player Chase right here. So let's see what we are going to do about that. Oh, okay, so I went through a couple of things and finally found the solution. So the problem in here was, and it's very simple, we just need to move this while loop up here over all of this. And we might want to extract this into some kind of method. So I'm going to call this method finding player or making sure we have the player. So why do we move it up here? Well, because if we try to call the moving towards, save that. So what's the whole problem in the whole problem and the whole thing that is causing this is when we go to a new level before the layer, which is the one that doesn't get destroyed, gets to the next level. The enemies already have a target, which was the previous player. So once we destroy him, we can no longer find him. So if we try that, say we wanted them to the new level, we have all the players chase set right here in the start and then we destroy him. And then we try to chase the player or move towards the player, and that's where the error was coming from. So right here we are trying to chase the player. And once there is an error in here, nothing under this works. The update stops, everything stops. So that's why we need to be having the finding player. First thing we do an update before we continue on, while we might just need the if statement in here, I believe, but let's keep it as well, just in case it takes a bit of five. So with that out of the way, if now we run the game, we should see that when we go to the next level. There we go, we have no errors. We open this up and there we go. The cowardly enemies are running away and they are shooting at. So what that out of the way, next thing we need to do is obviously we need to update the player UI. So I'm going to go into the UI Manager. We stop the game. Yep, we did. Back in the UI Manager. Here I'm going to create a method that is going to be the public void update layer UI. And we are going to do a couple of things in here. So the first thing we're going to do is we're going to create a player health handler. Deep layer health colored, and it's going to be equal to null. And you'll see why in just a bit, because we are going to create a while loop that will check for the player health. And while it's null, we are going to keep looking for the player health to be equal to find objects of type. And it's going to be the layer health handler. And once we find that, we can exit the while loop. And then in here we are going to go ahead and first of all get the health slider dot max value. And it's going to be equal to the player health dot get max value. So obviously we need to create some kind of way to access the max out on the player health handler. What do we have any year, Okay, so they are serialized field. Let's go ahead and create a public and get layer max health. And we're just going to return V-max. Have not. We already have one of those. No, we don't. Let's go ahead and create the good layer, current health also, as long as we're here. So the current health and what else do we need from here? We might need the, Nope, I think that's all that we need. So now we can get max health. And then we'll need to set the health slider dot value to be equal to the layer health dot get current health. Save that. What else do we need to do? We also need to find a way to update our text. So I'm going to say the, what was it called? The Health text, was it called the health tech step? There we go, and it's public also. Great. So scroll down here. So the health, health flexed dot text will be equal to the player health dot get current. The current health. And it's plus the slash. And was the max health. So Player health dot GetMax self. There we go. So everything is set, but I'm going to do something in here. And that's right, a debug dot log. And I just want to keep track of the same acts Health. And let me just get this one. And this will make sense in just a bit. So upset this one in here. And you'll see why in just a bit. So I'm going to save all of that. I'm going to go back into Unity. I'm going to run the game. I'm going to pick apartment becomes the Bitcoins. Get hit. Please get it. Okay, So there we go. Go through the world, go through the portal, go to the next level, and you can see that it's 100 in here, even though if I press on the layer, it's for 90. So what do you think is the problem? I'm just going to give you a couple of seconds to think about it. The problem was and I'll tell you what the problem is. First of all, we need to update player health. So update the layer health or player UI. Now let's go ahead and test it out. Maybe you saw it in the debugger. I just noticed that we didn't even call them methods. So there you go. Debug works, I'm going to get it. Go through the larval, go through the portal. And what's the health? So the max health is 50 and the current health is 0. What do you think is the problem? Well, the problem is just like we said in the previous video, we already had a player in the scene and that player was destroyed. So once we want to set this house bar and the tax, they are being set based on the old player. So in order to set the new player, what do you think we should do? While there are many solutions to this problem, but I found that the best one is to just have a simple way of converting this from a public voice to a public art and numerator. And then we are going to yield return. New. Wait four seconds. And let's just wait 0.1 and it will be the time while the, don't forget, we have a fainting image that we've turned off just for the sake of speeding the process of testing out. So now what will happen is we will wait 0.1 seconds and during that time the older player will be destroyed, the new player will be found, and we will immediately get our update. So in here, instead of updates player, I'm going to start a co-routine, which is going to be the update layer health you. I save that back into our game. We run the game. We get it. We go out, we go through this one, and there we go. We can see that our health has been updated and it's very seamless. So there we go, We can see everything is working perfectly fine. And first of all, we also have the Bitcoins, so we need to fix that also in here. And what we also want to do is we want to make sure that we spawned in the proper position. So currently, respond right next to the portal, which is not helpful. Our goal is to get to that portal and not just spawn in there. So I'm going to, first of all in here, Let's see what we need to do. So we need to do we have the Bitcoin text, the BTC effects. There we go. So BTC text, the text is equal to find or no, we have the game manager, the on instance. Get, but continous. We go, I believe this one returns the bitcoins all know this as Bitcoin. So if I go to the game manager to have, get current Bitcoin, so I can get current Bitcoin, save that. And this should be working except for it's not because you cannot implicitly convert the type and two strings. So the two string, this converts anything play string, save that. Let's test this out a little bit from the game. And now we pick up a coin and we go to the next level. Okay, so now we should see we have in here ten, there we go. It takes time, but it will not be noticeable, especially once we have the fate image, but now we need to spawn the player at a certain point. So I'm going to go into the level manager and I'm going to do this at the level manager. And I'm going to scroll down in here. And I'm going to create a new method. So under here we are going to create a new method which is a public void and its spot layer and point and input player in point, we are going to get the player controller dot instance, dot not instantiate, dot dance, play a bullet controller. Okay, So layer controller instance. And we're going to use the dot transform position and it's going to be equal to some kind of spawn point, the position. And now I'm going to copy this and create a serialized field up here. Of the transform and it's going to be the spawn point. Scroll down and see how that looks. Yep, there we go. So what happens in here is we put the player on the point from the start. Where does it start? In here we are going to put layer point. We save all of that. And what happens in here is as soon as the level manager starts, remember it's not a ton destroyer, it's not a single combat on the player controller dot instance dot position is put immediately on the spot point. So back in here, we already have these palm points. We are spawn points 1. So I'm going to create a new in here and it's going to be layer on spawn. And where is it and the scene. Let's see, and it's going to be about here. Save that if we go to another level, we can actually go ahead and override this. So in the manager override and you can choose what do you want to override? Keep in mind, we don't want to overwrite the spawn points because for every single level there will be a different spawn point. So I'm going to apply override the prefab manager's level manager, maybe also apply overwrite prefer manager. There we go. And here the player spawn points. Let's go ahead and also apply the prefab to the whole prefer. Okay, great. So make sure you don't apply. All, save all of that. And now I'm going to run the game. I'm going to go into a new level. And we should. Nope, we didn't. That's because because we oh, okay. Okay. Okay. So the problem is here and 11 manager, what's the problem in here? If we scroll up to them, we spawn point and the level manager. What seems to be the problem? Also, there we go, It's in here. We need to set it. And now we need to go to the level managers and apply the changes to. So now when we run, we should see if we go to the next level. No, it's still not working. So what's the problem? The variable has not been assigned. So I think there is something not rapidly set right here. So apply to prefab level manager. And what else is the problem? So I think in the other level, the spawn point isn't getting properly set. So I'm trying to apply the changes. Maybe this time it will work. Nope, it still doesn't because if we go to the manager's level manager, player spawn point on the level manager, it is not even set. So what do you think of a problem in here is, I think we made some kind of mistake because everything in here has been reset. So you can see right here that these are not being set. So I'm going to apply all for now. This is not the best idea, but let's not worry about that for now. I'm going to go to the next level and make sure that we finally spawn on the proper point. But right now we will have also spawning. And here, as you can see, but we don't want that because each level will have its own enemies, will have its own levels, sorry, waves, and so on and so forth. But as you can see, everything works. The only problem still in our game is the fact that when we go to the door, this pops up that first time and when we open it, when we go away, it does not go. I mean, the words do not appear again and the door does not close again. Why? Because in the room that you've created and this was a mistake by me. We turn off the door. So we turn off the door, but the text display is always on the door. So I'm going to leave this as a final challenge to you. Do outside of the realm of the scores. All that you need to do is remove this text displayed from the door and put it on the portal right here, and then move it right here. So the Canvas will need to be knocked on the door, it will have to be on the portal and you'll need to turn off the door on and off based on the text, there will be a bit of changes to the code. But I think at this point, you have become such a good game developer at a, such a high level with all the long, long videos that I've taught you through. I hope you enjoyed this video. I hope you enjoyed this whole course. I hope you learned a lot. I hope you enjoy the journey and the process. And I hope you weren't too angry when I made mistakes. I hope you are liking the transparency that I'm showing you. And if you haven't already, of course, leave me a review, make sure you join the discord and I'll see you maybe not in the next video because this one, this is the last one. Maybe someday in the future, we will keep in touch. No worries about that. Thank you so much for watching. Goodbye.
 Michael Murr, Software Engineer | Coding Instructor | Game Dev