Transcripts
1. Class Trailer: 3D Short Form Content in Blender: Want to create slick,
cinematic short form three D videos and blender
that field premium and actually get views? Then you're in the right place. Short three D stories
are exploding right now, racking up billions of views
across YouTube shorts, Tik Tok, and reels. This isn't another every
button blender course. This is where you
learn to design and animate viral ready
short form videos, clean, intentional and
undeniably high end. Yes, we're using blender, but we're using it like
the top creators do. Focus skills, clear pacing, and start to finish
pipeline, you can repeat. In this course, you learn
how to master the essential. Confident navigation,
creative focus shortcuts, and a simple workflow
you actually use. Create compelling
characters, make them camera ready with
personality and presence. Animate characters and timing, cinematic motion without
getting buried in keyframes, animate the camera,
dynamic moves, reviews, and bits
that tell the story. Light like a filmmaker, fast setups that make the scene
look cinematic instantly. Build striking environments, assemble scenes efficiently
and keep them optimized. Craft sound captions, mix
music, as effects, dialog, and add relatable
on pnt captions, render and Export Smart, setting stone for Tik Tok, reels and YouTube shorts. We'll build a complete short
phone video from scratch. Idea, build, animate, render, edit, and publish, so you
don't have to just watch. You do proof it works. When I first learned
Blender from scratch, my very first Blender
YouTube shorts upload hit 26,563 views in the
first 24 hours. You will learn the same
approach. Step by step. If you want to create short form three D videos
that look premium, tell the story fast,
and ready to post, this is the course.
I'll see you inside.
2. Welcome! Start here: Welcome to the viral three D short fromro content
in Blender course. My name is Lad, and I'll
guide you through one of the Internet's most
viral video formats, short three D stories that track up billions of views
across shorts, Tik Tok, and reels. This course is for
creators who want polished results without
feeling overwhelmed. We'll build one complete
short together step by step from idea and planning to scene build character and
camera animation, lighting, sound
design, and captions, and finally rendering
and publishing for YouTube shorts,
TikTok and reels. Before we start that build, you'll get the essentials
clearly and in order. Across the first
videos we'll cover the viral short form
mindset and autonomy, Blender setup and navigation, fast character creation
and animation, world building,
cinematic cameras, and lighting, and
render export basics, plus editing, sound
and captions. That way, when we begin the real life project, nothing
feels foreign. You'll recognize
every step and know exactly why we're you'll see the full process in a
clear practical way so you can follow along and finish with something you
are proud to post. I recommend watching
every video in order. Every lesson builds
into the previous one, giving you a natural smooth curve that compounds as you go. You can also control
the playback speed and the volume of each video
to learn at your own pace. If you get stuck who need help, be sure to drop your questions
in the Q&A section below. Just make sure to
check the existing questions first because there's a good chance that the
question you want to ask has already been
answered in detail. At some point, you'll be
asked to leave review. Please wait until you've had a good chance to
experience the material. Feedback helps me
improve the course and better serve you
and future students. Thanks again for choosing
me as your instructor. I'm genuinely excited
to help you create beautiful professional
three D videos and to give you the confidence
to use it in projects, whether personal
or client based. Let's jump to the first lesson.
3. Anatomy of a Viral Shorts: Hooks, Story Beats & Motion Rhythm: Welcome. In this video,
we can talk about the anatomy of viral
short form content. We can talk about a
number of things. We're going to take a
look at these creators. I'm going to show
you a video that's getting tens of thousands
of views for me currently. This is the video that
I created with Blender. And the best part about
this is that I started learning blender literally
less than a week ago, seven days ago,
Today, on Tuesday, I started learning blender, and a week after, I have a video that's
currently going viral, and I'm going to share
every single secret that I know about so that you
can get the same results. And you might be
wondering, Flat, well, if this is going well for you, why would you even
show this to us? Why wouldn't you
keep it to yourself? First of all, I don't
believe that it's beneficial for me or for anybody else to just keep
everything to themselves. I very much like the view
of Mr. Beast on this. It's way better to
collaborate than compete. And he gave this crazy
statistic that's actually true and
is confirmed by Google that YouTube shorts, for example, receives approximately 200
billion daily views. That's 6 trillion
views per month. Like, your brain cannot even comprehend the amount
of views that is. Imagine 1 million views. And then if we do that 1,000
times, that's 1 billion. And daily, just on
YouTube shorts alone, it's 200 billion views. Why am I telling you
this? Well, because if I help you and you get
1 million views a day, and another person's getting
another million views a day. Even if you get 10 million
views a day, like, there are so many views on YouTube that it's such
a small percentage that it's not going to have any
difference to anybody else. However, if I do good to you, I get satisfaction,
you get satisfaction. Maybe you will help me in
the future in some way. So, you know, it's way better to collaborate rather
than compete so. I do agree with Mr. Beast. Now, we can talk
about three people today, Jenny, Isaiah, and Hayden. And I like to show you
their YouTube channels. So this is Jenny. These are some of
her viral videos, as you can see, almost
200 million views, 100 million views, 84, a lot of millions of
views. This is Jenny. This is Isaiah Isaiah also has a ton of millions of views. So these guys are absolutely professionals when it comes
to viral short from content. And we have Hayden
Hillary Smith, who used to be an editor for Logan Paul for
a number of years. So they got started together. That's how Logan got
pretty good results, and that's how
Hating grew as well. So I'm going to tell you the secrets that these
guys shared with me. I was actually
part of this club. I think it's Creator
club or creator. So it's an app that
was created for creators that were able to
just learn from each other, share things with each other.
And I was a part of that. And so that's how I was able
to learn from these guys. So these are a couple
of notes that I took from what Janie Isa
and Hayden shared. Obviously, these people got results with slightly
different approaches, and you might find that
some of these things will work for you or
for your clients, but not necessarily all of them will work because
it's all personal. Something might work for you, something might
not work for you. But let's take a look, you can pause and take a
look at everything here. So give visual hooks for people. Definitely great.
What is the hook? The hook is when
you hook a viewer. It's like a fishing hook, so you try to hook the viewer
to get their attention. If people drop in the beginning, change the topic,
I agree with that. Sometimes you don't necessarily
have to change the topic. Sometimes you do have to
change just the video itself. By the way, before we continue, this is the part that I
forgot to show you, as well. So this is the video that
I posted yesterday that's getting that's currently getting
like 700 views per hour. But in less than 24 hours, you got 26,000 views. And this is the video that
I created in Blender. You can see, kind of, like, a little preview for you, and I'll show you exactly how I create this video will
create similar video, and you'll learn everything
in as smooth way as possible. Don't explain for half of the video what the
video is about. Explain in the process. I do agree with that because by the time you finish explaining, it's like the person is already watching the next video
because it's just boring. You have to hook the viewer and then get into action,
straight into action. Something that Jenny
did pretty well, is she started her
videos with the end and then with basically the
ending of the video and also looped the videos that people watch
more than 100%. That kind of plays
with the algorithm. If you can make people watch the video and we'll get to ISA, you can see the statistics here. So you can see 115% watch time. If you get people to watch
more than once your video, then it tells the algorithm that they really
enjoyed the video, that they wanted to
rewatch it the next time. And sort of when you think
about the algorithm, algorithm is just people. If you want to study
the algorithm, you should study the
psychology of people because all algorithm does is serving people the best video for them. Some people say that
algorithm hates them, but it doesn't work like that. The way it works is
if there's a demand, the algorithm will
show it to people. If there's no demand, it
will not show it to people. If the video is bad, it's not
going to show it to people. But if your videos are good, people really enjoy it. You know, it will show
it to a ton of people. Have the same style of music? Yeah, this does help. When you created,
like, your template, the video sort of template, and you just repeat the same
template so that people recognize you having the
same style of music house, but not only music, also the same kind
textile help, the same, color grading, the same timing, the same, you don't want to reinvent the wheel
with every single video. What you want to
do is just repeat the same template
that's working very well because people enjoy it. If you reinvent the
wheel every single time, people will not get
the same stability here that they want
to see from you. And so they're not going
to watch the video. Lists work very well, so use mechanisms to
keep people watching, for example. We're doing this. We can do it in three steps, step one, step two, step three. So basically, you get people hooked. This
is what we are doing. This is how we're doing it, and then you explain
every single thing. So lists work super, super well. They've always
worked super well, and still works.
It's like a classic. Now, let's talk
about the Isaiah. AZA gave actually
statistics of his videos. So videos below 20
seconds should get 115% watch time in order
for them to go viral. It's not a strict statistics, so it might fluctuate a
little bit, maybe 110, 120. Basically, the more watch
time you get, the better. And here's the interesting
part is that if you get people to
watch the video twice, your watch time grows, and so it tells the algorithm, people watch it just
the way I explained it. And if you take it at the video that's currently
going viral for me, the average percentage
is viewed 110%. So it means that on average, people don't watch the video
itself is 15 seconds long. And on average, people
watch it probably for, like, 16.5 seconds
because of the math. 15 times 1.1 equals 16.5. It's not there yet
in terms of the 115, but once again, it doesn't
have to be strict. Videos that are longer,
they're going to have a lower average duration. So as you can see, 2025 that's 97 to 99%, and over 25, the AVD is
going to be even lower. Overall, you should aim to get your AVD as high as possible. AVD is just average fferation. If we take a look at the
videos, for example, on YouTube, if we
come to analytics, I don't have access
to analytics yet because this video is
less than 24 hours, but let's say we go to
another video like this one. And we can see it at the bottom. If we take a look
at the details, it's in the analytics overview, and if we scroll at the bottom, by the way, the reason
why I love YouTube the most is because it gives
kind of the best analytics. So you can see that on average, people watched
84.3%, on average, 21 seconds out of 26
seconds that we have here, and people stayed to watch 53%. By the way, this is also
an important marker. The more people stay
to watch your video, the more views you'll get because if the topic
is very interesting, more people will click for it. Not swipe away from the
video, and we'll watch it. Community post, this is the
way to build community, post stories, things like that, and focus on the
middle section, yes, you should focus not only on the hook but also
in the middle section. In terms of hyperboles, yes, Google is a lot better
at explaining than I am. It's an exaggerated
statement or claim. It works pretty well for ASA, but there are also
a lot of people who don't necessarily
use hyperboles, although most of the
successful creators do, and it actually does work. So an example would be, I'm
not tired, I'm exhausted. And if you take a look at
the meaning of this word, it's not meant to
be taken literally. How with YouTube, people
do take it literally. So this was Jenny, Isaiah, and let's talk about
Hayden, Huele or Smith now. I mean, there are
a lot of lessons that I've learned from Hayden, but one of the most
interesting ones is give the audience to plans to don't give the audience for.
What does that mean? Don't just give the audience
kind of the solution, give them the equation and
let them finish the equation. Kind of let the
audience think through. You don't necessarily have
a lot of time to do it with vertical content
because that's more related to the
horizontal content, although this can still
absolutely be done. So, for example, if we're
making video about Mr. Beast, one option would be to just say that, you know, Mr. Beast spends millions of
dollars on each of his videos. But instead of
actually saying this, we can visually show
what he's doing and visually show that he's
spending millions of dollars. So that would be just a ton
of money on the screen. That would be him with
his analytics when Mr. Bees is working with his props and with his teams with, like, his 300 plus people crew, and then we can say,
why would someone spend this much money on video? And you can tell that
that's a ton of money. But we're not actually
saying that we are visually showing to people
what's happening so that they can build
their own conclusion. It's just one of the ways to get the people staying watching the video because the
video is interesting. So overall, to summarize, to hook the people, you
need to get them to watch. And then in the end,
and this is a part actually that comes from Alex
Romose a business person, in the end, you want you want to give people the reward so
that they enjoy the video. And then the next
time the CU video, they want to click on your video because they enjoyed
it the previous time. So hook retention, reward, and you want to continue that
with every single video. Now, this is just kind of the psychology of how YouTube works, of
how people work. Now, knowing this,
we need to actually build the video and we need
to build it in blender, and this is what we'll focus on. This is the psychological part, and now we actually
in future videos, we need to focus on how
to build a video and then put everything together and
get the video to go viral. Now, the important
part, once again, I had a challenge to learn blender as fast as possible and get the videos to go viral
as fast as possible. And I was able to do it
in less than a week. Trust me, you don't
even need a week. You can do it faster. I mean, a lot of
the results will depend on you on how much
time you can put in, on your ability to learn
and get new skills, but you can see the results. So if you have any
questions, let me know. But than that. I'll see
you in the next video.
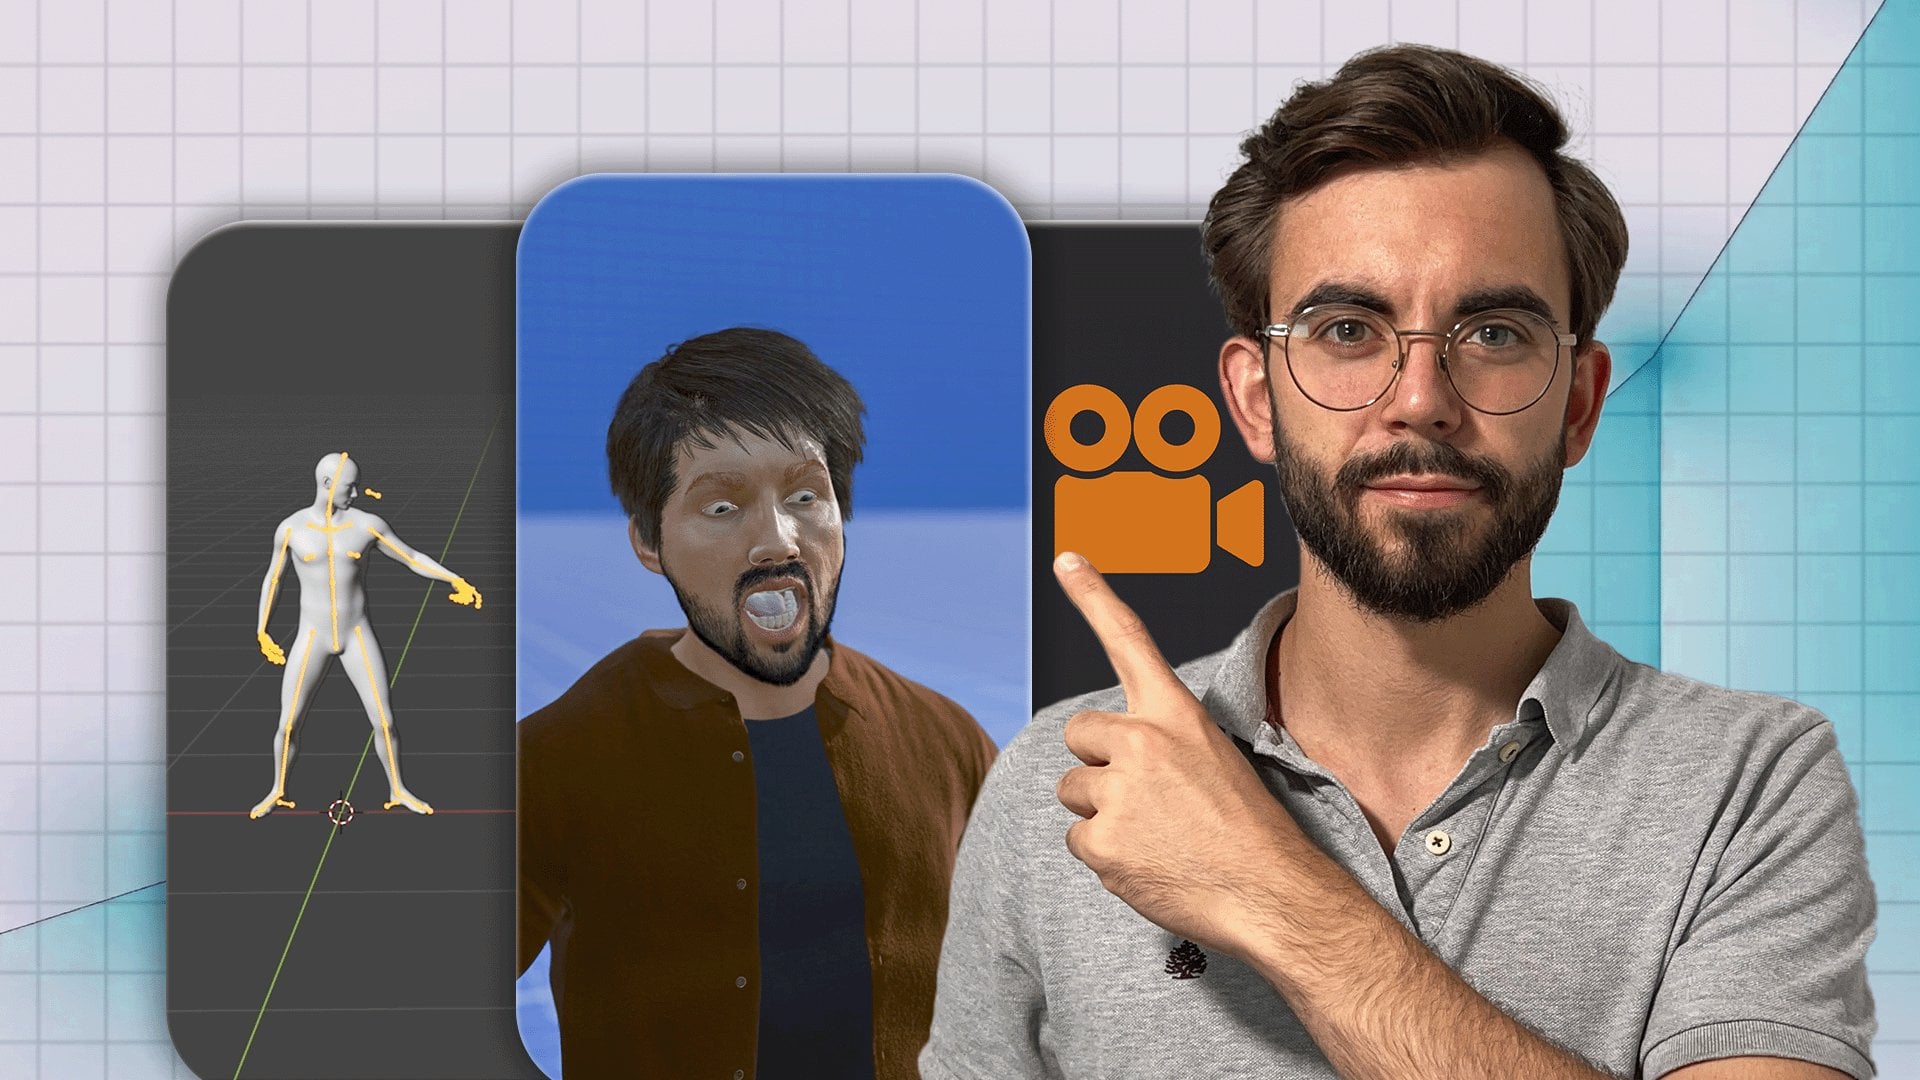
4. Blender 4.5 Tools Overview (Human Generator, Mixamo, BlenderKit, Sketchfab): Welcome. In this video, I want to walk you through the biggest secret of
how we're going to achieve everything
we're going to achieve because if you want
to learn Blender, like, Blender is it's
not easy to learn. It will I mean, it's
definitely doable, but it's just going to take a
significant amount of time. And you can
definitely do it, but there's a shortcut, in a way. And the shortcut is using all sorts of plug ins
and add ons, templates, basically already
prepared things where instead of you having to, for example, animate
a character, that's so much work. If you've never used blender, you don't it's like it's
hard to comprehend. Amount of work it takes
to animate something, especially a character and
do it with real animation. Instead of doing
everything from scratch, we're going to use add ons. Now, let me walk you through the most common ones
we're going to use. Maybe we'll sprinkle some of the other ones if there
is a need for that. But other than that, these four are the main ones
we're going to use. So the first one is Mixamo. So this is actually from Adobe, the same Adobe as
Adobe Photoshop, premiere after effects,
Illustrator, things like that. Now, if you go into characters, you'll see we have a ton
of creative characters. Take a look at them, and
we can add an animation. So instead of doing
a manual animation, there are a ton of pre
created animations. This is totally free. Like, can you imagine that? Unbelievable. And so we can actually do a number
of things here. This is an example, right? And
the person starts dancing, we can download, we can customize the movement,
things like that. Just a quick overview of how
we're going to do things. Next website is
called Sketch Fab, and Sketchfab is once again, a website where you can
download a lot of stuff. A lot of the stuff is for free. We can search a lot of stuff. There's also a button to
just add it in blender. So instead of you having to
download it from the website, you'll be able to just go ahead and add things to blender. So here we have a lot of
already created scenes, spaces, lot of objects,
ton of beautiful, amazing stuff that we'll be able to just use with the
click of a button. So instead of us having
to recreate, for example, a forest, we'll be able to just click of a
button and do it. Another add on is
called blender kit, and once again, free models, textures, all kinds
of interesting stuff. And if all of this
sounds overwhelming, trust me, a week ago, I knew nothing about this, and it took me less
than a week to get everything set
up, so don't worry. You'll be able to
learn everything fast. So it's similar to sketch Fab, slightly differently, we'll go into details a little bit later. And then there's
human generators. Well, this is the paid option. If you do have a budget,
I would recommend, but once again,
we can talk about all the details in the future. If not, we'll be able to
use the free options. If you have an option, this
is actually pretty great. We can take a look at
how things are done. You can customize
humans, create them, then animate all their
every single thing on their face, like,
it's unbelievable. So, this is the shortcut of
how we're going to do things. Instead of having to do
everything manually, we're going to use
all re created things in order to
speed up the time, save a lot of headache or
having to learn blender. And, I mean, we
will learn blender. It's just instead of taking
us like 100% of the time, we'll definitely shorten it up, like, at least four times. It's unbelievable how
easy and how quick it is. So now that you know
how it's going to work, let's get into the next video where we're going to
start learning blender. If you have any
questions, let me know, better than that, I'll see
you in the next video.
5. Blender 4.5 Navigation Fast-Track for Beginners: Welcome. In this video,
I'm going to show you how to quickly
install Blender, and I'm going to
introduce you to blender. First of all, in Google
search for Blender, then open one of
the first links. And the important thing is for
you to get to blender.org. This is their official
website by clicking here and going to the homepage
Blender 4.5, go ahead and click
on Download and download whichever
option you have. If you have Apple
or if you have Mac, Windows, you know, go
ahead and click on that. There are also options to download previous
versions of Blender, so you can click
here and Explore, download any version of Blender. This is done in order for some of the add
ons, for example, they work on the
previous ovins and they don't work in the
newest versions. But if you are just
getting started, I do recommend you downloading
just the latest version, which would be this 4.5. Or if you are watching
this, in the future, there's probably 4.6 or
five point something. To be honest, does not matter. The important thing
is that you get the application, go
ahead and install it. It weighs on like 300
megabytes or not a lot. After which, go ahead and open blender once
you install it. And once you open blender, you'll be greeted
with this pop up. This pop up allows you to choose what you're
going to work on, and it's going to automatically select a needed
workspace for you. If you click just anywhere
outside of this pop up, you'll just have the screen
open and there you go. Welcome to Blender. Don't worry about the pop up. Every single time where
you're going to work, just clicking outside of that. There's also a way to
go in the settings and disable that pop up from
appearing every single time. You can go ahead and
do that in settings. I'm going to show you where
the settings are in a second. Anyway, you come to blender. The biggest part here
is called the viewport. This is the main
visual part where you'll be seeing what's
actually happening and where you will be creating
all sorts of fun stuff. To the right, you
can see kind of the objects and what
you have in your scene. So this is the viewport.
This is the outliner. So let's say I just click over
here to disable the cube, and then if I click on it, you can it selects the cube, so it selects its outline. Say we can do full light.
So this is our light, and we have the
camera here as well. So whatever I select here is going to select
it here as well. At the bottom here, we have the properties panel. We have lots of
different properties for many different things, and we'll explore
this more as we go deeper into blender
and learn more. For now, this is the properties panel where you can customize the properties. This is the outliner
that shows your objects. This is the viewport and the bottom here, you
have the timeline. Everything I just
talked about is like a default workspace. However, you can
customize the workspace. For example, you can click in between and
move it like so, and you can move this thing
to the right, as well. You can also, for example, right click and you can
join up or join down. So, for example, if
I click Join Down, the stop part is going to be joined with
this bottom part, and basically, we're going to delete the bottom part.
So let's give it a try. Join down. But what if we
want to get that back? Well, we can come to the very
edge here at the bottom, and you can see the cursor
turns into a cross. So we can click and drag up. And you can see we have this
new kind of split window, and it's actually going to
just create another viewboard. And if we click on
this button here, we can switch between the different Windows
options that we have. In the very beginning,
we had a timeline. So if you click
here on timeline, this is exactly the
same thing that we had. And this brings me actually
to this button here, which has different windows. And by clicking here, you can select
different windows. We're going to use different windows for
different things, but the important thing
for you to know is that Blender has a lot of stuff. We're not going to learn
every single thing in Blender because we just don't need to know
every single thing in order to create the kind of videos that we're
going to create. We're going to explore
this a little bit deeper once again
as we go deeper. Another important thing in
blender is these four buttons. This is the viewport shading, and we have different shadings. In simple words, it
means this is the solid this is the
material preview, and this is the render. Render is how it's
going to look in the end when we
export the video. This is the material preview. So if we apply material here, we're going to see the material. But by clicking here,
it just will have absolutely nothing aside from
just the solids themselves. Now, the way you move
around in blender, the way you move around
in the viewpoard is you move with your scroll wheel. You have to press
on the scroll wheel and move your mouse around, and this is the way you'll
be able to move around. This is kind of the main way
to move around and blender. If you scroll down, you're going to zoom
out or scroll up, you're going to zoom in. Scroll down, scroll up. To be honest, some mice have different
scrolling patterns, so it might be vice
versa for you. By left clicking, you can do a selection like
this, for example, I can select this and I can
select both let's say we delect I can select
both the object and the light together by
doing a selection like this. You can also select all three, or you can select just one.
This is the way to do this. We can also just click
onto an object like this and we're going to
select the object. You can move around and
explore it this way. Now, we also have different
modes here at the top. So for example, right now,
we're in the object mode. With the camera, we can
only be in the object mode. But if we select the cube, for example, there
are different modes. There's edit mode, coped mode. So, for example, if I
go into the edit mode, I can select certain parts and
then I can customize them. We're going to explore
shortcuts and scale position, rotation, all sorts of stuff
in one of the future videos. For now, I just want to show you kind of a general overview of blender so that you start
getting used to it, but you don't get overwhelmed. Now, another way to move in
blender is to press shift. So if I press Shift first, and then I press on
the scroll wheel, I can move around like this. So instead of me moving
around our object, I can press Shift and
move right to left. Now, you might find this very unintuitive to move
around like this. And yes, definitely, especially
coming from premiere, from after effects, I
was like, What is this? But don't worry. You get
used to it quite fast. An important thing is we
can go into settings. We can either come
to d preferences. And you can also see lots of, like, small shortcuts here. So, for example, for
me, because I'm on Mac, I have a command comma. But if you're on Windows,
it's probably control comma. So if I press these, I can well, once again, either press
here, for example, to go into preferences or
I can just do a shortcut. There you go. And it
opens preferences. If it's not intuitive for you, first of all, you can change
the orbit sensitivity. You can lower it a little bit. You can also set a Zoom
to mouse position. It means that if you zoom in, it's not going to zoom
in in the center, but it's going to zoom in
whenever your mouse is. So if I zoom in on the camera, it's going
to zoom in here. On the light, it's going
to zoom in here and here. But if I don't have
this selected, it's going to zoom in, not in the cursory, but
just in the middle. I set this part to 0.25, which I found to be
pretty good for me. So you can either click here, so you can just put
a specific number. Also, Zoom method
for me is continue. Some people have it differently, and I think in the
very beginning, had it differently as well. So I put it to continue
to make it even better, and you can invert
Zoom direction. If your system
does the opposite, you can lick here. The next important thing is
for you to go into input. And here is something
you have to take a look at your
computer at your keyboard. For example, I'm
working on a MacBook, and I don't have the NAM pad. So I don't have this part of
the keyboard to the right. And the way blender works is it does have some shortcuts
on the snap pad. And if you don't
have the Snapad, it's important to
click on this button here to emulate the NAMPad. So if you have the NAM
pad, then don't click it. If the NAM pad is absent, then do click on this
button because we'll be able to transform the
keys one, two, three, until zero and get the same shortcuts
that people have with NAM pad. So go
ahead and do that. Now. If you have any
questions, let me know. Better than that I'll
see in next video where we are going to learn
some fun stuff. See.
6. Blender 4.5 Menu & Shortcut Cheat Sheet (Printable Quick Reference): Welcome. In this video, I
want to walk you through the essential menu and
the blender cheat sheet. You can find this chit cheet in the downloadable
resources section. It's just for you to more
easily remember the shortcuts and the keys in order for you to just move around and
blender a little bit faster. These are the main ones. So I do recommend
actually learning these. Some of these you mail no like Commands or Controls on
Windows or you know, undo Command Z or Control
Z or Control Shift Z. But just a reminder
for some of these, if you already know this, or you're going to
learn some new here. And in this video,
I'd like to show you visually how all
of this is done. So let's begin. You already know how to orbit, how to pan, how to zoom. So let's explore
the first shortcut, which is move, and the
shortcut is G. So for example, let's say I select our
Q and I press in G, and I will just move it around. Now, it does move around, not in a very straight way. There's a way to move
it around straight if I press on once
again, the mouse scroll, and you'll see that I'm either
moving it left to right, strictly on the line or
I'm moving it up and down, or I'm moving it front and back. But I can also
move it like this. And let's say I put
it here and we move around and you see that
it moved kind of weirdly. So if you want to move it in a very straight and specific
way, you can press on G, and you can either press on the mouse scroll over here to
move it in a straight way, like up and down, or
you can press shortcut. So you can actually
see to the right here, we have the X, Y, and Z. So we have three lines. If I press G and I press Z, it's going to move up and down. G and X, front and back, G and Y, and it's just
going left and right. The sequence is just press G, and after that, press whatever
you want. X, Y, and Z. The next shortcut is R.
So we can once again, select our object and press
R and start rotating it. And once again, you can see if we rotate it from an angle, when we are at an
angle to our object, it rotates in this
interesting weird way, right? If I put it here, then This
is not straight at all, but there's also a way
to rotate it straight. So for example, we can rotate it by pressing R and pressing Z, and this is the way it's going to rotate or by pressing X, and this is the way it's going
to rotate straight or Y, and it's going to
happen this way. The next shortcut is S, scale. So once again,
select our object S, and we can make
it bigger, right? If I press X, it's going to get bigger. In the X direction, sorry, in z direction. Now, if I press X, it's
going to get bigger in the X and Y, as well. Like so. And by the way,
the way I'm doing this movement is
by doing it with the mouse so I'm just going to the right to
left, up and down. You can see the two arrow head, this white one, and I'm just moving it away from the center. I'm moving to the left, and it's going bigger.
That's how it works. And let's say we increase the scale to something like this, but we don't like it. We wanted to go back,
so we press Command Z. Or if we want to
actually undo undoing. So like, redo, Shift command. That ends going to get
bigger once again. Another shortcut is Shift
D to duplicate something. And you might notice that, for example, on MacBook, the shortcut is Mandy, but here it is Shift D. So
it's slightly different. That's why it might be slightly confused in
the very beginning, but once you get used to it,
it's pretty straightforward. So shift D to make a copy, and you can see that
we made a copy, and now if I move it
around, I move it around. Now, make sure you select it in the viewport to duplicate it because let's say I
just diselected it, I click here, Shift D, and it does make a copy here. But if I select
it here, Shift D, it does make a copy like the shortcut is
to delete something. It's actually not the
delete key, but it's X. So let's say we do a
duplication, put it here, and let's select it, press on delete and
doesn't delete. But if I press on X, it's
going to have this pop up. Delete, selected object. Yes, we can go ahead
and delete it. Command. And you will
notice that if I press X, the delete button is
right beneath the cursor. It's like it doesn't
appear in random places. The delete button appears
right beneath the cursor. So it's just a bit easier for me to click instead of
having to move around. So once again, even if I do
it with this one, press on X, you can see the delete button, the blue button is right
beneath the cursor. So I can go ahead and press delete or Command chat and I can also do
the same thing here. If I select anything
here, for example, I press X, it's going to
automatically delete it. There's no pop up,
just delete it. Now, let's walk through
the camera view. We have a number
of camera views. And the reason why in
the previous video, we went into
preferences and added the Numpad selection is because now by
pressing certain keys, we are able to move our camera. So for example, view
through camera. This is either NAMPAD zero
or if we have our selection, this is irregular key zero. I don't have AMPA, so
I have to press zero, but if you do have an amp you have to press zero
on the Nampad. If you have any
questions, let me know, but it should be straightforward.
Let's give it a try. I come here and I press on zero. Our camera is here a press zero, and this is the
view of the camera. By pressing zero
again, I'm just going back to this floating mode. We have the front view,
right view, top view, and these are either one, three, and seven. So
let's give it a try. If I press one, it's going
to be the front view, three, right view,
left, top view. And from this point, this is the top view right now. We can just click with our
mouse here and move like so. So as you can see,
it was the top view. If I press one and then click, this is
what's going to happen. Now, there's also this toggle perspective
orthographic view. If you've never
seen this before, it's going to blow your mind, so let's click on number five. And you move around and like, What is going on? Well, let me give
you an example. For example, Shift D
to duplicate this guy. Let's place it here and let's move it around by pressing Y, let's move it further, like so. So you can see it's actually
a lot smaller in the size. This one is
significantly bigger. This one is smaller
because it's further away. That's how it works
in real life. Something's further away, it
gets a little bit smaller. However, if I press on five, you can see that
by pressing five, these are the same size. And this is exactly
why this view exists is because
by pressing five, everything in the viewport
becomes one size, even if it's further away. For example, these
lines are further away, but these lines are still, parallel to each other
because if I present five, you can see that the
further we get our lines, the further they go away, the closer they get to each other. But if I present five,
everything is straight. It's a specific view
that you can use in order to make things super straight, and that's
how it works. If a person two, you will
see that we're going to move around just a little
bit by going down. Person four, we're going to
move around by pressing six, we're going to move around in a different location position. By pressing eight, we're going
to once again move around. So the number keys
are created in order to put our viewport
in a specific position or move around in a straight
and easy way one until nine and including zero is all about just kind of
everything you see. Now, let's go into
lighting and rendering. If we press Shift A,
as you can see here, it's to add a light, but it's not only
to add a light. You can add all
sorts of stuff here. Shift A, and I can add, as you can see, I can add, like, a ton of
different stuff here. For example, I can add
another cube or circle say, I added circle, I'm going to
press to increase its size, and I'm going to scale
it up or I can just select it press on X
to delete Shift A, and we can add say, a cylinder, S to
increase the scale, and you can see we
have a cylinder. We can either kind of
go inside the cylinder, move around, like so or
select it X and deleted. So we can add a lot of
things by pressing Shift A. Now, we can also add a light. So we can add a point, we
can add a sunspot area. And we can actually see the
light by pressing here. So if I press on the rendered, you can see that we
have this small light. But if I press on X and delete, our object is going
to be dark, right? And if we want to add a light in order to
actually see it, say we want to add a sun. Delete the sun by pressing X, shift point light, G, and we can move it around,
like so you can see, it's illuminating it
in real time, right? We can we move it like so you
can add a light this way. The shortcut is Shift A, you can add a lot of stuff here. Let's say we want to
render our image. In order to render, we need
to press a shortcut F 12. But for example, on a McBook, it's not necessarily F 12. You have to press FN F 12 because F 12 is
another button for me. For example, for
me, it's volume up. And in order to not
volume up like so, right? I have to press FN
in the application. So if you have nothing on F 12, you can just go ahead
and press Ftwelve, but if you do have it,
you either have to press F 12 or the equivalent
of that on Windows. So if I do press FNF 12, you can see just
rendered the image. And it's exactly what we
have if I press on zero. It's exactly what we have
in the camera viewport. Now, we can also go ahead
and render the animation, but because we don't
have any animation, I mean, we can render, but it's just going to
stay exactly the same, and we're going to have
a separate lecture on exactly all the different
methods to export because there are also a
number of ways to export. I'm going to show
you the best way to export for social media. We'll get to that in one
of the future videos. And we can go ahead and come to one of the properties panel. We can come into Render and we can change our render
settings here. So this is just for you
to know where this is. The camera icon will
explore this in the future. And once again, general
essentials, this is command, comma, or control,
save as, and do redo. So if I want to press Command
S and save the project, and I need to select
where to save it, give it a name here
at the bottom. So for example, test, I'm going to save it on
desktop, save Blender file. Now, if I'm going
to press Command Q to quit the application, I quit. Here is my file, so I can go ahead
and just double click on it to open it or
press Command O to open. I can click on this button
to make sure it's rendered, and you can see our light is
exactly where we left it. Our camera is exactly
in the same position. Cube everything is the same. So that's how you
save a project. And if you're working on
project, for example, for let's say a week
or a couple of days, this is the way you just save it and continue working
on the project. So this is the chit sheet. You can find it in the
downloadable resources section. If you have any
questions, let me know. But add than that, I'll
see you in the next video.
7. Install & Activate Essential Add-ons: BlenderKit, Human Generator, Mixamo: Welcome. In this video, I'm
going to show you how to install and activate
the central add ons. You'll be able to find links in the resources
section for some of the links I was able to
get you a special offer. For example, some of the
tools offer an upgrade. So if you want to
get that upgrade, you'll have a little discount and things like that.
Now, let's get started. I'll show you a
couple of examples, but I'm not going to go
through every single add on, and you can see that
I'm showing you here the blender kit and
the sketch fab. The way you install
other add ons is exactly and
absolutely the same. So there's, there's no need for me to repeat it ten times. So Blender kit, you'll find this link, download Blender Kit. Allow the downloads downloaded. And when you download, there's no need to unzip
it. It should be zipped. Now, when we go to Blender, let's open it up, and
let's go to preferences. So command comma
or Control coma. And here we need
to go to add ons. You can see which addons
you have you have enabled. You have some of
them are disabled. And if you click on this arrowhead here,
install from disk, then you just find where it
was downloaded so for me, it was downloaded to the
download. I click on it. Install from disk, and you
will see that I have it here. Another new shortcut for
you is N. By pressing N, you will have this pop up, and here you will
have your add ons. So for example, for the
blender kit, this is the one. Let me give you a quick example. So let's say, actually, let's do it like this so that we can see the
way it's rendered. And let's search for blueprint. This is going to
be our material. If we apply it here, you can see that we have
the blueprint material. There you go. I'll show you in detail
how to use this, but it works like that. If you want to have
the paid option, you just have to login and
you'll be able to use it. So this is one of the add ons. The other one will
be a sketch fab. Once again, you'll find Link, and you can download
it on Github. So it's not downloaded from
the sketch fab website. So if you click through Link, there's once again this
file which we download, then we go into blender. Once again, command
coma for preferences. Let's go to add ons.
We already here. Click here, Install from disk, sketch fab, Install from disk. You'll see that I
have two because I already have sketch fab Install. You can also delete
some of these. So in order to delete them, you can just go ahead
and click here delete, and good to go. So once again, all the links are in the resources section. Go ahead and install these. And in the upcoming videos, we're going to dip into
each of these add ons, how to use them and yeah, what these are capable of. So if you have any questions, let me know, but than that, I'll see you in the next video.
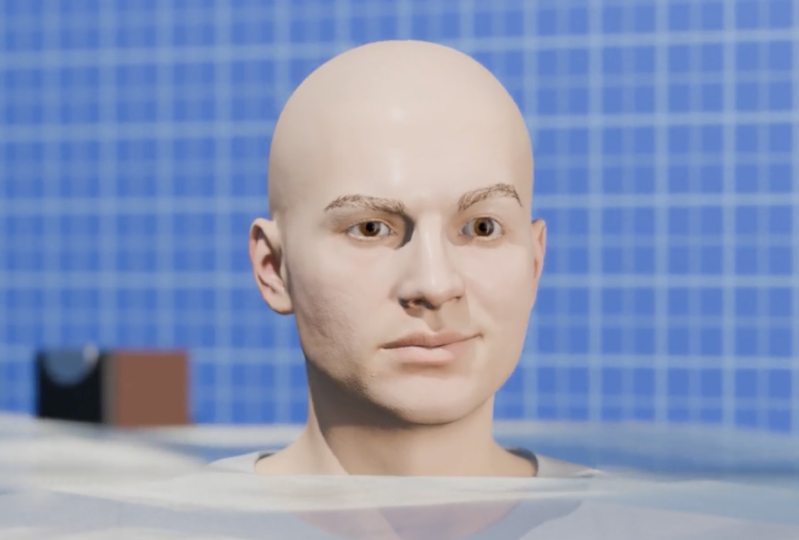
8. Human Generator in Blender: Fast Character Creation for 3D Shorts: In this video, I'm going
to introduce you to the human generator Ultimate. This is one of the
two videos on how to create characters in
minutes, not hours. Let's begin by opening blender. And let's get rid of this. So I'm going to select press
X and press on Delete. I'm going to press
on Shift A, mesh. Plane. So I'm just adding kind of like a
floor, in this case. I'm going to press
S to scale it up. Now we're going to press on N. After you purchase and
install the human generator, this is where you're
going to have it. And we can create both
females and males. We can create our character
by pressing here. So let's create Look, click on him and
generate new Human. This wasn't cut, so it's how fast we were able to
generate this guy. He's not naked completely. So if we click here, you'll see that he
has some clothing, not a lot of clothing,
but just a little bit. Before we begin working
on, in this case, author, let's press Shift
A to create a light. We can create a point light, and we can go into data and increase the power to
the power of our light. And if we go into object
into object properties, we can change the
position so that it's like this and we can see our person
a little bit better. So I just put light in front of the person and
increased the power. Okay, now, if we click in our person in the
human generator, we are going to see a lot
of different options. So we can have the body, and by the way, it
disables the hair. You can click here
to enable it back, but in order for the program
to work a little bit faster, the disable it, you can also disable it in the preferences. So if you go into
the human generator, you can click here on auto hide hair children
when switching tabs, but it's done in to improve
viewpoint performance. So I'm going to leave it on. So we can customize if he's
overweight or too thin, muscular or not muscular, skinny, or the opposite of that. And we can customize every
single piece about him. So we can customize the
head, neck thickness, arms, legs, torso, let me zoom out so
that you can see better. Okay, so he can be
short or be huge. So we can customize every
single part about him. And we can either switch between different properties here
so we can go from body to age or we can go
back and actually just see all of them at once
and then click and change. So at this point, he's 30, and we can make him 70, and he's going to be in good
shape for 70-years-old. Each adjustment
customize this as well. Now for the phase once again, you can customize every
single piece here, although he looks like
an ape a little bit, although we are apes, in my opinion, or
we used to be ones. So you can customize his face, can customize his skin, whatever color we want,
redness or redness, saturation, things like that. Let's go back for hair. For this, we will
need to enable it. So we can change every
single part of his hair. For clothing, let's get him some clothing because
he's a bit naked for us. So let's make him a pirate. Or if we want to, let's make him like
a real person. Something like this.
Okay, so we have a jacked 70-year-old author. Great. Let's set
him and continue. We can also change different
poses and, you know, you can choose
from any of these. And he's falling. Or why don't we Okay, he's going to pose for us,
and we have the expression. Okay, so we have a number
of expressions here. Why don't we make him blink? Okay. So we have a very
interesting 70-year-old author, and, yeah, it's this easy
to create character. Now, you can also badge
generate different characters. And in order to do this, we
first need to add markers. So for this, in this case, we need to press Shift A
and human generator marker. Let's add a pose, and let's add, like, a running pose,
standing around. Okay. And you will see that
because we added three poses, we can generate three humans. You can also customize different probabilities
of what kind of characters you
are going to create. And once you are satisfied with the customization, you
can click on generate. It's going to take some
time. It's going to take a bit longer to
generate all three. We have Lisa, Charlotte, and Melanie. Let's
select all of them. I select tel of them by pressing
Shift at the same time, and we can move them a
little bit to the side, like so, and then we can
select also each one of these press G then X and put
them in different positions. G and X. And there you go. Then you can click on
one of the people and come to create and customize
every single person. So this is one of the ways
to create humans in blender, super fast, super easy, but it does cost a
little bit of money. If you have any questions,
let me know, but than that, I'll see next video
where we are going to create everything for free.
9. Animate Faster with Mixamo in Blender: Apply & Tweak Motions(Minimal Keyframing): Video, I want to introduce you to another way to
create characters, to create animated characters, and it's through Mixamo. So if you come to their website and you go into characters, you will be able to select
your characters here. These are already
created characters. We can choose whatever we want, and everything here is for free. Pages and pages of already
created characters. Okay, let's search for
something interesting. Okay, let's go
let's go for Brian. Why not? It's going to
take some time to load. And now, if you go
into animations. And this is kind of the best
part about this website is because you can select already
pre created animations. You can put it on every
single character. So, for example, in one of the videos that
went viral for me, I need to create an animation
of a person digging. So I search for dig and
you can see digging here. So if I click on it, you
will see that our person, our brand is going
to start digging. Or we can have him
do a big jump. Like so. We can customize the trimming the arm space so that the arms are
going to be a lot wider. It doesn't look natural, so we can put it
here for overdrive. Okay, so this is
basically the speed. If you like, click on Download. Before we download,
we need to sign in. So it's absolutely for free. You can go ahead and
login with Google, and that's it. So that's
what I'm going to do. Okay, our brand disappeared
because I logged in. So let's come to
characters again. Search for I think
it was like this. Yes, proceed with
a new character. This is the character that
I animated previously. So I'm going to
select this character and kind of lose the
animation of that character. And let's search for
Ding once again. Because we were able to
find the big jump here, probably **** and Big. That's why they are providing
here because they might think that that's kind of
a mistake in the typo. Okay, so click on download here, select the number of
frames per second. We'll go deeper into frames per second a little bit later
when we're going to export. However, I do recommend you setting your videos at
30 frames a second. This is the best that works
on social media currently. So go ahead and set 30 frames second
and click on Download. Click on Lou, and that's it. The video is not sped up or cut so you can see
how fast it is. And you will see the
file name is FBX. And this is important because
when we come to blender, there are a couple of ways
we can import our person. We can either go
into file import, and we need to select our file. Which kind of file
we're going to import. And you will see that the file
that we downloaded is FBX. So if we come to File, Import, and let's search for
FBX, it's this one here. So we can go ahead
and click on it. And now we just need
to search where it is. And we have it in the download
folder called Big jump. This is exactly this file. So go ahead and click on Import. We can delete the square
by pressing X. Delete. And this is our person. This is the armature.
At the bottom, you can see we
have our timeline. Timeline basically
represents the key frames. And if I press on space, it's going to start playing. And there we have our animation. And we can also see
how it looks rendered. Let's take a look at another
angle, something like this. Let's take a look press space. There's our animation. Beautiful. Now, instead of
going into file import, and pressing here,
there's also another way, and we press Command Z do
until we have our file, and we'll go into downloads, and we'll just go ahead and drag and drop our
file into the viewer. And we can input our FBX
file this way as well. And now, if we get
rid of our box again and press on space, there we go. We have the same animation. So these are the two ways you can import your
animated characters. And you'll see that if
I disable the search, we have pages and pages and pages of
different animations. So I have 52 pages
of animations. Unbelievable. Rumba
dancing next level. Now, imagine if we were
to animate it by hand, just to give an example of
how much time it saves. So we need to go
into the pose mode, and here we will need to select like a part of the
arm, for example, and press on G, and we'll be able to move
an arm like this, but, you know, it
doesn't move naturally. And so we would have
to play around, change different
angles like this and set every single
keyframe out. And that's just for one arm. So in order to create
this kind of animation, it would take hours and
hours and hours. No kidding. And it wouldn't look as realistic and as good
as this animation does. So, trust me, this
tool is absolutely unbelievable because of the
amount of time it saves. Now, there's a slight
limitation with this tool, and limitations that you are
limited by the number of poses that you have
with this app. Of course, you can go ahead and customize the
animation later, but it's going to take
a little bit more time. And instead of animating
everything by hand, our goal is to make it as smooth and streamline
as possible. So that's why we're
using this tool. So technically, yes, we
have a bit of a limitation, but it's nothing
significant, to be honest, and you can still create
unbelievable videos with. Have any questions, let me know. But other than that, I'll
see you in the next video.
10. BlenderKit for Instant Environments: Search, Import & Organize Assets: In this video, we'll explore
how to instantly create environments with blender
kit and a bit more. Let's open Blender present and we're going to have the
blender kit on the right. If you haven't installed
the blender kit, then watch one of
the previous videos on how to install add ons. You will see that
we have blender kit over here on the right, and we also have blender
kit over here at the top. And there are two ways
that we can use it. We can either search for it over here or we can search for
something on the right. Now, we can also, for example, click on models, and it's
going to show models. We can also click over here. So we have models here
and we have models here, where we can go into materials, and it's going to switch
to materials here. So basically, this tab here
is the copy of this tab here, but this one is a bit bigger. You have a bit more
to take a look at. And this one at the top is just a little bit
smaller and more convenient if you don't want to open this whole
thing on the right. So let's start with models. The important thing is that
you can also put filters when you search for something
or just overall filters. We can put free first, so you can see that some
of these are locked because this is a
pas subscription so that you get access to more. You can see we have
quite a few locks here. But if we press on free first, it's going to show
everything that's free. And in order to import anything, we just literally go ahead, drag and drop it here. And it's going to take
some time to actually load because you don't have it
installed on your computer. It's showing previews
from the Internet. And when you drag it into
the three D viewport, it's going to actually
download it from the Internet and it's
going to put it here. It's going to store
it in your computer, and then you'll be
able to use it. So this is what we have, right? We just imported it. We can also select it, press on, scale it up. And there you go. We have
a number of models here, and we can search for
different models. Let's search for a bowl. Let's see if they have
it. Yes, they do. Oh, Pokemon ball
or juggling balls. Okay, we can drop
them in and increase the scale so that we
have the juggling balls. If we person this option, render it, you'll see
the way it looks. So it actually looks the
way it is over here. Or if we drop anything else, like fitness ball,
increase scale, and there you go. This is what we have. This is actually
exactly the same one. It's just a little bit turned. I select the fitness ball, press on R to rotate it, press on Z to rotate it. Like, so let's do
a rotation Z yes, this is exactly the one
you can see over here. It just needs a bit more light. And actually, I'm going to show you a very interesting way to illuminate to create light instead of actually
creating light. Okay, next thing, materials. Let's explore materials. We can actually delete this
search so that we have it. And by the way,
sometimes this tab at the top will disappear. So you have to press
a specific button. It's this button that you
can see on the screen. So whenever you press it, you can either hide
this bar or you can make it reappear,
for example, gold, vinyl, crocodile,
something, and just drag and drop and
apply it to something, and yeah, there you
go, as simple as that. And we can actually go ahead
and apply it to, like, one of the balls or to
this bowl over here, and you'll see that we'll have everything in this
gold crocodile style. And I mean, there's
a ton of stuff here, for example, jelly or
one of my favorite ones. And actually, the one
that got inspired, this whole course is blueprint. I've already shown
you this before, but it's this
blueprint over here. And by the way, one of the
things that we can do, and if we go into shader editor and we'll
have our ball selected, we can actually customize
the scale of this blueprint. So we can either make it bigger, smaller, absolutely
tiny or vice versa. So this is the way
you can customize it over here by going into
the shader editor, but we'll go back
to the timeline. Now, we also have a lot
of different scenes, and as you can see, it's
showing the free scenes. And if we diselect the
free options first, we're going to have a lot of unbelievable already
created scenes. But let's set the free first. Now, here's one very important
part about the scenes. When you import the scene, sometimes it's not going
to import the scene into your scene because what
we have in front of our eyes currently is our scene. And if you go to the top right corner and
press on this button here, you will see that
we have our scene. We can also rename
it by clicking here scene, 25, for example. And it's going to be
a scene 25, right? But we can also import
some of the scenes, and it's not going to
import them right here. It's going to add another
scene into blender. For example, let's di
select any searches, and this is the one that I
already downloaded before. And if I drag and drop
it here and press o, you can see that it imported as another scene,
modern dark bedroom. And everything I had before, like the juggling balls, they are not present
here because they are present in another scene, and I can switch between
different scenes over here. Now, if I go into the
modern dark bedroom and I enable the viewpoint rendered,
let's see what we have. So it's actually what do
we have in the background? What you see in the
background, this 360 degree picture in a way. This is actually an HDR, which we can talk
about in a second, but I can fly around. I can take a look at
what they have here. It does take some time
to load everything, but once it does, the quality is just absolutely next level. So there you go.
We have our room. So you can take a
look at the scenes, for example, a
scene with the car. We can drag and drop it
here personally came, and this one is not
downloaded for me yet. But as you can see, it took
very little time to download, although I would say that I have a pretty fast WiFi so that I
can download it pretty fast. So we have our car,
we have a bridge, and if we decided to render it, by the way, a lot of the
things that are added, we can actually just go
ahead and move them around. So, for example, I
just move the doors, can select the rubber, the wheels, the
headlights, everything. And we can actually
move things around. And this is absolutely unbelievable if you
think about this because if you ever played distraction games
in my childhood, I always wanted to have
things break down into very little pieces and so I
can break everything apart, and I was never able to do this, but I'm able to do here. You can also create all
of this by your hand, just using everything that's
available in blender. It's just it takes
a bit more time. Why don't you use
already prepared assets, templates and save hours, if not days and weeks of
time and just use use this. I think it's absolutely great. Kim. Let's come back
to our main scene. Let's take a look at HRs. So currently, you can see that this is the
light that I have. If I get rid of it, everything becomes dark, right? I can add more lights here, for example, we can add the sun, things like that, and
you can see we have two light sources actually in the reflection, one and two. But we can get rid of both. So becomes dark. And you can actually light
up the scenes with HDRs. So if I enable one of these and let's say I import one of
these and person okay, we'll have a whole world appear. You can see that it's actually illuminating the
objects very well. So this is one of the
ways that you can use lighting in your scenes
and just overall, why are we using blender kit? Why are we using these scenes? Well, in order to create these
viral short form videos, you will need to create
some sort of scene. Sometimes it can be as easy
as creating, for example, a box like this, scale it
up. You know, zoom in. And you can be in the space
of this box, just like so. Actually, we can scale
it up et more, show you. So yes, sometimes it
can be like this. And we can actually
get it higher so that it's acting like a floor. So this is one of the
ways we can do this, and we can isolate our
objects from the whole world. But if you don't want to have it and you want to
have, for example, a background and an
already prepared light, a scene where that's
already been created, then yeah, you can go ahead
and use some of these things. Now, in terms of the brushes, be honest, I don't use them. Node groups and printables I also don't use in
terms of the brushes, this is basically the
way you can customize, like, a pattern of something. So let me give you
a quick example. Shift A and create a UV sphere, and let's increase in size. The important thing about the
brushes is that actually, let me give you kind
of let me click here. And, you know, when
I move around, you can see some of the
things are changing slightly, but it's not very clear
what's happening, right before and after,
before and after. The reason for this
is because it's actually affecting the squares. If we want to have
a certain pattern, what we need to do is
we need to increase the number of squares
on our object. And the way you do
this is if you go into modifiers and you
click on Actually, let's search for it,
multi resolution. And what we can do here and
we can click on subdivide, and you can see
it's basically like quadrupling the
number of squares. We can press on
again, and again, and you can see it
almost looks like, smooth, but if we zoom
in, it's not smooth. You can see each of
the squares, right? And now, if we draw
something here, you can see that
we have a drawing. And now, coming back
to our blender kit, let's have the brushes open. And for example, I select
like this button here, right? I draw it, and there you go. And you can see that every
single square that we had, it's acting in order to
create this kind of button. And in terms of the node
groups and printables, I think we shouldn't
worry that much. Printables is just
a printable object. And by the way, you might ask, Okay, where did the
axis disappear? Like X, Y, Z axis? So if you ever
have this problem, all you need to do is to
go into show overlays. Make sure that this
is clicked on. Open this arrow head, make sure to click on the
floor and X, Y, and Z. And there you go. There
you have your axis. So sometimes it disappears
when you click on the brushes, and it's just something
you have to do. So yeah, in terms of principles, printables are just like actually printable things that you can print in real life. So you can just go ahead
and drop them here. Actually, probably I cannot
drop it in the sculpt mode. Let's go to printables. Drop it increase the scale. And there you go. So this is Blender Kit. If you have any
questions, let me know. But than that, go
ahead and play around, and I will see you
in the next video.
11. Sketchfab to Blender: Sourcing, Licensing & Import for Short-Form Scenes: In this video, we can
talk about sketch Fab. I'm going to show you how
to source three D assets, how to use sketch Fab
because there are interesting ways to use
it. So let's get started. Let's open later, press on and this is going to
be our extension, and there are a couple of
ways that we can do this. First of all, you
will need to log in, but it's free to
create an account. Just go ahead and
create an account, then login, and then we need
to press on activate add on. There are two ways
we can do this. We can either search
for something here, for example, let's
search for a car. Okay. We have a
number of cars here, and we can go ahead and
click on any of those. And now the very important
part, there's a glitch, and what we need to do
is we need to go into a render and we
need to set cycles. Because if you are
in this EV renderer, you will not be able
to import your models. Unfortunately, this
is what happens. And usually we will use the EV mode in order to
create everything else. But when inputing the models, we need to switch
into the cycles. And then after we import it, we can go back to EV. So we're in the cycles and
let's click Import model. It's going to take
some time to import the model to download it, once again, and then import it. Okay, so it took some time to import the model
about 1 minute. We can delete our cube. And if we click
here in the Render, this is our model. Very, very good. Once again, we can click on
anything, move things around, and break it down
however we want to. So this is one way to do this. Search over here, click Select, click on Import and make sure
you're in the cycles mode. Now, there's also another
way to actually go onto this Sketchfab website and
search for whatever you need. So, for example, we can
search for actually, let's search for
a car once again, but let's search for
Merc or Mercedes. Okay, what kind of
Mercedes do we like? We like old Mercedes, right? So we can click on the model. By the way, in the search here, you can make sure
it is downloadable. Not sure if that model
was downloadable, but we can download, for
example, this model. This mean looking Mercedes AGGT. Okay, great. Now, we just need to click over here
on download three Model. FBX original format
works for us. So just go ahead and click
on Download, Blender. Then once again,
we need to go into file just like we did before, Import FBX, search for Okay, we need to unzip this one. Okay, so let's reload AMG source we need
to unzip this one. Then come to source,
unzip this one, and this is the one we have FBX. So let's go into
File, Import, FBX. Search for the one we need. Yes, this is the one import, and let's move it around. Like, actually, let's move to let's move it to the
front a little bit. And let's enable or Androar
let's see our mean Mercedes. Beautiful. Looks pretty good. And one thing we can do, we can do Blenrikit, go to AGRs, make sure
we have free first, and just drag and drop it. And there you go to
illuminate our Mercedes. You can see the models
are different sizes, so we can either
select our Mercedes, like so, and increase in size, or we can decrease the size of this big car and
make it smaller. I wanted to show you another
way to import the models, but for some reason, it's not
currently working for me. The way it works is you go
onto the sketch fab website. You find a model, go
ahead and click on it, COVID link, then go ahead and click on
this Import from URL. Import the URL and
click on Import model, and it should import the model. However, currently, there's probably a
problem with service. It's not working,
but there's this way to import the models as
well. So let's click it. And we can also do search
filters, you know, all kinds of categories, relevant, number of lives. We can also search for a person, for instance, and
import the model. And there we have our person
not perfectly in the middle, far away, absolutely enormous. So we can scale him down you'll be able
to fit it in the car. Now the reason why
I'm showing you this tool is because we can import free three D
models very fast. In these short
form viral videos, they use a lot of these
models because they're free, fast use, and there's
a big variety. So, for example, we can
even search for a pistol. And for example, this pistol that looks
realistic, import the model. Let's give you
some time to load. And there you go. Our pistol
that we can move around, preview the way it looks, and you can see the realism and the quality is
absolutely next level. Now, I will say the
important thing is that it's important for you to check the policies if any
attribution is required, for example, for these videos, the attribution is
indeed required. And you can come to the website. If you go to the very
bottom and search for terms of can take a look at
what they have here. Overall, long story short, you do need either attribution or you need to
purchase these models. Let's go. If you, let's say, go into the buy three D models. So whatever you want to use, just make sure to double check. So for example, let's say, we want to use we need
downloadable ones, we want to use
destructor, license, attribution required,
and you can learn more by going here. So there you go.
This is Sched Fab. If you have any
questions, let me know. But other than that, I'll
see you in the next video.
12. Camera Animation in Blender: Moves for Viral Impact: In this video, I'm
going to show you how to animate anything in blender, as well as how to master
the camera moves. Then jump in. We'll
open blender. Here, we can see our camera. We can also create the
camera by pressing Shift A by going to
the camera over here, and we are going to have our
camera appear over here. So if I press in G, this is our second camera. But we don't need it, so
I'm going to delete it. Let's focus on this
camera over here. First of all, you can change the resolution of the camera
by going to the output, and we can change
our resolution here. So right now we have a vertical
full HD, 1920 by 1080. You can actually see kind of the preview of the
camera over here. It's the same ratio, 16 by nine, but we can change it to
the vertical format, and that would be 1080 by 1920. And you can see it
changing in real time. So before, after. Now, in order to see
what the camera sees, we have to press on zero. Everything we're going to
see in our final export, once we create
everything export, we are going to see everything that's a lighter shade of gray. Everything that's darker,
we will not be able to see. What we can also do is we
can select our camera. We can go into data. Viewpoint display, and we can
increase this thing here so that we don't actually see anything that will
not be visible. But to be honest, I don't like when it's like super black, I like to see what's
happening on the side, so we can put it to
something like this. So if a person zero again, I'm going to disable
the camera mode. Zero enable the camera. Basically, we are
becoming the camera. Now, before we
animate the camera, let me quickly explain
how the animations work. Animations work with frames. Let's say our camera
starts at this position. We want to make sure we capture
the data of this camera. Basically, we want
to set its position. And the way we set its
position rotation scale, everything is reset
it with Keyframes. In order to create the E frame in blender, you have to press I. So I'm going to press I. So I sat the camera, and
I'm going to press I. And you will see that
right over here, we have this keyframe
that just appeared, right, because we pressed I. Now, let's say we
change the position of the camera and we need to move
a little bit to the front, let's say, to frame number ten, and we want to change the
position of the camera. If we change the position
of the camera and put another keyframe,
let's take a look. Our camera now moves. So this is the way you
animate anything in blender. Long story short,
it's as easy as that, but once you have like
100 moving parts, it becomes a little
bit harder than this. Let's press Command Z and
put the camera over here. And you can basically animate everything like this in blender. So we can animate
our cube, right? We can put I put it to whatever, change its position,
press on I again, and we'll see that our cube
is going to move like Z. Let's delete the cube, and let's go into sketch fab. And let's search for something
like forest forest house. Looks interesting. So remember, we need to go into
Render and switch it to cycles in order for
everything to work properly. And let's import
our forest house. Now, let's increase it in size. Okay, let's make it a
little bit smaller like ZO. Okay. Looks really
good. Looks beautiful. Great. Now, let's try
to animate the camera. There's a couple of ways
to animate the camera. We can either select the camera and we can go into
object properties, and you will see that
we have location, rotation, and scale
of the camera. Let's select the camera.
We can select it here in our outliner, and we can change the
position of the camera over here like so, right? We can change its
rotation as well. And the scale. And one thing about
the camera as well, is if we go into data, we can change the focal point. Now, one tip I can give you, in order to animate
the camera better, and I'm going to make this
part a little bit smaller, I'm going to come here, see
until I get this cross, and I'm going to
create another viewer. And actually, let's
make it a bit bigger. We can press on here to disable. And in this viewer, I'm going to press on zero. So I'm going to see everything
that the camera sees. But in this viewer, I'm going
to see everything outside. Right? Just to make my
life a little bit easier. If I change the focal point, you can see that we either kind of as if we zoom in
with the camera, not necessarily just
zoom in on the picture, but as if we're
zooming with the lens. So we can make it super white view or we can really,
really zoom in. But we can put it at 50. Now, if we go into
object, once again, when we change the
position of the camera, for example, location X,
this is what happens. And now, there's another
way to animate the camera is if we click
here in this view, and if we press
Shift tilt that way, we become the camera. So if I move the mouse, right? This is what we have. And I can actually
fly around with AWS and D. So as you can see, I'm flying around
just like, you know, if you ever played video games,
then that's how it works. You fly around with these keys, and you can fly around a little bit faster
by pressing shift. So if I press shift, you can see, I start flying
faster or the opposite way. This is another way
that you can animate the camera by just flying
around and putting keyframes. Whichever method works best for you, you should
use that one. I think combination of
both can work great. So let's try to
combine both of these. Let's press Command set to undo the position
of the camera. Let's select to
camera. Let's press I. Now, let's go to frame 30. By the way, the
important part about frames is I also need to explain this to
you a little bit. If we go into the output, you can see that we have
number of frame rates, 24, or we can set it
to more, for example. This is the way we'll be
working with the timeline because if we have
set 24 frames, then every 24 frames is
going to be 1 second. But if we set 30 frames, every 1 second is
going to be 30 frames. Basically, it's saying
how many frames we're going to have each second. And as I told you before, it's better to put a 30, and I'm going to go in a bit more details
a little bit later. 30, especially for
this timeline, it's a little bit easier
because if you calculate 24, because you do have
to calculate it with your head a little bit. So if we set it to 24, it's just it's not
rounded numbers, so like 24 times 12 seconds. Like, okay, you
have to calculate and multiply 24 times 12, but 30 times 12 is 260. Is it? No, it's 360. Sorry. It's easier to calculate because it's
a rounded number. And also, it looks a bit better on social media.
That's what I recommend. Now, we know that
at 30 frame second, we're going to have
1 second passed. Another thing that might help you is by pressing this button. This is auto king. So instead of you
having to press I every time an object moves, it will automatically
create keyframe. And this is actually the way I'm used to working
from premiere and after effects is if you move something and you have
the keyframes active, then it will
automatically create keyframes for you instead of pressing I. Let's
give it the try. So first of all, let's
do it without auto king, and then we will enable
Auto king and you'll see. So we'll come here, we'll
change the position. By the way, we can also change the position by clicking
over here on the move, and we can move it like this. Actually, I find this to be the most precise way to do this, and we can change the ftation. Like, so actually, let's
put it something like this. Put it here. And now
I'm going to press I. If you press I while your mouse is hovering
over the timeline, it's going to ask
you which channels you want to insert keyframes. But if you hover over here, then it will
automatically create one. So let's see what we have. Mm. Interesting. Now,
let's select auto key, and let's go to
second number two. And let's move our
camera around. So like, so see? So the way I'm moving around is literally by just pressing
the scroll wheel. Now let's move it around
maybe look down a little bit. And you can see, I
did not press I, but it created this keyframe that I'm holding at the bottom. And if we go to the very
beginning, this is what we have. We can also copy keyframe. So for example, I can select this keyframe, press Command C, control, and it means that if
we have the same keyframe, then it's going to stay in this position for a
little bit because it's basically it's saying that stay in this position for, let's say, 10 seconds, and then so it's going
to move for a second, stay here for 10 seconds, and then move again. There you go. Let's go to 100. If we click here by
pressing Shift Tilda, now we can fly around. Like so. Actually, let's fly very
close to see, like, this house up
close. Okay, great. Now, if we set the camera, you can see that the
keyframe was created automatically because
we have the auto king. And actually, let's
copy this K frame, put it to 80, and we'll put this one to 110. So this is going to stay in the same position
for 10 seconds. Actually, it wasn't 10 seconds. Let's delete this keyframe by pressing X. Delete key frame. So let's copy this
one and put it here. This is interesting.
Why is it going down? So we have both the
Y and the y as well. Why is it? Actually,
we have Z and Y. So this one and this one, these two are changing. And actually, if we take a look, these are the ones
that are not keyed. So if I press key over here to make sure that
these are keyed as well, we'll delete this one. Now, if we copy, it should stay in the same position
over here because we created. We made sure that
these are staying in the same position as
well. So let's see. Okay. So let's take a look at everything
from the very beginning. Great. And you might
be wondering, B, there are so many ways
to animate the camera, and I can animate it. And there are just not so many ways to
animate the camera, but I can position
it in so many ways. What's the best way to position the camera? Now,
here's what I'll say. The most important thing is for you to try to make the video just as easy as
possible to understand. The reason being is because when the video is confusing,
nobody's going to watch it. You want every single
part of the video and everything you're going
to do to support the video. So the camera is going
to support the video, then we're going to work on the audio that's going
to support the video. Everything in the frame is
going to support the video because if you think it's kind of similar to
creating movies, it's just a very
short movie with, you know, we don't
have a lot of budget. We don't have, like, super
expensive visual effects. We don't have Hollywood actors, but it's actually creating, like, very short movies. And you do have to think like
a director a little bit. Everything in the
frame must make sense. Think that does make
sense and takes attention of the
viewer from the story, then you should probably just get read because it's
going to be confusing. And the same with the
camera, you just want to make things as simple as
possible to understand. If you take a look at my videos, I never try to confuse people. I try to simplify it
as much as possible. Trust me, it's already pretty hard for people to
understand what's going on. Like, there's so much going on. And you want to just simplify. If you take a look at Mr. Beast, super simple, you are trying to make the video
that an 80-year-old and an 8-year-old is going
to be interested in watching and will be able to understand the whole video
and watch the video. Yes, there are
times when you want to introduce something
you experiment, but once again, you
don't want to reinvent the wheel every single
time, every single video. You want to keep the
same template and make a similar video so
that the current video, the video that's
after and before, these videos are
similar to each other. But then the video that's six
months ahead or six months before the current video or year from now or a year before, you know, there's
a big difference. But the videos that
are next to each other, they're pretty similar. You do little improvements that can pound over time so that, you know, James Clear has an amazing book
called Atomic habit. And actually, let me
show you the book. And this is an amazing
graph that's going to just absolutely
blow your mind. Okay, so this is the graph. And you can see that if you
become one person better every day for 365 days. So we have the equation
1.01 to the power of 365, it's going to be equal to 37. So you want to do
little improvements, but over time, and you're going to become
absolutely next level. The growth is exponential. But if you become worse by 1%, in one year, you'll be
almost equal to zero. And it works like this with anything in life, to be honest. By the way, great book. If want to read it, really, really recommended, how
to create new habits. Tiny changes remarkable results easy improving way to build good habits and break bad ones. Absolutely amazing book. Anyway, the videos
should be similar. Little improvements as
simple as possible. Yes, try to improve, but don't try to reinvent
the wheel every time. So, let's recap. In order to animate
anything in blender, you have to use a timeline.
This is our timeline. In order to add a keyframe, you need to press on I, or
you can set auto keying. And every time you change
your position of something, you will create a new keyframe. Just make sure if you want to change the position
of something, you change the timing so
that it's not staying, let's say, 20 seconds
all the time. When you change the positions, you want to go to
a certain time, set the position, go to another
time, set the position. Try to simplify things
as much as possible. Don't try to make it hard. And let's take a look
at what we have here. Beautiful. Actually, this house
looks really interesting. I love the way it looks. Anyway, this is the
camera and the animation. If you have any
questions, let me know. But other than that, I'll
see you in the next video.
13. Lighting in Blender: Cinematic HDRs & 3-Light Setups for 3D Shorts: In this video, we're
going to explore and master lighting. Specifically, we're going to
focus on three things HRs, spotlights, and
dramatic lighting. Let's begin. I'm going
to delete the cube, create a plate,
increase it in size, and human generator, I'm going to create a
human as an example because it's a great way to show you everything
I want to show you. Generate a human. Let's give him some clothing so
that it's not naked, waked, let them in. Okay, great. So we have
some sort of light here. Let's get rid of that because
that's just as default. First of all, there are HRs. So if we go to Blender kit, and if we search
for HGRsT button here or this button and
filters free first, this is a great way for you to just not think about
lighting, right? It's just super easy, very well lit from all sides, just like normal day. It's a very great way to use lighting because you
don't have to think about it. Especially when you're
getting started, you want to make sure
things are easy. And if you find it a little bit hard and confusing
at some points, totally get you because
this is not easy stuff. So if you don't want to break
your head with lighting, then just go ahead and use HRs because it's going to light
your scene very well. And then on top of
that, if you want, you can just add another light that's going
to support this. But to be honest,
this is pretty good. Like, you can already just use this and it
would be good to go. So this is one super
easy way to use it. Now, let's press
Command Z to undo. Another one would be
to create a spotlight. So we're going to press Shift
A, light, and spotlight. Let's see where it is. Actually, let's move it. Why is it so low? Okay, let's move it up. Let's do it, so let's
go to the settings, and let's increase the exposure. This spotlight actually
plays a crucial role. When you want to
specifically illuminate, like, a specific subject. Let's say you have a scene and there's lots of things
scattered on the scene, but you want to make a focus
on one specific object, like a person object, whatever. And you want to help direct
eyes of the viewers. This is very great
way to do this. And once again, we can go ahead and just kind
of customize it, do a bit of rotation. We can move it. Where is it? Like, so, right, so that it's
illuminated from the front. A very, very effective
way to do this. It's sort of similar
to when, like, a comic is on a stage, you know, he's speaking, and he's illuminated by a spotlight
very similar to this. You might have other lights
illuminating the scene, for example, like,
just add a sun. So that's do it, for example, we have a
sun or we have an HDR, and we can decrease the exposure of the sun
or decrease the strength. And right, if we disable the sun, it's
going to be darker. So we have some illumination
in the background, but we also have a
spotlight on the person. And then when it comes to the
spotlight, if we select it, we can also kind of customize
it to increase the radius, for example, we
can blend it in so that the edges are not as sharp. So you can see it already looks pretty
well, to be honest. We can create a video from this. And a third way to create lighting is to use
dramatic lighting. There's a number of ways to
get drama from the lighting. I would say great
inspiration would be Google, movies, other channels. A dramatic lighting
is usually when not a whole object
is illuminated. Like, only part of
it is illuminated. The lighting doesn't, you
know, it's not ambient. It comes from the bottom, from the side, from
the top, or like, this is a great example where
it comes from two sides, but actually not in the front. Playing with colors is
also an interesting way to add drama. But specifically,
I want to focus on this Rembrandt lighting. It's something I
learned in photography while I was learning
photography, and it's this triangle. Below the eye looks incredible. And you can see, this
one is super sharp. You cannot even see the face, but this one is not
a sharp, where, for example, this one is
like a blend in between. And the way it's done, it's actually done
with our noses. So if you put a light
at a specific angle, you can achieve it. And this is one of my
favorite ways to create this sort of dramatic lighting, even with videos as well. So let's try to recreate it. We can recreate it both with
the sun with the spotlight. Let's delete both
of these for now. And let's start from scratch. So we'll create a light. Let's use spotlight, and let's get it up even more,
a little bit higher. So I'm pressing G
and then pressing Z in order to get it higher. And let's increase let's
increase the exposure, and let's really zoom
in on our person. Let's think through what
exactly is happening here. So we have a light
that's coming from an angle and a little bit
in front of the model, but not a lot, right, so that we don't see
part of the lip lit up, but we do see just kind
of the cheek bone. So let's try to replicate it. Let's go into the object
properties of our light, and okay, let's see the light. So let's move it a little bit, or is it a little bit to left and a little
bit to the front, maybe a bit more to the left, a bit more to the
front, like so. And And from here, let's try to do rotation. Maybe Okay, we need to move
it a little bit more to the left and then rotate
it to the right, like so. Maybe we need to move
it a little bit less. Okay, let's see what we have
here. We're getting better. Okay, to be honest, this person doesn't have the best chicks in the world to do this
because there's, like, a big hole here. I think we might also want to
move it down a little bit. Maybe, like, so so there you go. It's very similar to what
we have in the pictures. Yeah, this is pretty good. Actually, let's enable the we go into the human
gen. Let's select our person and enable our hair. Yes, there you go. So we have this sort of drama so we
have this triangle here. The lighting is dramatic. We are not illuminating
everything. And if we were to put a camera, so let's press and zero
to select the camera. Shift actually, let's change
the output to 1080 by 1920, shift till day, and let's fly around maybe let's
do it like so. I'm also clicking on the
left button of a mouse in order to kind of set the camera. And now, if we select the camera and we go into
the camera properties, we can increase the
focal length in order to really zoom in on
the face for a person. And because the camera
is coming from the low, it also adds a
little bit of drama. We're giving power
to this person because if the
person is above us, it usually has power. If it's below us, then it's
not as intimidating, right? Shift til D, once again, move it a little bit I would say it's pretty dramatic,
do you agree with that? So this is how you do lighting. Let's quickly recap. HGRs if you don't want
to mess with lighting, you just want to
create the animations. Spotlights in order to help isolate the object, the subject, and dramatic lighting with the use of spotlights or you
can even do it with the sun, with any kind of lighting,
you can do dramatic lighting. Make sure to put it at an angle, illuminate a part
of your subject, and in order to give
power to our subjects, we need to use the
camera and make the subject be a little
bit higher than we are. Because if we take a look the camera is just
below the subject. So this is how we do it. If you have any
questions, let me know. Better than that. I'll see
you in the next video.
14. Eevee vs Cycles in Blender: Fast Render Settings & Social Export Presets: Welcome. In this video, I'm going to show you
how to render and export without pain.
Let's get into Blender. In order for you to see
what's going to happen, I'm going to just animate the position of the
camera a little bit. Let's export 2 seconds. So I'm going to press on zero. Let's select To
camera, Auto king. Let's put a keyframe
here and then put go to 6 seconds,
shift till day, fly around a little bit, like so to see the other side, and let's go back. Like so. Okay, so we have
our very quick animation. By the way, we can probably
over here, let's select it. Let's fly a little bit
further so that we go in the circular motion.
Okay, perfect. So we keep our square
in the middle great. Now, let's go into output. And once again, let's select 1080 by 1920 to
make it vertical. Once again, it's saying more or less in the middle
throughout the video. And here we get to
the interesting part. We have three renderers. We have EV, workbench,
and cycles. And let me give you a quick
breakdown of each of these. Here we have our
engine or renderer. We have the type, quality, speed, and what it's best for. So cycles is realistic,
physically based. It's best use case is realism accurate lighting
and reflections. It takes the most
amount of time and takes a significant
amount of time, takes a lot longer to do, and it really takes a lot of
power from your computer. But it's best for
cinematic shops and close ups when you want to really get
the details, right? Then there's EV, which
is real time renderer. Good for most short fm videos, it's pretty fast when
it comes to rendering. And this is the one that's very best for Tik Tok,
shorts, and Instagram. Then there's also work bench, which is very simple,
has flat colors, no realistic lighting,
renders almost instantly, and it's best for previous
and topology checks. Topology checks, in other words, means just checking
that everything's okay with your object. So for our renders, we are going to use EV, and you can actually see
the difference even in the preview because this
one loads pretty fast, but if I switch to cycles, it's going to take a
bit longer to preview. You can see it takes some time to actually
render it in real life, and the edges are slightly disturbed when
I move it very fast, and it's lagging a little bit. So we'll go into IV and
let's go into output. Now, as I mentioned before, I do recommend using
30 frames a second. Let me give you a
quick explanation. 24 frames a second is
something that movies use. For example,
transformers are short in 24 frames a second, and
it's great for movies. It's great for having this
very natural motion blur. It's great. But I think
for social media, it's just a little bit it's
losing a couple of frames. And 60 frames a second is
too polished oftentimes. And also the problem
with 60 frames a second is that social media, it compresses your video so that it doesn't
take much space, which is also if you ever downloaded videos
from social media, the files are extremely small. A 20 minute YouTube
video will be like, just a couple of dozen
megabytes or maybe, like, Okay, 100 megabytes. But when you actually
upload it to YouTube, in order to keep
the best quality, it's going to, like, weigh
a significant amount. This is the problem
because even if you're uploading 60
frames a second, sometimes social media,
social media platforms will just compress
your video and you're not going to have
60 frames a second. 24 is not enough. 60 is a bit too smooth, and then social media
will just compress it. So the best way is just to go ahead and use 30
frames a second. There are a lot of creators
who use 30 frames a second. Misty Beast uses 30
frames a second. And there are rare
cases like when super smooth animators
use 60 frames a second, but once again, it's so rare
and it's kind of useless. I just really, really, really recommend you to go with 30, and it's easier to calculate and it's going to be
easier in your computer because it's going
to take a lot of your computer power
to render everything. Now, you will see at the bottom
here we have our frames. So I can scroll in the timeline by pressing
command or control. If I press Option or
Alt, I can scroll, and with my mouse will I kind
of zoom in and zoom out. You will notice that we have
kind of two shades of gray, the darker, actually, let me just make it
a little bit bigger. The darker shade of gray is
the part that's not selected. The lighter shade of gray is
the part that is selected, and it's actually selected here. Frame range, you can
see the start is one. The end is 250. The start is one, it's
over here exactly, and the end is here, 250. So this whole part, this letter shade of grade
is what we said here. Now, if we want the export
to be 3 seconds long, then we know that we have
30 frames for 1 second. And if we do it three times, then that's 90 frames. So we would need to put here 90 and we will have 90 frames, and this is going to
be exactly 3 seconds. And by the way, this is the
way you calculate in blender. Is just you have
to do it this way. Now, let's go further, and you will see the output. First of all, we need
to select the location. I'm going to select my desktop, and let's give it a name test. And I'm going to
press and accept. Now, we need to select
our file format. In order to export the video, we need to choose
this file format. So you can see
there are a lot of different formats and yeah, sometimes these need to be used, but for our social
media project, all we need to do is to
select this one FF MPG video. Next, we need to
expand encoding, and we need to go
into container. Matoka sat here and
we need to click, and we need to set
MPEG four grade. Now, if we export it, we are going to have our video because if we didn't set it, it would give fails and
just wouldn't work. But now, Things are good to go. And other than that, you
don't have to touch anything. You can export it like this. So let's give it a try. In order to export, we need to go to the
top left corner, press on Render and
render animation. And you can also see
the shortcut here, it's Command 12 on
Windows Control 12. Instead of even clicking here, I can be anywhere in timeline
and just press Command 12 and it's going to
start rendering it. And you can see it's
happening in real time. So you can see how long it
takes to export each frame. Now, if we were to do
60 frames a second, it would take twice as
much to export each frame. And if we use cycles, it would take just
a lot more time. This is the best way
to do this. So we had our animation move
from zero until 60. We had the last keyframe at 60, and we had set the end at 90. Perfect. I exported it. Now, let's go onto the desktop. Let's select our test
and take a look. Perfect. Now, one
thing that can be beneficial is going into file defaults,
save startup file. Obviously, we don't
want the camera to be animated like this
every single time. So when we need
to close blender, we need to set the settings
and then come here, file defaults,
save, start a file, and then every time
we open blender, we'll already have
these things set up. And that's how you render
export in Blender without pain. If you have any
questions, let me know, but other than that,
I'll see you next video.
15. Editing, Audio & Captions: Premiere Pro Workflow for TikTok/IG/YouTube Shorts: In this video and before
I show you actually, step by step exactly
how I do the videos and show you all the practices put together with a
real life project, let's talk about editing, sound design, and captions. My application of
choice is Premiere Pro, but whether you're
using a final cut, cap cat, to be honest,
it doesn't matter. What matters are the
overall kind of principles. By the way, if you want,
I have other courses on Premiere Pro and how to master
short fm video editing. So you can check those out. So let me open Premiere Pro and show you exactly
how I would do this. I would create new project. I would create new
project called EntitleO a desktop just
for now as an example. And I would go to
desktop and actually import the video
that we exported. And then I can just
go ahead and drag and drop it to the timeline so
that we see what's happening. So we have our video, and in order to master
sound design, to be honest, it's kind of simple, and all you have to do
is use a sound that represents movement or whatever's happening
on the screen. So if it's a person kind
of lighting a lighter, you would need some sort
of like a spark sound, maybe, like, a little bit of gas sound when the
flames are going. So you just kind of have to break down and
think through, Okay, what kind of sounds
represent a certain, motion? So in this example,
we have movement. We have one movement, and almost we kind of have two movements because
we had two key frames. So in order to do this, I would actually go to
two different websites, and there are two
options you have. There's a free option. There's a paid option, and
the free version is called Pixel B. Pixel B doesn't only have sound
effects or music. It has a lot more like photos, videos, and all sorts of stuff. So if I go into sound
effects, for example, and a search for let's
search for swoosh, because that's a
sound that would best represent this kind of movement. Let's listen. Okay, I kind of
like the first one. So we can go ahead
and download it, drop it in, then just put it where we think
the sound will be. So actually, I think it will
be from the very beginning. Or maybe we need to put it
just a little bit later. Let's find something
a little bit longer. Okay, something like this. So just go ahead and drop
it right into the timeline. This is for the second movement, so maybe we should do it here. Maybe a little bit faster. Yeah. Sounds good. So
this is something that you can do with Pixabay. There's also a lot of music. I will say that, of course, the paid options are definitely better because they do have the budget to reinvest
to get high quality. And in order to get the best sound effects and
music, it's epidemic sound. I've been using
epidemic sound for who knows how many years for like five plus years, six plus years. And it's absolutely amazing. So I find most of my songs and most of my
sound effects here. Sometimes I do use Pixe Bay as well because Pixabay
is a great website, and I will say this that if you do have a
bit of a budget, then Epidemic Sound is better. If you don't go ahead
and use Pixie Bay. And by the way, if you want
to test out Epidemic Sound, there's going to be a link in the resources section to
get a 30 day free trial. So you can just go
ahead, try it out. If you don't like it, then,
you have to do nothing. You just give it a try
and epidemic sound, we can also search
for sound effects. And for example,
it already has pre made kind of libraries,
for example, swooshes. And you can see, we
have a ton of swooshes. So let's have a quick listen. Something I downloaded before, you can see have this sound
saying that I downloaded it on October 24, 2024. Mmm. Mm. Actually, I think this might
be a little bit better. So I just go ahead and click
on the download button, and then I drag
and drop it here. Let's have a look. So we can delete the second one, and let's try to
use one of these. I'm going to put it
here. Actually, let's move something like
this. Let's take a look. Maybe a little bit earlier. Maybe a little bit
earlier. Yeah. Interesting. So
that's how you do it. In terms of the music,
let me give you just kind of a quick
overview as well. In terms of the
music, what I like the most is the themes. Like, of course, you can
search for, like, genres, for mood, but I think themes
are actually the best. For example, we want something cinematic or something like
comedy, which do we want? For this one, because
it's kind of gray and minimalist I would actually go ahead and use
something cinematic. And then here, we
can go even further. Cinematic old movie let's go ahead and open the
cinematic score for now. Let's take a look
at what they have. I kind of got distracted
and just started listening to music because
it's great music. I love pianos and violins
and yeah, it's great. Anyway, for the very short clip that's just 3 seconds long, I don't think we'll be
able to use any music, but we are going to
do it in a couple of videos when I'm going to show
you a real life project. And in the real life project, when we're going to put
everything together, yes, there we're definitely
going to use the music. So in terms of the music,
pizza epidemic sound, go ahead and try both out. The most important
thing for you to note is whatever
movement you have, you want to support it
with some sort of sound. If you feel like there's just too many sounds and
it's a bit too much, then just go ahead and, you know, delete some of
the sounds. It's okay. Not every single movement
has to be with the sound, but the more you
do it, the better. If it gets a bit too much, then just go ahead
and get rid of that. So that's how you do it. Now, let's get into the next
video where we are going to start creating a
real life project and putting all our
skills together. So if you have any
questions, let me know, but t than that, I'll see
you in the next video.
16. Congratulations!: Congratulations. If
you're watching this, it means you've made it halfway through the
course content. I know we've covered a lot, so congratulations to you for
making it to this point. And there's a lot more
valuable content coming soon, but before we get
to the next video, I want to simply ask you if you found value in this program
up until this point, to take 60 seconds to
leave you honest review. Of course, I will
immensely appreciate this, and this will also
help hundreds of future students in deciding
the best program for them. So leave your feedback
now, and of course, if there's anything
I can help you with, please let me know in
the Q&A section below. You're doing great. Keep going. And with that being said,
let's get to the next video.
17. Plan Your Blender Shorts: Concepts, Hooks & Micro-Storyboard: Welcome. In this
video, we're going to brainstorm and plan our video. Specifically, in this video, we're going to be using HGPT the regular version of HGPT that comes up
with great ideas. But in the next video, I'm going to show you
how to build a HGPT on steroids that will give
you a lot better responses. Let's begin. So we're
going to come to HGPT. HGPT just head latest update, and it's now even better. The responses are faster. The responses are better, and I have a set to auto. Things might change a
little bit in the future, but for now, this
is how it looks. To be honest, there's
not much difference between different HAGPTs
when it comes up with ideas, if it's just a regular HAGPT. But there's a big difference
when it's a custom HGPT and the only way to get that custom HA GPT
is with paid options. So that's why I'm
sharing a free option, and next video,
I'm going to show you the paid and best version. So in order to get the
best results with HAGPT, we should name him
something specific, like a specific export. And in this case, he would be a professional script writer. And we can actually
just go ahead and record an audio and going to transcribe it into text
and send it to HAGPT. We can go ahead and
talk with HAGPT, but I like it in a way where
I just talk through it. What I want to do, it
turns it into text and then gives me responses in text and not in audio format because it's a lot
easier for me to just scan through the text instead of just listening while
speaking slowly. You are a professional
script writer who gets paid $100,000 per video idea. Specifically, we
are creating video. We're creating video for
social media for Instagram, Tik Tok, and YouTube. And we're creating a video, a three D animation and blender, similar to what Zac
dot D Films does. And we need to come up with a list of viral ideas
to choose from. And this is where
you come into play. You will generate a list of 20 most potential viral ideas that are similar to
what Zack D films does. But instead of copying
him, I think we should get inspired by him and then come up with our own
original interesting ideas that have not been covered yet. I mean, everything has been
covered at some point, so we are able and we are free to use something that's
been sort of forgotten. But at the same time,
we want to keep originality and not just
go ahead and copy him. Come up with list of 20 ideas that have the most
viral potential. Okay, there was a lot of text. So let's take a look
at what he does. So he might be confusing
it with something else because the name
when I pronounce it, I said Zac dot D films, but it's actually
Zack D dot Films. So Zack D dot films. Sneezing particle explosion. We will not be able to replicate
all of the video ideas. The reason for that is because
sometimes they use, like, a lot of expensive animations, which is something we
will not be able to do. So that's why we'll
be kind of looking at what Cha GPT proposes to us. But the same time, we
need to think, Okay, so with the type of
animations and the type of characters and the type
of three D scenes, having all of that, what videos can we create out of this list? Context, we are going to use. But instead of
actually animating everything had h we'll
be adds extensions. We'll be using Maximo,
which is going to us character animions
we're going to be using. Human generator to
generate characters, using Blendkit and Sketchfab to create scenes and three
models and things like that. So we'll not be able to animatee everything the way Zach
D does in all the ways, because they have
custom animistions. But actually, having
a pistol on screen, I think you can do
something with a pistol. So give me ten ideas
with a pistol and then ten other ideas
with other sons. Okay, so let's see
what we have in terms of the pistol. I think
that might be interesting. Okay. This actually
looks very interesting. Okay, let's refine our prompt a little bit and see what we have. Okay, absolute great ideas. These ideas are
definitely otter. Now, the important
thing is that we will also add an audio overlay. So it's going to be
a narrated video. And for that, I
also need you to we will also need you to come
up with the video script. The script will
need to be for um, roughly like 20 seconds. So let's also think of
what script can we use? It can be something
like, Okay, here's what's going to happen
if this happened. You know, if this
happened, then what would happen? You know way. So I'll give you an example.
If a person, you know, had a heat stroke, what
are the next steps, anyway, I'm sure
we would be able to probably will be
able to do this, yes. So something something
along those lines. But also, they have
the most potential. Yeah, this is the important part we didn't mention for him is that we will be
also creating what? To be honest, this is
the interesting part. I don't know how to
make this video, but this video has
the potential to go absolutely just stratosphere
and become viral. But instead of this,
instead of this ending, I think we can use when people want to pee
during their sleep, these are the kind of
dreams that they will have. And so we can actually
just create the sorts of animation where the room is getting filled and
you see the ocean, and then you just
then you wake up. Something like that. It
is extremely relatable. So a lot of people will be able to share this
video with other people. It's kind of funny. You don't expect what's
going to happen. You see all of this stuff. So I think this is a really, really, really great idea. Let's copy it, and I'm going to use notes or
Macbook, but to be honest, you can use anything you
can use like Google Dogs, which is free online text editor or just another text
edit on your computer. Okay, so I'm going to
create a new note, and I'm going to
paste this here. One of the best
things about HGPT and the recent updates is you can actually if you
go to HAGPT you will see that has a plus sign
to work with notes. So if a person tab,
now HAGPT will be able to see what I'm working
on. Absolutely amazing. Now we can work on
this video with HGPT and it will be
seeing it in notes. Basically, if I select
a certain line, it's going to focus
on that line. It's going to tell it
to focus on this line. But if we have nothing selected, it's going to focus
on the whole node. However, once
again, if I select, I tell it to focus on the line, but it also takes a
look at the whole node. So that's just how it works
if you want to work with, like, a specific application. Okay, so look at the notes, and this is going to be our
video of the flooded room. Now instead of it being
ending like this, here's what we're going to, google create this sort of
water animation in room, which is absolutely great yeah. We are going to have
a person wake up. So it's going to be relate
when person wants to, for example, P or
P during sleep. So I think we should go
somewhere that route. So let's just walk
through this again. At first, it's just a puddle,
tend to foul over rivals. So to look at the noise and
take a look at the script. I rewrote it so that it is more relatable
and more terrible, especially in the end I
changed the end part. And now I need you to change
it a little bit in the end. I'm not sure if it's
the best word to use, but you get the idea. We show the scene of a person, almost drowning in
water for no reason. And then they realized
that they just eat themselves while sleeping. So I think this
is what we'll do. At first, it's just a puddle, then the floor ripples
and Yeah, this is great. So we can just paste
the script here. Okay, so let's time this
script a voice memo. I'm going to record this to see how long it takes
me to read the script. No. Just. Yeah, you beat. Roughly 20 seconds. Great. So I'm going to delete
this, quit this Perfect. Okay, now let's actually record the audio, like, really good. And then after that,
we'll just make a cut, put it into premiere, and then when we cut, we will know how long we
need each scene to be. And after that, we'll be able
to replicate it in blender. At first, it's just a puddle. Then the floor then
the flow ripples then the flow ripples and a wave crashes
through your desk. To warm. You window. Ocean. Swear. Swear ocean. And here. Mm. And here, you beat.
We're going to use this, and I'm going to put
it on a desktop, so I'm just going to
track and drop it there. And after this, I can just go ahead and
delete it from here. And next, I'm going
to go to Premiere, cut it up, and then we'll
be able to start creating. So I'll call it the Ocean video. And I'll create new project
called Ocean Video, and I'm going to
come to desktop. Let's actually create
another folder called PR to make sure
things are organized. Going to put this folder
and select and click ono. It's just the way I organize
things on my computer, and then we'll be
able to put it to put this recording in this
folder, put it there. Now we just need
to cut the video. The way you cut and
premiere is you can use C for razor tool. You can make a cut like this, then select it, delete it. At first, it's just a puddle. Then the floor then
the flow ripples. So we can make another cut here, another cut here.
Delete this part. Then the flow ripples. And then the flow ripples and a wave crashes
through your desk. Okay, so I made the cut. Now, let's listen. By the way, I can also
select all of this and go into the essential sound. If you don't have this
essential sound panel, you can come to Window and
search for essential sound. Just make sure you
click on this button, and then you'll be able
to have it appeared. And I'm going to press on automag so it's
going to automatic make the audio just the
right amount of loudness. At first, it's just a puddle. Then the floor ripples and a wave crashes
through your desk. In minutes, you are swimming
to reach the ceiling. The waters warm, too warm. You look out the window,
the street is gone, replaced by endless ocean. You gasp for air and wake up. No ocean, just your bed. And here, you bed. Great. I love this. So the video is 20
seconds, 17 milliseconds. So just the right amount of video where it's not
too long and it's kind of, it's a very good length. So, this video is
ready to be edited. Now, let's get into
the next video. I'm going to show
you how to build an extremely good hat GBT and come up with
even better ideas. If you have any
questions, let me know. But than that, I'll see you.
18. Build a Custom ChatGPT for Viral Ideas: Hooks, Scripts & Visual Beat Guides: In this video, we're
going to create a custom HAGPT or in other
words, HAGPT on steroids. A lot of people don't know,
but you can actually ask HAGPT to help you
create a custom HAGPT. TPT is very versatile, so let's jump in. I'm going to open
the same dialogue that we previously had about
the viral video ideas. Here's what I'm going to ask it. I'm planning to
create a custom HAGPT and I'm going to
create right now, and I will need your help
to create a custom HAGPT. The reason I want to create
custom JTTPT so that I can upload some PDF books, and I will need your
help with this as well in order to create
the most viral ideas. So you get what kind of videos we're going for. I've
already told you that. Basically, help me
create custom JetPT with everything when it
comes to kind of naming it, giving it instructions, what kind books to use
and things like that. The reason I want to
use books is so that we get even better responses. One of the books that I'm
thinking about is how to steal, like an artist and potentially some other
books for just kind of viral ideas or anything viral that you
should give me a list. I'll see what I can find on the Internet and
upload it into HAPT. Go ahead and tell
me about the books, and then after that, I'll tell you what else I need help with in terms
of creating TAG PT, giving instructions,
things like that. It will go ahead and
give us a list of books. And I will go to Safari. I do have to blur a lot of the stuff on the left
because these are all the HAGPTs that I have and some of the custom HGPTs
that I've created. But I'm going to go into GPTs. You can see it is here. Now, by clicking this button, I can go ahead and click on
Create Top right corner. And here I can
create custom HTPT. Like, we can ask TGPT directly here or we can
click on Configure, and here's where we're
going to give instructions. We're going to give it a name
a description instructions. Conversation starters,
not necessarily. The knowledge is where we're
going to upload our PDFs. HGPT will scan PDFs. And it will give better
responses this way. Then recommended model. We'll see about that. There's GPT five HGPTTing
which takes longer time, but gives better responses. It's more critical. Then GPT
four is just an older model, and we should click
on this button here. So let's take a look at here's
what we're going to do. We're going to download
some of the books, and the books that I download, you'll be able to find them
in the resources section. So still like an artist
download PDF for free. You can oftentimes find books online and just
download them for free. A lot of people don't know this, but you can just
search for name of the book artist or the author
and download PDF for free. We're going to open a number of pages to see which one
is actually for free. Okay, so I think this is the actual book so that
HGPT can take a look at it. File, Export as PDF. Let's see if we can export
it like this to the desktop. Okay, so yes, it works. This is the whole
book. So if you ever don't want to buy books and want to just
read them for free, this is the way to do
this, by the way, as well. So we have this book downloaded. Then I kind of like
this book contagious. Let's paste it in. Download PDF for free. So this is Google Books. So sometimes you can find it. Sometimes it takes a
little bit of time and clicking Contagious why
things catch on. Okay, great. So we have this
book here as well, which is absolutely great. So we have two books now. I'll put this one to
download as well. And let's see if there's
anything else that's worthwhile for hGPT to base on. This sounds like
a very good idea to download for free PDF. Okay, so it looks like we aren't able to find
this book exactly. Great. So we have
these three books. We can close all the other
typic site from hGPT. Now we can go to our
previous Cha GPT, and with the three books, we will open Safi. I'm going to press and record, and then I'm going
to talk to hGPT. I was able to dowload
the three books. Now I need you to help
to configure the AsmaPT. So I need you to give you the name description
and instructions. I'm going to upload three books to the
knowledgebase Threoks I'm going to upload are
contagious by Jona Berger, still an artist, and story
worthy by Matthew *****. So these three books give me all the instrutis the
name description and instrucions for the ChatB Great. Viral psychology,
creative mixing, and storytelling hooks. Absolutely fantastic. So name. Viral actually, for the name, we can put any of our own names, but we can also
put like an emoji. Let's put something like
pencil be this one. So for description, to be
honest, it's just for us, but we can just okay,
300 characters. Your personal viral video gin? Okay, we can just go
ahead and do it like so. Because when you open the HAGPT just this is what's going to this is what
it's going to have. So personal viral video IDgent rate for
short from content. Now, also, a very
important thing is that I will share
this HAGPT with you so that you will have access to the HAGPT and you'll be able
to just go ahead and use it. Everything I create here, you'll be able to use, but
then on top of that, if you ever want to
create your own HAGPT and make it your
own personal one, then this is the way to do this. Let's take a look
at instructions. You are a viral story lab, a creative partner specializing. You merge insights from
contagious silicon artist. Hook first, always. Blend real and relatable. Okay, I absolutely love everything in terms
of the instructions. However, we need to
change these fractions. Number two, blend,
surreal and relatable. It doesn't necessarily
have to be surreal. It can be actually real. It can be real stories. It's just that, you know, it
doesn't have to be surreal. So let's change
that so that it's not only surreal but
also real stories. Or maybe we should just
get rid of this surreal. Okay, great. So we
will copy everything. We'll copy all the
instructions, come and see, paste it here, and we're
also going to copy this. And we will find number two. So blend, real and relatable. Ideas can be based
on true events, everyday relatable moments, or real world. What if scenarios? They can be fictional or imaginative if it
enhances the hook, but realism is
optional, not required. The goal is to make the viewer feel this could
happen to me or I can imagine this whether trial or imagined. Okay, sounds great. Description, instructions,
conversation starters. Okay, now we need to
upload our books. I'm going to do this by clicking
here, going to download, and I'm going to
select all three books and upload them here. As you can see, the books
are being uploaded. Also, I think in
the instructions, it's important to note that
before providing the answer, take a look at the knowledge
base, something like that. Otherwise, it's
not going to look at the knowledge base or will so I think we should just go ahead and
copy this and paste it here. Before providing any answer, first check the
knowledge base for relevant information
from the uploaded books, prioritize insights
principles and examples from these
sources before using outside general knowledge if relevant content is found, integrated directly into the ideas script,
recommendation grid. We have our name, description, instructions, knowledge base. Yeah, I think we should just
go ahead and create it. We can also upload
a photo or use Dali to come up with the
picture. Let's see what it does. It does take some time, but it doesn't take a lot
of time, usually. Oh, actually, very good picture. So, let's go ahead
and create it. Anyone with Link, and this link will only be available
to the students. So anyone using JDPT will
not be able to access it. As you saw, it wasn't
in the GPT store. I was only using Link. So this is link I'm going to put in the resources section. So go ahead and use that link to create your
own viral video ideas. Now, I'm going to come
to Viral Story lab. Once again, I have to
blur a lot of the stuff. Actually, let's come
to the previous HTPT. Okay, HIGPT now that we have
created our custom HTGPT. I need you to create a prompt. In order to get
the best results. You know what kind of
videos I'm going for. So go ahead and
create the prompt and ask it to generate
20 different ideas. So we can go ahead
and copy this prompt, but we don't
necessarily have to. It's just to get the best
out of the best results. So go ahead and click on this. If I told you not to look
behind, could you resist? They say curiosity
kills the cat, but what about you? What happens when I
tell ten strangers? Mm hmm. So actually, I really like the hooks
from what we have here. However, the script
is, like, so small, and it's like, it's not the
finished story, I would say. Okay, these are great
results. Now, I need you to give me a way better script because the script
is very short. I can read the script
in like 2 seconds. And we need a script
for 20 seconds. So go ahead and give
me the video ideas, the hook line, the script, and, you know, the
scenes as well. So go ahead and give me
the updates list but with better updates scripts that actually tell the story
and finish the story. So this is kind of interesting, but it's like Stephen King
wrote this a little bit scary. I was working Cafe
and this guy buumped into me spilling
coffe over my laptop. I filming apologizes. Hands me napkin and
a small envelope. I think it's just a gird story. But inside, he's a single
doesn't know, get up to back. My instincts tell me to
stay curious to wins. Mm. Okay, I'm loving this. Now, instead of it
being from, like, a first person view, which
some of the stories are, make sure it's from
a third person view. Basically, I'll be creating
the audio recordings and telling stories about
other people that have happened or the
stories that have happened or imaginary stories like MaginEOTss or, you know,
what would things like? So, actually, I
like the stories. We just need to kind of customize these
stories a little bit. I really like the hook lines. Tim left the same wallets in five public spots just to
see what strangers would do. One man pocketed
without hesitation. Another called out and ran
after the Tim to return it. One person kicked in the
gutter, but one woman, she opened it, took the case, and left note and
said, I'm sorry, I need this more than you do. Hours later, they found her at the grocery store
feeding her to children. You know, these stories
are super good, but I think we just need to
customize them a little bit. I mean, if we were
to compare what we have here to a regular HAPT, these responses
are a lot better. We have the scenes, we have the script, we
have the hook line. The hooks are
amazing, by the way. So it's just like I will
probably change this line here. So that, you know, they found
her at the grocery store. And we need to check if
this is a real story or not because if it's
not real and it's like, something comedic or made up, then we hours later, they found her at
the grocery store feeding like a man behind the counter or
whoever the seller, something like that to
make it comedic, right? Because this is
just this is sad, and I'm not sure if we
want to do it this way. It's so funny that this hat GPT is creating scary stories. But this is actually
really good story. And like, just think
through this story, this is such an amazing story. If you were to see
this on social media, you would just
continue watching. Now, the only thing we
need to customize here is that we get the user
satisfaction because, yes, we'll definitely
hook the people in. We'll create an amazing video. But will the people
be satisfied? Because, to be honest, I
would not be satisfied, like watching a horror
movie without the ending. Okay, great. So let's you four. Is ending like this? Let's try to use a
different ending where we know what's happened. So we need a final
conclusion or something. So that people feel
satisfied in the video. This case, it can be
something like he was his wife or maybe he's driven or maybe he's just
tired or something like that. We need the ending to
satisfy the viewer. This is really important
things because if people watch a video and a lot of let's say one of your
videos go viral. But then people watch they don't get satisfaction and they watch a video for
the second time, and they know it's your video. But because the
previous experience wasn't satisfying for them, they will not watch
the video again, so it's super important to get the satisfaction
from the viewer. That's why I'm
asking about this. In quite apart manue
everything seemed normal. Okay, this is a lot better. This is just an example of a
great story out of nothing. And yeah, we can
definitely use this story. So if you want to
create a video on the story, you can
definitely do this. However, what I really want to do is great story that
we've already created the flooded room because
the reason I want to do this one specifically is because of how
challenging it might be, and we might need to learn something new because I'm
not sure how to do this. This video about the mirror it's quite simple to do, right? We just find two models, create these
animations in Mixamo, then create, like,
a room, a bathroom, and do this animation,
super easy. But now, about the water part, I'm not sure, so
we definitely need to research, experiment,
things like that. So this is how you do it. This is how you come
up with videos. Make sure to check
the resources section to get access to the
viral story lab. If you have any
questions, let me know. But other than that, I will
see you in the next video.
19. Environment Build: BlenderKit/Sketchfab Assembly, Lighting & Camera Blocking: Welcome. In this
video, we're going to start creating our
video in Blender, and first, we're going
to focus on creating our environment and
assembling the scene. So let's quickly come to premiere and take a
look at what we have. So this is our transcript. In the end, it's and yeah, you pit it's supposed
to be like this. You can come to the
window, click on text, and you'll be able to have
your text properties, and you'll be able to
sit in real time where the audio and the text
combine together. At first, it's just a puddle. Then the flow ripples and a wave crashes
through your desk. I'm going to mark
things with color. So you can say this color, but for this one,
let's make it Mango. Wave crashes through your desk. In minutes, you're swimming
to reach the ceiling. The waters warm, too warm. So for now, I'm going
to click here as well. You look out the window,
the street is gone, replaced by endless ocean
for air and wake up. No ocean, just your bed. And we'll make this one color. The reason why I actually pop. The reason why I'm marking
things with color, so we have some identification, and each color, basically, the difference in color
is going to be one scene. So this is going to
be one scene, two, three, four, five,
six, and seven. We're going to
have seven scenes. It's just kind of the way
I'm imagining this to be, so at first, it's just a puddle, so we need to show a puddle. Then the flow
ripples and the wave crashes and the wave
crashes through your desk. This is going to
be another scene. Technically, it's going to be one scene because we're
going to create it. But then when we put Camera
animation, exporting, I think it's better
to do it with different scenes because I'm going to make it a
little bit easier, and I'm going to show you
everything in a second. Let's see what you have
here? Swimming to bridge. Yes, this is going to be
another scene because there's going to be different levels of water and things like that. Water is warm. Too warm. The waters warm, too warm. You look out the window,
the street is gone, replaced by endless ocean. You gasp for air and wake up. No ocean, just your bed. No ocean, just your bed. And yeah, you pet. Each thing is going to be
different scene, but for now, we need to create one big scene. Basically, I'm thinking
about it being sort of like not necessarily
child room, but something like when where
there is a bed and a desk, usually it's like
a children's room. So this is what we need to do. Let's go to Blender and start
putting things together. So I'm going to
delete everything. Okay, so let's go
to Sketchfab and let's search for What's the
name of the children's room? Great question. Let's ask TAPT. Is there a name for
a children's room? For example, like, for adults, it's usually bedroom
for children. Is there a name? Kids room. Okay, kid kid room.
Okay, great. There are. Before we continue, I'm going
to press Command as to save the file because if it crashes, we're going to have
our file saved. So let's call it. How did we call it
premiere Ocean Video? Ocean video is going
to be our file. I'm going to create
another folder called Blender in our Ocean video. So Ocean Video Blender,
save our file. Okay, so now we have
our file saved. We'll press Command S. By the way, another thing
if you go to preferences, so command coma or
Control comma and if we go into the save and load, you can save files
every 2 minutes. It's going to autosave. So just make sure you
have this enabled. Otherwise, it will not
be autosaved and if you forgot to press Commands, you
will just lose everything. So let's see what we have here. So we have kids room this
one, we have this one. Let's see what actually,
there's a desk. So let's try to let's
write this one. So let's click on
it, input and I completely forgot to
change the renderer. We needed to be in cycles. Now there's going
to be a problem. So we need to command Q to quit. I'm not going to save, and I'm going to
come to blender, and this is going
to be our project. I'm going to open it.
Come to renderer, switch to cycles so
that we can import. And now kid room once
again. It was this one. So import model.
And you can see, now we have it in process. One thing as well, in
order for people to identify this iconic
style by Zag D films, I think we should change the walls to this
blueprint color. So remember, like, the
blue with stripes, we should do it here as well. Our room was imported. Let's take a look at what
we have in this room. So we have desk pistol. Not sure if we need this pistol, but we'll see. Mm hmm. So the windows are just want to see if we
can get rid of that. Yes, we can see through
the windows. Okay, great. Let's come to render, and we will put EV now because
we don't need tackles, which takes a lot
of time, no way. N for speed. Let's create
a light from the top. So we're going to press Shift A, and I'm going to create a light probably need a point light, to be honest because we
are using it in a room. So I'm going to press on G
with our light selected. Let's press on Z so
that we just move it up so that it stays in
the same position, move up. Then we can come to data
and we can increase the power so that it
illuminates the room. Now, if we search
for blueprint here, blue print, and we
go to materials. This is our blueprint.
Let's try to apply it to the wall. Mm hmm. Great. And to the floor as well. Okay, great. This
looks more like it. I'm going to increase the
power of the light a bit more. We'll see maybe we need
to add another wall here, and we'll be able
to just command D, duplicate this wall,
change the rotation, and press on that, so change the
rotation to actually, we can just type
in 180 like this, and this is going to be, you know, our wall. We can do it like this,
right? And then we can just put something here. But for now, we don't need a
Ig press on X and delete it. For outside, I
think we should use HDRs because we're going
to have like in the video, we're talking about the ocean. Come to blender kit, search filters, free first, and let's search for ocean. Dragon drop. Actually, this
ocean is kind of bad quality. Let's come on z and
search for other HDRs. Also, in terms of the videos, you want the videos to
be brighter rather than darker because if
the video is dark, people are less
likely to watch it. Mountain on the Let's see
what this is. This is good. I'm not sure about this quality. I just realized I
might have been importing it in bad quality. So what if we use
original like this? It's going to take a little
bit more time to load, but then I think the
quality should be better. Yes, the quality is now better. That's how we should
have done it. Okay, so let's
increase the strength, and it's going to be scarier, this background or
something else. Let's try another background. So Okay, this is great. I think we'll stick
with this one. We have our room, although it's really
well illuminated. What if we disable
the point light? What if we decrease the
strength? Of our HDR. Great. I think if we
were to see this, it'd still be good or potentially
maybe, like, that side. So we'll see maybe
we will rotate the whole thing because
this is our room. And if we were to rotate it, we could just click on our
select it and rotate it good. I'm not sure if I like this rug, so I'll click on delete it, delete this thing as well. Okay, is there anything
on the floor? No. Let's call this one
original scene. We will have it saved like this. Okay, we need to think through from the very beginning as well. Is there anything else we
need in terms of this scene? Is there anything
else we need to add here before animating? Because it's going to be a lot easier for us to just create the scene and then just go ahead and copy
it because if not, we might, like, need to customize every single
scene in the future. But I think this can work great. So this is going
to be our scene. Is your room and
we're good to go. Let's finish this
video here now. If you have any
questions, let me know. But than that you'll
see in the next video where we're going to create our characters
and create our animation. So see you there.
20. Character Creation & Animation: Human Generator + Mixamo Timing Tweaks: Welcome. Now, let's create our characters, create
our animations, put the camera, do
all the scenes, and we'll be good to go. The next thing we need to
think through about the model, let's go to Mixamo
and try to find a model Miximo characters. Let's search for a kid. Or like a child. Not realistic. So let's see what
options we have. Let's search for a man. He this Brian guy bold. So I'm thinking about
doing it in two ways. One, where we will
find the model that is easy to replicate
with a human generator. So we're going to use a model from Miximo and create
our animations here. But then we are
going to generate a human with human
generator, another model. Make that model look like
this model for close up. So this is going to be
like from far away, but from close ups, we're
going to use human generator. So let's try to use
this Brian guy. So, let's download our
character when sign in, so I'm going to log in as well. I'm going to login with Google, and let's download him. Let's use a Tipose
that would be good. I'm going to allow download. Let's come to Blender, and I'm going to
duplicate the scene. So I'm going to come
here new scene. You can see we can either
create new one copy settings, linked copy or full copy. I'm going to do full copy so that now we can
call this one test. I can see that we have to have our original scene
and we have a test. And now, if I import
our brand guy here, so let's import him. It's gonna take some time. There's our brin
guy. There we go. We should try and
replicate our person. I'm going to move him a little bit to the
left, like soap, and now we're going to
use a human generator and try to make the same guy. So let's come to human generator.
It's going to be male. Let's try to find a face that best represents this person. Okay, let's do
something like this, and then we'll be able to customize our person. So G, X, and move to
the left a little bit. Pose. Let's do a
T pose, as well. If there is one, I believe
there should be one. Wonder if we can search
in terms of poses. Probably not. Base poses. Okay, T pose. Great. So there we go. Okay, so let's come to clothing. Let's try to give him
similar clothing, so we have jeans,
jeans and t shirt. So we can come to material, and we should be
able to customize the colors here or if we
go into the shader editor, and we open it up. So these are the colors. Let's try to make
this color something like this so that it's
similar main color. Let's add it to
something like so. Okay, and also we forgot
about the footwear. So some probably
something like this. Terms of the colors, the main color should
be this color. Okay, it doesn't
have to be perfect. Once again. We're just trying to make them seem
like one person. Oops. Now, let's customize
the head a little bit face. We definitely need eyebrows. Case or blender,
quit unexpectedly, reopen, file, recover, autosave. This must be the one ocean,
video, autosave, recover. Great. This is where we stop. Now we need to do it again. So let's change the color Okay, so this person is very metallic, and I select him, and if I decrease the
metallic properties, becomes less metallic. I think these are more
or less good to go. Maybe we need to change
the pace a little bit. So if we come to hair, hidden hair, so what
do we need else? Maybe the face.
Actually, you know, I think these are
pretty identical. People will not see the
difference between those unless we explicitly show it,
but we're not going to it. Good. We have our person now. We can actually just if we
want get rid of this guy, completely command X, delete, and now we have our person. Great. Let's take a
look at the names. Original scene with person, original scene with person. So now we have original scene and original scene with person. If I switch between these two, you'll see that we have a person only one
of those. Great. Now, we'll go to the timeline, lower this down a little bit. And I think we should
start creating. Come to Premiere, open our file, see what kind of
text we have and for how long and continue. At first, it's just a puddle. At first, it's just a puddle. Actually, let's see if there's
a puddle on Sketchfab if we maybe don't even have
to animate the water. So let's change the
render to cycles and see if maybe we can import this Ooh. What's the size of this puddle? It's come to EV. Okay. Doesn't look like water. Looks like not even sure
what it looks like. Yeah, I don't think
this is going to work, so let's delete
it by pressing X. Let's see if there's
anything else. Sure, I just had another idea. What if we search for water downloadable on
Sketchfab, animated. There's already, like,
a water animation. Mm hmm. I mean, we can definitely
use something like this instead of
doing it by hand. And even something like this. Actually, I think, yeah, it's gonna save us a lot of time. Mmm. Yeah, something I did
not think about at all. So let's try to download it. I see this water is paid. This is why I'm not
able to download it. Okay, let's see which one
we are able to download. So this is good. This
is good, as well. Let's try to download this one. Once again, FBX. Let's come to blender, let's come to scene number one. Just going to unzip it. And let's drop it in
and see what we have. What if we go to I mean,
there is a way to do this. I'm just trying to find the
fastest way to go about this. So let's try to go Sketchfab. What our animation.
This is the one. Let's change it to cycles
and import our model. Great. Now let's go to EV and see what we have.
What's our animation. Let's decrease the scale of it so that it's
a lot smaller. G Z to move it a little
bit higher. Let's see. Interesting.
Actually, because we can actually see it from a different reflection
point, a little bit better. So from this side, we can see
better than from this side. So maybe instead of customizing, we can actually just play around with lighting a little bit. So let's see if
we can add, like, a light point G. Let's
see if we can yes, we can definitely illuminate it, and it will be better. G and Y? Yes, we can definitely illuminate
it so that it's visible, a little bit better. So great. Let's delete the light for now, and still, we need to
figure out the puddle part. I thought this could be
a great puddle part, but maybe not necessarily. What do we search for Weaver? See if there's
anything interesting. Actually, we'll have this
one. Maybe we can use it. So let's go to cycles
and search for this one. Import. Oh, wow, it's enormous. So we need to decrease
the scale a lot. G X, put it here. Let's see. I've been kind of
thinking about this, and so this is our script. At first, it's a puddle. So we can actually try and do the puddle a
little bit later, and then for now, then the flow ripples and
wave crash through your desk. What we can do is we can press on R Z. Yeah, so we need Z. Move it around a little
bit, make it smaller. We don't need it to be this big. Then we would need to press G, X, move it a little bit left
and see what we have here. Okay, so this is our water, and we can actually press G Z, mood a little bit
down, and we can now animate it so
that it's going up. And you can see there's
animation of the water itself, so we can do something else. Instead of just animating the water which
already has keyframes, we can press Shift
A empty plane axis. And we need to select
our water like this. Then we need to select our
empty actually, where is this. So we need to select
our water Okay, empty. Let's change the
position of empty G. X, and move it like this. So let's select water. By pressing Shift, I'm
going to select our empty. And by pressing Command P, I'm going to parent it object. So now, when I move
empty and press G, I'm going to move water as well. And right now, I'm going
to just animate the empty and the animation of the water is going
to stay the same. So I'm going to press I by selecting empty.
Let's think through. Okay, so this is going to take like 2 seconds,
for example. We can always change
a little bit later once we have things
opened in premiere. And I'm going to press G, Z, move it a little bit up, like so, and press I again.
So let's see what we have. Mm hmm. Perfect. So this is
going to be for this scene. The floor ripples
and the waves and the wave crashes
through your desk. In minutes, you're swimming
to reach the ceiling. So this is going
to be scene one, and we can duplicate this scene by pressing here full copy, and we'll call this scene two. And for this scene,
we're actually going to need to use miximo. So I'm going to
close all of this. Swim So let's do this animation. Okay, not necessarily this
one because they're grabbing. This is a good animation, so we can go ahead
and download it. Allow the download. I'm going to open the
downloads folder. So where's the swimming? This is the one. Let's import it. Okay. Great. Actually, let's make our person just
a little bit smaller. Not tiny, but just a little bit so that they can actually
swim in the room. Press R, Z and I'm going to rotate them like so G, X, Y. Should that move them? Let's animate the empty of
water rising even further. I'm going to delete this keyframe by selecting it and pressing X,
delete key frames. And we're going to
start from here. And let's say, actually we can put it to frame number one, Addme let's say 90, press G Z and make the water even higher and press
on I to set the keyframe. Actually, let's connect our
person to the empty as well. Let's select our
person, shift empty, command P or control P object, and it should be a very similar, yes, situation where
the person is rising. Great. Now, if we come to here and let's come
to frame number one, where this whole
animation starts. Let's open empty. We will have our person here, and we can lower
him down probably, like, so let's see. Swimming towards the
ceiling. Mm hmm. This is looking great. So this is going to be scene number two. Roughly, we'll customize the
timing a little bit later. Person command S. I'm going to duplicate to make full copy. Now, this is going to
be scene number three. Actually, scene one is
scene two. Scene two. Okay, so let's name scene four scene three is
actually scene four. Number two should
be number three. And number one should be two. So let's come to number four. And here, I would like to change the position
of the empty. I'm going to create
another empty, Shift A empty, and I'm going
to change its position, make it a little
bit higher and GX, put it a little bit to the left, and I'm going to connect empty number two to
empty number three. So whatever the first one that we select is going to be
the one parent teeth. And the second one we select
is going to be the parent. So object. And now I
want to move this empty. The reason I'm doing
this is because we have animation on empty number
basically on the first one, and empty number two, we will be able
to move it around without affecting the
animation of the first empty. So let's press G and Y, and I want to move it so that the water doesn't
appear over here. Let's also G and move it a little bit to the left so that we
don't see the wall. So something like this.
And now we can actually just take the window
way, delete, delete. We'll see what we can do
with the camera here, and I'm going to actually create another
empty right now to connect the person
so that the person will be next to the room. So I'm going to
empty plane axis, change the position of this
one so that we can see it. Like so. And I'm going
to connect our person. So I'm going to open and find our person over
here and I'm going to connect it to this empty. And I'm going to press
Command P once again object. And so now this is
how it should be. Oh, no, I see what happened. So because the person
was connected to another empty when I connected
it to this new empty, it actually stopped being
connected to the first empty. Interesting. So we need
to press Command et. We can delete this empty.
Let's select the person. Press G Y and move him to the very front and G and X and move him a
little bit to the left. Like so the reason
why we're doing this is because we want
to see him from the window because I
want to put the camera outside like this and to see the person rising
with the water, press Z and X and move him maybe change the
rotation a little bit. Okay. Let's see how it goes. Yeah, this is pretty good. Okay. So the water
is warm too warm. I think for this one, the
waters warm too warm. We should show this guy. And animate his face
when he's like, you know, a little
bit, like, What? Like, how is it to
warm? Why is it warm? This scene is going to be number five when he's looking
out of the window. So this is this scene, this one. And then This needs to
be scene number four. So let's duplicate this
scene, full copy now. Let's take a look at this
and delete the animation. We can get rid of this person, so we can move him
X to the left. And let's position this person. We're not going
to show his arms, so I would like to rotate him a little bit and move him
maybe just a bit, like. So what we're going to show with the camera is just like that he's floating pro, like this view right here. Let's take a look
at our empties. Looks like one of the empties
still has keyframes, yes. So I'm going to press
on X, delete. Yes. Perfect. So now we need to animate the face
of this person. I'm going to switch
the viewport, and what if we go into
actually, for this, we need to select our person, and we need to go into the
human generator expressions, add a facial rig. And now we'll be able to select parts of his face if we go
into the pose mode, right? So we can select, for example, present G, and we can
kind of move it around. Now, I'm going to go back
to this shadow here, and let's create an animation. So here, let's go to
frame number one. Select all of these
by pressing Shift. I'm not sure which
parts will animate, so I'm just going to
select all of these. I'm going to press on I, and we're going to
create a keyframe. Now, let's move like 30 frames, and let's move one of the
eyebrows up by pressing G. This one Up, as well. This one needs to go. Actually, this is the eye. This one needs to go down. This one needs to go down. Open one of his eyes
a little bit more. Who was one of you? I
sorry, this is very funny. Okay, you're gonna do this.
Okay, by doing the nose, I think it looks a
little bit weird, so let's bring it back
to the way it was. It looks like this
part did not animate. I think it's an
interesting phase. I'm not sure if it's
the best representation of this situation, but I feel like the waters warm, too warm. It works pretty great. You gasp for air and wake up. I think when they gasp for air, this can be a new scene where
original scene with person. So we can do this one, so we can duplicate
it, full copy. So it's going to be scene six. And here we just need to
place our person on the bed. So we need to rotate him. We do this 180, like so, and let's G actually R and put him down like 90 degrees. Oops. Yes, let's R X and 90. Now we need to press G Y, actually X, move
him to the side. G Z, move him up, G and Y. We can move the pillow a
little bit to the side. G and Y, maybe put
it here for now. So let's see what we
have. We can have this view from the top of the
camera a little bit later. So let's select our
human again, G, and I want to move him down, so I'm going to put
Y and move him down. Let's select the guitar,
move it to the side, pistol. Okay, we can keep
the pistol there. Visually show to people the part that the person beat themselves. So we're saying no
ocean, just your bed. But then on the screen, we will have a yellow
big spot rising. What are your thoughts? I think it's going to be
very interesting. Shift A. Let's
create a circle. G. Let's move it up by pressing Z. Press F to fill. Hmm. Now if you go to
material, actually, let's search for sketch fab or maybe we don't even need
to search for sketch Fab. Let's see if we can
add just, like, a color, like a yellow. Okay. Let's try to put it
below our person now. So I'm going to select
it. Go to object mode, select it, G, move
it a little bit. Actually, let's move
it perfectly Z down. S to decrease the
scale, press I, move it a little bit
further, increase the scale, person I I again, go to frame number one. So let's see For now, I think this looks pretty good. We might just need
to change the timing a little bit so that it takes a little bit longer to appear. You gasp for air and wake up. Let's select our person. Let's go to human generator and Expressions and face
Rk at a facial Rig. It's going to the pose mode, and let's make him gasp for air. So select all of
these, press on I. Actually, in the very beginning, I want his eyes to be closed. Frame number one, select one I, G, press on I. Okay, 30 frames in
G, open the eyes, press on I. I'm going
to select this one, press on I going
to go 50 frames, G, pull it down, press on I, and I'm
going to go 60, G to the left, I 70, G to the right, I. And now I can just copy
these and paste these in. Okay, maybe these
need to be placed a little bit faster,
closer to each other. Okay, so now we have all of our animations aside
from the very first one, which is at first, it's
just a puddle New. We are going to
call it scene one. And let's try to find a
puddle with Sketchfab, just some sort of puddle. Let's try to import this
one, see what we have. Okay, let's add
some sort of light. Sun. Let's increase the sun, change the position by
going to object and Okay. This liquid is pretty dark. Let's create a plate
so that we can see it better,
increase the scale. Actually, change the renderer, not to cycles, but to IV. Can probably change the color of this one to something else. Base color, metallic. What if we search for blender
kit and search for water in the materials and then try
to apply water to this guy? Or some sorts of
other water that would feel more realistic. At first, it's just a puddle. Maybe we can use this one
in the very beginning. Okay, I'm going
to copy this one, and I'm going to just actually, this will be water. This will be puddle. And I'm going to sin number two, and I'm going to
duplicate this full copy. Here, I'm just going
to delete this one and delete this one and paste our puddle X, Y G Y. Okay, so it's going to be like pecking from beneath the bed. We can also animate it, so we can set I like position. And GX move it a little
bit to the left, press on I actually come to this I. GX moves a little bit, even more before the bed. Oops, I forgot to click on I. So G X, Y. Okay, now we have
all of our scenes, but this is going to
be scene number one. So we have scene
number one where we have water coming below the bed. Scene number two, where
we have the water rising, showing the water rising
and hitting like this side. Then we have scene number three, where a person is kind of
floating towards the ceiling, which is what we
have in a script. Scene number five, Okay. Scene number four.
What's happened. Okay, so this is going to be scene number four when
the person is smiling, when it's very warm,
Scene number five, when the person is
floating and we'll be seeing him from the
window view right here, and scene number six, where we see the person and the person is just
pining themselves. These are all the scenes
that we will need. In the next video, we are
going to animate the camera. Then all that will be left to
do is to export the video, put everything in premiere with audio and things
like that, and that's it. So if you have any
questions, let me know. But other than that, I'll
see you in the next video.
21. Camera Animation & Render/Export: Polish in Blender, Deliver for Shorts/Reels: Welcome. In this video,
we're going to animate the camera and export all
the videos from Blender. I will come back
to Premiere Pro, and all I'm going to do is to take a look at how
many frames we have in order to identify how long each
scene needs to be. So, for example, you will
see that in Premiere, I have for example, I have 24, and after I go to the next
frame, it's going to be one. So if I come to the sequence
settings by clicking here, sequence settings, you
will see that I have timeline 25 frames a second. So I need to put it to
30 frames a second. It was created automatically
when I just dragged the audio clip to so now you will see
that I have 29 frames, and after that, it comes
to sort of 30 frames, but it comes to one,
becomes 1 second. And if I come here, we will see that we have 1
second 1024 milliseconds. So that would be 54 frames because we have
1 minute which is 30, 30 plus 24 equals 54. And this is what we
have to do in blender. So we will come to
scene number one, and we will come to output. And here we need to put star frame rate at
frame number one and end at frame number 54. Because of this, we also
need to put our animation so that it works
like this, right? So we'll put this one
through something like this. And we'll have something
like at first, it's just a puddle, and then we'll have the puddle come up. Let's now create a camera. So command A, camera, and let's change the
position of the camera. Okay. Okay, so we cannot see
anything with the camera. I'm going to press O to
have the camera view. Also going to change
the resolution to 1080 by 1920 so that
we have it vertical, and we'll do it in
the out properties. And I'm going to
press Shift till Day, and I'll be able to fly around and see exactly
what's happening. Actually, I'd like to go a
little bit lower, like so. And let's go into the camera and increase the focal length. Shift till day, and I
will just do it like so. For now, let's see what it
looks like in the viewport. Let's add another
viewer like this. Remember until we get, like, this cross, so let's move
it a little bit, like so. I'm going to press on
N, and then press here. And as well, to get
rid of this pop up. By pressing here, I'm
going to press on zero, and I'm going to
select this view. I'll be able to see the
camera like this, okay? And I'm going to zoom in here. Let's zoom in on the camera
just a little bit more. And let's select the camera. So let's come here, shift till day and fly a
little bit to the right, a little bit to the front. Let's see what do we have.
Great. Loving this. Okay. And now we need to
export this first scene. So first of all, I'm going to
come to our folder and I'm going to create Blender exports. This is going to be our folder. And now I'm going to go into output and just exactly the
same thing we did before. Come to the output,
click on this folder, desktop, Ocean Video,
Blender Exports. And we're going to call
this scene one and except. Now we need like the
video format encoding. And peck four. That's it. Now we will be able
to just press, once again, either come to Render
Render Animation, or you can click
on the shortcut, which is what I'm going to do, and it will be good to go. Now we just have to wait. Great. This was just finished.
So we can close this. And let's take a look
at what we have. Another secrety I'd like
to share with you about the video is the video should start with some
sort of movement. So right now it's static and it's not necessarily
thumb stopper. So it's just like it's
coming to the screen. I think we should
animate the camera. Let's put a final keyframe,
let's say around here. We're going to press on I, and we should do something here. So I'm going to press
on Shift today. Maybe we should just
do it like this. What if we move
this to the side? Yeah, I think it's better when we see
the background here. Let's try to export it this
way. So we have SN one. And right now, if we
just start rendering, it's going to override the file that we
created previously. So let's give it a try because we don't need
the previous file. Now we just need to
wait it once again. I had to stop the animation because I just had another idea. So we have our camera like this. But then we have our
focal point here, and I would like
to just make sure it's zooming in
until the very end. Let's come to camera. We need to keyframe it. Let's create a keyframe
by pressing here. And let's do 174 Presson or
one, we can do it like this. But the key frame I'll move this couple of
frames to the front. Yeah, I think this
will be great. Okay, now we will export. Let's take a look at
what we've created. Great. Movement from the
very beginning and zoom in. Slide zoom in. Great.
So now if you come to premiere and I drag and
drop the scene here, you will see that it's
exactly the size. It's like, perfect
frame by frame. At first, it's just a puddle. At first, at first, at first, I think it should start from
the very beginning. Right now, it starts
at frame Number four, we should start at
frame number one, okay? Let's do another export, because it's a
little bit too late. I thought it would
be a bit too much to start moving from
the very beginning, but then it stays for
like four frames. So at first is just a puddle. Then the flow ripples and a wave crashes
through your desk. Yeah, let's do another export. Great. Export it? Yes, this is better. Let's import it into Premiere
and see what we have. At first is just a puddle. Then Great. Okay, now 124 and here 511. 124, 511. So that's 120 because that's
4 seconds almost 30 times 420 -13 because
24 -11 equals 13. So we have 120 -13, 107. So if we go into
the second scene, the second scene needs
to be 107 frames. And I'm going to come
to the output and set it 207 frames right away. Let's listen. Then the floor ripples and a wave crashes
through your desk. Because we have
the empty animate, I think we should start
a little bit higher. So we press G Z
move it just a bit. Like, so, yes. I forgot to press the button to select
the Keyframes. So and press I. Great. Now, let's
create the camera, Shift A, create a camera, G to move it a little
bit to the left, and we'll do exactly
the same thing here. We'll press camera here. We'll come to Renderer 1080, 1920. Think we should. And let's take a
look at the camera. Okay. Let's do 30 mile and
let's try to put the camera. Over here. So I just once again, press Shift Tilda
to get the camera. Let's select the
camera, press I. Move it here to the first frame. Once the waters rising, we'll probably move
something like that. Press I. And once the
water is really high, we will shift til fly a little bit to the
front because we're talking about the table and how
the waves are crashing. Let's put I here and
delete disk frame. Let's see what we have. Mm. Maybe just like this. Mm, very smooth motion. I love the way it
looks. One thing we can also do is
add depth of field, and it's going to become
this slightly blurry, which adds a lot
of to the video, it becomes a lot more expensive. But we might do this a little bit later. I'll
just make a note. To be honest, the way
you do this is you just add a depto field, right? You can either
select your subject. Oops. What happened?
Where's the camera? Yeah, so you can either select your subject,
something like that, or we could you know, go ahead and select, like, a focus object, for
example, what to focus on. So we can set, for example, this thing here and it's going to stay in focus at all times. And if we go further,
staying in focus to what we had under
the table here. So we'll see about that. But for now, we nailed
this animation, which shows the water level
rising, which is amazing. Just like the depth of field. Mm, yes, this is great. So this is scene number two. Let's go for other scenes. In minutes, you're swimming
to reach the ceiling. In minutes, you are swimming
to reach the ceiling. Let's go to scene
number three. Mm hmm. Okay, let's create another
camera camera, press zero, shift till day, and
let's fly around. Let's see what we
have. The output 1080, 1920, shift till day. I would like to increase the
Let me select the camera, the focal length so that we have a little
bit less around us. It's like where once
again, like where zooming. Can kind of show more of the room without
showing the top, which is the sky or the bottom, which is, you know,
the sea. Great. So let's let the
camera, press on I. By the way, we did not
set how long this is. So this 511, and we
have it until 729511. So 29 -11 plus 30, 48. Just do the math, right? So the output is 48 frames. So put it over here. In minutes, you're swimming
to reach the ceiling. The waters No, actually,
it's more frames. Oh, that's 78 frames. My apologies, 78 frames. Okay. Let's select the camera. One key frame here, we'll
move it to the end, and now shift till the Okay, I'll just put a
keyframe here for now. But what I want to
do, to be honest, is I want to
duplicate this floor. Actually, I might need to I did not select the
right thing, right? Press Shift D Z. Rotate it. We can press 180 G, and Y, move it a little
bit to the right. Okay? And we can
select this part, press on X to delete it. So now if we select the
camera, press Shift Tilde, yeah, now we can see
the floor better. So we can start like this. In minutes, you're swimming
to reach the ceiling. Yeah. The waters warm. Too warm. Now, scene number four, let's go into the object
mode because we're in the pose mode and I wasn't
able to find to add a camera. So here I'm going
to press Shift A. Camera G, X, just to
move to the side. Now going to press here
and press and 01080, 1920, Shift till day, and let's fly around,
see what we have. I want to come here and
really zoom in on the person. I mean, we can do focal length
here as well, like this. So let's count how long
this portion needs to be. 729 until 928. This scene will be
59 seconds. 59. Okay. Let's put a keyframe
for the camera here. Select the camera
first, press on I, delete the second keyframe, which I automatically created. Actually, we can make
this the last one, and the first one can
be shiftild Like this, press on I, actually, we can change these around
so that we come from afar to the closeup to really see the emotion
of the person. And here, set another
keyframe like this. Mm, this is great. Let's see how long this one is. You look out the window.
This street is gone, replaced by endless ocean. Scene number five, where he's looking out the window,
Shift A camera, change the resolution
1080, 1920, going to press on zero, shift till day, going to
come here, press on I. This is where we're
going to start. And then the way we're
going to end is when a person when the camera turns
around, shift till day. Sees the endless ocean and
doesn't go de presson I. Okay, we might need
to move the person a little bit because we
cannot see them at all. How long is the scene? 928, 13 29. So we have 4 seconds
plus one frame. So that's 121 frames. Let's see 121 frames. Okay? This is going
to be the end. Let's select just our person
armature and let's move them X to the right Okay, great. And that's, like, the
empty or the second empty. Move it a little bit
higher by pressing on set. Like so. And the starting point should be a little
bit higher as well. So I'm going to press G,
et a little bit higher. Let's see what it looks like. Yes, this looks great. So we have this part
finished, as well. You gasp for air and wake up. No ocean, your bed. And here, pet. Okay. And I made this
one as one scene. In the end, so we can
try and make it G A. Let's come to blender
scene number six. Let's come to object mode, Shift A, create camera, zero, shift Tilde and let's
fly up 1080 1920. Going to press Shift Tilda. So we can start like this, select the camera, press I. Okay, let's see how long
this very last part is. So 132-91-9203. That is 144. So let's go 144 frames. You gasp for air and wake up. You gasp for air and wake up. Let's go to pause, select all of these,
and let's see. Okay, we need to move these
a little bit closer as well. So let's select the
camera, press I. No ocean, your bed. And yeah, PD. So roughly about here, let's set the camera
a little bit higher. Press the camera, I
select the key frame. And when we go to the very end, let's just move the
camera a little bit higher. So let's see. So let's see our circle that's
growing this animation, and we can just Mm, actually, we can just make the animation until the very end. So you can see I'm just taking
a look at with the camera and just trying to make sure it doesn't go beyond the floor. But even if it did go beyond, I would just be able
to copy the floor, put it there, and good to go. All I have to do is like I
did with the first video, I'm going to export
every single part. I'm going to name it
scene number two, number three, four, five, six, but I'm not going to bore you
with this because there's just no need for you to
see the boring stuff. There's no value for that. So if you have any
questions, let me know. But other than that, I'll
see in the next video where we're going
to put everything together with the audio
and finish this video.
22. Final Edit & Sound: Music, SFX, Captions & Posting Workflow: We are about to
finish this video. We have just a
couple of steps left to add audio, add captions, maybe a couple of other things, but mostly it's just
audio captions, and let's jump in. So let me show you what
I exported yesterday. We have our six scenes. So we did the export of
the first scene with you. Then we also did this scene, but the scene I just exported
myself and this scene. So as you can see, the camera movement,
everything is the same. The only thing I did extra
is add little bit of depth, a little bit of
this bouquet blur, so you can see we
have a little bit of blur here in the
foreground, and that's it. Okay, so we should put everything into premiere
on top of that. I was kind of looking
through some of the songs that I have
saved on my computer, and I found this song
from Epi McTollant. It's this one. Kind
of intriguing, and I think it can work
really, really well. So we will try to
use this song here. And on top of that, in
the resources section, you'll be able to find
my sound library. These are all the sounds
that I use for my clients, for myself, and it took me a number of years
to put it together. So you are welcome to use it. And once again, if you want
to try Epidemic Sound, there's going to be a link
in the resources section for a 30 day free trial. Let's actually organize
this a little bit. In premiere, you're
able to create these folders to make sure
things are organized. So this is our sequence. This is our audio, and this is the clip
that we imported. Let's create a folder
and call it audio. I'm going to put it here,
put our audio there. We'll have a folder
called sequences, and we're going to put our
sequence there, like so. And we have our scene here, which we can live there for now, and let's add the
rest of the clips. These clips, as you remember, should be exactly
the same size as our audio because we
calculated it yesterday, so let's double check. This is scene number two, you can see it fits
perfectly here as well. Scene number three, 45 and six. Mm. Scene number six might
be a little bit too short. You gasp for air and wake up. No ocean, your bed. And, yeah, you pee. Okay, we can actually
do something without having to re export
this and premiere. If you click on the clip and you come to
the bottom right, you can see this button
called Export frame. If you don't have it,
you will have it here. So you just need to click
on the plus button, then just go ahead and
drag and drop it there. So if we click on it, we'll be able to
export the last frame, and we can export it and
import it into the project, or we can save it on a desktop, for example, like it is here
and then just extend it. So I'm going to
save it on desktop. I'm going to come to desktop. This is our frame. Going to import it and leave it here, so. And yeah, peed. Yeah. So we miscalculated
this very last one, but as you can see,
it's not a problem. You gasp for air and wake up. No ocean, your bed. And yeah, peed. Okay, great. So let's take
a look at the video with just the audio and then we'll
put everything together. At first, it's just a puddle. Then the flow ripples and a wave crashes
through your desk. In minutes, you're swimming
to reach the ceiling. The waters warm, too warm. You look out the window,
the street is gone, replaced by endless ocean. You gasp for air and wake up. No ocean, your bed. And yeah, peed. Okay. Very creative. Okay, let's put
everything together. So let's find our song.
This is our song. I'm going to import
it into the project. Great. And I'm also going
to import the SFX folder, which is this folder, I'm just going to drag
and drop it, like so. And let's see what kind
of what we can add. It's just a puddle. At
first, it's just a puddle. Then the flow ripples
and the puddle. Then the flow ripples and a wave crashes
through your desk. In minutes, you're swimming
to reach the ceiling. The waters warm, too warm.
You look out the window. For water, we can add
some water sounds. Since we're using epidemic
sound to find music, let's use Pixabay to find sound. So I'm going to go into
the sound effects, and let's search for water. Let's search for just
something like maybe wet. This is not the kind of wet. What's going on
with these sounds? Okay, so I'm not liking
all of these sounds, and it's a little
harder to find it here because it's a free option. So it's a little bit better
to find an epigmic sound, but let's use a
combination of two. This we can actually use for
kind of swimming because we have a sound that
starts and stops. Okay, I know it's
super unrelated, but I can do the
sound with my mouth. Yeah, I know it's unrelated, but why not throw my
talents, as well. So let's come to premiere, and we're going to
go into our project. I'm going to select everything, and I'm going to press Shift B to create a bin
from the selection. We have our downloaded Who? Let's drop it in here as well. So we can start with this
one when we see water. Here, I'm going to use these handles to
make sure the sound starts from zero
and then goes to the full volume of the
sound. It's just a puddle. Then the flow ripple and a wave crashes
through your desk. When the sound is a
little bit louder, I'm going to use this part when we have a bit more
drama in the video. Minutes, you're swimming
to reach the ceiling. The waters warm.
Reach the ceiling. The waters warm. To warm. I think here we can
use vine heat sound. I reach the ceiling. The words. You look out. I'm going to select
our audio press on G, and this way, we're able to
make it a little bit quieter. So I'm going to press like -20, for example, and see how
loud it sounds. Warm. Too warm. You look out. Reach the ceiling.
The waters warm. Too warm. You look
out the window. Okay, maybe minus five extra. Warm. Too warm. You
look out the window. This street is gone replaced by endless ocean. You gasp for. So let's find gasp sound, gasp, and I'm going to import it air. Should start around here. For air and wakeup. Move it a little bit to the front because it wasn't perfect. And wakeup. Minus ten. For air and wakeup. No ocean, your bed. And air, you beat. Okay, let's see we
kind of fathered. So when our person
is swimming like, for example, here
you're swimming. We can probably use some
of these sounds here, so let's take a look. Let's see. A minute, you're swimming
to reach the scene. A minute. A minute, you're swimming to
reach the scene. The waters I'm going to press on as to listen to just
this audio track. Let's have this one wave when he's doing his
arms like this. And then for the second one
because he kind of stops, that's why it sounds
a little bit weird. Okay, sounds pretty good. In minutes, you're screaming
to reach the ceiling. Waters warm? Too warm. You look. Mm. Interesting. I
think for this video, when the vine when the
sound when we get this hit, I think we should have his face turn into this face
at this point. So not from the very
beginning where we have it, so it goes from here until here. So we should probably move the keyframes to here
and reexport this video. I think it's going to
sell it even better. So I'm going to open our
blender file, person Command O. Which scene is this? This is scene number four. So let's go ahead and
click scene number four. Let's select our person. Okay, this is our person. Great. Going to move a
bit in front of him. Let's select his face, like so. Come to the render, we were
in the edit mode, I see. So let's select all of this. Okay, so it's not
in the edit mode. Okay, there we have it. So it's in the pose mode when we select the
face of our person. So let's try to
select all of these. Do we have all of
these selected? Yes, now we try to
move all of them a little bit further like here. Okay. Now, let's come back to premiere and see exactly
where we needed to be. So how many frames is the 729, and we need it to
happen at 35 frames. At frame 35, we should have it. Yes, perfect. So we just need it to
happen at frame 35. This is frame 35, the way I calculate this as
I see the starting 0.7 29, and I just do the calculations when we have the
sound over here. So this is good, and we
should give it seen for 0.2, for example, I'm going
to click Accept, and I'm going to
start exporting this. And while it's exporting, we can go ahead and just
continue working on our video. To. You look out the window. This tree is gone, replaced by endless ocean.
This tree is gone. When we switch to
the endless ocean, I think we should stop the water sounds because we don't
necessarily need them. You look out the window.
This tree is gone. Because we will not see
the water. It's gone. Replaced by replaced
by endless ocean. You gasp for air and wake up. No ocean, your bed. And yeah, you pee. Let's listen to everything
with the sounds. At first, it's just a puddle. Then the floor ripples and a wave crashes
through your desk. In minutes, you are screaming
to reach the ceiling. The waters warm, too warm.
You look out the window. The street is gone,
replaced by endless ocean. You gasp for air and wake up. No ocean, your bed. And yeah, you pee. This is the kind of
video where people ask, What did the author smoke
or something like that? Actually, I think it's great. I'm really liking it. So let's see what
we have in Blender. Do we have frame 26, 27. Okay, while it's doing that, let's work on the music. We kind of have two
distinct portions of the music and
starts around here. So this operation
is around here. So we have this part, which
is like the beginning part, and we have this part where we have more of the
beat of the song, right? Let's have a listen. Okay, so we just have a bit
not necessarily the beat, but we have a lot
more happening on this side than this side. So I think we should start with this part because
this is usually like the beginning and this
is the way I like to add music to my videos and to
the videos of my clients. I'm going to just kind of
mark it out with this button, then drag and drop it like
so. And let's have a listen. At first, it's just a puddle. That the flow ripples and away
crashes through your desk. I'm going to go to
effects and I'm going to press on presets and I'm
going to drop my preset. This is the preset which
you can add as well, and kind of lowers the
heights of the song so that they don't compete with my
voice. So take a listen. That the flow ripple Actually, let me just select this track. Like, you can hear a big difference in the sound. So I'm
going to enable this. The way you do this is you
search for simple parametric Q in the eat panel,
simple parametric Q. So just go ahead and drop it and then copy these settings. So copy these settings. Let's listen once again. Actually, we need to make
it to lower the audio. I'm going to press G -20. At first, it's just a puddle. Then the flow ripples. We need to make it a
little bit louder, so ten going to add ten
instead of setting minus ten. So if we add ten,
it's going to make it louder by 10 decibels. At first, it's just a puddle. Then the flow ripples and a wave crashes
through your desk. In minutes, you're screaming
to reach the ceiling. The waters warm. Desk. A minute sq I think we should stop this
beginning part here, and then when we're
saying this phrase. A minute we're screening to reach the
ceiling. The waters. For this part, we should start the song the part of the
song that's more active. I can also use
shortcuts like I and O to set the outpoint. So I is in, O is out. So I can either press here
or press on the keyboard. I'm going to dragon drop, and I'm going to apply
the same effect, so I'm going to go
into my preset. By the way, you can also
save a preset for yourself. So let's say you have this
simple PrimagQ just go ahead, right click Save Preset and give it a name and
you'll have it here. So I'm going to
lower music as well. I'm going to lower it by
-15. Let's give it a try. By the way, the blender
file has finished, so let's see this one. Great. Let's import the
blender file. Drop it in. The waters warm. To warm. You look out What
is warm? Too warm. Actually, I think we're having a little bit out of
focus here as well. Didn't notice that earlier. So let's give it a try as well. In terms of the camera, let
me enable good quality here. Zoom in a little bit. Then when we go to the camera, good to select the camera
first, go to the camera. Where is the depth of field, so we have the focus
on our subject. Okay, so I'm going to come
to the very beginning, I'm going to set
the focus distance, and I'm going to select
this whip thing, and I'm going to Okay, blender is glitching for me. I have to restart it, press Command S and
Command Q to quit. And I'm going to reopen blender. Let's come here and set a focus distance.
Will it work now? Should we do it manually? Okay, let's try to
do it manually. So I'm going to come to frame number one and put a focus distance
keyframe, which is this one. And then when we
come to the middle, I'm going to put
another key frame. First, I'm going to
focus on his face. Like, so going to put
another keyframe, which was put automatically
because we have the auto king and let's come to the very end and like so and we have
the keyframe as well. Mm hmm. Perfect. Let's have it export, as well. We're going to do
exactly the same export. I'm just going to delete it from Premier because it's
going to lag with premiere. If we do it this
way, we first have to delete it and
then add it again. We have the same
name in the export, right in the render,
sorry the output, we have Scene 4.2 in the name. So I'm going to just press
shortcut Command F 12, and it's going to export in the background
with good quality. Great. Okay, so there's one file inconsistency that's exactly talking about our file. So we know about this, so we can just go ahead
and close this panel. And then this is the ending part where we should take
a look at the song. If there's like the ending
part which is more com So, I like this hit, and I think we should use it when we
switch the scenes. Yeah, something
like that. So let's go ahead and go to effect. Lower G minus. What was it -15? We can click on the previous audio G
to see how loud it is. -15. This one is -15, as well. It's ocean. You gasp
for air and wake up. No ocean, your bed. And yeah, UP. Replaced by endless ocean. You gasp for air and wake up. Going to press Shift Command D to add the default transitions, and let's select just the audio. It's sounding really
good, really good. I just want to try and do the cut a little bit earlier
to see if it's better. Okay, I'm actually liking
this a little bit more so that there's this sort of
like a riser here at the end. You can see it. You can hear it. Like. And then the
end, there's a hit. Yeah. Okay, so let's listen to the song from the
very begin to the very end. Mm. We need to add
a transition here. H. Like the way we
transition here. Okay, let's listen
to everything. At first, it's just a puddle. Then the flow ripples and a wave crashes
through your desk. In minutes, you are screaming
to reach the ceiling. The waters warm, too warm. You look out at the window. The street is gone.
Replaced by endless ocean. You gasp for air and wake up. No ocean, your bed. And, yeah, you pet. Everything is looking
great right now. Maybe we need to lower the
audio just a little bit, but than that, I think we are getting there.
This is looking good. Okay, so we had our
blender export Yeah, now it's good quality here. So we'll just do it like so. Let's see ceiling. The
waters warm. Too warm. You look out the window.
This street is gone. Replaced by endless
ocean. You gasp for air. So this needs to be
a little bit lower, as well, because we can
really hear it. That's okay. In minutes, you're screaming
to reach the ceiling. The w maybe this minus ten well? Crashes through your desk. In minutes, you're
swinging to So this, let's set it to Buzz and a wave crashes
through your desk. In minutes, you're going
to lower this part here, but not the beginning
because the beginning, we cannot really hear it
because it's quite quiet. Low ripples and a wave
crashes through your desk. In minutes, you're swimming
to reach the ceiling. The waters warm, too warm. You look out the window,
the street is gone, replaced by endless ocean. You gasp for air and wake up. No ocean, your bed. And, yeah, you peed. Great. Now, let's
create captions. Once again, if you're using a different software,
other than premiere, it's kind of similar where you just go to the captions
tab or the text tab. You take a look at what
kind of text you have, and then you just
create captions. So first thing I'm going to do is take a look
at the captions, make sure these are good, and then I'm going to actually
this is this transcript, and then I'm going to add
captions. So let's take a look. At first, it's just a puddle. All is good. I'm going to
click here, create captions. I'm going to open this part, and I'm going to maximum
length in characters. This is for every single
line that's going to be. So we can either have two
lines or single lines. So basically, we'll have
captions in two lines, like so on top and the
bottom or just on one line. I'm going to select single and then the minimum number
of characters so that we have each word one by one instead of being kind of
long text on the screen. Once again, there's something
Isaiah Photo taught me. He was explaining that
it's actually better because it's more engaging for people to read it like this, rather than just
having long text, which I absolutely agree with. So we're going to
create captions. You can see it was broken down
to one word at the bottom. I'm going to select all of this, and I'm going to go
into properties, which once again,
you can activate by going here window properties. Here, I have a preset, but I'm going to show you
how to do it from scratch. So I have a font called Tasker, which you are welcome
to copy if you want to. This is one of my
favorite fonts ever, and I'm going to make it
just the title All Caps, and I'm going to put
it in the middle, just like to maybe put
it a little bit down. At first, it's just a puddle. The Yeah, something like that. We also have a shadow which
we don't necessarily need. And the flow ripples. Okay. Then I'm going to
go into text, as well. Going to now instead
of the transcript, select our captions, which is
what we have created here. And I'm going to
search for comma. I'm going to replace
coma replace with what? Replace with nothing. So when I replace with nothing, the comas going to disappear because we replace
it with nothing. I want to do it
with all the commas and all the periods in
the end of the sentences. So replace all, you can see disappeared and I'm also
going to search for periods, replace all Great. Now,
let's take a look. Gas here, we need
gap, not gasped. So I'm going to
delete ED here by pressing By pressing I'm
selecting the text too, and I'm able to either
create a new one, if I click anywhere
or if I click exactly on the text where
I'm going to select it. For air and wakeup. No ocean, your bed. And here, UP. Okay, now, I need to
come to the very end, press on I come to the very end, and here's what you will see. If I press on O, which is the identification
of what to export, you will see that
we have this very annoying one extra frame, and it's just what
premiere does. So in order to get rid of that, we have to either
press arrow key to the left so that we go one frame to the left
and then press O, and it's going to be a
perfect cut until the end, or we just, you know,
drag and drop it. Like so this is our video. We have our captions. We have our sound effects, and we have our visuals here. Now, we're going to
go into the Export. I'm going to select my preset, which you are able
to copy as well. So once again, go into video
match source in terms of the frame size and the
frame rate because we want to make sure it's exactly the same as
it is in blender. And more maximum ran to depth, use maximum render quality. This something I recommend. Hardware encoding, if
you have the options, just kind of instead of encoding
instead of the software, which takes longer, it's
going to use your hardware. If you have a powerful computer, it's going to speed
up the process. Target bitrate set to 19. You can set it to
more, but basically Bitrate is kind of the
quality of the video, and the lower the bit rate, the lower the quality
of the video, but then at the same
time, the file size just drops significantly. So if I put it to five, take a look at the
estimated file size. So we put it to five. You can see the file size
decreased significantly, but I'll leave at 19. This is the best quality for social media because
social media in general, just overall decreases
the bit rate of each video to make sure the
videos are super lightweight. I do recommend going
into effects and selecting here in
lumetr selecting it, and setting a QT Gamma
compensation lot. This is a problem
specifically with Adobe, when you export,
you will see that the colors are a
little bit faded. But when you select
this loometr look, the colors are now saturated. You will find this
in the downloadable resources section, you know, when you select
on your computer, just go ahead and select
where it's located. I just have a folder
on my computer, so I just go ahead and open it. In the end, come to the very top safe
preset and you'll be able to reuse this preset
every single time. So if I select
this is my preset. Just make sure to give it a
name so that you identify it and it will be here
in your favorites. Then we need to click here, select a place where we're
going to export our video. We are going to export
it on our desktop. The name that is automatically suggested is the name of
the sequence that we have, which we're going
to call it ocean. The name of the sequence, you can if you go to the sequence, this is the name of the
sequence that we have. It's actually the
same name here, so we can call it
Ocean video PR. And it's going to
change the name here. And when we go into the
exporting settings, it's going to update
the name here as well. So it's Ocean video PR. Save. And let's click on Export. The video exported. Let's come to desktop
and see our video. At first, it's just a puddle. Then the flow ripples and a wave crashes
through your desk. In minutes, you're swimming
to reach the ceiling. The waters warm, too warm. You look out the
window, the street is gone replaced by endless ocean. You gasp for air and wake up. No ocean, your bed. And yeah, peed. So this is our video. This is how you do it. This
video is ready to be posted. Now, one thing I will say is
that it's actually better to post it from your phone
than from the computer. First of all, when
it comes to YouTube, it's better to post it from your phone because you are
able to select the thumbnail, kind of the picture of the
video before you click, if you have an option
to click on the video, it's better to do it through your phone because
you can select it. It's also better to do it on
Instagram because Instagram limits some of the features if you do it through
your desktop, so it's better to
post from your phone. I'm not sure if there are
any limitations on Tik Tok, but since you'll be doing
Instagram and YouTube, from your phone, then it's also easier to do it from your
phone on TikTok, as well. The way you can send the
video to your phone is, for example, if you're on MAC, you can actually just go ahead
and click on this button, and you will see that I
have well, my phone, Mr. Beast. You can click
on this button and send it via AirDrop. If you don't have
this button here, just go ahead and
do a Quick Google. It takes a couple of
steps to do this. If you're on Windows, you can go ahead or even
if you're on Mac as well, can go ahead and upload it to Google Drive or
send it to yourself via messengers like Telegram because telegram doesn't
comprise the video, I can actually upload
a very good quality. Then you just download it on your phone, go
ahead and post it. So if you have any questions, let me know, but
other than that, I'll see you in the next video.
23. Capstone: Final Project & Portfolio Plan for Blender 3D Shorts: Come. In this video,
I'd like to walk you through your capstone project. Now, of course, it's your choice whether you do this
project or not, but trust me, it is so important to create this
project, not for me, but for you because if you just watch me do all of this uf but you
don't take action, then what's the point? There is no progression
for you if you take a look at the best and most efficient
way to learn anything, it's to watch somebody do it, do it yourself, and then
teach others how to do it. You've watched me do
all of this stuff. Now, it's time for
you to go ahead and practice, and after that, I do really encourage you to share your experience
with other students. Now, the reason
super important is because your
learning experience, your journey is slightly
different from mine, and somebody might have a
similar experience to you. You will help other students by sharing your experience
and you will help yourself by just making sure you teach other students
what you learned. It doesn't have to
be anything crazy, just share a couple of things.
What have you learned? How is this process for you? Before you share all of that, it's important to
create the video. When it comes to the video, try to eliminate any pressure. I know sometimes there can
be a little bit of pressure, but trust me, there's
no pressure at all. All we're doing is
trying to become better and learn and
you'll see that I was making so many
mistakes when creating this course for you because we're humans and
that's totally fine. What I encourage
you to do is create a 15 to 22nd short form video posted on your social
media channels. If you're trying to
get clients this way, then you might get
clients this way. Because people
will see you work. It's like your live portfolio where people can
reach out to you. But if you want to
create your own videos, then this will be
the first video. This will be the first step for you to create these videos, and I really, really
encourage you to do this. Of course, I'm
here at all times. So if there's anything, be sure to reach out in
the QNS section below. Other than that, I encourage
you to use all the steps, all the techniques that
we used in this course, use miximo sketch
fab, blender kit, human generator, and some of the other things I included in the resource
section for you. Go ahead and practice. If you have any
questions, let me know, but other than that, I'll
see you in the next video.
24. Last Step!: Congratulations. You are
nearly 100% done with the viral three D short fon
content in blender cores. There are just two small
steps you need to take. First, take action. As Kafuch said, a journey of 1,000 miles begins
with a single step. So if you haven't already, take your first step by editing
your first video in blender. All the best information
in the world means nothing if you
don't act on it, and even small steps lead
to massive outcomes. You found value in this program, I would really appreciate
if you can take 60 seconds to leave
you host review. I will be immensely grateful to you and your feedback
will massively help hundreds of future students in deciding the best
course for them. Although this
course is complete, your journey has just begun. I'm excited to see
you edit online, so be sure to keep me and
your fellow students posted. Remember, I'm here
for your success. If there's anything
you need, don't hesitate to reach out in
the Q&A section below. Thank you for choosing
me as your instructor, wishing you all the
best and looking forward to seeing you
in future courses.
 Vladislav Sateev, Video Editor