Transcripts
1. Introduction: So are you ready to create AI
stunning videos in minutes? With hello AI, you will master AI video generation
without breaking a sweat. No technical skill, no problem. This course is
specially designed for beginners to unlock pro
level result first. So you may be asked a question
why join this course? Because first, you
will learn to generate eye catching AI
videos effortlessly. Second, you will craft
powerful prompt, even if you are a
complete beginner. Third, save time, turn your ideas into life
in minutes. Hi there. My name is Faizan
Amjad Ready to turn your creativity into reality
with just a few clicks. Join now and start creating
videos that stands out.
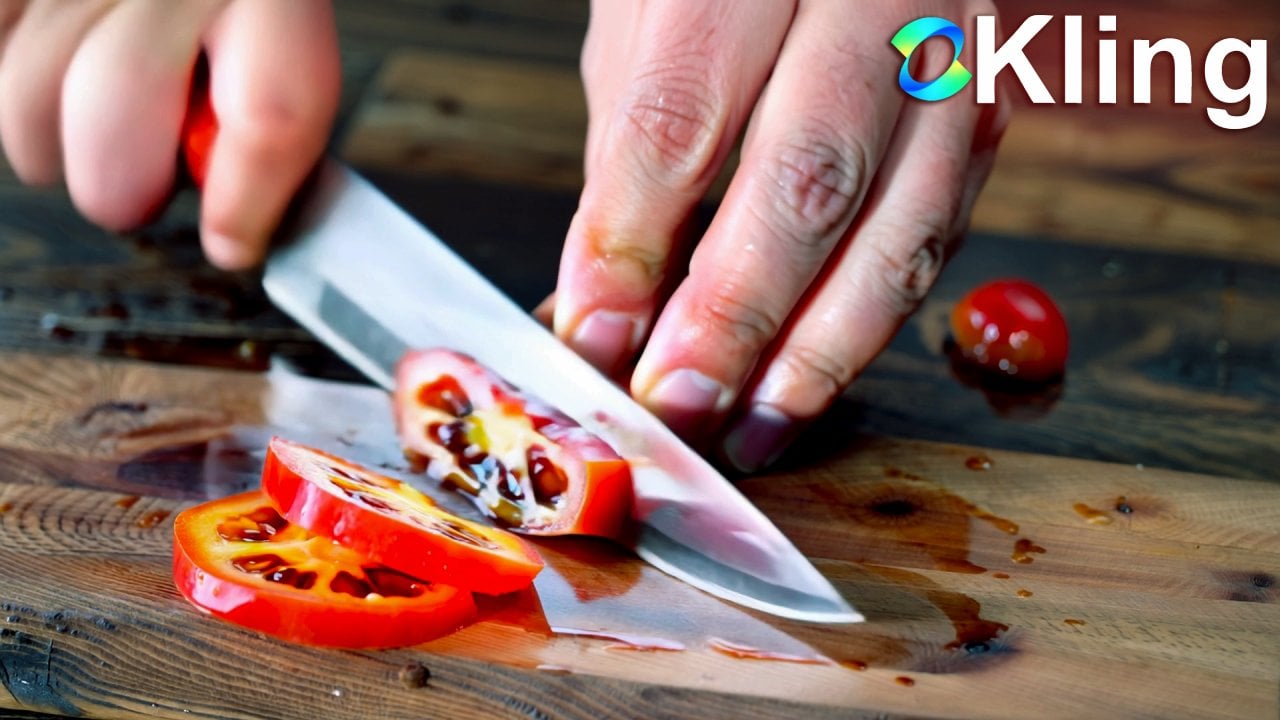
3. Basic Text-to-Video Generation: Welcome back. Now, we are going to create
some text to video, and I'm going to explain to
you what is a basic prompt. So in order to generate
impressive text to video, you have to gain some knowledge
about prompt engineering. So a basic prompt
consists three things. First, we have the subject, and then we have the
motion and the scene. So this prompt is also an
example of basic prompt. Now I'm going to again
delete this prompt, and I'm going to
type another prompt. So I have typed this prompt, a man running in a part. The man we have a subject, we have a motion, and we have the scene
in the part, right? So now we can generate this clip so now we have
this video generated, and as you can see guy, the video is looking amazing. Now we can go back and now I'm going to
type another prompt. Now, in order to
explain basic prompt, so basic prompt
contain three things mean subject scene plus motion. Now this is another
example of basic prompt. So we have a subject,
a futuristic robot. We have the scene
walking through a Non city and we have the
motion in the rain, right? Now we can copy this prompt. We can page this prompt
and without the plus sign. So I added the plus sign in order to explain to
you the basic prompt. Now we can click here
to generate this video. So the video is now generated, and here we have the result. And as you can see, guys, the video is pretty consistent, even we type a basic prompt. So let's see another example. So in this example, we have amin subject astronaut. We have the scene floating wesle and we have a motion
inside a space station. So now we can copy this prompt. Let's paste this prompt. Without the plus sign and let's create this video as well. Now we have the final
example of basic prompt. Here we have the main
subject a samurai. We have the scene
drawing their sword, and we have the motion
in a bamboonGrove. Now we can copy this prompt. We can again paste this prompt. Now you don't have to wait
till this video is generated. We can generate the next video. We can edit this video in a Que now we can
click on this button, and now we can add
this video in a Q. And as you can see, guys, now
we have two videos added in a Q let's edit the
final video in a queue. So we have the main subject. We have the scene, and
we have the motion. Now let's edit this video
in a queue as well. And as you can see, guys, now we have queue
three jobs at once. Now the queue is full. If you
want to add another video, you can't really add
because the queue is full. If you are using
the free account, you can only edit three video at the same time in a queue. So the three video
is now generated. Here we have the first result. Now we have the second video. And now we have the final video. And as you can see, guys, even we type basic prompt, we got these amazing result. So to summarize
the basic prompt, I typed all these prompt
and included the plus sign so you can better understand what the basic
prompt actually is. First, you have to write in
your prompt a main subject. So in the first prompt,
we have the summari. Second, we have Night, we
have feature strict robot, and then we have a man. Now you have to write a scene. So what is this character? What is this subject is doing? In the first samurai
drawing their sword, the night battling a dragon, a robot walking through a
neon city and man is running. And then you have
to add a motion. So the motion is like, where is the character? Where is the subject? So my samurai is swinging drawing its sword in a
bamboon grove, right? A night battering a dragon
where in a fairy cave. Futuristic board walking through a Non city where in the rain. A man running where in a park. So this is the design. This is the structure
of basic prompt. So if you want to
write a basic prompt, include these three things. Main subject, scene,
and final the motion. Now I'm going to show
you some few examples of basic prompt text to videos. So we have this robot driving cars of air through
fire and hit the wall. In this video, we
have an A robot. It's not in the car,
but as you can see, guys, if we ignore this
part, everything looks fine. We have another example
of basic prompt, car crashing to wall. We got this result. As you can see guy right here, the car is crash to wall. We have another example, two car crash to each other. And as you can see, guys, we got this result. We have this example. A sword of fire
is flying through the air leaving a trail
of flame behind it. So if you want to
add multiple things, then you have to add a comma, and then you have to
describe your second thing. And as you can see, guys, we have flying sword, and we
have trail flame behind it. We have another example. Two planets collide
in a fiery explosion, sending debris flying
in all direction. So as I told you, if you want to describe
your second change, if you want to describe
your, for example, second mini scene, then
you have to add a comma, and then you have to
describe some changes. And this is a result
of this prompt. We have this
example, close up of a hand mixing chocolate in milk. Wise, you can see, guys, we
have the close up you can also describe your
camera angles as well. We have another example, closeup of a hand
writing a name. So if you want AI
to write something, then you have to
add Quotien mark at the start and add
the end of that word. As you can see in this
example, I write my name, and as you can see
guys in this video, we have my name
written on this paper. The person writing
is not correct, but as you can see, guys, the spelling of my
name is correct, as I described in this prompt. Now with some basic prompt, you can also create some
fascinating results, a horror cinematic scene in
which a house is shaking. And as you can see, we got this amazing result. The house is not shaking, but as you can see, guys, with some few words we
created this masterpiece. Now, as I told you earlier, you can also
describe your angle. So we have 360 angle
camera cinematic shot of a house in middle of nowhere. And as you can see, we have 360 kind of a camera
shot of this house. We have another example of 360 cinematic camera moment of a house in middle of
nowhere at night. We have this example, time lapse of a tree
growing in a desert. And as you can see you guys, right now, we don't
have any time laps. We just have this
tree in a desert. We have another prompt, close up of a sun surface. Now we have another prompt. I meant to say I meant
to write here drone, but I mistakenly write drop drone view of
an abandoned city. And if you enable optimization, then AI will fix your prompt. So if we go to create if
you go to text two video, right now, as you can see, guys, we can unable or we can
disable this optimization, which automatically
optimize your prompt. So right now, I'm going
to write something like n. And as you can see, guys, it automatically
enable this. If we uncheck this, it will disable this
optimization prompt. So always enable
optimization prompt. But if you want to have
exact result of your prompt, and if you are not
getting the result, the AI is optimizing
your prompt, then you have to uncheck this in order to get your
desired result. Now we have another example, a hand holding a
streaming cup of a coffee in a cozy, dimly lit restaurant. You can also
describe your light. As you can see, guys, we
got this amazing result. Now if you recreate your video, you can get some better result. As you can see, we have that
prompt that we just viewed two massive planet collide in a fairy explosion sending debris flying in all directions. Now, recreation means you can
use this exact same prompt. You can create this
video using this prompt. You can click here to
recreate this video, and as you can see, guys, we got some better
result than before. Now if we go back to
the previous clip, as you can see,
guys, the latest one is better than this one. And now this is the latest clip. So if you are not getting
the alert that you want, then also try to
recreate your clip. It will help you to
get better result. We have this example,
a yellow Emoti with a smiling face standing in a well lit studio wearing a white shirt
and blue jeans. And now, as you can
see, we got this clip. We have this example, GTL like game third person view of a man running in New York. And as you can see, guys, we got this result. It looks like this is a
clip from a game trailer. We have another example, vector man driving a car. And by typing this simple word, as you can see, we got this unique and
amazing graphic video. We have another example, anime style a man
riding a cycle. And as you can see, guys, it looked like a
three d animation. So these are some
basic prompt example. As you can see, if you
write some simple word, you can create some
amazing videos. And right here, we
have another example. As you can see, I write some
basic words of English, and I got this amazing result. So it's up to you what you type. The AI is creating video
according to your word. So make sure to type
a correct word.
4. Precise Text-to-Video Generation: Welcome back. Now I'm going to explain to you what is
the precise prompt. So I have this notepad and this is the structure
of precise prompt. First, we have three things which we had in
the basic prompt. Now we have two more things. We have camera moment
and we have atmosphere. So this is the structure
of precise prompt. I'm going to recreate this
video maneuvering in a Park, and let's add a camera
moment and an atmosphere. Now we have this
prompt MN running in a park camera tracking from side angle with smooth motion, fresh morning atmosphere with golden sunlight and
dew on the grass. We can copy this prompt. Let's paste this prompt. And now let's create this video. So the video is now generated. Here we have the result. And as you can see, guys, if you write the precise prompt, you will get some
pretty amazing result. Now if we compare this
to the original video, where we have the basic prompt, this is the basic prompt. And if you add a camera
moment and atmosphere, you will get
something like this. Now I also han the
dragon video shot, and with adding camera
moment and atmosphere, we have this result. Now we have this robot result
with a precise prompt. And finally, we have the samurai
with the precise prompt. So to write a precise
prompt, simply, you have to add a camera moment and you have to
add an atmosphere. So in the first prompt,
as you can see, we have the subject
scene, emotion. We have a camera moment, and we have a atmosphere. Now, you can also add some additional stuff
if you want to. Like you can change your scene like I just added this
whole as a scene, and then I just add this intentional motion with
falling bamboon leaves. Then we have a camera moment, and at the last, we
have atmosphere. Now, in the third prompt, I also did something different. Like as you can see a
future visti robot, which is a subject, we have the scene walking
through a city at night, and we have the motion
rains streaming down its metallic body, right? And as you can see, after the camera moment, I added highlighting
reflection on the wet street. So you can also add some additional stuff if
you want to in your prompt. You can change the motion if you want to in
the precise prompt. As you can see, first,
we have the subject. We have the scene
battling a dragon, and I also added this in a
scene in a fairy cave, right? And as you can see, I
added this as a motion, swinging a flaming sword. Then we have a camera moment, and then we have atmosphere. So basically, if you want
to write a precise prompt, simply just follow
this structure. So now let's look at some other examples of text
video pre size prompt. As you can see, this is
my prompt and this is the video that will generate
it using this prompt. Now we have this video. By using this prompt, we got this video. Now by using the
exact same prompt, if you recreate your video, you will get some better result. As you can see, guys,
with the same prompt, we got this result. And after I recreate this video
by using the same prompt, we got this different result. And if we recreate it again, we will get some
different result. So every time if you
recreate your video, you will get some different
result or maybe better. Now we got this example. By using this prompt, we got this three D animation. M now you can also create
superheroes video. As you can see, guys,
by using this prompt, we got this video. This is another example
of precise prompt. We have this example as well. And as you can see, guys, by typing some simple word, adding some atmosphere,
you can also create some amazing
result as well. Now, you don't have to type a full paragraph in order to get amazing result because as you can see guy this
is my simple prompt. I just add an atmosphere, and we got this amazing
cinematic video. Now we have another example. With this prompt,
we got this result, which look like a
scene from a movie. We got this example
by using this prompt. Now we have another
example of robot. This time, I typed
robot transforming, and as you can see, guys, we got this amazing result. The lighting, everything, the camera angle,
everything looks great. Now if you try to
recreate your prompt, you will get different results
as I told you earlier. And this is my second
example of the same prompt. This is the third example. The third time I try to
recreate this video, we got this result. Now you can also create
superheroes video as well. As you can see, guys,
with this prompt, we got this result. Now we have another example. By using this prompt,
we got this result. And with this prompt, we got this result. Now I also try to recreate with the same prom
that transformer robot video, and this is my fourth
version of that video. As you can see, guys,
every time we are getting some different result. Now this is another
example of two robots. We have this example, and we got this futuristic
cyberpunxity version. Now we have another example
of superheroes video. As you can see, guys,
by using this prompt, we got this result, which is pretty amazing. Now with this prompt, which is different from
the previous prompt, we got this animated version
of venom versus Spider Man, which I was not expecting that, but this is crazy. Now, if you recreate this video, we will get some
different result. Now with this prompt, we got
this result, which is crazy. Now by using this prawn, we got this result. We have another example. And as you can see, guys, we can also create
some vector as well. We have this example, and we have this
example as well. This is the second version, and this is the first version. So as you can see, if
you recreate your video, you will get different result. Now, as you can see, guys, this is another recreation. I recreated this prompt and
I got different result. This is my first generation, and this is my second time
I re created this prompt. As you can see, guys, if
you recreate your video, you will get better result. Now we have another example. As you can see, guys, we created this graph by using this prompt. It looks like that I recorded this graph using my phone
because as you can see, guys, it also created this focus shifting
from here to here. Now we have this amazing example by typing some simple prompt, we got this amazing result. We have another example
of a graph animation. Now we got this example
by using this prompt, we got this result. You can also create commercial. If you want AI to
type something, then you have to add that
word inside quotation mark. As you can see, guys,
I add this quotation, and I write come and get it. And as you can see, guys, at the end of this clip, we got come and get it. We have another example
of the same prompt. We created that prompt, and now we got this result. Now, if you recreate this
prompt again in the third time, as you can see, guys,
we got this result. We have this example as well. Now we have this
example by using this prompt, this
is what we got. And this is another close
up image of this techy. This is an example
of a pizza slice. This is my prompt, and
this is the video. Now with the precise prompt, if you describe
everything clearly, you will get some pretty
convincing result. This is another example
of graph animation. As you can see guy, the focus
is shifting very slowly. Even the camera is
shaking a little bit. Looks like that we are recording this video using our cam coder. Now, this is another example, and this Brompt I just describe a macro view of a
freshly baked bread. This is another example of
board video generation. Now, if you want to create
some element that you can use in your video after
you generate a video, you can also create
that element. So now, as you can
see right here, I created this, and I asked him to add a black
screen behind this. This time, I just ask him to add a green
screen behind this. As you can see, guys,
the green background is solid and contrasts sharply
with the red button. We got this result. Now we have this example. With this prompt,
we got this result. As you can see, guys, we have a side view of a pair
of running shoes. We got this result. You can
also describe your view. As I told you earlier, you can describe your angle, your view, everything that
you want in your video, you can describe that
through your prompt. So these were some examples
of precise prompt. Now you know what to type
and what not to type. Now, go ahead and create your own video by
typing everything precisely and clearly in
your prompt. Good luck.
6. Image-to-Video Generation: Welcome back. Now, guys, we are going to turn
image into video. So first of all, go
to image to video, and as you can see, guys, you can drag your image
right here or you can click here to
upload your image. So I have selected this image, and my image is now uploading. Now if you drag your mouse, if you hold your
mouse right here, you can see we have
a pink line up here. You can click and
hold your click. You can drag this
to the bottom in order to view in a big size, or you can push this
to the upper side in order to view your image
in a smaller size. Same goes to this line. You can click here and
you can drag this to the left side in order to view your generated videos
in a big screen, or you can push this
to the right side. Order to view your generation
interface in a big size. Now there is two methods. In order to turn your
image into video. First, just upload your image
and generate your video. Second, you can write a prompt. And in a prompt engineering, there is also two method. You can either
write simple prompt or we can write precise prompt. So first of all, let's turn this image into video
without any prompt. Simply just click here. So the video is now generated
here, we have the result. And without writing any prompt, as you can see guy, the
result is phenomenal. We have background waves. We have a slide camera motion. Everything looks beautiful. Now let's look at
some example of image to video without
writing a prompt. So if we click here,
as you can see guy, this is my image source, and without any prompt, we got this result. Now with this simple image, without any prompt,
we got this result. Without writing any prompt, we got this result. Now we have this Imoge image, as you can see, and without
writing any prompt, we got this result. Now we have this
example, a nom image. This is my image source
and without any prompt, as you can see, we got
this weird result. We have another
rereation of this image, and this time we
got this result. Um, we have this
example of a library. This is my image which I created using designer
domicrosoft.com. Most of these images are created using
Microsoft Designer. We have this example
of this value. We have these two robot boxing. Without any prompt,
this is my result. We have another to robot
standing against each other. We have another example
of tour robot boxing. Without writing imprompt
we got this result. We have this example
and as you can see, guys, if we use
some basic image, we can also get
some better result. With this image, without
writing anything, as you can see, guys, the
character animation is smooth. The hand animation is smooth. Everything looks great. We have this example, and as you can see guys, the rain drop onto this
character is pretty convincing. We have this example of
another Spider Man image. This is my original source, and this is the animation. We have this example. With this image,
we got this video. This is my picture, and
as you can see, guys, without any prom,
this is my result. This is another car crashed, and as you can see
guys this time, it start the car and move
the car out of the frame. Now we have another example
of car crashed into the wall. This image is also created
by using Microsoft designer. This is another example
without writing any brom. This is my original image. And as you can see,
guys, without any brom, it makes me run, and
the leg movement, the hand movement is
pretty convincing. Even my cloth moving
so correctly, except the expression and the pace is just mixed
everything onto my face. But if we ignore this part,
everything looks great. Now we have this example
with this image which I also created by using
Microsoft Designer, we got this result and if
you recreate this video, as you can see, you will
get some different results. This time, it correctly
animate the character. We have another robot image. This is the animation of robots. This is another robot image. As you can see right
here, we have the image. Now we have pixel style
image of these robots. If you recreate this video, you will get different results. This time you will get an extended animation
of this robot. We have another Pixel
robot animation. With this image, which I also created by using
Microsoft designer, this is the result
without any prompt. And this image is created by using Microsoft
designer as well. We have this example. We can also create
commercial by using this technique. We
have this example. If you recreate this video, you will get this result. So as you can see,
guys, in this example, without writing any prom, you can also get amazing result. So go ahead, don't scare. If you get bad result, you can also
recreate your video. It will help you to
get better results. So now go ahead, don't scare and create your own video
by using this tool.
7. Basic Prompt Image-to-Video Generation: Come back. So in the
previous lecture, we turn this image into beautiful video without
writing any prompt. This time, we are going
to write a basic prompt. So the prompt structure
of image to video is different than
the text video. So if you look at the structure, first, you have your image. Second, you have your motion. So you can write anything that you want
to change in your video. So for example, I'm going
to type a basic prompt. So I just typed
this simple prompt, ocean waves splashing
onto the car. Let's add Ecoa and we can
write making car wet. Now let's click to
generate this clip. Now, if you want
multiple changes, then you can add Ecoa and
then describe second gene. If you want third change, again, add Ecoma and describe
your third change. So the video is now generated, and here we have the result
with the basic prompt. And as you can see, guys, he generated what we asked
for him to generate. We have ocean waves
splashing onto the gar, making carvett. Now let's look at some example of image to video basic prompt. As you can see guys by using this image without any prompt, we got this result. Now if you describe
something in your image, you will get different result
according to your prompt. As you can see, guys, I typed
this prompt, and basically, this is the prompt that I
used to generate this image, and we got different
result than the previous. This version, we
got this result. But if you type a prompt, if you describe
something, it will make that changes in your video. This is another example
of basic prompt. As you can see, I use this
image and I type everyone start hugging each other
and we got this result. Now in this example, I use this image. I type running in a
cyberpunk city wearing a cyberpunk style suit,
this is what we got. Now, this is another
example with the same image, but this time, I just type man running from big explosion happening
in the background. And this is what we got. As you can see, this is crazy. Now in this example,
I use this image, and I type giant slime fall from the ceiling and cover
the man's body, and this is what we got. Now in this example, again, I use that same image, but this time I type person
running towards camera, a giant bot is chasing
him in a cyberpunk style. This is what we got. Now we have another example
of this image. This time I type room is
getting darker very fast, and person head is on fire
lighting the room after. And as you can see, we
got this crazy result. Now, sometime if you
recreate your video, you will get bad result. As you can see, guys, I try to recreate that robot
chasing me video, and every time I'm
getting different result. Now we have this example. With this image which I created by using
Microsoft designer, I just type knife cutting
apple into two pieces. This is what we got. Now with this image, I my running away from the
board that following him, and this is what we got. Now we have another
recreation of this prompt. But with this image, as you can see, guys, we got this result which is not great. Now we have this example
by using this image, which I use this without
any prompt example. This time I type everyone
start fighting fast. So as you can see, guys, these bots are
fighting very fast. So by typing a single keyword, it will change your whole video. In this recreation, I
just remove the fast, and this time, as you can see, guys, we got different result. Now with the same image, I my running away
from the tsunami, arriving from the background, and this is what we got. Now we have another example. This is my image. I type
person standing behind him, I will Co explode. As you can see,
guys, this is all Co. Now I use this image, which I also created by
using Microsoft designer, camera slowly panned
to the screen. As you see guys in this example, the kid move with
the camera as well. Now in my second week
creation of this image, asymmetric camera
movement, camera is slowly panned towards monitor. And this is what we got. Now we have the third
recreation of this image. A cinematic camera
moment camera is slowly zooming into a TV screen. And this is what we got. So as I told you earlier, recreation make
your videos better.
8. Precise Prompt Image-to-Video Generation: Welcome back. So in
the previous lecture, we generate image to video
through basic prompt. This time we are going to
write a precise prompt. So the precise prom structure is a little bit different
than text to video. As you can see guys first, you have your image, then you have your
motion change, and then you have a
camera and atmosphere. So right now, as you can see, guys, we have motion change. First, we have image. Second, we have some motion. And third, we have
a camera moment. So I'm going to write
a camera moment. But before we write
any camera moment, let's use some camera moments. Now go to Google and
search for camera moment. As you can see, we have several examples
of camera moment. So I just add a camera
movement and atmosphere. Camera slowly
zooming to the car, heavy raining flying leaves. Now, let's click on this
button to generate this video. In order to write
a precise prompt, you don't have to write a full paragraph of
five to six line. You can just write one
line of simple words. Just add a camera moment, atmosphere, describe your
motion, and you good to go. The video is now generated
here we have the final result. We have flying leaves. We have heavy rain. There is some slight error in the video, but don't worry, we can
fix that. So go back. We can make some
slightly changes. Heavy rain Add a comer. So I just make some tiny
changes in the atmosphere. Day is getting dark. Let's change this to darker. Day is getting darker very fast. Leaves flying through the scene. I'm going to delete
this keyword. Ocean waves splashing
onto the gar, camera slowly
zooming to the gar, heavy raining days
getting darker very fast. Leave flying through the
scene. Now let's generate. And this time, hopefully we
will get the better result. So let's see if
we'll fix the error. Day is getting darker very fast, Leaflying through the scene. So we got this result. And as you can see, guys, we have a complete dark screen. We have completely black screen. So in my next generation, I try to fix this so
in this generation, as you can see, guys, I
just change slightly. Day is getting slightly dark very fast, leaf
lying in the air. And now we got this result. And again, we have a black
screen from half of the video. And in my next generation
in my final generation, I fix all these problem. So in the final generation, I add camera slowly
panning to the ocean. Stormy weather, heavy raining, day is changing into night, leaves flying in the
air from left to right. And as you can see, guys, we got this amazing result. We did not get the
camera panning effect, but I'm happy with this result. You can change your
camera moment if you are not getting any camera
moment in your video. Now let's check out
some other examples of precise prompt image
to video generation. So as you can see, guys, we have this image, and
I write this prompt. So in my first generation, I did not get the
result that I wanted, so I re created this prompt, and as you can see guys with the same prompt with
the same image, now we got this result, which is improved a lot. So if you are not getting
the result that you want, then try to recreate. I will help you to
get better result. Now we have this example
with this prompt, with this image, as
you can see, guys, if I play my clip, we
have the balloons, and balloons is also eliminating the light onto my face and
onto the studio as well. Now we had that same image
that we used before. But this time, I use
my color graded image. And with this prompt,
as you can see, guys, I write a man is sitting
on a chair in a room. Suddenly an earthquake occurs. And as you can see, guys, we got this fascinating result. We have the earthquake and we have a shaky photoge as well. Now we have this example
with that same image. With this prompt, I type
our board is chasing me, and as you can see, guys, we got this result. We have the second version where I just tweak some
keywords here and there, and we got this result. As you can see,
guys, the robot that chasing me is pretty insane. Now with that earthquake prompt, I use this image, and as you can see, guys, this
is the result that we got. The debris is also reacting
with my hand as well. Now we have this example
with that same image. I just cybe a man
sitting on a chair with a massive spark
occurring in the background. And this is some other
details as well. And as you can see, guys, we have this amazing
gen rated video. This spark is also eliminating the light all over the studio. Now with that same image
with the earthquake prompt, we got this result. Now with this image with
the balloon prompt, we got this result. Now with the same image
with the earthquake prompt, I got this result this time. So these were some examples of precise prompt image
to video generation.
9. Animation Image-to-Video Generation: Welcome back. Now, if you
want to animate any logo, if you want to animate
any animated character, then you can do that with the halo AI new model,
which is called live. So you have to switch your
model from this to live. As you can see here, it is
better for two d animation, vector animation, logo
animation as well. So now we have to
select the image. So I'm going to select
this vector image. Don't worry. I will give you
the prompt of this image. We can simply just generate this animation or we
can write a prompt. So now I just typed this prompt. A friendly creature
who is pushing a large bounder from
behind up to this tip. Now we can click to
generate this video. If you want to generate
multiple videos, if you want to generate
multiple variation of a single video, then you can increase
the quantity, and then you can click on this button to
generate your videos. And as soon as you
increase the quantity, it will also increase the credits that it will take
to generate your videos. So now let's change this to one. So this is the prompt
of this image, and I use Microsoft designer
to generate these images. And as you can see, we
have four variation, and I just use this image. As you can see, guys, the
video is now generated. Here we have the result.
Correct is pushing the rock, but the rock is not moving. In my next ineron, I try to fix this rock moving toward the top, reacting with the object
coming to its way. And this is the
result that we got. As you can see, guys, the
create is now moving the rock and rock is reacting
to the objects. By the way, I also generate
it without any prompt, and this is the result if you generate without any prompt. Now, let's check out
some other examples of live model image
to video generation. So as you can see, guys, I use this same prompt
to generate this image. And I use Microsoft designer to generate this image
by using this prompt. And without the live model, this is the result that we got. And if you use Live
model onto this image, we got this result, which is improved than
the previous generation. So if you want to
animate graphics, logo, or two D, animation or
illustration, use Live model. Now, if you generated a clip using the live model
or any other model, the model will appear in your
generated video as well. Now we have this image, and I also generated this image by using
Microsoft designer. And as you can see, right here, I use a live model
without any prompt. This is the result that we got. With this image, I
also use the model. And as you can see, guys, we
have this lava animation, and we have this volcanic
animation as well. Now, I also use model
onto this image, and this is what we got. Now, if you generate it any
three D caracter image, so I use Google Labs imager to generate these
three D characters, and without any prom
with the simple model, we got this result,
which is not bad. And with the live model,
this is what we got. So as you can see
in certain moments, the video improved a lot. Now we have this example. This is my image, and without any prom with a live
model, this is the result. We have another example of three D characters with a
live model without any prom, as you can see, we have
this precise animation. Now I use this image, and without any prom,
I use a live model, and this is what we got. I also use live model
for this image as well. We have another anime
style animation. Now with a simple model,
this is what we got. This is also not bad. But if you use a lime model, it will improve
overall animation. In the lie model version,
as you can see, guys, the character is moving, and the facial expression is
also appeared in this clip. But in the normal clip,
as you can see, guys, we don't have any
facial expression or movement of the lips. We have the simple in animation
onto these characters. Now we have this example. I use model onto this image, and I just type anime style
man riding your cycle. I accidentally type this prompt. This is another animation. This is my original clip, and this is with Live model. So I meant to write this
prompt in this generation, but accidentally,
I just typed here. Now, if you use Li model onto your vector and you type a
prom, this is what we got. Man come close to
camera and then he start scratching his set. And as you can see the man close to the camera and now
he's scratching his set. Now we have another
example with this image. As you can see,
with a live model without any prom,
this is what we got. Now with this image, as you can see this is different than the previous
version of this image. With the live model version, without any prom,
this is what we got. Now here's the
interesting generation. So with this image, which is a simple
logo of my name, with a simple model,
as you can see, guys, it animate
my logo like this. But when I use the live
model onto this image, so with the live
model with the prom that I use to generate this
image, this is what we got. We got the simple lens
play onto this logo. On the other hand,
on the other hand, with the normal model, it rotate a logo a little bit, not too much, but it animates
something of my logo. But in the live model, we got the simple lens player. So it's better to generate your logo or animation
with both model, and you can decide whether you can use the live model
or the normal model. But in most cases, the live model will do
better in animation, logo animation,
illustration, et cetera. Now we have another example. So as you can see guys,
this is my basic image. And with the live model,
this is what we got. Now we have this thumbnail
that I created for my god. And as you can see, guys, I just de man smiling we
floating in the background. I use live model for this. So the reason why
I'm showing you this generation is
because you can also animate your
thumbnails you want to if you have animated
characters in your thumbnail, you can also animate them and make your video interesting. We have another illustrated
vector character. With a live model,
this is what we got. Now with this anime image with a live model without any
prom, this is what we got. Now we have another example, normal model versus live model. So with this image with a normal model, this
is what we got. We got a decent animation
of this arrector. But with the live model, as you can see guys, we
have a facial expression. Now in this example, I use normal model, and as you can see guys, even with the normal model, we got the facial
movement as well, facial expression and
the mouth moment. The conclusion is
use both model, and if one model perform better, then use that model. If the normal model
perform better, then use the normal model onto the same image or onto
the same character. But if the live model
perform better, then use the live model. Now in the normal picture, you can also use live model. As you can see, guys,
I use this image, and I use live model
for this image as well. And without any prompt,
this is what we got. We have another example
with a live model. This is what we got. And this is my original source image.
10. Consistent Subject Video Generation: Welcome back. Now, I'm
going to show you how we can create videos with
consistent character. So go to subject reference
and confirm this term. As you can see, guys, these are the term
you have to confirm. Now we have to add
a subject reference in order to generate videos. So I'm selecting this subject. Now we can also
crop the subject. So we have to crop
the face only, we don't have to
select its whole body. So I'm just going to select
this pace and let's crop. Now let's click on the confirm, and now we can generate video with this subject consistency. Now just type simple prompt. So I just type person is riding a motorbike
in Tokyo City. City is empty, nighttime, different color of
light illuminating. Now, if you want to generate video with
subject reference, it will take your 45 credits. So let's click here to
generate this video. So the video is now
generated here. We have the result, and
as you can see, guys, with the subject reference, we are creating consistent video. Now you can create
multiple scenes if you want to.
So let's do that. Now I'm going to create a
video where this person, where this subject is a pirate. So in order to write
a prompt of a pirate, I'm going to take the
help of the designer. So let's type a pirate boy
in a ship in stormy weather. Now we don't have
to write anything, we can just click on this enhanced prompt and it will enhance
the prompt for us. Now just copy this prompt. Go to Hello AI, we can
paste this prompt. Now let's make this
character a pilot. A young pilot. Now I have typed a young pilot flying
plane, beautiful forest. We can enhance this prompt. And if you write some
spelling mistake, it will also fix your
spelling mistake as well. We can copy this
prompt, go to Hello AI, we can paste this prompt, and let's add this
video in a queue. Now I have typed a young
boy playing with its toy. Let's click on this enhance to enhance this prompt as well. Now we can copy this prompt. We can go to this Hello AI, we can paste this prompt. And now we can add this
in a queue as well. Now I have another
idea in my mind, a young boy laughing
and the camera will zoom in and
enter into its mouth. Let's enhance this prom and hopefully we will
get a better prompt. Young boy with
joyful expression, his eyes sparkling
into light with his mouth wide open camera move in capturing the detail of the and inside of the
mouth. This is good. We can copy this prompt. We can paste this prompt. And now let's generate
this video as well. Now, with the help
of lapsdt Google, image affects image three model. I have generated this image
map with skims front view, and I have downloaded
this image. Let's use this as a
subject to reference. Now we can cancel this subject. Now we can add another subject. Now I'm going to
click here to Crop. Or as you can see, guys, you can see my character. You will get to your arrectors. If you go back, we can
also swap the character, or you can delete your
character as well. So now I'm going to just crop and now let's click on
the Crop. Let's confirm. Now I have typed this prompt, man wearing SK man sitting
on a couch and a big fire happening in the background.
Let's add another. And now let's add this
video in a queue. Now, I have man driving
a car hyperspeed. So hyperspeed is a shot
where everything goes crazy. So now I'm going to
enhance this prompt. Now we can copy this prompt and let's review
the prompt first. I think the prompt is good. Now let's paste this prompt and let's generate this video. So I have generated
these images, so this is a anime
style man front view. And as you can see, guys, these are some result. So now I'm going to
download this image. So let's add this
as another subject. Now I'm going to
show you how we can control expression of a subject. Now we can crop this.
Let's confirm this. Now go to Microsoft Designer and I'm going to type a person. I want my subject to first
laugh then smile then cry. So now we can copy this prompt. Go to Hello AI, we can paste this prompt. Now let's generate. So all the subjects
video are now generated. Here, we have the pit one video. As you can see,
guys, the subject stay consistent in
all of these videos. Now we have a plane
flying video, and as you can see, the subject stay consistent in whole video. Now we have this example where a young boy
playing with a toy, and as you can see, guys, our subject is stay consistent. Now, this is an experiment
video where I want my camera to move and enter into
this person's mouth. And we got this weird result. This is like a horror clip. Let's delete this clip. Now we have another
subject example, man wearing a schema, sitting on a couch and a big fire happening in
the background. And as you can see, guys, the subject stay consistent and we have a pretty good
generated AI video. Now, again, with the camera
enter into the mouth, we got this weird result. But my point is the character, the subject is consistent. Now I regenerated camera
enter into mouth video, and I just type
this simple prompt. Camera move in
capturing the detail of its teeth and
inside of its mouth. And we got this result. And as you can see, guys, the result is improved a lot. So if you are not getting
the result that you want, just try to regenerate
your clips, try to tweak some
words here and there. Now we have this shot of hyper
speed, and as you can see, guys, the subjects
stay consistent, and we have this crazy shot. And now, as you can see, guys, the expression videos
are now generated, and here is the first one. As you can see,
guys, we can control the expression of the subject. We have another example
Now with this subject, I have write a person sitting on a herb explosion happening
in the background, expression starts off happy, suddenly turn to surprise
and then shift to sadness. And as you can see, guys, we got this incredible result. I have the second
variation as well, and as you can see guys
in this variation, we did not get the sadness. Now let's check out
some other example of subject reference. So as you can see guys
with this prompt, with this subject,
we got this result. And with the same subject, as casi guy with this prompt, we got this result. With the same prom, I
recreated that video, and now this time
we got this result. So if you recreate your video, then your result will do
better in most of the cases. Now with a different subject, with the same prom,
this is what we got. Now with that same subject, with this prom, this
is what we got. Uh, now you can also express the emotion
of your character. As you can see, guys,
in this prompt, I write man face slightly
tilted downward, and his tear glistened in
the light as they fall, and now check out the result. We have this amazing expression. We have the tears in the eye. Everything looks great. Now, go ahead and create your own video using
the subject reference, and don't be scared
to do experiment things because the
more you create, the more you
understand this tool.
11. Control Camera Shot in HailuoAI: Welcome back. So if
you go to text video, there is a new feature
called director. If you select this,
as you can see, guys, right here, as you
can see, we can insert different camera moments. So now from now on, you don't have to type
any camera moment. You can select
your camera moment from these camera moments. So we have pre selection,
and right here, we have cinematic shots, which is the combination
of this example. So these are some preset and these are some pre
selection that you can select. You can create your
own preset basically. Now if we click here, as you can see guys right here, we have several cinematic shots. So first, let's type
a simple prompt. So I have typed this simple
prompt car in nowhere. Now we can select the
camera moment from here, click onto this camera icon, and now I'm going to
select Scenic shot. So now I'm going to
select this shot. Now we can click to
create this video. Now the video is generated, as you can see this is
the prompt that we use, and this is the camera moment. Now let's see some
other examples of director mode camera moments. So in this example, if you select in free selection, tilt down tracking shot Zoom in, you will get this camera moment. So if I have to recreate
this video to show you, let's go to the recreate. And as you can see guide,
this is the prom that we got. And as you can see, this
is the director mode. You have to select the
director mode and you have to go to the
camera moments. So in the free selection, what I did, I
select tilted down. So this is tilted down. You can hold your mouse
to know your shot, what you are adding. So as you can see, I
add this tilt down, then I add tracking shot. So this is the tracking shot. It will track your subject. Now I have Zoom in. Now we have this zoom in. And if we combine these three together, this is what we got. We have tailed down Zoom in
and we have a tracking shot. The camera is tracking my
subject or this object. Now in this example, I use if we close this, I use shake shot, and the shake shot is
currently unable to use it because in most of the cases it failed to add a
shake in my video. If we go to the create section, if I select my camera, as you can see g this
is what it looked like. But if you add shake
in your video, it won't work for now. Now in this example, I selected these two shot. I combine them together, and this is what we got. Now let's go to the
recreate section. Now in the free selection, as you can see, guys,
I have prestlU. This is prestlU and
this is truck left. So this is truck left. Now let's look at some
other example as well. Now with this prompt, with this shot, this
is what we got. Now, with the same prompt and with this shot, this
is what we got. And again, with
that same prompt, with this shot, I combine
these three together, and this is what we got. Now if we go to the text
to video director mode, if we go to the director
mode, as you can see, guys, all of these jot are the combination of the
pre selection shot. So let's I'm going to
select this left circling. And as you can see, guys, in the bracket, we have three
shot combined together. We have truck left, pan
right tracking shot. Now if we go to
the pre selection, first we have truck left,
this is truck left. We have pan right,
we have pan right, and we have tracking shot. And as you can see guys, right here, we have
the tracking shot. All of these cinematic shots are a preset that combined these shots together
in different ways. So now let's look at some
other examples as well. Now with this prompt with this camera shot,
this is what we got. Now, I use this prompt
and I use these shot. And as you can see, we got
this fascinating result. Now, in my next example, I created this
anime style video. I use this prompt and I
just use these two shot. Push in Pastel up. And as you can see, guys, we got this result. We have this example. These are the shot that
I used in this video. Now we have this example. We have pan right
and we have Zoom in. If you have to add a tracking
shot, it would be better. Now in this example, I just
use pan left and zoom in. Now in this example, I have
truck right tracking shot. So as you can see, guys, the tracking shot will
track your subject. That is why we are getting
this weird result. We got this added because
at the same time, I'm tracking my subject and I'm also track the
right camera shot. That is why the camera is
moving toward the right side, and it has to fall on
my subject as well. So the subject supposed to move, but it just sit here. That is why the camera is moving the subject
with him as well. Now, as I told you
earlier, in this prompt, I also use Shakeshot and the AI failed to
add a Shakeshot. So right now, you can't
really use the shake shot. So you may be wondering if
you have a explosion video, the shake will work, right? But as you can see, guys, we have a big explosion
happening in the video, and I have added
this shake shot, but as you can see, guys, the AI is failed to add
a shake into my video. Now with this example
with this prompt, we have these three camera
shots combined together, and this is what it looked like. So these were some
examples of director mode. Now go ahead and create your video with
the director mode.
 Faizan Amjed, Video Editor,Filmmaker & Youtuber