Transcripts
1. Introduction: I taught first the
challenge for us to see the world
through new eyes and to open our minds to new ways of seeing,
thinking and being. I truly hope that what
you will learn in this course will inspire you
to create your own Mandela. Hello, my name is
Mercury and a moment, the lightest and YouTuber. I started drawing
Mondelez in 2014. Some of you might know me from my Instagram handle
two points. Mondelez. In this course we are going
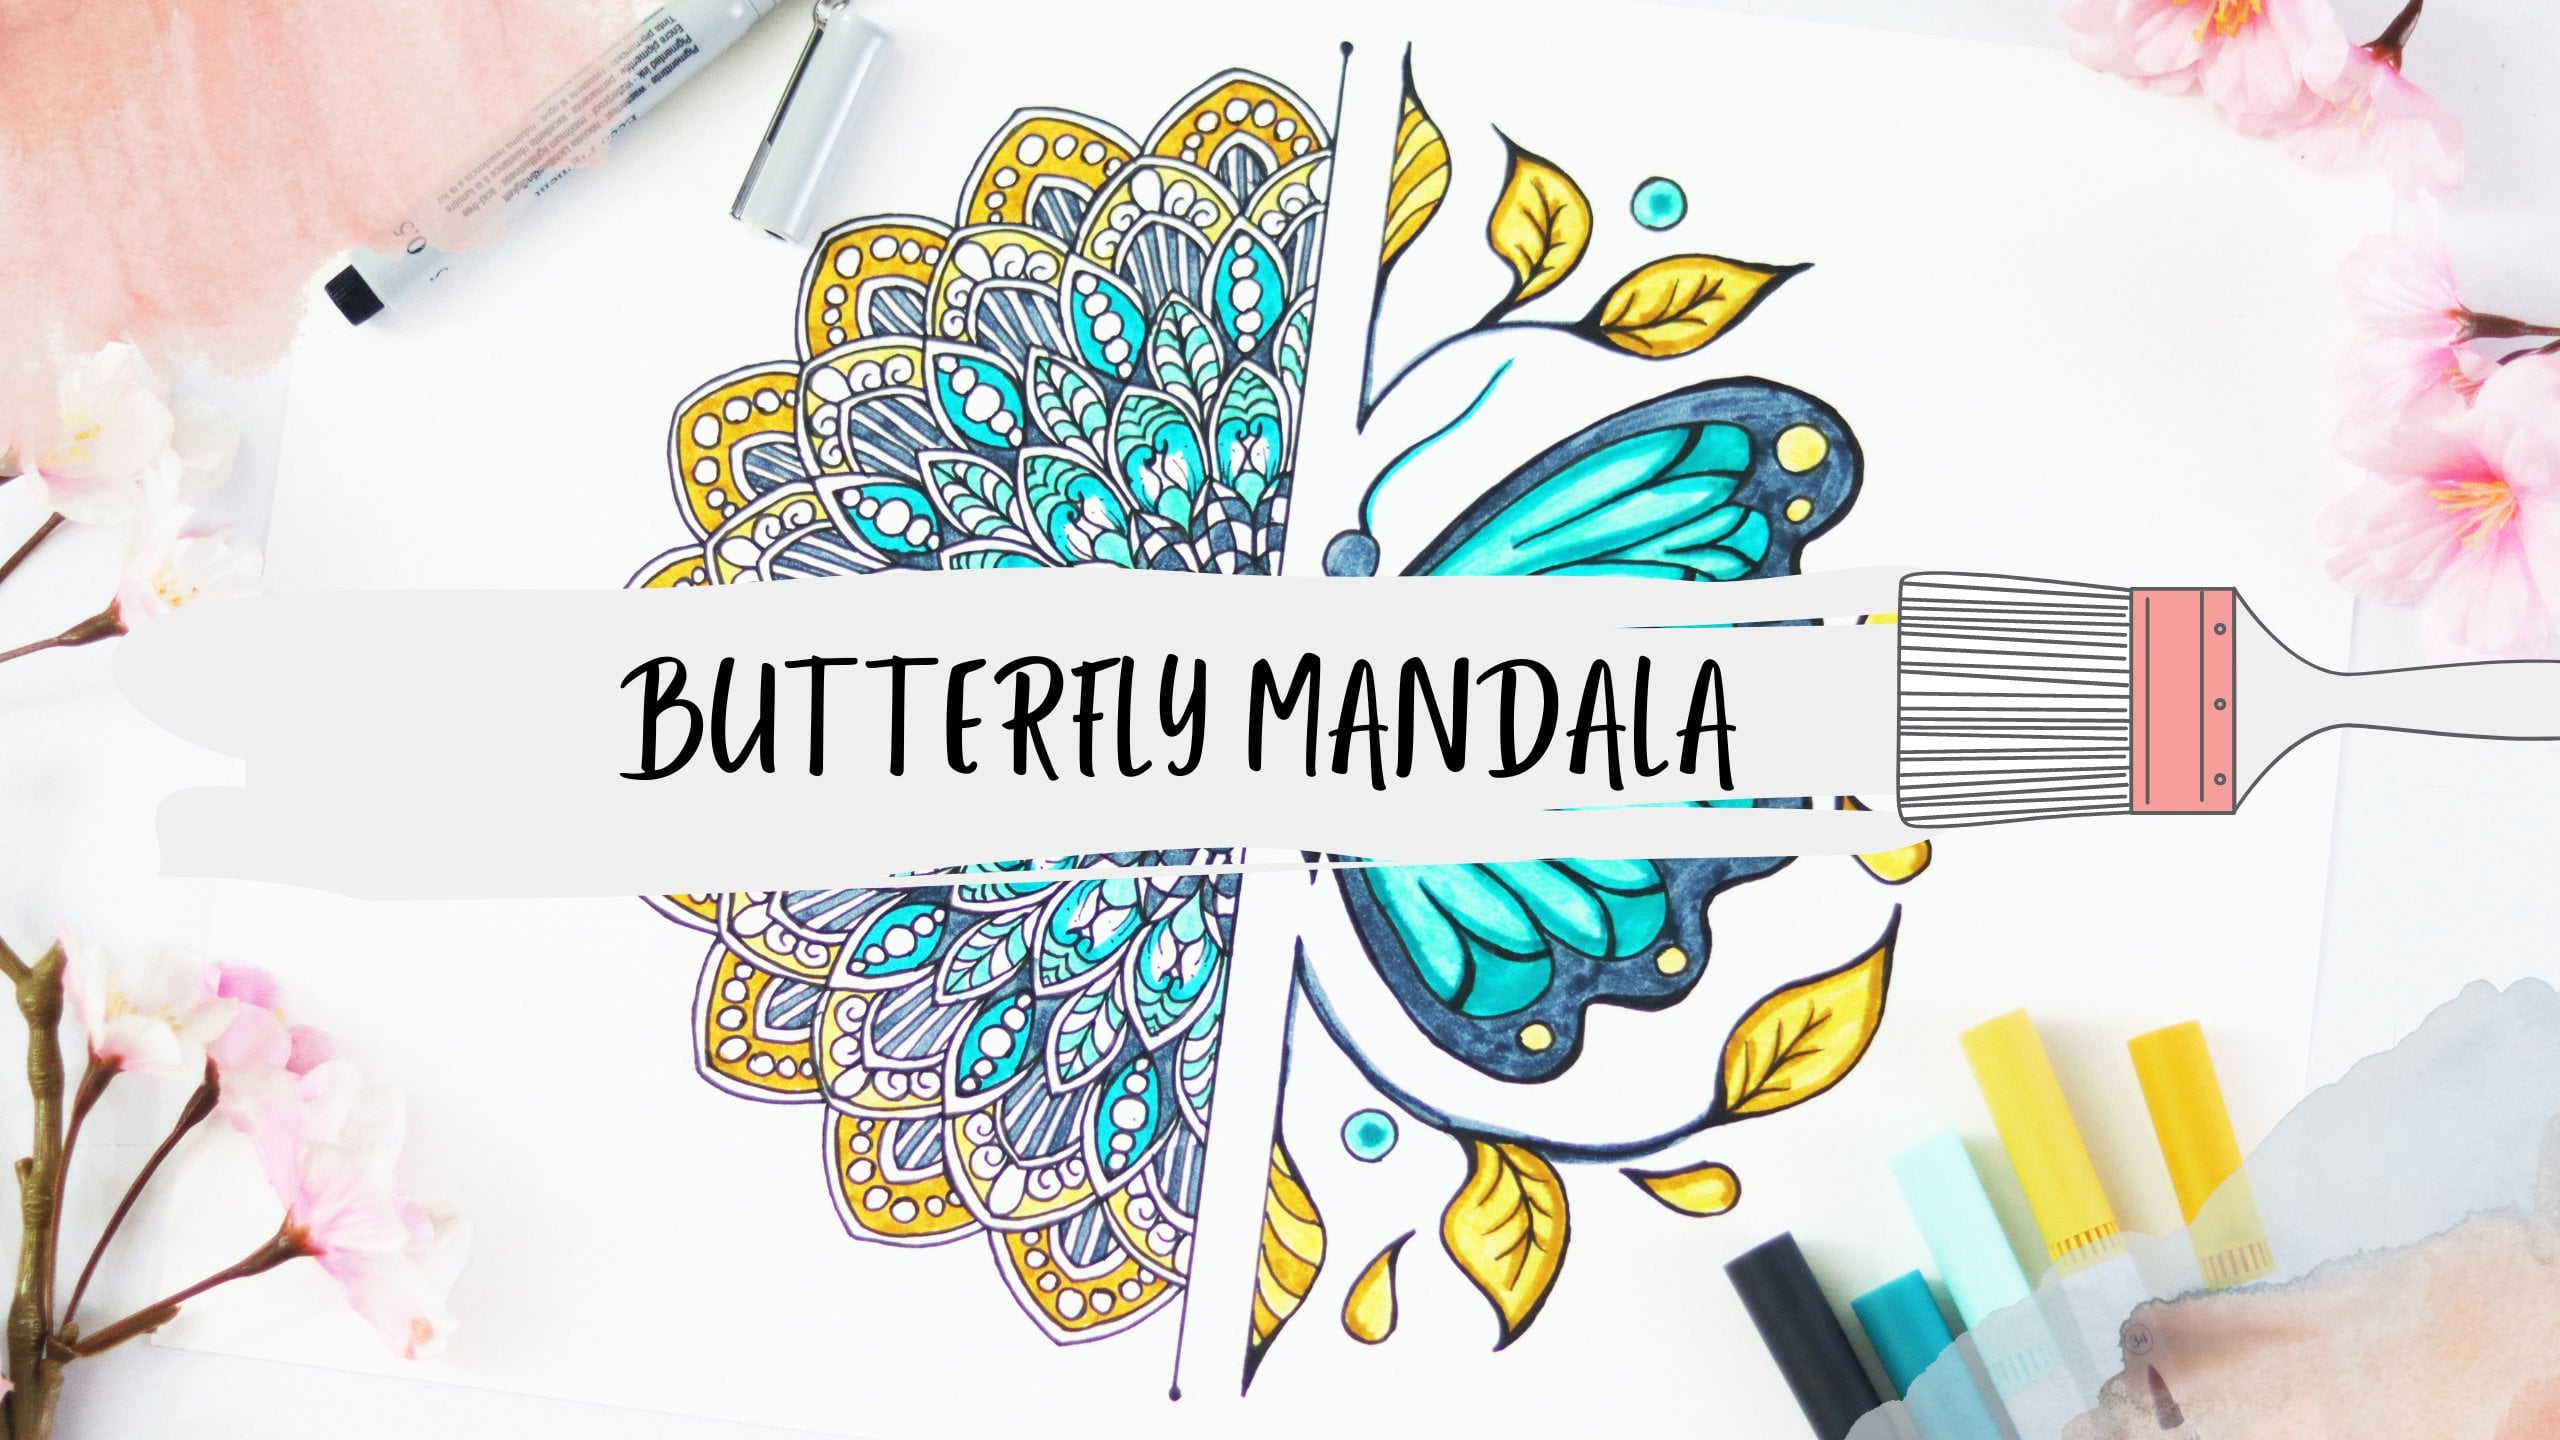
to learn when the light, which is fusion of
two colors, Mandela, is a complex actually design
that is circular in form. Let's go briefly through
the flow of this course. First, we will practice
few basic shapes and patterns which are required
for our final project. We will want to creating the perfect grid as per
our final mandala designs. Once done, we did, We will
start drawing our Mondelez. Starting with Dr. Mandela
using black fine liner. Then coloring our
final Mandela design using simple techniques. I will walk you through the
steps from beginning to end, all my tips and techniques
to dry Mandela, I'll create a free
downloadable worksheet to help you with your art. This printable PDF contents, the steps involved in
grid making and Mandela, and this might be fun to
color or watercolor in. This is black and white. You can easily
print copies out to color or drop at
incentives of your choice. You don't need any
drawing experience to take this course. Just an interesting
learning will make you learn things
as you do them. Join me now in creating beautiful mesmerizing Mandela
designs which get creative. See you there.
2. Material Required: What material you need
for this whole course. You can get these tools easily. Stationary stores, skin, Benson, protractors, grind concise. Here I'm using a
stateless come fast. You can also use any other
kind of simple compass. Black fine liner. There are various brands you can try like steadily art line, Sharpie microphone, whichever
fine liner is available. You can use it for your Monday. You can draw them on della
with pencil if you want. But dark markers make the patents cleaner
and more definite. A benzyl had someone said in 18, we'll never know when the line
is done with a marker pen. You have a sense of stability and the line seems more clear. Let's see which color we
can use for our Mandela. These are, Oh my goodness, this particular pad content,
100 different shapes. You tend to do a team
brush tip and fine liner. I will be using these
markers for our Mandela. There are many other brands you can try as part of an ability, like copy, Sharpie,
stirred letters, etc. Next, up, grind pepper. Use it on 100 to 300
GSM drying paper. Gsm stands for grams
per square meter. It defines the quality of paper.
3. Pattern Making: Through practice
gently and gradually, we can collect ourselves and learn how to be more
fully with what we do. We're going to do the
same thing in this class. We will be practicing this very basic petal shapes which will be helpful
for your Mandela. Drawing this petal designs. I suggest you should
consider using the grid paper from any
of the notebook so that you can work on symmetric and perfect patterns or make a
grid on any blame, pepper. Try simpler in each block. Do not rush very drying this petal tried to draw
a single smooth stroke. Second one, triangle. We can use these patterns
perfectly for detailing. This one is similar to triangle, but just a bit of color
on both the sides. Next, dropped like structure. Now draw similar triangles. We're practicing this shifts in the same order as we will
use in our final project. Next one is similar
to COVID triangle. Put the cursor on the opposite direction
instead of facing each other. If you're having trouble with
trying it symmetrically. Push practice one side
and then the other one. Drawing these petals
for practice has helped me immensely
for my art works. We spread this reflects when you start drawing
anymore Dillard, you don't really
have to think of the design we showed you
started drying Mandela. It will just start to
come to you once you have created your
own better designs. And you will be able to draw beautiful and intricate
Mandela's of your own. Next up spiders. I use it a lot in my Mondelez. This virus might seem a little difficult
to draw it first. But once you practice this, you can use it in various ways. We're going to practice some
variations of it as well. You don't have to use
these patents, have it is. You can experiment with different shapes and
create your own. Tends to be the
pitcher comfortable. Let's move on to practicing. Because whenever I'm teaching
Mandela to my students, they referred to these
common difficulty they have when
trying patterns for Mandela that they're
able to draw one side of better correctly
but not the other. So practicing it
separately Does, helps a lot when you are
working on big Manila project.
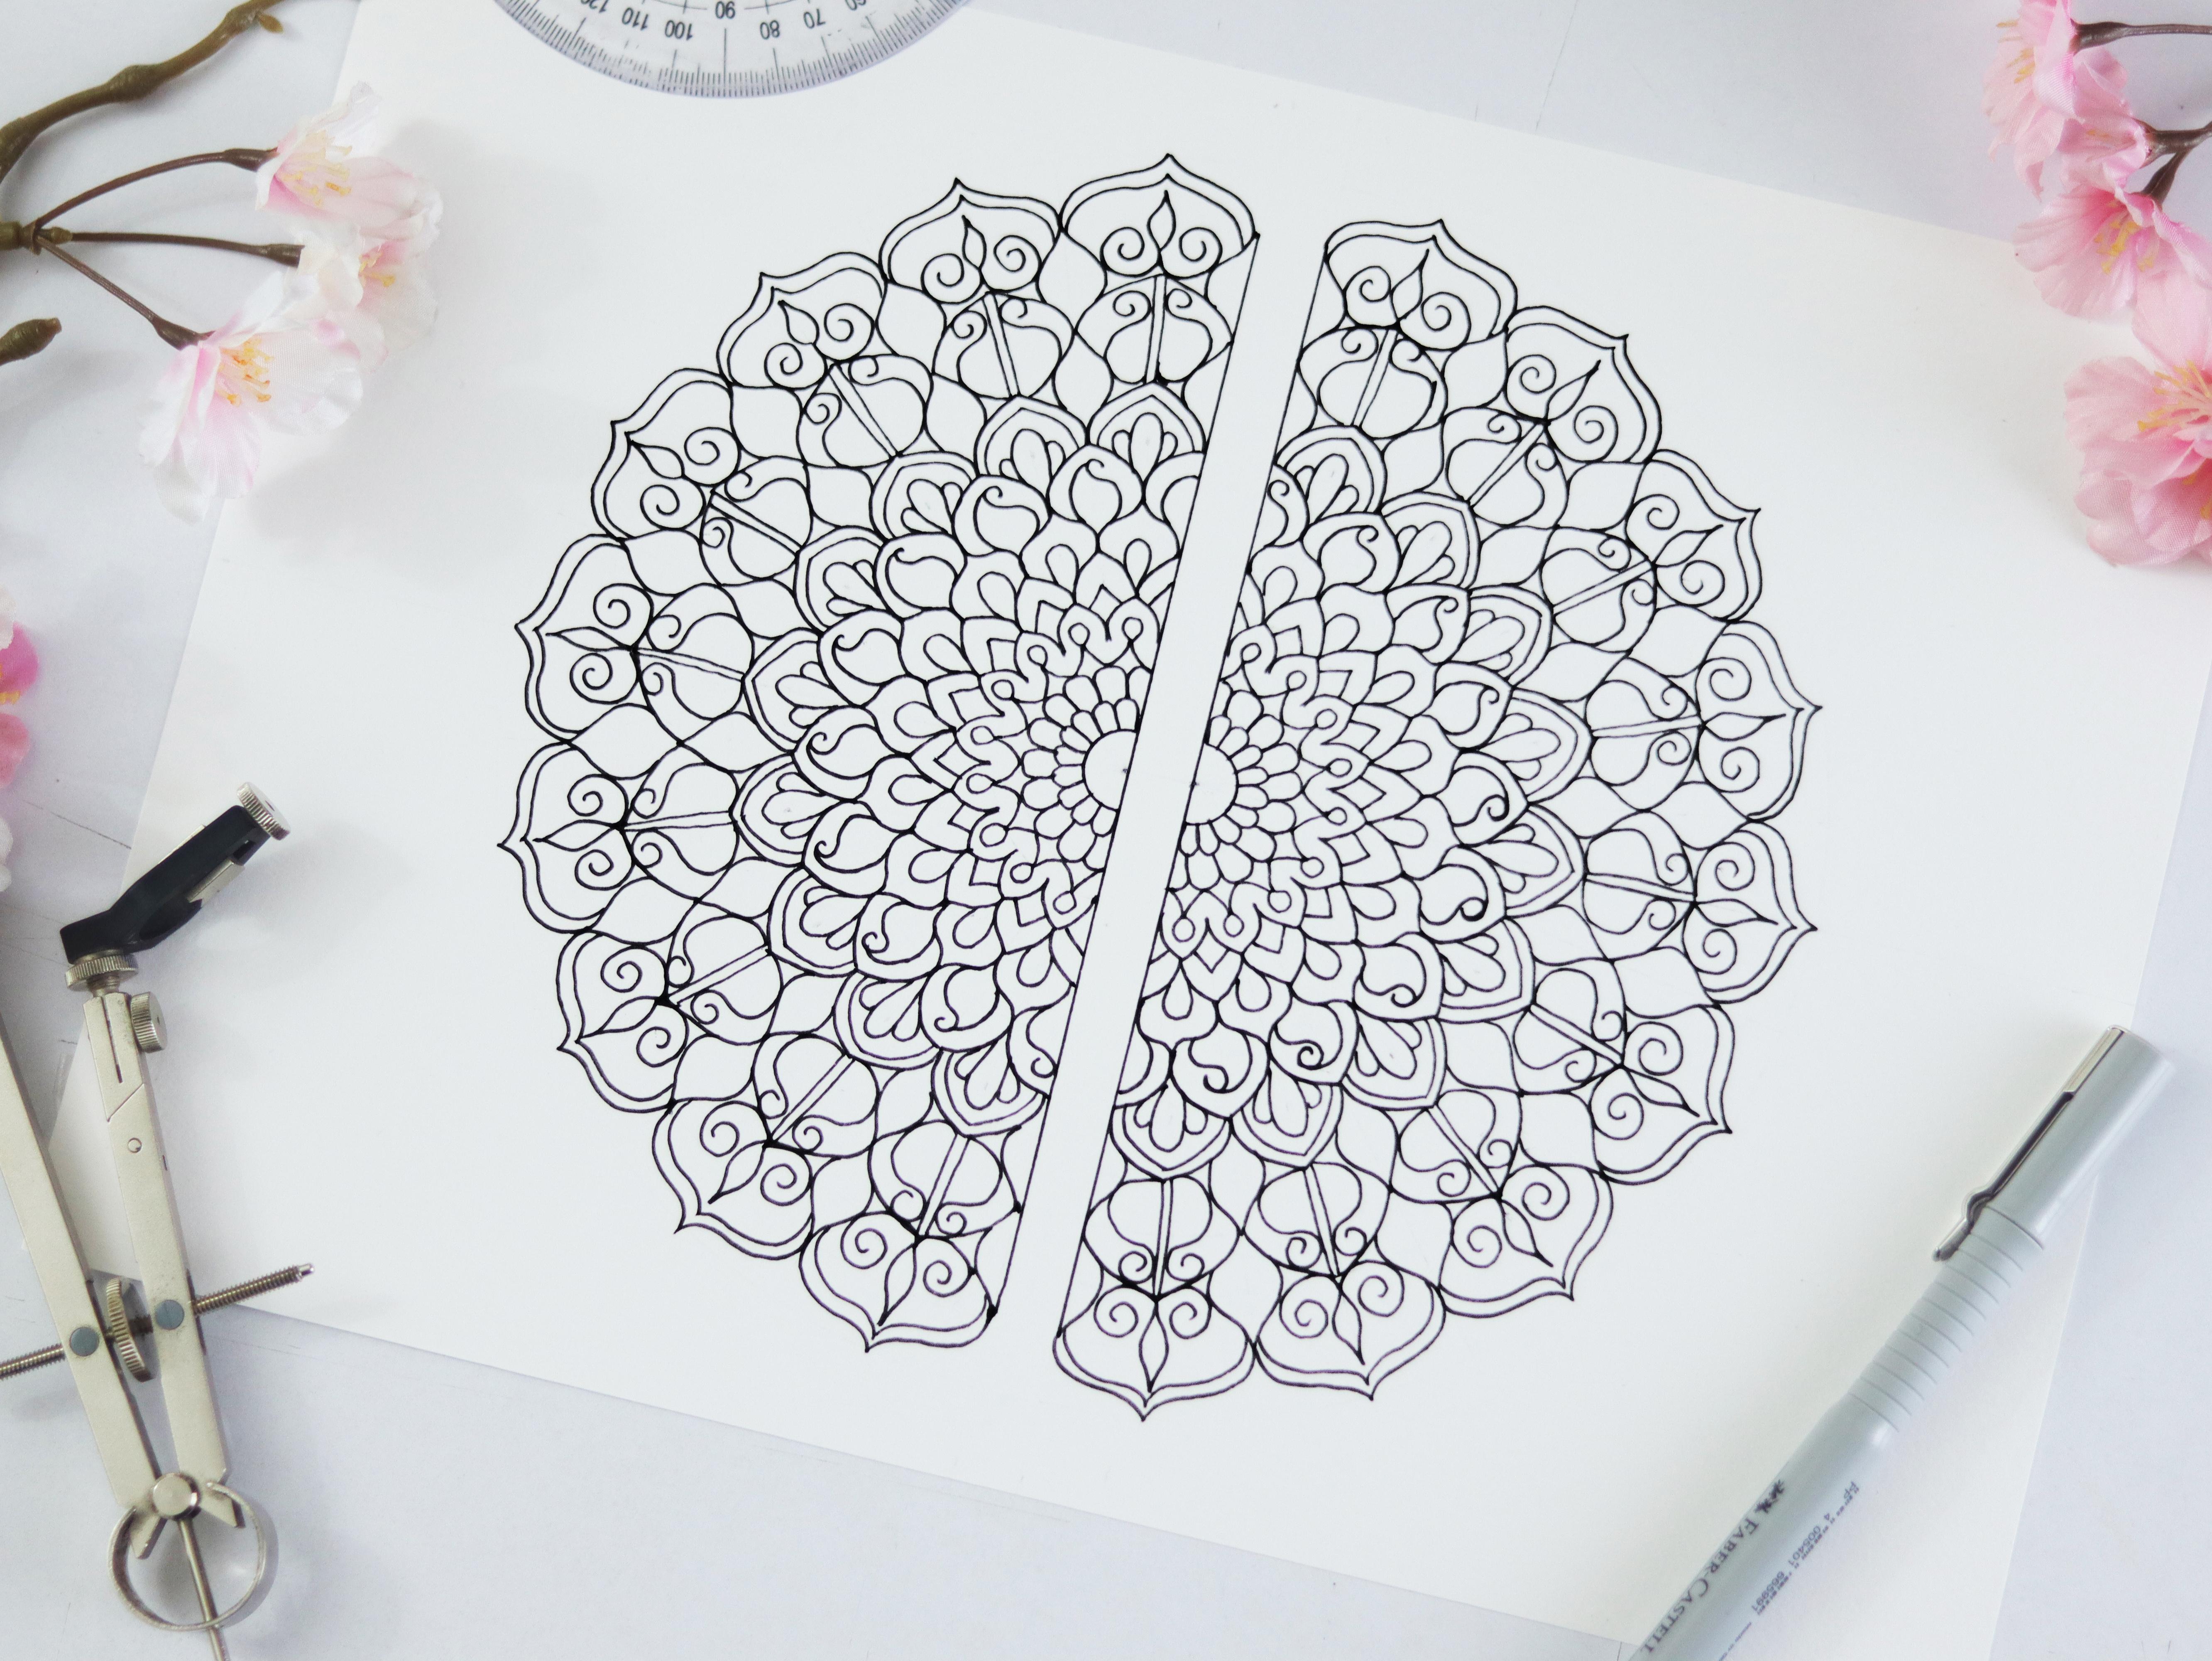
4. Grid Making: Wash process in creating Monday
light is forming a grid. Understanding the
formation of grid is the important part
in Mandela drawing. Grid construction can be
done in several ways. As we're going to create
fusion of two colors. We will separate our grid
in two semi-circles. Mr. Prime. Here I've taken 3222
centimeter size drawing paper. You can also use if what she'd. Step one is to find two
midpoints for semi-circles. That major bill enter paper and my book points in the middle with the cap of one centimeter. Buddha, same part,
opposite side. Now, draw lines
through those points. My descender of remaining two cells and draw a line
through those points. And I lead two centers. From each point, draw
a semicircle using complex of radius
9.5 centimeters. Miss your protector over
one of the central point. My point is that every
ten degrees interval around the center of
from 0 to 180 degrees. We finally get the
semicircle made with dots. Mildly points
correctly as it all depends on the symmetry
of the grid we made out. Do the same but opposite side. Now, draw lines from each ten
degree point in the center. Make sure that you draw lines largely by using the
pencil because we need to erase any leftover lines are a part of it at the end
to get a clean Mandela. Let's start making
concentric circles that I'm dissenters with the gap
of around one centimeter. Anyway, my gentlemen can
be taken on your choice. Draw as many
concentric circles you need to make patterns here. And we're going to draw it where semi-circles on each
side of hormone Bella. If you're looking
to create something more uniform and symmetrical. These guidelines can
help ensure that every part of the design
is correctly major.
5. Drawing Mandala: Drawing your own Mandela designs requires no artistic background. I tell my students, if you can print your
name and email from Ben, you can draw him when we use this same lines
and shapes, vertical, horizontal, diagonal, whether we draw the Mandela
free hand or within a grid. Now that you have
learned to draw grid in our previous lesson, we will move on to drawing part. Use black fine liner to
draw these basic structure. We will fill it with
colors in next lesson. The innermost circle with
the simplest flourish shape. Repeat the same for
the next layer. From first to third circle. You can experiment by feeling degrees with spiral pattern, swatch, darks and so on. But make sure you
start something simple and then later you can
get into complex designs. Draw good of a triangle is
in-between simple carbs withdraw before from
third to fourth circle. Next, let's draw simple shapes. The Mandela that looks
complicated is often constructed using very
simple and basic shapes. Therefore, go ahead
and keep trying. Draw drops structure inside this petal to make it
look more complex. Now from circle five to six, drop a test paired
with triangles. Add details to your Monday
led the way you want, or you can just follow the
designs we can creating. Mondelez are always constructed according to the same principle. Form. What is this headed, clearly defined
center with movement happening around the center and the design is
based on this center. You can draw from outside
to inside and vice versa. Many people find this procedure from inside to outside easier. If making patents and
filling the gap between the previously drawn patterns using different
shapes and designs. This is what makes the Mandela
look like more intricate. Even though we are
using simple shapes, the placement of shapes and the detailing makes
it more complex. Now from cervical
eight to nine dropped the insert bolder and
flowery shapes in it. Even though we are using same shapes and
patterns on boats, and we will use different colors to fill
it in our next lesson. If you see a spark
that looks too empty, you can go back in later and
more lines and patterns. Don't worry if you
make a mistake, take a slow deep breath
and know that you can. And hopefully we'll be
doing more of these and use your mistake as the way
to start a new pattern. Brown circle, 11th to 12th, draw the fish truck there in-between previously
drawn patents. Last leg, rocker, vapor
terrace and spirals inside it. Don't think about how it's
going to look when you finish or how people
react when they see it. Don't make it about
yourself and don't treat it as a test of
your drawing skill. Let them take you
around each circle and lead the Mandela become
your whole world for now. There is no good or bad. Just delete them
lines and contrast. Now it is the extra pencil lines for neat and clean Mandela. Draw two vertical lines to get that complete loop
to your Montana.
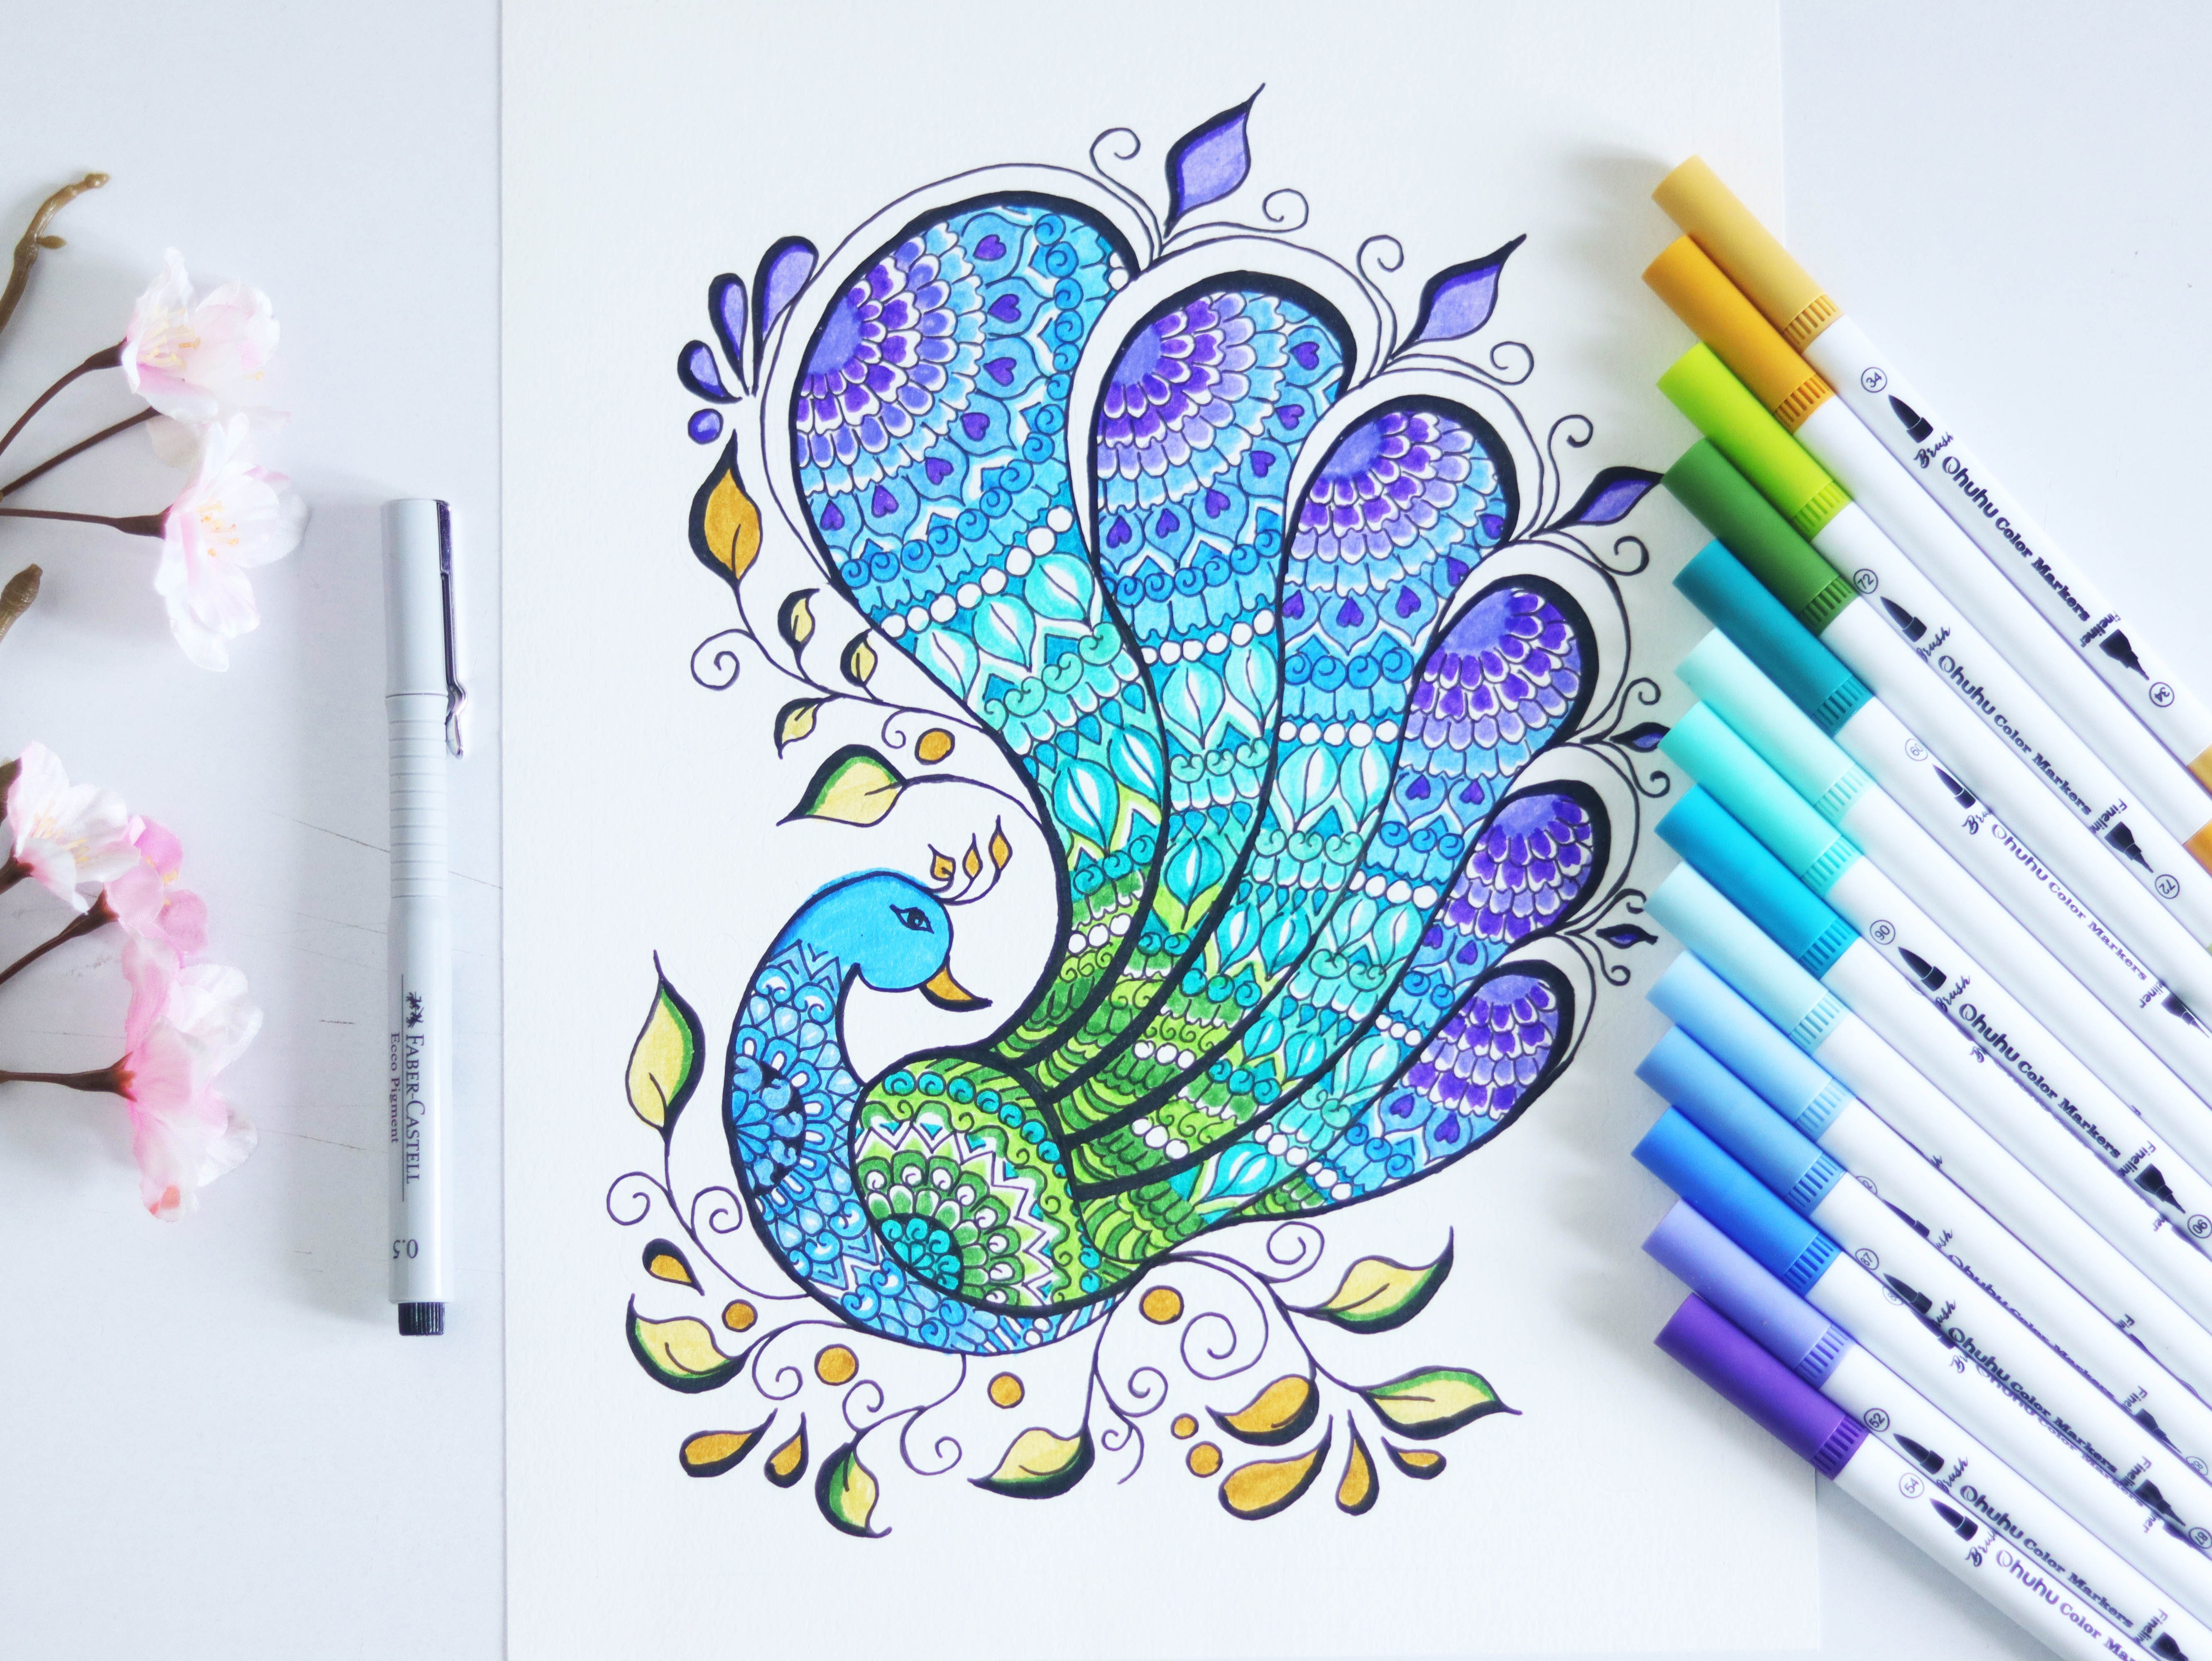
6. Coloring Mandala: When the law coloring
is an activity that has been around
for some time, but is now growing in
popularity with demand streams. It all starts with picking a color scheme and
sticking to it. You may be tempted
to be spontaneous and grab as many
colors as you like. But the thing is less
really is more and limiting your colors can make your Mandela more
balanced and symmetrical. Here, I will be using o markers
for coloring on Mandela. Brush tip markers makes
excellent tools for drying. I'm using combination
of blue and pink, but our two semi-circles
and different shades of it. We will use six shared
siege on both desires. May start with blue shirts. First one is lime green. Then to share, so blue, sky blue and aqua blue. If a separate sheet
of the same type of paper you are
working on next to you. So you can test colors first before laying them
down on your artwork. Next up, cornflower blue. And the last two. So by
the blue and ocean blue. Let's see which colors we will
be using for other 1.5th. One is called handling
Brown shared. Second baby pink, then
two shades of pink, salmon pink, and
strawberry pink. Last two, crimson,
red and magenta. Let's start coloring
our Mandela. Started from the center line
group or flush two layers, sky blue to color-coded
with triangles. The next layer, again
with lime green. Using markers for drawing
and coloring is so much fun. They're easy to use coming more colors than
you can imagine. There's not a lot of preparation
involved in using them. Just pick one up
and get started. Now use CornflowerBlue to
fill the whole background. And aqua blue for next layer. Different brands of mine workers
will behave differently. So try to use different types of markers that are out there. And the different types
of nave that they have. Different tapes are good for different styles and techniques. Get a scratch piece of
paper and try coloring in some square to get a feel for how the
different nibs work. For example, find blind, good for closed
lines and details. Brush tip, good for spreading smoothly in manner
similar to watercolor. Flexible like brush softer
length, broad teeth. Go for large area coverage. You screen share to
fill this model if your petals lose some
white gap in Moodle. For the second last layer. So if I had a blue filling
the whole background, the best way to get
even coverage and prevents trick is
to color slowly. Unless you're going for a particular look and warranty
might go strokes to show. Let a problem. To start light, you can always add more
color and go darker, but you can go to
the opposite way. Glenn, I didn't be
lighter shades first, then build up darker colors. Try to plan out
highlights in advance and know which areas you're
going to keep white. Now that we're done
with the coloring part, let's move on to retelling. Started decentered. Use lines, go spite in
cytokines for detailing. It will give you a Mandela more additional debt
and highlighted. Here we are done coloring
half of our Mandela design. Now, it is very simple to color. The other hand, pick
all the shirts there, decided for other hand,
started with dissenters. Use any brown to
fill two layers. Knowledge Base done to nature. Nature always gives us
the best color schemes. All E0 to do is get out
there and take note. You can take a walk
through your neighborhood and also the colors in C. You can also pick a bouquet of flowers and use it as
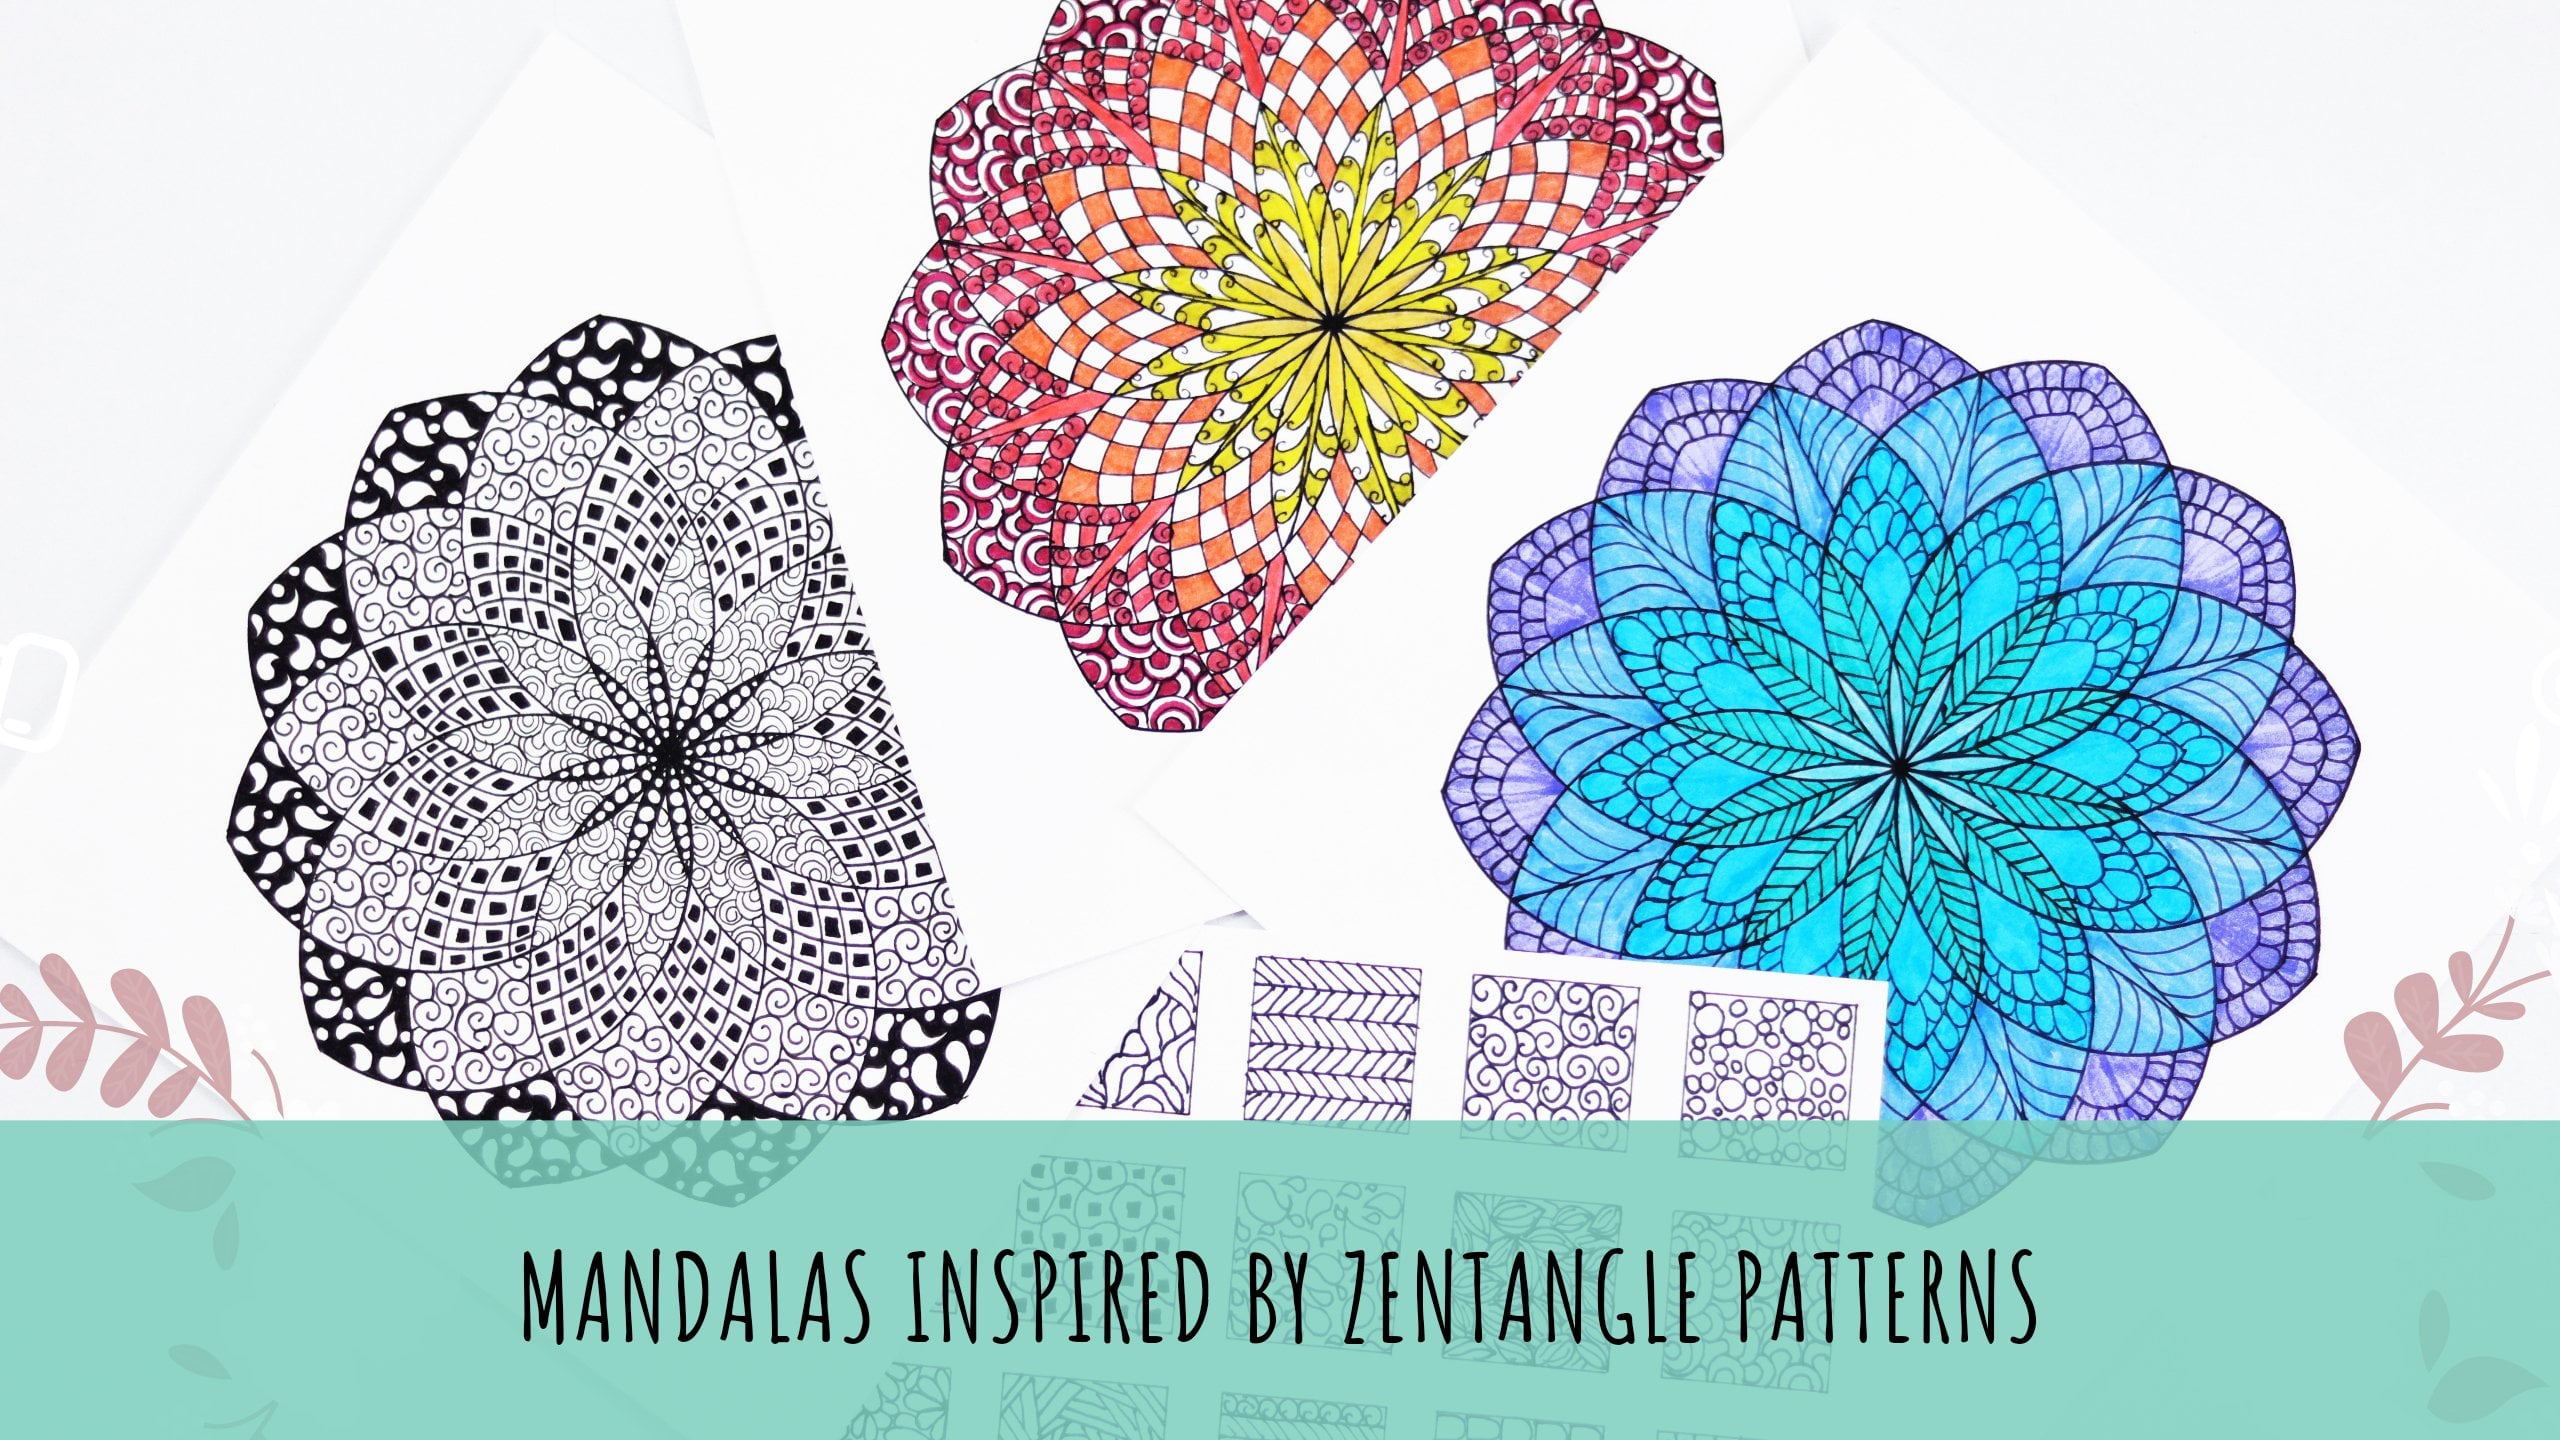
your color inspiration. Another approach to coloring Mandela is working by section. Since the Mandela usually has 46 or eight symmetrical section, you can pay a section
with different colors. Try experimenting
with a variety of possible color combinations to see which works best for you. Linear Zoom that you
need to color in all the details of the
Mandela to complete it. The thing is, you don't have to fill all the white
spaces with color, leaving some areas out, it's perfectly fine and mix them on della more
open and free. Notice that you can only use specific coloring tools
for your Mandela. Gel pens, colored pencils, watercolor brush pens and markers can all be
used for coloring. But because most Mandela designs are very detailed and intricate, mainly artists use gel
pens and colored pencils. They have very fine points. Doodling part will remain same
as we used for blue side. This semicircle, gray shade. Look at your Mandela once again. Try to see it for what it is
and not for what it isn't. Don't compare it to
something in your mind, some region of what it was
supposed to look like. After all, if your
goal was to dry Mandela and you did it,
then you succeeded.
 Mayuri Dhanad, Mandala and Craft Artist