Transcripts
1. Introduction: Hey, there. Welcome
to my class where I'm going to teach you
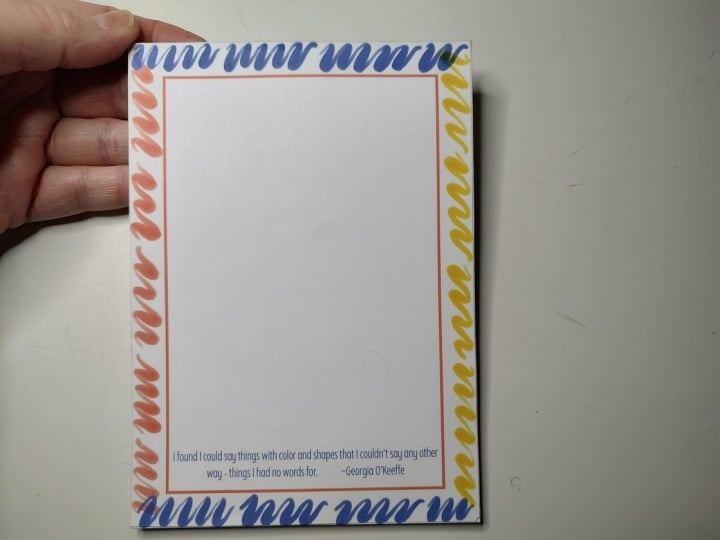
how to make notepads. This is an example of what
we are creating today. This is a five by
seven inch notepad. Several different
pages to draw on. We're going to be doing all
the steps from designing this in Canva to printing it, cutting it out,
gluing it together, and then you have a finished
product. My name is Rebecca. I run my own art and
Illustration business, and I also sell stationary
products, just like this one. This is a great
project if you are just making it for
yourself or as a gift. It's also how I got started making notepads
for my business. It creates a really
nice finished product, but it isn't necessarily as
efficient as outsourcing. So if you're not ready to
outsource but still want to sell something nice, this
is a good option for you. I'm going to go through all
the materials that you need, but I will say that
you can put this together with just stuff
you find around the house. You don't need any
particularly special tools, just something to cut, something
to glue and some paper. And honestly, I love making notepads. I think
it's a lot of fun. As I mentioned,
we're going to cover the design steps and the
manufacturing steps. But if you are interested
in the design as much, I've included the
actual notepad that I designed here in the
class project section, so you can just download that if you want to work with my design. This sounds like a
fun project to you, then I won't waste
any more time. Let's head into the lesson and start making some cool notepads.
2. Project Materials: Before we get started
making our nopads, let's go over the materials
that you're going to need in order to
do this project. First, I have a self healing cutting mat here
on my workspace. This is just to
protect my table. So it is optional, but if you care about your surface,
you may want to use this. In terms of paper
for our project, I am using 28 pound
weight printer paper. Typical printer paper
is about 20 pounds, and that's just about the
thickness of the paper. 28 pounds is just a
little bit thicker, a little bit more
of a luxury feeling to write on, in my opinion. Just buy this at
office supply stores. However, typical regular
printer paper works just fine. You may just find that you
need more sheets of it to make the notepad the
thickness that you want just because the paper
is a little bit thinner. Next, we're going to need a backing board for our notepad. Now, you can use a lot of
different things for it. And for today's project,
I'm using the back of a notepad or a little
sketchbook that I cut. So I will use this just
because it's sturdy and easy to recycle. You
can buy chipboard, which is the typical name
for this type of product at art supply stores
or packaging stores and look for a thickness
that you like. It's really up to you. You
can also use things like cereal boxes or anything from the recycling bin if you're just making
this for yourself. You just want something a
little bit sturdy to give you something to
hold the paper to. Terms of tools, I'm going
to be using these clamps to hold the paper together
when I'm gluing it. However, you can really
easily use bulldog clips, if you have those just from $1 store or any office supplies. These are just some
big artist clamps that I happen to have. Additionally, you could also use clothes pins. I have a pencil. I'm just going to
use that to trace the size on the backing board when I'm going
to cut it out. We're going to be
printing two sheets of our nopad paper per
printer paper sheet. So I need to cut those out. You can definitely use scissors. They're just going to be a
little bit less precise. So an option that I
frequently like to do is use a utility knife like
this along with a ruler. And a metal ruler
I find works best, and just do that to cut the different pieces
of your paper out. If you have a paper cutter, kind of like this one.
I know it's a giant. It'll be faster,
but sometimes it's slightly less precise
than the utility knife. Finally, for glue, I use a little paintbrush
to apply the glue, so just get one that you either wash really quickly or
you don't mind getting gluey and may be ruined. In terms of the glue
itself, these are two options that I like to use. My preference is the Mj Podge. This is the water based
satin version of it. But I've also used Elmer's school glue that works
out really well. I just find long
term Mj Pod is a little bit more plasticky and stays a little
bit more flexible, but I have had good results
with both of these. So if you only have
just some school glue, you can definitely use that. There's also a product out
there called padding compound, which is a little bottle of the adhesive that
professional bookbinders use. And if you want to splurge and get that, you can
definitely do that. I'm just going to be using some more accessible
products today. That's it for our
tools and materials. So I'm going to go hop on my computer and do our design work for
our Nopad in Canva, then we'll print
it and come back here and start assembling it.
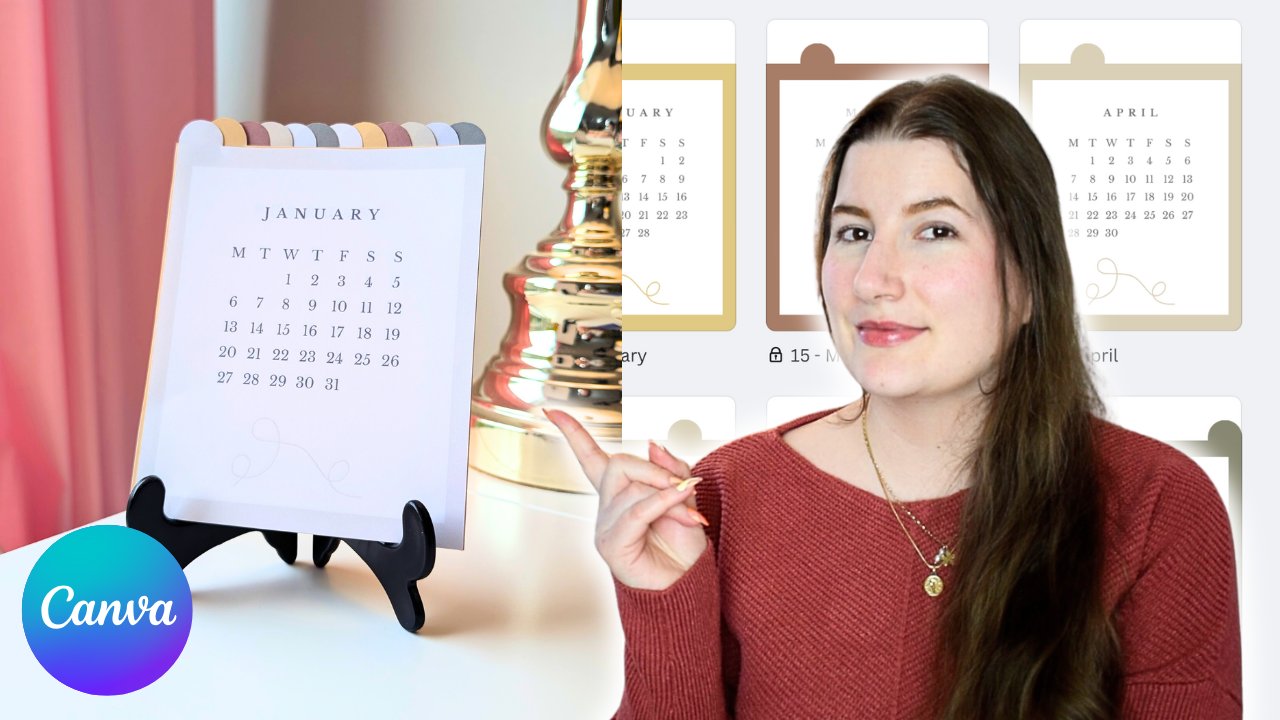
3. Designing in Canva: In this lesson, we are going
to design the actual notepad itself and then print it out so that we can
actually start making it. So I'm working in Canva. I'm going to do everything
just with a free account. You don't need to have a
paid one to do any of this. And I've created a new canvas
that is a custom size. It is 5 " by 7 ". The reason I've picked
this size is because it's more or less going to
be half a sheet of paper, and I can print two
of them on one sheet. Now, depending on what
kind of printer you have, you may not want to use
a ton of colored ink. In which case, you probably want to leave the background white. So if we're going to
do that, then we're just going to add some
guidelines for cutting. I'm going to tap R on the keyboard to give
us a rectangle. I'm going to make that
rectangle transparent, and then I'm going
to add a border that is just one pixel. I'm going to click on this
dotted line right here, but you can pick the
dash if you prefer. And I'm going to
choose as a color just sort of a light
gray because I don't want it to be too obvious in case I slip up
trimming it or something. Next, I'll drag it up to the top corner and then make
it the size of the document. This will leave a very subtle little dotted line
around the whole thing, which if I zoom in,
you can hopefully see around all the edges. So when we export this design, the little dash will be there to indicate where you can cut. If you aren't as concerned
about conserving ink, then you don't have to
do that necessarily. You may want to make
the background a color. So let's try this light blue. And then I'm going to tap R for rectangle, make this white, and tuck it up in
the corner so that basically we have a
frame around the design. So this is another way just
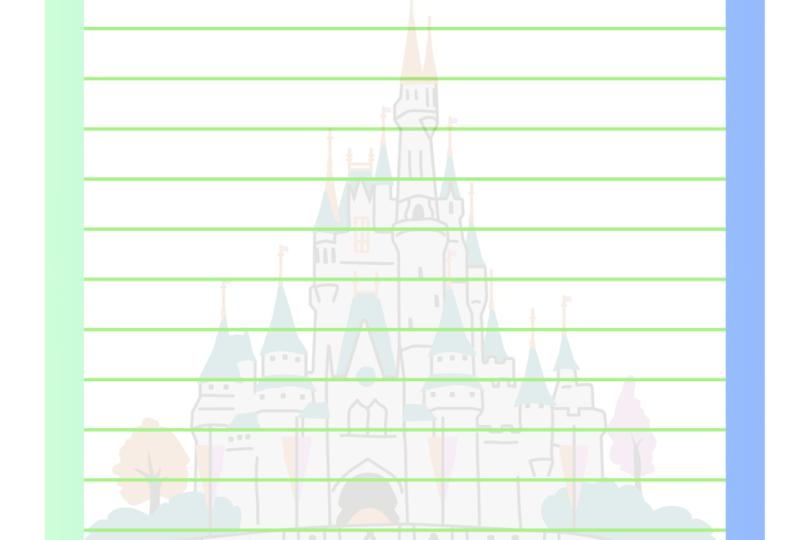
to make a base of a notepad. Next, I'm going to
add some lines. So this is just
going to be a basic notepad with lines on it, maybe a little bit of
clip art and a heading. And I'd recommend giving that
a go as your first attempt, but of course, you can be
as creative as you like. Go to tap L on the
keyboard for a line, and I'm just going to
bring it into position. I don't want it all
the way to the top because I'm going to put a
little heading up there. I will make this
line a lot thinner. I think I'll do line weight one. I'm actually going to
make it the same color as the background and then
click on Add New color, make it a bit darker, just
so it's more visible. Now we have to add all
the other lines below it. A good trick for that is
to have this highlighted. So I've clicked on this line
going to tap on duplicate and just reposition
it so it lines up and I have the line
width the way I want it. Now don't click out,
and as long as you haven't clicked off of it
and you hit duplicate again, it will keep adding lines in the same orientation
with the same spacing, you can do that all
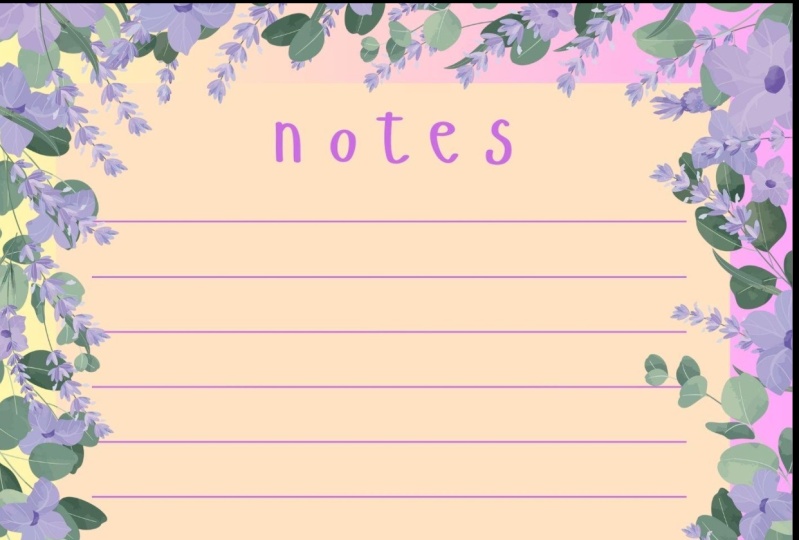
the way down the page. As for a heading, I think I'm just going to write
the word notes, so I'll tap the T on
the keyboard for text, drag that up to the top, just kind line it up and
we'll just write notes. To make it a bit stylized,
I'm going to select it. Let's find a fun font to use. And let's try this
FF Providence Sans. I'm going to change
the font color to that same dark
blue as the lines, and maybe I'll play with
the spacing a little bit. There we go. Now this is basically
ready to go, but I'm just going
to add a little bit of decorative flair
to make it fun. I went into elements and
search for seashell, and I found this one right here that I'm going to
change the color of to the same darker
greenish blue, and I'm just going to change
the opacity of it so it's a little bit more
transparent, maybe around 40. I'm going to put it in
the background behind the lines just for a
little bit of interest. And then I'm just going
to go to position layers, and I'm just going
to drag it all the way to the back under
all of these lines. So that's a fun decoration. Another option is to add a pattern on top
of the background. I just search for Poka dots. If you only have a free count and you want to
filter these out, you can go to the filters right here and just tap on free, and it will remove any
of the paid options. These poka dots look good. I'm going to make
them white, just so that they kind of
blend in a little bit. And I will drag that to the
edge with repeating patterns. Sometimes you want them
to kind of line up. This is an example of the Poka dots are pretty easy to line up, so I've made it halfway
across the design. I know it's on top right now, but we'll move it back after. I'll hit Duplicate and drag it to line up
in the other corner. And now the pattern
has continued, so like that poka
dot right up there. Right up there is
pretty seamless. I will select both of these and then
duplicate them again, drag it down, and one
more time, there we go. In order to not have it cover all of our other design work, I'm just going to
hold down Shift and click on all of
those rectangles. Or squares, rather, then I will group them and hit position. And again, just drag them to the back underneath
the white rectangle. Not too difficult to design. Obviously, you have a huge amount of creative freedom here. So this is just an idea for some ways to make it pretty simple for your first project, but you could make
this a day planner. You can make checklists,
you can make to do lists. You can make any
kind of custom form that you basically
want to create. It's a lot of fun making these. There's really no limit to
how creative you can get. I'm going to download
this to my computer. In order to print two on a page, I do that just through
the print window. So when I go on my computer, I open up this file, hit Print, and then it says, how many do you want
to print per page? I just select two, and that will evenly space two of
them on the page. I'm not showing you
that only because every printer has a little
bit of a different interface, so I don't want
to confuse you by setting up expectations, but I promise it's a very
standard feature for printers to be able to put
two copies on one page. So just have a look
in your print window. I'm sure you'll be
able to find it there. I will print this,
and then we'll hop back over to my desk, and we will start creating
the notepad together.
4. Trimming Paper: Here are the printed
pages for our notebook. I decided to print ten pages. There's gonna be 20 in
total in this notebook. Usually, I aim for about 30 if I'm going
to make this to sell, just to kind of make it a
little bit more substantial, but I'm just making
this for my own use, and I don't need
it to be too big. Feel free to print
as many copies of your design as you like. Now, in a perfect world, we could just line these up, make them really
even, and then chop, chop, chop, and it
would be perfect. And you can definitely
go that route. I have just found that sometimes
I'm not super precise. So I do end up liking
to cut the pages 1 or two together at
a time. It's slower. You don't have to
do it this way, but this is how I
do it just to make sure that my cuts
are super precise. So I'm going to take one
sheet just to get started. And I'm just gonna
go the manual route using my utility knife. And my ruler. And please be careful if you are
using anything sharp. So for this particular ruler, it has a little
cork backing pad, and I just like to flip it over and put it face down because it gives me better grip and also goes flatter
onto the paper. So that's why I'm
using it upside down. And I just line it up
as precisely as I can. There we go. There is
my first cutout page. I just had to fix
one of the edges. I left a slight bit of white
space, so I trim that off. So now it's like very
crisp and perfectly cut. I just do this for
all of the designs. Like I said, you can
find faster methods to cut if you prefer. But personally, I don't feel like I like to rush
with my crafts. I'm having fun doing this, so I like to take my time.
I will skip ahead. I'm not gonna make you watch
me cut all 20 of the pages. So just wait one moment. Okay? I finished cutting
out all of my sheets. And when I stack them
together and just tap them a little bit to
get them all in line, find that they are
super precise, and that's just what we
want for our project. The next step is to work
on our backing board. So I'm going to put
this stack aside except for one of them just
to use as a template, and I'm grabbing this
piece of cardboard that I put aside to use for
our backing board. So all I'm going to do is
basically just line this up. I'm going to use two of the edges just to
save myself time, make it as snug as possible. Then I'm just going to grab my pencil and just very lightly. Mark along the edge
where I need to cut. Now, this is quite a
thick piece of cardboard, so I'm going to use the exacto
knife and ruler again just because scissors would probably tear up the paper quite a lot, and my paper cutter can't
handle the thickness of this. So we're just going
to do it by hand, and we're just going
to cut this long piece and then this piece off.
Pretty straightforward. And you want to be extra careful when you're cutting
thick paper or cardboard like this because it can be a little
harder to control. I'm actually going to go over it multiple times very lightly, and that's just going
to whittle down the thickness of the paper
until it's easier to cut. I just had to cut seven times, and it cut this very crisply. No torn edges, and I
think it looks great. So I'll do the same
for the other edge. Perfect. So now we
have a piece of cardboard that is the
exact size of our notepad. This one actually does have
a sticker on the back, so I'm going to
put the papers on top of that side just
so we don't see it. Because of all our
careful cutting, this is a perfect fit. So in the next step,
I'm going to start gluing the top edge
so that it can set, and then we'll have our
notepad ready to use.
5. Glue Binding: We're ready to start
gluing our notepad. I have it all evenly lined
up with the backing board, and this is when I'm going to use my clamps or you can use your bulldog clips
or clothes pins, whatever works for you. In order to protect this
front page of the notepad, I'm actually going
to use this scrap of cardboard and just put it
right along the top edge, not all the way to the
top, but just enough that when I apply these clips, which I will do here. And on the other side, Now, it's not pressing on
the actual notepaper, protect it a little bit. Our top edge is where we
are going to be gluing. It's pretty straightforward. I would just recommend doing
several layers of thin glue. I would usually do two to three, depending on how thick
your layers are, and let them dry in between just so that it
becomes really secure. I just have a little scrap
piece of paper here, and I'm going to pour out
some of the white glue. I'll use this for
our project today. You really don't need very much. That was probably
more than I needed. I don't recommend just
using the nozzle of the glue to apply it on the top because you don't
have as much control, and you will probably
apply way too much glue, and it might run
down onto the paper, and just the end result
will look a little messier. So the control is kind
of important here. I will also put a
little tiny bit of glue on the back of the cards dock just to reinforce it a bit because I don't want the front of my notepad to fall off. The step is pretty
straightforward. Dipping a little bit of glue in, and I'm just going to brush
it on top of the notepad. I'll start at one corner,
go across to the other, then leave it to sit for
about five or 10 minutes, and then I'll repeat that
process two or three times. Alright, I put the first layer
of glue all along the top. I'm just going to flip it
over and just do a sort of reinforcing layer
just along the top and the top of the backboard, for a little bit
of extra security. There's not too much glue
back here, a thin line. And I'm sort of putting it
on an angle so that it's going right over the corner
of the top of the paper. So it's touching the
glue that I just prolong the top and
on the back as well. Okay, there's my back layer
just for a little security. So I'm going to leave this
to dry for a few minutes. Luckily, the clips keep it up off the table, so
it's not touching. And like I said, I'm going
to do probably three coats. If you have a lot of papers, so I've got 20 sheets on
here of a thicker paper. If you were doing 50 sheets
or a really thick notepad, I would say do a couple
extra layers of glue just to give it that reinforcement
for the extra weight. Now, in the next lesson,
I will come back. I will show you my
finished product, and I'll show you a couple
other notepads I've made with some style
variations and different features you
can add that make it pretty fun and will
hopefully inspire you.
6. Finishing Options: Alright, my notepad
is all finished. You can see all of the
pages are attached here. It took about four coats
of glue on the top. I think I would even add a few more if I was going
to be selling this or giving it to somebody
else just because the school glue takes several more coats
than the Moje podge. If you are going to
use the Moje pod, two to three codes is probably plenty because of how
much thicker it is. I'm very happy with
the final result. Let's tear off a sheet together. Perfect. And there you
go. That's our project. I wanted to show you a
couple of variations of different things I have done over the years with notepads. So for this one, this is just an example of how
I have packaged them. This is a greeting
card sized envelope. It basically folds over on the back and is just a
secure way to package it if you're selling these at in person shows or somewhere you don't want it
to get damaged. Additionally, I have a rubber
stamp made for my business that I stamp on the back of my notepads just with
my business name, my shop URL, and my
Instagram handle. So that's just how I've done some branding on my notepads. It's fairly easy
to find five inch by seven inch greeting
card sleeves, so that is the size of notepad that fits
in there as well. This is a smaller notepad I
took right off my fridge, and this is a smaller size. So I fit four of
these on one page, basically design it the
same way I did in Canva. But when I go to print, I select four per page
rather than two. So I get this smaller size,
which is very convenient. And I put magnets on
the back of this one. These are just sheet magnets
that I've trimmed to fit. They come with a sticky side, like a sticker, and you
just attach them on. You can get these at pretty
much any craft store. And I like to put two on just because it helps the
notepad stay up better. It has never fallen off since
there's been two on there. Again, how many pages and the overall weight
of the product will maybe determine
how many you need. And this is a variation that I did on the notepad project. This is actually a little
watercolor sketchbook. I use watercolor
paper trimmed to size instead of notepad paper. And I made a cover and a
ribbon to keep it closed. So on the back, you
can see, I just glued the ribbon along the back and then it just ties in the front. The cover is a bit of a heavier card stock with
a bit of a glossy front. You can see it's a
little bit shiny where I printed a
pattern I designed, and I just made it the length of the front of the notepad plus a little bit for the
top and a little bit for the back and then glued it down here with some creases. And that has made a really
cute little waterproof or watercolor notepad that
I can take on the go. So it flips open like that,
and there's my paper. So I hope these
give you some ideas of other ways that you
can edit your notepads, make them custom and make cute gifts or products
that you want to sell.
7. Class Project: For a class project, I bet you can guess what
we're going to do. I would love to see the
notepad that you create. I'm going to include
the file for this particular design
that we made in the class together in the
class project section. So if you don't feel
like designing, you can just download this and get on the craft
part of the project. But of course, use
your creativity, make whatever inspires you. And when you're all done, I would love if you
took a photo of your project and uploaded it to the class project
section of the class. That way, I can
see what you did. We can inspire each other, and your classmates can get
some inspiration as well. I'm so excited to
see what you make. I love making these
little notepads. I've given them as
gifts. I've made tons that I have
sold in the past. I have made lots for
myself. So I'm a big fan. It's a fun project and pretty
good result, in my opinion. If you enjoy taking
this class with me, I have lots of others that
are creative DIY projects, entrepreneurship,
all sorts of topics like that that you might enjoy. So please do check them out. If you have any questions, you can leave them in
the class discussion, I'd be happy to chat with you. And finally, I would
love it if you took a moment just
to review my class. I read all of my reviews, and I appreciate
all your feedback or ideas for classes you'd
like to see from me. And also the reviews
help other students know that my classes are
fun. So it means a lot. Alright. That is it for me. Thank you so much for watching. Hope you have a great day
and happy creating. Bye.
 Rebecca Wilson, Artist