Transcripts
1. introduction: You have ever felt
too intimidated to create meringue
desserts, don't be. This is probably one of the
fastest and easiest desserts that you can whip up
minus the drying time, and the designs that you
can create are endless. In this class, I'll be sharing my top tips on how
to create a nice, stable meringue and how to
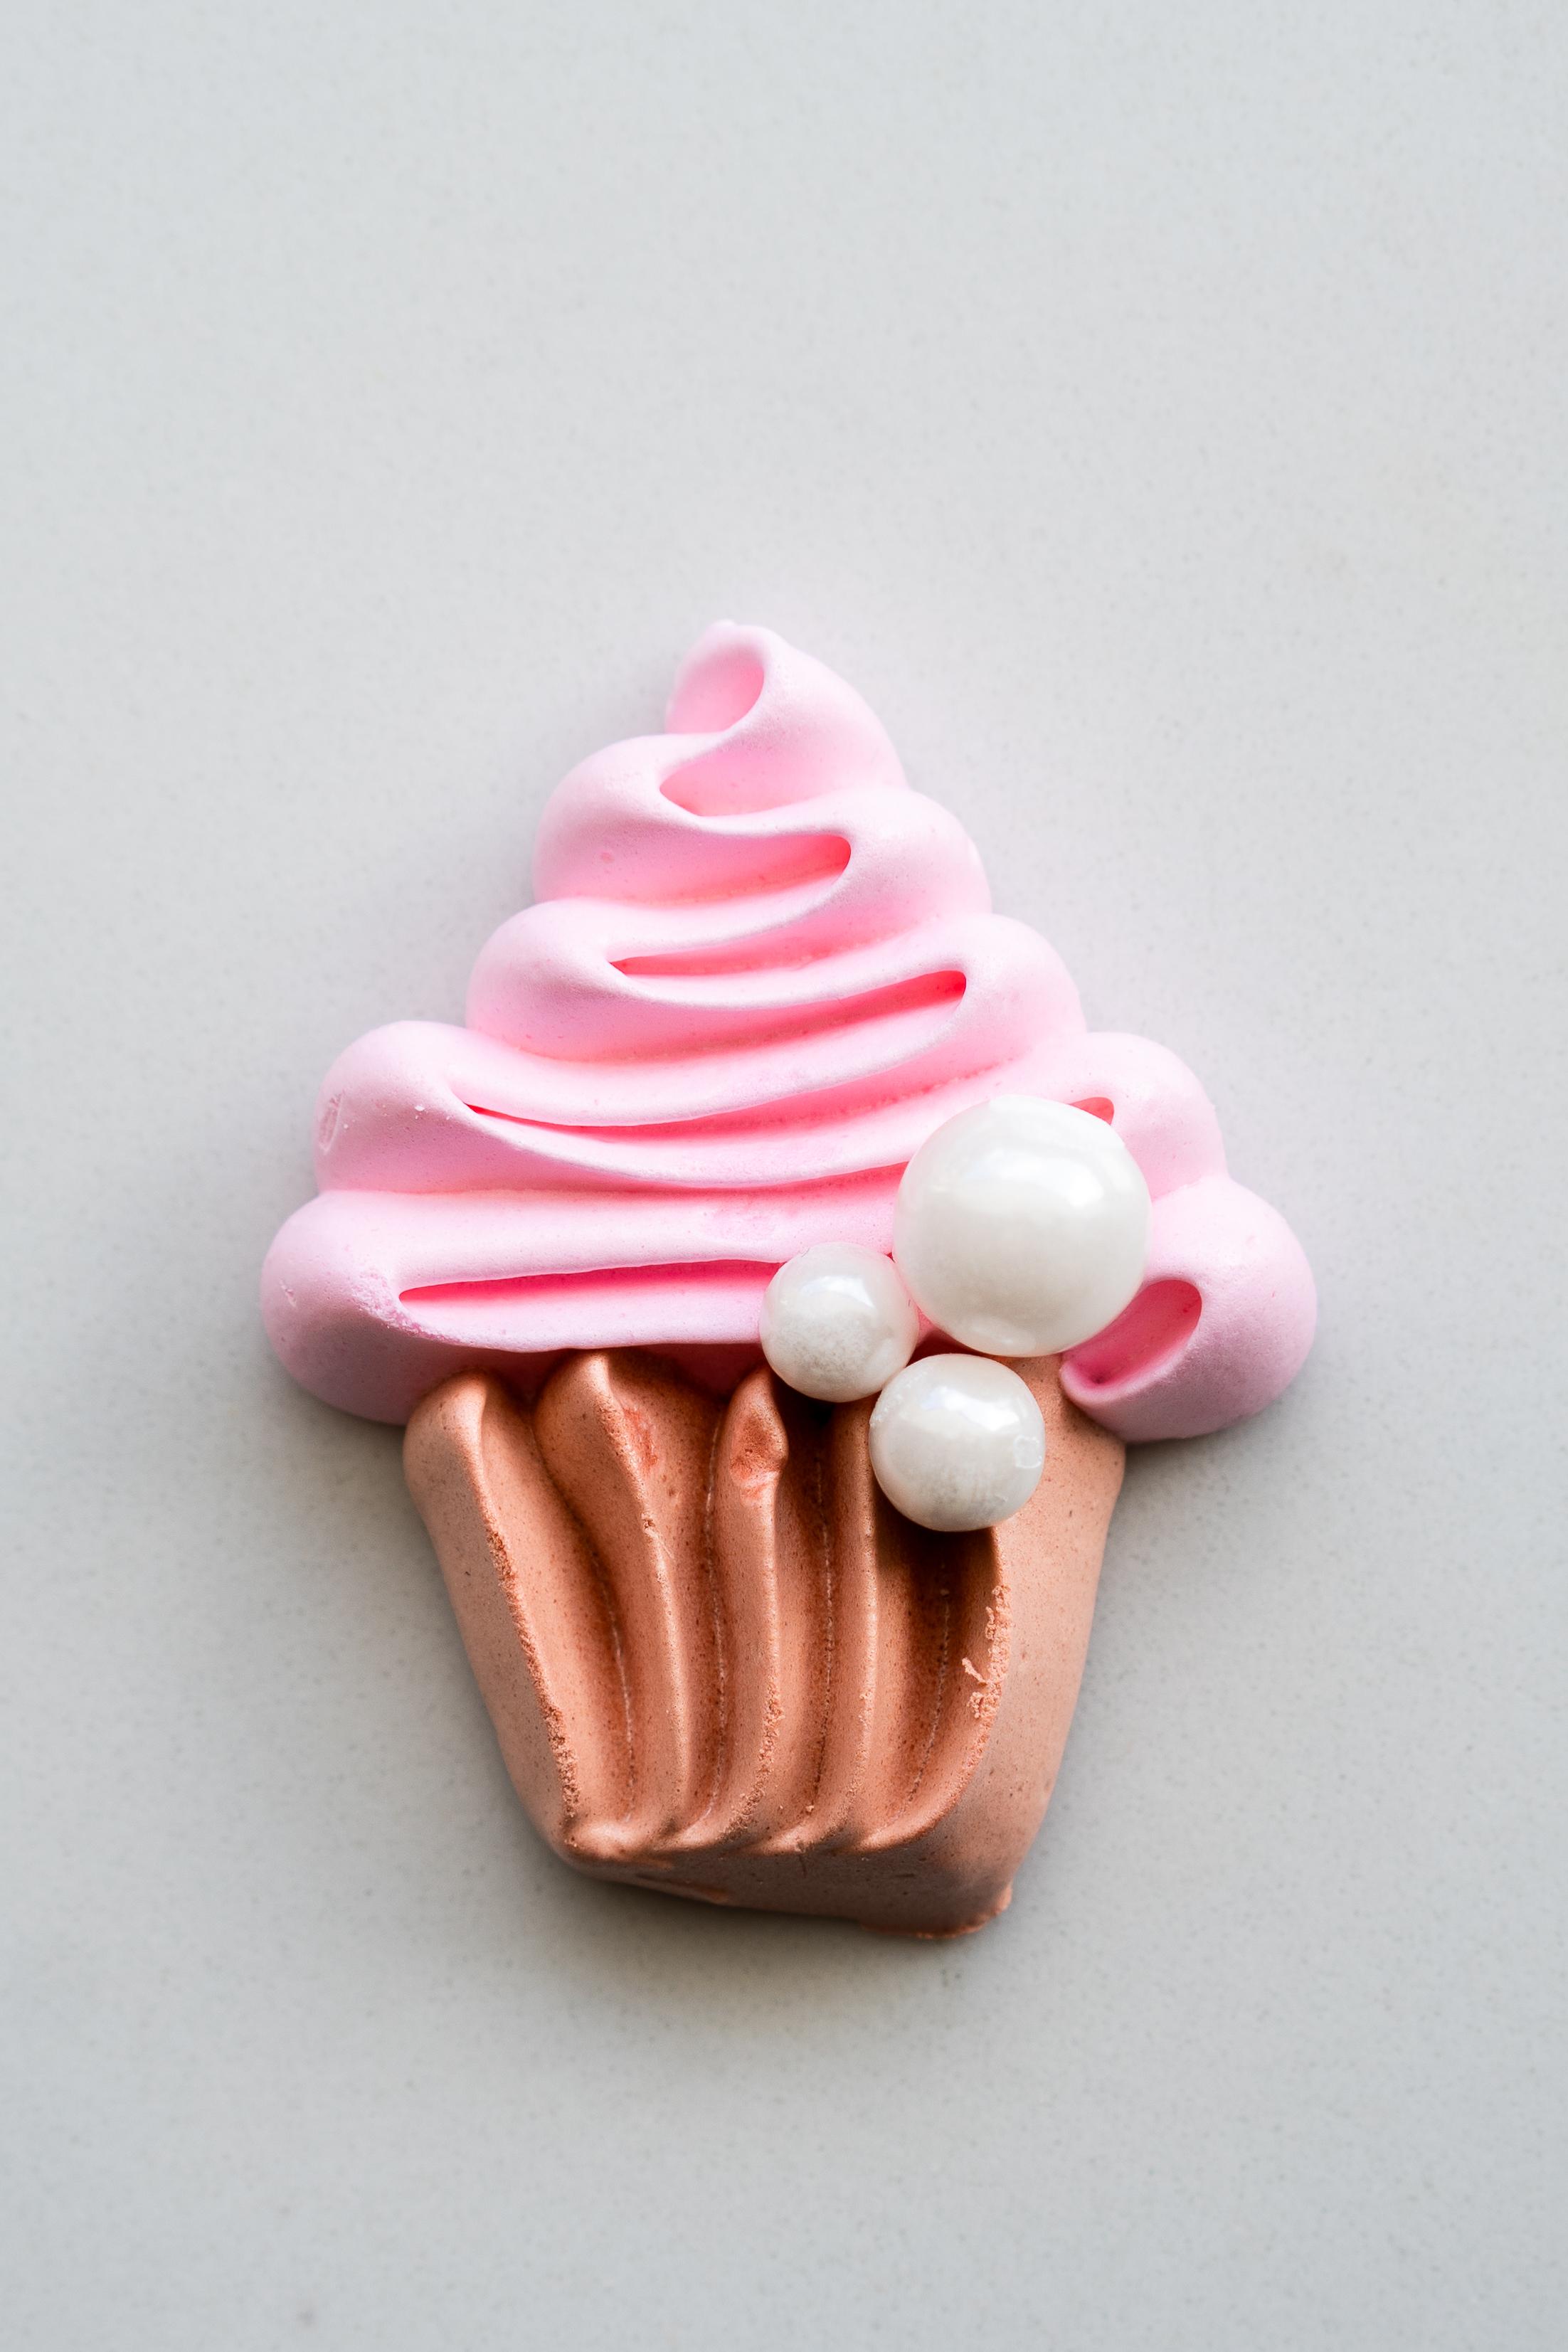
pipe out sweet and dainty, mini cupcake shapes
decorated with edible peels. So pop on your apron and
let's jump right in.
2. Module 1. Separating The Eggs: To create al meringues, we are going to need
a completely dry, oil free, moisture
free, clean bowl. Any of these elements
will affect how well our egg whites can whip up, and we want them
to be as aerated and as stiff as possible. I have my scale septograms
because that way I can really get an idea for weight that is just
very, very precise. I have my eggs that
are room temperature. Crack it, gently halve it, and I'm going to
separate the egg yolk from the egg whites. I like to do this in
a separablel in case the egg yolk cracks
and contaminates. If it does, any fat that
comes from the egg yolk will interfere with our ability to create those
nice stiff peaks. Very gently. Peeling that open. And if it does contaminate, we can very easily
just throw this out and grab another egg. If you were to divide the egg yolk over the main
ball of your egg whites, and you had all the
egg whites in there, so long as one cracked, you would have to start
everything all over again. This is why we keep
it nice and separate. So we're not wasting anything. Beautiful. And we're just going to be
dancing it back and forth, just very gently passing it
from one side to the other. You can make custard with
these, so don't throw it away. You can still use them. I'm
gonna throw them away anyway, so I hadn't combined
with my eggshells, but you could definitely make
custard with that instead. Gonna add it to the main bow. And three egg whites gets
me 101 grams. Exactly.
3. Module 2. Whipping Your Meringue: Into a standing mixer
with a whisk attachment, we're going to add
in our egg whites. And I have measured out a sifted amount of the icing sugar that is double the weight
of our egg whites. So our egg whites
weigh 100 grams. I have 200 grams of icing sugar. Before we start whisking away, we're going to add
just a pinch of salt. This will help to
stabilize our egg whites. We're going to
close this up, run it on high speed until
it's nice and foamy. Okay. At this point, you can see it's
starting to really develop a really
glossy white texture. The bubbles are
super duper fine. It's almost at it's about at soft soft
peaks at this point. This is when you
want to start adding in your icing sugar gradually. I would recommend running this on low speed, the
lowest you can go. And that way, your icing
sugar doesn't sort of clump at the base. We're going to add it in
in three different stages. We're gonna let this
run back on high speed. Let that completely incorporate before we add in the next batch. At this point, the
bubbles are even finer, just about not even
visible and super glossy. I'm going to add in the
next three tablespoons that are running high. It's nice and stiff at this
point, or getting there. It's nice and strong
in structure, so I'm going to add in the rest. Oh Should that running. The rest of icing sugar, and then let that go for
another 5 minutes on he Alright let's have
a look at our peaks. They are looking pretty good. I could let this run maybe for another couple of
minutes. There it is. Nice, fluffy, stiff peaks
at the end of our spatula. Um, my gosh, about whisk. So at this point,
it's a good idea to add in your gel food colors. You could go gel food
color or you could go powdered food color instead.
Either one will work. Ideally, you would want to
go powdered because it would affect the consistency of
your egg whites, at least. But considering you don't
really need a lot of gel food color to get
a nice rich tone, it doesn't matter too much. So I'm just gonna add
a drop, and you'll see how quickly
that incorporates. That's perfect pink for the
hearts that I want to create. I'm going to really
quickly trim down about a centimeter from
the edge of a piping bag. And then feed in a one
oh four piping tip. You will want to make
sure that this is constantly running
and not stationary to decrease the chances of your egg whites deflating for the purpose of you guys
being able to hear me, though, I do have
to stop it, but that is the one oh four. I'm going to grab about
two tablespoons worth. Close this up and
let it continue running and add in more gel
food colour as we need. So now I want a darker pink. I'm going to add in two more
drops of gel food colour, making sure that it touches the meringue that's
at the bottom of the ball so it incorporates nicely rather than getting
stuck along the edges. I'm gonna go just one more drop. Now that it's a
little bit darker, we are going to go ahead
and quickly fill in our second pipe and bag with a slightly darker shade of pink. For this one, I'll go about
three or so tablespoons. And then we'll drop
in our last color, which is going to be the base
of our cupcake, the brown. Let that run on high
for a minute or two. I'm also going to wipe down the sides of the bowl with
my spatula just to make sure that all of that color
is nicely incorporated and we don't have any pink
remaining along the sides. Let that run just for another
minute and shore be ready. Beautiful. Color
I'm looking for. I just unravel, inside
out, over my hand, open up that section in the middle and feed in here the remaining
meringue that's in my bowl. Using the side of
my thumb to scrape my spatula across to clean off my spatula
of the meringue. And you will want to wash out the whisk pretty quickly and the ball because
this will harden, and it becomes very
difficult to clean up afterwards once it's crusted. Little stretch that top of
the bag over that meringue. I'm going to put
my index and bug. Just pinch the top, pull the bag against it, so I'm pushing all the
meringue to the base, and then I'll give it a good twist so that when I squeeze, I won't come up and
out the other side.
4. Module 3 . Piping Cupcakes Using #104 Piping Tip: In the class resources, you should have access to
a page it looks like this. You can print it out on
an A four sheet of paper, pop it into a cookie sheet, and then add some baking
paper over the top. What I did was cut around the edges so that it sits
nice and flush otherwise. If it touches the edges,
it kind of curls up, and then your meringue detail
will be curled, as well. To help it to really stick down, what I'm going to do is add
just a little bit meringue behind each corner and then press it down onto
the cookie sheet. So the printed paper is
underneath the baking paper, and it's there for
us as a guide. You might just push it
up there so slightly. All four of our sides have been pressed
down, nice and firm. Now we're going to hold
our piping tip with the skinny side facing up and the larger side constantly
in contact with the project, so our piece of paper. What I'm going to do is hold it pretty we're perpendicular
to the piece of paper, so we're not at a
90 degree angle. We're all the way down here about a 20 degree angle or so. I'm going to squeeze,
let it touch, and then start
moving, zigzagging, following that guide,
as I squeeze out. That meringue. Maintaining
even pressure. I'll stop squeezing as I come to the end and then
gently pull away. So there is a top
of our cupcake. Then I'm going to use
the brown meringue, holding it the exact same way, so I've got my thumb and
my index finger sort of closed that end off. It is twisted. I'm going to wrap my other digits around
the rest of the bag. I'm going to squeeze
that larger end is constantly in
contact with the paper, skinny sides facing up. Squeeze, let it touch
the pink, drag it out. Stop squeezing, and then
just kind of cut it away. Do the same to the line
next to it, cut it away. Now, we really want
these lines to be touching so you can't
see in between. In between those little lines and it looks like
a cupcake liner. These areas here
that are squish, we can very easily just clean
that up with our finger, and now it's nice and neat. So there's our first cupcake. If you wanted two, you
could add another line on another side to make
the cupcake case thicker, totally up to you. I'm going to do the same again but this time with my darker pink and just following
that guide again. So, larger side is in
contact with the paper. Skinny side is facing
up towards the ceiling, zigzagging with even pressure, and I'm stabilizing
my hand with so I'm stabilizing my piping bag with my other hand on this side. Now we're just gonna
keep repeating this step until all of these drawings have been
covered with meringue. So to cut it, I am
stopping the pressure. I'm anging it down to
a full 90 degrees. The entire piping tip
is in contact with the paper as I drag it across
the surface of the paper. Then right at the end,
we can just remove that section with our hands and making sure skinny
sides facing up. And I'm squeezing
hard enough that enough meringue is
coming out that it's allowing each row to touch so that we can't see what's
happening in between. There's no paper to be seen. Squeeze, let it touch and trag. Bring it 90 degrees
and cut away. Maybe just one
more sin one here. Clean it up with elf
clean the fingers.
5. Module 4. Pipe and Decorate: This point, now that
they've all piped, we can add on our decorations. So I am going to take some
edible pearls and just drop them in the corner where the cupcake lining
meets the cupcake top. I'm going to add three of them. So three different sizes. Sorry, two different
sizes, a larger one, and then two smaller ones. You can range them
however you see fit. You can even pop one
on the top instead. Totally up to you. And then these get dried off in the oven. I've got the lowest
temperature of my oven at 50 degrees Celsius. So that's what it is. That's what I'll be
drying mine off at. Because these are pretty flat, it won't take too long to dry. I say that, but it's
still going to take on average about 6 hours. And it sounds like a long time, but you want these to be
super duper dehydrated. You could technically pop them
into a dehydrator as well. But most of us don't
really have access to one, so the oven will do just fine. In terms of which
setting to use, I'd recommend the fan on. And again, at the lowest
possible temperature. So we're gonna go
down all the way to 50 degrees of Celsius. And then I'm going to let
that run for about 3 hours, maybe 3 hours and 30. And then I'll turn off the oven, and I'll Without
opening the door, let them continue to dry out with that residual heat
until the next day. After 3.5 hours in the oven with the oven then turned off and
just the residual heat, we have our beautiful
crispy meringues. And if I were to break one open, let's choose the ugliest
one for the sacrifice. That's probably that
one. And just kind of. You hear that nice snap. And it's all completely
dry and hollow, not hollow but araded
on the inside. Another telltale sign
when they're ready, so they come off with
very little resistance.
6. Well done, you did it!: And that is how you create some delicious meringues
in the shape of a cupcake. Somehow the back is even, cute, as well. So cute. I hope this was helpful
for you and that you recreate lots of delicious
meringue creations now. If you'd like to
share your project with me, I would love to see it. You can send it through
either by email, sus desert spot@gmail.com, or you could also share
it within the project tab for all of us to see. Until next time, happy Baking.
 Rossana Aloi