Transcripts
1. Class Introduction: Hi everyone. Various Ikea
farmers use does that spot. I am a professional
cake decorator, been working in a
bakery for a few years. And I thought I
would bring you guys macaron making one or one. So if you've never
tried making macarons, they can be really
finicky cookies. But in this course,
I'll take you step-by-step with all my
little tips and tricks and how to render a perfect macaron with its dainty little feet. With all the troubleshooting
that I've done in the past, bringing it all to you. In this course, I'll
be showing you how to make a nut free version of the macro and cookie and
also the traditional one with the almond meal. So you can find a list of all the ingredient amounts for the recipes
and also a list of all the utensils and
tools we'll be using in the class resources
up on the apron. And let's get started
in module one.
2. Module 1- Making Traditional Macaron Batter: In this module, we are
going to be pairing our ingredients and whipping
up our macaron and data. So what I like to
do, first of all, is divide my egg whites
from the egg yolks. And I'll actually use a
scale when I do this, it's just a lot more
accurate and you get more consistent results if
you use scale in grams. So I highly recommend
buying one. They're really inexpensive
and very helpful. The recipe will be included in a PDF in this course
and the resources. But basically you
want to bolus here, one to collect your egg yolk
and one for your egg whites. I'm going to crack on the
side of the container ball. And then gently and
carefully crack that open. And you want to just go back and forth swapping which eggshell
is holding your egg yolk. And don't throw away your yolks. You can use them for
custard and continue on. You might actually want to crack each egg individually and
it's going to differ in bold. That way if the egg is off, you don't accidentally landed in the main container with
Olivia egg whites. So I'm going to do that and it's going to come in
in this container. It has actually
happened to me before. I've opened up an egg. And it was a black inside. And of course there was a
last egg out of the batch. So I just start all over with a different set of five
eggs though the West. The important thing to
consider is that one, your egg whites are
completely room temperature. When you work with them,
they fluff up a lot easier in the stand
mixer if you do that. And secondly, you don't
want your hands to be wet, any moisture will impact how well these will
fluff up in the mixer. And the last factor is fat. So whether it gets the egg
yolk that has the fat, if you accidentally
crack the egg yolk and it contaminates your egg whites, that's going to affect
how well your moraine, um, can stiffen up. And if there's any fat lingering in the mixing bowl
or on your whisk. Also going to impact how
well it's going to fluff up. And to get to that 150
g worth of egg whites. Usually it takes about six or so back-and-forth carefully
disguising the young. Adding this to the main bowl. We're going to pop
that aside and work on our dry ingredients. For the next step, we
are going to sift out icing sugar and
almond meal together. It's a good idea to
get this done before the egg whites start
to worry about because you want to work very quickly. Once these have
finished ripping, you want to quickly fold everything in and
amalgamate the beta. I'm going to start off
with my icing sugar. I'm going to sit into this larger bowl and we're
gonna do this twice. We basically want incorporate as much air into this as possible. The thing about moraine cookies is that they have very light, very airy, delicious cookies. So we want to make sure
that there are no lumps, dry ingredients in
goes, the Allen meal. We also want to make
sure that these are well blended together as a well. Were they going to dump
it all back into a bowl and a second time
just for extra, you know, making
sure it's all nice and airy and incorporated. So this time they go
into the CIF together. Make sure you use a nice
big 50 here for this. Give it a tap side of your hand. And then the ones that I think she got really
makes it in the air. I'm actually
allergic to elements and I can cut it. Tastes. Say if it's abruptly
stops, you know why? You have it all sifted
through like that. You want to take a width, just blend the two
together with a whisk. Basically, Louis just helps
to keep it all aerated. Well, combining the
two ingredients fully, just going to whisk that in. Okay, and our dry ingredients
already on standby. Let's move on to our egg. So we're gonna start off
with the egg whites. And I'm just going to
pull that straight into our clean mixing bowl with
the whisk attachment. And into this we're going
to sprinkle in and just a touch of salt to help
stabilize the egg whites. Turn your mics are on media, sorry, a high-speed
until you get. A little bit of firms
don't happen in your egg whites and that's
when you know you're ready to add in your ISO, your caster sugar,
super fine sugar. Eight bytes should look a
little something like this. I'm going to add in my sugar a little bit at a time
on a medium height. Let that run for about 2 min or until you have nine stiff peak. Egg white holds in shape but little stiff
peak right in there. This is a good time to
add in your flavoring. I recommend going for like a clear alcohol-based
vanilla so that the alcohol beverage or you
can go for a paste instead. So it's not as liquidity
and it won't mess with the texture of your moraine. And I also like that. It's got the seeds in there, so it gives a bit
more of a goal. May look for the coloring. I recommend gel food color. I'm not going to add in
more than two drops. You don't want to go. Liquid
food color because it will mess with the texture and smoothness of your moraine, sort of break it down, mix that in a high-speed
for another second. I'm wearing is ready. We can move on to
the dry ingredients. I am going to pull half of
our mixture into L moraine. I'm just going to
gently fold that in. This is where the
real magic happens. You want it's got a big
tastes development. You want to be careful not to mix it through to vigorously. You want to try to cooperate and hold that air in the moraines. We're just going to
fold very gently. You can see here, let me just go and go
underneath, bring it up. And we have rotating
else bachelor's we do. Once it's mostly incorporated
just like it is now. We're gonna go ahead and add in our other half of
the dry ingredients. Should be wearing a
mask when I do this, not to swallow any
Bowen Elman meal. And then we're just going to
keep holding that through. And you do not want to mix this. There is a very good tequila, sweet spot for macaron better, and it's when it comes off
your spatula in ribbon. I'm going to take off a bit of that from the silicon spatula. Just because it
tends to get hard. We want to make sure
that's everything is incorporated evenly. You can rotate your bowl. Well, I need to keep it
stationary for the camera. But if it was you guys at home, you would be spinning
as well, just like SAR. But I want to make
sure you guys can see what's happening inside, so I'm not going to do that. Again. Take off any better from your spatula, distinct
cases stiffening. Smells incredible. If I were to stop here, e.g. it doesn't quite come
off our spatula. It's not really ready just yet. This is looking a
lot more like had the bladder the
bladder, the better. It looks nice and fluid. It's rolling off our
spatula and like lava. Going to say a few more
turns and will be ready. There she is. Gorgeous.
3. Module 2- Piping Your Macarons: So our neck around
that AI is coming off in these beautiful
lover ribbons. That's exactly what we want,
what we're looking for. I'm going to fill in
a piping bag fitted with a number ten tip. Just like Cij is like a teeny
tiny little circle tip. I'm going to wrap the
piping bag her on my hand. And the key here is not to
overfill your piping bag. The warmth from your hand will deflate the baton
as your piping it. So you just want to fill in about one-and-a-half cups worth, maybe even just one cup. You can see the
consistency there is beautiful, not more than that. So that's what was that.
It was like 2.5 spatula. We're going to close that up and then hold
it down from here, give it a good twist
to secure the veteran. This, it doesn't come
out the other side. And we're going to pipe on to our prepared baking
trays line of baking paper and our
little macaron mold. Just want to aim for the middle of your macaron templates. Give it a squeeze, hold, steady and stop squeezing. So relieve the pressure just as it's coming to the
edge of your template. Again, aiming for the middle, going to squeeze as
it comes to the edge, but 2 mm from the edge, relief pressure and
create a bit of a circle. So you didn't get like
a little nipple kind of sticking up
from your macaron. And then just continue
this all the way across your stopping at a few millimeters away from
the edge of your template. Because it's going to
continue to spread. And you just want to
make sure that it doesn't spread so much. The two cookies or the cookies that are next to each of them end up touching. Granted, it's not going
to spread all too much. But just in case I'm about half a centimeter up from the actual cookie sheets
all the way down here. I'm not all we IPA, I'm
smack in the middle. The good half a
centimeter above. Continue this for the
rest of your battery. Might just move my baking
paper a little bit. I don't want it to be
up on the slide decks and I will miss shape
and locker rooms. There's a bit of a slant
to the baking paper. Coming towards the end. The last couple that pipette are going to be slightly
more deflated because there's pressure and the warmth from
your hand as well. It's refill your piping
bag and consume. This template will be included in the class resources
so you can download it, print it out April paper, and then cut it down to size
based on your cookie sheet. Sometimes they do
develop little bubble. I'm going to show
you guys how to get rid of that as well. Perfect. Just to get
rid of the bubbles. I'm just going to take
my tray and give it a soft tap on the bench. This will bring the
bubbles to the surface. You can see this pulp. They'll continue to settle so the batter will kind of settle. But you can also
use a pin to help. Hi, there is. Now show you how to
do that as well. This will also flatten
them out so you want to be gentle with how hard you tap. I don't know if you guys can see it's re-signed to
find out on its own, but there are these little
craters on Omeka runs. We're going to take
a really sharp, really skinny Penn and create little circular motions in
that area to fill it up. And that's what's
gonna give omega runs a super-duper Dean
finish on top. If you see any larger bubbles, you can pop it like
this one, e.g. it's going to then twirl to encourage the data
to settle in that area. These were the last
ones that I piped. Now, the beta really
started to soften. These are still
perfectly usable.
4. Module 3- Pre Baking Preparation and Baking Your Macarons: A macrons have all been piped. We have fixed up the
look of the shelves and now it's time to
allow them to rest. This I think, is probably the second most pivotal
section of macaron making. If you get this wrong, it can very easily mess up all
your efforts and they come out either cracking or having no feed or just
being super flat. So definitely allow
these to rest for at least half an hour. I let mine go in the oven with the fan
on and the light on, but no temperature on. I'll leave the door
slightly ajar. And what that does is it allows
the air to circulate over the top of the macaron shells
and it drives them out, which is exactly what we want. So I'll see you guys in about
half an hour to an hour when these are completely dried on the top but
not on the inside. The inside is still mushy. We just won't be outside
shell to be dry to the touch. And alternatively, you
can just leave them out on your benchtop to dry. How macrons have
been resting for a good half hour in an oven with the fan turn on
light and on the doughnut. If you can't have
an oven function with a fan on without
turning on the temperature. I had mine on 50 because
I wanted to test it out. And 50 degrees Celsius actually doesn't affect your macarons. It doesn't heat up the pan hot enough to disturb the
underneath layer. So if you have a 50 degree
of it and a fan on, totally fine to
dry your macarons. Otherwise at room temperature for about now and error now, I am going to touch
the sides and I can see that they are
completely dry to the touch. You can also touch the very top. And while they are
dry to the touch, it does give you just a
little bit of spring. You can you can feel that the
insides of big gooey still. So that's purple. It is gui should be nice and
gui should not be dried. But just the top shell
section to be dried. We're going to pop these into a preheated 140
degrees Celsius oven. And they're going to be cooking
for about 109 to 10 min, will be rotating it halfway through to make sure that
they call it evenly. And then we'll cook them
the rest of the way, another nine to 10 min. A quick hack as well, is that as you're baking them, you can cut them with
aluminum foil and that way they don't
brown in the oven. They retain their color. Nice and true. Macarons are out of the oven. They stayed in bed for
a total of 18 min. And they looking fabulous. There's a little bit of
browning on the edges. You'll always find that the
closer your macarons are to the walls of your oven, The more like Korea to Brown that section because
the wool will retain a little bit more
heat and pressure to be more heating that section. The aluminium
definitely does help. As a comparison, e.g. I'm here was baked with that. Any aluminum was with it. And you can see the huge
coupler difference. It's also worth playing around with the
settings in your oven. Every oven will be different. Unfortunately, in these very
finicky cookies, e.g. I. Had the element on the top and the bottom when
I bake two things. And then for these guys, I had the top and the bottom
only for the first 8 min. That way I started
for the first 9 min. That way the feet would develop nice and quickly and
nice and strong. When I rotated the pen, I turned off the element at the top and kept the element of the button open with
the fan circulating. So I didn't have
the element up top potentially browning
these prematurely. Plus I have the added benefit
of the aluminum foil at the top to reduce the
chances even more so. So play around with
your oven settings, see what works best for you. We're going to leave these here now for a good 20 min just to cool down completely before
we try to disturb them. They are still soft. If you were to try to remove them straight
out of the oven, you'll end up taking
the shell with you. But the foot and the
base will tear off it. So you definitely leave
easy to solidify. And then we'll come
back in 20 min.
5. Module 4- Make White Chocolate Ganache: In this module, we're
gonna be creating white chocolate ganache
as the filling. So what you're going to
need is two ingredients, white chocolate and heavy cream. I'm going to weigh out my
chocolate and I've got 130 g. When creating white chocolate, ganache, Eurasia is usually one, cream to three paths chocolate. So if I had 150 e.g. of white chocolate, I
would use 50 of cream, hundred and 13 of chocolate. I'm going to add in
approximately 43 g of cream. So it doesn't have to be exact. You're better off
going a little bit. Then you are under
sometimes if you go a little bit too, under, doesn't it doesn't melt properly when you try to
mix it and it'll split. But I find that
whenever you create with it a little bit extra
cream, which is fine. It does not do that. You're going to mix that up
to make sure that all of your white chocolate is
completely coded in the cream. And then zap this in the
microwave for about 30 s, and then we'll come back and see what the consistency is like. This is thirty-seconds
in the microwave. I'm going to stir that
through to combine. And that was actually
perfect amount of time. If you stir gently, you won't incorporate as much air into your ganache
and it'll be a lot smoother. But if there are any
chunks of chocolate lift, I just simply do
not want to mount. After you've stood, you can zip it back into the microwave for about five to 10
s and you can see, oh, the chocolate has been
melted and incorporated. I'm going to pop
this into bridge to set shouldn't take more
than about 20:07 minutes, and then it'll be
possible for our marae. Sorry for our macarons. Are ganache is out
of the fridge. I've given it a bit
of a stew through, was only in there
for about 15 min. And this is great
piping consistency. So it creates those
nice stiff peaks, holds its shape pretty
well and it does not come off the table spoon easily. So ganache is ready. Now we can fill out macarons.
6. Module 5- Filling your macarons: Macrons and now super nice
and cool to the touch. These guys here, I already kinda had a
bit of a play with. We're going to take these
off. And basically what I recommend doing is turning
these guys upside down. And then you can peel the
paper bag nice and tall. You are less likely to get that ron separating
from its shell. A nice chewy cookies. If they do start hearing
like this one here is e.g. you can pop them into the fridge and they'll
harden in the fridge. And then you can
repeat this step. Nice chewy texture that we
get from when we create a macaron that is a bait to
this sort of consistency. The one thing I don't
like about putting them in the freezer though, is that there is still
moraine in here, so they are the moisture from the fridge is going to stick to the sugar
that's in the moraine. So it's like a last
resort sort of thing. They can come off on their own. That would be the best. You go one way and then the other ways
that it isn't great. And there's another way to
release it for the filling. What I like to do is use
another number ten piping tip. So I'll cut it about
a centimeter up at the end of a plastic
reusable piping bag. And I'm going to feed through
the number ten piping tip. Just like before
we're going to take that piping bag and wrap it. And then just kind of read through our
white chocolate ganache. Going to wrap it up, give it a bit of a
squeeze as you twist to shift all of the
garage to the bottom. And then before we
actually pipe anything, I want to make sure that we have cookies that are the
same size as each other. So this is going to
be a pretty one and that's perfectly sized together. Proportionate, then can basically
just match them all up. And that way, you know, which ones can go with. What? If the two sticky as
you kiss them together, they could end up staying stuck. Under arrest them. I would recommend, oops,
I'm super Goodman. Resting them upside
down with each of them. This is baking paper as well. So just make sure that we have that extra little bit of
resistance from the stickiness. Not going to take my piping bag. And I'm actually going to draw, rather than leaving one
big dope in the center, I'm going to pipe
straight on and then just draw a circle around
that.in the middle, it's about a few millimeters
away from the very edge. And then we're going to take our second macaron cookie
and kiss the two together. I'm going to do the same
for the rest of them. The reason why I don't
like to just add one big dollop like this and
then press them together, is that you could actually break the cookies so that pressure could cause
them to collapse. So I would rather
draw a nice big in the middle and know that the cookies will
remain completely intact. So you didn't have to
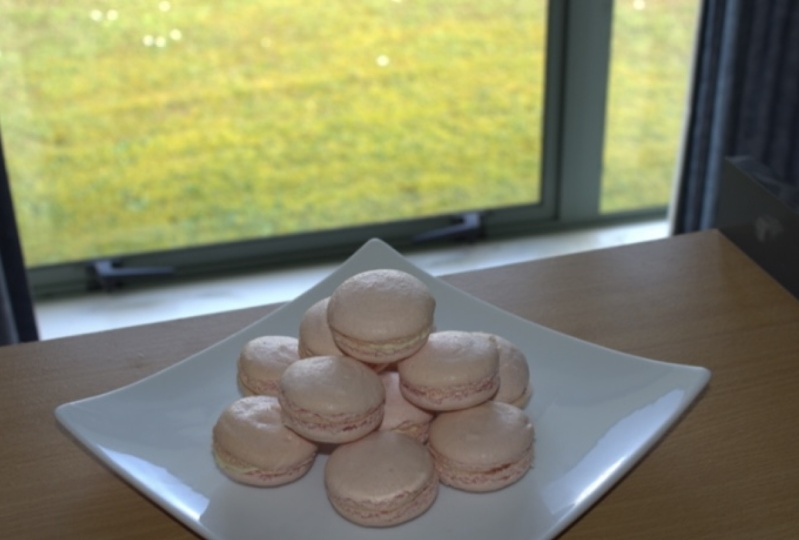
add a lot of pressure to close them to get them. Congratulations, you have just completed your first
batch of a macro runs. I hope they came out well, do send us some photos
that we can give you some feedback if you'd like. And that is halfway
through the course. I definitely invite you to try the nut free version of this. It is the exact same process, but you using sunflower
seeds instead of almond meal will see you
in that next module.
7. Module 6- Making Nut Free Macarons: In this module, we're
gonna be creating macarons without
using almond meal. Instead. We're going to be
using sunflower seeds. These have a very similar kind of chemical profile to Alan's. They have that protein factor, they got those fats. And we're going to grind
these up now into a mu else. Unless of course,
you can find at your local grocery store
ground sunflower seeds. But I think it's a long shot. So I'm going to
take out grinder. I've also got a bowl
here with a scale. We're going to be measuring out our milled sunflower
seeds and I'll have the recipe listed
with the class resources. I've also got a
sifter ads are ready. I'm going to add in
about two also handfuls worth of sunflower
seeds at a time. We don't want to overcrowd or it's not going to
blend them through. Probably gonna get
some large pieces and some skinny pieces, areas that don't want to
go down to the blade. So you want to post. I will do this for
about 30 s or so. From there you want to
just kinda keep it down to pulsate just completely
without stopping. And then when it's
nice and fine, pass it through the sieve. Get right down to those
pieces are at the bottom. If there are any
larger pieces that don't want to move through
your little sieve, place it back into your grinder, and grind them down. And then just like in
the previous recipe, we're going to sift the
two into another bowl. My icing sugar. You can also use ice. It makes jets a
little bit finer. Less nervous about this one. I can taste the little
particles, you know, but I think she got
when I took this time, there won't be any
elements mixed in. And then in goes your
sunflower seeds, which honestly looks
identical to almond meal. It's kinda nuts. Feel so nice under your skin, so fine. It's beautiful. Whole been stiff to together. We're going to take a whisk
to it and just amalgamate all of little particles
of sunflower seeds. And I think she got until
it's clearly well combined. Something like that. Now we can move on to our x, just like we had before. We're gonna go in with
a pinch of salt to stabilize and then let
it run high-speed Hill. She's nice and Fermi, there's that nice foamy stage. We are going to keep
that on high-speed. Want to show you what that
looks like and gently add in our IC across the
sugar, refined sugar. Little bit at a time that I go for another
minute and fill it. My stiff. That's much better. Now holds its peak really well. I'm going to add
in our flavoring. And again, you can
go something clear and alcohol-based, like it. And I let a sense. Or you can go up paste
like I have here, and then add in
our color as well. Now choose and purple this time, I wanted to be nice and dark. So I'm going to add about
three to four drugs, being that it is gel based, it's not going to mess with the consistency around the ring. If it was liquid. Different stories that do
not use liquid, really thin. We are ready to add in,
our dry ingredients, have added in half
of our mixture. We're going to gently
fold that OLS through. Once that is incorporated, can go ahead and add in our
second half of the mixture. And we're wrapping the spatula around the outsides of the bowl, pulling up, twisting the spatula and running it through the
center of the mixture. We have folding it all through. At some point you do want
to take off whatever is on the mixer because
that tends to be really, really thick as
everything sticks to it. Sorry, the spatula mixer. I'm continuous process making sure to scraper right at the
button bringing that up. Because that tends to be with the dry ingredients,
tend to pull. And here we've
reached consistency. So if I lifted up, it falls off the spatula and
these long beautiful ribbon. As before, we're going
to feed that into a piping bag fitted with
a number ten piping tip. And she comes down in
these beautiful ribbon. We're not going to
overfill the bags again, the warmth from my hands in
the squeezing and decide deflates the egg
whites even more so. By doing that, you're
going to end up with a really flat macarons. I just spread out of
control on demand. If we'd see you have any odors, bubbles just like before. We're going to use a
pin to even them out. Reaching the end of Alabama. He's last one's always going
to be a little flatter. So probably don't pipe
as close to the edge, keep it a little
bit further away because they will spread mole. Then we can just
take a little pin. Cuban motion in those
areas to fill them in. This step is very therapeutic. I love it into the oven to dry. And I will meet you guys
back in about half an hour. Say I'm going to place a
macron trays in the middle. In terms of oven setting, I've got it so that
the bottom element is the only element
that's been turned on. My oven is ethically
degrees Celsius, so it's not enough to
heat up the pans in such a way that it would bake
the bottom of my cookies. These will not heat up too much. It all got the fan on, the light on and the oven DO
will stay completely open. I'm going to dry them
out from the top. It's been half an hour. And you can see that your macaron shells are nice and dry on the
outside if you give them a bit of a touch on the edge and you'll notice that it's nice and
dry to the touch, but also on the
top of the shell. So preheat your
oven to 140 degrees Celsius and we'll bake
them uncovered for 9 min. After that nine minute mark, take them out of the oven, cover them with aluminum
foil, completely, rotate them, and then back into the oven for an additional
nine to 10 min. After which they should look
a little something like this. Just like before. We can fill them in with the
white chocolate ganache. You can mix in some
very cream as well. Totally up to you. Something like that. These can go into an
airtight container for about four to five
days if you'd like, you can freeze them as
well for up to a month.
8. Class Complete- Congratulations!: You made it this far. It means that you have
completed the course and you have two different macro and
recipes under your belt. Congratulations. I would love to see your photos if
you did recreate these. And if you want feedback, I am more than happy to
supply feedback as well. Thank you guys so much
for taking this course. You're one step
closer to becoming a macaron kind of saw
in urine kitchen. Practice does make perfect. Again, it depends on the
type of oven you have, the elements that you've
switched on and off. So I hope the tips I gave in this course helps to really hone down on this type of settings that you
need in your kitchen. Take care, and we'll see you
again in our next course.
 Rossana Aloi