Transcripts
1. Introduction: Do you love tiny things? I love tiny things. There's something very
appealing about them. Let's make tiny books together. Hi, I'm Shelly Scale. I'm an artist,
illustrator, book lover, order of tiny things, and I'm also a top teacher
here on Skillshare. You might have seen my
miniature watercolor paintings. I go through periods
where I just want to work small sure I can do
that on a larger page, but I find it much more pleasing to work in
a We sketchbook. This class is going
to cover how to make a delightful,
fun sized book, including how to bind
your paper together, depending on what
materials you've got. Options for creating unique,
personalized covers. How to include charming
accessories like bookmarks, enclosures, and belly bands. You don't need anything fancy. I started off with one piece of paper and a needle
in the thread. You're going to
end up with one or maybe several teeny and unique books that are a work
of art in and of themselves, and that's just the start. Perhaps you'll paint in them
or create tiny scrapbooks, use them as props or
give them as gifts. The possibilities are endless. If you love little things,
this is the class for you. If you're feeling burnt out, working at this small scale can gently ease you back
into your creativity. If you've been curious
about book binding, but haven't yet taken the leap, this class is a low
stress entry point. Are you ready? Okay.
Let's do this.
2. Class Project: So maybe making a book
sounds intimidating, but a point size
one, not so much. That's exactly what we're
going to do in this class. I'm going to show you
several different ways of putting miniature
books together, including the extras that really make them shine like
covers and enclosures. Then you'll pick one of
these and make it yourself. If you're new to making books, I recommend you watch the
class all the way through, then go back and review the
lessons you want to try. That way, you'll
have a feel for what the possibilities are and
what you're drawn to. I made my first tiny
book, this book, The day I came to the very
last sheet of paper in a fancy watercolor pad that had once belonged
to my grandmother. I didn't want to use that bit of paper because then the
pad would be all gone. To eke out, I decided to turn it into a
little sketchbook, creating more pages to use. I had no idea what I was doing, but I could maybe sew the
pages together and it worked. I hadn't figured out
covers or bookmarks or things to keep the book closed yet. That all came with time. Okay. Throughout this class, I'll be showing you my
way of doing things. If you've got questions
or if there's any book binders
out there that want to offer ideas or suggestions, you can pop all of that into
the class discussion area. Okay. Along the way, I'll share the tips I've picked up to help simplify the process. You don't need to be an
artist and you don't need anything complicated
to get started. I'll guide you step by
step through the process. There's a full list of required
and optional materials available in the
resources section, but you'll need paper. This can be any kind you like. I've mostly used scraps
of watercolor paper, but you can use any kind of
paper you like in your book. You'll need something
to cut the paper with, scissors, a craft
knife, a paper cutter. Although carefully
ripping the paper is a possibility to in most cases. For most of the
options, I show you, you'll need something to
hold the pages together, either PVA glue,
thread or twine. I've used twine
and normal thread. Embroidery thread also works, and if you want to
get really fancy, you can use waxed thread, which is what book binders
traditionally used. Everything else is optional, ribbon or twin for
bookmarks and enclosure, nice paper for the covers. I've used plain card, paper with abstract
paintings I've made, wrapping paper, pretty paper that I've bought from
a bookbinder shop. I've used all of those things to make covers, and
they all look great. Along the way, I
encourage you to experiment with these different
options and learn what you enjoy working
most with and create adorable little books
that are uniquely yours. I'd love it if you
felt willing to share your mini masterpieces by adding a project to the
projects gallery. If you'd like to share what
you've made on Instagram, please feel free to tag me so I can see what you've
made there too. I'm at Shelly Scale. Although fill disclosure, I'm not particularly
active on there, if you want to keep up
with what I'm doing, you might want to sign up to my newsletter and you'll
see my current projects. My aim for this class is to
give you the tools to create any kind of Biju book that
you like confidently, to get comfortable creating these magical mini treasures and take as much
delight in it as I do. So let's get into this. Okay.
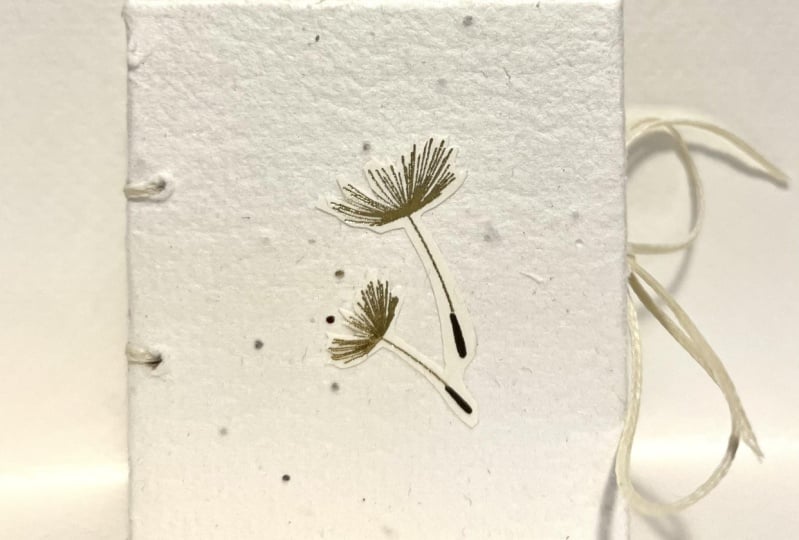
3. A Word About Covers: Okay. Hello. So before we get started making
our mini books, I wanted to talk about covers. They say don't judge
a book by its cover, but I think we all do. Covers are absolutely
not necessary. My first sketchbook
had no covers. I just made it and
then went for it. But that said, covers
are super fun. It's a way to add
your personality, your interests, a bit of
visual appeal to your book. I encourage you to give it a try even though
you don't need them. You can do all kinds
of things for covers. You can use just plain card. This was some scrap
card I got with some packaging that I cut and
used for the covers here. You can use wrapping paper. This was Christmas
wrapping paper that I repurposed for a cover. You can paint and take what you paint and
turn that into a cover. These pieces here where just me playing around
with colors that I liked. I let them dry, I flatten them as best I could and then
use those for my covers. You can also buy particular
paper that's used for covers. A lot of these here
like this and this one. These are special art papers, and I got them from an
online book binding shop. I'll pop the link in the
class description below. These ones are cotton rag papers and they used to be available
in art stores where I live, although I have to
get them online now, maybe you'll have more
luck where you live. So You can use pretty much
anything to make your covers, and I encourage you to do that. You can also decorate them. I've used little stamps to write words on here that
I find inspirational. If you're into washi tape, you can decorate it with
that or with stickers. Just go nuts, have fun with it. They're a nice addition to the fun part of
making a book. Okay. So with that all said, let's make a start
actually making the books. Come join me for
our first lesson, which is looking at
accordion fold books. Okay.
4. Make an Accordion Fold Book: Hello again. Right? I bet
you're eager to get started. In these first
practical lessons, we're going to look at
making a folding book. It's called an
accordion book because what you end up with
is accordion like see the main thing you need
for this lesson is paper. Unlike the methods that
follow with this one, you can't do this easily with scraps unless they
are big scraps. I'm looking at you
packing paper. You'll also want something
to cut the paper with. Depending on how
thick your paper is, you might want something
to help crease the paper. A bone folder, if you have one. A plastic ruler, or just
a bit of elbow grease. This method relies on folding and cutting the
paper in a specific way. The more precise your
folds and cuts are, the neater the outcome
you're going to get. The shape and orientation
of your original piece of paper will determine the shape of the
finished book pages. Plan accordingly for the
finished piece that you'd like. I'm going to show you
two examples here. One with scrap paper I
got as packing materials, and one with watercolor
paper. Let's crack on. The first thing we're going
to do is get our piece of paper into the shape that we want the final book to be. In this case, I'm making
a rectangular shape, because I want a
rectangular book. When I'm finished in
the second example, I'll show you doing this with a square shape and that results in a square shaped book top tip. I use the flat end of my metal ruler to help me
make the right angles here, because it's at a right angle to the long end of the ruler. That helps me tidy up the
rectangle that I'm making. Once you've got your paper
into the correct shape, you're going to
start making folds. You want these to be as precise
as possible because that will determine how neat
your end result is. Take your paper,
fold it in half, it doesn't matter in which
direction you'll do it in. Both make a sharp crease. I suggest you start
in the middle and push out to the edges
like I'm doing. Then open it out
and fold each of the edges into the center
line that you've just made. Then what you're going
to do is you're going to rotate your paper and
repeat the same process, but in the opposite direction. Then you fold it in half, make a nice sharp crease, and then you can fold
each section in half, taking the time to
make sure each of those creases is nice and sharp. What you should have now
is your piece of paper, whether you decided to go for a rectangular or a
square shape within it, it should be divided up into 16 little mini pages
via the folds. That's what you're
going to end up with. Once you're happy with the
folds that you've got, unfold the whole thing, and you're going
to make three cuts in alternating directions. I'm going to create a
portrait style book. The cuts I make are with the orientation of the paper
in that portrait mode. If you want it in landscape, rotate at 90 degrees and
follow the same process. They alternate these cuts, which side you come in
from and you've got three of them and they go three
of these many pages deep. Take care with your cuts because these are
going to divide your pages and make sure
that they alternate. Once you've got your cuts, this is where the magic happens. Rotate your paper so that in
the upper right hand corner, you have the start of a cut. Then from there, you're going to fold in alternate directions. Your first fold, the
paper folds up and over. The second fold, it's going
to fold under and behind. And you're going to
alternate that over and under all the way
through this piece of paper. I go over and under. Then when it comes to folding
down the way, it's the same thing. I'm at a point where I would go behind and under.
I just do that. But instead of going across
the way I go down the way, then I work my way
back along using the same pattern
over under, under. Now I've got little sketchbook
for this second example, I'm using thicker paper. This is thick watercolor paper, which makes it slightly
harder to fold. I want it to be square. I'm going for ten x 10 " because my paper is
already 10 " wide. This just means I need
to only make one cut. As you can see in both examples, I size the book to
whatever paper I've got. Some books will be larger,
some will be smaller. It just depends on
what I have to hand. Now I've created a square. I'm going to fold it in half
because this is thicker, it's trickier to fold, but I just have to push harder. I start in the middle and
then go out to the edges. I'm using this roller
that I got from printmaking to help make
the creases really tight. But of course you don't
have to use this. You can use all kinds of other
tools if you like to help, Like a roller or a
clean rolling pin. If you've got
really thick paper, I fold from the outside
into that central crease. Starting in the center, I push out towards the
edges and then use my little roller thing to make
the creases really sharp. However you fold your paper, make sure that the creases are as sharp as
you can get them. Then rotate your
paper 90 degrees and repeat this process. You first fold it in half, get a nice sharp crease, and then fold from the outside
into that center line. You want to get this as
exact as possible so that your finished book will fold
nicely and fold up neatly. If your folds are off, it will look a little
bit wonky once you accordion it up.
That's happened to me. If it happens to
you, don't worry. It's just a learning
thing, right? Once we've got our paper
folded into 16 little squares, we're going to make our cuts. We make three cuts starting
on alternate sides, and we go three little
squares in on each side. Try and make your cuts
as precise as possible, because again, this will affect how neat your
finished product is. If you use a craft
knife like me, make sure to keep your
fingers well away from the edge of that ruler so you don't end up with
any nasty cuts. Once you've made your cuts, now you can start folding again. You want to have the upper right corner is where you start. And I start over,
and then under, and then over, and so
on, all the way down. It doesn't matter if you're
going sideways or vertical. It's the same process. Then when you're
done, you end up with a little accordion
fold sketchbook. As you can see, mine
doesn't want to stay put. This is why we need an enclosure
of some description to wrap around like this thing
I took off of a lint bunny. You can also use hair bands or elastics or just a piece
of ribbon or twine. You can also make a thing to
keep it shut out of paper. These are called belly bands. I'll teach you how to make
one in the next lesson. Now you've got a basic
mini accordion style book. Come join me in the next
lesson to look at adding some accessories and
flavor to your books.
5. Accessorise your Accordion Fold Book: In this lesson, we're going
to look at customizing your accordion fold book with covers and personalized
enclosures. This is where you can
really make these books your own. Let's dig in. For this lesson, you'll want
whatever you want to use for a cover and something to tie around the book
to keep it shut, ribbon or twine or good
options as is paper. The covers are going
to stick to the first and the last pages. Choose something fairly solid. I'm using this piece of watercolor paper that I've
previously decorated. I'm going to draw around that first page to
create a template and then cut that out and use that
to create the other cover. It becomes my template
for the second cover. That way, they'll both
be about the same size. I often make them slightly
larger than the page. Although that's not
strictly necessary. I just like the finished
product that gives. Maybe you want to experiment
and see which you prefer. And then going to get
some scrap paper down to protect my work
surface from glue and then check your
folding direction so that you glue the
correct side of your paper. More than once I've
glued the wrong side of my paper and it's
really annoying. Just take a minute to make
sure that you're gluing the outside of your sketchbook. Whether that's the front or
the back, it doesn't matter. It's always the outside
edge that you're gluing. Glue your edge. I'm using a glue stick. You can use PVA or any other kind of
glue that you prefer. Glue it firmly and
then decide the way up you want your cover
and smooth it down. Then repeat on the back, making sure that you do
the outside of the paper. Get your cover, arrange the way you want
it, smooh it down. And there you've got a book. Okay. Because of the nature of these books, the
accordion style. It's quite nice to put something around it to keep
it all together. I call these a wrap around. You can use ribbon or
twin or fabric scraps. Because of the upcycled nature
of this particular book, I thought some rustic looking
twin would be a nice way to finish it off as wrap around to keep the book
shut when it's not in use. It also makes it look like a cute little gift
and I like that. I think it's appealing.
There we go. One cute, many
book all finished. In this example,
we're going to make a cover that's slightly
larger than the book itself. Once I've decided what
I'm going to use, I'm going to trace
around the paper, leaving a little gap so that
the cover is oversized. How big a gap you want to leave
is really up to yourself. You can experiment with different options to
see what you prefer. I'm going for a gap that's
maybe at most a centimeter. I'll cut one out
and then use that as a template to create the second one so that
they're the same size. This card is pretty stiff, so it's a little bit
tricky to cut through. This is what comes of using whatever I've got lying around. I don't know if you're
anything like me, but I tend to keep scraps of different things
with that thought of, I'm sure this will come
in handy at some point. It has, that worked. Now I've got two squares of black I need to get this lined up with the outside
cover so that the gap is pretty much the
same all the way around. I line up to a point where I'm happy with it and
I mark it with my pencil. I'm going to get a pair of scissors and round
off those edges, so they're not quite so sharp. This is a totally optional step. You can do it if
you like. Maybe if you've got card that's
as thick as mine, you might want to consider this because those
corners can be quite sharp and it's annoying if
you jab your fingers on them. This is also a good time to
add any extra embellishments. I didn't think about
doing this now. I do it later, but really it's much easier if you do
it before you stick it on. As before, you want to put some scrap paper
down to protect your work surface and
make sure that you glue the outside of the book. I'm using my trusty
glue stick here, gluing the outside of the
book pretty thoroughly, and then lining it up with the
marks that I made earlier, checking where I like them
and then squishing it. Also wipe off, there's
a bit of excess glue, I think I put quite
a lot on there. I'll wipe off the excess so it doesn't stick to things
I don't want it to. Next, I'm going to line up my covers because
they're oversized. This is a helpful step
to make sure that the covers will actually line up once you put it all together. I line them up and
then make a mark on the other cover except
I did on the wrong cover. Hopefully, you will line up and draw on the cover that
isn't yet glued and that'll tell you
where to line up your book so that the covers
are evenly paired up. Check that it looks okay and
then glue the outside of your accordion book to the cover and wipe
off any excess glue. Fold it back up. Then we've got our little book. After I made the cover, I decided I'd like to decorate it with an inspirational word. I've got these super cute
little letter stamps and metallic ink pad. I've used that to
decorate the cover. If you want to
decorate your covers, you can do whatever you like. You can use stamps, you can use stickers, you
can paint on it. I would recommend
doing it before you attach it to the book because
it's a little bit easier, but as you can see, you don't have to, I managed to do it while
it was still attached. This time around, I'm going
to make a belly band. That's the name we give
to a bit of paper that snugly encloses your book
and keeps it together. To make that, I'm going
to cut a strip of paper, which is at least twice the
width with extra for overlap, so you can glue it together. Maybe 2.5 times or three
times the width of your book because you'll
need a little bit extra to cover the thickness
of your book. Wrap it around, starting with the center of the book in
the middle of the band, and that mark will tell
you what area to glue, to get your scrap paper out and glue that section
of the belly band. Make sure it's liberally
coated with glue. And then you're going
to pinch it into place and hold it
while the glue sets. You can also use pegs or clips to keep it in place
while the glue sets. If you've used a glue stick, that should be quite fast. You may also want to
decorate your belly band. Generally, that's easier
to do before you glue it, but if like me, you forget, you can do it afterwards. Once your belly band is
decorated and the glues stuck, you can slip that
onto your book and it'll hold it nice
and snugly for you. And that's your accordion
style sketchbook. Made. Well done. Now you've got a
completely personalized, tiny accordion style book. Don't forget to snap a picture and add it to your project. This style of mini
book doesn't lend itself to a bookmark which is included as
part of the book. We'll look at those with our
other styles of tiny books. Come and join me for
the first of those the glued or perfect bound book.
6. Produce a Perfect Bound Book: Hello. In this class, we're going to make a book
bound together by glue. This is a perfect bound book. If you want to have a cover bookmark or
wraparound enclosure, it's worth planning that in from the beginning as it's much easier to add them during
the process than later. You can use scraps
for paper for this. You'll just need to cut
them all to the same size, and that's what I'll be doing. For this lesson,
we'll need paper, something to cut the paper with, PVA or craft glue, and something heavy like a few
big books away or similar. I'm using a little sculpture. If you want a bookmark, you'll need ribbon,
and that's about it. So let's get started. The first thing you're going
to do is decide how big your pages are going to be and what shape
they're going to be, whether you want them
square or rectangular. Once you've decided that, cut your first page. Top tip here is, take your time doing this. Make sure that you get it exactly the size and
shape that you want because you're going to
use this first page as a template for all the
other pages in your book. Once you're happy with
the size and the shape, use that as a template to mark on all your
other bits of paper, if you're using scraps or if you're using one
big piece of paper, you can mark it all
on that same piece. Then take your time to cut as many bits of
paper as you like. There's not really a
practical limit I would give on how many pages to
include with this method. You can bind a lot using this or a little it's
entirely up to you. I'm going to fast forward through this because
I don't think you need to see me cutting out 16 or
20 different pieces of paper. So cut as many
pages as you like, try and get them as
accurate as possible. Then for your covers, you're going to cut two
pages of that same size, but do it out of
some cheap paper, some scrap paper that you
don't really care about. You're going to use those as the skeleton for your covers. It really doesn't
matter what this paper looks like because you're not
going to see it in the end. Those two bits of cheap paper, you're going to
put one on the top and one on the bottom
of your stack of paper. Once you've got it all cut, arrange it neatly, try and
get it as tidy as you can. Then we're going to move
on to the next step, which is glue in your book. I'm using a mixture of PVA
glue and acrylic paint. I've just done this so that
it shows up better on camera. You absolutely don't
need to do this. I recommend you just use PVA or craft glue
straight out of the tub. The first thing you're
going to do is find somewhere where you
can do the gluing. I've sandwiched my paper hanging over the edge of my table
with a heavy object. It's a sculpture on top of it. You can do the same
thing at the edge of your desk with some books
or between two books. What I've done is I dangle it off the edge a little bit so that any stray
bits of glue don't get on the things that are
sandwiching it together. Once you've got everything in place, take something sharp. I'm using my craft knife here and rough up the edge or
going to glue a little bit. This just helps the glue sink into the paper a bit better. It's not strictly necessary. I didn't know about doing
this the first time I made one of these books
and it worked okay. But if you do remember, rough up your pages just a little bit on that edge
that you're going to glue. And once you've done that,
just take your glue and apply it to that edge as thickly as you can get away
with without it dripping. Try not to let the glue go too far into any of the pieces of paper because
when you open it up, that'll be a little bit that you can't use because
it's got glue on it. My bottom scrap bit of paper doesn't
really want to stick, so I'm squdging it up and adding extra glue to try
and keep it in place. And then you have to be patient, leave it to dry thoroughly. If you're going to
add a bookmark, I suggest you add it
on the second gluing. So cut a piece of
ribbon to size. It needs to be longer than the book so that it dangles out at the end and can wrap around
and glue onto the spine. I always stick down the end
of the ribbon that I've cut because that's the rough end that's more likely
to come undone. Once you've got your
piece of ribbon, line up where you want it
to be along the spine. If the glue is still a
little bit tacky that actually can help hold
it in place, well, you get your glue and do another layer on top of the
ribbon and down the spine. So you want it to enclose
the ribbon completely, as well as going over any
exposed bits of paper. If your ribbon is
uncooperative like mine, you can hold it in place
while you apply the glue. Usually, once you've
got a bit of glue down, that'll help stick
it into place. As before, add a thickesh
layer of glue and then rest the edge of your ribbon that isn't
being glued somewhere, so it's not dangling down. That means it's
less likely to fall off while it's still
being glued into place. Then make sure you've got
a nice thick layer of glue that your ribbon is being supported at the other end and then leave it
to dry completely. And that's done with the gluing. It only really needs two coats. If you're worried, maybe you think you've not done the glue thick
enough or something, you can do a third coat. Don't go mad though. You don't need loads and loads
of coats because then the book becomes really
stiff and hard to open. But that's it, you have glued
together your little book. Okay. All right. Now we've got our
perfect bound book. Join me in the next
lesson where we'll add amazing covers and
wraparound enclosures. Don't forget to take progress picks along the way
so you can see how your book grows and turns into your little masterpiece.
We'll see you there.
7. Perfect Bound Covers and Wrap-Arounds: All right. In this lesson, we're going to look
at customizing your perfect bound book
with covers and enclosures. For the wraparound enclosure, you'll need ribbon
or twine or wool, and for your cover, you'll
need your chosen cover paper, as well as paper to
use as lining paper. This can be the same
as your cover paper or you could use some
plain colored paper. You'll also need I
use a glue stick, but other glues
work fine as well, and you'll need
some scrap paper to protect your work
surface while you glue. Let's do this. Choose
whatever decorative paper you'd like to use today, and I do recommend
paper rather than card because it'll be easier for making
this kind of cover. I'm using this decorative
paper that I got online. What to do is place your
book on it and then measure about 1 centimeter
gap around each side. You'll need this gap to fold the paper in to make
sure it's secure. You then roll the book over so that takes into account
the thickness of the spine and continue with
that 1 centimeter gap and then do that same gap along the short end so that your cover paper covers the whole entire
outside of the book, both the front and back
pages and the spine. Once you've got your marks down, cut it out from your
paper and make any little tidying up
cuts that you need to do to get it looking
how you want it to look. Get some scrap paper out to protect your work
surface from the glue, and then you're going to
glue the cover pages, not the nice paper that you're
using to cover your book. Start with one side,
coat it well in glue, and then press it down firmly
onto your cover paper. Check your orientation. If your paper has orientation to make sure you've got
it the right way up, I had it backwards. Then secure the paper and
add glue on the other cover. You're not going
to glue the spine, that'll make it hard for
the book to open and shut, so you're going to leave
the spine unglued. You're just gluing the covers. Then roll over and make a little sandwich with
your book and press down carefully on
all the edges to make sure that the paper
is securely attached. Then once your glues dry, you're going to cut the inside edges so that
you can fold over neatly. You start maybe 2
millimeters away from the corner so that none of that scrap paper will be
exposed when you fold it in. And I'm cutting not
quite at 45 degrees to make these little
corner pieces here. If you cut out
exactly 45 degrees, then bits of your kind of scrap paper may show
through when you fold over. Do the same on both
external corners. You cut in leaving maybe
a two millimeter gap, and then for the spine, you're going to cut in and create a little
corner here too. Make sure you take into
account the thickness of the spine when you're
cutting those wedges out. Because once you've done that, you're then going to
really carefully cut those little those little flaps that are there at the spine. You're just going to
cut them straight off flush with the book. Be careful while
you're doing this so that you get that cut in
the right place and make sure that you don't
accidentally cut your ribbon that you spent so long
carefully attaching. If you want to use wrap around
to keep your book closed, this is the time to add it in. First, measure out the length of twin or fabric that
you're going to use. It should be at least
four book widths long, although six or eight
would be even better. Tie a knot in the end so
that it doesn't unravel. Then what you're going to do is you're going to cut a hole in that little flap at the
very back of your book. You can poke it
through with a needle or I'm going to use
a craft knife here. I'm putting a bit of card
down to protect my surface, and I choose the middle. And I poke that through to make a hole that I
can then thread that twin through and make sure the needle that I'm going
to use fits through that hole and then thread the needle to
get the twin onto it. Once I've done that, I poke
the twin through coming from the outside to the inside of the books so that my
knot is on the outside. As you see, when I fold over, That's going to
hold this enclosure in place as I glue things down. That'll glue this
in place as well. Now it's time to
glue the cover down. I'm going to start
with the tops and bottoms just so that the paper doesn't get when
I'm gluing it down. It's good to take each opposite side and
make sure they're glued. Sort of pairs. Take your time with the folding, make sure that
everything's nice and sharp and then do the
same on the other side, so the tops and the bottoms. Then you can go back and do that last little flap
on each of the covers. Careful, you don't get
glue on your enclosure, twin or ribbon,
then glue it down, which helps hold that
enclosure in place. At this point, you can say
that you're finished and you've got a very cute
little book with a cover, bookmark and an enclosure. But I like to add
internal cover panels. I think it just finishes
off really nice and neatly. You can use any kind
of paper for this. You can use your cover paper. I like to use black. Um, so I've just got some
black craft paper here. I'm cutting it to just
slightly smaller than the page size so that we see a little bit of the cover
peeking around the edge. And so that this
internal cover panel isn't visible when
the book is shut. There's no little bits going
to peek over the outside. Once you've cut your
first cover panel, you can use that as a template
to cut your second one. Cover the cover panel
with glue, not your book, and then line up carefully
to where you want it to be, smooth it down and wipe
away any excess glue, and then repeat for
the other side. This also has the
benefit of covering up any exposed bits of your twin or ribbon from the back
cover panel as well, which makes it look
extra neat and polished. I'm going to rub off some bits of glue that I've
managed to get onto that cover panel
so that it doesn't stick to that back page
when I keep it closed. If you're worried about that, put some scrap paper in between your front and back covers and the rest of the book
while it's drying. Now you've got a completely personalized tiny
perfect bound book. Don't forget to snap a picture and add
it to your project. Next, we'll be
looking at books that are held together by stitching. You don't need to be any good at sewing to do this,
though, so don't worry. Come join me for
the first of these, the simple stitch
bound book. Okay.
8. Create a Simple Stitched Book: Hello. In this class, we're going to make
a book held together by some super simple stitching. With this approach, you can add bookmarks or an enclosure later, but it's easiest to include
the cover from the beginning. You can use scraps
of paper for this. They'll just need to be
at least twice the length you want your
finished pages to be. You'll also find that depending on how thick your paper is, there's a practical limit to how many bits of paper you can find together
with this method. What we'll need for
this lesson is paper, something to cut the paper with and the needle and thread. I use twine in this example, but I have also used normal sewing thread just
doubled up in the past. My very first one here was made with simple
white sewing thread, although you can maybe see where the color has
stained the thread. You might want to
choose a darker color if that would bother you. Embroidery thread
will also work. If you want to get really fancy, you can use waxed thread, which is what book binders
traditionally used. You'll also need something
heavy like a few big books, a weight or something similar. Because my paper is super thick, I use roller from printmaking to help fold the paper. You
don't need to do this. You can use a plastic
ruler or bone folder. They come in plastic in bamboo too or just your
fingers and hands. If you want to cover, you'll need cover paper that's cut to the same size as
the other pages in your book for durability, I'd recommend a
reasonable thickness of paper or card for your cover. That says. Let's get started. The first thing
you're going to do is decide how big you
want your pages to be. I'm using scrap, so that kind decides it for
me to a certain extent. But if you have a whole paper, then you're a little bit more free with what you
can decide here. Instead of cutting my pages, I'm tearing them here, that'll give them a
nice rough edge effect that I think can be quite cute. I'm using that roller that I've got from printmaking to help
me make the edges sharp. You can use folding tools, you can use rulers, you can use rolling
pins, wine bottles, whatever you've got to hand, if you've got thick
paper that needs a bit more force to be folded. Once you've got all your papers, the size you'd like them
to be stack them all up one on top of each other to make the pile that
will form your book. When you've got as many pages as you want to make your book, you're going to
fold them over in half all at the same time. You've got one big pile
that's folded in half. Because my paper is so thick, it's really hard to get
this folded in half, and I decide to take a few pages out to make
it fold more nicely. You may have the same issue if you use thick paper like me. This is looking a lot better. It's a lot sharper,
tighter fold. That's going to
work for my book. I'm going to set it
under something heavy to help squish those pages down further and help
them keep their shape. Do this for as long as
your patients will allow. If you're going to make a cover and I suggest you do
because covers are fun. This is the right time to
cut your paper to size for that and you want it to be about the same size
as your cover. You might want to
make it slightly longer so that the
pages don't poke out. But if you don't, that's fine. I forgot to do that. Once
you've got your cover ready, slip it over your
stack of pages, and that's going to
be your little book. If your patient, put them all under a heavy
weight and leave them for a while to get used
to that folded shape. This is particularly if your
pages are thick like mine. If your pages poke out
from your cover like Mind, then you can cut them to size, and that's exactly what I do. Mine are too thick for
scissors to work here, so I use well, I could take it all apart and use scissors, but
I don't want to. I use my craft knife and I just trim them down
one page at a time. Once I'm happy with
the look of my book, I'm going to prepare
it for sewing. What to do to prepare your
book for sewing is you open it back up again
and on your inner seam, Mark a 0.1 third of the
way in on each side. You're going to poke holes
through at that point because that's going to be
the place where the sewing comes in and out. First time I did this,
I used a needle. I think I also tried a
scalpel that works fine. This time around, I found this pokey tool at a craft shop. I think it's called a piercing A. And I'm going to use that. I'm going to put some card down to protect my
cutting surface because stabbing from the
top can leave holes in it and I don't want that. Get your book ready to be
poked and I'm going to poke through and I suggest you do the same poke through all
the pages at the same time. You want to make sure that it goes all the way through
and out the cover. That's the path that your
needle is going to take. Take care to make sure those
holes are lined up with that exact center crease so that your stitching will be
in the place that you want it to be for a
neat finished product. Once you've poked the hole, check that the
needle you're going to use with your thread
fits through the hole. It's worth poking that needle through that hole back
and forth a couple of times just to make sure the thicker the thread you use, the fewer times you'll
have to stitch your book. With this thickness
that I'm using, I'll only need to go in
and out of the pages once. If I was using normal thread, I'd go around several times. Bear that in mind when
you're making your book. Although I'm only
sewing it once, you may need to do it
multiple times depending on the thickness of the
thread that you use. Once you've got your needle threaded with whatever
you're going to use, then poke it through
your pages. Don't worry. If you've got a
bit of difficulty like me and your book
starts to come apart, that's fine. It happens. You can just poke it back
together because the thread is going to hold it together
once it's through. When you're sewing
it, make sure to not your thread and start
from the outside of the book. Start from the outside and poke your thread through
to the inside. Once you've got it through, thread your needle through
the second hole that you've got and then knot it
securely on the other side, or go back around and look
it through a few times if you're using thinner thread
to help it be more secure. While you've done
it enough times, that's you and you can use any excess as a little bookmark. If you want to be fancy, you can do that whole process, but measure out a
much longer bit of thread because you'll use the other end as
your wrap around. You'll thread your needle and tie a knot on the end
as you normally would. But when you pull it
through that first hole, make sure to leave
a very long tail long enough to wrap
around your book several times and then tie a second knot to secure the
thread against the book. Then you thread the needle up
and out the second hole in your book and tie another knot on the outside
to keep that secure. Again, if you're
using thinner thread, you may need to go
around that loop several times before it's
ready to be tied off. Then you can use
the excess thread on the top as your bookmark. Trim any excess, if either your bookmark or your
wrap around is too long. Make sure both are
knotted so they don't fray and you've got
your simple sown book. Okay. Well done. Now you've got a super quick
personalized stitched book. Don't forget to snap a picture and add
it to your project. Next, we'll be looking at a more complex form of stitched book. Unlike the simple sewing method, this can handle pretty
much as many pages as you could possibly
want to bind. The binding method is
a bit more complex, but you still don't
need to be any good at sewing for this either. You just need a bit of patience. Come and join me to learn how to make a coptic bound book.
9. Prepare a Coptic Bound Book: Hello. In this class, we're going to make a
book bound together with a form of stitching
called Coptic. This is a form of binding where the stitches are on display. They're the hero
of the piece and definitely part of the
beauty of the finished book. You can create patterns
in the stitching if you like or leave it simple.
Both are beautiful. This technique is also unusual because the covers aren't
attached to each other. The front and back
covers are independent. You can use scraps of paper
to make this book as well. They'll just need to be twice
the length that you want your finished pages to be because again,
they're folded over. What we need for
this is paper and something to cut it with
and a needle and thread. In this example,
I'm going to use normal sewing thread that
I've just doubled up, but you can use twin
embroidery thread, or if you want to
get really fancy, you can use that waxed thread that book binders
traditionally used. Thick covers are a typical
part of this book as well, so you'll want something
to use for your cover. I'll show you how
to make them thick even starting with thin paper. As with the perfect bound book, you'll want scrap paper, your cover paper or
card and lining paper, which can be the cover paper
or just plain colored paper. Once you've got your
stuff, let's get started. The first thing
you're going to do is decide how big you
want your pages to be. Make your first page
double that width and use that to make all
your pages the same size. You can cut or tear
them like I'm doing. Once you've got
all of your pages, the right size, you're going to put them into
little bundles of two. In book binding, those bundles are referred
to as signatures. You're going to fold your
signatures together. The two pages, much like what we did with
the simple stitch, where you did all
the pages together. This time we're doing
it just with two pages, and you're going to
fold those two pages together for each
of your signatures. You'll have a little
stack of fold signatures. This is what's going to make
up the paper for your book. Okay. Once you've got your
signatures all folded, if you like, you can leave
them under something heavy, well, you start to
make your covers. For this type of binding, we'll make our covers
up front because we then stitch the covers as
part of the book binding, it has to be done at this stage. For the covers,
we're going to use cover paper at this
time, not covering card. The reason for that is that
we're going to make it in a similar way as we did for
the perfect bound book. That is to say,
we'll have a piece of cheap scrap paper that will be the interior that
will then completely cover over with the cover
paper and the lining paper. Okay cut your paper to size, and then we're going to
cover this with whatever you use for your cover paper. In this case, I'm
using a scrap of decorative paper that I've
had from previous projects. I think it's cotton rag paper. It's lovely if you ever get
to feel that kind of stuff. Whatever paper you're using, mark the size of scrap
paper that you've cut out and then add
at least a centimeter, if not more to wrap around and
glue and hold on securely. Okay. Top tip, I like me, you're using cover
paper that has a geometric or a symmetrical
pattern on it, take the time to line
up and get it right. You'll be much happier with your finished product if
you spend the time now. I'm taking time to
get it right and then once I'm happy with
it, I'll cut it out. Once your paper is cut, get some scrap paper down to
protect your work surface, and then glue that scrap paper, the interior page
that we won't see. Apply the glue to that, and then stick that to
your decorative paper. If you've got a specific
pattern like I do, take care to get it lined
up how you want it. Squish it down to
make sure it sticks. What I do is I tuck it under
the cutting mat I'm using or my scrap paper so it gets extra squished when I
work on the second cover. You might want to try that. Once you've got both
pieces of paper attached, cut the corners on
your decorative page. It's almost 45 degrees. This is just like we did in
the perfect bound books, so it's not quite 45 degrees, and make sure not
to cut right up to the edge of your
interior paper. You need that tiny two
millimeter gap space left to ensure that none of that interior paper is exposed
when you fold it over. Once you've made your cuts, you're going to glue opposite sides and stick
them down at the same time. This just make sure
the paper doesn't get twisted or rotated at all as you can fold each side in that can happen if you go
around them in order. Make sure that you
do opposite sides, glue them and stick
them one after the other before moving on to
the next pair of opposites. Once you've got both of
your cover pages done, you're ready for
your lining paper. This can be plain paper, it can be the same
as your cover paper. It's really up to you. It's just a decorative
panel that hides the gluing and the gaps that you've got from
putting the cover paper on. Cut it slightly smaller than the page and then apply
glue to the lining paper, not to the thing that
you're sticking it to because it's the
smaller piece of paper. If you drew on your lining paper and the
marks are still visible. A quick top tip is to just apply glue to the side
where the marks are, then you won't see it
and you don't have to spend any time
rubbing the marks off and pay particular attention when you're gluing to
corners and edges. Once you've got all of
those things stuck down, make sure you leave
them under something heavy so that as
the glue dries it glues flat and it doesn't
bow it or curve it at all. You've got your covers
ready for binding. The next thing we're
going to do is prepare our book for sewing. You need to sandwich
your book in place. You can do this
between two big books. I've used clamps so that it's easier for you to
see what I'm doing, but it's not the most easy way if you were doing it yourself. You might just want to
stick it between two books. Then what you're going
to do is you're going to mark two lines on the
edge of your book. Both of them are about
a third of the way in from their respective edges. As you're marking your line, I suggest you do it in pencil. Make sure that each of
your bits of paper, each of your
signatures is marked. Once you've marked all your
pages and your covers, put down some thick card to
protect your work surface. Even if you've got
a cutting mat, you don't want to end up
with pokey holes in it. Then what I do is I use whatever I'm going
to make my holes with, whether it's a needle, a scalpel, or in my case, I've got this piercing tool. With my covers, I go
about half a centimeter in from where that mark I made
and I make the hole there. From my signatures, I'm going
to open them up each in turn and poke holes through where those little
marks are dotted on them. Make sure whatever you're using goes all the way
through and that the hole is going to
be big enough for whatever thread you're going to use to bind this together. I'm going to use
normal sewing thread, so my holes don't need
to be that big and I'm only using normal
sewing needle for this. If I was using twin, I would probably use
a thicker needle like a darning needle and make sure it's poked all the
way through and top tip, if you're having trouble
getting your needle through, wiggle it as you're
pushing it through. Another top tip is try and
keep your covers and each of your signatures in
the same orientation and direction as they were
when you drew the lines on. It'll mean that your holes are all aligned so that
when you stitch it, it'll be neat and not a
bit zigzaggy unless you were incredibly precise when you measured your
lines to draw them in. Once you've got holes in all of your signatures and your covers, you are ready to bind your book. Now we've got our book ready. Join me in the next
lesson where we will bind it together and
add an enclosure. Don't forget to take progress
picks along the way.
10. Construct a Coptic Bound Book: All right. Let's get
this book bound. Spoiler alert, this can
be a bit fiddly at first. I recommend pausing as
often as you need to, rewinding and going over any
bits that are confusing. Take your time with it.
You'll get there in the end. Let's crack on.
Thread your needle using whatever thread you want
to use to bind this with. Just make sure that
your needle is an appropriate size for the thread that
you're using and that you've made your holes in your signatures and your cover an appropriate size
for that needle. I'm going to use
normal sewing thread. I've doubled it over and tied a knot in the
end to secure it, and that's what I'm
going to use to bind this particular coptic
stitch book together. I pick up the bottom cover. This is going to be
the back of my book. I take that up from
the stack that I've got and also my last signature. Starting on the inside
of that signature, I poke my needle from the inside through to the
outside of the cover, and then I poke
the needle through the cover so that the thread looks around and comes back in. I pull these tightly together, and then I create a knot
by looping the thread around that stitch
I've just made between the signature and the
cover and I pull it tight. Once you're happy with that, then you take your needle
and you poke it back in that same hole into the first set of
signatures you're using. Thread up and then poke it out of the second hole
in the signature, the one that you
haven't used yet, and you're going to
repeat the same process. The needle goes from the inside of the signature to the outside, and then it looks around the front and goes through
that hole in the cover. You then pull it tight, L the needle through that
stitch that you've just made to create a knot and
you pull it nice and snug. Okay. And that's
you. You've attached your cover to your
first signature. The next set is pretty
straightforward. You pick up your next signature from the bottom of the pile, poke your needle
from the outside of the signature into the
interior of that signature. Pull it tight, and
then you poke it back out through the second
hole on that signature. Take care to pull
the thread tight. Once it's back out
the other hole, you're going to
create a knot with the bindings from the
previous signatures. You poke it back, pull
the thread tight, and then loop around
the stitching that's right next to it from
the previous signature. I find this a little bit fiddly. If you do two, take
your time with it, you'll find a method
that works for you. We attach it to the
previous signature to hold the whole
thing together. So each signature you add, you're going to knot it
to the one before it. Then you get your next signature from the bottom of the pile. You take the needle
from the outside, you poke it from the
outside into the inside. Pulling it nice and tightly, and then you poke the needle
back out the second hole. Once it's out, you knot this
to the previous binding, just like we just did. Then you carry on in this way for every signature
that you have. You knot it to the last one, you keep those bindings
tight and snug and that'll give you a
nice well bound book by the end of it. Okay. Okay. So you proceed in
this way until you've got all your signatures bound and the only thing remaining
is your top cover. What you do is you
poke your needle from the inside of the
cover to the outside. Okay. Take it over and around and back into
your signature, and that will bind
it into your book. You get the thread
nice and tight, poke your needle out through the other hole in the signature. You love it through
the inside of the top cover, pulling it tight, and then look around and make a double knot between the last bindings that
you've made here. This will attach your top
cover securely to your book. At this stage, you have
a coptic bound book. You can leave it
here alternatively, you can add decorative
stitch details. To do that, you pull
your thread from an upper top corner to the opposite lower corner
and knot it securely there. Then you would take the thread
to the upper corner there and then pull it across to
the opposite lower corner, knotting it securely
at each stage. When you're finished,
you can use your excess thread
as a wrap around, depending on what kind
of thread you've used. You can also attach twine or
ribbon into the stitching. But what I'm going to do is I'm going to make a belly band. It's using the same
method that we use previously on the
accordion fold book. Just as a quick reminder, I take a strip of paper that maybe about three times
the width of the book. I wrap it around starting with the front of the book
in the center of that strip. Mark where it needs
to be glued and then glue the paper to
make it stick together. Then I've got a lovely little
belly band which will keep my coptic stitch book closed
when I'm not using it. You can also decorate
your belly band. I've used these dinky little
letter stamps and gold ink. You can decorate it
however you like, or leave it undecorated. Now you've got your very
own coptic bound book. They take a bit more work, but I think they are stunning
when they're finished. Don't forget to snap a picture and add
it to your project. Then come and join me in the
next lesson where I'll talk about where to go next
with all of this. Okay.
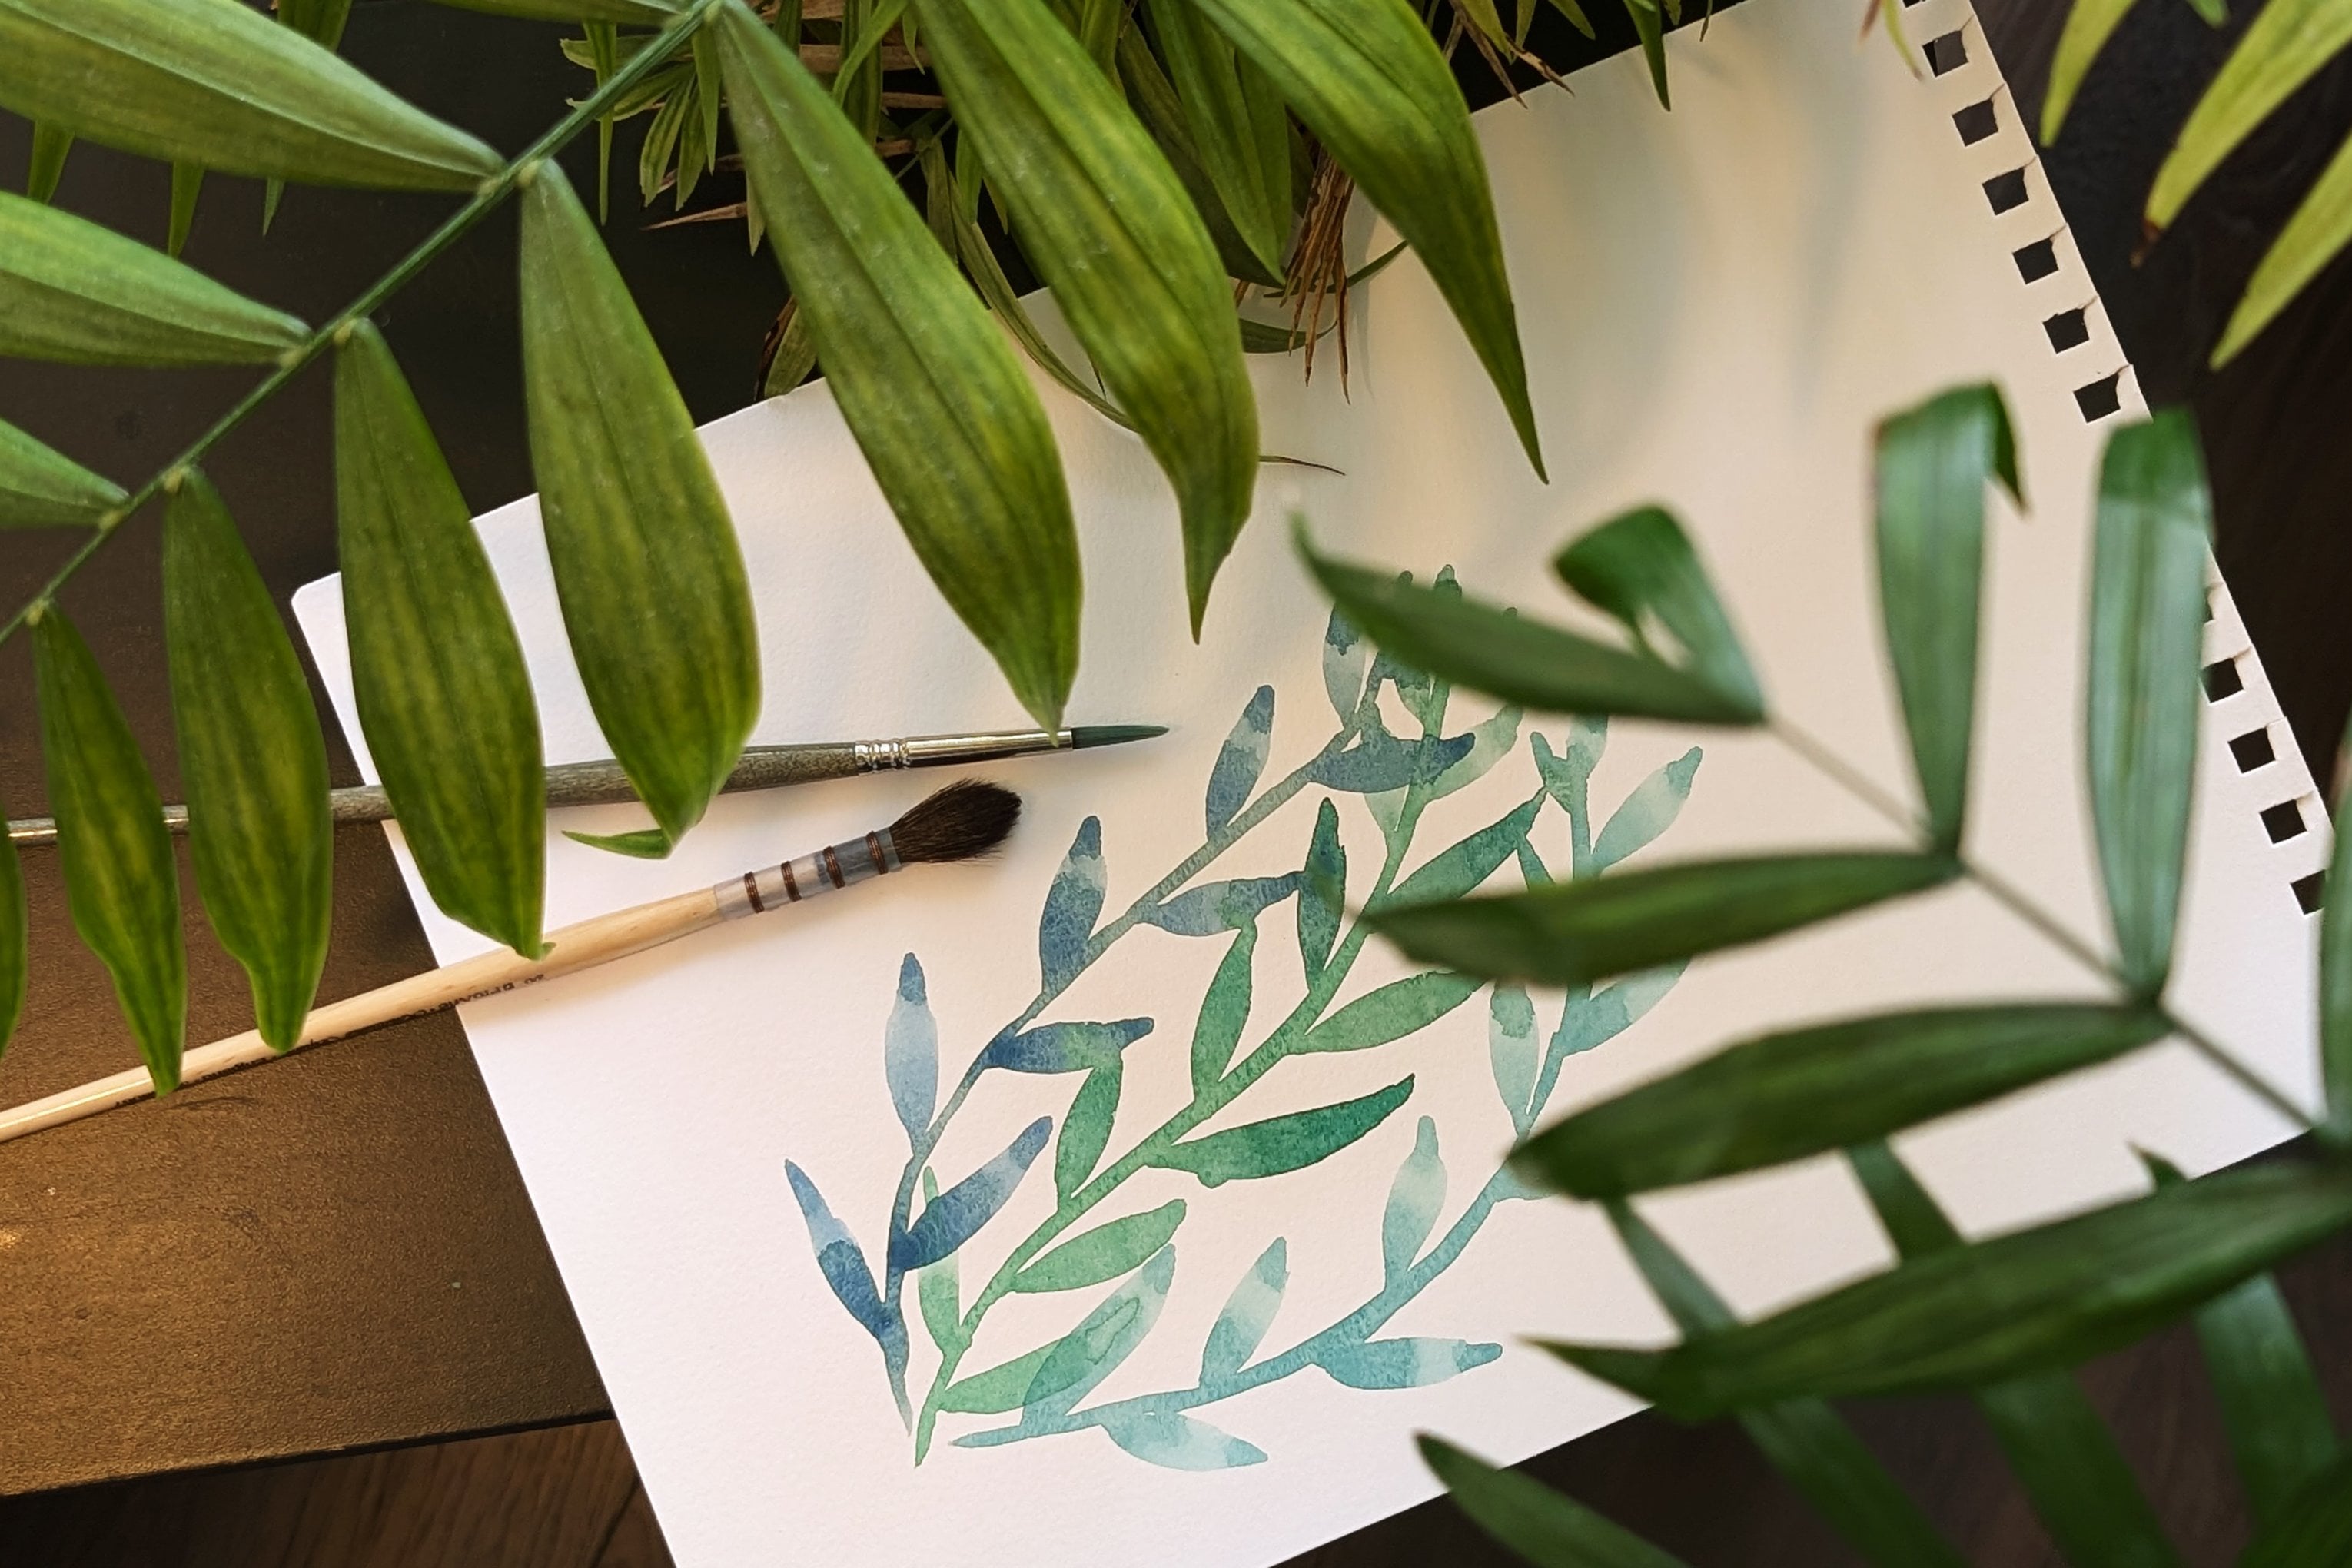
11. Taking It Further: Hello again. In this lesson, I'm going to talk about options and possible uses for
your tiny treasures. I draw and paint in mine, and there's a few different
reasons to paint small. First off, for me, at least, I find it pleasurable and satisfying and honestly,
that's reason enough for me. That said, when you paint small, it forces you to make choices about what you
include and what you leave out and that helps you hone your skill
with composition. As your images by necessity
gets stripped back, which allows for a
greater focus on what you do include and how you
place those objects. Something else to bear in mind, Painting tiny can be less stressful than taking on
a big piece of paper. Artists like Cecil Metzer and fellow top teacher
Marin Noel Worm have spoken about painting tiny as a method they've used to get
past their creative ruts, periods where they've
struggled to paint. I believe that method
can work for anyone, whether you're an expert
like them or a beginner. You can also use
these techniques to create different
kind of story books. Here I've used glued together accordion fold to create
my carrot thief book. I've shaped the top and created fun cutouts and to add
interest to the story. Okay. Okay. But you don't
have to paint in your books. You could use them as
cute tiny scrapbooks or mini journals. You could use them as props in a doll house or maybe even make a whole bunch of
them and give them as gifts or wedding favors. The possibilities are endless and the only limit
is your imagination. I've created a pinterest board dedicated to miniature books, which you can also look
at for extra inspiration. The link is in the class
description below. I'm sure you'll come up with really interesting ways
to use your books. When you do, please come
back and let me know. I'd love to see them. Okay. And now we're
just about finished. Come join me in the last lesson
for some final thoughts.
12. Final Thoughts: Hello, book find are you. Well done on making
it to the end. Thank you for joining
me as we learned how to make different kinds
of miniature books. We started with the
accordion fold method, then looked at using
glue to create perfect bound books
before moving on to simple and
coptic son books. Along the way, we
looked at how to create different
kinds of covers, how to add bookmarks, and wraparound enclosures, including the adorably
named Belly bands. What I would really like for you to take away from this class is how accessible and delightful making books book
binding can be. There is simple joy in creating Tini books and accessorizing them in whatever way
takes your fancy. I hope that you've
experienced that. If you feel like sharing the baby books you've made,
I'd love to see them. You can post them in the
class projects gallery, and if you'd like to
stop by there and leave a kind word for other
people's books, that would be really nice. If you enjoy sharing
things to Instagram, feel free to tag me there. I'd love to see what you create. If you want to find
out when I release another class, you
can follow me here. There should be a little
green follow button up there. If you click on my name, that'll take you to my profile, which has my other
classes on it as well as links to my website where
you can see more of my work. If you're interested in creating abstract patterns to
use for your covers, I suggest you give my mindful
watercolors class a try. If you could leave
this class a review, it would be super helpful. It can flag to potential
students what kind of a class this is and if it's the thing that they might
be interested in too. Thank you again for joining me to learn how to
make tiny books. I hope you've enjoyed
this time and I'll see you in one of
my other classes soon.
 Shelley Skail, Artist, Illustrator, friendly nerd