Transcripts
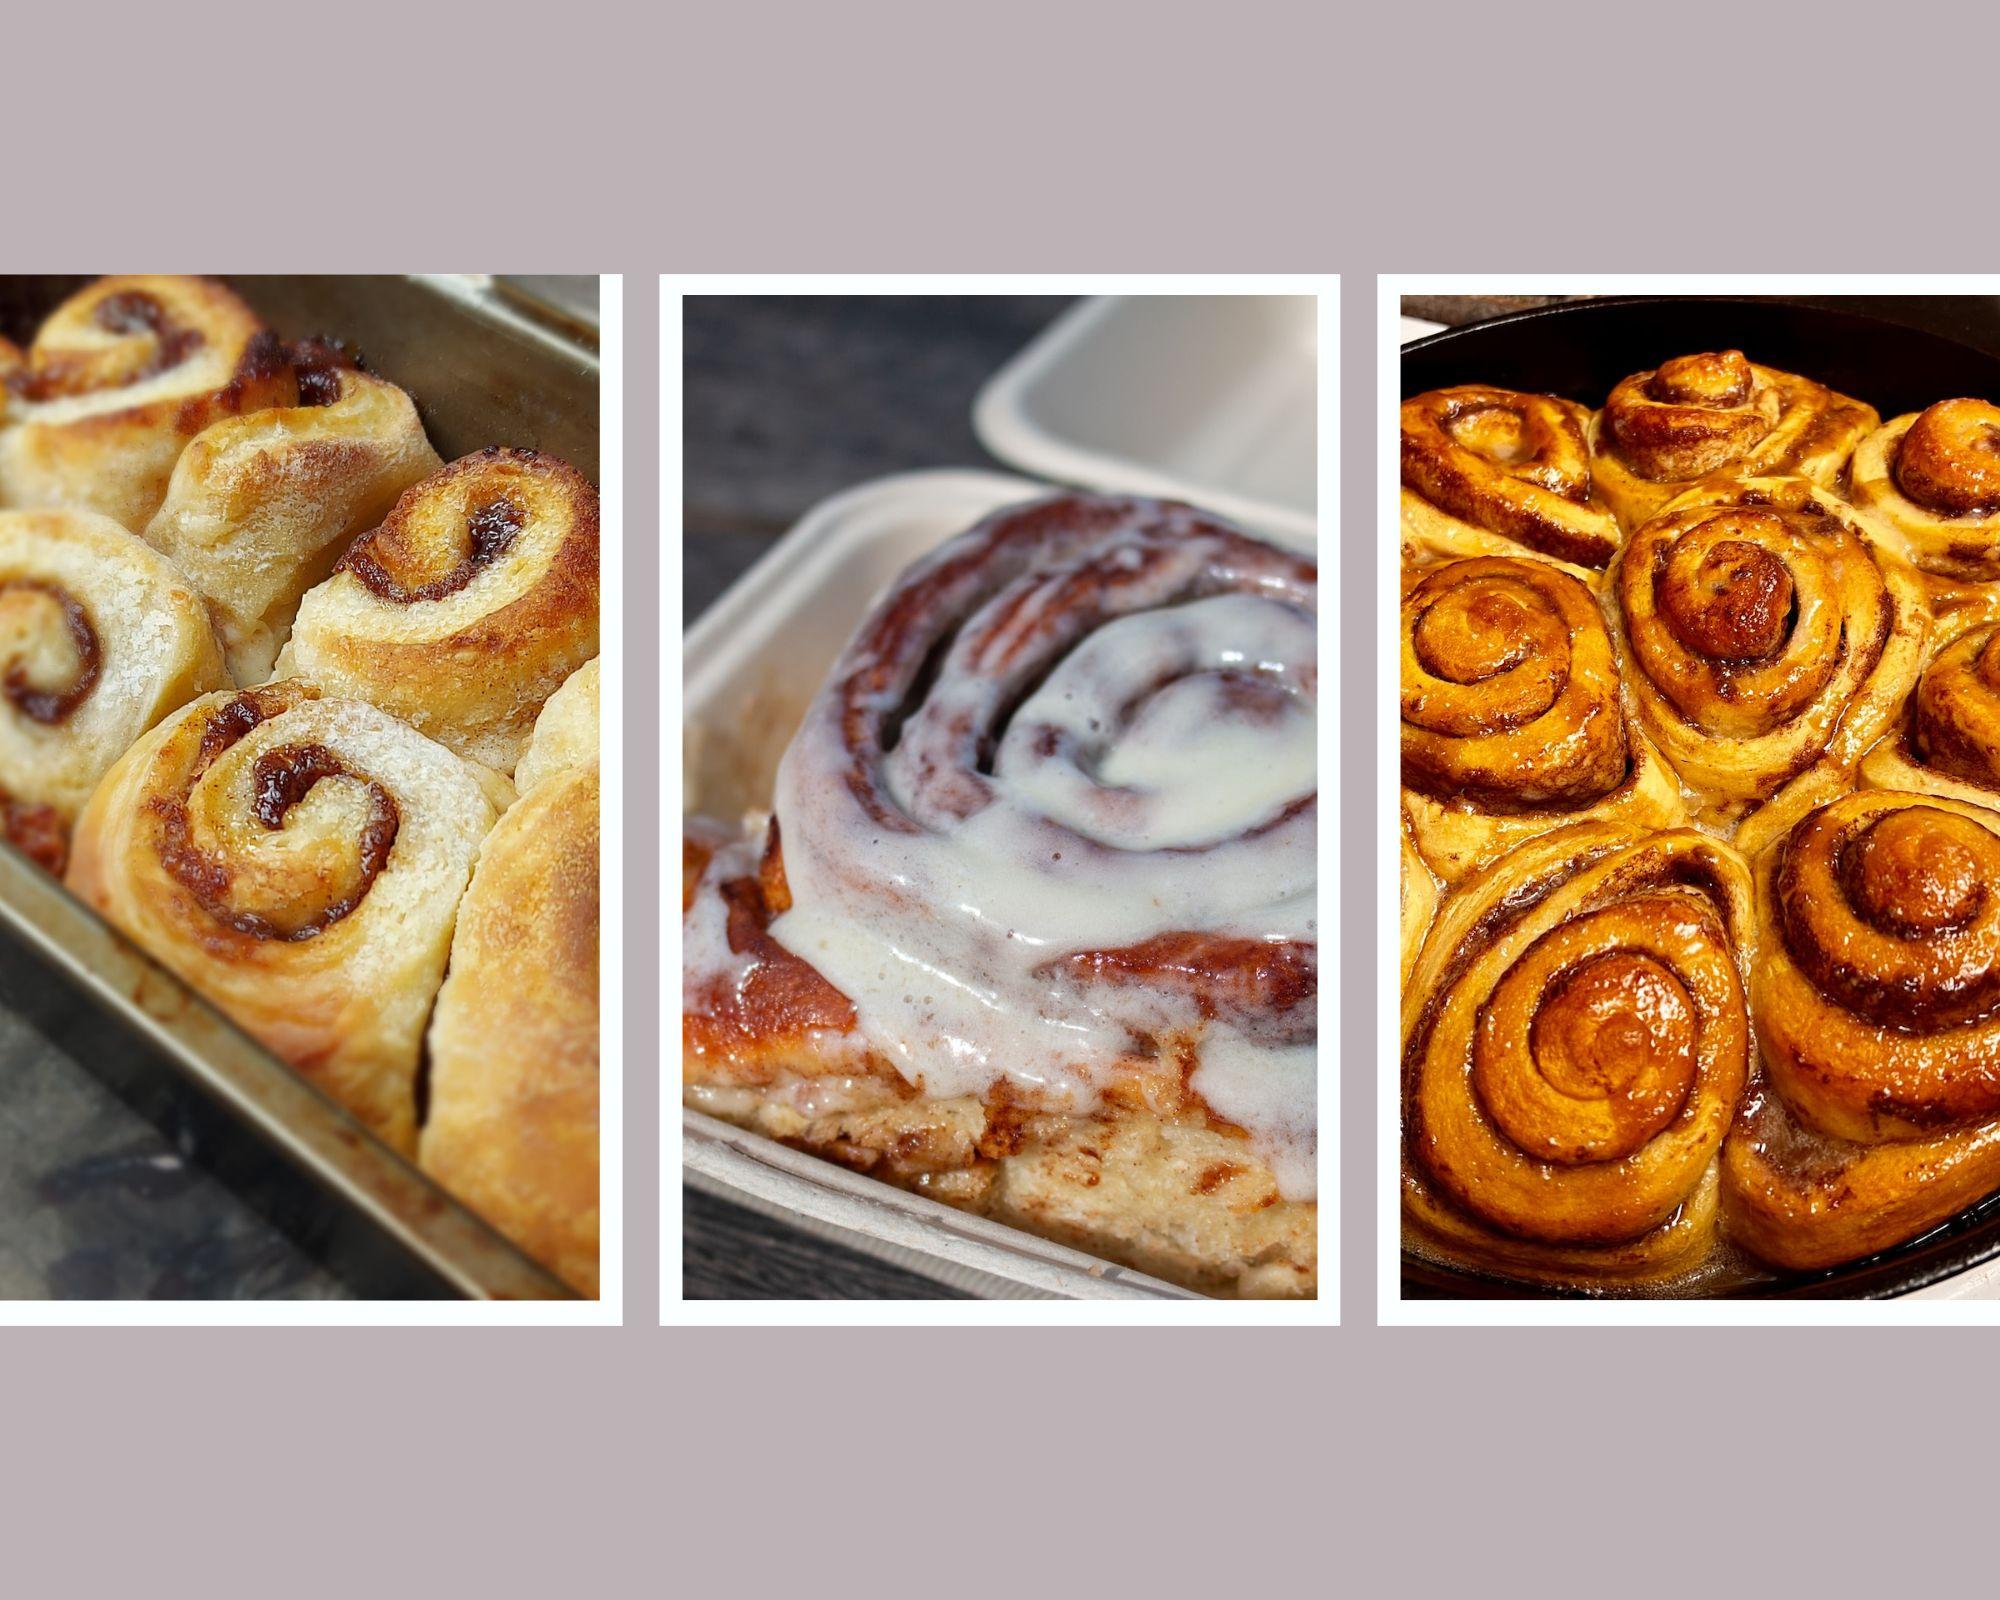
1. Make, Fill, and Bake The Best Cinnamon Rolls Ever (3): Among us isn't lured in by the sweet decadent yeasty aroma of freshly baked cinnamon rolls. You can create
these delicacies in your own kitchen using a
few simple ingredients. Hi I'm Shelly. Welcome to roll fill and bake the best
cinnamon rolls ever. In this class,
you'll learn how to combine simple everyday
ingredients to make amazing cinnamon
rolls and how to use different flavors
to make each pan of rolls special in your own. We'll discuss the
kitchen utensils, bowls and baking
pans you'll use, along with plenty of suggestions
to use what you've got. You can start to bake right away without having to buy
a bunch of supplies. If you're interested in making rolls that are gluten free, dairy free, or vegan, you can using the
exact same recipe with a few easy tweaks to accommodate different
dietary concerns. Then we'll start baking.
We'll mix up our ingredients, talk about how to
need dough like a pro and make a
delicious filling. Finally, we'll form our rolls, and while they're in the oven, we'll mix up a sweet, dewy
frosting to smear on the top. Over the last 15 years, I've taught thousands of people to eat well by learning to cook. I specialize in baking, pretzels, pizza, bagel,
sourdough bread, French macarons, cream puffs, chocolate, and of
course, cinnamon rolls. My goal is to make your life
in a kitchen easier and more fun by improving on your skills regardless of
your level of experience. Learning to make
things you love like cinnamon rolls is a
great place to start. When we're done, you'll have everything
you need to create the best cinnamon rolls ever anytime you want.
Let's get started.
2. Your Class Project : Your project for this
class will be to create an amazing pan of cinnamon
rolls for yourself. Using the skills you
learn in this class, you'll gather your
ingredients and supplies, mix up and need your dough, make your filling, form
and bake your rolls, pop them with frosting, then post a picture of your delicious creation
to the project board. Cinnamolls are made with simple, easy to locate ingredients. They come together quickly, look great, and they
taste delicious. They're a great first step
into baking because you're learning skills that can be used in so many other recipes, like how to measure and
mix up ingredients, how to need the dough, how to make substitutions, and more. I know that people
can be intimidated by baking and that they often worry about things
not turning out well. But in this class, you'll learn how to make roles that are delicious and that you'll be
proud of every single time. To get the most
out of this class, please watch the video
all the way through. Then read the recipe, gather your ingredients
and supplies, measure everything out, and then dive in and start baking. Feel free to replay the
video as you bake and pause after each section to
make sure you've got it down before moving
on to the next lesson. I can't wait to see
what you create. I'll see you in the next
lesson to get started.
3. Ingredients You'll Need: Okay. Let's look at the ingredients that go into
making amazing salmon rolls. Our dough, we'll be
using flour, yeast, baking powder, sugar,
salt, butter, and milk. We'll look at each one
and discuss how and why we use it and where you
can make substitutions. Then we'll move on
to our fillings and frosting and the ingredients
I've used today, but I'll also give
you some fun ideas to incorporate different
flavors into your own rolls. Our recipe today calls
for all purpose flour. The basic white flour you'll
find at every grocery store. But what about whole
wheat or bread flour? Bad flour can be
used in place of all purpose flour without
any changes to the recipe. It has more protein
than all purpose flour, which makes it a great
option for recipes where you're baking
denser things like pizza crust and bagels. But you can use it here too. The rolls may be
a little firmer, but they'll still be delicious. All wheat flour can be a
great addition to theoretic. It as a slightly grainy
texture that tastes healthy. If you'd like to add
it, you could replace up to two cups of the
all purpose flour in your recipe with
whole wheat flour without making any
other changes. Don't use more
than that, though, or your rolls will be
really dense and heavy. Okay. I want to make your
rolls gluten free. Gluten free flour is a
great replacement for all purpose flour and doesn't require any changes
to the recipe. Just make sure it's labeled
cup for cup or one to one rather than using an all purpose gluten
free flour blend. All purpose gluten
free flour doesn't have a binder like
vampm gum in it, so it doesn't have
enough structure to make amazing rolls on itself. But the one to one
blends works just fine. Let's talk about yeast
and baking powder. Both are important to our recipe because they are what
gives our rolls loft, making them spot and fluffy. You'll see yeast called active dry instant rapid rise
or just for bread machines. Any of these that you have
will work absolutely fine. East usually comes
in a glass jar or in a strip of
packets like this, and there's usually
three on the strip. One packet like this holds two and a quarter
teaspoons of yet. People sometimes worry about
their yeast being outdated, but as long as you
keep it in the fridge, will last a really long time. Okay. Baking powder is the other
thing that we need here. Baking powder creates
a chemical reaction that causes things to rise. Don't confuse baking
powder with baking soda, even though they look alike,
they're not interchangeable. Next step in our
recipe is sugar. Sugar adds sweetness,
but also helps to give the yeast to boost,
so it works faster. I'd like to use white
granulated sugar in my dough recipe, but brown sugar would
work well here too, and we'll be using
it in our filling. If you'd like to use it
both places, that's fine. Brown sugar comes in both a
light and dark brown variety. The dark brown has a flavor. If that's something
you'd like to taste, feel free to use it. Okay. Next comes salt. And salt may seem
like a funny thing to add to our sweet rolls, but salt brings more to the
party than just saltiness. In baking, salt tends to work like a flavor enhancer
and without it, baked goods tastes
really flat and boring. Recipes for sweet breads like cinnamon rolls are
butter intensive. Butter is used in the dough, the filling, and usually
in the frosting. Butter comes in both salted
and unsalted varieties. I prefer to use unsalted
butter if I have the choice because then I'm in control
of how much salt'm using. But if salted butter
is what you have, by all means, use
it, it will be fine. Plant butter is a great
substitution for regular butter. It comes in both
the tub and sticks. The kind in the tub tends to be a little softer than the sticks, but both kinds work great
here with no other changes. Milk gives this recipe and mini baked goods a rich flavor, and really any kind of milk or milky liquid that you'd
like to use is fine. For regular milk, full melt 2% or stim milk will
all work great. Or if you'd like to go
dairy for your vegan, unsweetened plant milk is a fantastic substitute
in nearly every recipe. I prefer the thicker ones
like at coconut and almond. I think they really give our
recipe a nice rich flavor. The recipe I've included
for the filling and the frosting gives you a
great place to start, but you can use anything that
sounds interesting to you. There are lots of
possibilities here. Think of your cinnamon
rolled dough as a blank canvas for
whatever sounds delicious. For your filling, consider chocolate chips, peanut butter, nuts, dried fruit, jam, apple pie filling,
even tela, Okay. I fear frosting, you
could use orange juice, lemon, maple syrup, even
add bourbon or rum. Don't be afraid to let your
imagination go wild here. Some of the best
flavor combinations grow out of crazy ideas. You have questions
about the ingredients, substitutions or how to use
an unusual flavor combo, please post a question
on the discussion board. I'll be happy to get
back to you right away. So now that we've
covered our ingredients, let's look at the kitchen
supplies you'll need.
4. KItchen Supplies & Utensils: Okay. Let's talk about the kitchen utensils
and supplies you need to make
amazing cinnamon rolls. This recipe will make
about 12 cinnamon rolls, and a nine by 13 pan is
a great size for this. 12 rolls fit in here perfectly. But you also could use two
smaller pans, pie plates, and nine by nine baking pan, cake pans, even muffin tins would work. Use
whatever you've got. You also need a rolling pin or something that can
act as a rolling pin, could be a wine bottle or
a straight sided glass. You'll need a mixing bowl that will hold at least eight cups of liquid and then
two smaller bowls for filling in our frosting. You'll need measuring
cups and spoons, a wooden spoon, plastic
spoon, either is great. You'll need a whisk or a fork. You'll need a spatula, a kitchen knife, and we'll be needing and
forming our dough. You can either do this
on the countertop or a large cutting board. If you'll be using
a cutting board, place a wet kitchen
or paper towel under the board to hold it in place so it doesn't dance around
while we're needing there. Finally, if you've got a stand mixer and you'd like to use it by all means you can. I'll be happy to walk you
through that as well. You will need the dough hook for kneading our dough, Discuy. And now that we've gone
over everything you need, let's measure out and
set up our ingredients.
5. Measuring the Ingredients : Okay. Now we're going to
set up our mes and plot. It's a fancy word that just means we're going
to get everything organized and measured out before we start
mixing the dough. There are a couple of
reasons for doing this. First of all, we need to make sure we have
everything we need. Secondly, mismeasuring
or forgetting to add ingredients is the easiest way to screw up your recipe and it happens
more often than you'd think. By having it all ready to go, you've already improved your
chances for a great outcome. The quantities are in both
metric and imperial measure. So for our dough, we'll need one and a quarter
cups of whole milk, room temperature or warm
to the touch, please. Four tablespoons of sugar, and I'd like to divide
it in two tablespoons of two tablespoons because we'll be adding it at two
different times. We'll need two and a
quarter teaspoons of yeast or one packet. We'll need six tablespoons of
preferably unsalted butter. Soften please. We
need four cups of all purpose flour plus a little more for dusting the countertop
while we're needing. We need 1.5 teaspoons
of baking powder and one and one quarter
teaspoons of kosher salt. And now that we have everything
prepped and ready to go, let's mix up our dough.
6. Mixing up the dough: Okay, let's mix up our dough. I'm going to start
with the milk. Again, I'd like it to be pretty warm in the room temperature, but not so hot that
it burned, you. So I'm going to pour that
right in my mixing bowl. If you're going to
use your stand mixer, you can start with
the bowl of your stand mixer here as well. I'm going to add two
tablespoons of our sugar. And remember that we
divided it earlier, so I'm using half of our total sugar now.
I'll add that to it. And I'm going to add our yeast. So one of the packets, if you've got it on the strip, otherwise, two and a
quarter teaspoons of it. Now when I've got it in here, I'm going to use a
whisk or a fork. Just kind of beat it up. This tends to be a
little bit clumpy. And so we want to make sure we can press out all of the lumps. And that the sugar isn't
just sitting on the bottom. We want it to be
really well dissolved. So now we set this here to let
it get a little bit foamy. Let's take a couple of
minutes and melt our butter. Please don't add it
to your recipe yet, but let's melt it and then bring it back here and
just set it aside. I got a few little
bubbles in here. It doesn't need to
be going crazy. I just like to see
some movement here. That looks good. I'm
now going to add our remaining two
tablespoons of sugar. I'm going to use my wooden
spoon to stir it in. The next thing I'm going to
add is my baking powder. Give that a stir two. Now I've added about two
cups of our flour. We have all of it
measured. We know how much we're going to use,
but this is about half. I'm going to stir
it in. We don't want to add it all at once. It can overwhelm the
liquid ingredients, and then you end up
with lumpy flour in here, and we don't want that. I'm just going to mix
this really well until it's smooth and not lumpy. Do you see any lumps in there, press them up
against the side of the bowl with the
back of your spoon. When that's pretty
well incorporated, now we can add the
melt of butter. We didn't want to add
it right away because really hot things can
damage your yeast. Again, if it's too hot for you, it's too hot for the yeast. But now we've let it cool a little bit and we've
got some flour in here too, so we've got some
other things in it and distributed the
heat a little bit. The other thing I'm going
to add now is my salt. Also, it can damage the yeast, which is why we add it later in the recipe rather than
at the beginning. I'm going to add this in two stir it till it's
really well combined. Looks good. I'm going to add
a little more of our flour. Add a little more
flour, mix more. We may not need
all of our flour, which is the other reason we
don't add all of it at once. We'll need some for the needing. But a lot of times
how much flour you need is dependent on how human
or dry where you are is, if it's hot, if it's cool. I like to work with
a dough that's so, so the least amount of flour I can work with
here, the better. All right. That's
coming together nicely. It's still pretty wet. I'm going to add a little
more flour to it. Continue to add flour until it's kind of a shaggy
mass that's really too difficult to use
the wooden spoon on. All right. That's
coming along nicely. So now we're going to turn it out on either
our countertop or a cutting board. Okay.
7. Kneading the Dough: Okay. It's time for us
to knead our dough. Again, you could
do this either on the countertop or
on a cutting board. If you're going to
use a cutting board, please put a damp towel
between it and the countertop, so it stays in place. We're going to put down
a little bit of flour and then dump your dough
out onto the flour. If you've never kneeded
bread dough before, flour is your friend here. It can be a little sticky and so anytime it gets sticky,
add more flour. Okay. Make sure you got it all
cleaned out of the bowl. Set the bowl aside. You
don't need to wash it, yet, we'll be using it again. Sprinkle some more
flour on top here. We didn't use it
all previously in the recipe because we'll be
working some into it now. The key to success in needing is to think about keeping
your fingertips out of it. Please think about
using the palm of your hand here where it
attaches to your wrist. Stack your hands up, keep
your fingertips out of it, push it away, give it a quarter turn and bring it back towards you
and do it again. Using your whole body
to just lean into it. We're going to do this
for five or 6 minutes. You'll notice that the dough will start to change texture. It will feel different.
It'll become satiny, it'll become smooth. If it's seeming very sticky, don't be shy about adding a little more flour to
it and working it in. It might sometimes need
a little more liquid, if it's seeming very
dry and you've got a bunch of flour that
you can incorporate, I add a teaspoon of water to it. But if you're adding
your flour slowly during the mixing up process,
that shouldn't be the case. It would be much
more likely that you need to add a
little more flour. Just super sticky
on your fingers. Pick up some flour
and rub it between your hands called washing
your hands in the flour. But if you just rub
your hands together, the dough will roll
off and you can reincorporated into your dough. People ask sometimes if you
can over need your dough. It's possible but not likely. You can really be
pretty rough with it. It can withstand
all kind of abuse. What I'll eventually
be looking for here is that your dough will become the same texture as this place where your thumb attaches to the
rest of your hands. That squishy bit in there. That's what your dough
should start to feel like. It should become less sticky, it should become smoother. It can be tacky, but I don't want it to be super
super sticky. Again, continue to add
flour as you need to. Here's how you check it then. So set it down on
the counter and start to work some
top edge up here. I'd like you to be
able to pull it up and almost be able to see light through
it before it tears. If when you start pulling it
up, it tears immediately, it needs another minute
or two of needing, need it a little
more and try again. Called window painting, but
that's what I'm looking for. And when your dough
is smooth and satiny and feels really nice, we're going to put
it back in the same bowl and cover it up, and then please put it in the fridge for at least an hour, but overnight wouldn't
hurt it a bit. Please don't skip the step of refrigerating your dough.
It's super important. In the fridge, the butter
will firm up again and make your dough much more
manageable and easy to form.
8. Mixing Up The filling : Okay. Let's mix up the
filling for our rolls. We'll maze and plasar
ingredients here again. So here now we have
six tablespoons of unsalted butter
at room temperature. We have one cup of either
light or dark brown sugar. We have two tablespoons of ground cinnamon and one
half teaspoon of salt. So I'm going to use a fork
here and a mixing bowl. I'm actually just going to
start mixing it up here. I'm going to start with our
brown sugar in the bowl. And then I'm going
to add in my butter. Having it pretty soft
here is really helpful. I don't want it melted though because it runs
out of our roles, but it needs to be
really workable here. Okay. I'm going to add in my
cinnamon and my salt. I'm just going to use my fork
to really smash the butter together and bring everything together as a
cohesive mass here. I don't want to see
any lumps of butter. I don't want to see any
lumps of brown sugar. I want it to be a nice smooth, spread mix here when I'm done. And when it's all come together
and it's all very well. We're just going
to set this aside while we roll out our dough.
10. Making The Frosting: Let's take a frosting
to top our rolls. Again, we'll set up
our maze and place. For our frosting, we'll need
3 ounces of cream cheese, 3 ounces of butter, a cup of powdered sugar, and if you'd like to
add some vanilla, a teaspoon would be
a great addition. To make our frosting,
it's important that the butter and the cream cheese are both at room temperature. If one is much cooler
than the other, the cream cheese
tends to get lumpy, so please take them both out of the fridge 30 minutes or so before you're going
to work with them to give them time to warm up. Put both your cream cheese and your butter in a
small bowl and use silicone spatula or a fork to mix them together until
they're very smooth, pressing out any
lumps as you go. When your mix is
completely smooth, add a cup of powdered sugar and mix until it's really
well combined. If you're going to
use the vanilla, add a teaspoon of it
and mix it in well. You'd like your frosting
to be thicker than that. Mix in another half a
cup of powdered sugar. If you think it's too thick, add about a teaspoon of
milk to smooth it out. When your rolls come
out of the oven, please let them cool
before you frost them. If you put the frosting on
while they're still warm, the frosting will melt
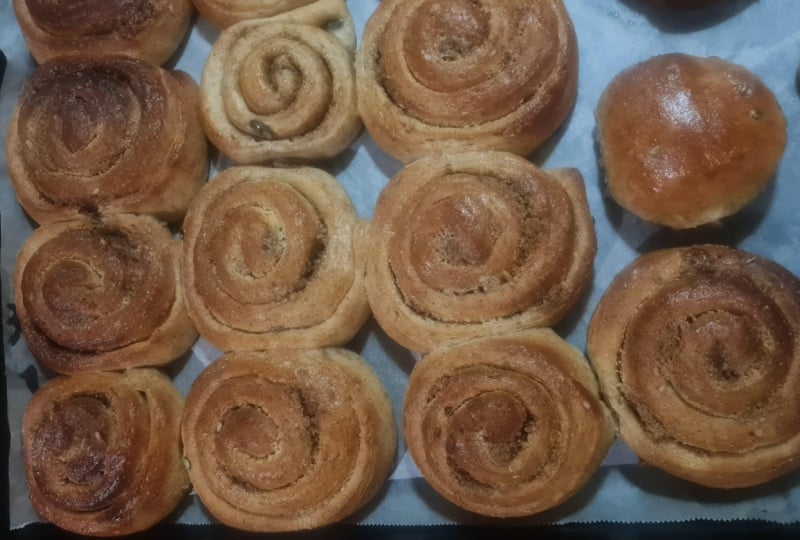
away into your rolls. So here's a finished pan
of amazing cinnamon rolls. I'm so happy with how
these turned out. This is actually everything I'm looking for in cinnamon rolls. They're a great color.
They're very firm when I touch them.
They've risen a lot. I like how many different
shapes and sizes they are. I think it makes a very interesting pan of
cinnamon rolls. These will be the
most delicious on the day you've made them
or the morning after. But if you have any leftover,
I don't know why you would, but if you do, wrap it up really well in plastic wrap and
put it in the fridge. You can also reheat them. Just put them in a
350 degree oven for about 5 minutes just enough to heat them through
and then enjoy.
11. Wrapping It All Up: So now you've seen
everything you need to know to make a bazing
cinnamon rolls. We've talked about
the ingredients you need with measurements. I gave you suggestions for substitutions and some fun
ways to customize your rolls. Then we looked at the
supplies you need and how to use the kitchen
utensils you already own. You mixed up the
dough, we needed it, we let it rest while
we made filling, and we rolled out, filmed
formed and baked our rolls. Finally, we made a
creamy frosty to smear on our cool rolls. Okay. Now it's your turn. Read
back to the recipe, decide what you're going to
fill and frost rolls with, collect your ingredients and
supplies and start baking. If you have questions
along the way, send me a note on
the discussion board and I'll get back
to you right away. I'm more than happy to help. When you've made your
pan of delicious rolls, please remember to post a
picture on the project board. Tell us all what flavor you decided on and let
us know how it went. I can't wait to see
what you turn out. When you're done, please take a minute and leave me
a review of the class. I'm always interested
in your thoughts. If you'd like to learn to
bake more incredible things, please follow me
here on skill share, so you'll always be notified
as new classes are added. I'm looking forward to baking
with you again soon. Here's
 Chelly Klann, Culinary Coach & Bread Lover