Transcripts
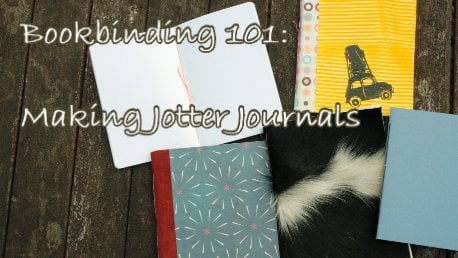
1. Welcome: Hello and welcome to my studio and to this bookbinding class. Today I'm going to show you how to make daughter journal small notebooks that can quickly made from materials you have already lying about. I loved order journals. I wouldn't know where I'd be without them. They're not made from precious materials. And so they're perfect to play around with ideas to dot down things without feeling precious about any of it. Technically speaking, what I'm going to show you today is a three hole pamphlet stitch on a fivefold pamphlets itch, and we're going to make this really, really easy. This course is suitable for everyone, including not too young Children. You have to be able to safely use shop tools like needles, alls and a knife. So let's dive right in and make our first daughter
2. Getting Ready Part I: The pages of your Jotter: Now is the time to decide what paper you want on the inside pages off your daughter. So what you're going to write on? I'm going to just a simple office paper, but you confuse anything that's lying around and that you have at hand. Usually, I like to reuse paper, even if there's already something written, honored that can be actually great to let the creative juices flow. When you're using your daughter, for example, reusing an old paperback can be the perfect thing for something like this, maybe surprisingly, so you'll see the minute that the former off your daughter will depend on the paper you're going to use. But apart from this, anything goes. No, that we've decided on what paper to use its time dis term in the paper grain. All paper you'll ever come across, including handmade paper, has a grain or fiber direction. This is the direction in which these plant fibers off, which the paper consists, are predominantly oriented. Um, an industrial produced paper like this office paper has a very pronounced paper grain, and you can already feel it by handling how thes two directions are different. So if you fold the paper or bend the paper without folding it. You'll notice a slight resistance this puts to your hand. And in this direction the resistance is much smaller and in this direction, so the fibers are all oriented like this. And, of course, it's easier to fold kind off if the fold falls between this fibers rather than if it's breaking some. But for other papers, it's sometimes not as easy to tell. And if you want to make sure you can experience this paper grain in a different way, cut a piece from your sheet that's not square so that you still know how it was oriented in the larger sheet and wetted from just one side, and it will immediately curl up. And as you can see, it's not doing this in a chaotic way. But one direction stays pretty much straight. Whereas while the other spending and the direction that stay straight iss the direction in which the fibers are oriented, the gap between the fibers is really what's getting bigger with a paper. So again, we just look how this was sitting in here. We see that this year is the grain direction, so now we've tournament this as the grain direction on this will be the same for all the papers in this deck for bookbinding. We always want that the spine of the book is going to be parallel to the grain. The reason why I'm talking about this is because it's very tempting when you have a fortune of cope your paper to fold it in half like this and try to bind the A five pamphlet from it . But if you have now, if you bind it here and you connect these holes with a thread now, if this is getting wet, it will move here in this direction. And so the both the paper will pull on the binding, and it might actually pull it apart. That being said, we're not doing anything precious year. So if if that's what you need to do than just go ahead. But I'm definitely going to make an A six journal from this For the second book I'm going to make, I'm using this paper, which is a short grain paper, so the fibre directions parallel to this side, and I can make a ruled a Fife daughter from it. I bought this at a bookbinding supplier. So in this paper, it's not so easy to hold like this without flopping down, which is the reason why we want to use it for in a five journal, whereas the scope your paper is really stable like this. And this is, of course, because of the fiber direction. And this is what, a printer, your printing machine once, if want to feed it a paper that where the grain direction is perpendicular to the rollers. With this, you would get a lot of paper times. So if you cut down in a three sheet of paper to get short grained a four paper to make your a five daughter, then you can't put it well, put it through the printer to rule this. If you got your hands on short grain paper and you wanted ruled, of course, you can go ahead and do every line by hand. You can't well put it through the printer. As I just explained. If you want to print lines on this, you have to use more traditional methods. I made myself these boards, for example, where I put down this a string which I glued down on this cardboard and just using printing , and you can roll this up and print ruled paper. So we determined our grain direction, which means for our daughter, and we will have to fold the paper like this. And therefore I'm going to shorten this paper because that makes for a nicer book. To do that, you take a sheet of paper, you line up the top corner, then enforced the fold first on the corner that's on the same side and then slide your finger over to here. And now you can enforce this with a bone folder if you want to. It makes for Anita. Cut you. Then insert your paper knife into the fold. And this should now be on the edge of your table. My table table edge. I insert the knife and I put it really flat here on the table, and I'm pulling the knife toward the edge rather than in this direction like this. And so you cut the paper open without tearing it, really? And you do this as until you have as many pages as you would like. I'm going to go for 16 I think so. I cut here a couple more pages And now that I have all my pages, I like to fold, um, for the signature in one go. And for this I dropped them. Get them as a stack of really need stack, pull them together like this. And now you have again this arrow shaped here, which was called the creep, and you try to get this even hold it down, press down, and then you can use your bone folder to enforce this fold from both sides. And then you put this under a heavy book and let it rest for a while so that the fold contact.
3. Getting Ready Part II: Choose the Cover: the next and last thing we need to decide on ISS what to use for recover for it to feel like a cover. It will need to be at least as thick and sturdy as you're inside pages. And if you're using something that's just like the inside pages made, you want to give it a different color. But you could. Profit depends a bit on what you're doing. If you're reusing this paperback we've been talking about before, then maybe you just take the piece of the paper back for the outside and maybe add some decoration to it, and that's it. And of course, you could also just decide not to give it a cover. If you want to do something really quick, this is what I'm going to use for covers these wallpaper samples, which has just great for covers. I love them because they're a bit sturdier. They even water repellent. Um, you need a piece of paper that about the same size as you're inside pages. If it's a bit bigger or smaller, this doesn't matter. We're going to trim the daughter anyway, and you'll have to make sure that the grain direction is the same as in your paper. So it will end up peril to the spine. Once you have all this, you fold a son half and we're all set to go.
4. Project I: The 5-Hole Pamphlet Stitch: I'm ready to buy. And my first daughter. Now, the paper has arrested under a white for a while that I chose discover, which is also Ah, well, paper left over. The creep is creeping out of the cover here, which doesn't matter. We're going to trim it. I in addition to this, I need a piece of scrap paper. The scrap paper should be a bit taller than the actual paper. I'm going to mark the height, and I like to cut off the longer edge at an angle just so that I don't accidentally tip it over. But that's not even that important for a single signature. That's just me being trains differently. Okay, so we have 15 centimeters. We want to punch five holes in here, so that makes six gaps, which I just want to distribute evenly over the length. So we have 15 divided by six, which equals 2.5. So every 2.5 centimeters, we're going to make a whole one to three for five. And this should be 2.5 centimeters away from the bridge. I inserted the paper into the cover. I'm opening this up a little bit. I insert my punching template, Doc everything into place that everything make sure everything sitting where truth said. And then with my own, I punched these holes into the paper. Depending on which paper you use and how thick it is, this can be quite hard. I'm struggling here a little bit as you can see this wobbly. This is because I'm not using a very sturdy all here. If you're using something a bit more studio that sees all right, that's it. Have my five holds you. Now we can start sewing for this. I'm going to use this Rex threat you need about twice the length of the spine, plus a bid for Notting handling. And then we start on the inside in the middle hole and go from the inside to the outside. Pull the thread until there's an end, which can trust easily not and go back in the next the next hole. If this giving you trouble, it's not sometimes easier to go through the referee first of into the stack of paper. So the next hole from the outside to the inside and then out most whole from the inside Back outside, I always pull in the direction the papers, other threat is going inside the Rep. Krystle, you would pull it like this so that it doesn't turn at a whole. And then you go back inside here, make sure you don't pierce the threat that's already there. Which sometimes cannabis be a bit hard because the whole is tight. And it was hard from the beginning. Go back inside here. So it looks like this on the outside and like this on the inside. Carly, we skipped this middle hole. The threat process. We go out in this home back inside here. This is how it looks on the outside. Now she's hard. Looks on the inside. We go back out here, make sure not to pierce the threat. That's already there. Out and now, back in in the whole, we started it all. Now there's one piece of threat spanning here, and one piece of bread comes out here and you want to come out on the other side of the spanning, Pull everything tight. So now I have these two ends and threat spending across it, and I make a not so that will also hold down this spanning threat. Esther double not pull that tight cut off, and then I like to fray the ends of the thread. This so that's the binding down here, and we're going to trim the Self year to give it a neat edge for this. You put it down on the table, you take your steel ruler. If you have a cutting mad to use the grist on the paper to help help you make a real particular could line up your ruler takes the trustee knife on from the front edge off and try not to coach, but planning rule number one. Never bleed on your books that it's just too hard to get any material. Take it steady. Try to cut, make shallow cuts and take just a few of the sheets at a time until you're all done inthe set and that's pass it. And to give it a really nice finish, you could also round the address. To do that, you need a corner Qatar, which is a bit of an advanced tool, and by no means you do not really need it off course. If you have one that's really easy and gifts, the whole thing, the nice finished. Look, now you could attach the label or put a title so that you can mark the front.
5. Project II: The 3-Hole Pamphlet Stitch: no for the larger book. We could, of course, perfectly do another five whole pamphlet. That's no problem. I just want to show you something slightly different again. I'm using a piece of scrap paper. It should be a bit taller than the height of the book. Everything like before I mark rights and cutting off. And this time we're doing going to do to three hole pamphlets ditches on a smaller volume like the one we found before. You could also just do 13 whole pamphlet stitch. Our first hole will be two centimeters out from the edge on both sides. I want to do this. I want to do this, symmetrically said to sending me to out from the top two centimeters out from the bottom. And then I think 2.5 centimeters is a good spacing for these stitches, taking 2.5 centimeters again. So I'm going to plunge thes six holes now in the same interes before. All right, put everything inside the reference and try to meet him. That's up as much as I can. I open this up a little bit and then I people unfolds with my all one to three. Opening this up as little as possible helps to center this really on the spine. 45 six holes. Then I take the length of Fred on, Thread my needle with it, and now I begin sewing. It doesn't matter whether you start at the top and bottom. These are like two separate separate stitches. As I said in on a smaller volume, you might just center one on the spine. You go out through the middle, the detail. You cannot go to a neighboring hole. It doesn't really matter whether you go up or down, but it doesn't matter that you pull the thread in the direction it's going. Skip the middle hole just like before. Spend the threat there. Go out at the bottom. So it looks like this year in the middle and back in the middle, and it wants to come out at the same side as this end. But make sure that the two answered on the two sides of the spending. Fred here and land finish off with a double knot could spread and then repeat on the bottom Bottom hole again. Middle. Leave a tale. One to the side, Spend two over here. Back inside on the two sides of the spending, Fred. So that then the threat that we're going to make the double. Not. And this also ties down this spending, Fred. Okay. Could thread. You could leave it like this, or I like to fray the answer bed. So untwist the threat and then insert the needle and pull us up. Now, this rep awas a bit taller than my paper. And I'm going to trim this not here. So pressed on the throwing a little bit. So I'm not trying to put this down like this so that I'm I'm not just cutting the cover. You have to take a few millimeters off the paychecks wells. Otherwise it won't come out neat. You can use the grid too. Help you make perpendicular cut, put on the ruler, and then make shallow cards trying just to catch a few sheets of paper at a time. And now I'm I've cut through here, but not yet there. That's quite typical. If you have a full there, just keep going gently until you got them. No, I'm also trimming the front edge here. I need a little up and that's it. I'm done
6. Information about Threads: um, what when you buying bookbinding threat? It's usually just this unde I'd variety, which you can buy in many different thicknesses, but not in a lot of colors red that's made for sewing leather ISS. Usually what you get when you look for colored linen thread the thread that most people use . And also I used in this project for this project is this Irish linen threads Crawford's Irish linen thread, which is waxed. This is a four ply threat, but they produce it in different thicknesses, and because it's already waxed, it's quite easy to use. It holds. You can see how it'll holds this loop, and, um, because it holds its shape really nicely. It's easy to use for bookbinding, and knots are holding fast nicely on the wax also protects the threat from fraying while you're pulling it through the paper. So this is waxed linen thread. Or rather, it's heavily Rex Linn and Threat. I have other wax threads, for example. This is also Rex threat, and but as you can see, this is just slightly waxed, and if you're pulling a loop, it will come come out again, and so this can actually be hand waxed with just a piece off beeswax, which I can show you in a minute. What I'm holding here is a cable threat, which is a bit more sturdy than a bookbinding threat, which has, other than it made sounds has actually disadvantages. But this doesn't matter for this project we're doing here. All the threats I'm going to show you are perfectly fine. The one test you want your threat to with standards, if you pulling at it as much as you can still shouldn't break. But linen thread is not the only threat that does this, so all these kinds of linen threats would be suitable. This year is very thick lace thread. It's also with reply and non waxed thes year are also three pipe um, linen threads, but very thin there. A buttonhole thread. If I wanted to use this, I probably for this project would use a two or threefold. This also Solin in Threat. I brought for Crow Shea, and it's thinner and it's not as tightly twisted, and it's fraying slightly. But for a project like this, it's perfectly fine. You might want to use it to double it to make make it a bit thicker. You could also use something like this with this, which is a Merce arised cotton thread, which would also work. It's again. It's something I can't break with my hands. That's the 11 test you want to do for this project. So a cotton thread like this would be perfectly fine. In the beginning, when I just started out bookbinding, I found thes threats by Goldman most accessible, which ah, sewing threads meant for sewing jeans. Again. The one test is icon. Break it and you would probably use this two or four fold to make up and thickness. And once we're here, we could also use some embroidery thread. This is a silk thread which would also perfectly work fine for this project. Now, toe wax, appease off, right. You need a piece off beeswax and you just cut a length off red, for example, this linen thread I'm going to wax now for you to see him. So this is my Maybe I'm taking a bit shorter piece, even so that you can. This is, of course, ridiculously short to bind with. But just to show you how waxing work works, you take the piece off wax in one hand, place one end of the threat on top and hold it with your thumb. You don't want to press hard. You just keep it in the middle here and then you pull through quickly. What you want to happen here is not to scrape off wax instead what? He wonders that the heat of the friction melts a bit off the wax into the thread, and you just do this several times. You have to turn a little to cover it from all sides, and you just repeat until you're satisfied with the amount off wax you have in this thread , you can probably already see how it's getting stiffer, and now it will hold this loop.
7. The End: So that's it already. We're already done. We made thes two daughter journals. Now all you need to do is fill it with ideas. I hope you'll change your journals in the project section. Let me see what you come up with. If you have any questions, ask me, like always. And I hope I see you for the next class, Fine.
 Hilke Kurzke, Book Artist, Printmaker, Writer, Bookbinder