Transcripts
1. Sunflower Intro: I've got a question for you. You love drawing, but
someone then asks you, what is your favorite
style of drawing? You look at them like a
deer in the headlights. Let's solve that problem
because we don't want any deers harmed and have a go at a style of drawing
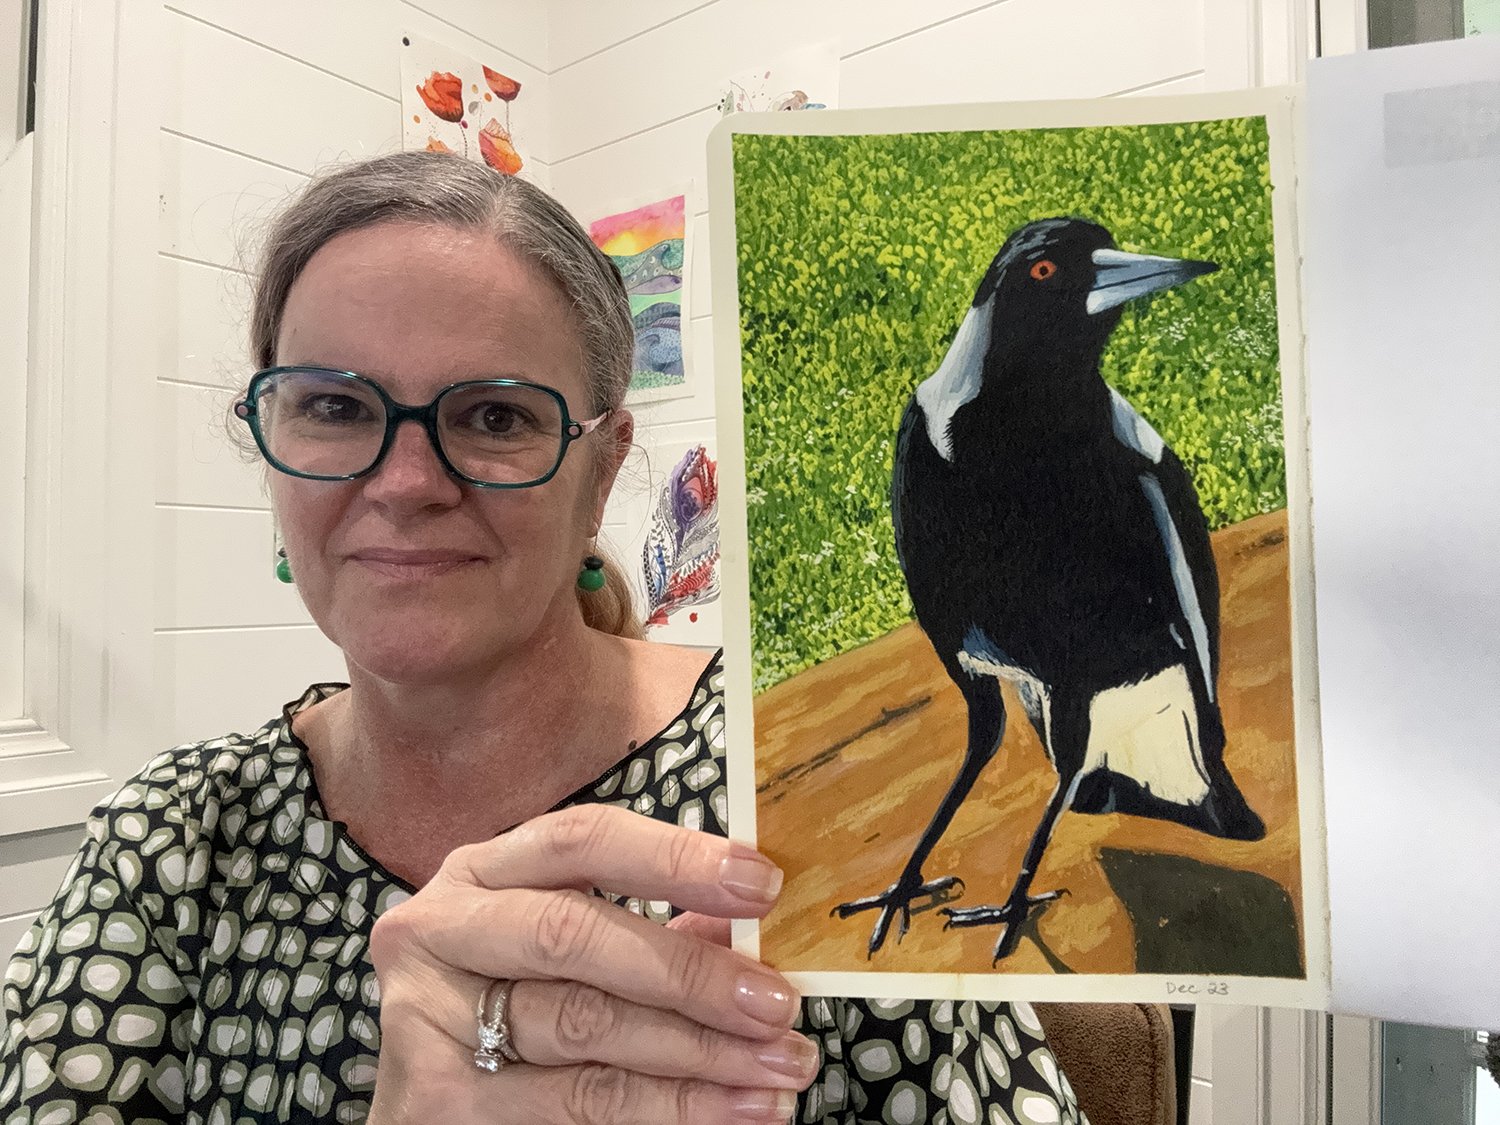
that dates back to 4.5 thousand years ago. If you haven't met me before, my name is Jane and my business name is
misses Red's Art Room. I live on the Gold
Coast, Queensland, Australia, along
with my husband. My two remaining chalks, they're the ones that
are in their late teens, early 20s, but haven't
left home yet. One dog, two cats,
three chickens, and six Avy birds, plus a great veggie patch. I do local sketchbook
classes here on the Gold Coast and also have
a patron page where I offer free drawing sessions per month plus a paid tier for
watercolor and doodling. But this class is not about
me or Ds for that matter. It's about you and extending your sketching knowledge into
the world of pen and ink. So let's get in to the art room.
2. Project Description: We will start from
scratch and build our way up to understanding
the pen and ink. You'll do various pen exercises before we go on
to the sunflower. In the next video, which
is the material list, I will show you which pens and paper to use for this
pen and ink exercise. Also, don't forget to
print out your sunflower. It's a black and
white image and it doesn't matter if you've got
a bit of a crappy printer. As long as it prints
out the image, you're going to be fine because
we're not actually using the printout as a reference. We're using it purely to transfer sunflower onto
our drawing paper. So at any stage
through the project, if you want to
take a clear photo of your work that
you're working on, you can load it up in the
project and resources page or tab and I will see it and I can give you
constructive feedback. Yeah, you can do
this at anytime. You don't have to
worry if you're only halfway through and
you've got a question. Even if you've just got a
question, just ask it in there. We are on to the next video, which is the materials list.
I'll see you in there.
3. Materials: Okay, so we're going to talk
about the materials that we're going to be using
for this drawing. First, we're going to start
off with our template. You can free draw your
sunflower if you want to, but that's not what
this project is about. It's about the actual pen and ink work that
we're going to be doing. So that template is
printed out as A four, and I'm going to be drawing
in my A four cartridge. Actually, I don't
think it is cartridge. I think it's a mixed media
paper, about 300 GSM. So that's an A four book, sketchbook that I'm going to
be using for my sunflower. However, I do have
another sketchbook, which is cartridge paper. I've had this sketchbook
for many years, and it's more of a testing
kind of sketchbook. It hasn't got very many
finished artworks in it. It's very much for
demonstration. So that's what I'm
going to be doing with all of these
pens here today. You definitely do not need this many pens to
finish this project. But the next video is going to be on the
pens that we're using. So that's why I've thrown
down that many there. Then we have a pencil. This one is getting short, but that's why I've just put this pencil extender
onto it and, of course, the trusty eraser. So our next video
will be actually using this sketchbook
and these pens, and I'll talk to you why
some of them have got washi tape on them,
et cetera, like that.
4. Pen exercises: Here are our pens. So the reason why
I've got washy tape around some of my pens is
because they are getting old. So the nibs have worn
down a little bit, and the ink isn't flowing
as well as it used to be, but that does not mean
that you throw them out, because I'm going to show
you why I keep these pens, and I'll show you with one of
the finest ones, the 0.05. Okay, so we're not going to use all these pens in this drawing. We are going to be
using some of them. Let's pick out the ones
that I want to test. So a oh five definitely, and that one has a good
one and a bad one. We'll go the 24, and there is a 0.5 here as well. Okay. It does have
a band around it. I'm not sure why it does. Anyway. So these are the ones
that we're going to test. So like I said, this is my
bit of a scrap sketchbook. Let's start with the
heaviest one, the 0.5. So this is what I want
you to do, as well. We're testing out all the
lines that we're going to be using in the
sunflower illustration. So I want you to
do this on a page. It can be a piece of
scrap paper as well. You don't have to do
it in your sketchbook. Basically, we're drawing
a straight line. Then we're going to
break that line up with a few little
dashes like that. Then we're going
to be doing little scribble, very
controlled scribble. This will mainly be in that
center of the sunflower, controlled scribble, and then
we'll go to some stippling. Stippling is basically dots. You don't put any
pressure on your pen, you just press down. Like that. And then we'll
do some cross hatching. We will put 0.5 there. Then we're going
to go to our four. Won't see much of a
difference with this one. Straight line broken line controlled scribble. Stippling and cross hatching. Okay, and we'll put a 0.4 there. Now we're going to go to two. You see a big difference
with the two. Broken line. Controlled scribble, some stippling, also
called pointillism. I'll be using a lot of that
in this s flour as well. That is a two. It's going to the good 0.05. You can really see
the difference between these ones so fine. The 0.05 and the 0.03, which is the finest you
can go in these UIPins. It's really not worthwhile doing pointillism for a video
because it is so fine. But these are my favorites
favorite weights of the UIPins these 0.05 and 0.03. You may even hear
my pen this time. I wouldn't normally go this
fast with this weight. Absolutely no pressure
on the pen, though, because if you do, you
will ruin the nib. That is the 0.05. Now, if I go to this one, which is quite worn out, the tip is quite worn out. This will do you can see there
it's not a complete line. It's very scratchy. But
it's really good for, like, little dainty feathering. You're just not going to you
can't rely on them anymore, but you can still use them. They will still work
and still do the job. Now, just quickly in regards to the actual pens that
you're wanting to buy, waterproof definitely
and fade proof. It may say archival ink, as well, rather than fade proof. I think the Pigma microns
actually say archival ink. So that's basically going
to mean that the black is going to stay black forever.
It's never going to fade. It's not going to go to a
sepia or a khaki color. And then the water is obviously
that it's waterproof. So in regards to it
being waterproof, yes, you could put a wash down
over the top of that, and it's not going to bleed. But what it will do is die if you put pen
down on wet paper. So if you have done a watercolor wash
and it hasn't dried, and you go and
start putting some doodling in or just
drawing with a pen, these pens will just die, and they never come back. So please don't do that because all you can do is throw them in the bin
when that happens. They will not even be your old pens that you
put washing tape on. Alright, we will go
on to our next video, which would be, I think,
starting our sunflower.
5. Tracing Sunflower: Alright, so we are going to
get started on our sunflower. So we need to move all our pens to the side. We
do not need them. We do not even need the eraser. What we're gonna do is take our black and white printout of the sunflower and just
turn it straight over. Now, I can see that you cannot
see too well from here, and neither can I, but
we are losing light. And it would be very
inappropriate of me to take this away to a window where
you can't see me drawing. But if I show it like that, you can see the image. Oh, reflection happening. So if you put it up to a window and do all
this via a window, that is going to be easier
than if you're copying me, doing it straight
down onto the paper. However, you may be doing
it at nighttime, as well, or you're just in an area that you cannot get to a window. So you'll do it like I will, which I so I'm going to
just lift this up and draw a very messy outline. I don't know if you can even
see that. There you go. You can see I've drawn an
outline around that sun cloud. We're not going to be drawing these sunflowers in
the background here, or the horizon, in the
background, all the clouds. We are just focusing
on this one suncloud. So I can see where
the page ends here. So with the edge of your pencil, I want you to do a really nice, messy scribble over the
back of your template. It doesn't matter that
you're doing this down on the paper that
you're about to use because nothing will mark And
then when we finish this, make sure it's nice and dark. Go darker in spots if you want, because what we're
doing is we're transferring the
pencil onto the paper. So this is how we transfer. It's the easiest way to do it, and there's no prizes for
anyone who does this neatly. Alright, the messiest one wins. That's what I always
say in my classes. Okay. Then hold that up again to your light source
and just make sure that you have
covered everywhere. Okay, so we are now ready to transfer down onto our paper. You've got to work out where
this flour is going to go. This is A four paper, and it's an A four printout. So we wouldn't want to put it right over the edge here so that it is actually
going off the page. We want to sit it
maybe about there. And then that leaves a nice little amount
here and less here. Because the sunflower is
facing in this direction, we want to give it more
space on this side. You can tell it's there
rather than this side. It's just compositionally
what we want to do. So I am also just going
to put a very light line. Down there and there, so
that if I do take this off, and I might just put a
border here and here, as well, so I know exactly where this template
is going to go down. I might just change that there. Alright 'cause I
can rub them out. They're not too heavy. So what we want to
do with tracing our template is getting
the outside circle. Now, there is
shadowing all here. So make sure you get the
outside of the circle here. You don't really have to
worry about this shading. You've got enough reference
to be able to shade that in. But you will want to do as many petals as you
feel comfortable doing. Again, you could just do
the outline of it and then bring all those petals in or just draw as
many in as you can. Definitely doing the stalk
and all these leaves. Now, the one thing I'm going to No, I think we should do it. I was going to
say, let's cut out some of these and
not have them there. We could probably
leave that one out. But this one, I think we need it there because they do come right up to the flower. Alright, so I'm going to
speed the video up here. There's no need for you to
see me doing all of this. But you go ahead and do yours. Step Okay, so I have finished what I think is pretty
much everything. There were some pretty
unclear areas here and here and maybe here
as well that I can look at in the screen photo of the sunflower
that will give me a little bit more clarification
in regards to that. I left that leaf out in
the background there. I don't know. I might
actually just include it. I think it gives it a little bit of depth and brings
this petal out. The other thing you can do, so I don't know if that's
a shadow or a leaf. So you can actually add some of your shadows
in here and there, which are going to help you. And the other thing
that I want you to do before you take that off, hold it down with your
less dominant hand and then have a look at it. Very hard to see on
mine. There you go. You can kind of see
it if I shadow it. Maybe if I go from the top,
you'll be able to see it. Yeah, you can kind of see it
there. But it's all there. Pretty much I can now add in more than I need to, as well. So I'll take that off. And I will show
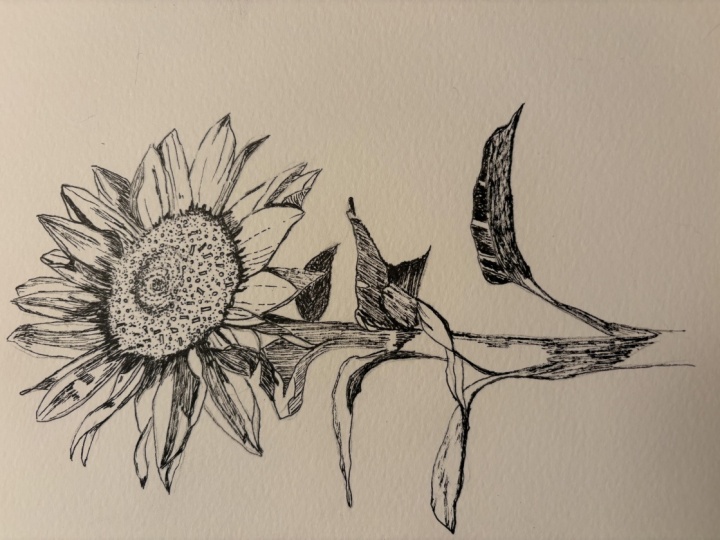
you. There we go. There's my sunflower drawn in. Now, that is quite dark
'cause I used a two B. So I am going to
adjust with my eraser. Just dab it a little
bit like this. If you've got a kable
eraser? Which I do. No, can't find it. Okay, I'm just going to keep
going with this. And I'm just going to
lighten up a few bits, and then I'm going to look
at my reference photo on the screen and just put in
any areas that I feel I need. And then we'll come back
with the next video where we actually get started
with all of our pens, which is the exciting part. I
6. Sunflower Centre: Alright, so we are
going to start. I'm starting with a 0.05. That is a very fine pen. If you don't have a 0.05, use a 0.10 0.01. Sorry, hang on. Let me just make sure I'm I
know what I'm talking about. 0.1, it will be a 0.1, so it's this one here, 0.1. If that's your
finest, use this one. If you've got a 0.05, I'm getting tongue twisted,
then use that one. Because what we're going to
do here I'm only using this as a reference for you because
you can't see my screen. But I do suggest that you have your reference now on
your screen because it's going to be clearer
quality than it will be from your printout. I have also drawn in a
few little lines just to work out where
leaves were, et cetera. And I decided not to rub it out. You can still see it
quite clearly there, because it doesn't matter
when we rub the lines out. So make sure that
you can see them. If you have rubbed them out like I told you to
in the last video, but you can still see them, then leave it at that
because you don't need to see I don't need
to see what you're doing, but you need to see
what I'm doing. This is what I'm trying to say. So we're going to
actually start in the center in this
little center. You'll notice there are
some little white dots. They are the highlights of the center of the flower
where they just stick up. So we're going to do
some series of circles. Now, the one thing
I did after I hit Stop is put this
center circle in. All right. And it just shows you where
the shadow outline is. So if you forgot to do that, then please look at mine there. And, uh, give that a go. But with your fine pen, what I want you to do now, we've got some circles, and we've got some
little rectangles. It's going to look weird as
to why we're doing this. But we are doing a series of little circles all
around this here, keep looking at your reference. And these are going to be areas where actually there
will be no pen at all. Just keep an eye
on your reference. You don't want to think you
know what you're drawing. Okay, so I'm back. I'm still going to
do some circles. The reason we're doing this
is because we're going to be filling in all
around the circles, and they will end up
being little white tips. But there's also some of
those little rectangles. So I just wanted to show
you myself doing them. You can just place them anywhere they usually
around this side, and then they go to dots
all around that side. Don't confuse the
shadow lions, either. I mean, I don't know what
maybe these are just little seedy bits that are just leaning over or something or they're more
growing. I don't know. I don't know. I
haven't looked at a sunflower that
closely, if I'm honest. I'll do that when
I go to the shops next because they're
out at the moment. And it's also Mother's
Day on the weekend. So there's lots of
flowers out in the shops. This center of the
flower is probably going to be the
most intricate part of the whole flower that we do. So I'm not going to
just do this now. I'm going to start
off doing this. Then I'm going to show you
a bit of the leaf, as well. I'm not going to record
every single bit of it, because that's where
you've got to just use your own artistic license
and use those practices that we did of all the lines, the scribbling, the pointillism, and the broken lines as well. So there's some more
little round circles out bottom here. When it comes to the shadows, um, I might just do a few more of these before I show you what to do
with the shadows. They're they're distracting me. I feel like I want to
put them in, but no, I'm just going to
resist and keep going until I've finished all
these little areas in here. Alright, so I'm going to show you how we're going to start doing the
center of the flower, but I do want to if you look
in the center of the flower, you see sort of like
swirls happening, like little patterns of lines. So choose roughly where the
center of your flower is, and then just
create some swirls. It's just going to be easier to do the little dots that
we're going to be doing. We're gonna be using a lot of stippling in the
center of the flower. Now, I don't know if
you can see my lines, but I will zoom in so you can. They tend to go out
a bit here as well. You don't have to
go too far, right. Just give it some guidance. Okay, so you can see that zoom, just the little swells
that I've done there. So in regards to the shadow, we can go to a larger pen. If you've got you're
using the 0.5, go to a one, and if you're
using a one, go to a two. Oh, I've picked the Here we go. The better one,
the sharper point. So I want to focus on those
little shadows that are on some of the little
circles over here. So we will just be doing just
fine little lines between, and they will all be going
like the light source. Where is the light
source coming from? It will be coming
from here this way because we're getting
the shadow here and we're getting the shadow behind these little bits that
pop up in the center. I don't know what they're
called, forgive me. More than welcome
to let me know in the project and resources area. Send me a little message. Okay, so you're just doing
little dark spots like that. So you'll continue
doing all those to where keep looking
at your reference, keep looking up at your screen, or if you've got
it on your phone, even, so you've got
it right beside you. Like I said, I'm
just using this one here as an example for you. Then when we get into this
centre bit here, like, these little bits are going
to have I'm doing stippling. Because they're quite fine. And then you could just
do some stippling. I think I want to get
a bigger pen. I do. I want to go to a Oh, I don't. Oh, yes, I do. I've
got a three on me now. It'll be a little bit thicker. Oh, I could actually go four. Just doing the center. There's a bit of shadowing Okay, this is going to take the
longest of time because we are using such fine pens. Let's go to a four. I don't know if I've got a five with me. The four is much
thicker, though. And you want to get some
of these little lines happening So most of the inside is going to be doing the stippling
in different ways. I might well, I want to
go on to another section. But when I come back to it, I will show you another
video as I move on. Maybe I should just
keep going and we get the center done so
that we can move on. Okay, I'm just thinking
out loud here. We'll keep going
with the center. I'll stop recording. You
know what you're doing. And when I come back, you
may not have finished yours, and you can have a look at mine, and I'll tell you what
I've done. Alright. Alright, so I haven't got much further on from the
last little take. But what I'm doing now,
I'm staying with my 0.4, and I'm just almost dotting
in areas of shadow, and I'm just going
I'm working all over. I am going to go
back to a finer pen. Let's go back to
the one to do in between some of
those thicker lines, we want to create some little light sections in there as well. And you can do that
without making a mess of it by using a fineer pen
around the outside of them. And it will just chop and
change between your pens. Okay? So we're working
on the shadows. We're acknowledging
the highlights, and there'll be lots
of different tones in between, as well. A Okay, so I wanted to just quickly
do another quick recording. I'm obviously not
going to just record the whole lot of this
drawing because I am absolutely a
slow slow drawer. So I do take a lot of time. But I just wanted to do I'm not finished on the center yet, as you can see,
but I will zoom in so that you can actually
see the very fine dots. I am using the 0.03 for them. Um I want to tell
you that this is the most detailed and slowest
part of your whole drawing. But if you don't get
the center right, the rest is going to look wrong. So I'm just checking in, just to say this is where I'm at. I have probably
spent 40 minutes, I'd say, working on that
using these pens here. So it's a 0.05, the 0.03 a 0.2, a 0.4, and I'm pretty sure
I also used a 0.1 as well. I did. So they're the ones
that I've been using, getting the dark areas, getting shadows, getting
fine little dots. So up here, very fine
penwk, a lot of stippling. Down here, you can see
there's a lot more shadows and you can afford to
use a thicker marker. I reckon I've probably got another 15 minutes left on this, and then I will be able
to move on to the leaves, which are not going to
take as long as this. I'd almost say that
the center is going to take let's say the
center takes you an hour. The petals themselves are
going to take another hour, and then you've got the I
need to zoom out for that. And then you've got the
stem and the leaves. So once that is all done, I reckon 3 hours, Max, but let's see how we go. Yeah. So I just wanted to check in on that center and
let you know that this is the hardest and the longest part of our whole
sketch that we're doing. But you will be
rewarded at the end. Just take your time
and enjoy the process.
7. Sunflower Petals: I Alright, we are going to start on the
shadow around the center. So I have finished the center to a point that
I'm happy with at the moment. You may also notice that
the light is better. That is because I
have a new lamp, which is a daylight lamp, so I had to do nothing to the light of the
camera, which was awesome. Okay, so looking at your
reference on the computer, please don't rely on this. I'm just pointing to it
because we can all see it. We're going to be doing
this little area here next. And it will kind
of just flow into the petals because we're
going to be doing line now. So we've done as
much stippling as we need to do at the moment. This was the longest part
of what we're doing. So we'll start to cover much
more surface now as we go. I am using a 0.1 and it's
going to be all little lines. So looking up at
your reference as I am because we've got lots
of shadow lines in here. So if we were to do
this in stippling, then we'd have to do
all this in stippling, and then it turns into
a stippling project, and that's not the intention. We're doing lines, scribbles, all types of things. So pick one of your areas. Actually, that little
area in there is easy because it's actually
going to be quite dark. And then follow on from there. I don't know if you can
hear the magpie outside. It's not spring yet
here in Australia, but there's a beautiful
magpie singing a little song. It's, gosh, is it it's 1 June, still a few weeks
off, July, actually. I have not been working
on my Skillshare for six weeks because I've
had a lot of other things on, which are now finished, and I really was
missing doing this. I really enjoy
black pen artwork. So it is really nice to now
be able to come back to it. So again, I'm filling in, where one petal, you know, behind the petal type of thing. Now I've got a Coke
bar going out there, having a laugh. All the birds. The birds are singing
because it's not raining. We've had so much rain here on the Gold coast for the first
six months of this year. So the birdies are
all rejoicing. Your shadow on this does not
need to be 100% accurate. It's all the organic lines. So organic lines, if they
are a little bit incorrect, you're not going to even notice. Hm. So before I keep going
with that up there, I'm just going to start doing
the petals because then I'll let the camera go. Now, I'm not doing a full line. This is where we're doing
a bit of broken line work. And keep it organic, have a little wobble in it. And you'll see the flowers behind the petals behind rather. What am I doing with this one? Yeah, the petals
behind will have those little dark
edges on them as well. So really nice sharp
shadows on these. So if I do this little
bit of an outline, Now, you want your lines to
all be working the same way. So we don't want to be
doing cross hatching. Definitely not in the petals. So the lines are going to follow the direction of the petals. So this area here, which is very much in shadow, we will just do lines close together but not complete lines. And still And you'll find that you just all of a sudden realize how much
more you're getting done over I don't know if you heard that,
but that was my cat. There's obviously a
bird out on the lawn, so she's talking to it. She is not a bird catcher. She's just scared of birds. So she's just letting me know that there
is a bird around. Little does she
know that I've got an avery up in the backyard. She could go and talk to the birds all day
if she wanted to. So you could end up working on these literally for a long time, literally for a long time, that doesn't sound quite right. But anyway, you
know what I mean. Like, you can just get carried away with some of these leaves. And once you leave one petal to go on to another doesn't mean
you can't go back. All right, so I'm going
to stop the video now, and I'll start it again soon, but just continue on cover a
few petals at the same time. And keep moving
around so that you can come back and continue on. And it's all line work now, and it's all in the
direction of the petals. So these ones here
will be going this way up here that way. Over here, this way. Alright? And then the next job will be the leave sorry,
the stem and the leaves. Okay, so I've probably been going about 10 minutes
here or there. Send a text message or two. So yeah, I'd say it would
only be about 10 minutes. Remained with the 0.1. And just on starting to
get up to the top now, I did turn my book around
before to do this one. But then I'm looking
up at the photo, and it's a different angle, and I'm looking back down. And I just went, No, no, no. You just have to
keep the book in the same position for
this one, I think, because your image is excuse
me, the same position. Let me just get my sorry, I just didn't have the reference photo up on the screen, then. So I will just
continue on again, while I chat to you. No lines have been completely
blocked straight line. They are all I'm getting
a phone call now. I've put it on silent, but you may be able to
hear that or may not. Always get phone calls
when I cannot take them. So I'm just starting
this one here, and it also has a nice
big shadow there. So you can see what I'm
doing for shadow lines. Like this is all going
to be in shadow, but it's still very sketchy kind of line that's going in there. One thing that I must say, and this relates to
every drawing that you do is that even though we
know what we're drawing here, we know it's a sunflower. We know what a
flower looks like. You have to pretend you've never seen this
object in your life before. You don't even know
what it's called. You have to keep looking at your reference image
because the minute you stop looking at your
reference image is where all the errors occur. So please keep that in mind. It's really important
and make sure that you're looking at
the one on the screen, not the printed one, and I'll remind you
again as to why that is, but the printed one
usually is going to be printed onto just
standard copy paper. And it is just not going to print as clearly as the
screen image would be. Keep everything nice and loose. Guide your lines in by doing
a lot of dot like skipping across the page type of See, I'm going to improve
this one here, and this one looks terrible. That's because there's
actually quite a bit there. So I think it's best
to stick with the pen that you're using for this because you can make
the lines thicker. And by not putting any
pressure on the pen, you should have a very,
very faint line as well. Birds still singing
outside. It's beautiful. I'd normally have music going in the background
while I'm drawing, but can't do that
when I'm recording, but it's actually
really lovely just to hear the outside sound
at the same time. If you see me pause, it's because I'm looking up
at the image on the screen. And In this one here, I'm not going to go as dark as the shadow tells me
to not yet anyway, because I don't want
to lose the definition between this petal
and the petal here. This should be quite dark. H, It doesn't mean that
I won't go back. But for now, I just want
to lighten it up a bit. You can always go back
and darken things, but you cannot go back
and lighten things. So keep that in mind, but don't be scared
at the same time. I think I'll flick
the camera off again now and we'll come back with a few more tips and tricks
as I've headed around here. Okay, so so you can see I've now completed half of the
sunflower petals, and it's really
starting to look great. Still using just one pen, which is the 0.1. I'm now This was this
real shadow area, so you can see that
there's a lot more pen in that area as
there is to that. So I'm just going to continue on here and make my
way around to here. I'll just leave the
camera rolling for another minute or so and hope you are going
well with yours. Just remember all those little Oh, this is also a good thing. Once you start to really
cover your drawing, it's best to just have
something down under your hand just because of the natural oils that
we have on our hands, and you just don't want it going on to there
'cause it could stain the paper and the paper go yellow
over time, possibly. Anyway, I will continue on
looking at my reference photo. Just jumping back on,
because this area here, if you're looking up at your
actual reference photo, not your printout, was the most challenging
that I've found. I think it was because
there's a lot of curliness, there's a lot of overlapping, and it just take more
attention to doing this, slow it down, keep
looking at it, go back to it, do
a little bit more. I'll keep the camera
rolling again. But yes, this was where the difficulty came
in because you've got these harsh shadows
coming over some of the flowers as well
that come right over. They'll come right
over the shadow there. I mean, sorry right
over the petal there. So you have to make it look like it's a shadow rather than, say, a fold or something. Anyway, I will just
keep the camera rolling for a little bit so
you can see what I'm doing. But yes, if you are
having difficulty in this section,
you are not alone. Okay, so I would
say that for now, I have finished the
petals. Mm. Okay. I'm not happy with
that area there, but if you go too dark, you can't come back white, so I will just leave it. I feel like I got a
bit pen heavy there and almost possibly at that last bit there.
So we'll leave that. We'll start a new
video on the leaves, but it's basically going to be the same process that
we're using on the leaves. With the lines, we're finished
with all the little dots. You don't have to
go back to dots. Um, so the leaves are
going to be next, and they're going to
be the same as petals.
8. Leaves: Alright, so we are starting
the stem and the leaves now. What I didn't realize
is that I hadn't actually introduced this video. So I watching a YouTube
video as this was going on. So obviously, no one wants to hear the
YouTube video going on. It would be very confusing. We are doing exactly what we
were doing with the petals. Now, this gives me an
opportunity to say that we did the scribble in our
first pen exercises, but I did not do any
scribble in the sunflower. Why didn't I I obviously just didn't
feel the need for it, but you can put a little
bit of scribble into it. Just mess it up a little bit. I tend to be probably
way too detailed. So if you did want to
put scribble in it, it's probably a bit
late to say it now, but you are welcome to
put the scribble into it. So I will speed it
up a little bit, put some music in, and I'm pretty sure I start talking in the next
cut of the video. Enjoy. Okay, I just wanted to jump in again. When we're doing the petals, we're doing all the lines
going the way the petals go. We're not doing any lines across ways or
anything like that. It's not cross hatching. Same applies to the leaves. So this leaf here,
which I did first, I put a line across there, and that was a shadow line, but I don't want it to
look like a shadow line. I want it to evolve
into a shadow line. So I've managed to hide it. But, say, for example,
this leaf here. All the lines are still
running the way of the leaf. This little shadow here still
running like up the stem. This was a difficult leaf
because it's quite overexposed. You can't really see
too much detail. In fact, I'm now
seeing a detail. I feel like I'm running
these lines the wrong way. I shouldn't be leaving my pen
off. It's going to dry out. So let me just close out. Just bear in mind, as you're going
through these leaves, you're trying to still
go over the direction of the stem or the little
veins in the leaf. The way the leaf is going, don't go in the
opposite direction. So really no cross hatching. It's basically lines that we're doing down
here on the stem. Alright, so I'll just keep
the video rolling a bit more while I go to this one, which is also another
difficult one. Oh, goodness.
Alright, here we go. Okay, so I've kept the video rolling while
I've done that whole leaf. I'm quite happy with it. One thing that's
really important, and I've actually got a
class on this tomorrow locally is make sure you see those shadows because the shadows are really important
in drawing and painting. They help give something that three day look rather
than a flat look. So when you see the little
shadows inside the leaf, I'm thinking I'm
looking up at it now, and I'm thinking
that I actually did. This leaf here. So it doesn't matter. I probably have to do
something a bit different on this leaf now because
I didn't realize that I was actually
repeating that leaf there. So that's all good. We
can still work with that. Um, I'm just going to do a little bit of
shadowing here where there's still some shadows and then move down to this leaf. Okay, so just bear in mind you working the same way
that the leaf goes, the veins of the leaf. Alright? Remember that. Oh So I just want to point out what is happening right
here on this one. It is a leaf that is
behind this leaf, and it's pretty much black. But we can't make it black, just like this one up here. You can't just color
it all in because then it's a very flat leaf. Now, this leaf, to me, looks like it actually
came down here. I'm not going to
change that now. I'm just going to
give this one a little bit more to go by. So I'll probably use this one as the
reference for this one. So it's going to
be just one tone, but it's not going to be
completely black leaf. It's quite hard to do this and not lose the shape
and the texture, the depth that all is being relied on when
you are filling in. Um, an area that is in shadow. Okay. All right. So that is good enough. You want it to be dark
where that sorry, this leaf here is going. There's that bit there.
I'm gonna leave that. That can just be a gap
between the two leaves. So I won't go any further
on that one than that. We'll leave it at that
we can always come back. Always and come
back to everything. We just don't want to
make anything too dark. So I am down to the
last two leaves to go, so I'm very excited about this. I might start with this one. And then, as you recall, I did the shadows of this
one, which was for this one. So this one I either
just have to repeat it or I put that shadow in there, and
that will help that one. I might do that. Alright, so we'll We'll just do that there. And then, um, I can actually do the correct
shading on that one. So we'll start with
this one here. Okay. That one is now
also pretty much dns. It's really hard when you've got some leaves that really
there's nothing in them. And the stem is
so light in Yeah, the little veins in
the leaf are so light. I did forget to put this
bit of the leaf down, so I just threw that in. That was easy.
Alright. Last leaf and last bit of the stem. Got to try and keep this shadow going through without lines. Okay, I'm going to get a pencil. Oh, gosh, that's a six B, so I won't go that one? To be. I'm actually going to put the shadow bits in
because the pen has to run this way because all it is is bits of light
coming through. And I want the leaves
to still run that way. So it's very light. You probably can't even see what
I'm doing here. But I'm just carving in a couple of guidelines. Like that. There's one there, too, which
I probably didn't need. And then I will just continue
on with the direction all leading up to 'cause it's
quite in shadow this leaf. So hard to see what is
going on with this leaf. So I'm going to change it to become like this is
going to be the fold, so the underside of the leaf. I went a bit dark there, so I'm going to be
a little bit more careful here and leave a gap as well as to where the fold of the leaf
or the edge of the leaf is. And I may even I'll actually put some little lines through just so it's not
too stark white. Okay. Time to review
it and see if there's some bits that
I want to neaten up. So just put it straight again. Um, I'm liking it. I'm much happier with putting a few little dashes through there so that it
wasn't stark white. Um, looking at the
one on the screen. And then at this
one. I'm liking it. Definitely liking
it. Okay, so I will come back with a new video
or conclusion to doing this.
9. Sunflower Wrap: Congratulations. You are
at the end of the video. Thank you very much
for joining me for the Sunflower
pen and ink class. There's a couple of things
that you can do now. I better just turn off the
sound of my computer there. Go to your project
and resources tab in Skillshare and take a
photograph, nice and clear. It's nice and focused and send me that picture
so I can see it. You can do this at any
stage through the project. Secondly, if you want
to add color to it, go for it, but you just have to be careful about
what paper you've used. If you've used a
cartridge paper, it's best not to put
any wet media down. I just had a bug
fly into my glass. Cartridge paper
is for dry media. Colored pencils or tombo markers is one of the tombo
markers here. If it is mixed media paper, which mine is, you could
put down some watercolor. Don't do paint, don't do Gase or acrylic because
they will sit on top of the black and they will cloud it and make it not as
clear and crisp, but you can use
watercolor if you like. That wraps it up. I really hope to see your results in the
project and resources tab, I can give you feedback. It will be all constructive
and beautiful feedback. Join me on the
Patrion page as well. Just go to Patrion and search
for misses Red's Art room, and I would love to see you. We're just sketching
sketchbooks on that channel, pretty much, come and
draw with me. All right. Well, now is the time to say goodbye and happy sunflowering. See you in the next video.
 Jane Whittred, Art Teacher and Illustrator at Mrs Red's