Transcripts
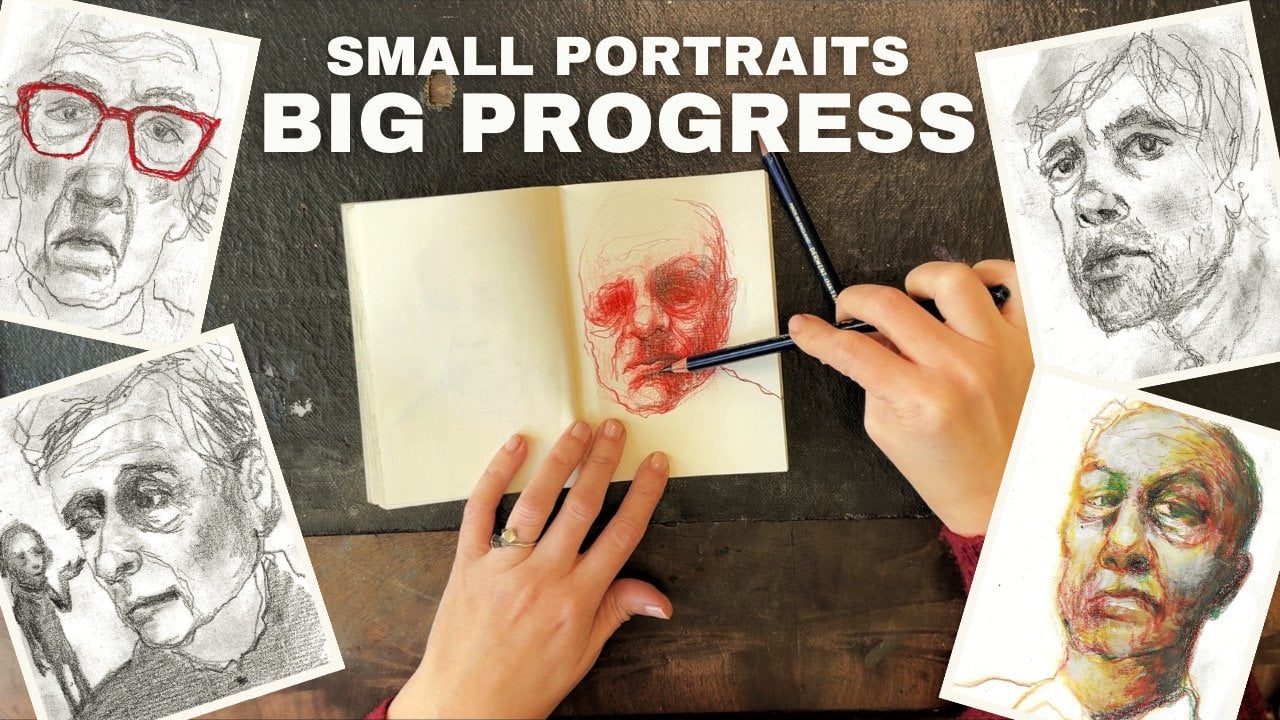
1. Welcome to Class: Can I tell you a secret? I absolutely love to create
loose and immodest portraits, but I avoid measuring
like the plague. I think it's really boring. And if there's one thing
that's important to me, it is that arch should be
phon, like all the time. Hi, my name is jerney
Marisha and I'm a Dutch Art teacher and Creative Coach with a
background in our therapy. I'm not a therapist, but I use the principles
to help my students to conquer fear of failure and other limiting beliefs
that are holding them back. And just have some
FUN where it's already because there's
enough stress in life. I live in Antwerp
with my free cats and I create in pretty
much all the media. But for this class, I decided to stick
to charcoal because this was my absolute
favorite medium to learn and to focus on emotion and expression,
value and form. And it's so incredibly flexible. So it takes away the stress of making a mistake because
it's just charcoal. You're going to erase it or wipe it and try something else. And step-by-step to
create awesome portraits. You'll see by the
end of this class, you'll have at least
six dynamic drawings. But more importantly,
you will have the newfound confidence to
just dive into your portraits, not worry about the results. You'll have learned
different techniques to create loose portraits. And isn't that what we all want? I know I do though,
what do you say? I ready to learn? Take my hand
2. The Inner Critic & Perfectionism: I'm so happy you're here. Now before I dive
into the exercises, I'm going to walk you
through the arts supplies and we'll do two quick
warm-up exercises before we dive into the actual exercises
to work more loose. Warming up when
you start today in the studio is pretty important. And I'm going to tell you
why using my own example. Typically when I wake up
and I want to make Art, I will make some breakfast. And then the
procrastination starts. I will do stupid
games on my phone. I will watch series, Netflix. And this is because our Inner Critic works
below the surface. Gets an old coping
mechanism from childhood and it's afraid to be judged
and to be criticized. And if you don't do
anything, then guess what? You're, you can't be criticized. That is why you feel resistance. Even though you really
want to create. It is why we do small
warm-ups where we're not really creating
anything big. It's kinda like visual gibberish maybe with little snippets
of things that interests us, maybe some mild mark-making. We just want to get
our body moving and to sooth that Inner
Critic and let it know that it's safe to create. And strangely enough,
this needs to be done every day when we start in a studio because
that Inner Critic, it is very persistent. But it can be worked with. Only need to do is make the decision to just
start even though you have no idea what you're
going to do or you think, I know what I wanted to
do but I can't do it. It's the Inner Critic
talking while we can't get rid of
it just like that, we can make the conscious
decision to not let it affect our arts and do a little
warm up, maybe two. So if you're ready or
not, Let's Dive in.
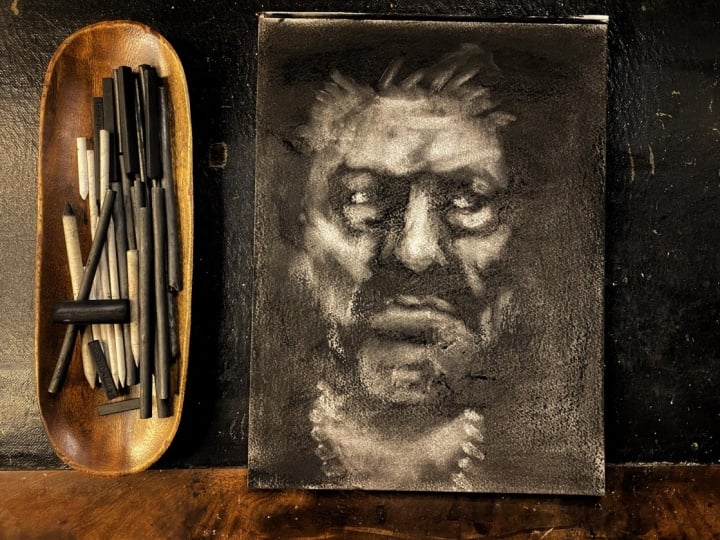
3. Supplies: I just wanted to do a quick
video on Art supplies that I will be using in this class for the
charcoal newbies. If you are more seasoned
charcoal artist, then feel free to skip to the next lesson
and dive right in. And otherwise, let me explain. I have a couple of sticks
of the willow charcoal. Vine is fine as well. For that lighter value
that is easy to erase. Then I have some of the compressed
charcoal that is really, really black, but it is
difficult to erase back into it. It can be done for sure. But it's really hard to get back to that white of the paper. And if you want that, then this is your friend. I also have couple of charcoal pencils and I
really loved the stat, one of my patrons
sent me from the US, the generals charcoal and six B. I couldn't find them over
here that we're so soft. And they're very nice
to draw with if you want delicate line work and
a little bit more control. And because these will
break pretty easily and you'll have to do
your best with these. Really, really recommend these. Of course, my blending stump. You can blend with
your fingers as well. But this will work a
little bit better. I will show you
why am I going to do maybe it's break
this one there. So maybe not going to do something. Very nice. This is kind of a base,
moody little face. Very weird. You can blend with your finger. Shore will work. But I like this blending
stump little bit better because when you do
it with your fingers, then more of the
charcoal will come off. But if use this, then you can really move
it around your page. Really like the tier if
a still kind of black. But if I go with my finger, first of blackness,
I didn't know. After food it back in there. That is why I like it. You can really shape a portrait
with this fabulous tool. It looks like a human already. I think. Then there is the charcoal
powder, which I love. Now, if you don't want to
buy to charcoal powder, then you can do
couple of things. You can take some sanding
paper for sandpaper. I'm not sure which is you can
just connected like that, but that is going
to take you, wow. So you can also do is get one of these
and just pounded. And now you have some powder. With a little bit less effort. It isn't going to be as
fine as the store-bought. But who cares? Maybe we'll get interesting
marks with this little chunk. Let's see. Works. You don't need to run it Art Supply store. For one lesson. The one with Figure Drawing, I'm also using one of these, and this is the color charcoal by Art chunky from Credit
color, create a color. I don't know. You can also use white chalk. You can use Pastel
Pastel, contact France, whatever you have at home, don't don't feel like you need this to be able
to do my lessons. Just work with what you've got. Now, let's play
4. Intuitive Play Session: Let's do a little warm-up, get to know our supplies. I'm just going to take my compressed charcoal
and my willow charcoal. And the way you can
tell them apart is that this one is much lighter
in weight than this one. And also this one is
very dark and shiny. And we're just going to
play around with it. Not making anything unless something evolves by
accident, It's always FUN. But even when that
doesn't happen. All right, let's talk about the difference
between the two. So this is the will
of charcoal and it's very easy to move around. You can move around
this one as well. But you can take this
one much further. See you'll get closer to
the white of the paper with the willow charcoal
and a compressed one. Now, what if we take
a kneaded eraser? I'm just going to put
it back in there. He, this one is much blacker
and willow charcoal as well. Now let's erase through it. Just one stroke. Same thing here. This is much harder
to erase back into. You can do it, but you won't get as close
to the white of the paper. Okay? So I really like to draw
on with the sides of them. But you can also use the tips. You can press really
hard or soft. You can very pressures
S your drawing. You can twist it around
as you are drawing. That also has a nice effect. Pressing harder,
pressing, softer. Twisting it around. And a twisting gets you very unpredictable
line work, which is mice. And do some mark-making. And try to experienced
the difference between, for example, here
going from bottom to top and from top to bottom. What feels better to you? And can you see
difference in into vibe? Can experiment with
going on top of your mark-making with
a blending stump. Really love this as a tool. Maybe you want to do some mark-making on its side as well. Maybe you like found figures. I really do. So I can see
an eye socket right here. And I saw good is something
that I will see very often. You can take that as
reference points. Then maybe you can
erase back into it. This is my Tombow eraser. It's really nice. Like a mechanical pencil I can pull it in an eyelid, maybe cheekbone, their forehead. Just let your imagination roam free in this little
play session. And take it step-by-step. And if it comes out weird, then more power to you. I like weird stuff. So you can combine line and and color blocks and really make some cool stuff. I like putting into whites
of the eyes right here. And you can make an I
like that. Cool, right? This is all bonus. Know, if you want to work
abstract than abstract, whatever helps you
to get in the zone, I free happen to like figure. So That's what makes it's been for me whenever I
do play sessions like this. You can take your
charcoal powder and they with that
for a little while. You see those dynamic marks. You erase back into them. Just try out all the
things and See if you find something
that you would like to repeat in a more
intentional way later on. But for this session, just be bold and ask
yourself, what can I do? What else can I do to
this little play session? Maybe? I want to repeat
lines on top of each other. I think that is cool. Something I really enjoy. Maybe changed directions
of certain marks. That's also pretty interesting. And don't be afraid to
leave things unfinished. I hope you enjoyed
the inspiration and I wish you lots of PFK-1 on
your own play session. Let's see what a
charcoal can do.
5. Experimental Lines: When we hold our pencil
as if we were riding, we have a lot of control and therefore we can get
very tight drawings. So I suggest that
you try and hold your pencil near the benefits and throw you into the face. Just map out the features
and have some FUN with it. We're not creating
anything special. It's just an exploration. Don't be afraid to draw
multiple lines that overlap each other or make
a very wonky and big ear. Very, and pressure. You're putting on your pencil. Whenever you would like lines
to be a little bit darker. And experiment with this grip. When you hold it
a little bit more tight than you have
some more control. But if you'll hold
it very loosely, then you get wonderful
squiggly lines. Now, let's try some drawing
with our non-dominant hand. I'm not going to lie,
it's going to feel weird. But this is a very nice way
to start a drawing whenever you're maybe working from a reference photo and you
are too much in your head. This way you will need to
divide your attention between your perfectionism and trying to make your non-dominant hand do whatever you want it to do. And often, oftentimes that will lead to very loose drawings. Always switch hands
at a later stage. But no, maybe not
because there's always a risk of losing that initial looseness
when we switch hands. I will show you that
later on in this lesson. And if you're looking
at your drawing and you want a little bit
more value in there. You can always take your finger and smudge it around
a little bit. Way you can create
form if you want to. Really liked the shadow
underneath or nose there. Okay, so now I'm holding my
pencil near the end again, but I'm holding it
sideways as I'm drawing. My hand is really up
against my paper. It's also a different experience and we'll have our own
Favorites and it would like is to try them
all and just see which one suitable for you. The trick to lose
portrait drawing is to not get lost
in the details. Especially when we're working
from a reference photo, we can get really caught up in getting
everything in there. That's awesome. Mesos more. I get it. It can be hard to
know when to stop, and we all struggle with that. But as we are drawing and
practicing and making mistakes, then after a while you learn. Any one way to get there is by having a lot of experience. So let's make some drawings. Right now. I'm doing the
stabbing technique. It's like you're holding a knife and you want
to stab someone. I imagine. I didn't know, I don't
have experience with that. Not one of my favorites
because I get tighter from it, but I've seen artists do
wonderful stuff with this. So try it for yourself. Maybe this will
be your favorite. Personally, I'm more of a fence for to techniques that will give you very delicate line work. Right now, I'll show
you how you can lose your looseness when
you're switching hands. I'm going from non-dominant
hand to the dominant one and see how I
have more control. And immediately my drawing is getting a little bit tighter. It's not necessarily wrong, it's just something
to keep in mind. And now I'll show
you my favorite one. As I'm drawing with
very loose grip, I'm twisting and
turning my pencil. Make your movements extra slow. Take your time and find
your way across the paper. Just indicating
where the features. Here. I'll show you better. I can see my hand
as I'm drawing. You just want to indicate
where the features are. We're not getting into detail. All we're after are
these dynamic marks. Because you know what? Our brain has evolved to
recognize the human face. So as long as we're
making our marks in a certain pattern while we're observing the
shadows in the face. If we have a reference photo, then our brain is going to
interpret that as a portrait. So why were we obsessing over getting all the details in
there again, I didn't know. I hope you'll give it
a go and try to reduce the portrait to its
bare essentials. Often of the times this
makes it much more interesting than
the hyper realism, which is a real skill. I admit that, but I often miss a lot of emotion
in those portraits. Now another thing that I like to do when I have all my faces, I'm going to see if there are some that I really don't like. And then I'll just do
something to those. And I'm going to make an effort to improve
them just a little bit. And this is to practice my
problem-solving skills. Those are really
important for an artist because there will be lots of times where things
won't go our way. And it's important that we learn not to give up
natural rip up the paper. Take a step back and think of how you can improve that image. Again, it's not the goal
to make the perfect image, but the goal is to practice
with perseverance. And also to build
up our confidence. In this class, I'm going to
give you lots and lots of tools for you to practice. And if Fung and get out of your comfort zone for a
little bit, be PFK-1. Now, let's move on
to the next lesson
6. Let's Dive in! A Tiny Pep Talk: Now it's, we're all warmed up. Let's move on to the exercises. But first, I want to
address a couple of things. First of all, something
that's really important is finding a
good reference photo. The ones that are
easiest to create. Feminist Art width are the ones that have some emotion
in there already. And high contrast
black and white photos because it's really easy for our brains to
interpret those. And I got your back because
I will put a cheat sheet in the class resources
with links to my Pinterest board with excellent portraits
that you can use, and also all the exercises so you can just leave it in
your studio and look at it. I wanted to death today. And I'll also put in a
couple of bonus exercises for those of you who'd
like to create even more. Yeah, been portraits. If you're watching a video and you'll feel a
little bit intimidated, then know that it's
normal and do it anyway. Because when you're actually
doing the exercise, you will find your way. And even when it's
hard, first time, try a second time
because let me, let me show you something. When I was filming
my class project, I started out with this girl and I didn't
really like her, and that was because I
wasn't warmed up yet. Follow your own if
five jerney, why not? And then I created this
girl which I really loved. So give yourself some time. No, don't expect yourself to always deliver
high-quality stuff. It's not realistic. Okay, rambling. Let's go to the first exercise.
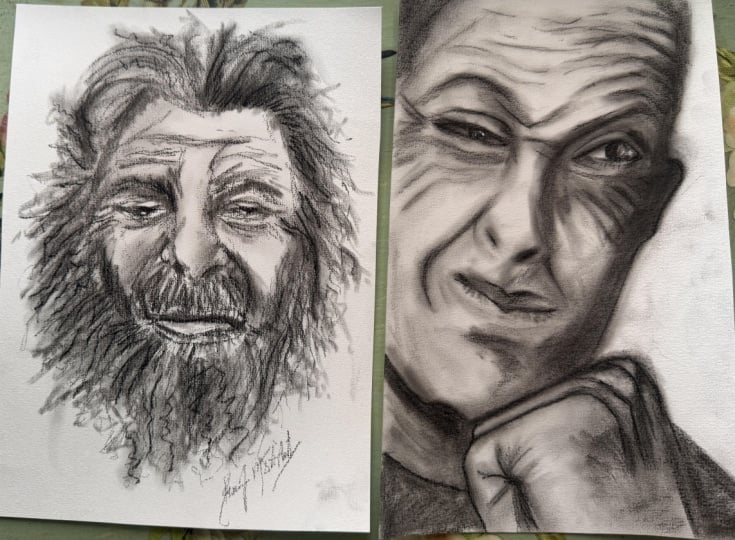
7. x1. Hands Only - Ditch Those Details: That's changed the way
we look at Portraits. Going to take a bit of
this charcoal powder. And we're just going to move
it around with our fingers. And that way you can't
really go into detail. And we just need to observe
the values in the portrait. We're going to put
in the shadow parts. Let's take a little
bit more there. And this will teach
you to look at the essence of the Portraits
underneath the nose here. And here's the mouth. Can't go into detail. I'm going to ignore
those glasses, fight away. It goes. I want to I like how marks like this can indicate
wrinkles into forehead. See how with just
your fingers you can really simplify the
portrait even bigger. Let's put in, I have a bit of charcoal powder on my
fingers had put in at head because I kinda like it. We need more charcoal powder there. Maybe a bit more
charcoal powder here to here that is
really, really dark. That is what we want to observe. We can do it with our fingers, we can learn how to do it with
our drawing tools as well. Let's see how loose this is. Even without details, you can create very cool
looking portraits. And if you want to, you can, you can go into it
with some charcoal, but I recommend
that for first few, you just play around like
this to a couple of them. And then maybe at the
end of the play session, maybe three to five for
something like that, just a couple of minutes. And if you still want to
work in some detail, Stan, start with your lease
favorites of the series and tried to see
if you'd like it. I agree happen to like
this guy as he is, maybe I will give
them a body as well. If I'm Nick jacket. If I'm some context, you know, there'll
be a body language. She's, it seems a bit
and bit hunched over. Sorry, talking in. Creating can be hard sometimes. See, I really like
this color right here. So you just need to
create those silhouettes. You don't even need
a details in here. You can try to put
them in there. Make some highlights.
If you want to. Put in some highlights,
you can take a clean finger and
remove to charcoal. With them. That way you can really play with
light and dark. So if you have made a
made mark somewhere, didn't really want it that dark, then you can just try to find a clean spot
somewhere like that. Maybe here as well. A bit more forehead, maybe ear. But don't overdo it. You don't want to murder your
cool and Loose portraits. The array liked it before. When you notice that
you get too fussy than that is a nice indication that you need a little break. Just a couple of little marks
can really hint at an ear. Maybe a bit more of that. Beanie. There he is. I wish you lots
of Fun with this exercise. Whether you are convinced
that you can do it or not, just go for it, try it, because we often convince ourselves that we
can't do anything. And then we give it a try, and then we are blown away because it's so much FUN
and edits my wish for you. Let's get our hands dirty
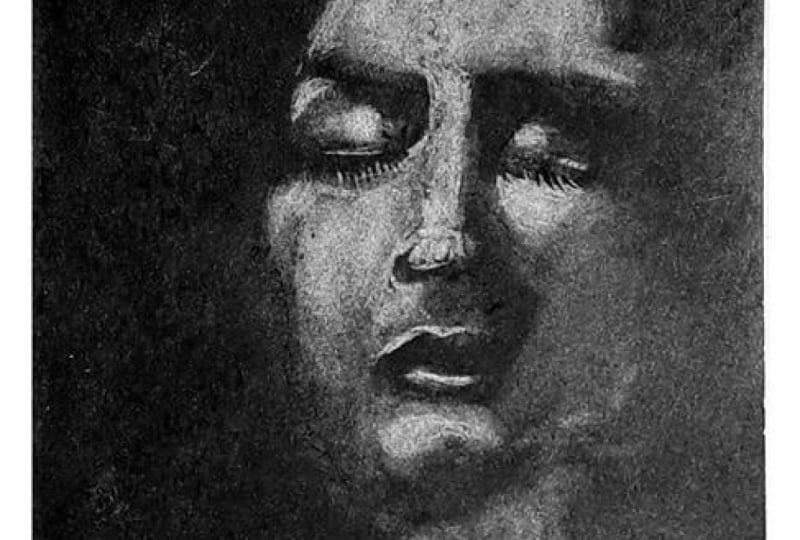
8. x2. Painting With Charcoal: This exercise is really great for when you want to
figure out portraits. And you don't really
know where to start. It's best to find yourself
a reference photo with high contrast so you can spot
the shadows really easily. And that's just what
you're gonna do. You're going to look
at the Sheriff's. I'm going to start with
the shadow on the nose because that is easiest for me to start as
kind of a triangle. There. Then here is
a shadow of the eye. There's a shadow underneath
the eye as well. Don't need to be too precise. Just going to take
some more year if that pupil see it's not about likeness
or be incorrect. It's about exploring
this portrait. Here are some
shadow in his hair. Here's an ear there. That's good enough. Then here is also very dark area underneath
his cheekbone. So you put that in there. Bit by bit. You're building
up your portrait. There's a shadow
underneath the nose here. Then the upper lip is
pretty dark there. And then underneath the
bottom lip is also darker. Hair. Sorry guys, sound like Bob Ross. It's just, I don't know why. I think I watched
him too many times. Really love to show their stop. And then can just move the
charcoal around a little bit. Knows it's a little bit
bigger so I can just I can't make adjustments there. And underneath this is
also a bit more shadow, so I can still put it in there. Now I can see what does
this portrait need? There's a bit more
body behind him. And body language
also has an impact on Your portraits so
you can observe it really well or you can change it up a bit if
you want to change the emotion and you don't need to know
which one it will be. Just try something and observe. You like your Portrait
more or less. Hopefully more. But
if you'd like it less could change it again. Charcoal is very, very
flexible, like I said. Now in about 4 min, we made a quirky
little portraits. And there's some emotion
in there and you can, you can just leave it like
it is and its practice. Just about learning how
to build a face with values by observing the darks and lights in your portrait. But you can also take advantage of maybe
compressed charcoal. And you can try and
work in some line work. See if you, if you'd like that. You can emphasize
certain features. Can put in a maestro
if you want to. And less is more really don't want to
lose that looseness. Some line work in that ear. Again, we're not doing
anything realistic. If you haven't trouble with, with a lack of focal points
in your brush portrait and just put it in a couple of lines and you don't need
to outline everything. And if you regret a
mistake or a decision, rather regret her decision, you can take your
blending stump and maybe push it a little
bit more to the back. There. Maybe you want a bit more contrast here. Contrast adds a bit
more depth into your portrait and you can
make it softer again. Try not to be too focused
on the end result. Just pay. Let's see, we can bring a
bit more life into this. I am going to put in
the iris right here. And maybe I want
to find my eraser. I like my mechanical
eraser by Tombow. And let's put it in
a reflective light. So if there's a window here or something or there
doesn't matter. Flag of lights on top
of on top of the iris. Cool. You can you
can play around, go back and forth and
see how you like it. Trying not to rest my risks on a charcoal because
I'm going to make marks. Like to draw with
the side of my, my charcoal because I
like to texture see. So you can really create some form on top of
those brush strokes and work in little
patches at a time. Because sometimes we can
get very enthusiastic and we tend to take
it too far. Here. You can keep observing
your portrait as well. Maybe underneath that knows. It's a bit more dark. I can see in the reference photo longer you observe a portrait memorial. See, don't worry about this being an archival
piece of Art. Just explore. I know I say it is a lot, but I really want
you to believe me. If you want bit more
highlights somewhere, you can just take your eraser. I'm going to use
my kneaded eraser and under budget the nose, I would like there to
be a bit more light. And I want bit more highlight
in some places to make it seem like it's more to the front towards us because
those parts of the face, they catch the light. Typically a bridge of the
nose here to cheek, forehead. And it really makes
it three-dimensional. Here that no swing also
has been a light on it. You can really fine-tune
your portraits. Now it's your turn. I hope you'll have lots of PFK-1 and don't be too
hard on yourself. You'll learn with every
sketch that you make
9. x3. Drawing With Both Hands: This is one of my
favorite exercises, drawing With Both Hands. At the same time. I'm likely mapping out that face with the
side of my charcoal. That will help me to be a
little bit more confident when I'm going to do my line
work in about a second. It really helps with
that starters, anxiety. And using both your
hands simultaneously really helps to battle
that inner critic because we're so focused on observing and executing those
movements at the same time. We don't really
have much room yet for that judgmental
part in our brain. And you'll notice that
placement can be a little bit hard because for giving
up some of our control, that is actually a good thing. Doesn't really matter
that those irises are in a slightly different direction or that the eyes
are too far apart. What matters is that our mark-making will be way loose or when we
draw with both hands. And maybe this will
not really happened. First time you try this because
you're too worried about the end result and you still try to control very, very much. Just try to do a couple
of thumb in a row. And you'll notice that
after first one or two, it will become much more easy. And especially when
you put on some music, something you can sing along to let you know well
and that you love. And that will also distract
your inner critic. I hope you will give it a try. It has helped a lot
of my students. As you can see,
sometimes I forget that I should keep my hands
moving at the same time. But that happens. Your exercise hasn't failed. When that happens. Just when you notice
that you are doing it, try to get back to the original exercise because
it's not about perfection. It is about the experience
that we're having. And that's it. Just a couple of minutes. That's all you need. Now, let's move on to the next lesson.
10. x4. Negative Space - Figure it Out: Another way to create loosely, especially when
we're drawing fears, is to draw by blocking out the negative
space around the figure. And I'm just going
to start by putting some value on my paper
with my charcoal powder. You can also put some
charcoal powder in a pantyhose and just
rub it over your page. That is easier, is less dusty, but I can't find mine. So let's start. I'm taking my compress
charcoal because that is darker than the
willow or vine charcoal. And I noticed that I'm
having some trouble with adhesion because
of the Dustin is that I told you
about earlier. So that's why I was
rubbing way to dust and now it's easier for me
to get it on there. And I'm just observing the dark spaces around that figure on my
reference photo there. Without being married to it, I don't want to
stress myself out by putting too much
pressure on myself. That it has to be exactly the same as the reference photo. It's just here for
our inspiration. Remember we're
working loose, right? So let's not go for 100%
ligands or even 80 per cent. Just have FUN with it. This is such a great exercise to practice our
observational skills. Without the need for
tedious measuring. I personally disliked
that activity very much. And also this way we'll get you much more loose figure
in the end, you'll see. And if part of your Figure doesn't make it onto the page,
just roll with it. Maybe it will be
interesting when there's something left to
the imagination. And you can always do another round and
be a little bit more mindful of how much base you
actually have on your paper. It's always a bit of
a search and don't be disappointed if you don't get it the way you want
it right away. There's nothing wrong with doing the study three times in a row. I applauded when you do so. Sometimes I'm a bit
lazy with this, but one of the best and
most annoying Exercises my Art teacher gave me when
I was studying ART therapy, was to make ten drawings
of the same still life. I hated that exercise, but when I got to that
ninth or 10th one, then I was so fed up with it. Then I get sloppy and
I would work really, really quickly because I
want it to be done with it. And that was the best drawing of all of them because I
just didn't care anymore. I wasn't being fussy. I just wanted to get
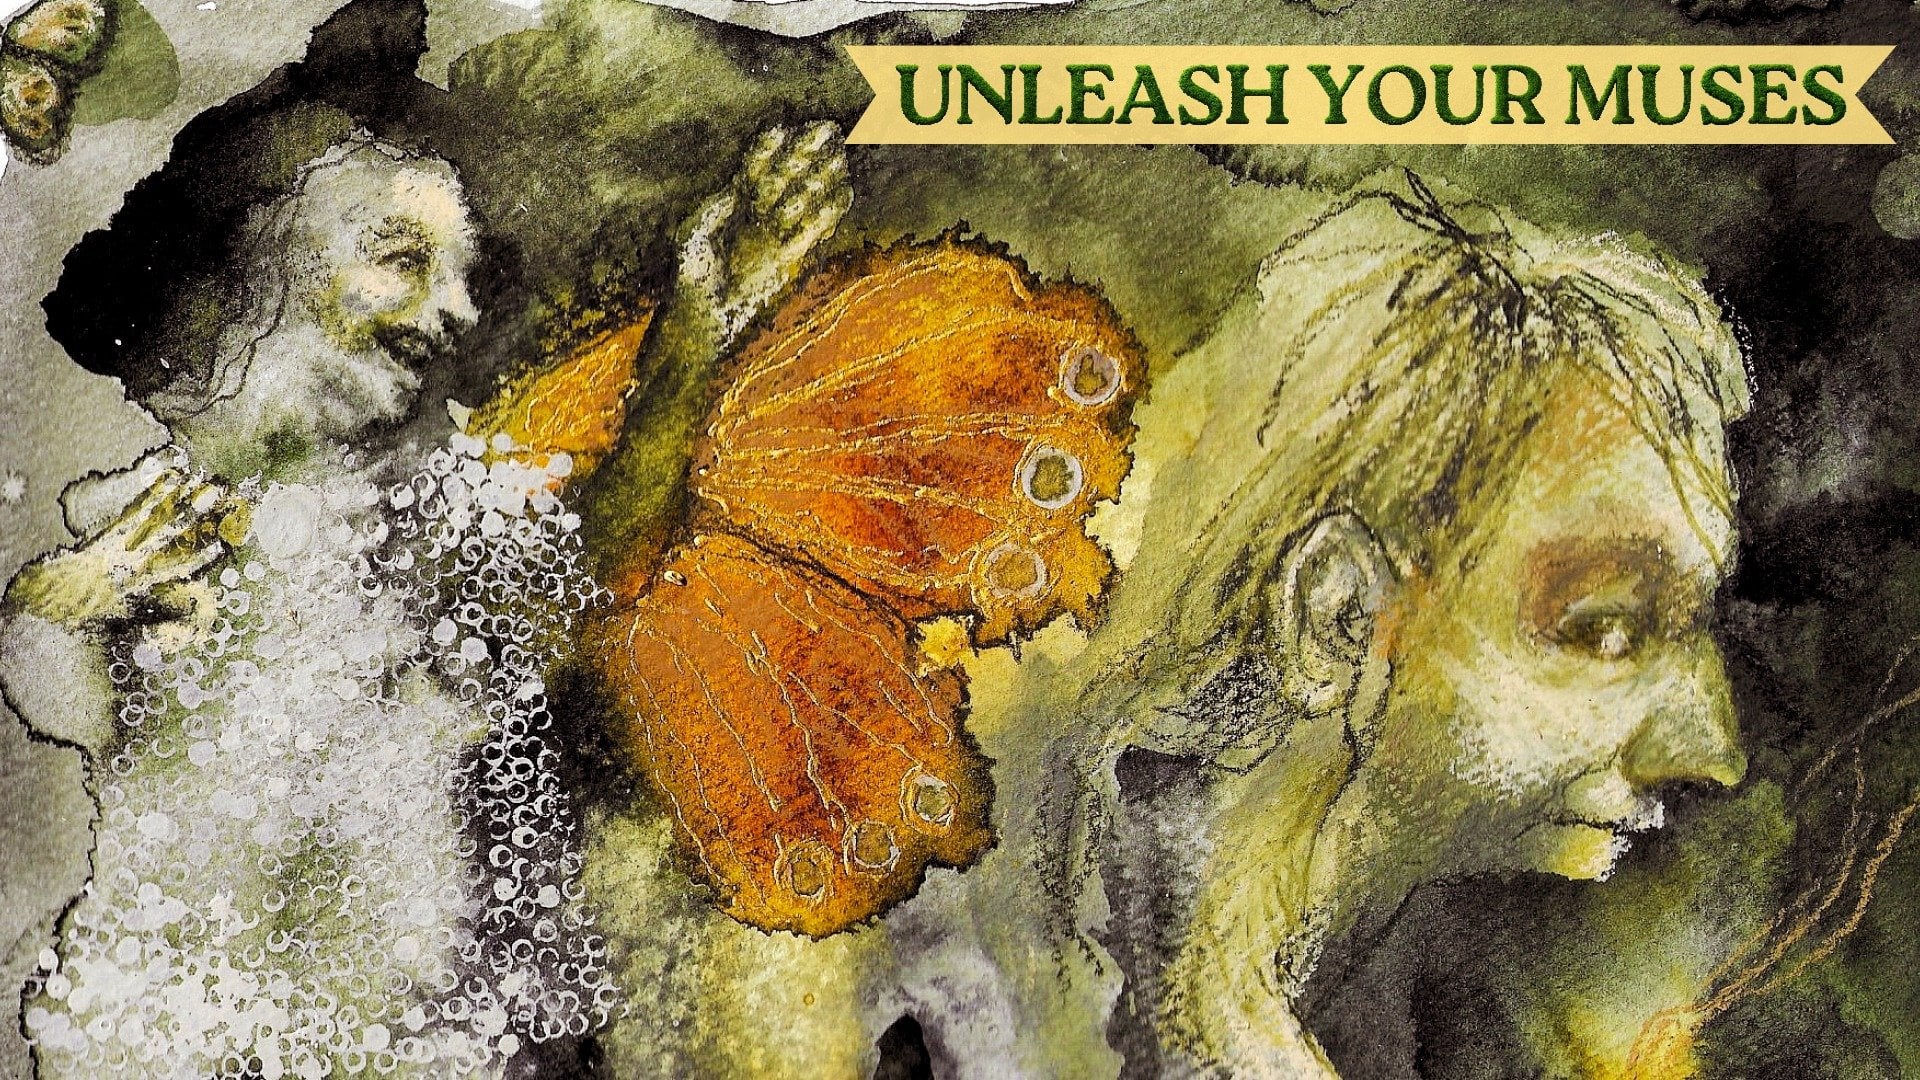
it over with and yeah, for me to really work. Right now, I'm trying to find my highlights with white chalk. And I'm giving myself
permission to not be right. I just want to create
an interesting figure, but I'm not going to recreate
that woman on the right. But she is my muse, so yeah, I'm just making quick
motions trying to get that pattern in there without being too
mathematical about it. My only objective
here is to practice. Have FUN doing so, and maybe find an
interesting figure. I'm not going to frame
this or sell this. This is just for my own
personal development. And if it's going to end up
looking great, then awesome. And if not, then that's okay. I have learned something. Maybe I'll get inspiration
for the next piece. I think I will let you
observe for a little while. Just remember to slowly build up some form by alternating
between dark and light values You can reshape your
Figure any moment. Who have total freedom. That's all I want you to know. I hope you enjoyed watching me. As you can see, this girl is far from perfect. Her hand is awkward. You can't really tell what exactly she's doing
there near her mouth. Her head is a
little bit too big, but not that much that
it really bothered me. I kinda like her. Her forearm is awkward, but then again, the one in the reference photo is as
well so bothered by that. But what you do see is someone who is in deep thought and our
some emotion in their, It's rather loose
and has a nice vibe. And that is more important than everything being
where it should be. You know, he
procreating everybody
11. x5. Erasure as a tool: Now, let's reverse things. Instead of focusing
on a negative space, we're going to fill up
our whole page with charcoal and then
erase back into it. So now we're going to
focus on the highlights. And this was the
exercise that really made Charles click for
me because before that, I just wasn't getting it, and I felt overwhelmed. But by using your eraser as a drawing tool instead of
a method of correction, it really changed how
I looked at drawing, and it made me more capable of building up more complex
portraits in bits and pieces. So instead of looking at
the portrait as a whole, just focus on the
individual shapes like the forehead right now. Just focus on that. Next, try to observe the
shape of the nose. You know, it doesn't need
to be perfect as usual, but try to do
something similar and forgive yourself
for not nailing it. We're not trying
to nail anything. We just want to have
some portrait fun and build up some experience. And as you can see, I keep kneading my body eraser. That is because I
want to get rid of the charcoal on the surface, and then it will work better. Here I'm making some slight
adjustments to where the eyebrows would be just
to make my next job easier, which is focusing on
the upper eyelids. Just a few marks, that's enough. Don't sweat it if the shapes are different
than in the reference photo. That's only important when
you're going for likeness, and that's not what
we're doing here. Just going to observe and experiment and working our
way down the portrait. Now I'm going to put in
the whites of the eyes, which is kind of hard
with the body eraser. But try it anyway because
it will be looser than if I were to use my
mechanical eraser by Tombo. And if it looks a
little bit weird or makes the cross
eyed, don't mind it. Just continue with
building up your portrait before you're going to think about correcting it
with some charcoal. Just focus on observing first. And as you are drawing, you'll start to
notice new things. Like here, I noticed
that there is some more white around his eye there. So I'm putting that in there. And I just continue
like this for a while. Take it in bits and pieces. I can't stress this enough. This is my favorite
way of building up a portrait because I
don't like to measure. And this is way more intuitive. The only thing is that sometimes they come out
a little bit wonky. I personally don't mind it. For example, look at his nose. It's a lot more straight in the reference photo than
in my drawing there. But, you know, I don't care because this is just
portrait practice for me. And if I would really like to work on this
portrait properly, I can just take some charcoal,
make some corrections, go back and forth between drawing and erasing
and fix it that way. So don't panic if some features kind of get
away from you there. It's all part of the process. Let's form the eraser into a tip and put in a hint
of his upper lip there. And the next few minutes, you'll see my concentration
going out of the window. Happens to the best of us, especially when we are
creating for more than, let's say, 40 minutes or so. We only can take so
much concentration. Okay, so watch this. Here, I'm really going to mess
up in a couple of places. I'm taking too much
away of his mustache. I'm giving him a very
weird cheek there. I try to put in his ear lobe, but it doesn't really work. So I will show you
how I solve this. I just take some charcoal and I'll put it on its side and just put back some of that black in there in
a couple of places. And if you go like this
back and forth for a while, then you can really create a portrait full of history
and interesting layers, and you can slowly come closer to the reference
photo if you really want to. Mm. Oh I hope you enjoy this exercise. Now, as a last suggestion, I will ask you to find yourself a reference photo
that you really enjoy because that is
where the magic happens. If this reference photo
doesn't speak to you, you will not enjoy
working on it. Now let's move on to
the next lesson. No
12. x6. Upside Down: A lot of us create faces with very similar facial features simply because we have learned
how to draw them that way. In this lesson, I'll show you a good exercise to try what you see instead of what
you think you know. By turning our reference
photo upside down, we're tracking our brains
so that we can finally see all the shapes that together
form this Portraits. We don't see a nose or mouth anymore for the most
part, of course. But we can read really
see those shapes and even more so if
we squint our eyes. Whenever you get confused, just squint for a little
bit and then you'll see the values and all the
details will fade away. And I encourage you to
draw pretty sloppily, especially when it
comes to the joules. Again, don't look
at them as joules, but observe the shapes
they consist of. Again, I'm drawing most of this portrait with the side
of my piece of charcoal. Like those textures. And it's easier to block
in the values that way. When you start with line work, it's not wrong or anything, but it's easier to make a
very tight drawing that way. And also when you're
pressing very hard on Your Charcoal while
doing that line work, it's pretty hard to
erase back into it. You'll still see
hints of that line. And this isn't always
problematic or anything but me personally, I don't really like that. Now, let's just
watch for awhile. Here. I'm noticing that white
is very wide and her face, so I'm smudging little bit to get a hint of value in
the rest of her face. Isn't it? Wonderful
that in about 5 min you can ready create pretty cool
portraits in this manner. So when you're happy
with your portraits, then just turn it around to
see what you're working with. And I really liked this phase. Now, if to droopy corn after
mouth would bother you, there is a very simple
thing you can do. You just take your finger
and wiping an upward motion. And that's it. I hope you enjoyed this lesson. Let's move on to the next one.
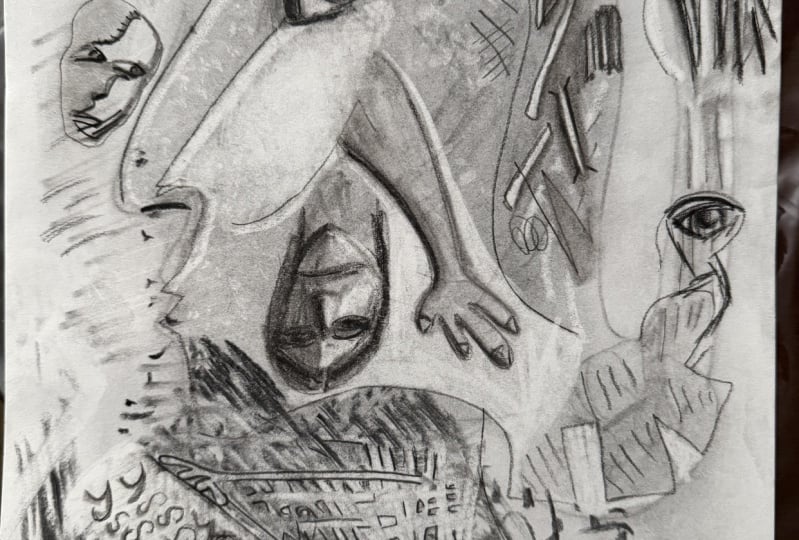
13. x7. Blind Sketching: Now we've been working
pretty small so far, but another way to loosen up is still work
a little bit bigger. And you can see that this
paper is pretty warped. That is because
there's an ink and watery ink portraits
on the back. But I don't want to
set it or anything. So I'm just going to use
this as practice paper. And I encourage you
to also not be too specific about your paper where you're just
trying things out. Unless you are afraid to
make something amazing. And then you have this
paper then spring forward to new and maybe a
little bit better paper. But I have gone a butter. Also about paper. I don't think I've mentioned it. I don't really have
a specific brand or kind that I prefer. Just as long as it's
not too smooth because otherwise you can wipe off
your charcoal very easily. And that's a shame because you put all this effort into it to draw
something on there. Other than that, use white, you're like, okay, so
now pretty exercise. I'm going to get up to my easel very closely so that I can't
see what I'm going to draw. I have two phases of charcoal. This is compress charcoal,
whatever you like. And here my nose is up against
my easel and I'm going to place my charcoal on and I'm going to move it around
the paper pretty randomly. Okay, you can do this as
long as you would like to. Whatever feels good. This is a very good way to
find intuitive drawings. So it's just Play. So I could see Figure in there, maybe this is the bum leg. These are nice and
I didn't know. You can also turn your
paper if you want to look at it from a
different perspective. But now I'm not going to just know that
it isn't an option. Okay, let's make a weirdo. Maybe, maybe
something like this. Just using my blending sounds. This is very textured. Cold press paper,
watercolor paper. You can make very dynamic marks where you just move it
across your charcoal. I'm not worried about him. Can put more detail in there, but can also just
kind of suggest them. I think it helps with
the anxiety when you give yourself permission to be a little sloppy. I was done to saying out of
work, but I'm not going to some weird little arm,
right leg extend it. This is what I meant
when I said charcoal is a very flexible Art Supply and it's really useful to figure
out proportions and ideas. Maybe before you turn
this into painting, you can spray some
fixative on there. And then I'm brush on a medium
and it won't move at all. And even without the medium, you can just go with painting there and some
of it will mix in, but that's also a way
to fix your charcoal. Just bring some acrylics in there and they will mute colors. And then it won't move anymore because it's
all mixed in there. Just try something. I think this is a pretty
cool looking figure that we found in
some random marks. Okay, I don't want
this to be too long, so that is it for this exercise. I hope that you enjoyed
this inspiration. And just try it. And if the marks make you see
a very weird, wonky Figure, try to accept that and
work with that and see how that can make your drawing more
interesting than try to adjust it to be very realistic. No, I'm fine with it.
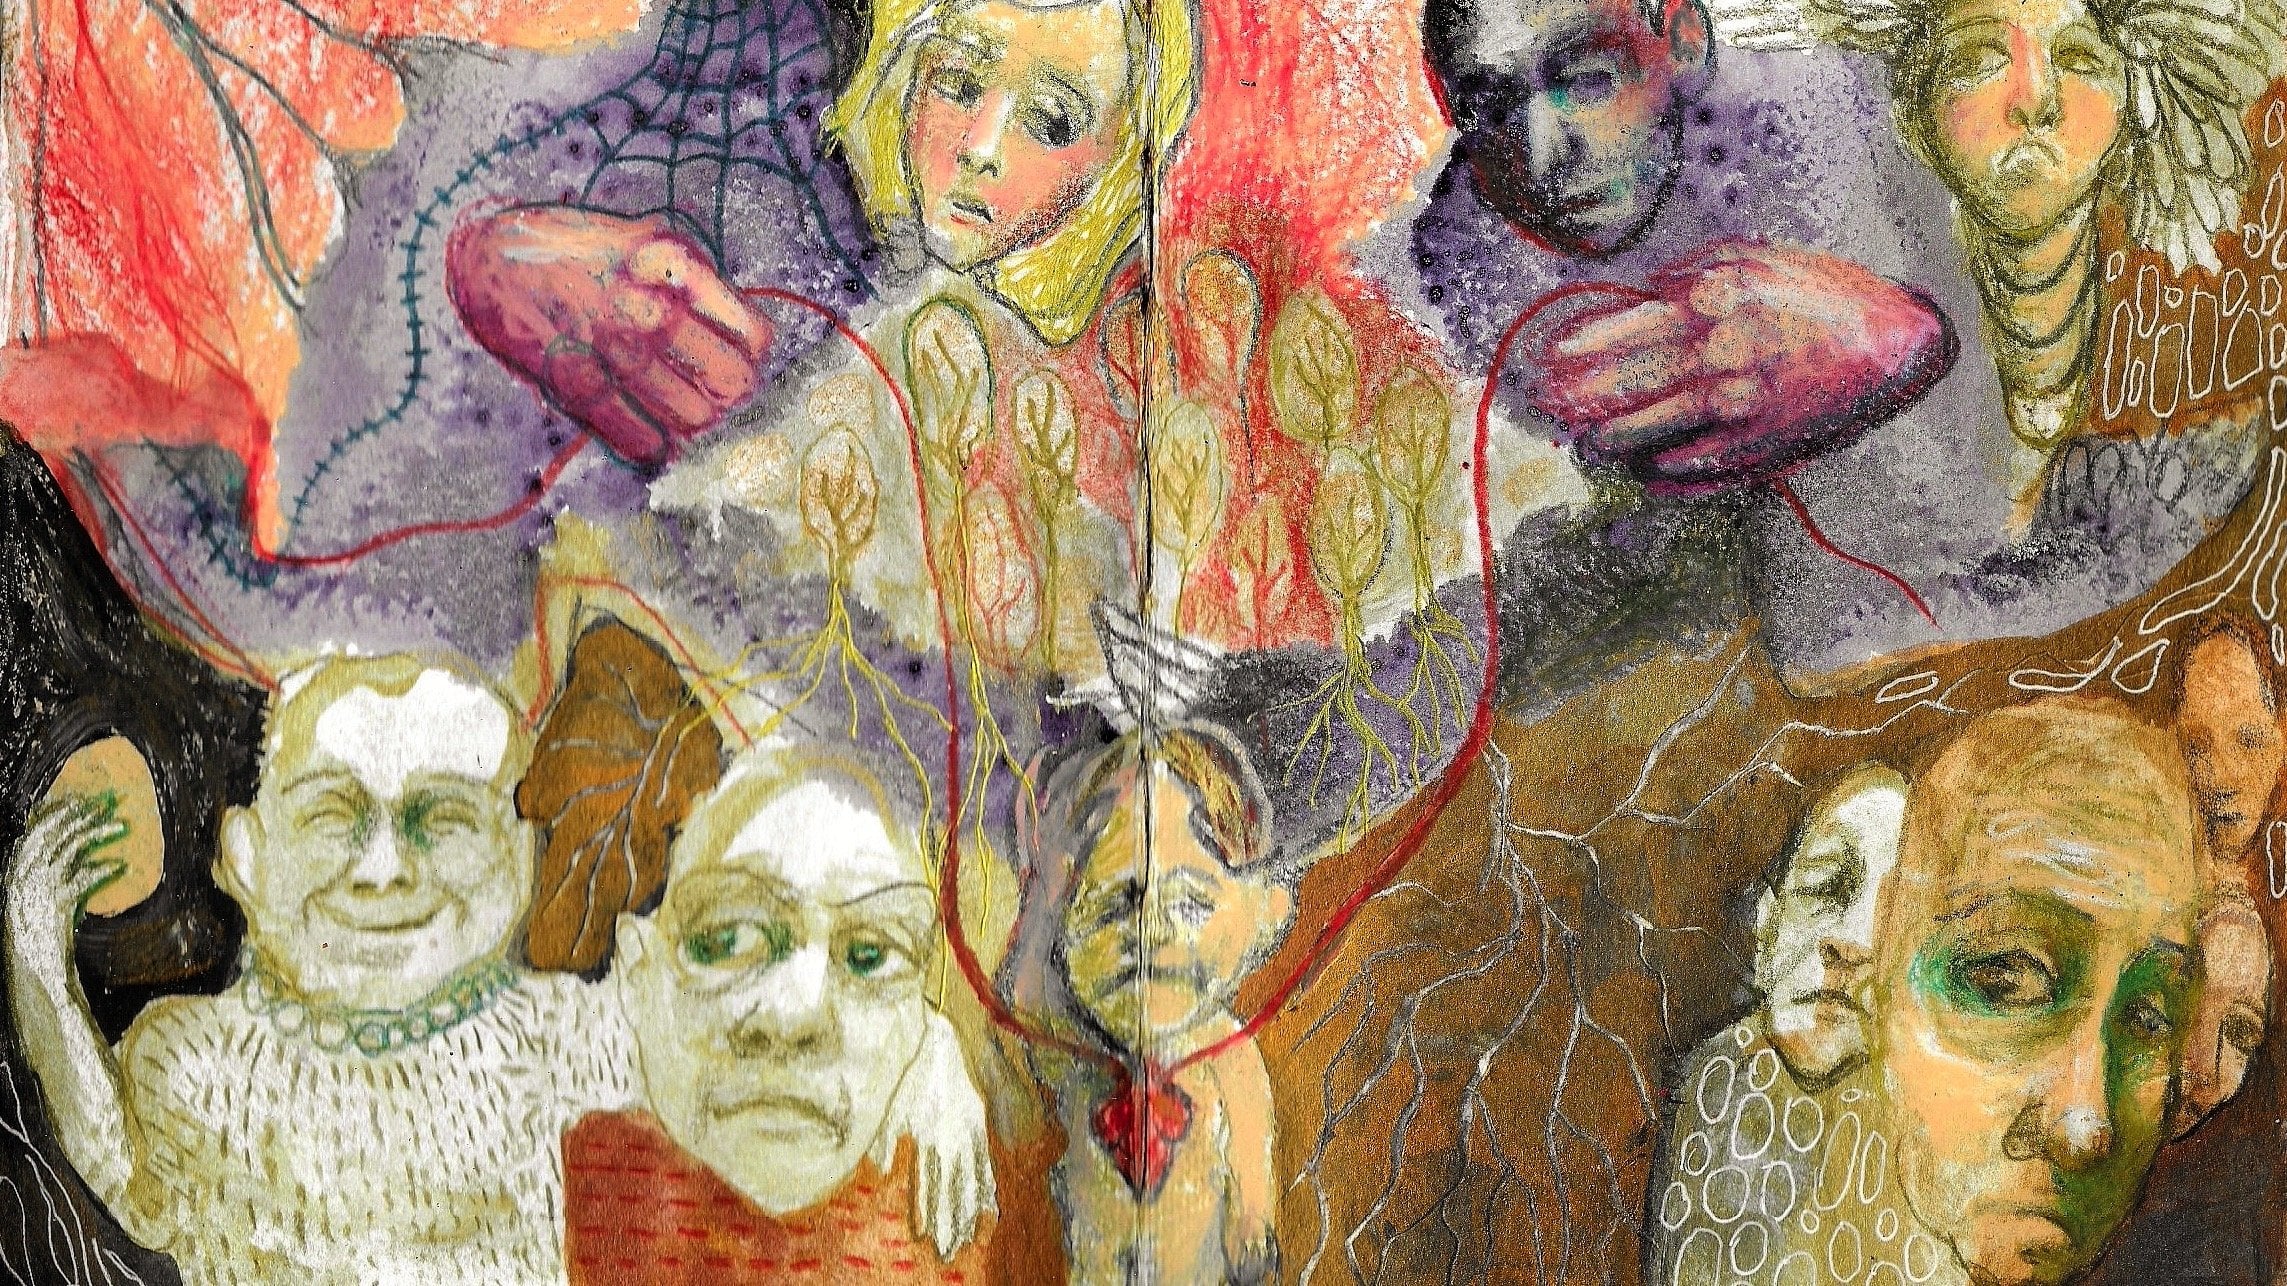
14. Now it's Your Turn!: I hope you had Fun
with those exercises. Now we're class project. I would like you to have lots
of Fun with the exercises. And if that's all
you want to do, then that's completely valid. And I've plotted, and I would like to see them
in the classroom if you're upwards because I'm curious and I want
to cheer you on. But if you want to take a
little bit further than I would like you to reflect
on them for a little bit, which were the ones that
you enjoyed the most. And pick 234 or maybe
all six of them. And combine them
into a new artwork. Just think about what resonated
with you the most and you can archive theater exercises. I'm just here to be a few tools and you pick the ones
that work for you. And make something new, mix, something that
feels good to you. If you want to create
abstract ART, that's great. If you want to create
intuitive Art, also awesome. But just try to take a minute
and think about how you can integrate these exercises that you loved into your arts. And I would love to see
what you do as well. Because all the reasons
that I said before, I just want to see it. And also thank you guys for leaving such
amazing refuels for my very first class
that helped me so much for width visibility with knowing things
that you enjoy it. So I can create more higher-quality
classes in the future. So thank you. Thank
you. Thank you. If you'd like to see more
of these kinds of classes, then give me a follow because
in the future I will create some more classes
on loosening up in different media
and ink, acrylic. All the things because I
love to use all the things. I said this already. Why am I why do I keep
repeating myself? Because that's how we learn. Okay? I had lots of PFK-1
creating this class. And I can't wait to see
what you'll do it at. Happy creating
 Jerney Marisha, Making Art Fun Again