Transcripts
1. Introduction: Have you ever stared
painting and wonder how it was made so spontaneous
and exciting? Well, this short
Landscape Painting, Let's show you where to start. Hello, my name is Dawna. I'm an illustrator and artist
currently based in Spain. And in this class, I'm going to show you how
to paint intuitively. Painting what you feel
rather than what you see, seeing shapes, rather than
a collection of things. Simplify your composition,
Paint loosely and phon, and understanding
light and shadow. I've worked with
galleries and sold more than 200 paintings
all around the globe. And recently, I had my first solo exposition since I started to be an
artist three years ago. And my goal is to
inspire other artists, especially the Beginners, to give painting and
reaching their dreams. This class is designed
for intermediate levels, although all levels can also
give it a try and have FUN. You can paint the spot I did, or any place that
excites you as low as it has a good quality
of light and shadow. Although this is a short cost, I've promised you
that this is packed with effective tips
from yours truly, based from my years
of experience to make your watercolor journey easier,
memorable, and exciting. So it is with pleasure
that I invite you to join me in this short
but exciting class. I really hope to see you
2. Plein Air Preparation and Tips: I'm so happy to have
you in this class. And now I'm going to take
you plein air to one of my favorite place in
this town is the path. And I made sure that I checked everything
from the weather to the materials to make sure that I will have a
bright and sunny day, especially during this class. Because we will be focusing
a light and shadow. And also is going to
say me for Brown, bringing some things that I don't need during the process. Now, I'm making sure that I tape the paper very well before
starting the Painting. I am going to make everything
ready for you in PDF so that you will be 100% fully prepared
before painting with me. So I look forward to seeing you
3. Material : Hello again. And now I'm going to show you all the materials that we are going to need
for this class. And also, I would like to
encourage you to improvise any materials that
you have an you don't have to always follow
what's in the video, but also to explore
whatever you have. First, we're going
to start where the paper and we will be using Arches,
Watercolor, rough grain. And this is in 100% cotton. And I really liked this paper because it's very easy to use. And I really like the
texture that it has. And it just make your pigment flow
beautifully onto your paper. So in this, in this
Watercolor video, I'll be using this. And most of the time, I
usually use this paper. I use other types of
vapor such as soft grain. But I think for me it works
pretty well with draft. And I usually buy them online. And I found they also
found shops store, I material Art store nearby. And I found them a little
bit cheaper than on lights. Course. I also have this, this old ballets that I have. It's, it's kinda messy, but I like it the way it is. I just had Wash this
part from time-to-time so that I want mix my
color unintentionally. These are the parts where I put all the blues and this is
the part where it's warmer, who's, and it's practical to
use because it's plastic, so I just carry it everywhere, although I have other
palettes as well. But this one, I use
it most of the time. Of course, we're also gonna be using spray, spray of water. So it's practical when
you are working with wet, on wet and of course
with a loose technique. So with the watercolor paints, I am using the big
Watercolor to cut mine. I'll be using Cotman
for this class. And it's 21 ML. And I found it better when
I buy them in bigger tubes. And I don't usually use in
PAD because I found this one more friendly to your brushes and
it's easier to work. I just had this
spray sprayed like this is just going to wake up all the Watercolors I need
for my painting to start. So in this class, we will be using these
colors of watercolor paints. I'll be using ivory
black, cobalt blue. Who are the blues? Blue? For the orange, we have poor
sienna, cadmium orange, who? I'll be mixing my blues with Alizarin crimson who,
to make purples. For the yellows, I
have cadmium yellow. Yellow, or and of course, I cannot live without this. I'm using a lot of Chinese
whites in my painting. And I think that sit, I will be using for this class. The Vinci brush number two. And of course just a
lot rates go down. Brush number 20. And this is optional is the SCADA bus number,
rational number 12. And of course, the smallest
brush that we have, the density is the zero. Or I think you can use any brushes that you
like for this course, as long as you match them with the size of your
fate of your paper. So you have to feel comfortable while you are
working on your paper. As I've said before, the smaller your brushes,
the smaller paper, the video your brushes up here, your paper is really what
depends on your healing. If you feel comfortable
working with your brushes on this type
of paper, then go with it. I will just remind you, I think the one important
tip I could give you is to really buy brushes
that has pointed tip. I found it's easier to walk around with
it as pointed tip, especially when adding
specific details. And when I am working with
projects that are really huge, I usually would
use brush brushes. It mop mop brushes,
the normal brush. I would usually use them in
simple and smaller projects. But I am a big fan
of mop brushes. So it doesn't have to be
expensive brushes, I would say. But at least a better
quality with pointed. For me, it's better
to use synthetic one. I think that's it. I hope I don't forget anything. And so we are so
excited to start plein air Landscape Painting. I'll see you in sketching
and the Painting Class.
4. Sketching: Welcome everyone to this class, and I thank you for painting the knee and these will
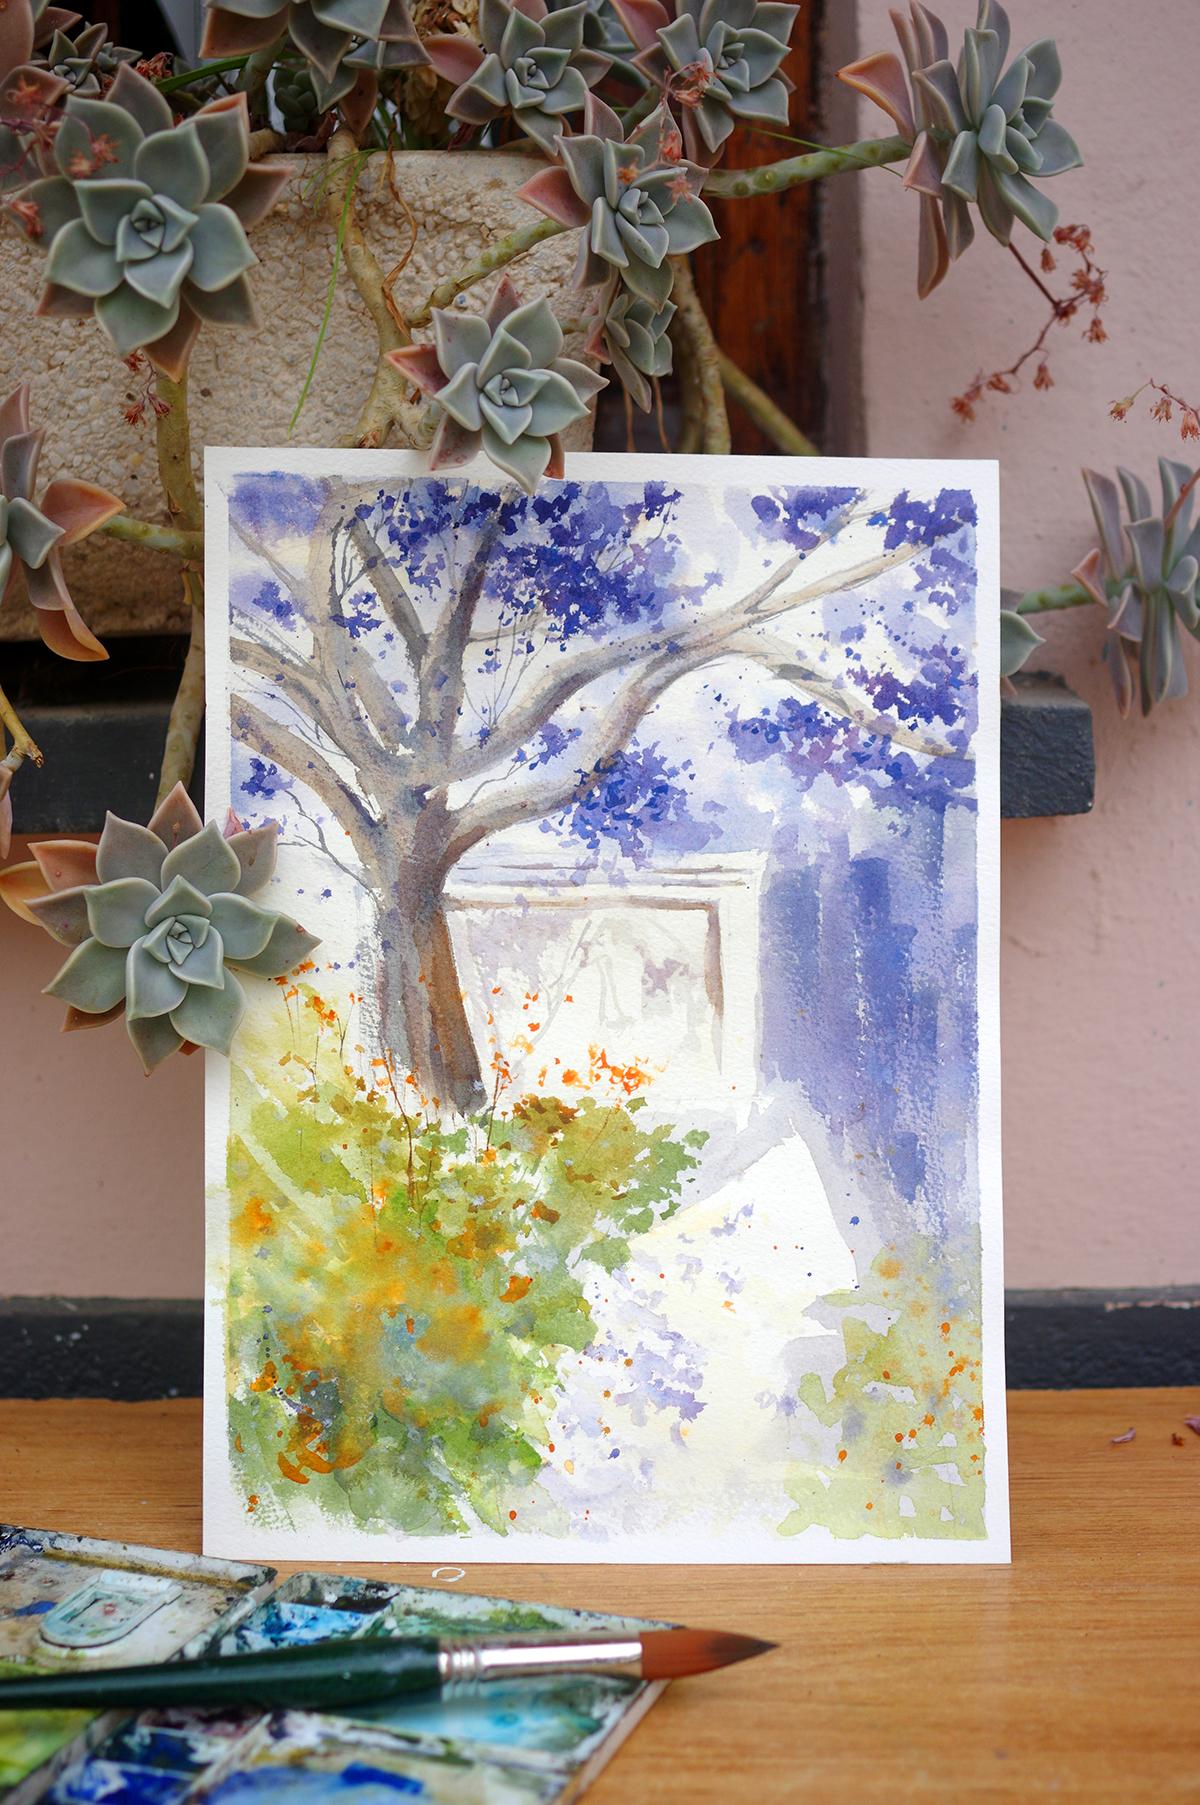
be the final end result. This painting of this Landscape
Painting in small corner, in fact, in our little town. So by now, you have decided, what are you going to paint? White location are
probably you are going to paint the same
location as I did. So before you paint, you have to plan ahead
all your composition. The position of your objects. Where is your focal point? And it's very important before
you start your sketching. So I've started sketching now, I'm using a normal pencil, drawing the line between my
foreground and my background. And notice the position my
pencil is just slanting. This is when I'm trying to
make a more accurate lines. So my I'm holding my pencil
close to its ballpoint. Also, when you are sketching, try to sketch only the
most important objects on your painting because you are going to cover
them with paint. So it's not really necessary to sketch every object
that you see. So planning ahead will
help you minimize your time and be more effective. In the end, here I am painting the small house isn't really a house because
it's in the park, so it's probably a place, it's like a stockroom. And we are sketching the
purple tree and the branches. So as I've said before, you can chase your composition dislike what I am
going to do now, but you have to remember
that your composition, in your composition, you
have your focal point, which is the most
important parts. And I think the first thing
that you should sketch, just like what I'm doing now, the poker focal point
out is Painting is the House and the tree. So that's why I
painted them before. Anything else. Other risks, they are not so important. So we will try to keep it
loose even in their sketching. Also, if you make a mistake
while you are sketching, which is, of course, everyone can make
mistake. Dislike me. You can always originate
with with the eraser, but try to make it as gentle as possible because we are
only working on paper. So and I want to make straight lines and I
have more control. I have more control
rather on my lines. I would definitely
like hold it this way. And if I want to have like
quick and straight lines, I will be a little bit
far away from my paper, ECL rudder, and hold my
pencil on that team. So that's far away
from the ballpoint. We're sketching these. Or if you're sketching
somewhere else. Just remember that during
our Painting time, we need to have a good amount of light and shadow
for this class. I encourage you to, to get to know the place a
little bit before bringing on. You're bringing all your
materials in the site so that there will
be less hassle by the moment you decide
to paint on that day. And probably also
look at our forecast. Little by little. I understood as a painter
that I cannot escape. Making my sketching skills improve AP1 to be a better
pen, better painter. And as I've said in this book of Lauren's
the light and shadow, we are better to be like a shape-maker rather
than a sketcher. What does it mean? So when
we are going to paint later, you will see that the be
the light and shadow. There are shapes
and some of them, they are not accurate, but we wonder why are our mind, our eyes will tell
us that that's a building or that's a
tree or does a person. But it's because of the
beautiful shape that we are doing on our sketching
and our painting process. And I just want you to enjoy all the things that
you are doing right now and don't be too
hard on yourself. Because we are going
to do loose painting. And it is very intuitive,
intuitive manner. So it's gonna
require a little bit of patients and creativity. I can assure you that at the end of this
painting process, I think your painting
will get better. And I hope that we will continue
to paint until the end. This painting of a landscape. I can't wait to see you
in the painting process. And I'm just finishing
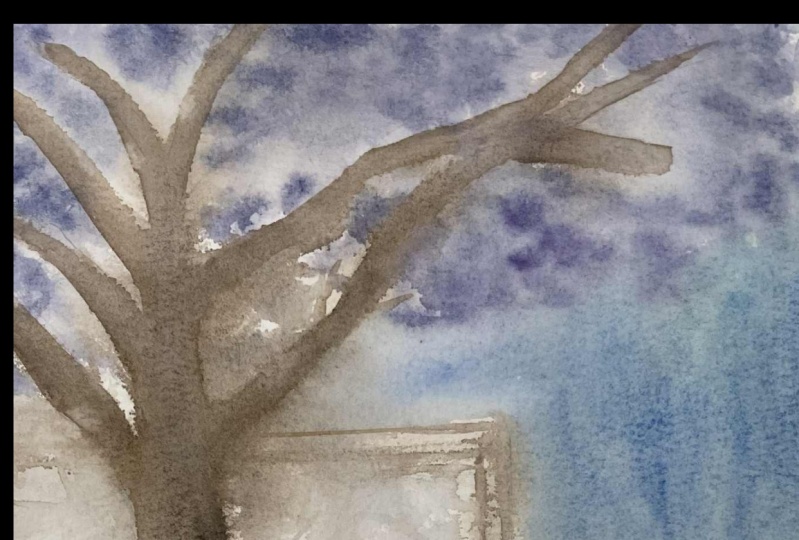
touches for this sketching. I'm making some shades
on the shadows. And I think that's it. As simple sketch for a
painting. I'll see you
5. First Wash - Light: Thank you so much for
joining me in this class. I'm so happy to have you here. So let's begin. Before I will begin, anything like a painting, I think is very
important to know where we are heading to as a
painter, as an artist. And for this painting
in particular. Because goal is very
important before we begin, because without it, we
will feel kinda lost. And it's very important to evaluate the progress
that we have. So it's going to help us
evaluate the progress that we have made in our
journey as an artist. Here in this
particular painting, we would like to have
the light and shadow. So after having the
perfect spot for me, I got at everything as you can see and bring
everything at a park. It doesn't have to be fancy, the place that you have, but it has to be a place that
you really love and excite to amusing the biggest
brush that I have an, I'm waiting and waiting
my watercolor paper. This is the spot that I've used because I really love this part, is really close
to where I leave. And it gives me the excitement that I need in order to make this painting our robot
K. So I've added yellow, cadmium yellow, instead
of just washing it with white so that it will
have this warm effects. And I'm mixing the
blue to have purples. So I have a crimson
alizarin and cobalt blue, which is really my favorite. And I'm making sure that my
Watercolor paper is wet. Using the tip of this map brush, which we already know that
can hold more pigment. I am dropping that blue colors. So blue to make this
purple, blue and purple. And I, adding the beautiful purple and blue
is flour or this tree. So we are doing it
on a wet paper. As you already know, this is wet-on-wet technique and I'm just dropping
it and as you can see, I am leaving some white. And those whites are
the Light of the tree. So everything that
is in the lights, we are leaving it white. So we're trying to keep this process as
simple as possible. And I hope you will
enjoy painting with me. So since this is, this paper is wet, you can see that
the Watercolour is just flowing on its own,
freely and beautifully. It has this loss effect. I think if you really want
to be a better painter, you always have to consider painting outdoor and plein air, or plein air like this. If you want to follow this reference that
I have right now, of course, feel free to do it. But I encourage
you to really find that spot that
excites you to paint. It doesn't have to be fancy. It doesn't have to be
like the perfect place, but it has to be a place that
it's warm in your heart. So I'm not letting this Watercolor paper
dry because I want it to be as loose as possible
with our purple blue pigments. And yes, you can see, I'm still working on it. So this tree is in Spain and
I haven't google their name, but it's everywhere in our local town and
it's just beautiful. It really inspired
me to paint it. This painting is focusing
on light and shadow, and I think it's very
important ingredients to have successful painting. During this painting process, I would like to encourage you
to do your own experiment. And you know, just, just be happy painting outside and discovering
new things and trying new things because
that's the only way to learn the medium much better. So here I've mixed a little
bit of greens and blue. And I'm just trying to
alternate the colors. So I'm still working
on wet on wet. And I'm washing the paper
and wetting the paper as much as possible because we are outside and it's trying quickly. If we are not inside. I've added some warm colors
of Van **** brown as well. So you have your
reference photo with you. So if you are working with this, your friends try to
have it at hand. So I'm having brush
strokes and I'm adding shadows right now. I'm going to change the
composition for this one and try to make it as
spontaneous as possible. So these are the
shadows that we have. And shadows, they are usually
lighter than your subjects. And it's always like that. But usually they are
not just cool colors. You can add a little bit
pigment of warmer browns, like Van **** brown. So I'm still using
the same brush. And these Building, this
small house is dry. And I'm adding some shadows to give it a liter
of shape and detail. And i'm, I'm just using the same palette color and I'm not really adding more colors. So I'll see you in
the next steps.
6. Tree and Shadow: Thank you so much for
joining me in this class. I'm super excited to finish this painting with you and
especially novelist part, while be working on our shadow. So shadows are usually lighter
than the main subject. And we're gonna be focusing on this in
this class as well. So we're still in the park
and maybe you are still in that location that you've chosen and hopefully you're
still enjoying it. I'm still using the same brush, brush number 20, and I'm using the tip of my brush
to add some shadow. We are working on wet paper. And I've used loads
of pigments of Chinese whites with
our Van **** brown. So it is very light in
color to make your shadow. I decided to put the big trunk
shadow at the back of it. And I'm just going
to add the leaves and branches on
the wall that are, that is visible on our painting. When you are doing this, I encourage you to, when you are adding
your shadow, you can, you don't always have to
follow the reference. You have to follow your heart, you have to follow
your intuition. And you know, as long as
it feels Greg and right, you can keep on doing it. So I'm just letting the Watercolor pigments
flow on its own. And I'm making it as
light as possible. And I'm just dragging the
Watercolor paint on the paper. There are many ways to
simplify the subject, and one of that is to see
the shape and added things. So when you see the shapes, you will recognize the most important
parts of your painting. Here I've used a smaller brush and I'm wetting this
part of the tree, the branches and the trunk. I had before I do it because it was already trying
because we are outside. So I wanted to have this
kind of blues effect. So you have your
reference photo with you. If you're following this
Landscape Painting with me and it choosing
somewhere else, then please have
your reference photo with you or more or less, if you are in blend Air, just keep on enjoying
the Painting. So I'm wetting it ahead. So it will have a
lot loose effects. And I'm using smaller brush
and this one, and this is, I think at least
brush number six. It doesn't matter how
big or small your brush, as long as it matches on
the size of your paper. So when you, the
bigger your paper is, a bigger your brushes is. And the smaller it is, the smaller your brushes are. So now I've added yellow colors. You can see the list of our
Watercolor paint on your PDF. I'm just dragging the
yellow color everywhere. And now I've applied Van
**** brown on the wet part, the trunk and branches. So I would like you to
experiment with the yellows, with the browns, with a blues. And that's only just
follow all the colors, the Watercolor paint
that I'm using in here. But usually we will
be using a lot. Purples, Van ****
brown, Chinese white, and yellow 4k in this
painting in particular. So here you have that beautiful purple flowers
on this beautiful tree. And we are trying to leave the lights on
their branches as well. Your white as I've said before, is the light on your paper. And we choose the location that we are against the light so that we have a beautiful
quantity of shadow. I've changed my brush
into brush number 20 or any brush it really tip watercolor paintbrush
with tip edges. This can help us to control. So notice the way
I hold my brush when I want to be more
specific and detailed. I'm holding it close to the edge And I'm trying to make
quick Brock brush strokes. This is the final result of
our Painting and we're so excited to finish this
and share it to everyone. I also would like to add that you have to think of
yourself as a painter. And Dawna just define yourself as a Watercolour
is a lot of people, I see posting and saying
Watercolour is bad thing. It will be so much better
if you think yourself as a painter who is using watercolor pigment
as you are medium. Now, I'm adding darker shadows on the tree while
it's still wet. And this is a combination of Van **** brown and ivory noir. So that's ivory black. I suggest that you don't add black directly on your paper. So you always, hopefully most of the time mixed it with another color like
browns or blues. Here I've kinda mix it
with blues as well. So before lifting that
brush from your palette, you have to really mix those
Watercolor paint very well. Are working on wet, on wet paper right now. I'm adding highlights and
darker shadows on our branches. And notice the way I'm
slanting where brush and I'm holding it while they are wet. This paper, you can add as
much pigment as you like, and they will have
this Loose effect. Here. I've drug some colors from
it using the very tip of my brush so that they
will be smaller. So the smaller teeth you use, the smaller lines you will have. This requires additional
bit of practice, but in time, you will
be able to master that. If you are uncomfortable
or unsure about these, you can use a course. The smaller brushes sets
us zero or number one. A lot of new painter, they're always stressed
with the colors, with the Payne's with a paper. I think it's important part of your of your
learning process. But I think you also
shouldn't forget to know that the best part of painting
is enjoying the search. And it's not the non
E6 then existed. And so I got it from this beautiful book
of Florence Martin, I think, of light and shadow. And it's a really
wonderful book. You can get a lot of ideas
and Tips brand this book. I also encourage you not
to settle in one book. I think you can learn a lot from different artists and from different books of Watercolors
and also from sketching. So while it's wet, I'm taking advantage
of it and I'm keep on adding more washes. So we're getting
darker and darker. Of course, is the
final results of this painting and we're
super excited to have it. So when you paint, sometimes the pigment,
they are brighter. They are more visible, but once they dry, sometimes they fade away. So if you want it
to be dark or dark, you have to add more pigment. And you have to take advantage of the time
that they are still wet. Because if you're going
to wet them again and apply the color
that it's not the same. I think it will look
muddy and overworked. So here is we're working on wet, on wet paper and
adding more washes and contrast on our trees
so that it will look more natural and unique. I always hear not to
overwork your painting, but I think it's also good
to remember that you, if you underworld your
painting as well, they will look and finish. So I think in our mind, in humans brain, they sometimes like Impressionist,
like most of the time, I think we let the audience, the viewer, finish the Painting, but we have to
help them as well. So that would be, I think, achieved through too great
and correct shapes and lines. And this is what we
are doing right now. This is a little bit
of Intuitive Painting, I would say, because
I don't just follow the branches that we have
right now in our reference. But I'm kind of
experimenting on my own. I think it's very important
that you should remember that always trust
your intuition. And you know, you have to believe in yourself
and you have to believe in your painting that you tell yourself that is gonna
be a successful one. Because every inch and
movement of your brushes, they are going to
tell your confidence. It isn't a technique. For me, it isn't a technique
that destroys a painting, but it's the lack
of self-confidence. And self-confidence can only be achieved through
constant practice, constant learning, a lot of
patients and a lot of errors. So never discouraged yourself and always believe
that you can do it. We're almost ready for the
next part of this painting. I did some quick dry
brushes on that side, on the left side of the trees. So I'll see you in
the next part and I'm super excited to
have you with me.
7. Foreground: So let's continue a painting
at the reference photo, and they were in plein air. And this is the final
result of our painting. This beautiful purple trees in the middle of
inner corner of a, for all of a park. And here we are. I'm painting and I've wet some parts of the paper because we will be
adding some bushes. So as you can see, I've changed the position was I was
finished with my shadow. I've added the greens instead of the cemented part
of the building. So you can change your
composition as much as xuan too, as long as you feel
that it's right, it's, it doesn't
have to be balanced, but as long as it has
a wonderful shapes, I'm wetting this part
in order for me to have that Loose effect
on my painting. I'm using the same brush
and that's brush number 20. And I mix the colors very well before applying it
onto the paper. So I'm adding greens and yellows and some
orange and browns. I'm just mixing the, the, the cool and warm
color on my paper. And I'm doing a lot
of Intuitive moment. And I don't forget to leave
some whites which will serve as the light
on my brushes. So as you, if you observe
in plein air that the light surface
did don't observe the light and those dark surface
they observe the lights. So it's a bit tricky. So here you are trying to show the light on our painting
by leaving the white. I hope you're enjoying wherever you are or
whatever reference that you are doing
and you just keep it Fine and no stress. So I've done another bit of dry brushing as well
with quick brush. So as you can see when I'm
doing the quick brush, we have some white that's
left on the paper. I've added some blues to
call down a little bit. And I'm just really
following my intuition and I'm doing lots of Intuitive
movements on these pots. I am doing brushes
and some flowers in front of the building
and in front of the tree. So as you can see that
if you are a painter, I think it's really
important, as I've said, to have your own specific goal. Where do you want to go? Because I think
it's more important than having a generalization. And as thin as I think, as you've already know, that the two elements
in paintings are the formal and expressive goals. So the formal design is
the line, the value, the color, the texture, the shape, the direction, and all the technical
aspects in a painting, whether it's Watercolor
or oil or acrylic. And better one would
be the explicit goal. So this is all about you. This is your personnel and your own perception
about things, is your own feelings
and experience and use. So I think those, the combination of both
can be achieved when you are painting regularly and observing other people
and other artists. And just keep on
learning every day. Here, I'm adding some leaves, so I'm making quick brushes, brushstroke, brushstroke
in the paper away the use of the tip
of my Watercolor brush. And I'm still looking at the plein air that
we are painting. Why does the tip
that I could give you when you are
painting a landscape is to always start painting on your focal point
and all the rest. Although there are
also important, I think you can leave
them more loose. And so I'll see you in the next part of
our painting process.
8. Adding Details - Unifying the Painting: You so much for joining me
and welcome to this class. I'm so excited to continue
painting with you. So as you have noticed, I've changed my location. I went back home because
it's not very far and I feel like it's still hard
to stay in there. So I am now painting
in my garden. I'm still using
the same materials and everything is to save
just the location is changed. So you might find it challenging when you are
outside and painting outside. But I always encourage my students to always do
their best to stay outside. And in the end, because
always finish their painting. A home where they feel
more comfortable. I really hope that
you will enjoy painting the spot
that you have chosen. Or if you have chosen to paint
the same spot like I do. And I hope that
you will learn in this painting practice and
just enjoy the process. As you can see, I've changed my brush, the smaller one, and
that's brush 20. I'm using a Skoda. I also would like to
add that in order for you to add this
dark rich pigment, you have to use less water, but really mix your
watercolor paint as much as possible
on your palette. You would also want to
let it flow and mix it directly on your paper because I found them to
be more rich and fresh. When you do that. This class was inspired by the book of light and shadow,
or William Lawrence. And he said something
that light and color take your viewer on a journey
and they convey emotion, create mood, or tell a story. So when you are painting, you are not just painting. Always remember that a piece of paper or a
piece of picture, but you are painting a story, a story maybe of something that makes you feel happy
or inspire you. Painting light and shadow
on Watercolors will help you create radiant
watercolor paintings. And we'll give you
greater Painting pleasure as to develop new skills which bring you and your
imagination to life. So I always encourage
my students to be brave enough to follow
your imagination and just don't follow me. Method. You have to be
independent on your own and you notice follow your intuition when
you are painting. And how can you achieve this? In my experience, adding, It's about observing
other people paint, observing your favorite painter, even observing any
painting that you like, me know and just being there, observing the nature, practicing daily and also sketching
Delhi is very important. And understanding how
composition works. Although this, this class
is about light and shadow, I would also try and do
my best to emphasis that your composition
is probably one of the most important ingredient
for successful painting. So now I am mixing, of course, the cobalt blue with
my crimson alizarin. I'm just dropping small
drops or pigments of it. And we still using blue and purple mix to have
these beautiful trees. And I'm just trying to
make everything relax, Mixing where the
pigment and just trying to paint using
my imagination. And intuitively, if you feel like maybe at
the end of your process, you will say, Oh, there's something missing
in this painting. And I think it's probably because you haven't
followed your heart, your feelings, your emotion. So something is missing. For every stroke that you do. The displays on your painting. It's the stroke of confidence. So be confident, I know it. Just believe in yourself and always telling yourself
that you can do it. So we are painting in my
garden and I'm inspired by this beautiful spot in the park that's very
near as and of course, this beautiful trees that
we have in this park. And when I feel like I'm so
excited to paint something, I'm so excited to do something. It's always because the subject excites me and inspires me. So that's why, right from
the beginning of this class, I've always encourage
you to find that spot that
tickles your heart. So we just relax and
continue to paint this beautiful landscapes
and just enjoy the process. He can listen to your favorite
music while you do this. You can be in the nature
when you do this. So one of the tips
as well that I could give you a further
light and shadow. The light is like, I feel like it's like
the icing on the cake is like something that
when you look at, you look at it, you feel that
you're painting is, is radian because
it's just glow. So you need those white
spots on your paper to leave them because they are the lights on your painting. And the contrast is
very important as well. So when you have the lights, you have the shadow and
you have the contrast. So if you paint something like, for example, this tree, and I have some spots that
are lighter in value. Those are the light, the light purple, and
some of them are dark, and that's your contrast. So by, by arranging your, your values and of course you leave the UI
your total values. You will have an achieve,
a more dramatic. So now we are going to add more and more details
on our painting. And I'm still Mixing your, I'm still Mixing my cobalt
and my crimson alizarin. I'm dropping the purple flowers on the floor just
next to the shadow. I mean, on the shadows
on the ground. And I'm working on
semi wet paper. Here, I'm using smaller brush and I think that's
brush number two. And I'm just dropping
colors and witting it at the same time because this part of the paper has already dried. So now we can see the overall or the Painting
and we have the, the good amount of
shadow and light. I'm just going to add on the Building a little
bit of contrast. So they do a pop-up
just a little bit. So I'm not doing it that much. I'm not overworking it so that our light and
shadow will remain. As you can see, this big Shadow of the tree. I disregarded it
in this painting, and I've created
my own imagination with some spots which shadows, which I think you could also do, as long as it feels correct
and it feels right. Your painting should have the
cool and warm tonal values. So the purple, the mix
of purple and blue, they are kind of cool. So I'm adding some
warm color of Van **** brown and burnt sienna
on our branches. I'm trying to make
something that is unique. So I'm adding more
and more layers on the trees and branches on
the tree and the branches. And at the same time, I'm painting at home, so I have my little one just
playing around with me. So yes, it's a, it's always good to
be a painter when you can work and look
up there yours, your children at the same time. I'll see you in
the next process.
9. Final Details and Project: I'm super happy that you have
done this painting with me. Thank you so much
for joining me in this wonderful
journey of painting. Loose style. This other ball Purple trees
in the corner of the park, or any reference that you have. And it is, is very intuitive
and Impressionist style. And with a mood, with a good mood ambiance. And I really congratulate you for going this far
and for your patient, for your patients as well. So it's a big lift for you
and I'm very proud of you. So we are almost ready
and almost finished. And as you can see, I've added few
drops, warm orange, yellows and browns
on to our brushes to give it a little bit
visually excitement. And I'm using the smallest
brush that I have, the drugs, colors to create some twigs, some small leaves,
some small flowers. I feel like when I came
home and brought it home, It feels like it was a little
bit too tight because I had to do it again when
I got home from the bug. So I am going to spray and do a little bit
of lifting to make my foreground and little
bit loosen up K. For now, I am just dragging the
watercolor paints. I'm adding some
branches and twigs. This book from William
Lawrence is very exciting and very
useful because it talks about being a shape-maker rather than just sketching. And I think it's really important to understand
that because we always say that I need to be a better sketcher in order
to be a good painter. And in fact, in this book, is telling us that we have to be a better shape-maker in order
to be a better painter. And I totally agree with this. Yes, I think the moment you understand the
shapes and of course, you got a better hold
on the composition. I think your entire painting will end result will
definitely be better. Personally, I learn from videos and learn
from other artists. I learned by destroying
my painting. Sometimes. I learn by thinking out of the box and doing a
lot of experiments. And by understanding
the tonal values and how important it is as well. Every morning, I will
always make sure or do my best not to
skip my painting. Sketches. I'm sketching every morning and I'm sharing
it and Instagram. So I would like to invite you to follow me in
Instagram if you would like to improve your sketching
and your drawing skills. Daily, I would share you
the Tips and those and the don'ts in terms of
Watercolor Painting. So as you can see here, I am actually doing some lifting and making my
painting a little bit loose. I'm even using some tissue paper to do the lifting if needed. So don't be afraid
to do other things. To lift your, your Watercolor pigments
and just be expert, experimental with
everything that you do and don't be scared. Be confident all the time, and try to tell yourself that
it's okay to make mistake. It's Gabby's going to be
better than next time. So now this is going to be the annual results of
this painting process. And we're super
excited to get there. And I cannot wait to see
your own magical painting. And I would be very
happy if you could share them with me
in the Instagram. Or you can tag me or
in Skillshare forum, or you can share
your end results. And I will be very happy to
see and comment on them. So now I'm just
adding more and more. It's more specific
details on the Painting. And the paper is almost
completely dry on the top. And it's still wet
on the foreground, which is the bushes. And I keep adding colors
that I would like. This is yellow or some orange
that we have some yellows. You can add any colors that
you want as long as the, what the Watercolor
paper is wet. But I would like to advise you that when
you are adding colors It's better to stay muted. I don't just drop
any crazy colors. That would definitely change the outcome of your painting
if you know what I mean. So now we'll keep on
looking on the Painting as, as you can see, I'm going to trap a little
bit of purple again, just to add a little
bit Details and highlight and contrast
on our purple trees, on our purple tree rather. So I got some quite a few of Watercolour Landscape Painting published already. Before this. I would like to invite you to, to join this class is to
get a better understanding and that can help you with
your watercolor journey. I've talked about
composition and tonal values in my other
paintings as well. Although this one is more
on the shadows and light, I'm just dropping
more and more details before we finish this painting. So one again, what are the tips I can give you as an advice for the materials is that you better buy painting tubes and
rather than just dry up, buying them in little pan. Because I think there are more
friendly to your brushes. And for the brushes, I know is quite luxury and expensive to buy those
square L made brushes. I think the one that is, I'm just using is
the normal brush. As low as I think it has
some it has a pointed tip. I think it's a good brush. So don't be to focus
on your materials, but as I've said before, focus on your
sketching and shape making skills and
your composition. And I think that's the only way to improve your
Watercolor Painting. If you have some questions and any other things we'd like
to ask me or to tell me, feel free to send message
or to type it on the forum. And I'll be happy to
answer you and help you. So now we've finished and we're so happy
with this results. And I cannot wait to
see your own painting. And I'm sure is
gonna be wonderful. So please share it with me
and share it to everyone. I think it's another
way to improve is to, is to listen and to know what others are saying
about your painting. And this always, constructive criticism
is always helpful. So thank you so much once again for joining me in this class. And I'm really looking
forward for you and me to be joining together and painting together in plein air or stirred
you in my next classes. And I really hope that you learned something
from this class. And I'll see you in
my next classes. So goodbye and see
you once again.
 Dawna Mae, Author-Illustrator