Transcripts
1. Class Trailer: Let's explore the fun and
playful world of loose florals, from soft petals, to dreamy leaves, to bold strokes,
and vibrant colors. This class will take
you on a journey of self-discovery,
creative play, and we are going to be fearless, whether you're an
experienced painter, or just starting out, this bite-size comprehensive
class is for you. Hi, my name is Yasmina, and I've been painting
for over a decade. I want to show you how easy
it can be, and how fun. My style is loose and dreamy, and lately more loose. One of my favorite things
to paint loosely is, you guessed it, florals. I want to push the boundaries loose floral play even more, and I want to share
that joy with you. We're going to begin by covering everything you need to know
from recommended supplies, to loose brush plate, to the wet on wet technique, and then we'll go over tons of flour ideas that will inspire you to create your
own unique florals from your imagination. We'll cover three main styles. The doodling, the
delicate, and the loose. We'll also combine all three. We're also going to
learn how to paint fun leaf, and vases. Then we'll learn how to build
your visual vocabulary, by studying more flowers. We're going to talk about
finding inspiration, or even cover some
composition tips. I'll introduce you to one
of my favorite waste paint. We're going to make tons of tiny little floral bouquets
that are just so cute, and so quick to make, so we can make tons of them. For the big finale, you're going to choose
your favorite tiny piece, and transform it into a larger finished painting using either
watercolor or gouache. I personally will do one in each medium to show
you the possibilities. Speaking up, you can use watercolor or gouache
in this class. You don't need both. This class is super whimsical, fun, and freeing. It's designed to make
you a floral play pro, and equip you with lots
of skills that you can use in your
other art as well. From imagination, to
intuitive painting, to being okay with making
ugly art along the way, we are going to grow as artists. I'm so excited to share
this class with you. Are you ready to explore the
limitless possibilities of loose florals and have
tons of fun along the way? Join me in this super
exciting and inspiring class. Grab your brush, and let's play.
2. Quiet Your Inner Critic: Hi, welcome to the class. I'm so excited that you joined. But first, let's talk
about the inner credit. You might have heard
this term already. It's just the voice
in your head that's meaning critical of
everything you create. It's like, oh, that's ugly. You can never be a good artist. You suck at this.
Just a mean voice. We don't want him. What we're going to do is when
we hear that voice, we're going to say shhh,
we're just going to have fun and play in this class. We're going to learn a lot
and you're going to learn how to let go and be
intuitive with your work. It's just so important to not worry about results.
Because guess what? Sometimes you make ugly stuff and sometimes you
make pretty stuff. But you'll always be able to enjoy the process
if you choose to. But if you choose to listen to that inner voice, it's
going to hold you back. You're not going to
create as much art. You're going to be afraid
to try new things. It's just not what we
want for this class. This class is more about
being intuitive and free styling and having
fun and experimenting. To do all that, you
have to say no to the inner critic and
just have fun and play. I also find in my
more serious work, the more I let the inner
critic takeover and the more I criticize and analyze what I'm doing in the
moment with my paints, the less fun I have
in the moment and the less the results look good. Usually they don't look
great at all actually. I'm going to just be okay
with making mistakes, with making ugly art. In fact, one out of
two of my pieces, as you will see in
the future lessons, don't turn out so good
because I like to be loose and that's normal. If maybe only one out of five of your pieces looks
good, that's fine too. You shouldn't try to put such high expectations
on yourself. Everything you paint
teaches a lesson, you're always getting experience
points and leveling up, even if you're not aware of it. Subconsciously, you're
picking up all techniques and ways of painting that you
can use in the future. You will only improve with time as better to have
lots and lots of practice with painting
lots of different pieces than just painting one perfect piece and
obsessing over it. You're going to learn a
lot more from quantity, not quality, especially
if you're a beginner. Look for just one fun
technique that you learn from every piece and look for something in there that
teaches you something, even if you don't
like the results. I'm excited to start. Are you? Let's dive in.
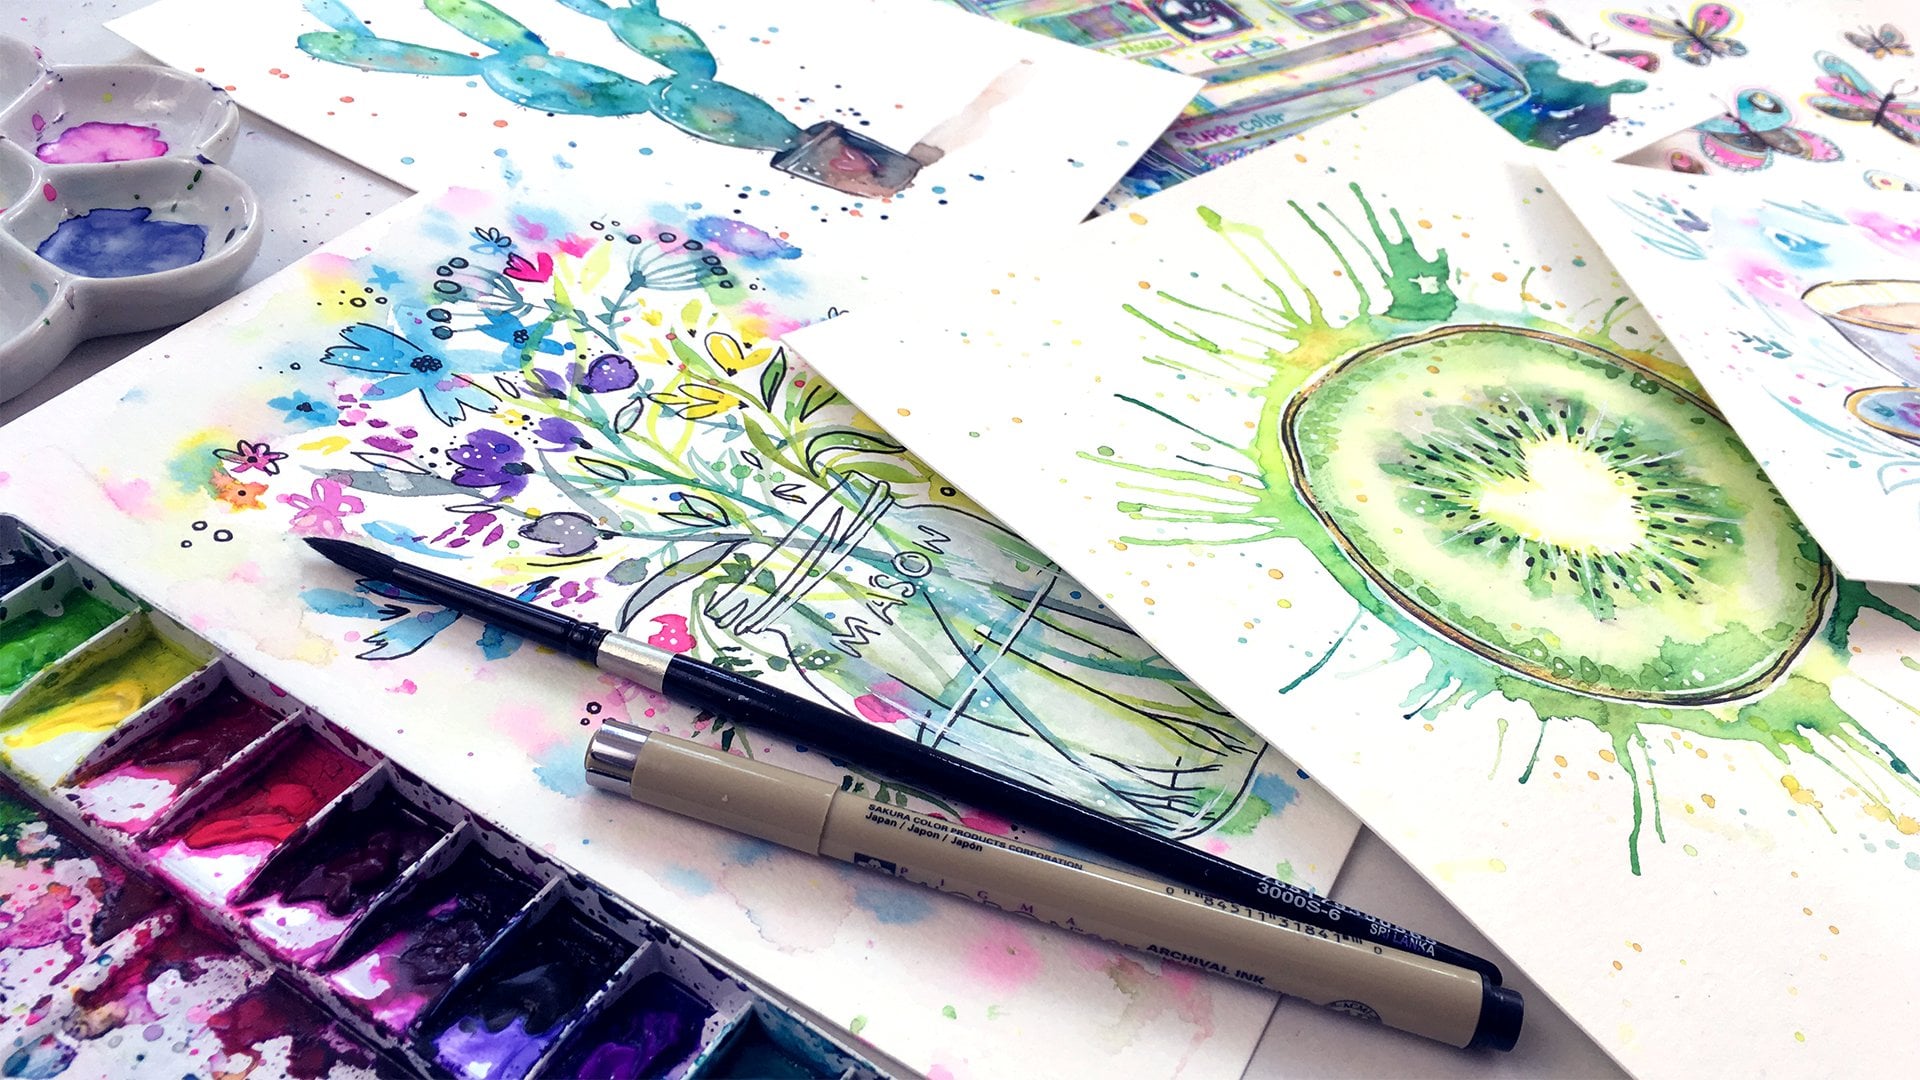
3. Supplies: The supplies for this
class are so simple, you just need watercolor
or gouache paints, and I'll talk about the difference between
each in a second. You'll need brushes. Any size or type is just fine, but if you're looking for a
brush just for this class, I'd recommend one or
two round brushes, a bigger one for bigger things and a smaller one for detail. You will need a
smaller brush for the tiny paintings
we will be doing. A Size 4 round brush is perfect or you could do
a two or even a zero, but any brush is fine even those really
cheap ones that come in sets will work well. You'll see me use
various brushes in this class and I'll
usually name them. Paper is a necessity and
this needs to be thicker, especially if you're
using watercolor. If you are using watercolor, I would go with at
least 140 pound paper, but if you're using gouache, you can get away with
it a little thinner, as low as 100 pounds. The last few things are a jar of water to
clean your brush, a paper towel or
cloth to control how much water is on your brush and to
also help clean it, and scissors or a paper
cutter will be used to make tiny pieces of
paper to paint on. You can also use a
simple ceramic plate to mix your colors
on if you wanted. You also have the option
of using anything else, like I will use color pencils
in one of the lessons, and you can use any mixed
media supplies that you have. You can use pastels, ink, anything you like. Don't feel limited
in this class, I just want you to do your own thing and have fun with it. Another optional thing if you
go with watercolor paint, is just white gouache, or a white ballpoint pen, or a Posca marker, or even white acrylic paint, just something that can add white on top
of your paintings, this can really add some
pizzazz to your florals. White gouache is my preference especially for this class
because you can mix it with any watercolor
color to make a lighter opaque version of that color in case you
need it to fix a mistake, or add detail, or to paint
on top of a dark glare, since with watercolor we
can only go from light to dark and not vice-versa
because it's transparent. This is the main difference between gouache and watercolor. Gouache is opaque,
so you can paint with a lighter color on
top of a darker one. Even though watercolor
has this limit, some people prefer watercolor
to gouache or have gouache, not watercolor,
whatever you have is fine because if you
dilute gouache, it looks and behaves a
lot like watercolor. In fact, you can't really
tell the difference, just the particles are bigger. Another fun perk with gouache
is you can paint with it on a dark background
like you'll see me do in the final project. I personally like to
use both mediums, and it's up to you which one you want to follow
the class with. You can also use both
if you have them, but you shouldn't have
to go out there and purchase the other medium
if you don't have it, you can use either or,
it doesn't matter. The majority of the class
will be done with watercolor, but everything I do with it can also be
done with gouache. The only reason I
chose watercolor is because I know that more
people have it than gouache, but I'll also show you
a gouache painting in the final projects. You'll have an idea
of how you can use these properties to
paint loose florals as well because you can use all the techniques from
watercolor with gouache, but not all of gouache
techniques with watercolor. Gouache has its own
unique properties. But don't worry about all that, just paint with me. If you're curious about my
current favorite supplies, I have an extensive list on my website that breaks
them all down for you. Now that we got our supplies, let's talk about being
loose with our brush.
4. Getting Loose!: Before we jump into
painting our florals, let's talk about getting
loose with our brush. In this class, we
will play a lot. I want you to grab all
the brushes you have. It's okay if you only have one round brush or
something or any brush, just master that one. Also you can use
your scrap paper or the back sides of
failed paintings if you wish to save paper. Have some fresh water and
grab a color and let's play. First off, I want to talk
about dry brush technique. This is where we show
the texture of the paper by using very little water
and more paint on our brush. Having a dry brush gives
us this rough texture. The more water you
have on your brush, the less texture you get. If you paint quickly, you
get more texture as well. Texture is super fun to
incorporate in your work, especially if you're
painting loose. If you want to master it, just play with your
water to paint ratio to get it as textured
as you want. This is all just
practice and play. Here I have more water on my brush and there's
much less texture. If you don't want
any texture at all, make sure your brush
has enough water on it and just move
your hand slower. This is a cat's tongue brush. I rarely use it. I think I've used it twice, but it's so fun to see what it can do and get out
of my comfort zone. Take whatever brush you're
using and use it at different angles with different speeds and
just be loose with it. See what strokes you can make. These scribbles may
not look like much, but they can make some fun
flowers and leaf shapes. Learning how to paint quickly
and loosely starts with gaining confidence and
letting go by practicing, by getting to know your brush. See what happens when you
just paint with the tip of your brush and
edge of your brush and then press down
on it a little bit, press down on it more, press down on it a lot, see what happens, what strokes
you make with each press. Usually it'll go from really
thin to really thick. I also want to point out
that when you paint slow, you can control
your brush easier. Here I'm making
this line straight. It was no big deal, it was easy. But in this second example, even though I tried harder
because I went fast, the results were still crooked. We are letting go of control
when we paint quickly. But nothing is stopping you
from painting some parts fast to make it more loose and other parts slow to make
it more perfect. The contrast makes it more
interesting to look at. Now I grabbed a flat brush, I can make a very
thick and uniform line with it and a thinner
ones on its side. I played with trying to make it feel loose with a thicker line. Again, just get to know your brushes, anything you have. Here I grabbed a very
small round brush, which you can use
for fine detail. If you're a beginner, I recommend you have
one because it can be hard to just use the tip of your brush like I usually do. I like to use it for stems
if I want a dooly line, but I usually end up just using one larger round brush and you can do so too with practice. If you were to master
just one brush, the best would be a round brush. Next is my normal round brush that I've had for
a very long time. It's seen a lot of use. The point is not as
thin as it used to be, but I still love it for looser
paintings like florals. If you want a super sharp point, I recommend this Trekell brush. It's wonderful for
making details and also you can make thicker
strokes with its body. But I actually really like warn brushes for loose florals. I think they make them
more fun and whimsical. Don't worry about
having cheap brushes. Again, I just play with my brush and just get
comfortable with it. See which brush you
prefer the most. Maybe you will try different
ones with each painting. Maybe you'll just use one,
whatever you like to do. But getting comfortable with
your brushes helps you to just play and do your own
thing when you're ready. If all your brush
strokes are very clean and neat and perfect, try to loosen up. Try to just flick them with your hand and see what happens. Quicker brushstrokes
have more life in them. They're more fun and whimsical. It's okay if you're
a perfectionist and that's all you
feel comfortable with, but I recommend that you just play and try different ways of painting and see what sticks and what you enjoy doing the
most because you never know. Sometimes perfectionist need
to let go in watercolor. That's it. We just
practiced using our brushes and there's
no right way to do this. We're just getting
comfortable and learning what strokes our brushes can make and what we
enjoy to do the most. Now let's talk about
an important concept in watercolor that we
should keep in mind.
5. Wet on Wet VS Wet on Dry: Whether you're using watercolor, or gouache, there is one thing
I want you to be aware of. This does not apply
to dry media, or paints like acrylic paint, or oil paints, just to
watercolor, or gouache. If you wet an area with water, or wet paint and then add color, the color will spread out
to wherever there is water. This is called wet on wet
and makes gorgeous bleeds. You can add multiple colors, they'll all mix and mingle. On the other hand, if the paper is dry and
then you add color, it will stay exactly
where you put it. This is called wet on dry and you use
this to add detail, or make clean and
perfect strokes. How much the paint spreads also depends on how wet the page is. Here I wait a little bit longer for it to dry and when
I add the details, you can see it spreads less. If I want it to be
completely crisp, I need to wait for it to fully dry before adding another layer. Also watch out for your
paints still being wet even when you don't
use too much water. If you really want to check for wetness and want to be neat, you can check out
glossier paint is, water is reflective
and dry paint is not. Here the paint was still wet in some parts and dry in others. I think this actually makes a really fun and gorgeous look. I encourage you to be more
loose and bold when you paint and let the paint
do its own thing. But this is something
important to be aware of and can frustrate
a lot of beginners. I think this is a
secret magical feeling of watercolor, or gouache. We play with wet on wet, and it's especially
useful in loose florals. But one thing to be aware of is if you're working
with a lot of water, maybe cut back a little
bit because when you add more detail to your
painting while it's still wet, you don't want it
to go everywhere. You want to control it. Just get used to
that water to paint ratio and how what your pages, or how much the
paint will spread, you'll learn how to do all
that if you just practice. You can also just make loosen dreamy florals with no details and lots of wet on wet play, or you can make them just
detail with no wet on wet play. You can do whatever you want. I just wanted you
guys to be aware of what happens
with this effect. Now let's paint some flowers.
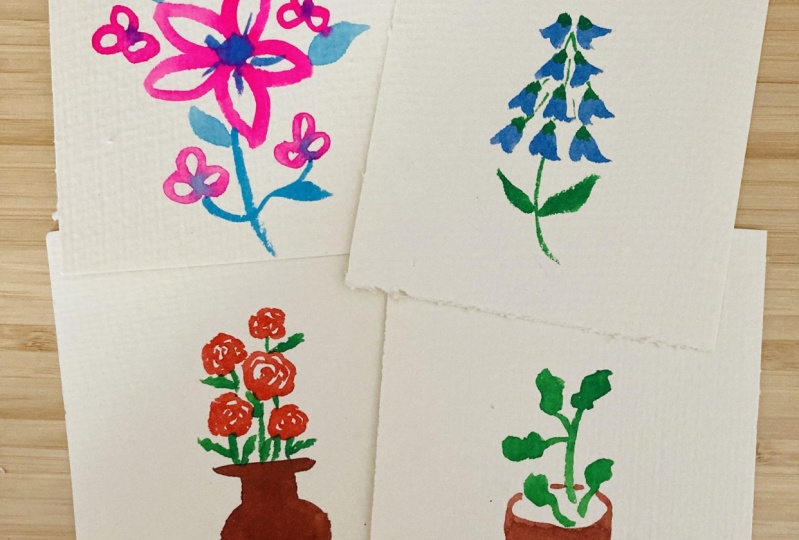
6. Flowers: It's time for flowers. This is actually my second
watercolor florals class. The first one we concentrated
on using references. I'm playing with what we see. In this one, I
want to paint from our imaginations because all of us have an idea what a flower looks like even if we
never painted one before. Even if those ideas
are childish they can be super cute when
done with watercolor. But before I show you examples, I do want to say that I have lots of experience setting and painting flowers so it's so
easy for me to make them up. But if you've never
painted them before, it can be challenging to
just make him from a void. Nothing is stopping
you from using references of flowers
or getting ideas of shapes from other artists as long as you don't
copy them directly but just get inspired by them and put a fun twist
on what they did. I will talk more about finding inspiration in a future lesson. But I believe anyone
can make flowers, it just takes practice. So don't be scared and try it, and remember that no matter
where you're starting with your skills you can
only go up from here. Let's start with
some simple ideas. Grab a round brush that you're comfortable with if you
want to follow along. Again you can use the backs of failed paintings which
I encourage you to do to save paper and not to worry about practicing and not
making something pretty. We're just learning. Have press your brush and
make a bunch of quick lines that meet in a center point and you've got yourself
a daisy shape. You can always add in more
colors while the paint is still wet for that
fun wet-on-wet effect. I love to do this to make my color schemes
more interesting. You can also first
paint in the middle in this case a circle and then
add the petals around it. Notice how I drew them
with open shapes. I call this a doodly flower because we didn't fill
in all the shapes. It's like a doodle
but with paint. You can make your
petals longer or shorter or thinner or
thicker whatever you like. The next one is just making up circular feeling shapes by using the natural
shape of your brush. You can just do circles but
they won't feel as organic. Just you see shapes
with your brush. You just got to try it
until it feels right and there's no right way to do
it so just have fun with it. You can leave white
space between petals or make one pedal come out
or whatever you like. The next one is like
the first one but instead of making
them all around we're rounding out the
petals as they go out to meet at one
point on both sides. I also made my line thinner by not pressing on
my brush as much. Here's another
doodly flower idea. I love doodly flowers. Start with a small
daisy shape and add lines all around it
a couple of times. You can make a huge flower with this technique or you can do half-daisy shapes
and little dots for the feeling of tiny
flower clusters. Or just press down
your brush and randomly put shapes down facing random directions and make a triangle outline of the
shapes as I did here. A lot of flowers look
like this as well. Or you can make
longer shapes that are similar but are
very close together imagining a single stem and
boom this looks like lavender because we use purple
but you can do any color you like,
how flibby believable? If you're going to add a
stem to a shape like this, I like to do it after I
paint in the flowers. I think it makes it
more dimensional. You can wait for the
paint to dry if you like but I also
like it bleeding. But I definitely like
to add stems later especially if I want to
make flowers overlap. Planning the flowers
first helps do that. It's okay either way, it
depends on your style. Now notice how at the top
flower the paint was still wet and the green bled
into the flower slightly. I love this effect. Next, we got a quick
brush-play mess but our brains will
automatically think flower. This is what we did when we were getting to
know our brushes. You can really make any shapes you like
as long as they're a little bit circular
and organic. Now if we add more details [inaudible] really
look like flowers. I use wet on wet to
add a second layer of a different flower
shape and look how dimensional and fun that is. I loved the wet and
wet play here as well. Here I use the brush in an angular way to make
a circular shape. To me, this mimics
how petals look like in a rose of similar flowers. By using quick strokes, it makes it feel more alive
and adds a touch of texture. Again here I used
quick strokes to make a flower like the top one
but with less petals. See how different they feel. This bottom one has
more texture to it and just feels more loose
than the top one. Lastly, I had fun with this childish doodle
but it's so cute. Your flowers can be super
simple if you like. You can always go in later with your layers fully or mostly dry, and add details with
a darker color. We can only work from
light to dark with watercolor but if you're
working with gouache, you can do it vice versa. If you're planning
on adding detail later and you're working
with watercolor, it's always good to
start lighter and then work your way
up to being darker. But it's okay if
you make a mistake. I'll show you in a future
lesson how I would use white gouache to fix it. Now I'm adding just a few
simple details here and there and look how much more dimensional all
the flowers feel. I especially want you to see how the lavender feels more full in 3D by adding a simple
shading with the same color. I also think yellow can be a superpower with
floral planting. When you add yellow it makes
everything feel more bright. Since it's such a light color, it doesn't take away
from the main flowers too much but adds
a lot of pizzazz. I love to use yellow
for filler flowers or centers of flowers
but that's just a tip. If you want to practice
this more grab a blank page and fill it with flowers
from your imagination. I recommend you just use one color because then you
won't be distracted by color and you can just focus on the shapes of your flowers
which are very important. Color can be done in
lots of different ways. But if you get the shapes right
it will always look good. You can be as playful and
whimsical as you like. It's always good to
practice like this before doing final
pieces because you'll make the mistakes that you're
going to make when you practice and you'll learn a lot and then in
your final pieces, you'll make less mistakes. If you've never painted florals, I encourage you to just
give it a go and have fun. You can be as playful and whimsical as you like
with your shapes and you can even pause here
and try to copy what I did and then also try
to make up your own. Play with line, with shape, with the way that the
flowers are bending with the shape of the silhouette
of the flowers or the petals, or the shape they're all making together, or is it a bell? Is it an open-petaled
flower? What is it? Just be playful, make it any way you want it
to be, and have fun. This page is just basic ideas but I'm going to
break it down to three main styles
that we can use in this class. Let's
get into that.
7. The 'Doodly' Style: The first style is
called the doodly style, and I showed it to you already. Let's look at a
few more examples. For this style, I
recommend a smaller brush. I'll be using a Size 3, 0 they're round brush for
the first two examples to show how a smaller brush
would give you more detail, but you can use any
brush you like. Like I said before, just a
tip of a round brush is fine. With this one, we start with a simple center with a
circle and dots around it. Notice, I'm not trying to
be super neat and perfect, but you can if you want to. I just personally like
this messy style. Then I hinted the petals with simple lines that
are a little wavy. Having more detail like
this can be super fun. The second example, I'm doing an outline of a flower shape
that I showed earlier, and the look is very different and feels elegant, doesn't it? I kept all the
shapes very rounded. This is still a
very simple shape. Adding details like circles and outline leaves always
makes things fun too, especially in this style. Now, I'm going to switch over
to a Size 6 round brush. Here I start with loose
strokes that meet in the middle point and are
thicker in the front, and then I add in some
circles for the middle. Now, I'm just using the
tip of the brush and I go back in and add detail
using a darker color. This is a nice way to layer from light to dark
and to add detail. If you don't want any bleed, let the previous layer dry
fully before doing this, but I don't mind a
little bit of bleed. But if you're having
a lot of bleed, you're probably using
too much water on your first layer or just let
it dry a little bit longer. This style tends to look more dimensional even though
it's loose and doodly. You can do this with any shape. Just do a really,
really light layer, and then just add detail
with the doodly style. Next, I did a rose shape by drawing lots of half
circles and it's really loose and I'm just making it detailed in the
middle and then going out. These are just wobbly
lines attached. Then I paint in the bottom
part of it and that's because the half-oval shape
is something I see roses a lot and it gives
it more dimension. Then I go back in and thicken out all the lines and add more. If you change your shapes while the paint is still
wet, you can't tell, but I recommend working
quickly if you do this because it can dry
faster than you think. I added a darker color in some parts and even more petals. Notice how I utilize
the whitespaces to show separation
between the petals. If you make less whitespace, it look more organic. If you make more, it
look more doodly. I added in some not
filled-in stem leaves. I'll show you a few more
rose examples in one second. This next one is done with
super loose and quick strokes. You can work quickly
and achieve this look, and it's built on imperfection. I add little centers
with blue and some details plus leaves and
stems done in the same way. This can be more
cartoony, or childish, but I think it's so fun
to paint like this, and the results can be so cute. You can do this with any
flower shapes you like. This last example is more
mixed media and it's inspired by my previous
class in botanical doodling. I'm going to be using
waterproof ink, but you can also use
graphite pencil or colored pencil or marker,
whatever you like. You just put it down first and make a little
doodle of a flower, and then you add watercolor
on top to define it, or you could do the watercolor first and then add ink
on top to define it. You can even start with
just a watercolor blob and then make up a
flower shape on top. This is a very fun look and it can be super
creative to do. If you want to use ink
in this class, go ahead. Nothing is stopping you
from playing with supplies. Now, I wanted to show you
some more rose examples using the doodly style, because it's such
a versatile style. I love to play with how
dark or light my paint is, layering and using wet on wet or even quick
and messy strokes when I do the doodly style. The sky is the limit. Look how different
all these roses feel, and look how fun they are. These were all done
with simple strokes and were done very quickly. I encourage you to play with
whatever you want to do. You don't have to follow
my flowers exactly, I encourage you just to see what you like and just
do your own thing, but you can also copy me. That's just fine. Now that we learned about the doodly style, let's talk about
the delicate style.
8. The Delicate Style: The delicate style is more about fine detail and precision and
sweetness and dreaminess. I will show examples of
the size 6 round brush, but this time using one
that has a very pointy tip so I can get those nice and
thin details and stems. I personally love
it for this style, but you can still use
any brush you like, or use a bigger round brush and then a tiny one for detail. In fact, I recommend
this if you're a beginner and that's hard for you to use the tip
of your brush. But you can look at the
delicate style with any brush. It just helps be able
to make thin strokes. So we're going to use the side
of our round brush to make these thicker strokes
that are touching some parts and not others
tainted a floral shape. Again, we're just making up the circular shape and we're pretending there's
petals on the outside. The trick is not to leave
too much white space and to make your strokes random. This just takes a little
bit of practice so don't worry if you don't get
it right the first time. The shape can be very different. I mean, there's all kinds of different shapes with flowers. Next, I use a similar technique, but this time in
a circular motion to add some leaves and I add a stem with just the tip
of my brush, very thin. Notice how sweet and delicate it feels because of the contrast of loose shapes plus a super
thin and careful stem. I also vary the
size of the leaves and add little dots to
make it more dreamy. The delicate style also thrives
in keeping it simple by leaving more white space
around the flowers and shapes. If we overdo it with
the delicate style, it doesn't feel as delicate. It's good to keep your bouquet
smaller with this style. Next, I went in with a darker color to
define some parts, and the wet on wet effect
made it even more dreamy. But notice how I try
not to overdo it, which requires me to hold back
a lot with adding things. That's probably my biggest
weakness is overdoing it. We can finish here, very simple and dreamy. This next example is
of a flower cluster. I'm using the tip
of my brush to make tiny flower shapes with
four or five petals. Notice how I vary their sizes and don't do each one
exactly the same. So they all look
like they're facing different directions and
they just feel more organic. You can vary the shapes of the petals and the size
of the petals as well. I also use the paint
on my brush until it's very light because the more
you paint with your brush, the less paint you
have on your brush and the lighter it gets. But then I just
pick up some more. Again, it's dark and
then goes lighter. This adds a nice variation
value as I paint my flowers, and this makes it feel
more dimensional. I add even more tinier, tinier flowers all around. This really helps to get
that delicate feeling. Notice how the shape is
again, a long triangle. A lot of flowers look like this. I know this from study, adding delicate stems
here and there, adds the delicate style. This time I did lose
doodly leaves by doing ragged the outlines and it looked pretty
good together. Always mix styles. Again, little dots add
to the dreaminess. For this next example, we're going to do some
bell-shaped flowers with two longer strokes that just
flare out on each side. Again, I'm being
more neat to make it feel delicate and use
the most paint at the top and let my
brush gradually have less paint on the bottom
for a subtle gradient. It's going from dark to light. This just adds dimension, and then I add little stems
around each flower and tiny ones in-between some part and I connected
all at the bottom. I add leaves with
the same color, but I use more water and less
paint for a lighter look. Again, varying value helps make things look more delicate
and dimensional. It also makes more contrast and whatever's darker
stands out more to us. So the leaves are more
in the background and the florals are standing out. You can always add
more detail than this, but let me show you what
happens when you do. When I do it here, it changes the look
and it becomes less delicate and
more whimsical. This is just a
differentiation of style, and I usually do add
too much detail. But I just want
you to know how to make it look more
dainty if you like. Simple is usually better
for the delicate style, but you can still be
loose and whimsical. It's up to you what you
prefer to do the most, just have fun with it. Now let's talk about one of my favorite styles,
the loose style.
9. The Loose Style: The loose style
incorporates what we did when we practiced
using quick brushstrokes. We want that texture, we want that whimsy,
we want that speed. It gives our paintings
and aliveness. We're letting go of control. This is what we use when
we do the loose style. We want character, we want fun. Let me show you what I mean. Here I'm doing a quick
rose shape by just making quick strokes
around a center point. Always plan where your center
point is before you paint it and that will make it
easier to make a flower shape. Next, I quickly
add in the center, and again with quick
and loose strokes. I try to make them all random, even though the strokes
themselves are similar, the leaves are also
done in the same way. Notice the fun textures we get and these are
just longer strokes. If you want to do this style, the only way is to practice being loose and getting
to know your brush. It's also important
to let go of results. It really is trial and error and sometimes when you paint like this, it looks like garbage. Other times it looks amazing, it's just fun and practice. When painting your flowers, you can also start with
the middle part first, like I did here, with the loose center and notice how I left some
of the white of the page in it to make it more whimsical
and then I painted in loose petals all around and I tried to keep the
shapes similar, but they're all still
a little different. I varied how light or
dark my paint was by using either more water or
more paint in different parts. Also notice how when my
petals touch the center, there was some bleed. Wet on wet looks amazing
for the loose look, and I rarely wait for my layers to dry when I paint like this. Another thing you can do is do an initial loose layer
and then go back in with finer detail
that's still semi loose but more clean
like I did here, with the simple lines for definition and a
fun leaf pattern. This makes a nice
contrast of looseness and neatness and I think it makes
it look more professional, and this is combining the delicate style
with the loose style. Now I think, personally, the best style is
when you combine all three and other
styles and just play. These aren't written in stone and can do whatever you like, but if you're drawn to
one more than another, just develop that one. Usually the kind of
art you admire the most is what you want
to create the most. I've been admiring very
loose paintings lately, and that's what I want to make. With this last
example I'm going to combine all three styles. I'm being quick and loose with the initial shapes of the
flowers and then I'm adding in doodly outlines
which I'm also being loose with and to
make it delicate, I'm going to add
some stems that are very neat and cute and tiny. I think this one
turned out so cute. This is what happens when
you try to do all three. I also went back to the
last flower and added more dainty and delicate details to play with the
styles even more. I love to use all three
styles together in my work, but it's okay if
you're drawn to one more than another, just do you, play and discover what
you enjoy doing the most and it's okay if your favorite
style isn't even here, maybe you have to
discover it for yourself, but this class is just for fun, so don't worry about all that. Now let's quickly
go over leaf ideas.
10. Leaves: Now let's paint some leaves. My biggest advice is
to use rounded lines, not perfectly straight ones, and to use the tip of your brush first and then the body, and then the tip again. I already showed you
a little bit of this in the previous
brush play lesson, but let's look at
it more in detail. Here I'm using my
favorite brush, a round brush, but this
works for many brushes. I highly recommend you learn
how to do this and master it because they will truly
help you with your leaves. If you paint with just
the tip of your brush, barely touching the page, you get your thinnest line. Then if you press down a
little bit, it thickens. If you continue to press
down a little bit more, it gets even thicker. If we press down a lot, you get the thickest
stroke you can make. If you lift off
your brush slowly, it tapers to been thinner and thinner until it's
a thin tip again. We're just varying the pressure
that we put on the brush, slowly easing in and out. First practice
doing this movement by making straight leaves. Once you get good at it, move on to curvy ones. All you going to do is the
same movement and then curve your brush slightly as you
do it for curved leaves. Look how much more
alive these feel. This just takes some practice, so don't feel overwhelmed
and just try it. If you want a thicker
more rounded leaf, you can just do two brushstrokes close together with
them mirroring each other or you can just use the body of the brush
in a circular way. You can leave some white
space in the middle of your leaves for added
interest or not do it. Some people like it,
some people don't, I personally love this
look, practice doing this. But if you find this difficult or don't like this technique, you can always just paint only an outline of the shape
that you like and then just fill it in
quickly or you can just leave the outline
for our doodling look. Let's see more ideas. Here's exactly what
I just showed you, but if I move my
hand very quickly, it looks more random and loose, and we also get some texture. I love painting quickly
like this because I relinquish control but I get
fun results in the process. You can also paint
leaves around the stem. With this first one, it's implied that it's
there instead of painting in the whole thing and the leaves are
long and thin. The second one has
it fully painted in. But again, I'm being loose and quick and the leaves are in clusters of three with stems
coming out of the main one. Just by varying something small, it gives you a different look. Here's another quick example, this time I didn't
start with the tip, but instead with a harder
press and flicked the brush until just the tip was left
and took it off the page. You probably noticed these are very similar to the strokes I did in the getting loose
with your brush lesson. This one was also done
quickly and loosely, and I have the all meet together but they are longer leaves. A lot of flowers have this. This one is more neat and
is a cute little pattern. You can also just do outlines
of leaves and alternate between outline and filled-in and be loose with it as well. I love doing this look as you'll see with a
lot of my florals. You can also just do one kind of leaf and then another
kind right next to it. Even dots that are green
will look just like leaves. I tried to include
more than one leaf and my compositions. This one was also
super loose and quick. As you can see, I
love the loose style for leaves and even though I use the side of my
brush and just make clusters of leaves
randomly touching, you can still read
it as leaves and it makes it look pretty cool. This is just like when
I showed you earlier, the random brush
strokes that I use for the flowers look like flowers. There's really no wrong way
to paint loose florals. Don't be shy, I'm playing
with your brushes. I hope you're following
along with me and if you are just filling your
whole page with play. Whatever empty space you
have to do something there. You can change up how
you use your brush or the shapes of the leaves or
how quickly or slowly paint. Everything you do, we'll learn from even things that
don't look good, so just go for it. I showed more examples of leaf ideas in my
other florals class. These were more neat and more
based off of real flowers. If you like this painting more, this is more like
a delicate style, go ahead and copy this page as well, you can pause it here. But if you'd like
the loose style, I encourage you to also get
out another blank page and do all of this again but this time making them up from
your imagination. You can really play with leaves. Don't feel pressure to be
perfect and just play with it. The more you practice it, like I said before, the
faster you master it. That's it for leaves, have fun, don't overthink it, play and practice,
and that's how you'll get better
and find your style. Now let's talk phases.
11. Vases: Now let's talk vases. Now you don't have
to do a vase at all, but if you want to do vases, they can be super cute. Make up a vase shape and paint in a thin
oval for the water and then use plain
water on your brush to soften the edges and make
it look dimensional. Leave some white of the
page for highlights too. We're being loose,
none of this has to be perfect, be playful. You can also add in more
colors, whatever you want. Here are a bunch of shape ideas, but these aren't
all that exists. I encourage you to do
whatever you like and use Google images if
you need more ideas. There's many cool
vases out there and many ideas for containers
for your flowers, but you can use these ideas
as a reference to start with, don't be afraid of using your imagination and getting
creative with it either. There's no wrong answers. You can have the vase be someone's hand or head
or whatever you like, do whatever you want to do. As you can see with
these simple outlines, that's all you really need and can do with loose paintings. You can add fun patterns to them and do
whatever you want. You can make them
dimensional or flat. The biggest thing
to decide is if you're vase is opaque
or see-through, you can add stems inside
it if it's see-through. Another thing to
consider is if you want your flowers and leaves to
hang out over the vase, if you do, you can
paint them in first and then add the vase at the
end to make it easier. Whether you painted first or
last, don't overthink it. It's fine if lines overlap too. I think it looks super neat in loose paintings like these,
especially with watercolors. Have fun and collect
inspiration. Find ideas that inspire you and keep them for
future paintings, whether you use a
Pinterest board or have a sketchbook
with small doodles. Now let's talk about building
your visual vocabulary.
12. Building Your Visual Vocabulary: We are painting from imagination in this class
and that is wonderful, but I do want you to be
aware of how you can expand on your visual
vocabulary too. A visual vocabulary
is like a verbal one, but instead of knowing
the definition of a word, you learn what something looks like and then that
way you can recall it and make it your
own on the page without having to
look at a reference. It's built by
studying a subject, in this case, flowers. If you study flowers
by drawing or painting them from real
life over and over again, you memorize how they
look and then have more information that you
can play with in the future. You can do this
with any subject. For example, it's peony season and I had this
gorgeous PD to study. I may not have done a perfect
job in painting it here, but in sitting with it and just taking the time to observe it, I now have a better idea of
what a peony looks like, the shape of it, the colors, the petals, the way
the petals droop, and just the feel of it, and also how the leaves look. By practicing
painting it loosely, I get better at painting it
loosely for imagination. Your studies don't have to
be realistic as long as you take some time with your
subject and you try to observe. You can also just use a pencil and sketch
out what you observe. Of course, setting from
real life will give you the most benefit because
you can see all the detail, but you can also use
references on Google Images. Pay attention to the
basic shapes that make up your flower and
to the details. You can make these
completely your own. There's nothing stopping
you from having fun. If you have a hard time drawing, I have a class that teaches you how to draw anything by using basic shapes and that's
what I want you to pay attention to the
most with your flowers. Everything is made up of shapes, but especially flowers where
the shapes repeat a lot. That's why you can just
hint at something, it'll look like a flower. This is an example of a page
of flower studies that I did and here's an example of how I play with
that information. Because I have this
visual vocabulary from hours and hours
of studying flowers, I can make up my own fun and doodly flowers from imagination. These are very simple
and whimsical. Feel free to copy any of these and use them in
your future paintings. But the important thing is, I made these without
any references. Having this ability and building your visual vocabulary
works with any subject, not just flowers, but it takes much longer with
people or animals, for example, since
they are more complex. But with flowers, you can
pick it up really quickly. They're so much simpler
to paint and draw. I just want to encourage you to not be afraid to draw or paint any flowers that you
like and to build your own visual vocabulary
and confidence. But only if you feel
led to, of course, you can just stay loose with it like we will in this class. I just want you to
know that you had the creative liberty to learn these things and
to play with them. It's not as hard as it seems. Of course, you can do it. Even if you're a
beginner artist, you just need to practice. Now let's chat about filling our creative well by
finding inspiration.
13. Finding Inspiration: I want you to think of yourself
as a creative well and we can't always be pulling out stuff without putting
anything back in. To feed your well, you want to look at art
that you find inspiring. You want to go to the park, maybe a botanical garden nearby, not just for related stuff, it could be watching an inspiring enemy movie or reading a book
that you enjoy. We're going to feed our
creative soul and nurture it. But if you do want to
paint loose florals, it's really good to have
flowers that you can look at. Take pictures of them, analyze and study them, draw them like I
just showed you. But just having flowers around you and just
by looking at them, you're actually putting
a lot of information in your subconscious
mind that later on you'll unconsciously
remember what they look like. Drawing them will give
you more results, but even just observing
will give you results. I also want you guys to
collect inspiration from your favorite artist and have a huge arsenal of pieces
that really inspire you. Maybe study your favorite ones. What techniques did
the artists use? Did they use layering? What medium did they
use? What colors? You can learn a lot
from other artists, but it's important
not to copy them. It's important to just
do your own thing with the information
that you gather. But the more information
inspiration that you gather, the more it's in
your subconscious, and when you're painting, it'll come out in new ways and things you wouldn't
even think of normally. A lot of new ideas are actually reused old ideas just
with a twist on them. Your style is that twist. Like I said before, you don't
have to be aware of this, just observing other people's
art and really enjoying it and just looking at
it will give you more ideas for your
subconscious to play with. I recommend starting
a Pinterest board. It can be a secret
one if you like, and just collect all the things that you think are beautiful. Maybe some flower shapes, maybe color schemes, anything that you find inspiring so that you don't
get overwhelmed by the blank page and you just have more ideas to work with. Because we don't
create from a void, we have to create
from somewhere. Building your visual
vocabulary by studying flowers is
always the best, but also studying other
artist's work and just seeing what makes it so beautiful to you
is also the best. For me, I personally love very loose and whimsical
work lately and that's the stuff that
I find inspiring and I have a collection myself
that I like to look at. But I don't copy anyone,
and you shouldn't either. We're just studying it
and just enjoying it. Now let's talk about a
few tips for composition. Again, this is subconscious, you don't have to
memorize it exactly. But learning this stuff will help you to remember what to do, and what not to do
when you create your beautiful
floral arrangements.
14. Composition Tips: I want you to keep in mind a couple of composition
rules that will help you to paint loose florals that are pleasing to the eye. These rules or tips apply to any illustration but
also don't feel pressure to memorize these or follow
them to a T. Rules are meant to be broken and I break a couple of these
from time to time. Actually, I break
one of them a lot, [LAUGHTER] you'll see which one. But knowing the concepts and terms will help you
to understand why something doesn't look right and how you can fix it and will better to help you to analyze
your work in general. Knowing what makes
things pleasing to look at helps you to make
more pleasing things. If you're a planner then, yes, you can also plan with
these, is up to you. But don't let that kill the joy of creating in the moment. Think of these as light
guidelines set of rules. Our first concept is balance. When we have a
painting that feels unbalanced it
doesn't feel right. But this first one, there's way too
much whitespace in the bottom-right corner
and nowhere else. It almost feels
like the painting could fall over or
the vase could, just doesn't feel
easy to look at. Also the flowers and details on the left side are much bigger. If I wanted to fix it I could make there
be less flowers on the left side and
some whitespace and maybe more on the right
side towards the bottom. Since the vase is on
the left we need to add less to that side and more
to the opposite side. An easy fix for this is just to make your stuff
more centered, which usually automatically makes everything feel balanced. Notice how I alternate
the leaves on both sides to make it
feel balanced too. But, of course, your vase can be on the left or right side, is just harder to make
it feel balanced. If you do this you have
to really plan more. The next rule is to
keep it simple, silly. This just means if there's
way too much detail in your art it will
be hard to look at. Notice how busy the first one is but if I simplify
what I was trying to portray I can still
do similar things but it's just much
easier to look at. This is the rule I
personally break the most and have the most
trouble with as you will see. I love to overwork
things and I add too much detail and
I have learned to pump the breaks more often. Even with me overworking it now, trust me, I am pumping
the break, so yeah. [LAUGHTER] But
knowing that I break this rule too much doesn't
stop me from breaking it, I just like those results. But I try not to go too far. If you're like me and
you just do too much, It's good to start practicing stopping yourself when
you think it looks done. The next concept is scale. Notice how if I make all
the flowers the same size, the piece feels a little
bit flat and boring, but if I vary their size it
feels more organic and alive. Varying the skills of your
flowers and leaves is simple thing you can do to keep your florals
more interesting. Next up is value. Just like scale, if you make everything the same value it will feel flat and not very
interesting to look at. But if you vary how light or
dark different areas are, it's much more fun to look at. If you're not sure
what this means, just squint your eyes
at your painting and then you can tell where the dark and light areas are
and what feels unbalanced. I do this all the time. The last thing I want
to touch on is curves. If you make your florals
angular they won't feel very florally because flowers
are rounded and organic. There's no strange shapes
in them except for stems. It's almost always better
to make them curvy. Notice how the sharp edges also feel like little
knives to our eyes and almost threatening and how gentle and sweet the
curved flowers are. This isn't written in stone, if you like sharp
flowers, that's fine too. But the same concept does
apply to leaf stems. I think when they're curved
they look much more organic. That's it for composition. Not that bad. We're almost
ready to start painting. But first, let me share
a few more small tips.
15. Other Tips: First, let's talk color. I know this is something
a lot of people struggle with and don't
know how to use well, but not for the
reasons they think. I do have a short class I
teaches how to mix colors and a little bit of color theory in it if you want to dive deeper, but there are simple
techniques you can be aware of and then you can use to make your colors more cohesive. No, I'm not talking
about the color wheel, which I rarely use. The secret to making a
harmonious color combinations lies in using less colors. If you pick two colors, you can make any two
colors work together. Just try it. Try
to pick two colors that don't look good
together. It's pretty hard. If you pick three, again, you can pretty much make any three work pretty
well together. Well, almost any. If you feel overwhelmed
by picking your colors, you can always pick colors
beforehand, like I did here. Notice how cute all of these
three color combos are. Trying how to color
combo on a scrap piece of paper will help you
to decide what to use, and also just builds
your color confidence. The more important thing than
picking the right colors to me is picking
the right values. If your whole piece is
done with the same values, like I showed in
the last lesson, it'll be very flat, so it's good to
vary the value no matter what colors you choose. The same thing with neon colors. If all your colors
are screaming at you, it can be hard on the eyes. It's good to just pick one neon color or maybe
two and dilute it. But otherwise you are free to play and experiment with color, those are just my small tips. But I want you to play,
especially in this class, we're just going to have fun. You never know what colors will look good together
until you try it. Try new things I did in this class and some of the color combos
weren't that great, but it was still fun and I
like getting out of my box. I sometimes like to just
paint with rainbow florals, and you can do so too, or you can just do black and
white once if you want to avoid color altogether and
just practice your values, or maybe make a
monochrome one of pink and maybe just a little
bit of green for stems. I don't know. Whatever
floats your boat they're your paintings
just to you. You can also make
a Pinterest board filled with color
combos that you like. If it's still hard for you
to pick some colors out, there's tons of color combos out there that people have
already made for you. The next topic is thumbnail
sketching and painting. If you know what
thumbnail sketching is, stick around for a
second because I have a different take on it. A thumbnail sketch is
something artists use to generate ideas and
visualize them tiny, they also use it to evolve an
idea until it feels right. If an idea looks good, tiny as a thumbnail sketch, it will look good bigger, you're getting the
composition right. It also saves supplies
and wasted time working on an idea that
may not be so good. Isn't it better to find out if idea looks good before
you make it big? I don't always use
thumbnail sketches. In fact, I rarely do
because I paint so loosely, but I want you to be aware
of them because it really helps to pick a better idea, especially if you're starting
out and you're just not sure what a good
composition looks like. It's also a way to visualize
something complex, like weird vase ideas. You can also test our color
schemes if you want to. The next level of this is something that we're going
to do in this class. I call it thumbnail painting. It's the same concept, but instead of sketching
with a pencil, we're doing a
miniature painting to see if it will look good, big, but because miniature
paintings are so cute and they're complete
paintings in of themselves. Here I did some floral theme
paintings with gouache. Notice how I multitask and did many ideas at the same time. You can also do this. This is a great chance, not only tests out
a composition, but also colors, schemes, and even play with
mixed media supplies. Here I added ink and colored pencil to see
what it will look like. I don't like every single
thumbnail painting that I did, but
in doing so many, I tried many different
ideas and I can pick one or two that are my
favorites to make bigger. That's exactly what we're
doing for our final project. We're going to first
paint tiny bouquets, and then we're going
to pick one favorite or more if you like,
and make it big. I also want to point
out that sometimes even super tiny paintings
can look great scanned in, and you can add detail and
procreate if you like, or with mixed media
and then scan it in. I sometimes paint so
small and I scan it in. It looks like a big painting, just looks super loose. I love that effect. To me these are also
tiny finished pieces, and the best part about painting
so small is you can make a lot of them in a short period of time and
get tons of practice time in, tons of experience
in, and guess what, you won't care about
results as much because you can just
go make another one. They're so small, they
takes a little time, only five minutes each or less, and you'll only get
better as you do more. Also you can work out an idea a couple of times if you
really like an idea, but you're not sure how
you want to take it. Are you excited because I am? Let's start painting.
16. Tiny Quick Florals: It's time to finally paint, I hope the previous lesson got you excited for
what we're going to do here because this is one of my favorite ways to paint. We're going to do a lot
of tiny quick paintings. When you paint small, you don't focus on the details. You finish quickly and you
get lots of practice time in and you get experience and level up your skills very fast. You're also not
afraid to try lots of new things because you're
using less supplies, less paper, and you don't put
in that much time into it, so for this didn't turn
out good, who cares? We're going for
quantity over quality, so please don't care about
results and just try. I know this sounds backwards, but especially when
you're a beginner at something or even
more advanced at it, the more you do something
the better you get at it and if you just obsess
over one painting, you're not learning
as many skills as if you just
make lots of them. With this exercise, we're just looking for one little
painting that you like so that we can make a big version of it
in the final project. You can do as many little
paintings as you want, I'm personally going to do 14. Let me tell you the truth, I only liked half of
the paintings that I did and I have over 10
years of experience, so don't be hard on yourself. Making lots of quick paintings like this is like
sifting for gold. Sometimes we get fool's gold, but it's worth it
to get that one special piece and who knows, maybe we'll find a
diamond or two as well. Loose painting really is a lot about luck and trial and error, but even the fool's
gold will teach us how to look for real
gold in the future. We can learn and improve
from every painting we make. Let's start, to do this you
need small pieces of paper. If you have scrap paper, you
can cut into tiny pieces. Scissors work just fine, but I have a paper cutter, so I'm going to use that
for straighter edges. Another alternative,
if you have washi tape is you can make little squares that you can paint in. By sectioning off small areas for you to paint with,
whatever you do, just make sure your
paintings are tiny and don't spend more than five
minutes on one painting. If you find this hard, just
use a timer on your phone to limit yourself and teach
yourself how to paint faster. In fact, it's fun to maybe do a two-minute timer or
one-minute timer just for those super quick doodle
fun florals. Let's start. We're just putting together all the information that
we learned in this class. I encourage you to watch
this lesson and see how I do it and then try
to do your own thing. It's okay to copy me but you'll
get the most benefit from doing your own thing and
practicing painting intuitively. That's what this
class is all about, it's about playing, so
just go for it and let go. Don't worry about results, enjoy the moment and
do your own thing. I'm going to be using a size
4 round brush but you can get an even smaller one if
you want it to be easier, but keep in mind the
bigger your brushes the bigger your flower strokes can be, the broader they can be. But you don't want to
use a brush that's too big for your tiny paper, so just do whatever
feels right to you. I started off with
a simple vase shape using wet on wet to make
it softer on the inside. Then I added simple flower
shapes using various colors, notice how I alternated
the size and only used three colors for them. Then I added simple
stems and leaves. This is usually the order
I do these paintings in, vase first or last, and then flowers and
then stems and leaves. But you'll see me do
them in every order, this is probably the
easiest one though. I also added some doodle flowers and then try to refine the vase more and make it
more dimensional by adding darker colors
and a shadow, but to be honest,
I think it looked way better before I added this. Sometimes simpler is better especially with the
delicate style. I finished it off
with tiny details inside some of the flowers and leaves and this is one of my favorite paintings from
all the ones I'll make. The second one is my
least favorite painting. I think it's a huge mess and it was way too detailed and dark, and just didn't mesh well
with the composition, and the leaves are
just way too in your face and spiky feeling. One golden nugget of
wisdom in this one is the cute little circle with
dashes or rounded flowers, the little brown ones. I like how those turned out. If you make something ugly, just keep going and who
cares and guess what, nobody ever has to see it and you probably still
enjoyed making it, but try to look for that one little thing that
looks good to you. The next piece is
another favorite, I started with a
stripe doodle vase, added roses, leaves
and doodle flowers. I think I did so well
on this one because the previous one was such a mess and the leaves were
to prominence, so I learned not to make the leaves like that
and make them so dark and look how
cute and dreamy it was with the leaves
being a light value. I also used colors that are my favorites and
the composition in this one feels so balanced and I love how all the
colors look together. Adding some darker details
in the roses made them pop out more and
I love this one, this is my favorite, I think. I also think varying the
leaf and flower shapes is a huge strength
of this piece. When you have a piece
that you really like, analyze it, think,
what went right? Then remember that
for future paintings. Feel free to pause this class
at anytime and copy any of these finished pieces if you want to learn from what I did, but also feel free to
just be loosely inspired by it and do your own thing
that's still inspired by it, or just do your own thing, all three are good
learning tools. This next one, I tried
to leave my comfort zone and do something a little
different and more loose. I made a wide planter
shaped and then I added doodle flower shapes and stems throughout and made
this simple pattern. I'm not in love with the result, it just doesn't feel like
my style completely and I think you looked better before I outlined the blue flowers, so again I have to practice
not adding too much detail, but a golden nugget is the
pot having light polka dots. I actually really liked
the look of the pot, and overall it's
not terrible piece. The next piece was inspired
by a potted plant I loosely started with a brown pot
and added some wispy stems, but I ended up
painting over them with tons of flowers
and wet on wet play. This is definitely
a loose piece. I was very bold
with this one and darkened the leaves and I
like how it turned out. It's not really my
style with the colors, but I tried to go
out of my comfort zone and I think it's cute. This next one is
the doodle style. I wanted to be more playful and childish and I
think I succeeded. I really like how the pot and the pink flowers turned
out. This is cute. I wanted to try that again and continue playing with
this style and I thought it'd be fun to
do one large flower in a tiny vase. It didn't turn out so well but I liked the dots
in the background, there's my golden nugget and the pattern in the
flowers is cute. As you can see, even
paintings that I really don't like have something in
them that is a value. I wanted to really
play with looseness. I absolutely love how this painting looked
when I started it, but I kept adding flowers and I just got a little
too busy real quick. This is definitely
a pattern for me. [LAUGHTER] Just another lesson for me not to
overdo it, but hey, it's better to overdo
it in expressing yourself than to be afraid
to express herself, so it's okay with me. But I had a lot of fun being super loose and
quick with my brush, so I tried the style again
and learned from my mistake. Well, I overdid it again, but it turned out cute
and I didn't do too bad. This is definitely more
balanced than the last one. If you really like an idea
and you want to develop it, you can keep doing painting
similar to your previous one and just try the same style again until you
get better at it. You will learn with
every painting. I really had fun
with being loose and quick with my brush and
let the colors bleed. This is definitely the
style am most drawn to, the very loose style, but I just need more
practice in it. I added the checkered
pattern table and I just loved that look, that's definitely a golden
nugget right there. This next one I was more doodle and graphic and started off with a light layer of stems and
added lots of light flowers. Then I went in and darkened
some areas and added details and I think this
looks so nice and balanced, I did a good job of
playing with contrast, I also like the little
curved leaf shapes I did. As you can see with
this composition, you just want touches of darker areas here and
there and not throughout the whole piece like I did with the first painting
that I disliked. [LAUGHTER] So far, I did 10 mini paintings, I thought I was done
but the next day I wanted to do more,
so I did four more. There's no limit to how many of these you can do by the way, the more the better and
the faster you'll improve. This time I was inspired by the peony and wildflower
bouquet I had on my desk and the painting
started out so cute, but then I just had to
ruin it like I always do. [LAUGHTER] You know what
I did, I overdid it. I added way too much detail on the flower petals, and
in the background, and then to try to fix it
I kept adding detail and I fixed it by darkening
the outline, not really. [LAUGHTER] I added a druggie
background with water, but I think it looked better
without the background and lately it hasn't been my style to add backgrounds as much. I really need to learn how
to keep it simple, silly, and maybe one day I
will, I'll let you know, but it's okay, the
result is still cute. By the way, if you want to incorporate the dreamy
background look, you just do it by adding plain water to the
background and pulling from the
paint already on the page by reactivating it. This won't work with
acrylic gouache, but normal gouache or
watercolor will work just fine. You're just making
the edges bleed. Make sure to use
random brushstrokes of water so that it's
not uniform and you can also add splatter to
make it more fun by just tapping your brush on your
finger. Onto the next one. I realize I rarely use
the delicate style, so I gave it a go
and try to keep my colors pastel to make
it feel more dainty. I think this one
turned out super cute and planning which
flowers I'll paint helped to make it more
believable because these are all based off of real flowers
that I painted from memory. This one is definitely
a favorite, but it's more safe
than the other ones, I like to push boundaries. This next one is doodle
and graphic again. Graphic and doodle style definitely tends
to be more flat, but I really like how
playful and fun it is. As you can see, I
try not to overlap too many things and just keep
them in their own areas. I try to be loose and flow with my strokes and I think
this is super cute, if not a little busy like all my other pieces,
but I like it. One of my favorite
things and this one is the vase, it's just so cute. In this last example I want to try negative space,
loose painting, I painted the silhouette of my flowers and the vase since I wanted to keep them
white and then I just filled in the background
with a dark color. I should have made the
flowers bigger and maybe the vase smaller, but it turned out okay and it
was a fun little exercise. I especially like the
pattern in the vase and the circle flowers
look like dandelions. That's it, 14 in total. I'll say I really like
seven of them and I mostly dislike seven of them, so it's around half and half, which is pretty much my usual. I usually make one thing
I like and one thing I don't like even when I
do bigger paintings. But each painting
taught me something about my strengths
and weaknesses, and what works and what doesn't. The only failure you'll
have an art is not trying. I encourage you to do as
many as you want to and tell your inner critic to
be quiet when you do these like I told you
earlier, please do that. The more you do
these the more they speed up your growth and confidence and you'll just
have so much fun making them. Do this until you get at least one painting idea that you like, that you want to blow up. Even if you try lots of times because for the
final project we're going to take that
one tiny painting and make a bigger version of it. But we're not going
to copy it exactly we're just going to
be inspired by it, unless you do want to copy it. I'll show you two
different examples, one with watercolor
and one with gouache. I'm going to show
you lots of tips and tricks for both
mediums along the way. Pick a tiny painting and if
you haven't made them yet, go ahead and make
them and have fun, and let's jump in.
17. Final Project in Watercolor: It's time for the most fun part. All you got to do is pick one of your tiny paintings
and make it big. You're not glued to your
thumbnail painting and you can be as inspired
by it as you want. Maybe you just like the way
you did a certain thing, but want to change
something else. You can do whatever you like. This first one that
I picked was just for the looseness and the style. I wanted to convey
the same feeling and I had a lot of
fun painting it. But the second one is the
one I want to make bigger. This is the one that one had the composition of
and the colors, but I still want to keep
it loose and whimsical. I'm being inspired
by two paintings here but mostly one of them. You're not limited to being inspired by just one
mini painting either, you could try to combine some. But if you really like
two or three paintings, you can even try
combining all of them. Whatever you want to do
with your mini painting, it's up to you. You're not limited to being inspired by just
one mini painting, just do whatever you
feel like doing. In this lesson, I'll show you a watercolor example
and then the next one, we use a different mini
painting to show you a gouache example. Let's start. Put your mini painting or paintings where
you can see them, grab a bigger piece of
paper and let's paint. I chose to use the cat's
tongue brush since I never use it and it seemed
like a fun choice for florals. I started out by painting
the stems and notice how I varied the thickness of each one and I made
them cross randomly. This gives it a fun feel. I added more blues
and greens into the wet paint to make
it more interesting. Then I started on the
florals and mimic the shapes and placement
in the tiny painting. Notice how I added
yellow inside to the pink to make it more
interesting as well. Then I painted in
the yellow flowers. I left a big one out
since I didn't have space for it and added more to the left side to
make it balanced. Then I mixed the
grayish-blue color and added it in the same place
as the mini painting, but also on the left to
make it more balanced and to have the same floral
on more than one place. Then I use the same color
to add a simple vase that had a mason jar top to it
because I love that look. Next, I took a light
blue color and added more leaf shapes
and stems with it. I would say my initial
layer is complete and I was pretty faithful to my
thumbnail mini painting. Now it's time to add more whimsy and details that I
couldn't paint small. I add centers to the flowers, outlines to the
petals and leaves, and little details and
touches everywhere. Yes, I do usually
overdo things but I don't let that hold
me back from having fun and painting intuitively. I feel like overdoing is a part of my style
at this point. I love to mix mediums and I didn't cover this
much in this class but you can really use any medium on top of your
dry watercolors. You can also add detail
with just watercolor or gouache by just
using a thin tip. But I wanted to use
colored pencil because I love the texture that it makes
and how easy it is to use. Just be sure your
watercolor layer is dry first if you're going to be
using other media on top. I use a darker blue color
for some accents and definition and then
some lighter colors to define edges and details. Then I use the white
ballpoint pen to add sparkles everywhere by making little
dots and varying their sizes. I usually use this at the
end of my illustration. At this point, I was looking at the pink flowers and I realized that they felt
a little bit too dark. Since you can't go
lighter with watercolor, here is where the tube of
white gouache comes in. I just take some white
paint out and then I can use it to add
highlights anywhere I like. You can also use
acrylic paint instead. I use it to make a striped
pattern inside the flower, and I love how it turned out. I also added highlights
to the other flowers, some leaves, and the jar. You can see how
useful this can be and how it brightens
up the whole piece. Investing in just one tube of white gouache is a great
investment for your watercolors. Now I also think the centers of the pink flowers are too dark, so I mix some yellow watercolor with the white gouache to make a pastel opaque watercolor
color and I filled in the circles with it to lighten them and added more circles. This really made
the centers pop. It definitely increase
the contrast. You can do this with
any color you like, you can always mix
watercolor with gouache. I use this technique to fix
mistakes or add detail. I thought I was finished here, but here's a super pro tip, before claiming something is finished or posting
it on social media, walk away from it
for a little while. It can just be a
15 minute break or looking at it the next
day like I did here. The longer you're away from it, the better you'll be able to see if anything needs changing. When you stare at one
thing for a while, your brain has a hard
time processing it, so walking away is like a
superpower with your art. The next day I
looked to my pieces and there was a quite
a bit of things I need to change and
the day before I just couldn't put my finger
on what they were. You see where this
pink flower touches the yellow one? I
did not like that. That really bothered me because the pink
was way too strong. In fact, it was the
most vibrant part of the whole piece and
it's not supposed to be the focal point. It was the center of attention, that's what a focal point is. Also, it eclipse the yellow
flower where they touched, it just looked awkward. To fix it, I use plain water to reactivate the
place where there's too much pink and
reactivate just means that I made the
paint active again, I made it watery again. I can clean my brush and just pick up the
excess water and paint with it or I can use
a clean paper towel do the same thing and
make the area lighter. If you have gouache, you can also just paint
right over a mistake, especially if you
mix the right color. I did so here by adding the premixed yellow paint from before and because
the area was wet, it blend into it and it matched the rest of
the piece better. Look how much better
the painting looks with just this one detail fixed. I also think the yellow flower
needed more definition. It was bland and just going to the background so I
added more pink paint by outlining the centers and some petals and I'll
do more in a second. The next thing that
stood out to me is the greenish-blue flower
clusters looked flat, so I just mixed the
same color again, slightly darker and added a second layer
loosely to the top. Then I went in with the
pink colored pencil and added more details
throughout the piece. I usually like to use one color to unite
everything together. I use it to outline
the yellow flower more and also put
it in the vase. Even though pink doesn't make
sense here, it looks good. Speaking of the vase, it
looked a little flat, so I added more blue
colored pencil to it as well to have
more definition. The piece finally
felt done to me. Here is the first day
results scanned in, and here is the
second day results. I could see where the
painting could be improved much easier when
I took time away from it. As you can see, it
looks a lot better now. That's it for my
watercolor finished piece. I hope you enjoyed watching my process and it was really
fun to paint in play. As you can see, I was inspired
by my small painting, but I wasn't glued to
it, I did my own thing. But having that idea helped
me to start somewhere and gave them the confidence to
have a good composition. I can't wait to see what you do, but I'm going to show
you one more example in gouache that
turned out super fun. I encourage you to make as many big paintings
as you like from your little ones and if you failed the first time you tried, you can always try again
or try to fix mistakes, or just do it again and again
until it's not a failure. I encourage you to make
as many big paintings as you like from
your little ones. In fact, keep all
the little pieces that you like so that
you can make them into big paintings
in the future for those days when you don't
know what to paint. If you fail the first time you try to make a big painting, you can always try to either fix your mistakes or just try again. There's lots of times that I try the same painting
again and the second time I do way
better because I learn from my mistakes
from the first time. Don't be discouraged
this happens to you and just go again. It's fun to paint anyway, you're not losing anything. Now, let's do this with gouache.
18. Final Project in Gouache: For my gouache painting, I chose this super mini cutie. I think it was my favorite one. I pick the same
colors plus white. I'll also end up adding
some black at the end. I just wanted to keep my mixing
palette clean until then. I'll be painting in
100 pound black paper. I need to make sure when
I'm painting that I always have thicker layers
and it's not watered down so that it stays opaque and doesn't warp the paper
with too much water. This is the first
time we're using gouache thicker in this class. As you'll see, you
can pretty much use all the techniques
we learned so far, even with opaque paint. Which means you can
also do a lot of these techniques with oil
paints or acrylic paints. This time I will work with a limited color palette
instead of having free rein. I'm going to copy the colors
from my little mini sketch. I squeezed out a bit of each
color and start painting. Right off the bud,
I made the rows too big to follow the mini
painting completely. I have to be more picky
with the flowers I include. But like I said before,
you don't have to follow your mini
painting exactly. Just use it as a
loose guideline. Notice how the wet
on wet look still happens when the paint
is thicker and it makes very beautiful bleeds
that are different from working with thin
paints like watercolor. They're both beautiful. I achieve this look
and the roses by painting with a darker color
and then mixing it with the white to make it lighter
and then painting with the lighter one on top while the
first layer was still wet. So wet on wet. I decided to move the big
yellow flower to the left and edit another one on
top and tiny wants too. I like having
bigger flowers this time and then making
smaller ones all around it. Varying the skill like
this is super fun. Then I went in and added some
loose leaves like always. I mix a light purple
color and added some fun flower shapes
with it as well. Loosely filled in the
vase shape with white. I think it looks
very cool when you do it like this because
it's more messy. But if you're more
neat, nothing's stopping you from working
in layers with gouache. You can completely paint
your vase first and then add the flowers
on top after it dries. I added more details, outlines and little centers to my flowers and
stripes in the vase. Then I added some white flowers on top for more contrast and some white and
yellow loose florals on the right that
are draping over. Then I painted slightly
lighter leaves everywhere. You might be thinking
what I was thinking. Yes, Nina, I've seen
this behavior before, please pump the breaks
and you're not wrong. [LAUGHTER] I am overdoing it. But the good thing
about gouache is how easy it is to fix mistakes. I don't worry about it too much. I just kept adding and adding and adding and
yeah, it happened. I overdid it. I was tempted
to throw away the piece, but I chose to walk away instead and took a 20 minute
coffee break. When I came back the way
to fix it was obvious. Again, walking away
is a superpower. The middle of the
painting was far too busy with all the details, so I'm painted one
more bigger rose right on top of everything to
quiet it down and it worked. While waiting for that to dry, add a second layer of white
to the vase to make it lighter and add a little
center to the side flowers. To help balance the piece more I also made the vase taller. I brought it all the way down to the bottom of the
page by expanding it. Then I went back into
the rows and finished it like I did with the
others to make it blend in. When you have a
limited color palette, it's easier to use the same
colors again, if you need to. I kept refining little things, mostly added
highlights everywhere. Here's a very cool
technique that you can use, whether you paint on
black or white paper. Just take the color
of your page and make sure it's super opaque so
it looks like the page. In this case it's
black and paint in tiny lines all around
to make it look more messy as if
the page is showing through cracks of where
it didn't connect colors. This adds to the
loose and messy look. I love how it looks. It also adds more contrast. We're tricking our eyes. I added the black randomly
but try not to overdo it, which I definitely can. But like I said before,
if you overdo it, it's okay because you
can just paint over things with gouache. I was done. I love how this turned out and I really had a
moment of doubt here. But I'm glad that the
piece was saved and all it took was walking
away and layering. This is one of the reasons I've been obsessed with
gouache lately. If you've never used it
and want to give it a try, I have a class that
teaches the basics. If you come from a
watercolor background, there also just great
to use together. I absolutely adore the
bouquet that I made here. It's very different from
my other pieces and I had fun getting out of my comfort zone and trying to be loose. Notice how the
final illustration is similar to the mini painting, but I did my own thing too. Don't be glued to
your mini painting or you can lessen the creativity and spontaneity of painting in the moment and being loose. Or you can copy it exactly too, it really is up to you and
your style of doing things. Now, it is your turn. Go ahead and make your own
bigger piece or pieces. If for whatever
reason you have to try two times or
three, that's okay. It's part of the learning
process and you'll learn what not to do and what
looks better every time, even if it's
subconscious and you'll get better and better
results with time. But I believe in you, I
think you can do this. Just give it a go, have fun, quiet your inner
critic and play. That's it, it's time to
finish off the class.
19. Parting Advice & Goodbye!: My friend deserve a huge pat on the back because
you just finished this class and that's
awesome. That's amazing. I really hope you painted
along with me as we went through everything because the best way to
learn is by doing. You got to put in the
practice time to get good at something and just doing it one time is not going to
give you much results. If you practice every day, you'll get the most results, but even once or twice a
week or five-minute sessions every other day will
give you results as long as you put the time in. For my parting advice, I just want to tell you that there are gold nuggets of wisdom in every single piece you make and it's up to
you to find them. Find something that
stands out to you that you think is
beautiful and then you'll have that in your
subconscious mind that you can use again and you'll learn what techniques work well
and what don't. Especially if you
make an ugly piece, think, what did I do wrong here? But not in a critical voice, not the inner critic voice, in a constructive voice. Think of it as if
you're the parent and you're telling your
child how they can improve, you wouldn't be mean to them, you would just help them. We need to learn how to make
the voice in our head sound more like a best friend
instead of an enemy. If you really like what you made and you're not too shy to share it or even if you
don't like what you made, but you want to share
it, go ahead and make a project in
the project gallery. It is so much fun to share your creative
journey with others. We can all learn a
lot from each other. I personally have a ton of classes out there
and I'd recommend my botanical doodling
one or my loose florals one for something
related to this class. You can also take one on
color mixing with watercolor, or you can use it
for other mediums. Or my watercolor basics
class if you want to learn the basics and I also have
a gouache basics class, if you want to learn
those and I have tons of other classes on all kinds of
fun mediums and techniques, including drawing,
ink, and cuties. I love cuties. I also have a book on how to
draw cute animals. If you guys want
to stay in touch, you can follow me
on my newsletter. That's probably where
you'll find me the most. If you want to know about
supplies that I use, I also have a section in my
website that shows that. Thank you guys so much for
taking this class with me. I really hope you enjoyed
it and learned a lot. I'll see you guys
in the next class. Take care and stay
awesome and play. Have fun and just do
your own thing. Bye.
 Yasmina Creates, Artist & Creativity Cheerleader