Transcripts
1. Introduction: I believe the difference between a professional and amateur logo is clear communication. The key to this isn't in advanced techniques or fancy software, it's actually in the fundamentals of design. Hi, I'm Jason Miller, I'm a freelance graphic designer from London. I specialize in brand identity design, working with brands globally to create unique, tailored identities. I absolutely love what I get to do. My preference is working with smaller businesses, and using branding to help them truly connect with their ideal clients or customers. But just what is brand identity? [MUSIC] Well, brand identity is a communication system, made up of many different elements. But perhaps the most important of those elements is the logo itself. This is often the most memorable part of that system and it's the focus of today's class. In this class, you will learn how to create a stunning professional logos no matter the style, no matter the industry. Now, unfortunately, a very common mistake that catches even experienced designers out is remembering that the purpose of a logo is to communicate a message clearly. Think of it like this, if you ask the group of strangers for directions, would you prefer them to reply one at a time, or all at once? Well, it's obvious, isn't it? It's much easier to understand one clear instruction or message than it is to try to decipher a sea of screams. Exactly the same goes for logo design, and really less is more when it comes to clear communication. At the very core of logo design is clear messaging. This is achieved with strategy, or the process of asking the right questions and deciding beforehand what you want your design to achieve. Once we know what to communicate will then take what we know about culture and the way our brains work to visually translate these messages through your design. This class isn't software-specific. As long as you're not planning to use Microsoft Paint [NOISE], you should be okay. It's absolutely perfect for beginners, and I've even created a work that to help keep you on track throughout the process. You can follow along, even if you're not a designer, perhaps you are a creative wanting to level up their personal branding, or maybe you are a proud business owner wanting to improve your image. A professional logo can actually control what people think and feel when they look at it. By the time we finish this class, you'll know exactly how to ensure your logo falls comfortably into that professional category. I'm really excited to share this with you. When you're ready, let's jump into the first lesson.
2. Class Project: In this class project, you create a new logo for yourself, your own business, or personal brand. Now, I'm not going to share just one method of creating a very specific type of logo. Instead, I'm going to share principles that you can apply to any type or style of logo you choose to design. We'll start with planning and to help guide you through this, I've created a downloadable workbook that you'll be able to find under the class resources. You'll not only be able to complete this workbook as you watch the lessons, but if you save it at the end, this will be a valuable resource you can use for future projects. When you see this icon appear in the class, please follow along in your workbook on the corresponding page. Or when you see this icon appear, please pause the class and take as much time as you need to work through that particular step before resuming the video. Now once the planning stage is done and you've completed that workbook, you're free to follow along using any design software you're comfortable with to actually work on your logo concepts. Now that said, I'd recommend using something that enables you to create vector graphics for best results, For example, Adobe Illustrator, which is my preference, or Inkscape, or something similar. As you go along, please remember to share your work in the class project section. I absolutely love looking through what you are able to create. If as you work through this, you're stuck where you want direction on something, I look through these regularly and I'd be happy to try to help you. I'm really looking forward to seeing what you are able to create. When you're ready to do this, please download that workbook resource, and I'll see you in the first lesson. [MUSIC]
3. What Makes a Good Logo?: [MUSIC] What makes a good logo? In fact, I bet the second I say good logo, you automatically begin to think or certain brands. If you look at these three examples, perhaps you're thinking what could the key to a great logo be a strong simple symbol? Sure, but what about these guys? There's no symbol at all. Is it a great custom font that makes a good logo? But hold on aren't these good logos and successful logos as well. You can forgive beginners for being more than a little confused about exactly what makes a good logo. To help you out, I'm going to answer the reverse first. What makes a bad logo? What are some of the most common mistakes that we need to avoid? Well, let's take a basic example. It's no pressure here. This is just a logo for our local dry cleaners. It's super simple, nothing special, and I formed this together in five minutes. Just to show you how badly this concept could be developed if we make some of these surprisingly common mistakes. Our first mistake, the logo being hard to read. In this version of the designers perhaps tried to be clever and has overlapped a symbol of the iron. There's absolutely no need for this. This symbol overlapping the E makes it very difficult to read. Because rather than a clean, clear character, you've now got to decipher what this unusual symbol in the middle means. Which part is a character and which is part of the symbol. Then we've got A turned into a triangle. Sometimes this can work, but together with the initial mistake, it makes the entire logo difficult to read. Our next mistake, impossible to see at small sizes. This is an extreme example, but this logo would be very difficult to read. It's just too much text on a single line. There's no spacing between it. The little icons along the bottom. [LAUGHTER] There small they're going to be wasted. While this might just about work for the main sign on the front of a shop. In most places this logo fails, it's just not going to be legible. Another common mistake, not communicating brand values well. This can be a little bit less obvious, but I'll show you an obvious example of this. Our logo here says it's traditional dry cleaning since the 1800s. But that's absolutely ridiculous because this logo application, it couldn't have a more modern treatment and style there's such a disjoin and a disconnect here, a poor communication of the brand's values if the heritage and the age of a company is one of his key messages. Our next mistake, attempting to communicate too many messages. Now surely that goes and never this bad, are they? Well, every detail in this logo is trying to communicate something else. There's an icon for family, an icon for laundry and icon for dry cleaning. It's trying to tell us when it was established, but it's also trying to be modern. There's a playful font to try to soften the look of a brand. The blue circle around the outside means something. The yellow wash, it means something. There's just too much information. There's no way a logo with this many complex elements can work, can communicate clearly. Our next mistake, unbalanced. Where to begin? The kerning and that's the spacing between letters is all over the place, has a massive gap between the L and the E. Then the A and the N in clean or too close together. The tagline of a bottom is off-center and it's not aligned to anything. The symbol at the top that's also off-center. It looks like it's been aligned to the left of the L, and I in the symbol is just sitting awkwardly, again off-center. Yes, this is an exaggerated and extreme example. But even a little unbalanced can feel this bad to a professional eye. Our next mistake, novelty fonts, and I must qualify that by saying novelty fonts when it's not appropriate. To advertise school cake sale, sure, go crazy with these kinds of fonts. But there are not many professional brands that are going to feel right with something like this. Another mistake, a logo of it geometrically weak. Again, this is an exaggerated example to make it obvious. But that symbol looks terrible because the square is warped, the of a circle, isn't a perfect circle. It's slanted and again warped and even I, inside that washing machine symbol, it's been warped and stretched out of proportion. If you're going to use elements like circles, squares, or even certain types of type. They should be regular and properly proportioned. Our brains are very good at spotting when something is an irregular geometric shape. Then were actually two more things that we need to avoid. I'm not going to share examples of these because I don't want to get sued, but generally, you want to avoid logos are overly cartoony when it's not appropriate. There's nothing wrong with a strong mascot for a brand, in fact, that can be very successful, but that's rarely be appropriate approach for serious business types. Don't go the cartoony, bubbly route when that's not fitting. Last on our list, logos but feel as a spare stock made. What do people mean when they say a look, looks stock made? They're saying it looks like a name has simply been pasted into a template. That means it's not a great fit. It doesn't feel bespoke. It doesn't feel tailored for a brand. It feels like someone's looked through a stock library and just popped their name. They're basically saying this logo has taken five seconds to create from an existing template. Now, that may be a personal choice. There may be some brands out there who simply have next to no budget that they need something to start using. I can empathize with that. But if we want to be professional logo designers, we've got to stay a long way from that approach. That's already taken care of. Those who want templates can find them if we want to create bespoke professional logos, we've got to ensure our work feels more professional, bespoke to the client made to measure unique to them, and that way it justifies the difference in price point. A good logo will avoid all of those mistakes. It will also clearly identify a brand. It needs to be versatile. It still works whether it's displayed in black and white or engraved in a single color or finish. It needs to feel relevant and appropriate to the brand. I can appreciate this probably feels like quite a lot of information to absorb. But try to remember these points. These are the factors that differentiate a great logo from a terrible one. But don't worry, by the end of this class, you will know exactly how to avoid these mistakes and how to ensure that your logo fits firmly into the professional category and avoids the amateur look. Let's start by preparing ourselves for this project, and we'll do that in the next lesson, where I'll show you how we can go about research the right way. [MUSIC]
4. Research: Know Your Client: [MUSIC] Who is your client? That sounds like a strange question to ask. But if this isn't a personal brand, don't make the mistake of trying to get to know your clients tastes rather than getting to know the needs of their brand and their audience. Ironically, their brand is your real client, not them personally. For example, your client's favorite color should not be a good enough reason for that color to feature in their brand identity. What if your client's target audience absolutely hates that color? Well, then it's not going to attract them. Then this begs for question, how do we get to know the needs of your real client, the actual brand? Well, you don't have to stalk your client or shadow them as they go about their work. There's an easier way, and very rarely do we have a project scope that allows us to invest that time getting to know a client. What can we do? Well, there are two easy things to start with. We can ask questions. The key here is to ask the right questions about the brand and about the client's audience, and secondly, we can gain many useful insights by researching that brand's competitors. Let's begin by looking at some good questions we can ask. This is not an exhaustive list of questions, but I think this is the bare minimum I'd want to include for a small project scope. You'd want to ask your client, and if you're doing this for your class project, really, you want to give your answers to these questions and fill them into these boxes yourself. But you want to find out about for business in general, first of all, so you would ask a client, what can they tell you about their business or products or the services they are looking to provide? Then come goals and objectives. Perhaps the three most important goals that the client would like their business to achieve. Now, while some of these objectives may not relate to the brand identity, most of them will, and they might open up some great opportunities for branding and a brand strategy at a later stage. Next, target audience and demographics. Who are the target audience? Are they consumers or other businesses? What are their tastes? What are their budgets? Where do they live? What age are they? The more questions you can answer here the better. Then there's a section where I like to be a little more specific and ask about the target audiences habits. What might attract them to this brand? What are they actually looking for? How is it they may come across your business? Value proposition comes next. You may be familiar with this USP, what's a unique selling point of a brand or company. Now, if you struggle with or had unique because you're conscious of others doing the same thing, swap instead for word key. What's the key selling point of your brand or company? What's the main reason someone would choose you? Next come key brand messages. Now, we'll dive into these in more detail a little later, but for now, just list as many as you can think of or as your client can think of, off the bat. What are the key messages for a wish the brand to communicate? Lastly, come competitors and inspirational brands. First of all, which brands or individuals will be competing against the brand you're creating? Secondly, what inspiration is fair? What brands does your client perhaps aspire to emulate? Or which are some of your favorite brands from a design standpoint? Next, we want to get a general idea of this scale in terms of visual style and tone. Now, the reason I place this on a scale is to help well either you or your clients to understand that you can't have something at both ends of the scale, even needs to sit in the middle, so it's not really communicating in either direction where it needs to sit on one side or the other. Now sometimes it will be best if you make these decisions for your client based on their brief, but sometimes they'll have an initial steer or a preference. The way you go about this usually depends on the project scope but it's always good to at least begin a dialogue, start a conversation, discussing these things, and get some feedback from your clients, see what their thoughts are. Please complete this scale for your brand as best as you can. As our last step for the research, we want to go about looking into the competitors and the inspirational brands that our client has indicated to us. As an example, I'll show you how I would go about this with my sample project for the top Ridge Bakehouse. Now they're not a chain. They are small local cafe, which is based in North London. But it's the kind of cafe where you could stop in and enjoy, not just the coffee, but the atmosphere, some nice food for lunch, as well as a range of bait goodies. This is a summary I've put together for them. The goal here is really to highlight key insights and trends to my client. For a real life project, you might choose to present it this way, it may instead just be a conversation. But quite often, I found using a client's competitors or inspirational brands as context, it helps them to better describe where they see themselves, so it becomes a relative exercise. They want to be more modern than brand x, but not as modern as brand y. Sometimes a client will find that a great help in articulating to you where they think they should fit. Armed with all this information, we're now in a great position to begin forming a strategy and have a closer look at the messaging and positioning of a brand, which we'll do in the next lesson. [MUSIC]
5. Strategy: Messaging & Positioning: [MUSIC] A good strategy is essentially a game plan. What does this brand need to communicate about itself? How would this brand be positioned? Which essentially means how will it indicate it measures up against other similar brands offering similar products or services. Using the questions we've answered in the previous lesson as a starting point, ask yourself, are there any missing messages? Has anything here not been covered. Are the brand messages are going to help this brand accomplish its goals. For example, if you notice that a brand, let's say it's a tailor, wants to be the most expensive, most high-end tailor in town. But your brand messages contain no indication of it being a premium service, then it's time to add those messages. Similarly, do the brand messages reflect the USP, the unique selling point. For example, let's say you're working on a brand for a bakery and its USP is that it's a vegan bakery. The only vegan and bakery in the area. Now, what a crime it would be if wasn't conveyed somehow in its brand messages. To help you understand how this works, let's go through a few examples of turning a client's goals into brand messages. Our first example, let's say your branding for a graphic designer, and they wish to indicate that no job is too small for them. They're more than happy to work with local businesses and to do bits and pieces. How might that goal translate into a brand message? Or you could use messages such as the fact there approachable, or local. Another example, let's say you're working on a brand for a photographer. Now, this photographer wants to score higher-end commissions and to get recommended by top event planners and perhaps prestigious hotel. Which brand messages might you use to help the photographer reach that goal, or perhaps you could suggest they indicate reliability and professionalism. I hope those examples are useful to you and help you to get the idea. Our next task is to identify these brand messages in no particular order for now, and you'll see my example here. This is the list I've put together for my cafe, so you want to put your own list together for your brands. Don't worry because we're going to refine it later on. But for now, just add as many as you can think of that are relevant to your brand. Next, we take a look at the positioning of a brand. Now, this may repeat brand messages, or it may run along very similar lines, but positioning tends to be a little more relative and specific. I'll begin by sharing my example which I've created for the cafe, the Top Rich Bakehouse, and I've included just two items here on the positioning. Usually, this would tie in to the brand messages. They want to be positioned and perceived as the high-end cafe in the area, which is top rich. They also want to position themselves among other cafes as a venue that's appropriate for business meetings or people working from laptops. The section underneath the expectation we want this positioning to create is where we just clarify and usually explained this to a client. Positioned in that way, clients would be prepared to pay a premium. They would expect likely have very high quality, maybe an artisan quality of coffee and food. They'd expect there to be impressive interior design and a nice ambiance to the cafe and because we're trying to position it as appropriate for business meetings, they'd expect there to be a reasonable noise level and a mature atmosphere in the cafe. You may notice for the second section, client expectations are actually up to our client to deliver with a brand, but our job is simply to create the correct expectation in the first place. While it's unlikely that the logo alone would be able to clearly convey all of this in terms of positioning. We can at least try to ensure it aligns well with the positioning and messaging. That's why we're considering it in this stage in this class. When you're ready in your copy of a workbook and the top box for positioning, enter something you would like your brand to indicate to the client, and then in the second books enter the intended expectation this will create for the client. This is of course the area the brand itself will need to follow through on. Good news, we're almost ready to begin designing now. There is just one more little task we need to do first, which we'll cover in the next lesson, but we need to take a step back, have a look at the overall strategy and then quite importantly, organize the collection of prime messages into an order, a hierarchy so that we've already established which is more important than the other, which is really going to help us in future stages. When you're ready, join me in the next lesson, and we'll look through this together. [MUSIC]
6. Understanding The Brief: [MUSIC] Understanding the Brief. Now, although we've created the brief for this project, taking a step back and making sure everything makes sense and is in alignment is very important. The strategy we've been creating in previous lessons essentially formed our brief for this project. As we review what we have, we're looking for any disjoints or contradictions. Now, this was much easier to identify with our visual style and tone because we use the sliding scale to help us to identify that you couldn't have things on opposite ends of the spectrum. You couldn't have premium and economical. You couldn't have simple and sophisticated. But this can be less obvious with a brand messages. For example, a client might wish to appeal to small local businesses with limited budgets, but perhaps the messaging they indicate to you is that they wish to appear global, international, and premium. You'd need to flag that up and have a conversation with the client and just to let them know, the two don't fit together really, we need to lean one way or the other. Once we're happy there are no contradictions, we're ready to organize these messages into a hierarchy, which really means we're going to list them in order of importance. There's a good reason we do this at the end of a research phase because this is when we've just looked through and absorbed ourselves with the ins and outs of this brand. We're in the best position now to make an informed decision as to which messages should be most important. You can use this layout from the workbook to help you organize this. There's a clear hierarchy in order of importance. I'll begin by showing you my example here, which I've completed for my cafe, the Totteridge bake house. Right at the top we have our primary message. Now, this is often the USP of a big idea, the core message of a brand, the absolute most important primary message that we have to get across. In my example, this is the high-end cafe in the area, in Totteridge. Now, ideally although it's not always the case, we then use the key messages to add layers of meaning to that primary message and to validate it. In my example, why is it the high-end cafe in the area? Well, because it offers a premium experience, because it's trendy, it's the place to be, and it has an artisan level of food and coffee. There's a great synergy between those messages. Where that's the case, that's absolutely ideal. But don't be worried if one or two of those key messages don't perfectly align. Some parallel messaging is allowed as long as there are no clashes in place. For supporting messages, well those are still important but perhaps less essential. In my example, the fact it's a friendly cafe and friendly service, the overall style is timeless. It's going to mix modern and classic elements. The quality is high. There's great ambiance and there's also a charitable element to the proceeds from the cafe. I hope my explanation there with my example helps you to complete yours. Please complete this page for your brand thinking carefully about each of these brand messages. Which messages really support the primary message and not key, and which are just secondary supporting messages? After a final review, this is usually the stage where for a real life project, you would now share this with your client. Perhaps you present it within a document. All of your time and research really pay off because you'll be able to answer your client's questions. You'll be able to clearly explain the reasons for some of the decisions you're proposing. That's not only going to impress your client, it will mean you've agreed your strategy in principle before you've even created a single sketch. All of this is really going to help us in the next lesson where we decide which of these messages are important enough to convey in our logo itself. [MUSIC]
7. Deciding What to Communicate: [MUSIC] In the previous lesson we spent some time understanding the messages our brand needs to communicate, and then organizing those messages in order of importance. Now we have to decide what to communicate in the logo itself. Now this is important because we simply can't cram our entire brand strategy into the logo. It would be too much information. Is far better to communicate just a few key messages clearly than attempt to communicate many messages poorly. Let's begin with a quick exercise to show you how this works in practice. I'm going to show you three different very famous logos, and for each one, when I display on the screen, I want you to pause the video and just write down the clear messages that you feel it communicates, the really obvious ones. When you're ready, let's begin with the first brand. What does that logo communicate? Well, hopefully to most of us, burgers. What kind of burgers? Well big burgers. Everything about that logo, the font, the shapes are big and almost juicy, so perhaps what it communicates to us. Let's take a look at the next logo. Again, very famous, very successful. What does this communicate to you? Well perhaps two very clear messages. We have the A pointing to the Z with a little arrow, so A-Z, the full alphabet, everything. You can get everything at amazon.com. We have a message, well that arrow actually forms a smile. If you shop at Amazon, you're going to be happy. Happy, smiling customers. Let's take a look at our last brand, and the messaging here might be a little less obvious, but see what you come up with. The Nike logo, that famous Nike swoosh, what does this bring to our minds? Well it's more abstract. This is a little less obvious, but a sense of speed and movement of activity. Even the tick, the swoosh forms, well that's a successful positive symbol, isn't it? That last example may have been less literal, but all three of those brands use very simple clear messages. Why do brands use this approach? Well let's use an analogy. I'd like you to imagine you're lost and you're looking for directions. You decide to approach a group of six strangers. Which would you prefer, just one of a strangers replies and gives you clear, obvious directions that you can follow to your destination, or that all six strangers try to reply to you at the same time, shouting over each other, and perhaps giving you slightly different messages? Well I'm sure if all six answered at once, you'd feel confused and likely overwhelmed. What's the point? Well we don't want our logo to feel like a group of people shouting different messages at us. Is better for the logo to communicate just one or two messages clearly than attempt and fail to communicate many messages. Just to know at this stage, but before we actually begin looking at visual elements and design, we're going to keep it based on the theory. We're going to look at words and meanings. Then in the next lesson we'll look at how we can communicate these different things visually. If you've completed the previous lesson in your workbook, you'll see that we've already done a fair amount of work here, and you'll have a clear hierarchy of your brand messages in place. Now yours will be different. But in my example, with my client being that high-end local cafe, here are the brand messages that we arrived at. How do we decide which of the messages we should try to communicate in our logo, particularly as we're looking to feature just one or two of them? Well essentially the higher up this hierarchy we've created the better. The messages toward the top are more fundamental and more important to the brand. To help you with this, I'll first walk you through my thought process as I went about this for my example. For my example, the Totteridge Bakehouse, the primary message is for this to be known as the destination, the high-end cafe in the area. The logo can definitely fit that bill, can look very classy and high-end. I also think the key message, trendy, is something the logo could convey particularly well. In the best communicated via column, I'm going to write Logo for both of those messages. Now this doesn't mean some of the other messages might not come across in the logo as a bonus, but I'm not going to worry if I don't come across clearly and strongly. Why not? Well although it's beyond the scope of this course, there are other elements of a brand identity system that we can use to convey these remaining messages. Some may actually be more appropriate or do a better job. If you pause this next slides, you can actually see an example of the elements I might choose to cover these remaining messages, wherever it be, colors, fonts, or imagery. By using the brand identity system as a whole, you're then allowing each element to play to its strengths. For example, if we take the brand message, charitable, for the cafe I'm branding, we wouldn't panic if that's not something we can communicate clearly within the logo itself. In fact it might clash with the luxurious, high-end look and feel we're trying to give the brand as a priority. Instead a brand might decide it's better to communicate that value via video or images of a charity it contributes to inaction. It might decide to share those on social media, or it could appear on the company's webpage or blog. Please work through this page in your copy of a workbook and don't worry about assigning something to every single brand message at the moment. Try to identify just one to a maximum or three messages that you want to attempt to communicate in the logo design. Type Logo in the column alongside that message to indicate that's your choice, and then save the document. In our next lesson we're going to focus on how to communicate these various values visually. Now this is often something specific to the target audience, their culture, their background, the environment they live in, the things we're used to seeing, and the brand decisions we're used to making. That might sound scary, but it's actually quite easy to start putting a knowledge of that in place in your work and your decisions. I'll show you just how we can do this over the next few lessons. [MUSIC]
8. Perception: Know Your Culture: [MUSIC]. If you've been following along with the class, by this point, you've decided exactly which messages you'd like to communicate. Now let's talk about how we communicate them visually. When I show this next image, what does it bring to your mind? What message comes into your head when you look at this? Perhaps it's stop or danger. What about this one? Likely this makes you think, go. Why is it we have that reaction to the colors red and green within a certain object. Well, it's because we're programmed to think that way. When we see a red light, we automatically think stop. When we see a green light, we think it's safe to go and that's just one example. In our lives and our cultures, there are many different objects, colors, and visuals, that we're taught to understand and interpret a certain way. For example, remember for red light, we just considered the fact it meant stop. Well, in this context, red, paired with gold actually means something completely different, it indicates royalty, luxury, celebration. Some human experiences transcend culture they're more universal and these are particularly powerful for designers. Let's do a quick exercise to illustrate this. What would you associate with this? What word comes to mind? Perhaps ocean. But what emotions come to mind when you look at this? Maybe peace, tranquility. How about this one? You probably think of a word, fire. But what about now? Well, maybe in this context you think of heat. It's the common link between fire and chili peppers, it's less specific. What emotions would you associate with this? Well, for one, maybe warmth or perhaps pain. It's so important that as designers, we understand both the meaning and the emotional connection between visual elements that we choose to employ. Some values can be communicated very clearly. Other values are a little harder to articulate, such as luxury. Which of these would you associate with luxury versus economy? Why do we view one shop exterior as luxurious, another as economical? Why one arrangement of clothes as luxurious and one as lower-end. To consider another element, you may have noticed that in Western culture, primary colors are often used for kids brands, but it's not that simple. If we visit African cultures, even for mature brands and luxurious clothing, bright colors and patterns are often used. Now that said, globalization is actually closing the gaps to some extent and many cultures are now influencing each other. For example, this is a modern advert created for an African audience promoting a luxury lifestyle. But there's no use of strong primary color or patterns here, and the tone is quite muted. We've discussed objects and colors, but what about fonts? What role can fonts play in our visual communication? Now this is a poster I've created to show the psychology behind fonts and the different values they're famous for communicating. For example, serif fonts are seen as more authoritative, formal, serious, trustworthy, perhaps even respectful. Sans serifs, well, they are more modern and they're seen as more modern, but also minimalist, elegant, at times sophisticated or simple. Decorative fonts, well, they're usually seen as informal, perhaps quirky, versatile, original, or unique. Script fonts, well, they can convey a sense of something artistic, informal, feminine, or personal. For your brand, which region or culture does the target audience share? Which colors might be appropriate? Which style of fonts would you explore initially? If a brand is to be luxurious, what do people from that region, that culture associate with luxury? If it's to be economical, what do they associate with budget and economy? What's the best way to learn this? Well, it's to always be learning. If you go into town for dinner, have a look at the restaurant branding , the restaurant menu. Billboards you see along the way, posters, adverts. Always be learning, always be looking and trying to identify why things have been designed a certain way. Which audience were they designed for and what can you learn that you can then use in your own work? We've looked at the way we perceive visual information based on our culture, our environment. In the next lesson, let's look at the way we actually process information as humans. [MUSIC].
9. Perception: Shape, Colour & Form: [MUSIC] Have you ever looked at a wall of different brands and logos, perhaps at a supermarket, and just felt overwhelmed, just struggled to take all the information in. Well, in such a crowded marketplace where often people have very little time is very important. We understand the way humans process visual information, armed with that knowledge, will then be able to structure our logos deliberately for success. We're going to discuss something called the sequence of cognition. That's the order in which our brains perceive and process visual information. The first thing we perceive is shape, then color, and finally form or the final details. Let me give you an example to illustrate how this works and what our brains are focusing on at each stage. We have here three different logos. They're currently all in full color and all of that detail is showing. Now I'm deliberately showing these at a fairly small size because we want to replicate the viewing experience someone might have of these logos from a reasonable distance away. What does our brains see first when we process visual information? Well, the first element we see is shape. This could be the overall form of your symbol or brand mark, the overall shape of the entire logo lockup. But our brains haven't yet process color, and we haven't processed for finer details, such as the language or type. Now interestingly, even at this first level of cognition, the Nike swoosh and Apple icon can be instantly recognized without color or type. Now granted, it has taken them millions in marketing to build that kind of awareness, and you and I will likely be working with a slightly lower budget in our projects. But going back to our example, what gets processed next? Well, it's color. Color can be a strong emotion or trigger. It's also a powerful tool in differentiating, and in fact, from great distances, it can actually be processed before shape. Now, let me show you what I mean by this. In this example, I doubt any of us can see any shapes whatsoever on the packaging on this soft drinks. However, I bet you can tell exactly wherever Coca-Cola is, why? Because of that recognizable red color. Let's go back to our example, one last time. What do our brains process next? Well, it's some of the detail and language. Now, language takes a little more time for our brains to process. As do the finer details, such as the nuance of a typeface or fonts. But it can be said that while shape and color might grab the attention is for content, language that take us to the next level. You might notice I've left some of the smaller details blurred for now, and this is to illustrate that this size, they'll be processed last if at all. It's important to consider this, whether our logos will work, whether they're still recognizable as our brain goes through these stages. Understanding the sequence of cognition enables us to plan which elements of a logo and which messages our brain is going to assimilate first. It's a combined effort, but considering our logo design on each of these levels and considering how our audience is going to process the information we present to them can greatly enhance their effectiveness. We've taken a look at culture and at the way we process visual information. Just before we start creating, let's get some inspiration in the next lesson. [MUSIC]
10. Inspiration vs. Reproduction: [MUSIC] Design is contextual. It's always useful to see what others have done, are doing, what approaches have worked and also what approaches have failed. But how do you allow an idea to inspire you without simply copying it? Well, an idea, it doesn't have to fit exactly. In fact, some of the best ideas of the ones that fit just a portion of a problem we're trying to solve. Because by combining different ideas, will actually create something that's completely unique. Let me show you what I mean by this. How can we extract ideas rather than copy? Well, in our first example here, we have some initials paired with an abstract lacey symbol. Now what we can't do is simply copy this symbol. What we can do is try exploring different abstract symbols, creating our own, perhaps lazy, perhaps not, maybe arranging them in a similar way to this. Now, if you use different fonts, different initials, you create a different symbol, then you've used a technique, an idea, to create something that's going to be entirely Bespoke and unique to your brand. Let's take another example. Here, this brand has used color to get away without a gap in the middle of a brand name. Instead of royal space Pooch, we have Royal Pooch which looks much tighter and it's aesthetically pleasing. Rather than try to steal or copy this in its entirety, take that single idea, the idea of bridging a space. If you have a brand name with more than one words and using this technique to allow you to create a tighter lockup, that's an idea you could apply to any of your designs. Or even better, perhaps a bad idea sparks your own unique idea. Rather than use color to differentiate those words without a gap, maybe you then have the idea to use font-weight. That idea would have the advantage of working just as well without any color being necessary. This is the ultimate goal of finding inspiration. It's not to copy something, is to find an idea and approach that inspires you, that sparks your own idea or similar approach so that you solve your problem in a unique way on the back of an idea that someone else has shared with you. One good idea often leads to at least one other. Let's consider another example of this with iconography or symbolism. Let's say that you're designing a brand where you decide a tree would be a fitting symbol. Well, before you dive in and get busy sketching, take a look first at the approaches others have already tried. I'm sure you are capable of finding examples like this anywhere. You can even search stock libraries such as Shutterstock. You can find a whole range of symbols for different designers have collated and explored. The goal here isn't to pick a symbol that fits and steal it, or try to replicate it in your own work, we want to do more than that. We want to try to identify why a particular style might have worked. What level of detail is it using? How has it represented shapes? Is it using something that is geometric or irregular? Does it have a sketch or a hand-drawn feel to it? When you find a particularly good example, I like this one I'm highlighting here. If you can identify why it works so well, you can then go away and use this to create something that's unique and that works for the same reasons. Could I use a different type of tree and when represented in a similar way? For your brand, spend some time now looking for sources of inspiration. It could be brands from the same industry, or brands from a completely different industry. For example, a graphic designer could perhaps look at the styles and brands produced by interior designers. It could be a specific idea, symbol, or message that you want to convey for your Logo and you want to take a look and see what others have done first. It could simply be some of your favorite brands that inspire you, whatever the case, save as many ideas as you can for the penalty. When you're happy, join me in the next lesson where at long last, we're going to get creating and I'm going to help you explore some of your ideas and concepts. [MUSIC]
11. Concept Generation: Explore Ideas: Everything in our class so far has led us up to this point. We're about to get creating. Although a blank white page can be quite daunting, don't worry, we're going to start filling this up together very soon. Rather than just show you how to create one specific type of logo, be it a monogram or a symbol, I'm going to teach you principles that you can apply to almost any type of logo you decide is best for your brand. Ultimately, our goal at this stage is to get the ideas from our brains onto something, anything tangible that we are able to step back and review at later stage. It's optional, but you might choose to begin this stage with a mind map, looking at some of the word association as a bridge to actually sketching out your concepts and ideas. Which method should you use? Which software suite to explore your concepts? Well, use whatever method you're most comfortable with and that you feel you can work with most freely. It could be sketching on paper, sketching digitally on something like an iPad Pro or even diving straight into your favorite application on your laptop. Now, I've found that certain ideas are best sketched out. For example, if it features symbols or shapes, I find it much freer and easier to simply sketch through reiterations and to try to create something digitally. I've also found that to be the case if I'm exploring something that's a little more abstract or complex, other things are more easily explored digitally. I think fonts are a great example of something. It's very easy to explore digitally to compare options. Then perhaps once you've narrowed in, you could begin fine tuning may be sketching your own versions. We've monograms too. If you use something digital as a starting point, I found you can drag the characters over [inaudible] in hundreds of different ways to explore different potential arrangements. Now if you were sketching that would take you pages of iterations and a whole lot of time. Whichever method you choose, this doesn't have to be super neat. Here's an example where I've literally grabbed some complement slips that were on my desk. I've sketched on them. I've stitched them together and I've used this as an exploration of the concepts. I think the ink here has even bled from my fine liner pen, but it doesn't matter as long as it's a way of downloading those ideas from your brain to something tangible, something you can record and refer to, then its mission accomplished. Relax and have fun doing this if you can. Now if you feel stuck, try going back and using some of the ideas you've saved out in our previous lesson. Trying those approaches in different ways. Remember, the goal isn't to just copy an idea, is to use that idea or approach in your own unique way to create something new. For my sample project, be cafe, Totteridge bake house. Here are a few of the ideas that I've decided to explore. I've begun by sketching out on my iPad Pro and then scanning in a few of the concepts I thought would be easier and freer to do by hand. Then I've explored different fonts, few layout options here, but mainly just for fonts themselves. Then I begin exploring the combination of maybe different type faces, different sizes. I tried to get a feel for what might work there. Here I've explored something quite abstract. A combination, almost a symbol in itself created from the first letters of the brand name. An assortment of ideas exploring mainly different fonts and here some fonts for contrast quite heavily. I'm also exploring which of the words comprising the brand name work best with the attention drawn to them. Should it be the location Totteridge or should it be the fact it's a bake house? This concept I really liked. I think it combines something that looks high-end and prestigious with something inviting and friendly and that personal touch. The way bake house is written, I think catches the eye and it really sets that logo off nicely. I've explored the use of a monogram with far more traditional type. This is a little bit of an art decor concept. I'm not sure if that's the area, the periods that the client's keen on, but I thought that was worth exploring. Then an ultra modern concept here, which I really like. Quite like the initials from the brand being used in that way and quite light putting them sideways in that last example. You may have noticed that I've left color out in this stage. I prefer to leave color until the end and then I use that to fine tune the tone of the concepts. If you were working with a client, you could of course, take out the strongest of these concepts and then present them nicely, perhaps one per page using whichever method you prefer, start generating concepts and exploring the ideas and possibilities. Keep going with this until you have a range of 3-4 concepts that you are reasonably happy with. When you have that take us with you and join me in the next lesson where we decide which concept we're going to develop further. [MUSIC]
12. Concept Selection: Back to Brief: Usually, having created a range of concepts you're happy with, this would be presentation time. But in this case, you have a client and so you're the decision-maker. To help you make this decision rather than go with your gut instinct or a concept visually appeals most to you, I'd like you to open up the workbook page where you identified your key brand messages. As you review that page, ask yourself which of my concepts does the best job of ticking those boxes of conveying these brand messages? Additionally, you could choose to open this page back up and ask yourself which logo is really nailing the intended style and tone. Now, this is actually a really valuable exercise to experience as a graphic designer, because often our clients are in this position, they are faced with a difficult decision and experiencing this will make you much better to relate to them in future, when they're trying to make a decision when you present concepts to them. From now over, we have a decision to make. Just bear in mind in my case here for the Totteridge Bakehouse, the two messages I absolutely wanted to convey with a logo that would make for bakehouse look like the high-end cafe for the area, the place to be, and for overall the logo would convey a very trendy modern tone. Here's my first concept, and it certainly looks modern. It looks trendy and overall, it has a very premium feel about it. This is definitely a strong contender. This next concept is actually my favorite, and this is the concept that I've chosen to take forward to develop further. As well as conveying the two main messages that I wanted in the logo, there's also a bonus message conveyed here. The font use for the word bakehouse, it's got a very friendly, approachable tone to it. I think it also ties in quite well with the term artisan, artisan food and coffee because of a personal handmade element. This is sometimes the case where you're set out to convey one or two messages very clearly. As you look back at your brand messaging, if a particular concept is actually conveying bonus messages, sometimes that can be the deciding factor. If it's two or more concepts you're not sure which one to push forward, where those bonus messages, or sometimes being well aligned with other messages, can be a deciding factor. My next concept, I really liked this, and it does make some classic elements with modern. But I felt overall the tone of this is a little too classical, too traditional, to meet this brief. It looks very effective. It looks premium, but I wouldn't say it looks trendy. Finally, this concept is very similar to the first one, with one exception, which is the initials TBH turn sideways and there's a little graphic, a little block surrounding that. I quite like that as a stand-alone identifier, perhaps a sub mark of a brand. This was another contender. It looks very modern, contemporary, and premium. But to me, the second concept had really nailed it and really fit for brief. Well, I've picked the concept that I'm going to be taking forward. When you've picked the concept that you wish to develop further, join me in the next lesson. We'll look at some tips for really refining and helping your logo to reach its full potential. [MUSIC]
13. Refinement: Tailoring & Testing: [MUSIC] Now you could say this stage is what separates an amateur from a professional-looking logo. Do you remember some of the key points from our earlier lesson? What makes a good logo? Well, firstly, of course, we want to go through that list and just ensure that our concept isn't breaking any of those cardinal rules. If it does, what could we do to address some of these potential problems? Could font sizes or weights be adjusted? Could it be better balanced? What changes can we make to rescue the logo if it's making some of these mistakes? To share my own project as an example. In this case, my chosen concept when I tested it at small sizes, and of course you can do that by just zooming out, this full version of the logo was just too small to be used in all applications. I'm talking profile pictures on social media, avatars, something where you literally just got a few pixels to work with. In that situation, you could consider creating a sub mark for the brand or you could address those issues. Perhaps I could have tightened the spacing, made the font a little bolder. Well, I opted to create a sub mark and I did this simply taking the first letter of a word Totteridge, and then the B and H from bakehouse. I used these with the exact same fonts and treatment as the primary logo, but placed them together and made sure I was happy with the positioning and the contrast in size, and I think the result is quite effective. It's a sub mark that quite clearly ties back to the primary logo, and so it addresses that problem. A sub mark really provides a strong option for usage in situations where a full logo would struggle to be seen clearly. Let's have a look now at one more area that my logo could use some improvement, which is its overall balancing. When we ask ourselves if we're happy with a balance of a logo, really we're asking, are we happy with the overall layout, the spacing, the kerning between letters, and is everything visually balanced? When we look at it, if it's supposed to be centered, does it feel centered to our eye? A little method I like to use to test this is using semi-transparent blocks just to help me visualize and isolate where there might be any problems. You can see I've used this to look at the spacing between lines. I've taken into account the deliberate overlap between Totteridge and bakehouse, which is placed in such a way it appears, but it's sitting on top of it. But interestingly, the T looks quite hollow. If you look at the first T in the word Totteridge for bottom left side of that is just empty space. I've decided not to align the tagline at the bottom to the very edge of the T, but I've aligned it just next to the stem because for me that balance is better visually. Next, looking at the type for the word Totteridge itself, I noticed there's quite a big gap between the R and the I, at least for top portion of those letters. Also between the D and the G, you've got the two sloping edges which coalesce together in the middle, but it leaves quite a big gap of the top and bottom. The bottom part, the gaps are not as obvious because we have a word bakehouse overlapping and so our eye isn't drawn to it, but the top part of those letters definitely needed attention. You can see the results when I've tightened those up. That's looking far better balance now. What if you like your concept and principle, but you're still exploring ways to refine it visually. This can be especially true for logos, for feature symbols. Well, keep exploring variations and iterations until you get it right. For example, look at this logo I developed for Highbridge partners. The concept here was quite simple. We wanted to create a symbol that both looks quite obviously like a bridge, but also read as the letter H. After deciding this was the correct route for the brand, it took literally dozens of iterations to arrive at something we felt was perfect. This is all part and parcel of the development stage. In a real world, you wouldn't want to invest this time unless a client had perhaps at least indicated that they were interested in pursuing this concept further. Once you've addressed these issues, looking for solutions or alternatives if needed, we come to the part where we do some testing. Overall results look great. It's actually very easy to throw your logo into a few different situations just to test it out. You could grab some stock imagery. Here, I've just placed the logo on the top of a menu. You can even grab assets from the website of a similar brand. You wouldn't publish or use this in any way, of course, but if it's just for testing to see how the logo works in a particular situation, then it's absolutely fine and well-worth doing. How is your logo concept measuring up so far? Please remember to spend time refining and tailoring your logo to avoid those common mistakes we considered. Don't be afraid to explore multiple iterations if needed, until you get the balance, just right. Before you finish, be sure to test your logo in different situations. Yes, it might feel like a lot of work, but trust me, it's worth it in the end.
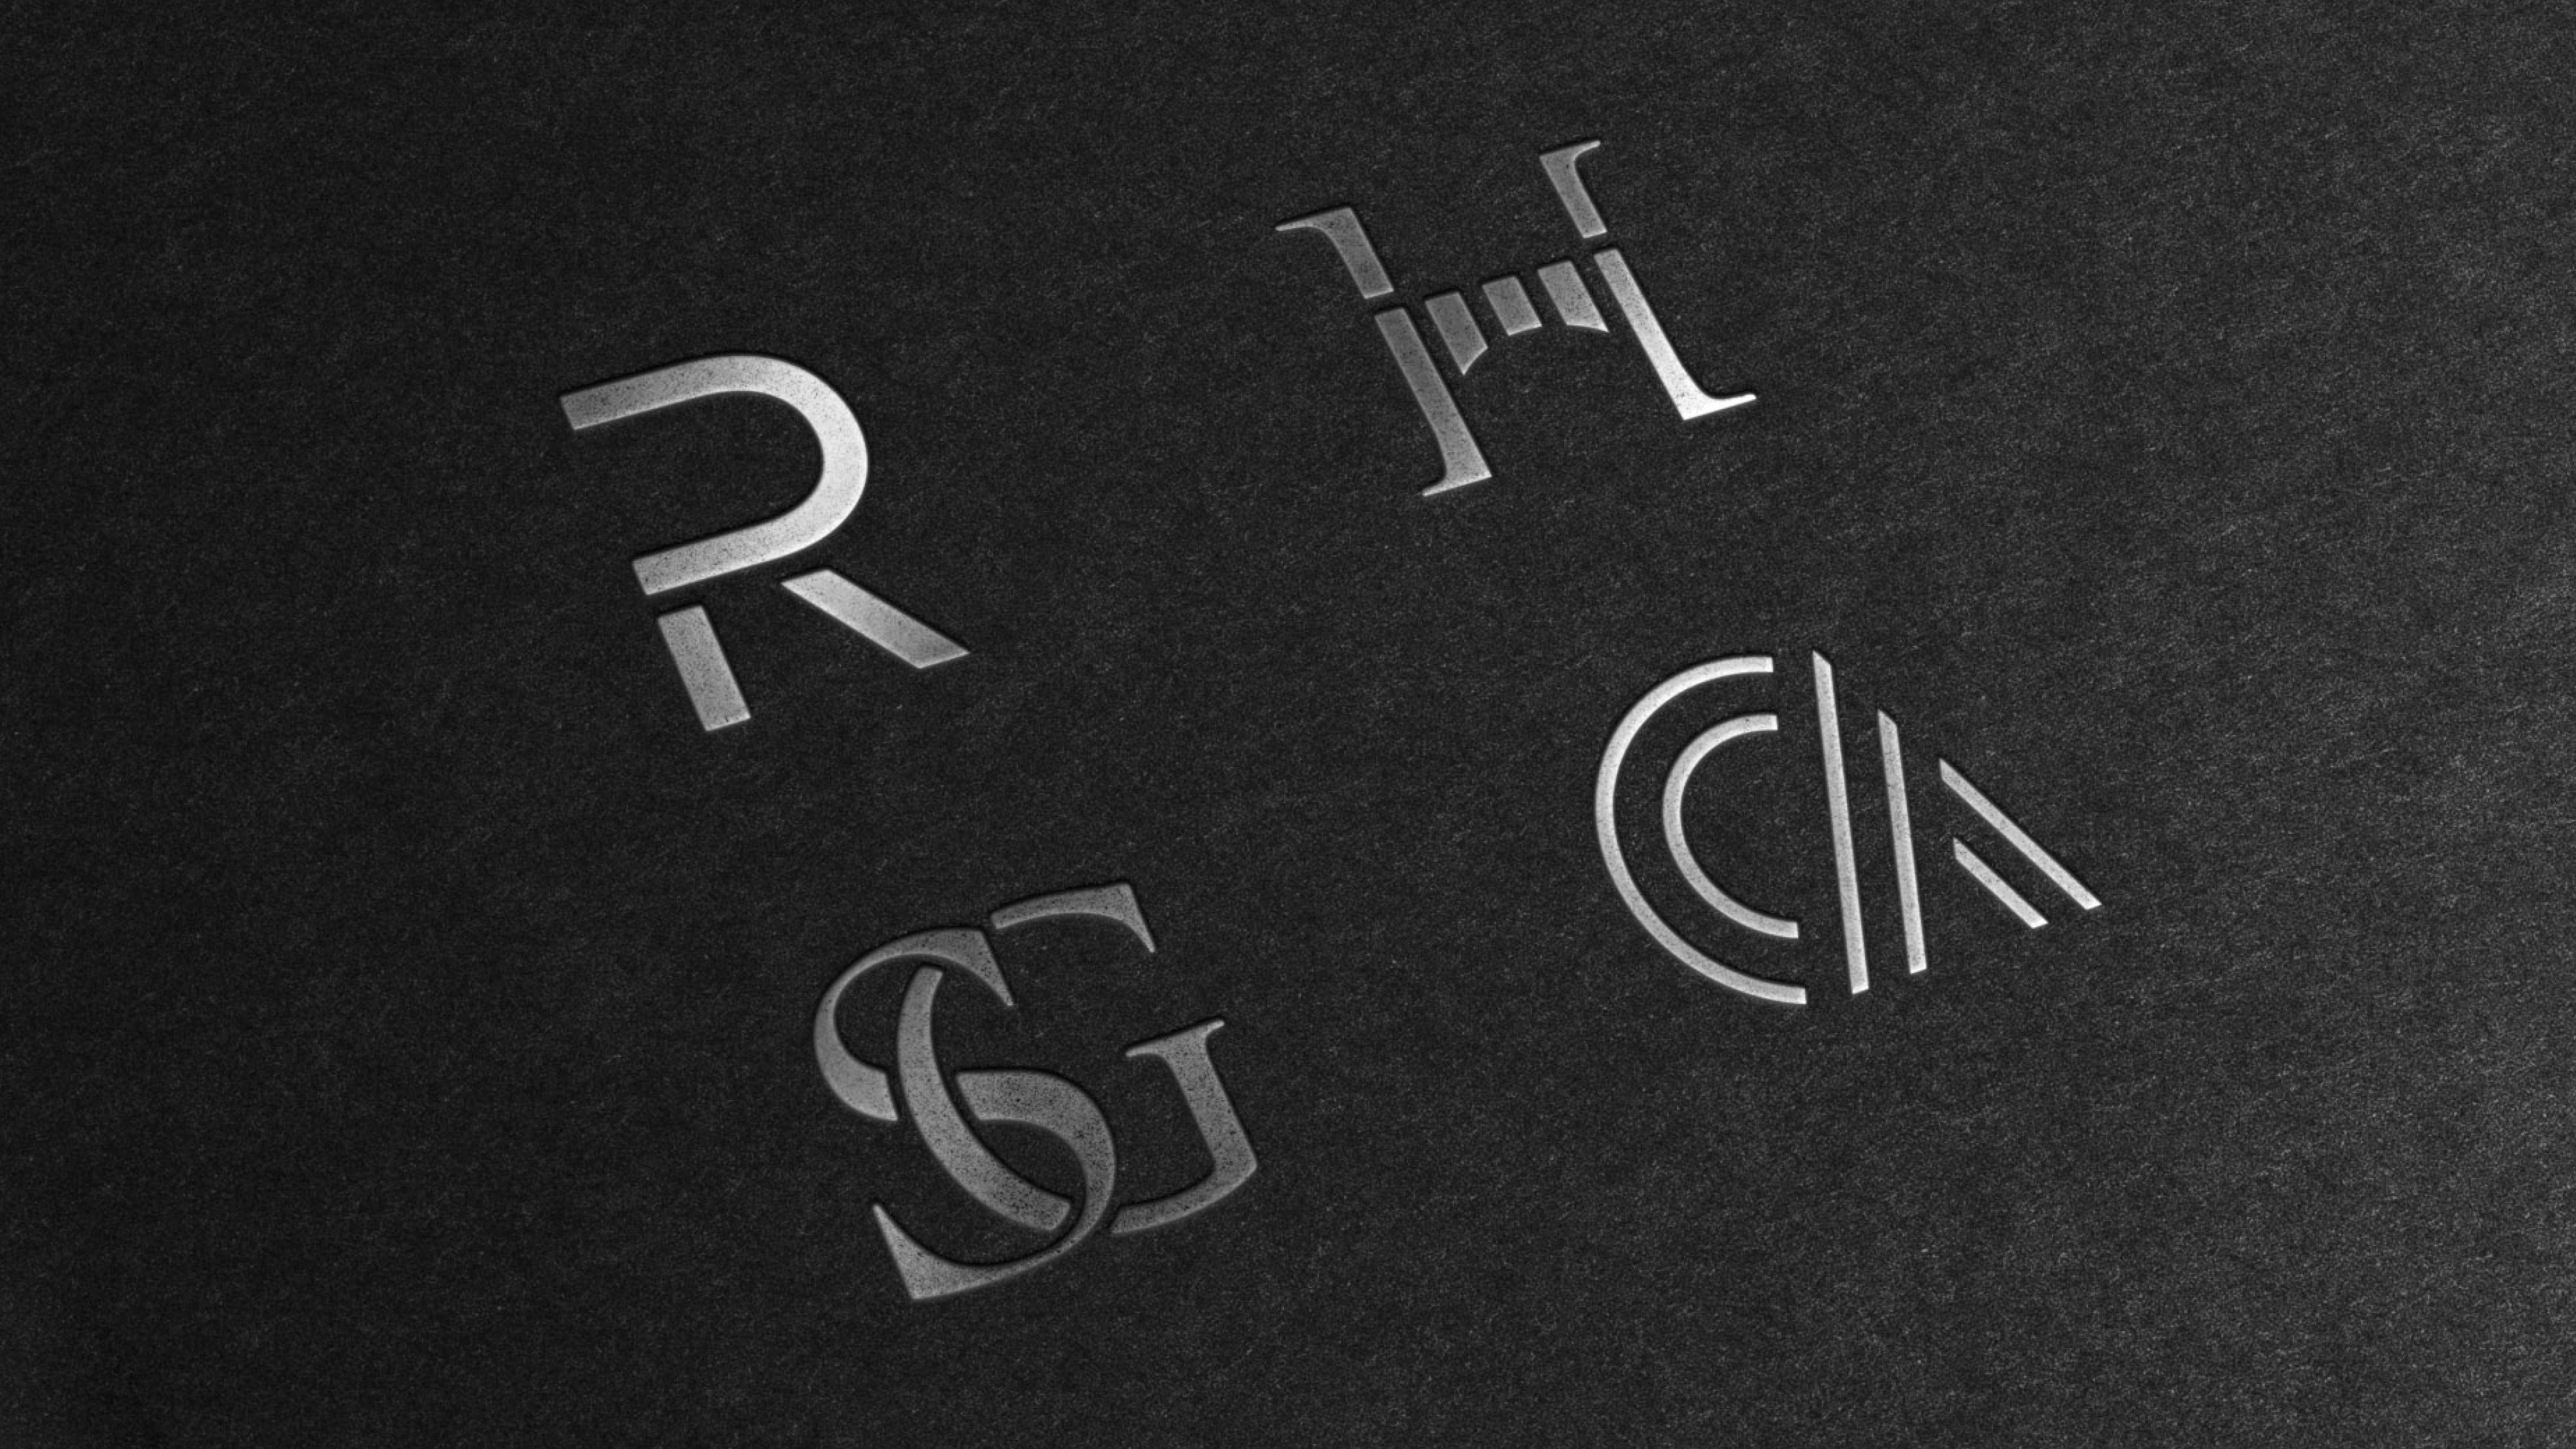
14. Finishing Touches: Fine-Tuning: [MUSIC] So by this stage, hopefully you've developed something very strong and we're almost ready to begin preparing and using it. But there are just a few last bits of fine tuning you might want to do before we sign off on this. Now for most glaringly obvious element that's missing at the moment should be color. You may have noticed that in my sample project for the Totteridge Bakehouse, I've kept all the design in black and white up until this point. Now that's completely deliberate. I like to develop a logo in black and white, focus on its shape and its form. Then I use color, which can be quite a powerful emotional element to fine-tune the tone and taper design across the finish line. My reasoning is that if it's strong enough to work well in black and white, then it can look absolutely incredible once you take it to color. For example, let's say I wanted to push for high-end aspects of this brand even further and almost align this with fine dining. We'll look at the difference an elegant green gold combination makes, or look at how the energy of a logo changes if I use a softer blue and violet combination. Don't worry, I'm not going to even attempt to teach you color theory in a single lesson. But again, I found this is a really powerful tool to save until the end to fine-tune your design. Now aside from color, this is also your last chance to make any last tweaks or adjustments to your logo itself. So it's good practice to take another look back at the brief and just ask yourself, is there anything further I could do to enhance this, to make it better communicate the values we set out to convey. It can also be a good time to take your logo under the microscope, particularly if you're trying to either tweak or create your own custom fonts. Well, here is an example of some finishing touches I made with this logo type for my client, CCNETROL London. As you can see here, we decided the Cs would work better with an angled end rather than the flat vertical ones in the current version at the top. To accomplish that, I mirrored the C shapes, overlaid them, I subtracted a little angled area in blue and then merge for result to create a new C, which had the angled ends we wanted. Then we also felt the E and the L were just a little too narrow compared to the other characters in this typeface so I added sections to these. You may notice the E also looks a little better balance, just leaving that middle horizontal stroke shorter than the top and bottom ones. Next, we then felt the N for London was just a little too sharp compared to other flat characters. I believe the original font used here was Futura. Again, I tweaked this to create a flatter, blunter version that was more in keeping with the other characters. Look at your logo under that figurative microscope. Is there anything that bothers you about the type of a symbol? If you're someone who up until now tends to just use a font as it comes out of the box, don't be afraid to, in whichever software package you're comfortable with, start outlining and making tweaks and adjustments to it. It can sometimes be well worth doing that to create something that's truly unique. Whichever type of logo you've created, wherever it has a monogram, a symbol, or just logo type, this is the chance to make those last adjustments. When you're happy, then you're ready to prepare your files for use. It would depend on the software you're using, but I'll explain which file formats we need to export in in the next lesson. [MUSIC]
15. Bonus: Understanding File Formats: [MUSIC] Which file formats do you need to provide a logo in? Well often, you need to provide screen resolution JPGs. These are quite small, perhaps 1,000 pixels for longest length. Why do we need to provide these? Well, have you ever seen this error message pop up? There are often size limits for uploads on various platforms, so it's helpful to provide your clients with a smaller JPEG they'll be able to use on the web. High res JPEGs, these are ideal for personal printing. Personal not professional desktop publishing or larger web use. This is a popular format, but it's actually not enough to supply to your client by itself. You also need transparent PNG files for situations like this, where you will actually want to position the logo over a photo, whatever background and you just can't do that with a JPEG. A vector file can have transparency too, but clients often lack the software to use it, so a PNG is better for them. Now finally and perhaps the most important file type is a vector file. From a vector file, you can create any of the other file formats and that process doesn't work in reverse. Now why is it so important? Well, if you try to zoom in to any of the other file types, eventually you see pixelation. If you zoom into a vector file, it remains smooth because all of the data is recorded using coordinates or vectors rather than pixels, so even 10 years from now, if we had holograms or super altro mega HD screens, a vector would still be future-proof. Those are the file formats you need and the reasons why. Using the software of your choice, save your logo or out into those different formats if you can. Also don't forget to create a reversed version of your logo so that if needed, it can be used on either light or dark backgrounds. [MUSIC]
16. Conclusion: [MUSIC] Congratulations on completing your own new logo design. If you followed the steps in this class and taking the time to plan your messaging carefully, this will have made a huge difference to the end result you've been able to achieve. Clear communication is absolutely key. Throughout this class, we've learned how to research, strategize, how to reach different audiences with our visual messaging and finally, how to execute our design professionally. If there's just one thing you take away from this class, remember, less is more when it comes to communicating through a logo. Now we've spoken a lot about the brand identity system of which for logo is just a single part. If you need some more help on the different stages of a brand identity system, please check out some of my other videos. They dive into a little more depth and detail and they can really help you to spend a little more time on the brand identity system as a whole. Or maybe you need more specific help with a logo you're creating. Perhaps it's a monogram or you're trying to balance a symbol. Have a look at some classes I've created that can give you some more help in those areas too. Lastly, please don't forget to share what you've been able to create following this class in the class projects area. It's so satisfying to look and be able to see what you as students have created following the classes. Thank you so much for watching this class and please don't forget to follow my profile so that hopefully I can see you again in the next one. [MUSIC]
 Jason Miller, Freelance Graphic Designer